MrBlueJacket
-
Posts
1,313 -
Joined
-
Last visited
Content Type
Profiles
Forums
Gallery
Events
Everything posted by MrBlueJacket
-
 You are doing a credible job for your first model. Keep it up!
- 60 replies
-
- 2
-

-
- swampscott dory
- finished
- (and 1 more)
-
Look at where and why the drills are used - often a different diameter will work just fine. You're only talking a few thousandths of an inch. If you think you will do another model, consider the entire #61-80 drill set. As for mistakes - the definition of experience is "what you get right after you needed it"
- 60 replies
-
- 1
-
-
- swampscott dory
- finished
- (and 1 more)
-
A little more sanding, and ready for the sheer strake.
- 63 replies
-
- 7
-
-
- bluejacket shipcrafters
- new bedford whaleboat
- (and 1 more)
-
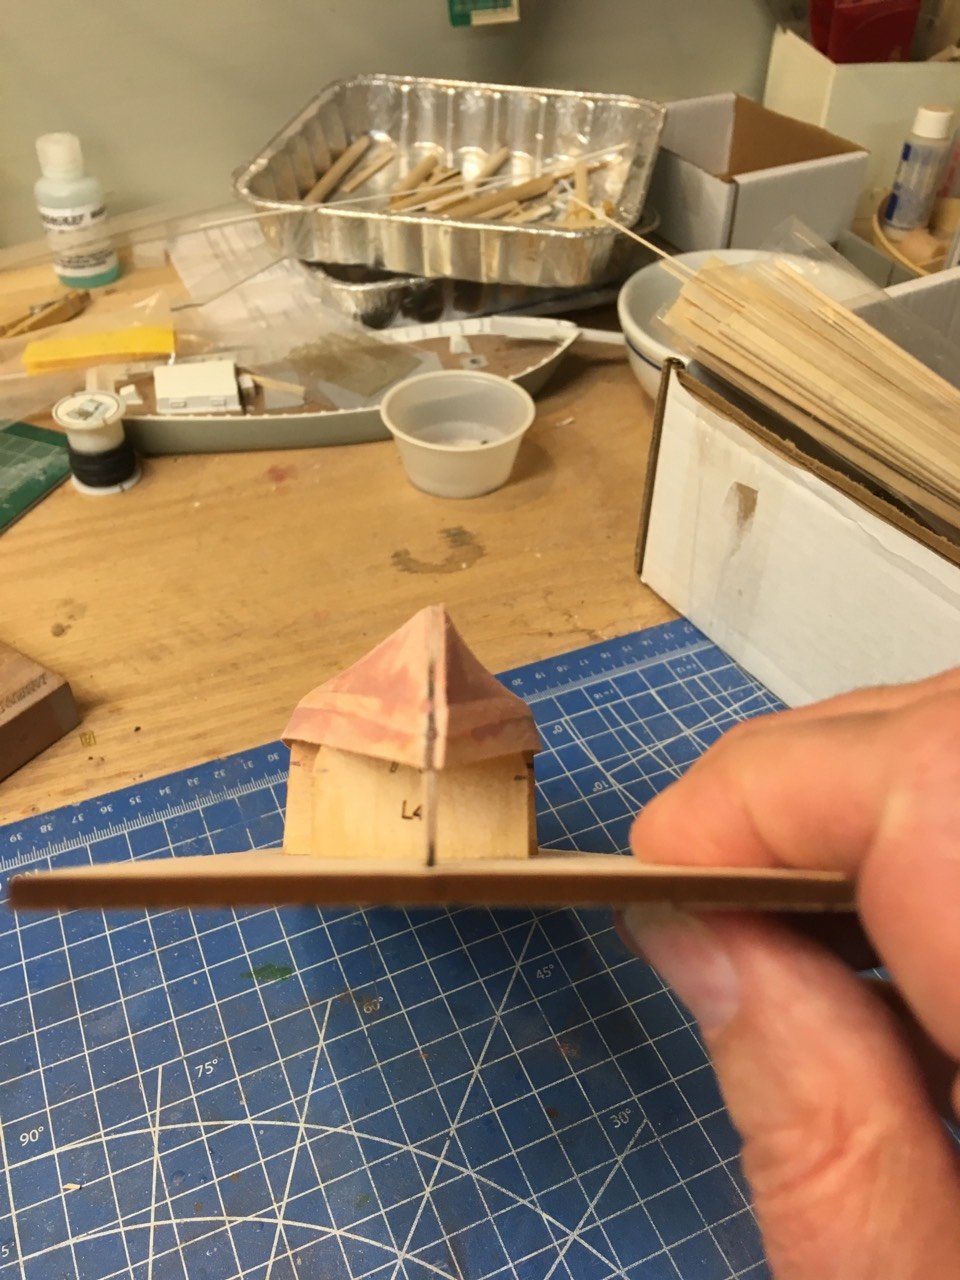
Now a quick check for symmetry

- 63 replies
-
- 4
-
-
- bluejacket shipcrafters
- new bedford whaleboat
- (and 1 more)
-
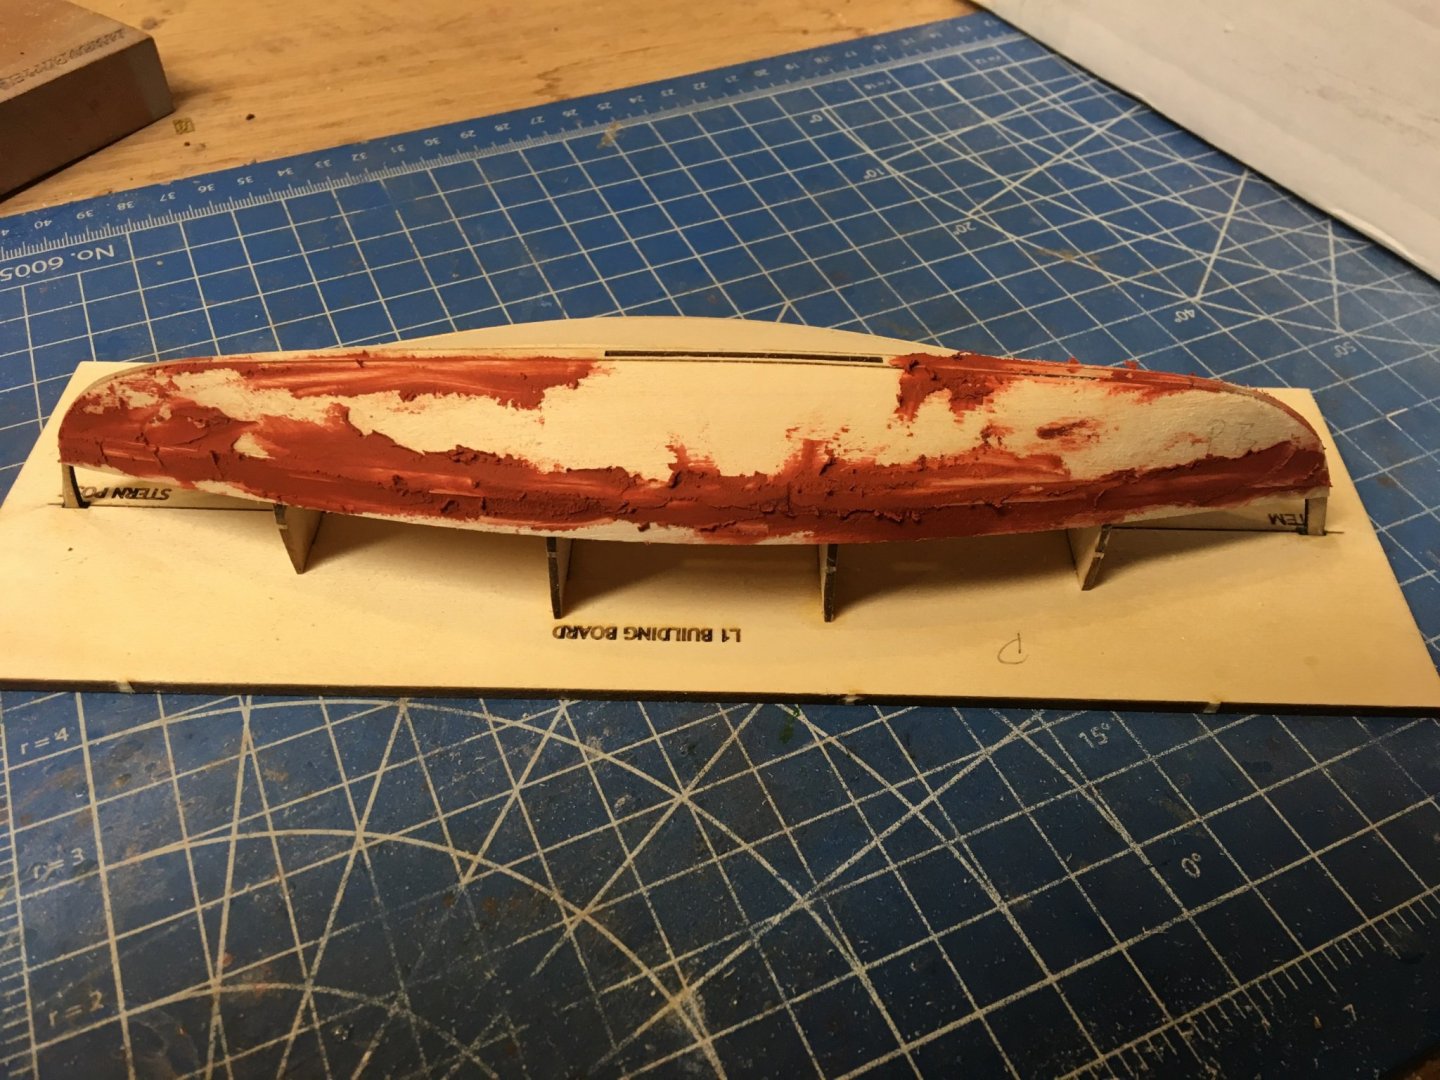
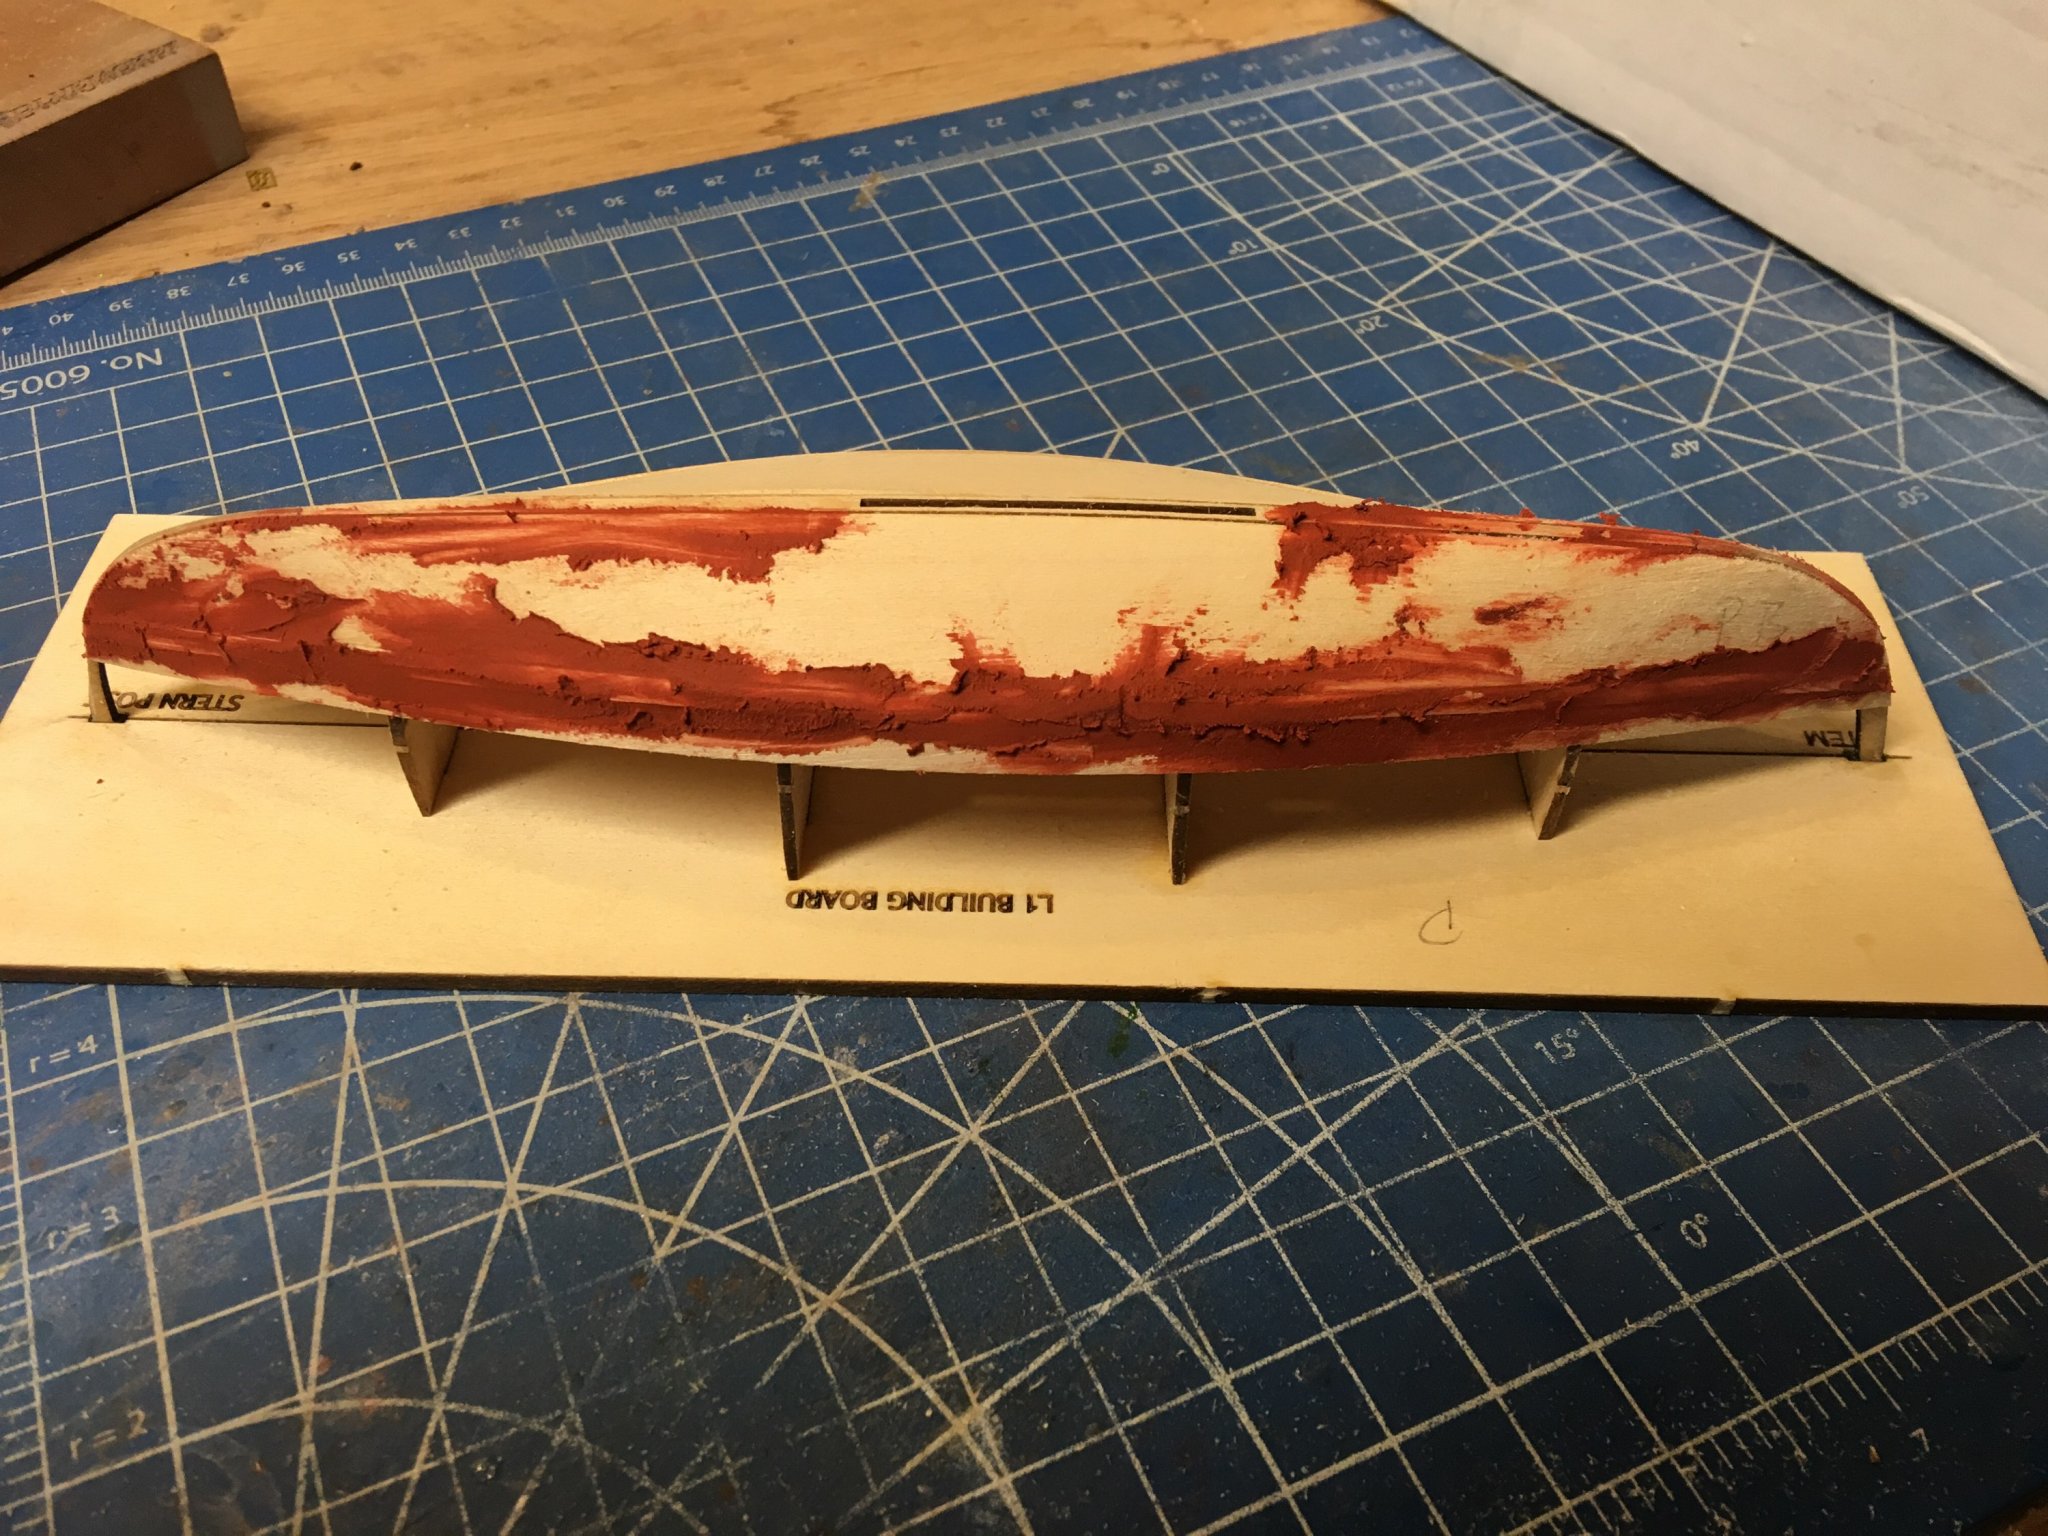
After sanding and putty, you can see why.

- 63 replies
-
- 4
-
-
- bluejacket shipcrafters
- new bedford whaleboat
- (and 1 more)
-
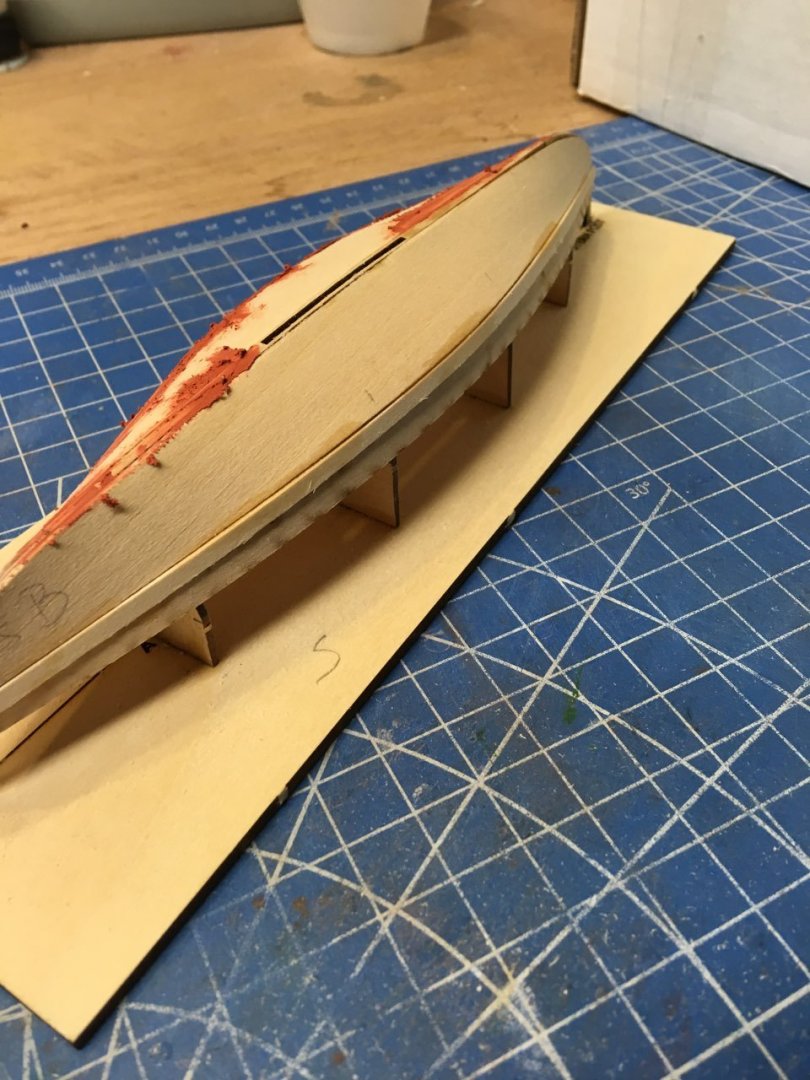
Here's a shot of the first plank being thicker than the ones on either side.
- 63 replies
-
- 4
-
-
- bluejacket shipcrafters
- new bedford whaleboat
- (and 1 more)
-
As for applying the CA glue, look at the tip of the month in this link (near the bottom) http://campaign.r20.constantcontact.com/render?m=1105166336677&ca=64bf22da-704d-496c-8e70-95bc1220ea79
- 60 replies
-
- 1
-
-
- swampscott dory
- finished
- (and 1 more)
-
Regarding the garboard strakes, look at the instructions page 5 where it starts with "hull planking" - the second sentence says the garboard strakes are cut oversize to allow for trimming. So you did not do anything wrong!
-
I held it with my fingers at the center of the keelson, then applied a bit of CA inbetween the two middle formers. Then is was easy to use clothespins at the ends and finish the gluing.
- 63 replies
-
- 1
-
-
- bluejacket shipcrafters
- new bedford whaleboat
- (and 1 more)
-
Next comes the first plank, a strip of 1/16 x 1/8. Then the next plank, a laser-cut piece of 1/32. So the 1/16 thick plank sits proud of the planks on either side. That's because it sits on the turn of the bilge. The instructions then say to fair it to the other planks, making a rounded surface. They also recommend putty to fill in any irregularities. For me, when it comes to putty, the more the better. Less chance of needing a second coat. So far I think I'm into this for 3 1/2 hours or so.
- 63 replies
-
- 6
-
-
- bluejacket shipcrafters
- new bedford whaleboat
- (and 1 more)
-
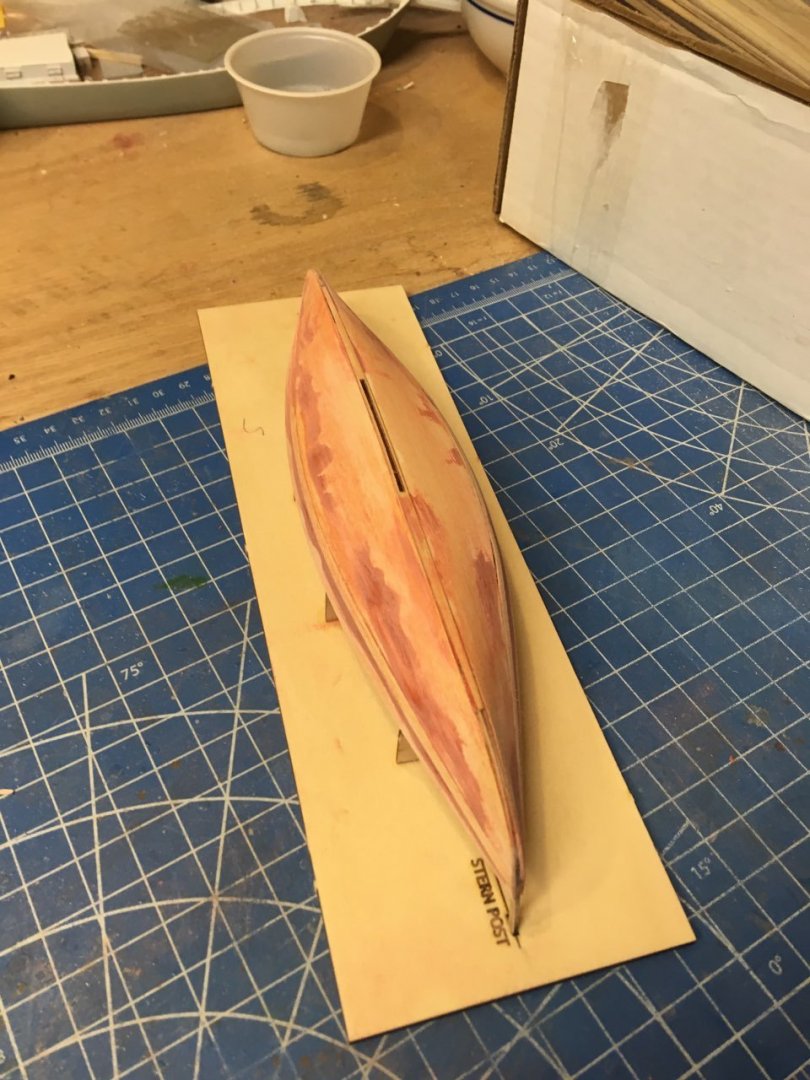
First planks to go on are the garboard planks, Quite wide, but wetting the 1/32 basswood let them form to the jig perfectly.
.thumb.jpg.7c6f649297d38b37c8dd2fcfa841baf5.jpg)
- 63 replies
-
- 8
-
-
- bluejacket shipcrafters
- new bedford whaleboat
- (and 1 more)
-
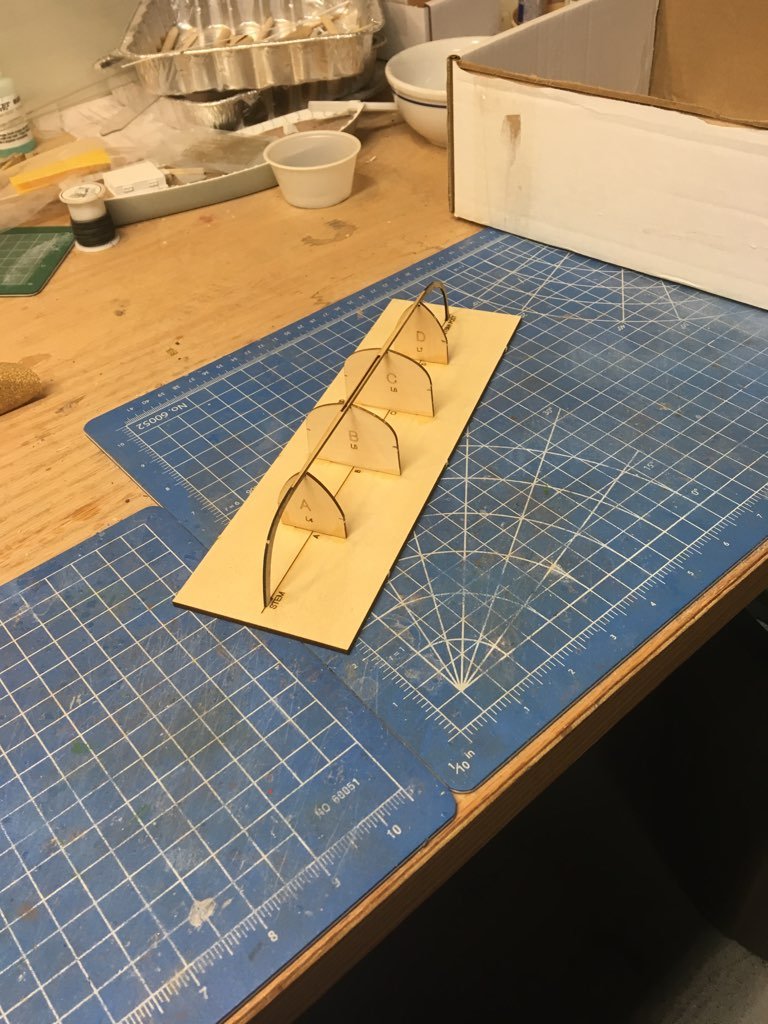
Moving on to construction, the first thing is to build the assembly jig. 4 formers, then glue the stem and stern to the keelson and put over the jig. I liberally waxed the formers to prevent the planks from sticking, we'll see how well that works.
- 63 replies
-
- 6
-
-
- bluejacket shipcrafters
- new bedford whaleboat
- (and 1 more)
-
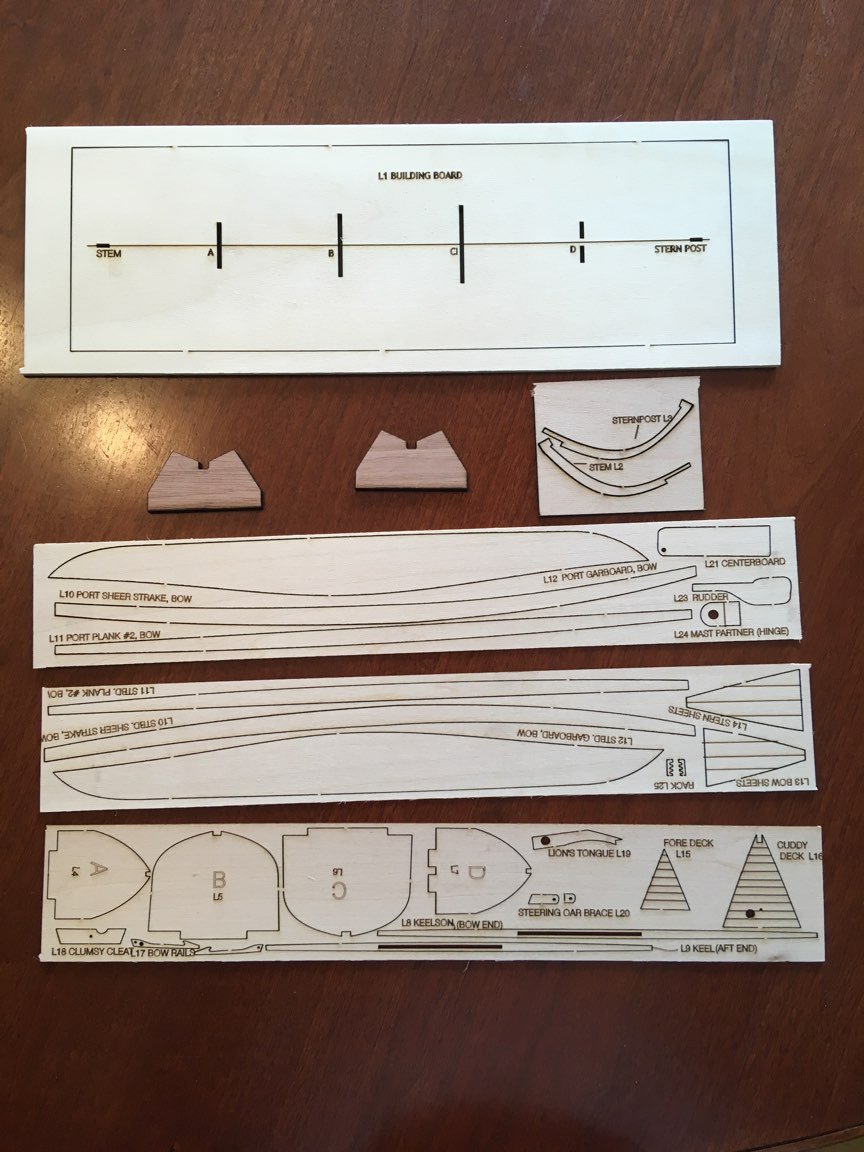
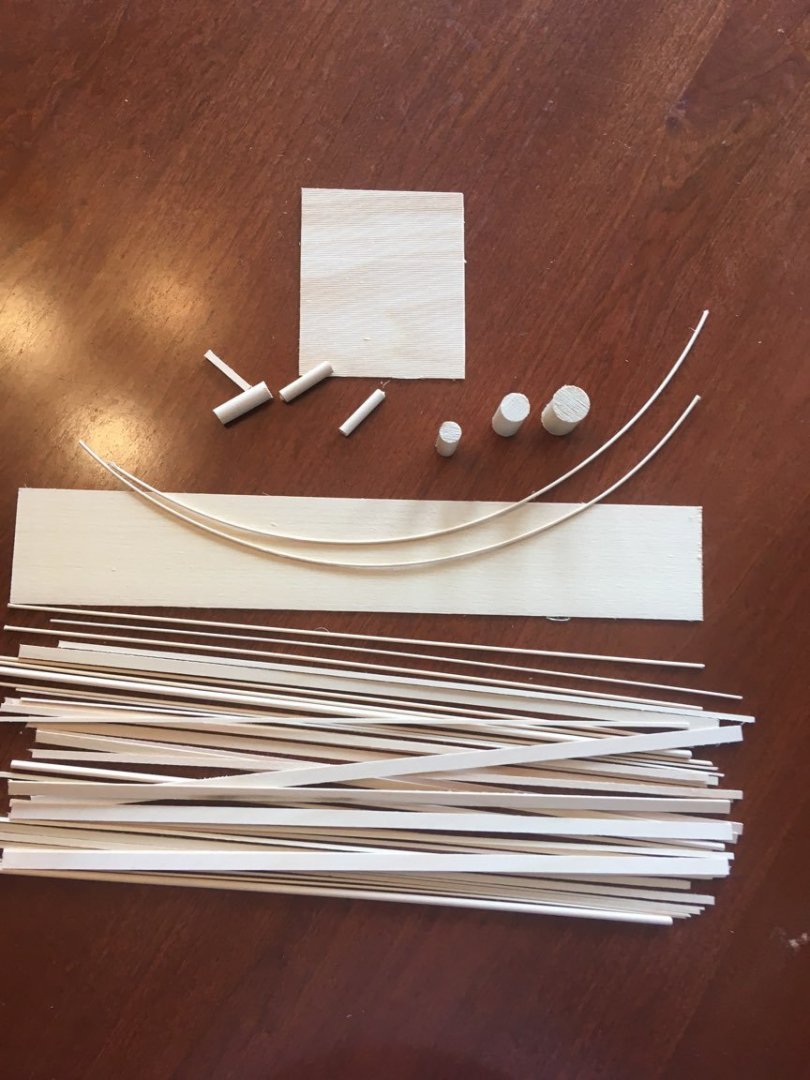
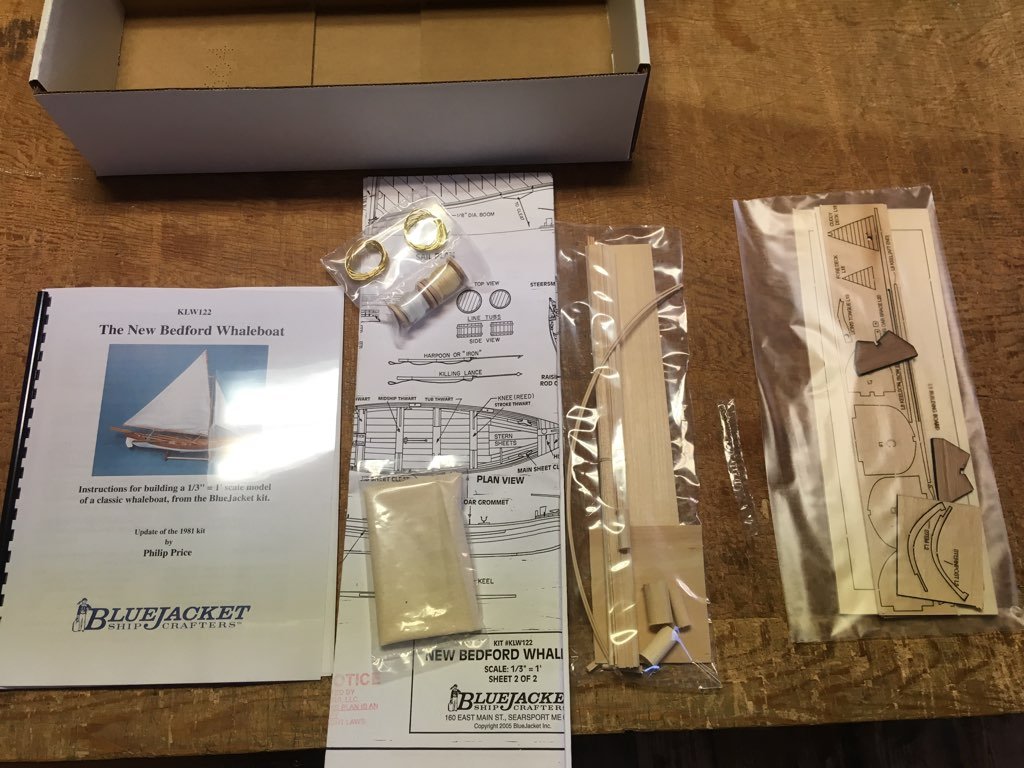
Getting into a little more detail, here's the laser package: And the wood package:

- 63 replies
-
- 6
-
-
- bluejacket shipcrafters
- new bedford whaleboat
- (and 1 more)
-
So here we go to build this interesting whaleboat. Despite its large scale, it is a small model. Here's the box top And the overview of the contents:
.jpg.2c9717ae38a98246d7d4bfadfaee536f.jpg)
- 63 replies
-
- 5
-
-
- bluejacket shipcrafters
- new bedford whaleboat
- (and 1 more)
-
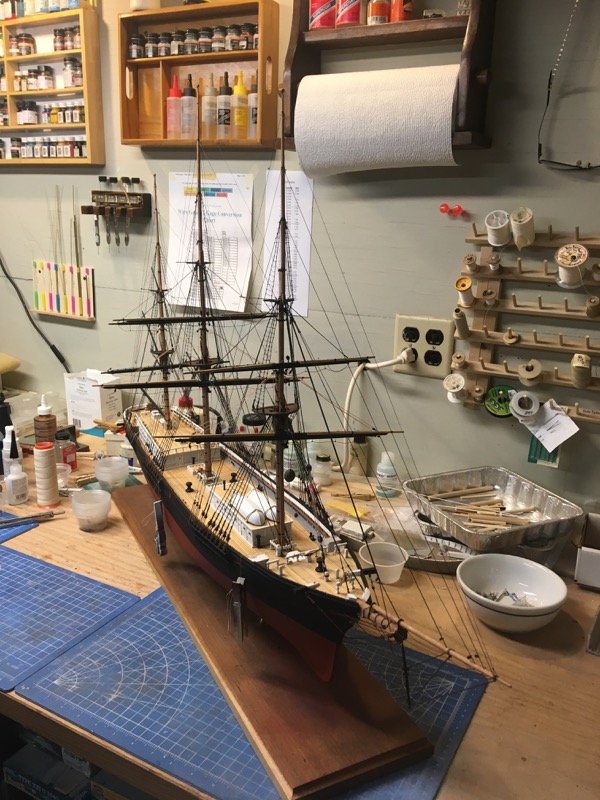
So now I have put all 3 top yards on and attached their lifts. Now this project goes on hold while I build a New Bedford Whaleboat for a customer.
- 356 replies
-
- 10
-
-
- red jacket
- finished
- (and 1 more)
-
FYI - cherry darkens over time and exposure to sunlight.
-
Clamping the keel between the subdecks insures a straight hull.
-
Been too busy to do much. Here's the fore top yard almost done. Need to add 4 blocks, then it can be mounted.

- 356 replies
-
- 7
-
-
- red jacket
- finished
- (and 1 more)
-
I leave some DNA on every model. Usually just a little blood from getting poked by the #11 blade.
- 57 replies
-
- 1
-
-
- finished
- yankee hero
- (and 1 more)
-
Nice work, Stan. We'll be sending corrected copies to everyone who bought a Perry.
- 85 replies
-
- 1
-
-
- perry
- BlueJacket Shipcrafters
- (and 1 more)
-
Excellent job!
-
Well done. Your customer file now has a 10% off your next kit note. Nic


.jpg.500f2f3f955dcbae021d23913470bd04.jpg)