MrBlueJacket
-
Posts
1,313 -
Joined
-
Last visited
Content Type
Profiles
Forums
Gallery
Events
Everything posted by MrBlueJacket
-
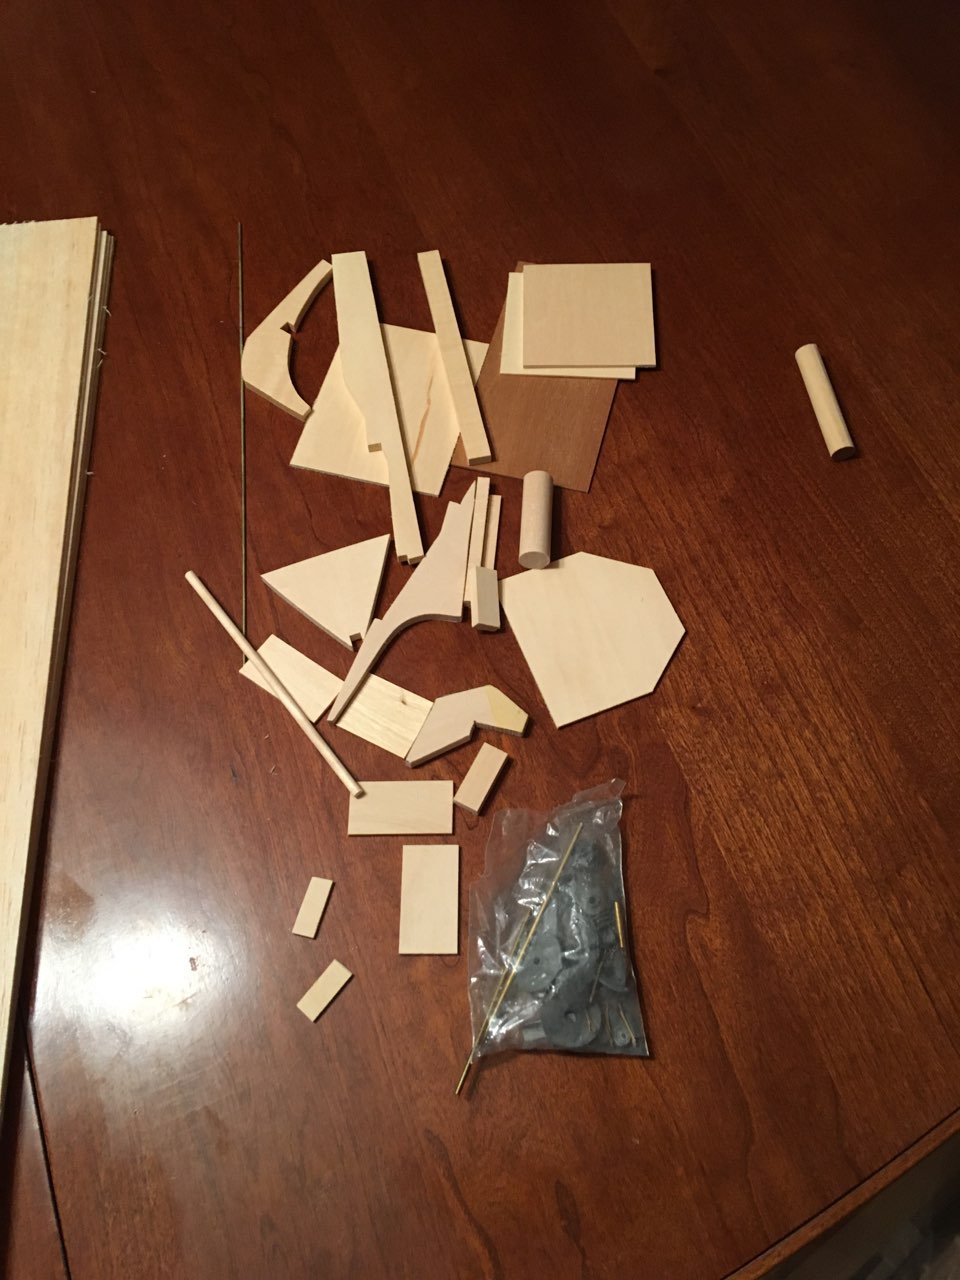
 First, let's take a good look at the cast metal pieces. These obviously have lead in them, so they will have to go. Luckily, I know where i can find replacements ;-)
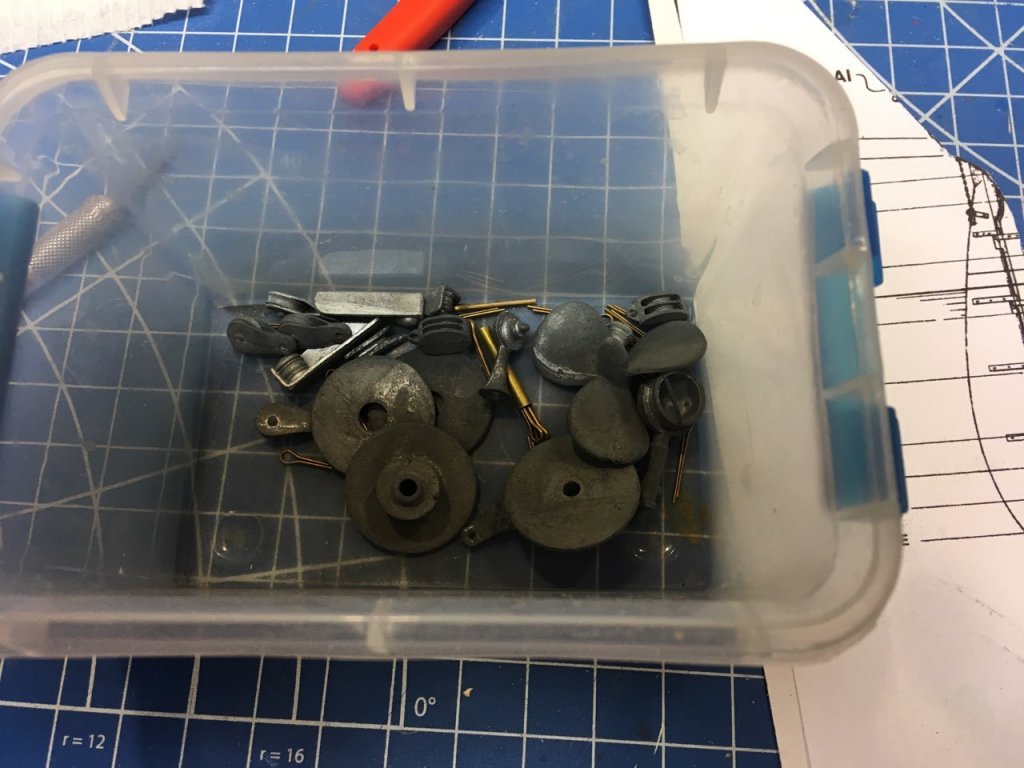
- 64 replies
-
- 4
-

-
- laughing whale
- trawler
- (and 2 more)
-
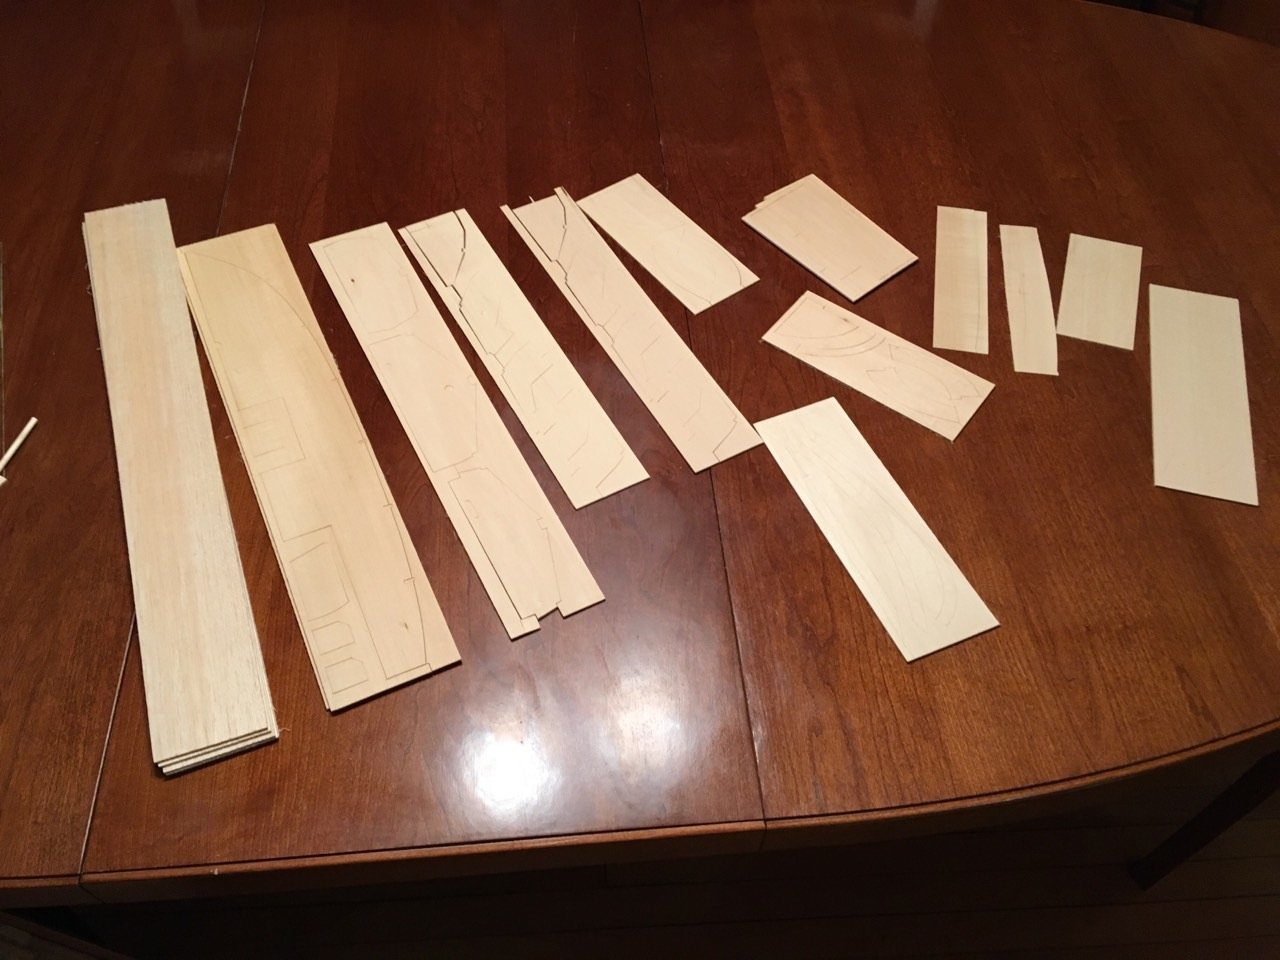
Completing the kit are some die-cut pieces and some band-sawed pieces.


- 64 replies
-
- 5
-
-
- laughing whale
- trawler
- (and 2 more)
-
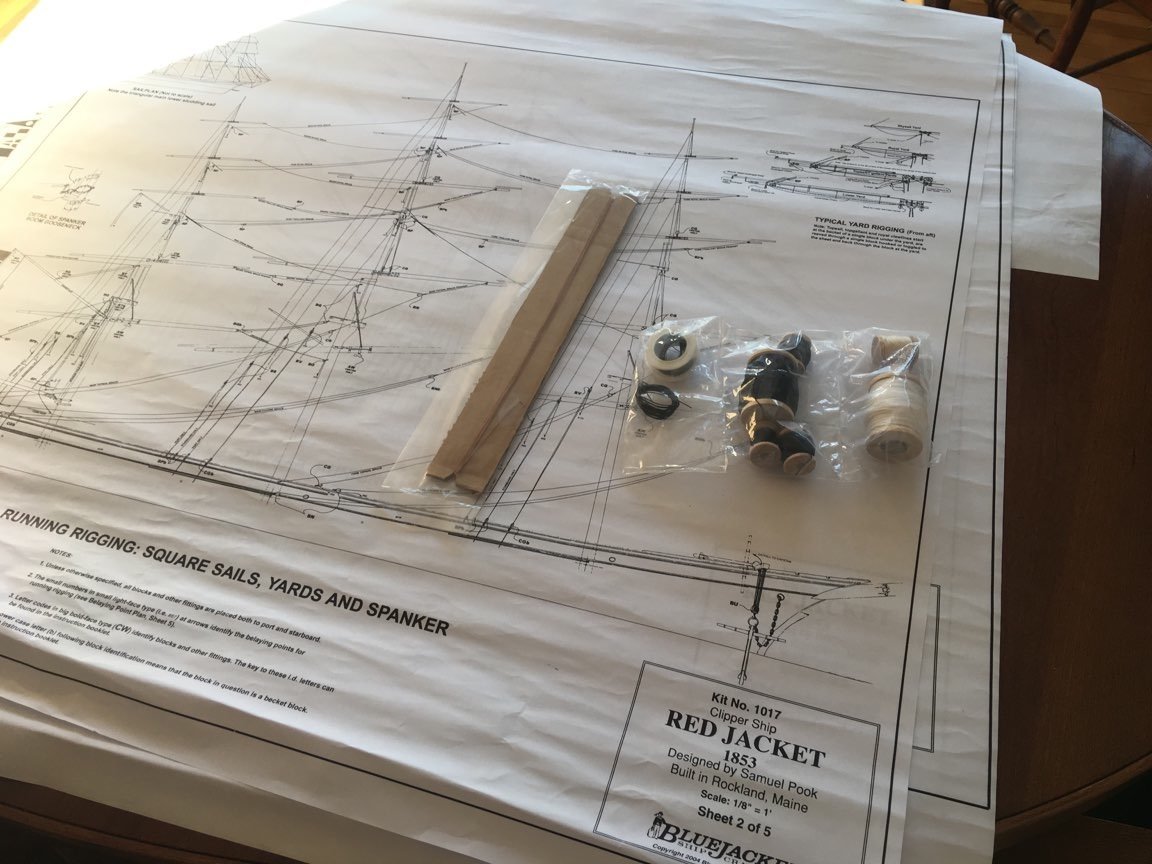
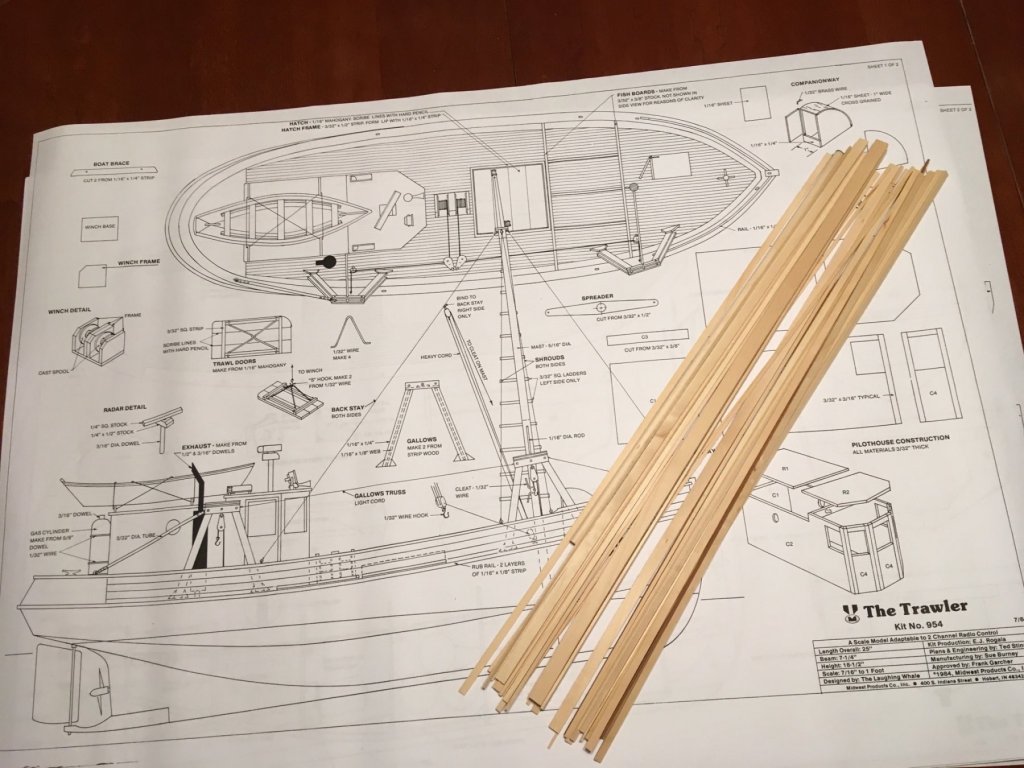
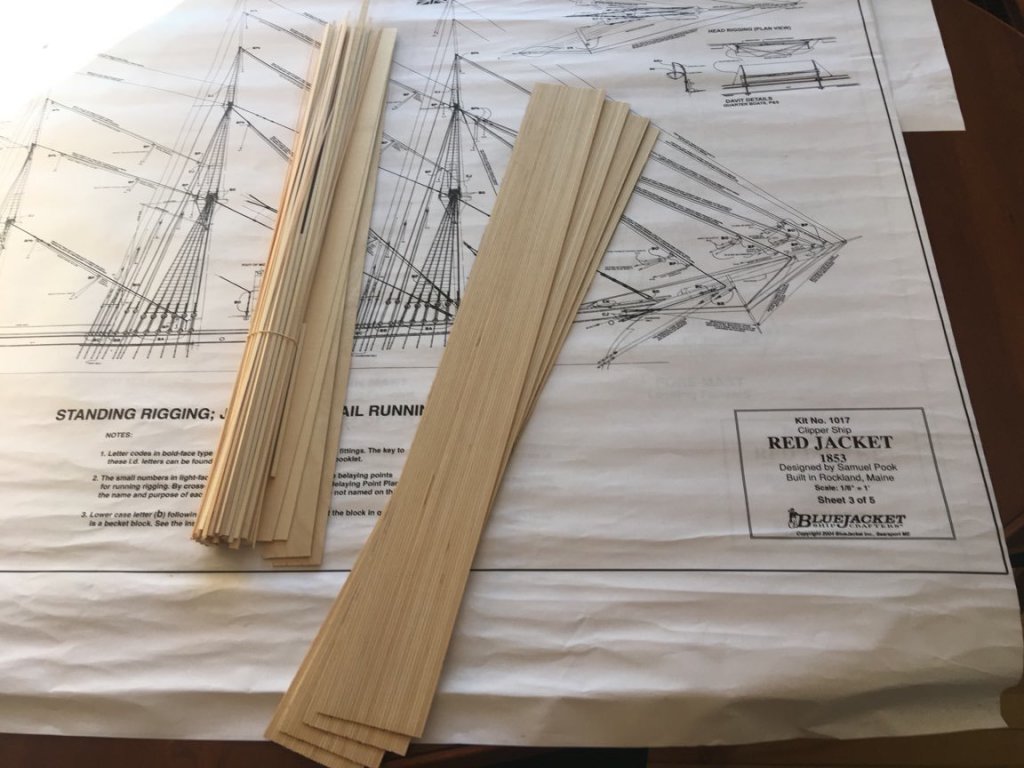
So here we go again with an older kit. Let's start with the kit contents. Here's one of the two plan sheets, the rigging package, and the instruction booklet. And here is the other plan sheet, along with the stick wood.

- 64 replies
-
- 5
-
-
- laughing whale
- trawler
- (and 2 more)
-
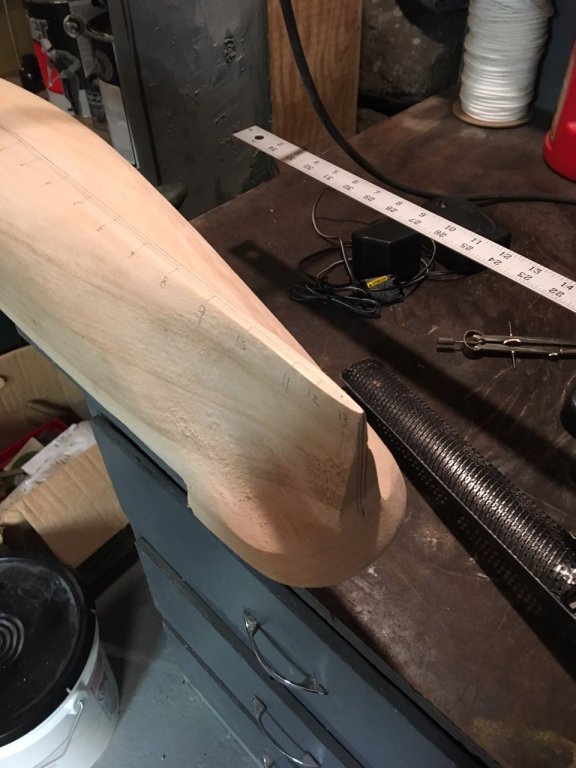
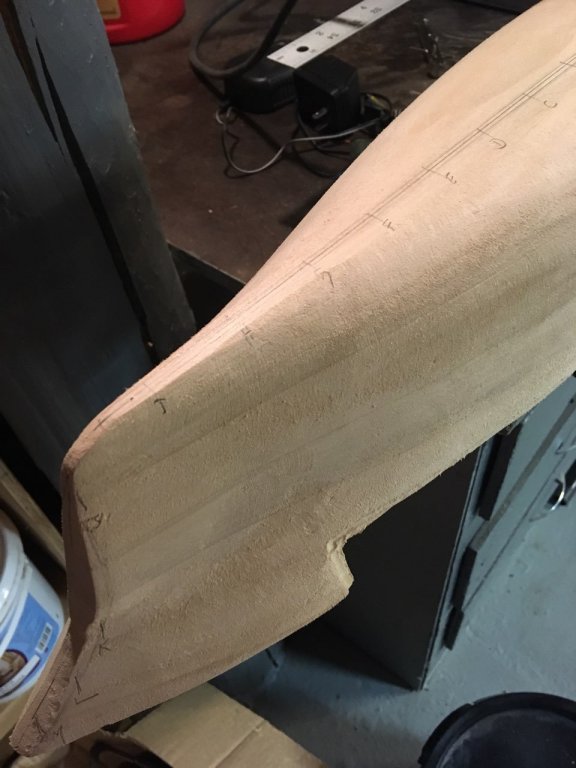
So I have roughed out the bow and stern, taking off most of the knobs left from the hull carving process. big wood block screwed into the deck so I can hold the hull in a vise. Marked off the centerline, the width of the keel, and the station locations. Now comes the boring carve, fit, check, then repeat ad nauseum. After that, make the bulwarks, then it should get to be more fun.
- 356 replies
-
- 13
-
-
- red jacket
- finished
- (and 1 more)
-
It seems the Red Jacket was launched with anti-fouling paint on her hull, but once in England, the British put on copper plates. I will do her "as launched" I think. I am also going to keep a time sheet, which is something I have never done before on a model. I'm also thinking of adding a few furled sails of silkspan.
- 356 replies
-
- 10
-
-
- red jacket
- finished
- (and 1 more)
-
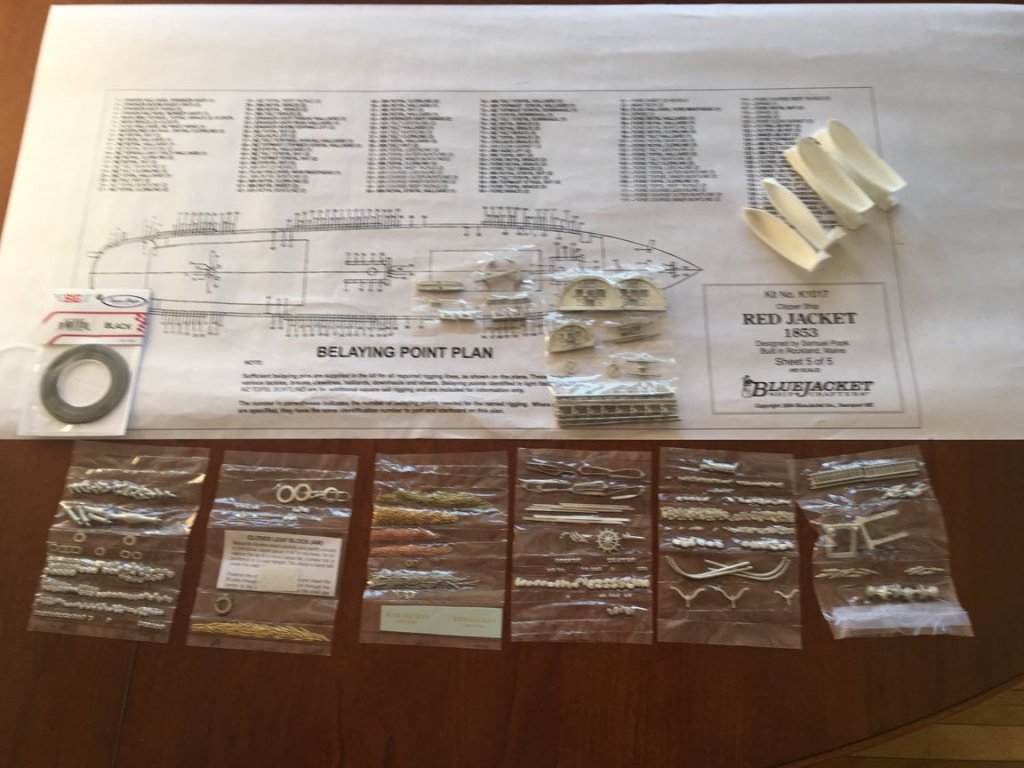
Finally, sheet 5 is the belaying points, and the cast fittings and resin lifeboats. My prediction is that it will take me about 1 1/2 years to finish.
- 356 replies
-
- 14
-
-
- red jacket
- finished
- (and 1 more)
-
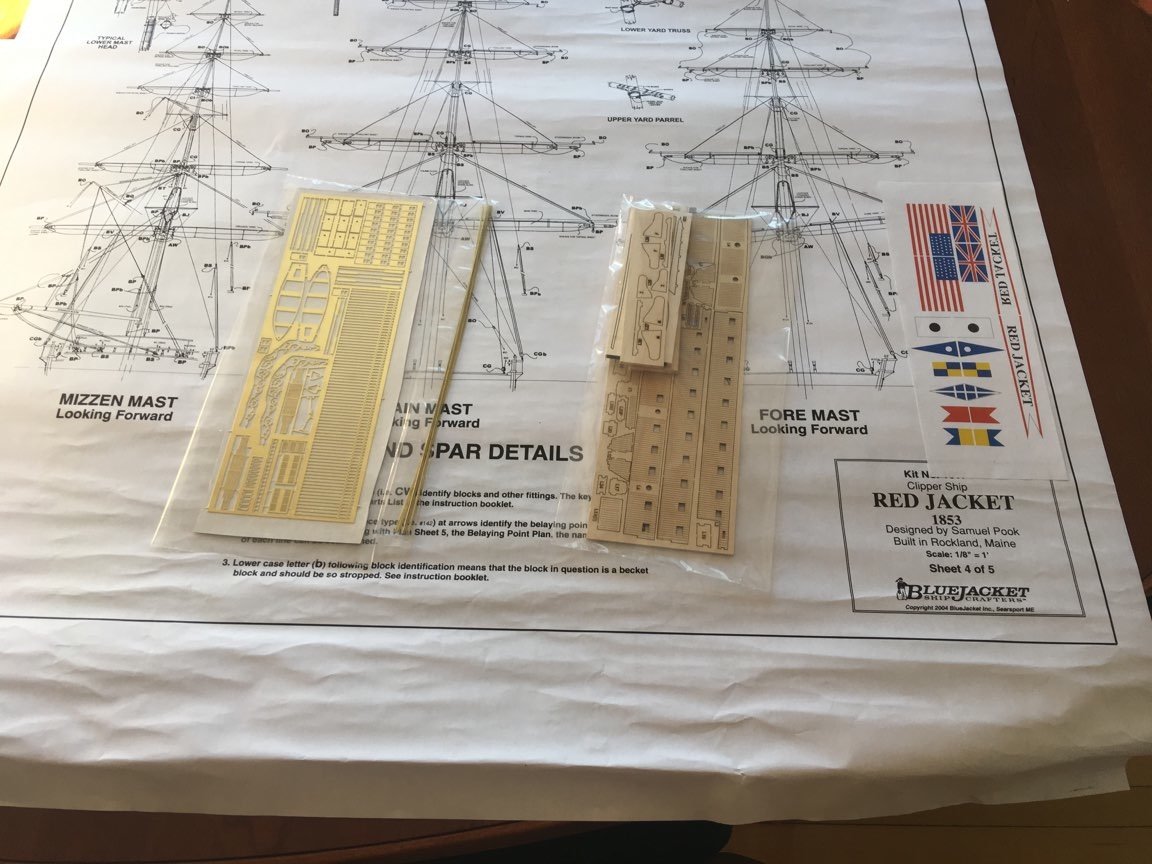
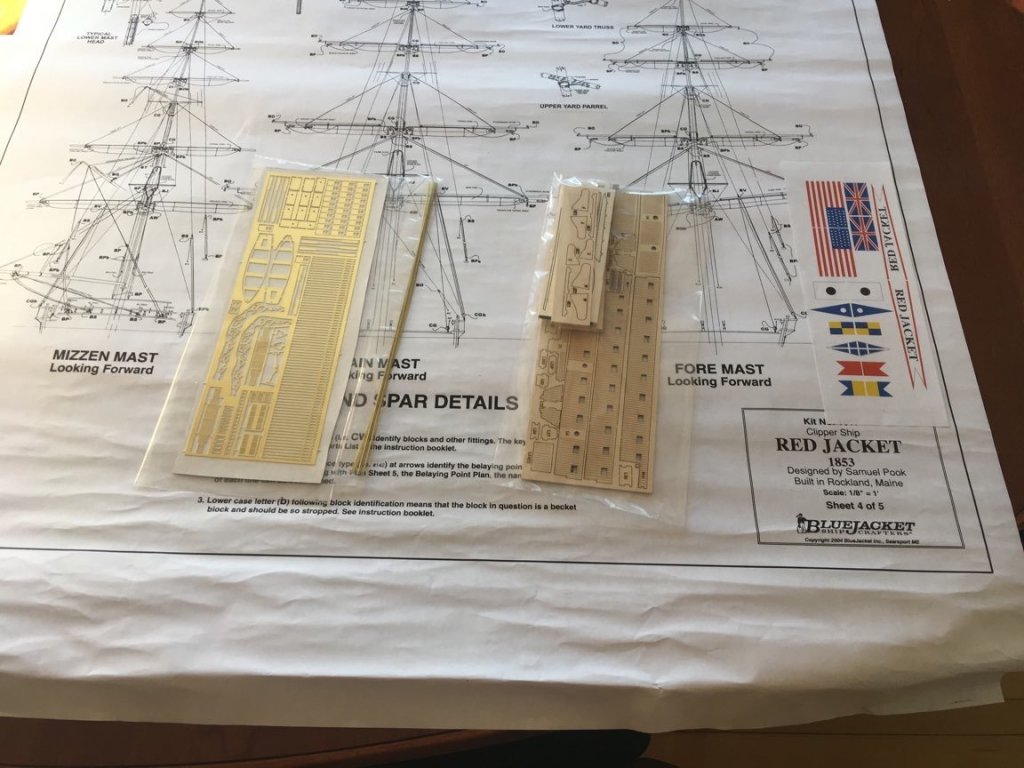
Sheet 4 is the mast and spar details, along with the photo etched brass, brass rod, laser cut wood, and flags. There's a lot of chainplates, about 1/3 of the photo etch sheet.
- 356 replies
-
- 11
-
-
- red jacket
- finished
- (and 1 more)
-
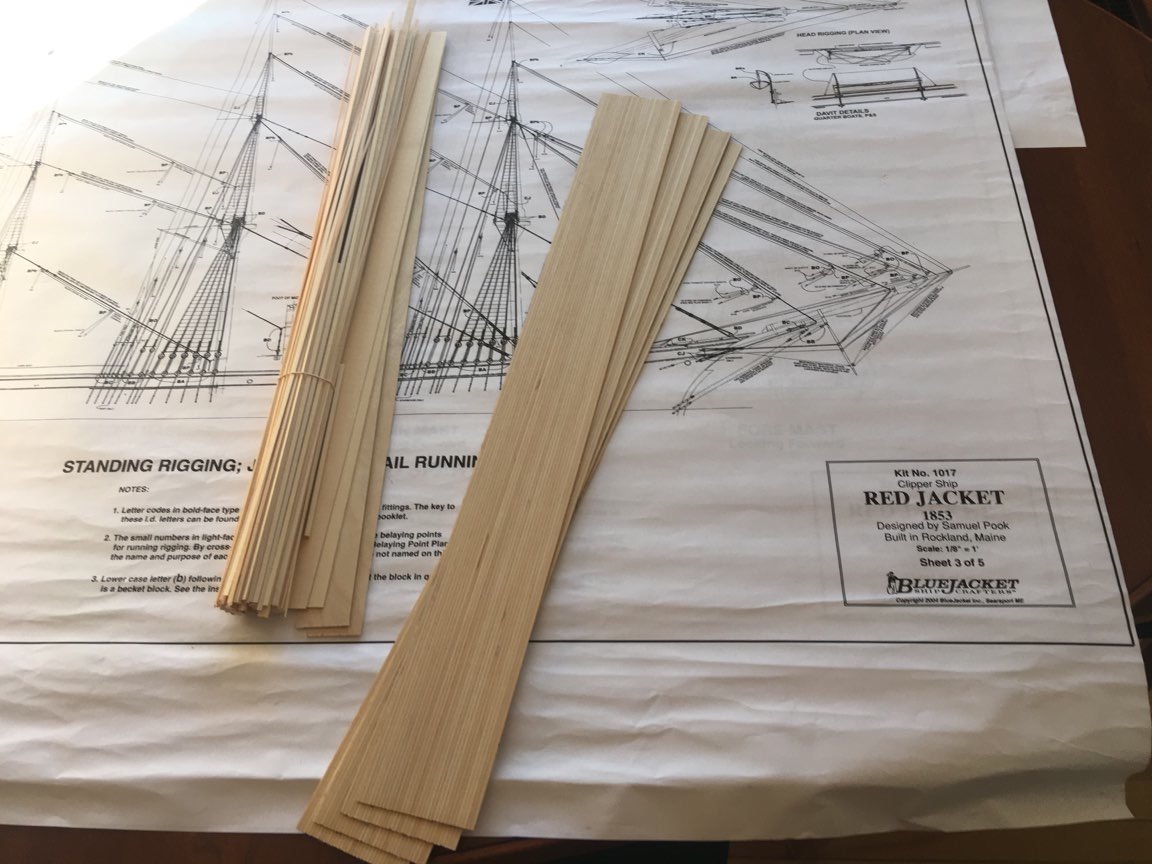
Sheet 3 is the standing rigging. And here is the stick and sheet wood, along with 4 sheets of pre-glued decking.
- 356 replies
-
- 11
-
-
- red jacket
- finished
- (and 1 more)
-
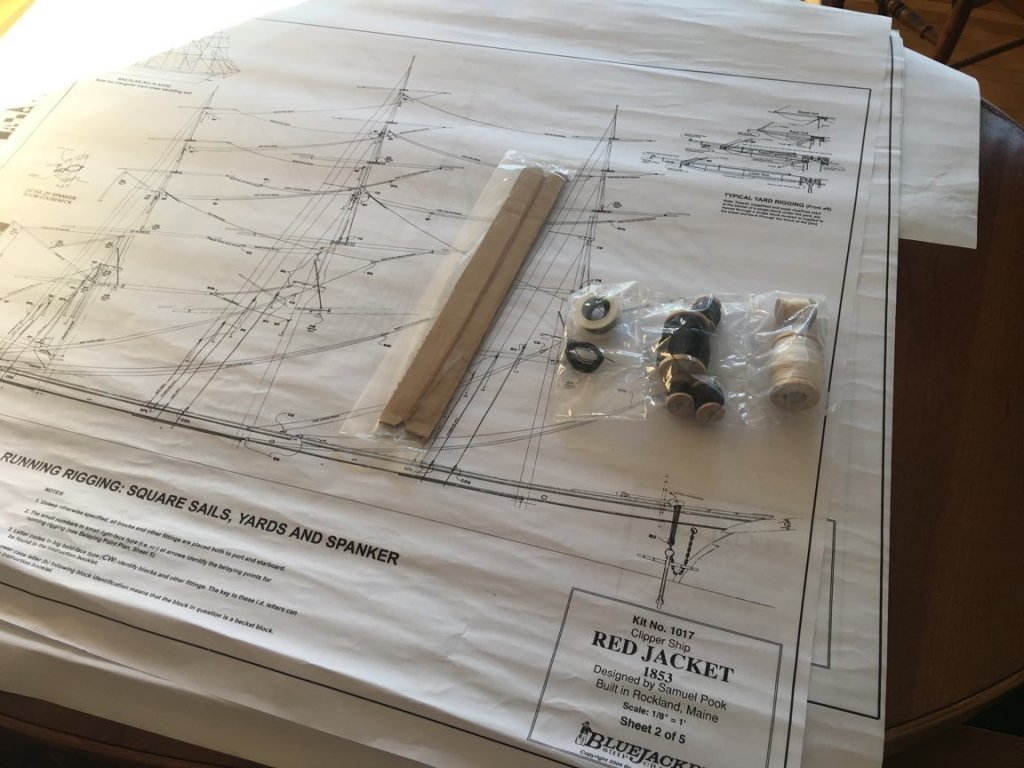
Sheet 2 is the running rigging plan, and here's the chain and rigging thread. There's a LOT of it!
- 356 replies
-
- 11
-
-
- red jacket
- finished
- (and 1 more)
-
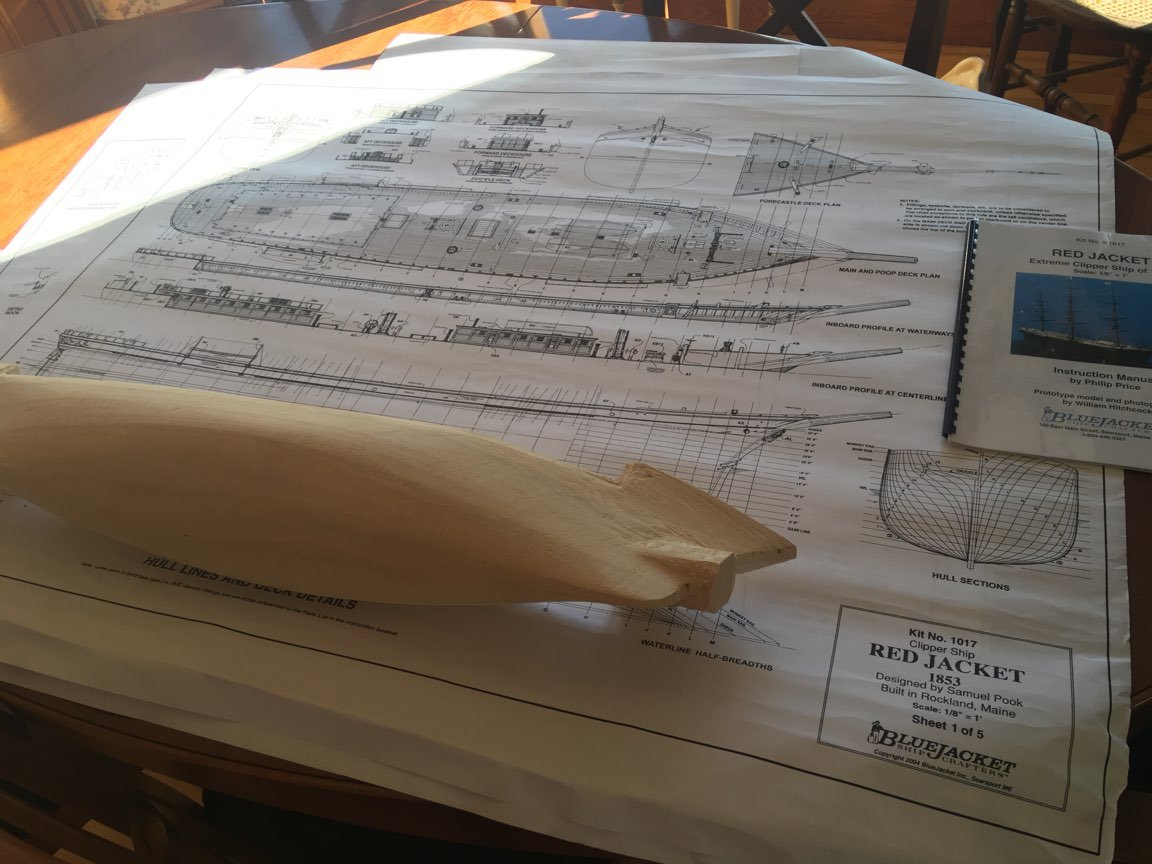
Time to start a new model. Made in Rockland, Maine in 1853, the Red Jacket was a clipper ship, one of the largest and fastest ever built. She was also the first ship of the White Star Line company. She was named after Sagoyewatha, a famous Seneca Indian chief, called "Red Jacket" by settlers.She was lost in a gale in 1885.On her first voyage, Red Jacket set the speed record for sailing ships crossing the Atlantic by traveling from New York to Liverpool in 13 days, 1 hour, 25 minutes, dock to dock. That record still stands today for commercial sailing vessels. The BlueJacket kit has 5 sheets of plans. Sheet 1 has the pre-carved hull laid on top of it. This is going to be a large model! (41" LOA)

- 356 replies
-
- 17
-
-
- red jacket
- finished
- (and 1 more)
-
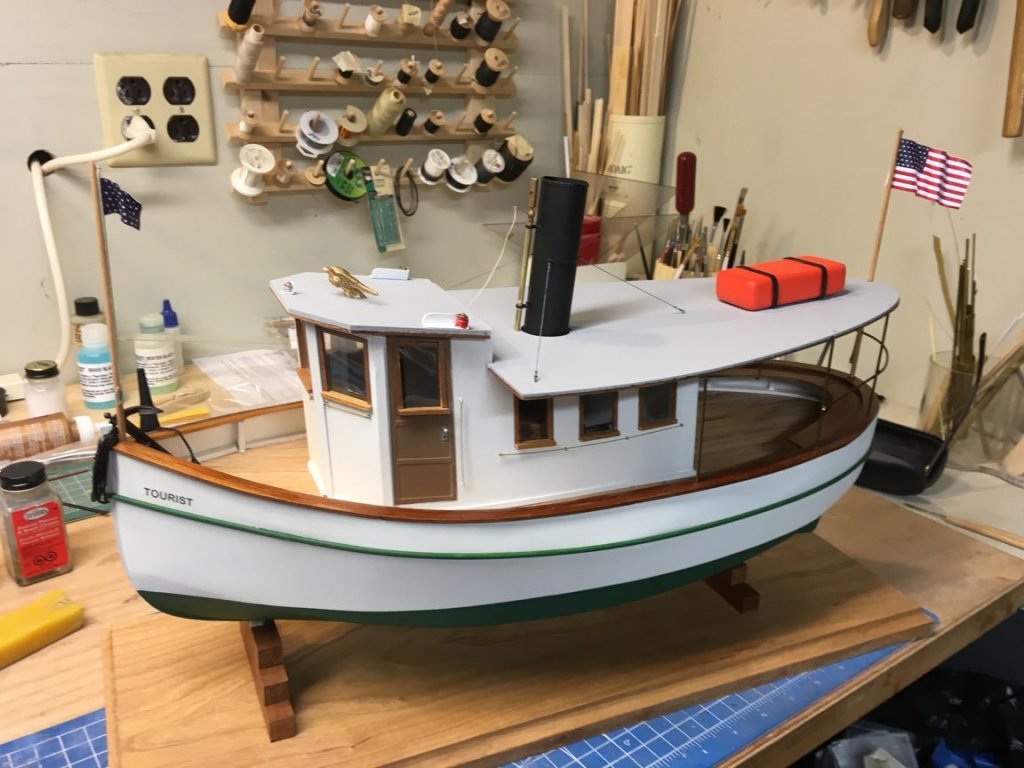
And the model is finally finished. It was an interesting project, to say the least!

- 29 replies
-
- 7
-
-
- tourist
- laughing whale
- (and 1 more)
-
Hi Steve, I used some med CA very sparingly. Nic
- 43 replies
-
- 1
-
-
- virginia
- BlueJacket Shipcrafters
- (and 1 more)
-
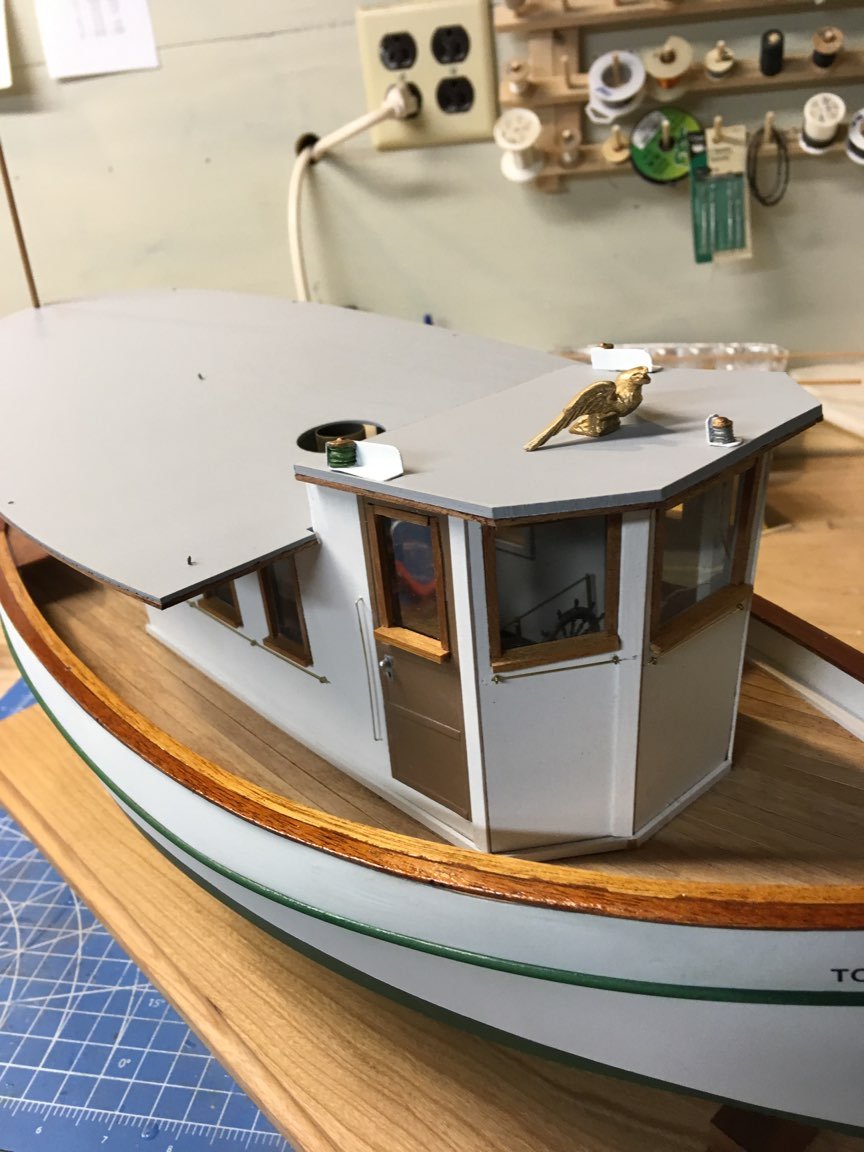
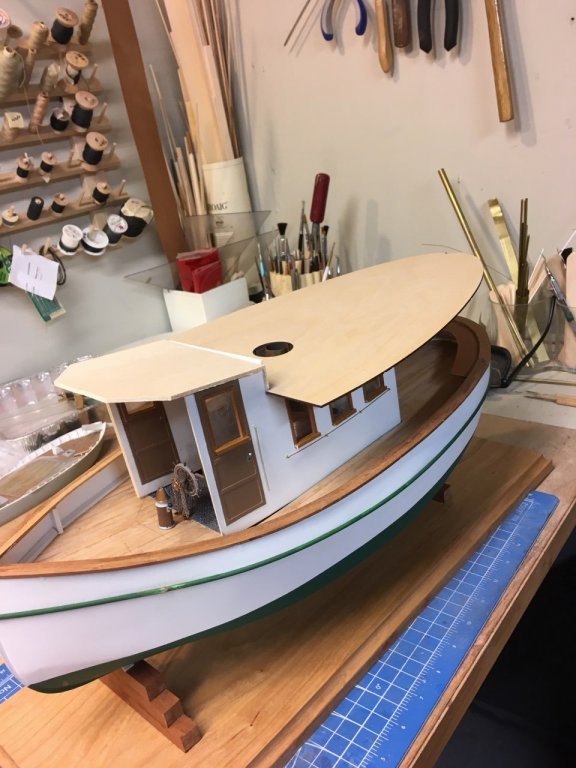
Starting to assemble the housing walls, and placed the roofs on just to see what they will look like.
- 29 replies
-
- 6
-
-
- tourist
- laughing whale
- (and 1 more)
-
Added: Jond - Bowdoin diorama
-
Is that another Monitor hull I see in the background?
- 43 replies
-
- 1
-
-
- virginia
- BlueJacket Shipcrafters
- (and 1 more)
-
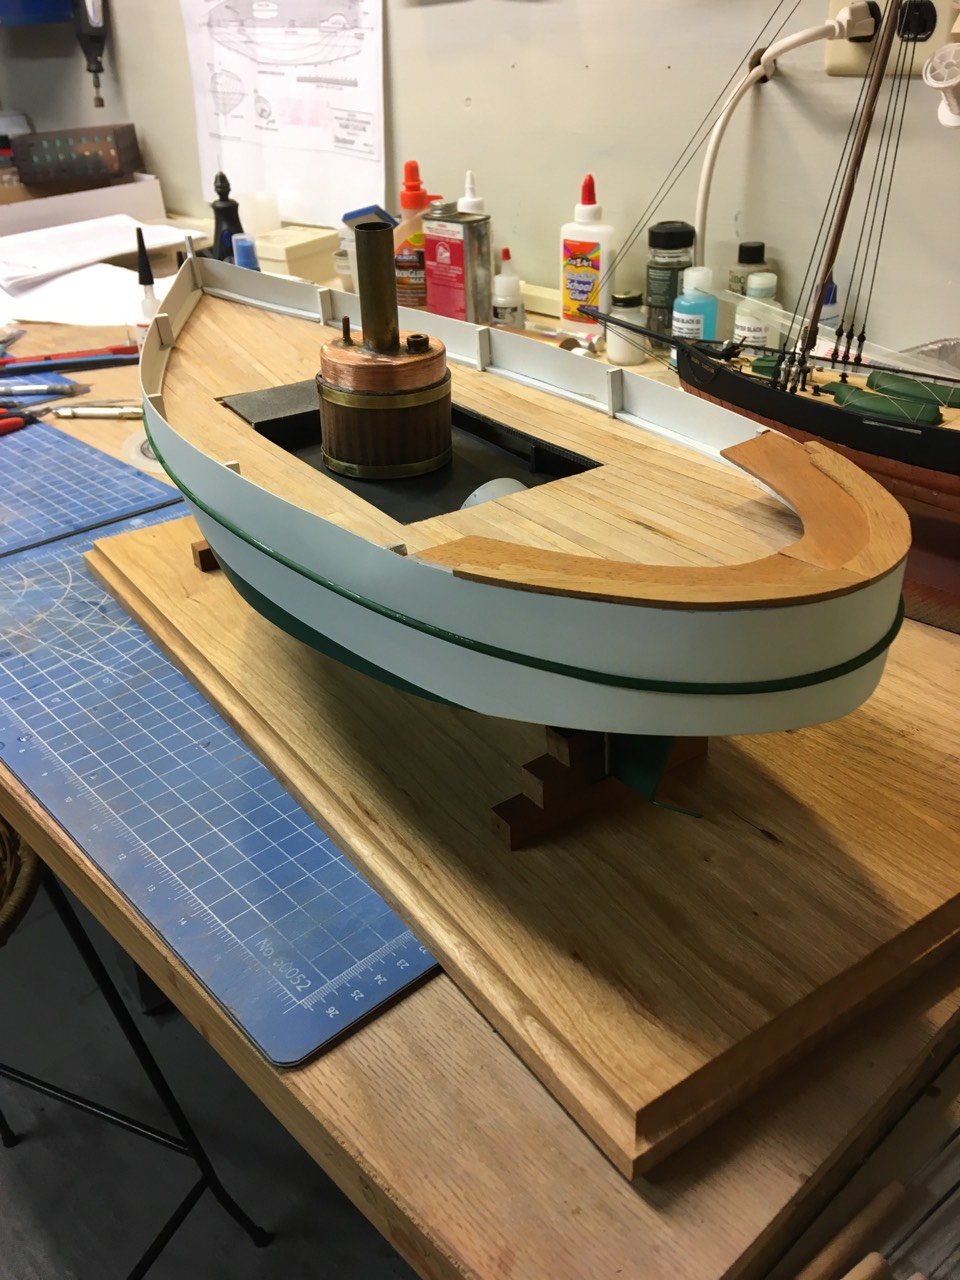
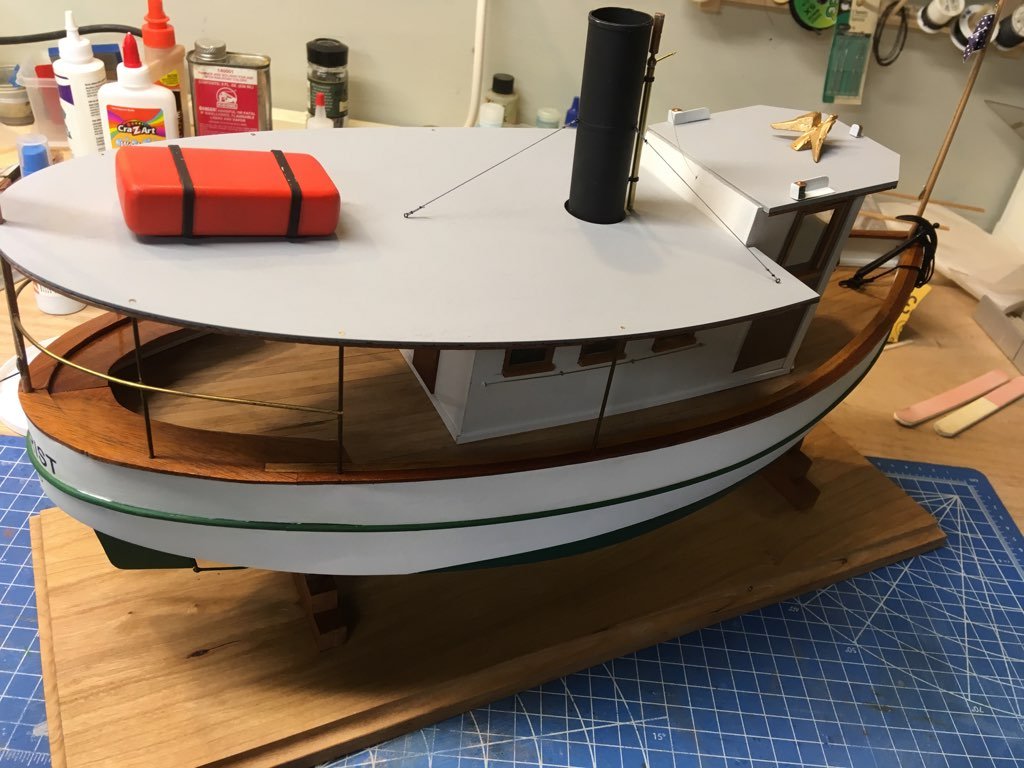
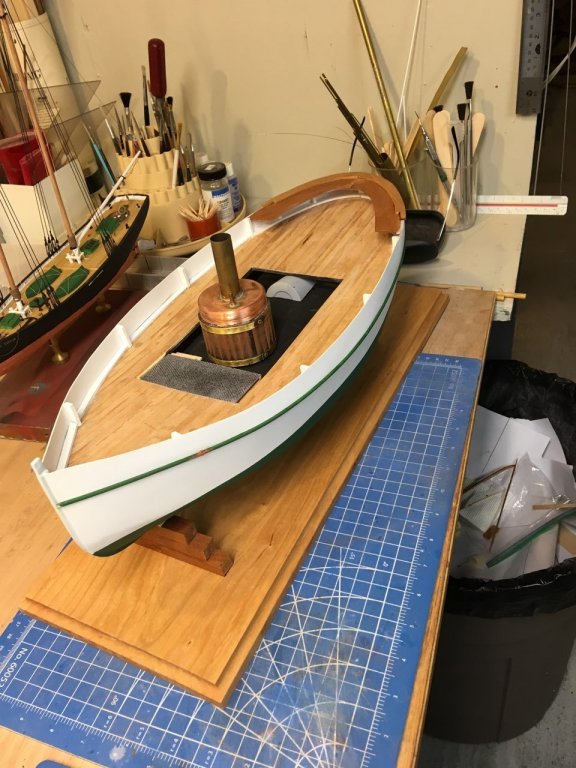
Got the caprails in, and added some detailing to the transmission housing. It is actually a pill bottle.
- 29 replies
-
- 5
-
-
- tourist
- laughing whale
- (and 1 more)
-
Watch out for the gaps between the two layers of tape - that was a problem I didn't anticipate...........
- 43 replies
-
- 2
-
-
- virginia
- BlueJacket Shipcrafters
- (and 1 more)
-
Hi Jon, Another possibility for your water is to just use a flat sheet of poly or ply, then treat the surface with spackle and paint. Look into BlueJacket Newsletter Archives for May 2014 for the technique. Nic
-
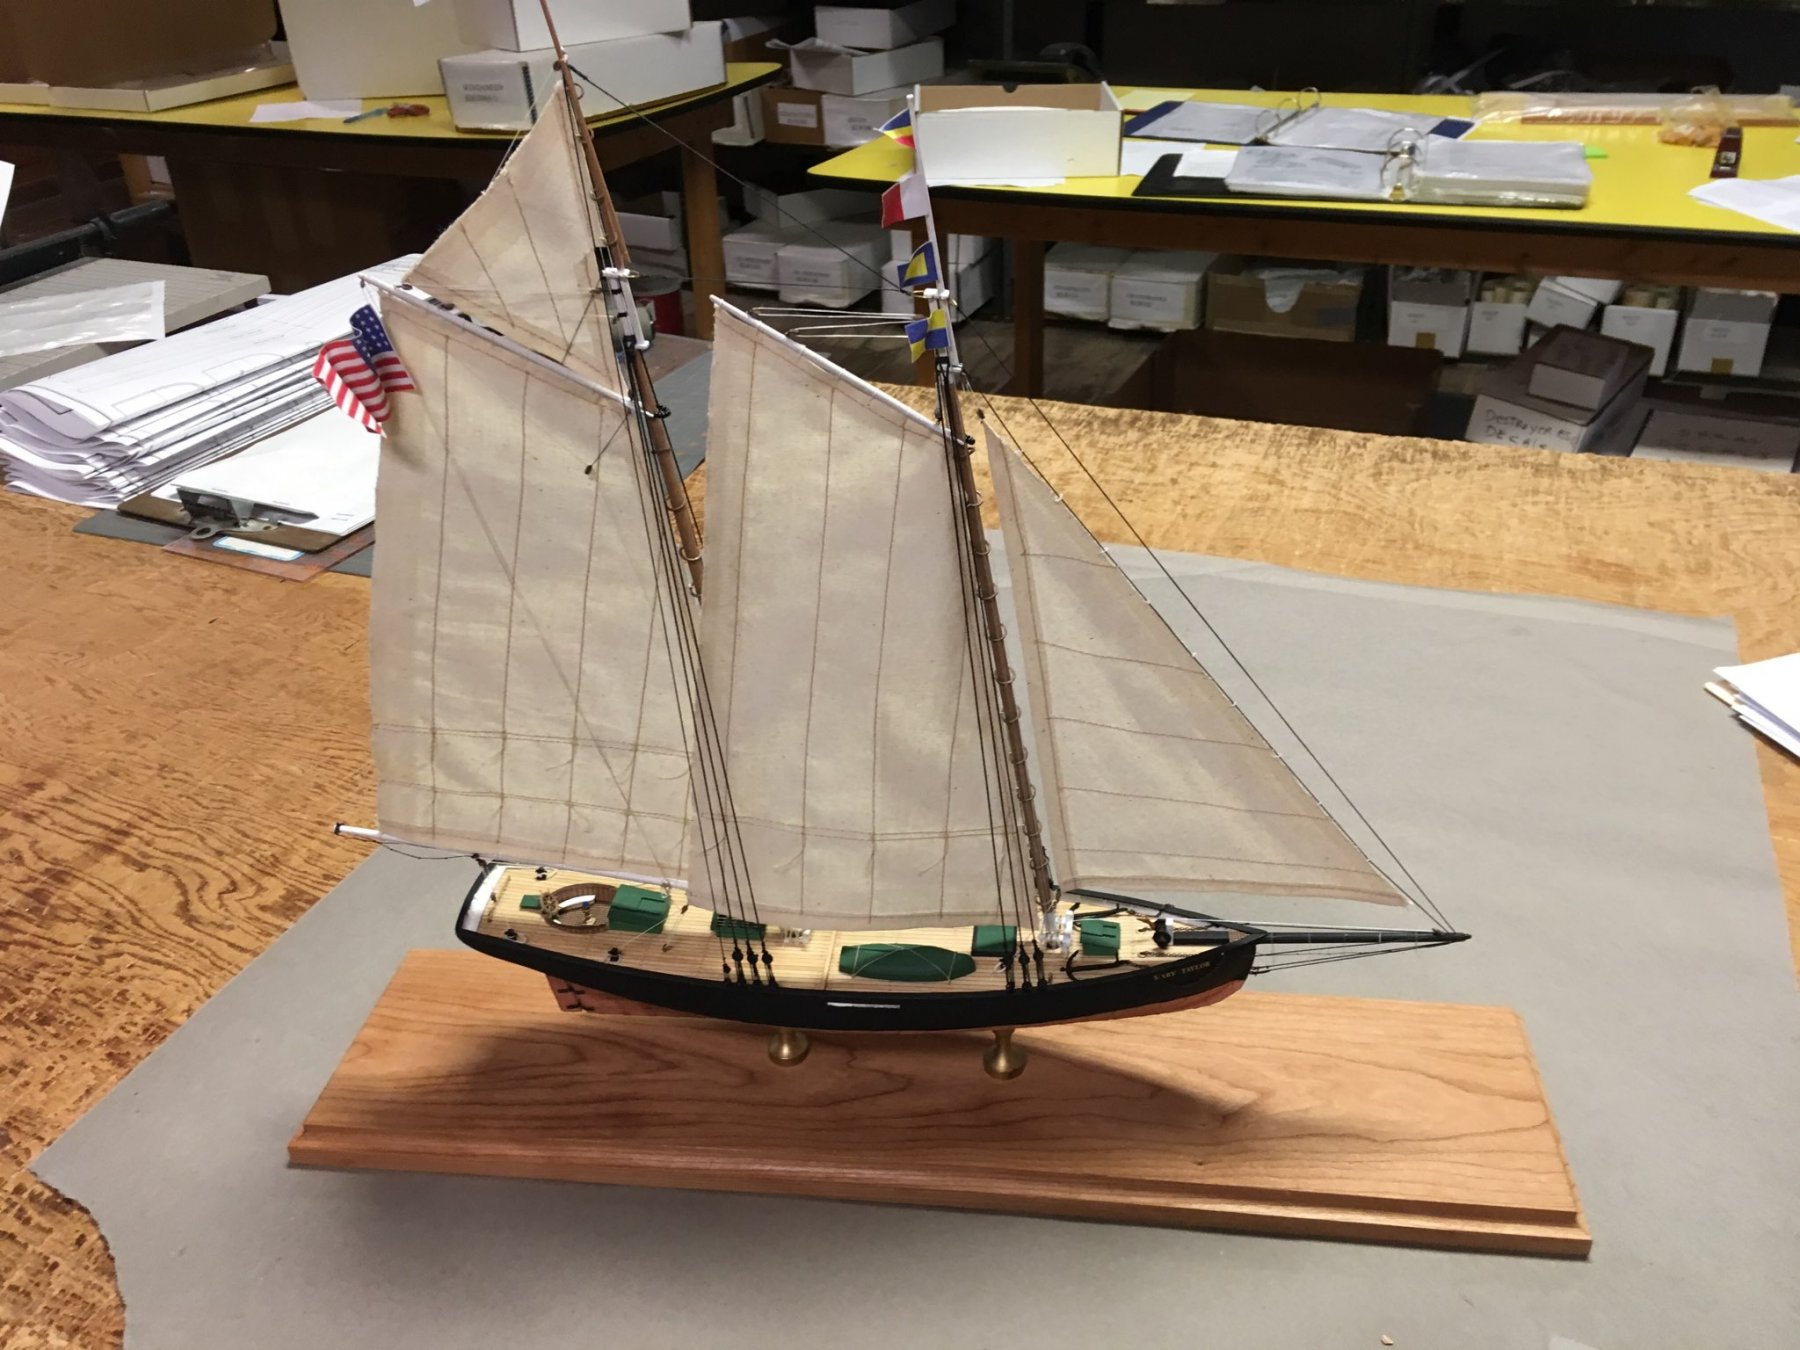
And finally this model is completed. The build is straightforward, I think the most difficult areas are the transom and bulwarks, but they were done early on.


- 77 replies
-
- 13
-
-
- schooner
- solid hull
- (and 4 more)
-
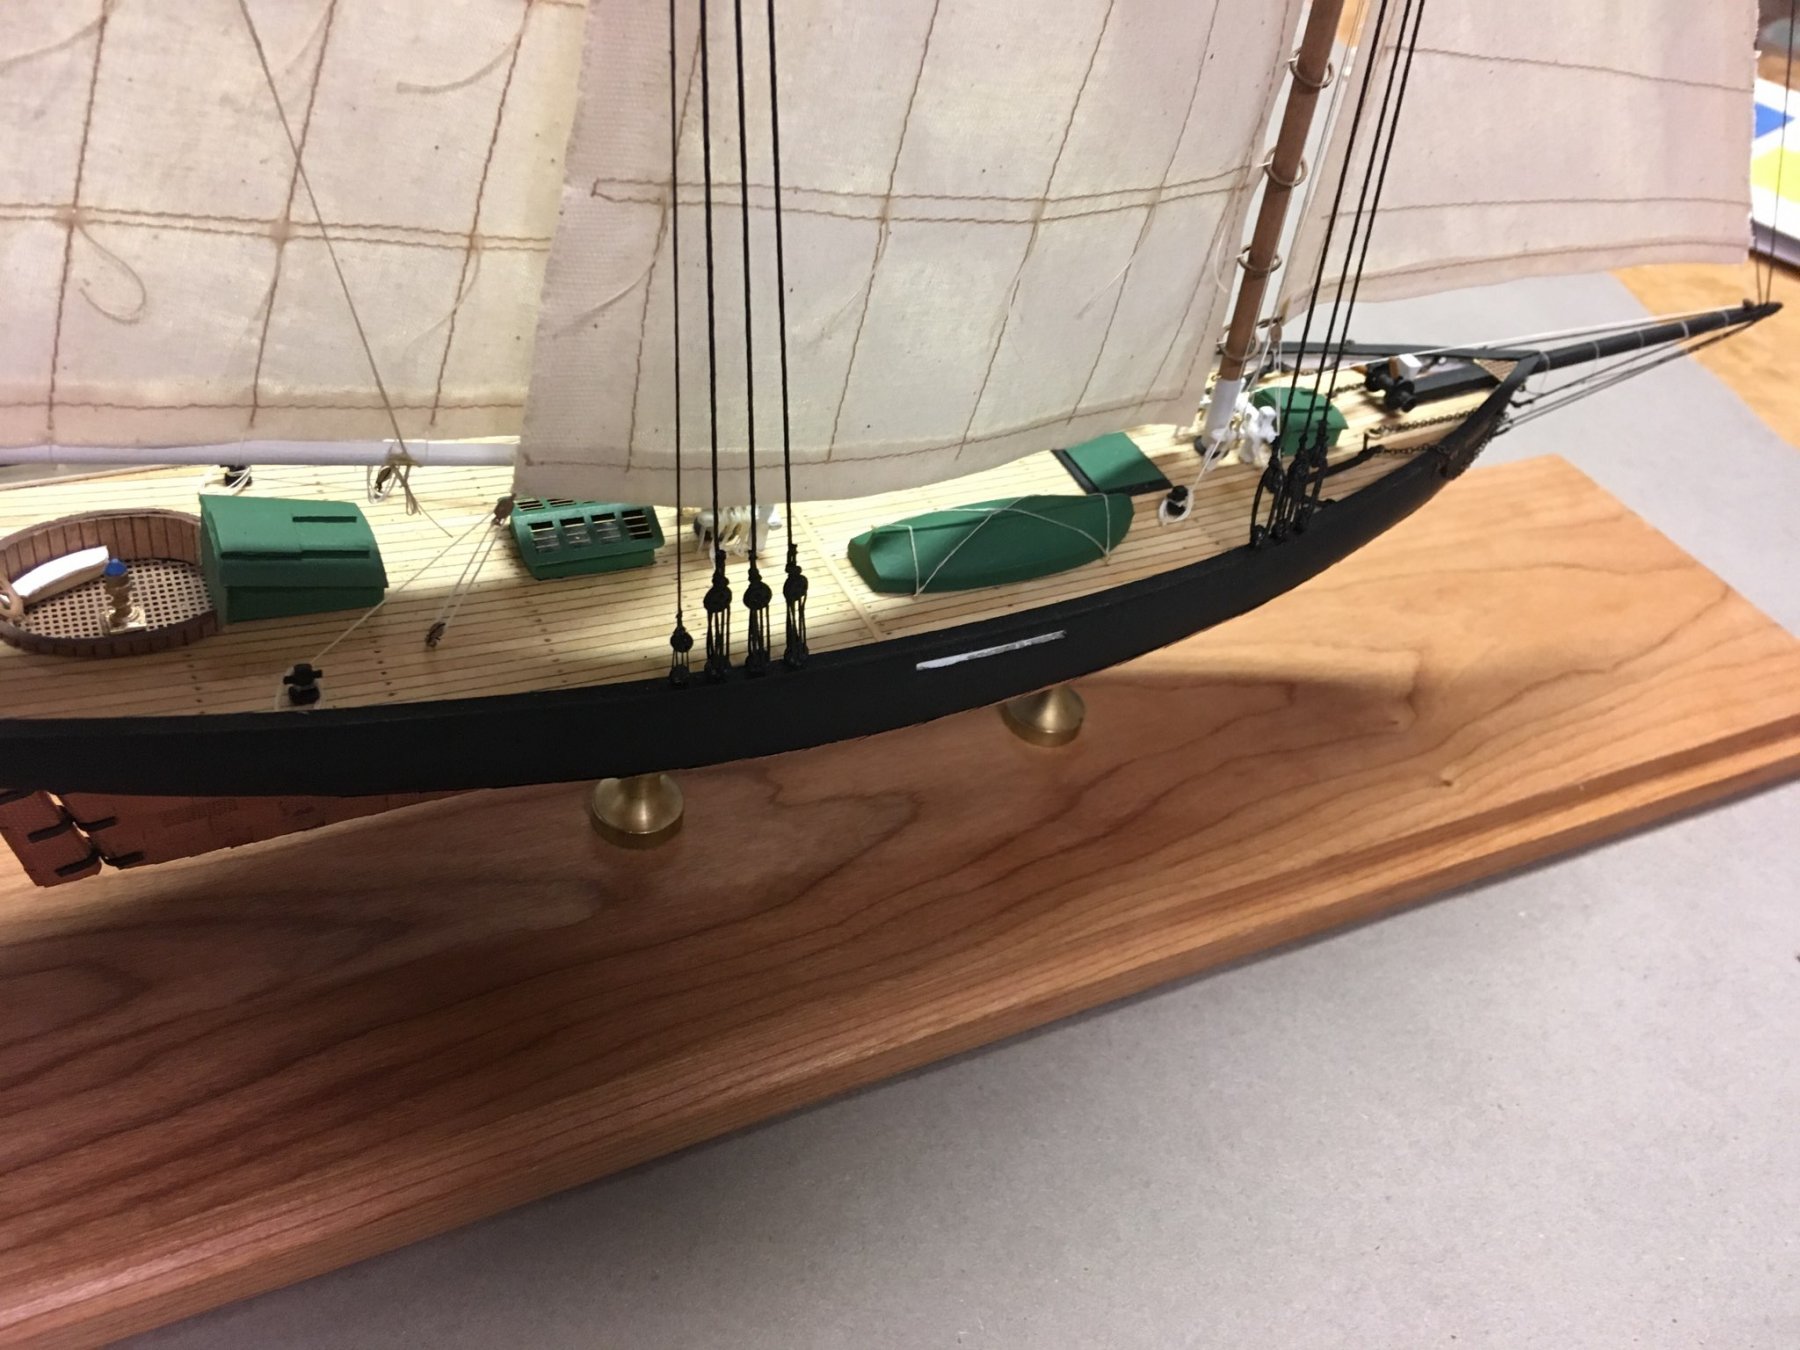
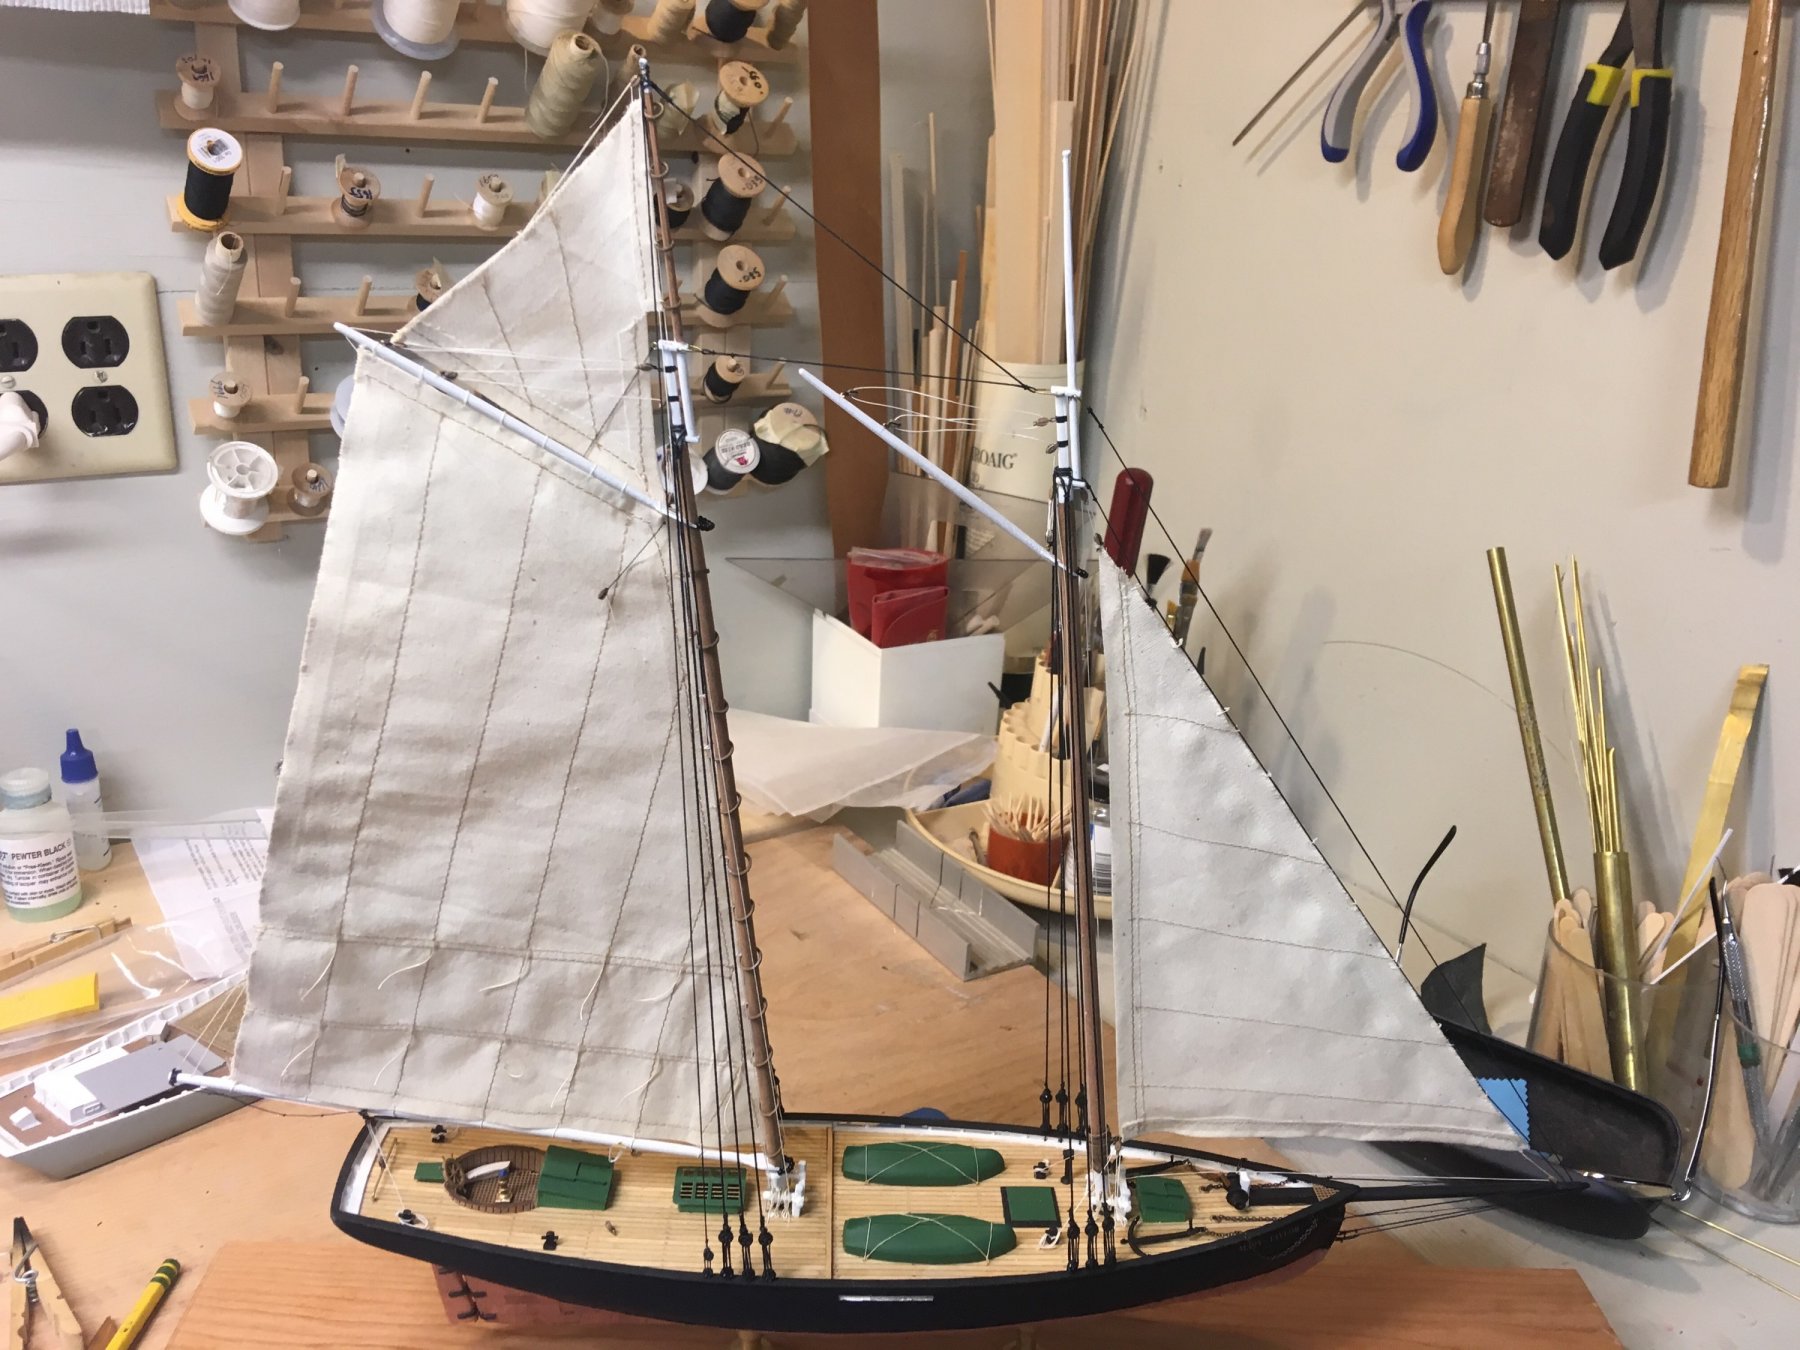
Speaking of sails, here's 3 of the 4 sails added. One sail, and some jib tie-downs and she's done. notice the finished display base instead of the work board. I had to do it twice, because the first time I had bow/stern in the wrong direction!

- 77 replies
-
- 7
-
-
- schooner
- solid hull
- (and 4 more)
-
List of build threads in progress. If you have one I missed, please let me know K Hauptfuehrer - Constitution JFinan - Constitution Rtibbs - Kearsarge CPS_Skybolt - Kearsarge Sjanicki - Virginia - DONE ahb26 - Bowdsoin rcboatbill - Muscungus gsdpic - America RStrick - Smuggler Pete Jaquith - Seguin Schooner - Jeremiah O'Brien (modified) andygp5 - Sam Roberts (modified) BlackGSD - Yankee Hero
-
I am encouraging everyone to do a build thread of their BlueJacket projects on www.modelshipworld.com . So, to "put my money where my mouth is," here's a deal for you: If you do a build thread of any current BlueJacket kit, when you are finished, I will give you a 10% discount on the next BlueJacket kit you get from us. This offer will be good through at least the end of 2020 and maybe I'll extend it even further. Yes, this offer applies to the several build threads already in progress.
-
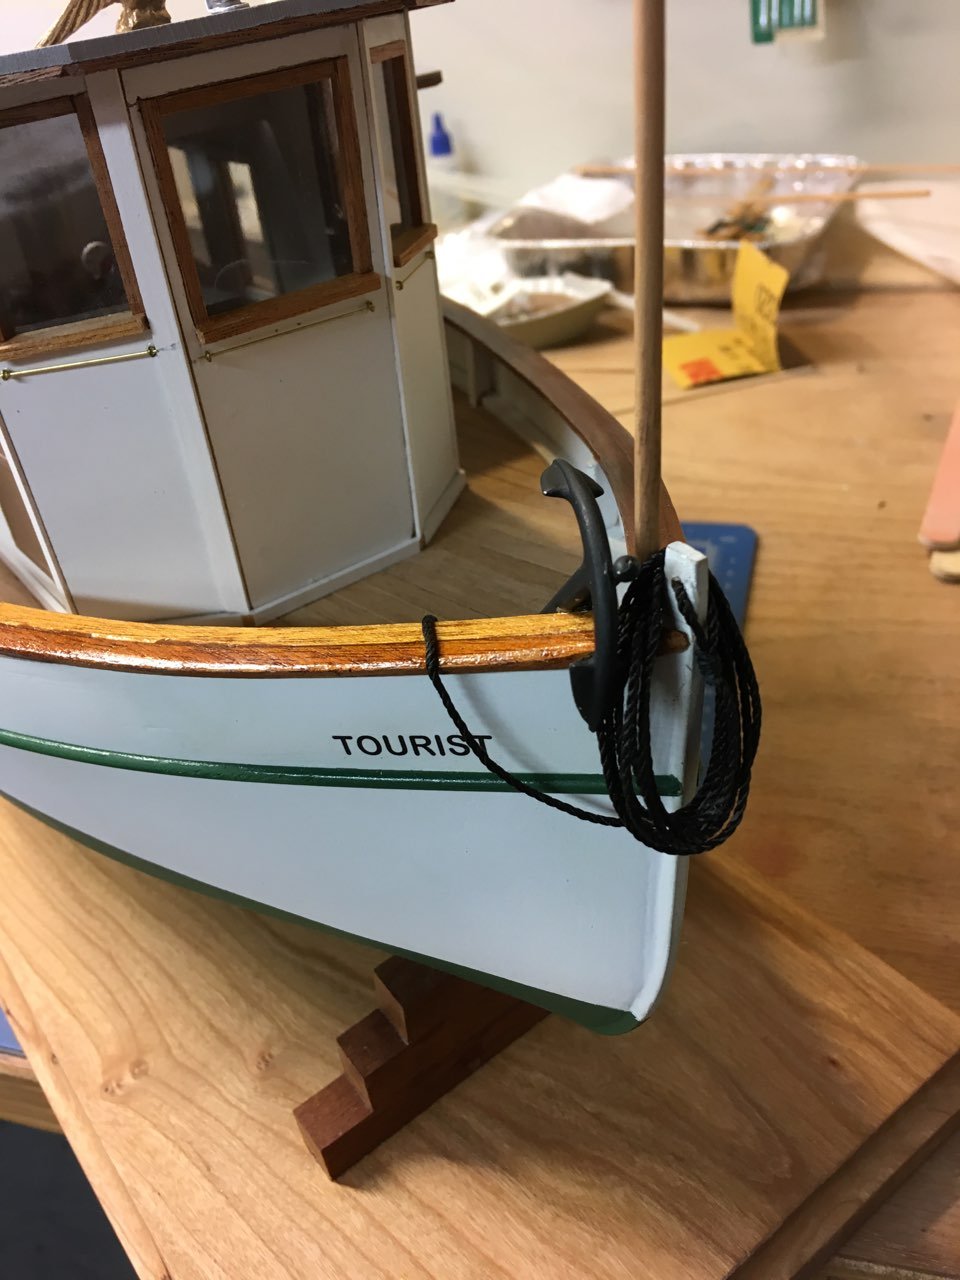
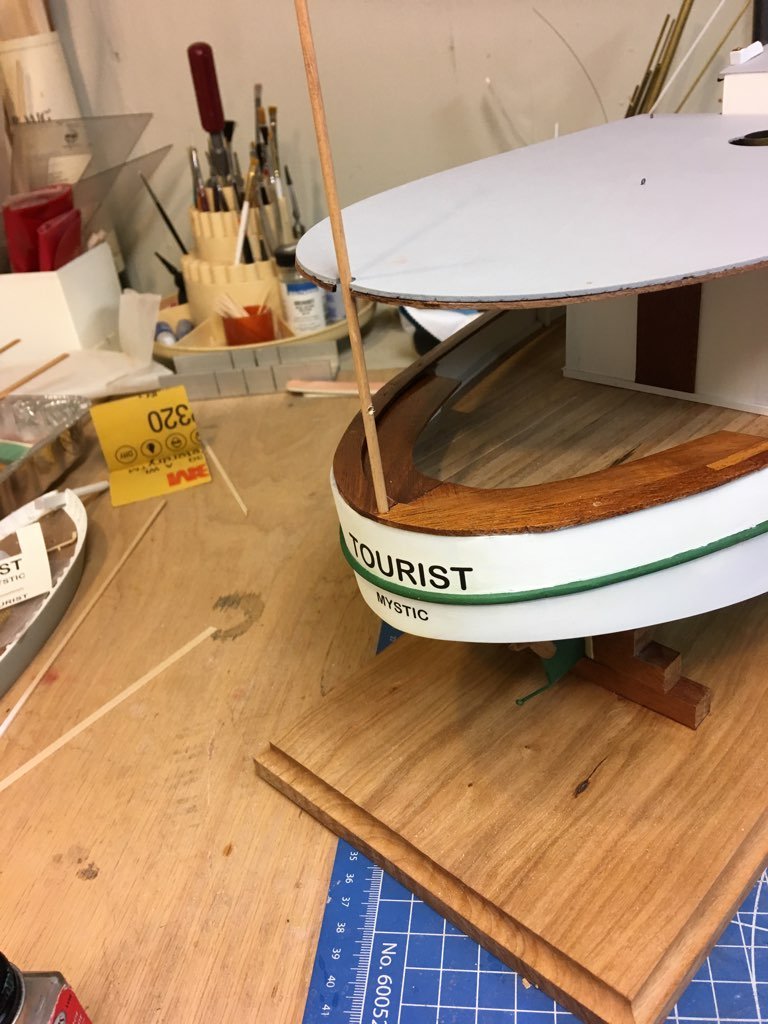
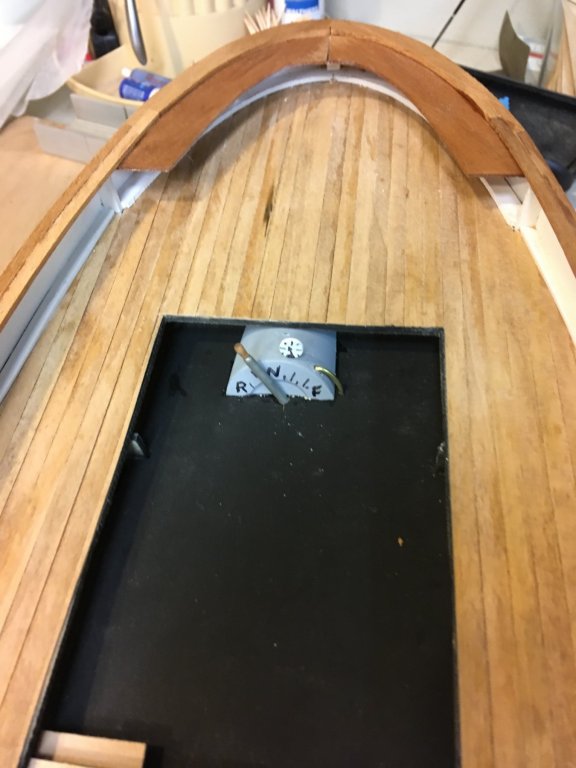
WHile the mahogany caprail is drying, I decided it is time to put the model on its mounting base. Here's bow and stern views:

- 29 replies
-
- 4
-
-
- tourist
- laughing whale
- (and 1 more)