shihawk
-
Posts
709 -
Joined
-
Last visited
Content Type
Profiles
Forums
Gallery
Events
Everything posted by shihawk
-
 Looks great , you have to admit the germans knew how to design good lookin tanks , i always prefered them to the allied .You seem to have it down to a fine art , congrats . What do you do with all the finished models , i put mine in plastic bags ,boxes and stored in the attic
 -
A the good old days , almost makes me want to go back to the plastics !!!
-
You lost me there Mike , that don,t sound like something i would ever say ????
-
I think i could be doing a lot of compromising !!!!!!
-
Well that is a lesson learned, mainly to keep my big mouth shut ,or keyboard in this case, untill i do a bit more research and know at least the basics of what im talking about. I have been through the jotika and billings manuals and worked out that it will take in excess of 1100 metres of rigging for a 1:72 Victory . Can this be correct or am i doing something wrong ??? the vast majority of this ,aprox 1000 metres is 0.5 mm or below ..Approx 230 deadeyes and 660 blocks of various sizes are also required . As you say Bill the kit plans usually only cover the basics so fully rigging cannons etc will be extra again . This of course changes my plans completely , Im sorry Chuck ,from the reports of your rope there is none better but i could never justify my original intention of rigging completely in handmade rope , im still however considering the heavier rope and blocks ?? I will be in touch soon . I still can,t believe that there could almost a mile of rigging on a model ??
-
Thanks Nigel , didn,t think on that
-
I know im a long way of the main rigging on my Billings Victory but i am starting to think about rigging cannons for the middle deck . I have decided to use Chucks rope , tan and dark brown plus the 3 and 4 mm hooks. I may as well order all the rigging etc at the one time. All the line supplied appears to be white or off white so none of it will be of any use and as regards quantity and size the Billings instructions are as usual vague . My question is this , on 1:72 scale Victory does anyone have an idea of approx quantities and thickness for complete rigging . Of course i don,t want it down to the last metre ,10 would do !! I suppose Chuck would know but just wondered if anyone had worked it out recently . while i,m at it blocks and deadeyes ,again any ideas as to what sizes and quantities are required would be usefull , i really like the look of the pear ones he makes Thanks in advance , any info will be appreciated Boyd
-
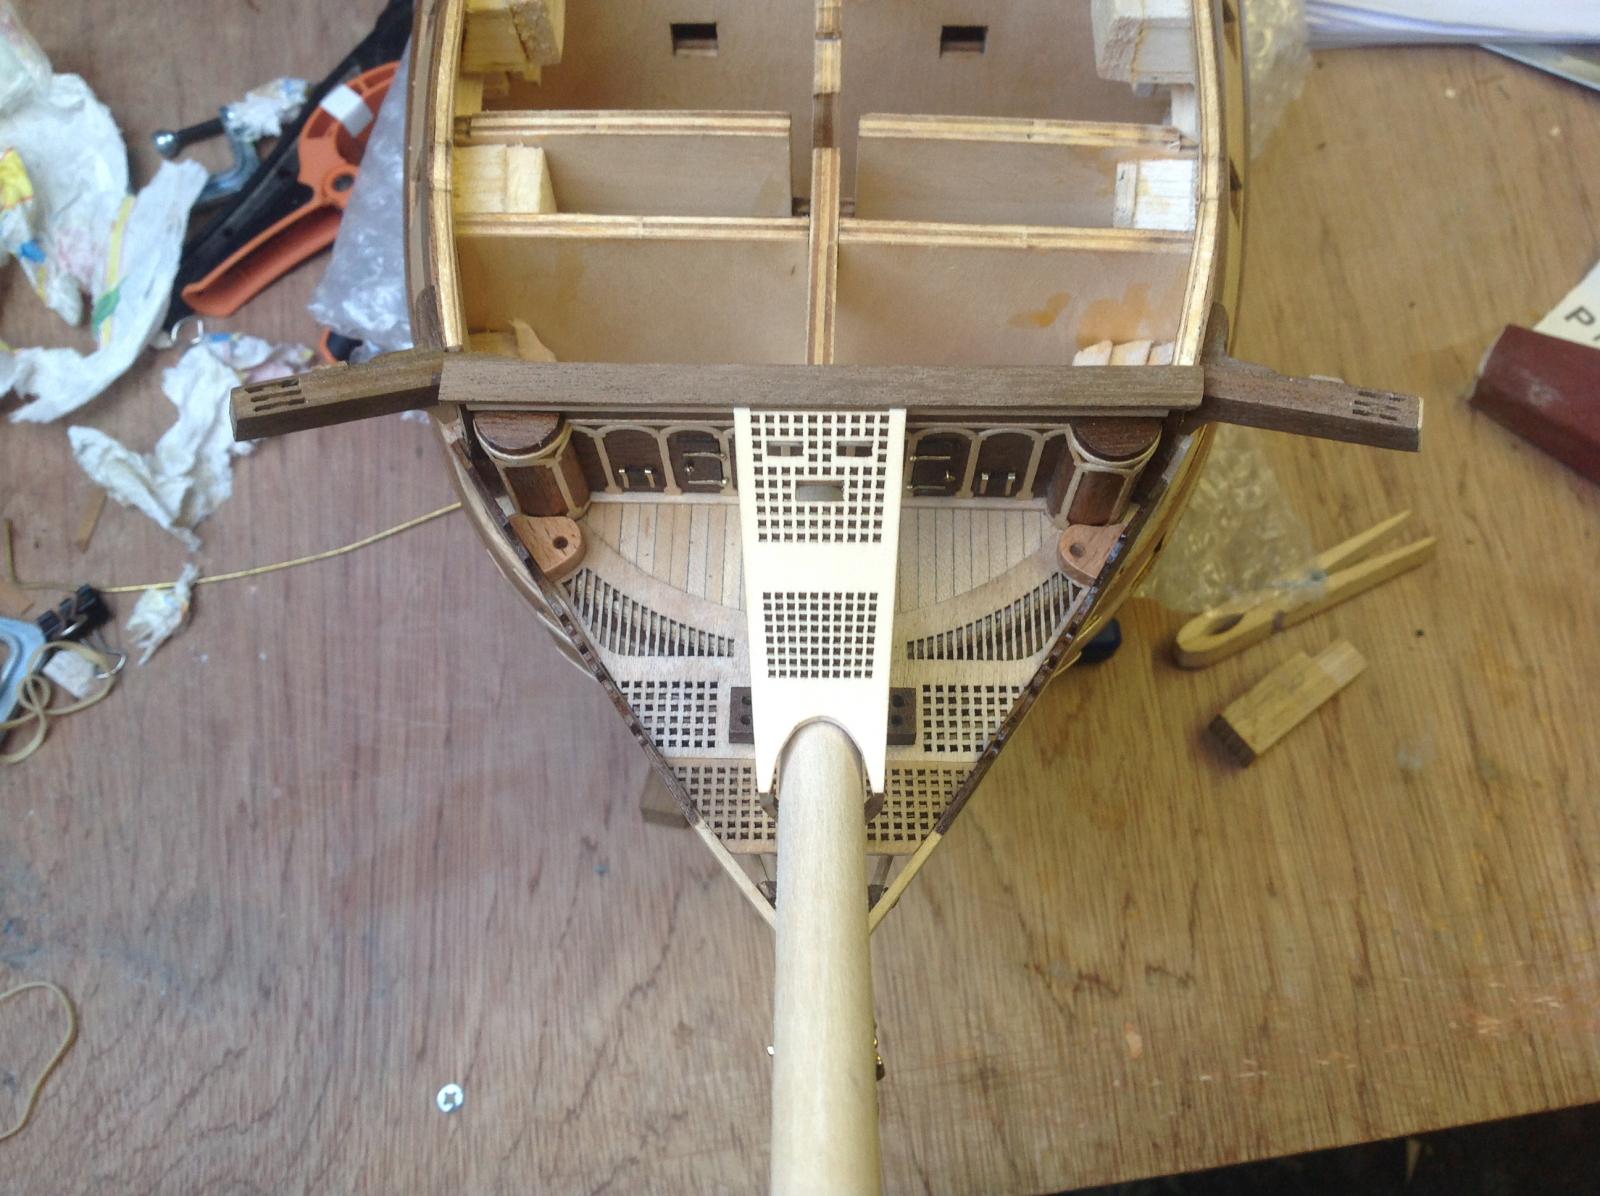
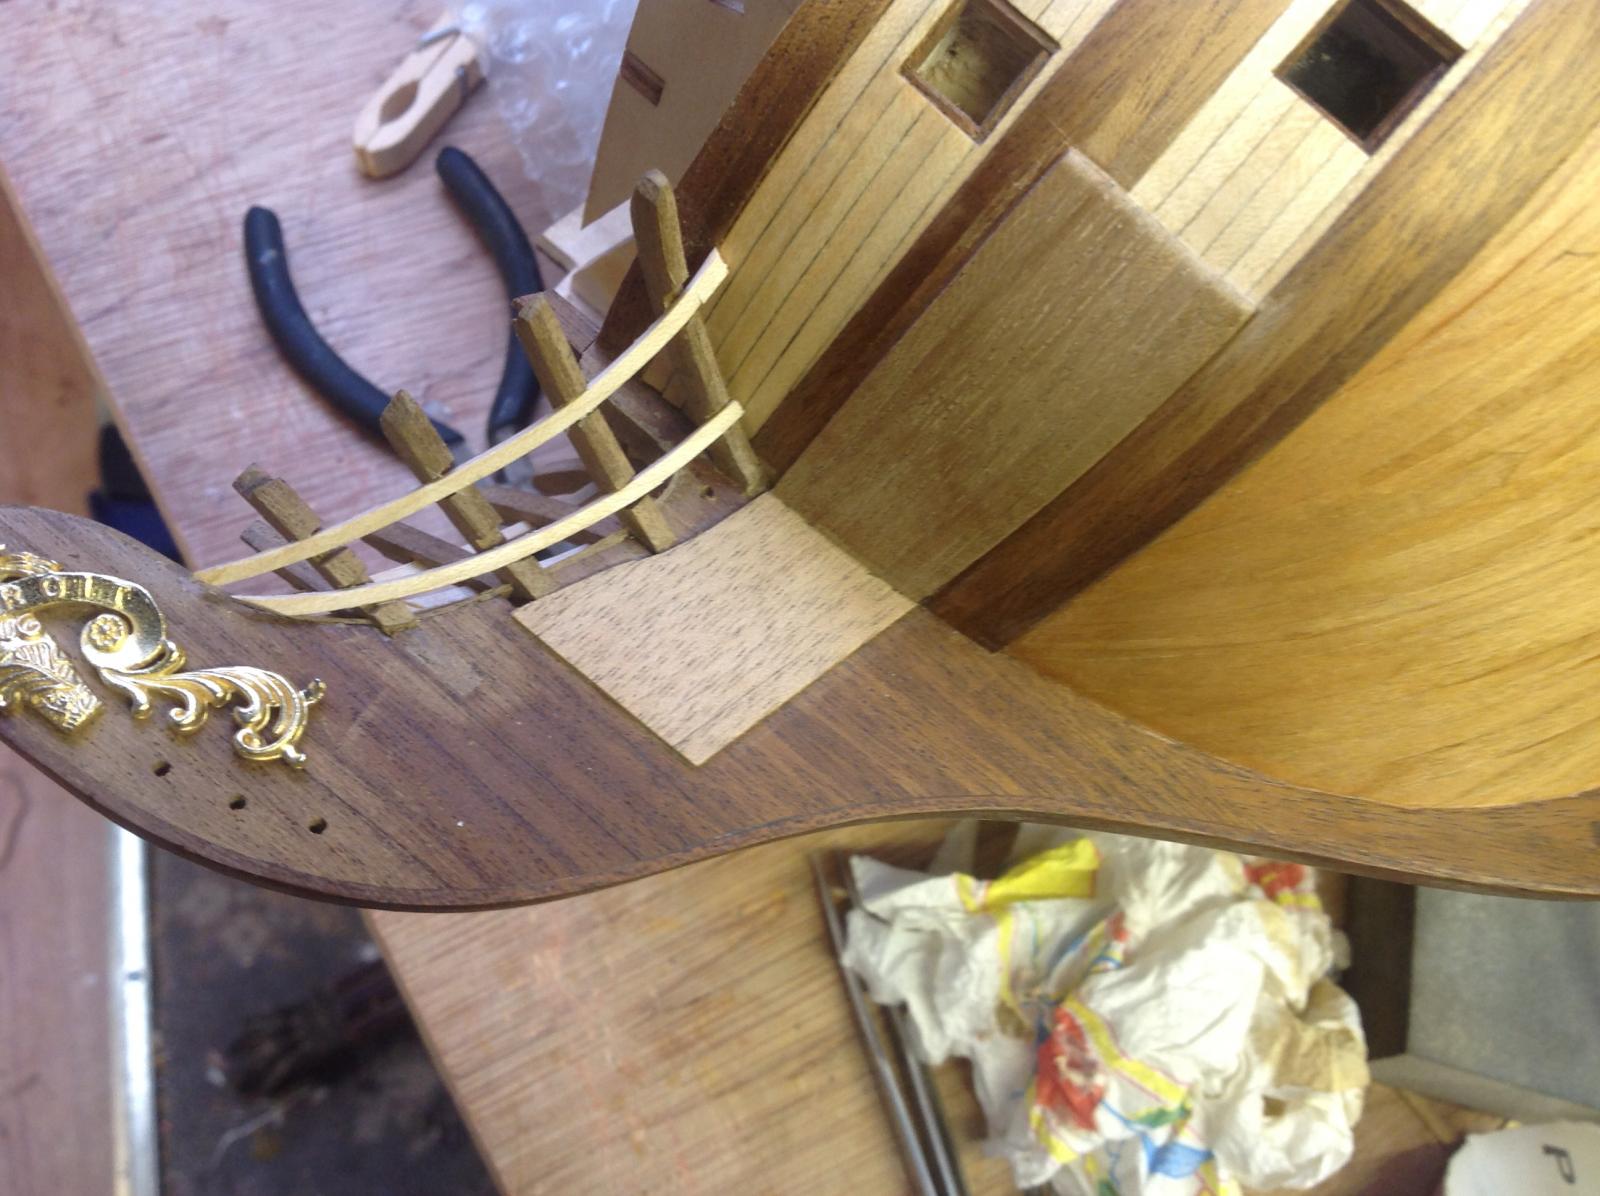
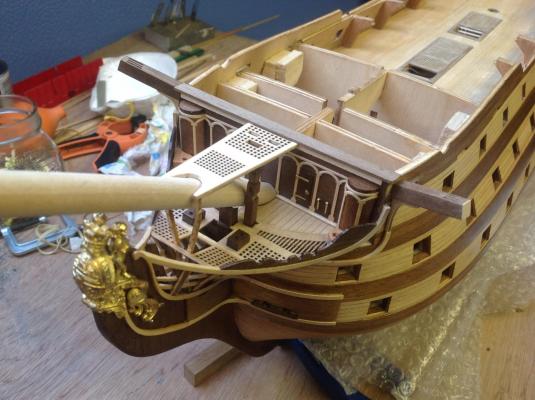
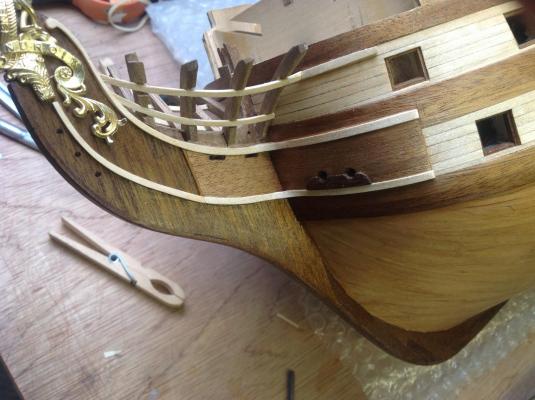
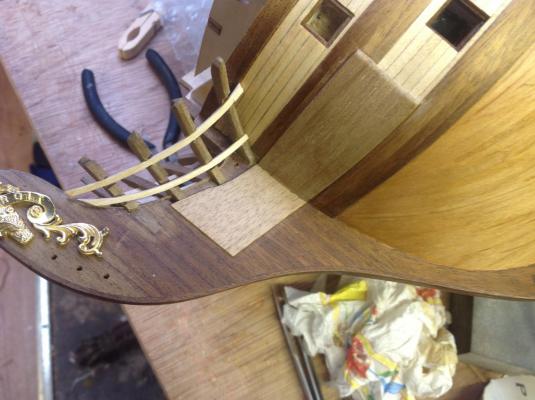
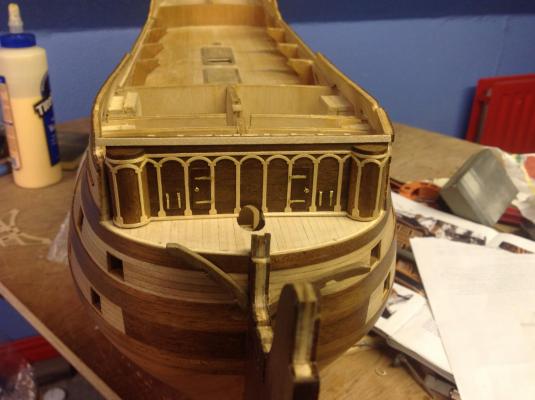
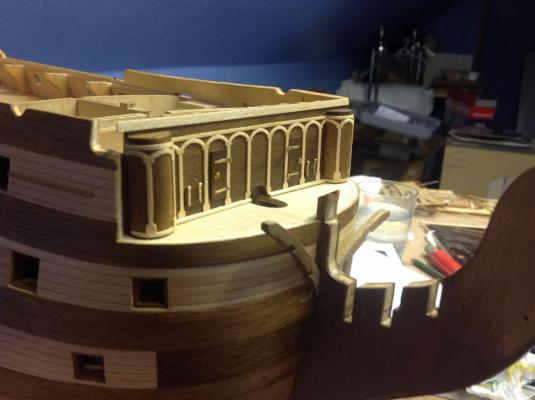
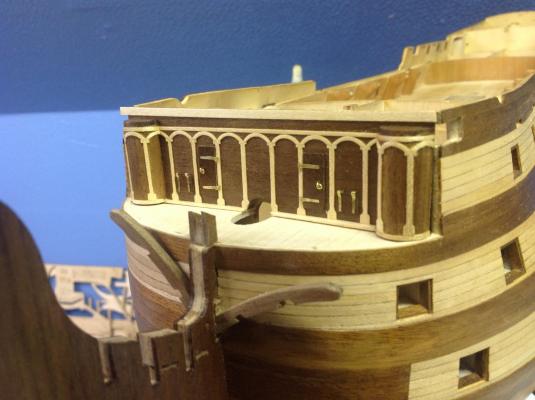
Been having a few computer problems so took a few pics as i went along .As i thought the most of the bow had to be rebuilt using the ply parts as a guide Afew bits and pieces copied from the ply parts supplied the extra pieces shown in the final 2 pics are only dryfitted and will not be added for safety reasons untill later in the build


- 413 replies
-
- 12
-

-
Can i live without a BYRNES TABLE SAW
shihawk replied to shihawk's topic in Modeling tools and Workshop Equipment
thanks folks for all the good advice and comments i think perhaps i can live without the saw, temporarily anyway ,. When i think about i don,t realy have enough use for it to justify it ,maybe if i ever reach the scratch building stage i will reconsider . I ordered a Domanoff nanogrinder and serving machine which i hope will be of more use to me at my present build stage and satisfies my new tool cravings for a while at least . Before buying anything a cooling off period is adviseable , sleep on it for a week ,it could save on a few expensive ornaments ?? -
HMS Victory by willz
shihawk replied to willz's topic in - Build logs for subjects built 1751 - 1800
Just finished the stern on my own build and thought it looked well but seeing yours makes mine look rubbish ,but i still ain,t redoing it ..Your carving skills are to be envied , by me anyway , tried my hand at it and finished up buying the brass docors . -
Just read quickly through your log ., great build and very informative log . I also used Maple for my Vic decking but not of the same quality as yours ,lesson learned ,.big variation in color .fortunately it was a lower deck and i will be more picy on my main deck . Forgive me if i missed it but what is your caulking method ?? as it looks very impressive, as does all your build tks Boyd
-
Probably one of Brian,s copies
-
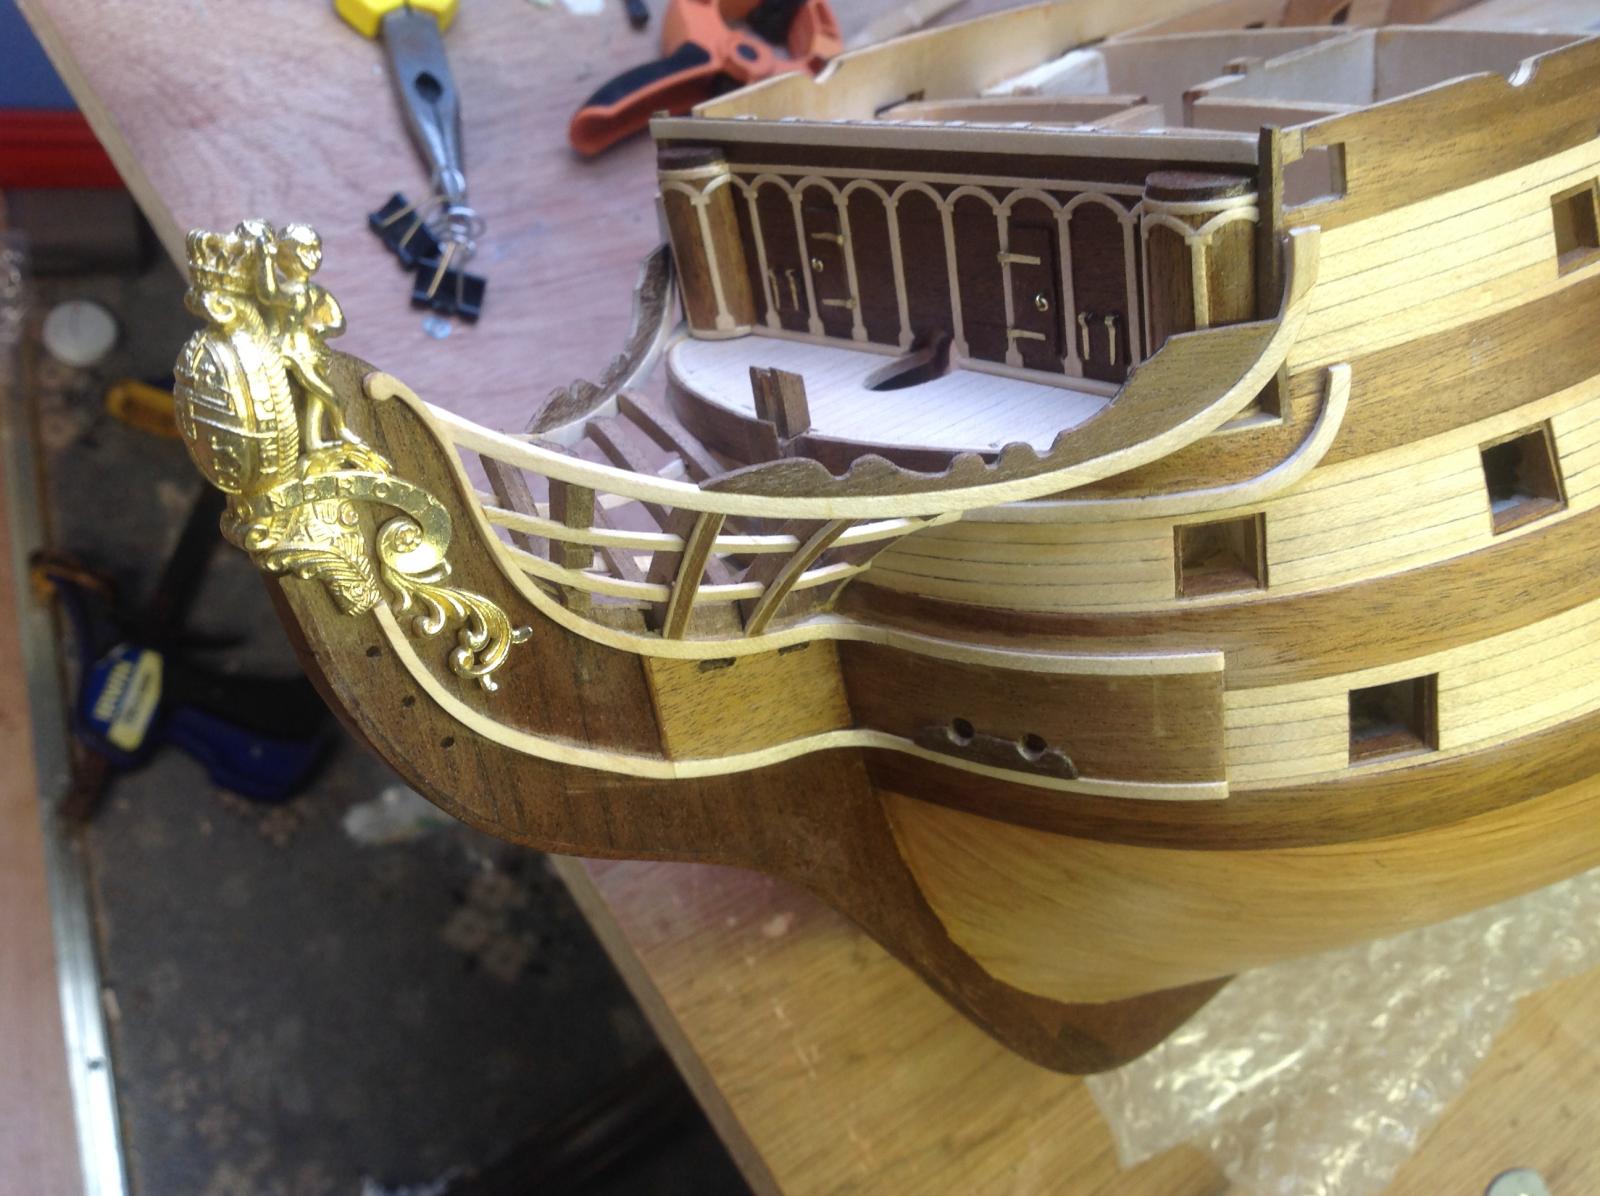
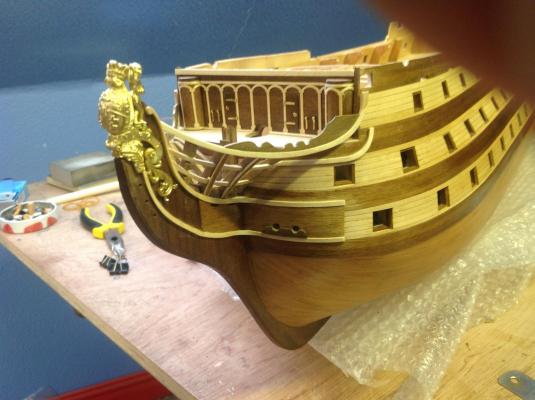
tks Keith . the brass fittings weren,t hard to fit , the swirls above the figure were the worst and needed severe cutting back i also filed them down to about half their thickness, which also meant i could straighten the twirls slightly to fit them in , The strips that join the swirls to the top piece were made from brass wire , shaped and then flattened , not perfect but the best i could manage
-
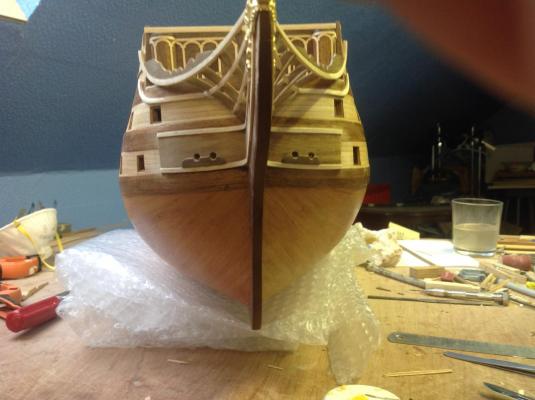
Nigel , I am inclined to agree that the painted option wouldn,t have looked right even if it had been possible ,and this is part of my predicament with this build . When i look at other authentic Victory models for help i have to remind myself that mine is not a copy of the real Victory and that i can do it what ever way i think looks right , but i,m slowly getting used to it . John , I,m happy with the stern gunports as they are , in fact when i looked at the gallery of Victory models i was plesantly suprised to see that many builders had left them out completely , so apart from a few fidly bites , chain etc which i will add later i consider my stern finished . Now it,s on to the bow or front end as i call it , and guess what , it,s going to be another scratch build !!!! tks for looking in. Boyd
-
What,s the three timbers you used , species i mean ??
-
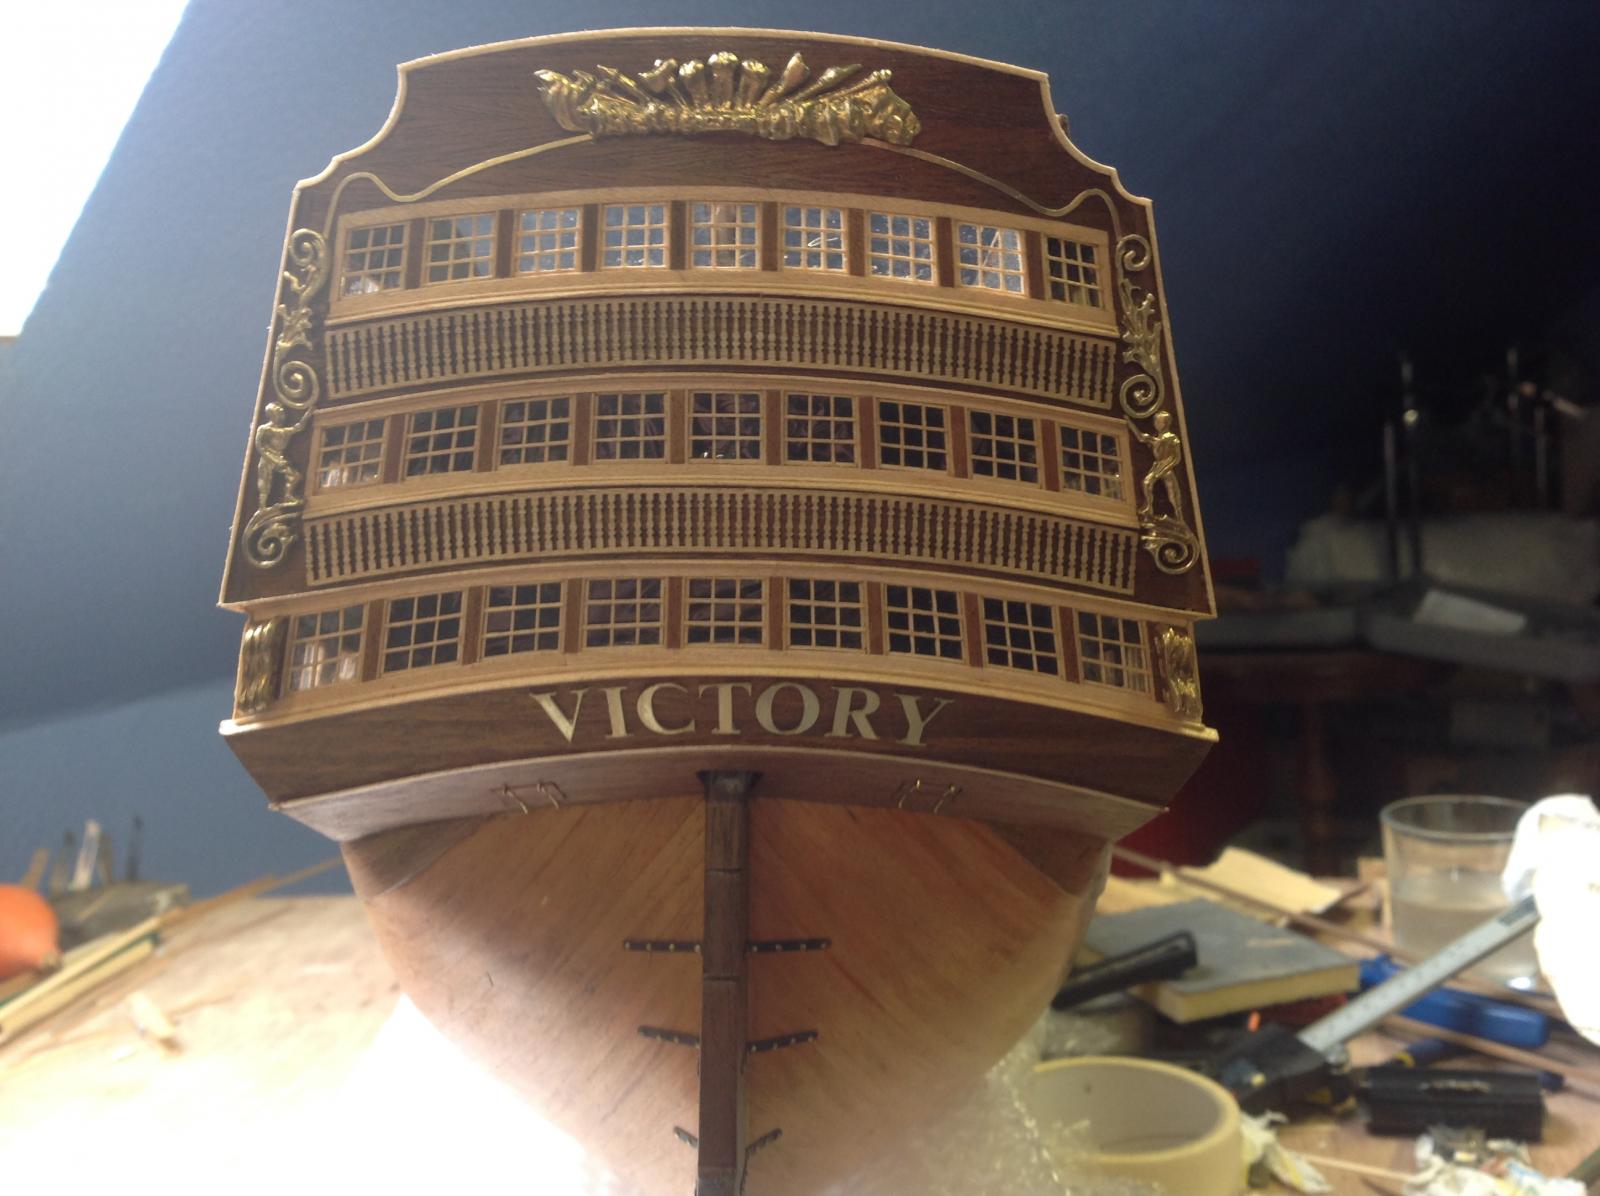
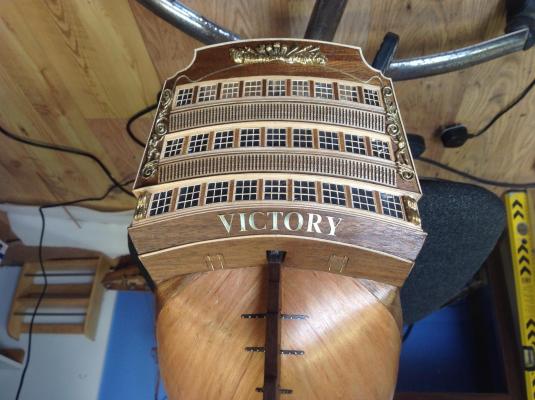
Quick couple of pics to show finished stern gallaries I think the brass looks alright , i can,t even begin to think how some of you guys can paint such fine detail , it would be completely beyond me . I think it,s the T that is slightly off ??

- 413 replies
-
- 10
-
-
Can you tell us who manufactured the kit and the scale , there are so many variations ???
-
They say a change is as good as a rest , i can,t see the Triton being a problem , a challenge yes but not a problem . Good luck ,i will be watching
- 1,319 replies
-
- 3
-
-
- caldercraft
- Victory
- (and 1 more)
-
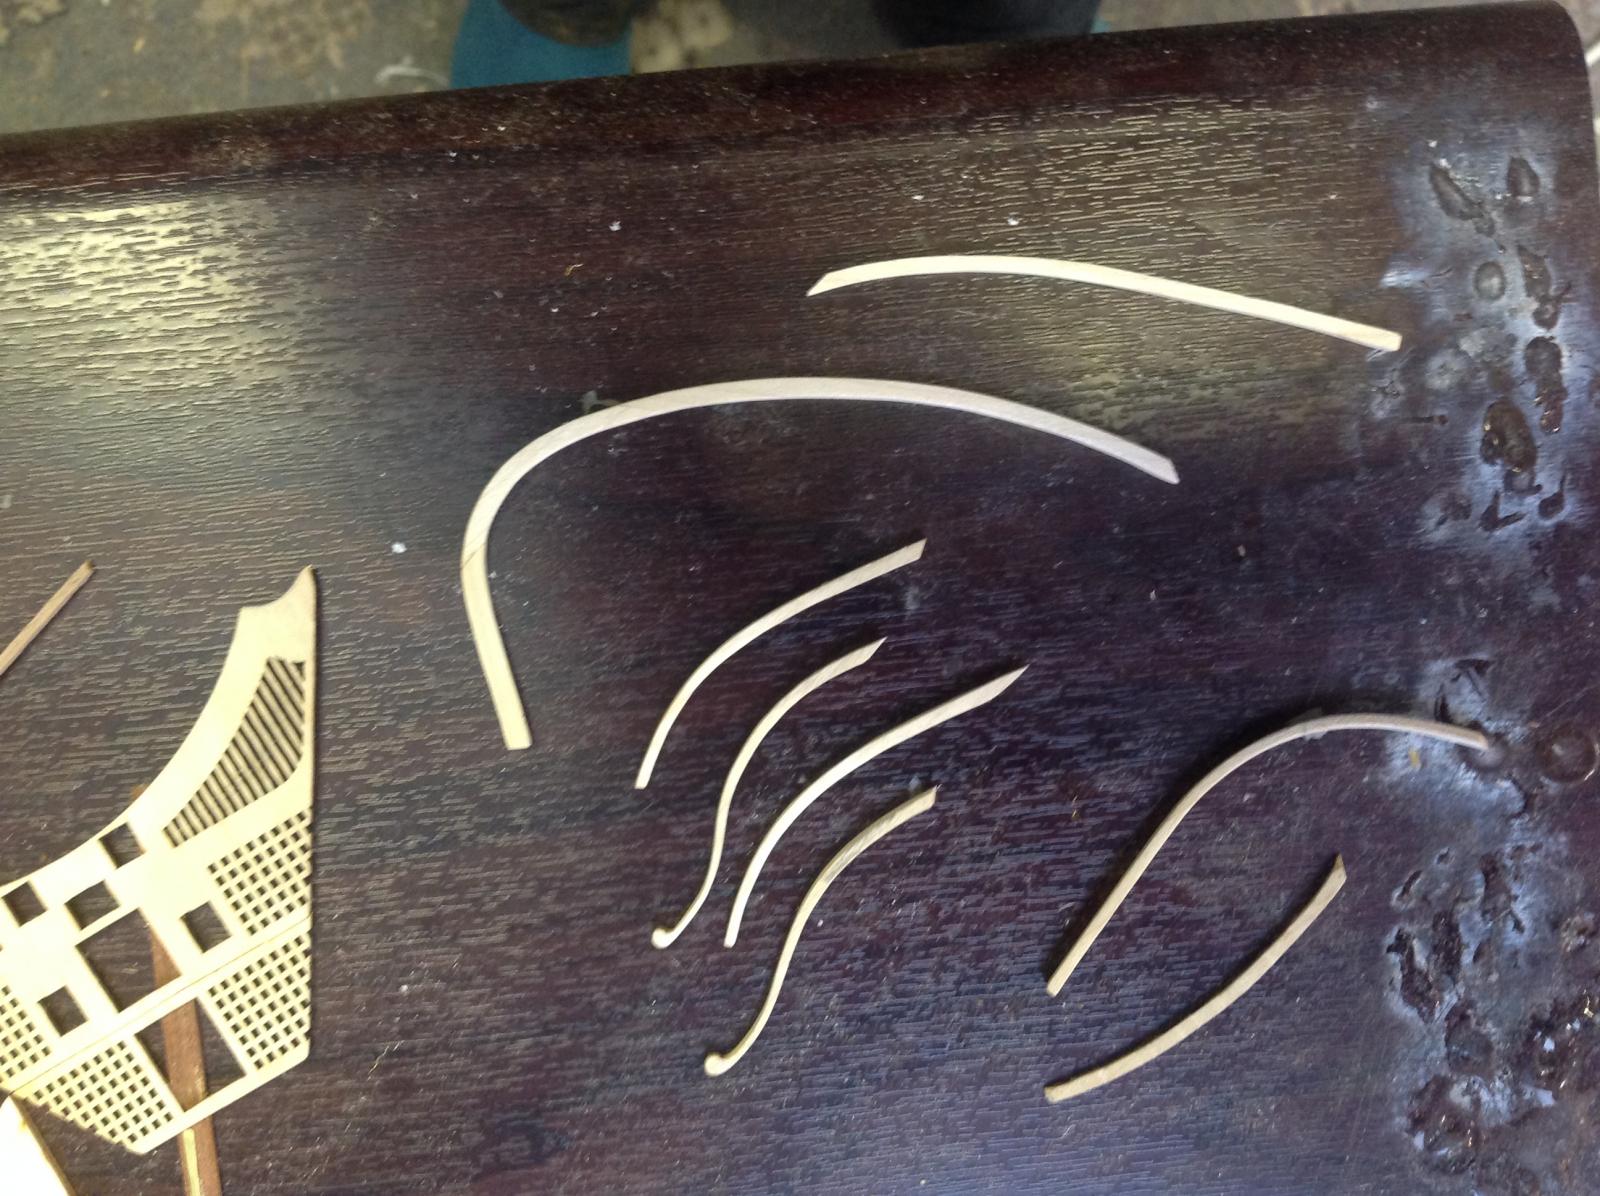
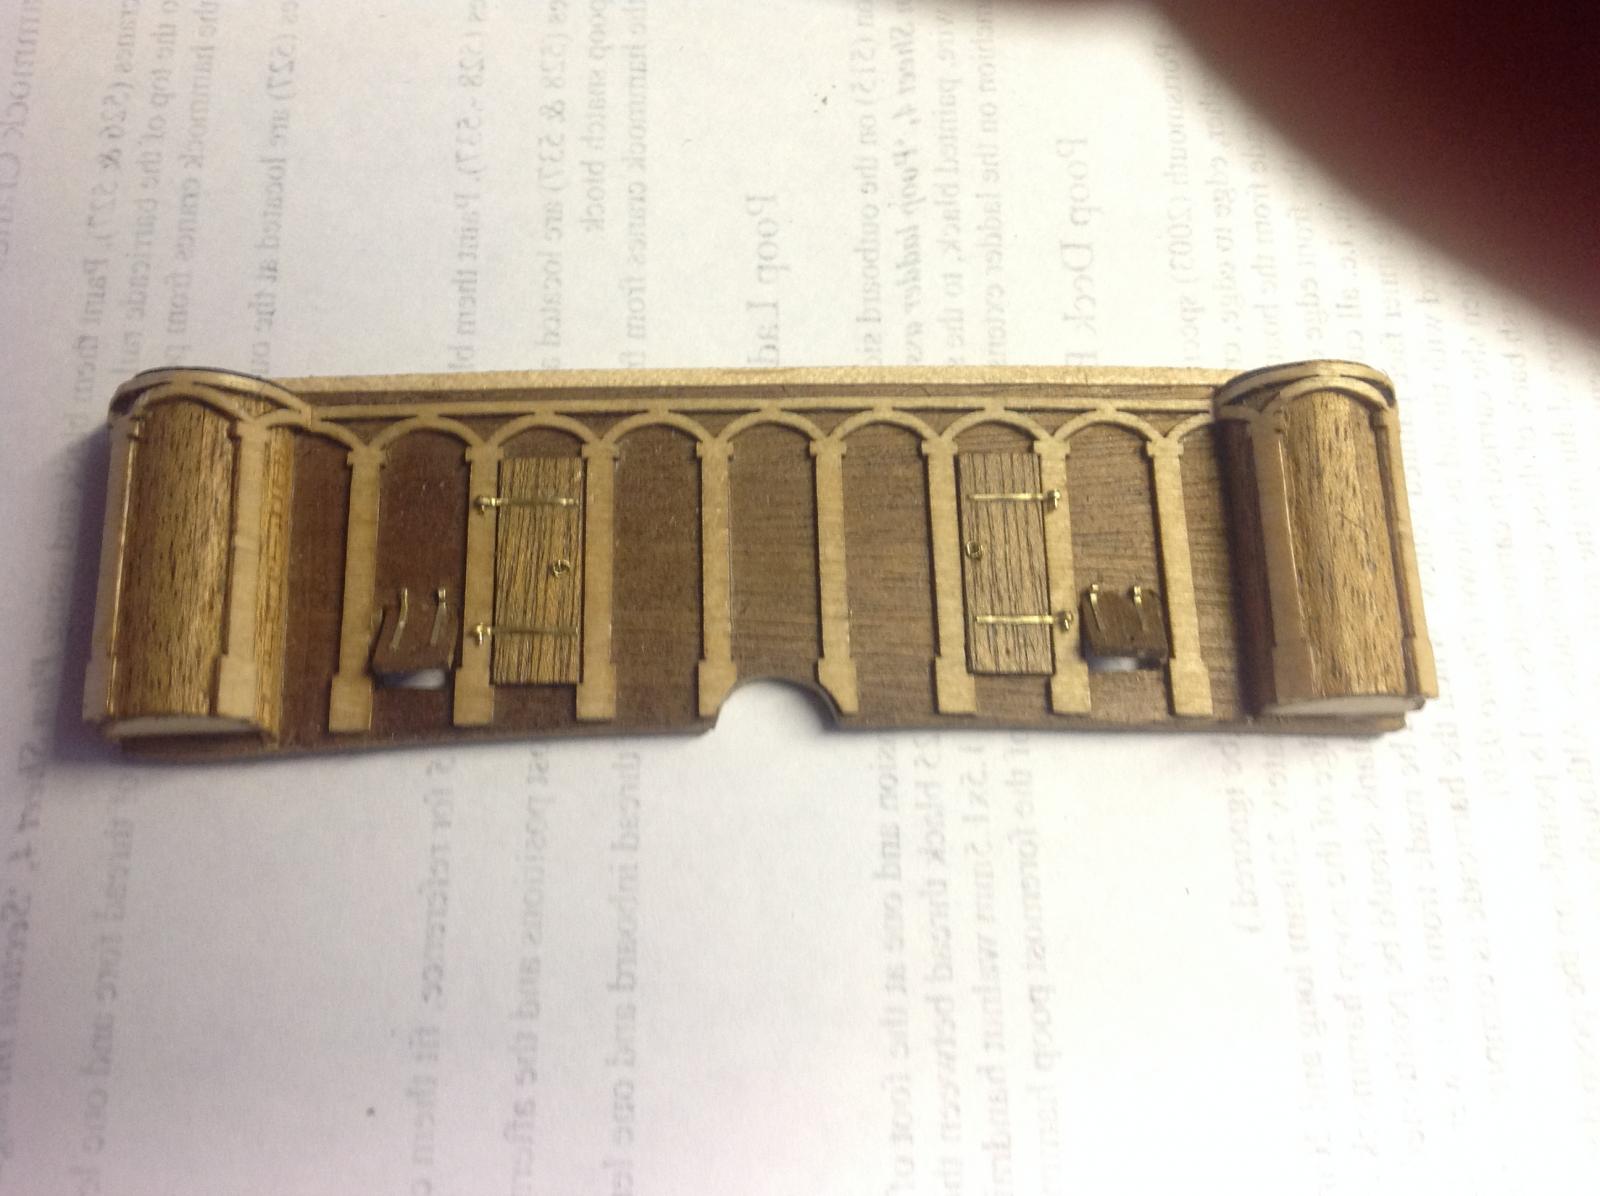
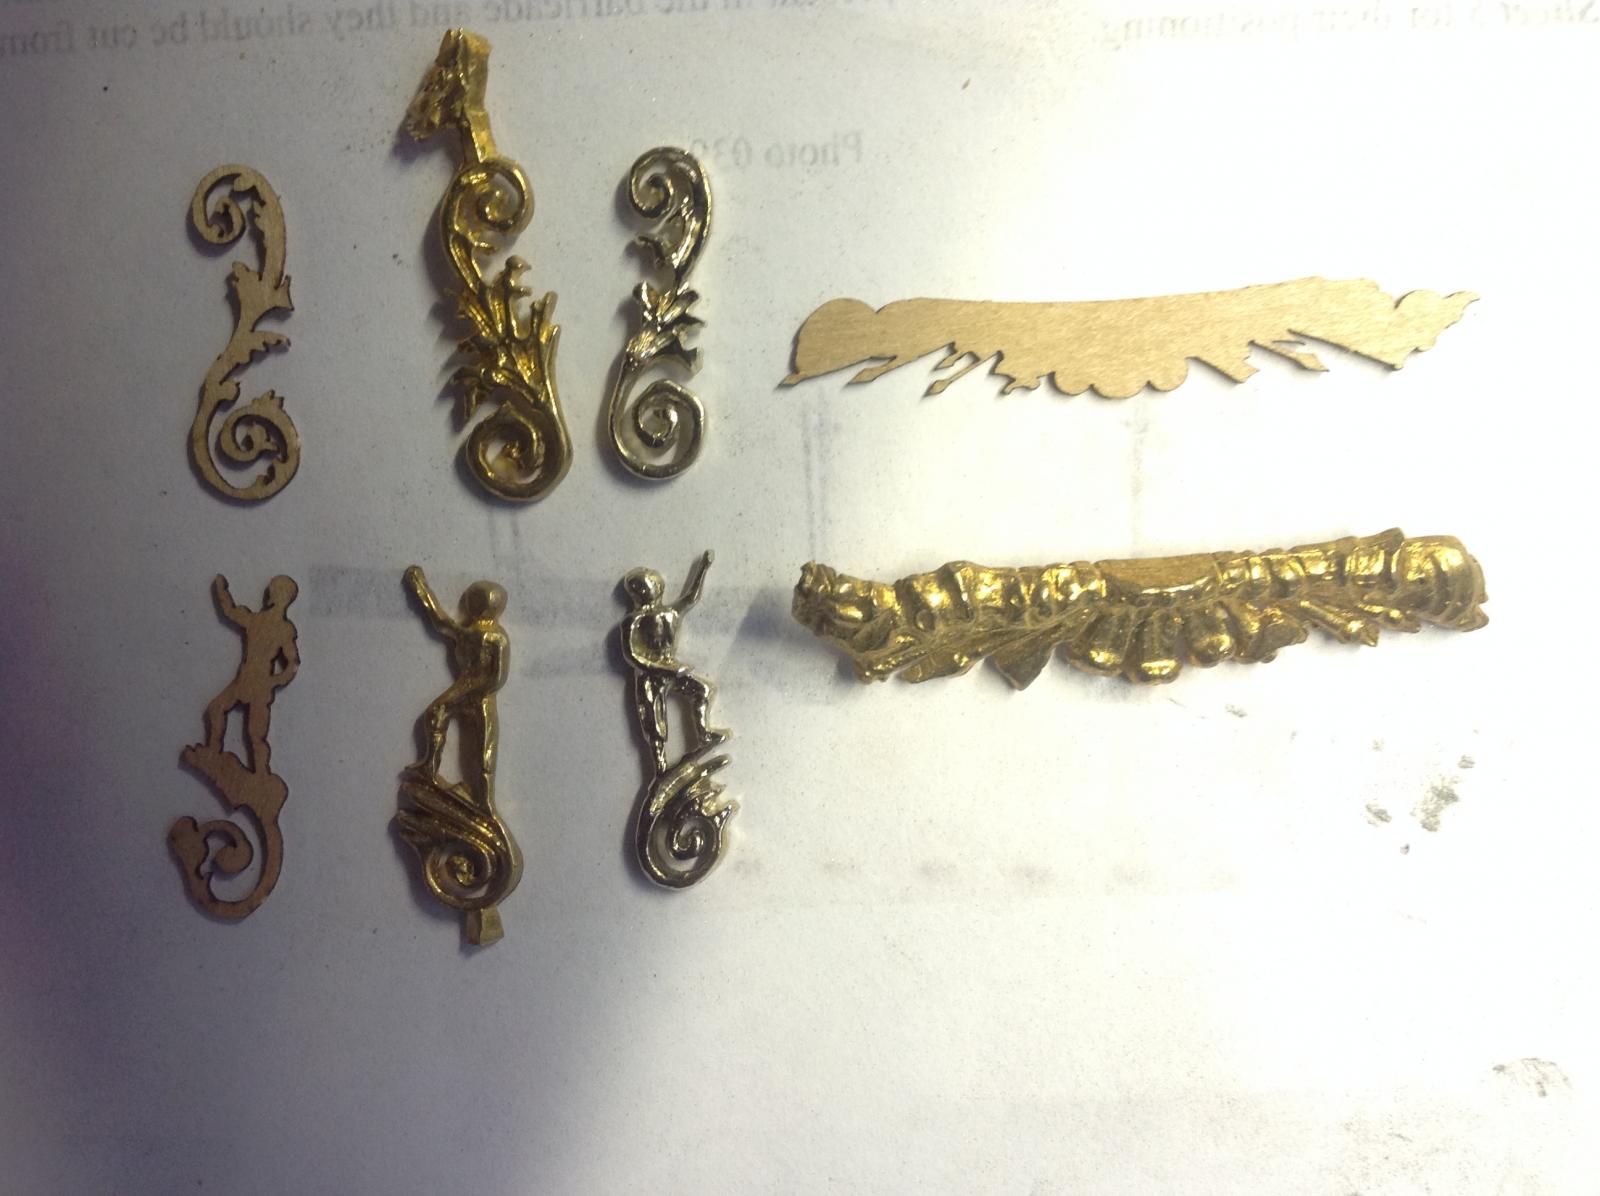
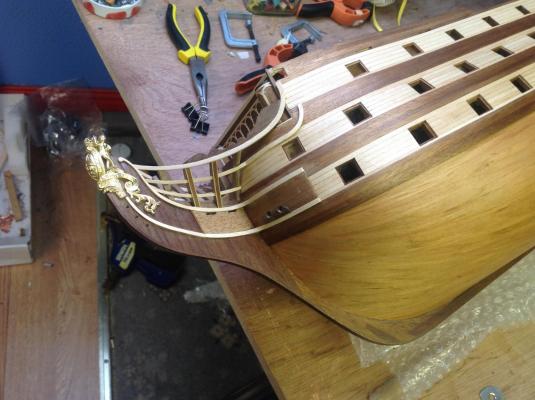
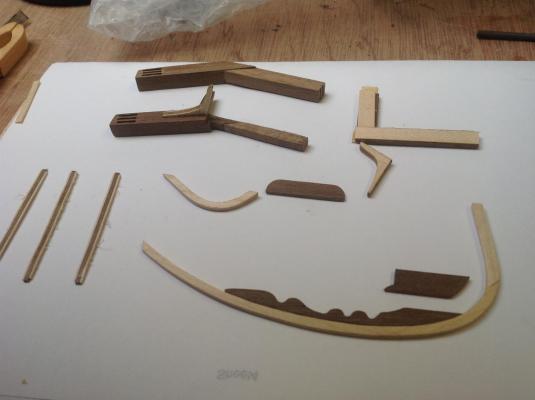
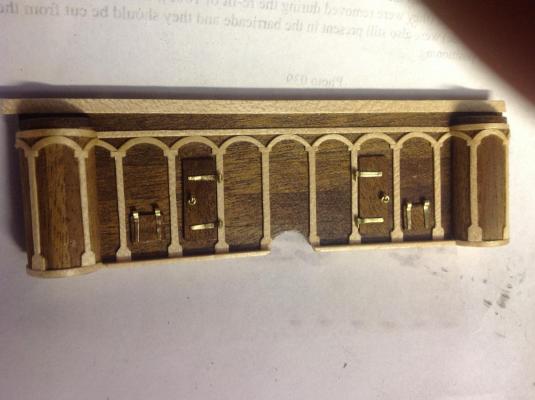
As seems to be the norm with this build everything has to done at least twice .I had thought i was doing well on the bow section and had used the ply arches and coloumns provided and was reasonably happy untill i varnished and to be honest it just looked like varnished ply !! So i started again and this time replaced the ply with maple and changed the hindges etc (, this led to my post on cutting curves ,thanks for all the likes i hope it will be of some help to somebody ) the first is the ply and the second the maple the difference is much greater in real life then i moved back to the decor on the stern , the brass replacements are a big improvement but although very similar in size needed quite a bit of triming and cleaning . the fact they didn,t fit was my fault as i didn,t leave enough room when making the window frames the pic shows the ply ones provided ,next the raw replacement and finaly 2 hours of triming and polishing I want to finish the stern before i do any more work up front as the best way to work at the rear end is to stand it upright and hold between legs


-
tks Keith I have to keep reminding myself i,m the captain .By the way i received the 1:78 brass decor ,hope to get it fitted soon
-
Not really familar with the fingernail test but i assume you mean that it can be marked if you push your nail into it . if so , yes it will mark fairly easily
-
At the top of the Timber section on the CMD site it tells you that the timber will be cut in half [0.5 m ] unless you pay extra for delivery If your order was over £150 delivery may be free Normally unless you state otherwise it will be sent full length by UPS at £ 12 50 cost . you should have recieved an e-mail by now stating the progress on delivery
-
Sneak it into the suitcaase there is bound to be quite times !! It,s a great read
-
I have used a fair bit of maple from CMB and although i have nothing to compare it to i found it a a nice wood to work with . Like all wood order a bit extra as there will be slight variations in color ,texture etc . Seems to hold an edge well and is relatively easily bent and although i only used 0.5 for my final planking between wales i found it easier to work with than the cherry i was also using .
-
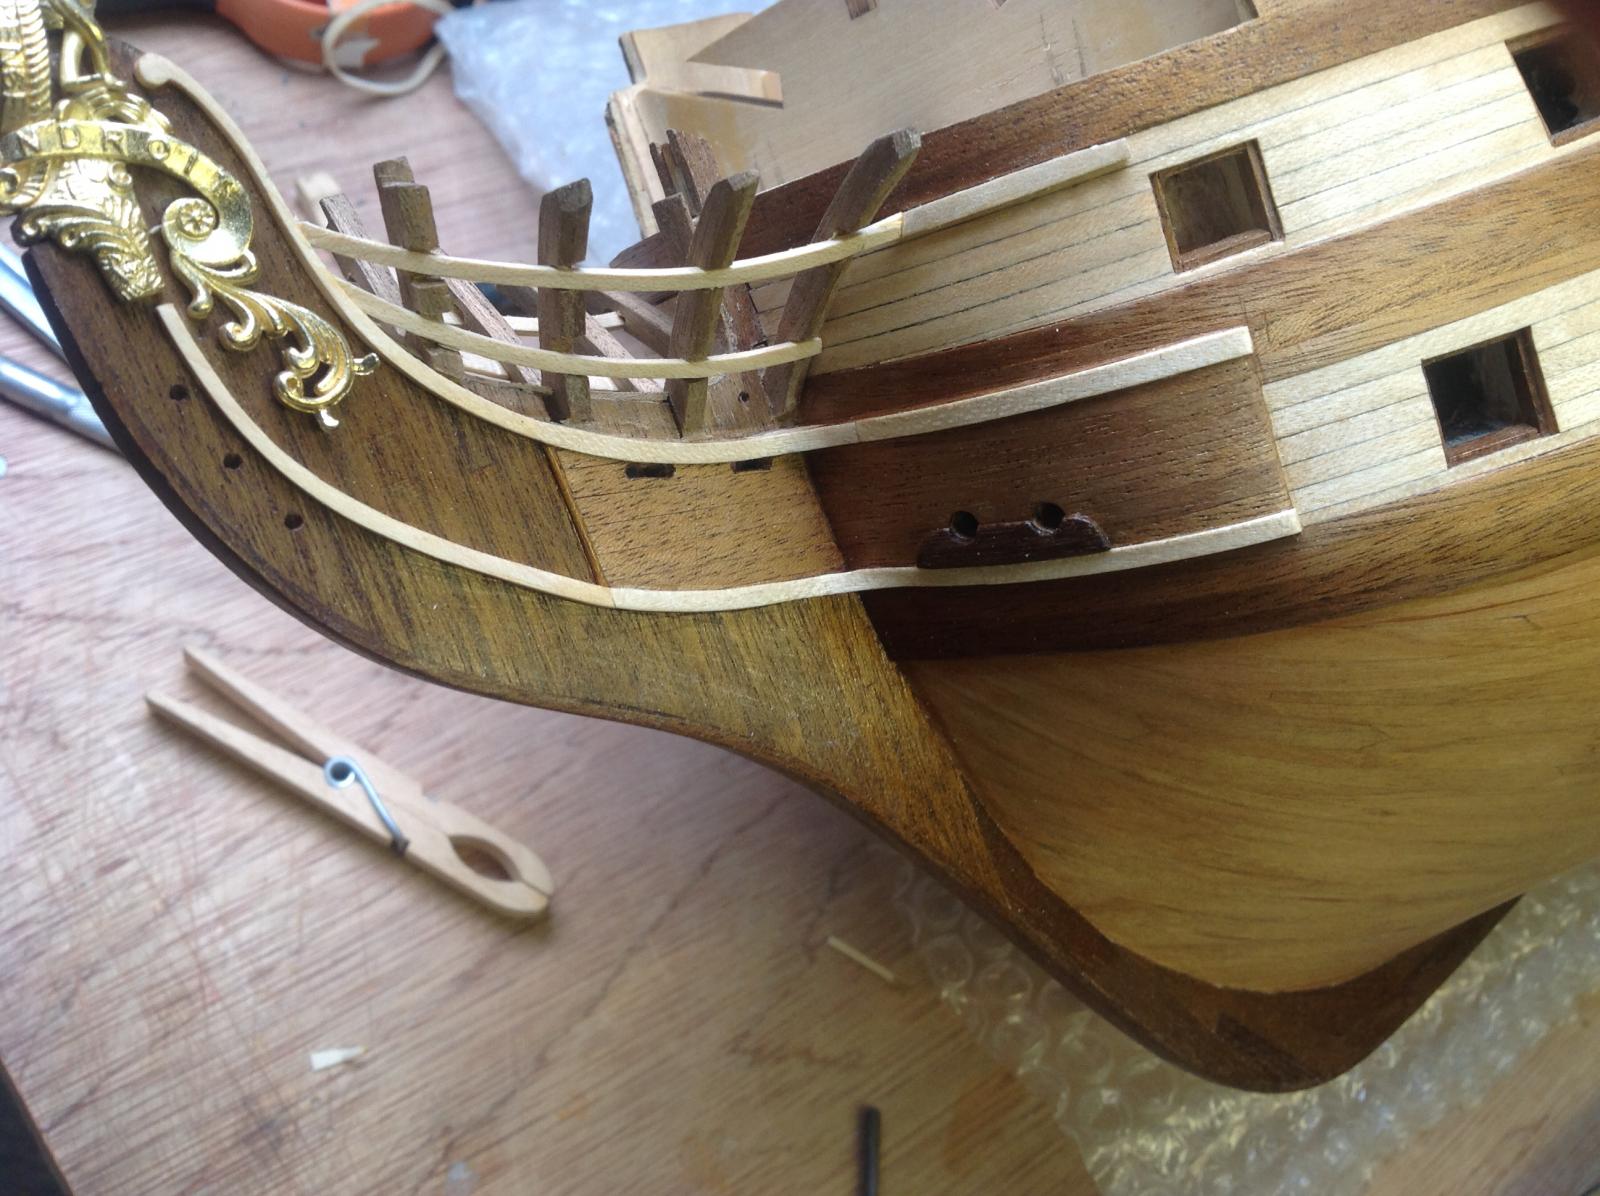
Been doing a lot of searching through pics of Victorys this last couple of days mainly to get ideas of how to complete the bow area and have come to the conclusion that i have sliped back onto trying to duplicate the color scheme with wood rather than doing my own thing which was the original idea . Having looked at numerous other model pics none of which are the same i have decided to try to forget about the real color scheme and go with what i think looks right ,this may unfortunately mean redoing some previous work again ,catheads for example ,i think the one,s i made are not solid looking enough and maybe over worked , some times simpler looks best ? good clean lines !! Maybe as the admiral has suggested on several occasions i am slowly losing it ,?but i,ll work it out eventually .