


Old Collingwood
-
Posts
11,493 -
Joined
-
Last visited
Content Type
Profiles
Forums
Gallery
Events
Posts posted by Old Collingwood
-
-
Really really nice work Kevin - sure is standing out with all that detail, well worth all the hard work and time you have put into her.
OC.
- mtaylor, Kevin, popeye the sailor and 1 other
-
 4
4
-
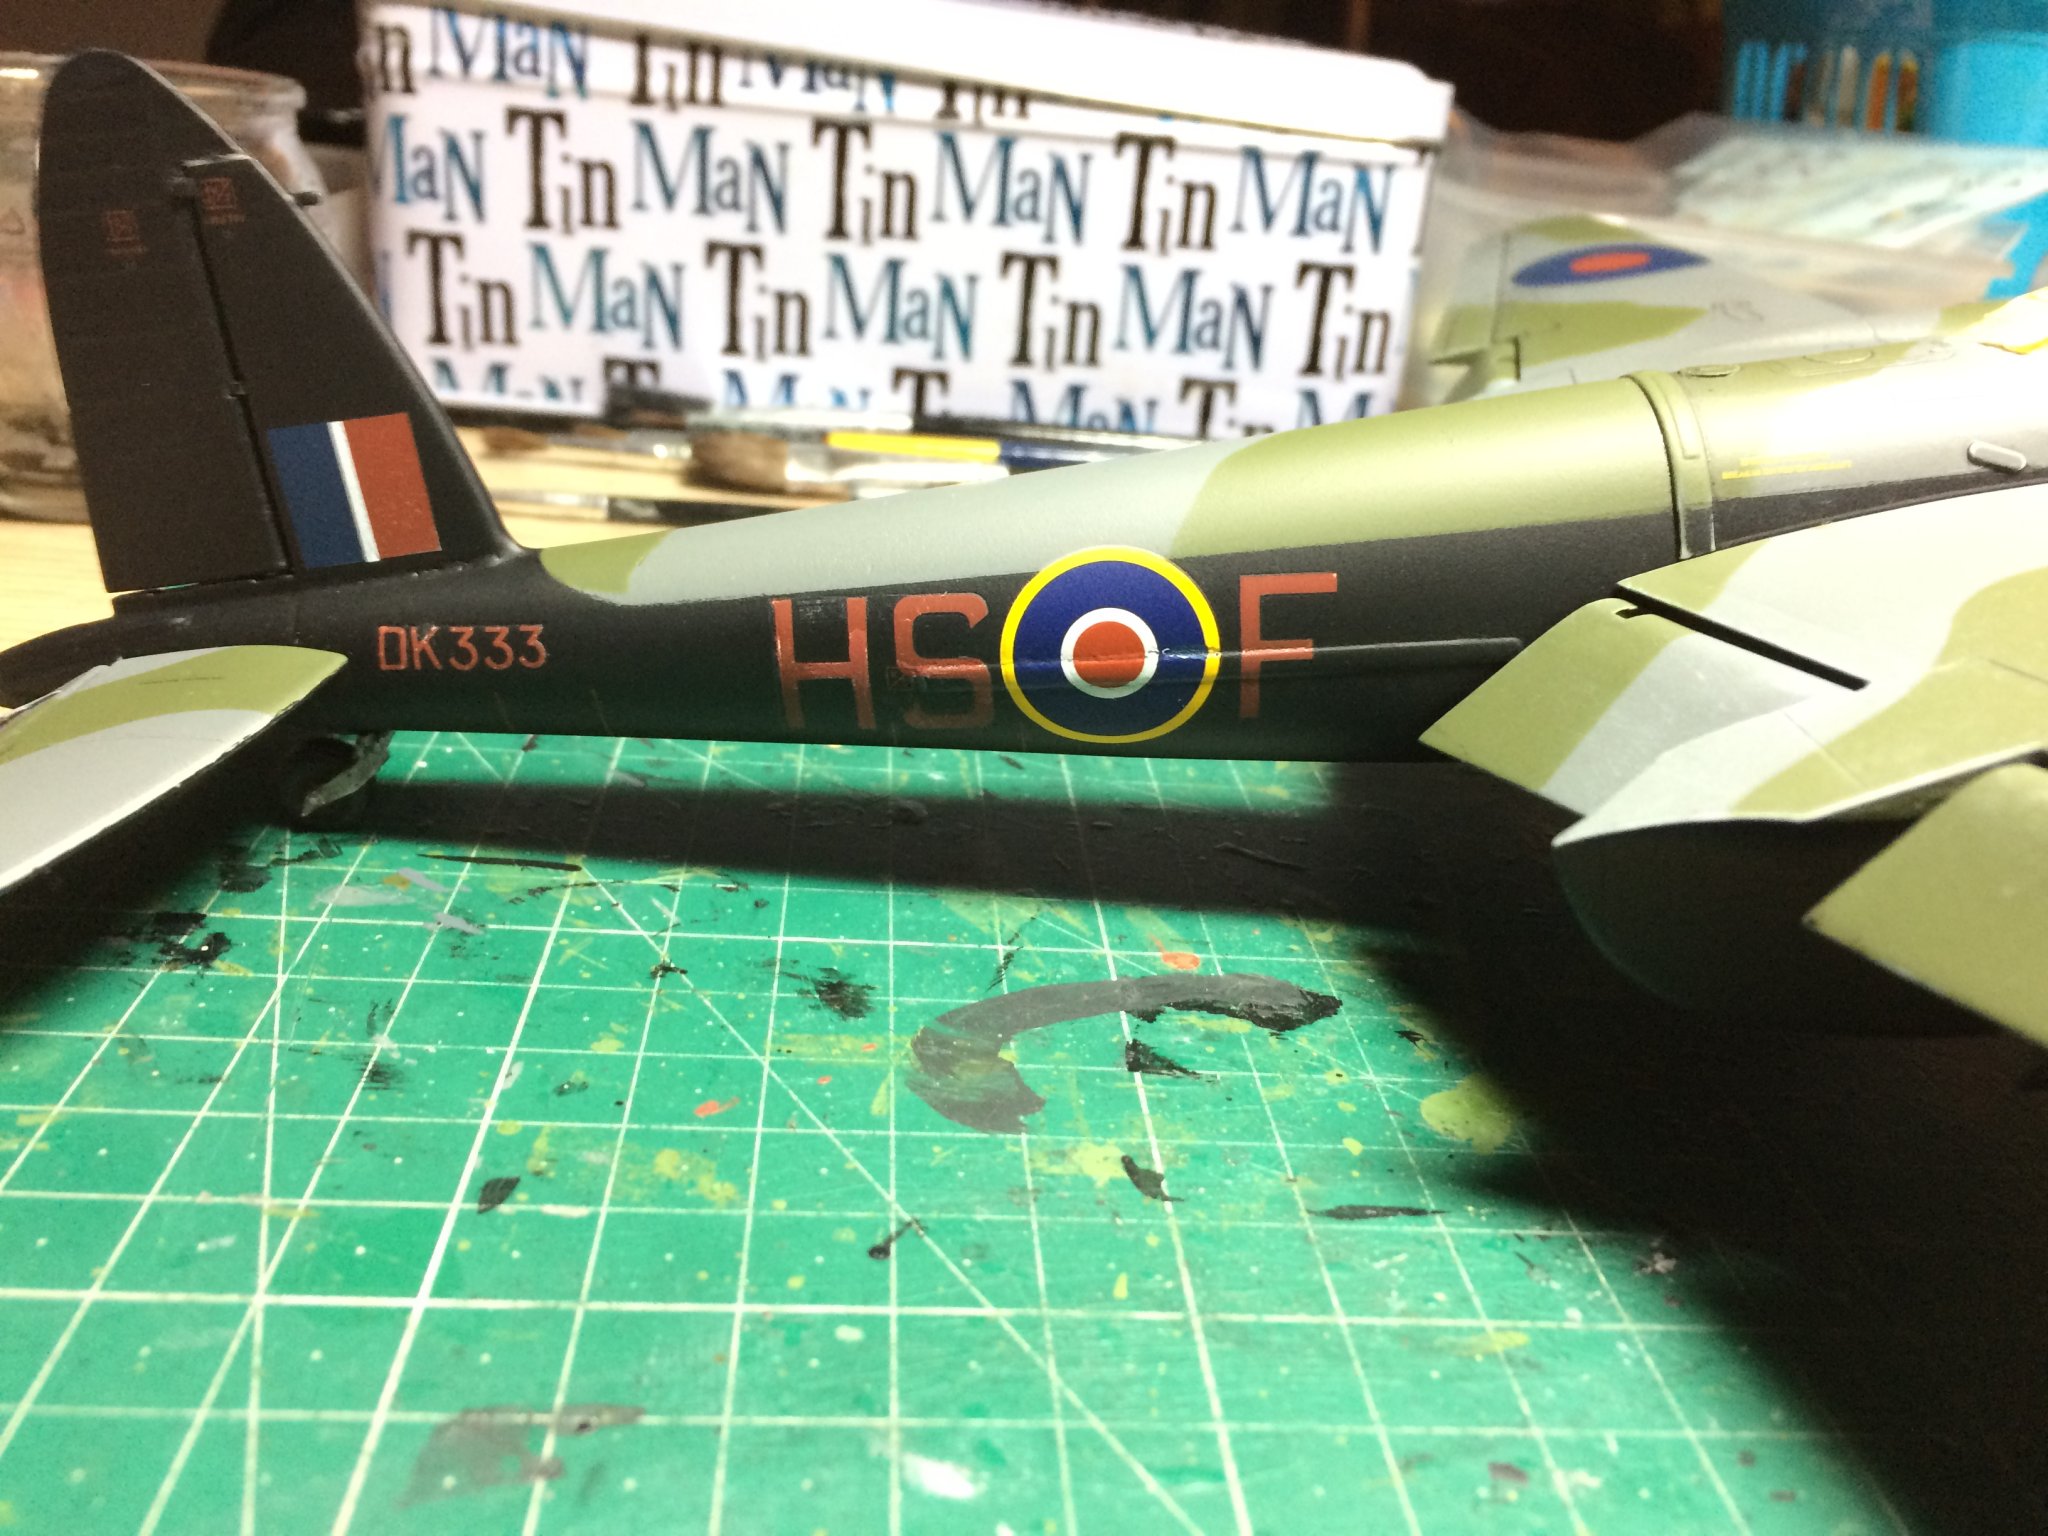
Evening All, in between working on the Seafire I found the time to check over mossie to see how the flat coats had gone especially over that troubled area we all know well, then answer is Fine, no issues atb all the top spray put on in a couple of fine sprays did the job.
Here are two pics just showing "that troubled area" as it is now.
OC.
- popeye the sailor, lmagna, CDW and 9 others
-
12
-
Excellent job Craig - really nice work mate.
OC.
- Canute, popeye the sailor, mtaylor and 3 others
-
6
-
-
Those decals look impresive mate.
OC.
- mtaylor, Edwardkenway, Egilman and 3 others
-
6
-
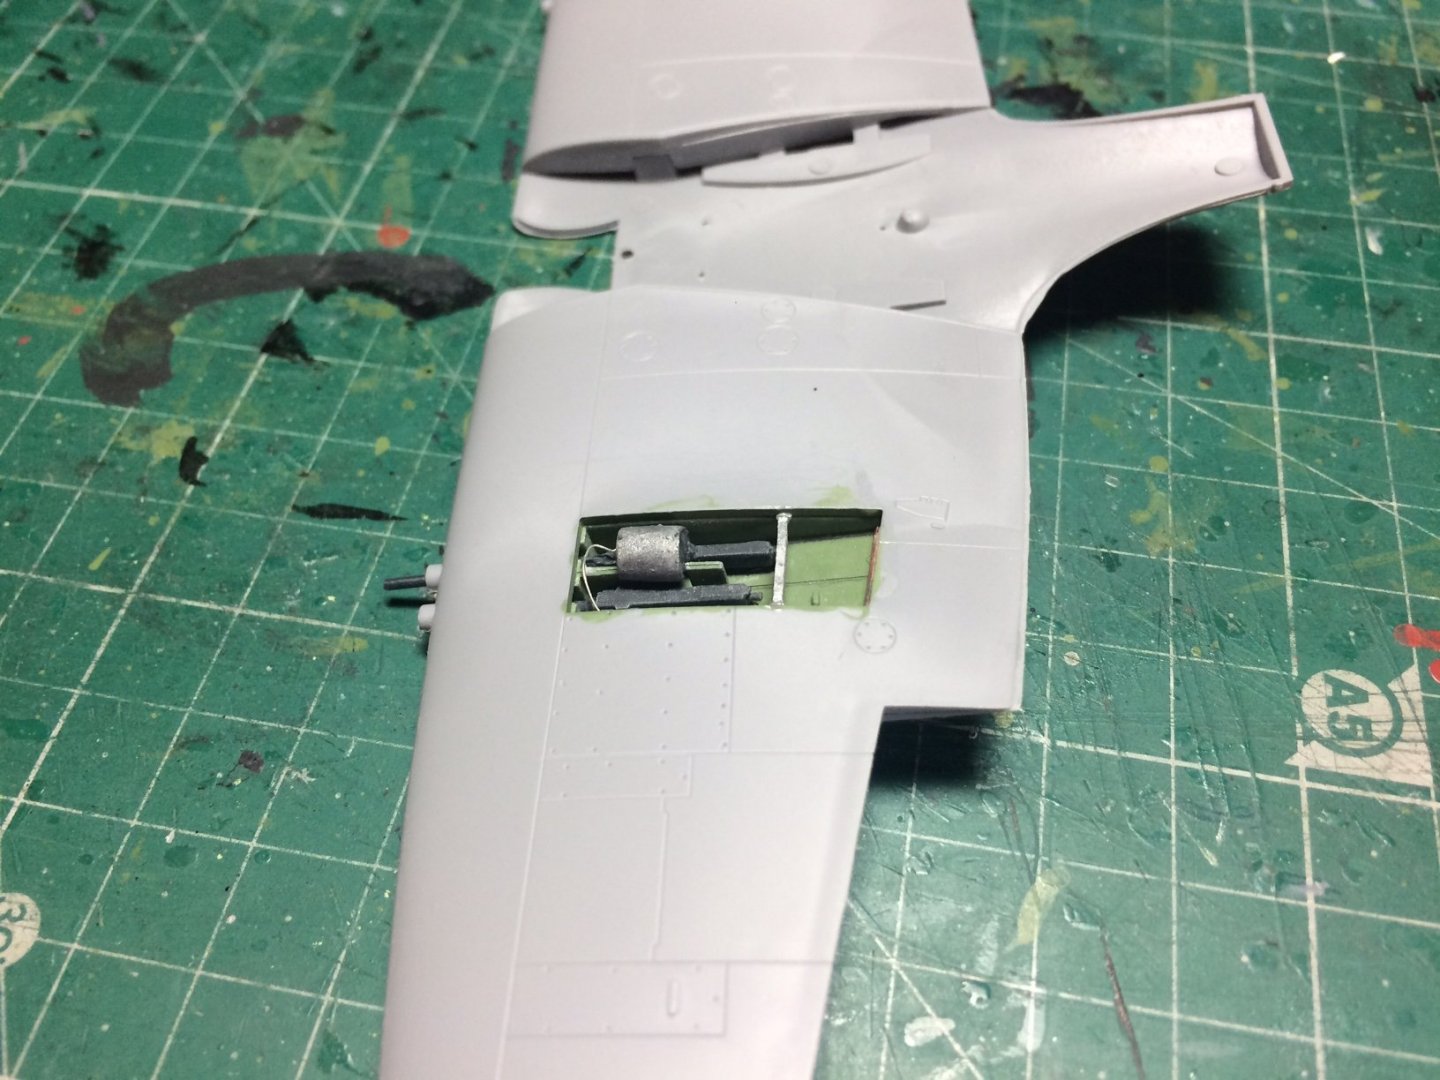
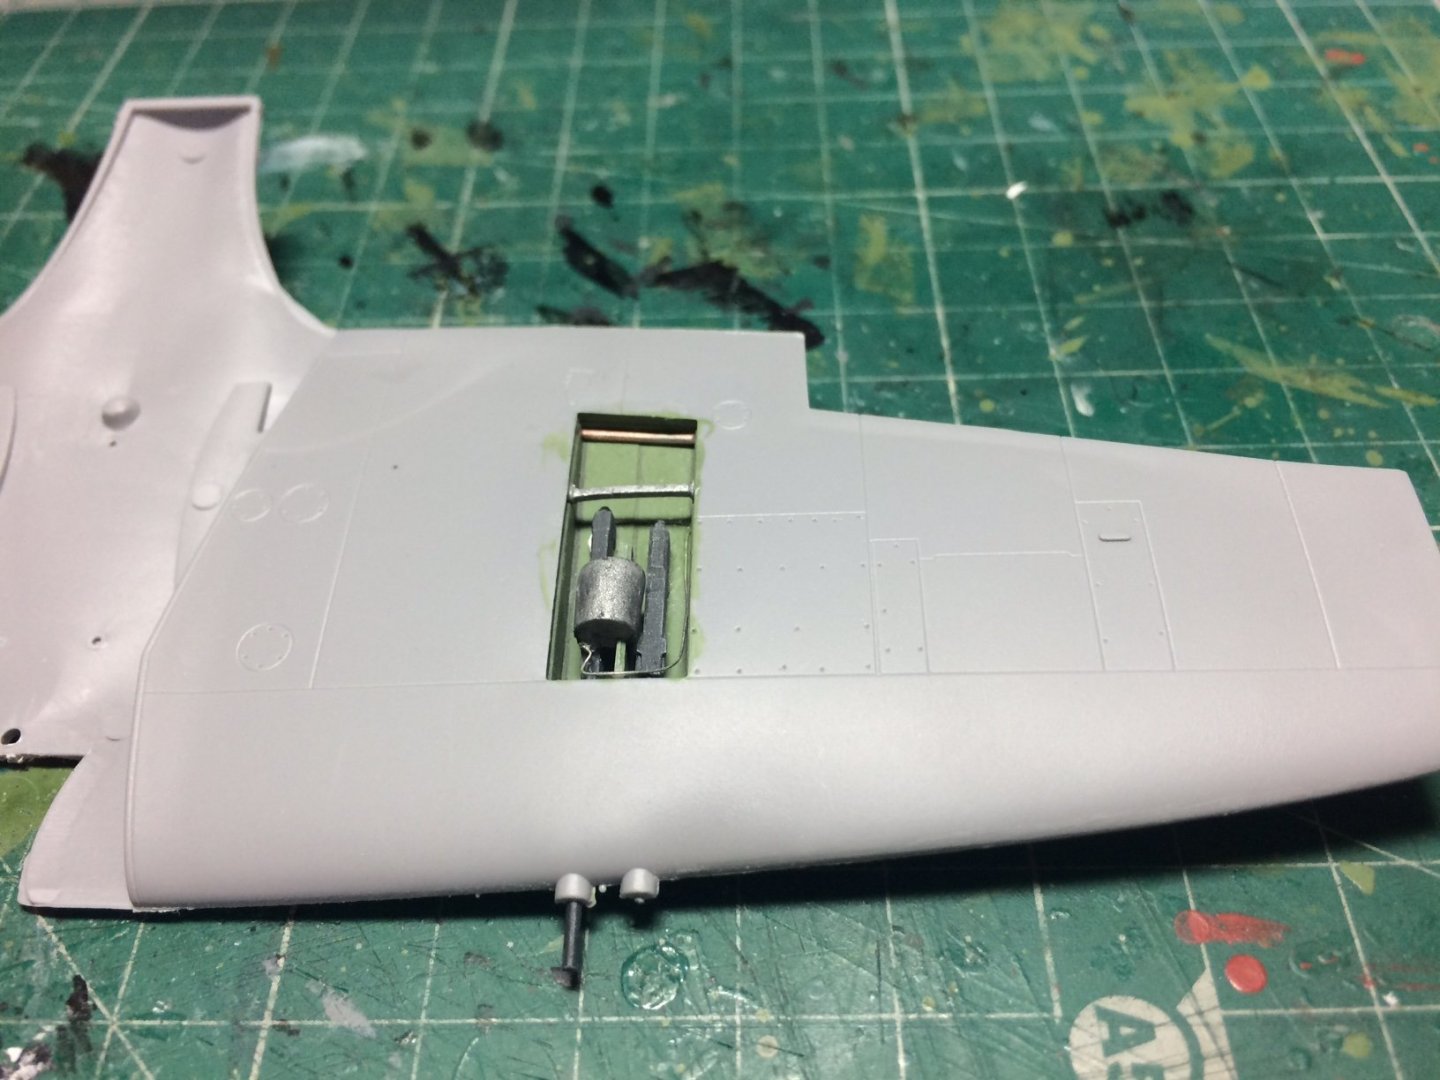
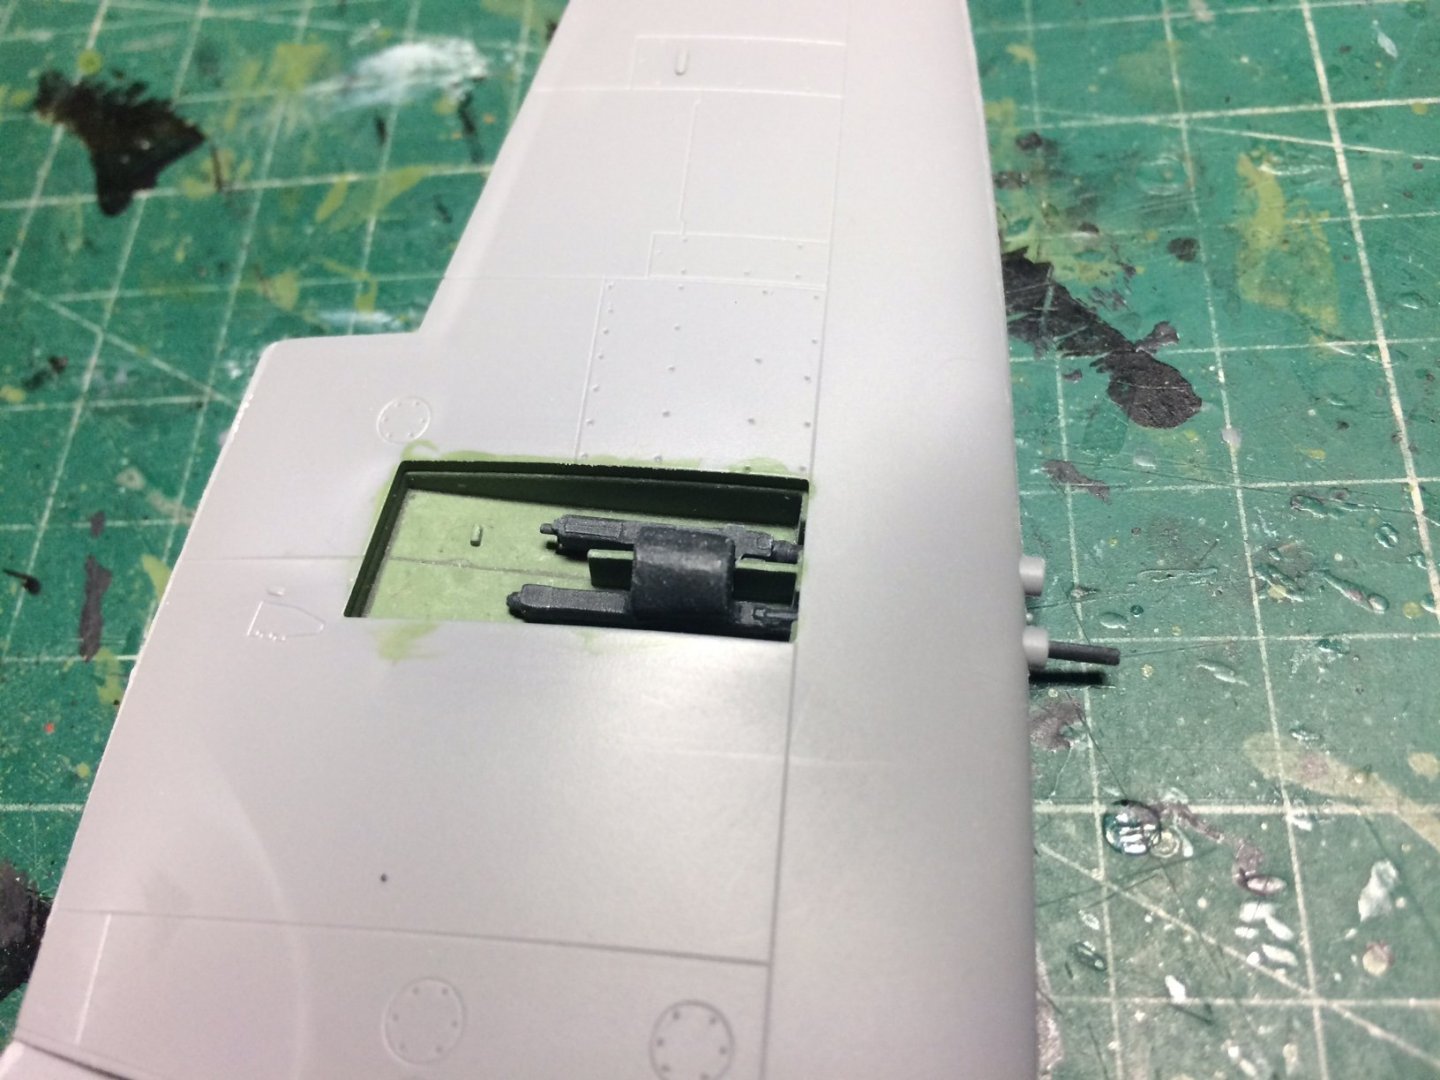
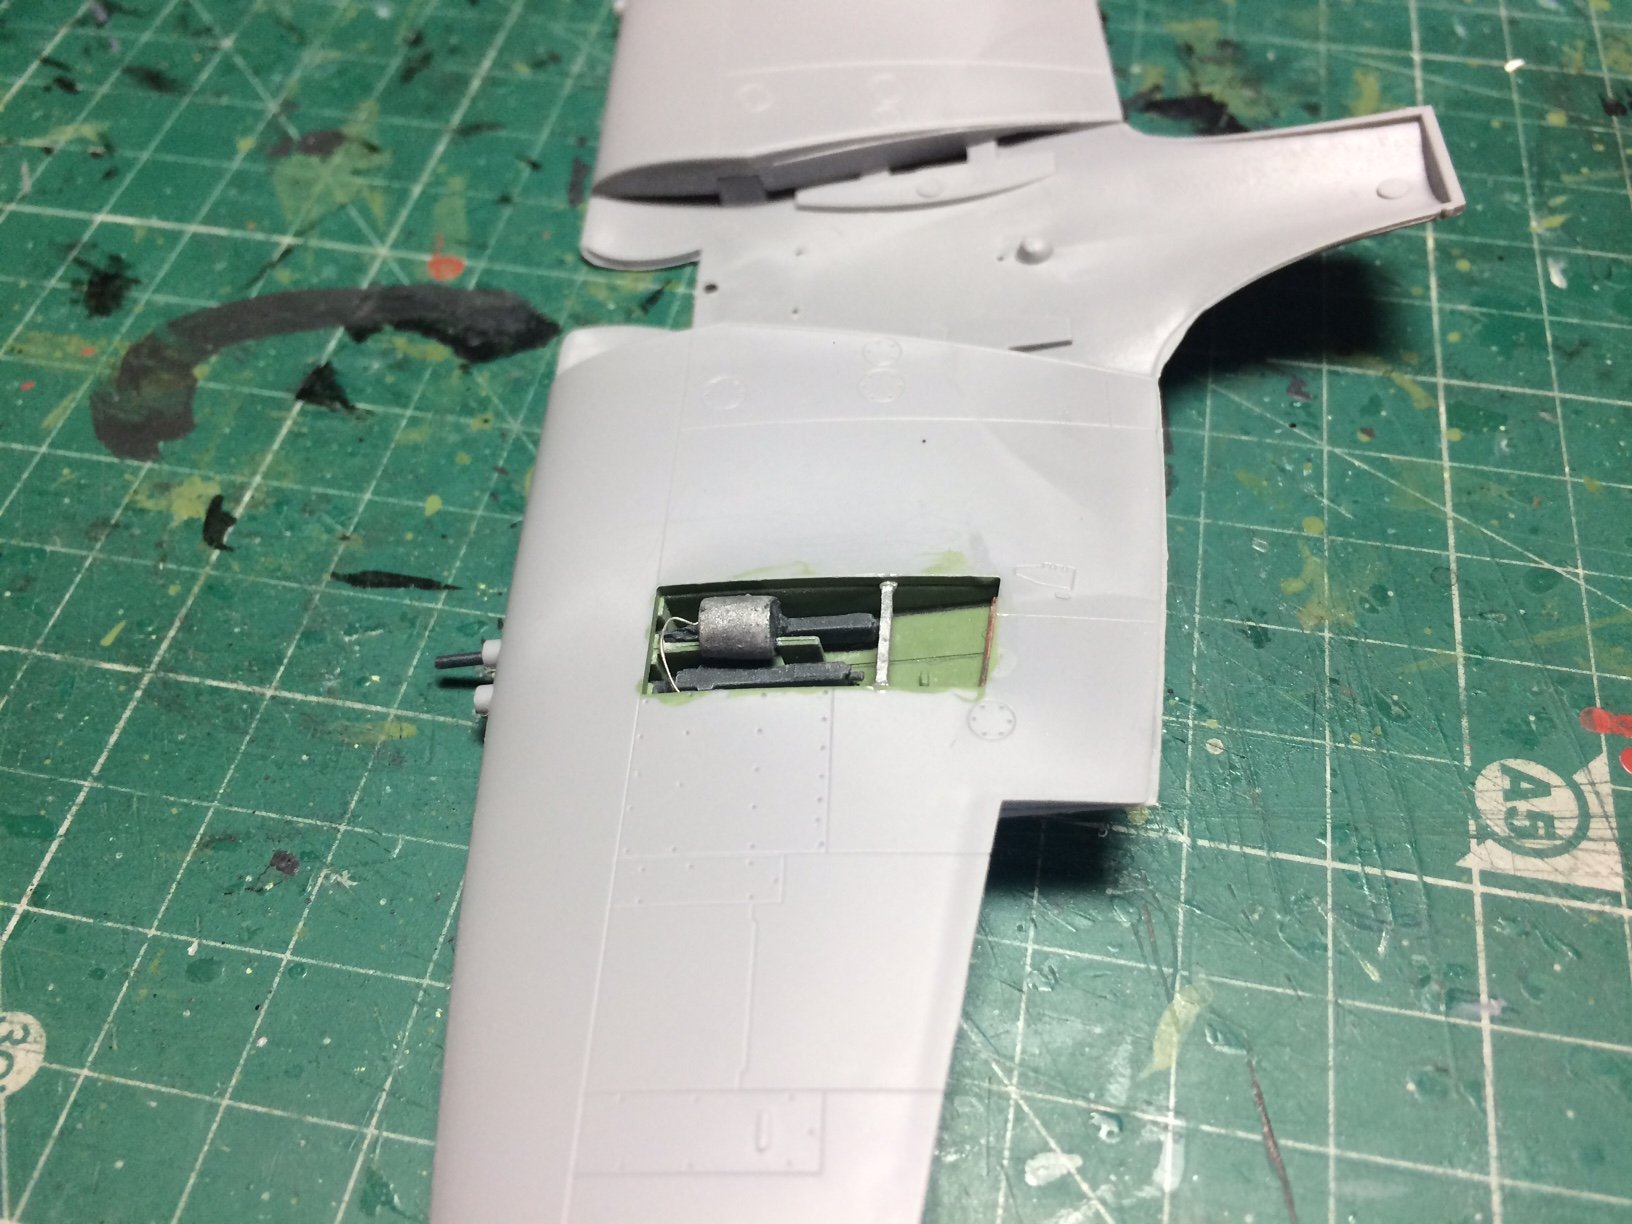
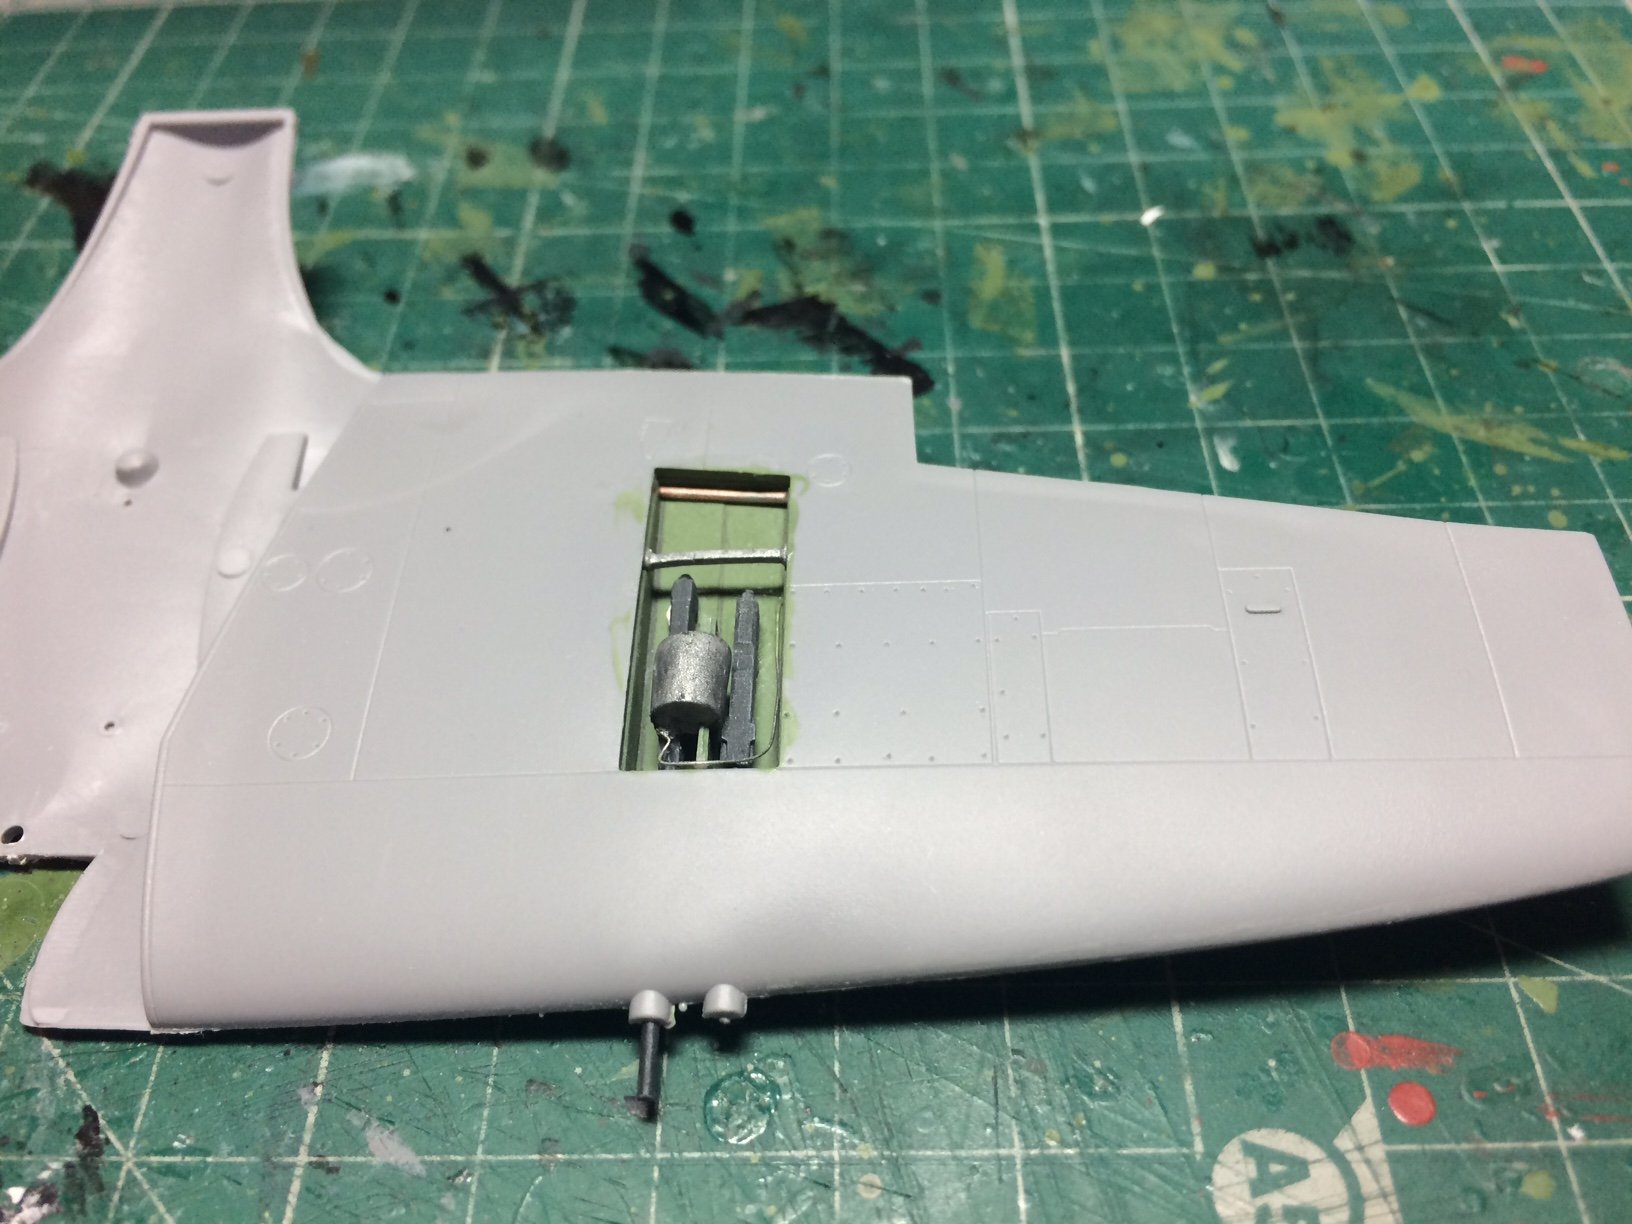
Good day all, more work fiddling around in the machine gun box - I fiited a couple of runs of fine fuse wire to represent wiring, also I fitted a larger piece of tubing and a bracing strip.
OC.

- CDW, marktiedens, mtaylor and 6 others
-
9
-
17 minutes ago, mtaylor said:
What did they have, OC? A long barrel one and short barrel one? Nice work on them. I would have thought the ammo box would have been bigger...
20mm and a 0.5inch Browning in total Two 20mm Hispano canons and Four 0.5Inch Brownings, the round box shown is just the feed, the Ammo cases were further to the side under the wing in armour plated covers, and fed on a chain.
OC.
-
1 minute ago, Jack12477 said:
Still here! Just waiting for supplies !
 Also got a little sidetrack, planting veggies and flowers; had to build a 2 ft high fence around a raised bed to keep the feral cats from digging it up.
We are sloooooooowly coming out of lockdown, but now I have to remember to put a "face covering" in my pocket along with a handkerchief
")
I have that sorted when I go out - Flame thrower does the job fine.🤭
OC.
-
Just now, CDW said:
It will be a surprise. Thanks for the kind words OC
No worries, will look forward to what ever you build mate.
OC.
- Egilman, Edwardkenway, CDW and 3 others
-
6
-
Just backing up what Ken said.
OC.
- popeye the sailor, Canute, mtaylor and 3 others
-
6
-
Armour or A/C mate?
OC.
- popeye the sailor, mtaylor, Canute and 3 others
-
6
-
Looking really nice Craig.
OC.
- popeye the sailor, Egilman, lmagna and 4 others
-
7
-
-
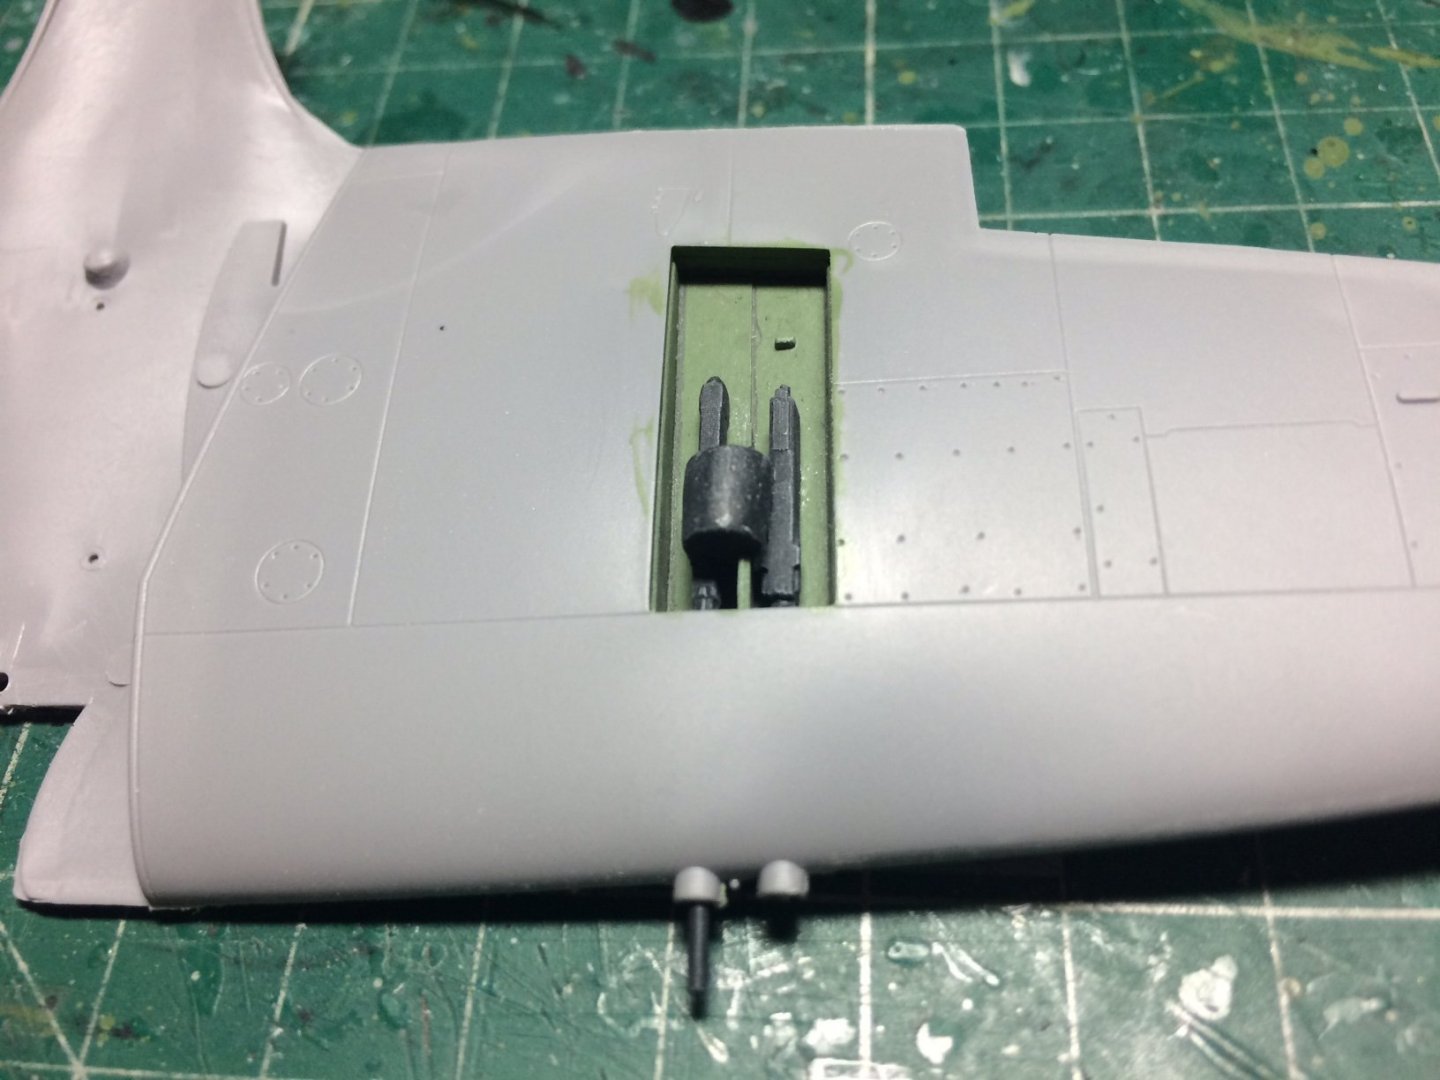
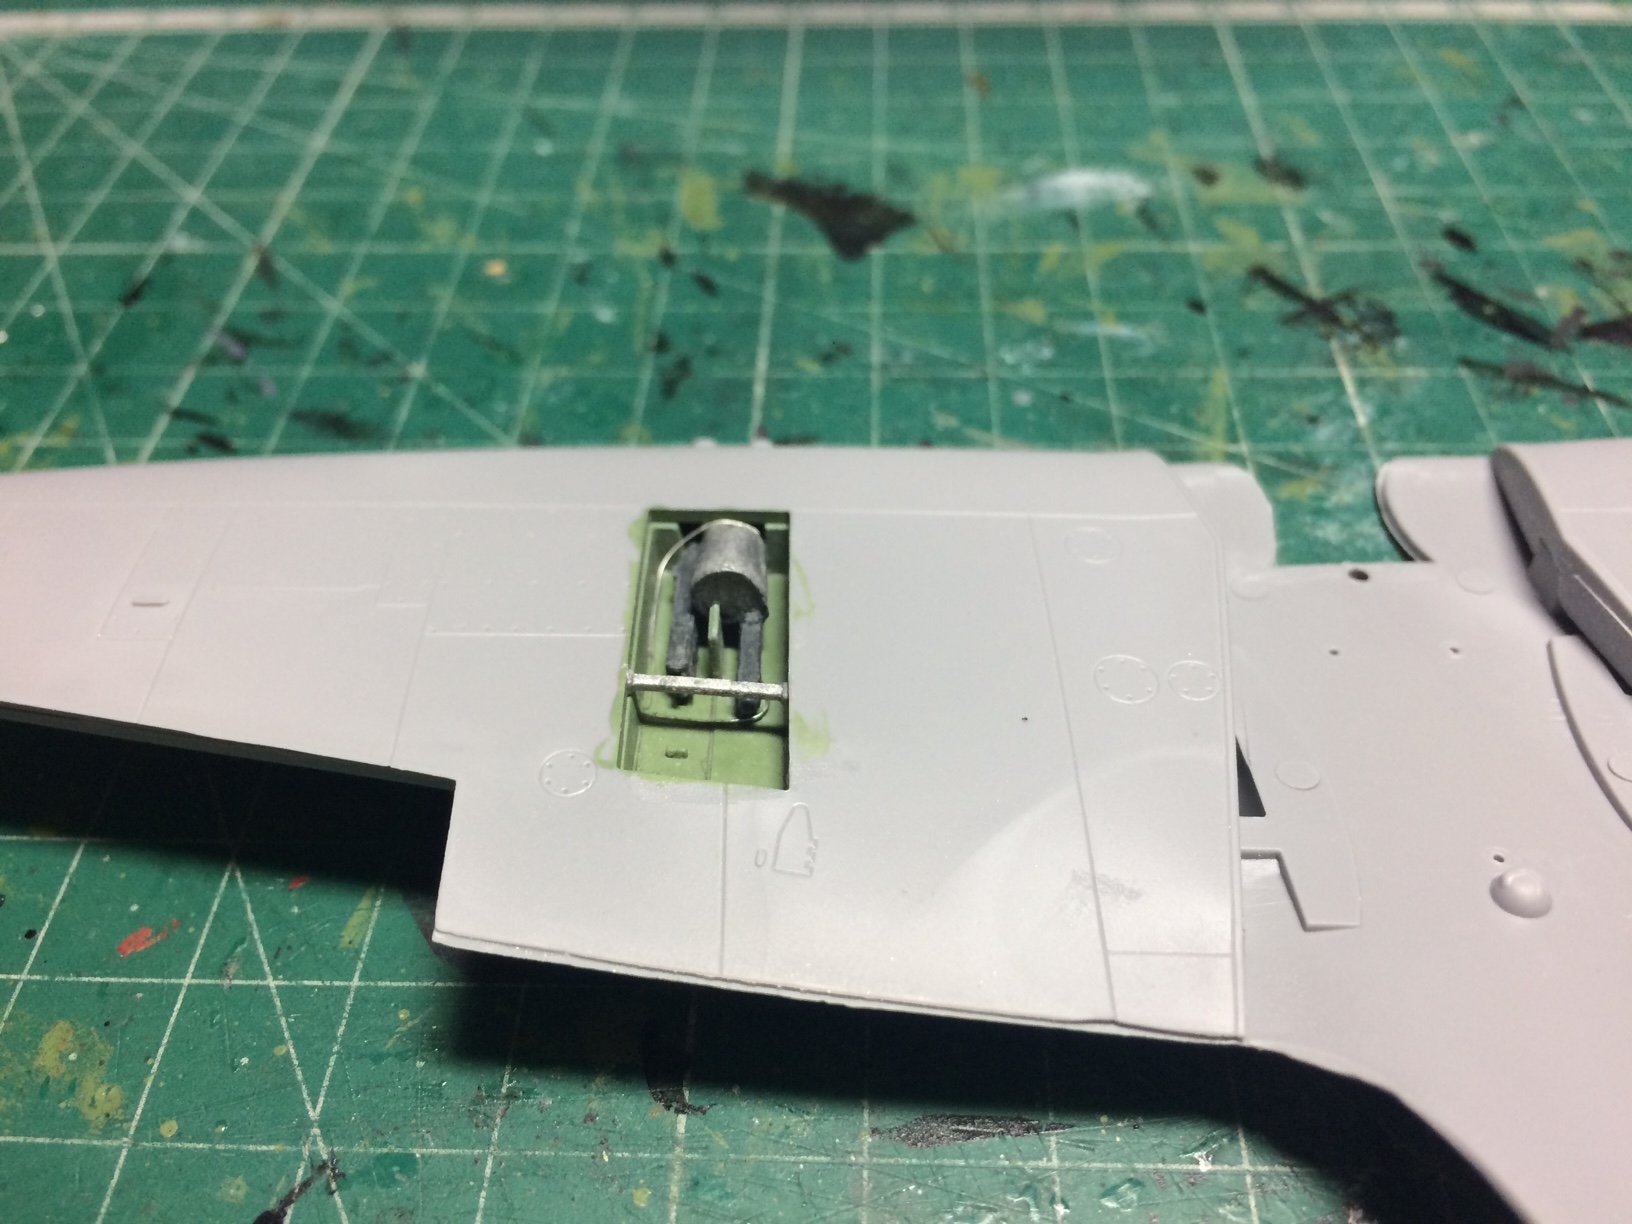
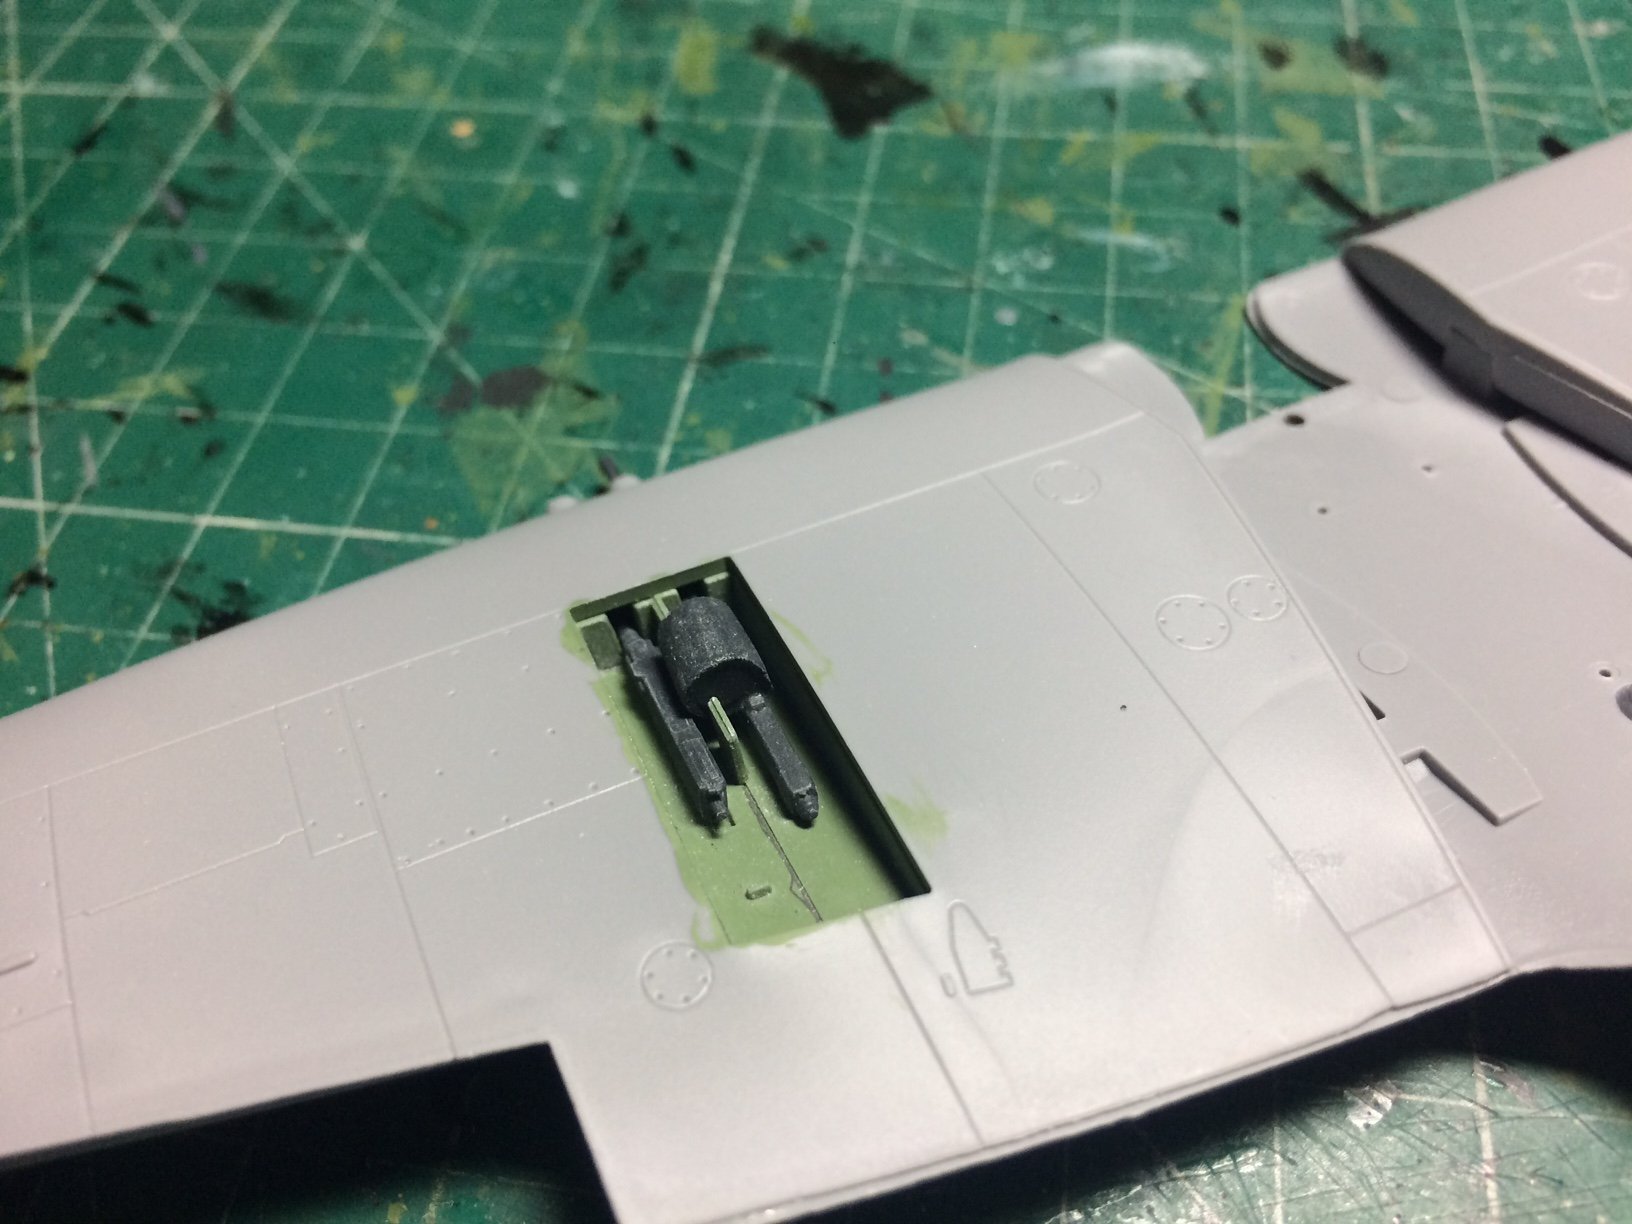
Hi all, so today I was "multi tasking - shhhh cant let the admiral hear I struggle looking at the hoover as it is" I first put the first grey coat down on the Spit, then put it away in my box to dry, then the second bit - I decided to work on the Seafire, in the kit you have the choice to display the wing guns open through an open panel, I decided this would be good on the one wing, first I struggled to understand the instructions as it wasn't clear how the machine guns and feed units go, they come into two different types of assemblies, after going to Mr Google to check out some pics - I found out how they fit together.
I first put a few coats of cockpit green down, and while at it did the same to the wheel wall and well bottoms, next job was to put some nato black on the machine guns, then when dry (with hairdryer again) I dry brushed some white over them.
I finished off by gluing the wings together.
OC.

- Canute, Edwardkenway, Egilman and 6 others
-
9
-
9 minutes ago, Egilman said:
That's a beautiful update set and in injected styrene to boot! it will make any 1/48th scale builder very very happy accurizing their 1/4 scale manned missile... That being said, unfortunately my 3/8th scale manned missle will have to suffer along with resin unfortunately......
Thanks for the link brother I"m sure it will give another Zipper "G" modeler exactly what they need to build a real beauty...
No problem at all.
OC.
-
Thats a great size will be a beauty.
Found this link to update goody heaven -
http://www.dacoproducts.com/KDCC4802.php
OC.
-
I used to uses any old screws/nuts etc knocking around (pinching them out of my dads work box)🤫then I would set them in a ball of blue tak/putty to stop them moving about.
OC.
-
Excellent work Tom, really busy in that plane.
OC.
- Tom E, Fright, popeye the sailor and 2 others
-
5
-
-
So well said by Harley 👍
OC.
- Canute, popeye the sailor, Egilman and 1 other
-
4
-
52 minutes ago, cog said:
Thanks all for the likes, and comments
I did paint on stripes Denis. As it would be rather silly not to. In all honesty, Initially I forgot and had them painted the base "belly colour", but realised I should have painted them with stripes. Checked the paint scheme, and added them by hand. By the way, I changed the prop from fixed to a turning one. That's why it's still not mounted. I did a wee bit of weathering, painted the exhaust (nearly forgot as well) ... final layer of varnish/lacquer ... would satin be the propper choice or gloss?
Carl I have seen both Slightly shinny satin with modern versions or those in museums, but those in service I'm not sure about (I assume they would be mat with just heavy use areas slightly shinny)
OC.
-
1 hour ago, popeye the sailor said:
sorry I missed all the action............sad to see that happen OC. I've had decals do that.......that's why I hardly ever coat them afterwards. something about the decal film........perhaps not enough adhesive properties. when the decals are movable on the paper, I like to move them around a bit, to insure they have sufficient adhesion. the use of micro sol and micro set can take some away, if too much is used. one might never know the cause, but it's a learning curve nonetheless. hard to say if the use of paint pens might have helped you, but I've done that in the past with reasonable results. you did the right course of action. glad to see you can move on from here.....and get this bird finished........hopefully Murphy free
Thank you kindly Denis, It has been a Huge learning curve for me as its the first (proper) attempt at building a half decent plane kit, the construction stage never was a real issue as the parts can be wiggled about and glued/filed/sanded where needed, it was the large area painting that has been the trouble, that and mixing paint/top coat layers, and also not having as much control with rattle cans.
Will I learn for the next build or one after that - "probably not" as I have to use what I have and am limited by my enviroment.
Still its all fun.
OC.
- popeye the sailor, Egilman, Canute and 1 other
-
4
-
34 minutes ago, popeye the sailor said:
that's where scratch building comes in.........lots of time, the supplied parts aren't quite up to snuff, especially ship fittings. the use of paint is more of a requirement with plastic than wood.........with wood you see more lacquers and stains.
Seafire is com'in along nicely OC
")
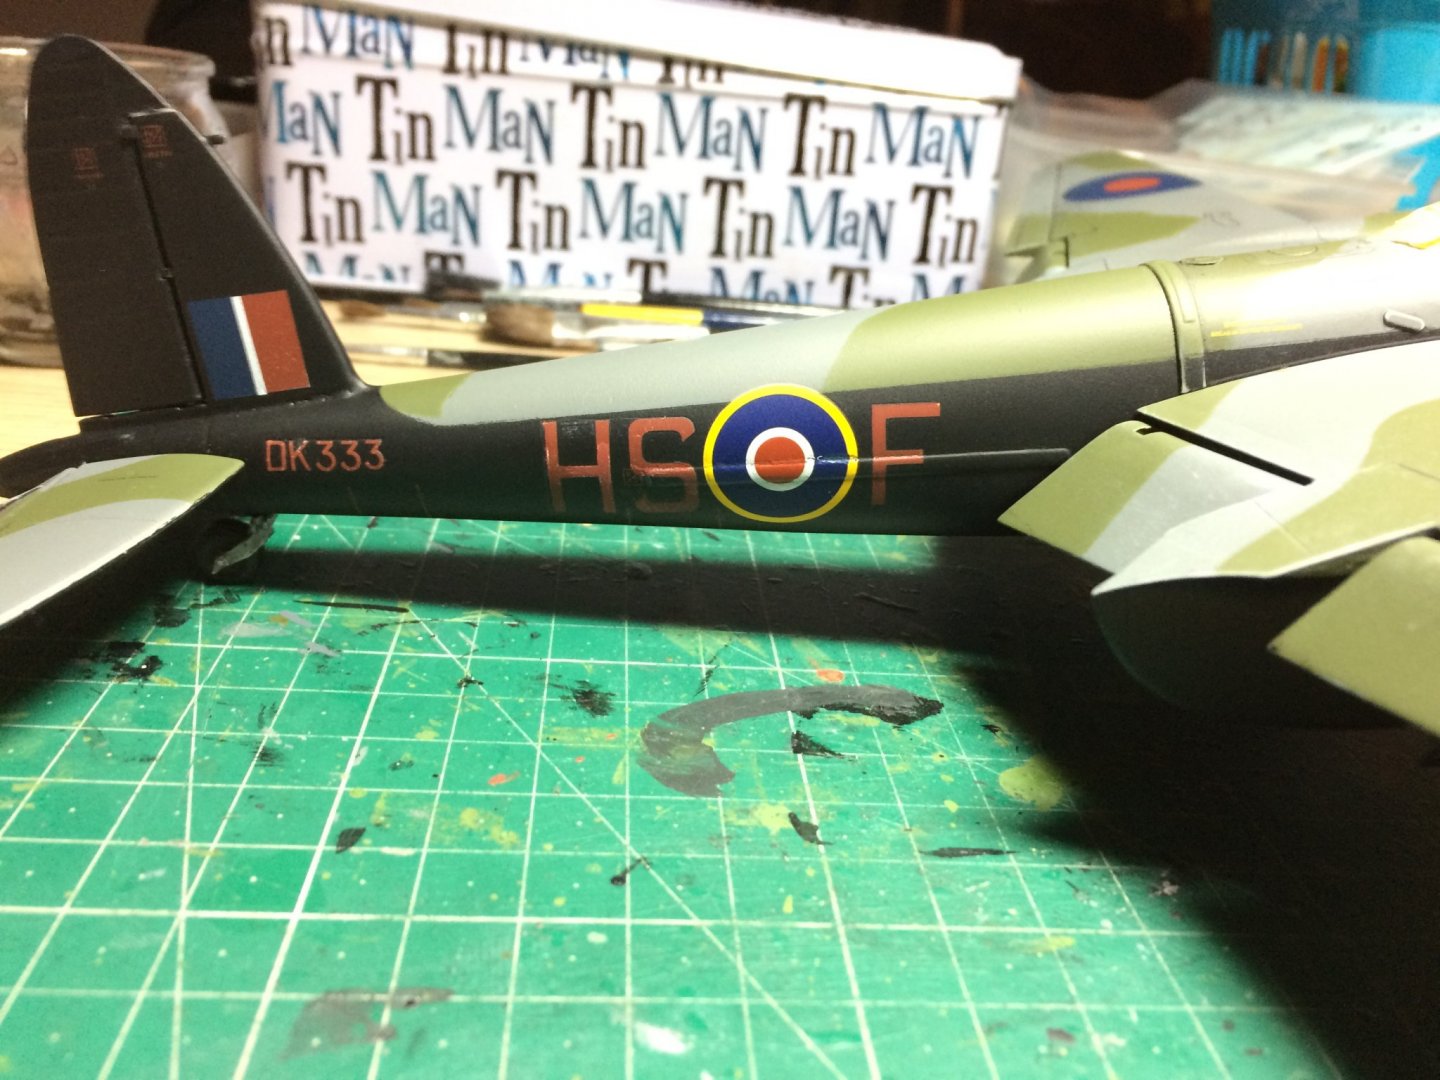
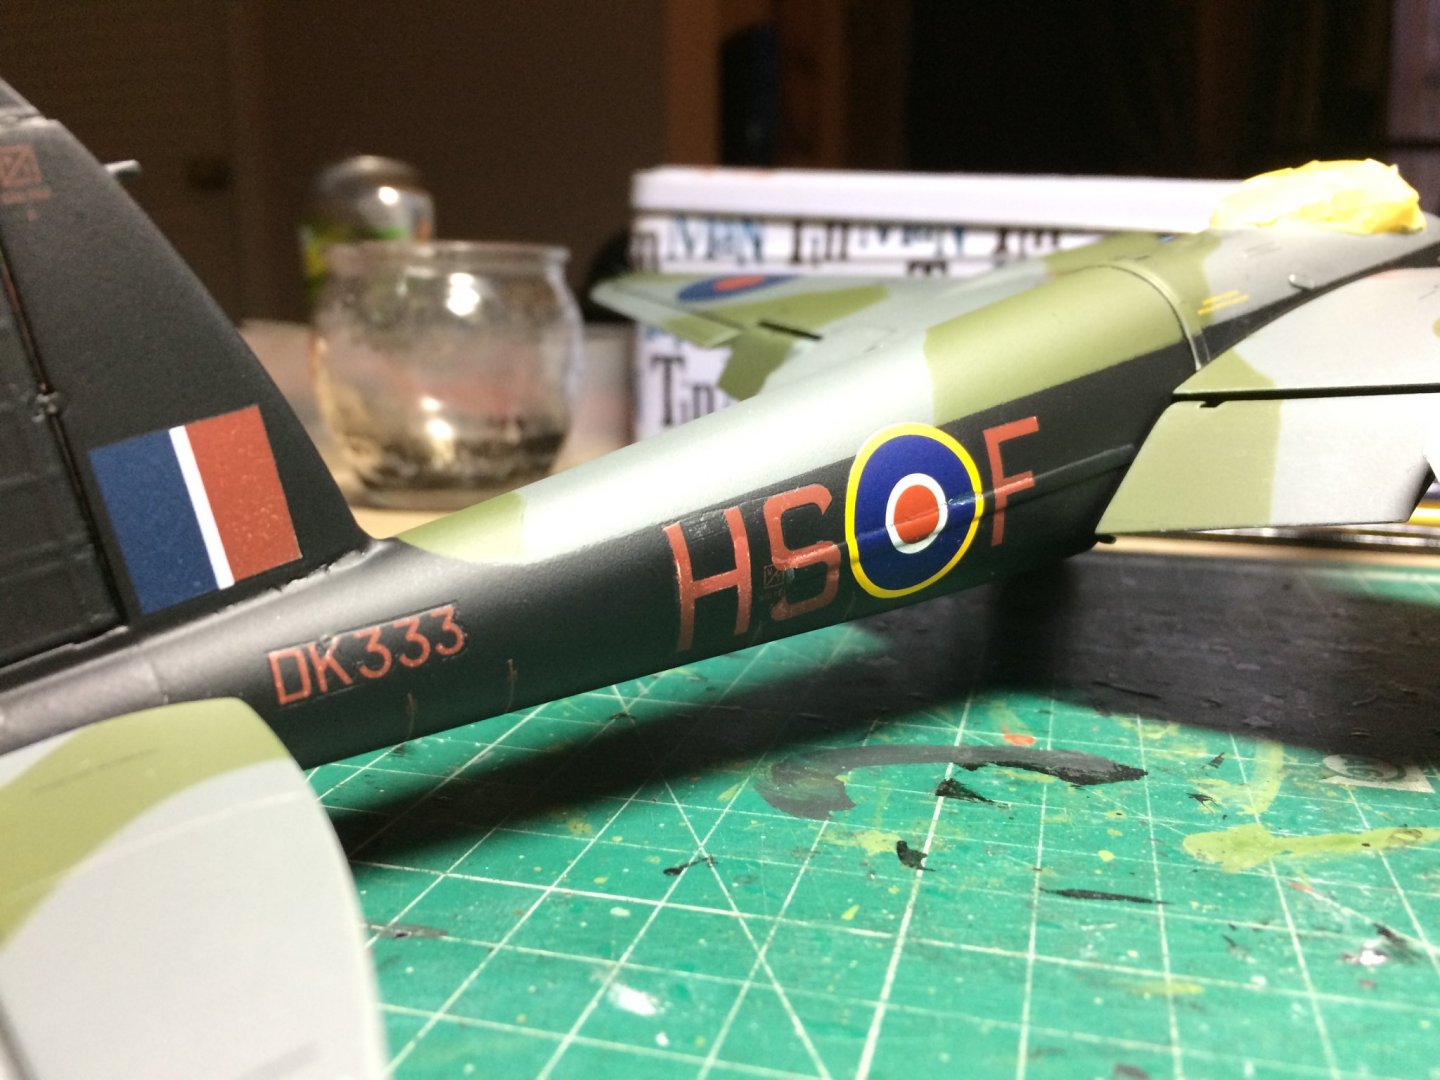
Thank you Denis, not bad considering this was the original Spit I had binned in the "naughty cupboard"
OC.
- Egilman, mtaylor, Edwardkenway and 3 others
-
6
-
Nice blank canvas ready for her paint.
OC.
- Canute, mtaylor, popeye the sailor and 3 others
-
6


Mosquito B Mk IV - FINISHED - Revell - My next non-ship project
in Non-ship/categorised builds
Posted
Thank you kindly EG.
OC.