Old Collingwood
-
Posts
12,106 -
Joined
-
Last visited
Content Type
Profiles
Forums
Gallery
Events
Everything posted by Old Collingwood
-
 You could try 30/70 something like that, I tend to use Acrylics these days and dilute these near 50/50 and try to paint in controled areas or mask an area that falls near to a natural fuselage line / panel line. OC.
 -
Have you got any Enamel thinners Jack? OC.
-
Must be a Huge hairy stick if he borrowing it from over here Ken.🤪 OC.
-
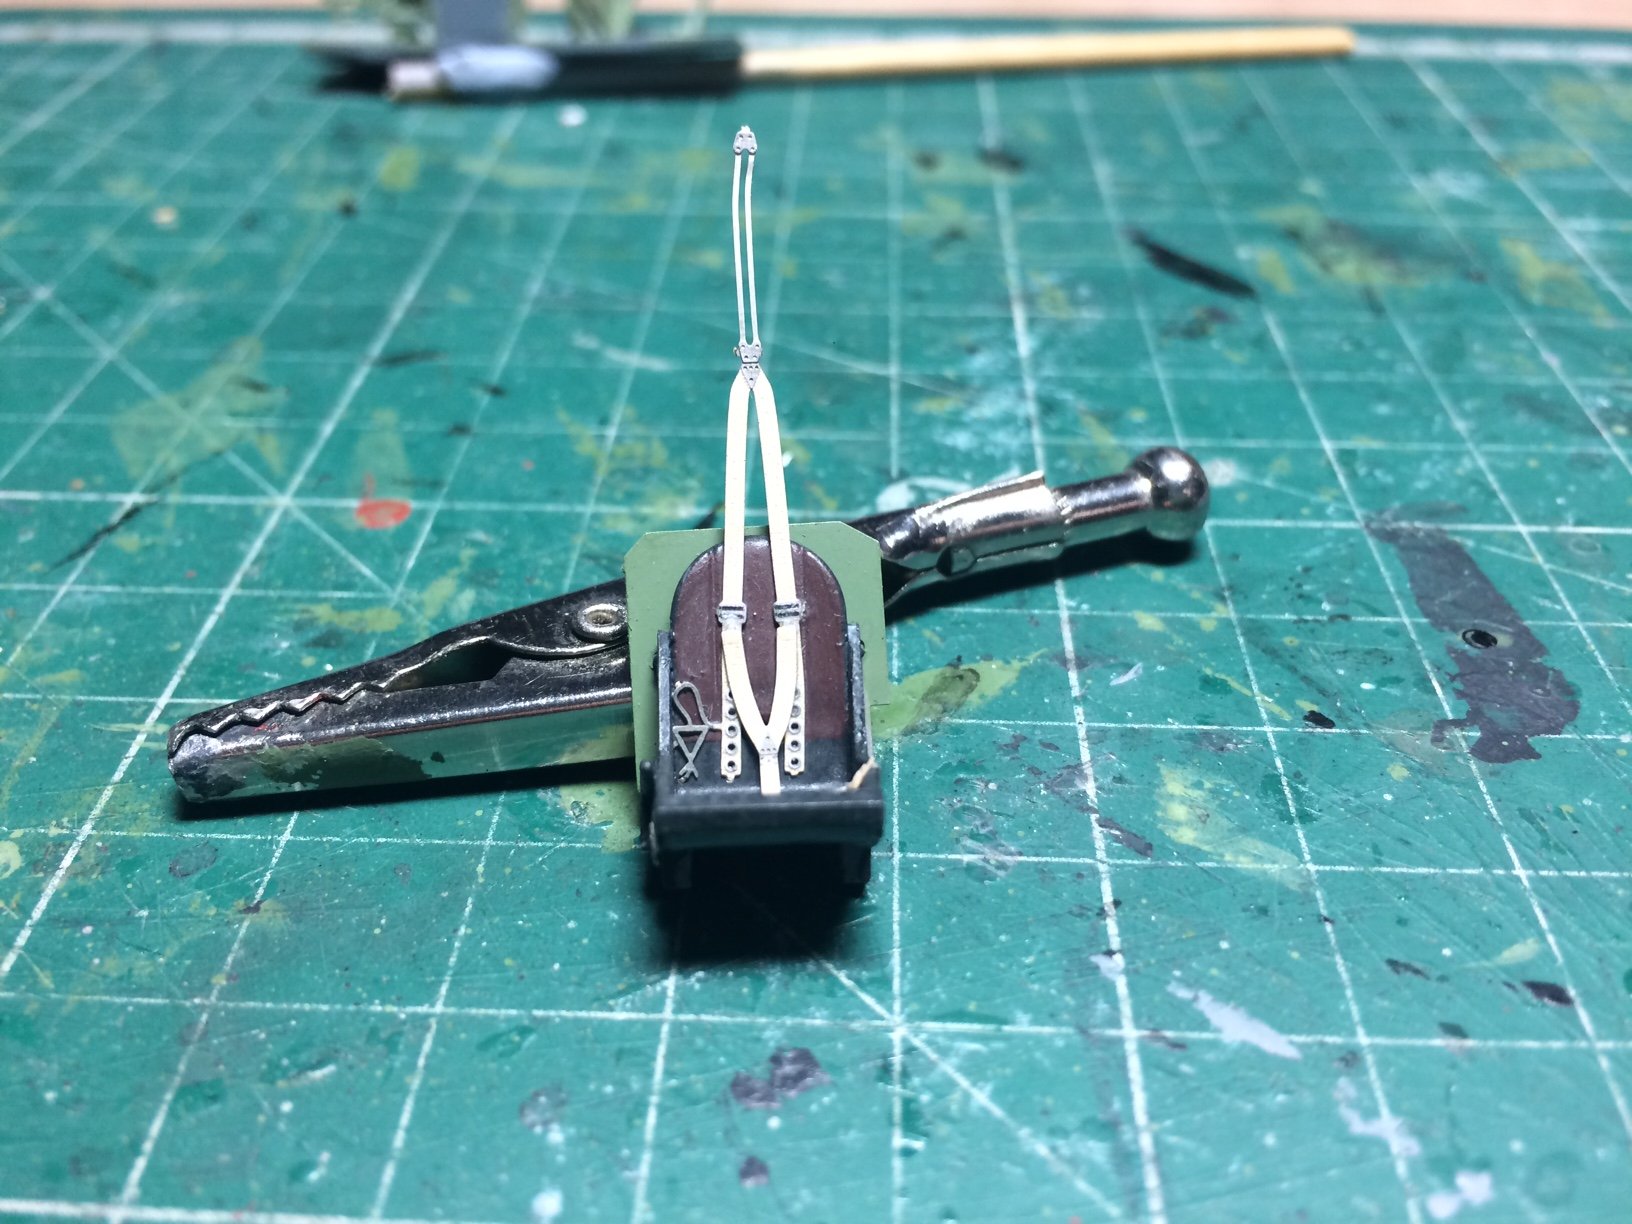
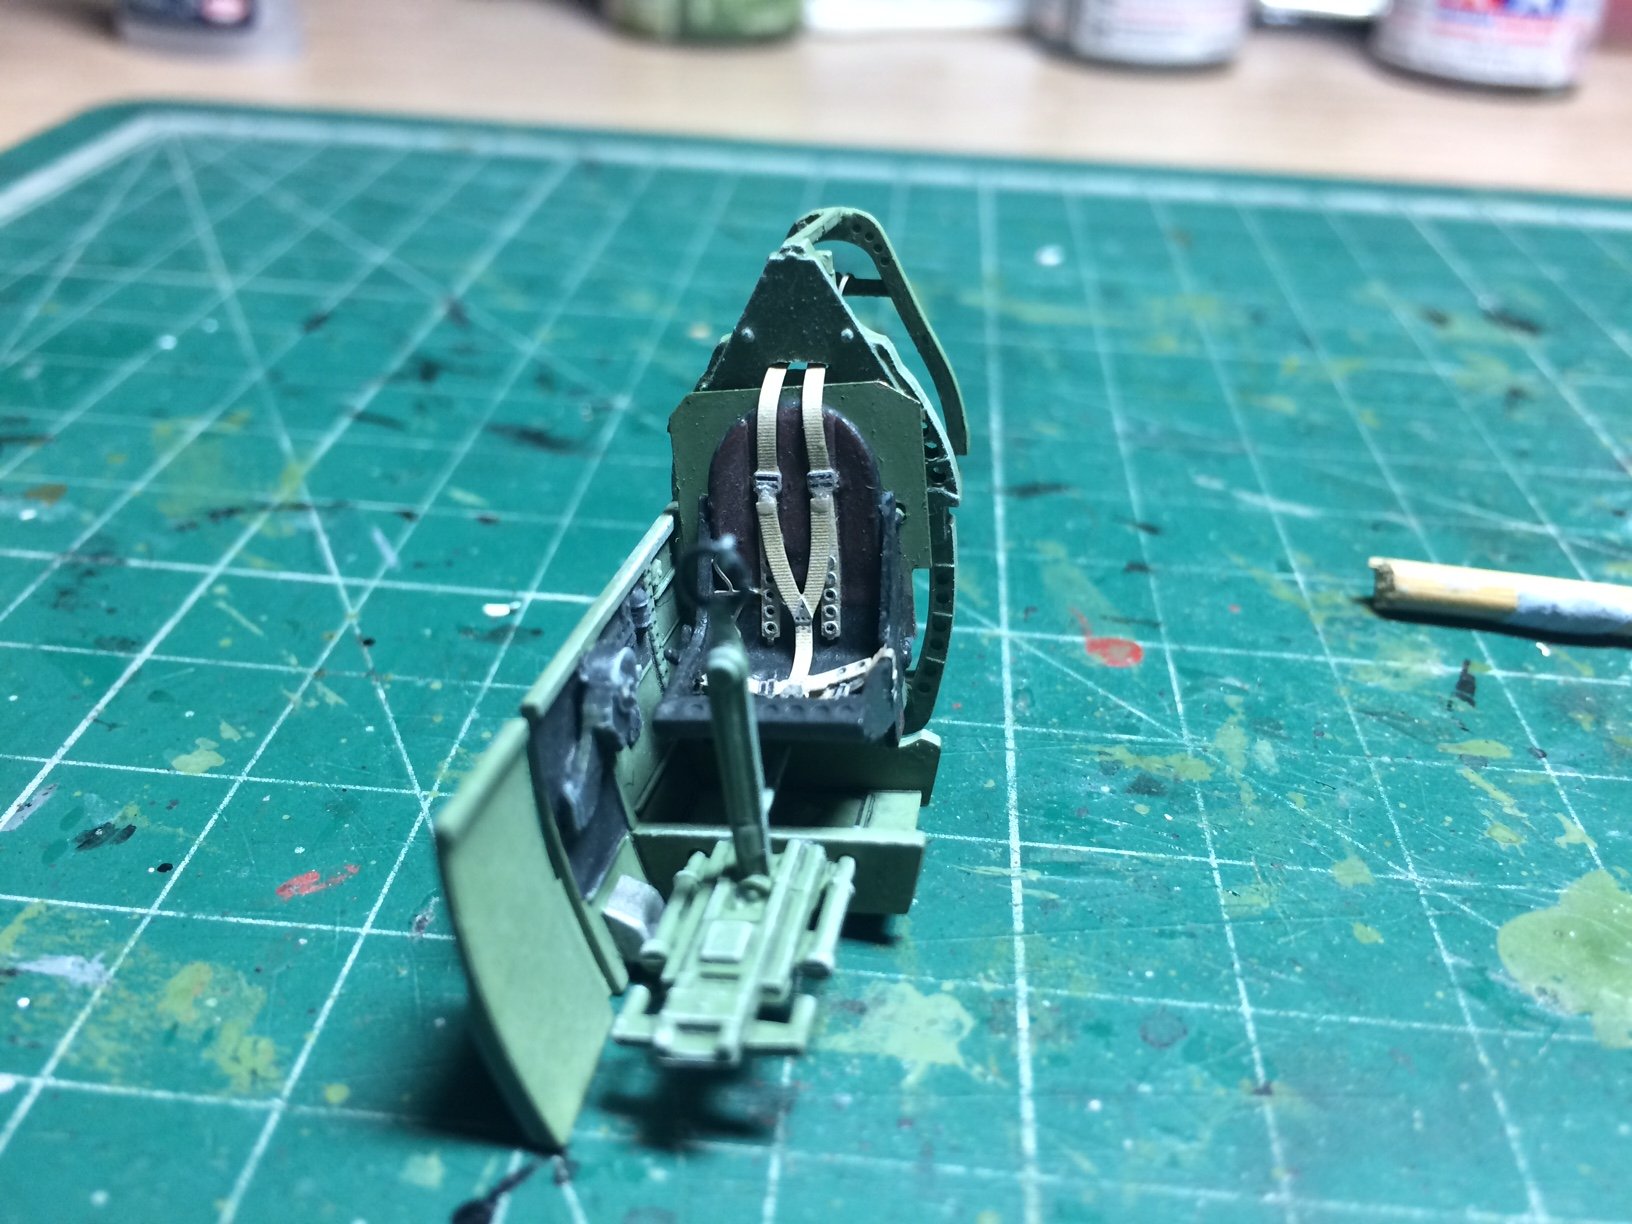
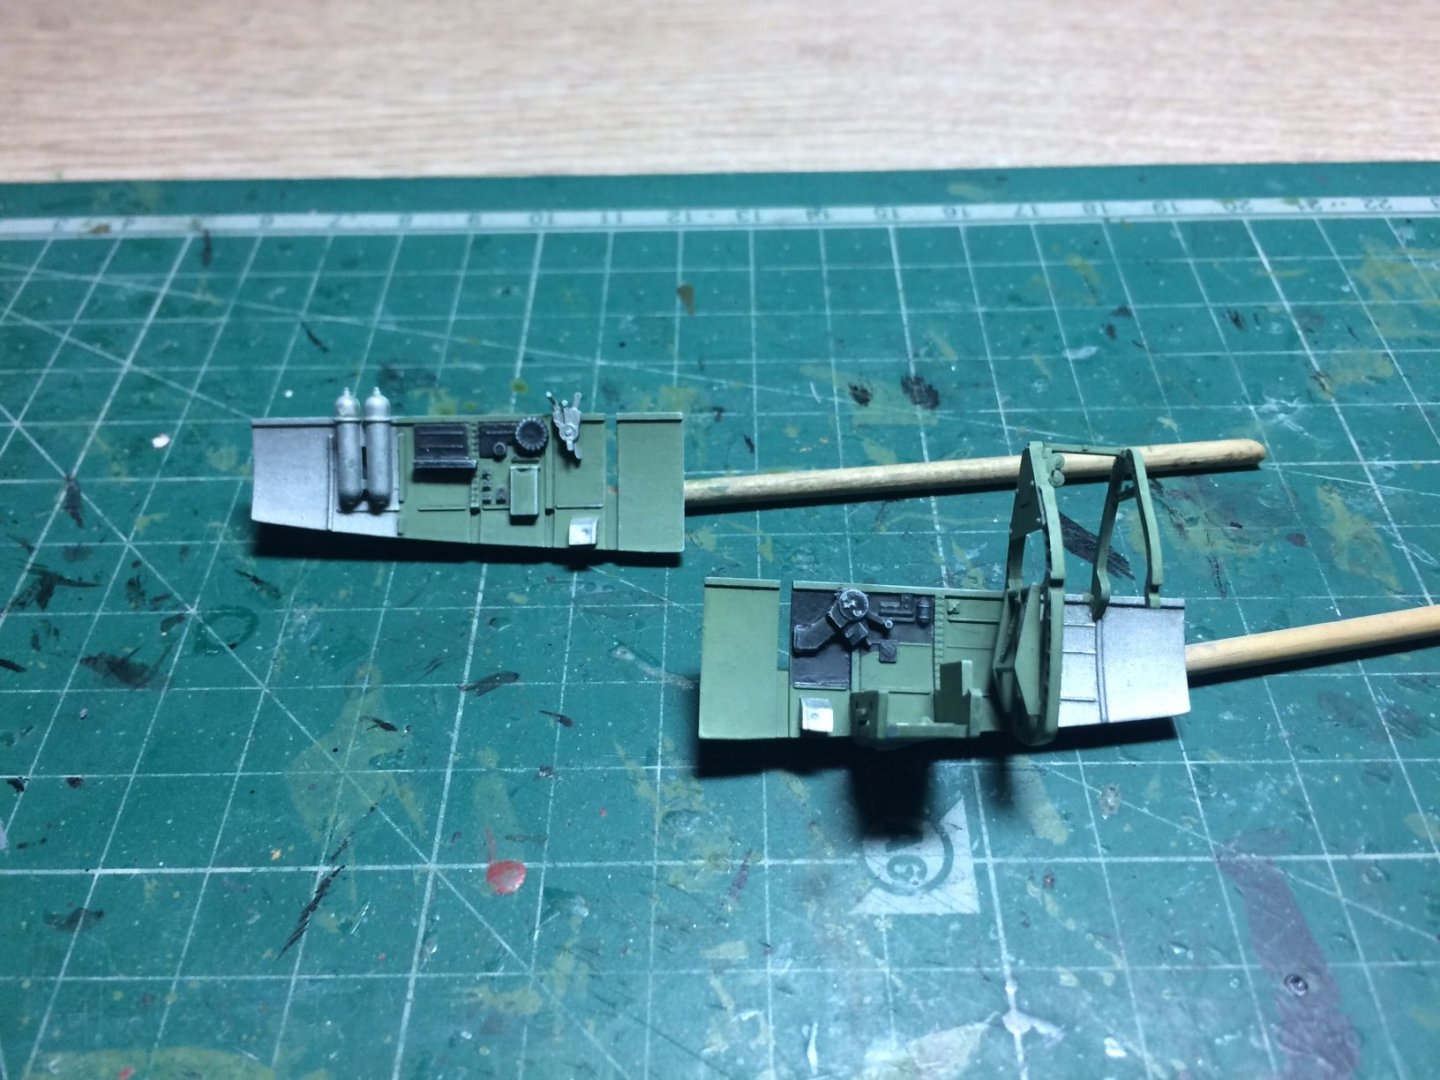
Seat assembled - painted and weathered, then the belts from the enclosed pe were cut off and glued into place, then when set I did a couple of coats of brushed on flat coat, then I placed the seat in the tub and routed the rear harness through the rear framework and glued it in place. OC.


- 298 replies
-
- 17
-

-
Looking very good Edward, hand brushing is not easy (its been my way for many many years). OC.
-
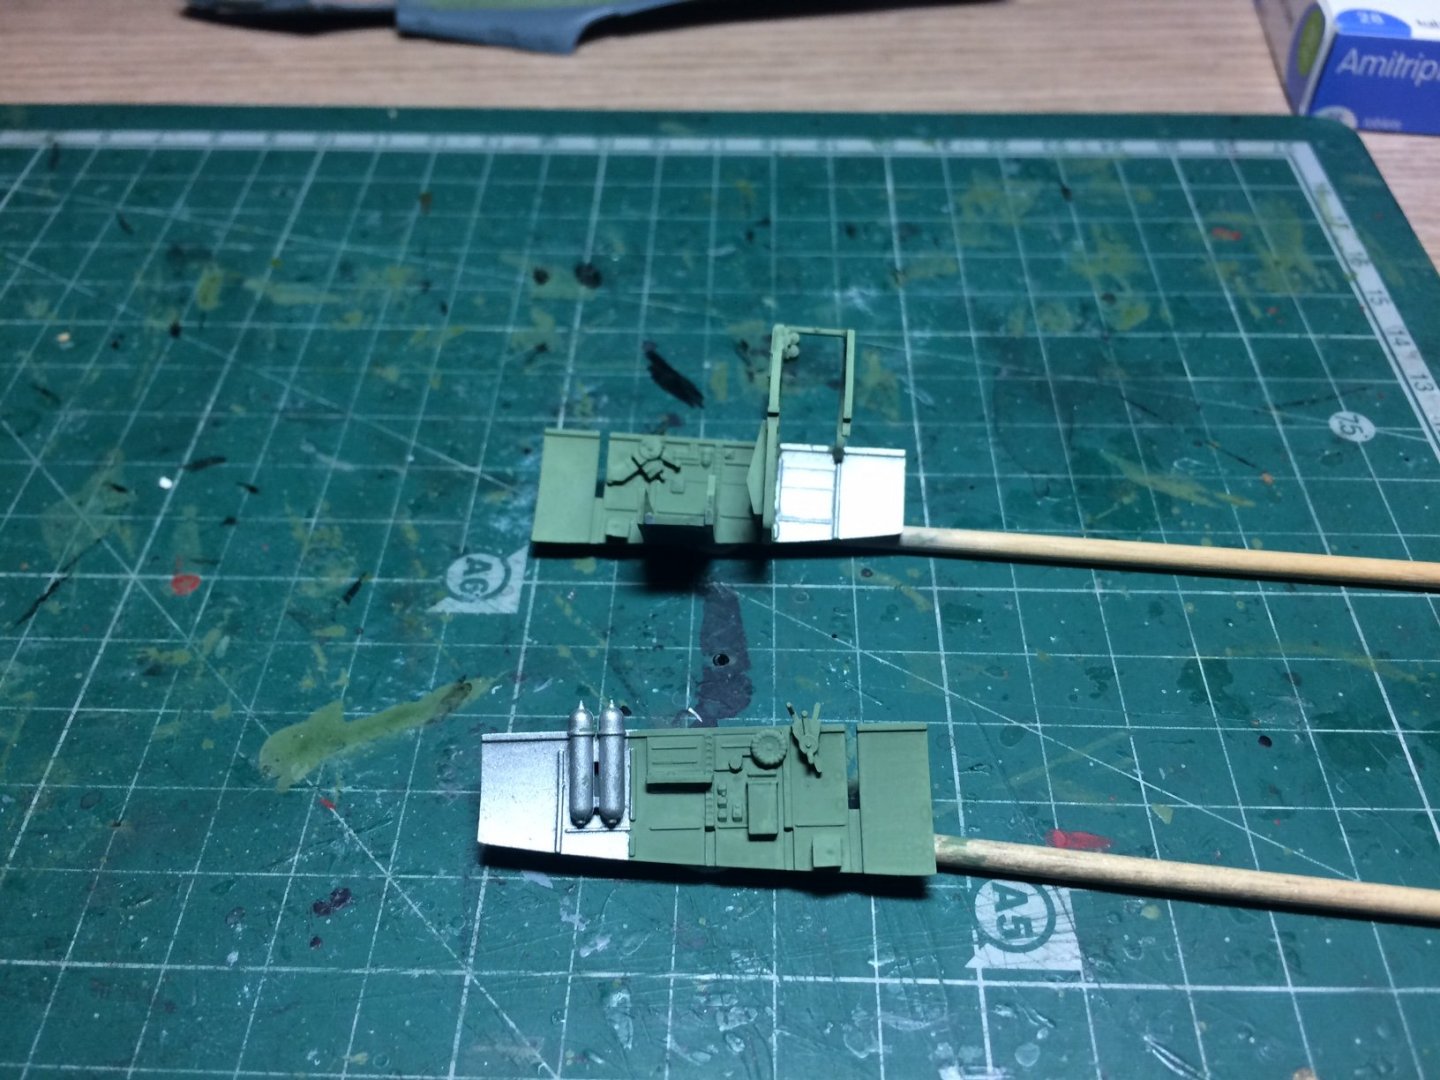
More work today - next job inside the cockpit was to paint the floor assembly, this was then shaded and dry brushed for highlighting, next was to attach the yoke and stearing columb, this again was painted and weathered then the floor was glued in place. OC.

- 298 replies
-
- 10
-
-
What a smart looking Starfighter, OC.
-
Yep certainly was, I used to work looking after the grounds for someone with more money than sense - he brought a railroad carriage to do up (me do up) over a period of hot weeks in the summer I worked on it. oc.
-
Great subject Andy, I once painted (by hand) a full size passenger sleeper carriage including brushing on Bituminous paint using a broom on the roof. OC.
-
That engine looks super. OC.
-
Thanks EG, I just use a wide brush and make sure its almost dry like a powder brush, then just light brushes over the details keeping an eye on how its building up, then seal in with brushed on clear top coat. OC.
-
Thank you kindly Denis, I'm very impressed with the quality and accuracy of the moldings. OC.
-
Nothing wrong with that. OC.
-
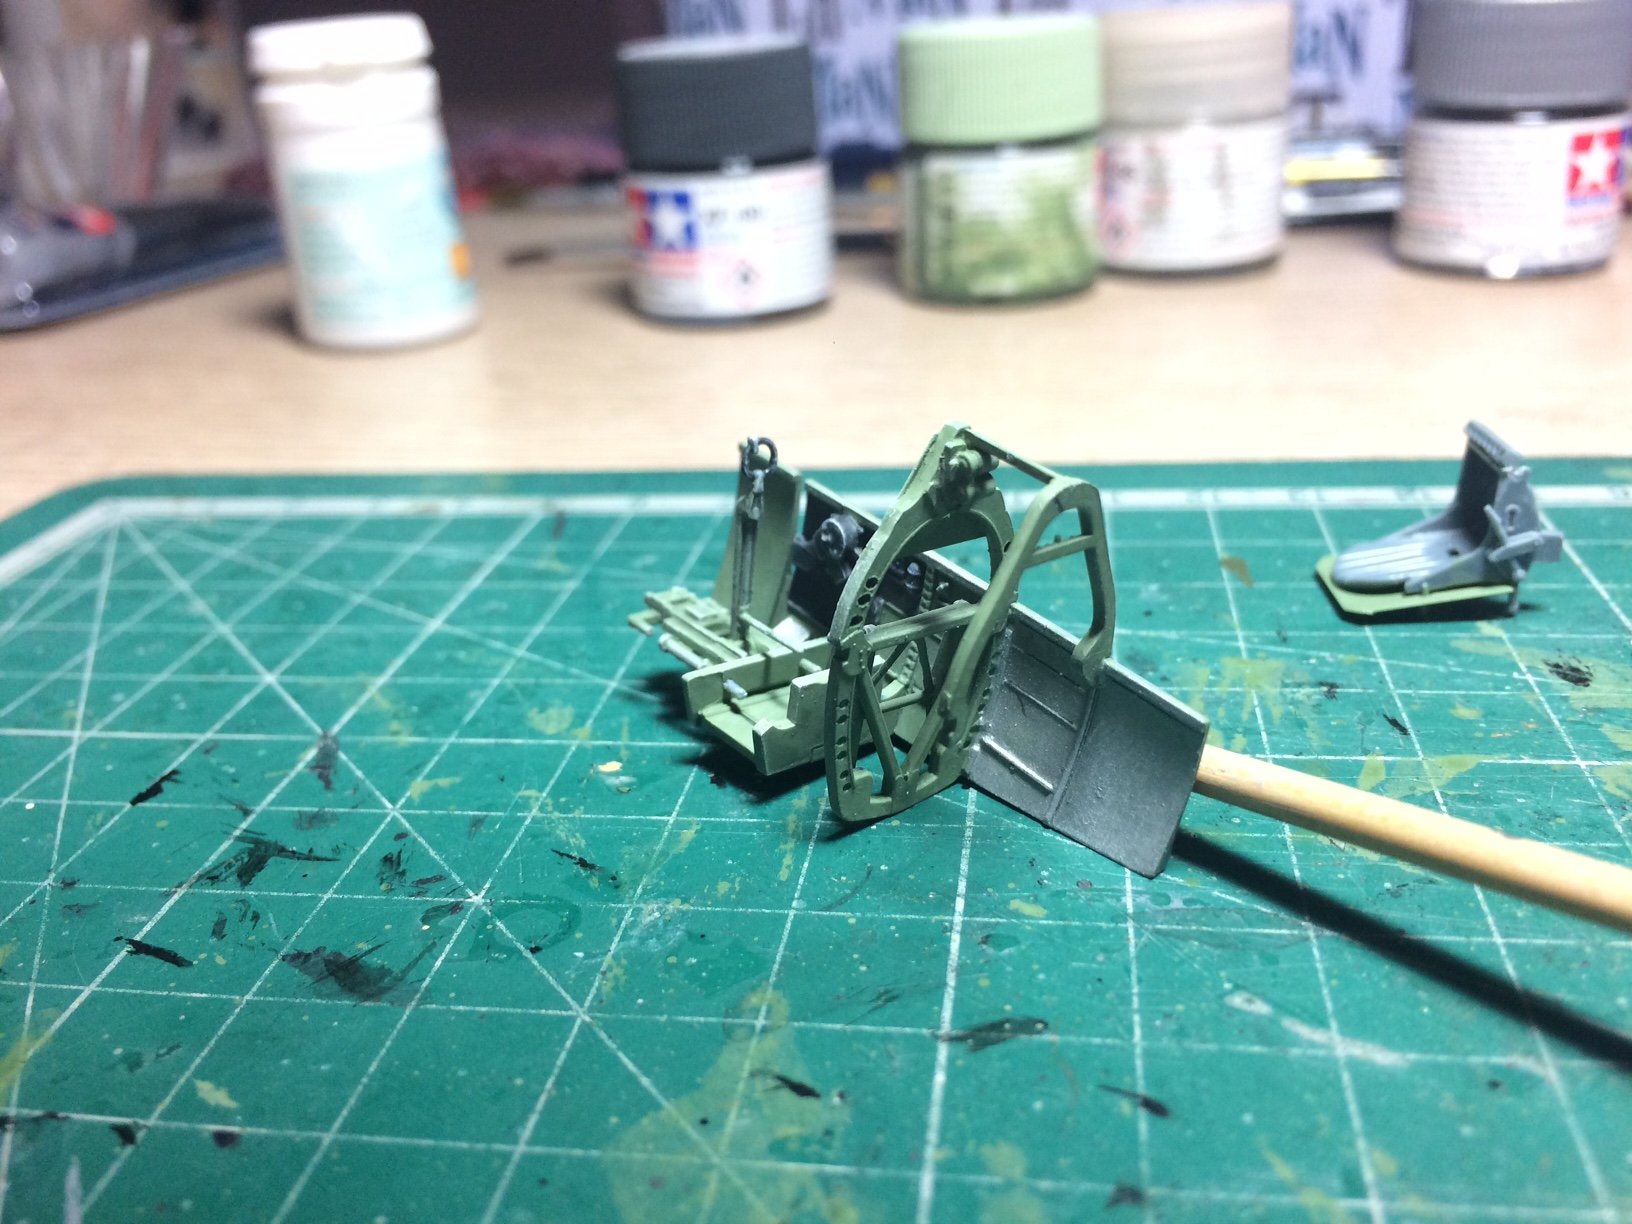
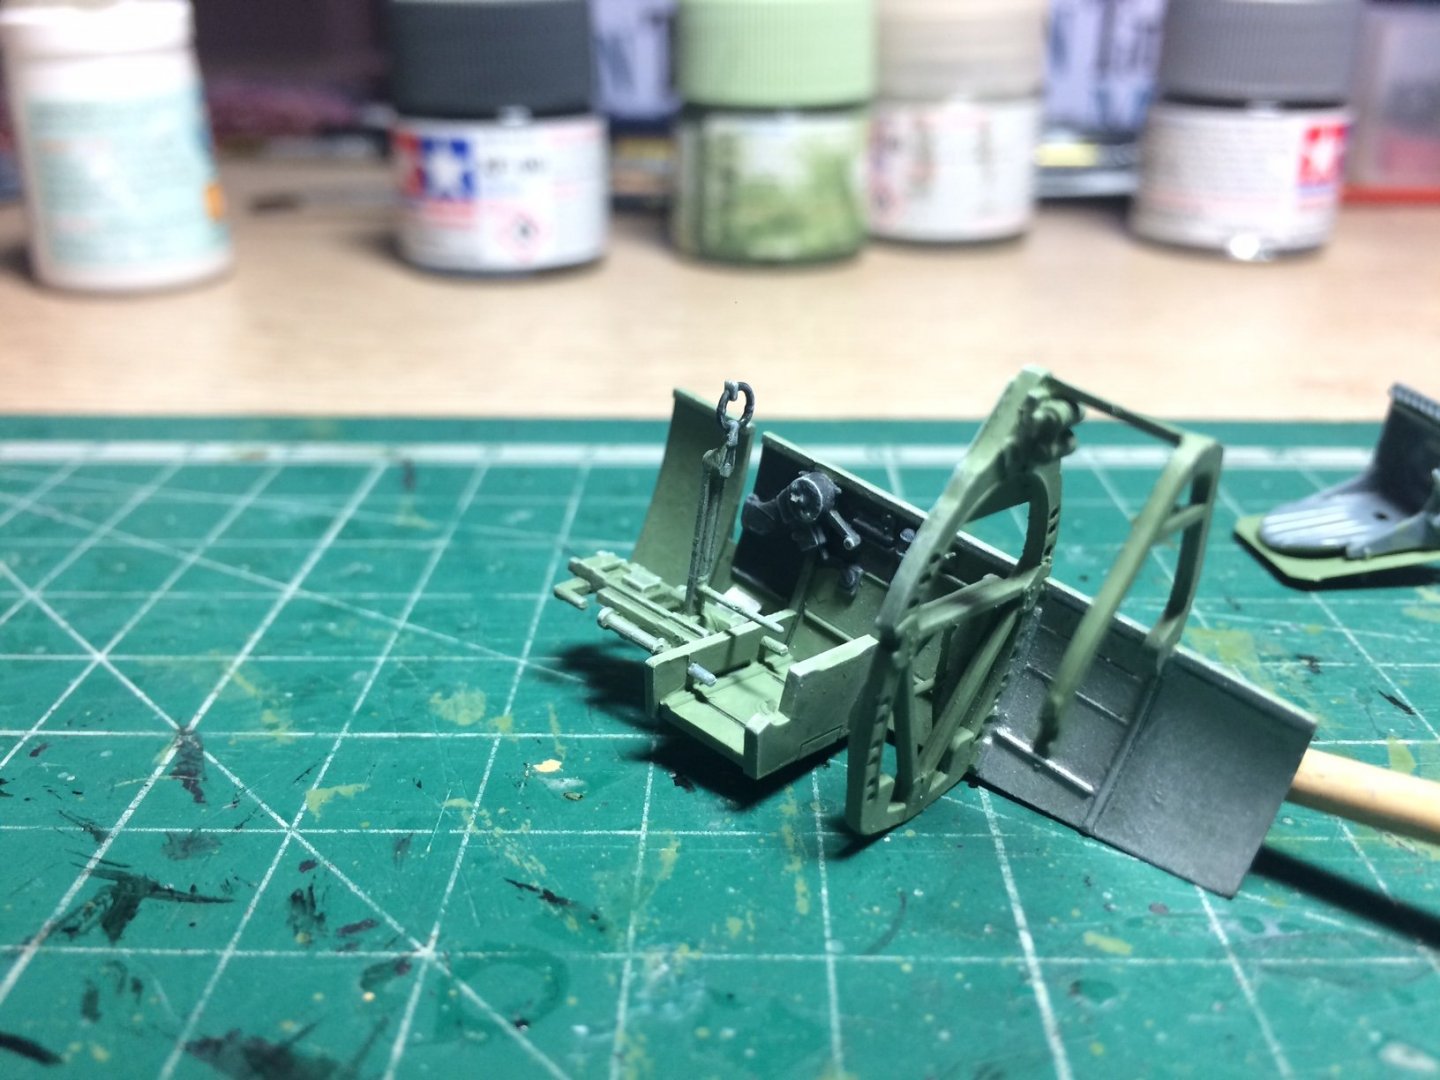
Hi all, Another good couple of hours, I touched up the green then picked out the Black fittings, then a few items in flat Alum, then when dry (with hairdryer) I then ran a pencil to create some shading, next using white I I did some highlighting then I dulled everything with some flat coat. Next will be to build the seat. OC.
- 298 replies
-
- 11
-
-
Lou you could always fall in as winch man. OC.
-
The FW-190 was the reason the Spit got a new engine in the IX model so it could take on the FW as earlier models spits were out paced by the german. OC.
-
WOW, thats amazing work all that detail bringing a model to life. OC.
-
It will be interesting and great what ever you decide Kevin. OC.
-
Yep I hear you mate. OC.
-
In deed it is mate, my dad was there between 43 and early 44, he then was moved to Norfolk to work on bombers and stayed into the Fifties where he worked on the first jet engines and also did some work in Oz doing diss-assembly of fighters to be crated up and returned back to the UK. OC.
-
Yep that would be good. OC.
-
"Yummy yummy you cant not have a Spooky " Love em. OC.
-
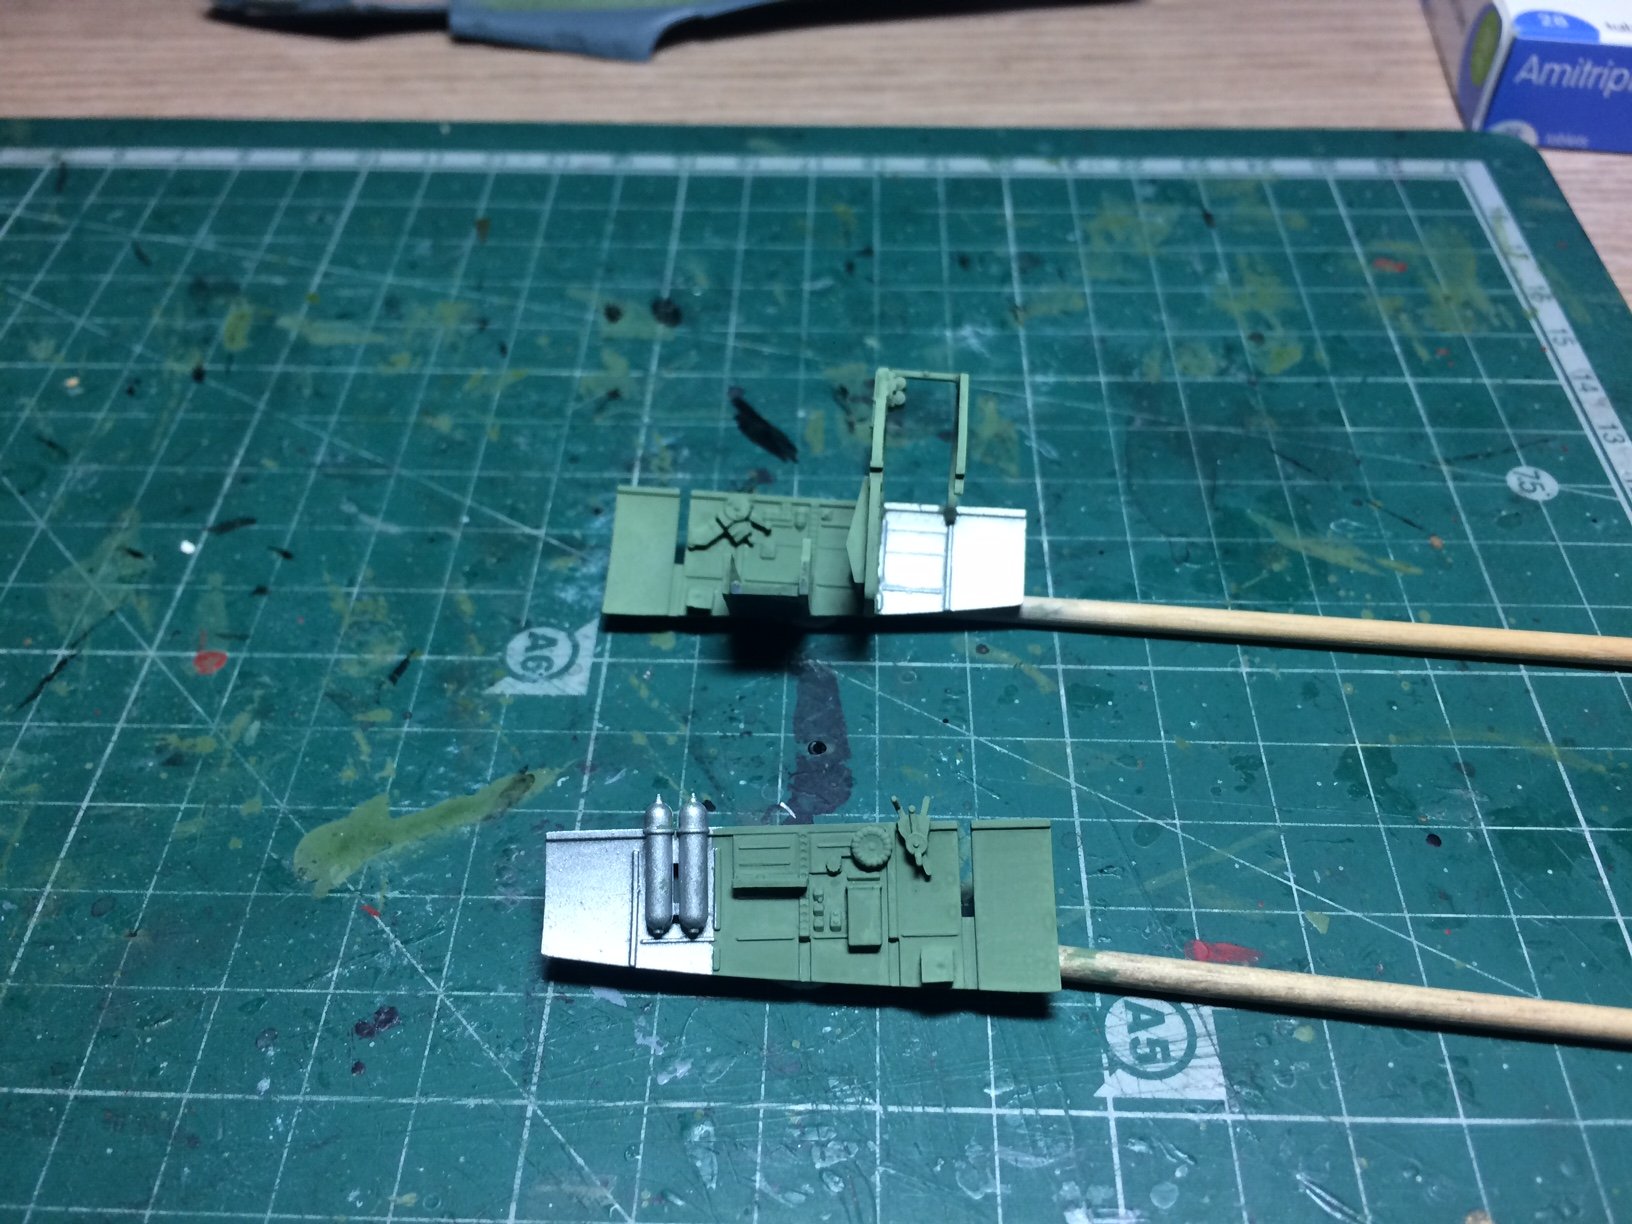
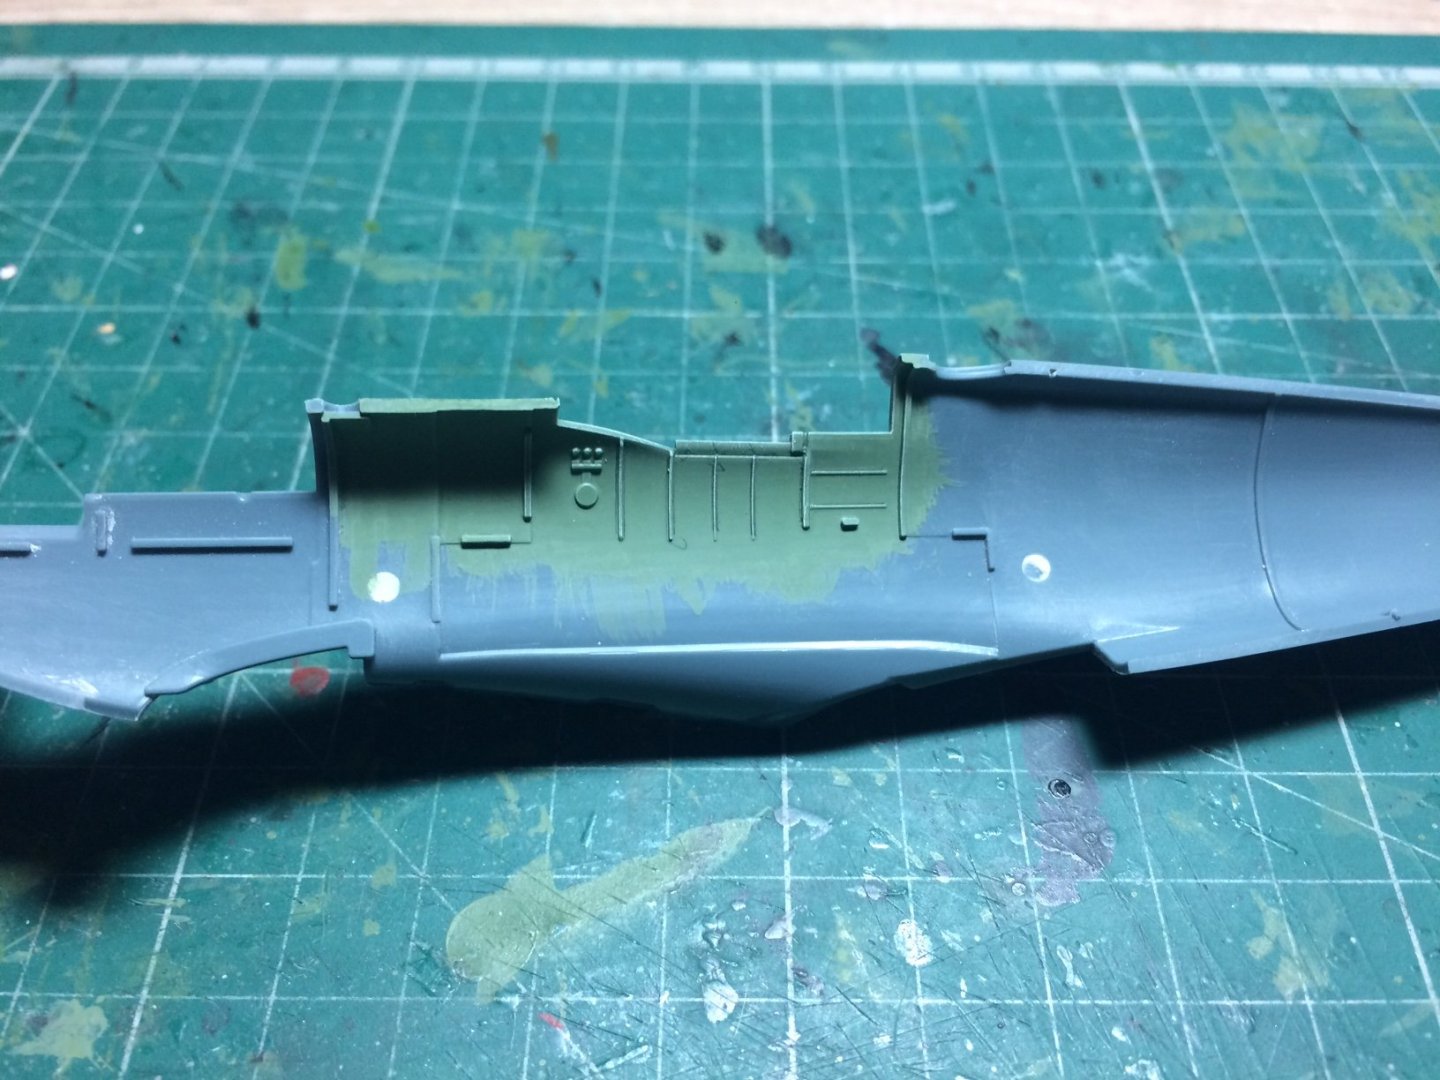
A bit more done - I brush painted the cockpit green and flat alum also the fuselage sides. OC.
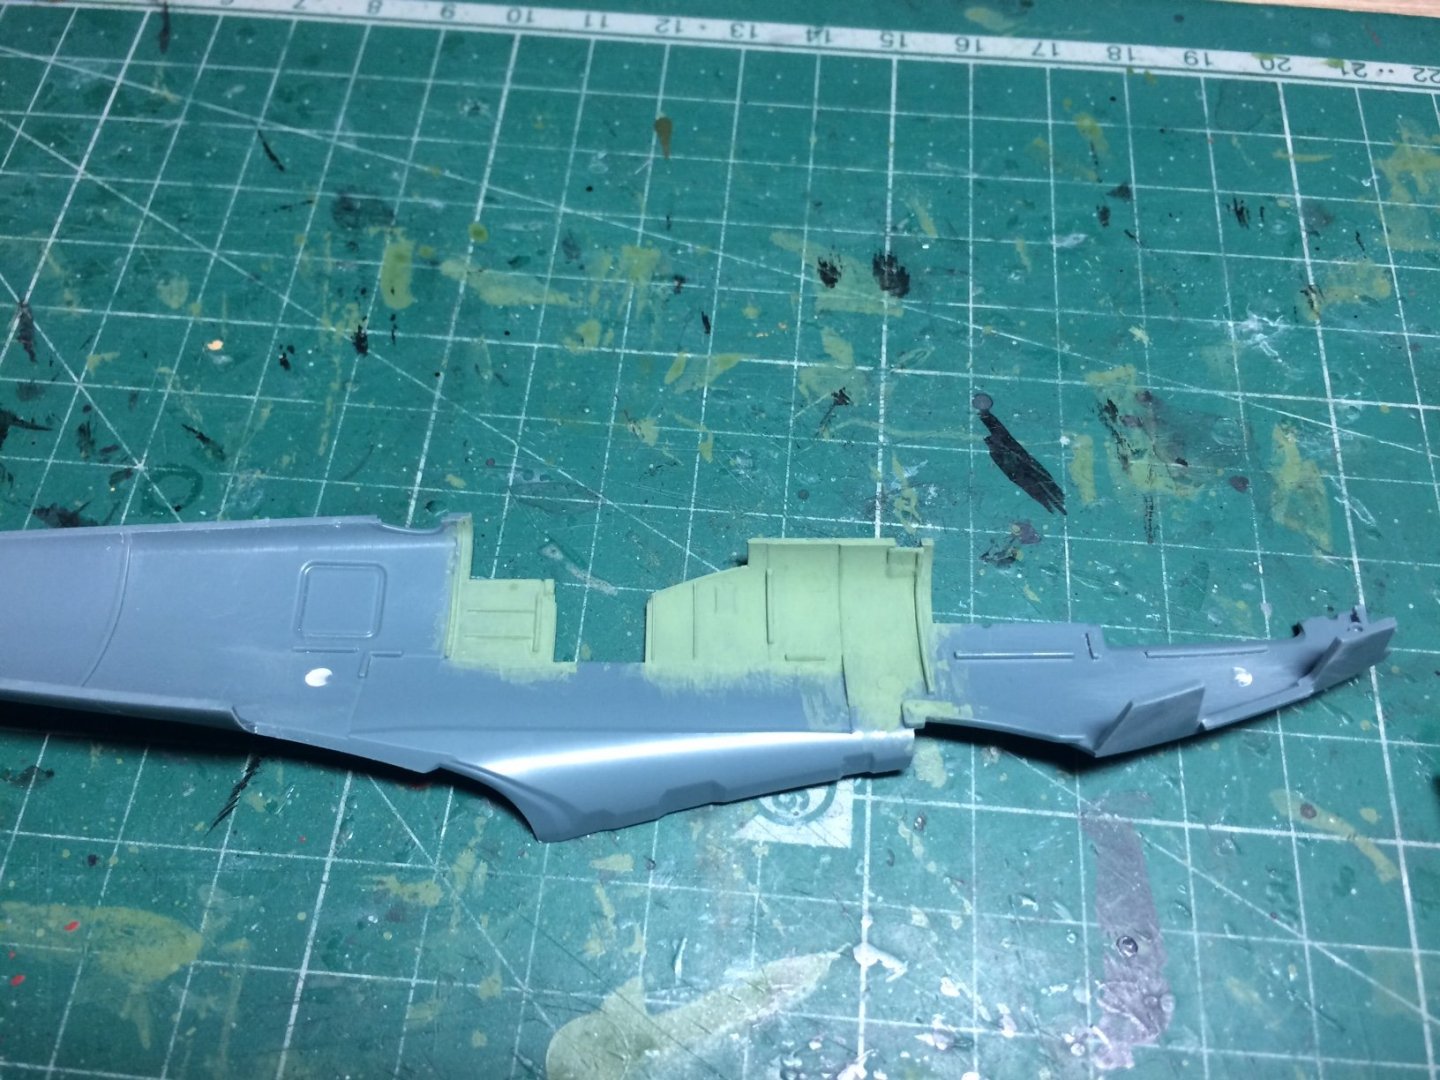
- 298 replies
-
- 10
-
-
I am sure we will all look forward to that. OC.
-
The detail is amazing Denis and more so at 1/72. OC.