HOLIDAY DONATION DRIVE - SUPPORT MSW - DO YOUR PART TO KEEP THIS GREAT FORUM GOING! (Only 20 donations so far - C'mon guys!)
×


Old Collingwood
-
Posts
12,098 -
Joined
-
Last visited
Content Type
Profiles
Forums
Gallery
Events
Everything posted by Old Collingwood
-
 I can relate to that regarding all the deck details, and guess the time can dash by and all of a sudden so much has been completed, just worries me - a completed ship and no where safe to keep here away from accidents and Dust. OC.
- 405 replies
-
- 5
-

-
- tamiya
- king george v
- (and 2 more)
-
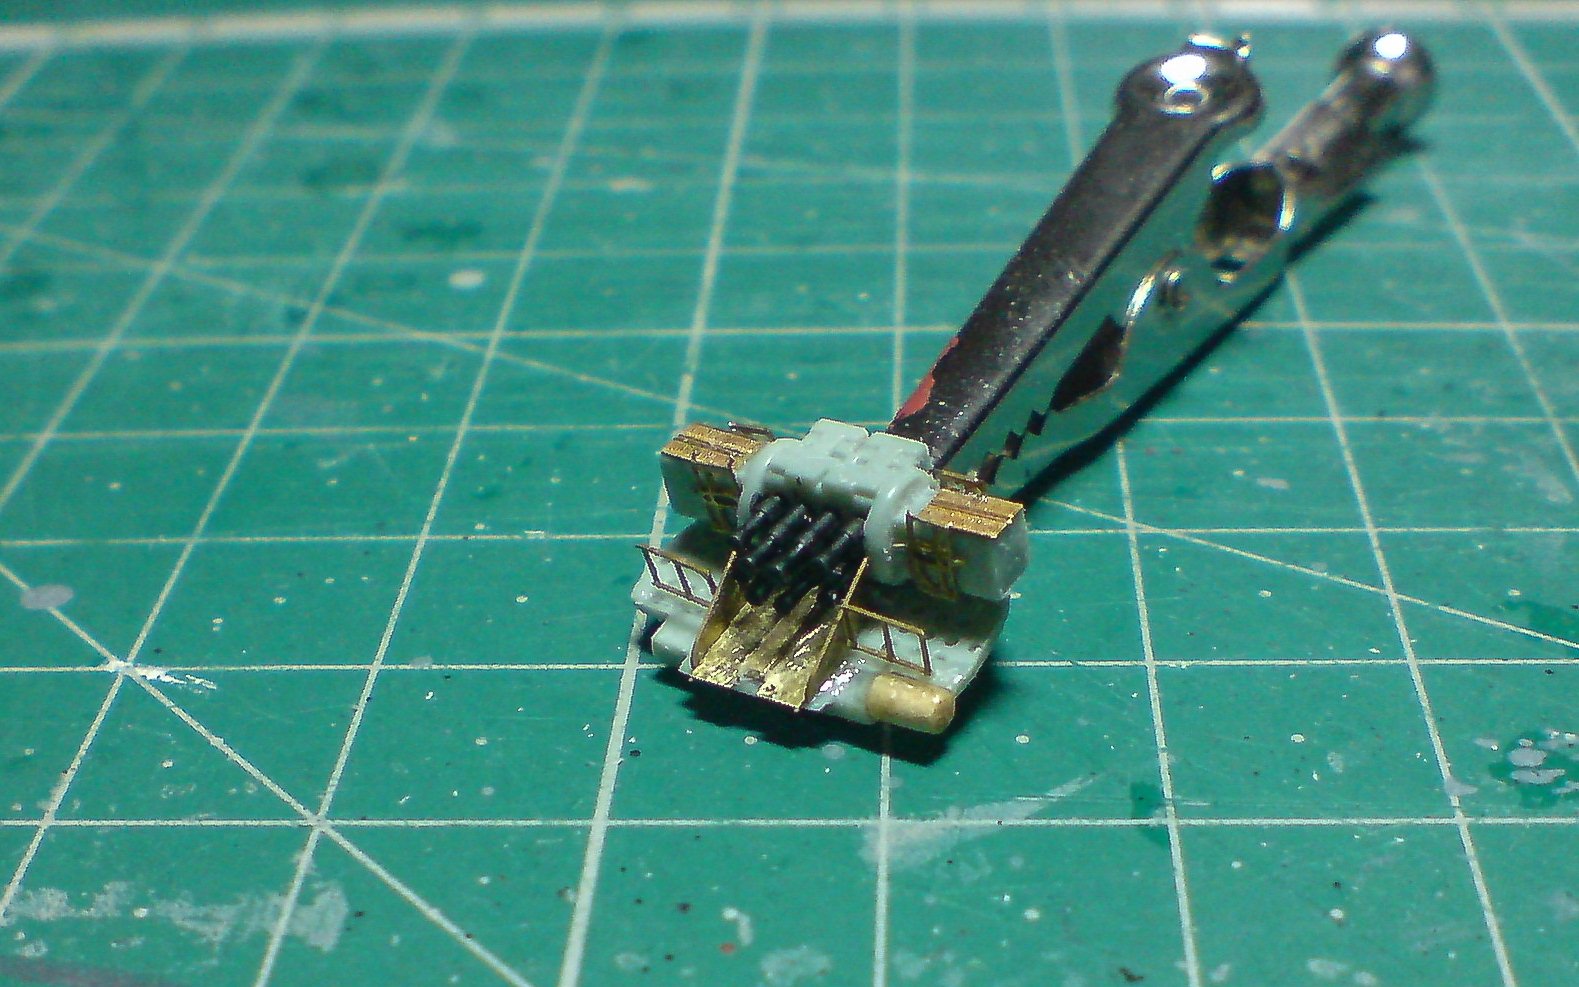
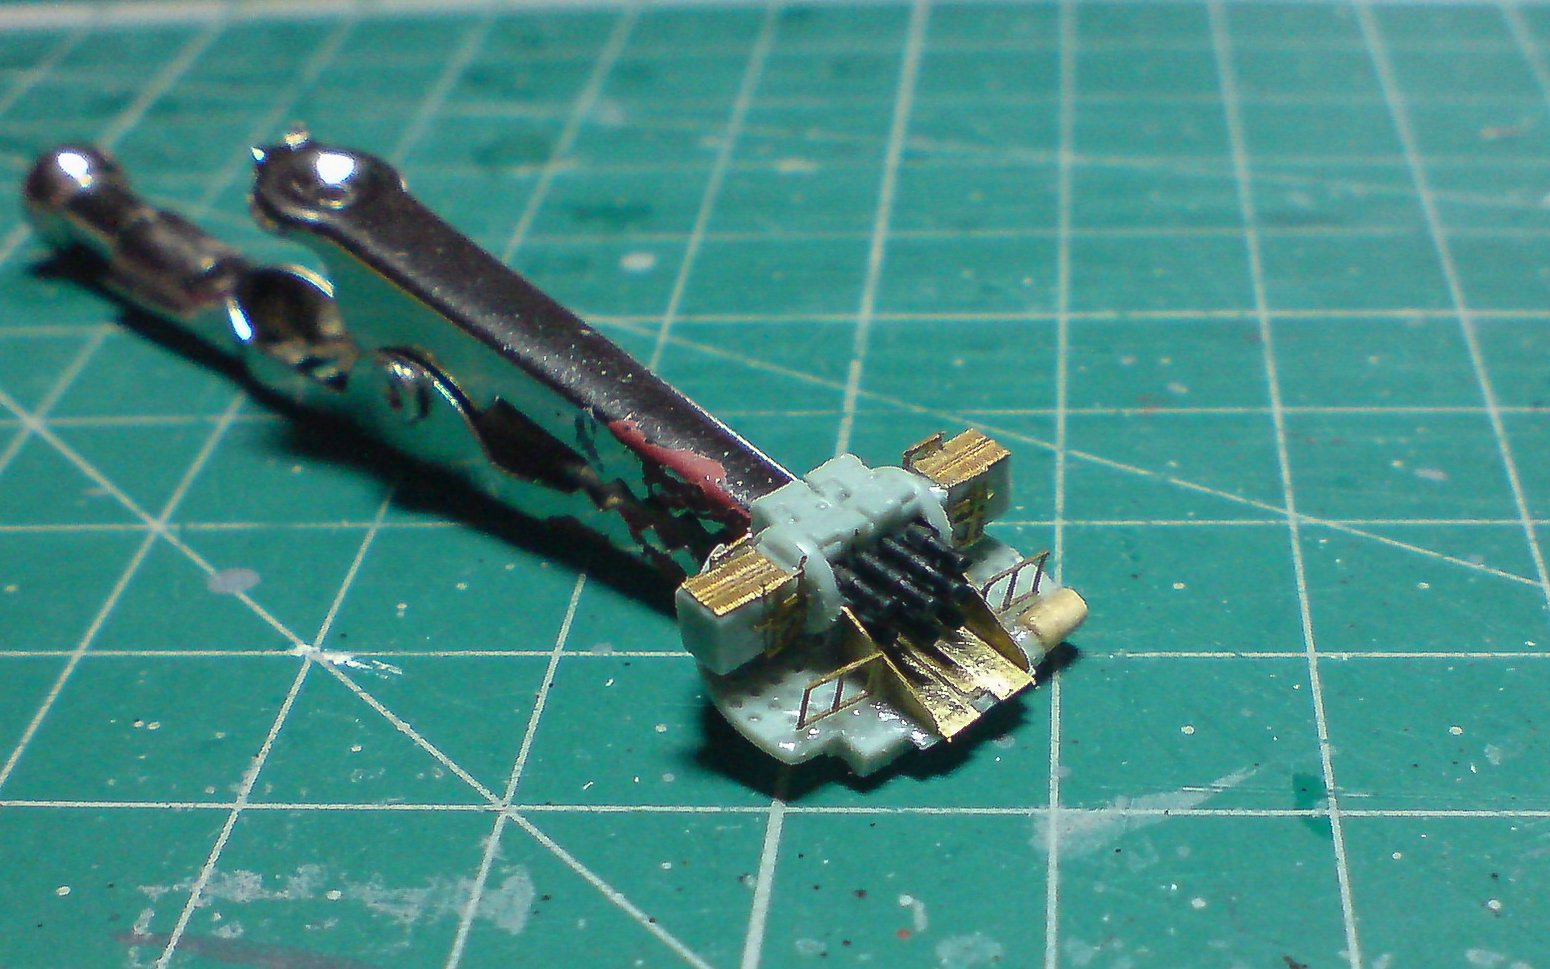
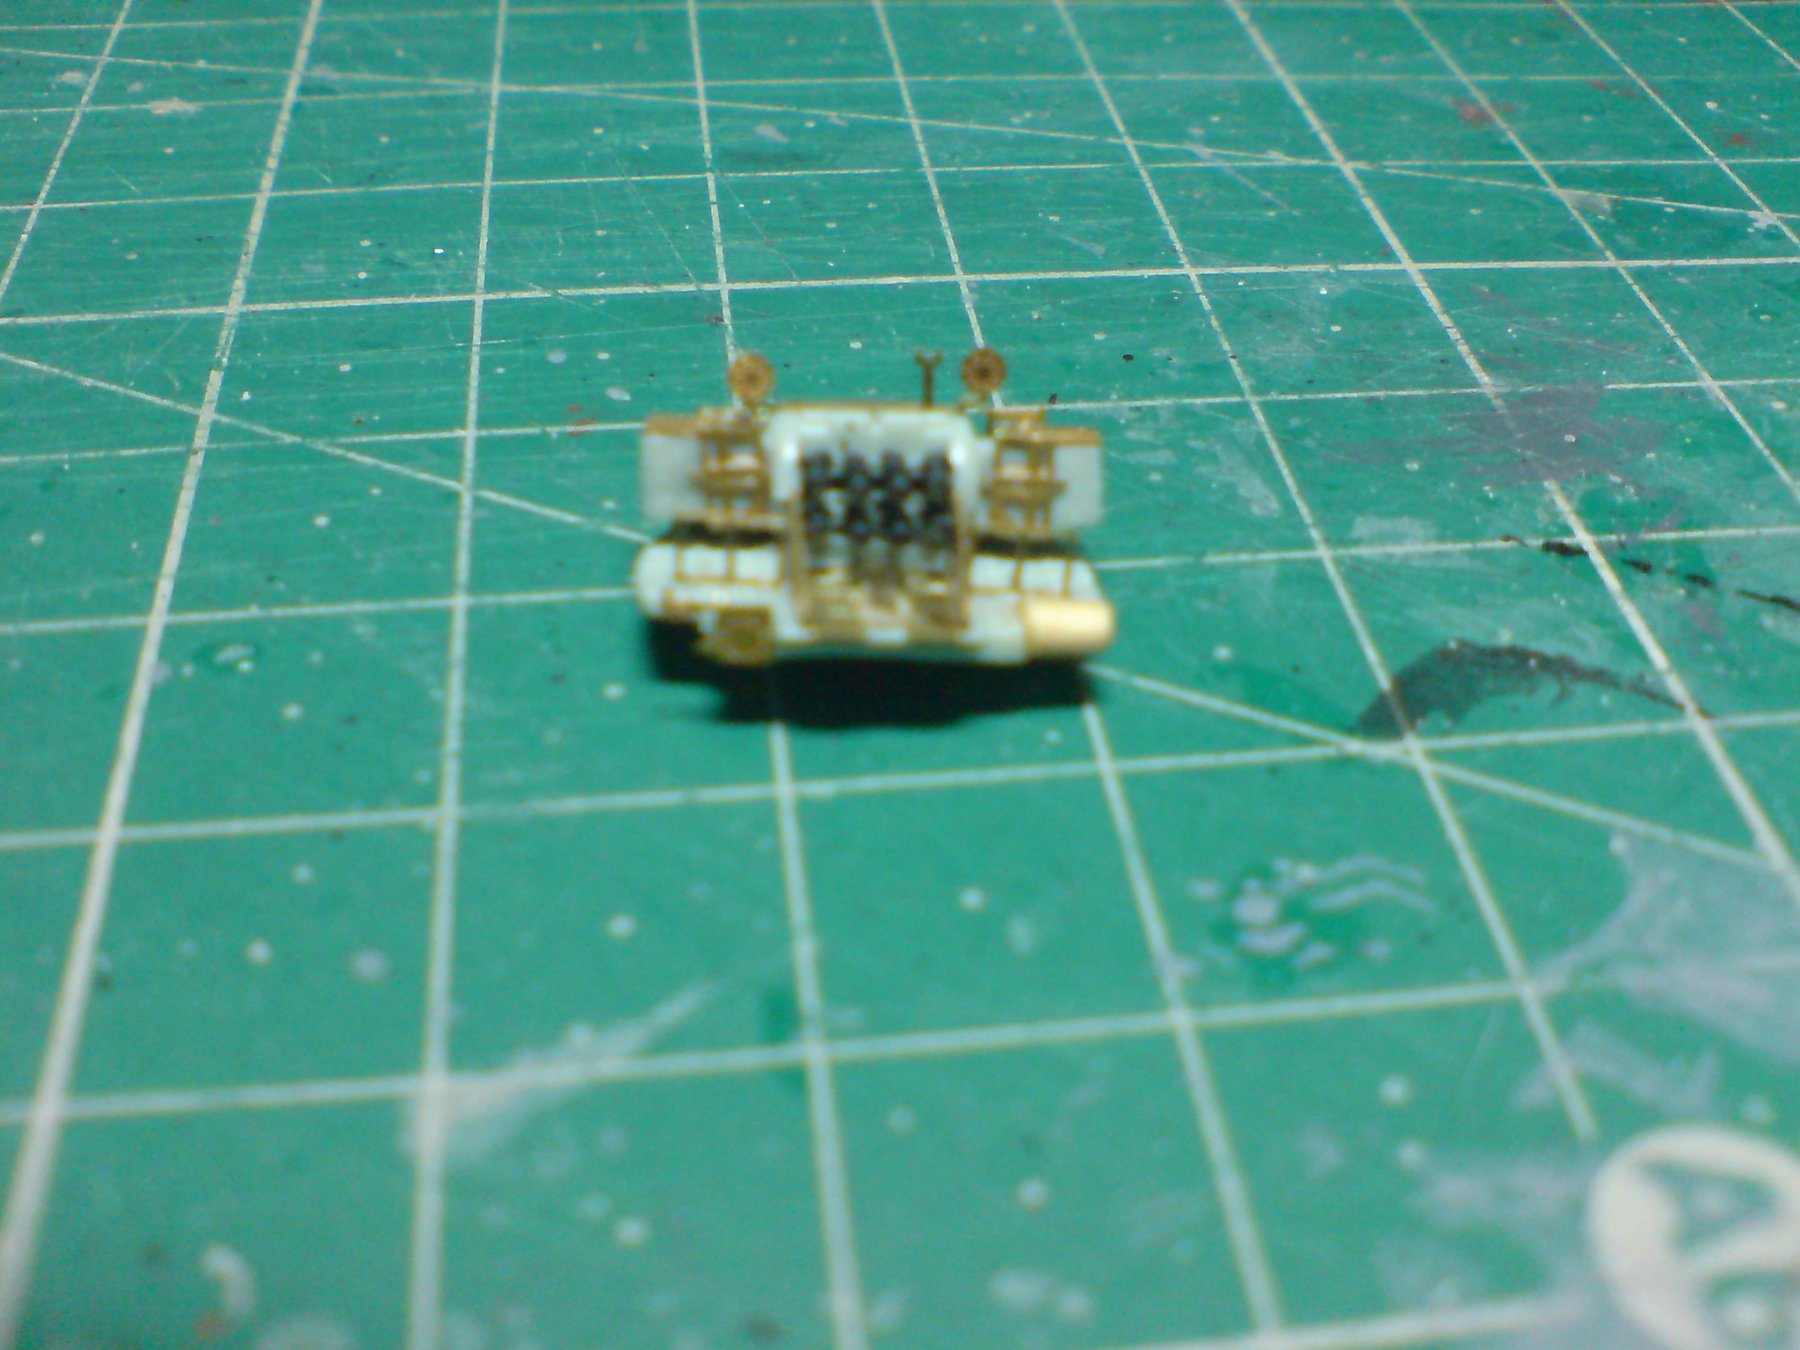
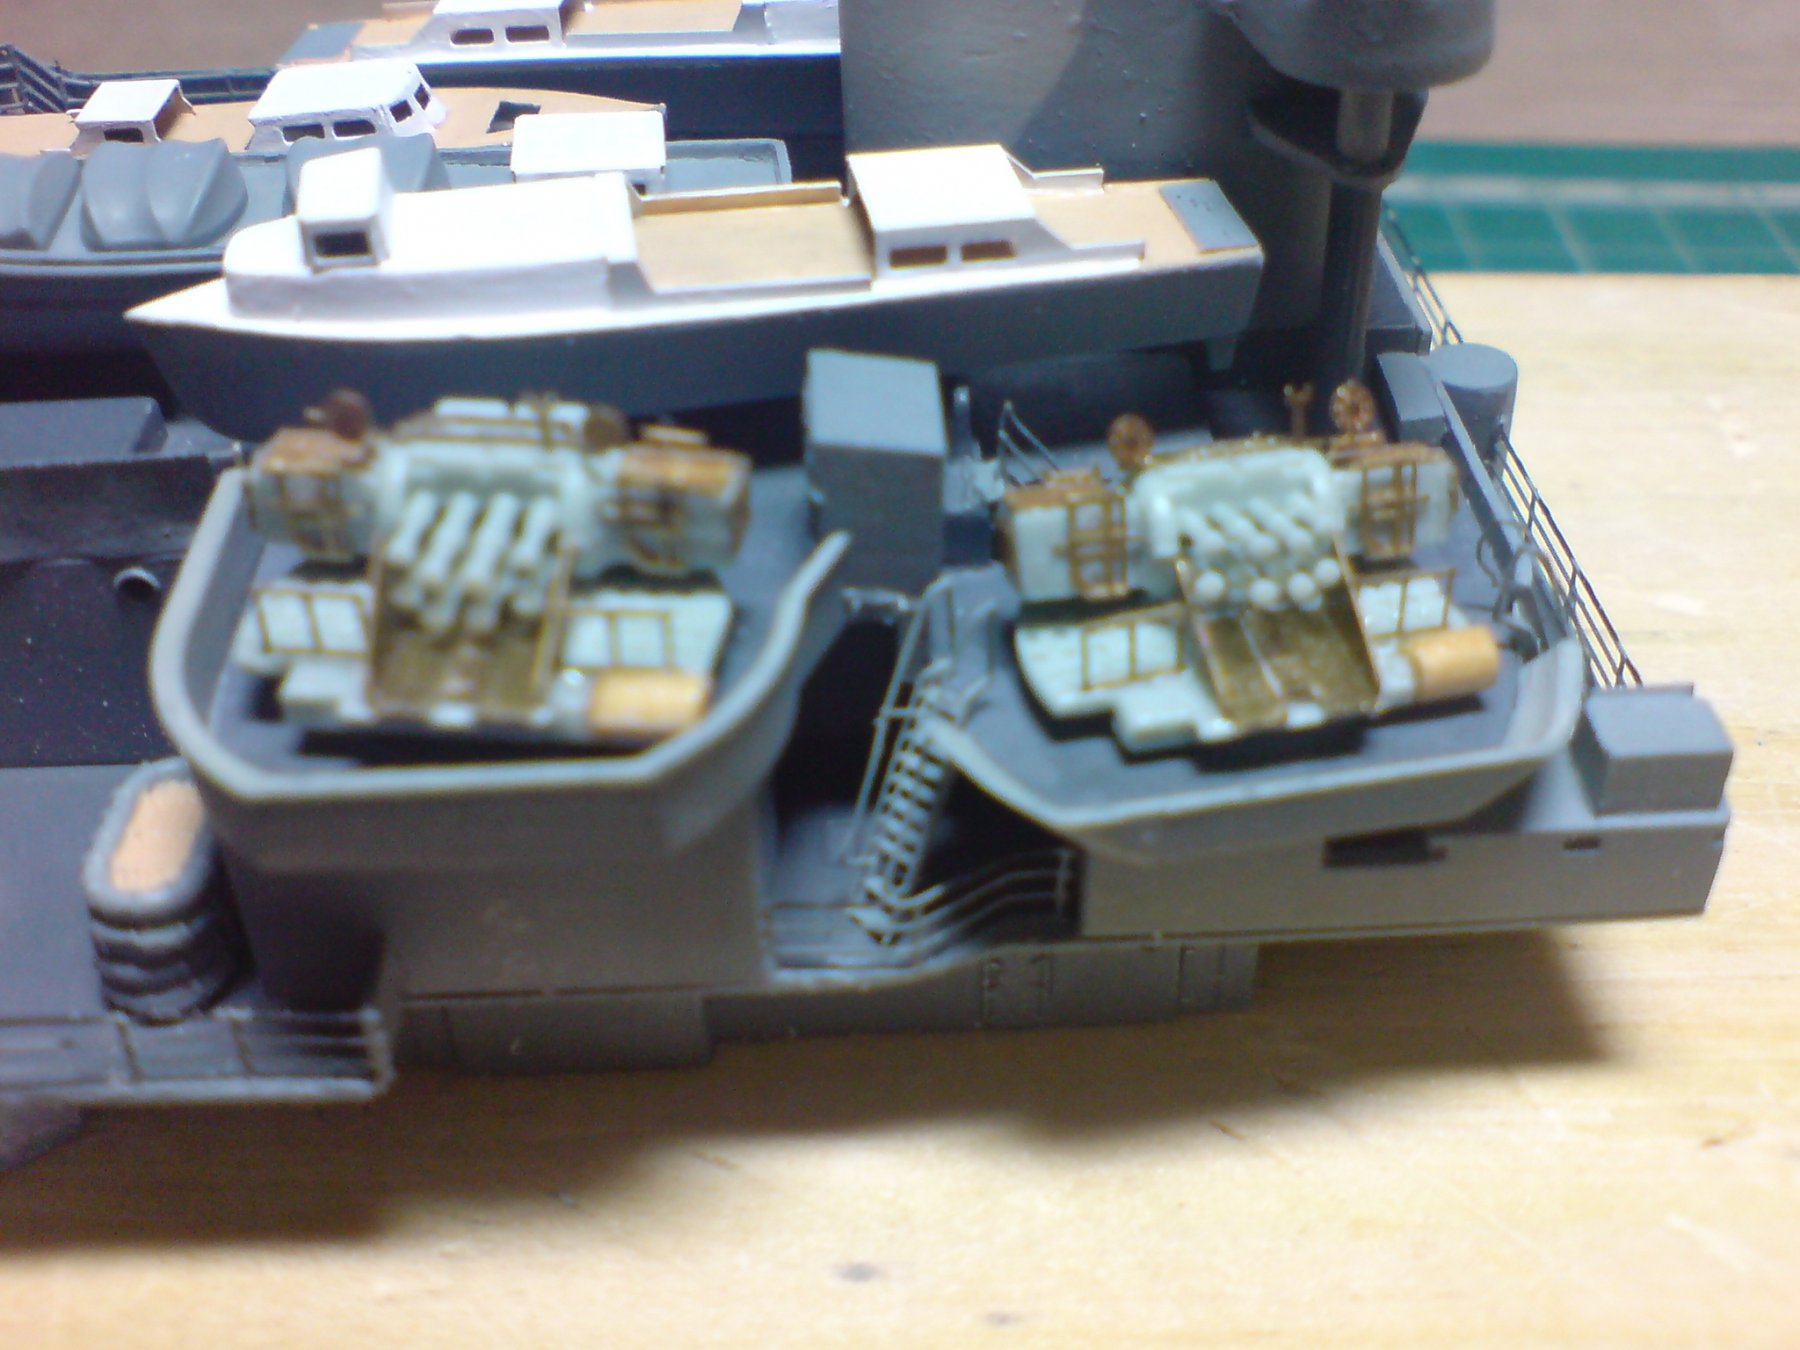
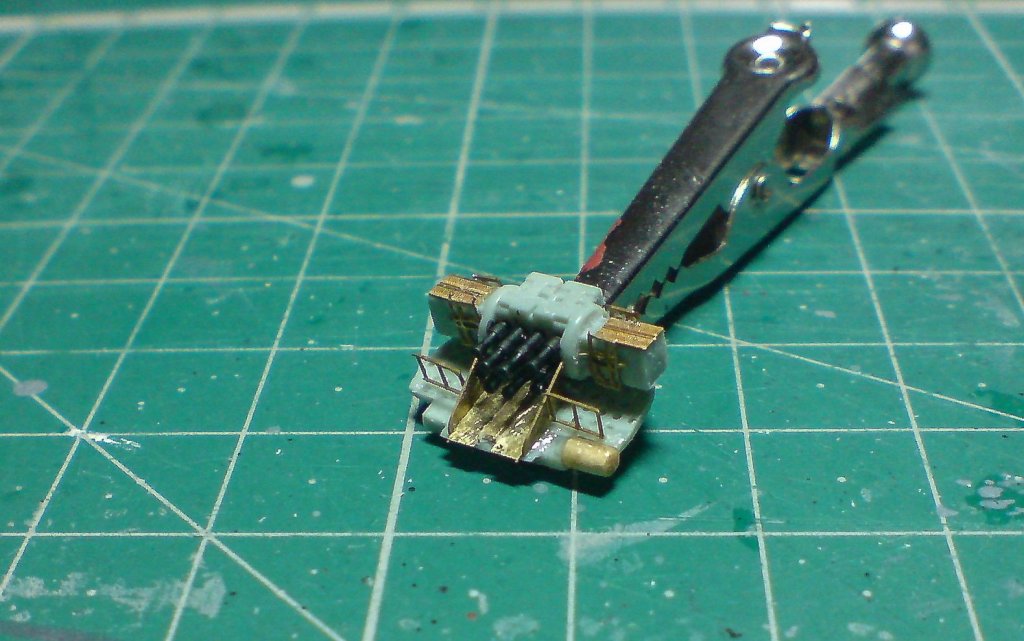
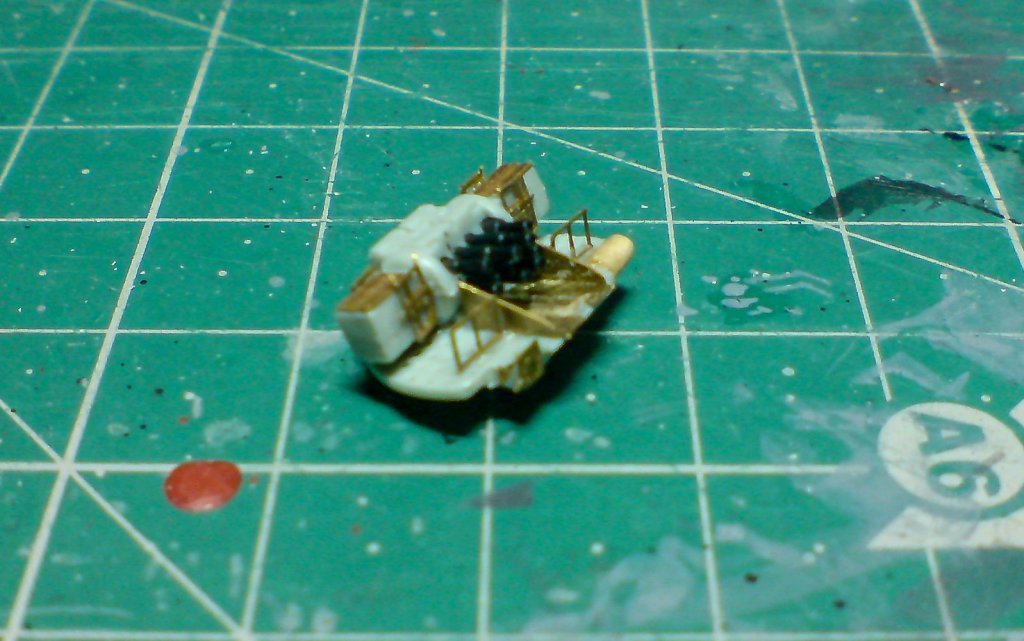
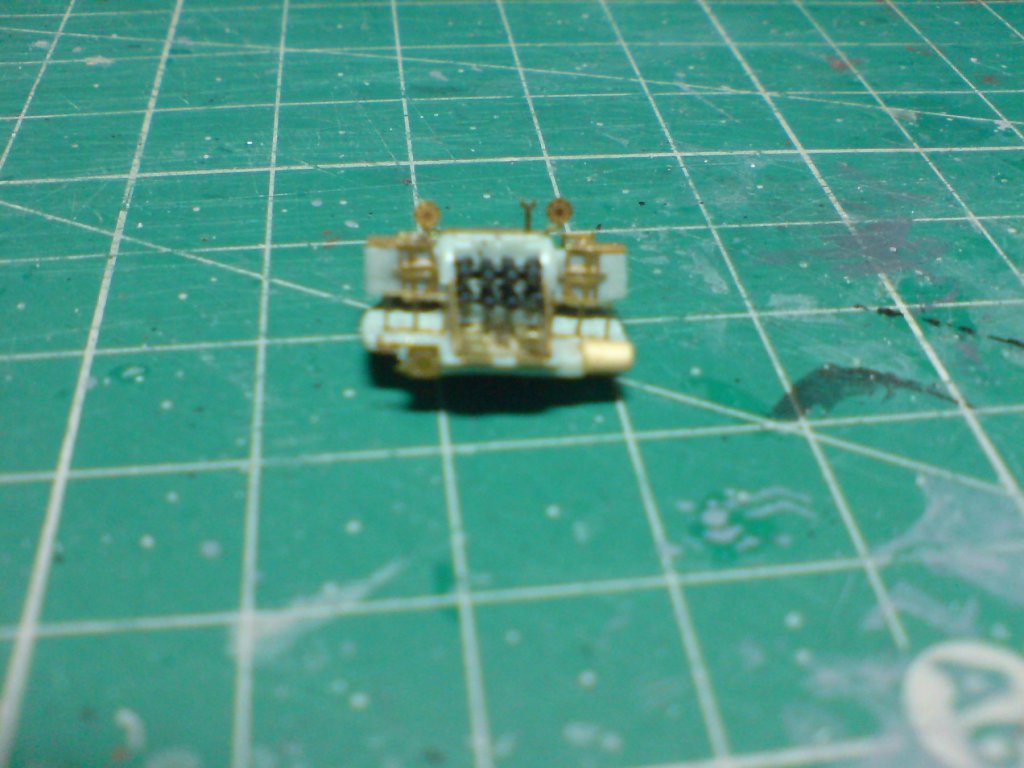
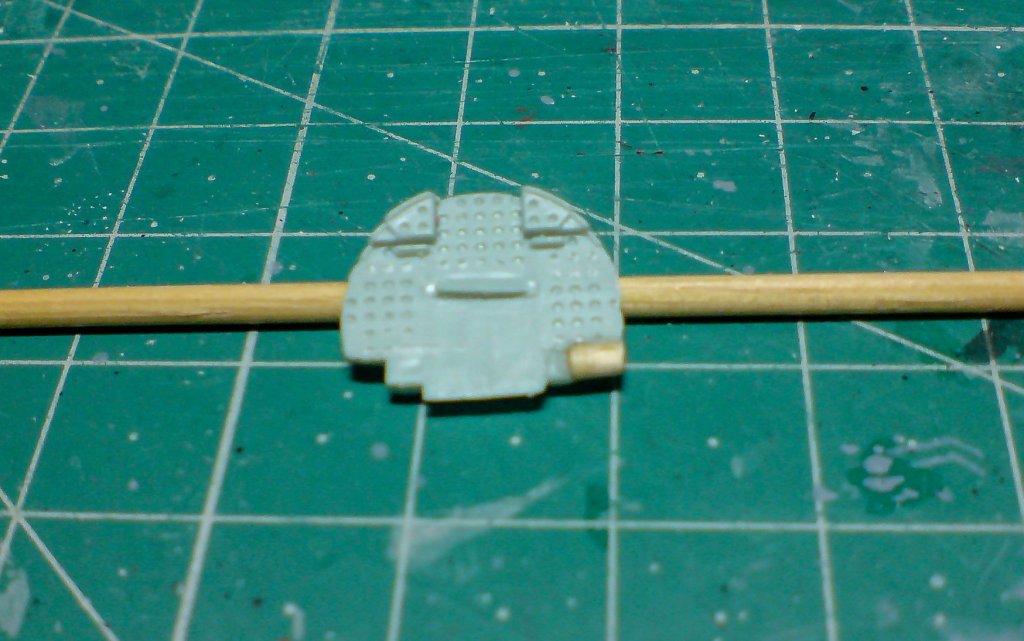
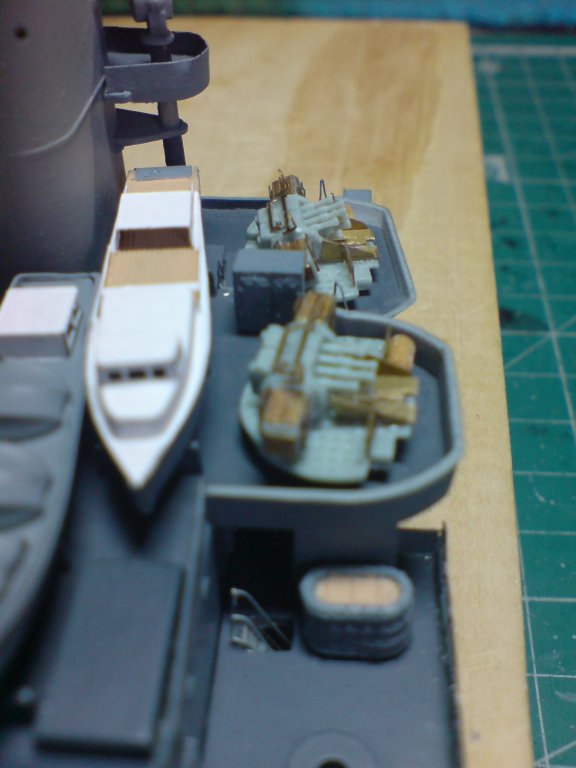
Nearly there - Next was to glue dow the barrel unit to the base and in doing choose what elevation I wanted, then after drying I fitted the final small pe items including the sights unit that was fitted ontop of the barrel unit, and a front sight unit that was glued to the edge front of the base. So apart from painting, this is the completed pom pom unit - and last one I needed to build. Hope its been of interest and helpful in building these interesting assemblies. OC.

-
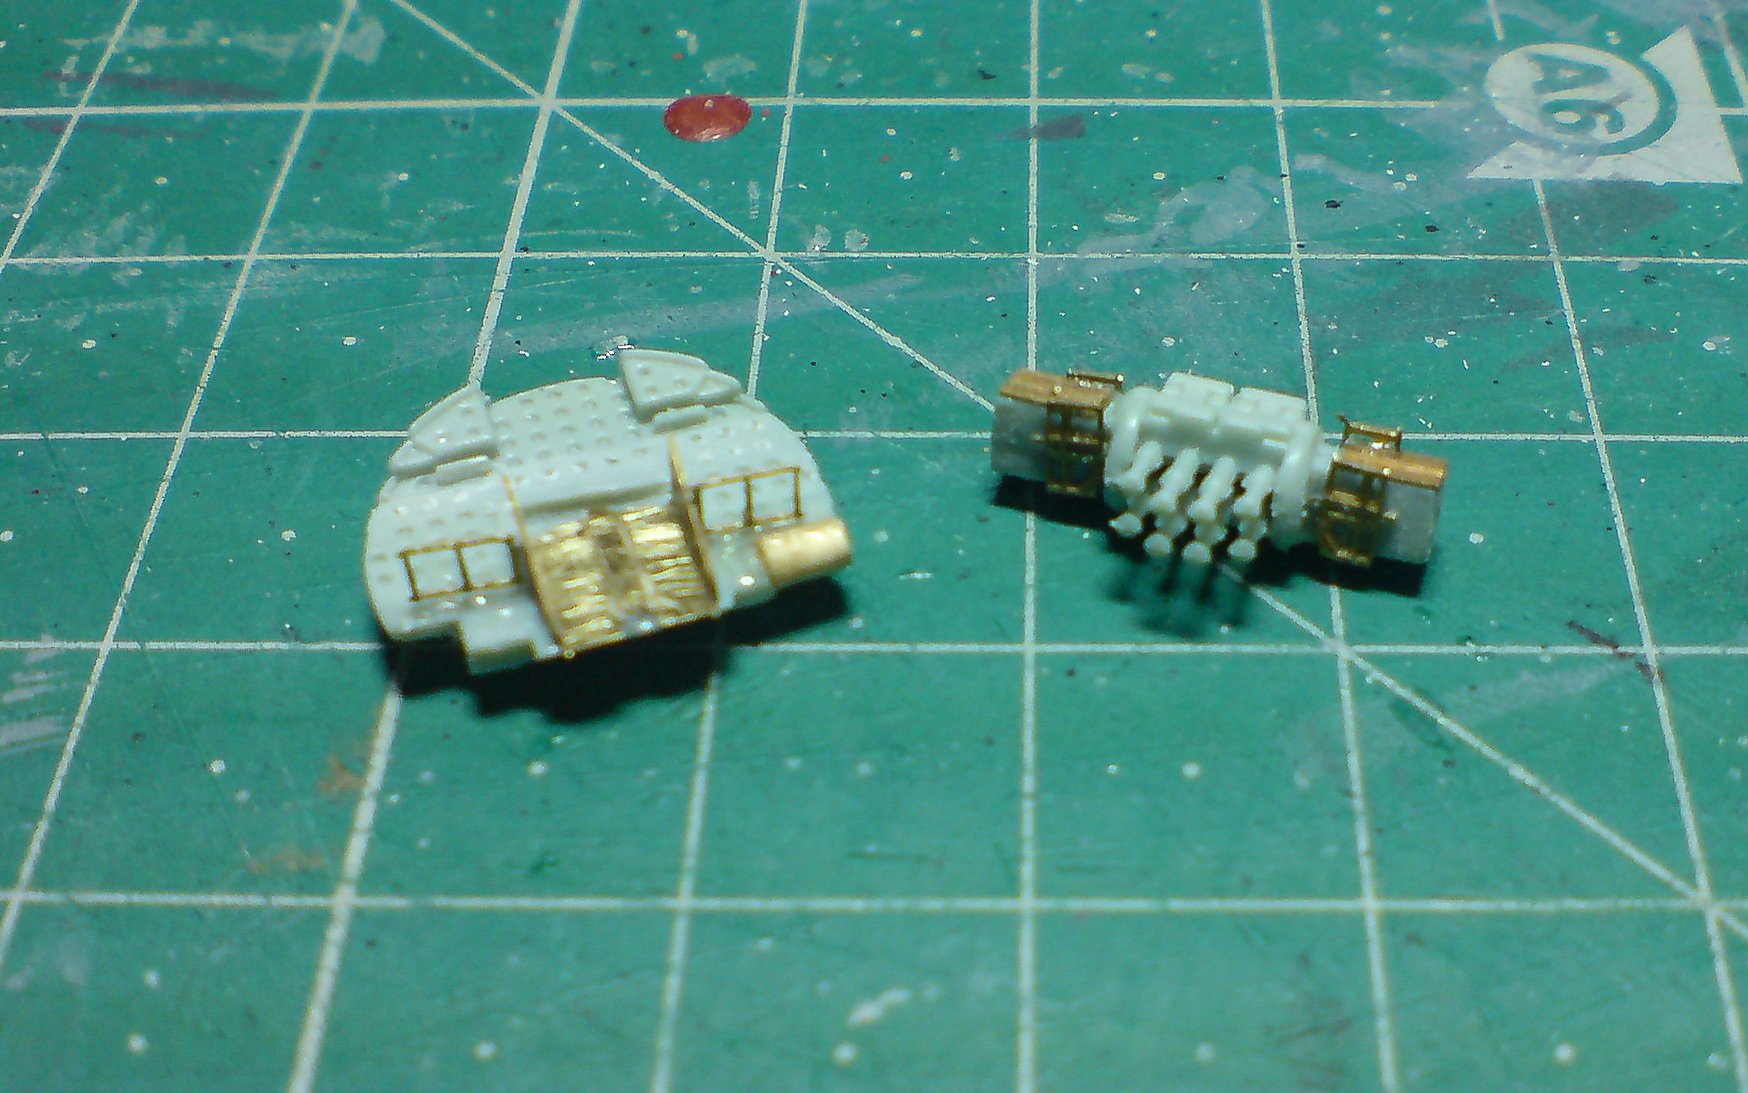
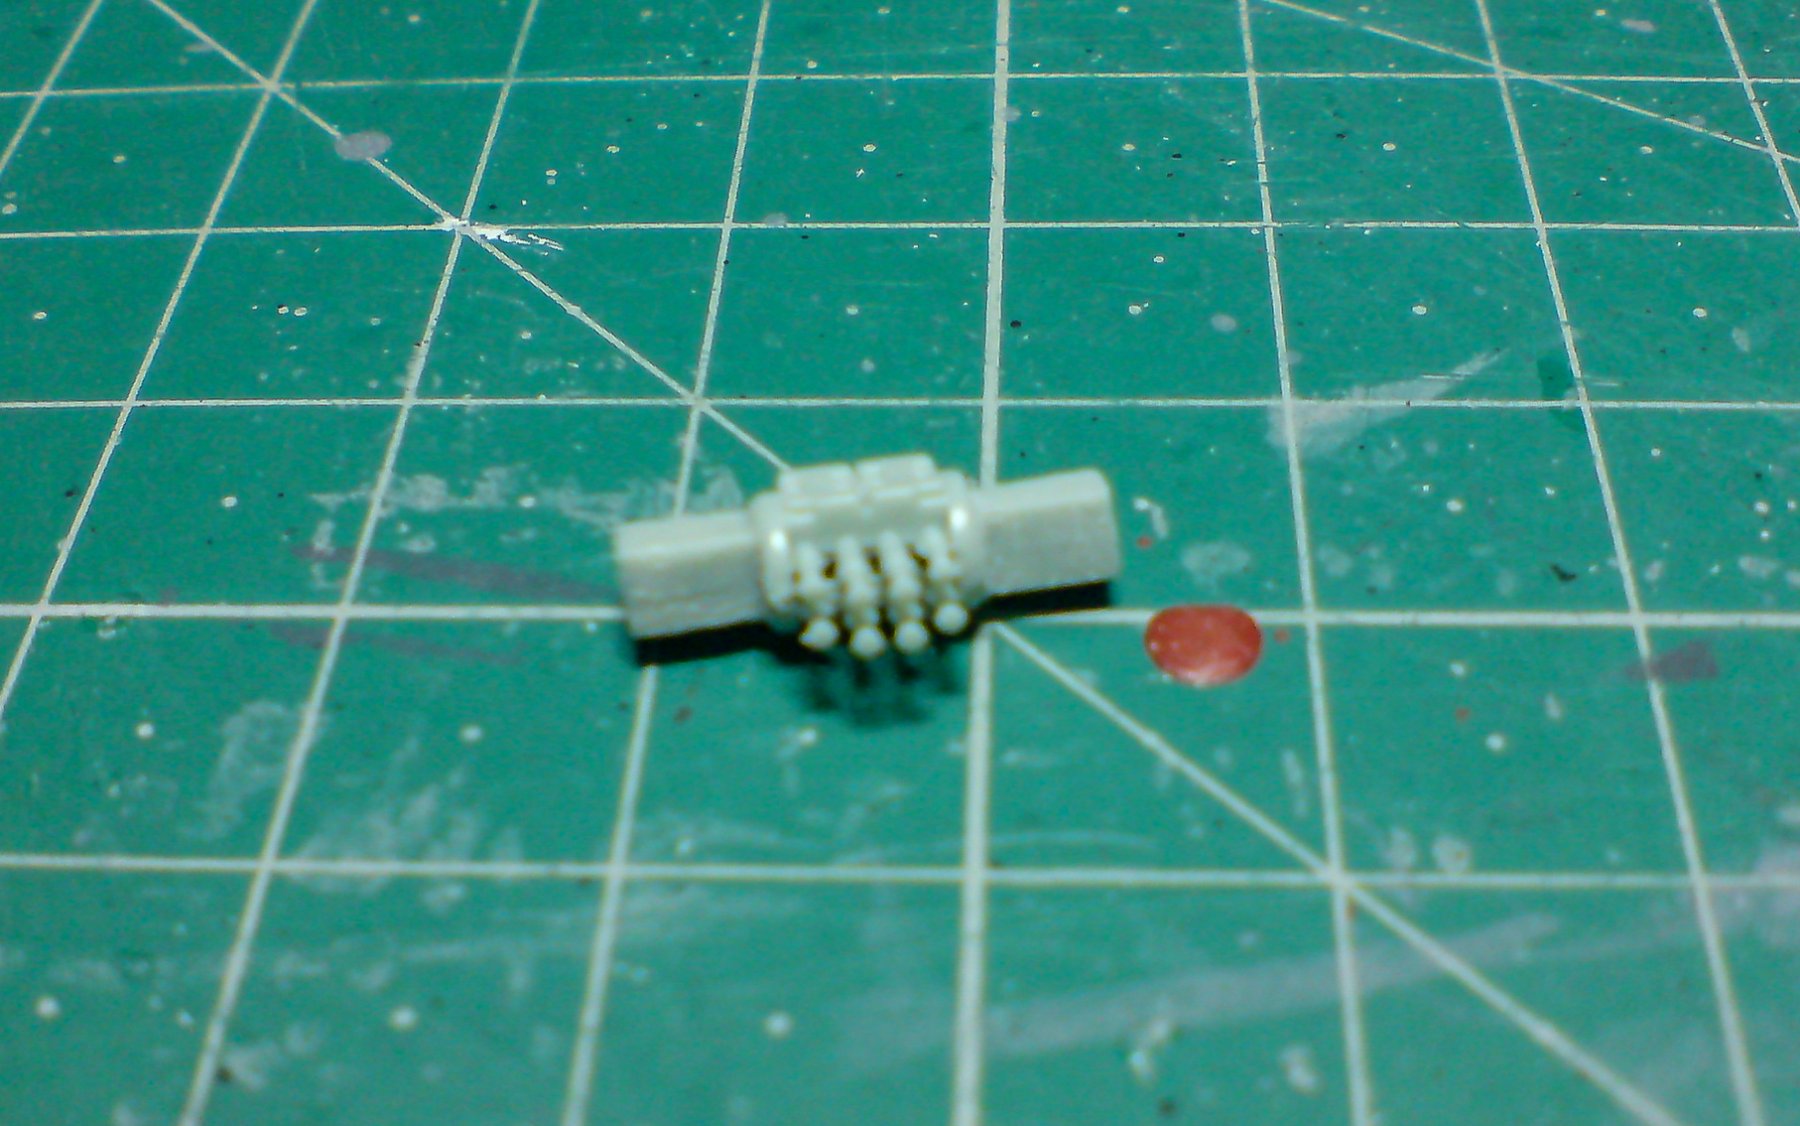
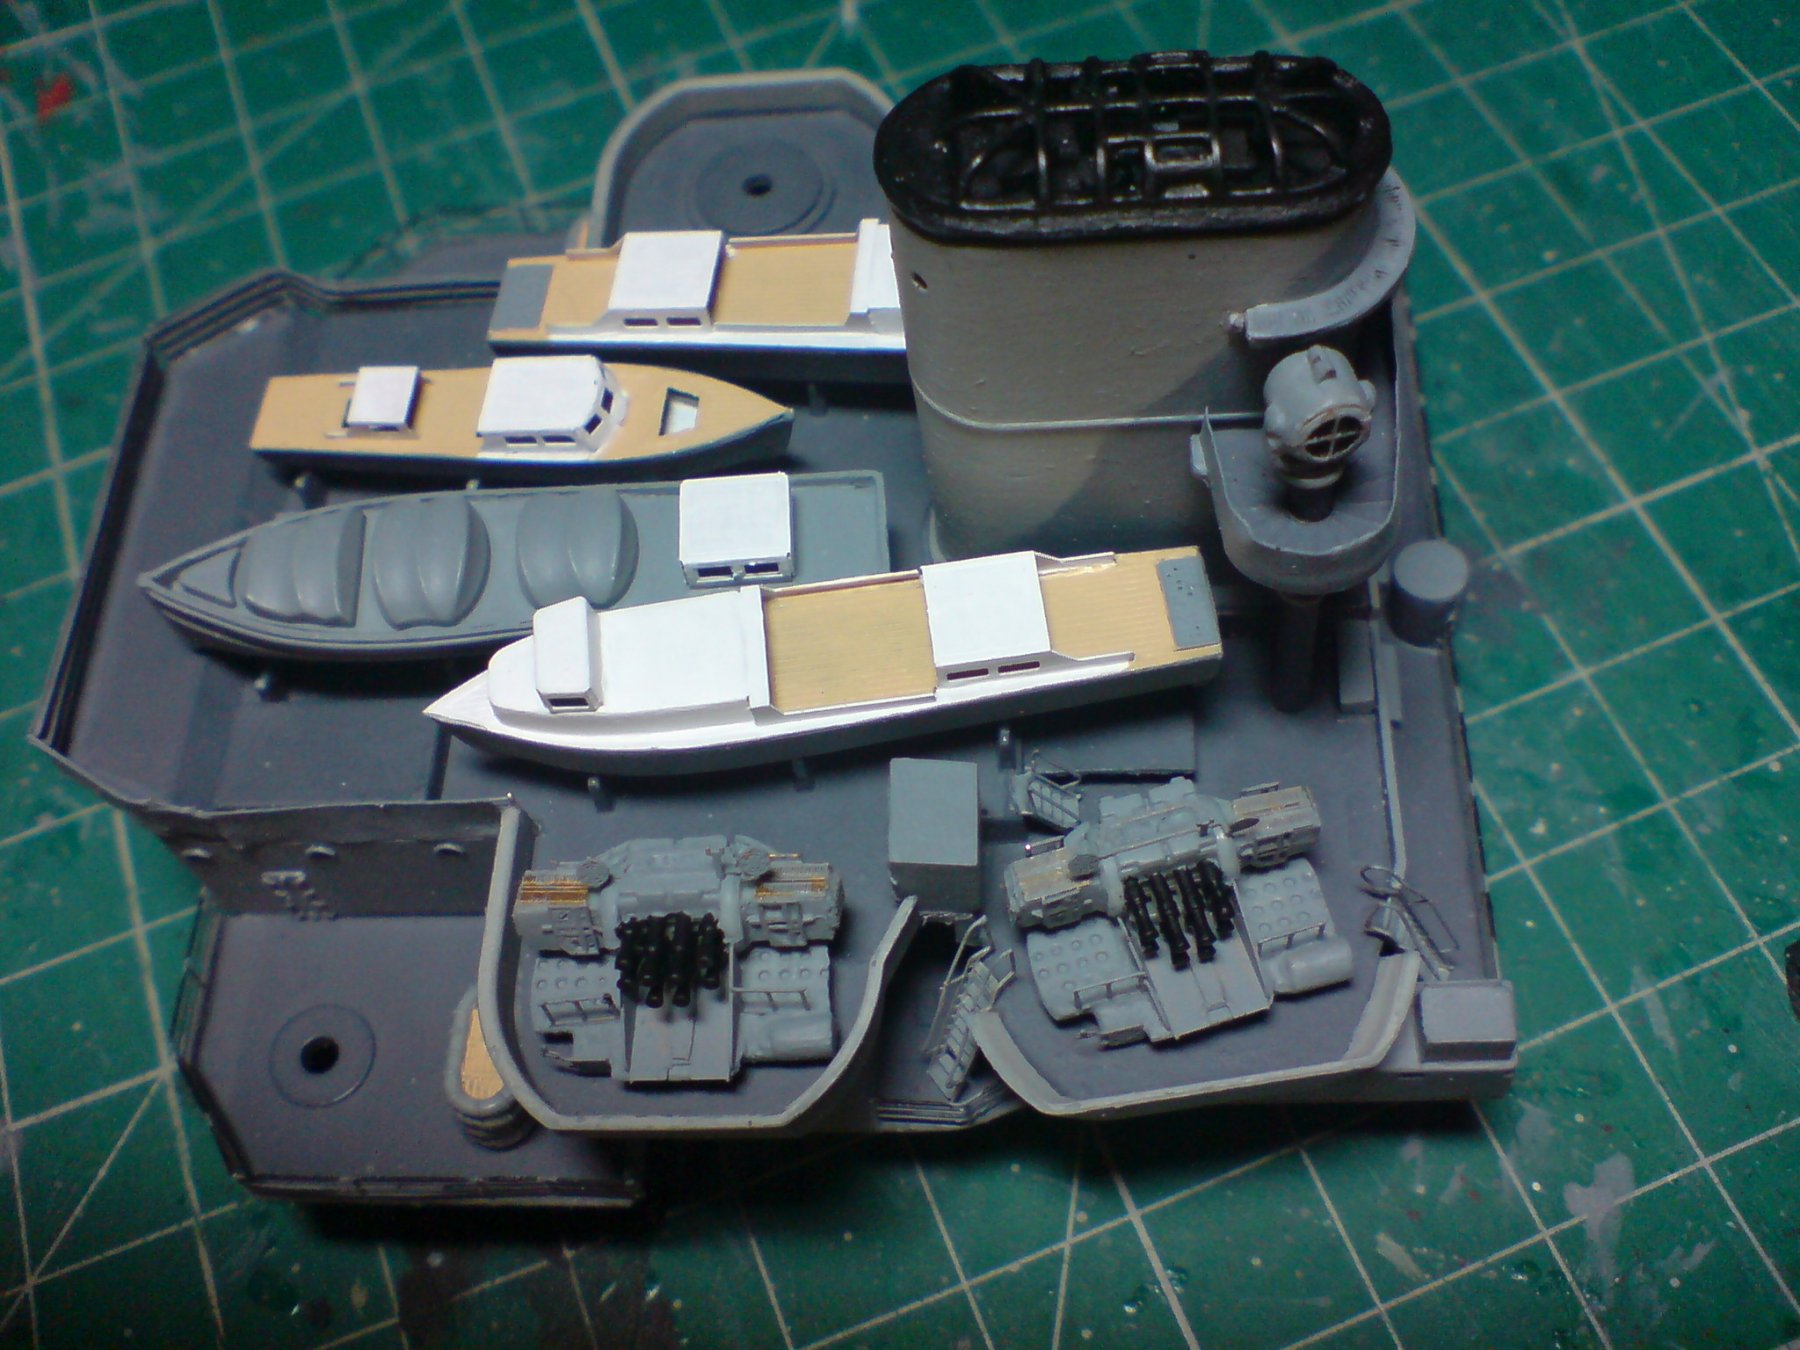
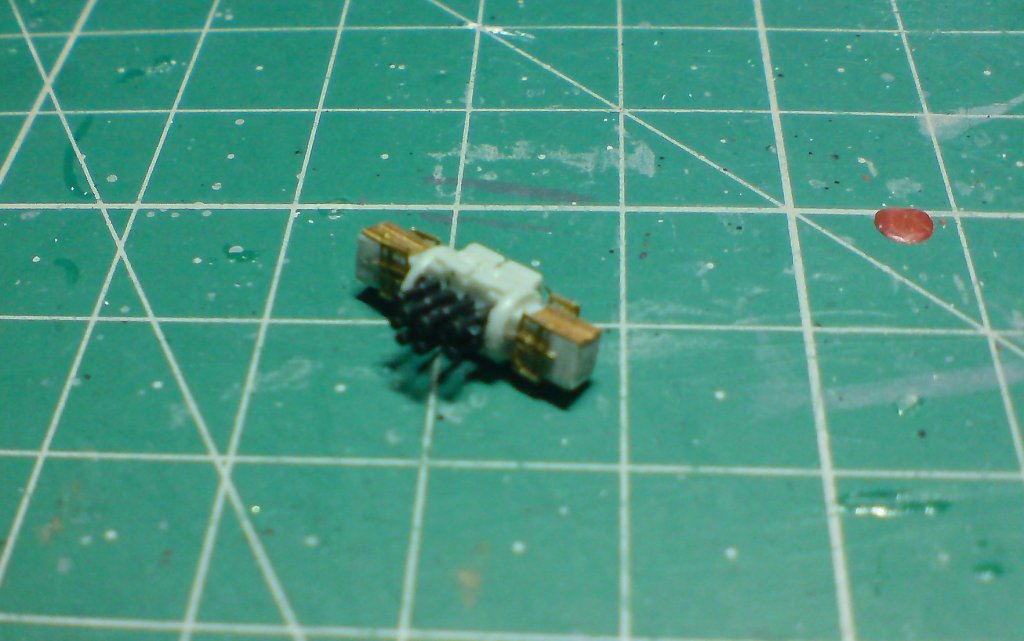
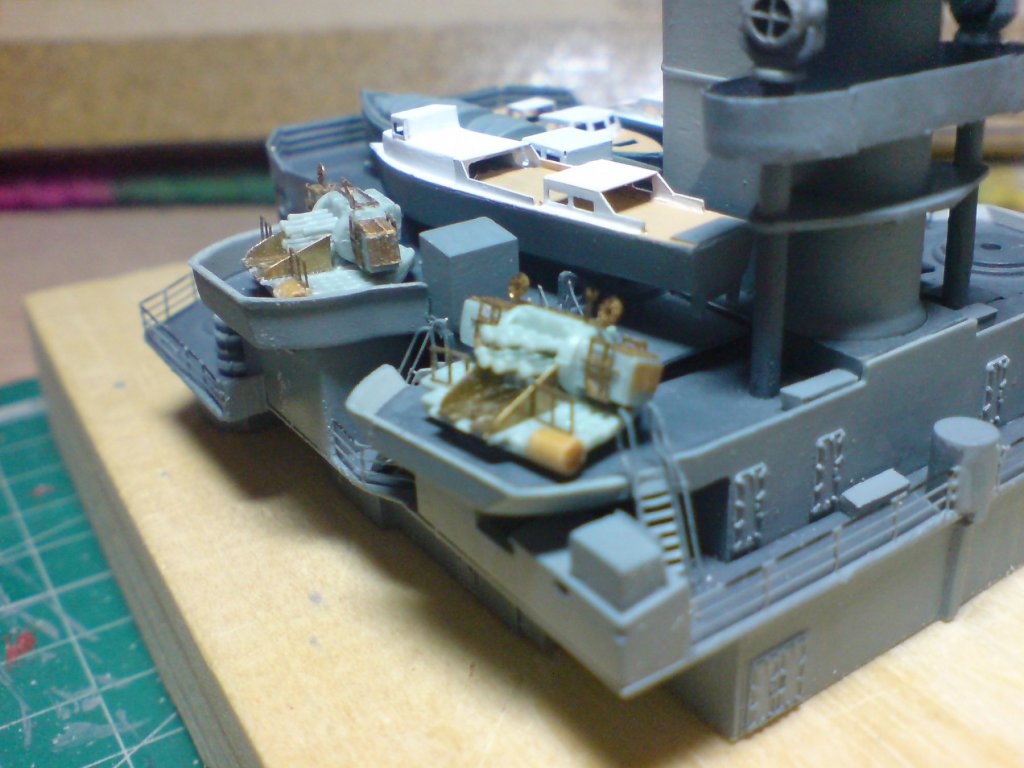
So were getting there piece by piece - next comes the barrel units that were fiited with the left and right ammo unit frames, these were cut from the pe fret then bent into a U shape bending in their wings, these were then placed over the ammo boxes (but a little trick was to hold the units upside down so the frames were placed with gravity keeping them in place) then some ca was applied over them - this found its way behind the frames by capillary action, this was repeated front and back and on both ammo boxes, then dry heated. Next off was to cut away the top details that simulate the ammo, this was attached to other parts of the frames on the pe fret, then it was just a case of applying some ca and placing the two ammo plates ontop of the ammo boxes. These pics show the completed barrel unit and the base. OC.
-
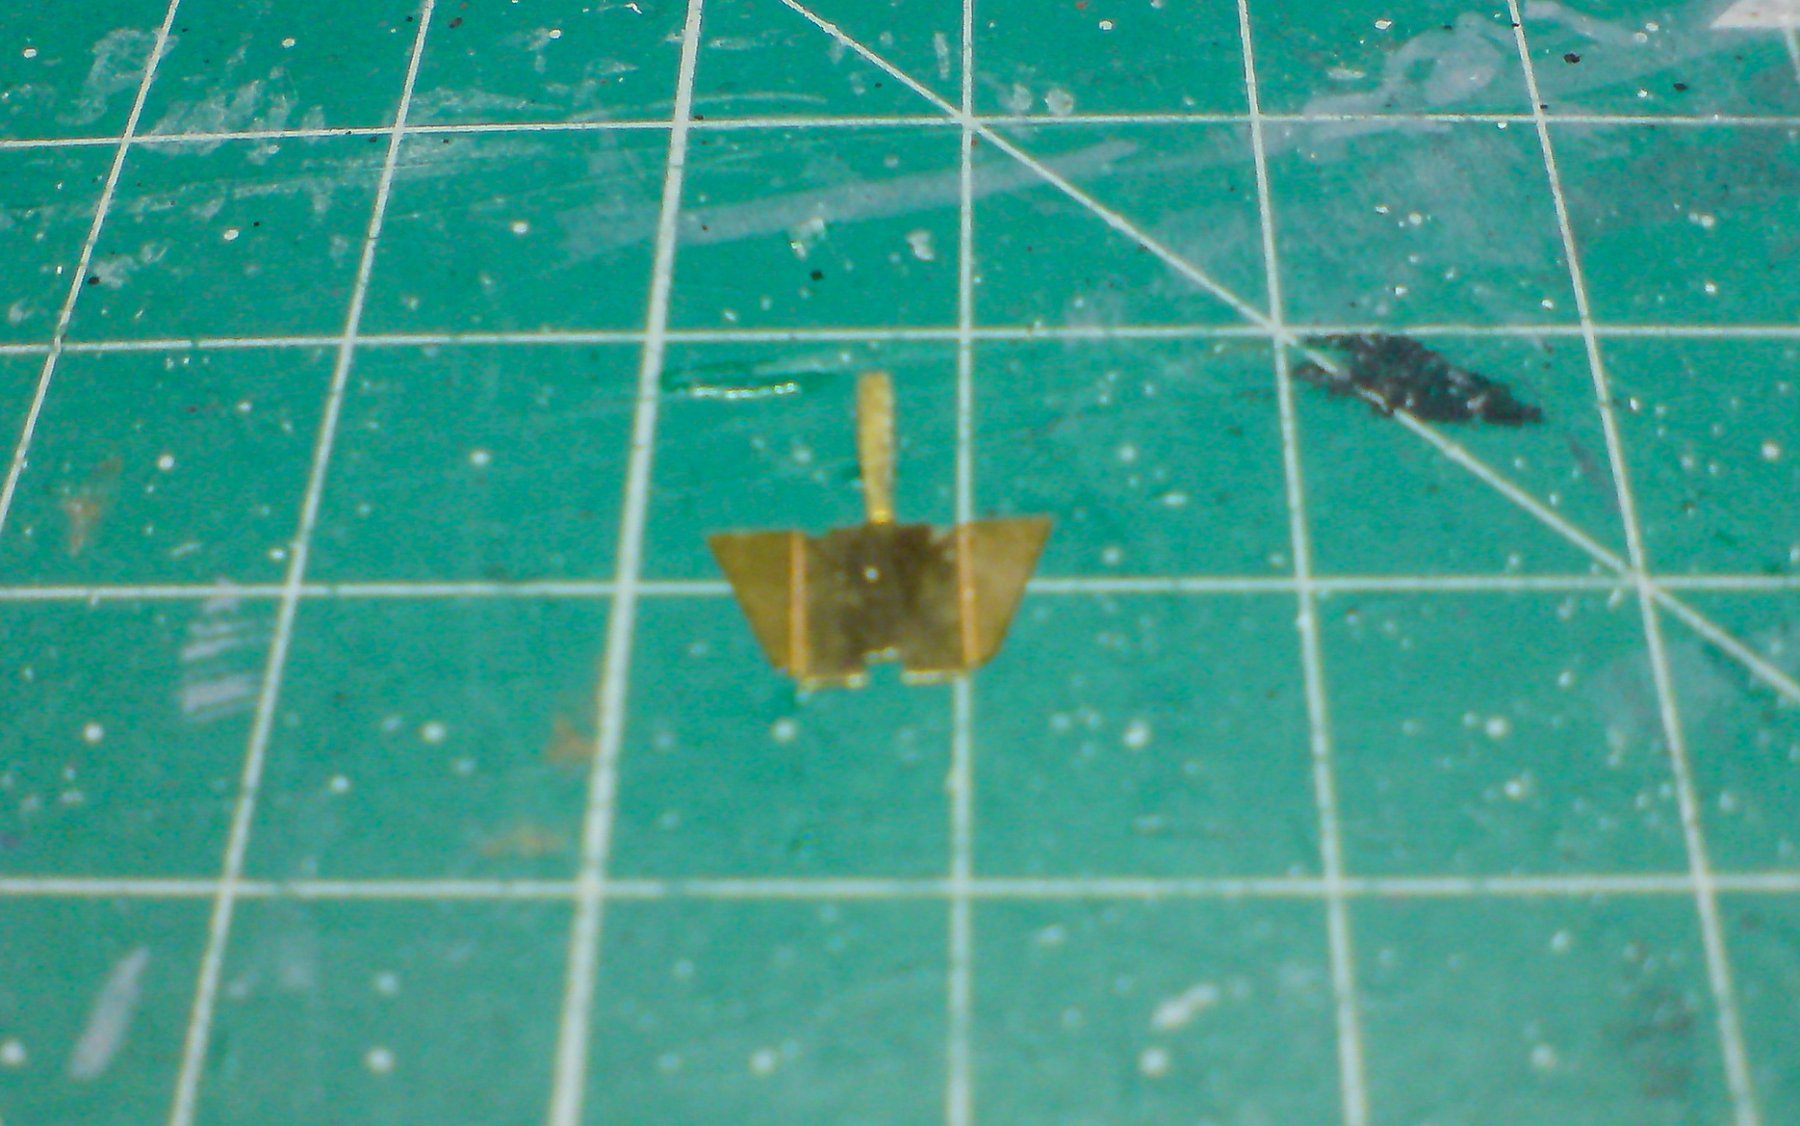
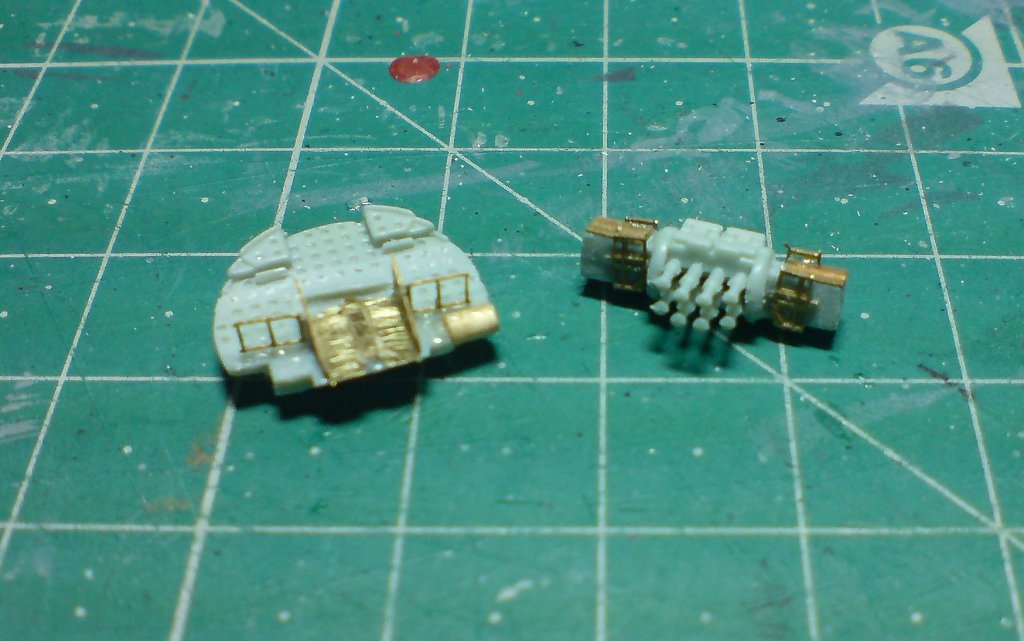
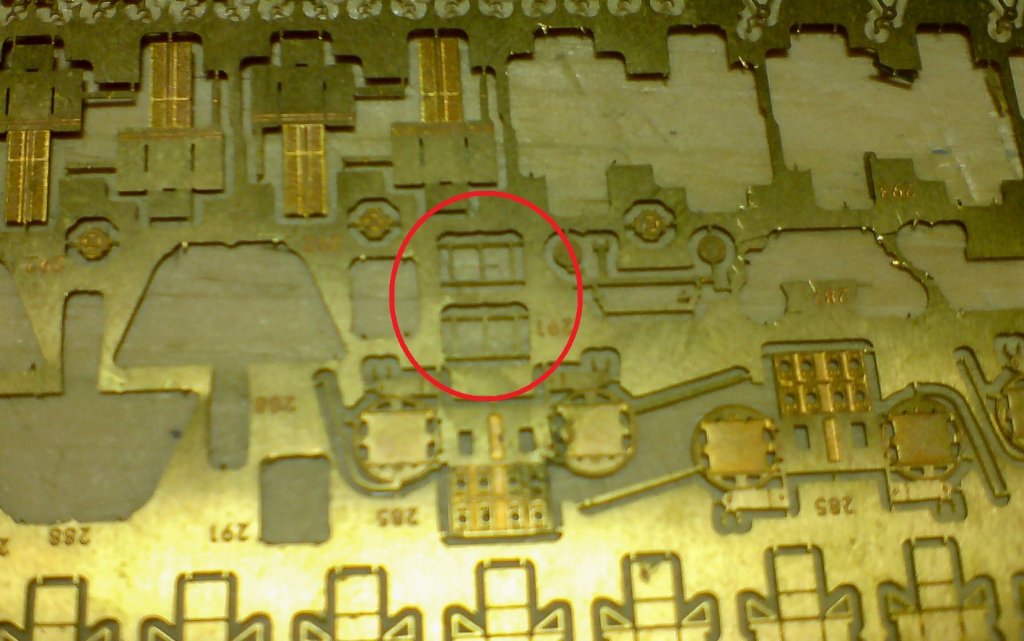
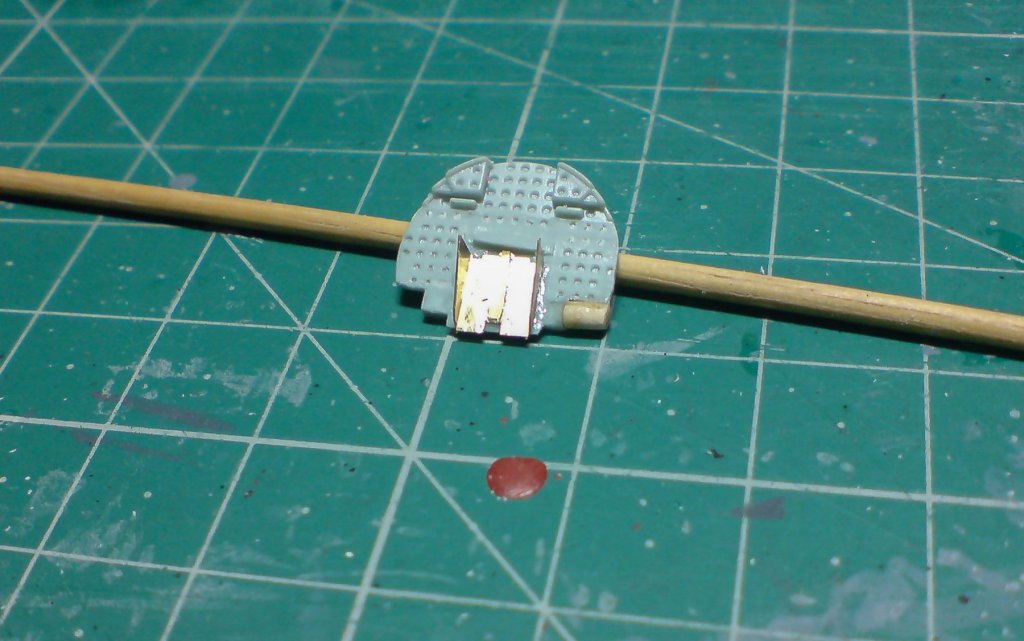
Next was to cut away the two hand rails that go on the front of the base - again pe units, these were cut using my sharp scalpel blade, with a small amount of trimming the pips that come away with it, to aid fitting in place - I scored a slight channel in the base (only a scalpel blade width) then I dribbled a small amount of ca into the channel using a tooth pic size dowel thats been pointed, and used my scalpel to place the rails carefully nudging them into correct alignement. Pics show the pe fret with the rails highlighted inside the red circle, and me cutting them away with my scalpel, then showing them placed on the base. OC.

-
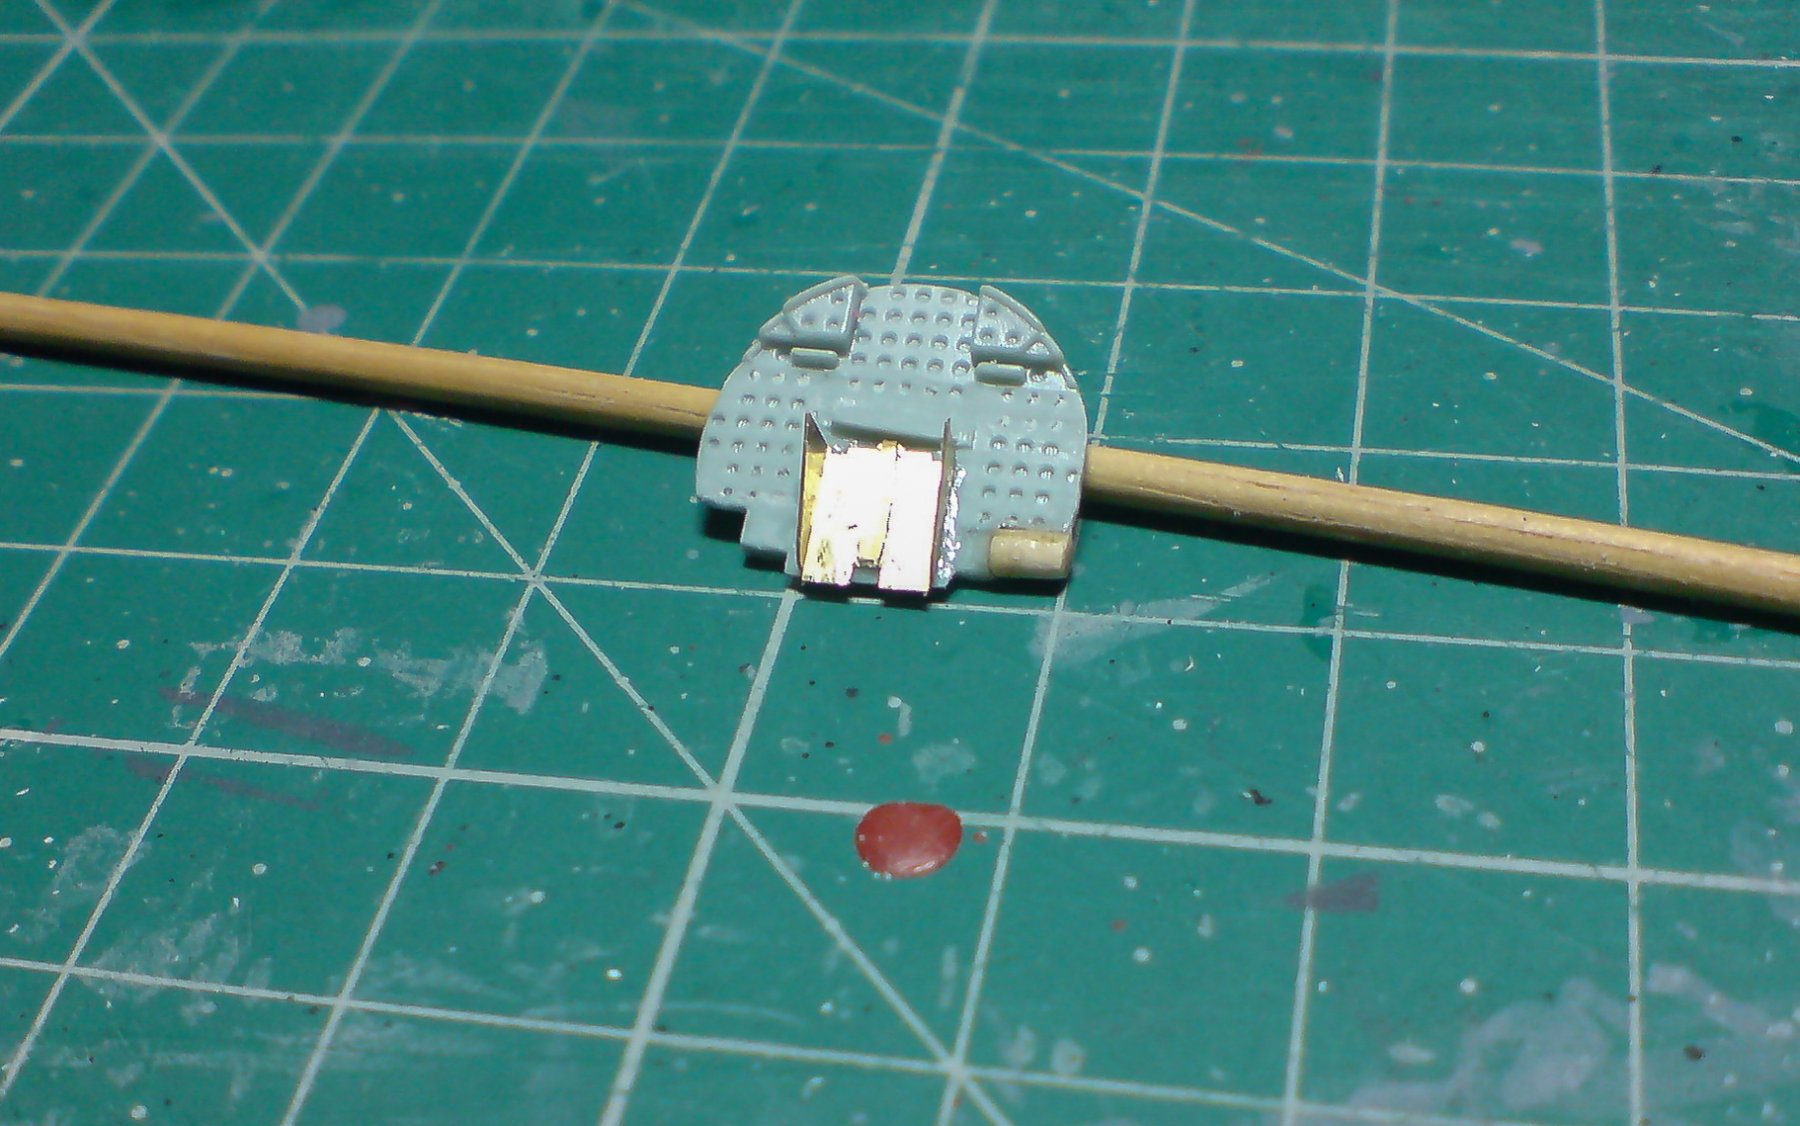
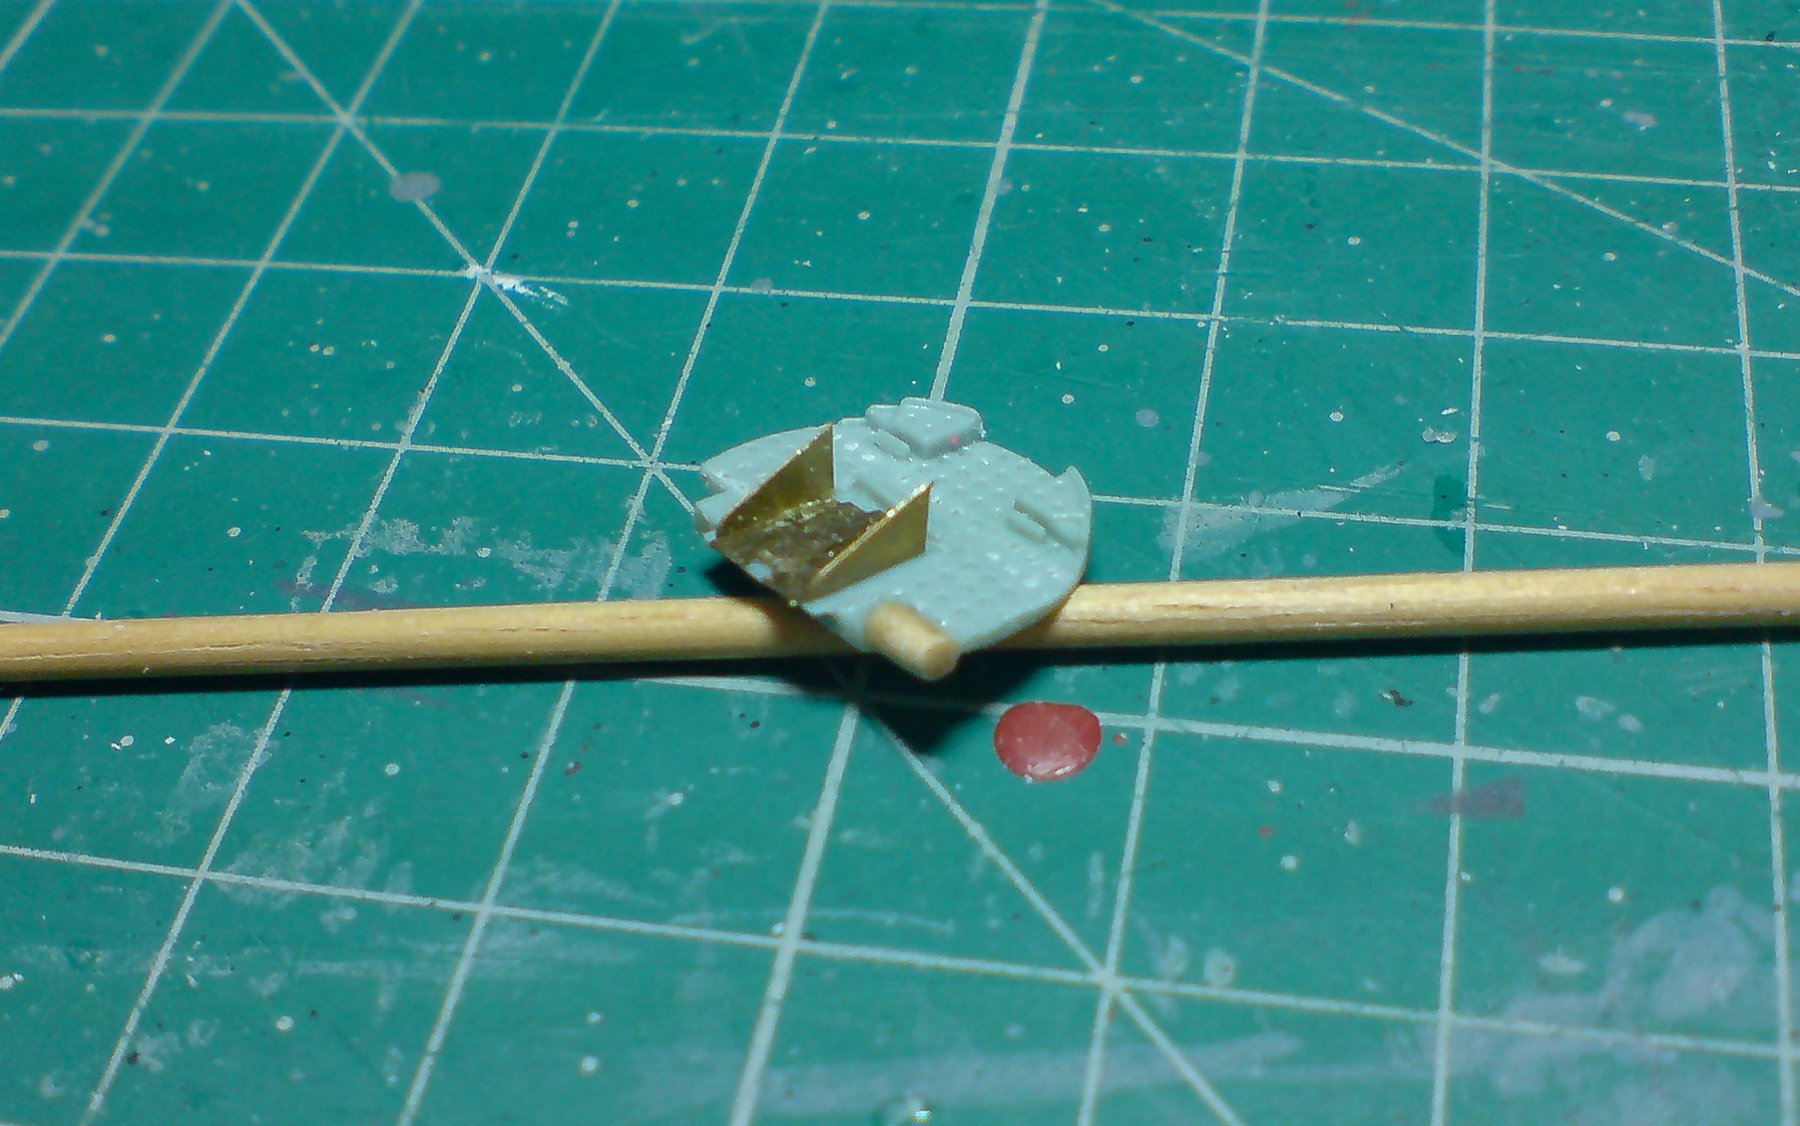
Then I turned the base over and set about removing some of the framework by filing it (the idea is to reduce the height they sit on the deck) next was to remove the pe barrel guard and clean it up slightly around the edge also filing the inside a bit to aid gluing the center strip against the body, then after drying I had to bend in both wings of the guard and glue it to the base - Pictures show this sequence starting from the flat guard. OC.


-
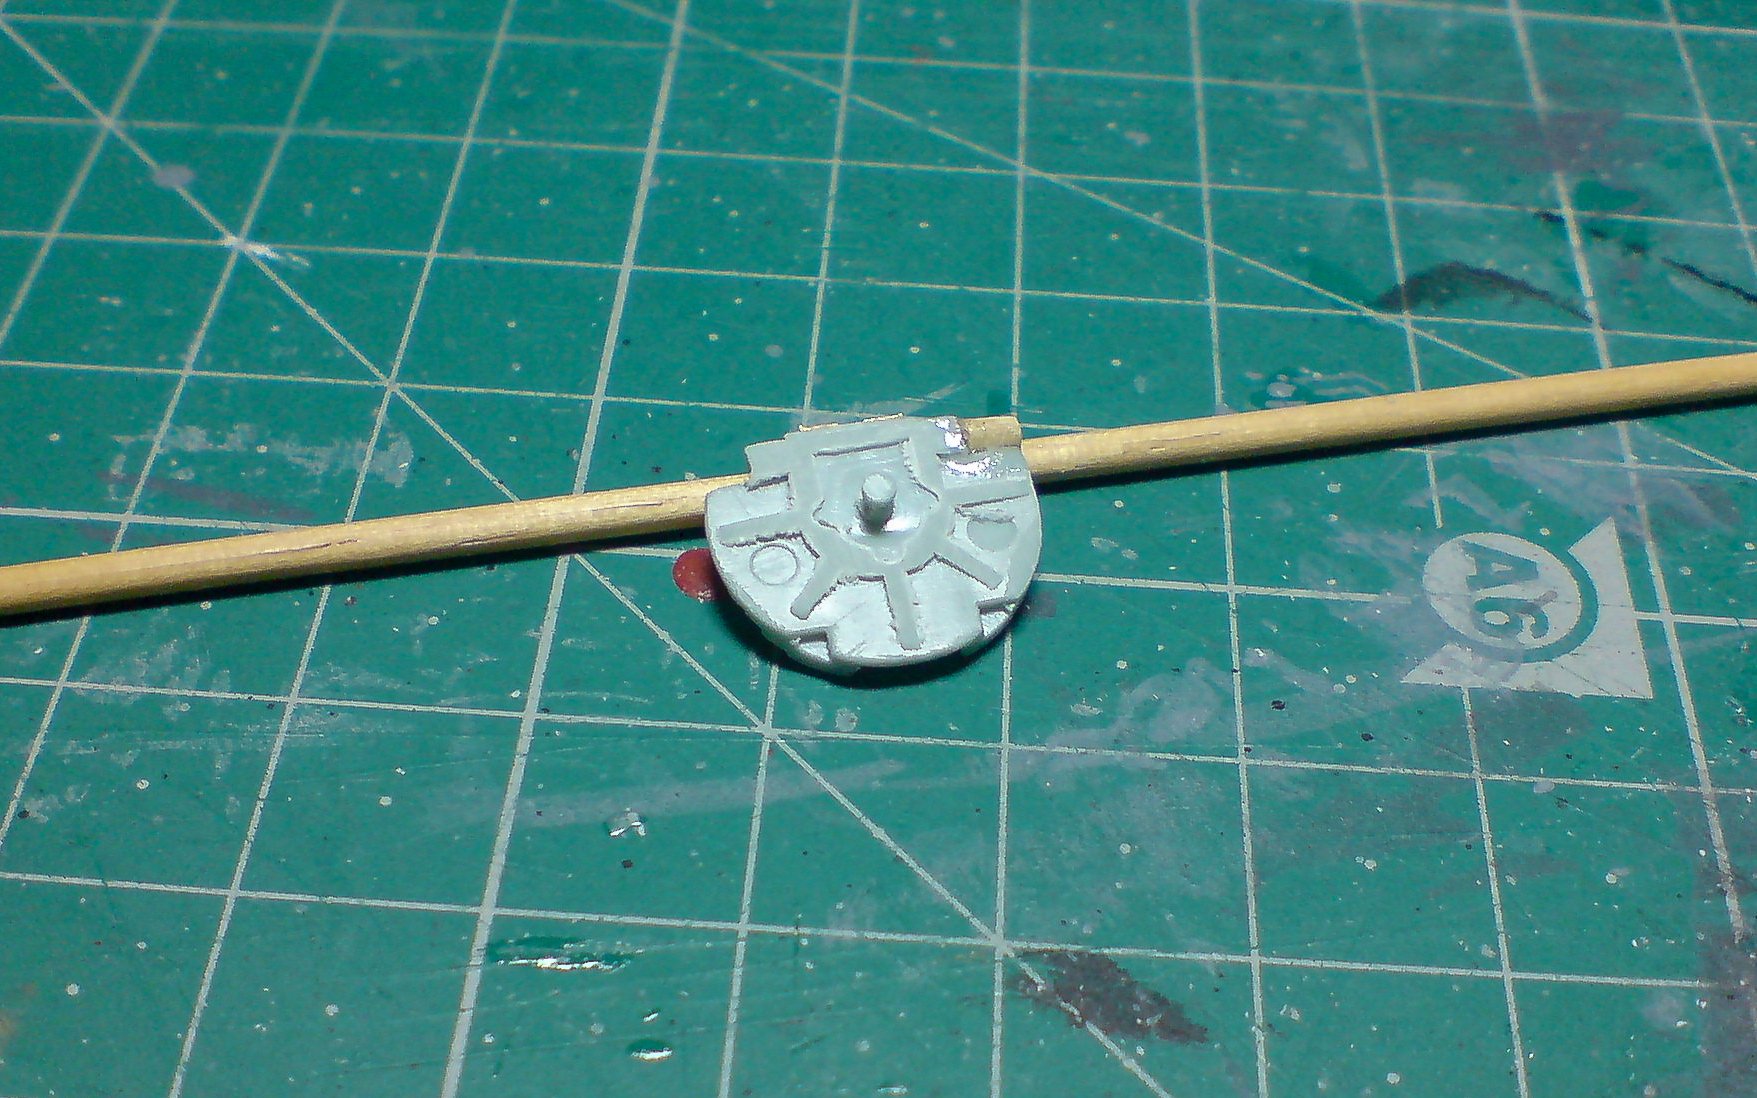
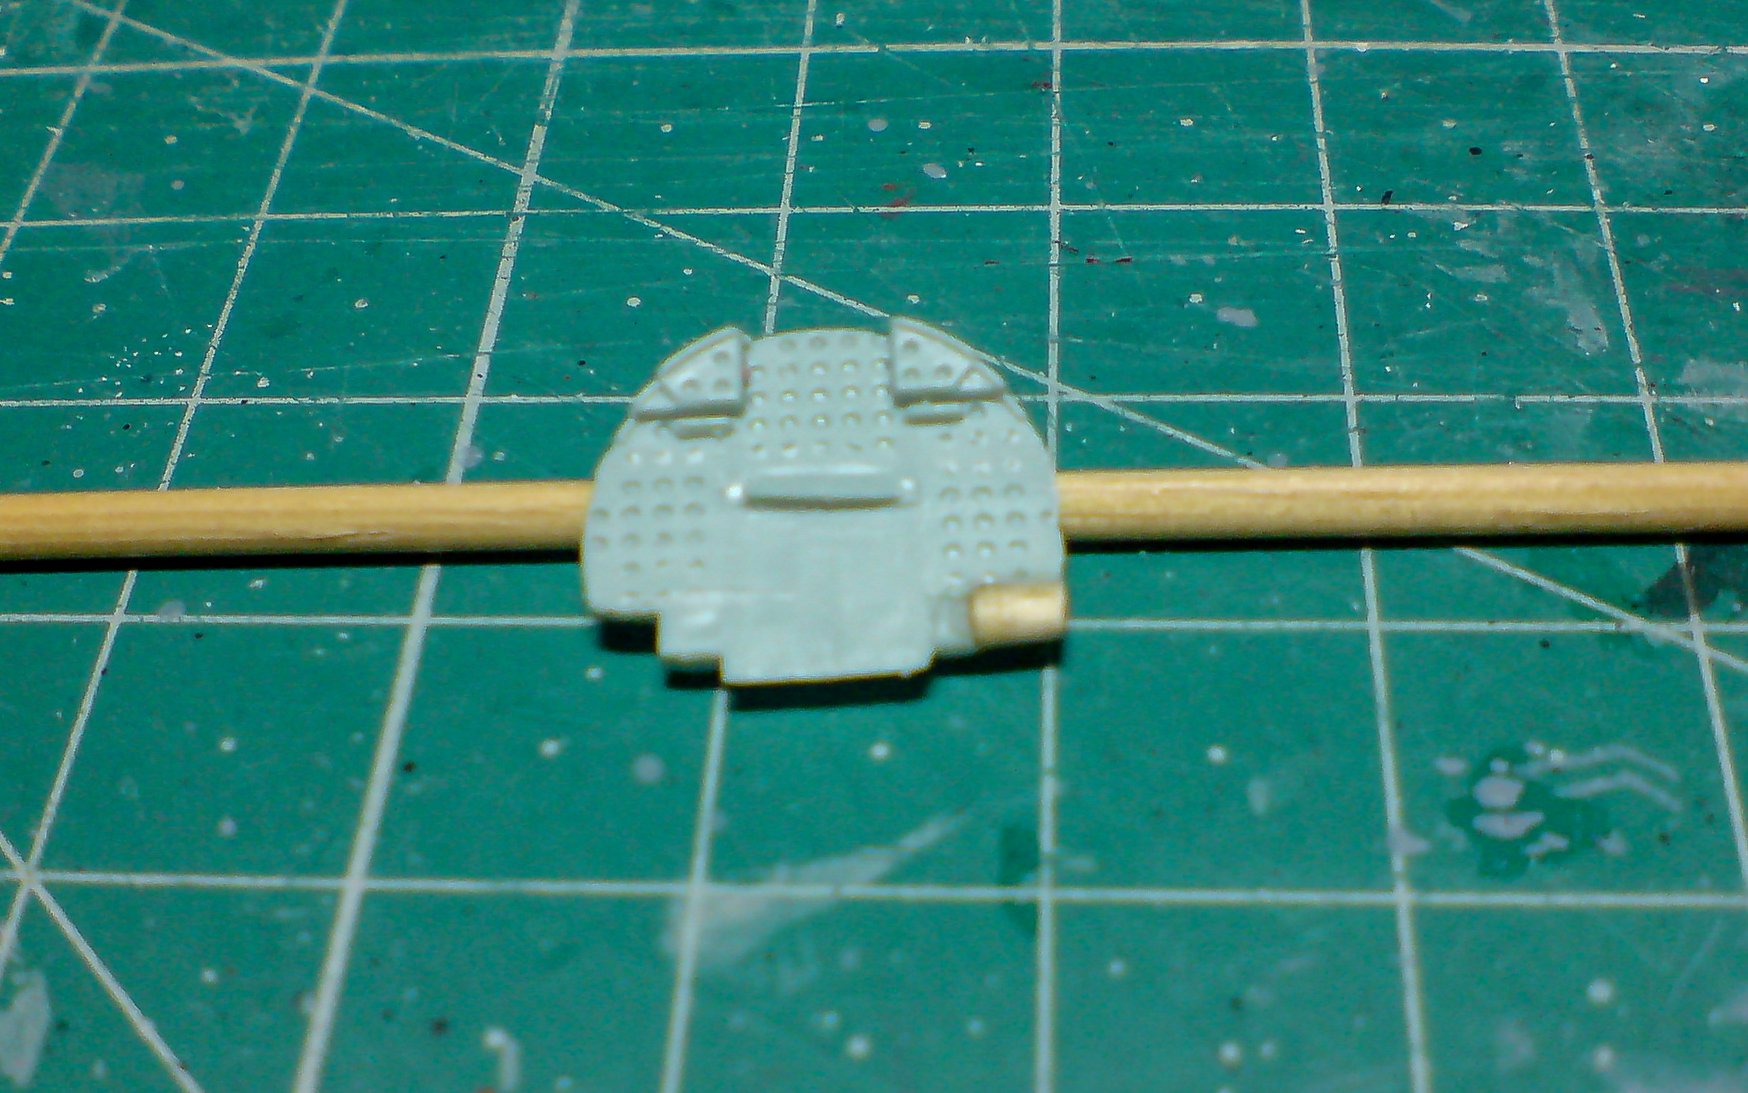
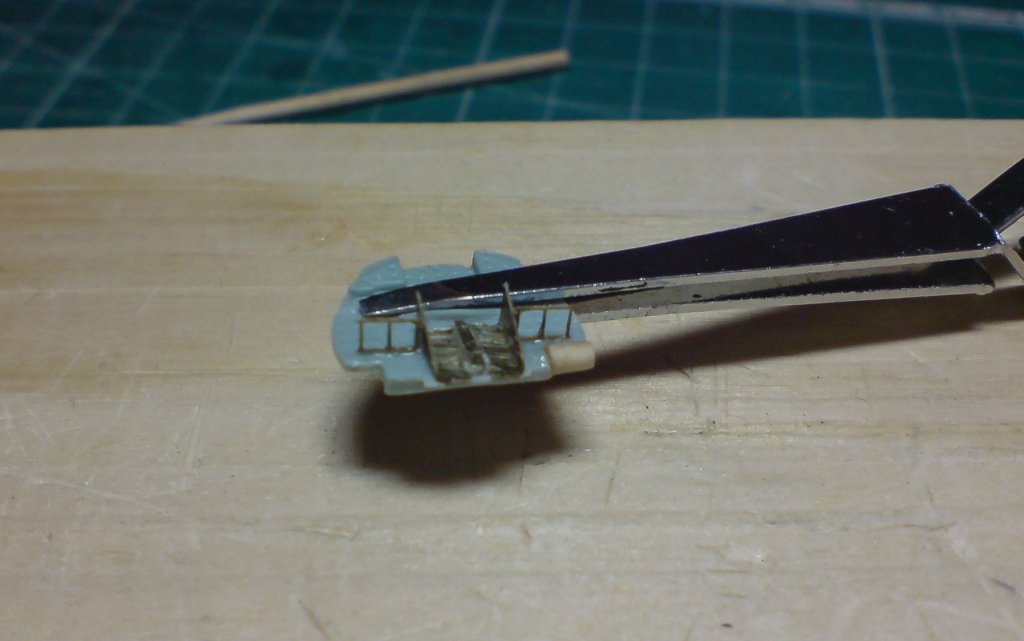
Evening everyone, again - sincere thanks to all for the looks, likes and comments. Right! I thought I would do a mini blog on the building of one of my pom pom units, I thought I would do this as its the last one to be built and perhaps it will be useful and hopefully interesting. So lets start - First job was to cut the base and the left and right barrel units from the spru, then they were tieded up removing the join pips - after the two halves of the barrel unit were glued together, and the ammo feeds were filed smmoth all the way round, then the base recieved some attention starting by the fitting of the motor body made from 2mm dowel sanded down slightly and cut to a legnth of about 4mm, it was then glued using ca and heated by hairdryer to speed up setting. Next I cut and filed off the plastic interpretation of the barrel guard. Here are the pictures showing the barrel unit assembled, and the base with the motor unit - OC.

-
She is looking superb but hey slowly slowly does it why rush, if it took a year - 2/3 years no matter, the enjoyement is in the building no the finnishing unless you own a model shop and want to display as many as possible. My intention is to make sure I have a dustproof covered display case to put my ole girl in for when she is finnished. OC.
- 405 replies
-
- 7
-
-
- tamiya
- king george v
- (and 2 more)
-
Super - Duper "Oh boy - oh boy" I cant wait for this one, im bringing my tent and camping stove, and about a thousand hot dogs. OC.
-
What would help a lot visualy would be to do the same as I did - scrape and thin down the thickness of the plastic where the armour shields are around gun placements on the deck areas (on the insides), I did this on my warspite and it worked quite well. And for armour plates on the hull - I still sware by thin paper cut into narrow strips and stuck down with pva, it worked ok on mine as long as the primer seals them in. Just a few ideas for you denis. OC.
-
Superb work carl congrats on finnishing her. OC.
- 292 replies
-
- 5
-
-
- g class destroyer
- trumpeter
- (and 4 more)
-
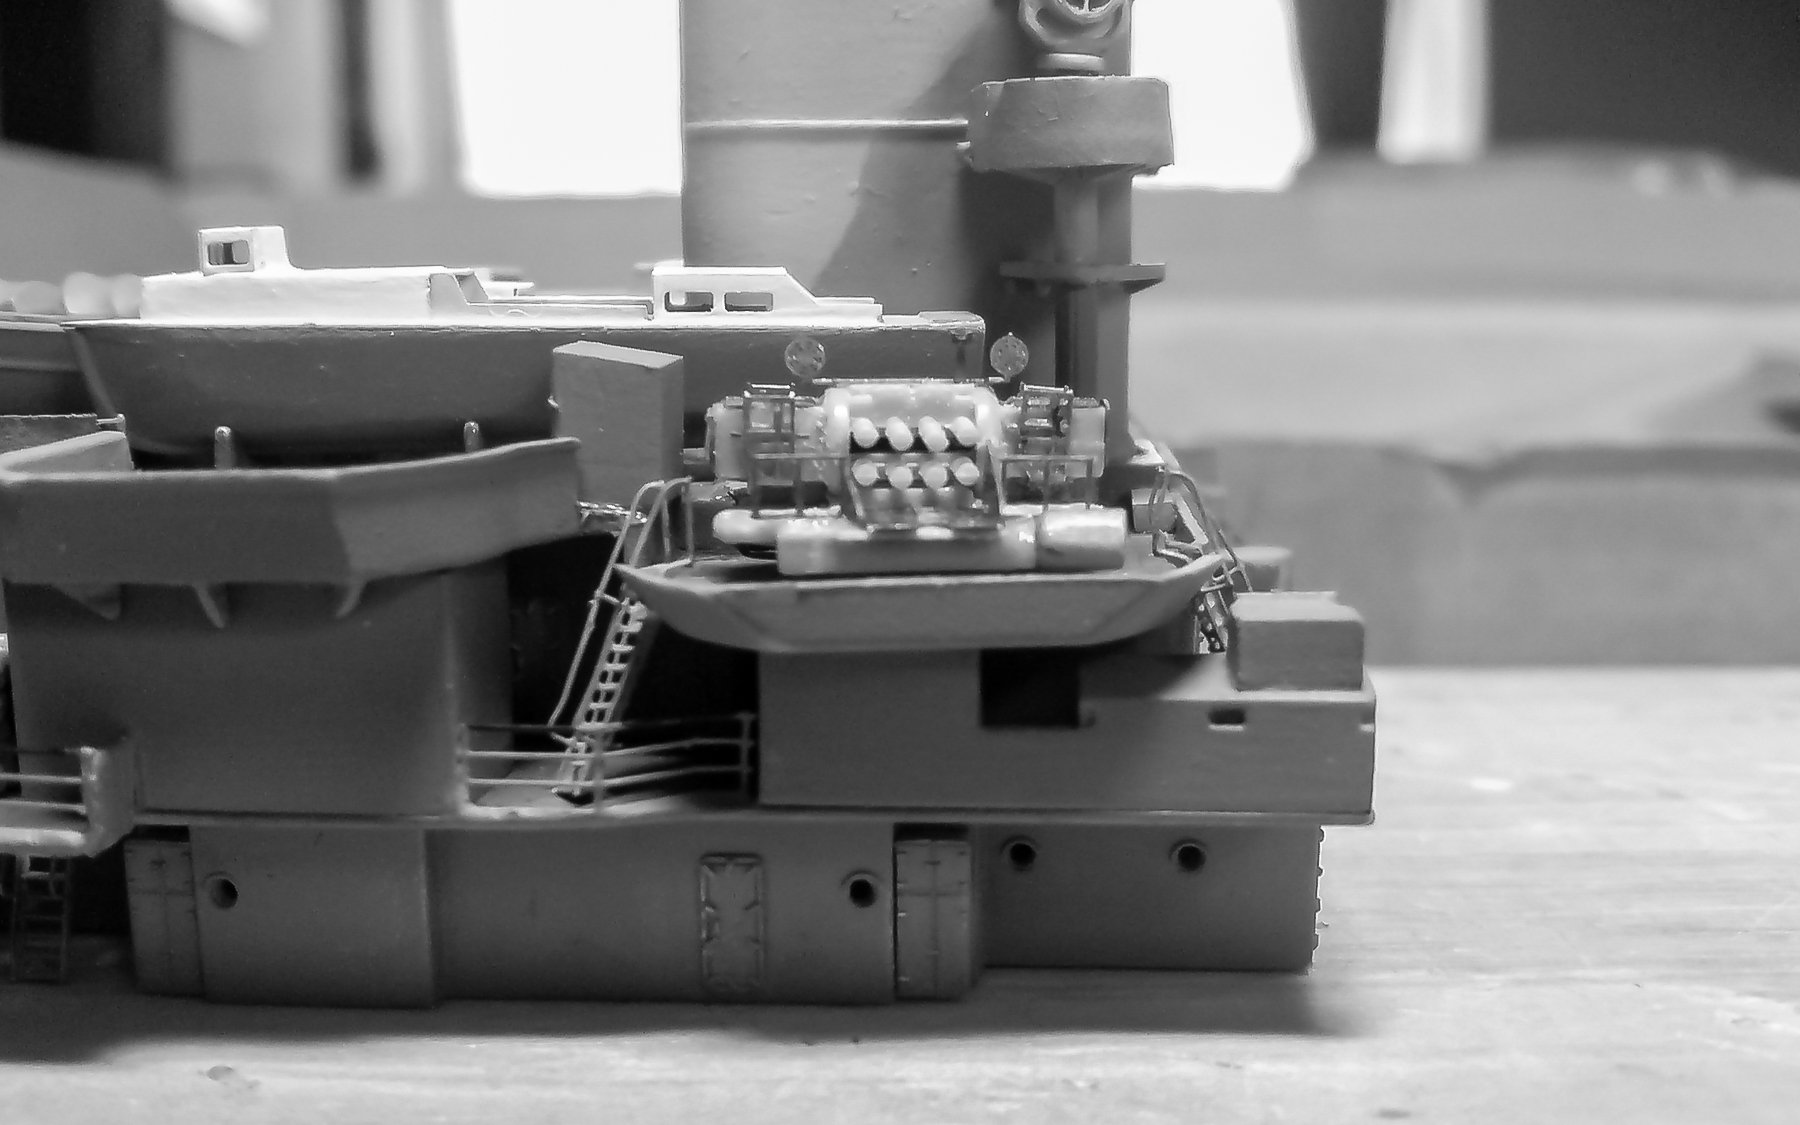
I took a shot this evening with my dslr, it was a low light shot using the camera flash. OC.

-
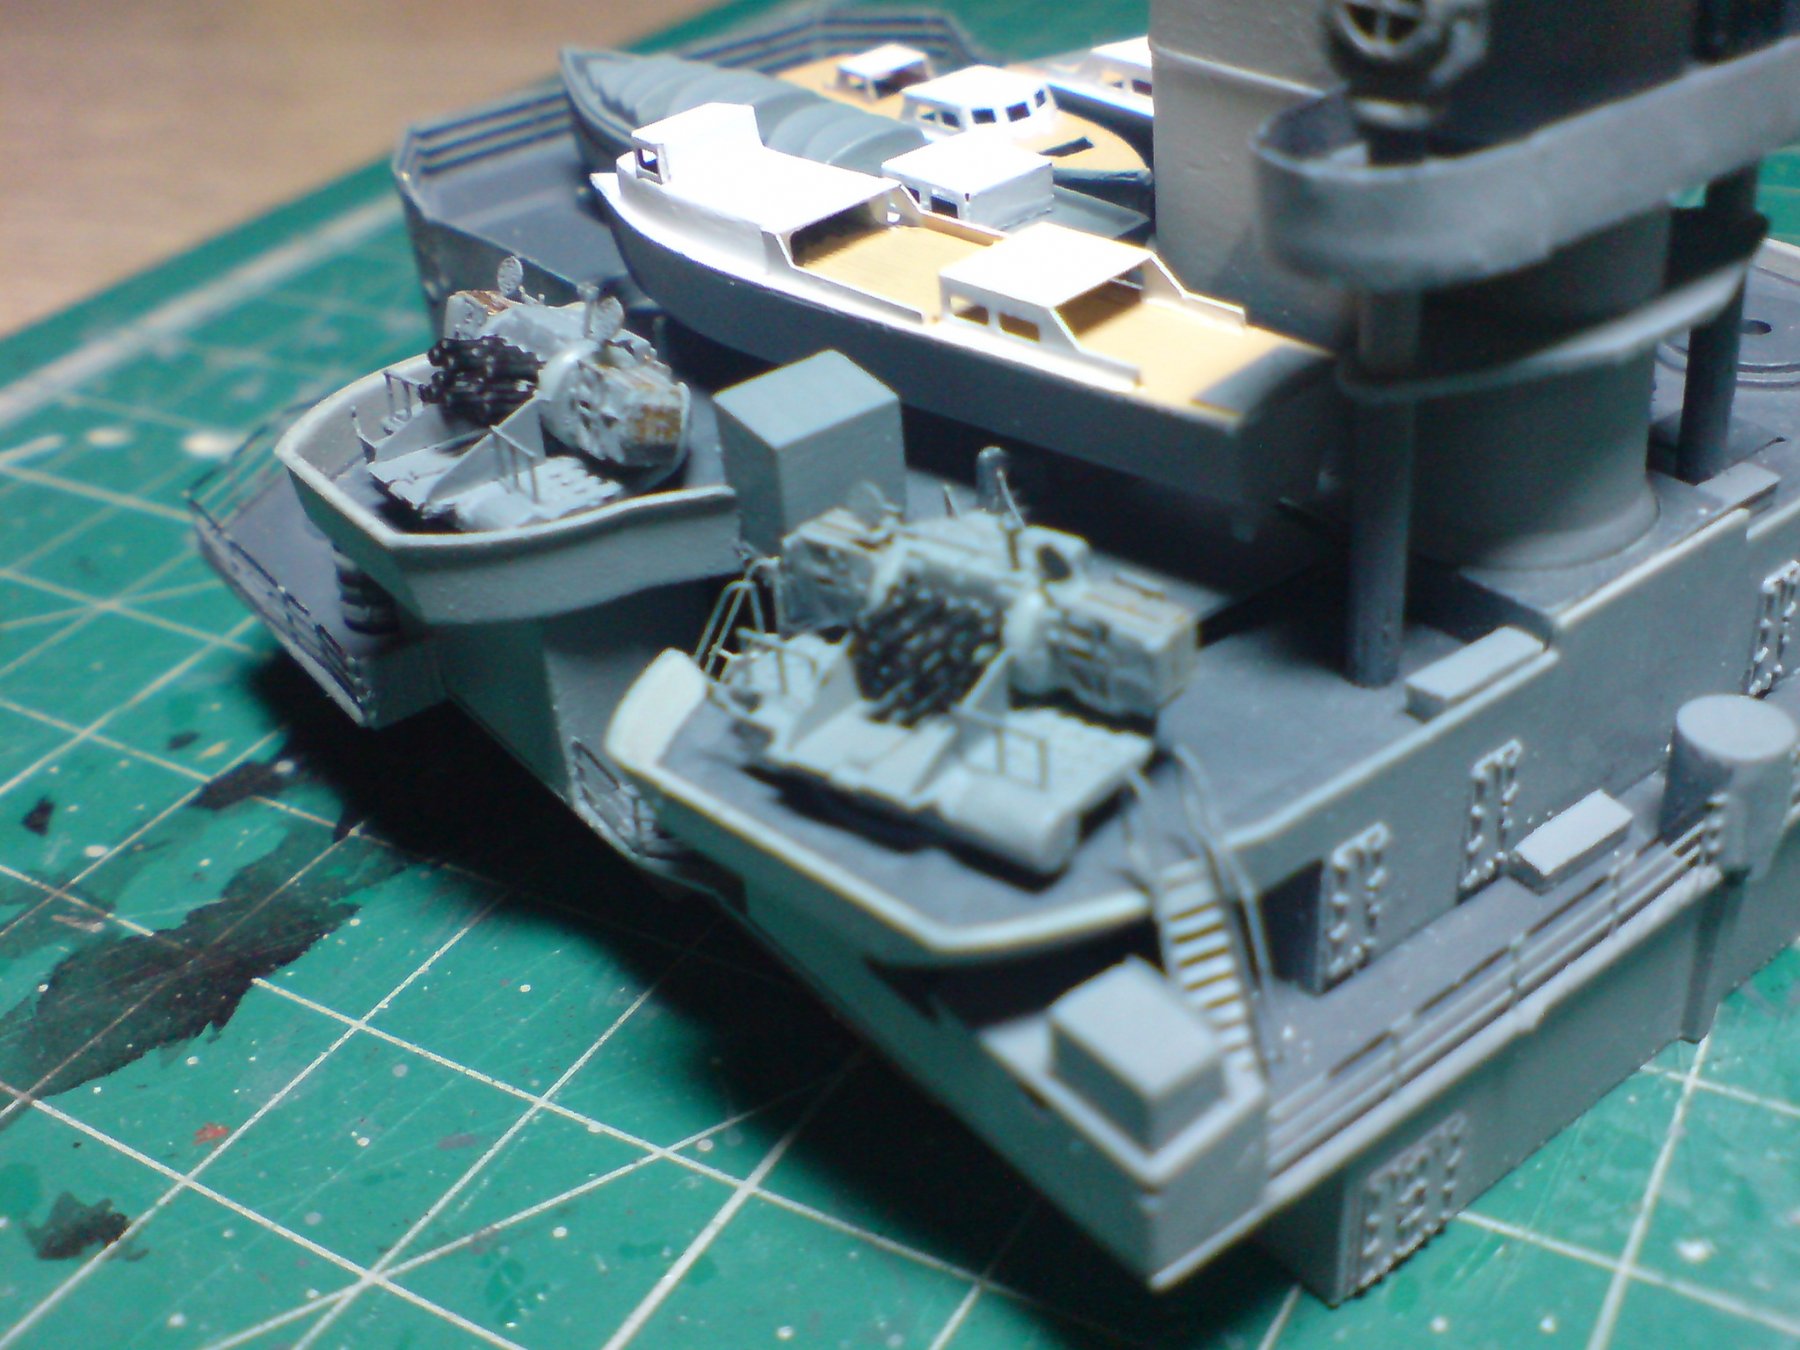
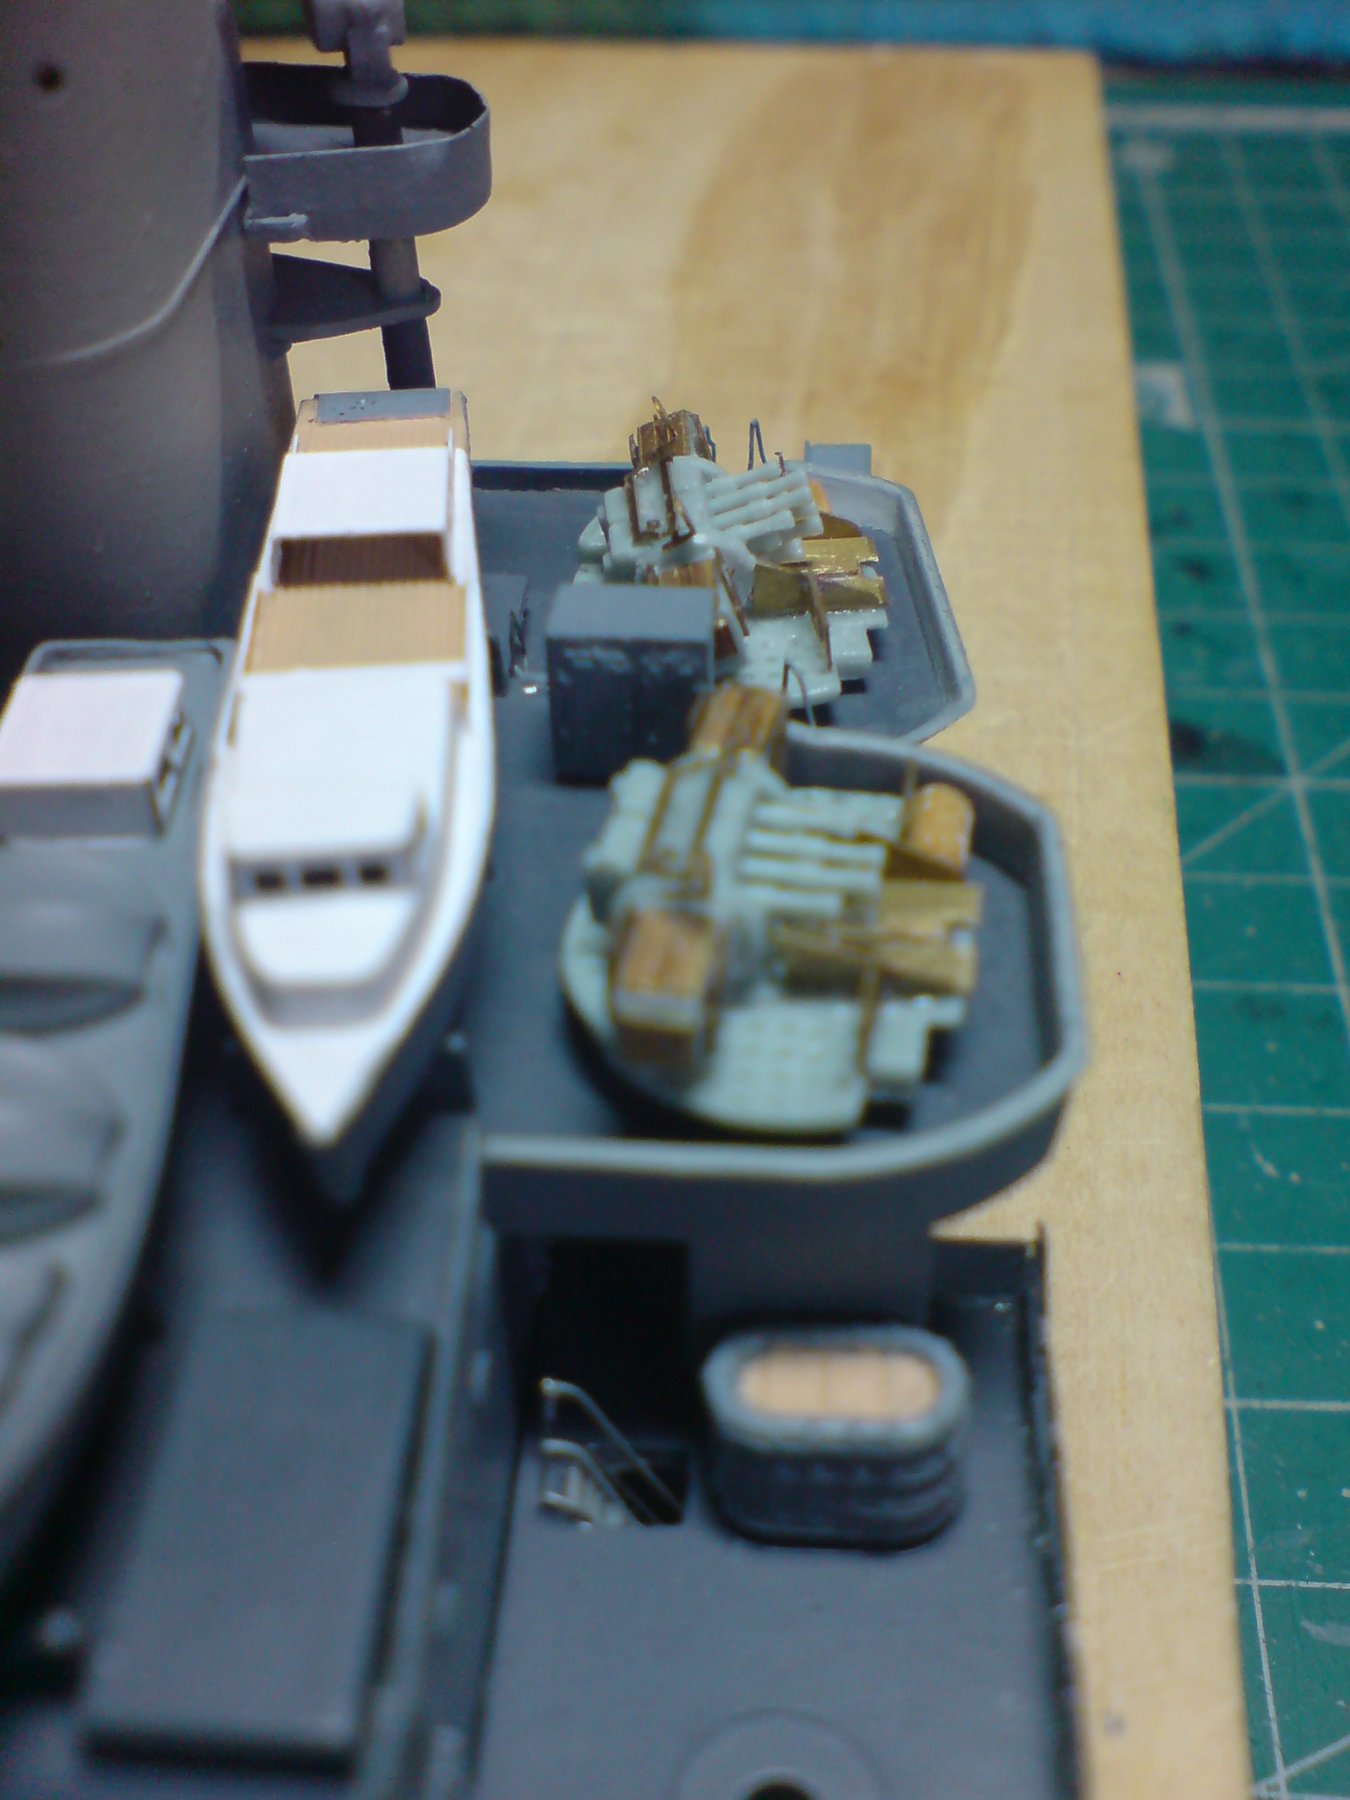
Evening all, pom pom number three - kit bashed, assembled pe fitted and painted then glued down. OC.
-
Thank you denis. I tried mowing our back garden twice but no good - then I realised its all slabs(pavers)😮 OC.
-
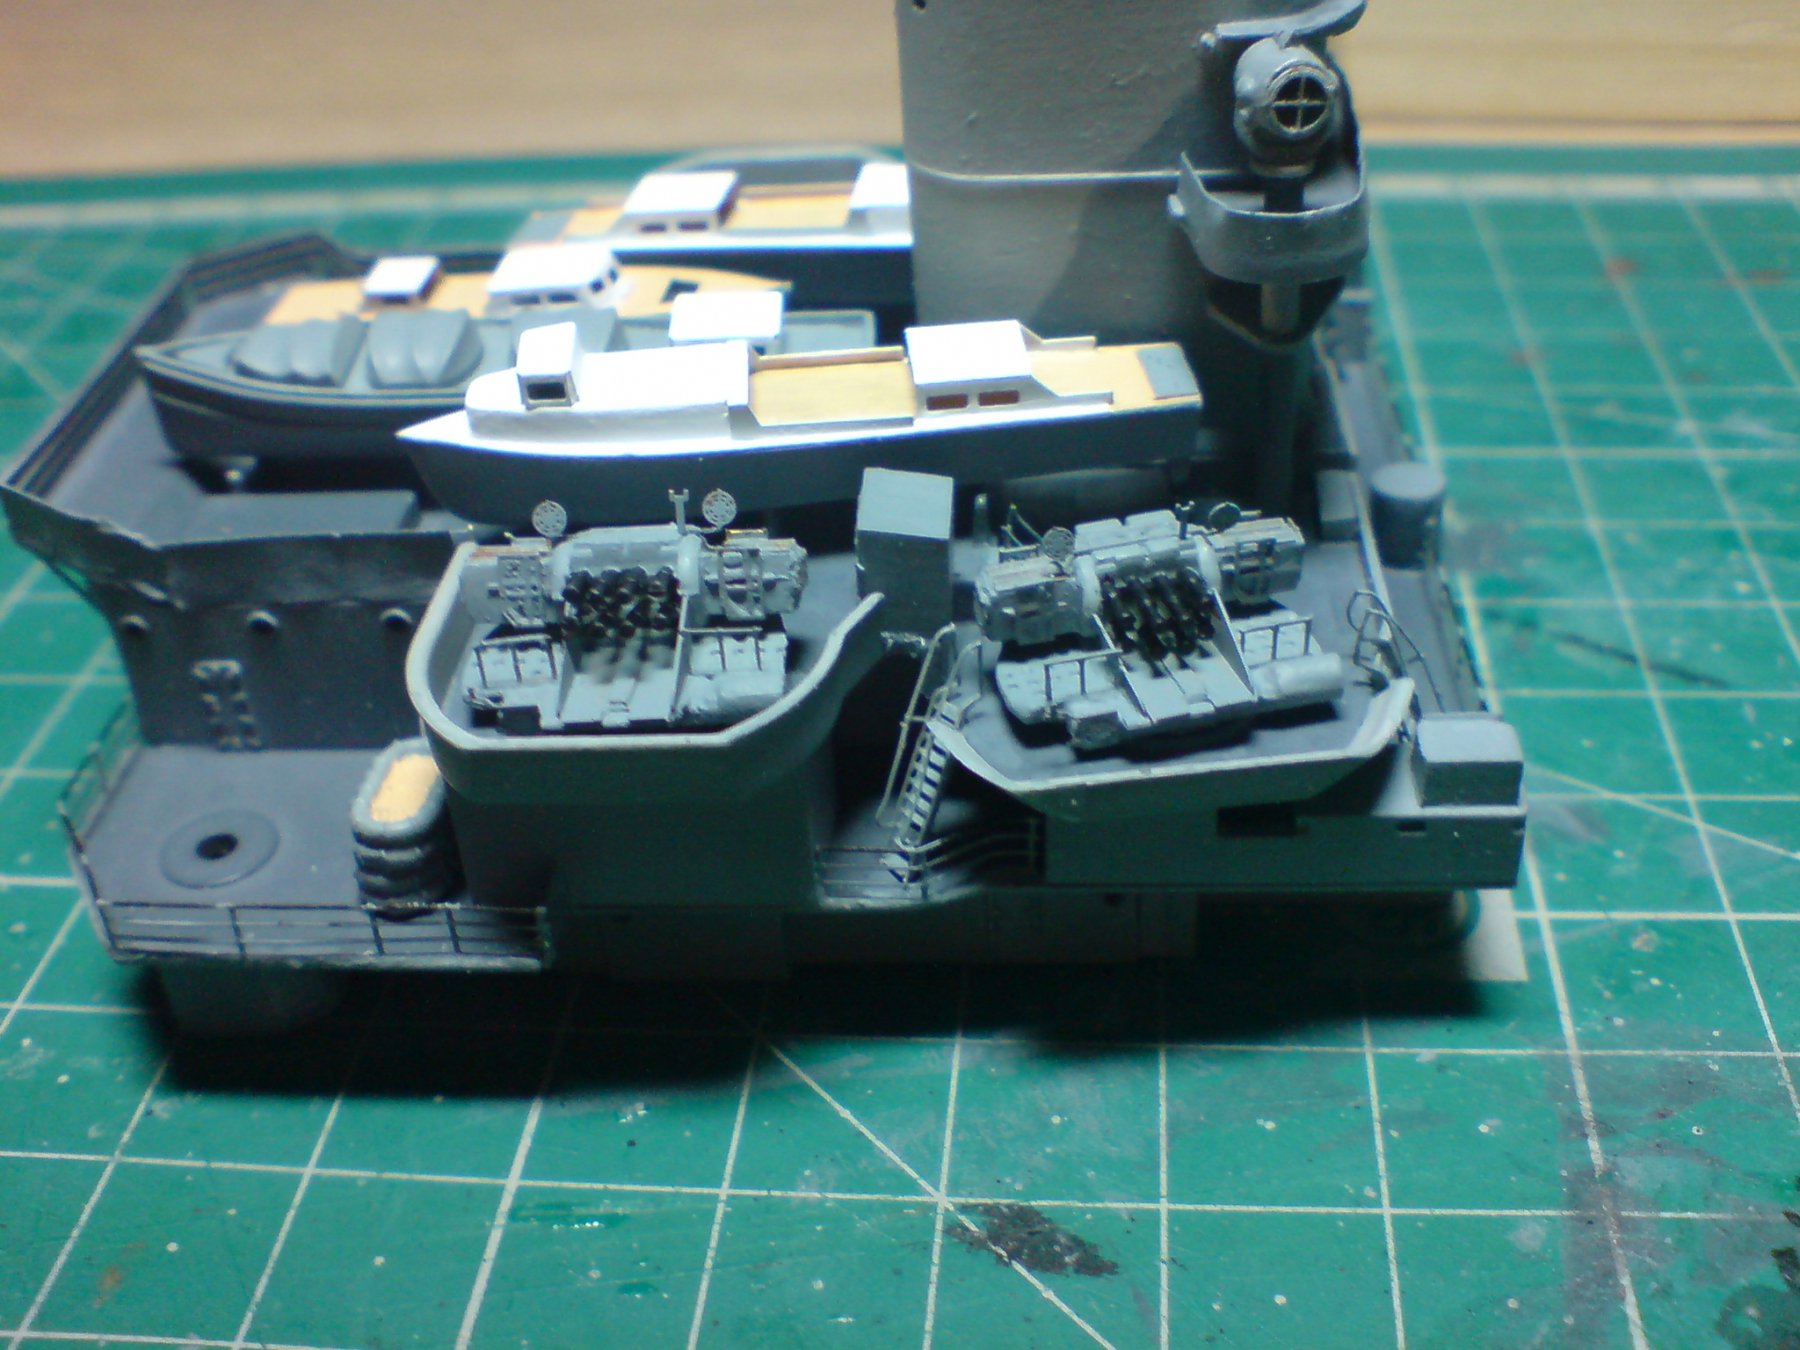
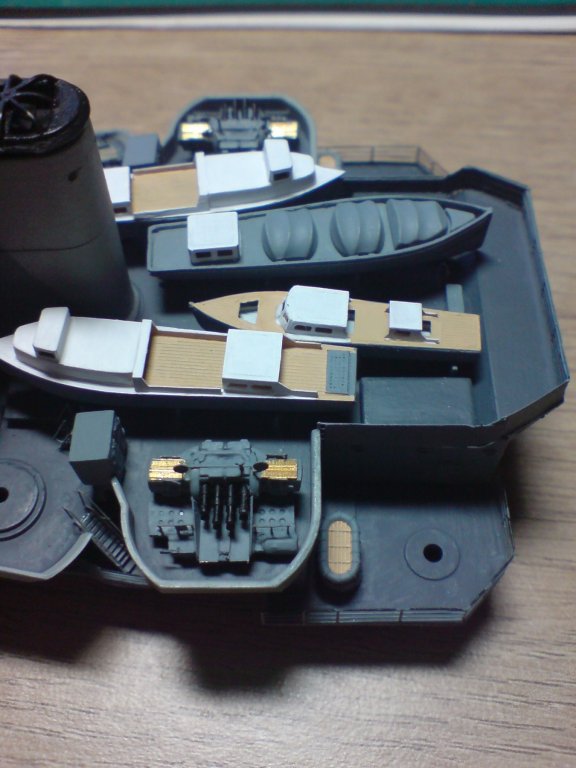
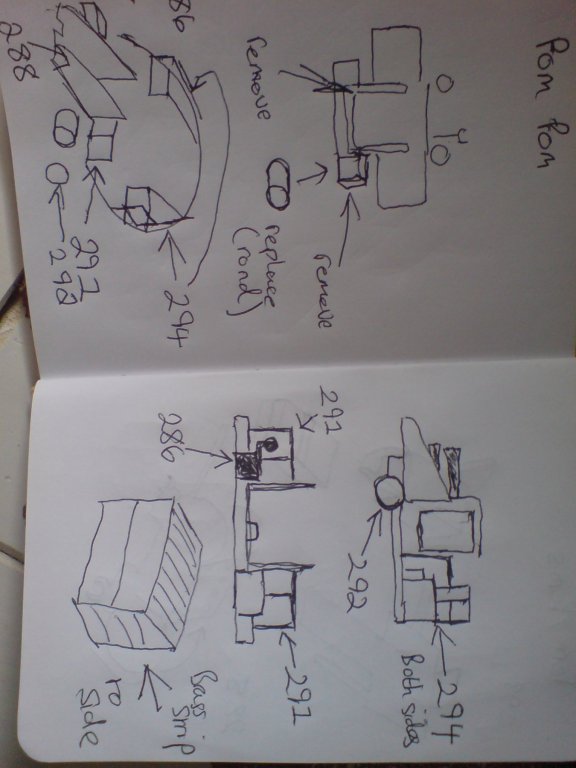
Hi all, firstly thank you sincerely for all the likes and comments. So more work with the pom poms - firstly it occured to me that the first one was sitting to high, this was a combination affect of the molded bas it sits on being stepped, and also there is some frame work molded under the pom pom platforms, so I decided to have a go at filing the bottom base of the pom pom and also scrape off some of the stepped piece on the deck. Next was to construct pom pom number two, using the same procedure as before except this time I was able to file the base of the pom pom before fitting anything - then all the extra bits was placed on it. So a few pics of two of them dry fitted also a pic of my scriblings. OC.

-
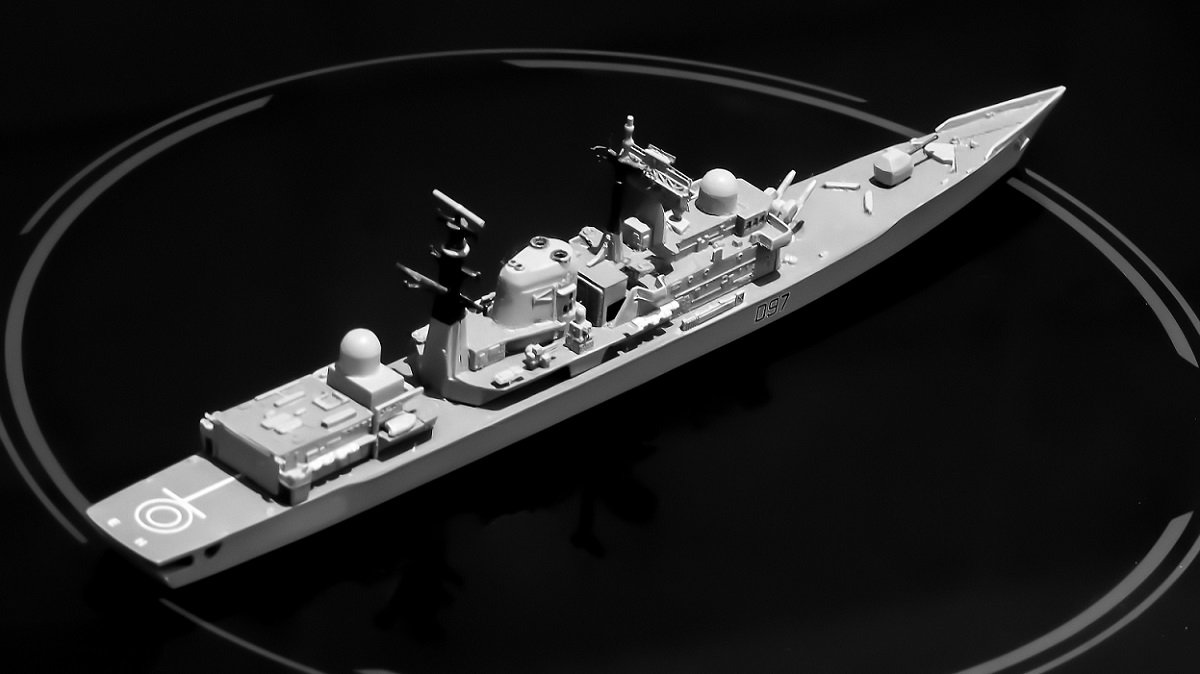
The b&w really do it justice - its like looking at a news paper photo of her from the time period. OC.
- 405 replies
-
- 6
-
-
- tamiya
- king george v
- (and 2 more)
-
Mmmmmm - yep! this was my first attempt at 1/700 scale including a bit of scratching, but minus the rails. OC.

-
Thanks lou, yep its a real hold your breath moment when fitting the pe, I even say to the wife that I can even reply to her when im working with the tiny parts, then when fitted I call her over to have a look (kind of feeling proud moment) OC.