HOLIDAY DONATION DRIVE - SUPPORT MSW - DO YOUR PART TO KEEP THIS GREAT FORUM GOING! (Only 20 donations so far - C'mon guys!)
×


Old Collingwood
-
Posts
12,098 -
Joined
-
Last visited
Content Type
Profiles
Forums
Gallery
Events
Everything posted by Old Collingwood
-
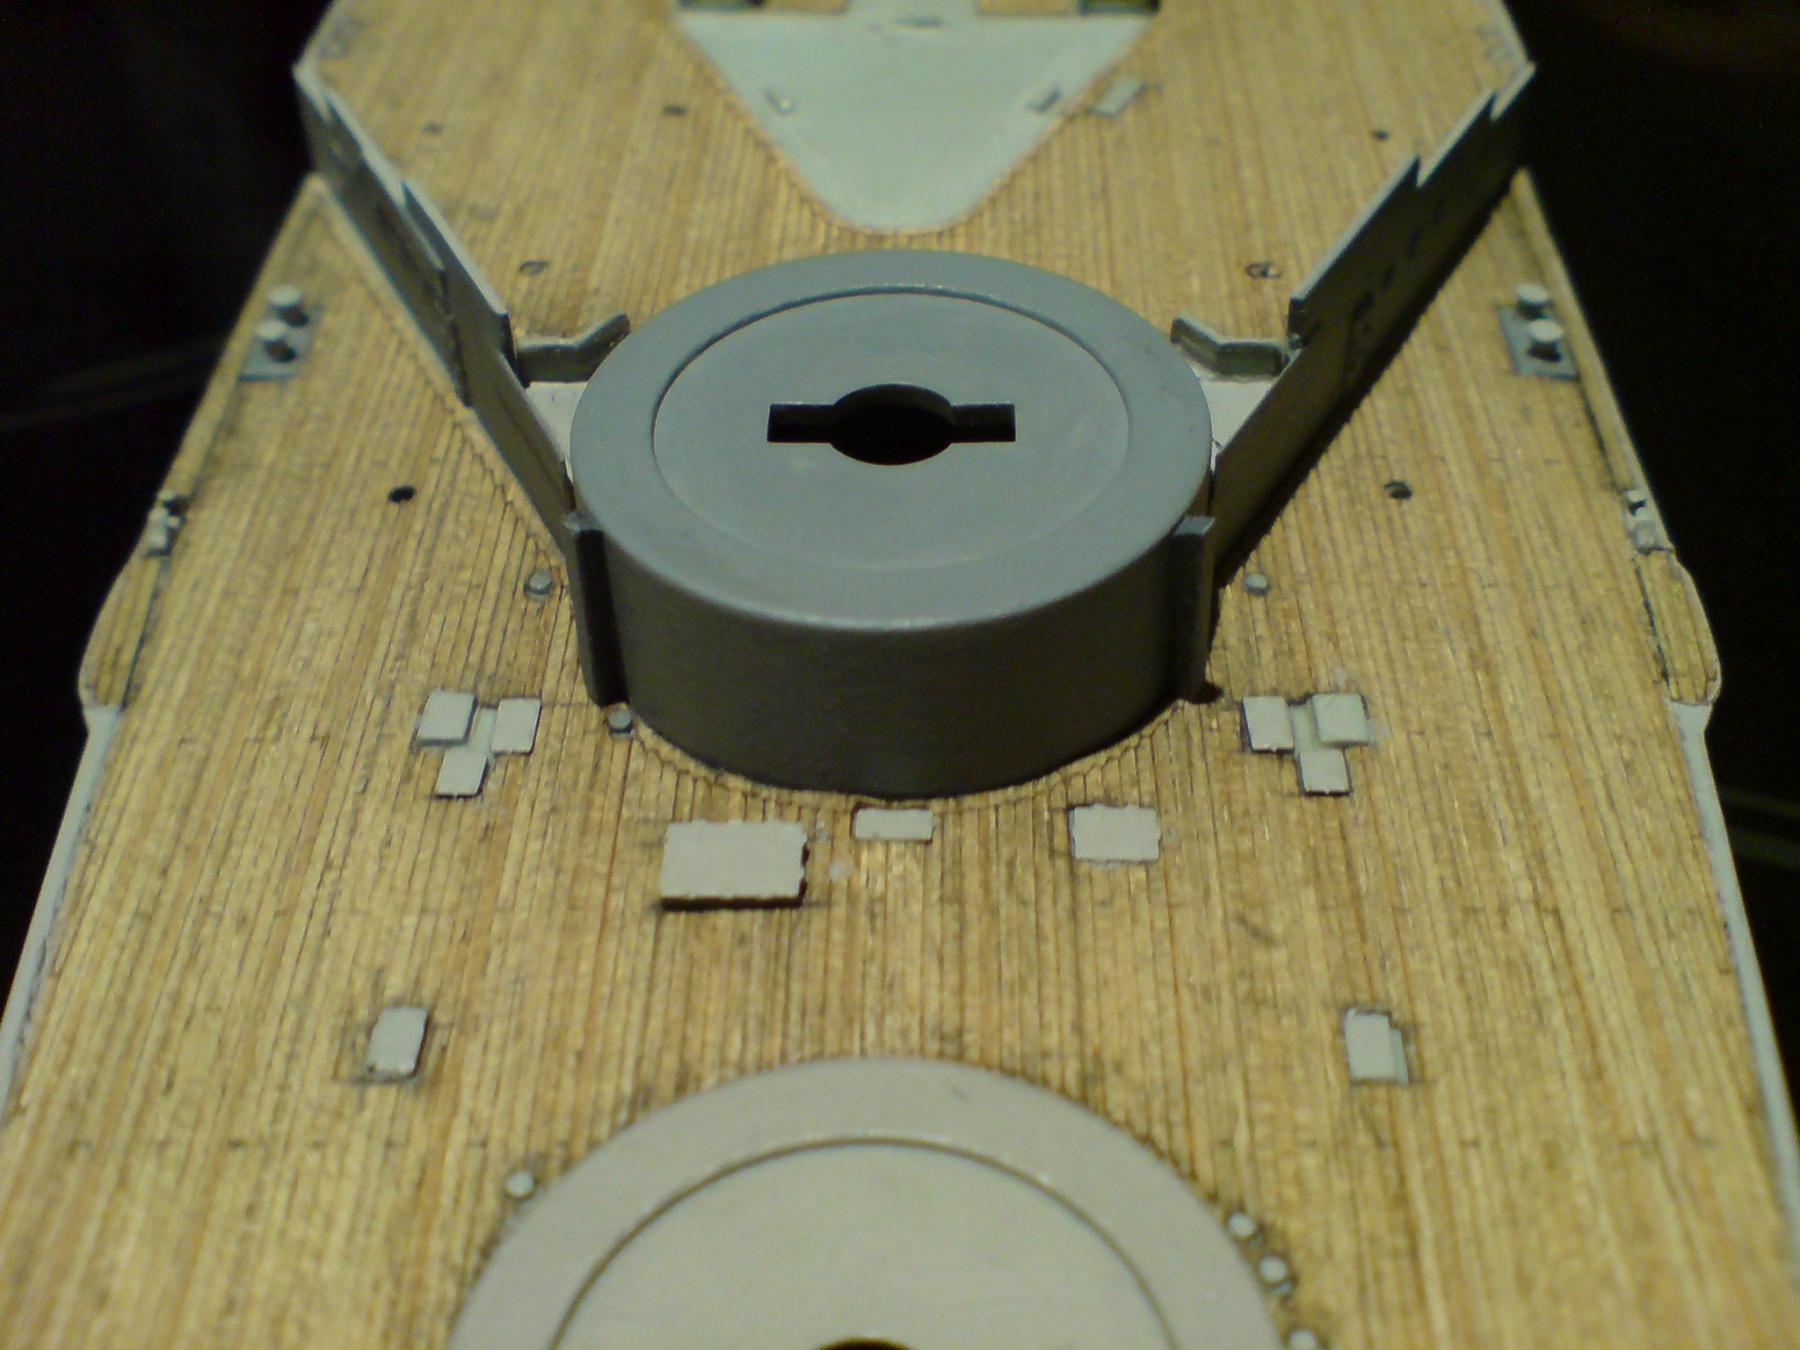
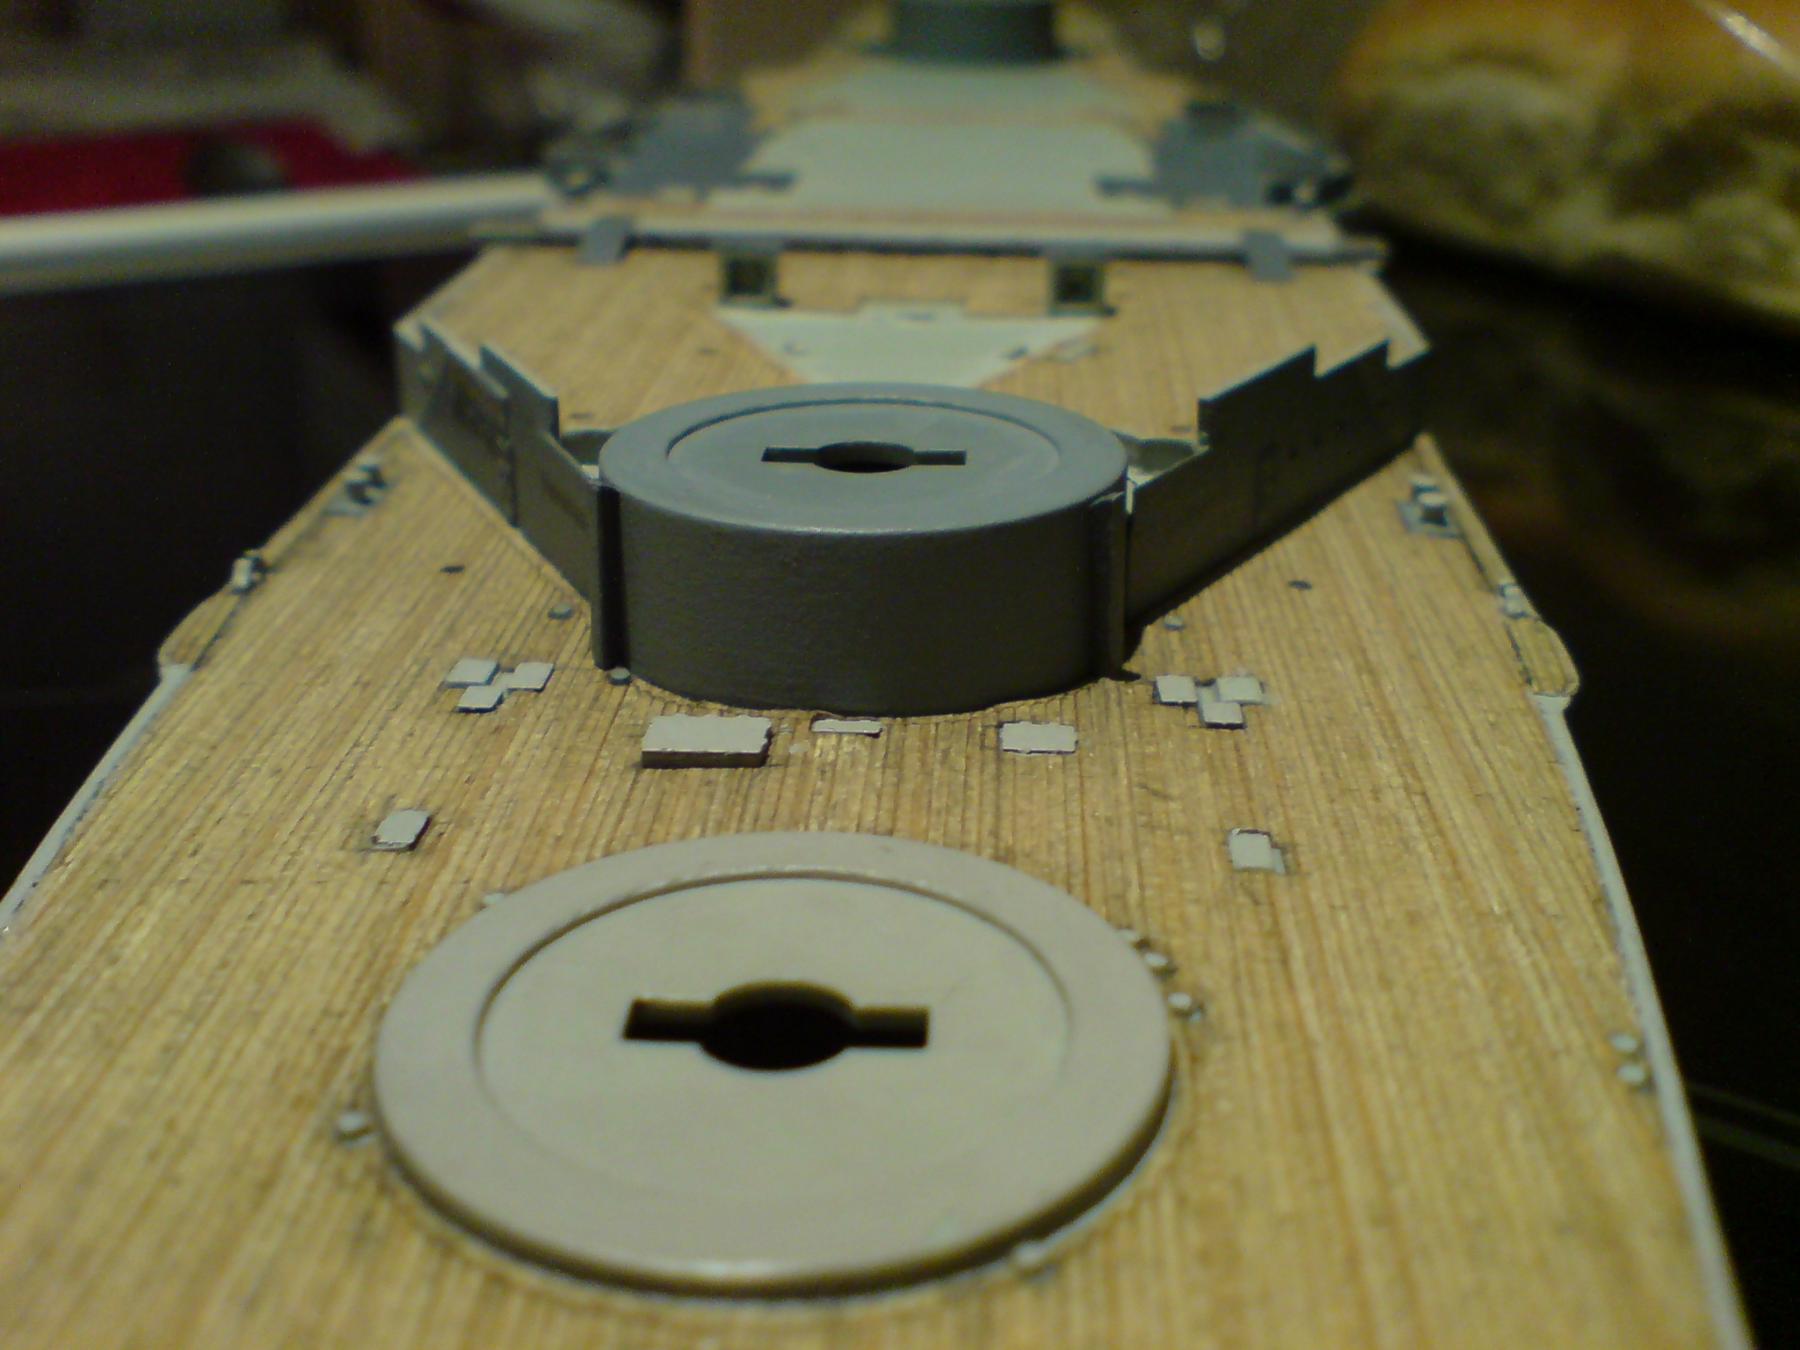
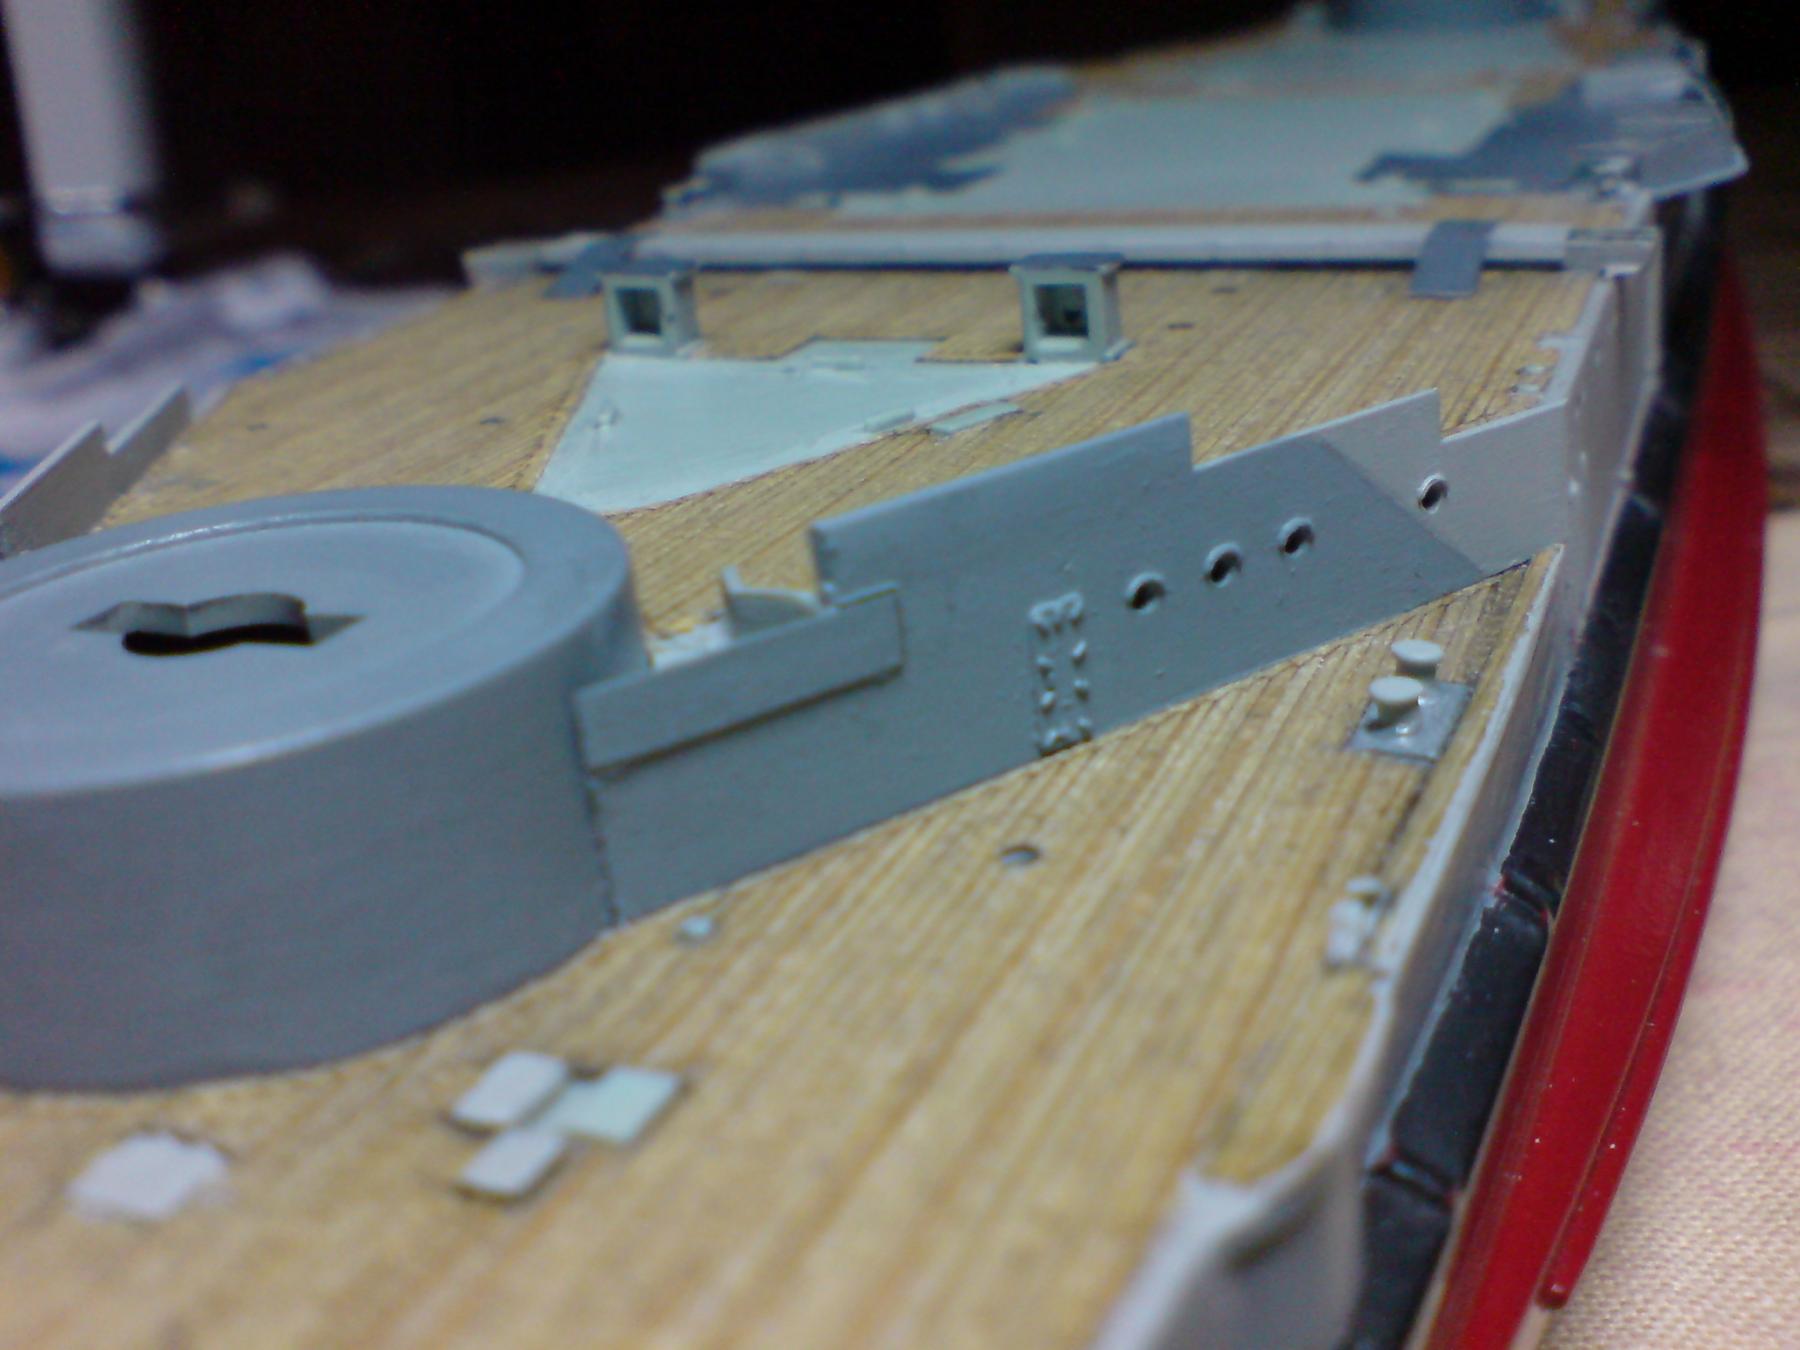
 A bit more work folks - after checking the instructions and checking the frets, I realized that the rear Barbette did not have any funnels included in the kit, so after doing a bit of searching in my wood kit box, I came across some box section wood that needed to be brought down in scale thicness almost by half, I did this with sanding sticks and a fine file then I cut two lengths similar to the forward ones. After sticking to the tape I panited the edges slightly darker and the faces the same shade as the barbette, when dry I fitted them in place. A few Photos folks.

-
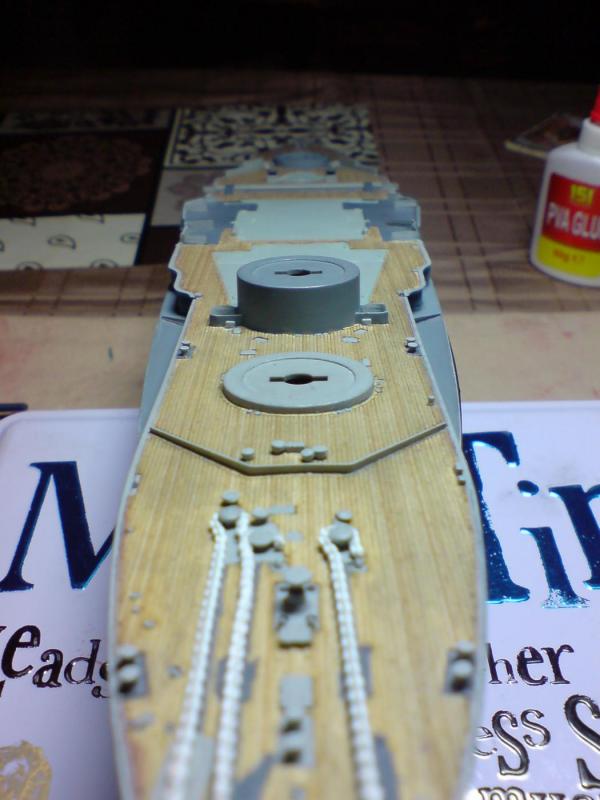
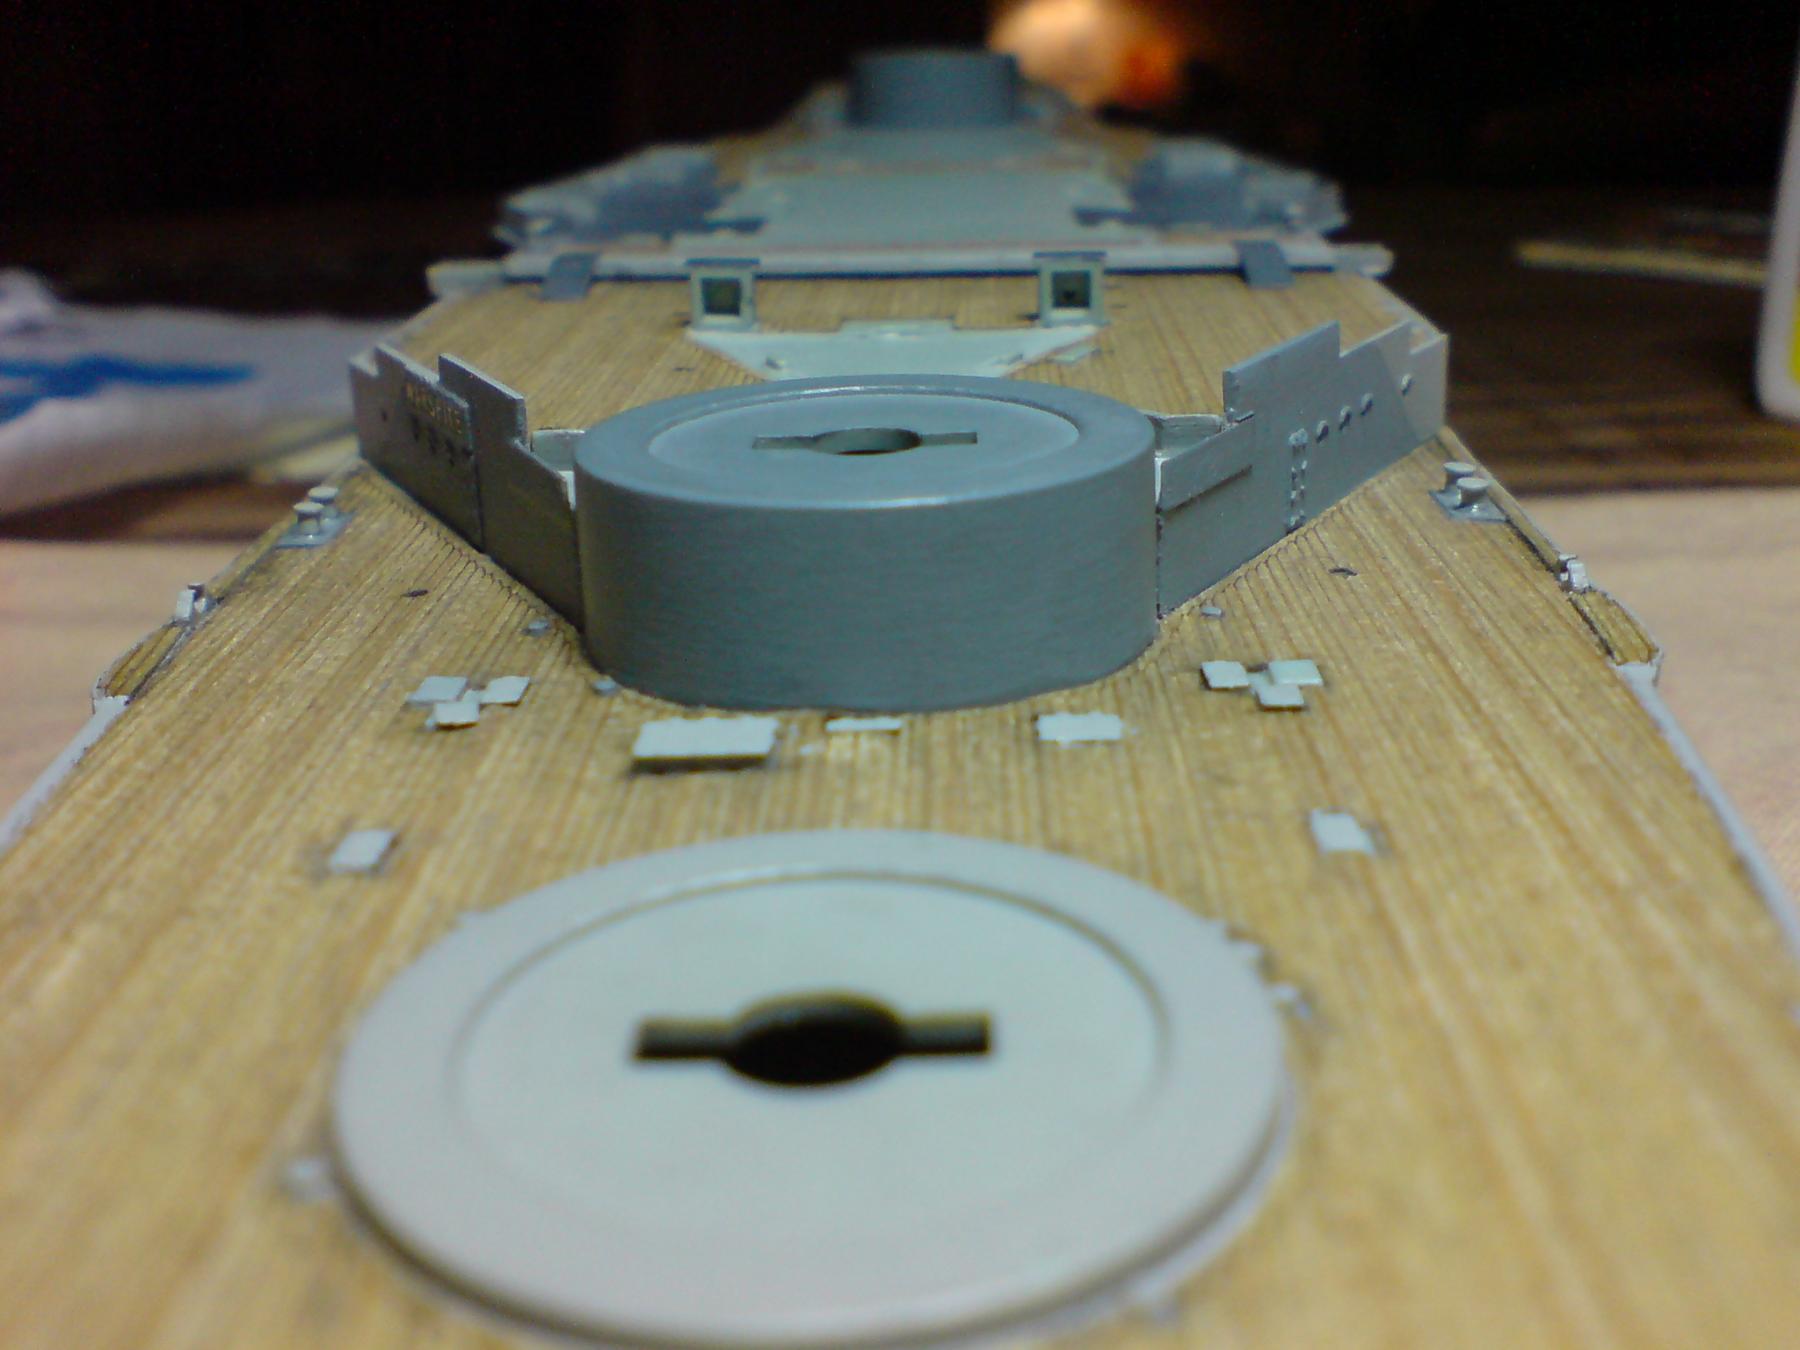
Bit more work this evening not much to write but Funnels attached to the forward barbette, and a couple of coats of top coat to seal them in place. Just one pic folks. OC.
-
Looking great - all that PE makes such a difference - how do you apply it CA or PVA ? OC.
-
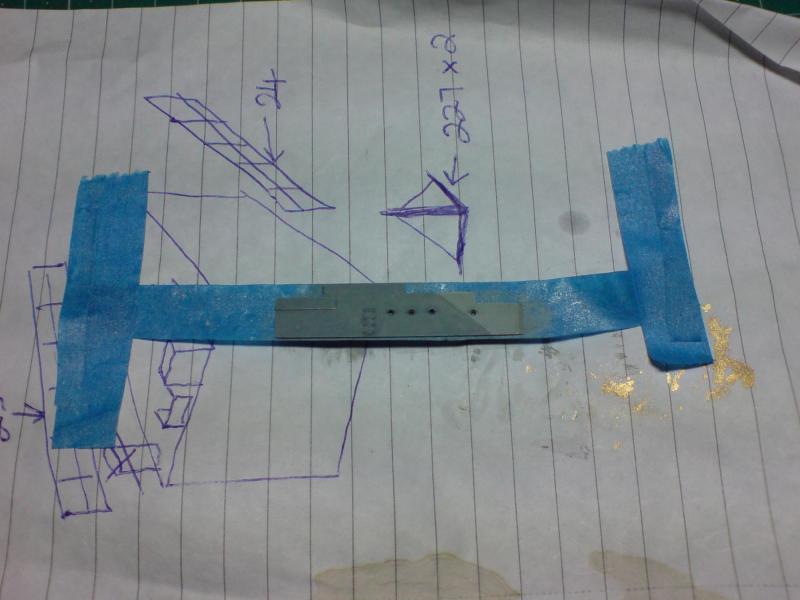
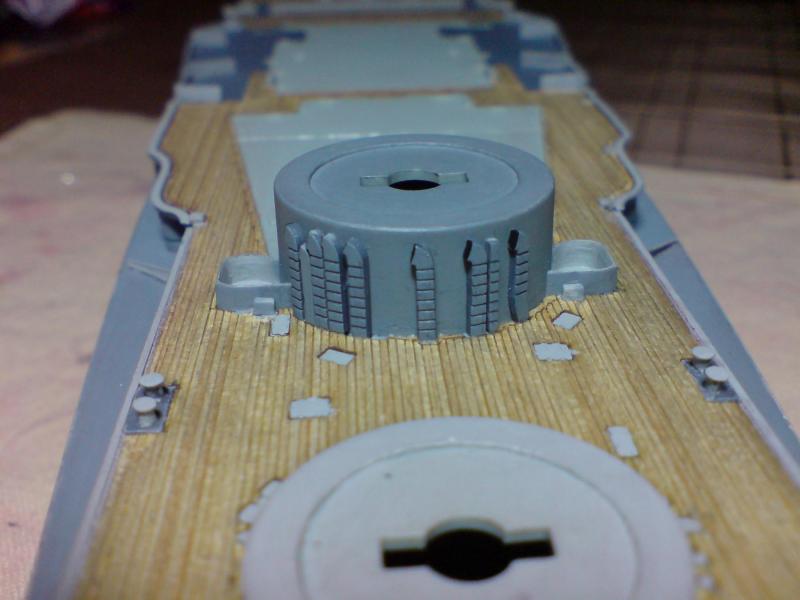
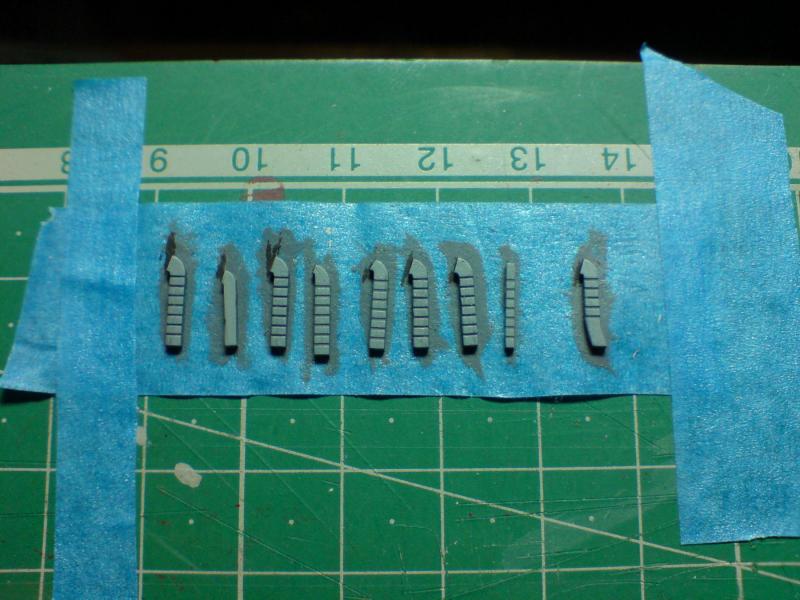
Just a bit of work tonight on the bench - I decided to work on the Barbette funnels, I cut these from the frets and cleaned them up then placed them on some tape, I decided to shade them by applying a darker shade on the edges and in the grooves, next I applied an almost dry coat of mid grey. When dry tomorrow I will glue them in place around the front of the Barbettes. Just the one pic folks. OC.
-
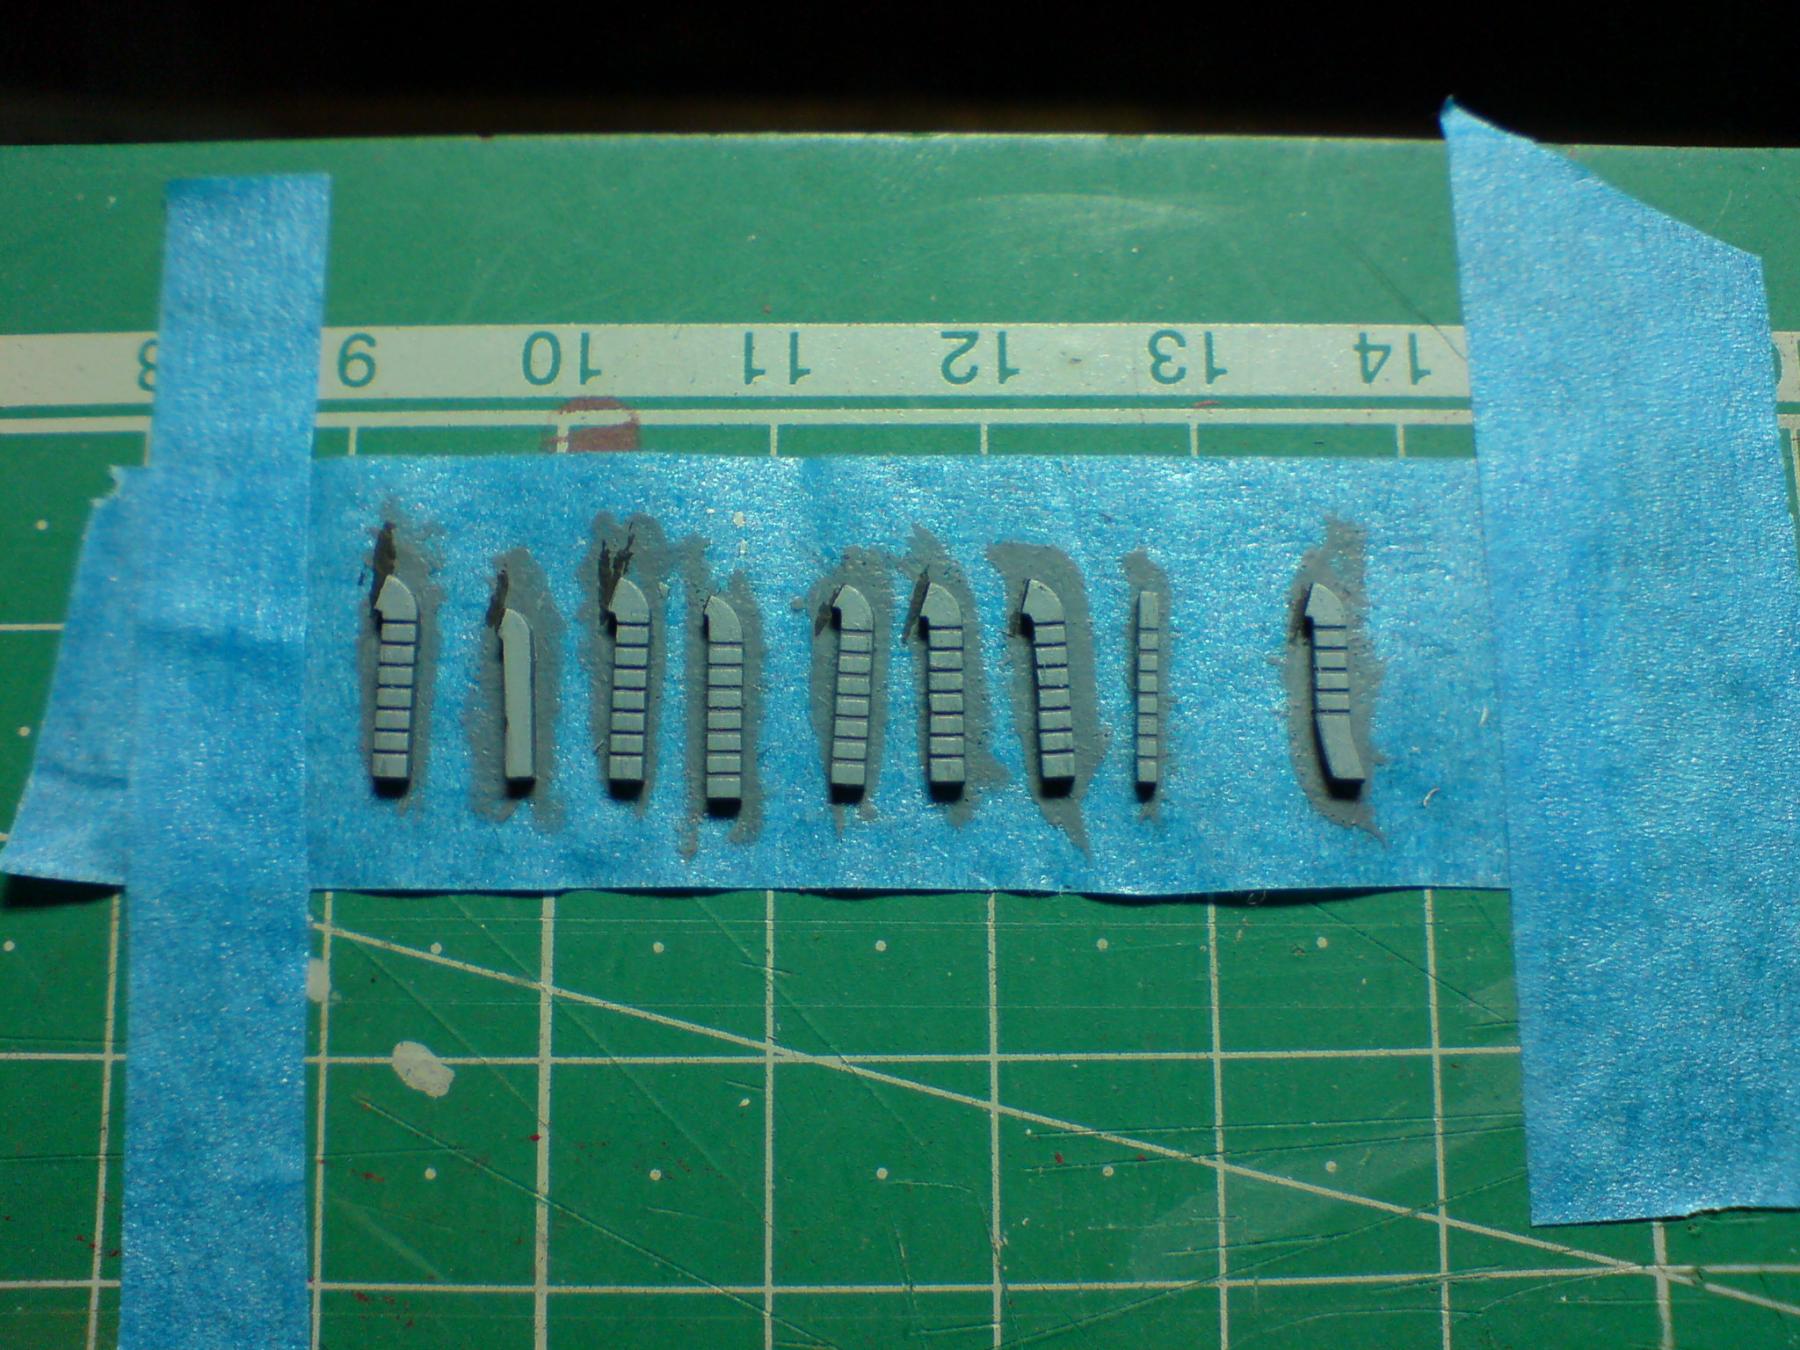
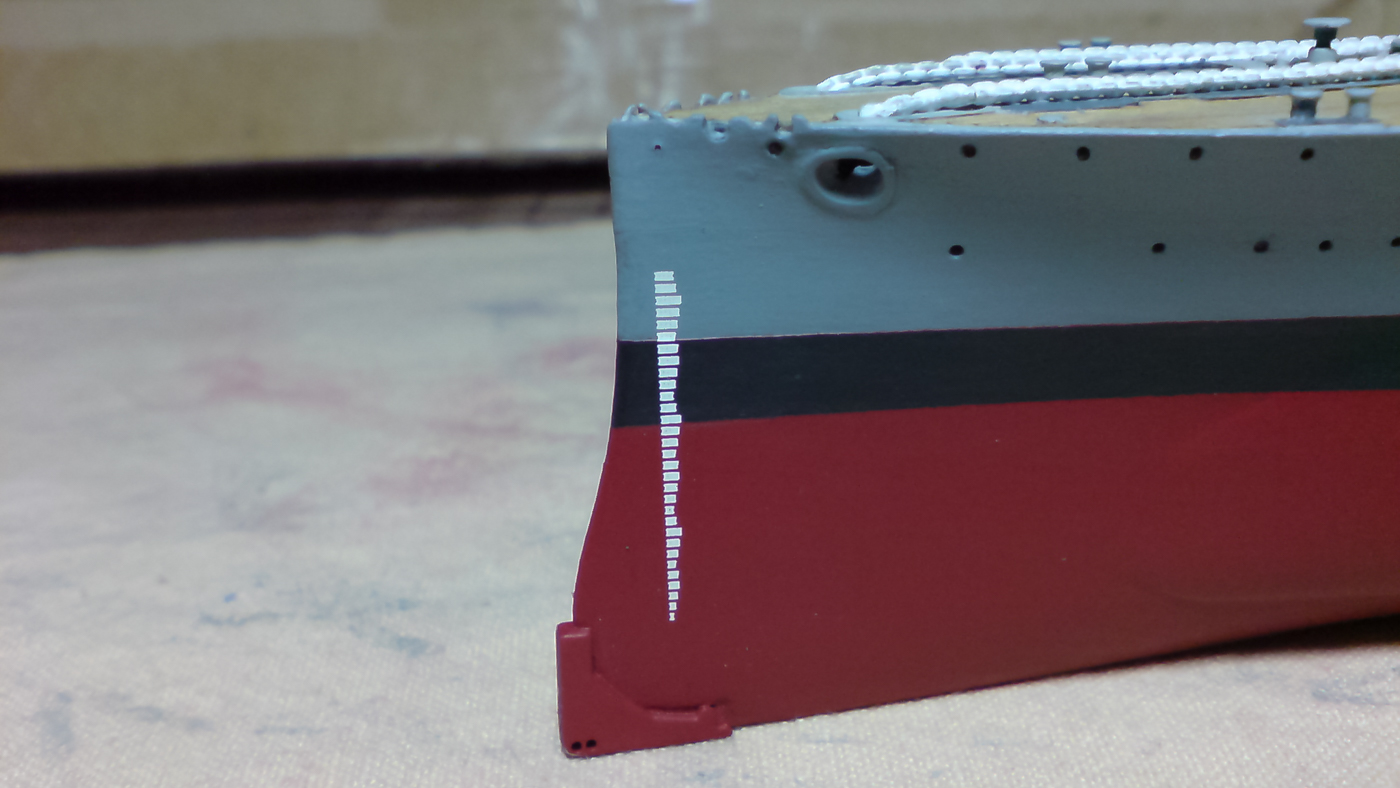
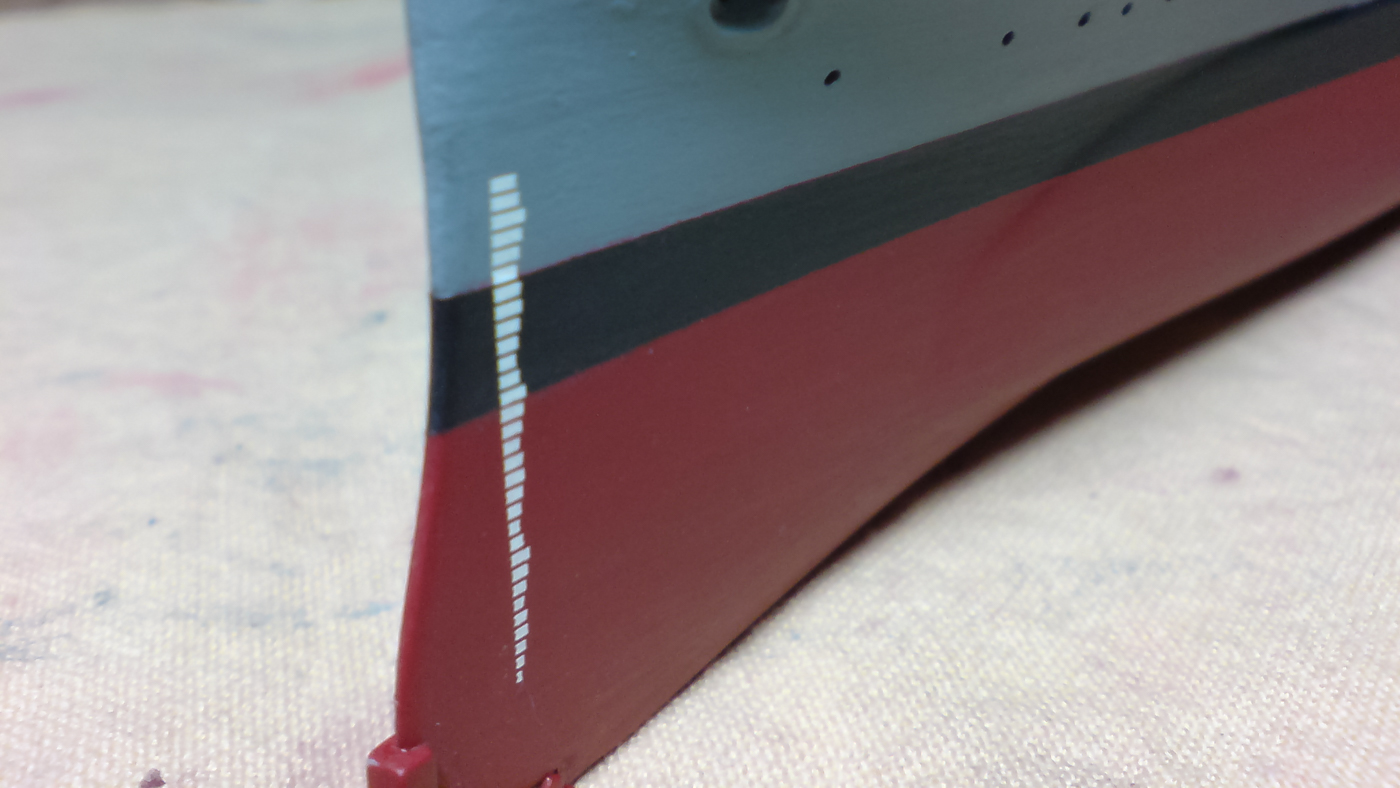
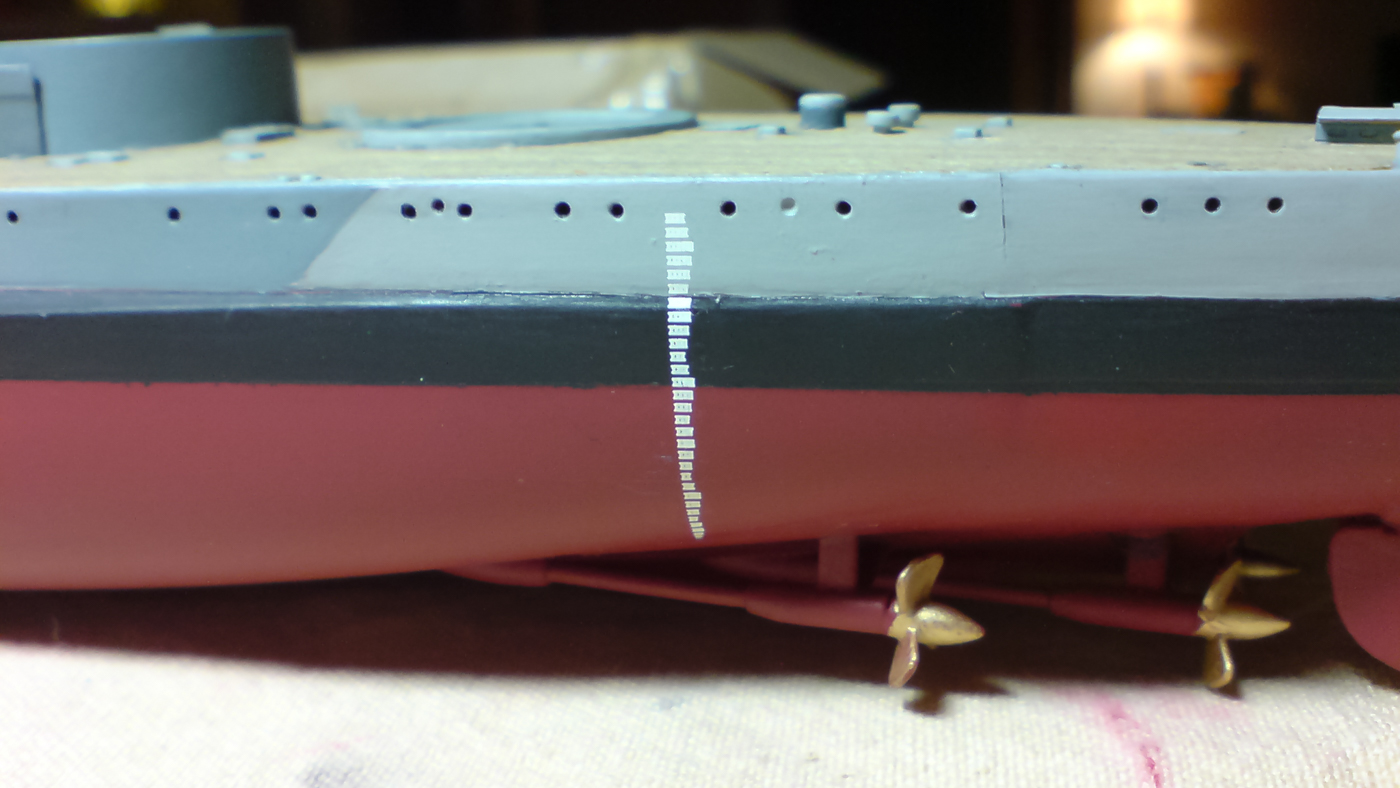
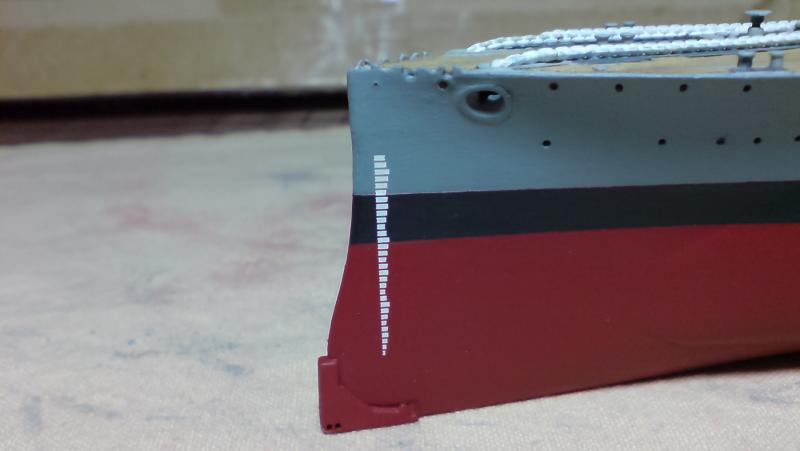
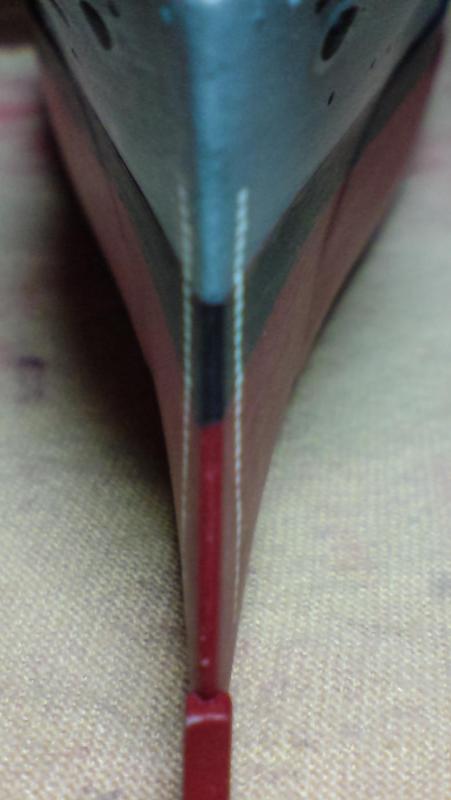
After doing a bit of net researching on dry transfer usage, I decided to have a go at the draft markings that are attached on the bow and stern, these are on a strip with a backing plate, I cut one of the markings from the strip attached some tape top and bottom to hold in place then used a paint brush handle to burnish the transfer, to my supprise they went on very easy with very little pressure and look superb. Here are a few pics including a rather radical one showing the head on look of the bow. OC.


-
She brought me one as the last time I used her's I broke it, funny thing is - I have no hair OC.
-
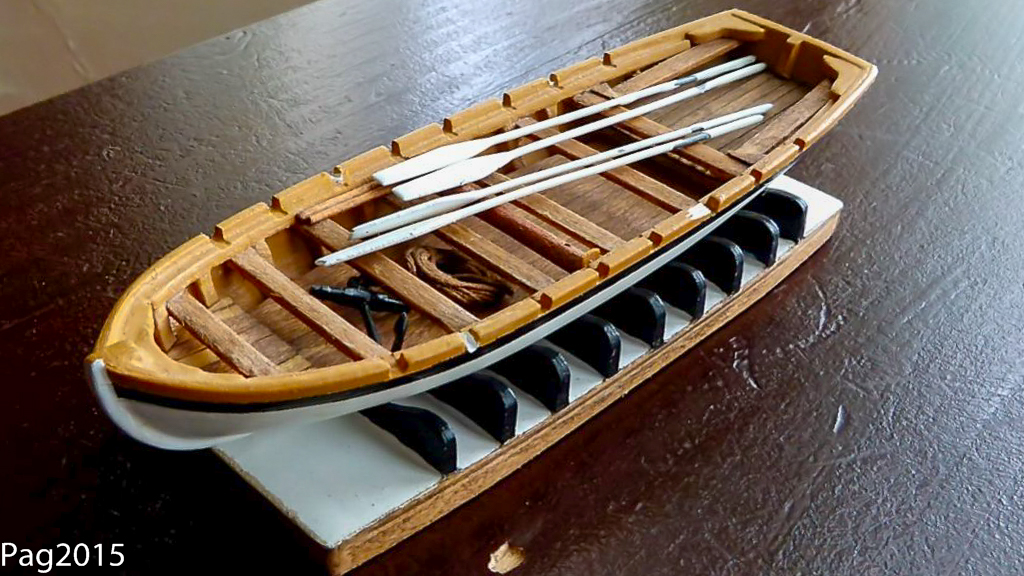
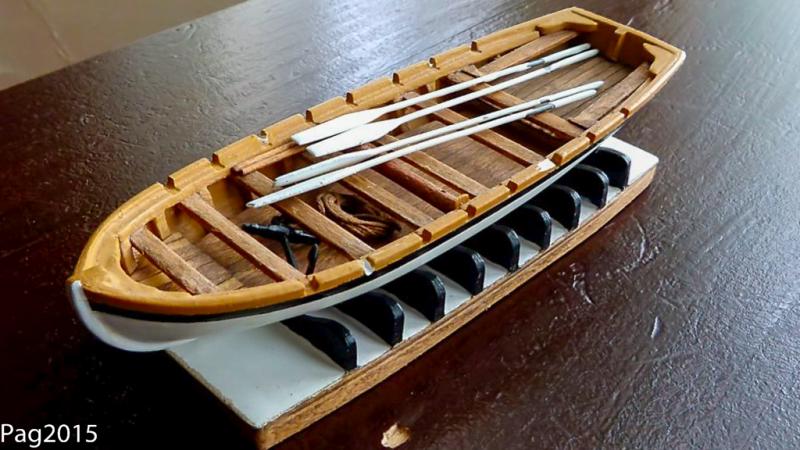
Great work looking good Here is my old completed Vic launch. OC.
-
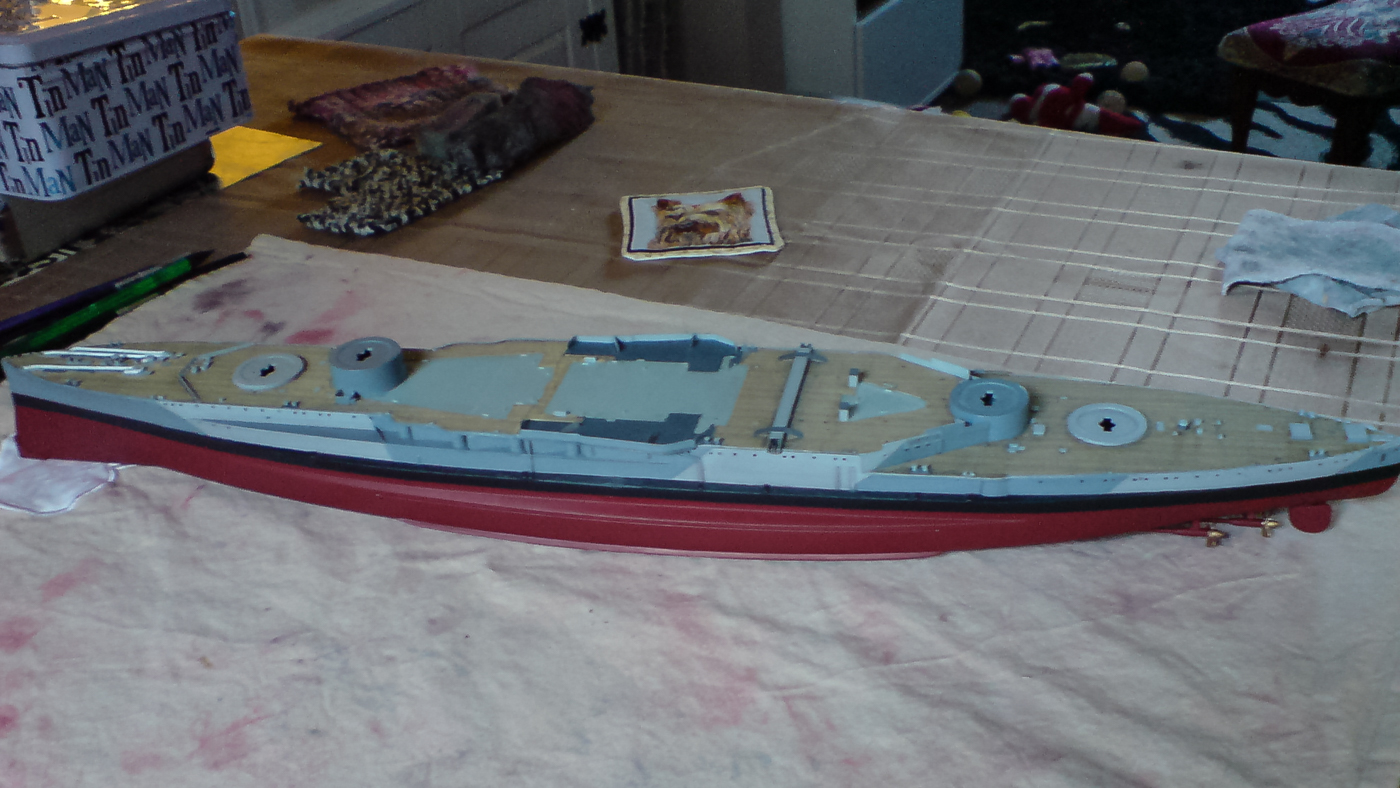
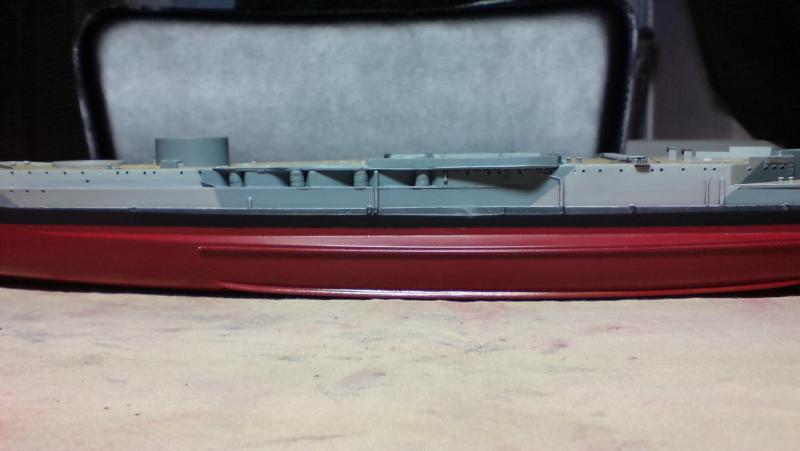
Right folks - I carried on with flattening the lower hull so after the use of a hammer and an Iron LOL, no seriously I found a slightly larger flatter paintbrush in my paint box, I softened it with washing detergent and made up some more diluted acrylic top coat, got quite a thin watery consistancy and with smooth even strokes I managed to get the whole lower hull covered. I continued putting about 5 layers on with hairdrying between each coat, its covered well and only left faint brush marks that will easily be buffed out with gentle action from a sponge/cloth. I am Over the moon to have get to this stage - where I can now start building the sub assemlies on the deck Here are a few pics folks OC
-
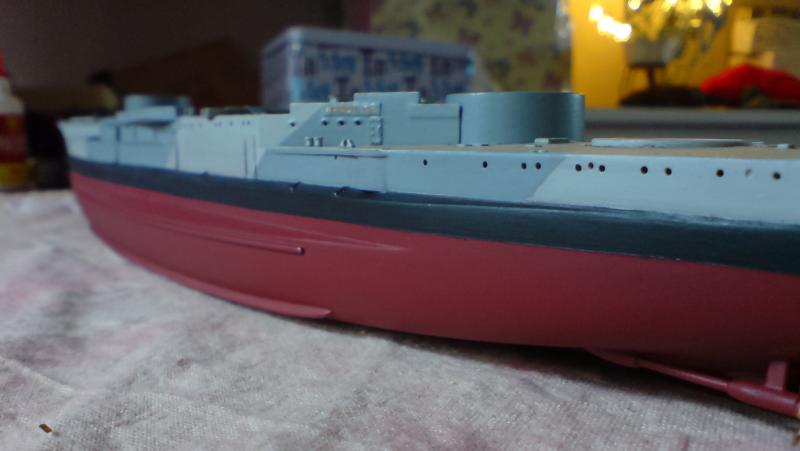
Right then folk you would never call me impatient but I decided to try a new stratergy with my lower hull flat coat, I have some acrylic in a bottle that I hav ebeen using on my upper hull, anyway I decided to mask off sections of the hull starting with a section under the rear hull around the props, I made a box section with tape then mixed my normal skimmed milk thickness flat coat, and started to brush it on in thin layers drying with a hairdryer between each. About 4 layers and it had a nice flat finish and was touch dry due to the heat from the hairdryer. Next I masked off a narrow strip along and under the boot line, and proceeded to apply the top coat with my brush in the same manner as the bottom, again with drying in between each coat, again about 4 layers then I removed the tape and the flat finish was quite good. The idea is to mask off another line tomorrow lower down and carry on in the same manner till the side of the lower hull is flat laquared, then the main bottom will be done but that is a more controled area and not seen - so less worry about its smooth flat finish. Well thats what I was doing today folks OC.
-
Hi there, just checked back through my builds - I put the Anti Fouling on Two Months ago so guess it should be completely dry and set by now. OC.
-
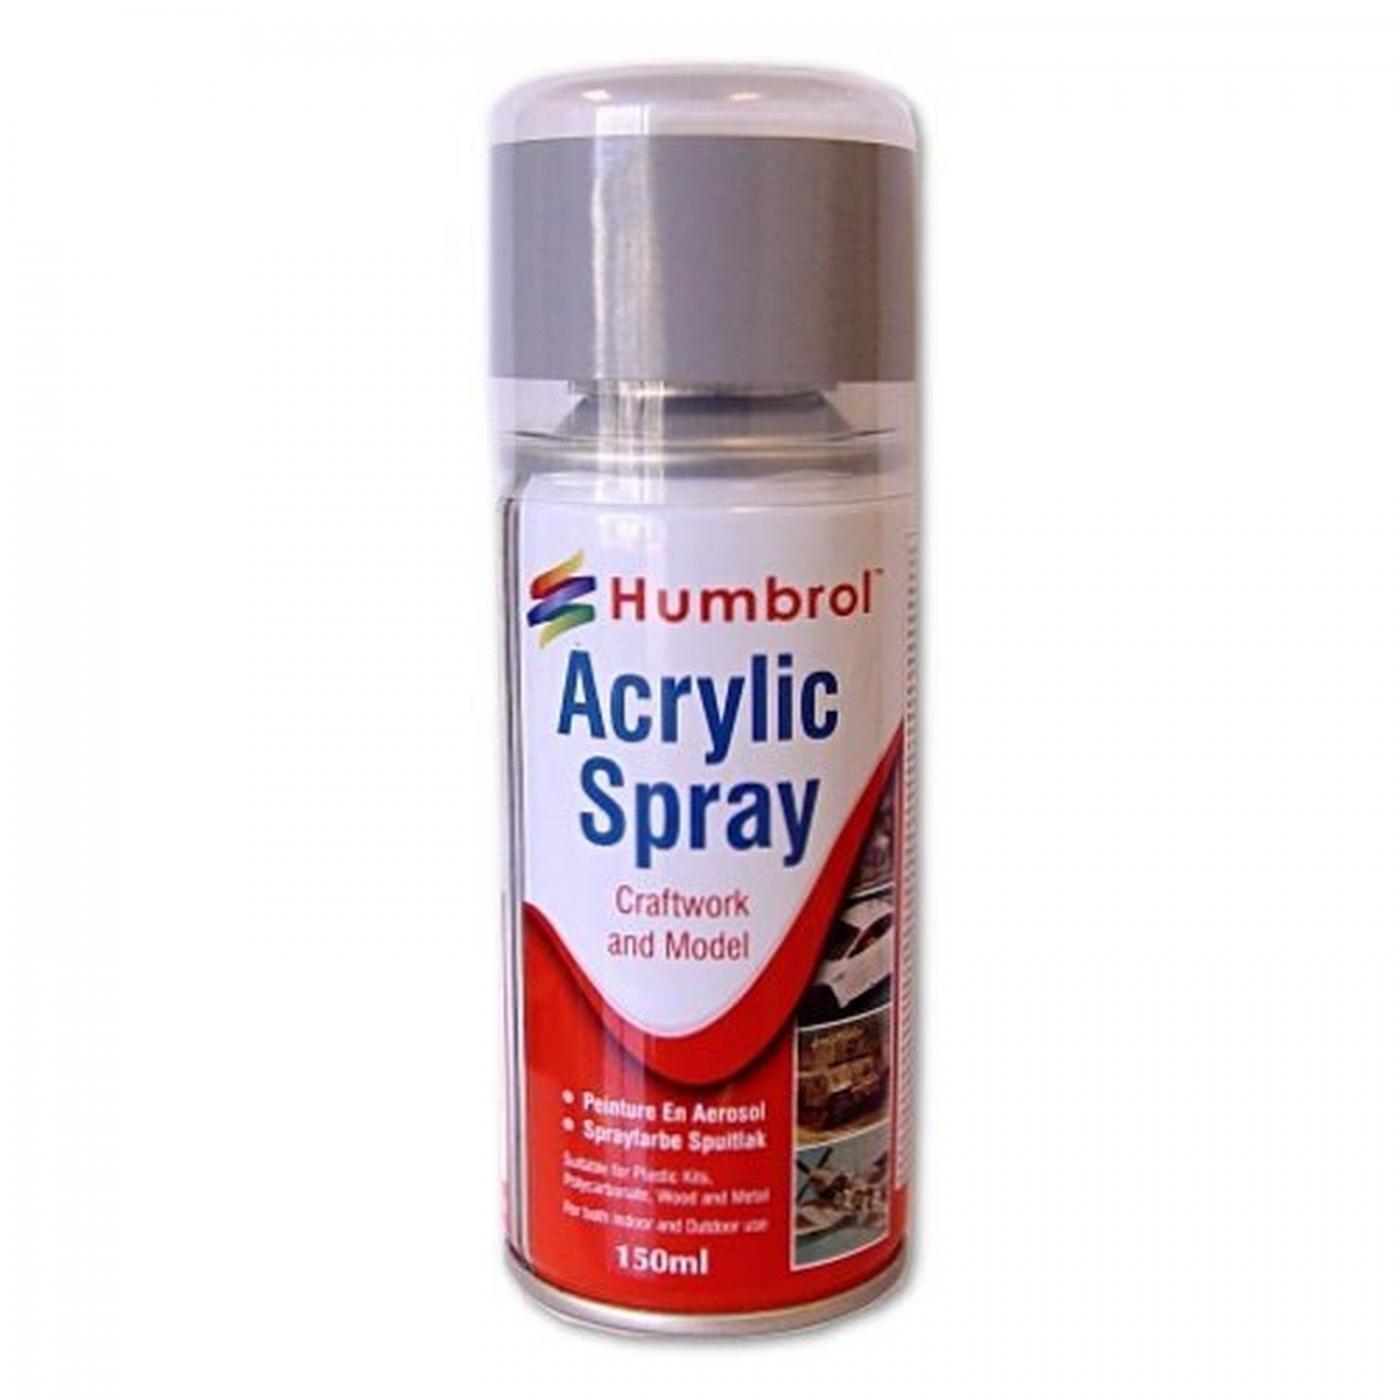
Do folk think this Humrol Acrylic Matt spray would be ok - its says it can be sprayed over enamel or acrylic and is fine for plastic models. OC.

-
Folks Im looking for a bit of advice - I want to get the hull finished all it needs is the Anti Fouling bottom upto the boot line dulling the gloss finish, its a good layer that went on with an enamel rattle can, I dont want to wait to get a clear matt laquar off the net and no where near me sells stuff like that. Could i key the area with wire wool or very fine sand paper if i mask off the boot line to avoid damaging the finish on it. What do folk think? OC
-
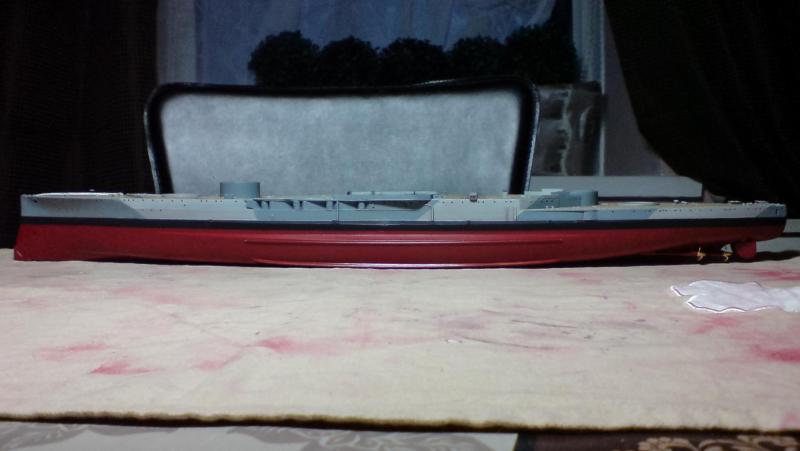
Did some more work on the top coat with my small brush - spent about 4 hours doing it, the application had to be done faily quick to stop the laquar gunging up, but also in small areas with controled dead stops like pipes etc, I applied about 6 thin layers - so now the whole top hull section both port and starboard and the deck is flat laquared with acrylic. No picture as it looks just the same as the port side. OC
-
That rangefinder looks super greg, I like the rails - did you have to bend them to give them sag or was they like that on the fret? OC.
-
Tomorrow it will be a repete on the other side again using a few thinned down coats with a brush, but as practice has shown me - applying as little as possible to avoid patchiness. When I do the hull because of its area I will use a rattle can flat coat for that, as brush applying just wont work without it going patchy. OC.
-
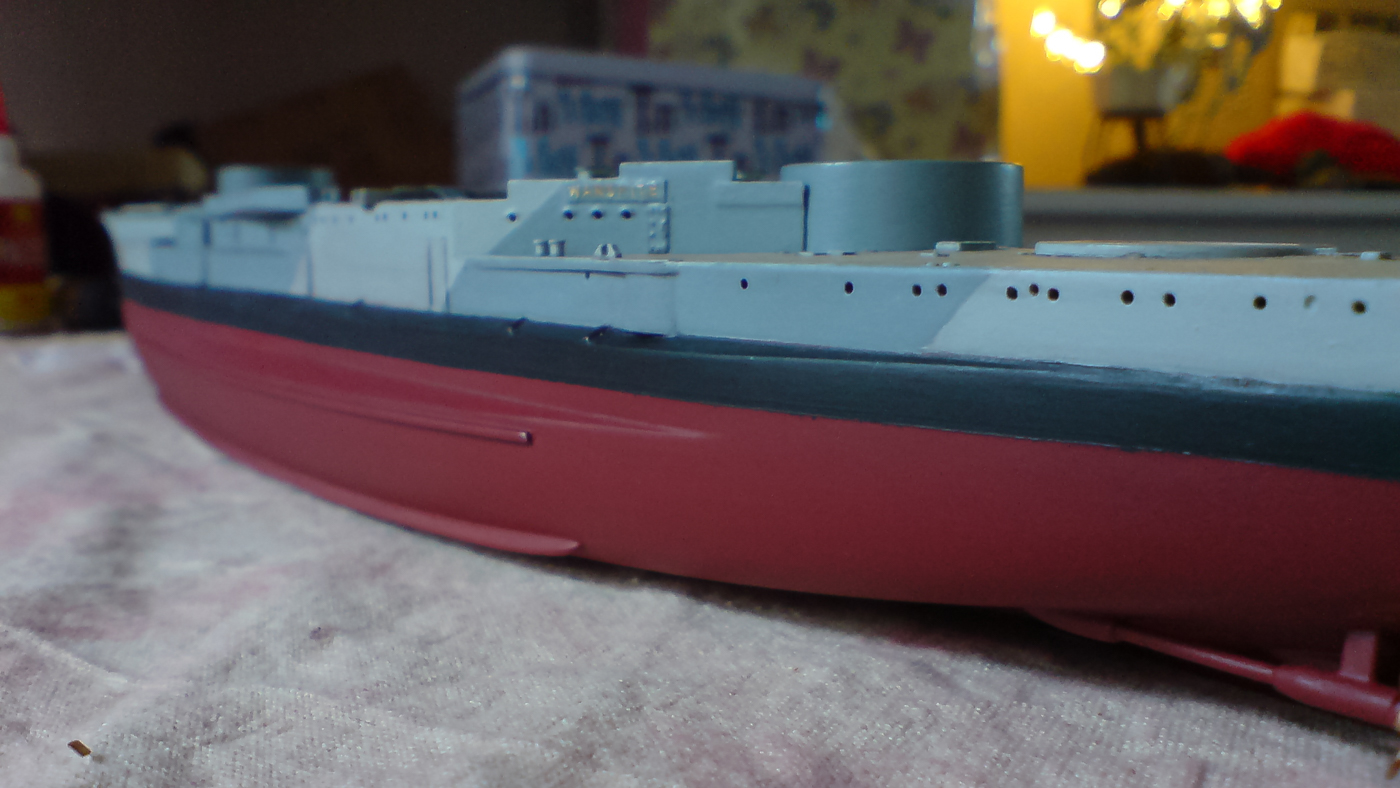
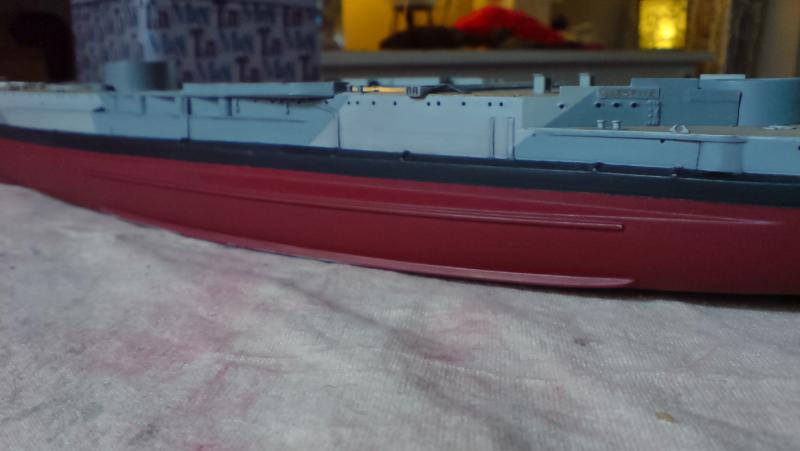
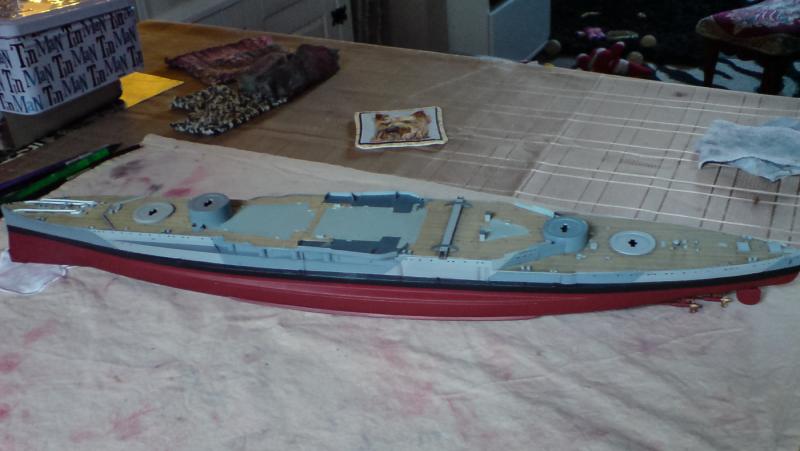
Decided to lay down some flat top coat today - I was going to just do the the deck, but after I decided to do the hull top side including the boot line, I have only done the one side as the top coat would skin quite quick, and as I was applying with a fine brush I was trying to do a few watered down coats. Here is a couple of photos that also show a slight amount of weathering, only shadow detail mainly. OC.
-
Hola como estas Liberto - Bueno muchas Bueno :) OC.
-
I can relate to that no end - I wont dare start anything small till the hull is completed and sparayed underneath with flat topcoat, I keep all my stuff tooked away in the main box and other build boxes, only getting stuff out when I am working on her, afterwards its all packed away and the table is left clear, the hull is kept on the shelf where she will live when finished. OC.
-
More time on the bench(dinning table) today - i finished off the painting on the rear starboard bulkhead by applying the two tone camo, when dry helped by a few blasts from the hairdryer I fixed it in place on the rear deck, so this has sealed in the deck ready for a few small bits and pieces before I give the deck a couple of coats of matt top coat. Here are a few more pics folks. OC.