


Stuntflyer
-
Posts
1,196 -
Joined
-
Last visited
Content Type
Profiles
Forums
Gallery
Events
Posts posted by Stuntflyer
-
-
I just checked the measurements. They are the same port and starboard. I didn't think to check this before installing them. I guess I just got lucky.
-
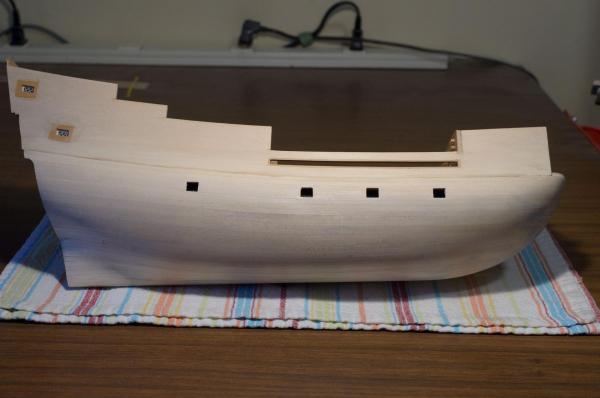
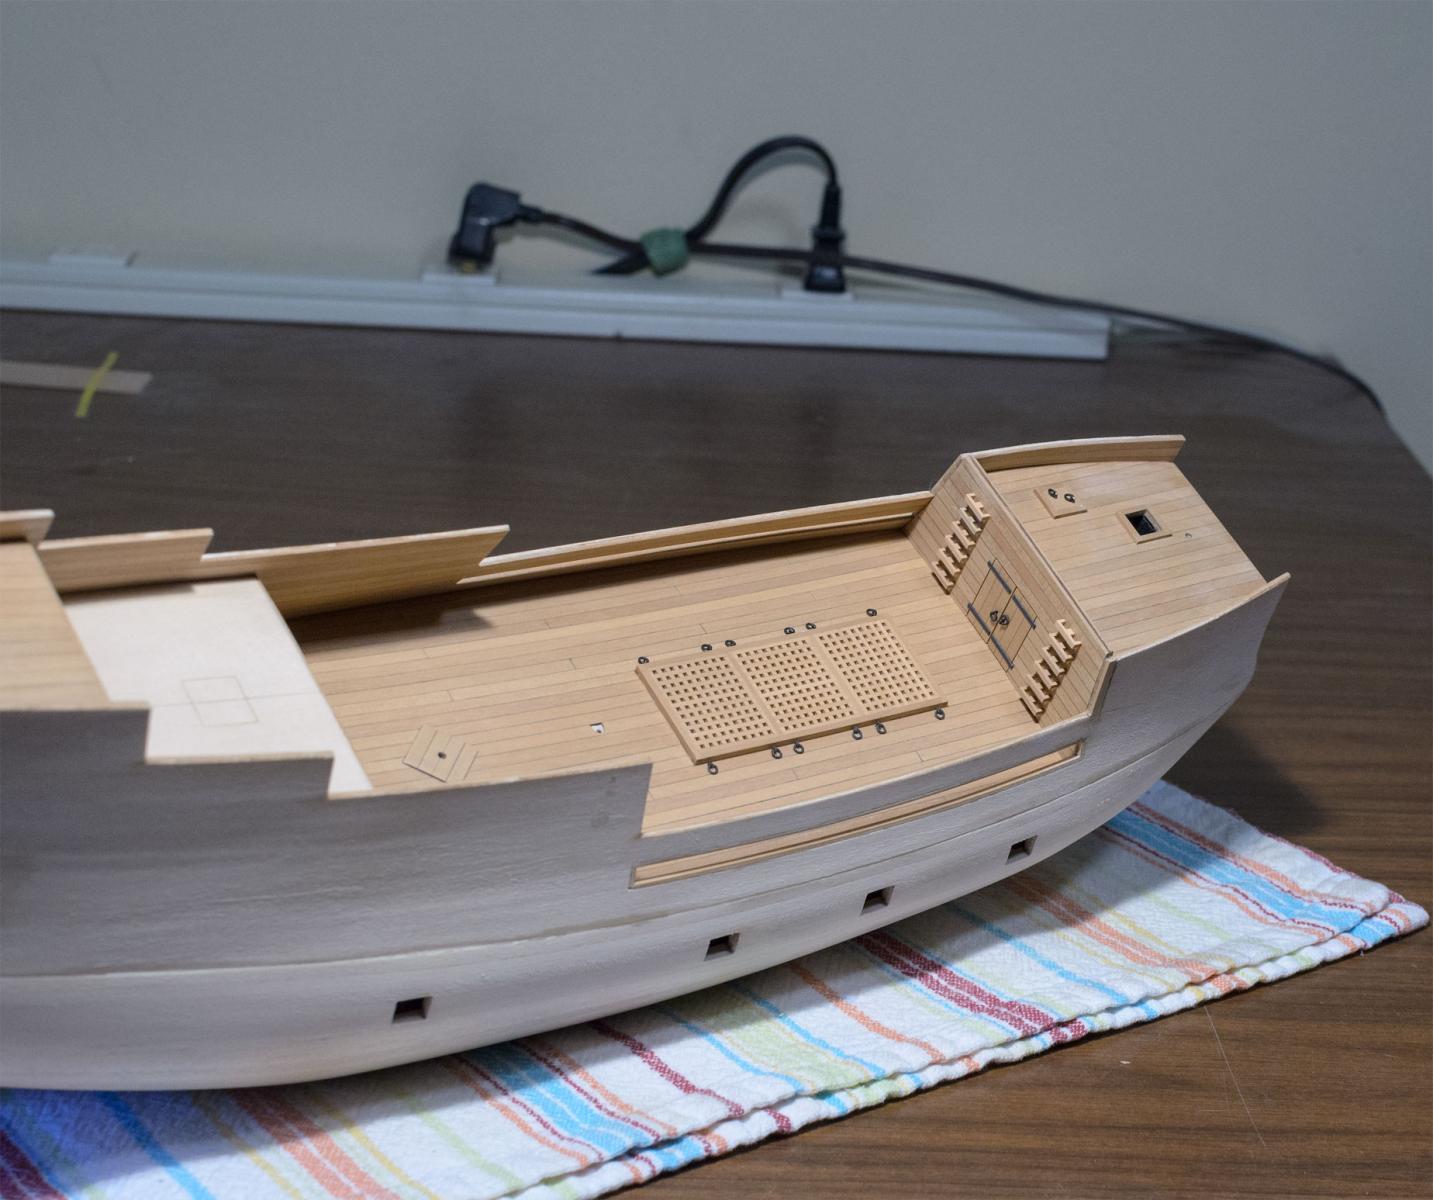
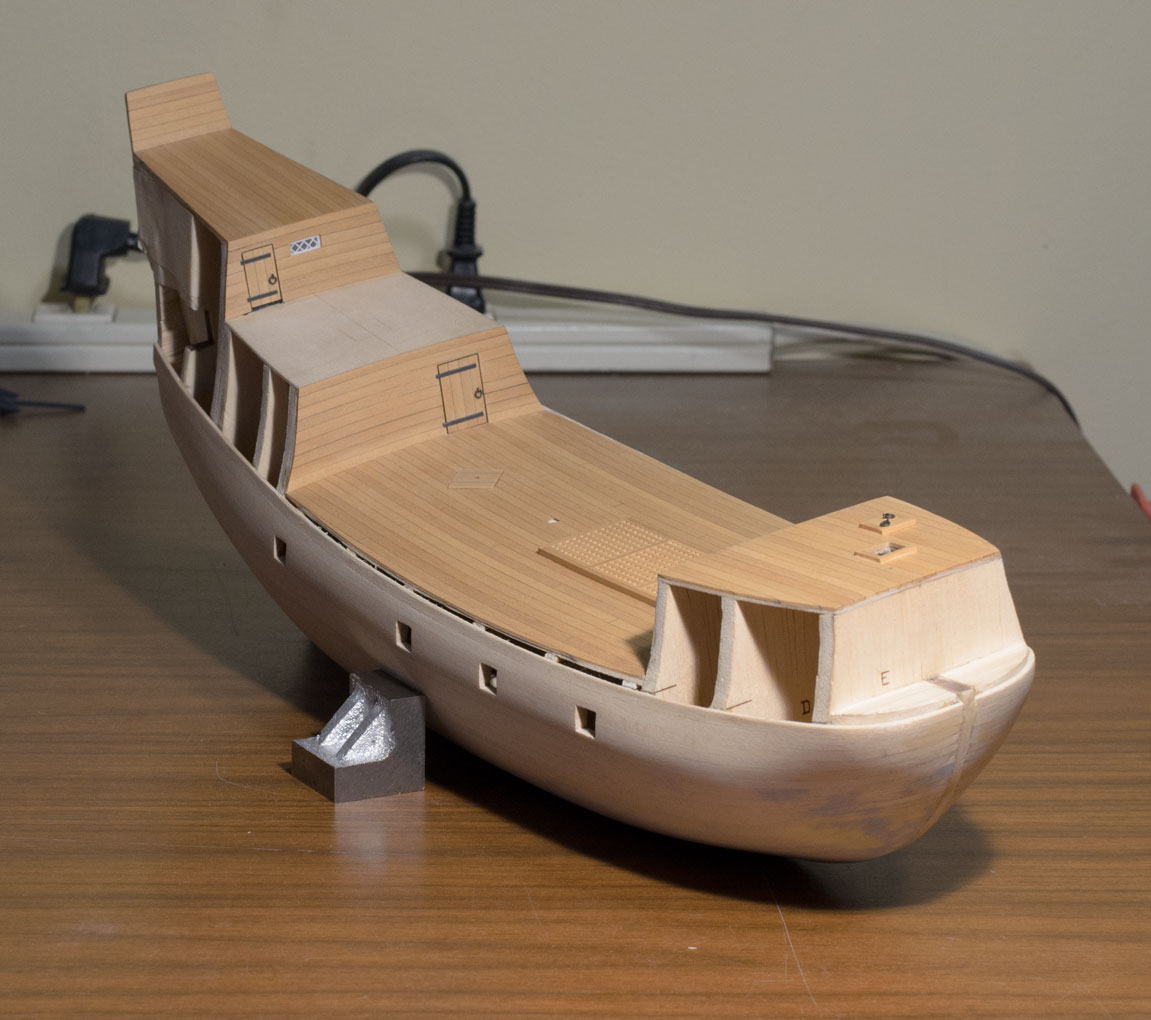
● Bulwark Template Installation: I first glued the bulwark templates to the hull using CA at the area of the Great Cabin where the inward bend is most pronounced. Next, I glued the area at the Forward Cubbridge Head. These areas were not clamped as I found it easier to get a tight fit by using my fingers to push on the template. The area at the bow was done using CA and clamps. After that, it was simply a matter of working fore and aft using PVA to finish the gluing process. I lined the windows and other areas of the templates with boxwood to maintain uniformity where it will be seen. Both templates fit very close to the initial plank avoiding the need for a lot of filler. I still need to trim the templates where they overhang slightly. There are areas that will need a second coat of Wipe-on Poly, like the Forecastle deck, which I will do later after the remaining parts are in place.
-
Augie, Thomas and Randy, thank you for all the nice comments!
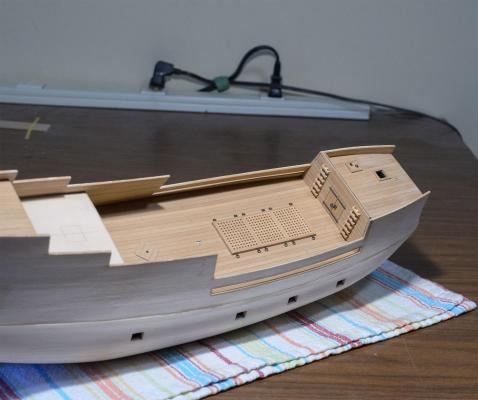
● Upper Deck Planking: The strips I received vary by as much as .020 in thickness so I ran them through my new thickness sander until they were all 1/32" thick. This proved to be very helpful during the sanding process. I had to be very careful not to damage the area around the coamings and Capstan base. For this I used a "0" barrette escapement file which was able to get right up to these parts without damaging them. I'm not sure how important it is to have the deck planking be uniform in color. Does anyone have a comment about this?
-
Those look great Randy. Can't wait to do mine!

-
-
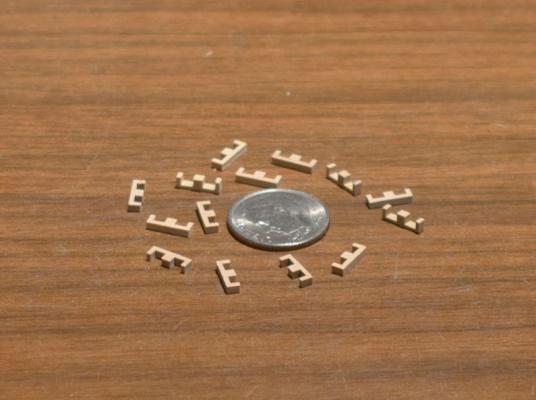
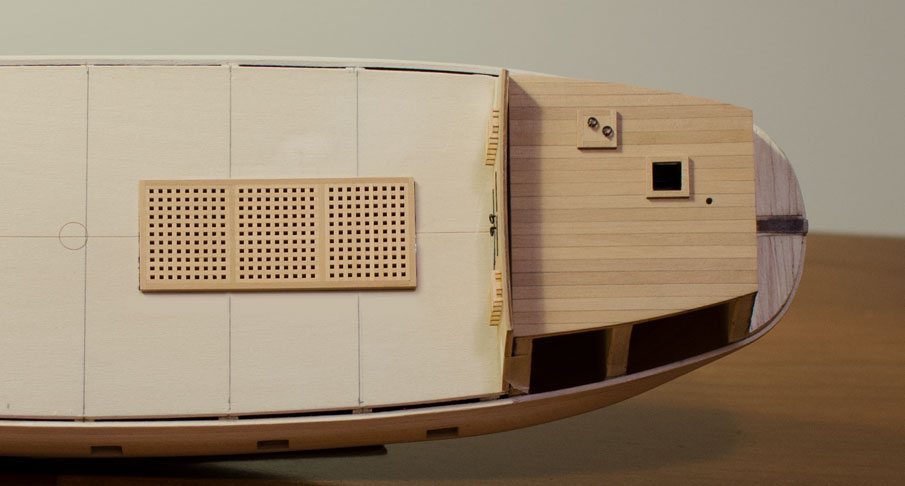
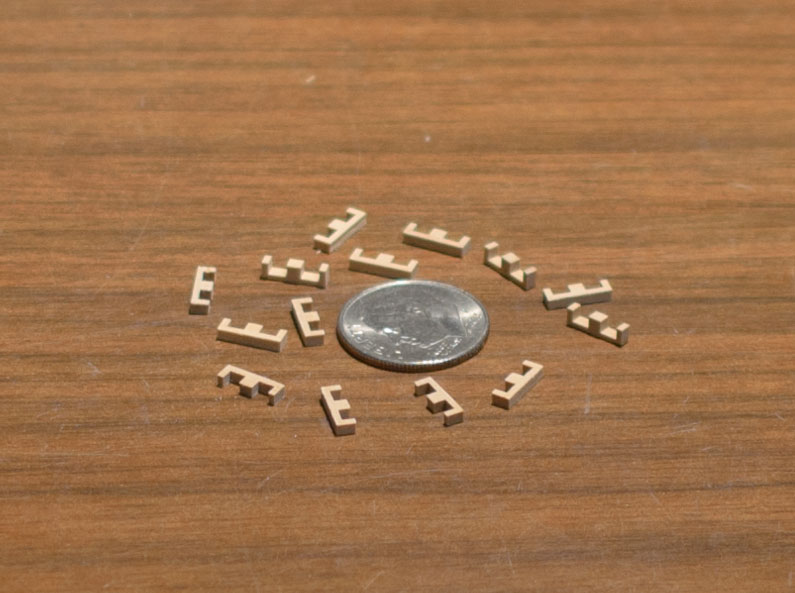
● Grating (Upper Deck): I made my first set of gratings today with 3/64" holes and 3/64" battens. The coamings were made from 1/16" x 1/8" strip with lap joints. I used the method described on EdT's Victory log to make the gratings. .http://modelshipworld.com/index.php/topic/316-hms-victory-by-edt-196-pob/page-2#entry29518. No glue was necessary since the battens went together with a nice fit. Thank you Chuck, EdT and Michael Mott for all your help.

-
Fantastic job on the capstan Thomas. I am always looking forward to seeing what you are going to do next.
Mike
-
-
-
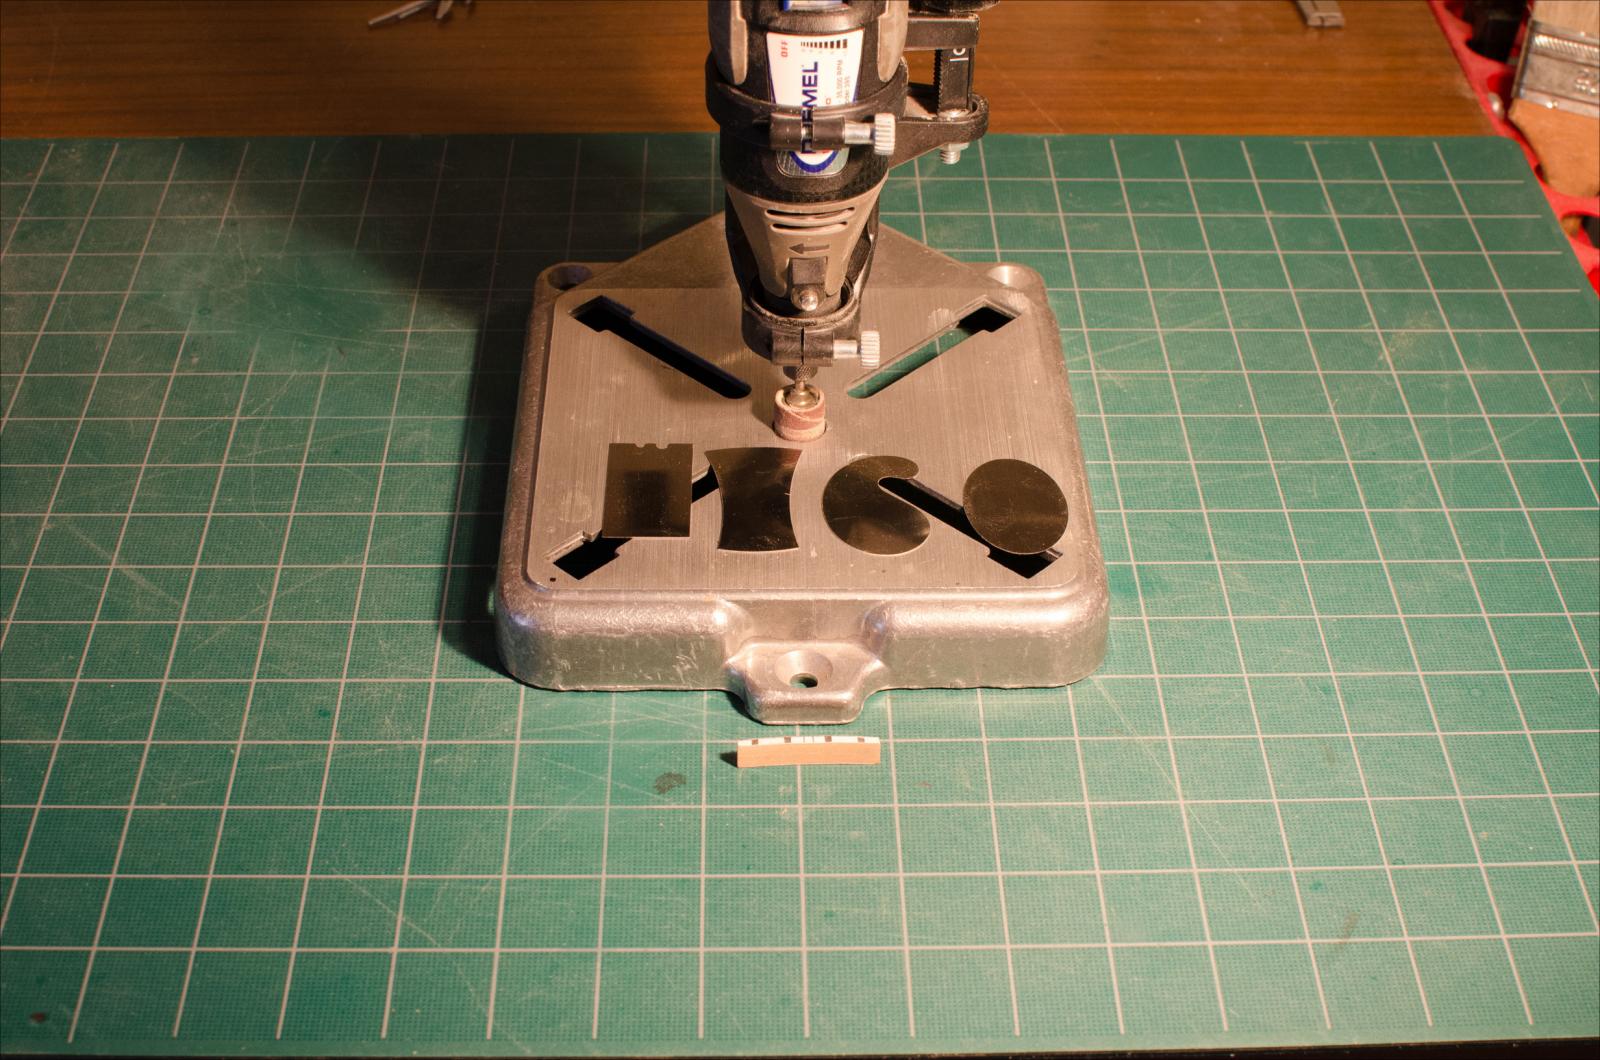
I have looked online for a mini drum sander but have been unable to find one. I prefer not to use the drill press conversion idea. Does anyone make a small drum sander that they would recommend? So far I have been using this. .
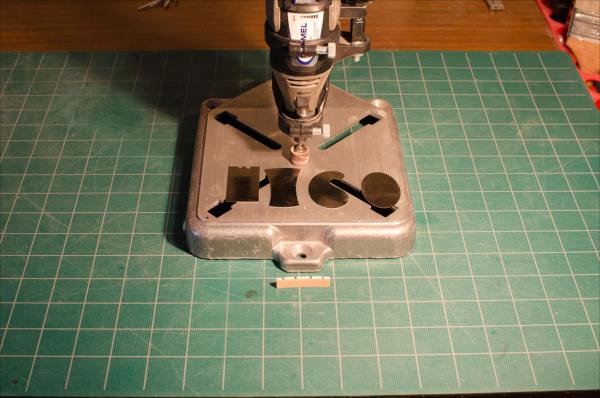
Mike
-
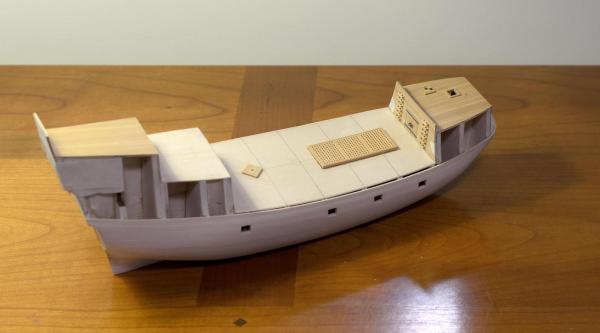
● Great Cabin Bulkhead: I managed to get this one done today.

- Ryland Craze, GuntherMT, Jack12477 and 3 others
-
 6
6
-
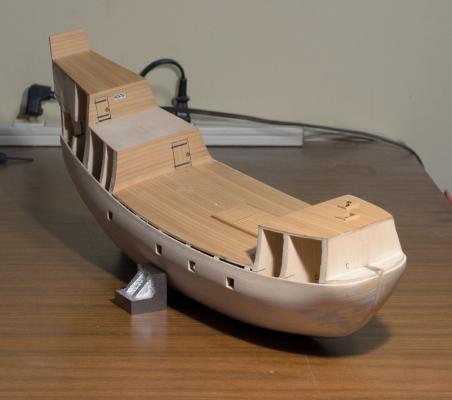
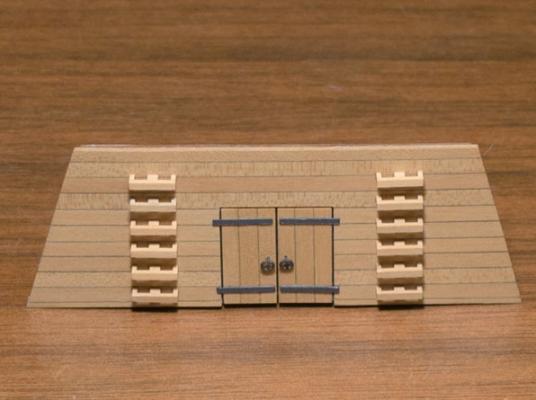
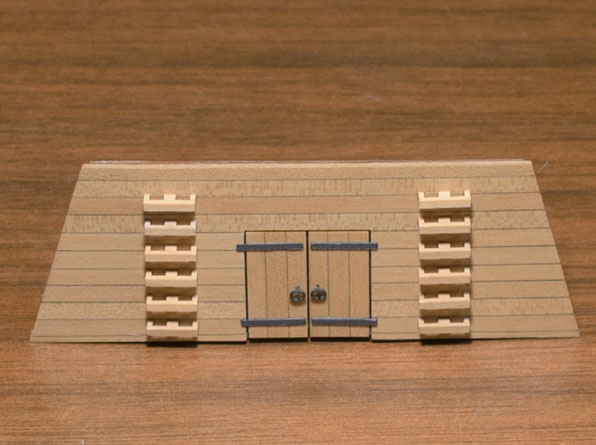
● Forward Cubbridge Head Bulkhead: Now that the Byrnes table saw has arrived I'm finally able to finish this bulkhead. The kit supplied ladders, although not too bad, were replaced with ones made from boxwood. There was only a tiny area in which to glue the ladders and the PVA glue I first tried did not hold well enough. I switched to 5 minute epoxy applied with a needle and that worked out very well. Any excess glue was easily removed minutes later with a sharp #11 blade.
-
Randy, I found this on Ilhan Gokcay's log of the Matthew. He shows how he made his tops. Scroll to the bottom of the page. http://modelshipworld.com/index.php/topic/566-matthew-1497-by-ilhan-gokcay-scale-150/page-3
-
Happy Birthday Dave!
Mike
-
-
William, I found the answer through Wayne's reply which I simplified my own crazy way. .example below
To find the scale ratio for 1/8" scale: 1/8"=.125, (12 ÷.125) = 1:96 scale
-
I did see that but again isn't that for scaling up or down as well? What I was trying to find out was how to convert for example, 1/4" scale to a ratio like 1:48. The formula is above in my 3rd post or you could use Wayne's method.
-
Pat, Looks like it scales up or down which is great, but not exactly what I was asking for. Still, this is a useful tool which I can use. Thanks!
-
-
Wayne, thanks for the great explanation.
Mike
-
Can fractional scale be converted to a ratio, for example. . .
5/32" scale = 1:?
Mike
-
Thanks Randy,
Your build is looking very nice and I really like the colors of the decorative parts. Scratching the "tops" seems like your only option. Those metal stanchions look really bad and I have no idea why the wood parts don't match the drawings. I might start on my "tops" soon but I first need to make some gratings which I will start on this week.
-
-
Dr Per, Jack, I found the Dremel Workbench here. . .http://www.ebay.com/itm/like/221495363403?item=221495363403&lgeo=1&vectorid=229466&rmvSB=true


HMS Vulture 1776 by Dan Vadas - FINISHED - 1:48 scale - 16-gun Swan-class sloop from TFFM plans
in - Build logs for subjects built 1751 - 1800
Posted
I had to pull myself away from staring at that traveler Dan. I love the rigging too. Just great!