


Stuntflyer
-
Posts
1,196 -
Joined
-
Last visited
Content Type
Profiles
Forums
Gallery
Events
Posts posted by Stuntflyer
-
-
-
-
Thanks guys, I truly appreciate your comments as well as all the "Likes". .
I remember the first SMSNJ meeting I went to where Tom Ruggiero was talking about our tech sessions. He felt that no tech session was too simple to show as there would always be something to learn from it. I never thought that the steps in making the block were anything special and was probably done that way many times before. It's very gratifying to see that I was able to show something different and perhaps useful to other modelers.
Mike
- Ryland Craze, mtaylor, PeteB and 4 others
-
 7
7
-
Here's wishing you all a very Happy New Year!
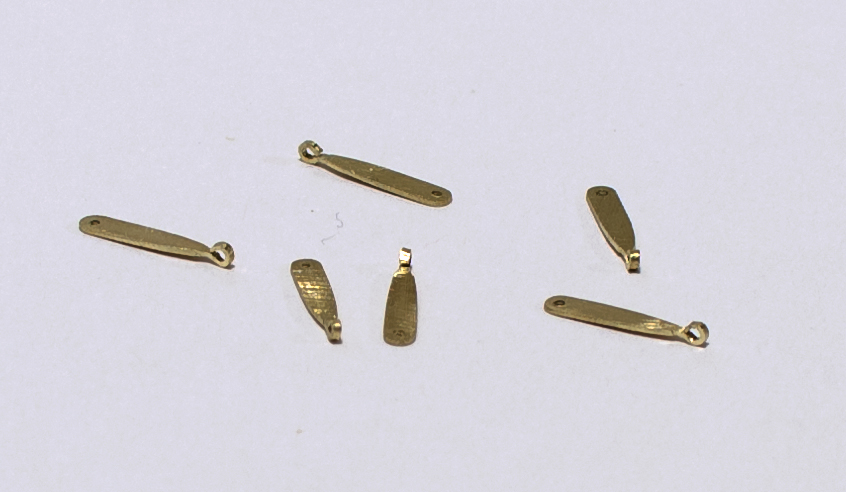
While waiting for boxwood sheet needed for deck planking, I was able to complete a few small projects. Those being the shaping the channels, backstay plates (unpainted), jib outhaul block and scuppers.
The channels and backstay plates were made as described in Chuck's log.

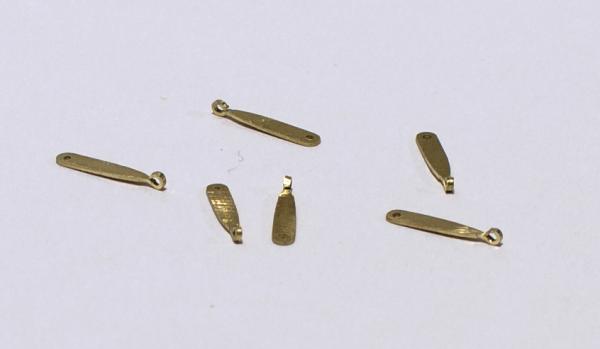
This was my build sequence to complete the outhaul block. .
Step 1. 1/16" strip was cut to the overall size of the block. Holes were measured and drilled for the treenails (#76) and center pin (.028"). Drilling incorrectly at this stage seemed far better than doing so after the whole thing was assembled and shaped.
Step 2. Used as a guide a short length of 22 gauge wire was inserted through the center hole. A 5/32" dowel center drilled and sliced to 3/64" was placed over the wire. The dowel was then secured to the strip.
Steps 3-4. 3/64" strip was glued to the 1/16" strip with a .024 pin used as a spacer. This allows the .018 rigging rope to pass through the block.
Steps 5-8. The overhanging 3/64" strips are trimmed off and the block is shaped. Once completed the treenails are simulated and 22 gauge wire is inserted through the center hole, standing proud slightly. The back of the wire is filed flush.

-
-
Erik, druxey, thank you for the nice comments and for all the "Likes".
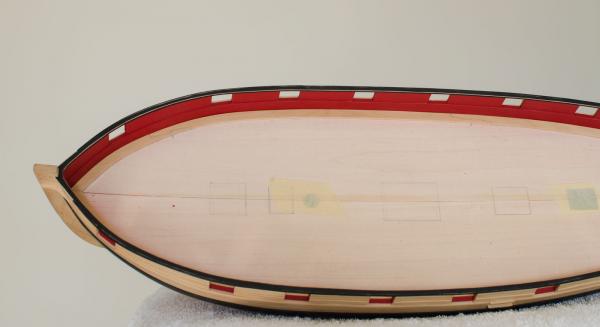
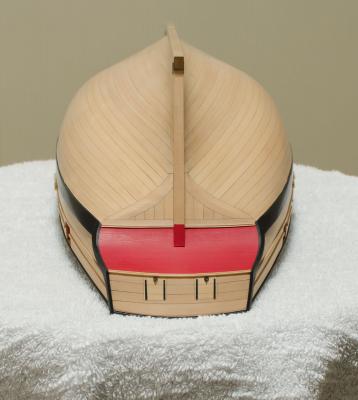
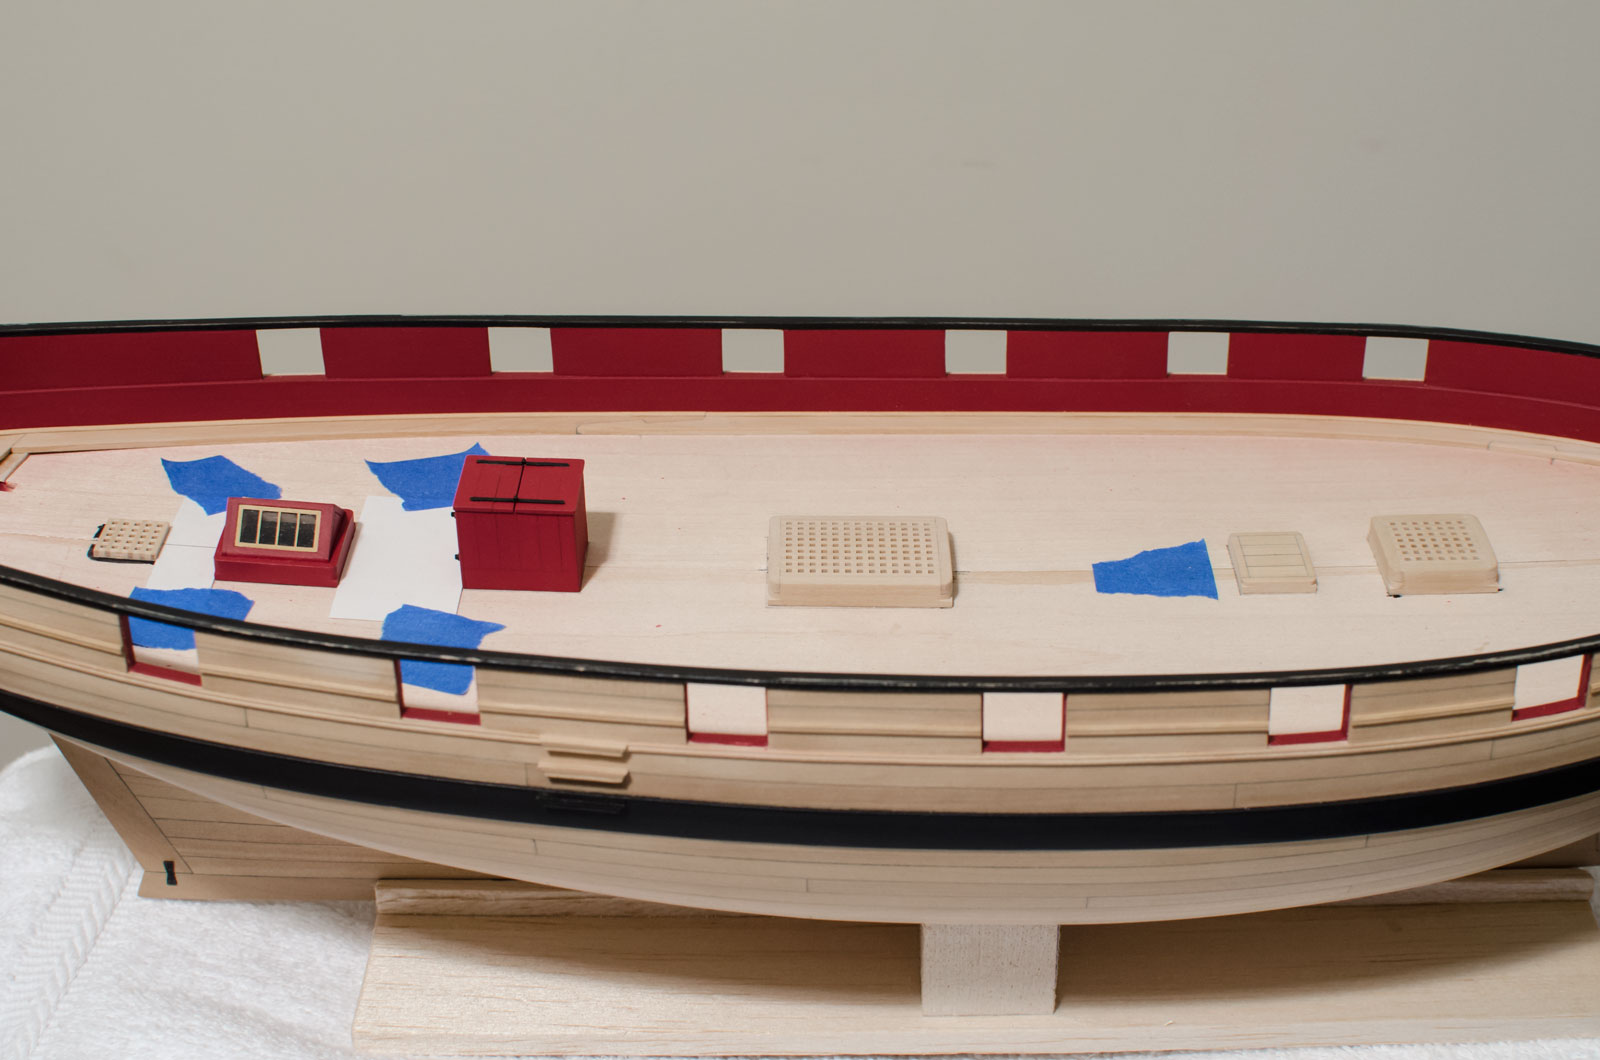
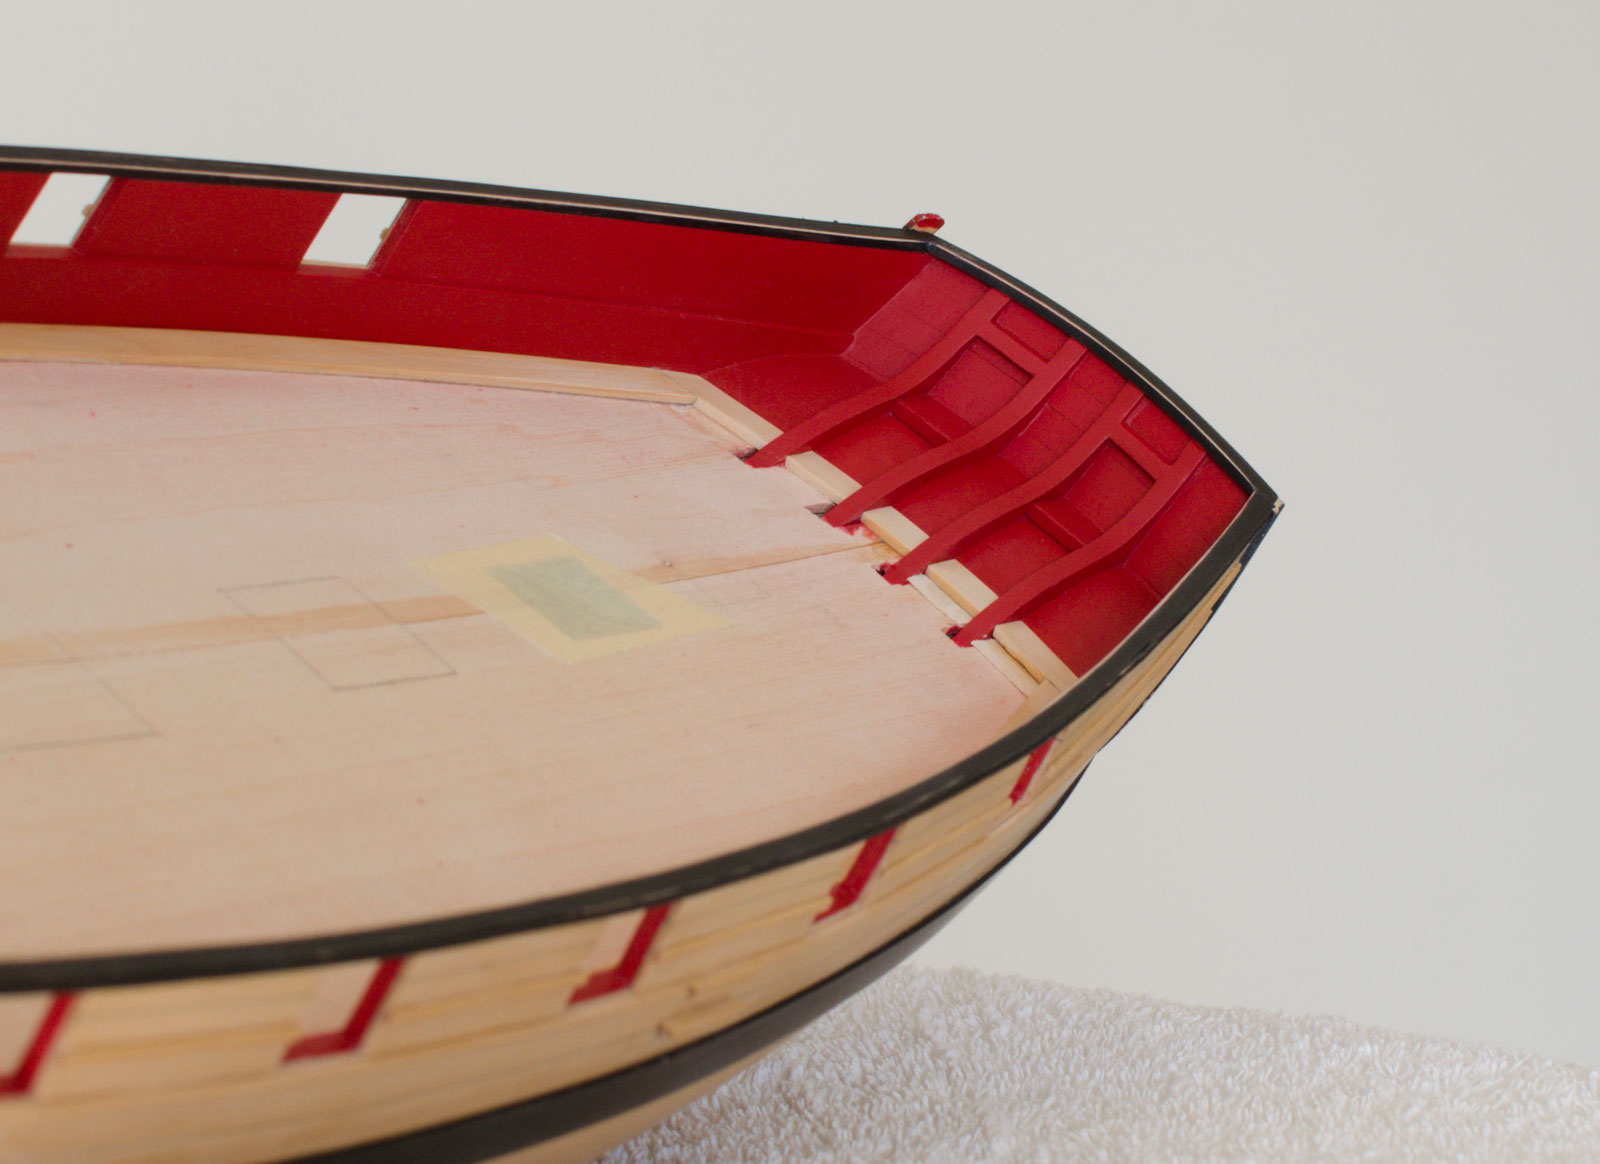
With the waterway completed I was finally able to add a few of the deck structures. These were all done a while back as a diversion, that kept me from getting crazy, when I was re-doing the planking. The photo below shows how I was able to set the structures with the correct spacing and parallel. You can't see it here but there is a lower deck below the skylight. The skylight windows have been antiqued thus reducing reflections, though quite subtle when viewed in person.

-
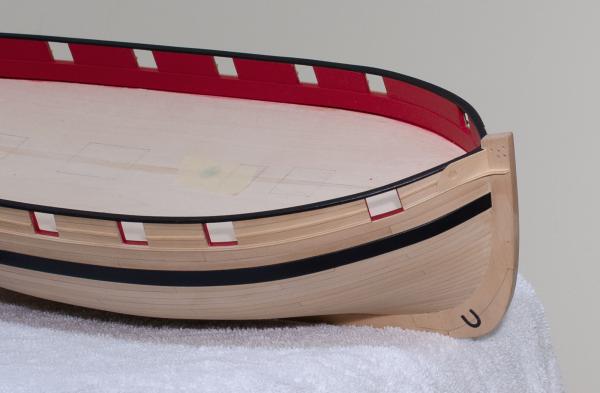
I managed to complete the waterways today. .
They are very small and fragile being only 1/32" x 1/32" before being rounded off. The shape was created by taping a 1/32" sheet at the edge of a table with a slight overhang. Another piece of tape was laid down about 1/8" back of the sheets edge, to prevent any sanding of the wood further back. A long, flat sanding block was used to shape the quarter round. A 1/32" strip was then ripped from the sheet with the flat side up on the table saw. Done the other way the round edge would have slid underneath the saws fence. The waterways were glued in with medium CA.


-
-
Looking really good Ken. . I'm looking forward to seeing it a one of our meetings.
Mike
-
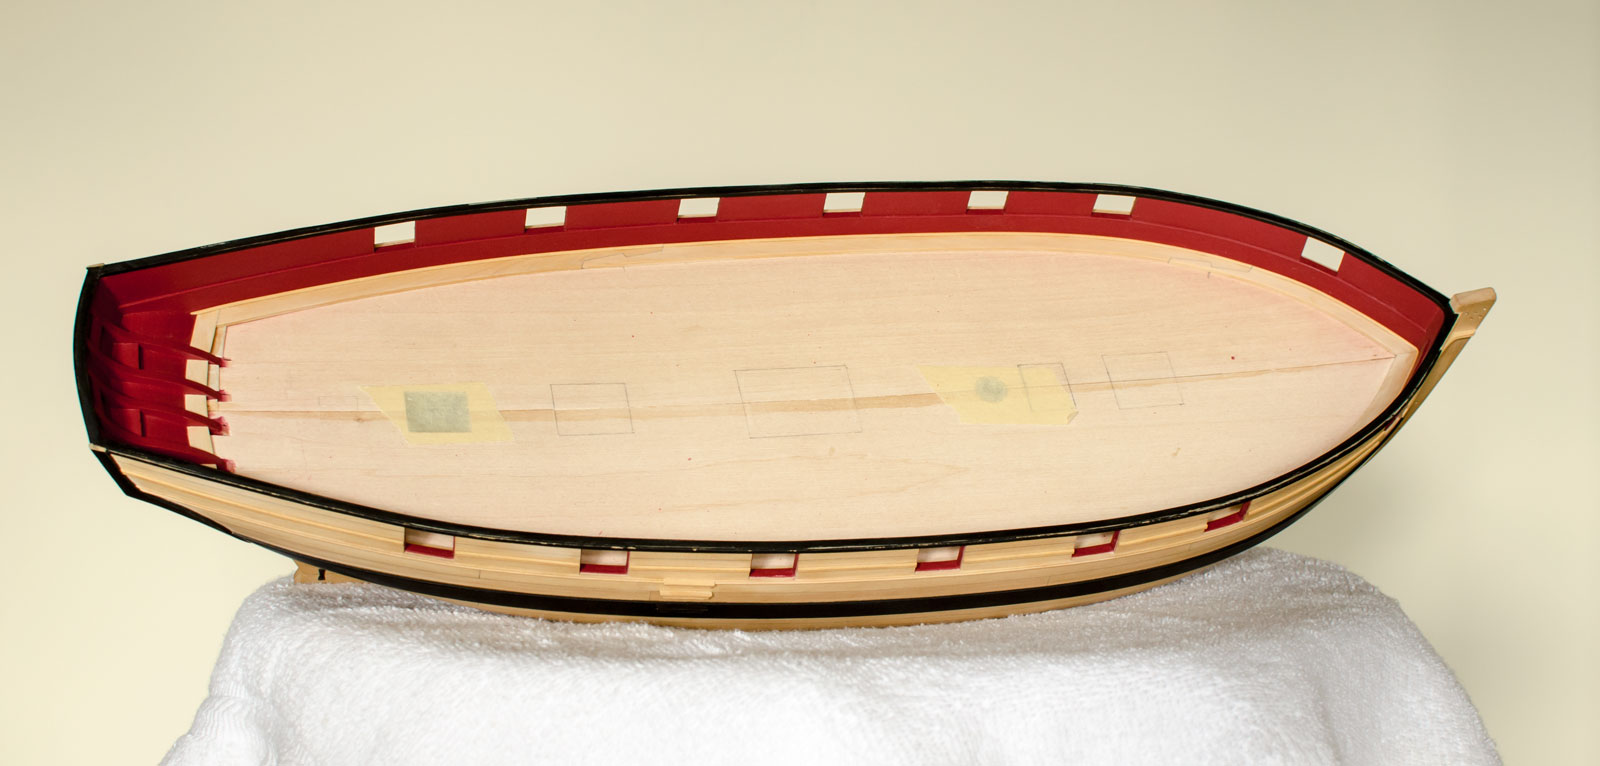
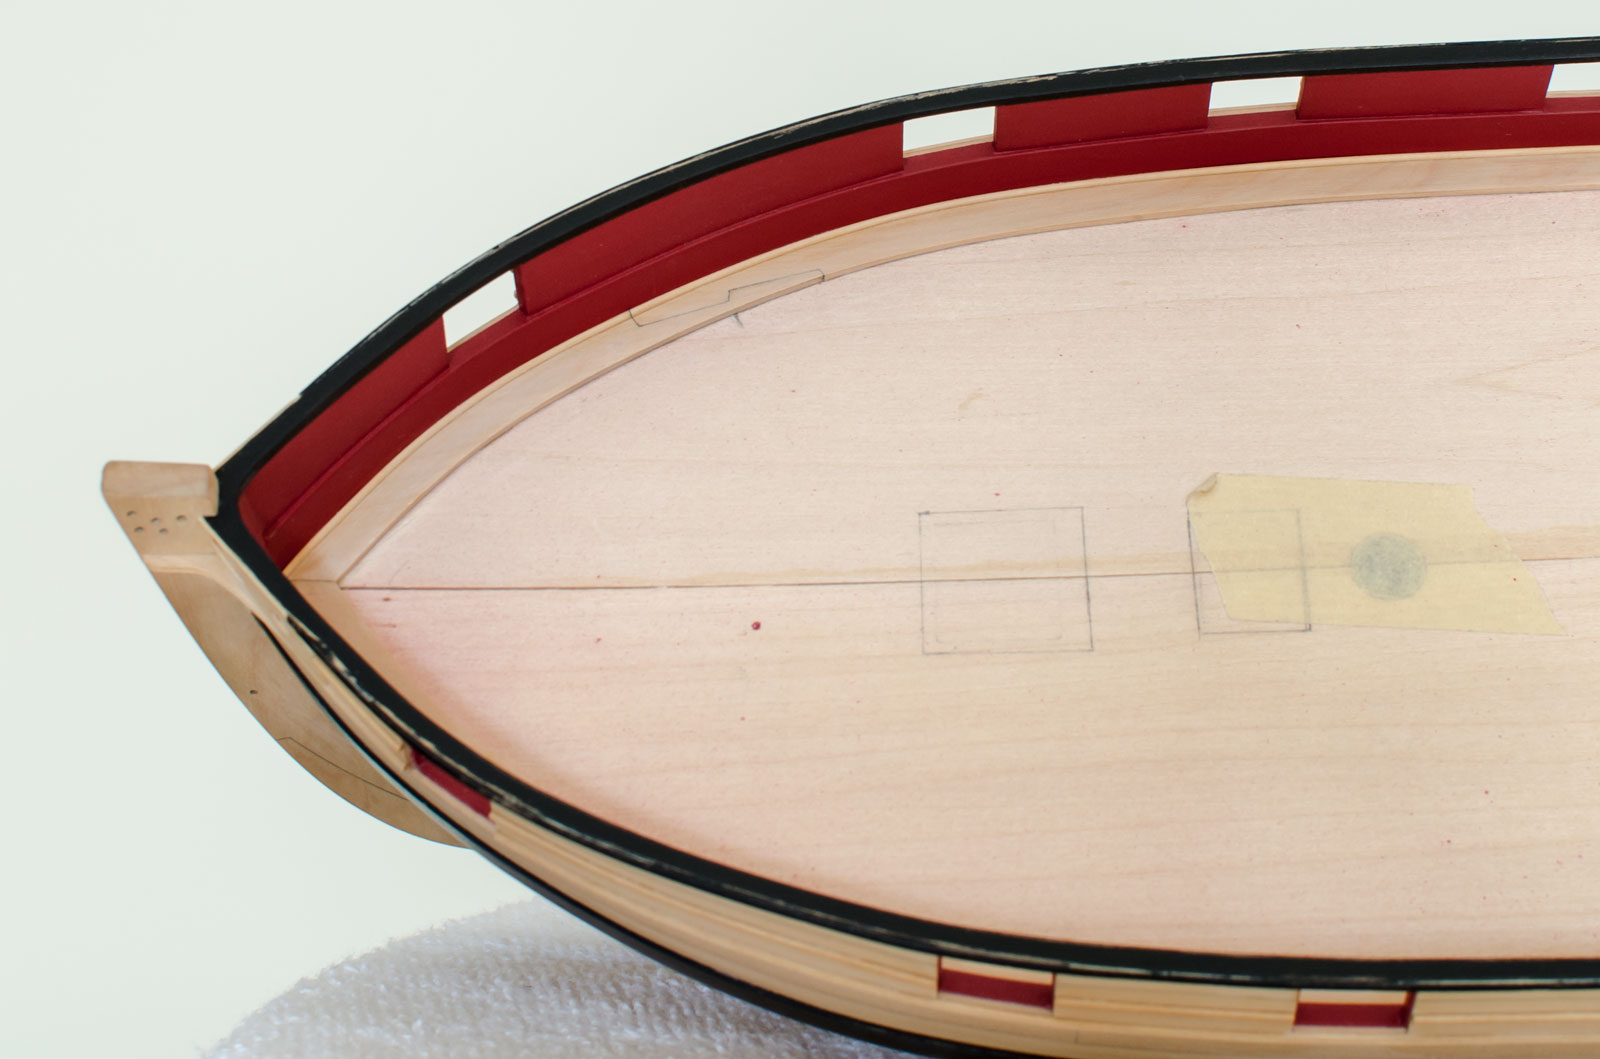
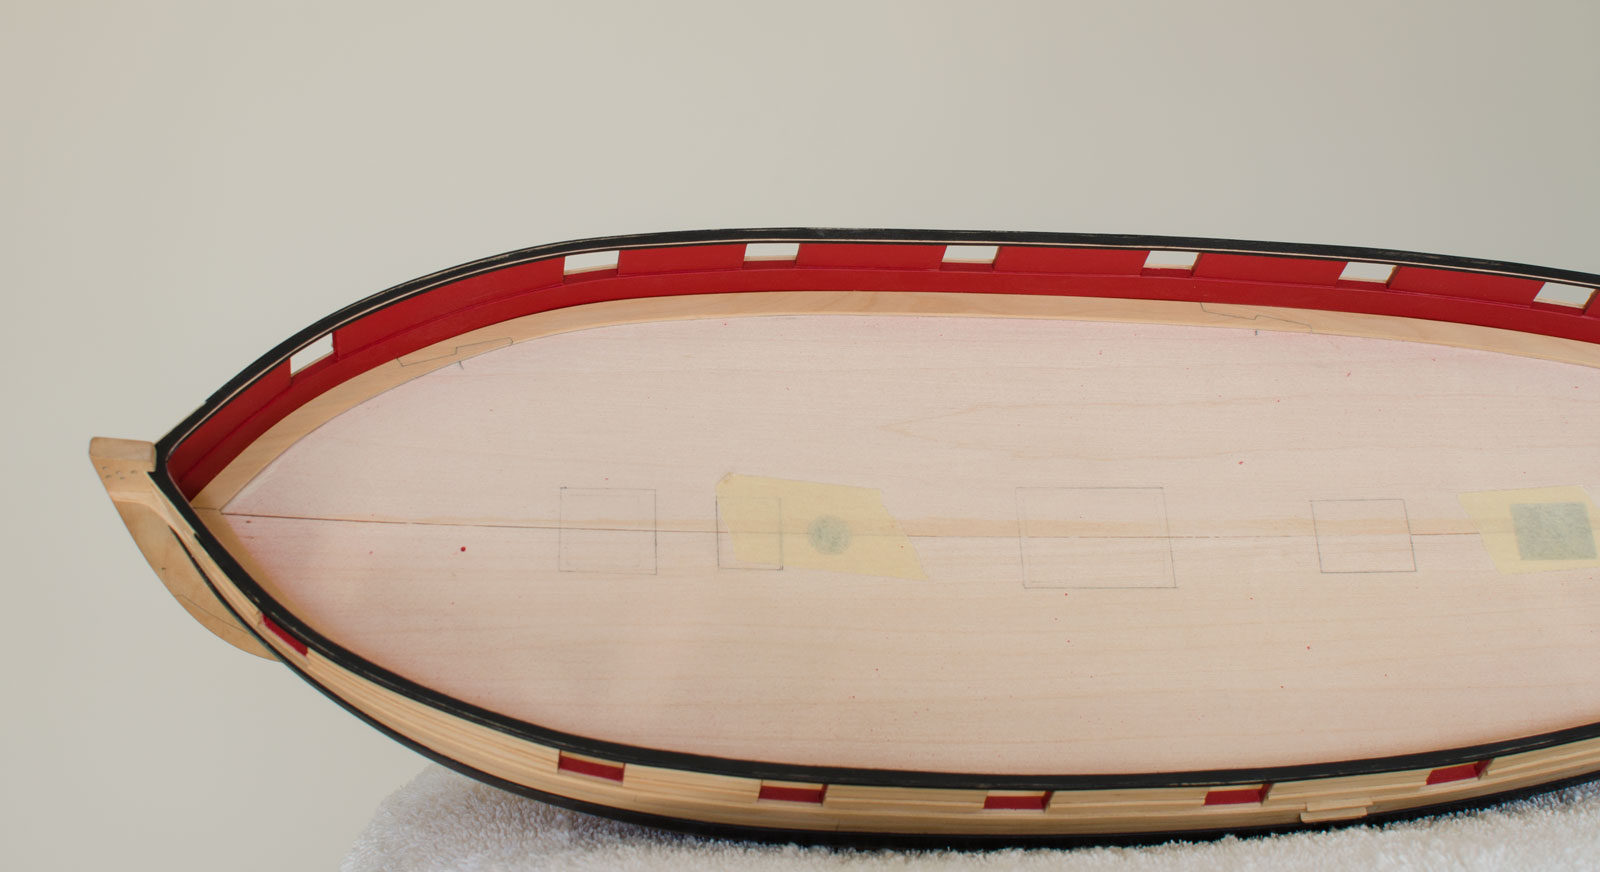
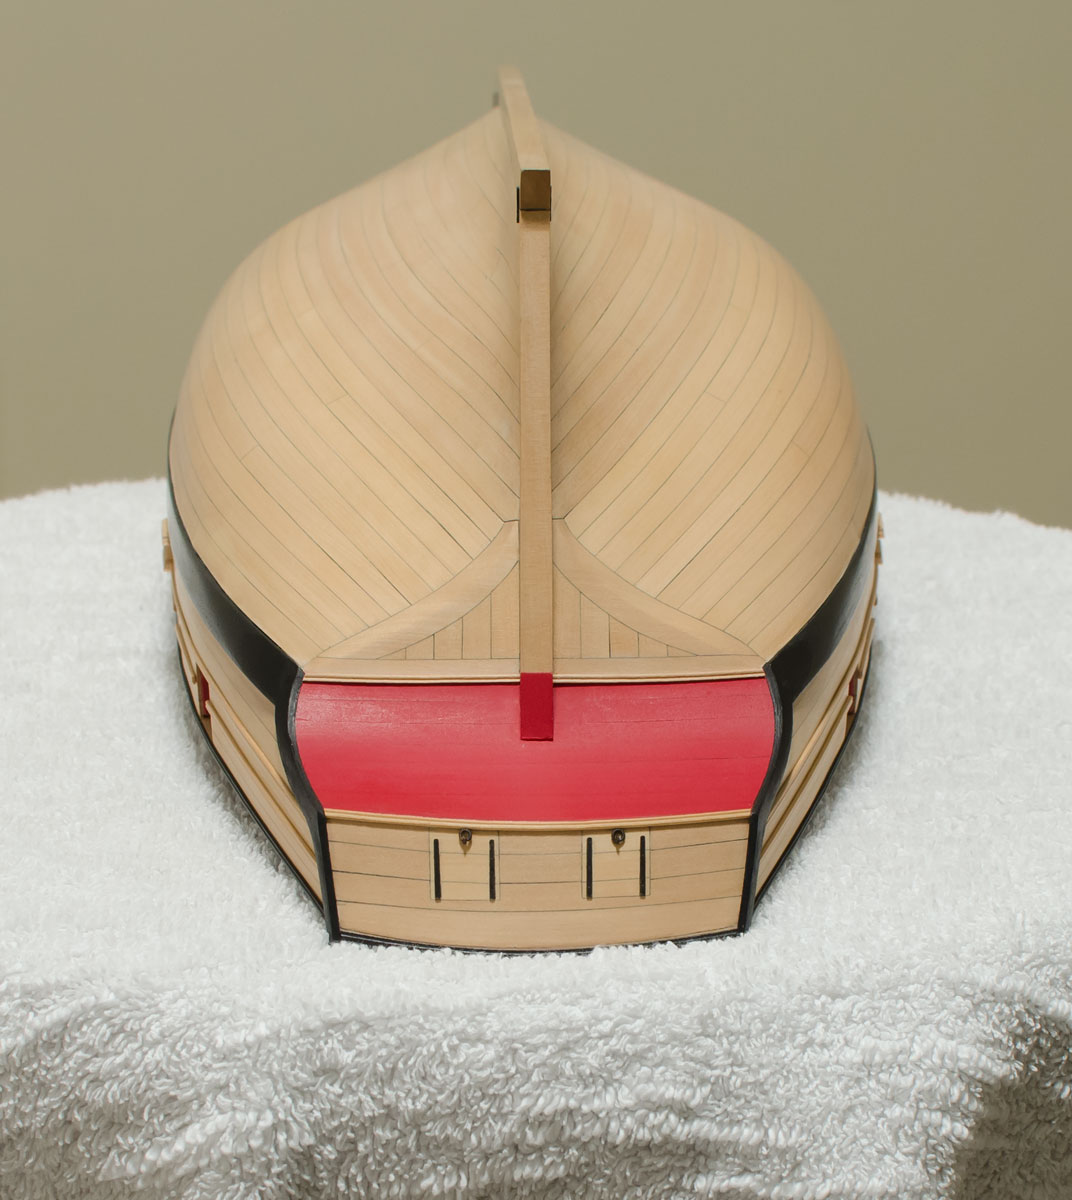
The margin planks are done. .
The only way that I could get the four sections of planks located between the stern frames at the same angle was to add shims onto the false deck. You can see where I placed them between the stern frames on the port side. The shims taper across the deck from 1/64" to less than 1/32". Without them the two sections on the port side would have dropped too much. Prior to installing these four pieces I could see where the false deck was slightly lower on the port side near the counter.
The scarph joints were made with a #11 blade and some needle files. I went slowly, spending time trying to get a close fit. I also had to figure out the proper length of each section so the joints would center between the gun ports. The three long sections on each side were joined, sanded and given a coat of W-O-P off the ship prior to placing them into the hull.
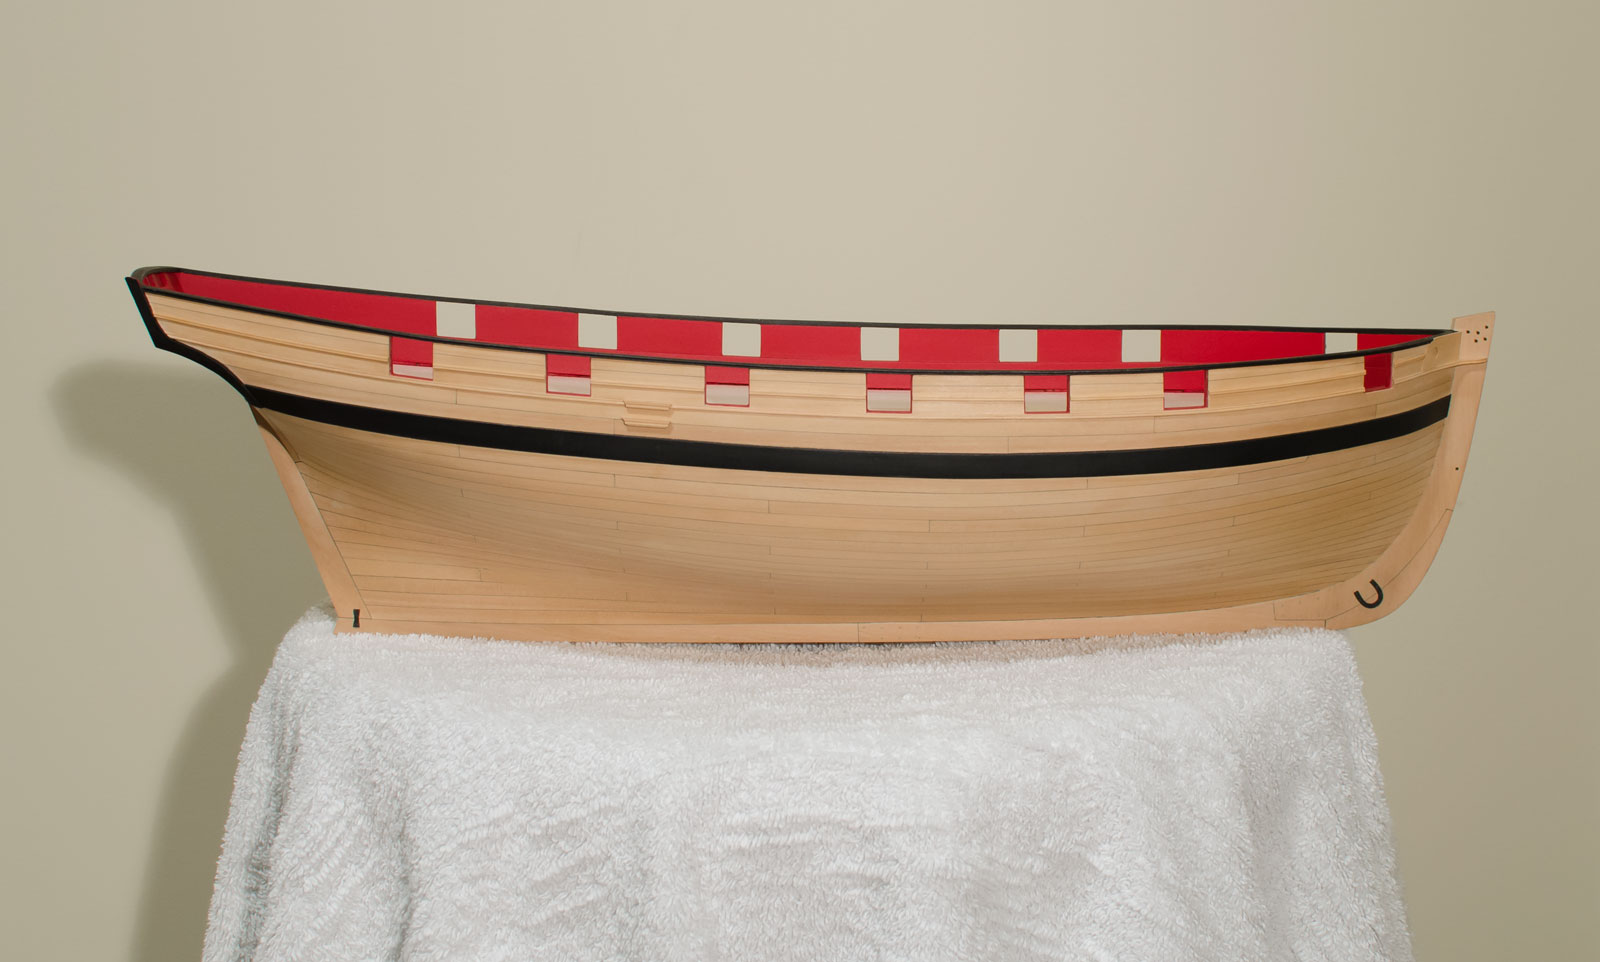
I decided to soften the inside edge of the caprail. It's a small thing but it does make the overall appearance better, I think. I'm also refining the paint work around the fashion pieces as you can see. I'm not in any hurry to finish painting around the caprail since other parts have to be installed on top, which would only require more sanding and painting.

- egkb, PeteB, Ryland Craze and 19 others
-
22
-
-
-
-
Wow!!! What nice compliments from all of you and thanks for all the "Likes" as well.
I must say that Cheerful has not been an easy task. Being fairly new to the hobby, I need some guidance on figuring out how to do it right and Chuck, your support is highly appreciated. Even so, there are times when something doesn't look or fit right and it means that I have to do it again. I used to get frustrated but now I just accept the re-do's as being part of the hobby. Honestly though I am getting a wee bit better on knowing when to say "good enough".
Again, thank you all for your kind and inspiring comments. This hobby is a lot of fun!
Mike
-
I've been hard at work completing a number of tasks and thought that it would be better to post after all of them were completed. Here are a few notes that might be of interest to others who are building Cheerful.
Before installing the false deck, the four stern frames were thinned down gradually, 1/16" at the top to 1/8" at the bottom.
The 2nd layer of bulwark planking is slightly rounded at its top outside edge where it sits directly below the gun port sills.
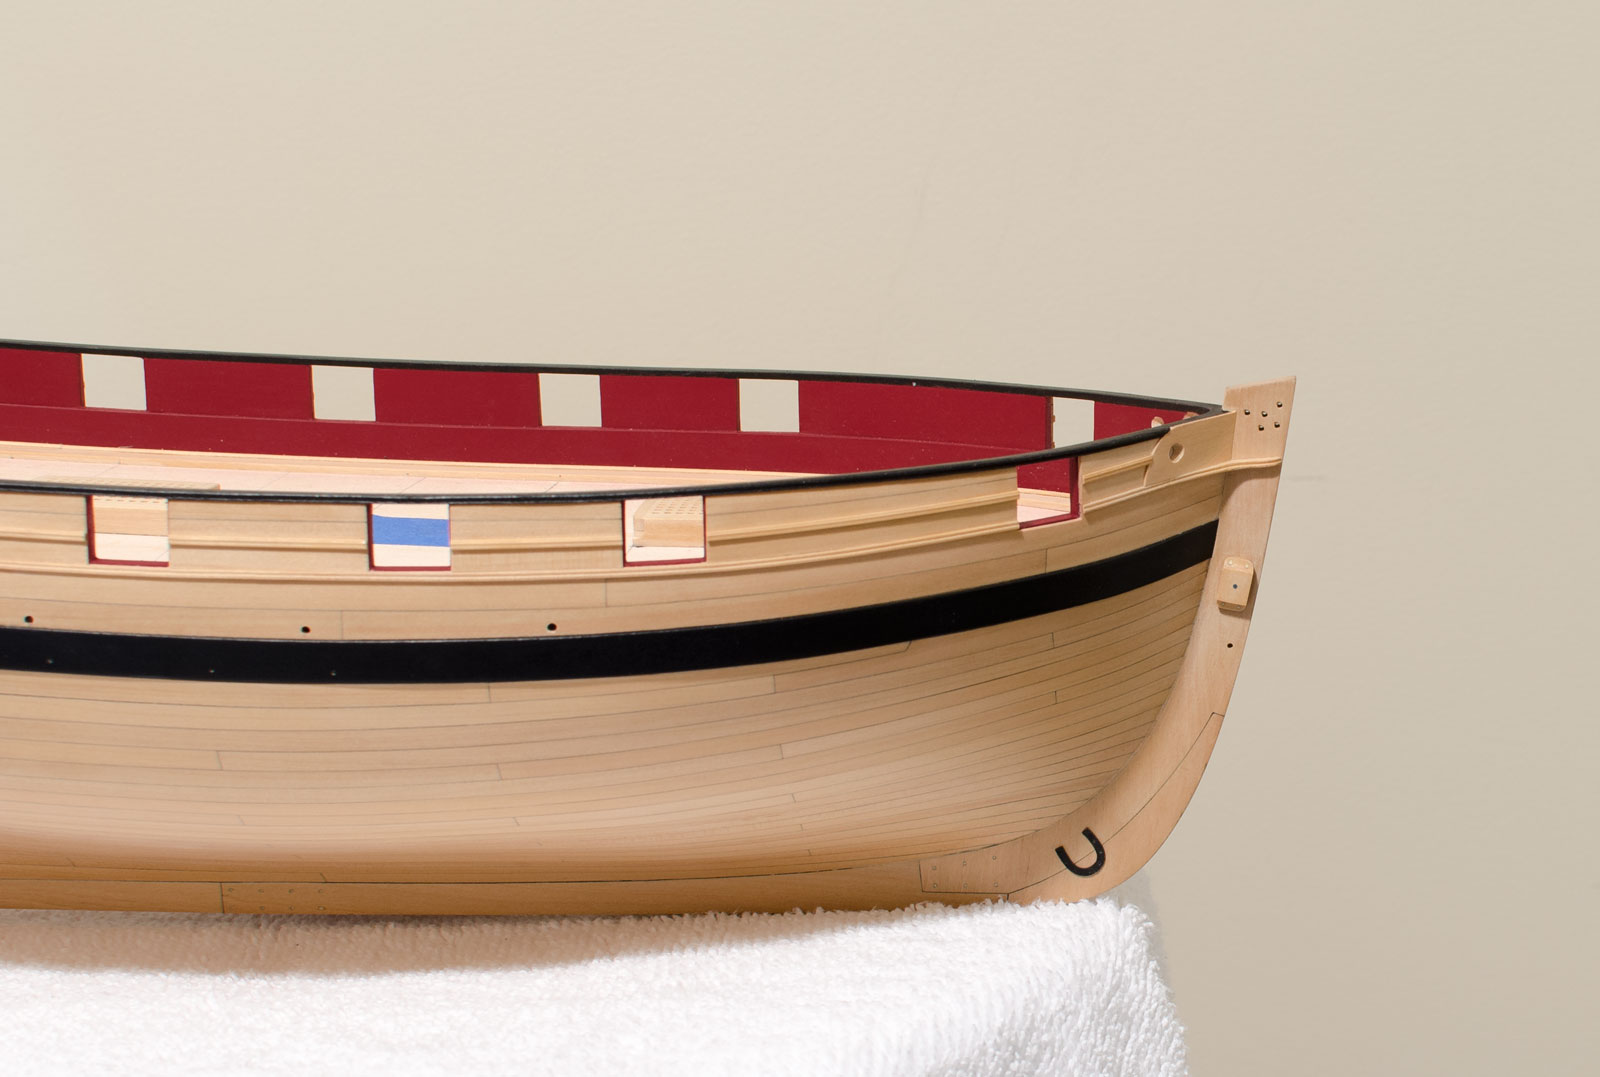
The Caprail's fancy molding was added after painting its bottom edge black. It was glued to the caprail using medium CA from the top. Consequently, there was no CA seepage below its bottom edge. The width of the Caprail, which includes its fancy molding, is slightly under 5/32".
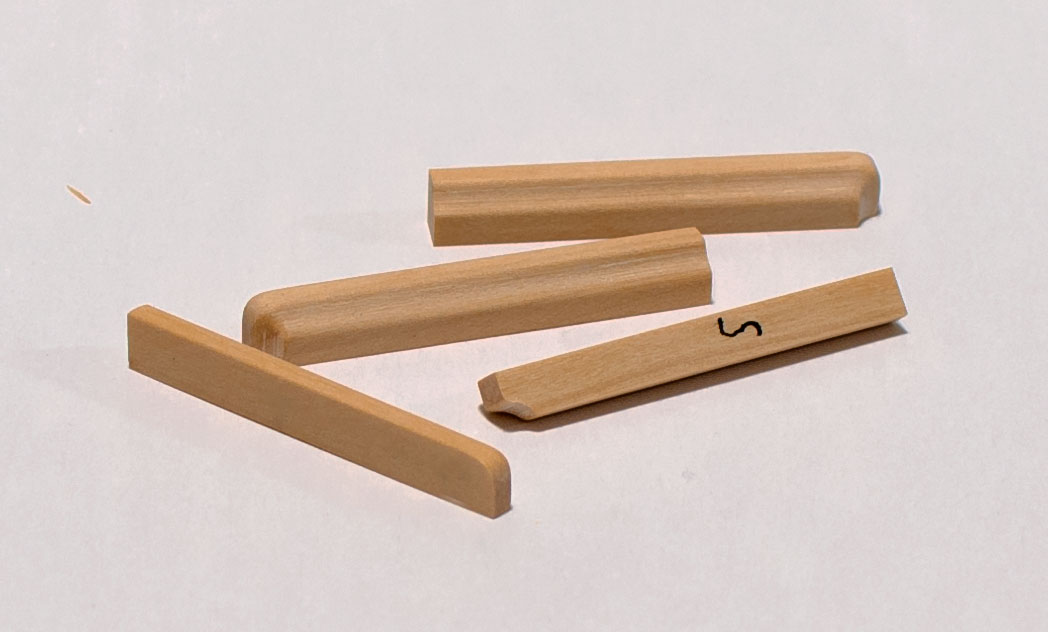
After shaping the boarding ladder steps I installed the top one to the hull before starting on the remaining fancy molding. This was easier for me than to try and cut out the space for the top ladder after the molding was glued to the hull. All of the remaining fancy moldings were then added to the hull including the small “ear” at the stem. The moldings are quite thin being under 1/32". I could see that the 1/32" Hawse Plates would stand proud of the molding, which I didn't like, so I made them from .025 sheet.
On the transom, the port lids are stationary with simulated hinge straps using Chuck's Laser Board kit. There are tiny holes in the hinges that are filled with glue during application which aid in holding the hinges in place. They are stiff, easy to paint and easy to install. Highly recommended. Missing are the four hinges on the top of each strap. I am still trying to decide how I want to make them.
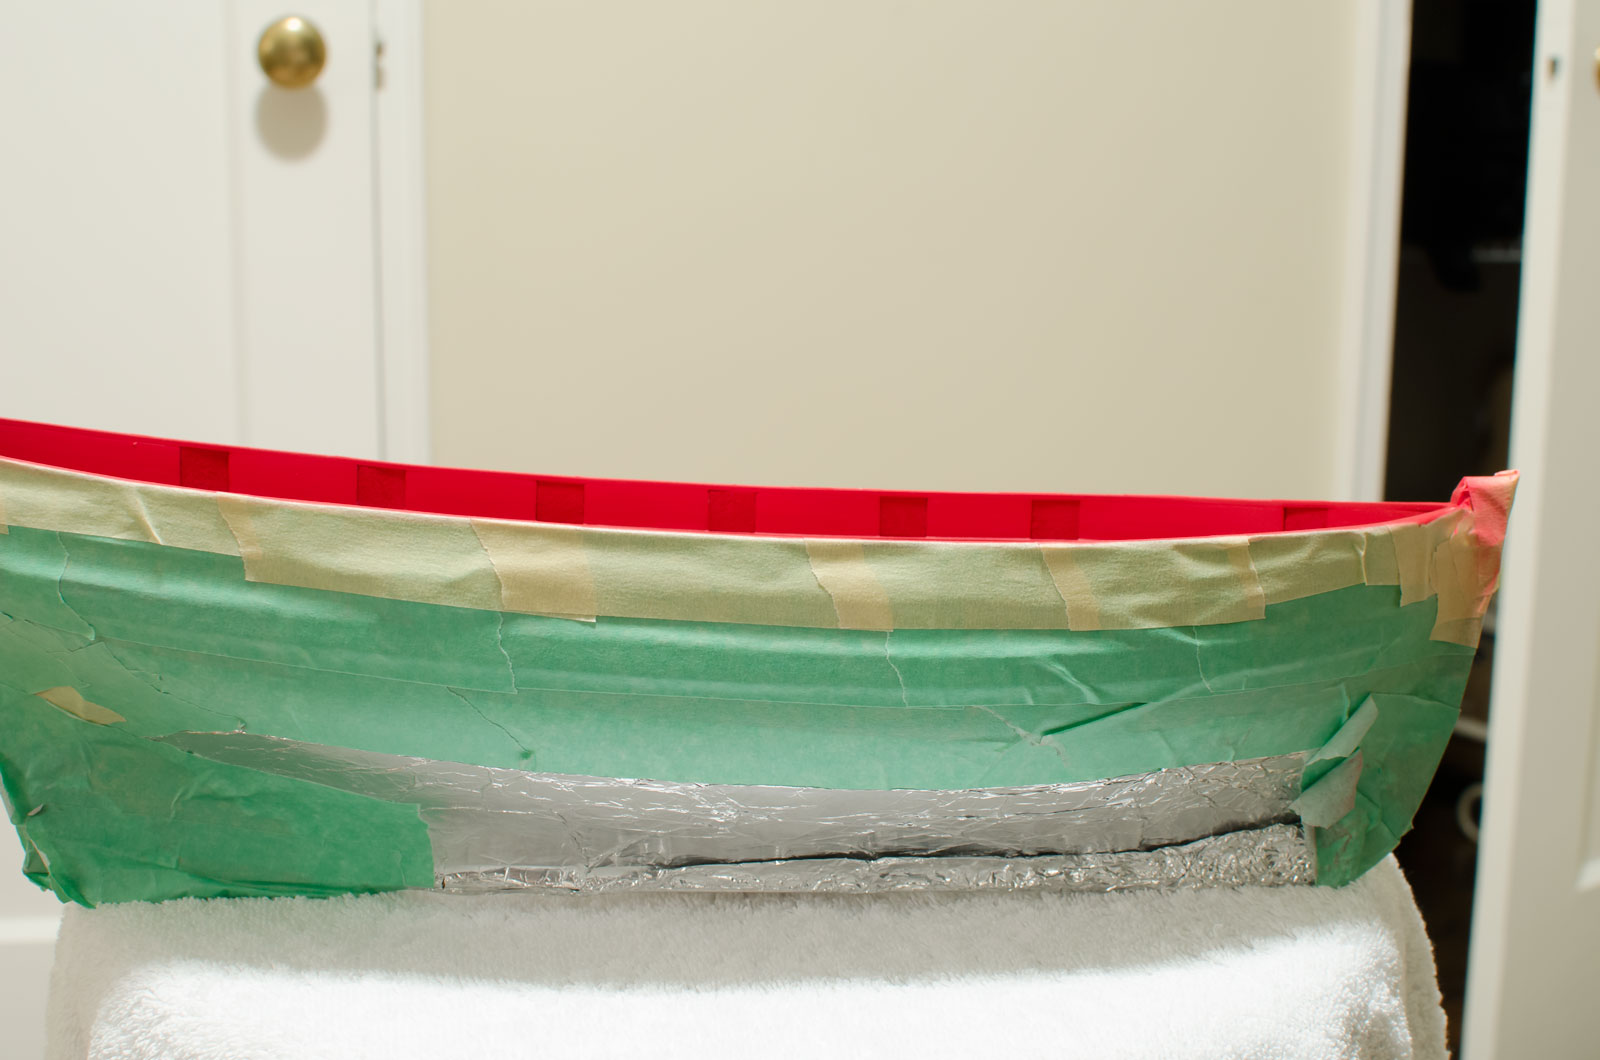
Some prep work was necessary before painting the bulwark planking. Using soft 4-6 lb balsa (left over from the airplane building days) I fitted plugs into each gun port to protect them from any overspray. They are only 1/8" thick and were easy to shape and fit into the ports. Then the entire hull including the false deck was masked off. The paint was applied using the Paasche air brush. W&N Galeria Acrylic paint, when properly thinned, does not clog this airbrush. I also noticed that cleaning the airbrush between coats was not necessary. Seven coats were applied.
I laid down some 3M fine line tape inside the hull along the bottom edge of the caprail. Using a black .020 Micron Archival pen, I scribed a line against the tapes edge to establish the bottom of the caprail. Now it was a simple matter of painting from the line up to the top of the caprail.

-
Erik,
I used the kit supplied wire to make the Chainplates for my Longboat. After sanding the wire to remove the outside finish I was able to solder the wire. After some cleanup, I sprayed the wire with Krylon primer and painted with model expo paint. No problem with adhesion.
Mike
-
-
-
Thomas,
I haven't been on MSW for a long time and have yet to catch up with all the nice builds here. I have seen what can be done with a lot of skill and creative thinking to bring these kit builds to a higher level. Along with yourself, Dirk and Augie, to name a few, it's a pleasure to see the results of your hard work.
Mike
-
Looking really nice Erik!
Mike
- Dimitris71, mtaylor, Erik W and 1 other
-
4
-
-
-
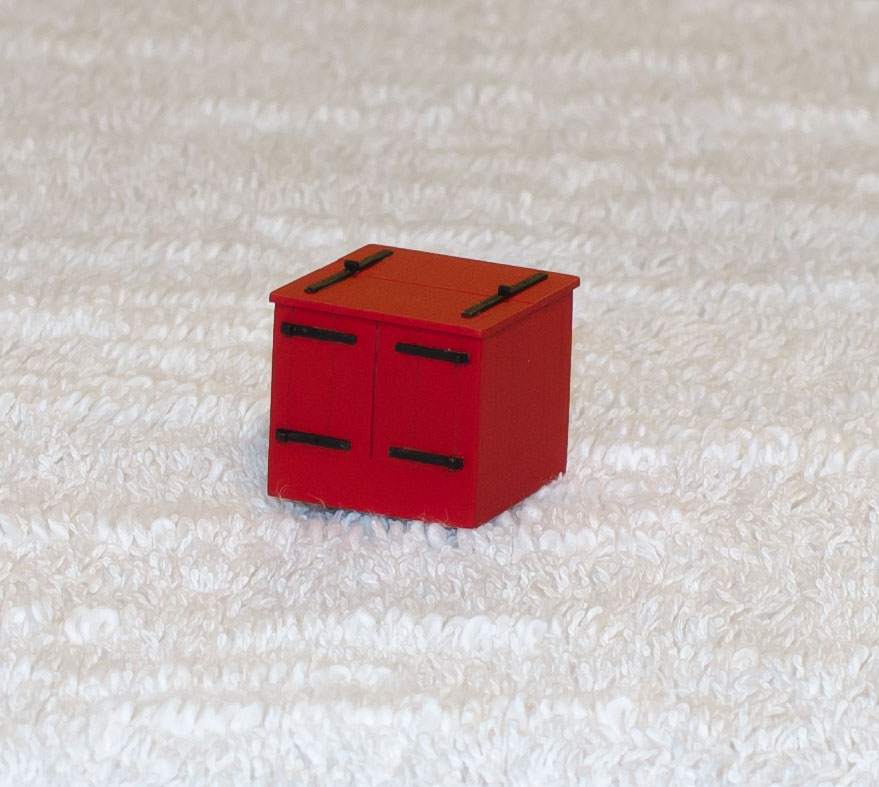
Except for the two door handles that are missing, the Companion is done. They will go on when I get some wire with the right gauge thickness, 30 or smaller. I only have a 35mm lens so photos of these small objects are not really a good representation since I have to crop the image. This of course decreases sharpness. I can see where a macro lens might come in handy here. Anyway, you should be able to get the general idea of what it looks like.
Now it's back to the hull.

-
Erik,
Be careful when you make the sheaves. On mine, also basswood, the area around them was very thin and weakened the mast considerably.
Mike
- Dimitris71, Erik W, mtaylor and 1 other
-
4


HM Cutter Cheerful 1806 by Stuntflyer (Mike) - FINISHED - 1:48 scale
in - Build logs for subjects built 1801 - 1850
Posted
Planking the deck is not exactly what I would call a milestone though it does feel like I'm moving along. . .
Though not very scientific, I did come up with a way to get those center planks in a straight line. After setting the first plank at the stern I used a card template at each location along the deck to keep the planks straight. To confirm alignment, I marked the center of the plank at its forward edge as well as the aft edge of the deck structure. After pulling the plank to the card template I could see whether or not two marks matched closely
The four remaining planks (two on each side of center plank) where then installed using PVA and clamps. I was careful not to glue anywhere close to the red deck structures. Scrap strips were used between the clamp and the deck planking to avoid any dents that might be caused from tightening of the clamps. I don't have any of those high-tech wooden clamps like those used by EdT though the ones from Dewalt (found at Home Depot) worked well enough. The clamp's protective covers were removed in order to get a better grip on the planks. The Irwin Quick-Grips have a more rounded shape underneath the covers and tend to slip off too easily.
My deck planks are approximately 3/16" wide and in various locations will have a small tab. These have to be made using a wider strip. I tried making one that would have been 7/32" at its widest point using a 7/32" strip. Guess what, it didn't work. There wasn't enough room to allow for adjustments to the shape. I decided to go with a 1/4" strip, which worked quite well. Once the shape was completed it was only a matter of reducing the width to 3/16" outside of the tab location. This is an important step if you want to maintain consistency to the overall look of the planking.
This is the plank which goes on either side of the "ventilation scuttle grating", just behind the skylight.
Once the first five rows were completed, excess glue was removed and the planks were lightly sanded. I will hold off doing the final sanding until all of the remaining planks are in.