


Stuntflyer
-
Posts
1,140 -
Joined
-
Last visited
Content Type
Profiles
Forums
Gallery
Events
Posts posted by Stuntflyer
-
-
The port sills, port uprights and chase ports are now finished. I opened up the chase ports by 1/32" on each side so I could line them with 1/32" boxwood strip. I wanted to have a clean look and knew that this would achieve that. This should make it a lot easier to paint them when the time comes. With the final sanding of the sills and uprights completed I took another look at the hull fairing and did some more fine tuning. It seems like the more you look the more you find.


- PeteB, Archi, Elmer Cornish and 13 others
-
 16
16
-
Now that I have started Cheerful, your posts including the nice photos have helped me to answer some of questions which I have had so far. Nice work Maury!
Mike
-
Jay,
I made 4 sanding blocks with different curves since the hull shape is not constant. Mine were made from some medium hard balsa. The ones for the bow and stern areas are shorter and span 3 bulkheads. The others, like those for sanding amidships, are longer and span 4-5 bulkheads. I think that using curved blocks will give you a more gradual shape from one bulkhead to another.
Mike
-
-
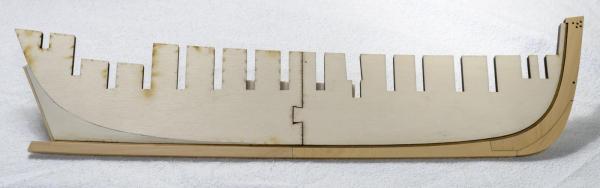
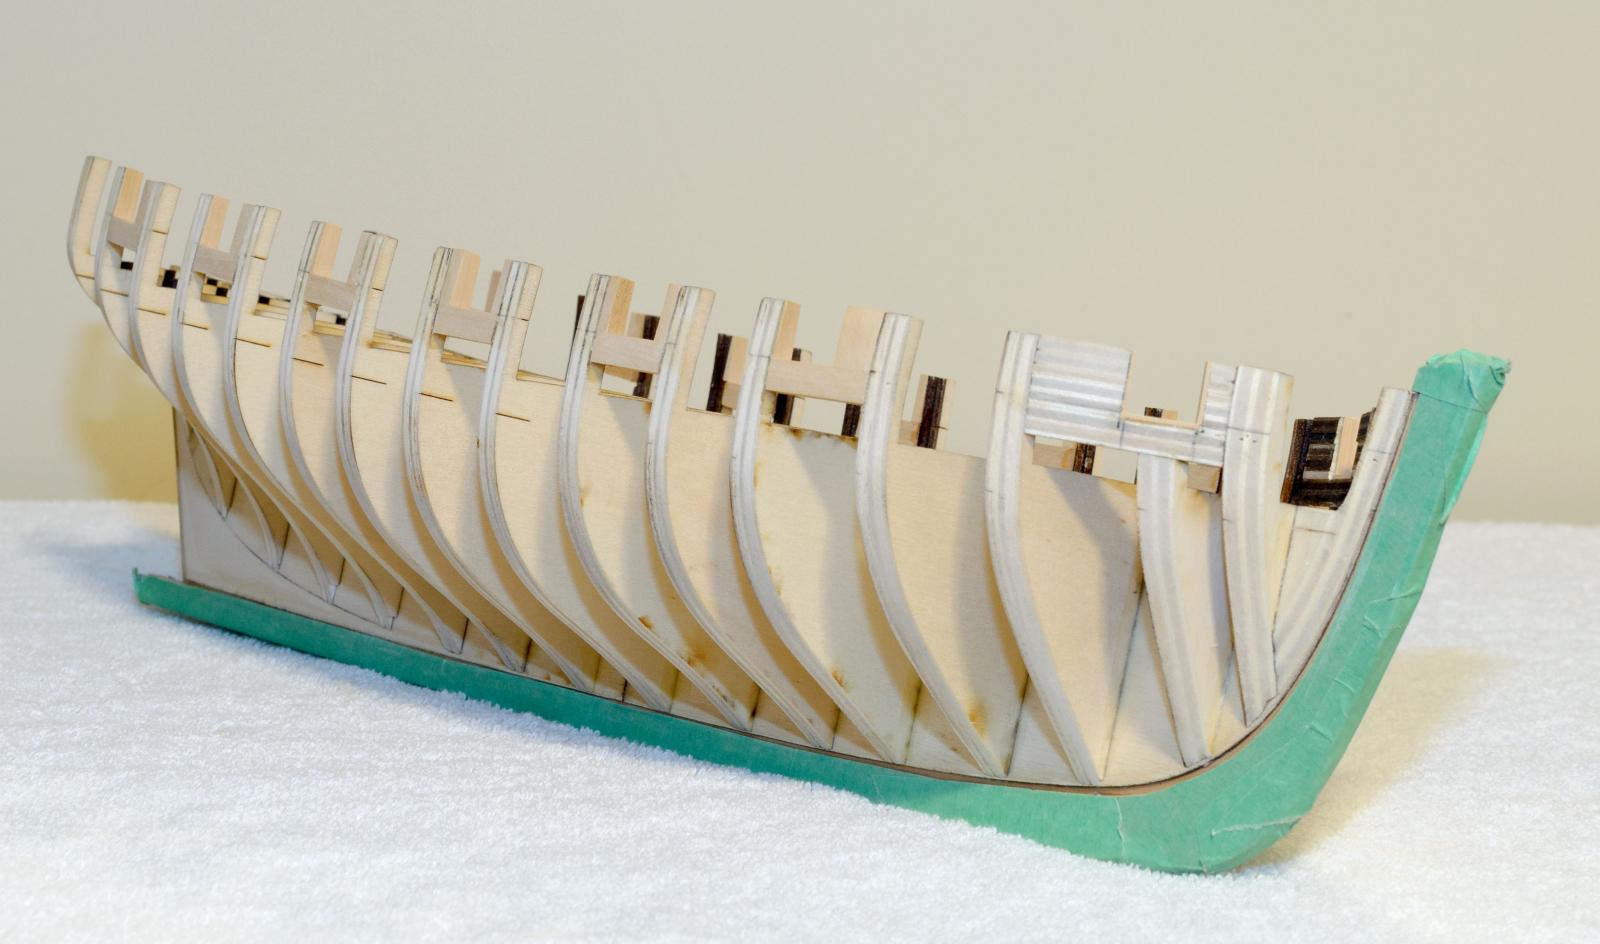
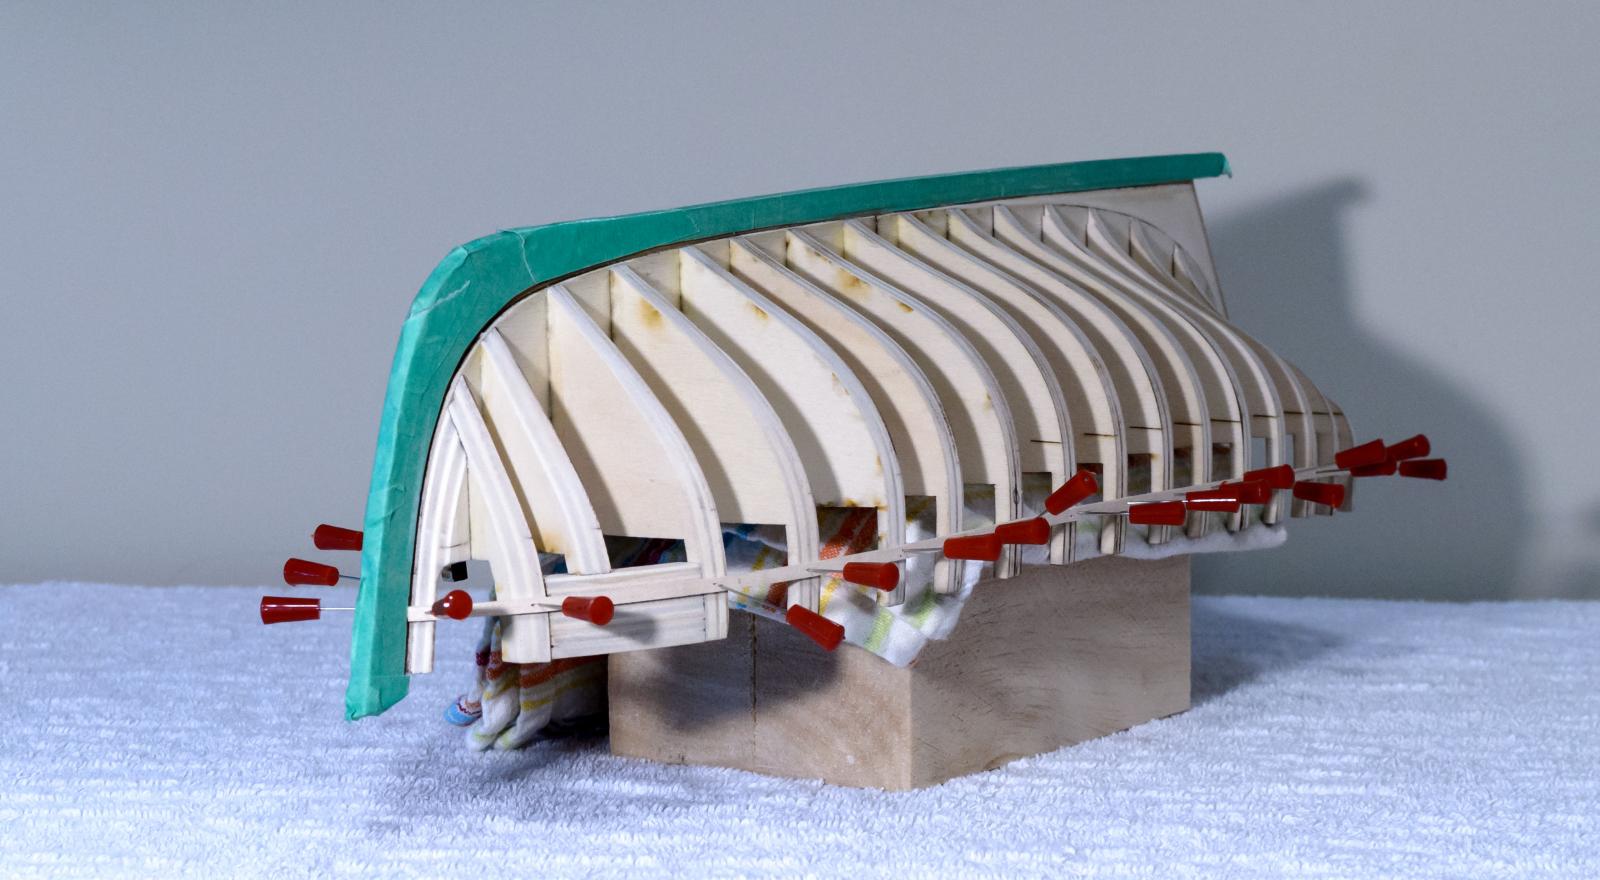
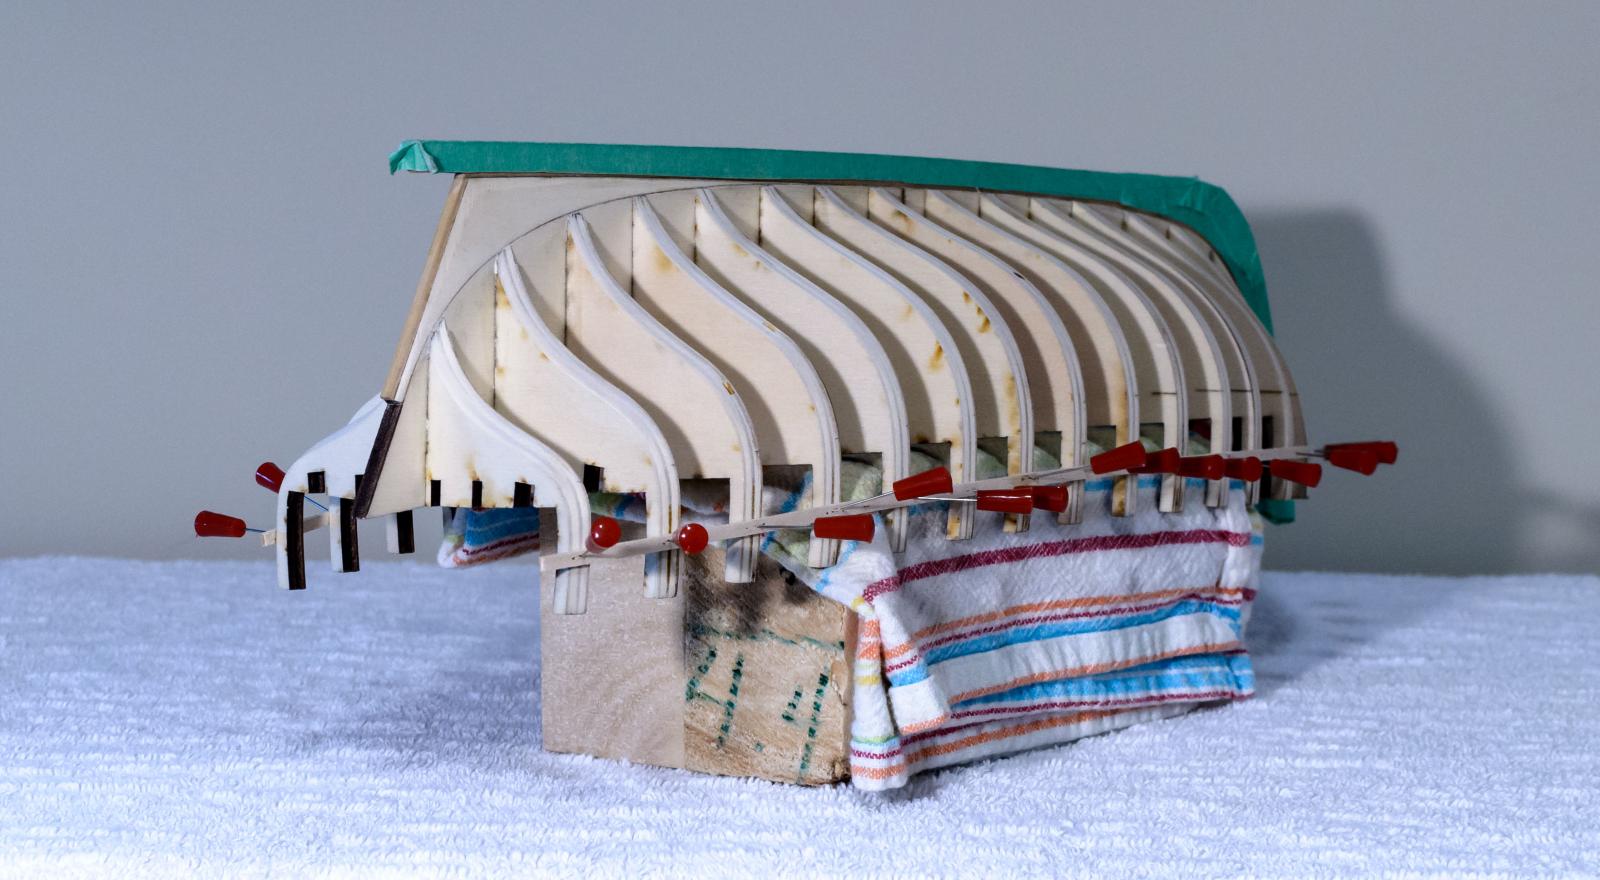
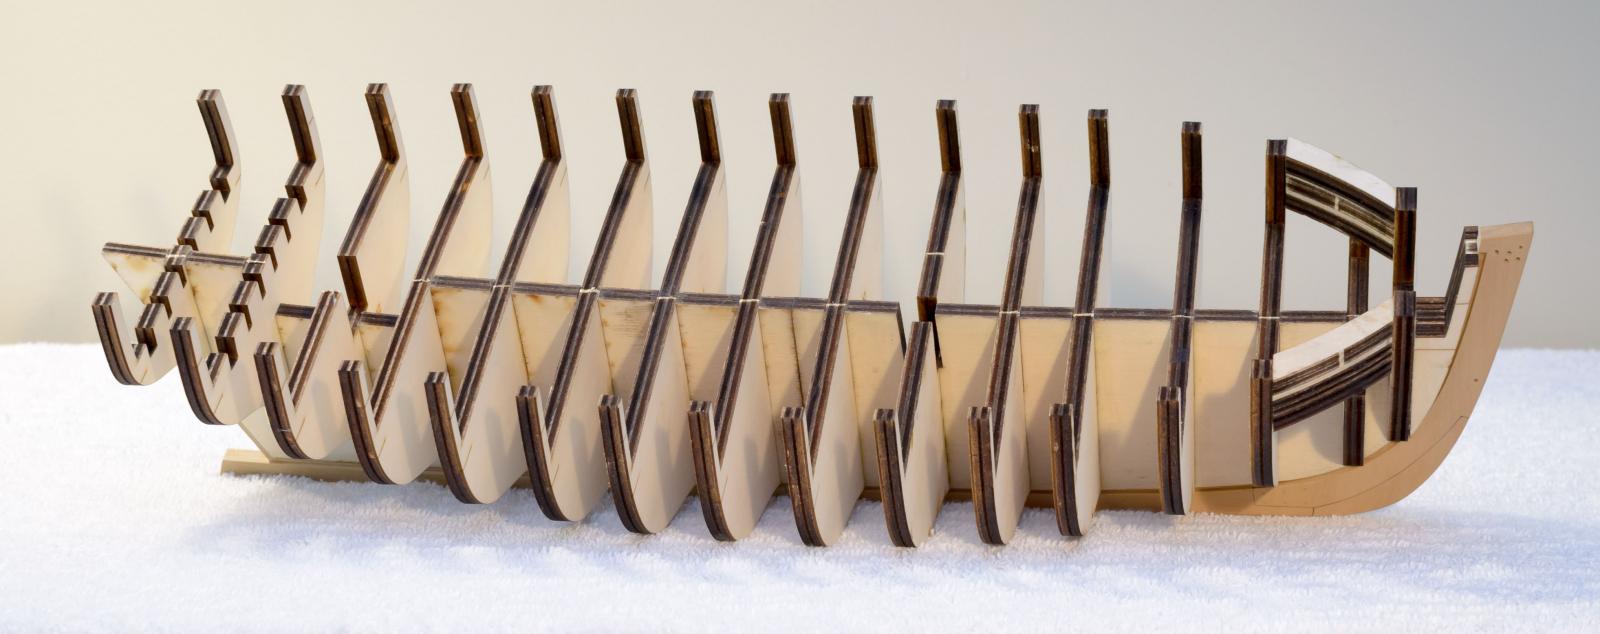
I completed all of the bulkhead and filler pieces today using PVA glue. Only one false keel slot had to be adjusted to allow for a 90° bulkhead fit. All of the laser cut bulkheads had just the right amount of slot clearance and no additional work was necessary. Very impressive since the false keel was .230" thick and the bulkheads slots had to be adjusted for this when the laser cutting was done, I think. The 3 piece port fillers call for an overall thickness of 3/4" so I added a 1/16" soft ply filler piece to make up the difference.

-
Great idea Chuck. Thanks!
-
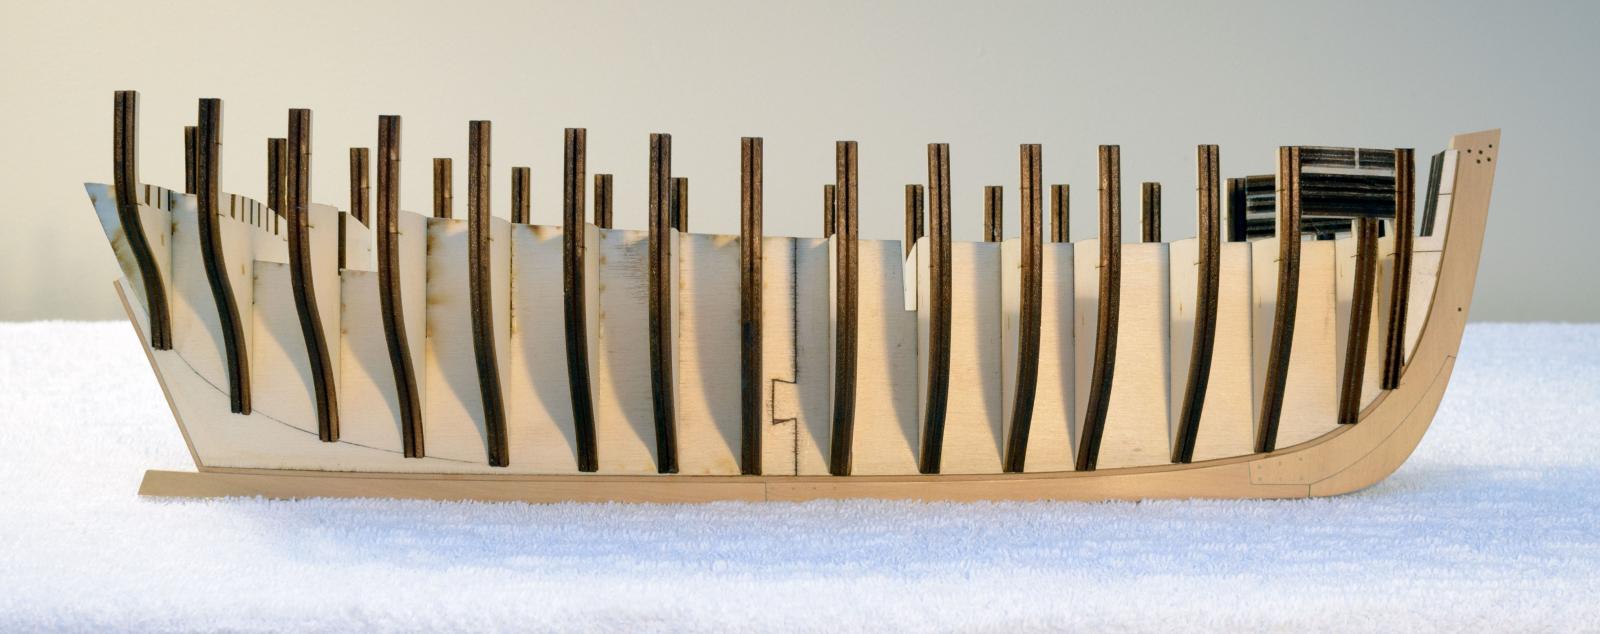
The completed stem post and keel assembly is now glued to the false keel. I used a # 4b pencil to darken the seams. Treenailing was done using Chuck's method as described in chapter one of his Cheerful practicum. Once completed, the stem post and keel were given a coat of Wipe-on-Poly. The WOP was buffed immediately in order to prevent a gloss finish.
-
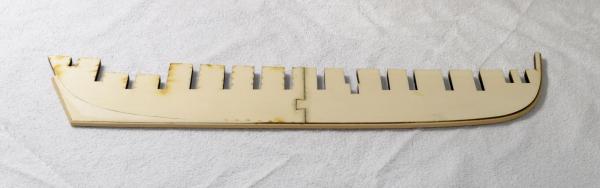
The two halves of the false keel are joined using 1 hour epoxy. A 1/8” x 1/16 rabbet strip is glued along center of the false keels edge. The false keel has been tapered from the bearding line to the rabbet strip.
-
Welcome to my build of Chuck's HM Cutter Cheerful. Most of the parts will be scratch built. Others like the false keel, windlass, rigging material and blocks will be purchased directly from Chuck. The wood for this project (all sheet stock) was purchased from Jason at Crown Timberyard. The quality of his wood is excellent and I am looking forward to working with it. As with my other builds, there will be many new things to learn and I will rely heavily on the knowledge base from MSW to help guide me through the process. So please don't hesitate to post your comments along the way. Thanks!.
-
-
-
Thomas, thanks! I never thought of using a sanding sealer. Can you recommend a brand that I can try out. Maybe primer could be used over the sealer to prep for paint.
-
Russ, thanks!
I'm sure that you are right so I will do what you have suggested. Unfortunately, the 1/8" square boxwood strips I received were either undersized or not square. Since I didn't have any 1/8" boxwood sheet stock to cut one, I went with the kit supplied basswood strips. I figured that as long as the keel was going to be in basswood it would be all right to do the lower stem post in basswood too. We'll see!
-
● Stem, Keel and Stern Post: I used both boxwood and basswood to make these parts. I'm hoping that this wasn't a mistake. Everything looks good right now but I'm now wondering if the transition point between the boxwood and basswood will look the same once painted. I think that it would be a good idea to harden the basswood in order to protect its edge and fill the grain with primer. Any thoughts or suggestions?
The kit supplied laser cut stem post was used as a template for cutting the boxwood and then used on the bottom to complete the part.
The stern post was done in boxwood since a small portion at the top will be unpainted. It has a slight taper as per the plans.

-
Jim, Ken, thanks so much. I'm looking forward to next months meeting and hope to bring some of my girlfriends "healthy" cup cakes along.
Mike
-
I just came back from the monthly SMSNJ meeting in Millburn, NJ. This was my first time there and I cannot say enough about how nice it was meeting some of its members there, including Chuck. Take my word for it, Chuck's build log photos as good as they are don't really show how beautiful this build really is.
Mike
-
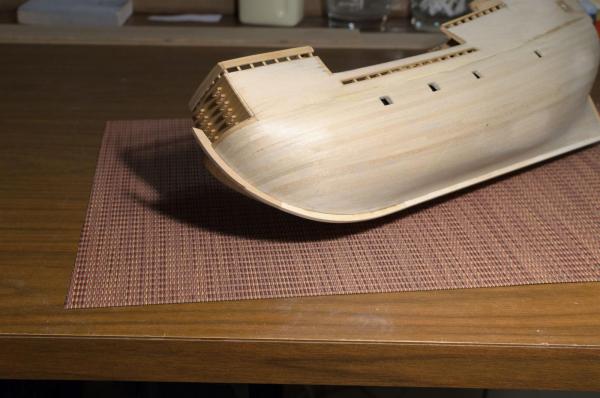
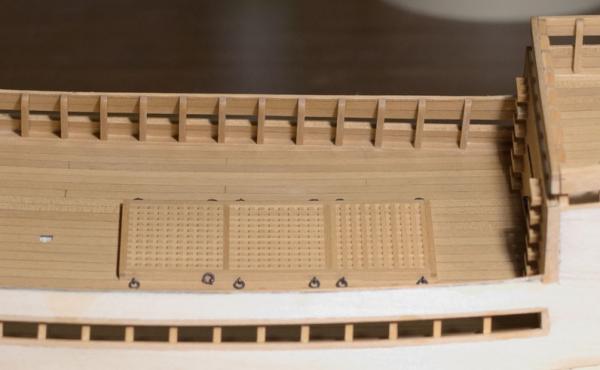
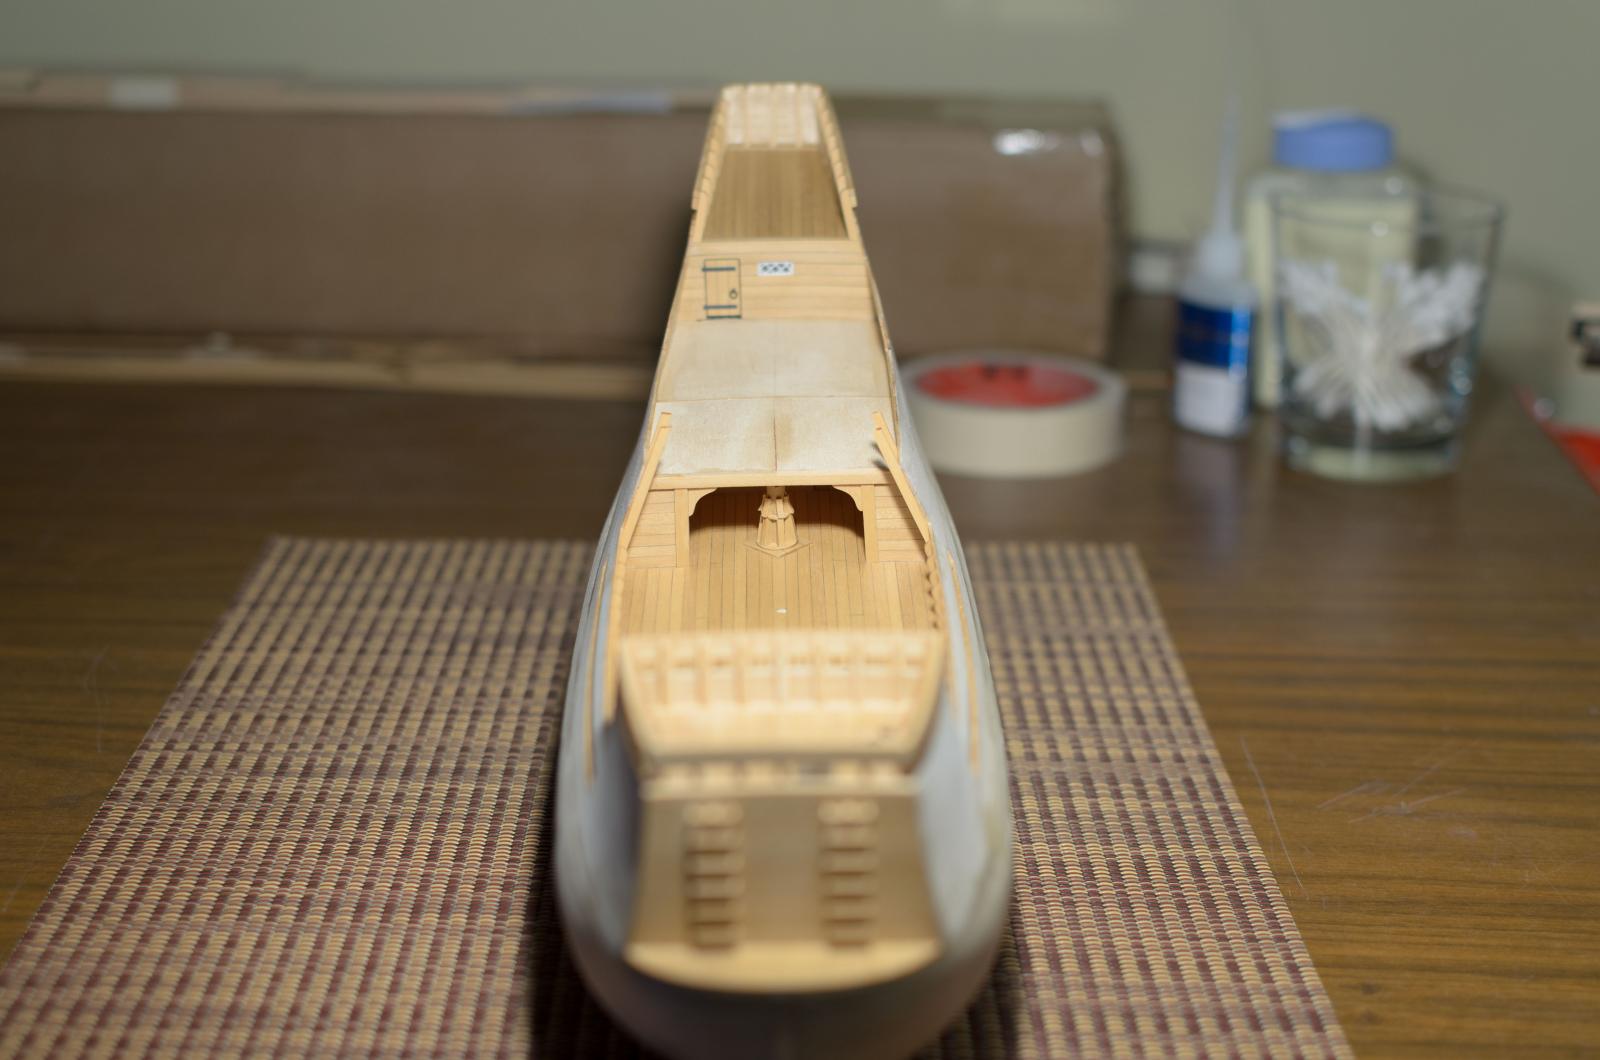
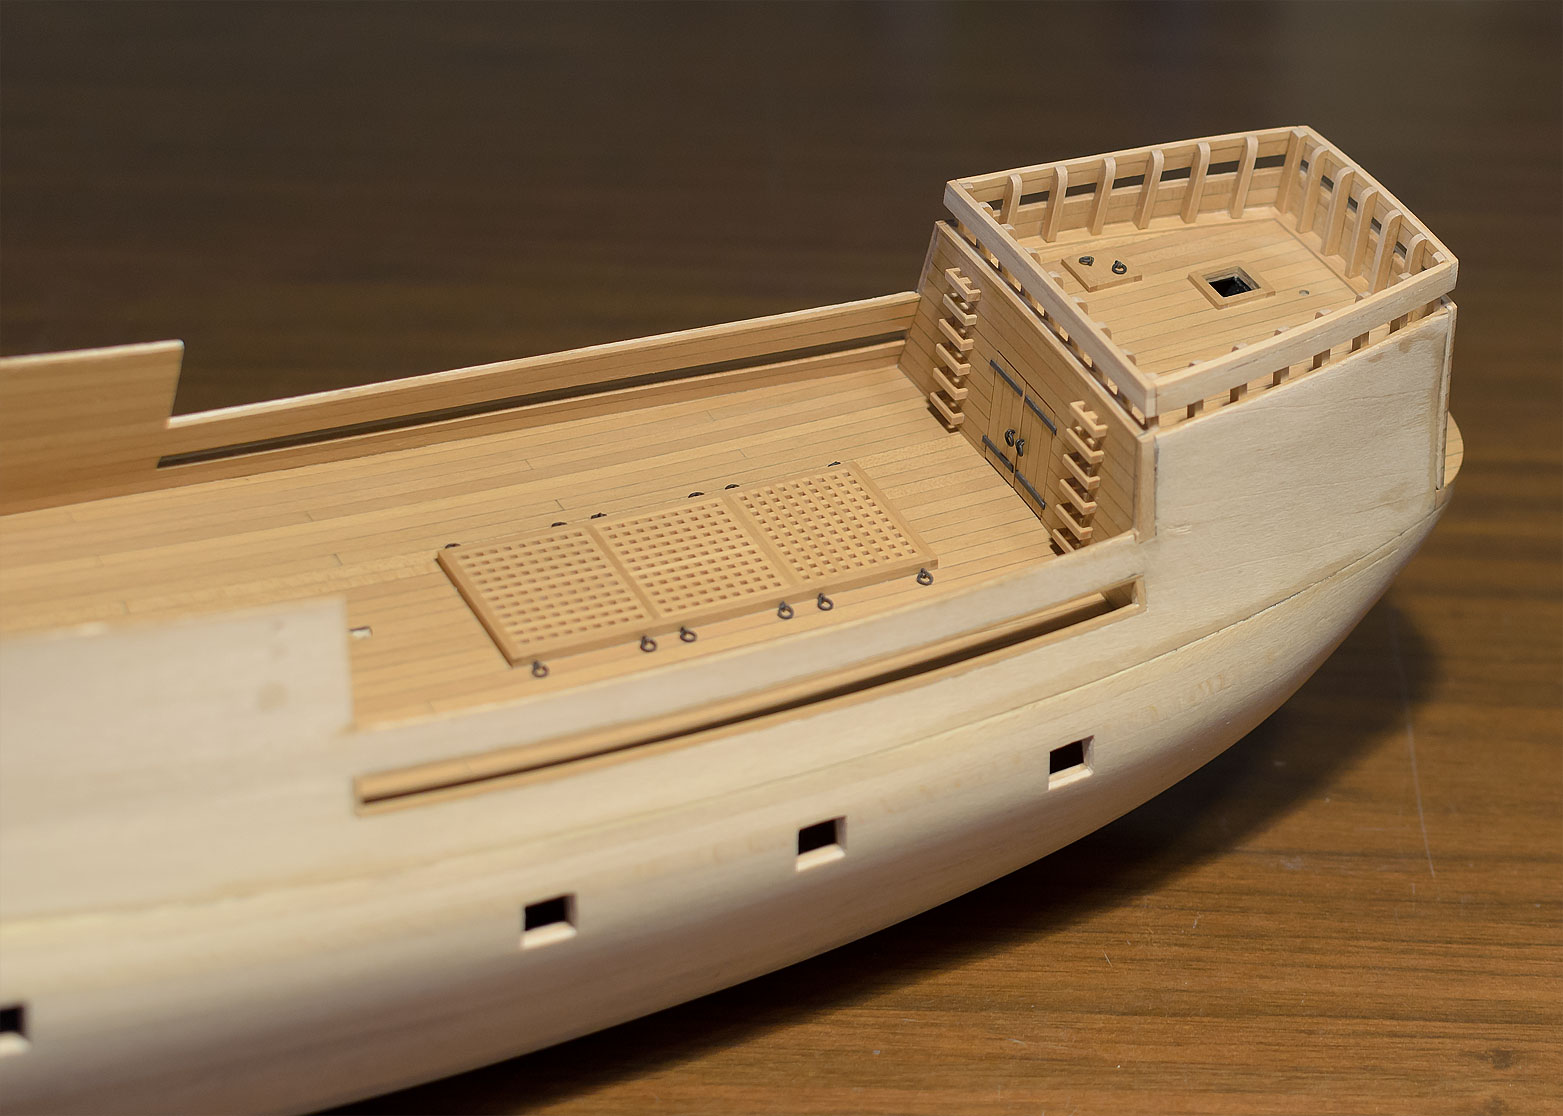
All of the deck planking, waterways, stanchions and pre-planking are now finished.
It was more time consuming doing the upper deck this way. 1/32" edge joints are fragile. The only real advantage being that it's easier to sand the planking off the ship. Just something I wanted to try.

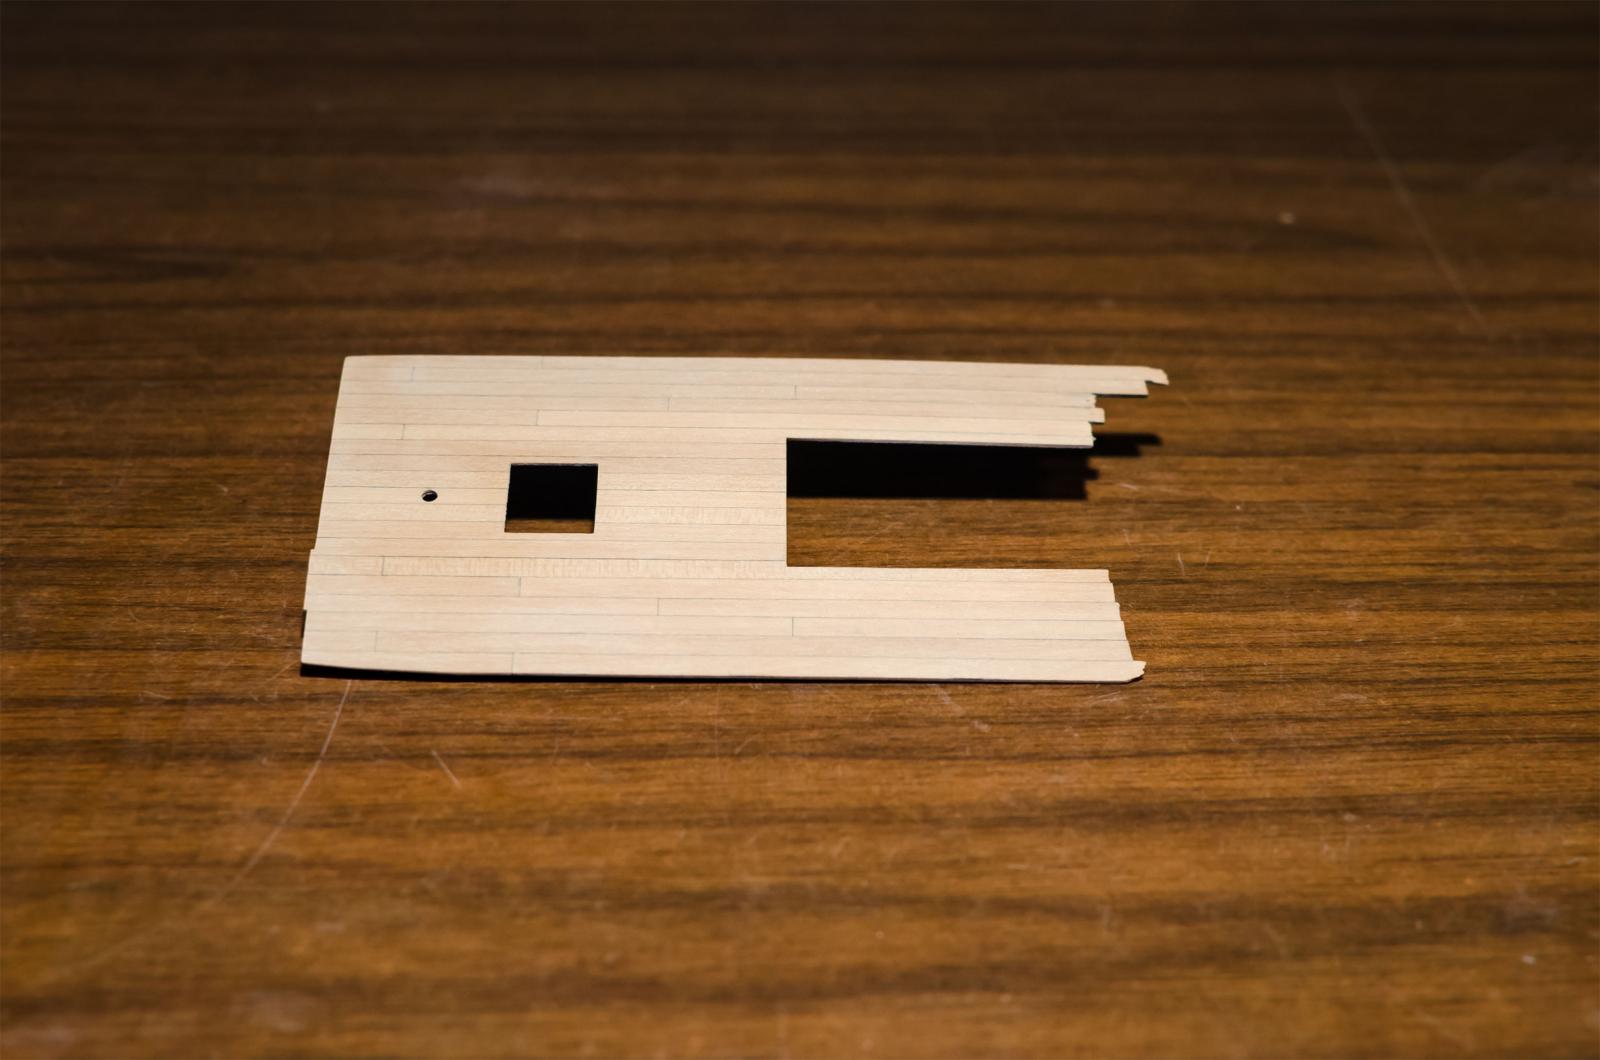
The deck planking glued to the false deck

The last 2 planks and those in front of the grating were installed and covered by the waterway.

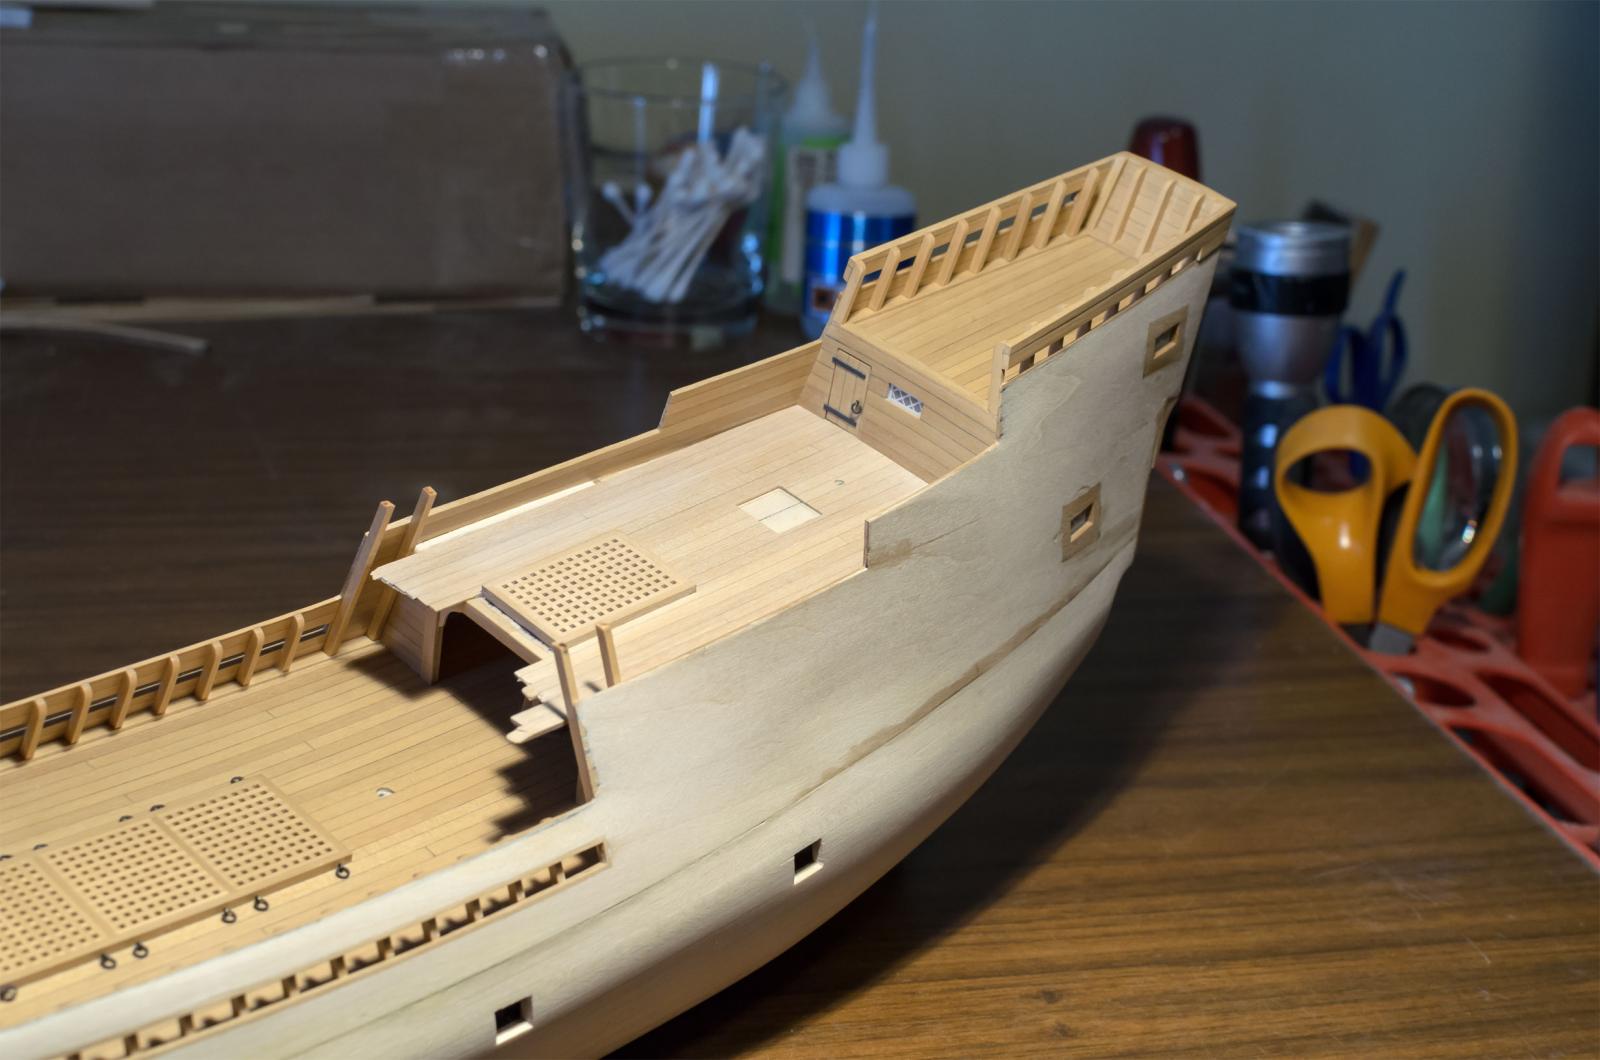
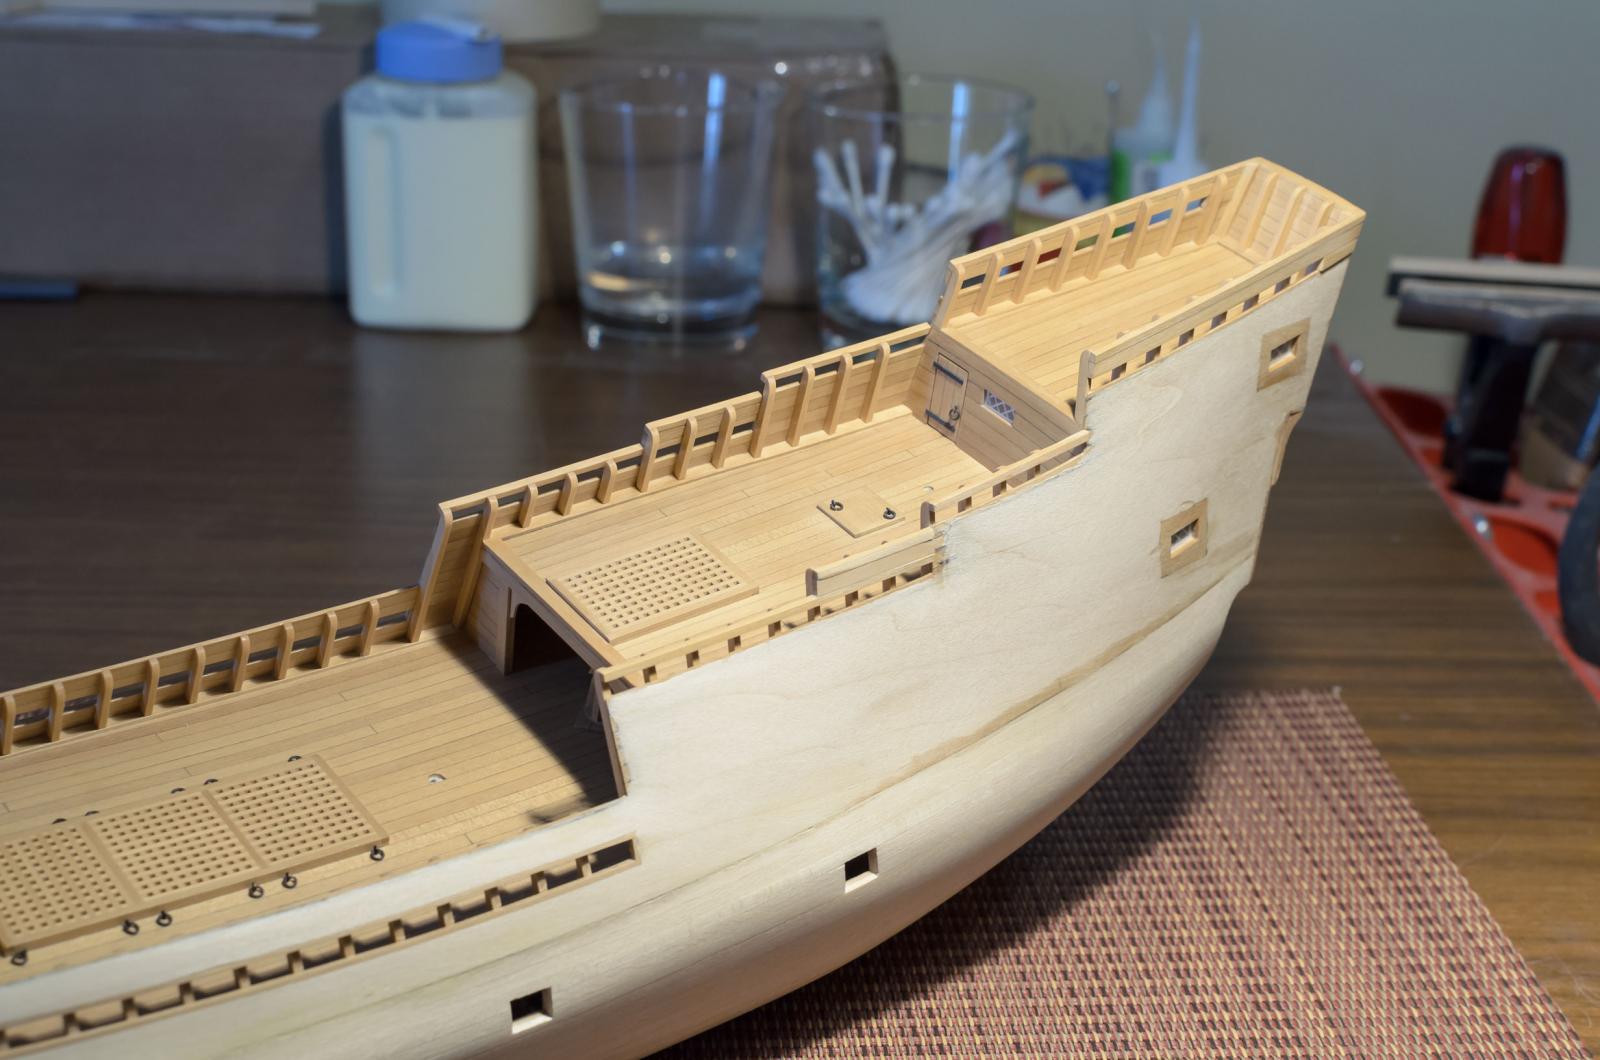
Upper deck with stanchions, grating, hatch and pre-planking installed. The bulwark template has been thinned down gradually exposing the inboard planking at its top edge. This will make the bulwark 1/16" thick after the second layer planking is completed.

-
Russ, Nils, thanks for your comments and all the likes!
I just started using Chuck's method of applying Wipe-on Poly. He uses the Satin finish and it's applied with a soft, lint-free cloth and immediately buffed before it dries. Since I haven't been wiping it off immediately it has a bit too much gloss. I've been using Dullcote Spray Lacquer on top of it to flatten the finish. Problem is that it prevents you from applying more W-O-P if needed. However, I can see places where using Dullcote would still be useful.
-
-
● Bulwark Stanchions Upper Deck: Upper Deck stanchions are now completed and the Bulwark template has been gradually thinned in this area as was done on the Poop Deck.
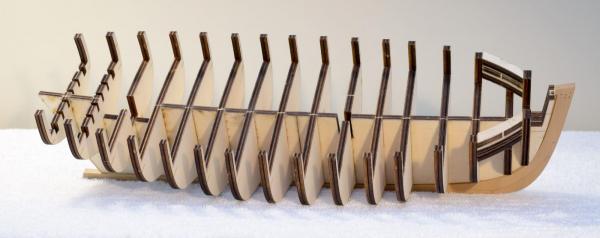
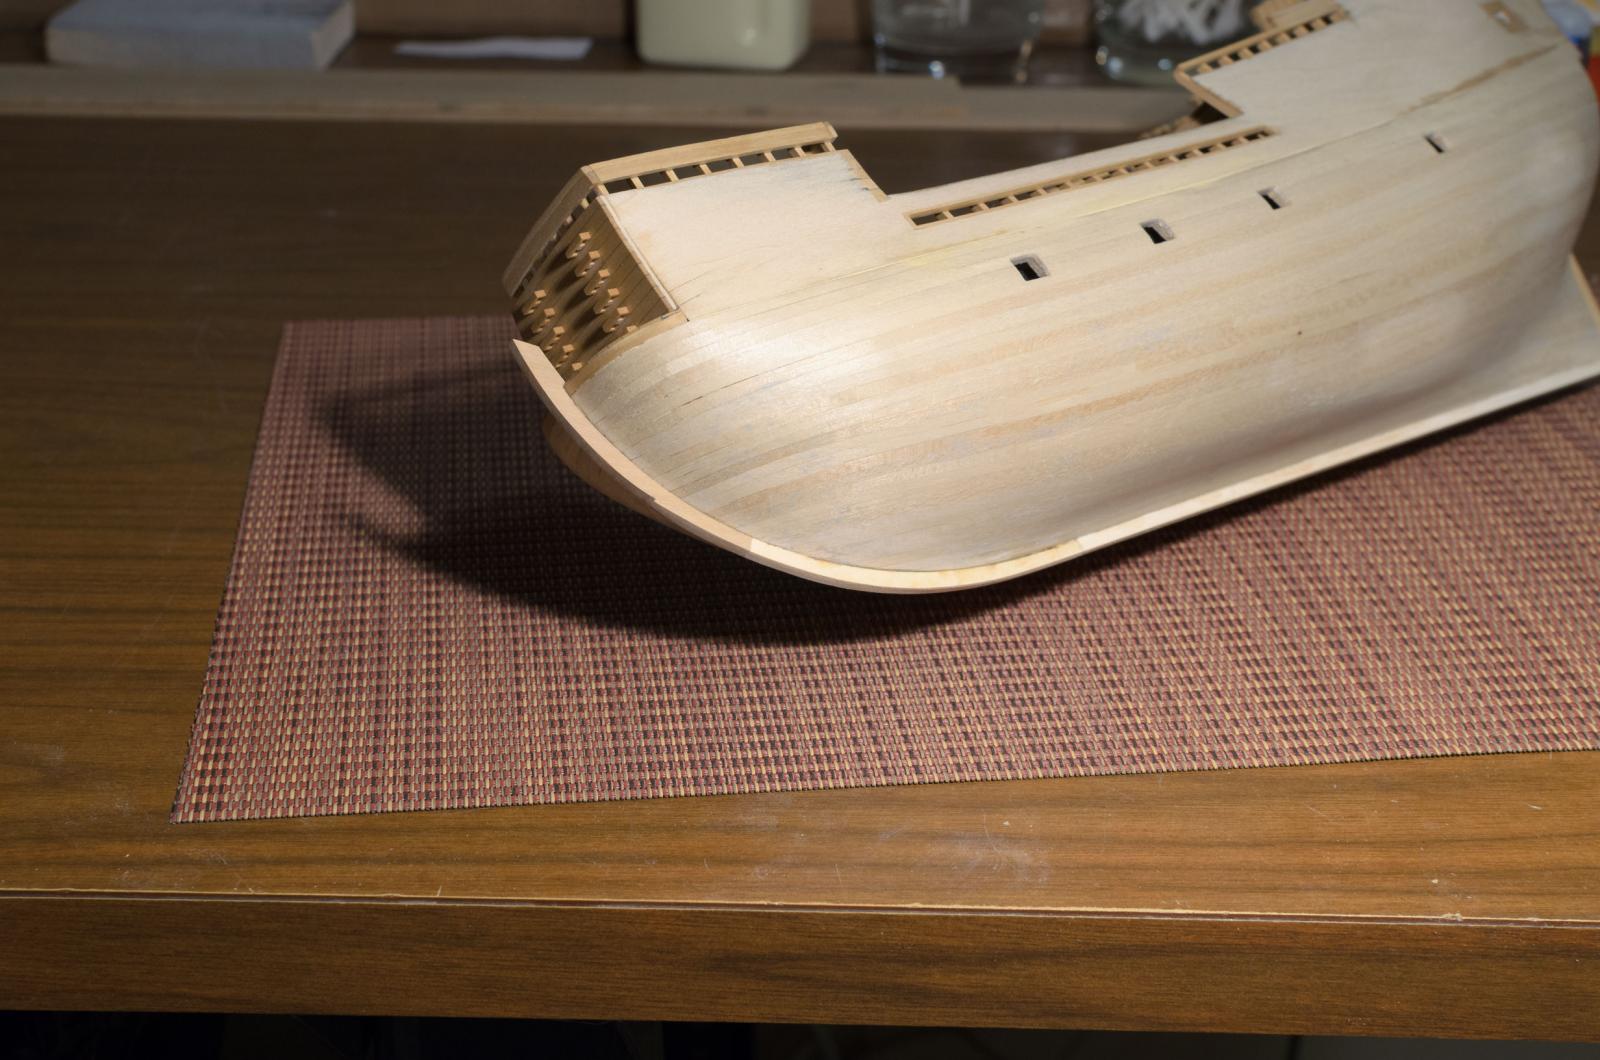
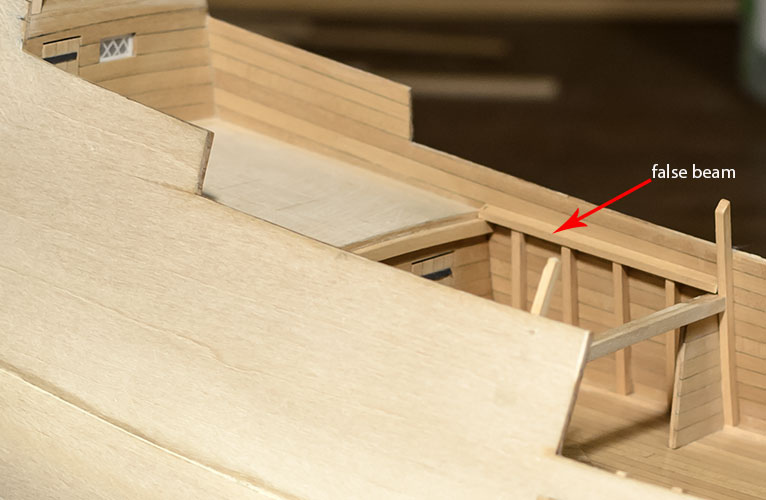
● Bulwark Stanchions Quarter Deck: Instructions say to cut a 1/16" thick waterway around the stanchions before the Quarter Deck is planked. To be honest, I didn't think that I would be able to get a tight fit around each stanchion. Some stanchions are at slightly different angles and they extend almost to the edge of the waterway which would make it very fragile. My solution was to split the stanchions at each location into two parts. One half below the false deck now and the other half on top of the waterway once the planking is completed. I had to start on the "After Cubbridge Head" in order to determine the length of each stanchion. The false beam, which was later removed, shows how I determined the length of each stanchion below the false deck.The correct spacing was maintained for the stanchions so they will match the location of the stanchions on top of the waterway.

-
Mike, Thomas, thank You!
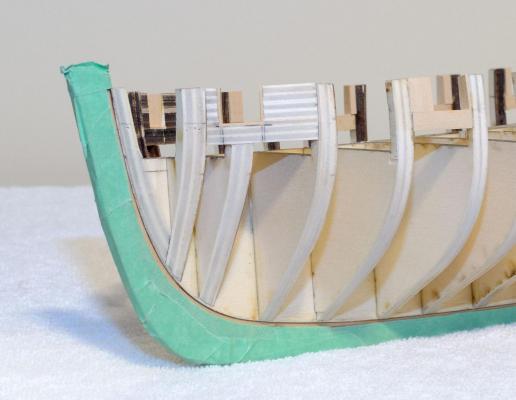
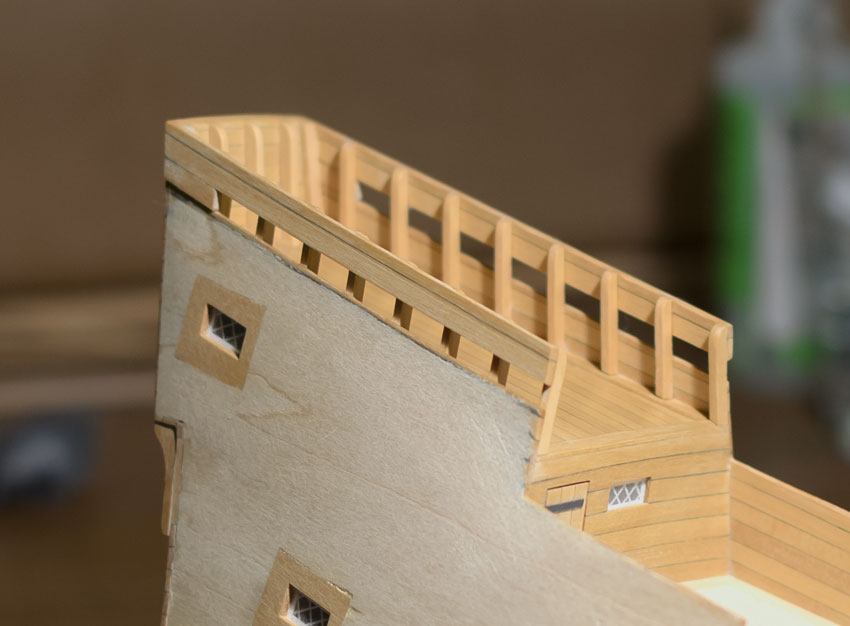
● Waterway, Bulwark Stanchions and pre-planking the Poop Deck: The Waterway was done the same way as the Forecastle deck. The stanchions were protected with a coat of Wipe-on Poly prior to gluing. Rather than using PVA to tack glue the stanchions like those on the Forecastle deck, all of these were glued using only CA. The glue was applied with the point of a nail that was grooved using a Dremel cut-off wheel. A quick swipe with a Q-tip removed any excess CA, leaving the wood unblemished. In order to complete the pre-planking, the transom had to be raised another 1/16" or so. Otherwise things went smoothly. In preparation for the final layer of planking I started thinning the Bulwark Template. The photo shows where I thinned the bulwark template leaving the overall Bulwark thickness at 1/32".
-
-
-
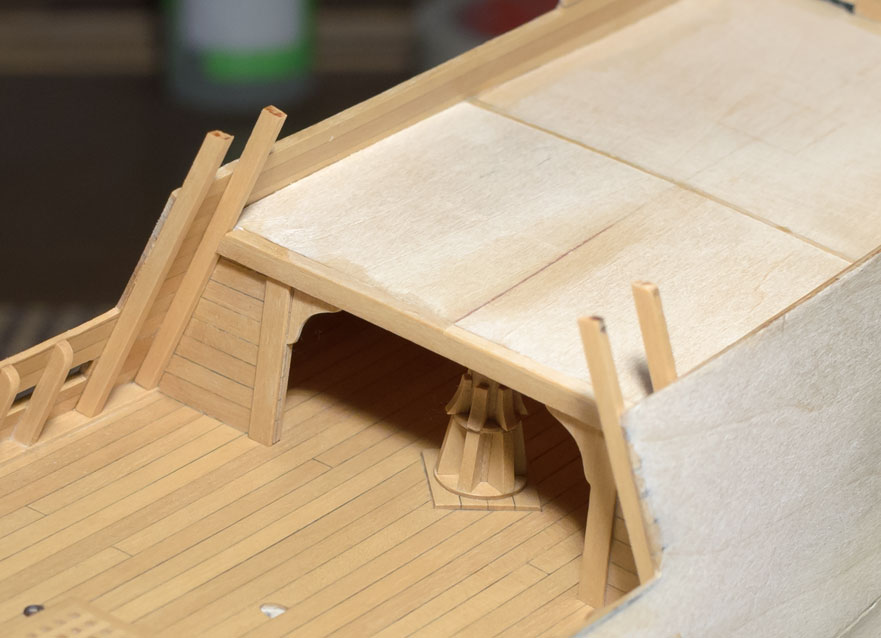
● Waterway, Bulwark Stanchions and pre-planking the Forecastle Deck: The wood strip for the waterway was made uniform by running it through the thickness sander prior to being installed onto the deck. The stanchions and pre-planking strips were given a thin coat of Wipe-on Poly where needed in order to protect the wood from becoming blotchy when glued. Four different spacers had to be created to keep the stanchions parallel and equidistant from each other. The deck is slightly smaller than the one shown on the plan and further adjustments had to be made to account for this. The stanchions were initially held in place using a tiny amount of PVA. Once the glue was set, the excess was cleared away using a #11 blade and CA was applied near the top of the stanchion. Installing each stanchion proved to be very tedious work. The pre-planking was boiled and shaped to the appropriate curve prior to being glued in place.
After the remaining parts are installed I will give everything a final coat of Wipe-on Poly. To Say that I was happy when this part of the build was completed would be a bit of an understatement.


HM Cutter Cheerful 1806 by Stuntflyer (Mike) - FINISHED - 1:48 scale
in - Build logs for subjects built 1801 - 1850
Posted · Edited by Stuntflyer
When first reading chapter two I kept wondering how this was all going to come together smoothly. It's interesting to see how Chuck has put this to work in such a logical way thus making the process much easier than it looks.
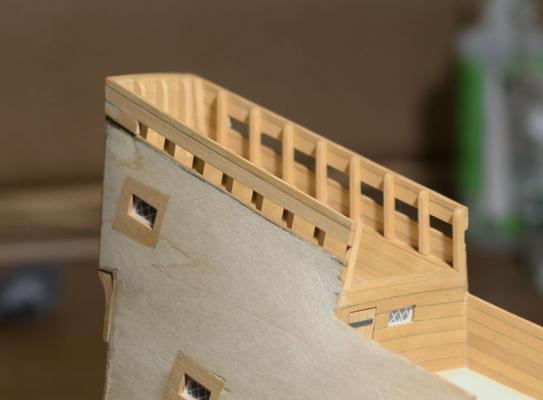
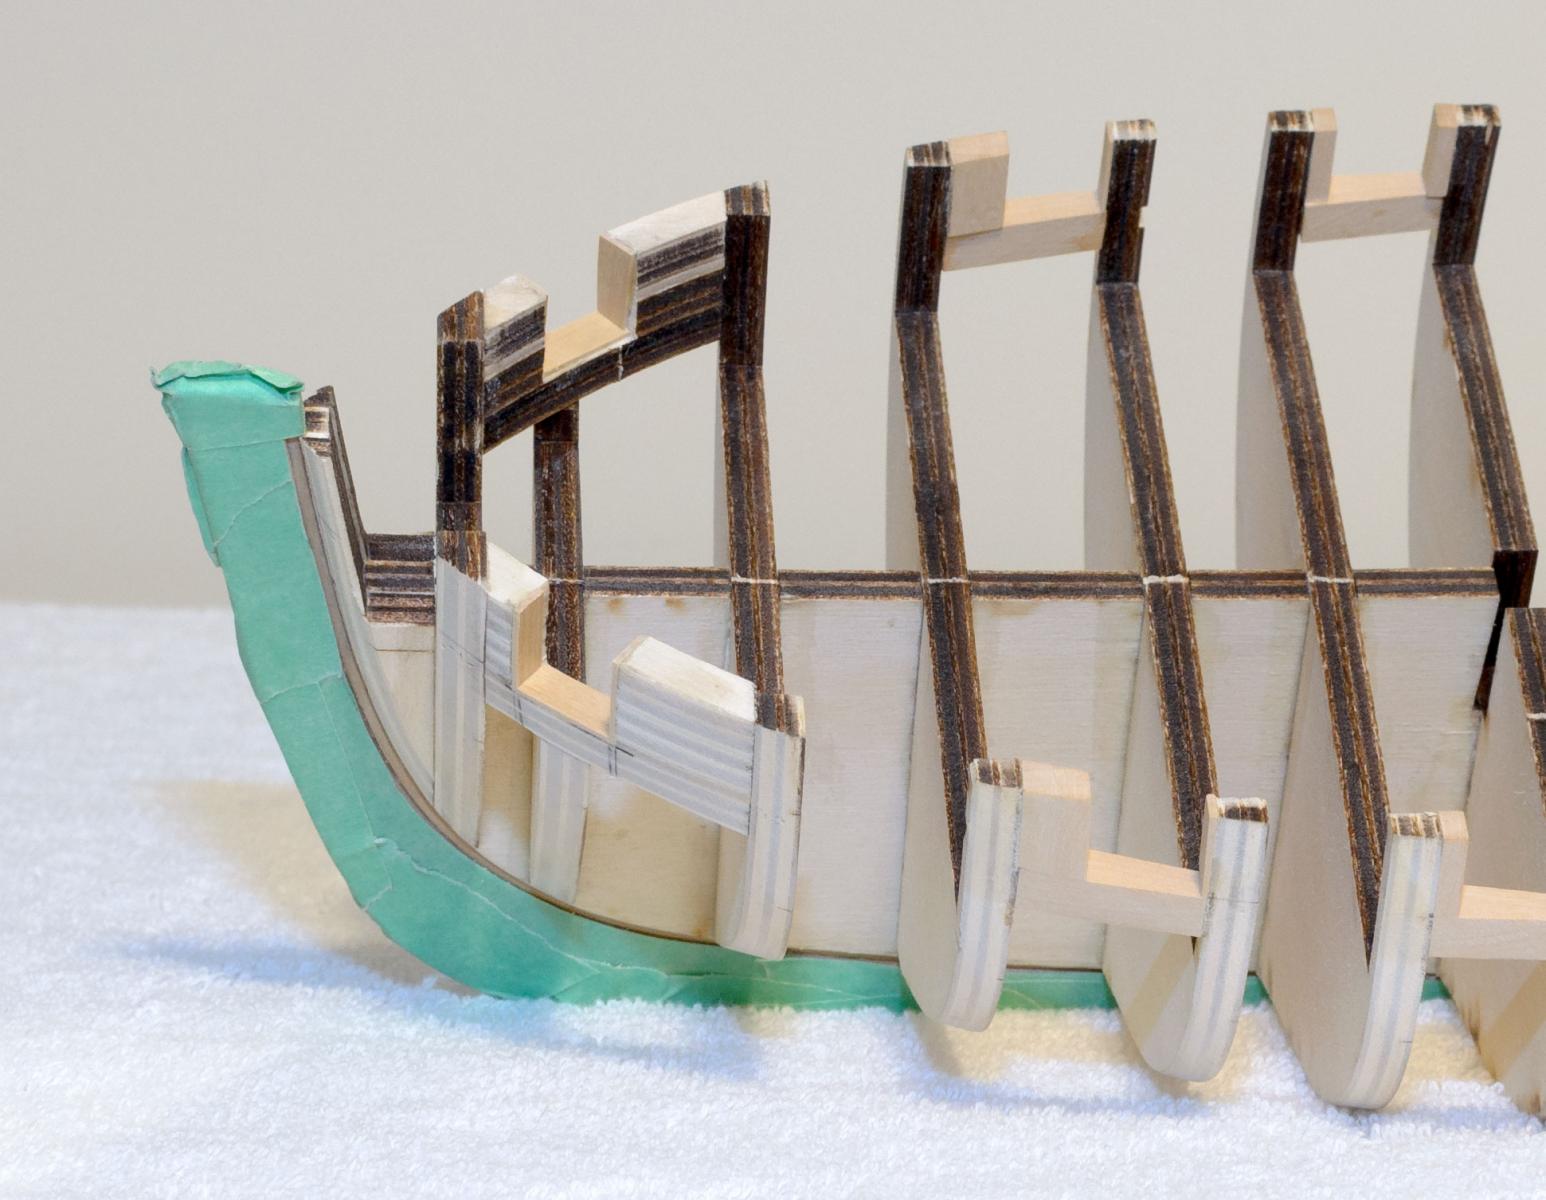
Rather than cutting the stern frames individually, each frame X, Y and Z were stacked together and cut as one piece. Each of the two outer frames ZZ were stacked three together. A tiny amount of PVA was used to hold the parts together while cutting them with the jigsaw. I used Elmer's Washable School Glue to adhere the drawings to the parts. The disc sander and oscillating drum sander cleaned things up nicely afterwards. Given the accuracy of Jason's boxwood sheets and Chuck's laser cutting the fitting of the stern frames was a breeze with no sanding necessary. Frames ZZ were faired as Chuck describes in his practicum.
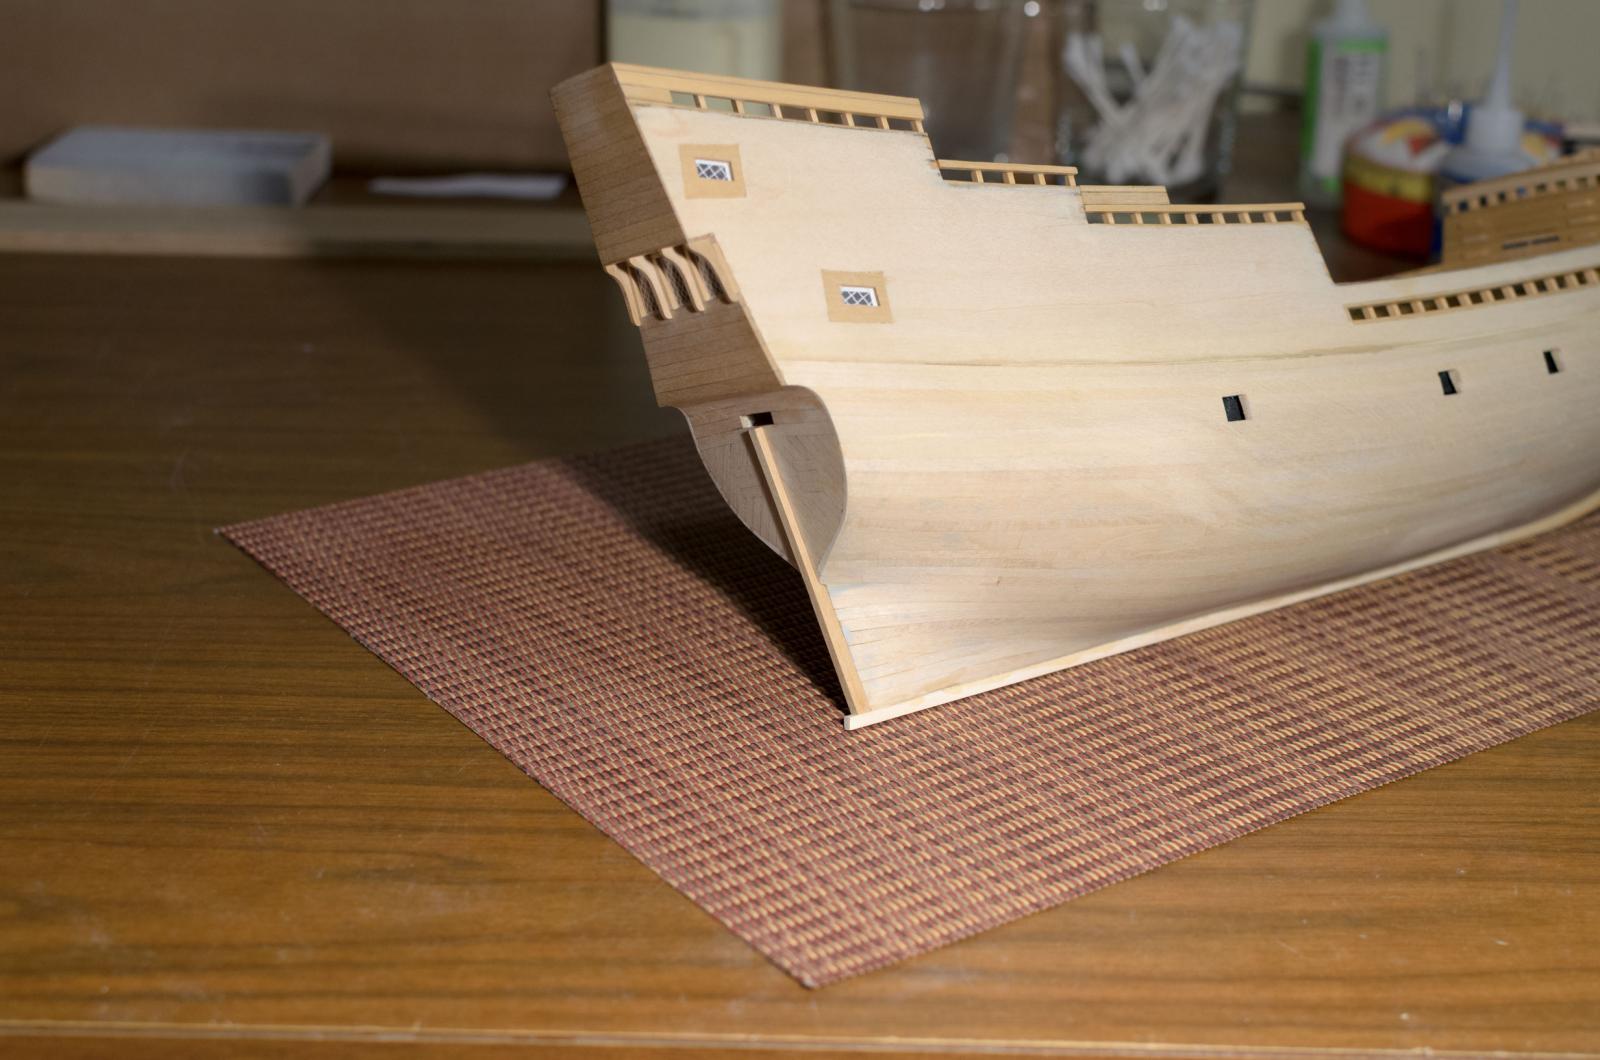
Though apparently simple, I found that the two stern ports were very challenging to make. They are awkward to hold and care must be taken while making adjustments to the angles. They should be positioned parallel to the waterline.
The square tuck piece was then added along with the filler pieces glued behind it. The photo shows the port side after being faired. A lot of material had to be removed in order to get a batten to run smoothly over the hull.