HOLIDAY DONATION DRIVE - SUPPORT MSW - DO YOUR PART TO KEEP THIS GREAT FORUM GOING! (Only 66 donations so far out of 49,000 members - Can we at least get100? C'mon guys!)
×


Kevin
-
Posts
7,010 -
Joined
-
Last visited
Content Type
Profiles
Forums
Gallery
Events
Everything posted by Kevin
-
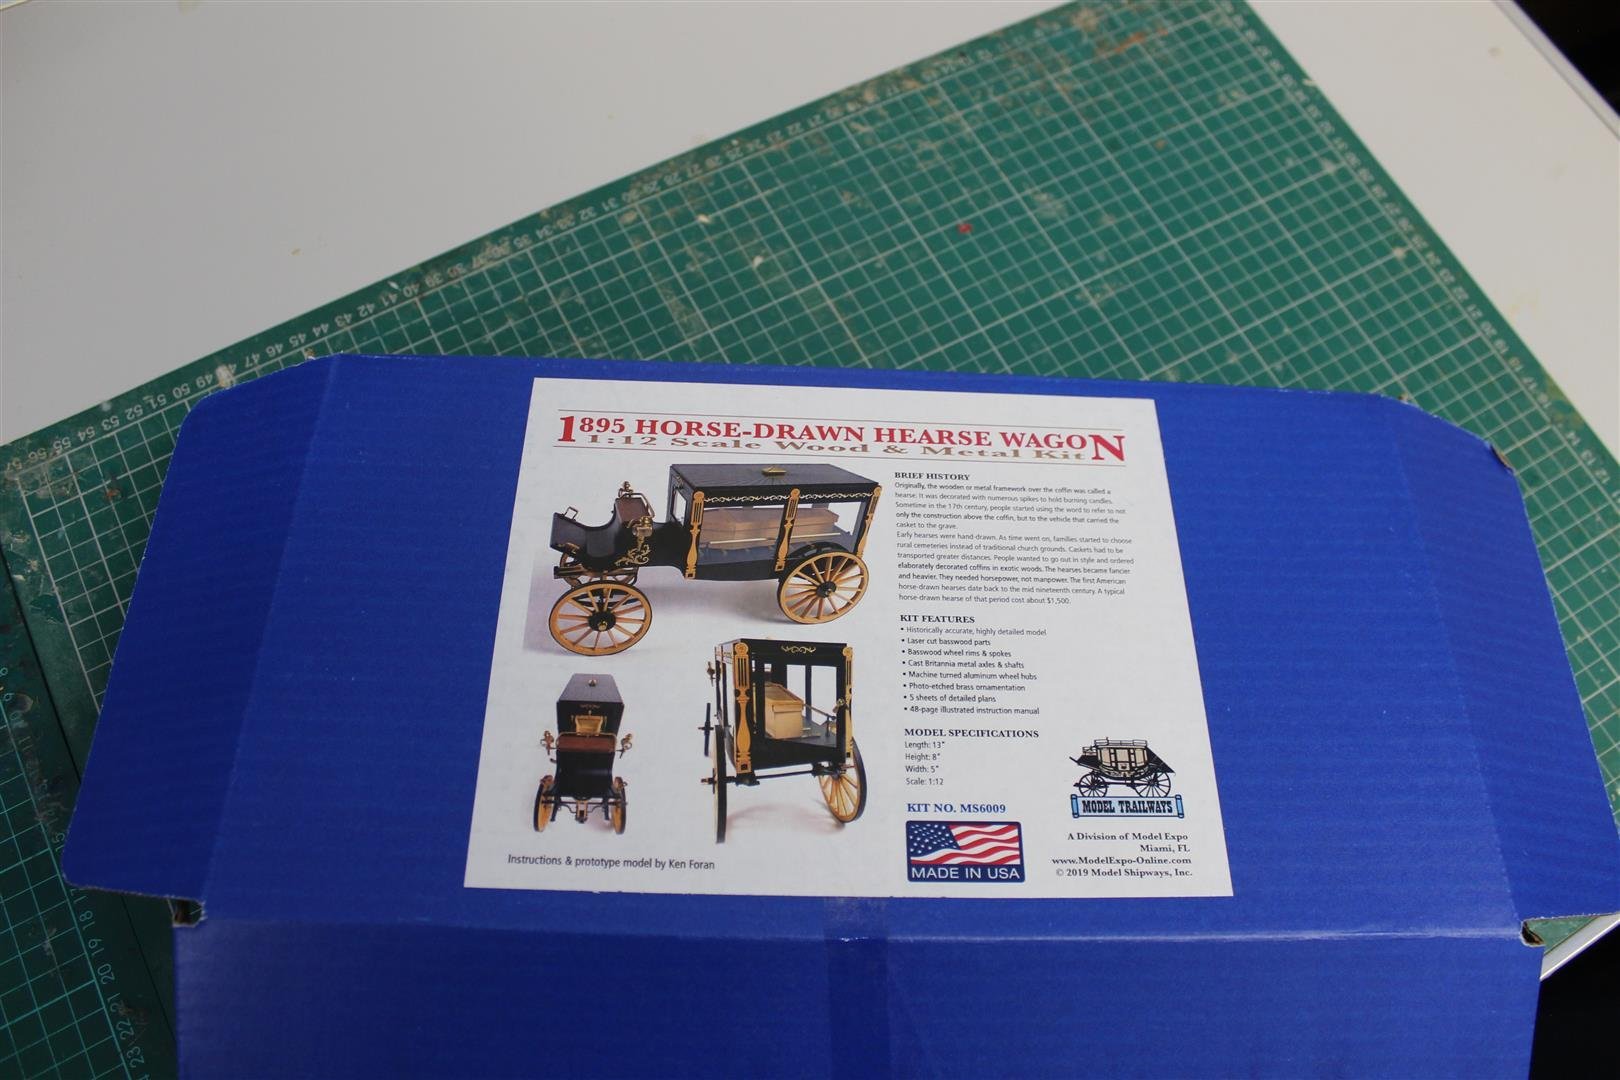
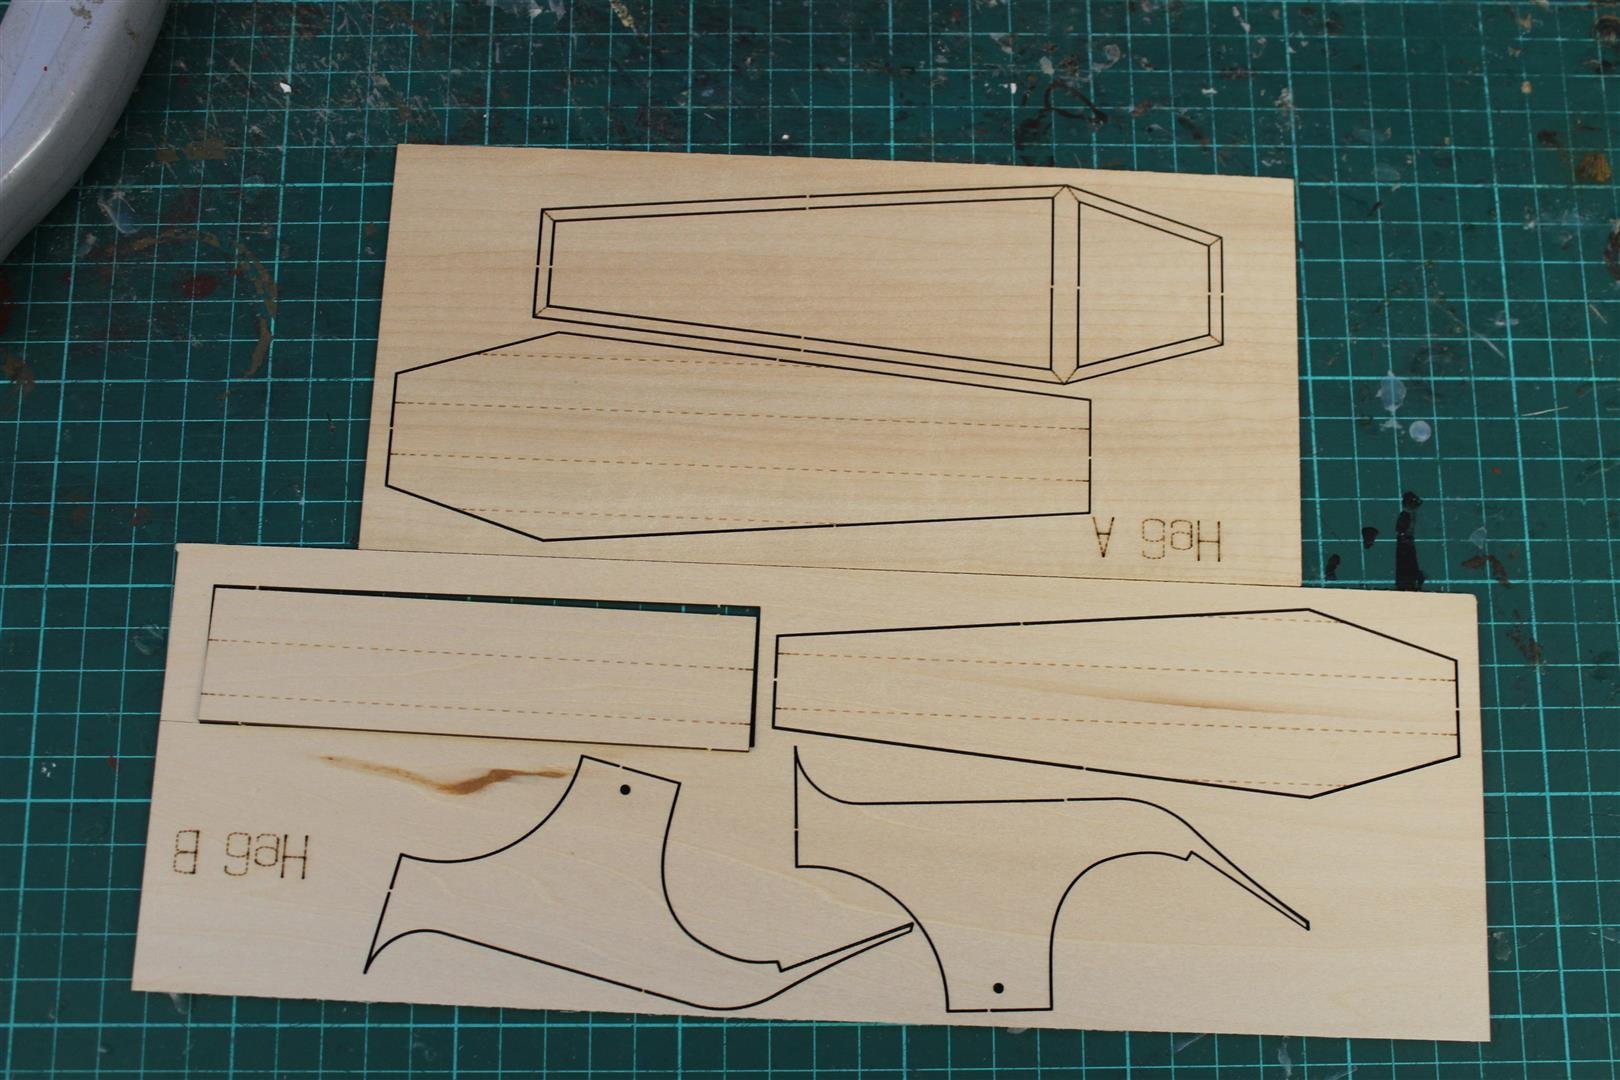
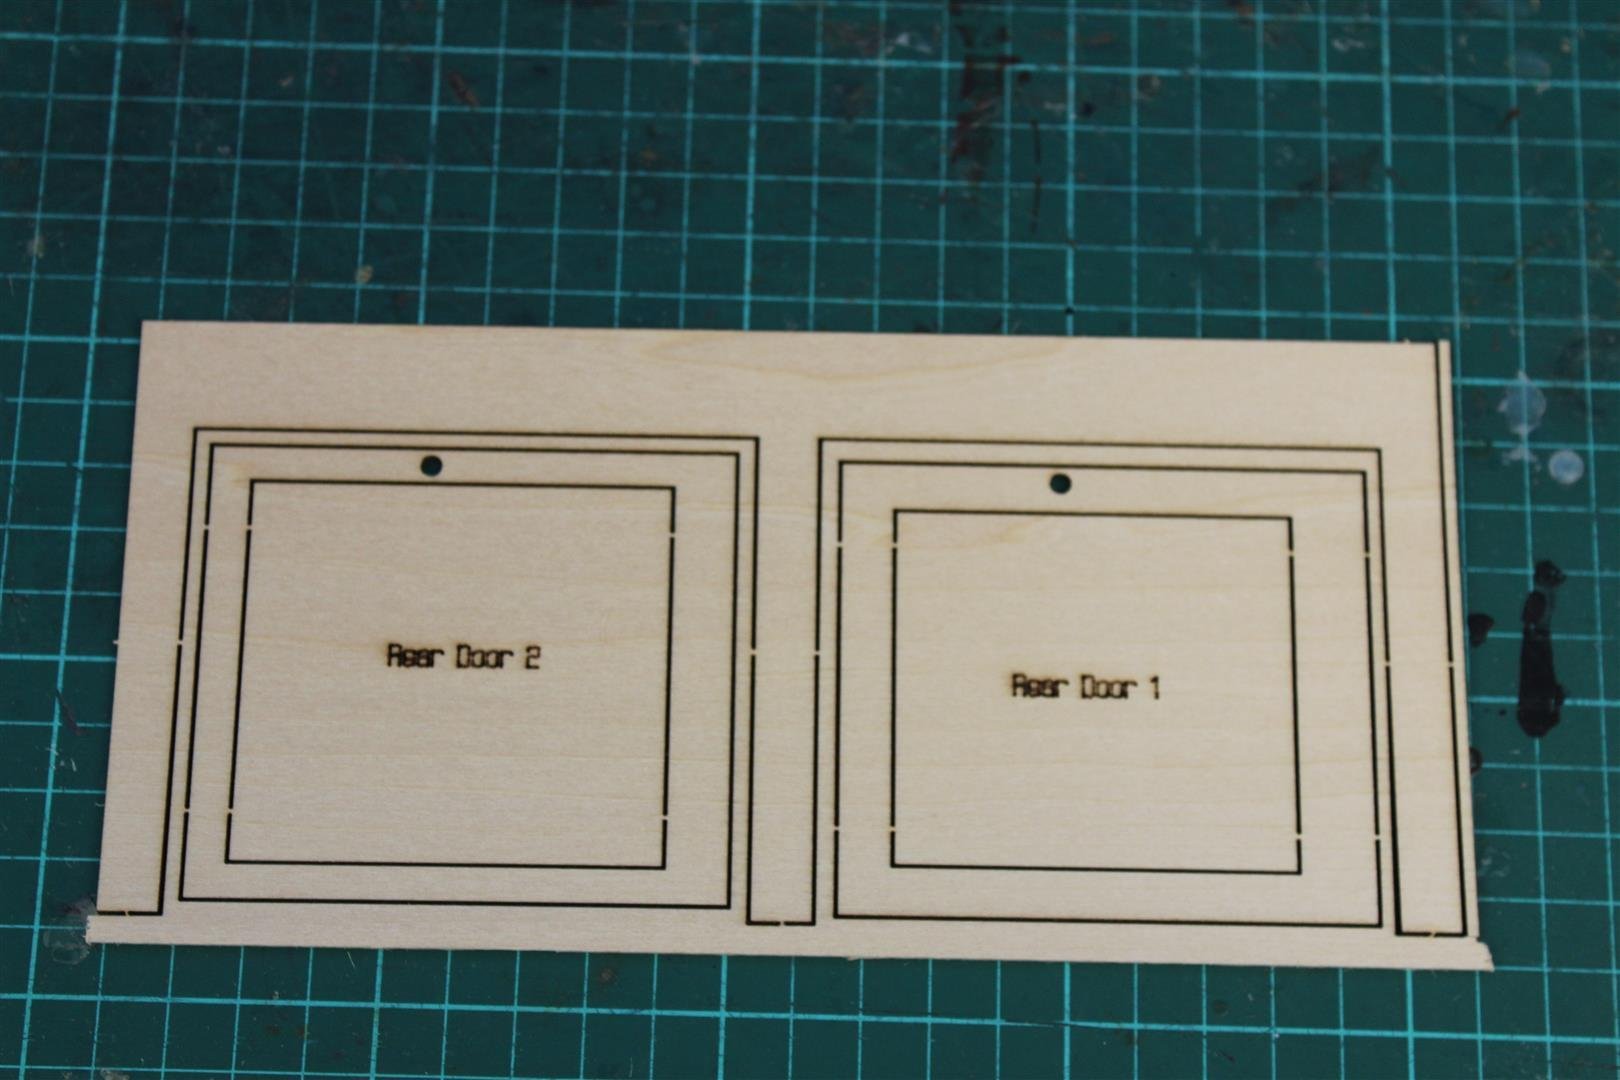
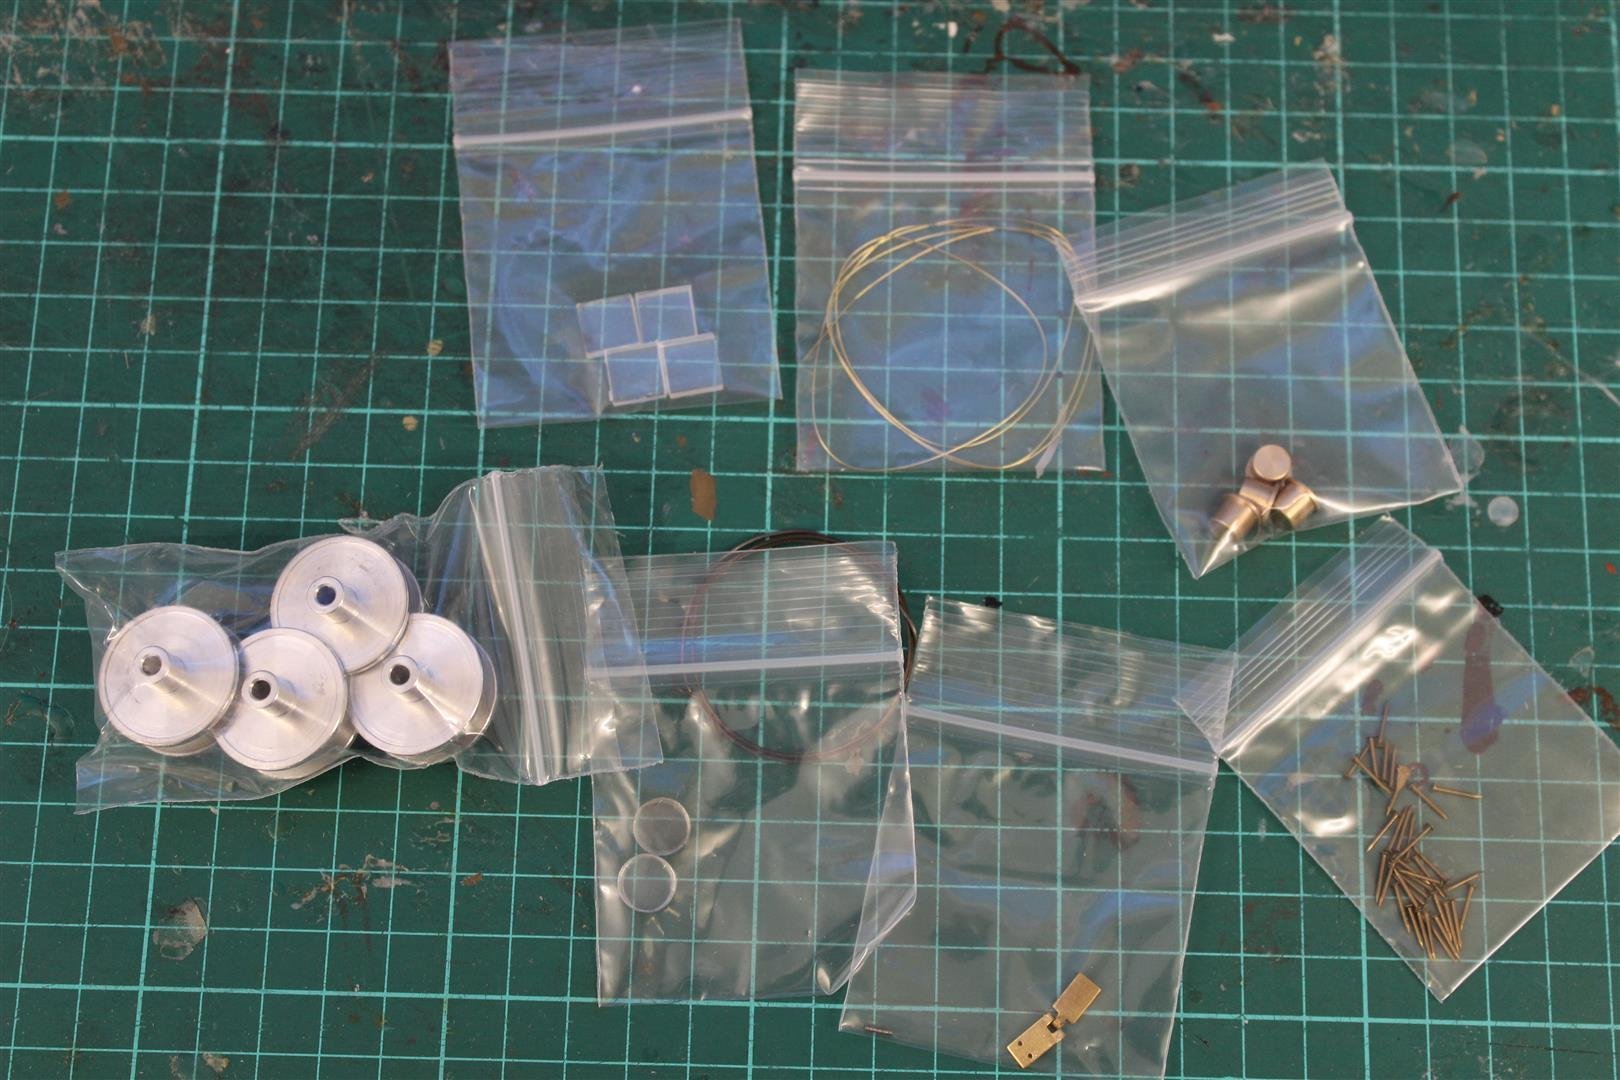
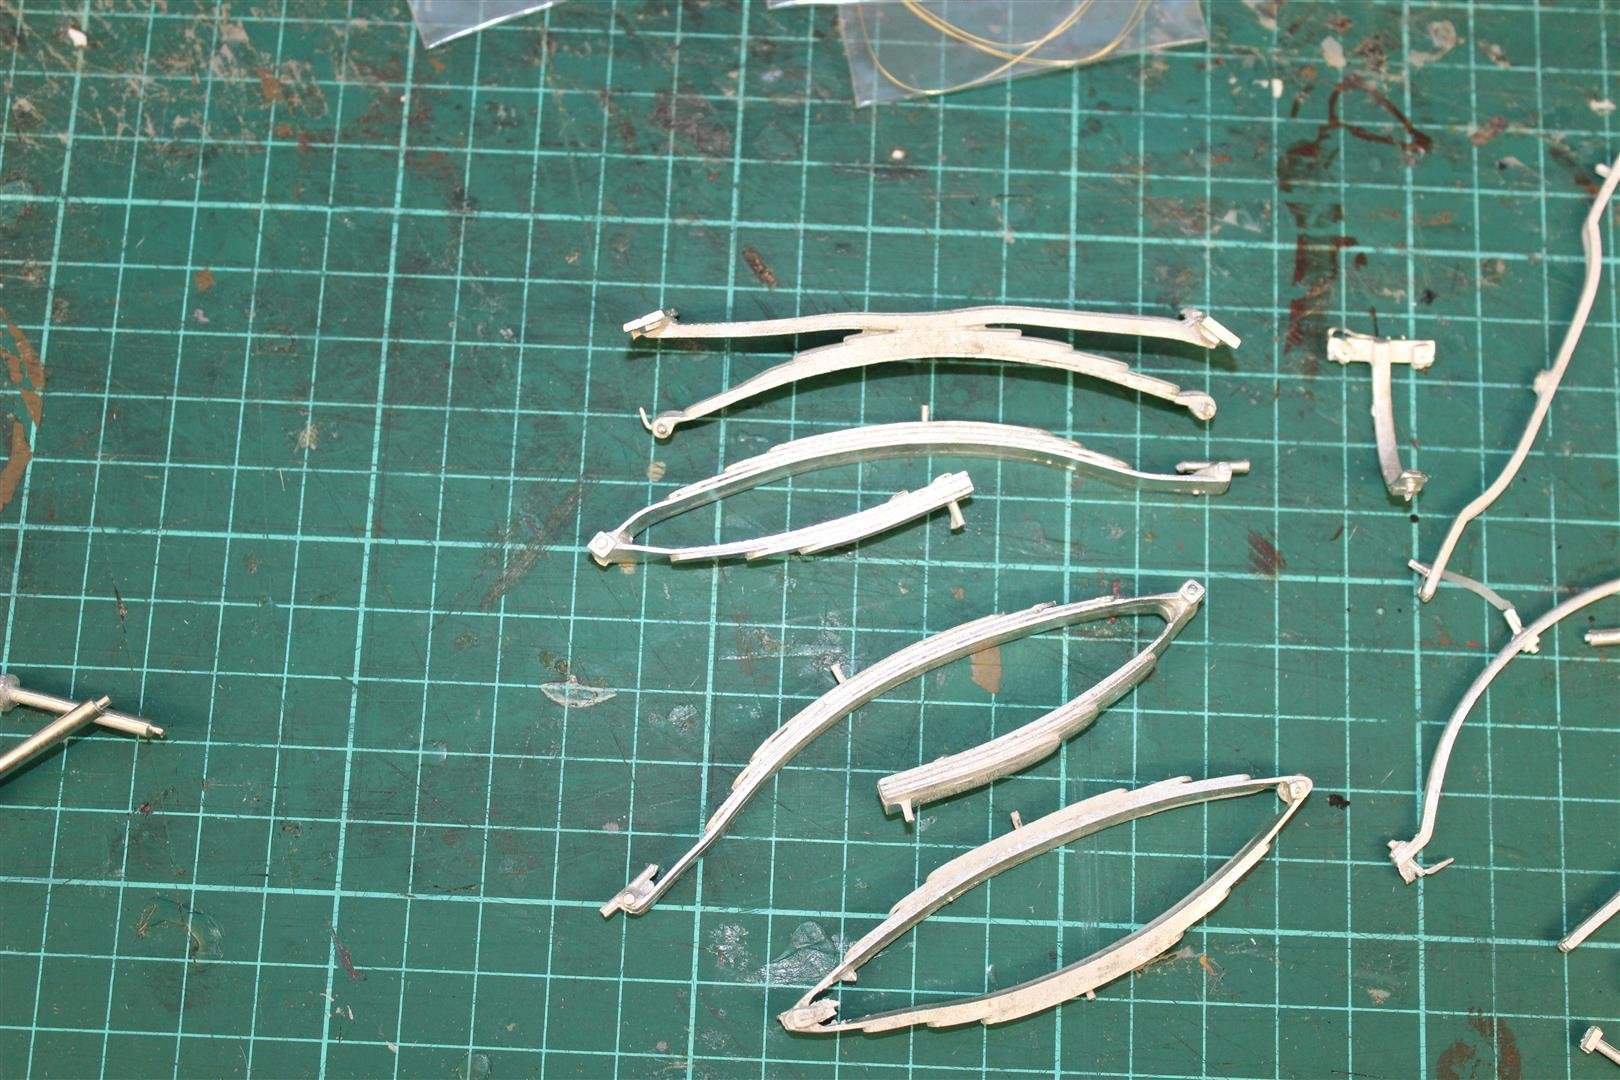
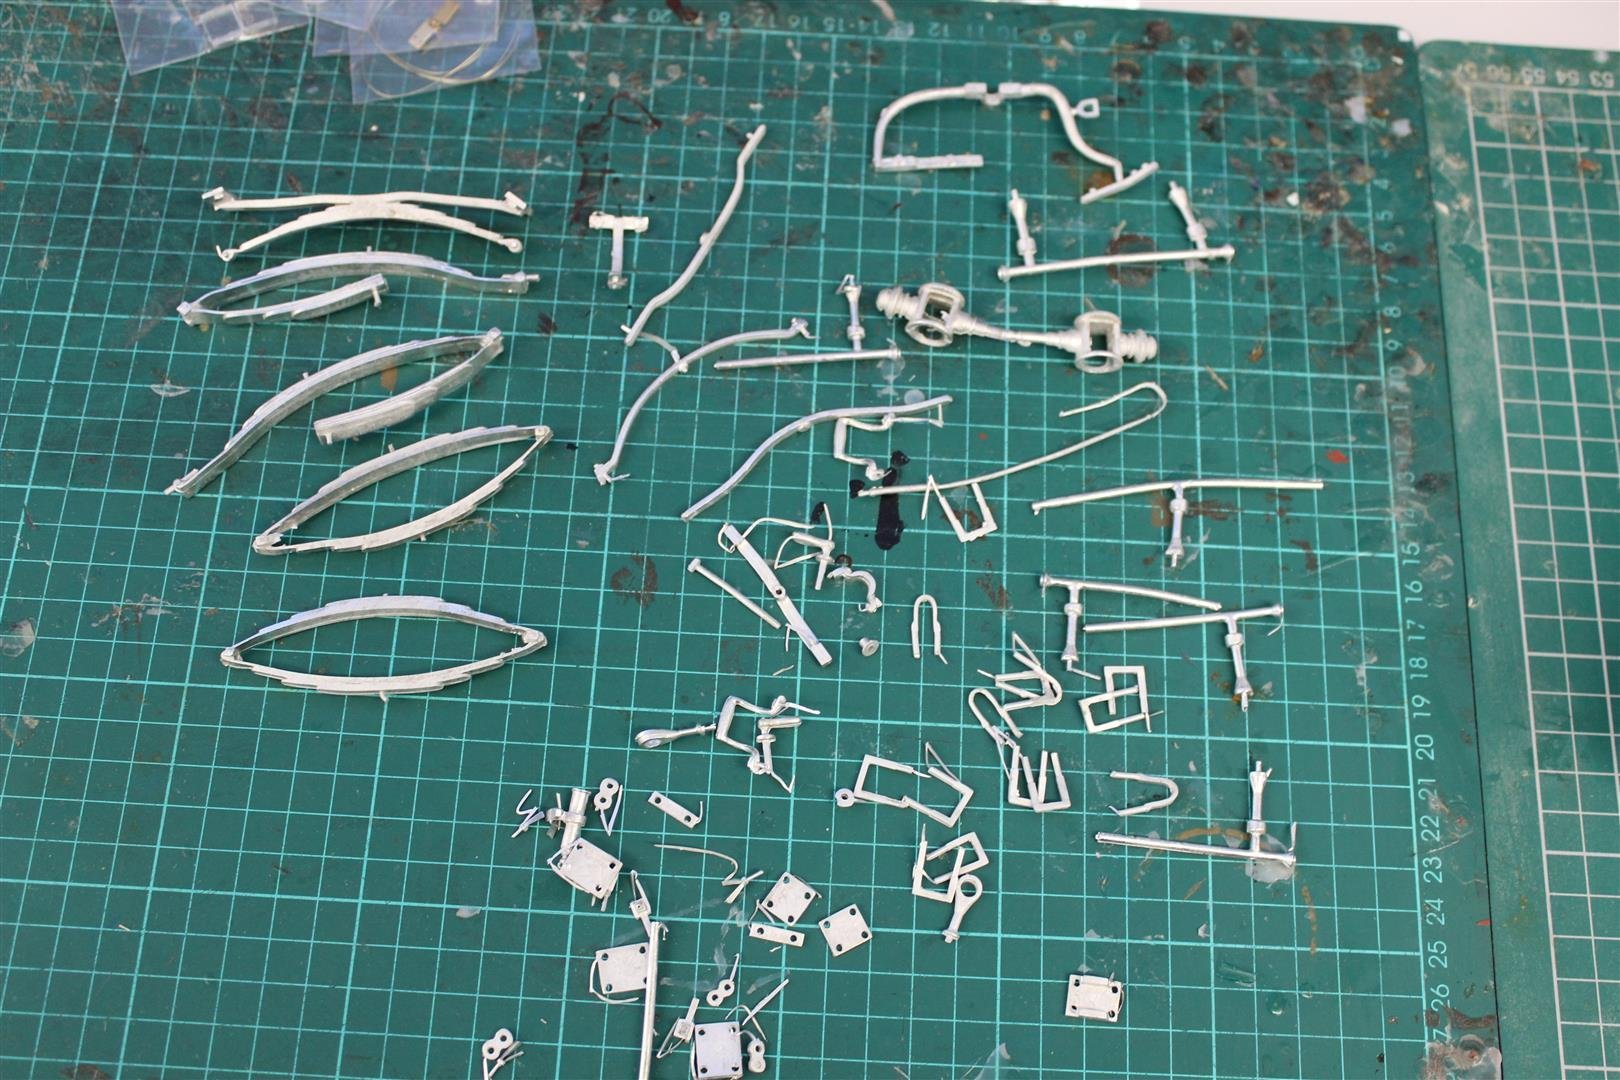
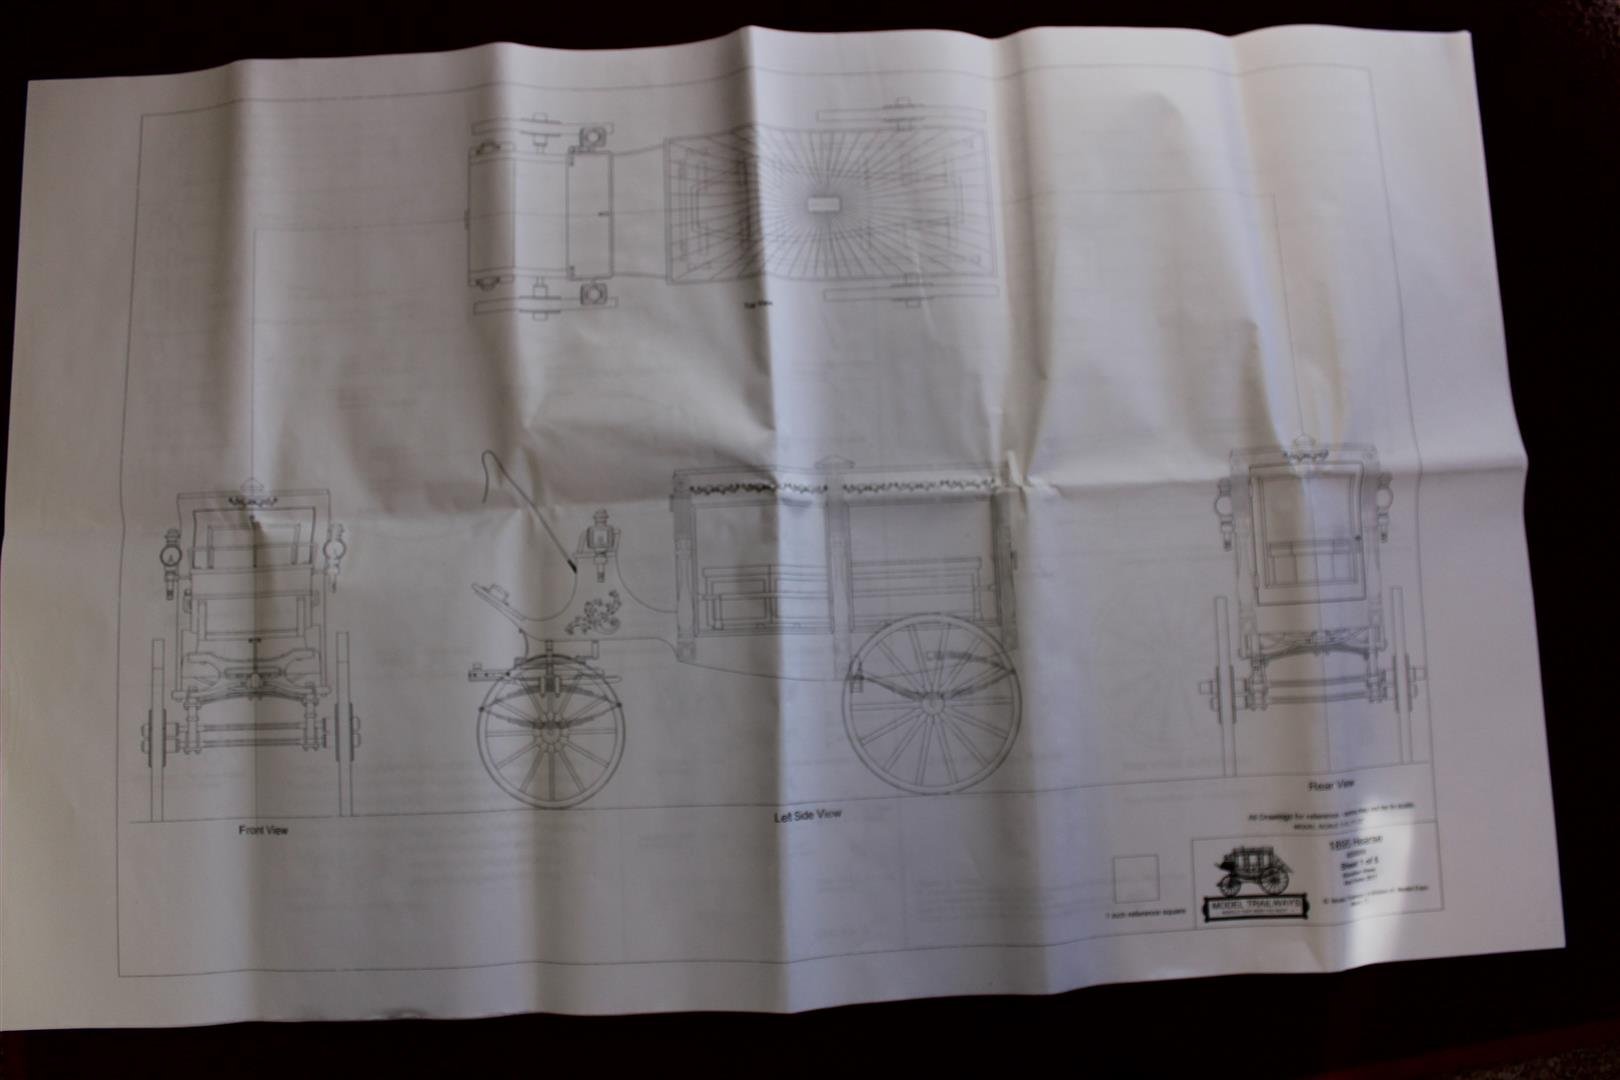
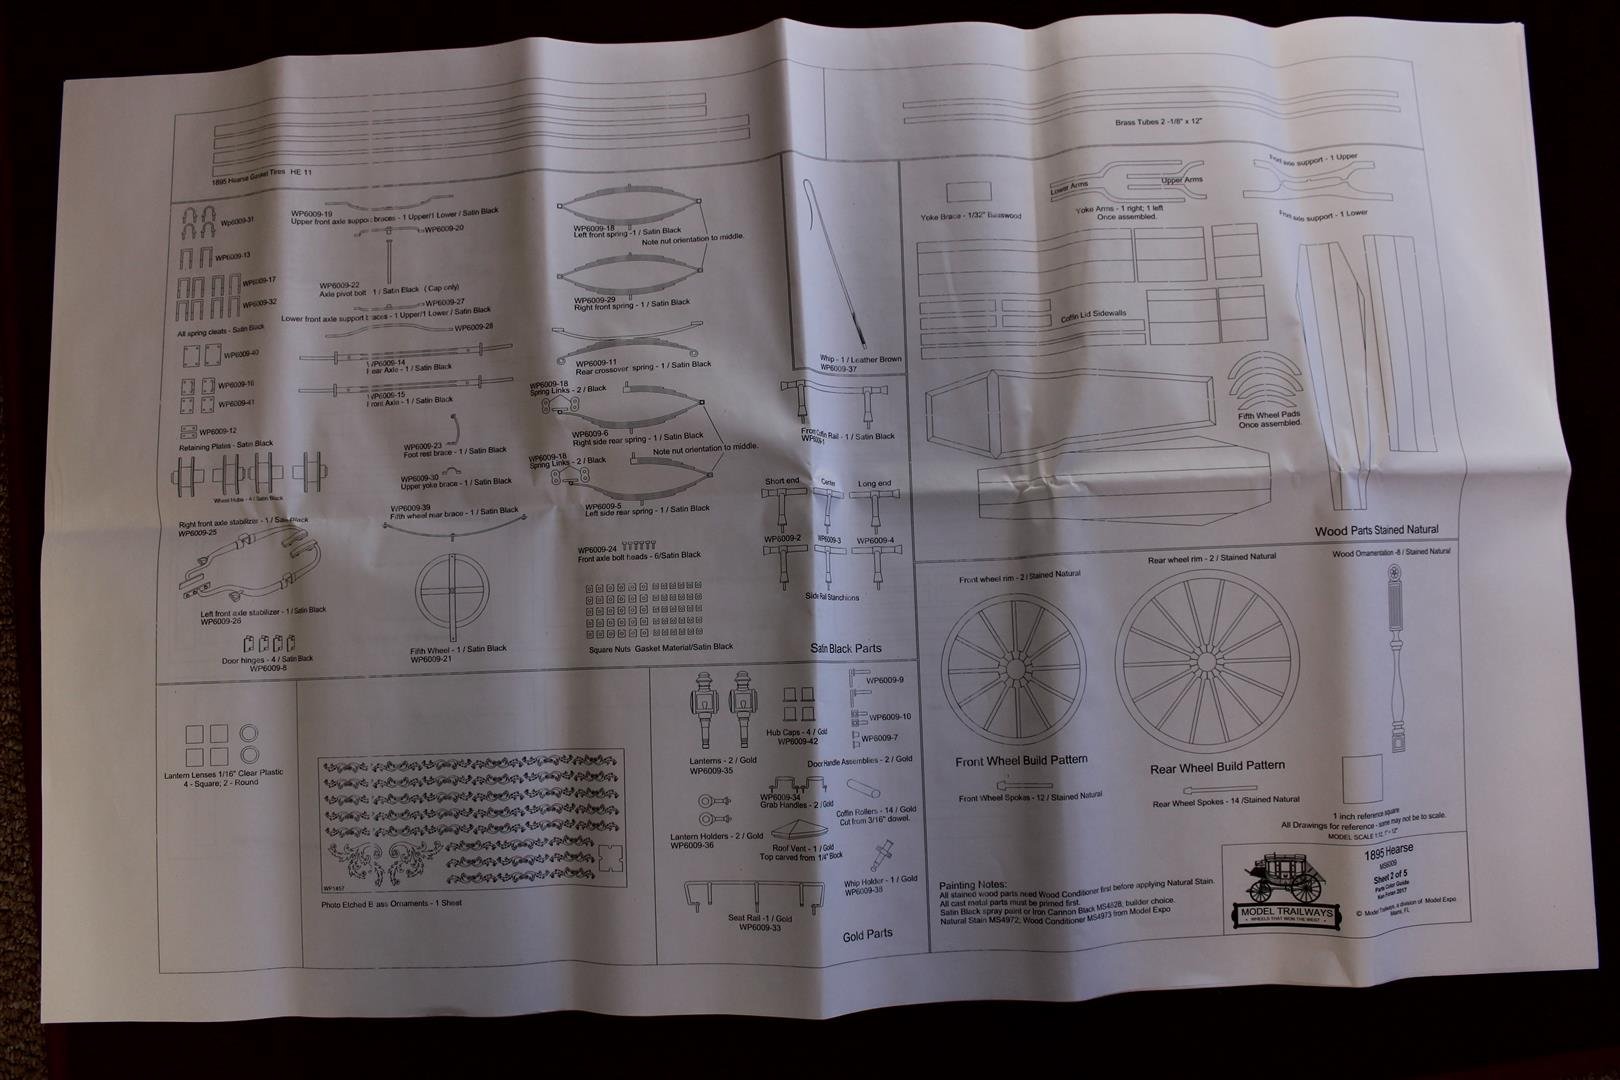
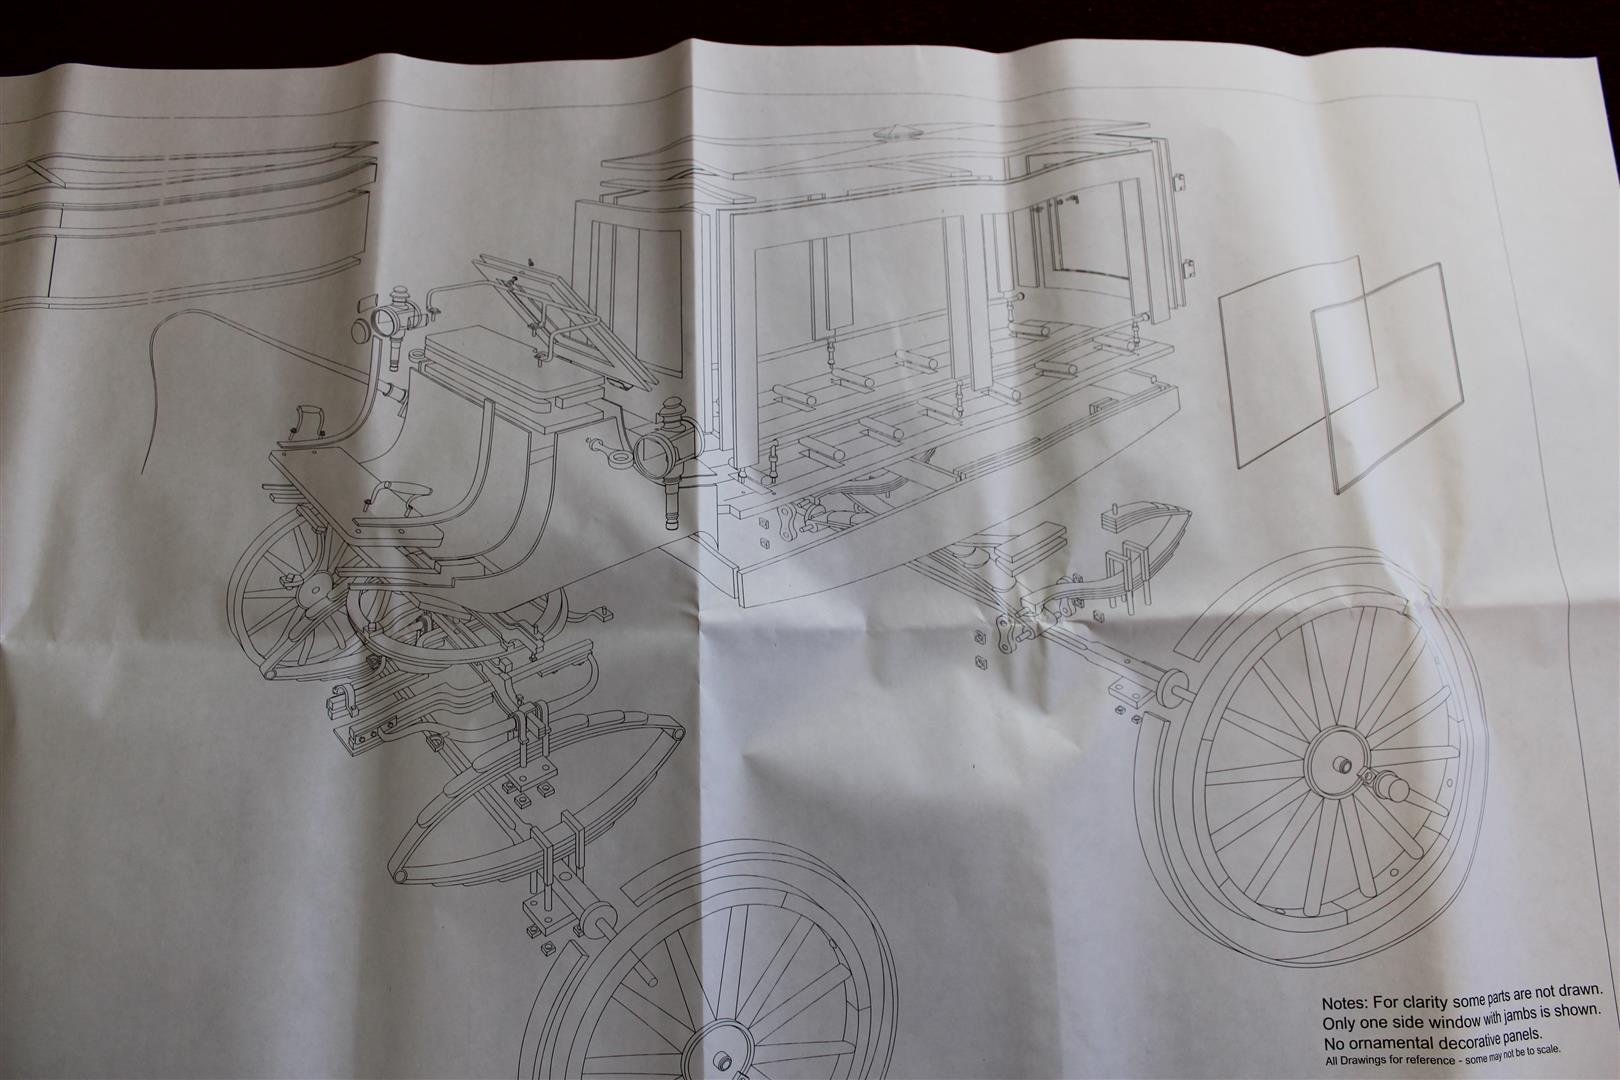
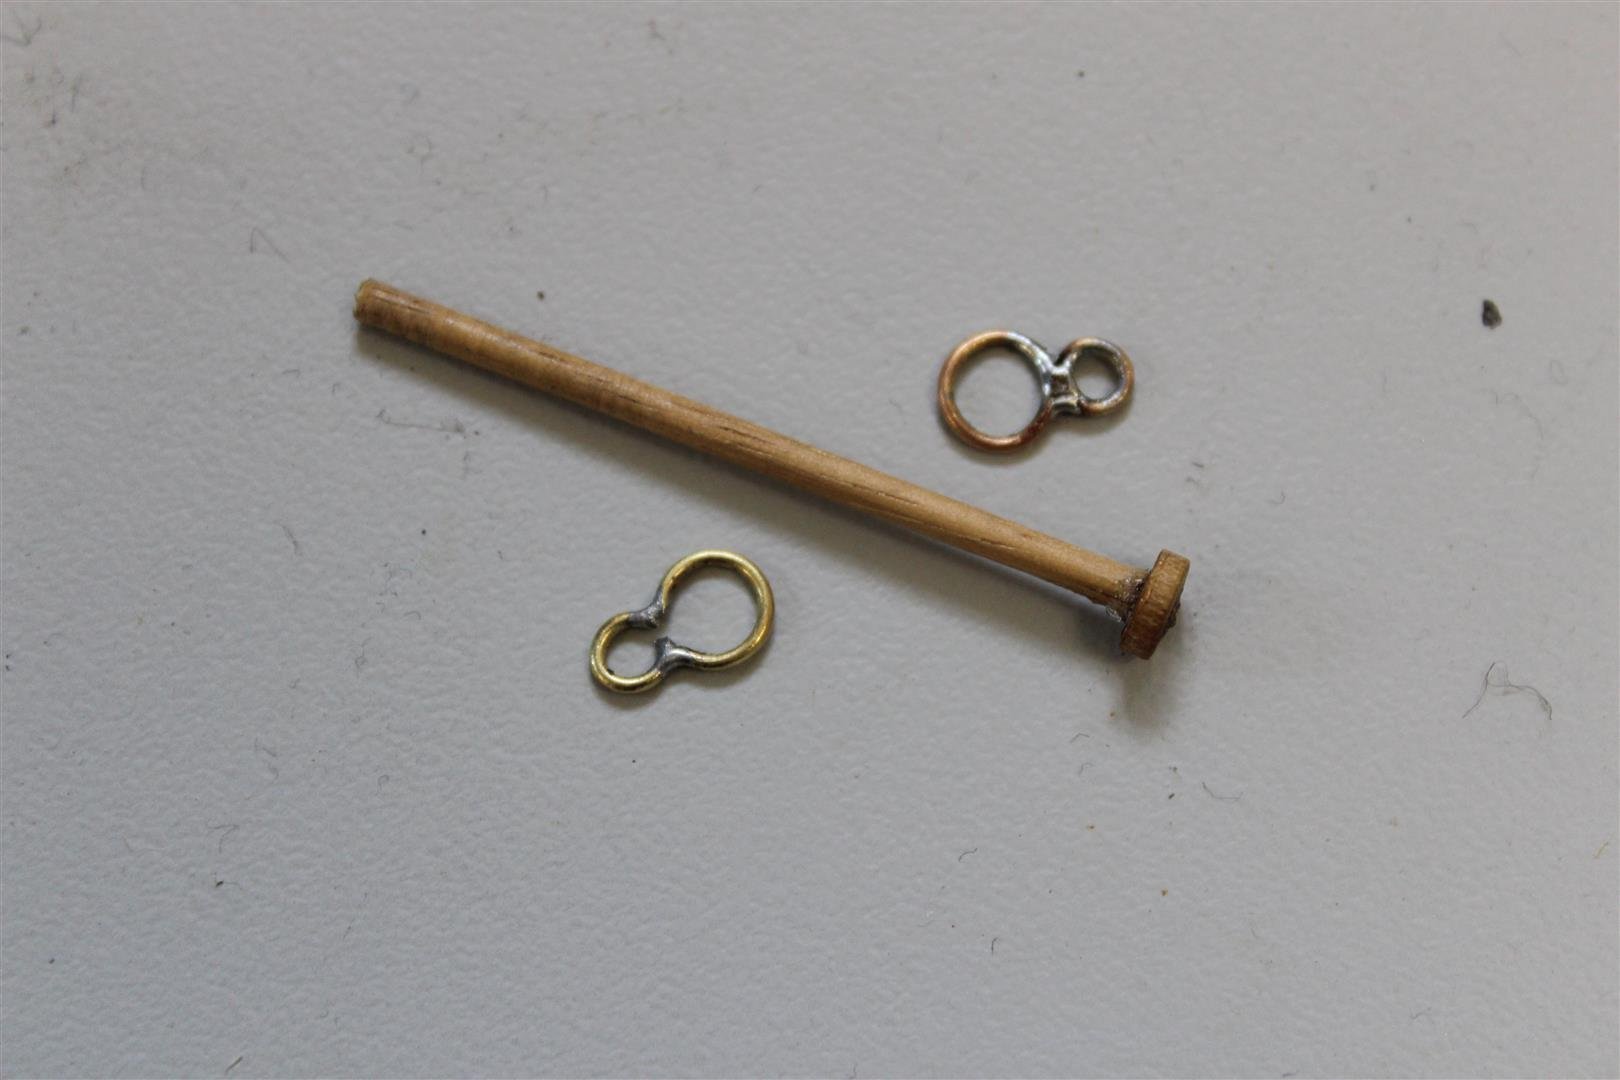
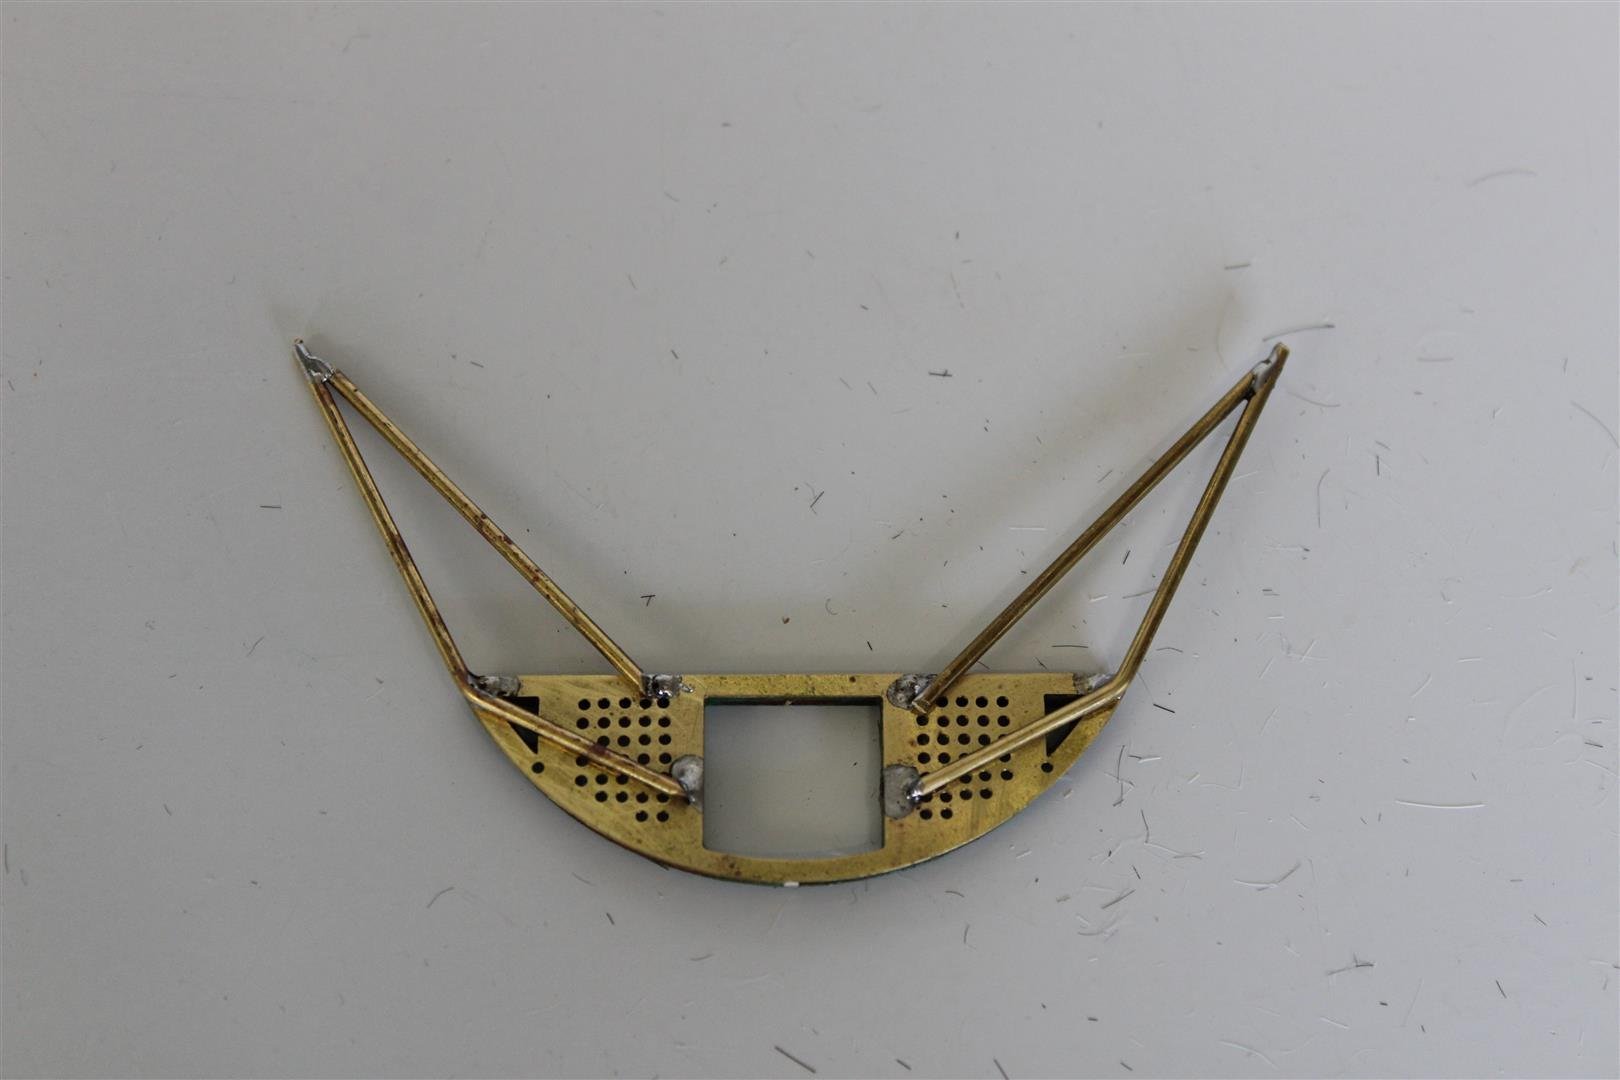
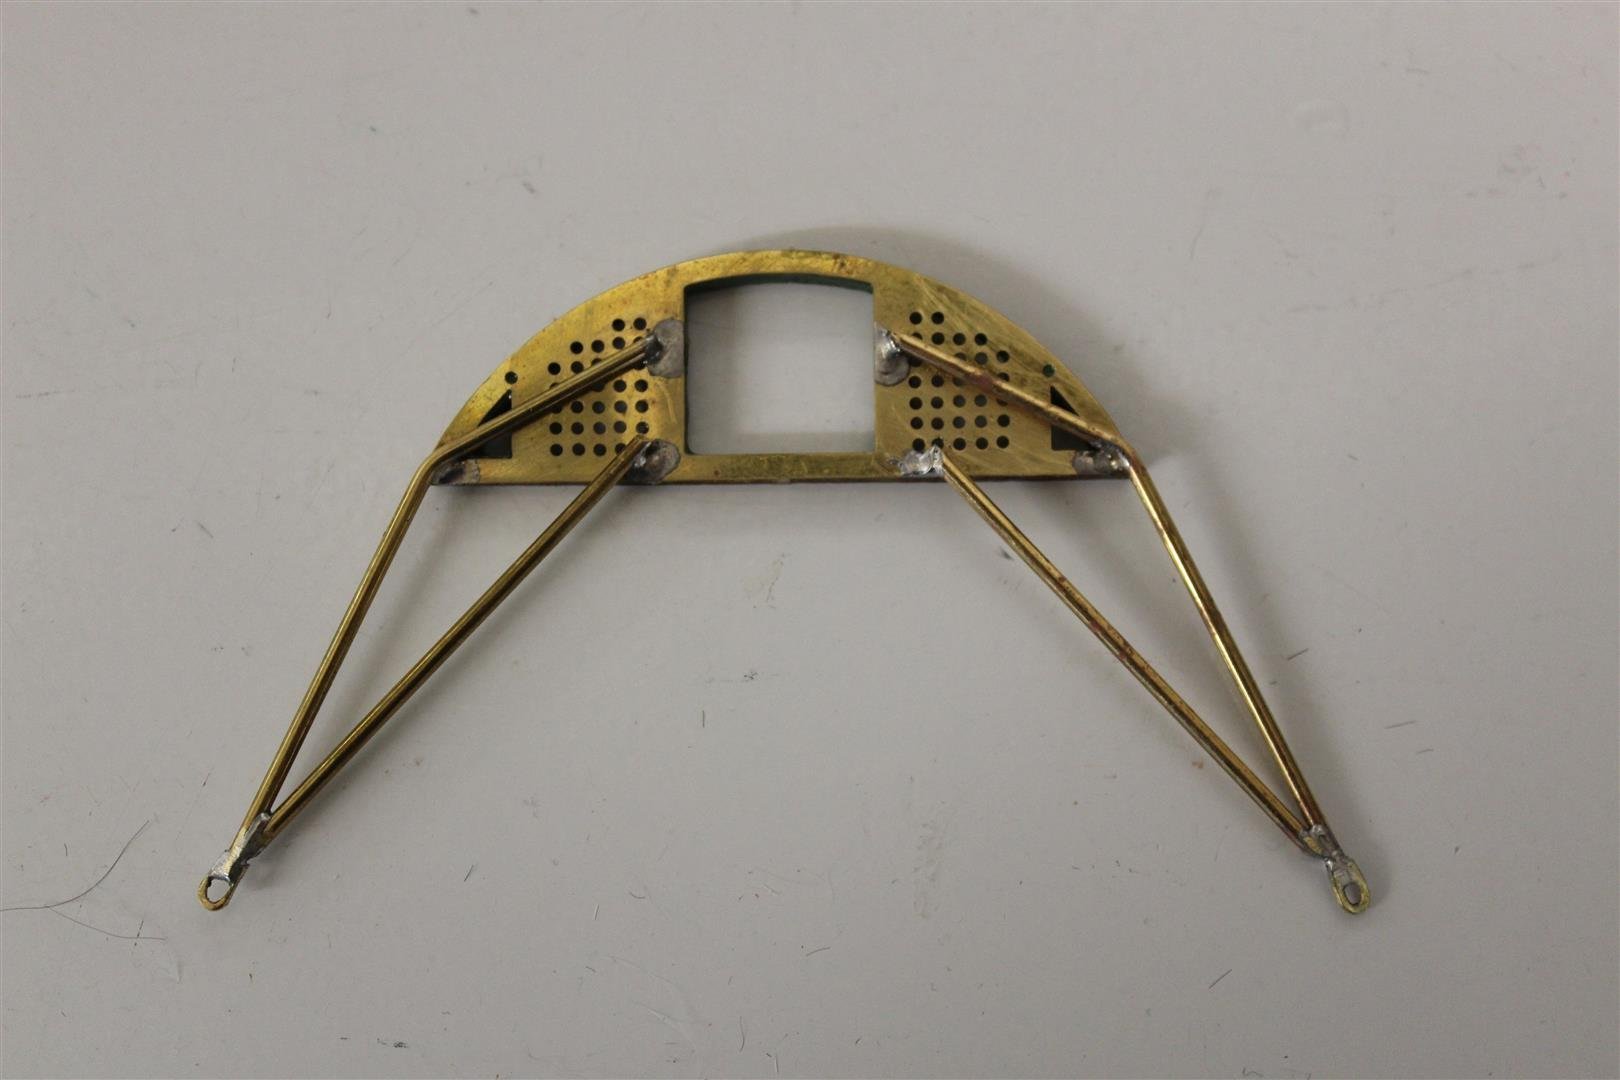
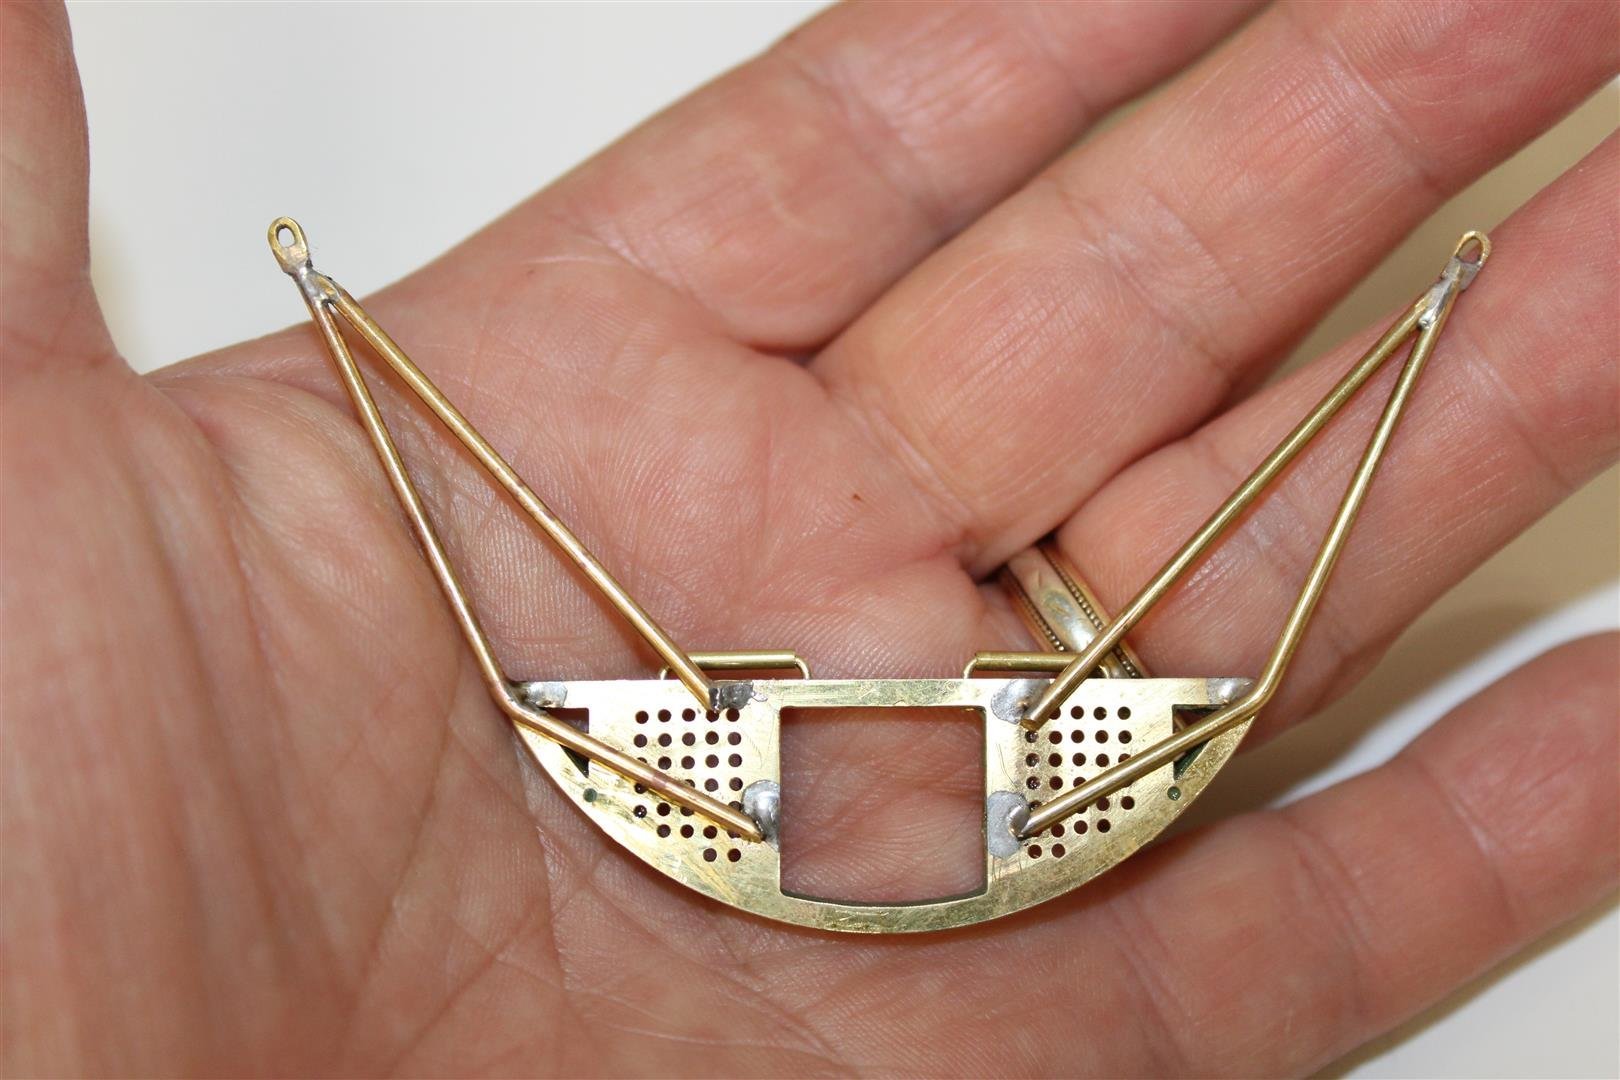
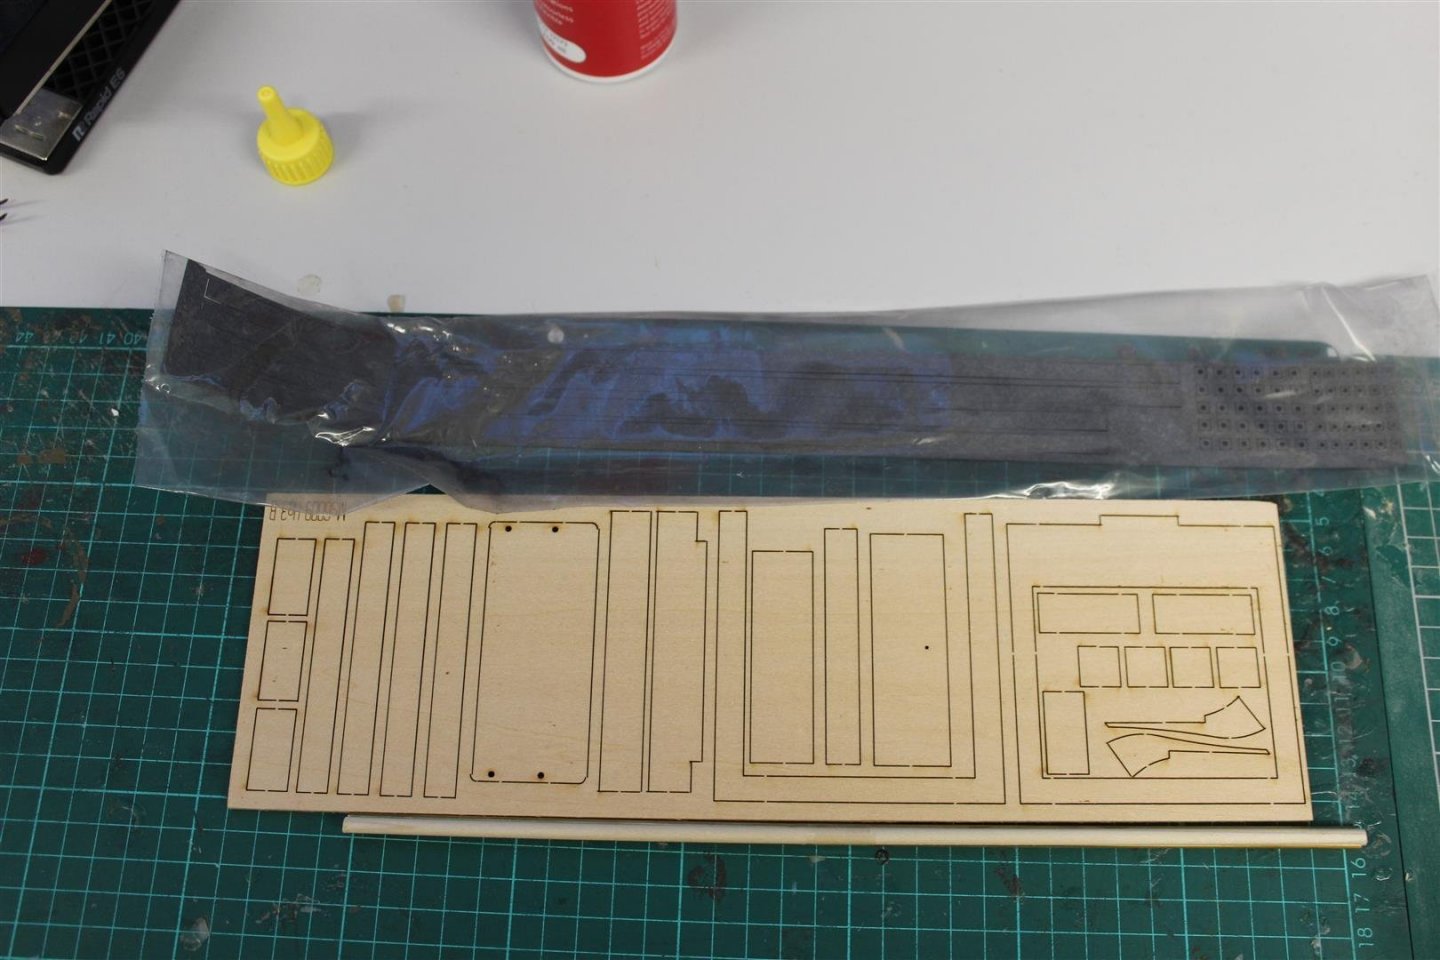
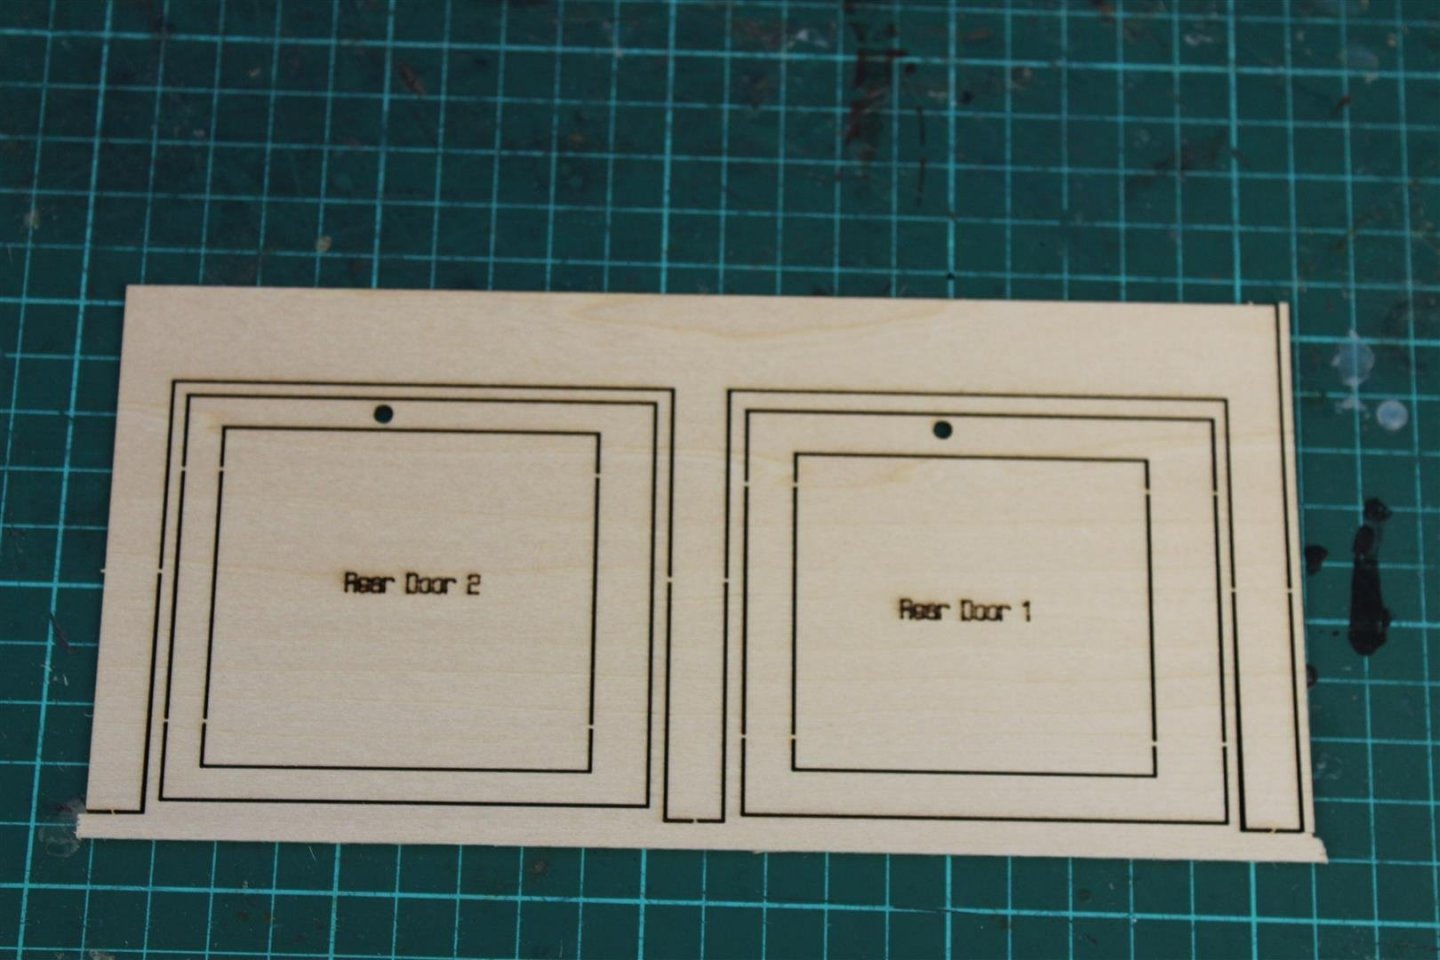
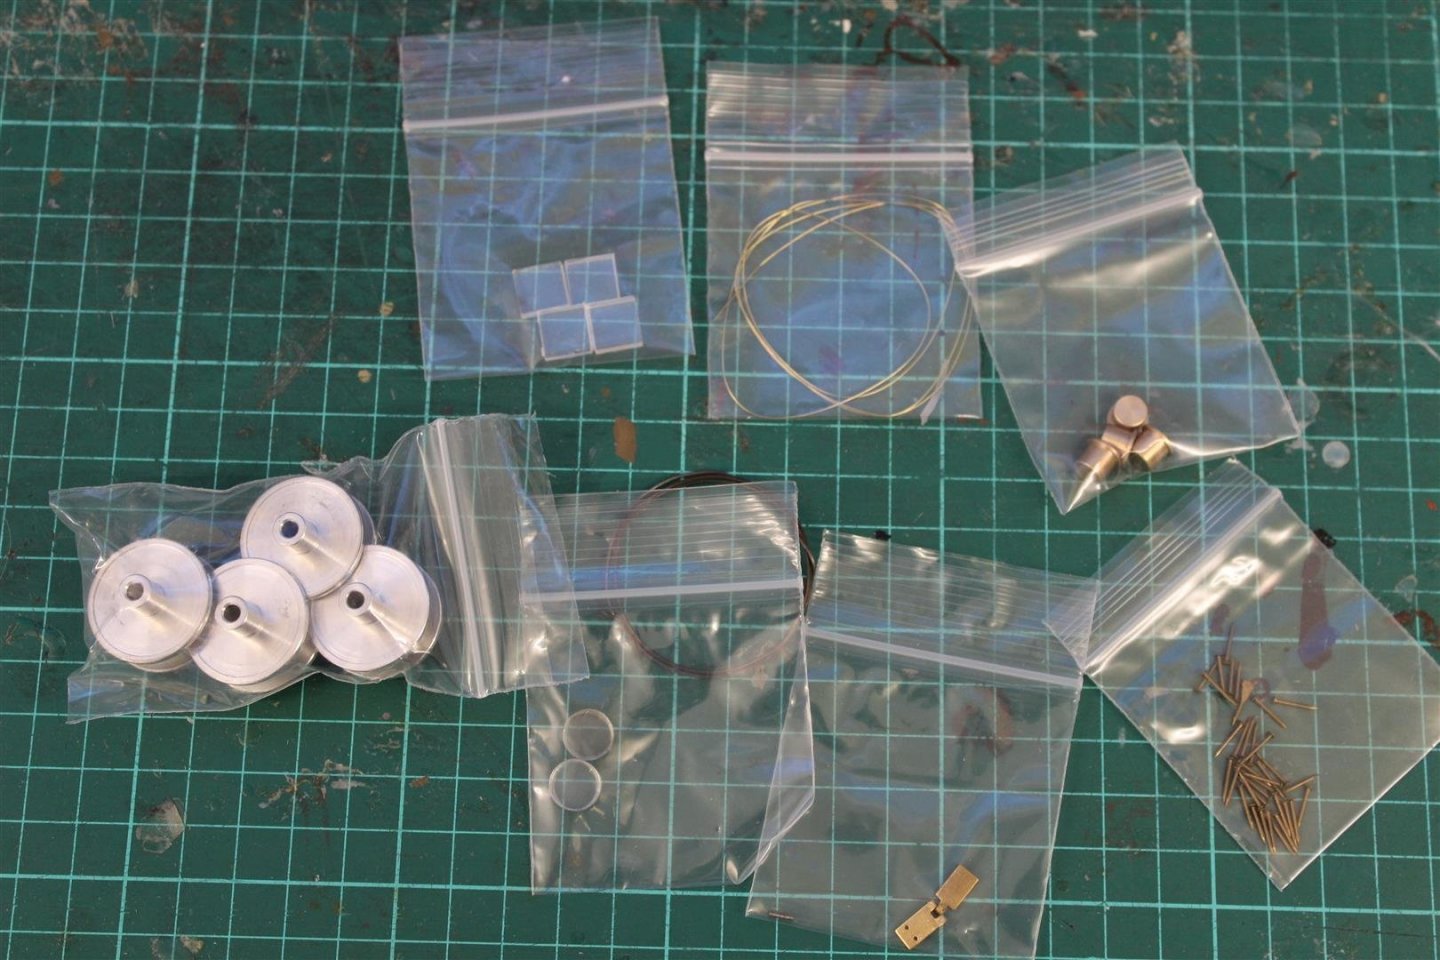
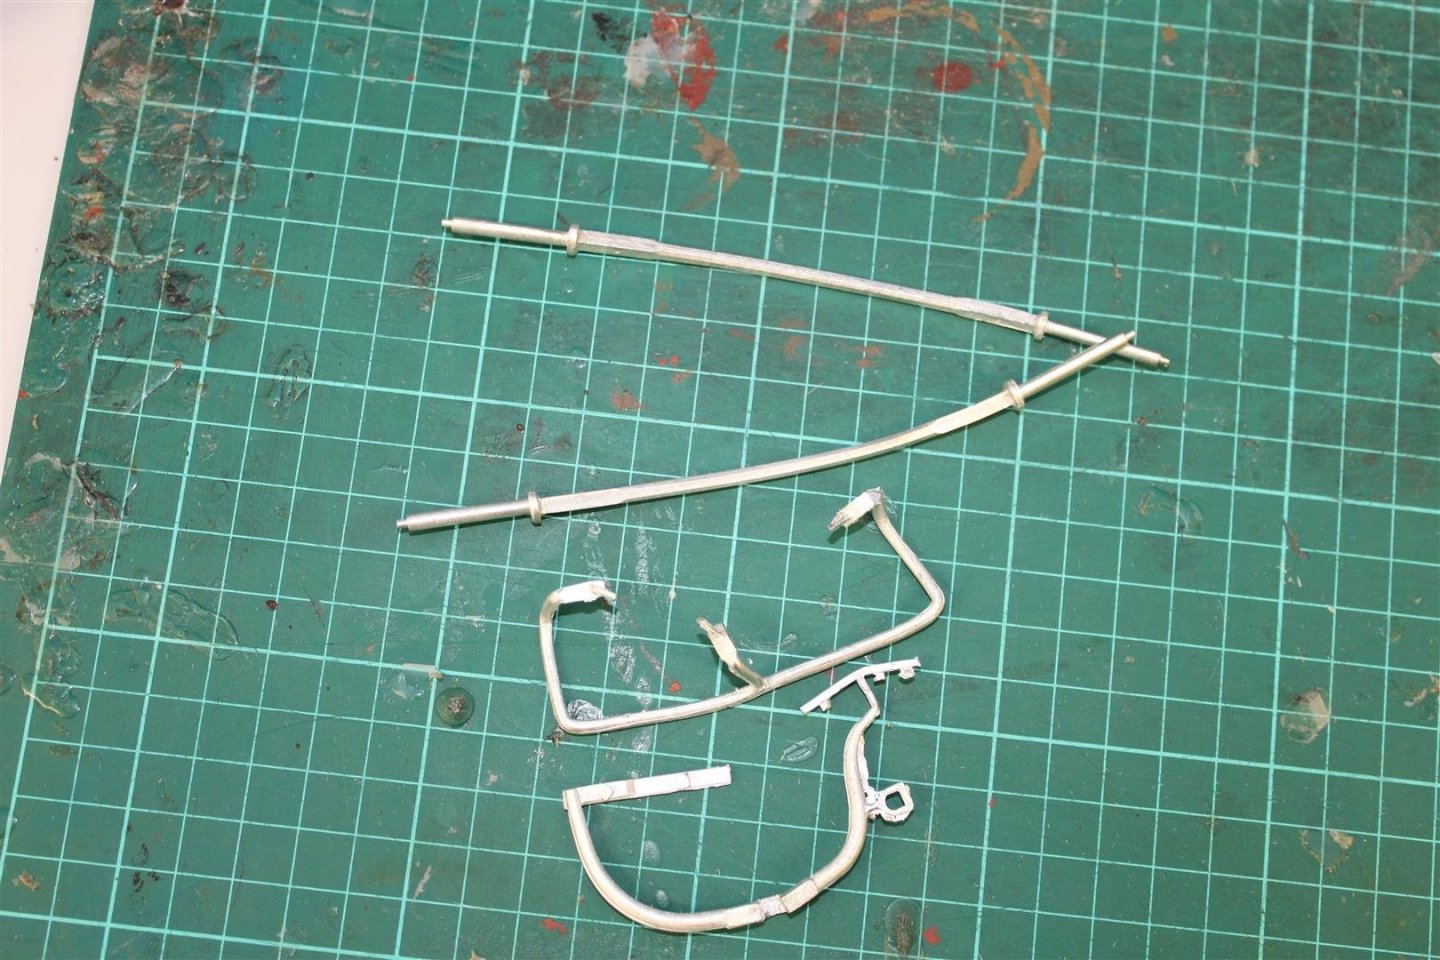
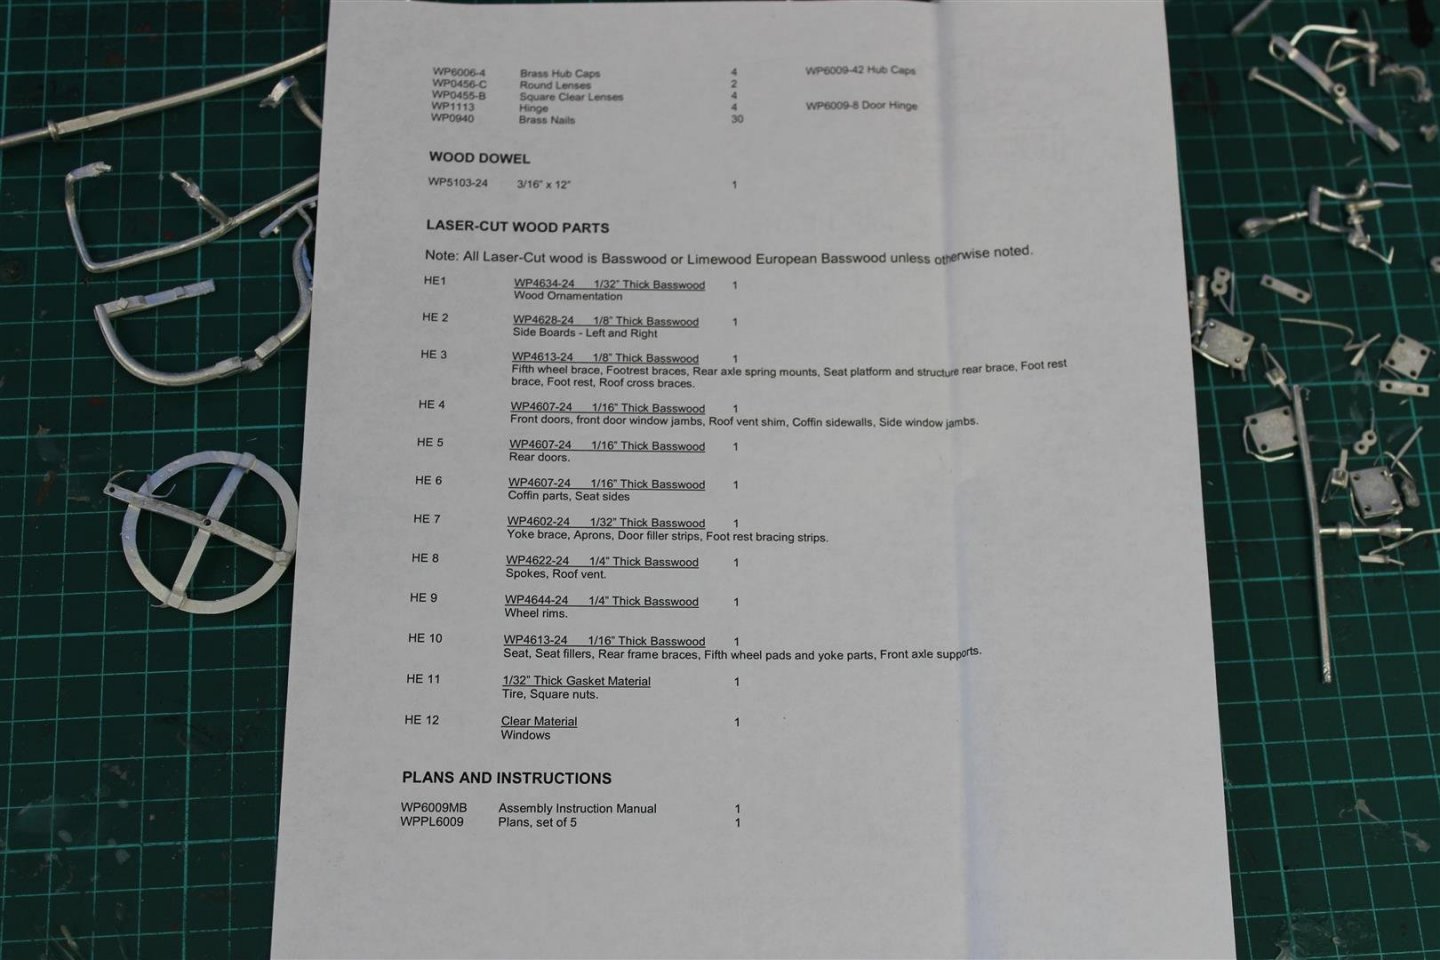
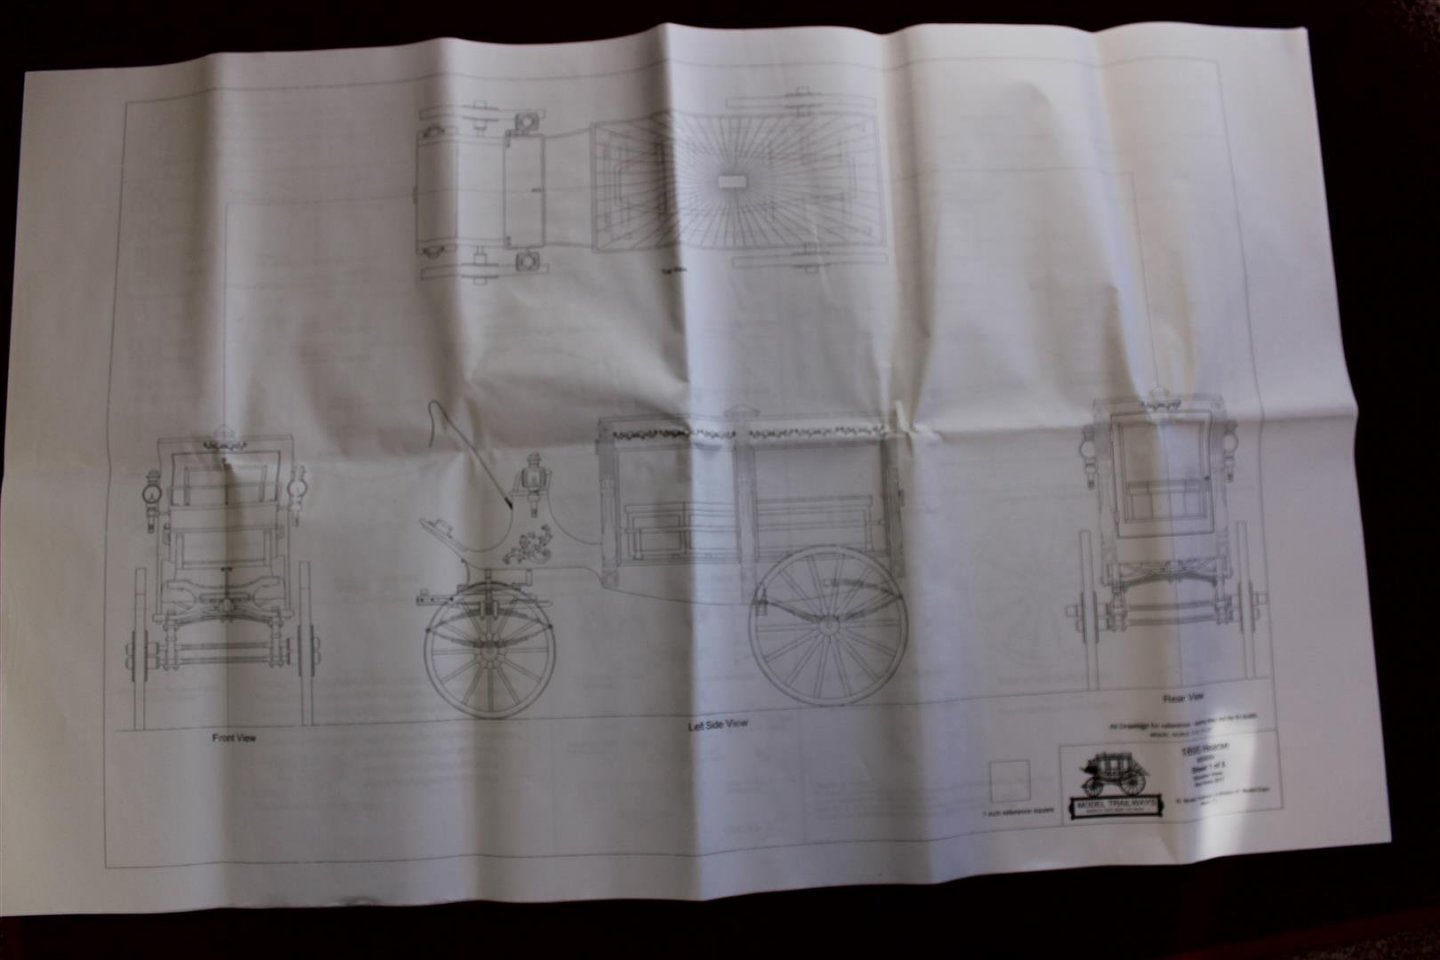
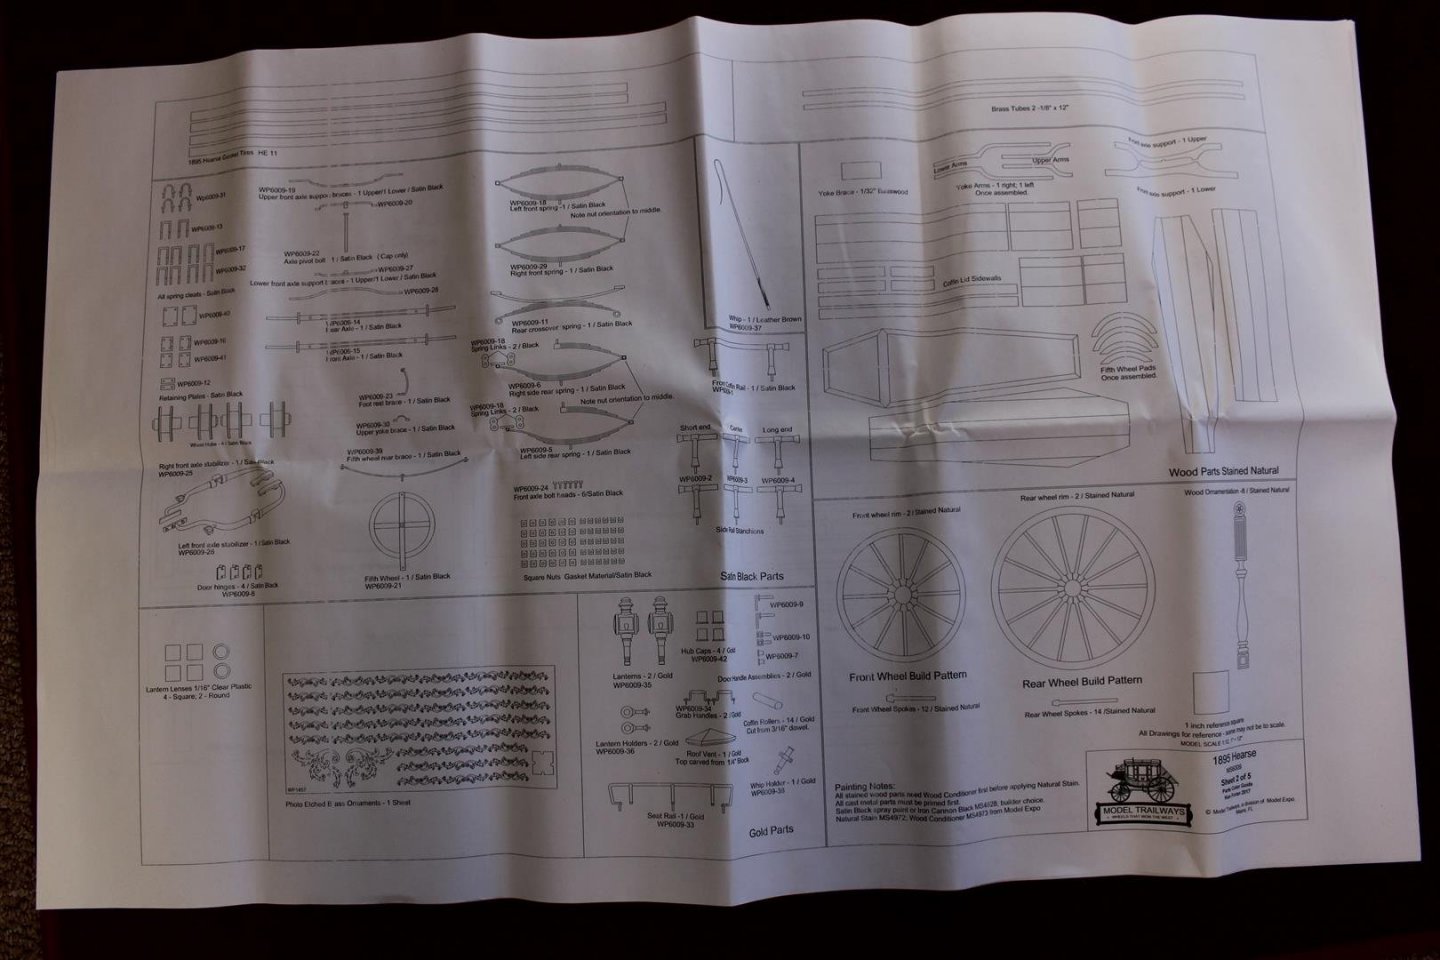
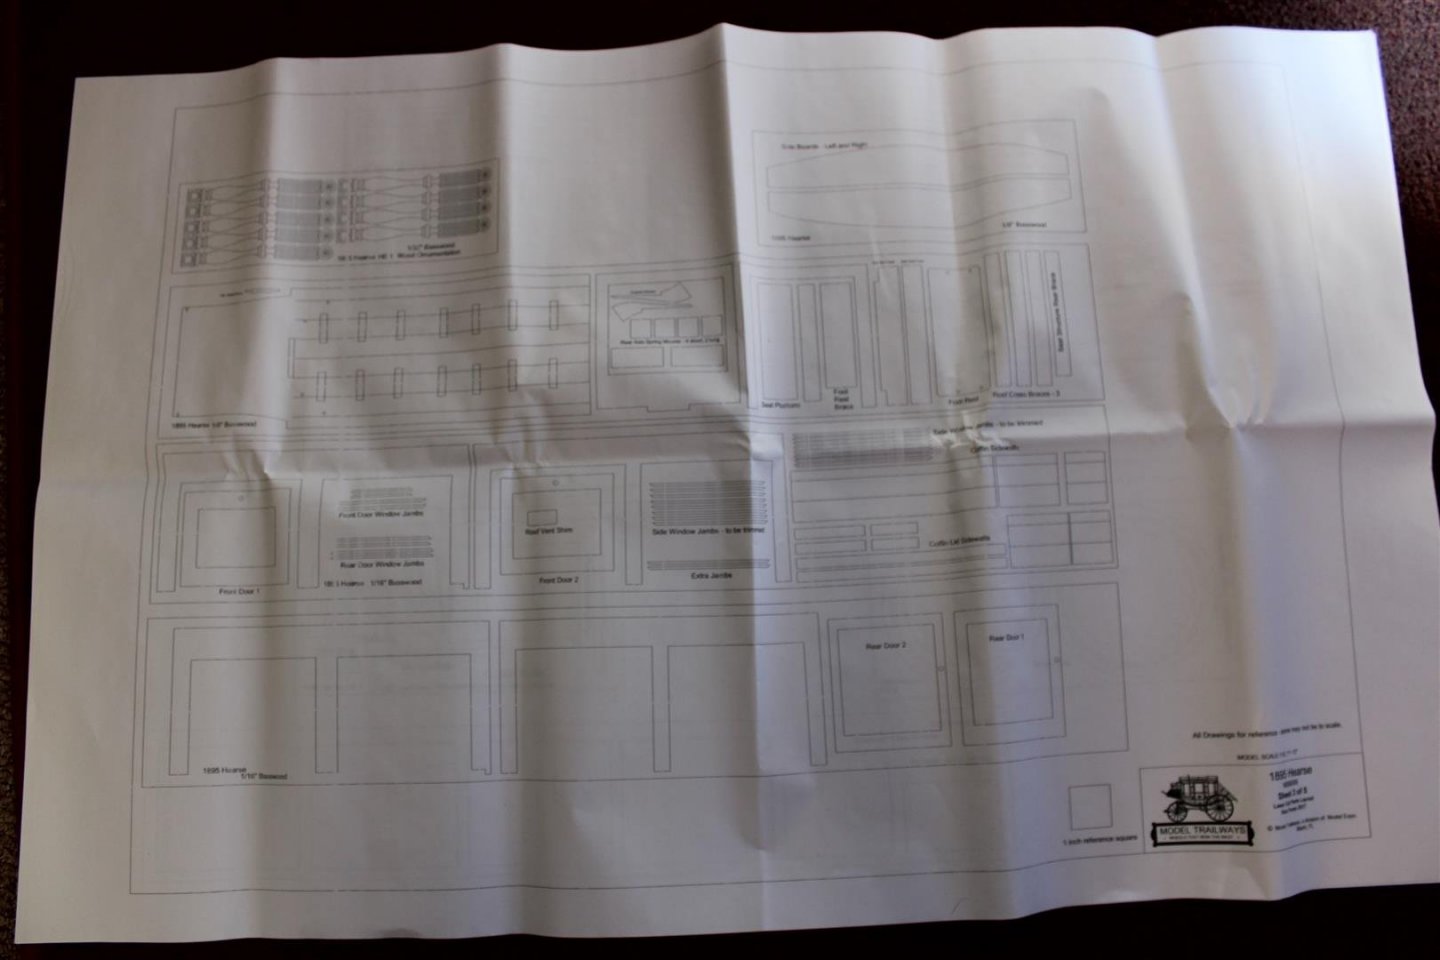
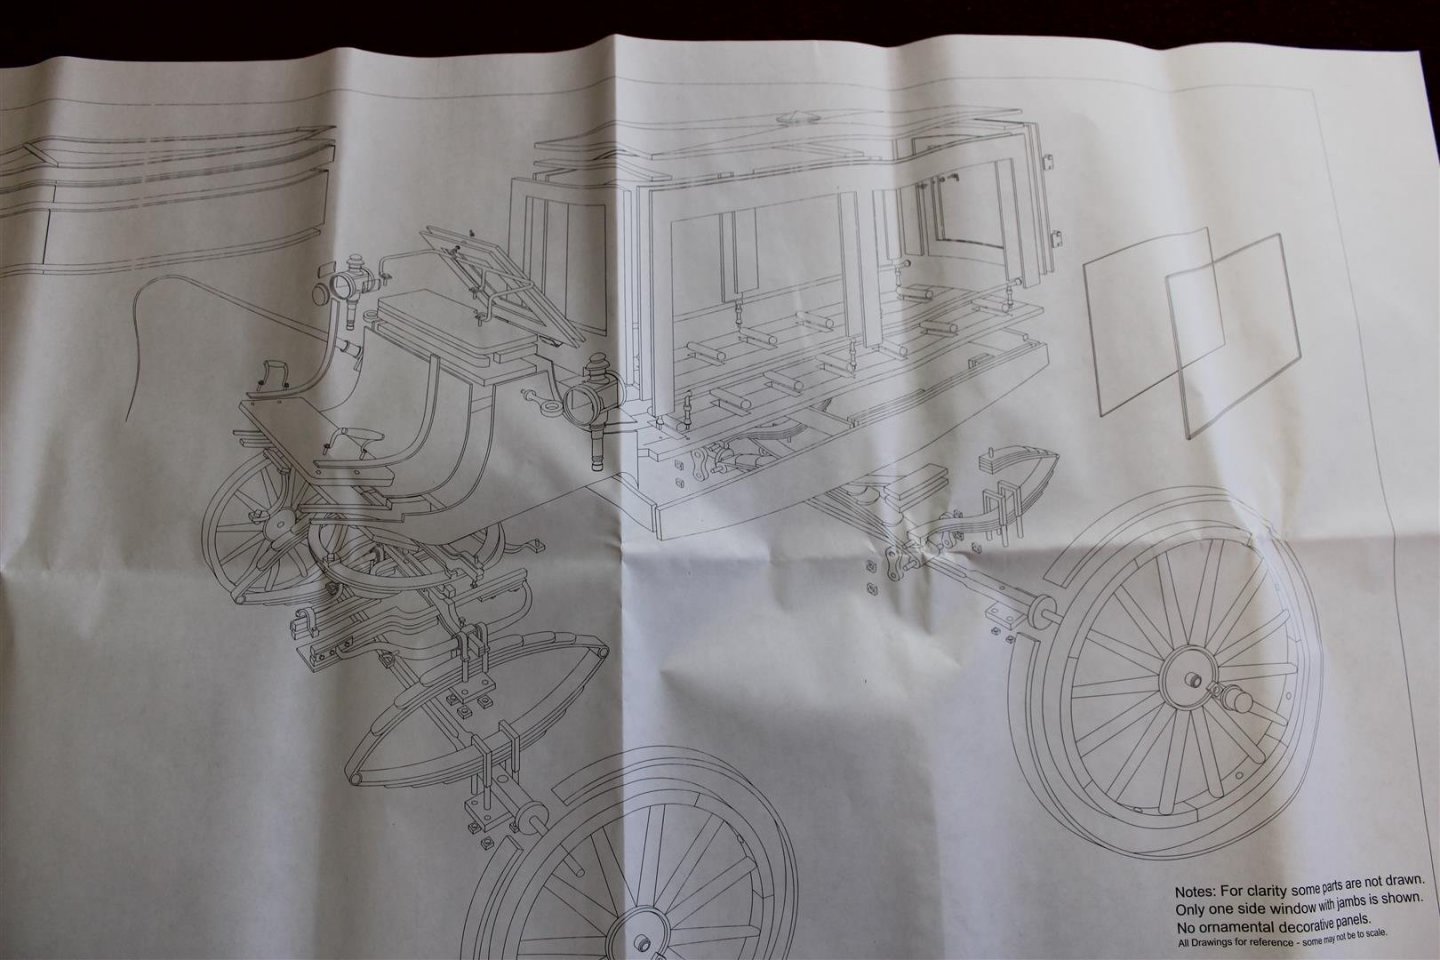
 good evening everyone some of you may have seen a recent post wrt to a 1/12 Tudor mansion that the wife found thinking i had thrown it out 10+ years ago to cut a story short a couple of hours discussions about what to do with it then perused thoughts of putting in a display case then turned into a diorama idea, which in turn made me look for a royal mail British horse drawn carriage, which i have ordered, however i saw this and it arrived first this is the box contents, looks quite good value for the money, off Amazon, actually it was 1/2 the price of Cornwall Model Boats and fleabay Britannia white metal, will need cleaning up a bit 5 sheets of plans all 1/1 at 1/12 scale


- 50 replies
-
- 13
-

-
lol well that spooky, dead spooky at that
-
i must admit im surprised no one else on here has started this build i was one of the many that was not kind to Trumpeter over the design and pre release of this kit, there are still flaws with the design which they chose to ignore, to top it all they then put the funnels on back to front in the preproduction photos however, it does build into a lovely build, and i am looking forward to watching this take shape good luck @Winnie
-
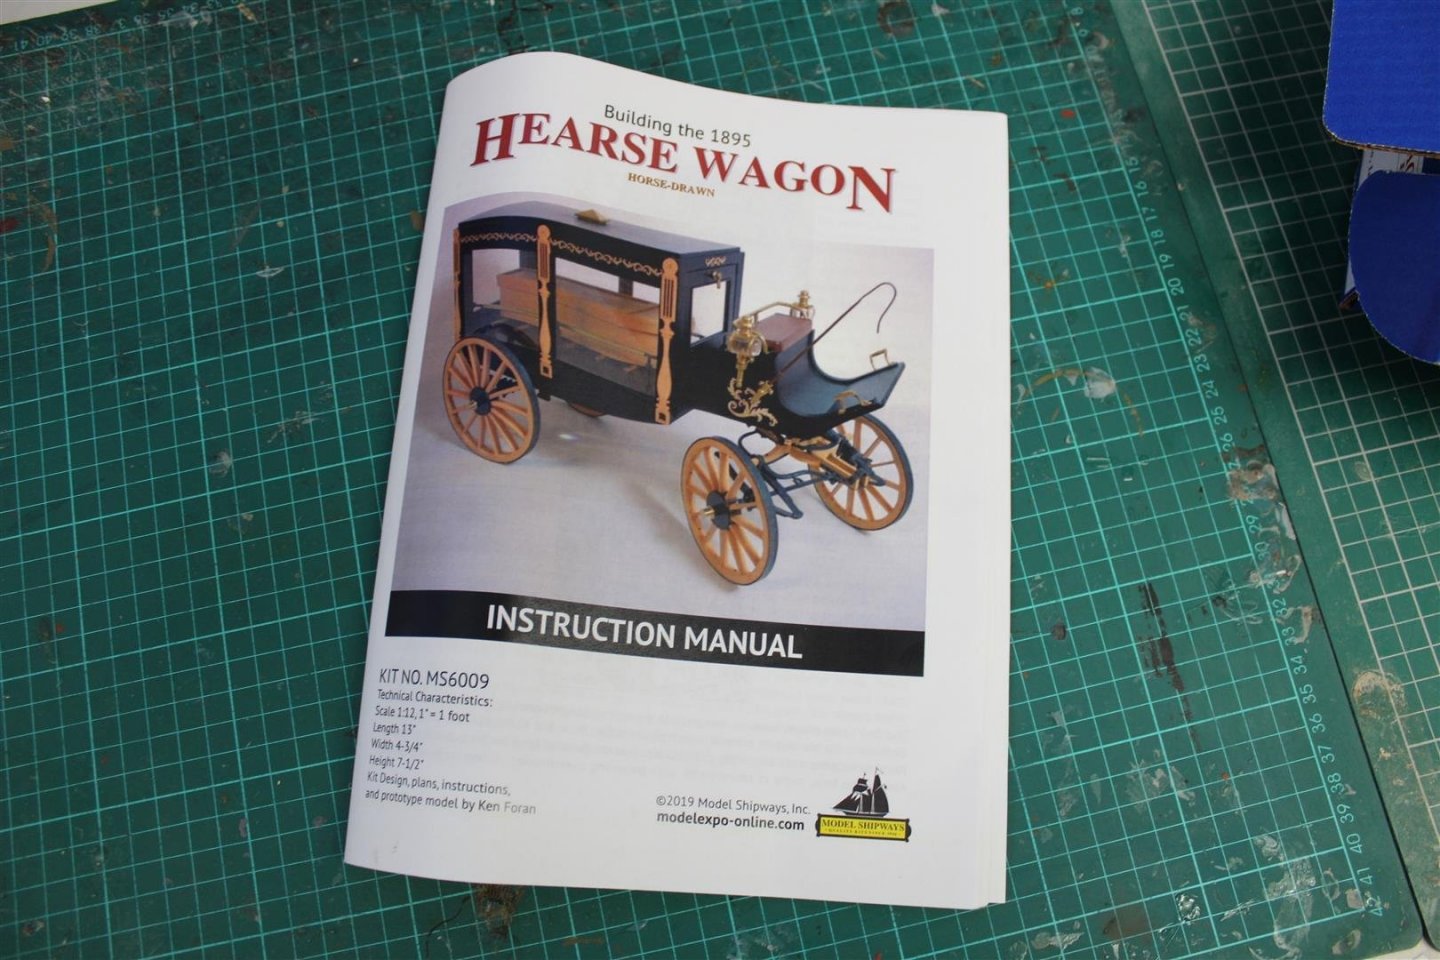
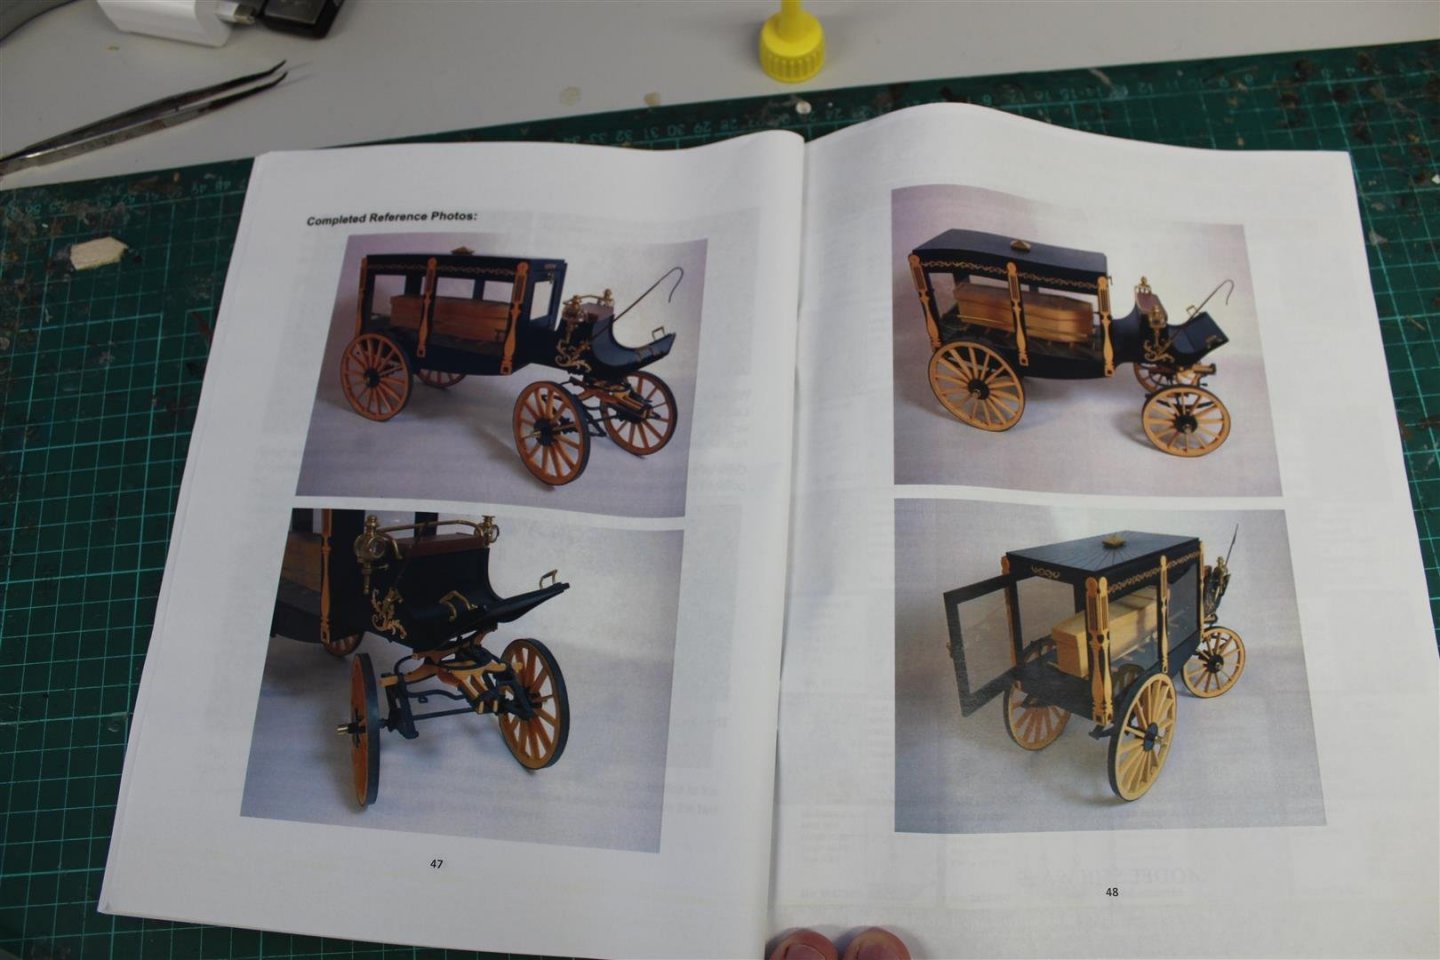
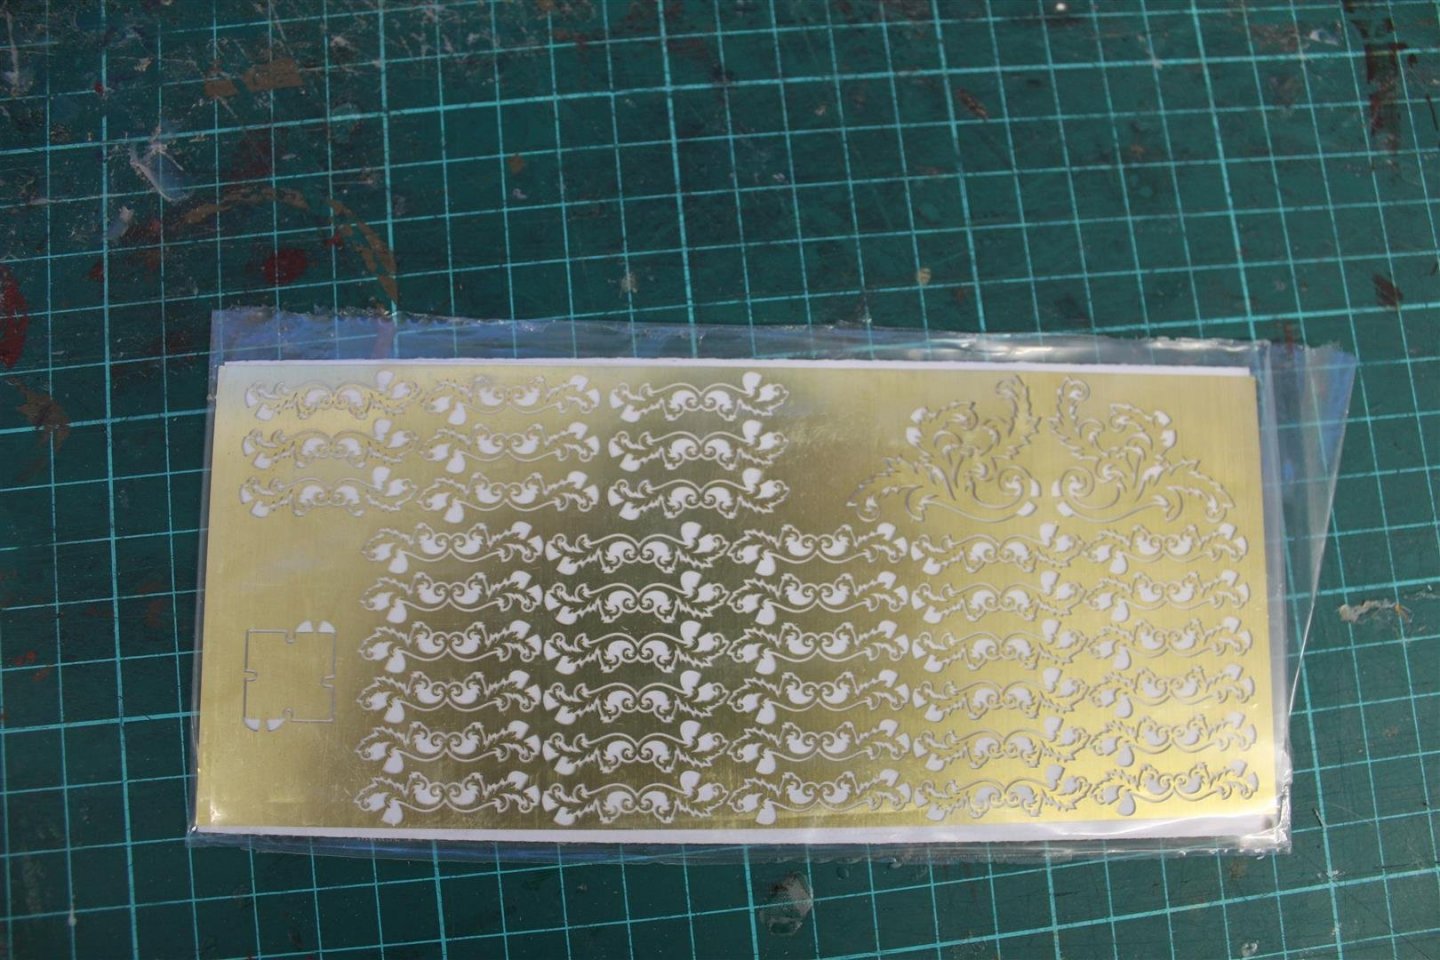
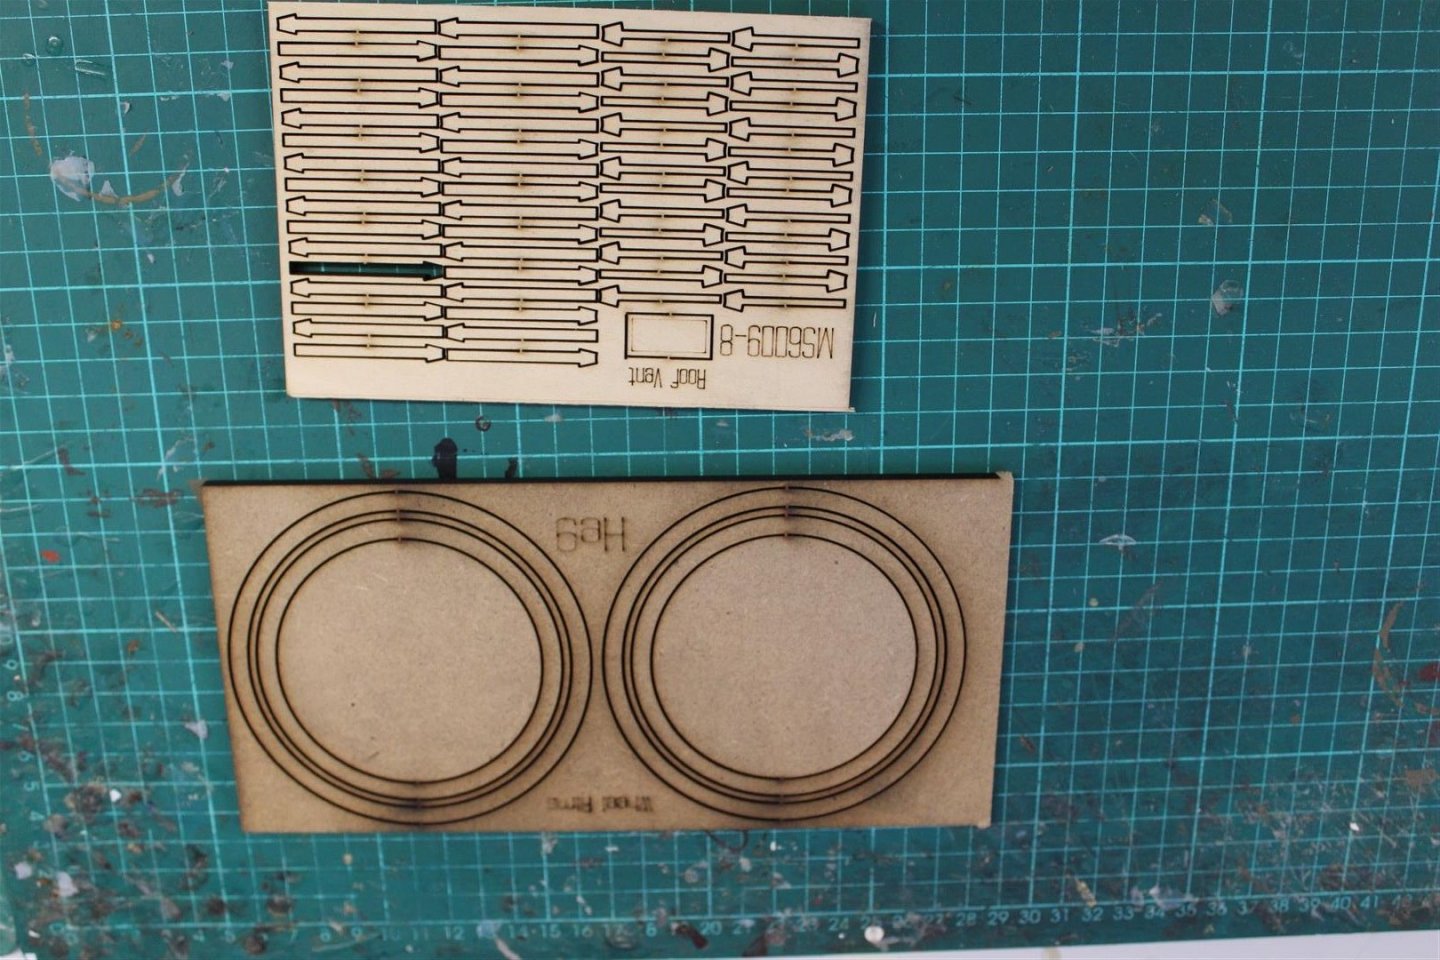
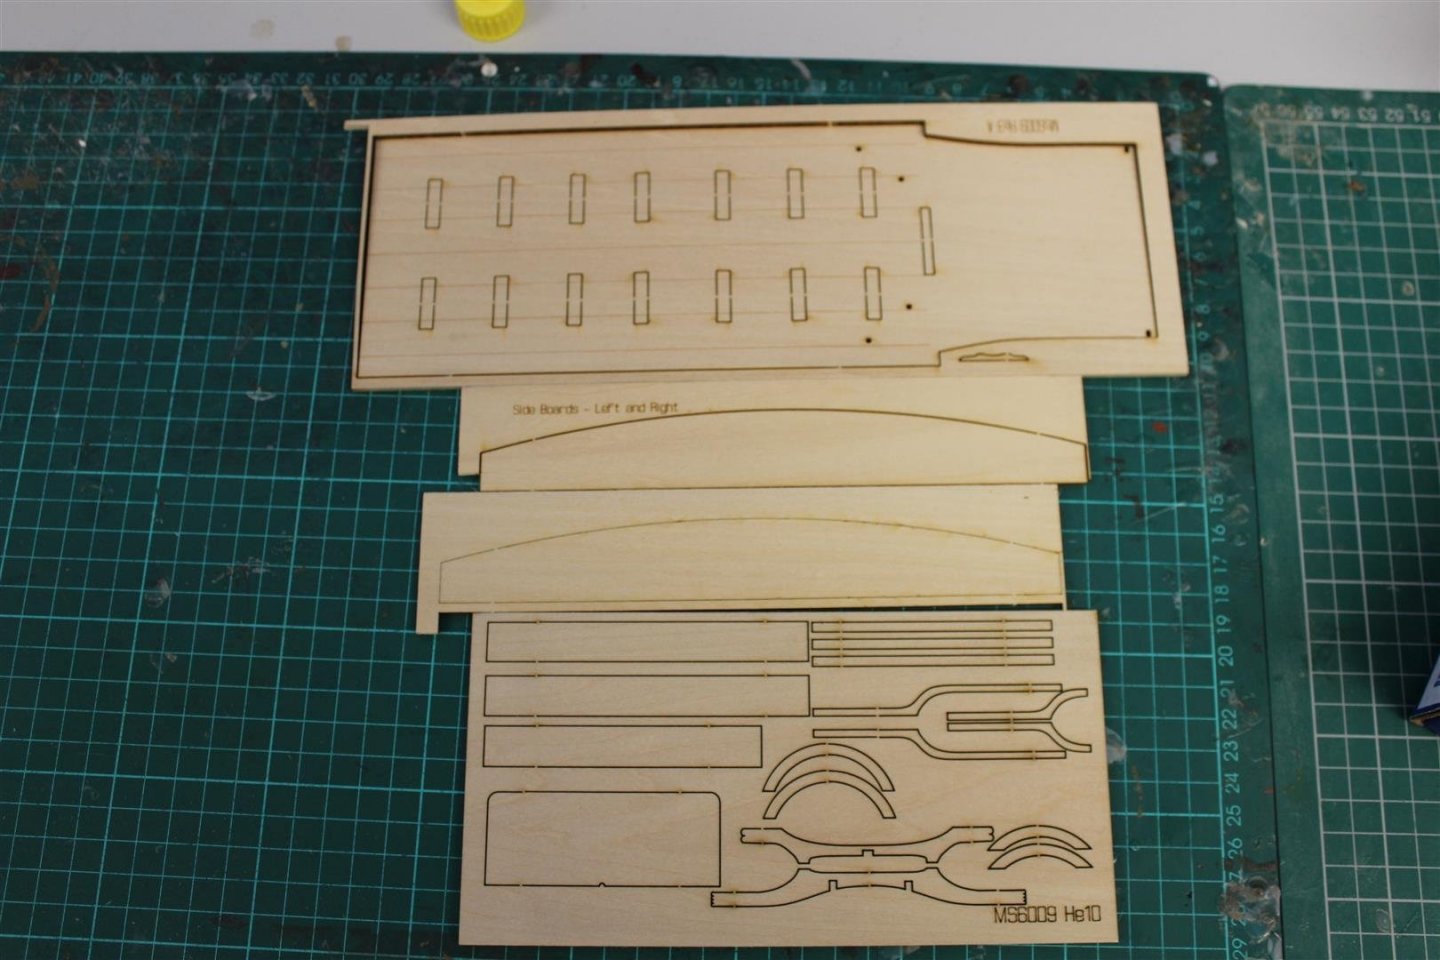
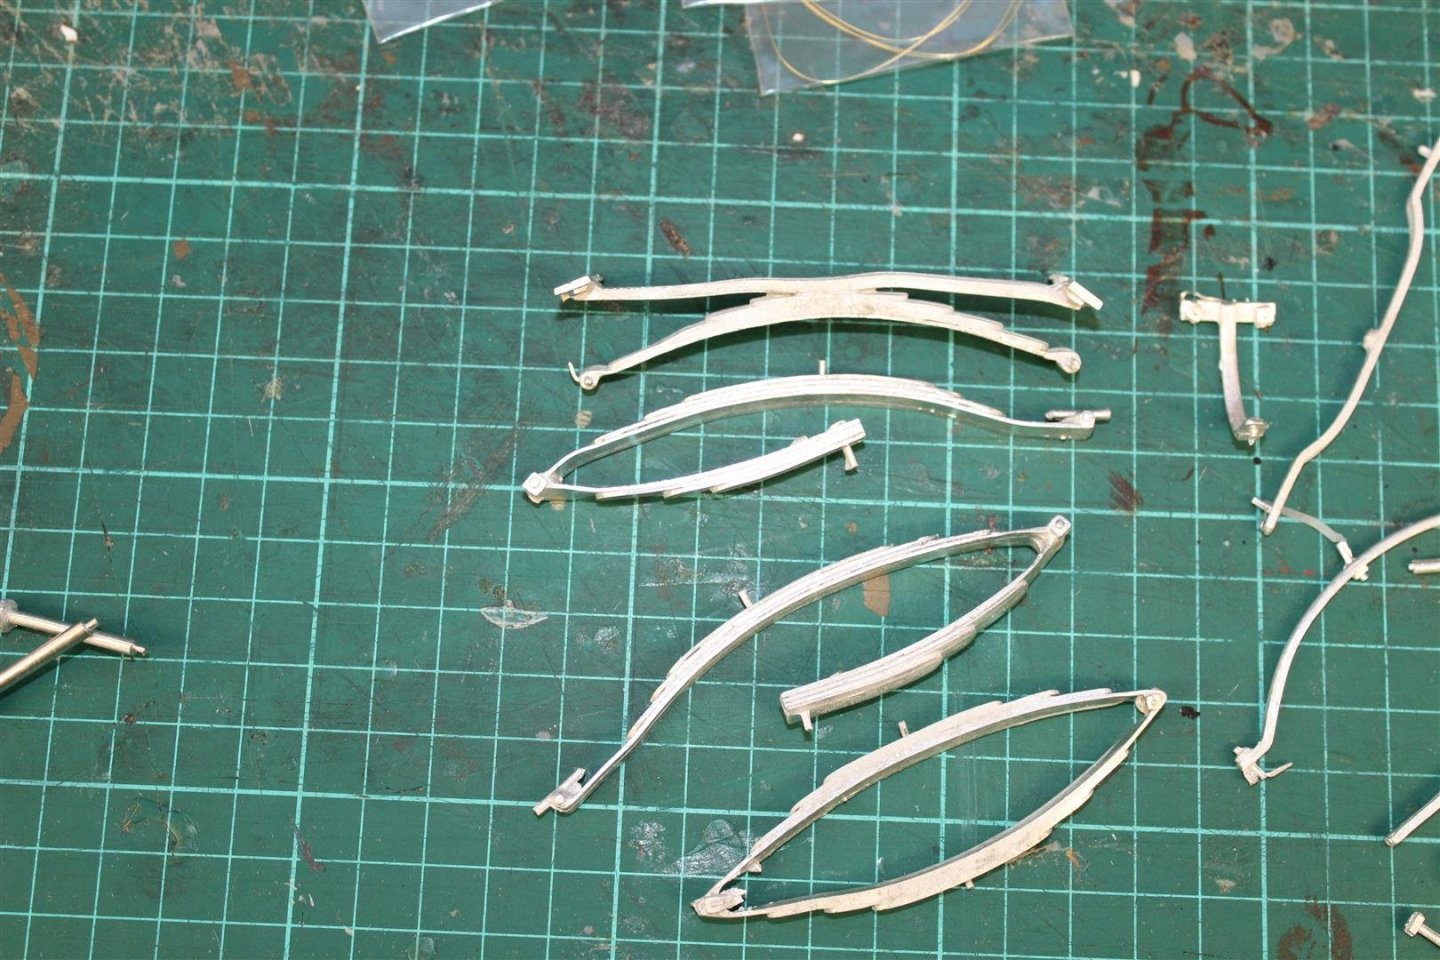
good morning everyone and now for something different BRIEF HISTORY Originally, the wooden or metal framework over the coffin was called a hearse. It was decorated with numerous spikes to hold burning candles. Sometime in the 17th century, people started using the word to refer to not only the construction above the coffin, but to the vehicle that carried the casket to the grave. Early hearses were hand-drawn. As time went on, families started to choose rural cemeteries instead of traditional church grounds. Caskets had to be transported greater distances. People wanted to go out in style and ordered elaborately decorated coffins in exotic woods. The hearses became fancier and heavier. They needed horsepower, not manpower. The first American horse-drawn hearses date back to the mid nineteenth century. A typical horse-drawn hearse of that period cost about $1,500. KIT FEATURES Historically accurate, highly detailed model Laser cut basswood parts Basswood wheel rims & spokes Cast Britannia metal axles & shafts Machine turned aluminium wheel hubs Photo-etched brass ornamentation 5 sheets of detailed plans 48-page illustrated instruction manual Instructions & prototype model by Ken Foran MODEL SPECIFICATIONS Length: 13” Height: 8” Width: 5” Scale: 1:12
- 50 replies
-
- 14
-
-
Amati Bismarck Cornwall Model Boats now has it on pre-order, ready for first batch in August Amati Bismarck 1:200 Scale 1300/04 | Cornwall Model Boats
-
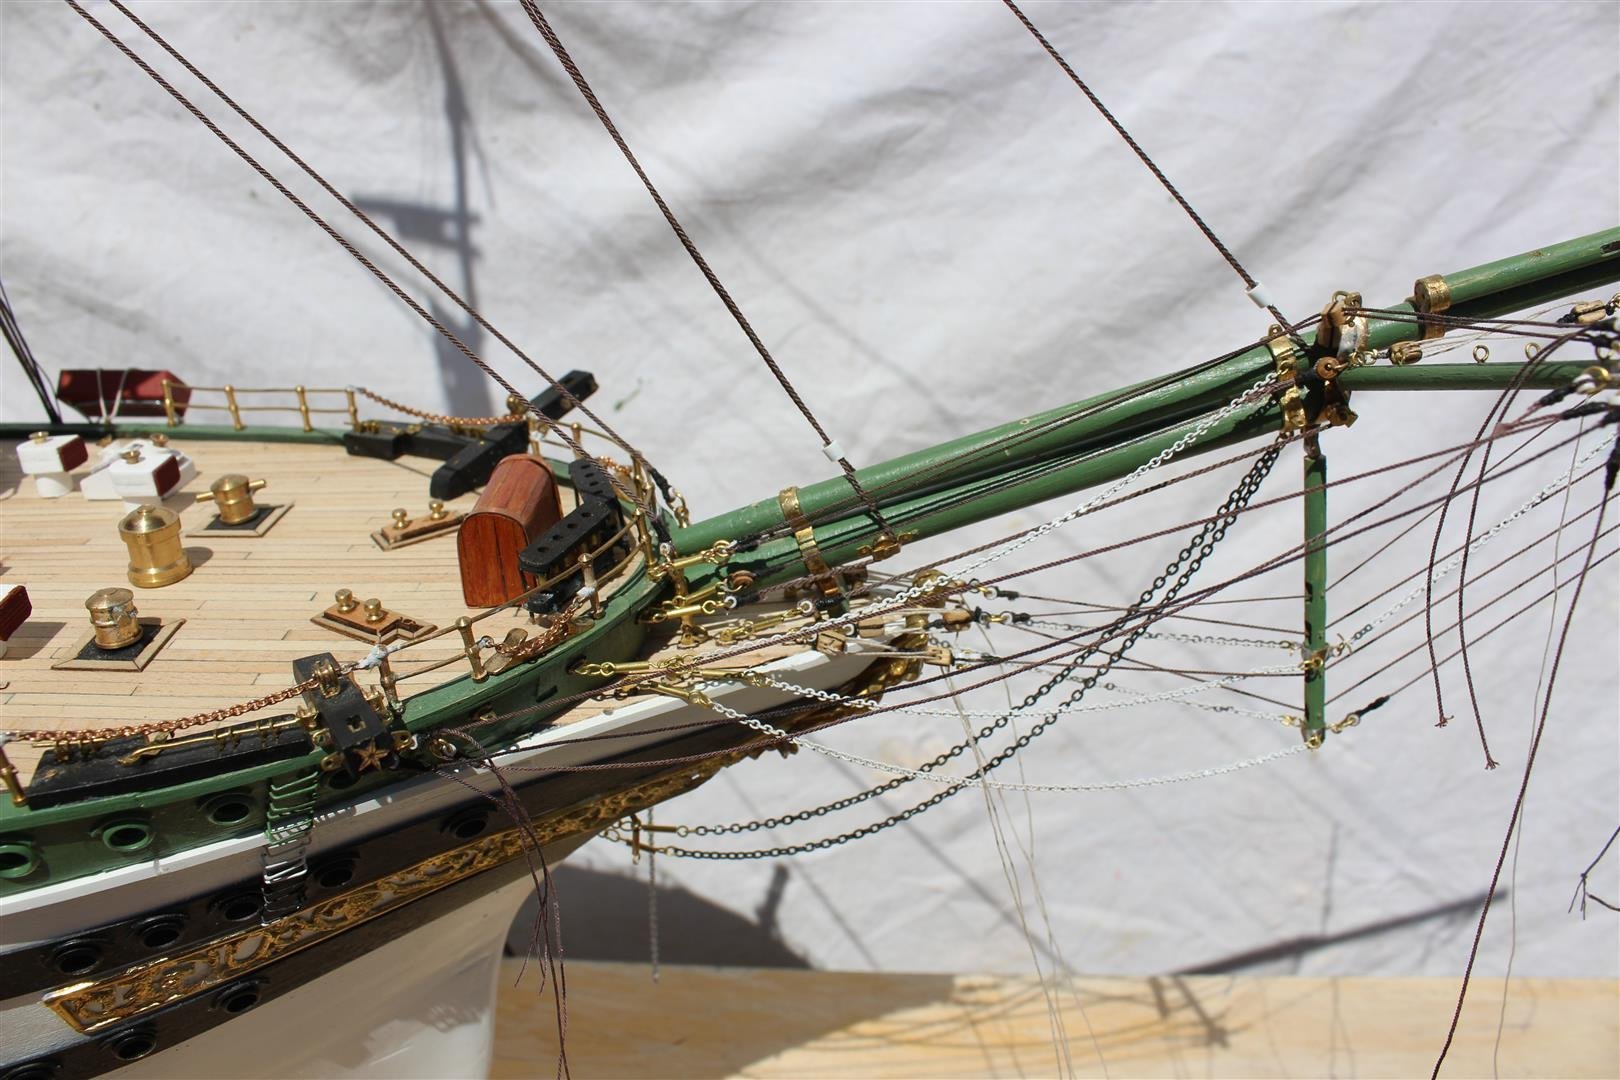
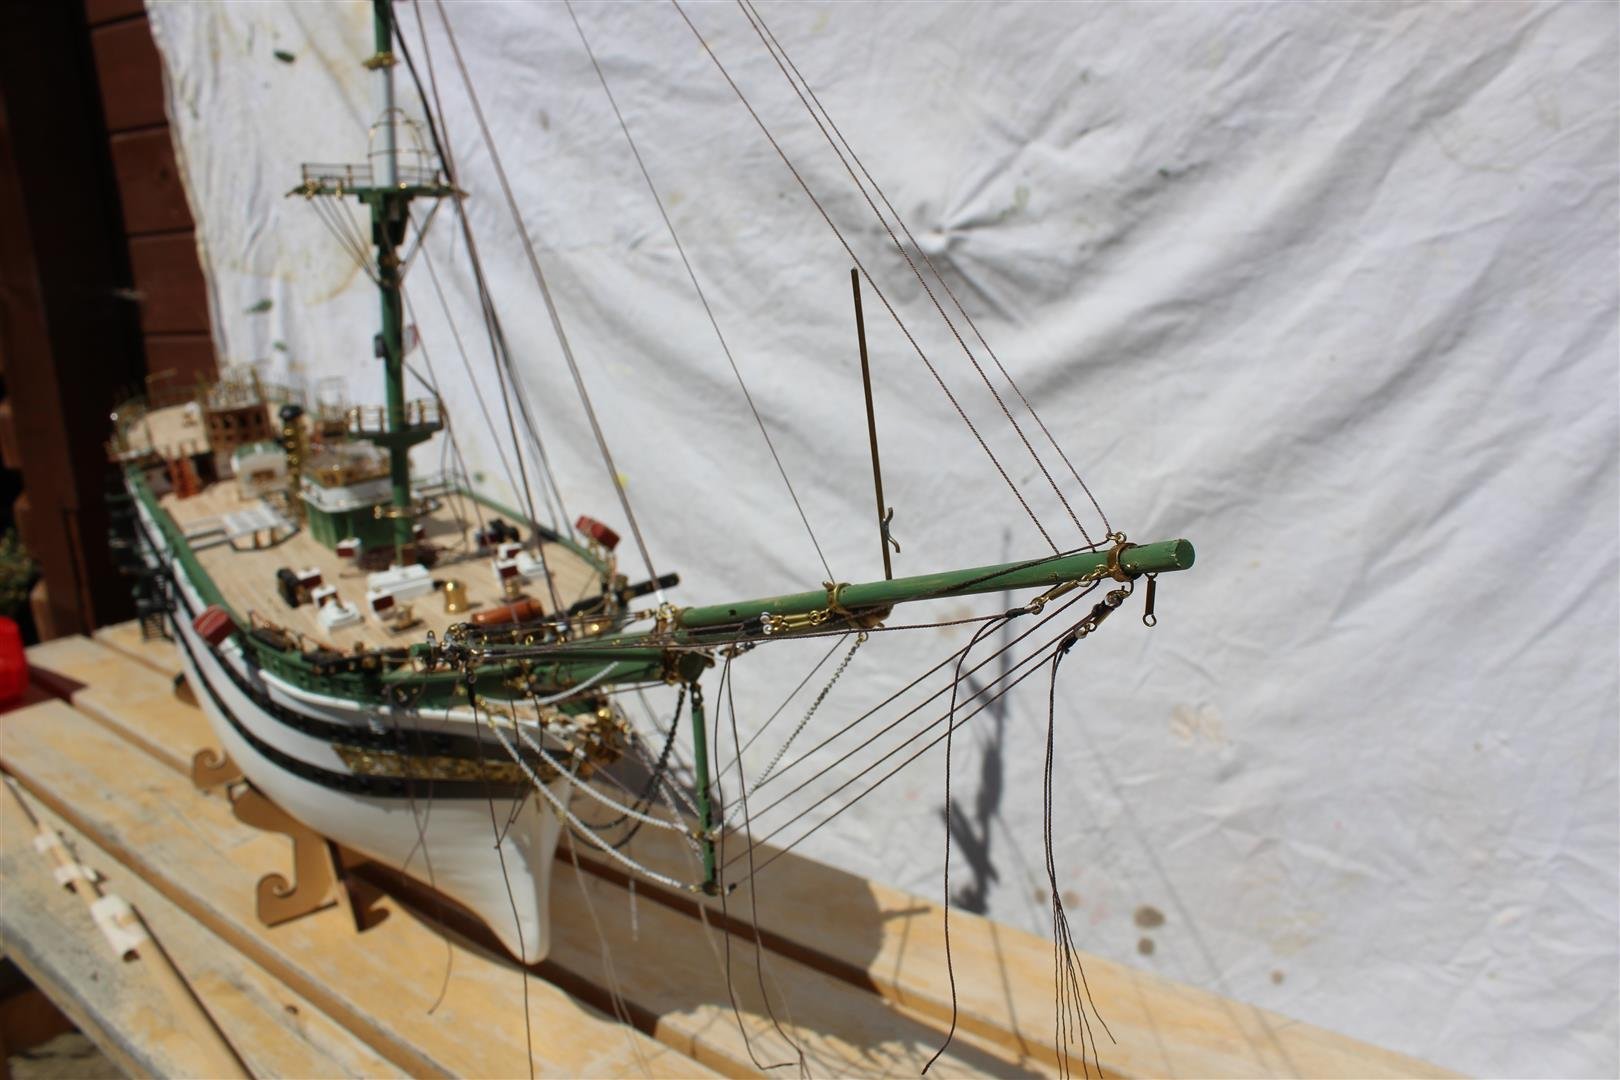
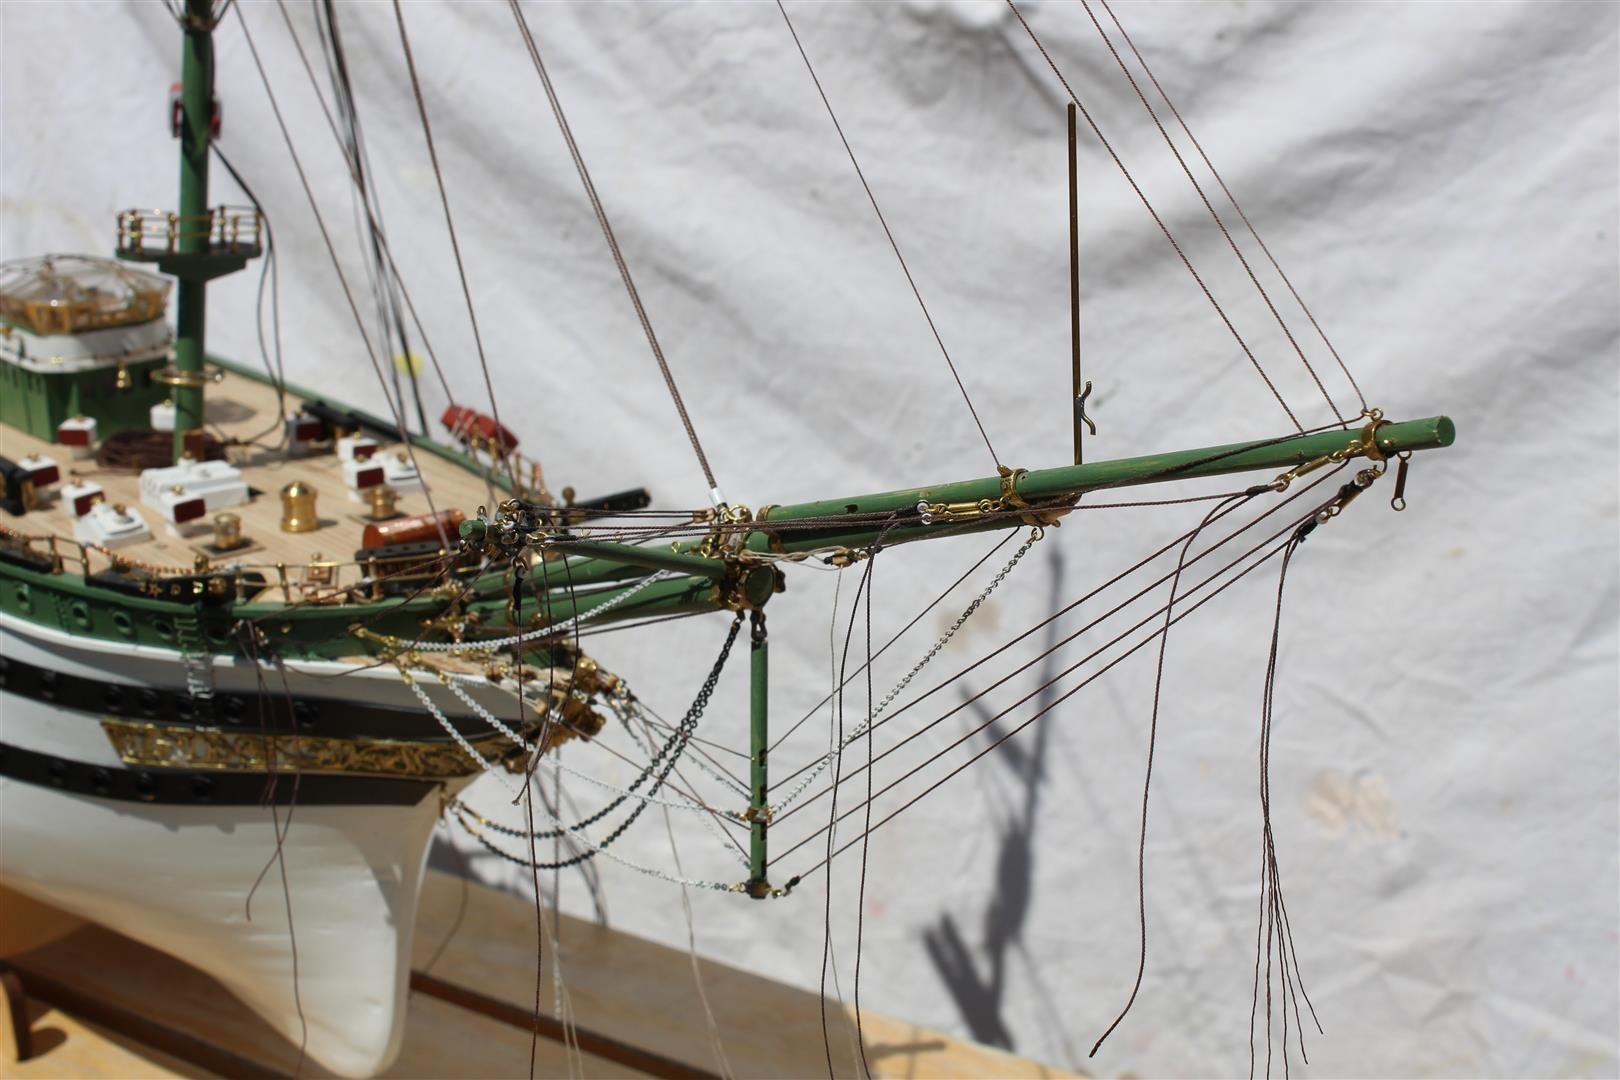
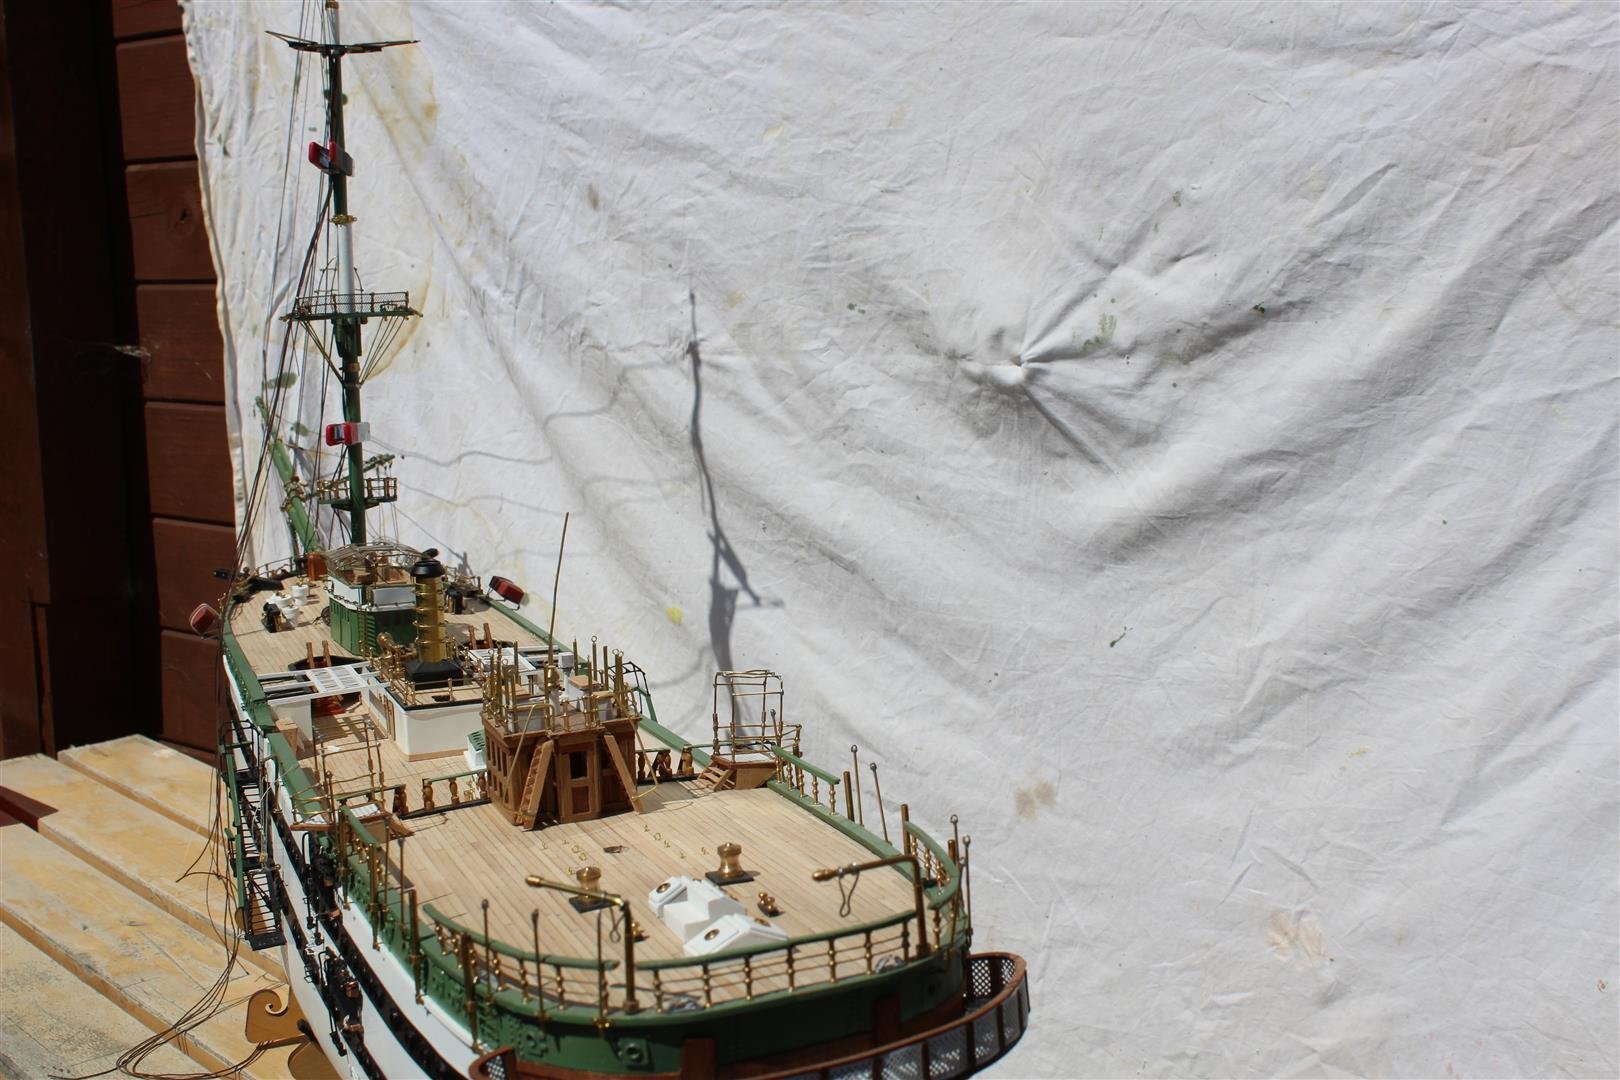
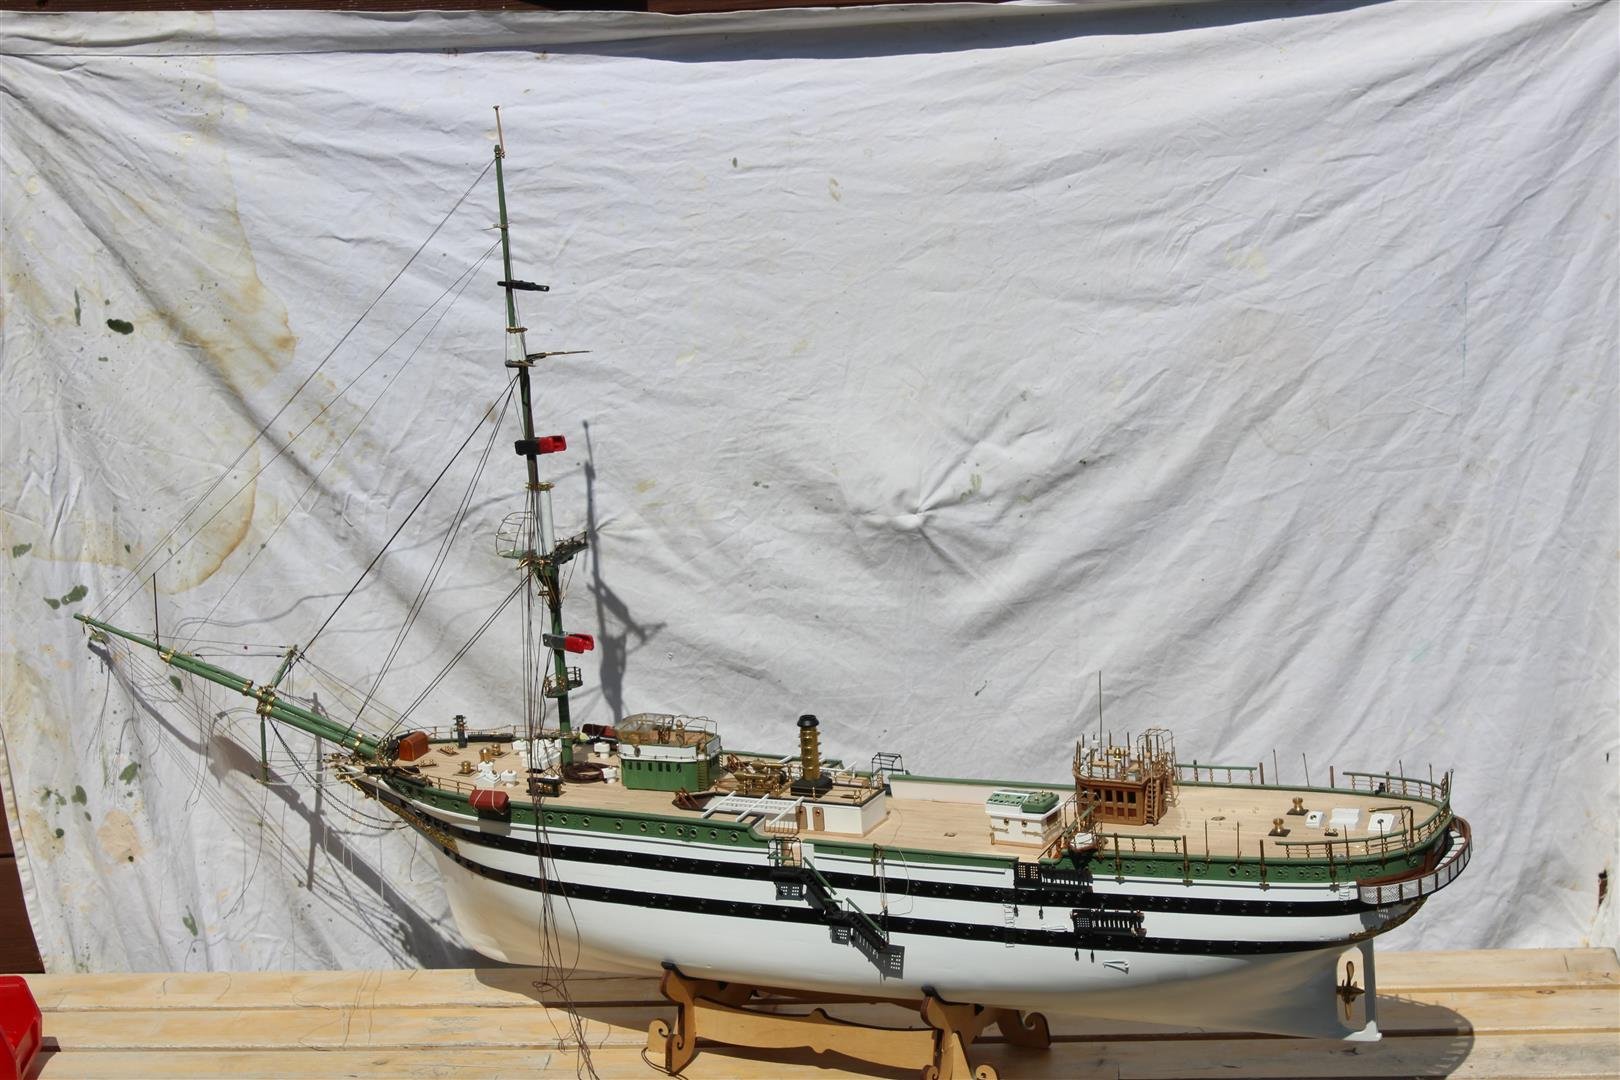
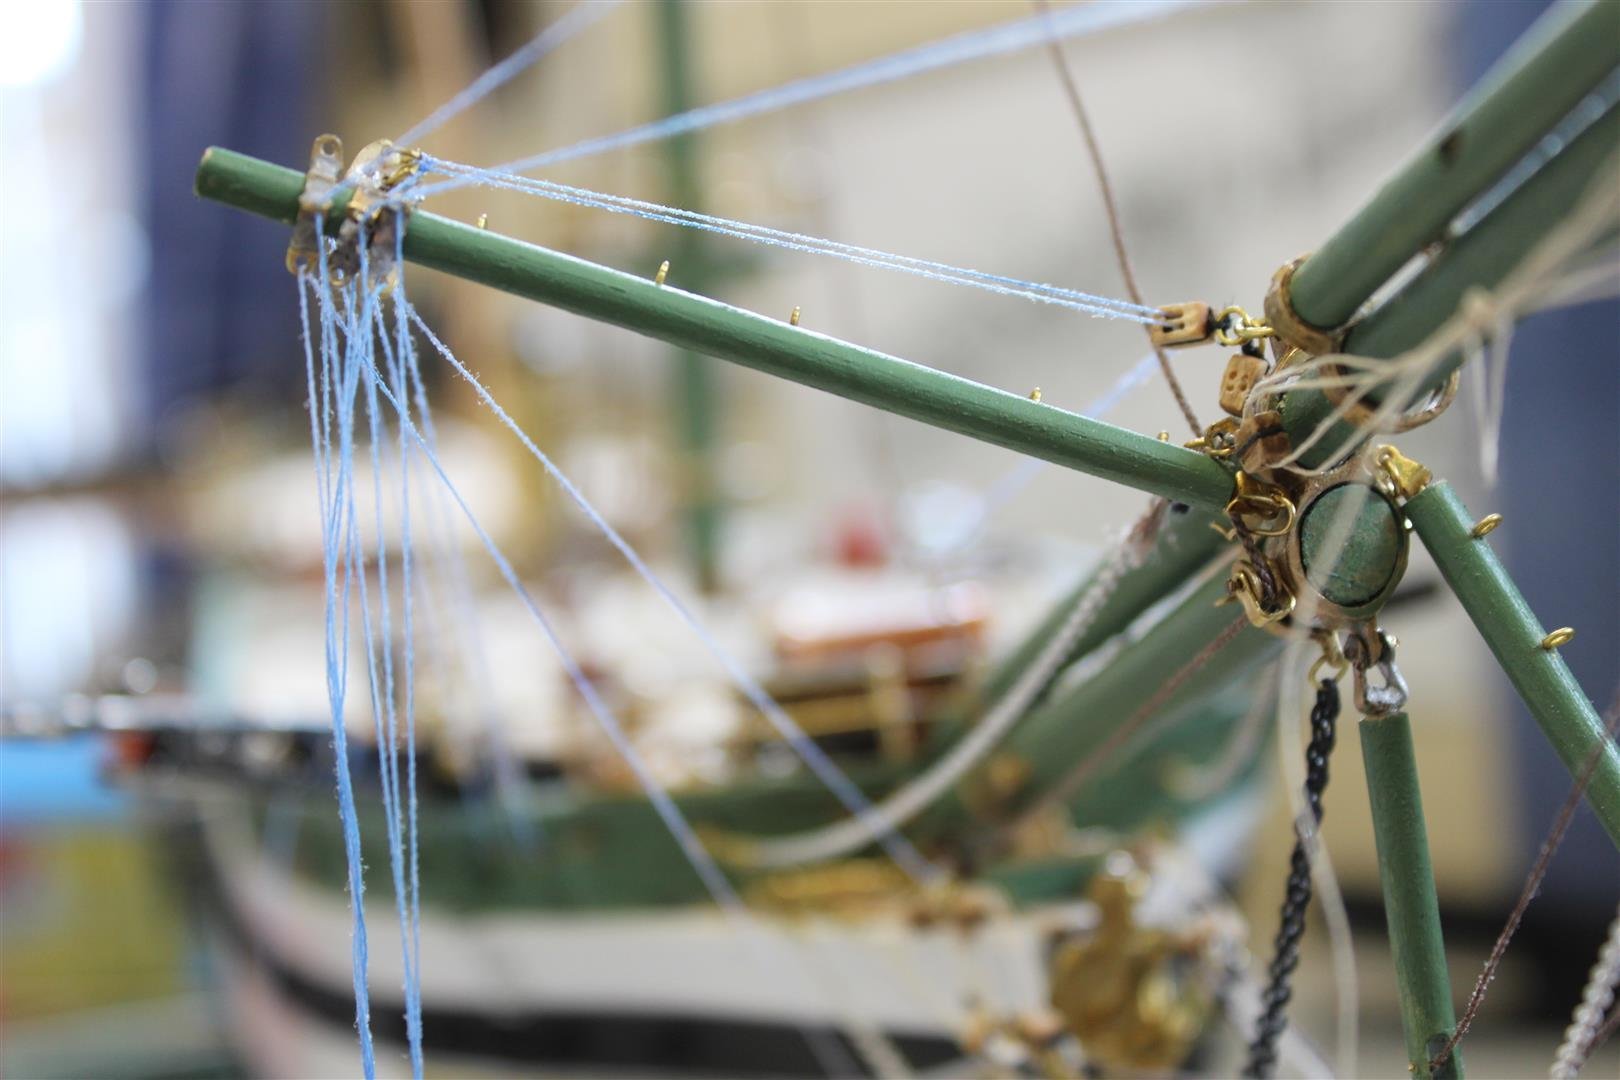
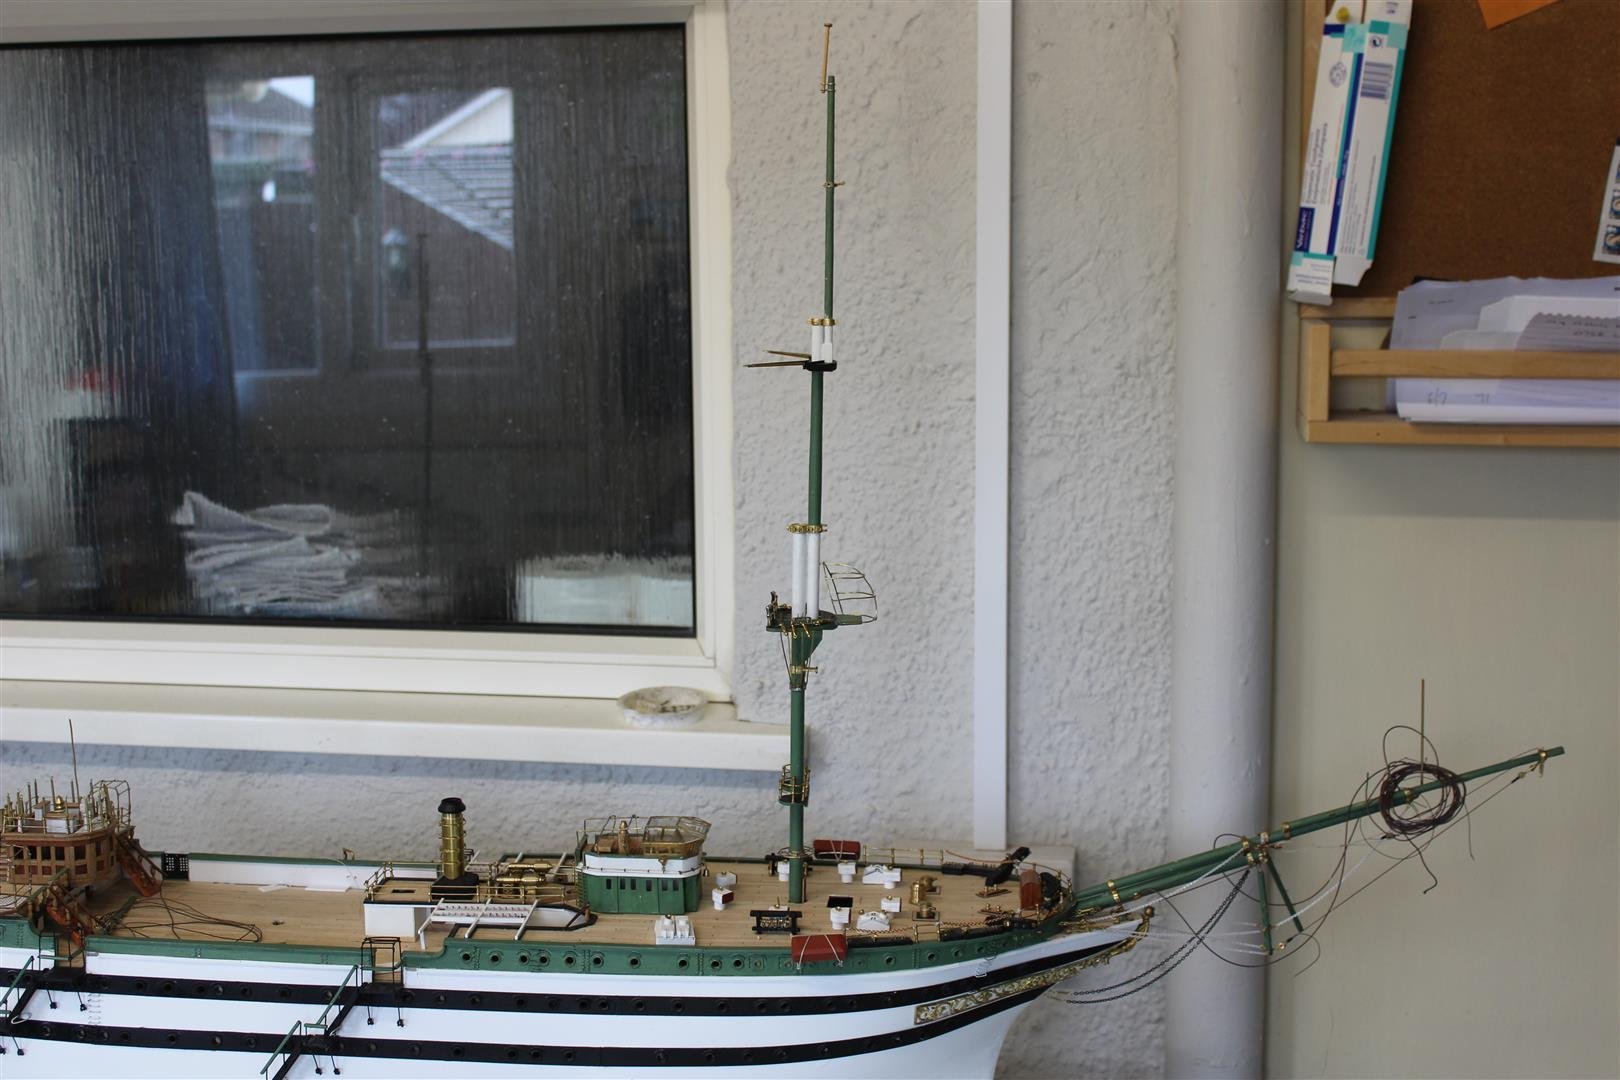
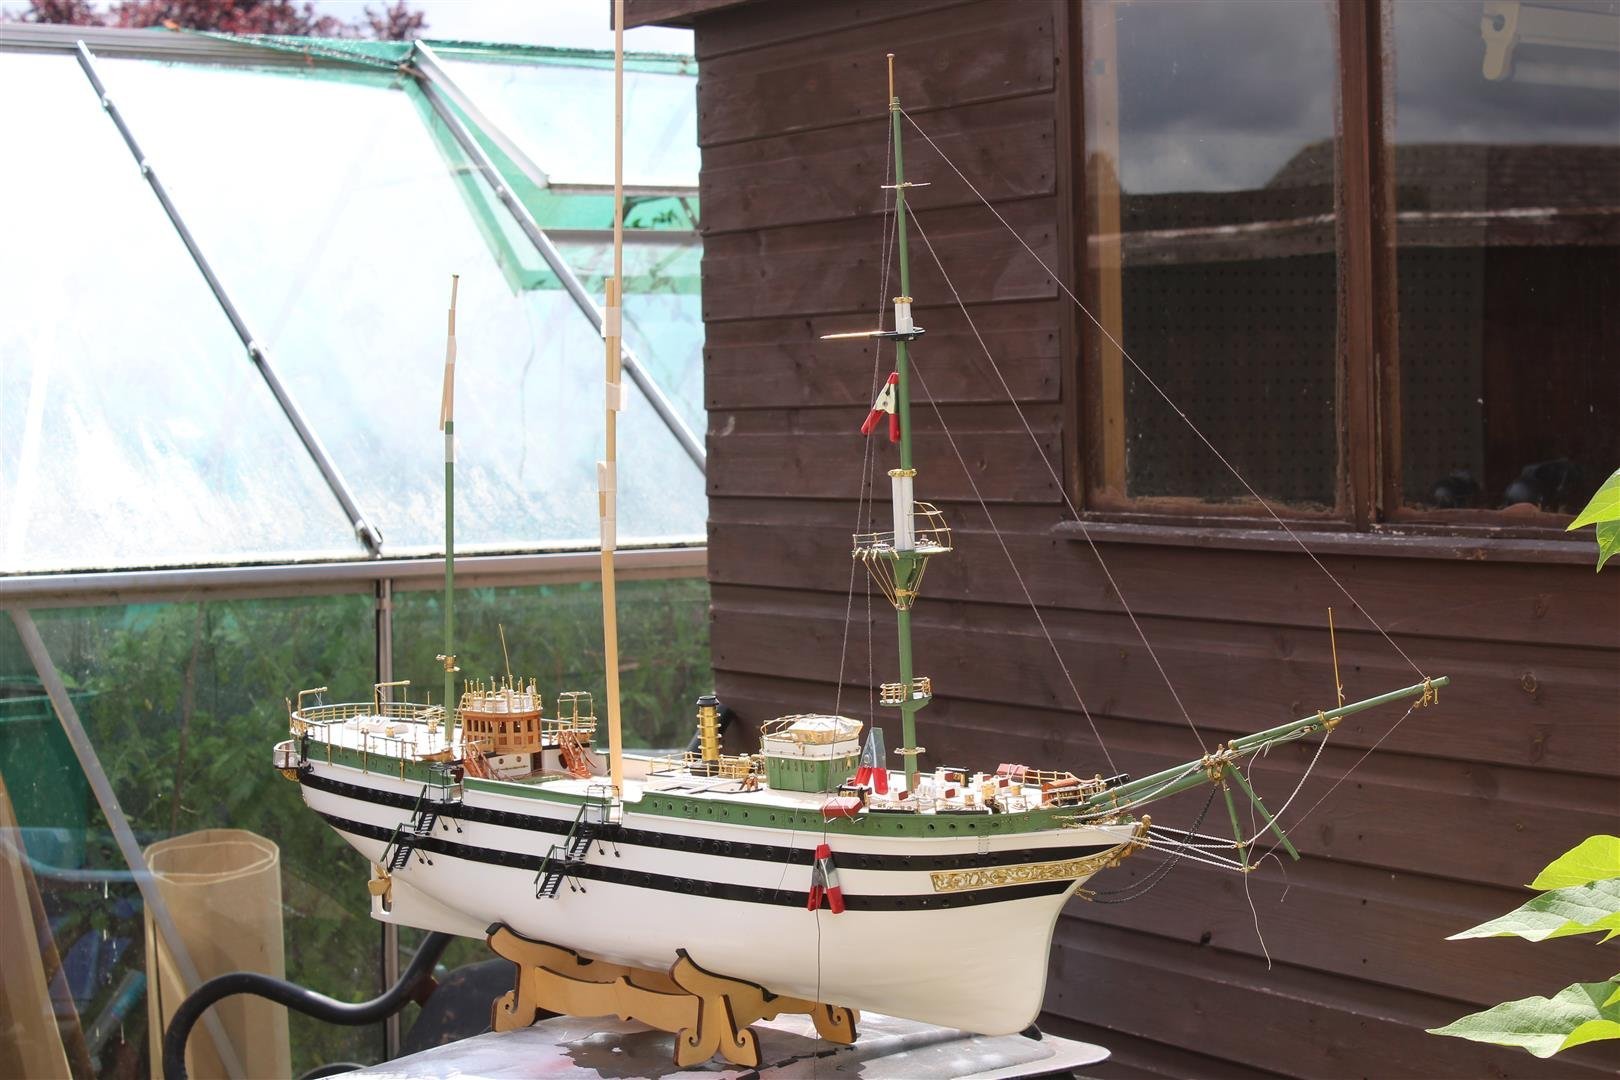
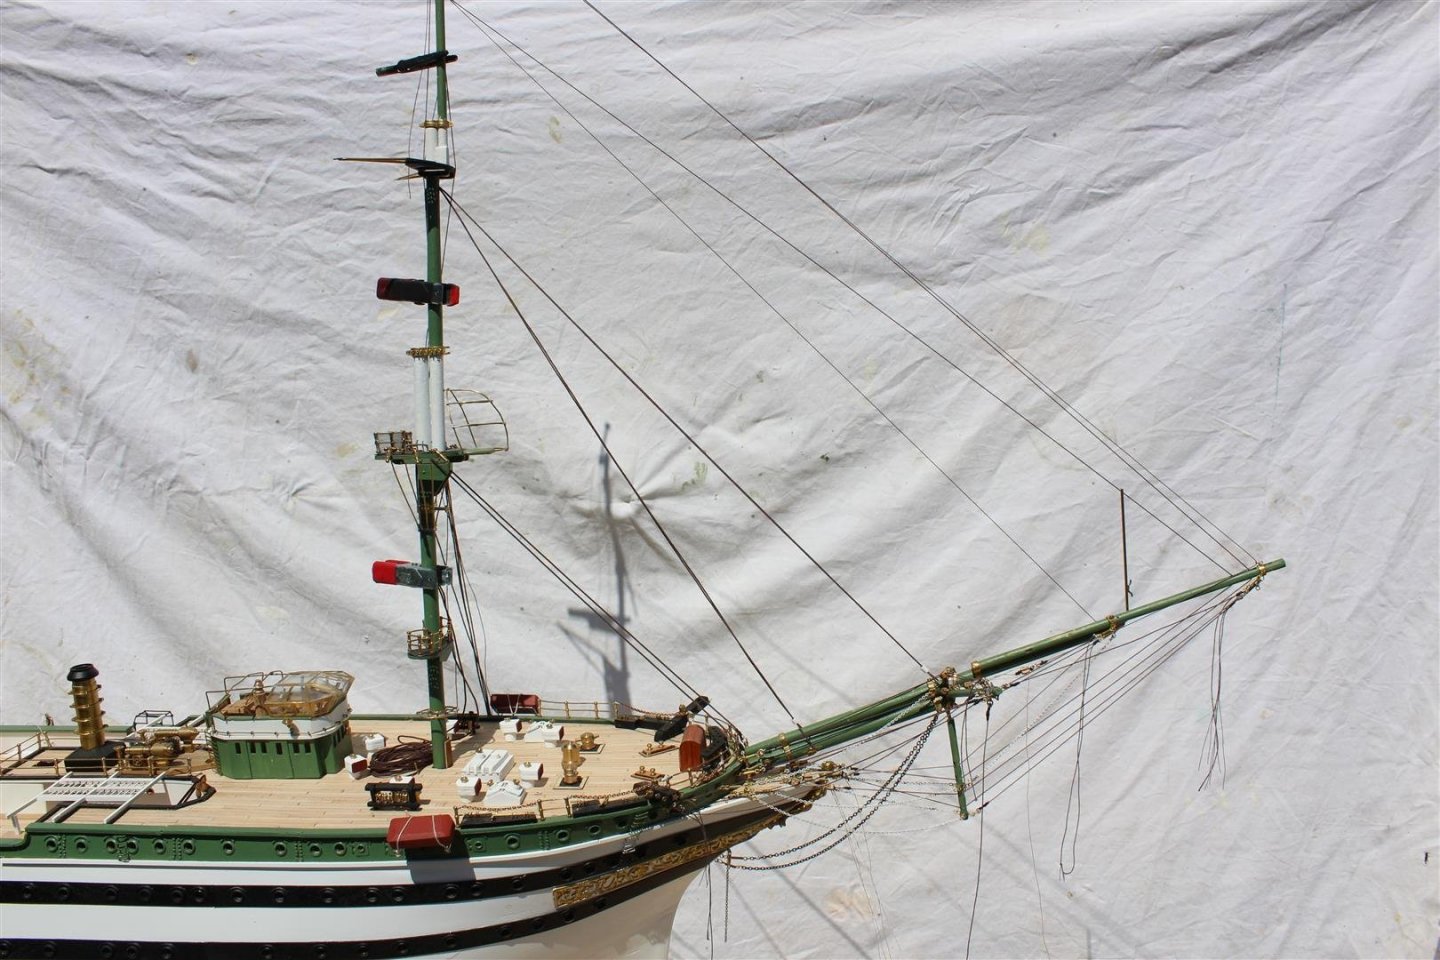
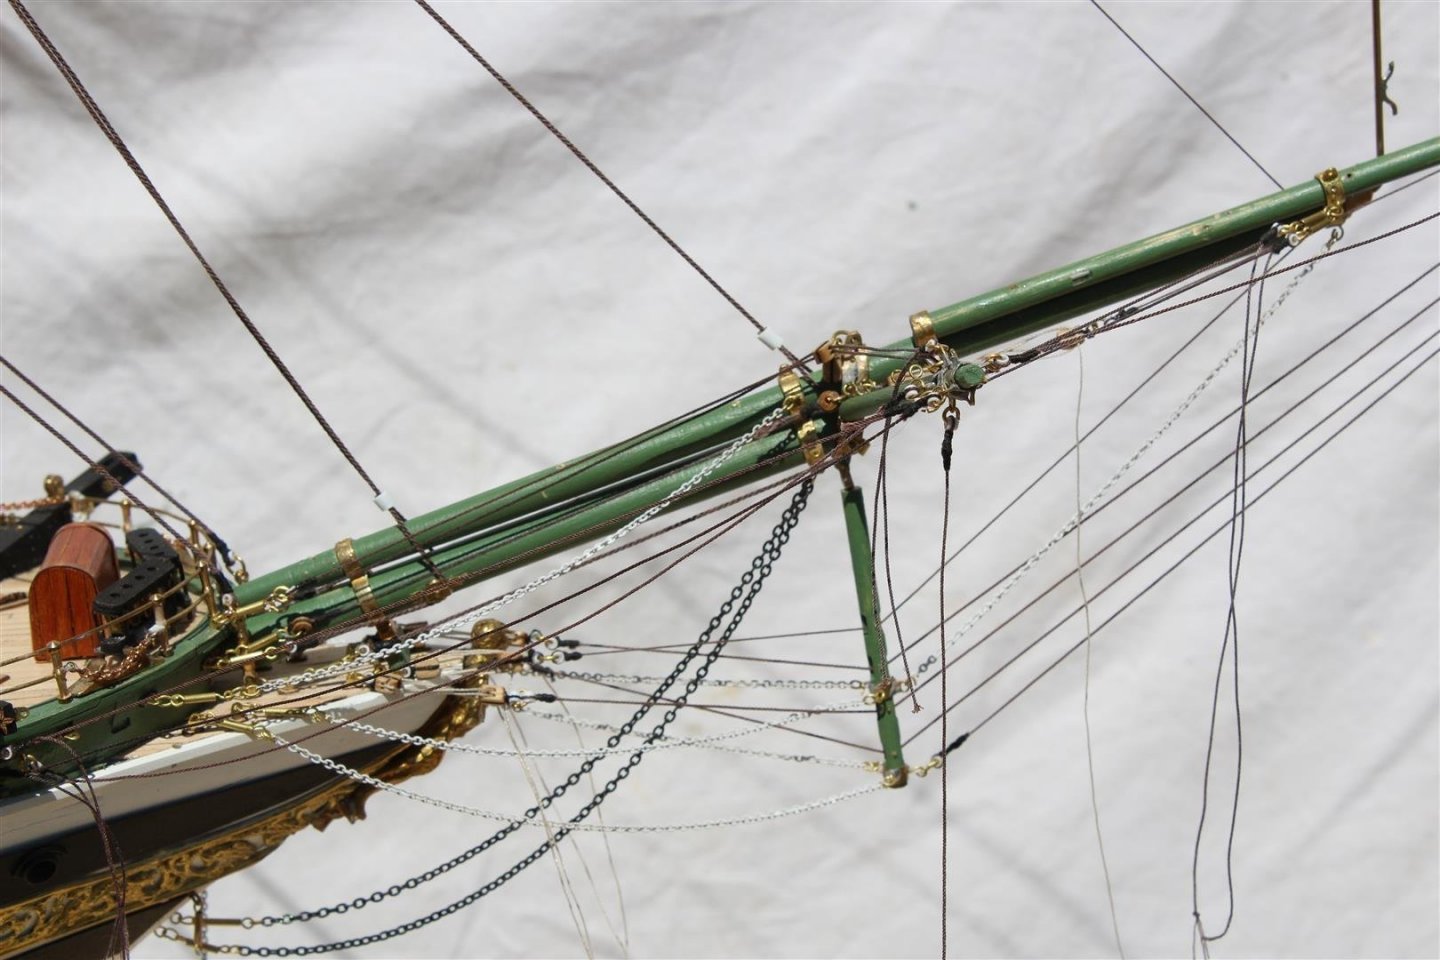
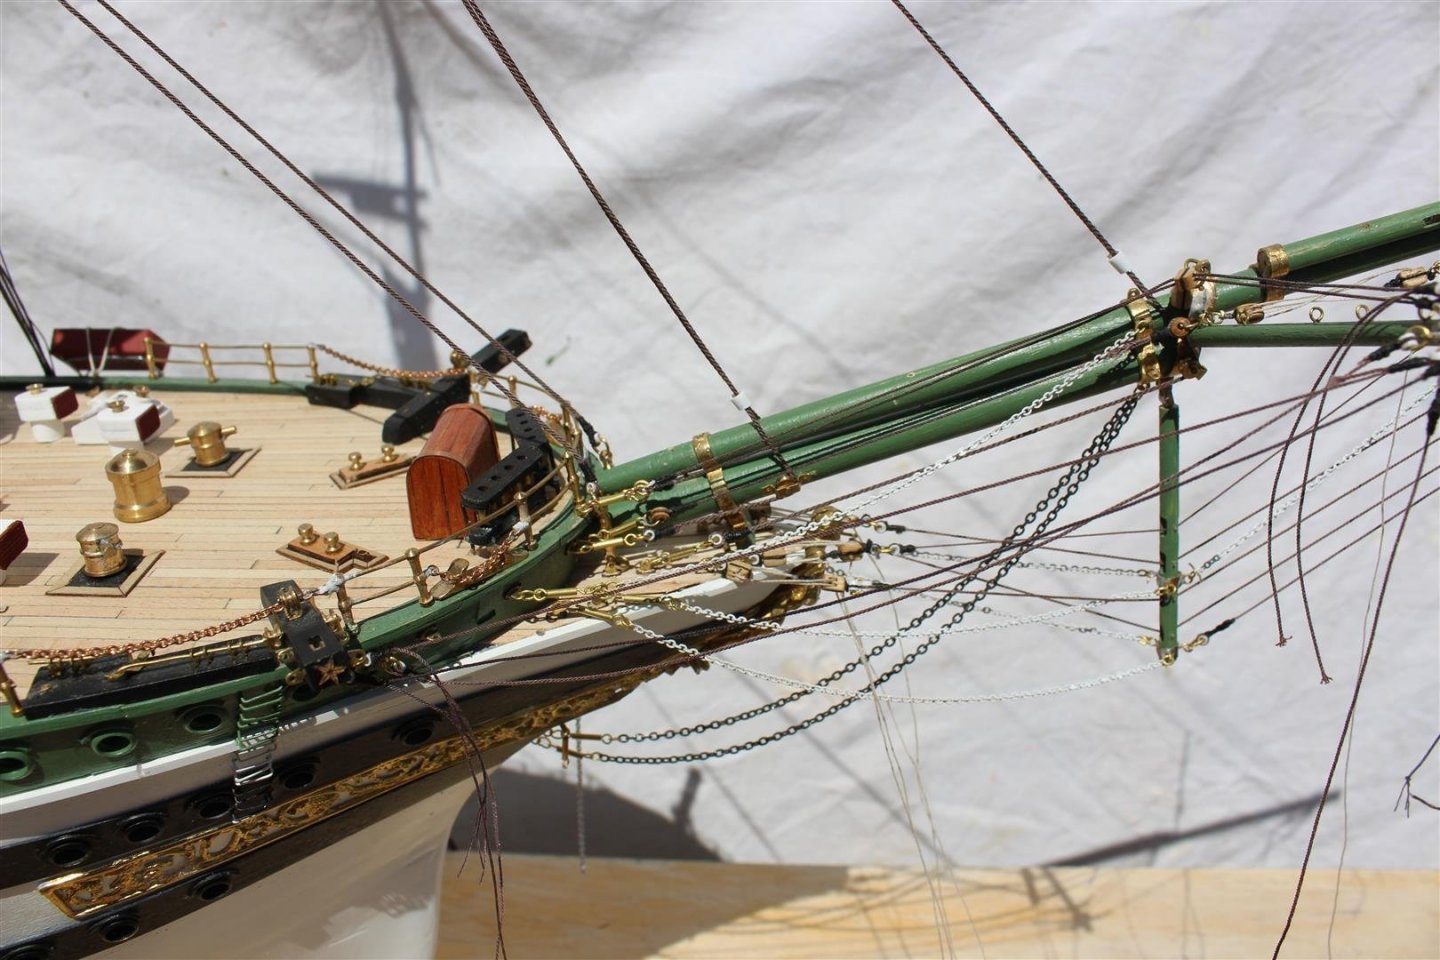
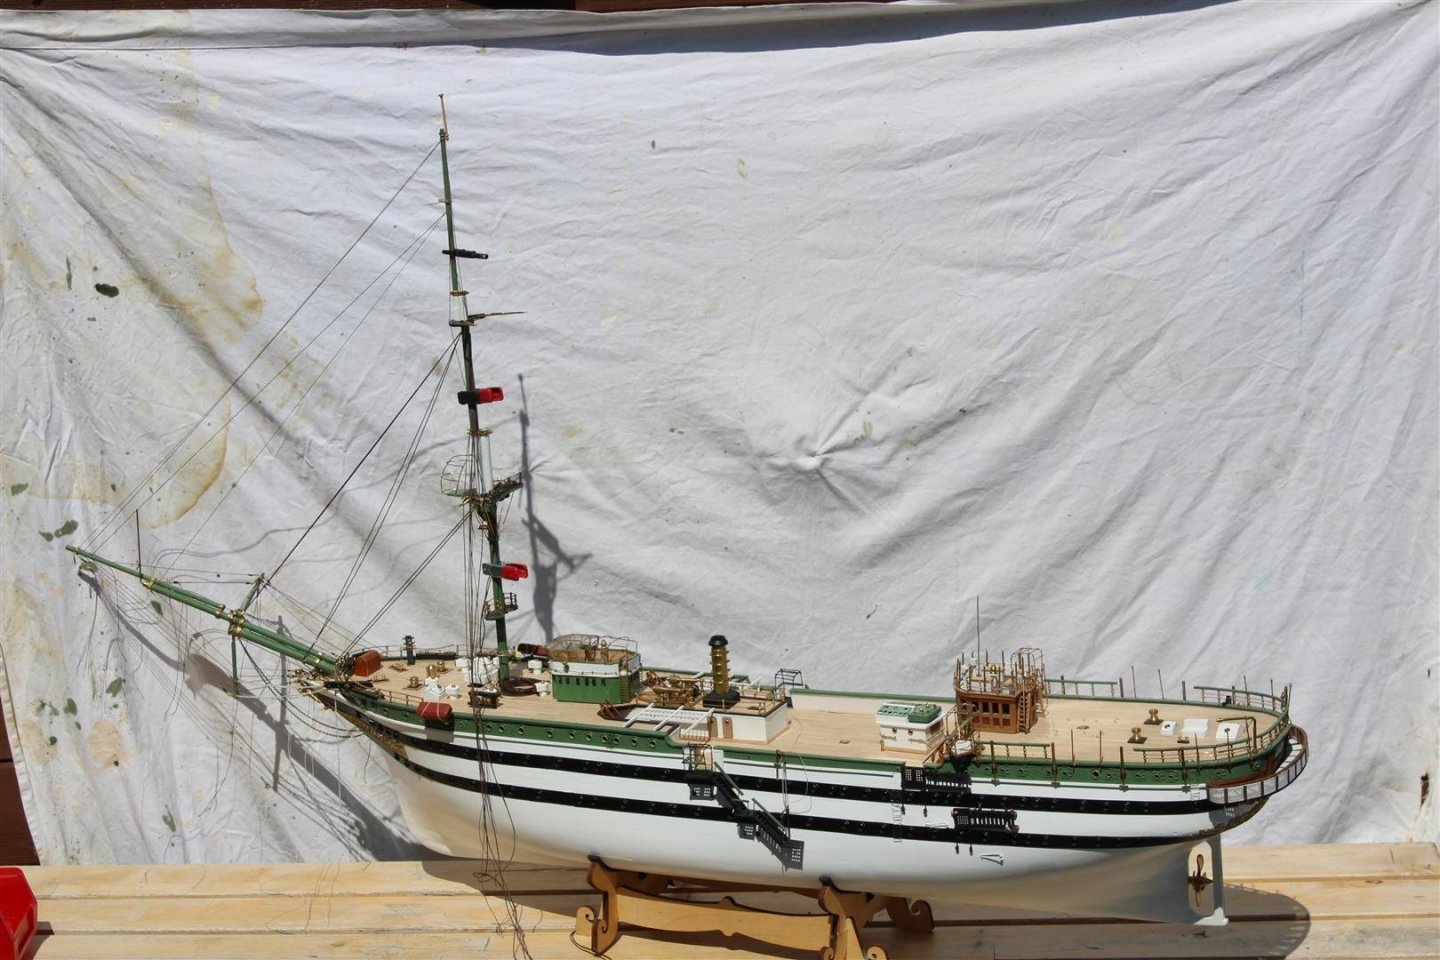
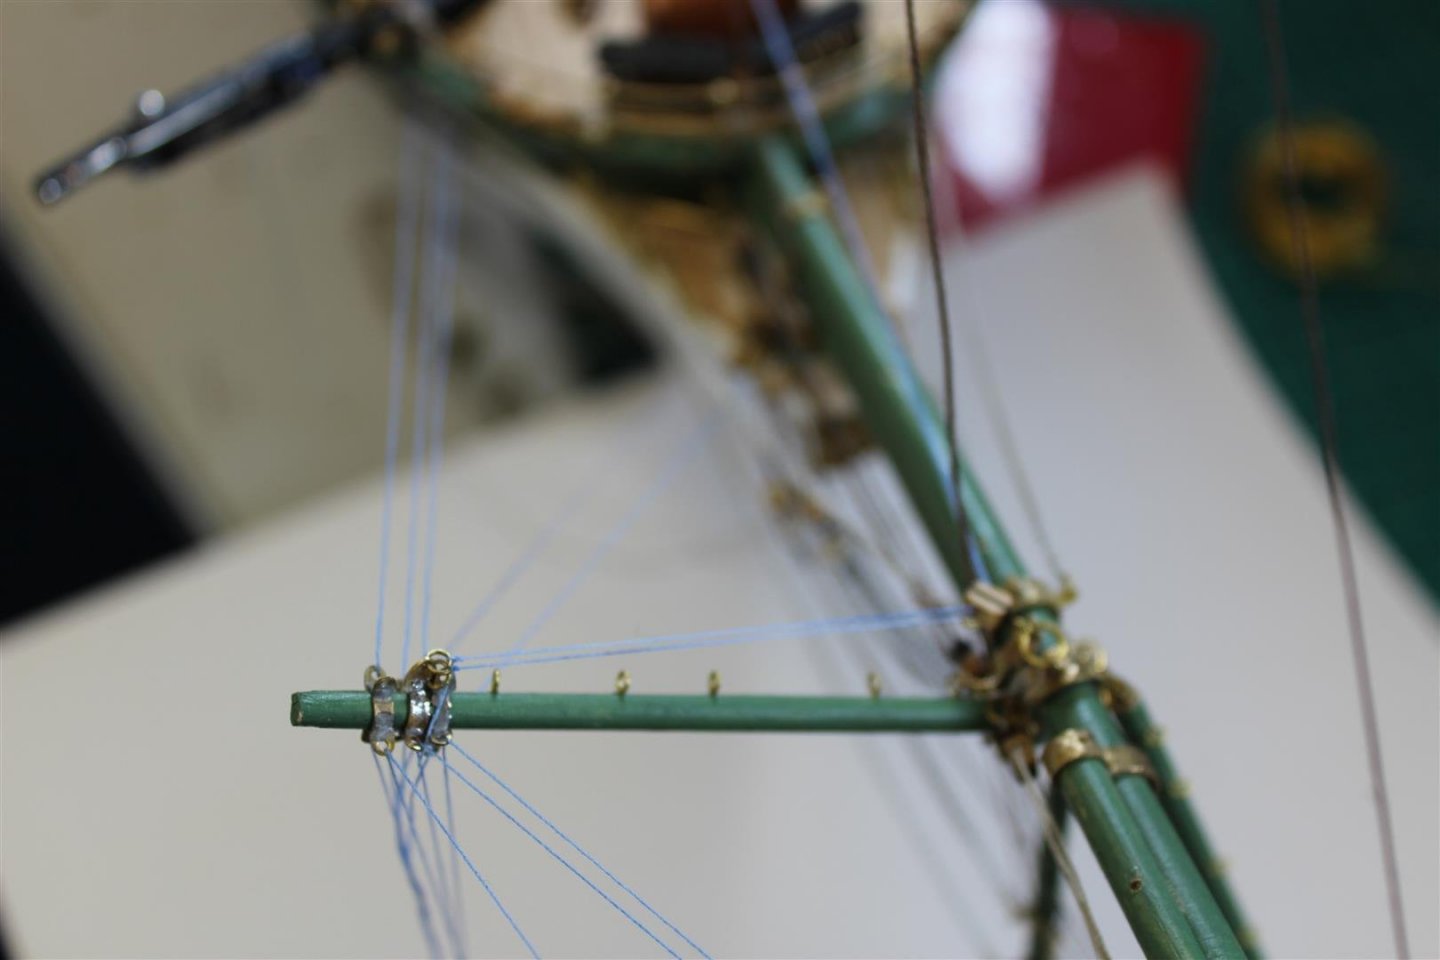
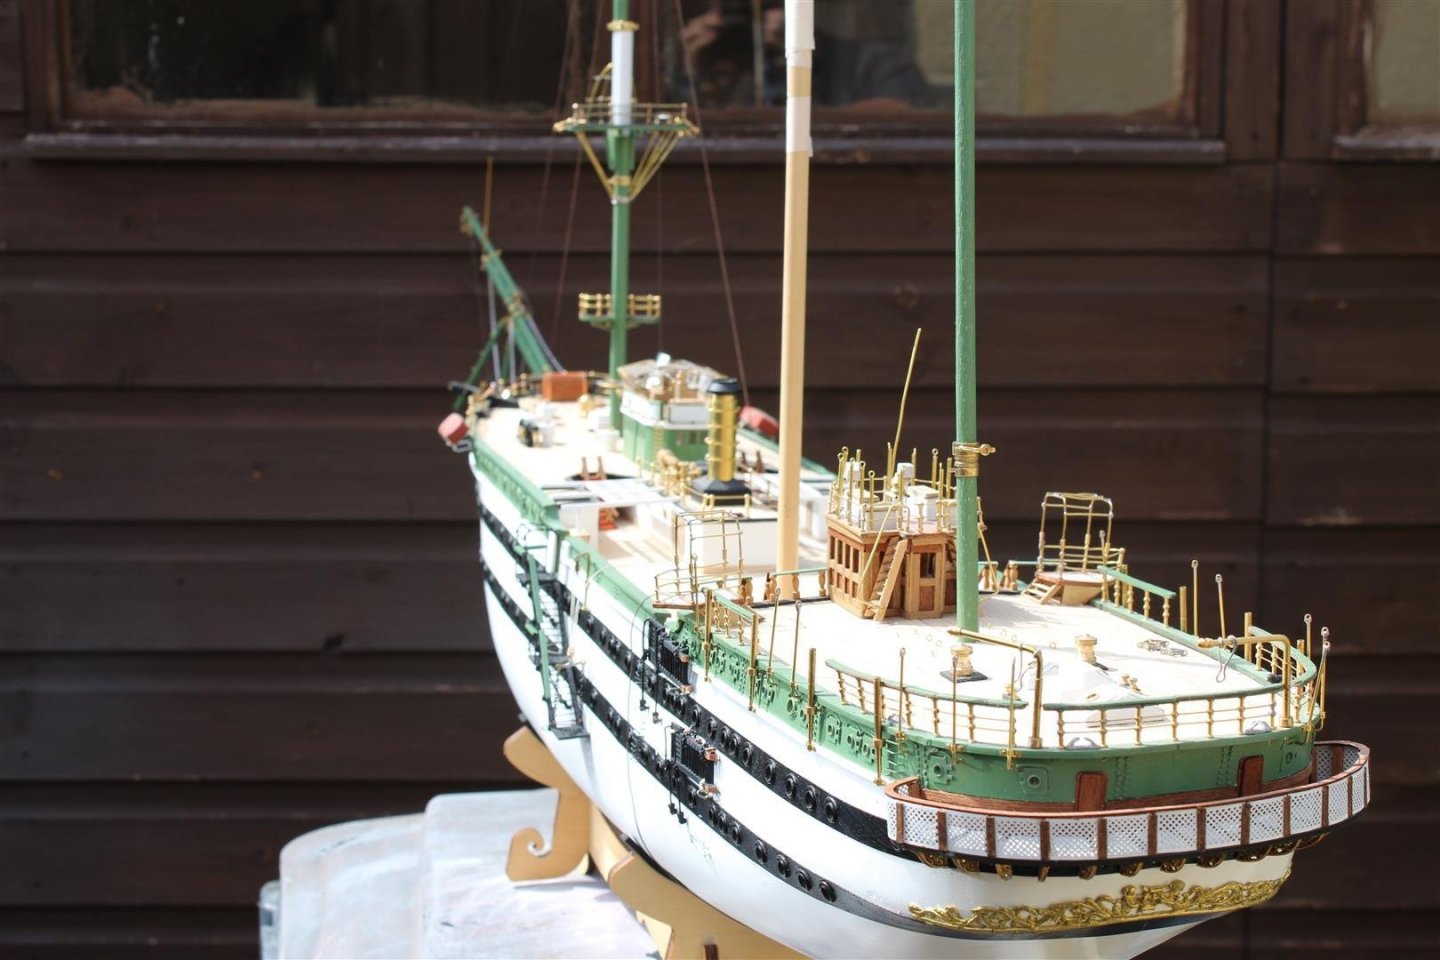
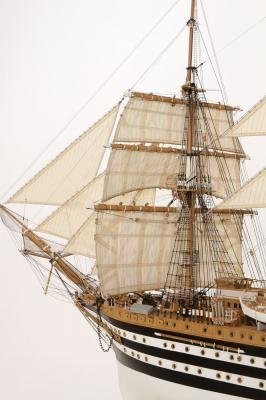
good afternoon everyone although i have the intentions of a break for a couple of weeks from the AV i have slowly been getting on with her most of the starboard side bowsprit lines are in and the lines for the Port side are made up ready it is much slower this build as i have to make the lines, then stain them, but im happy with the progress


- 273 replies
-
- 10
-
-
- panart
- amerigo vespucci
- (and 1 more)
-
thank you yes the St Nectan is still my favourite build
- 273 replies
-
- 1
-
-
- panart
- amerigo vespucci
- (and 1 more)
-
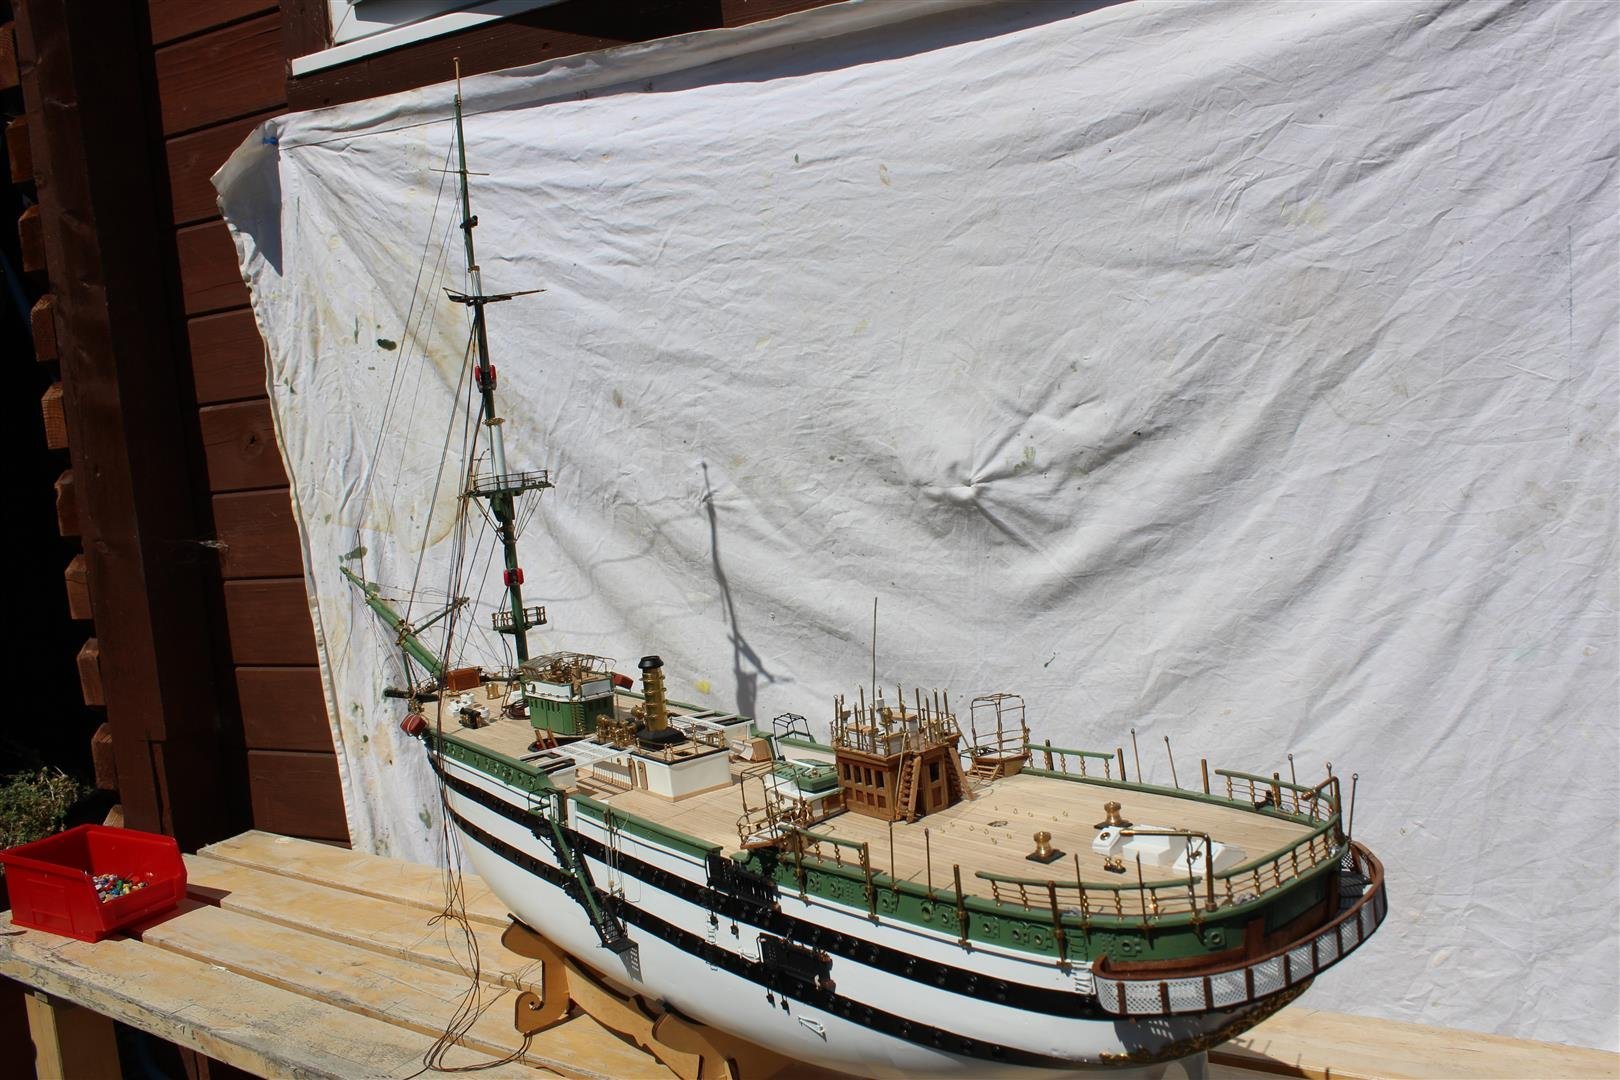
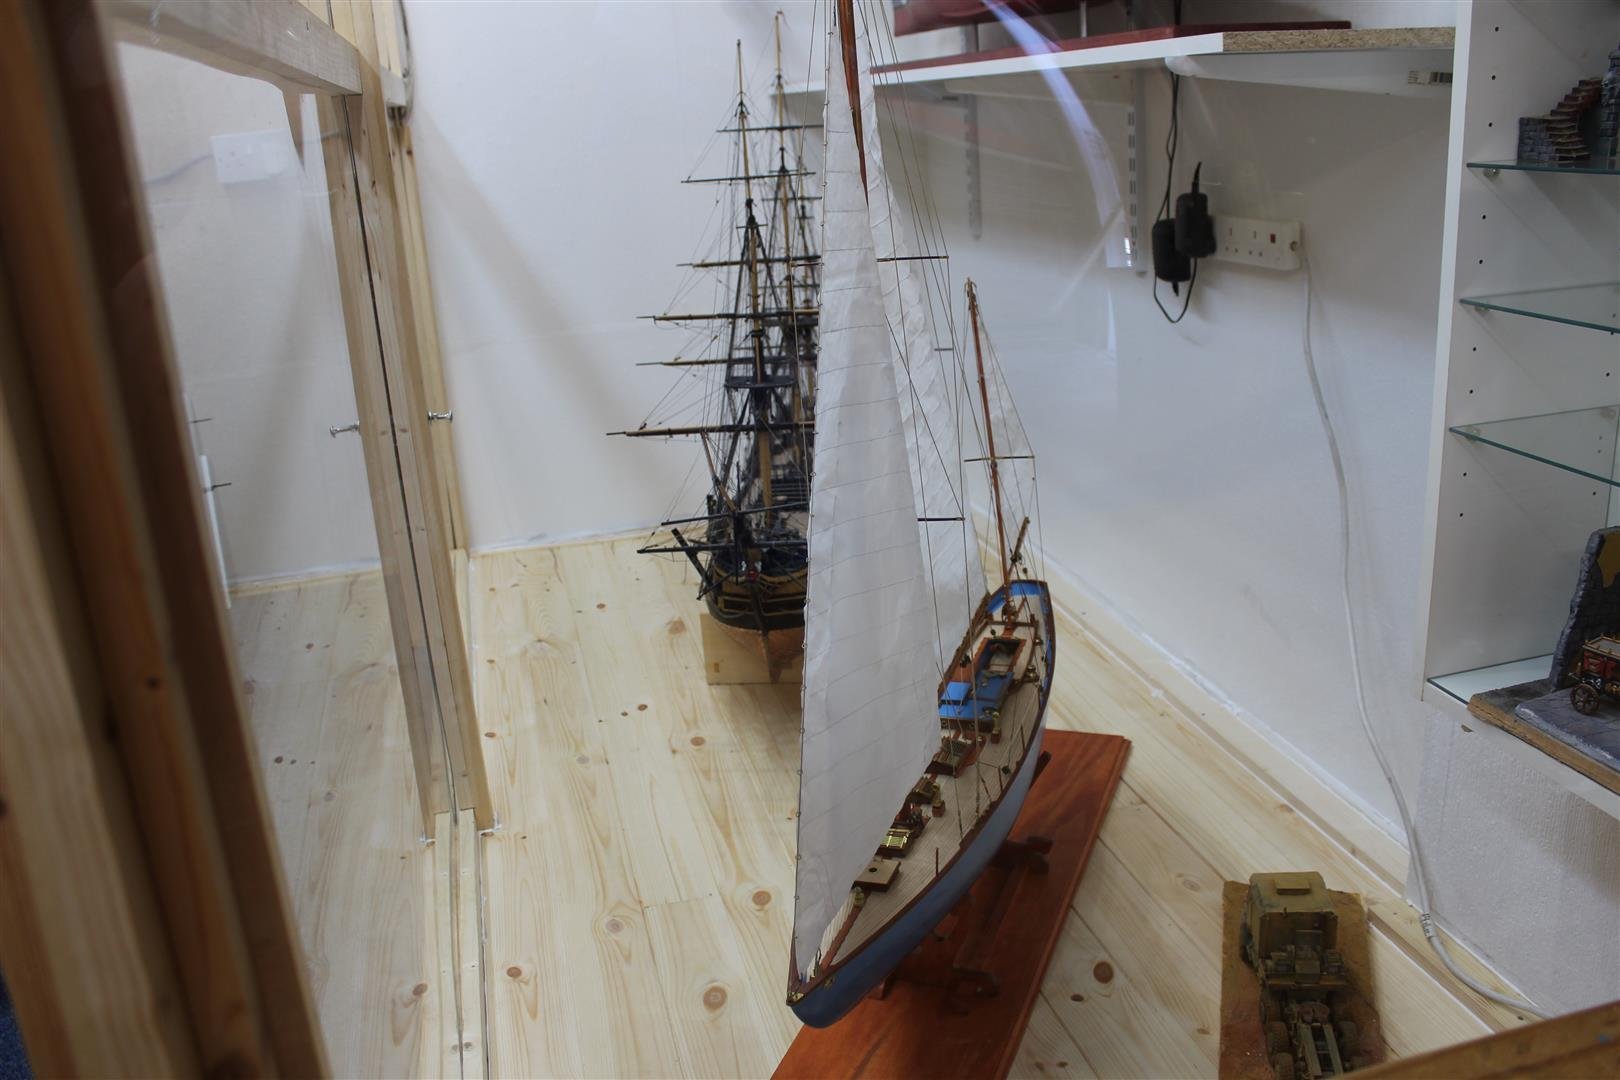
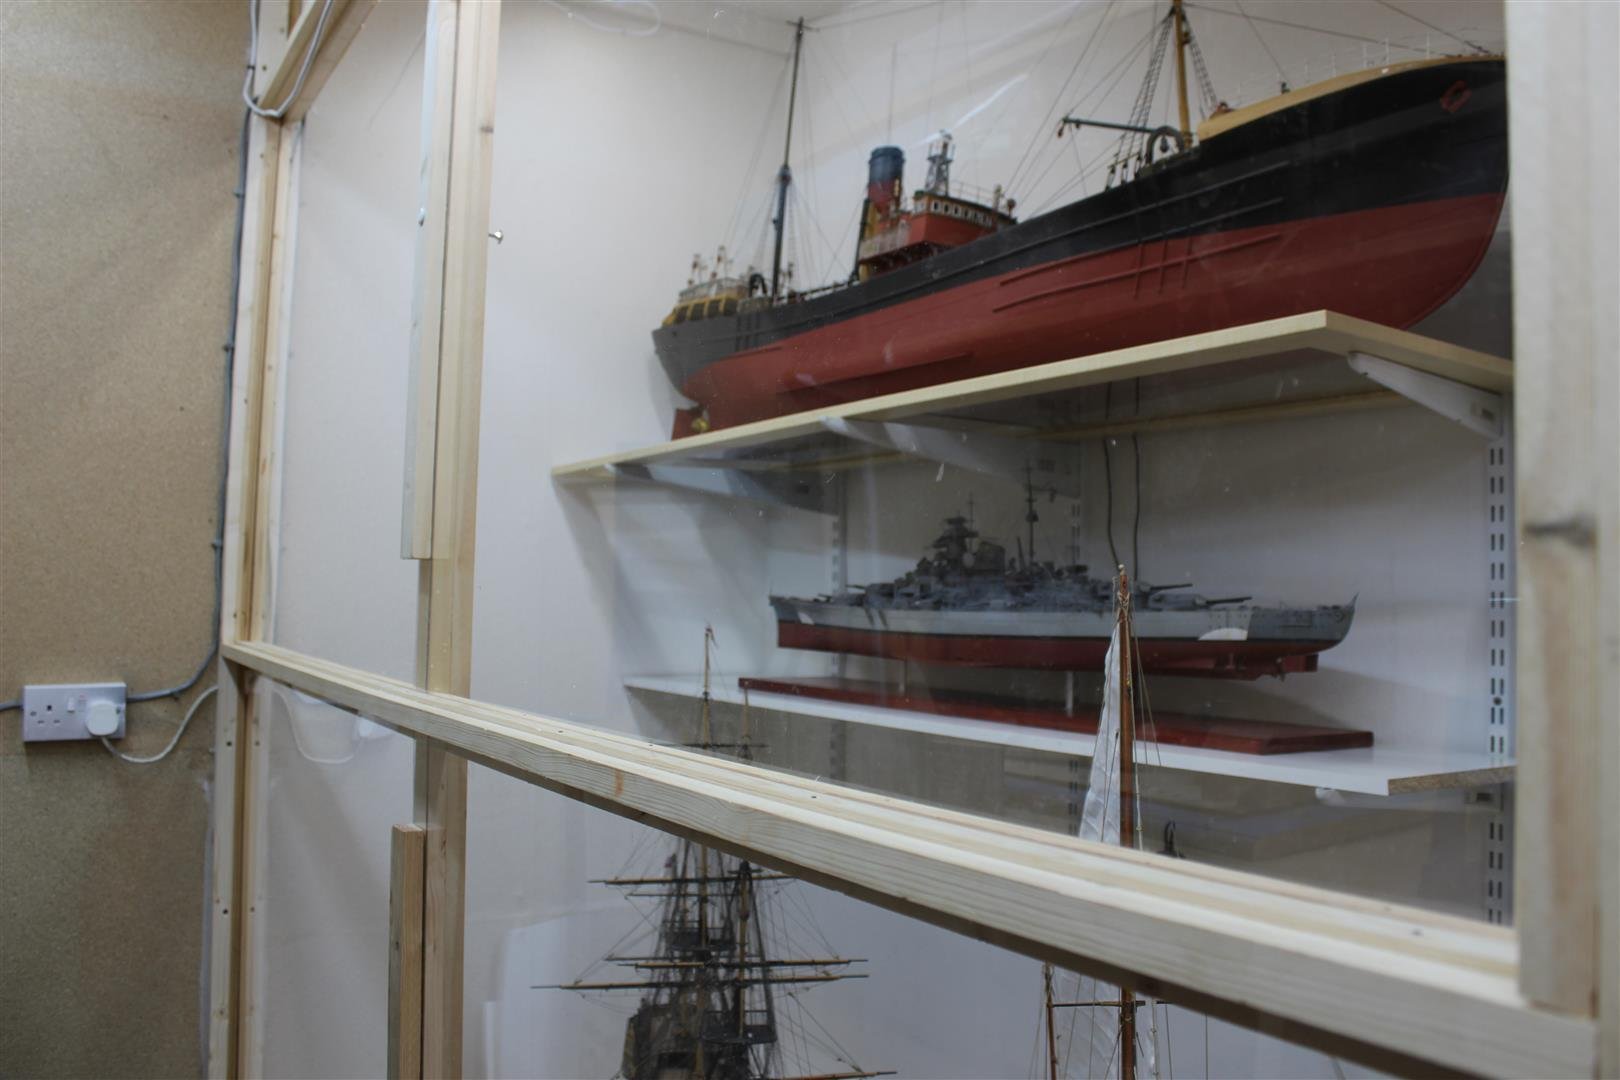
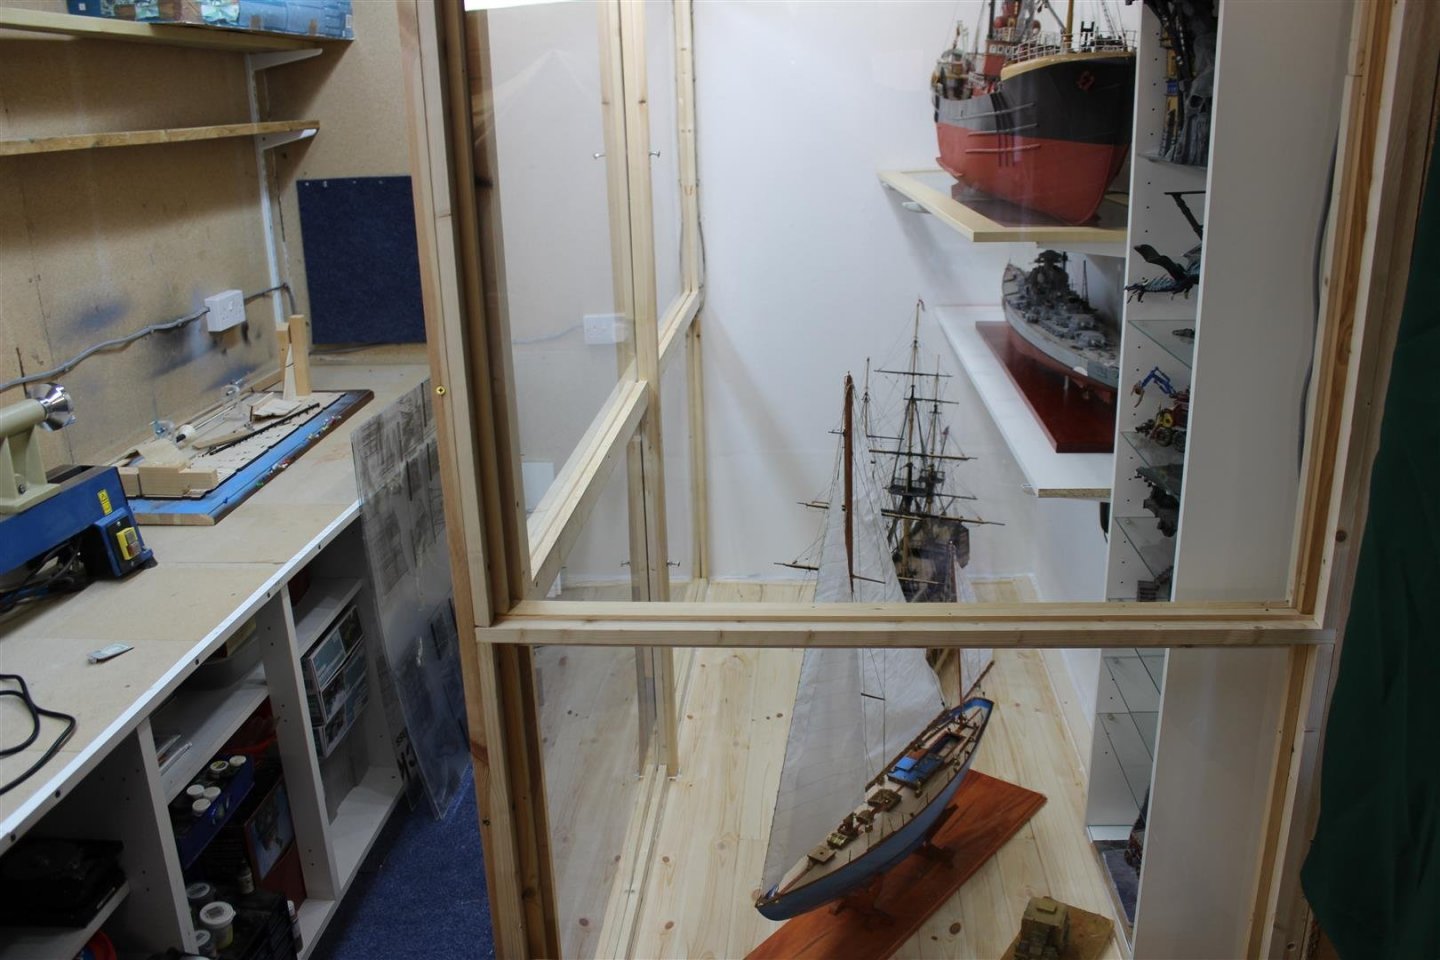
Good afternoon everyone just finished the display case, im happy with it


- 273 replies
-
- 13
-
-

-
- panart
- amerigo vespucci
- (and 1 more)
-
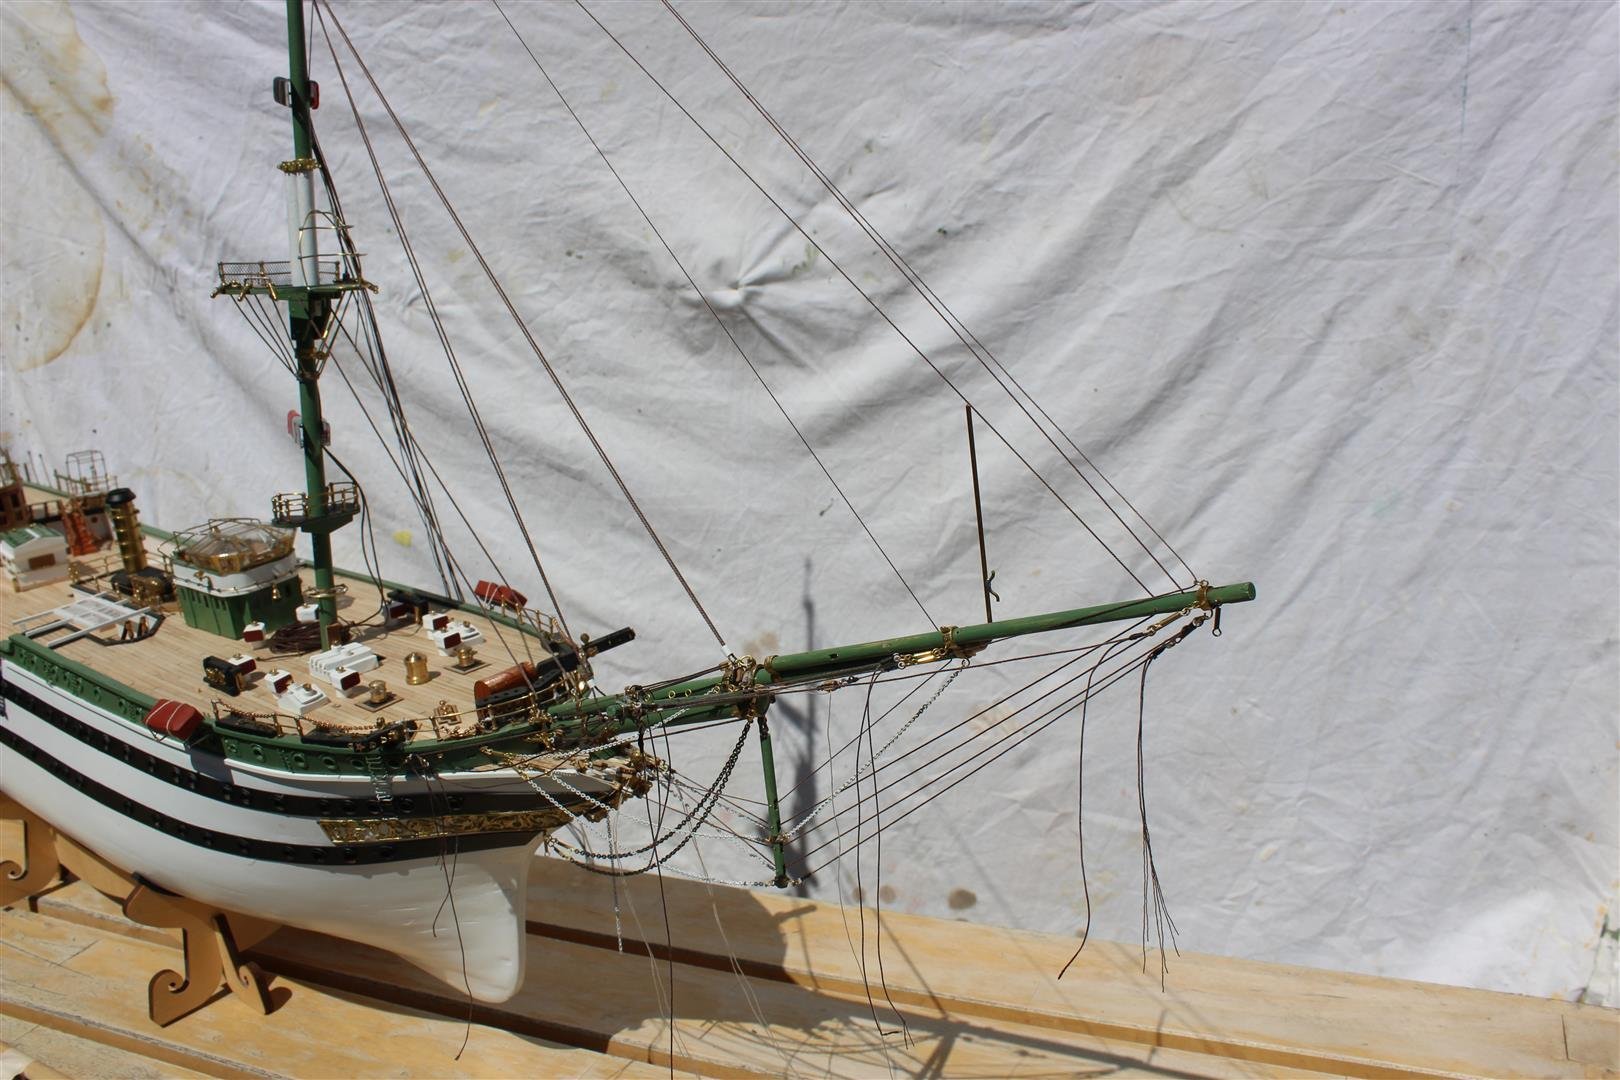
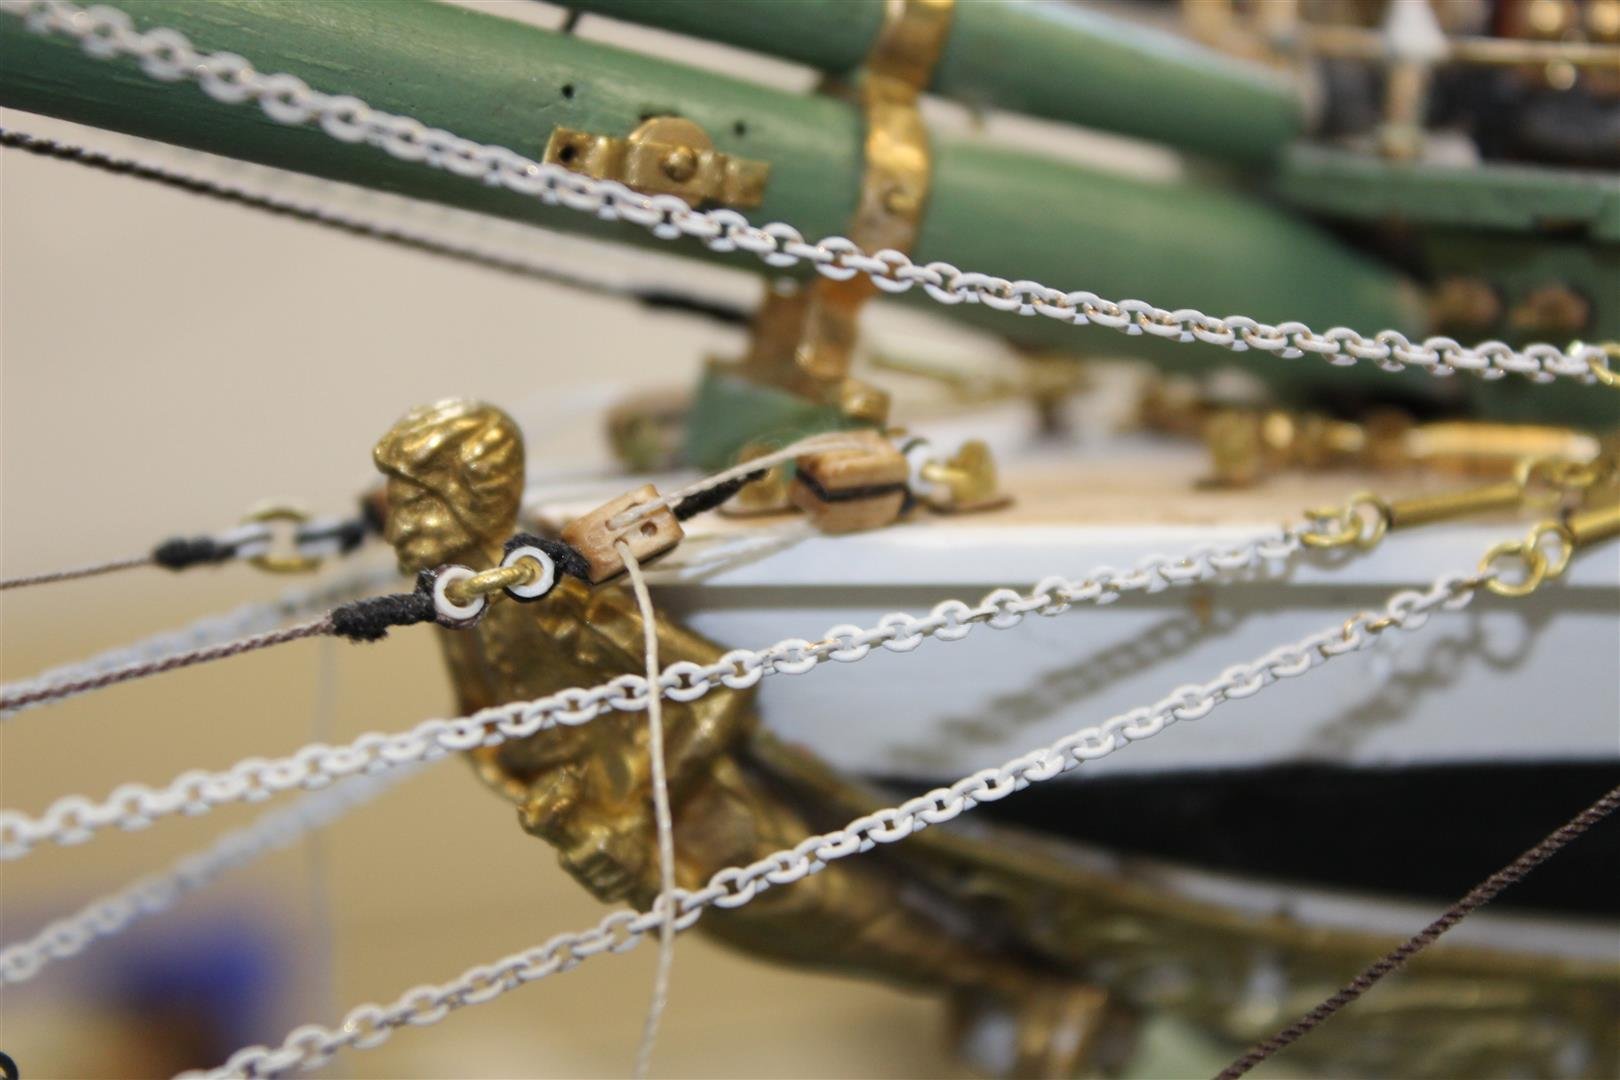
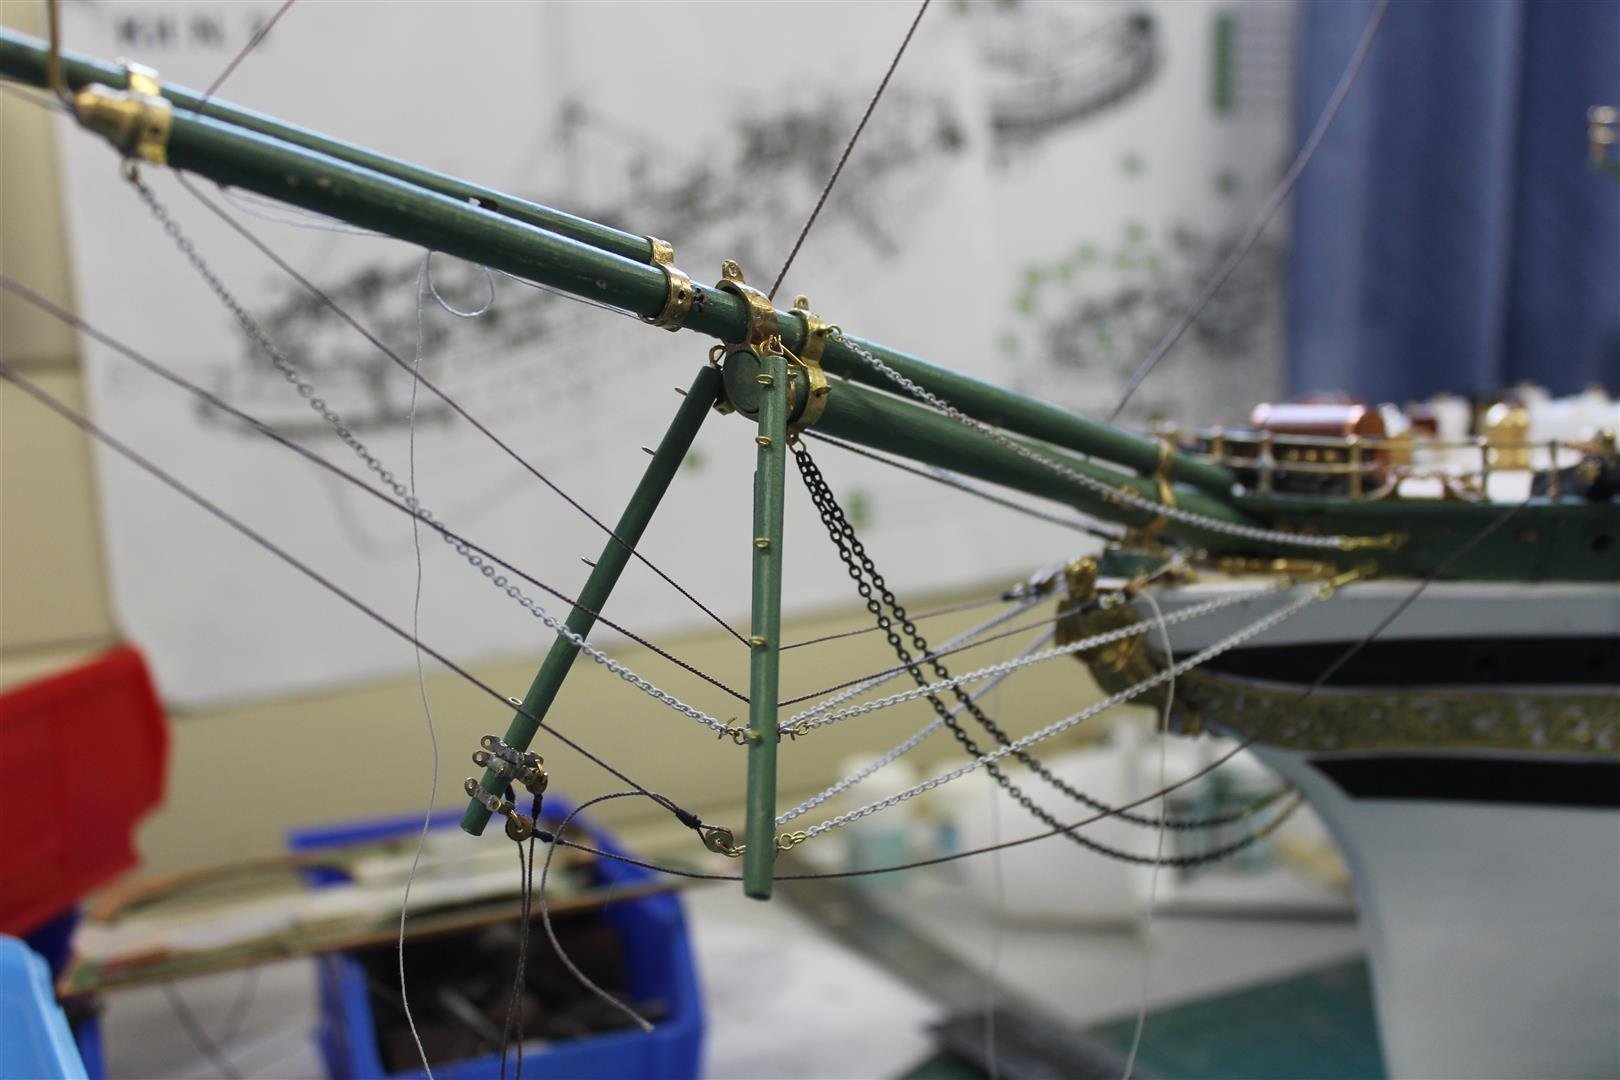
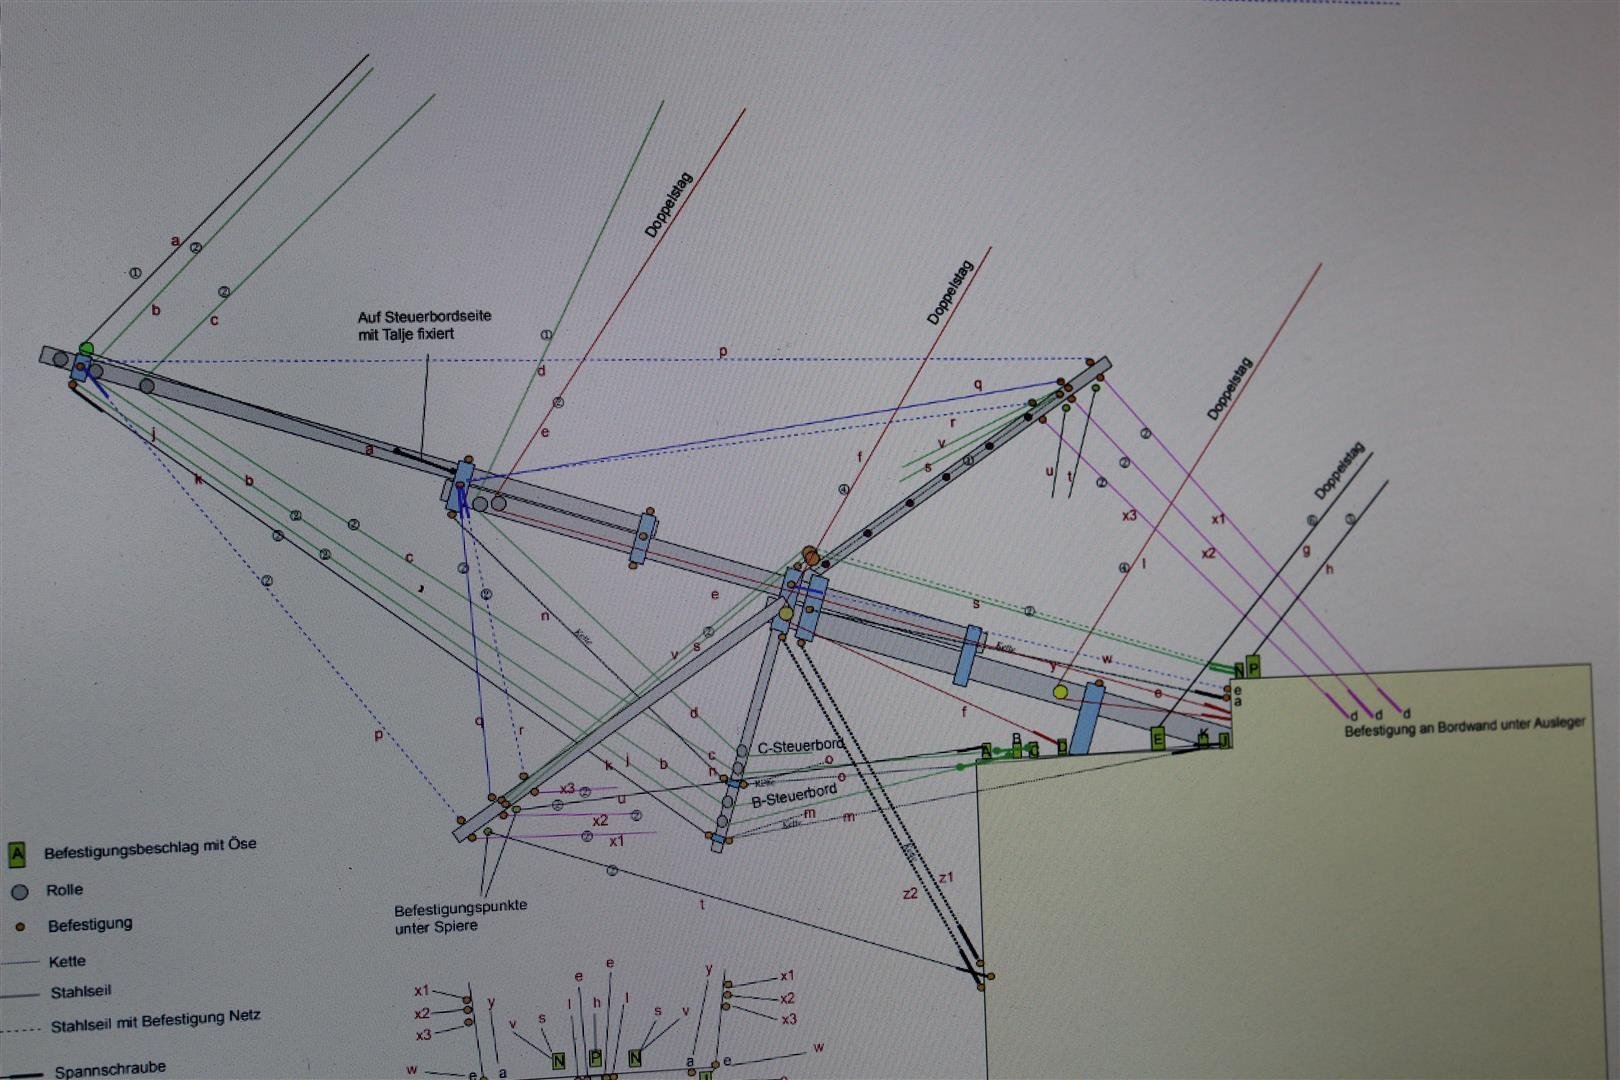
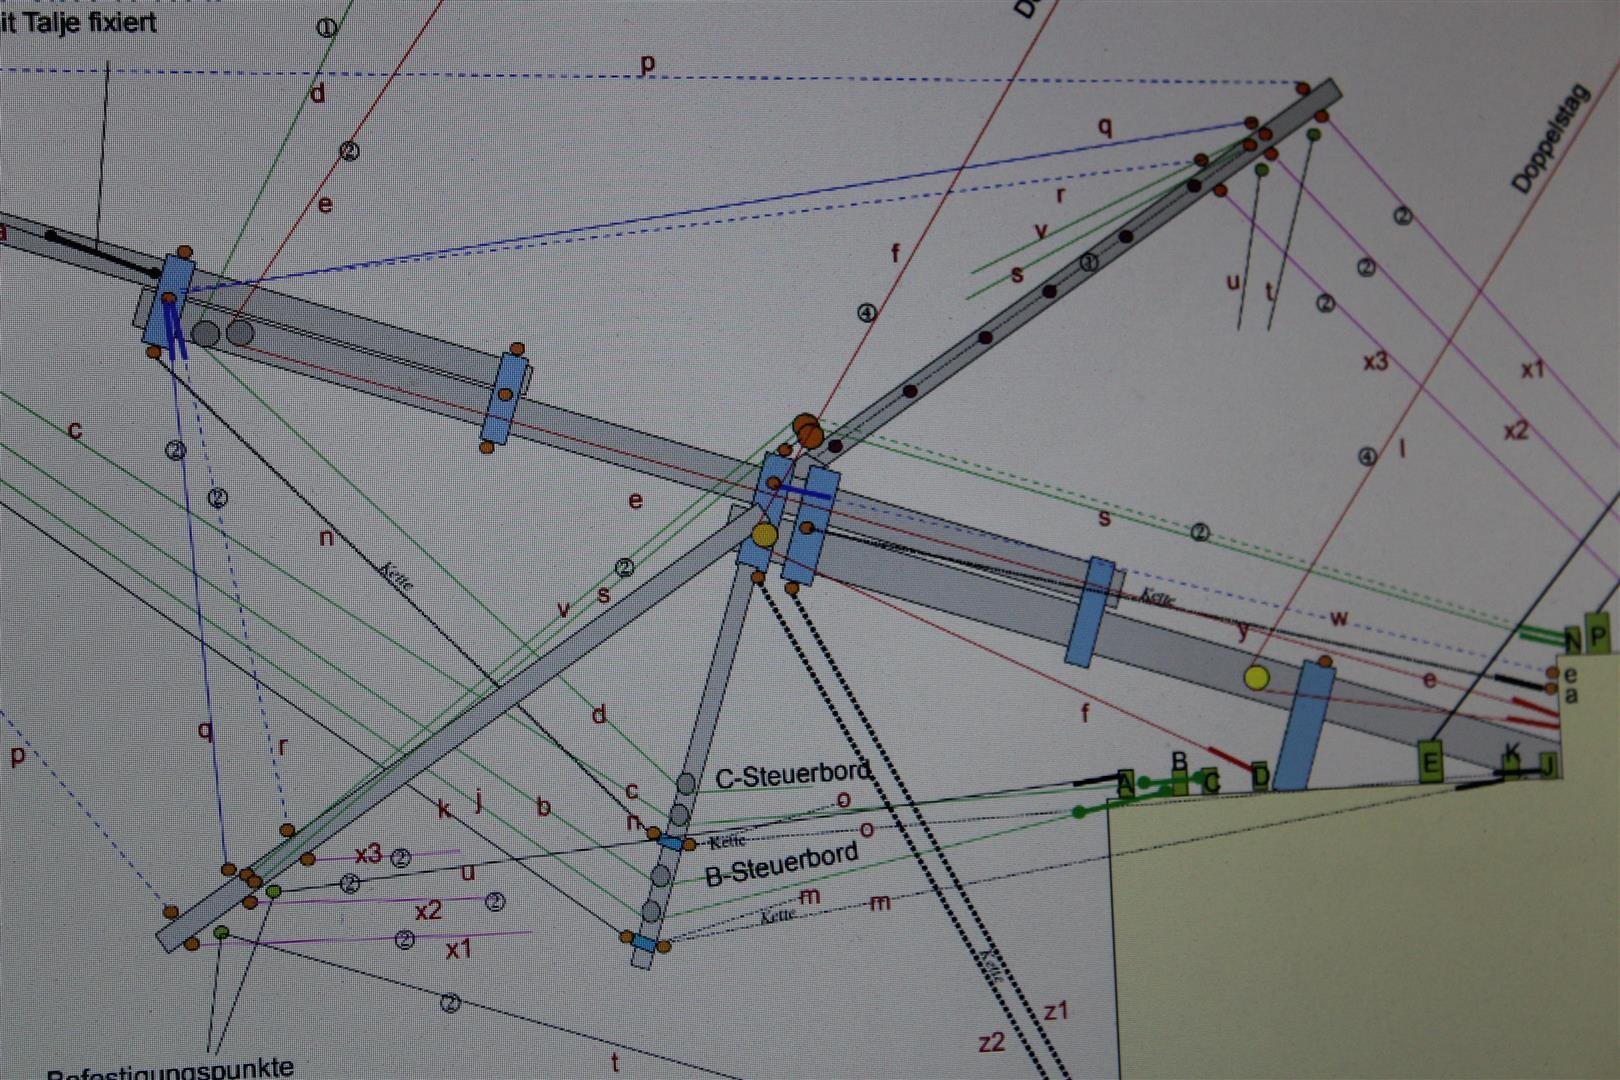
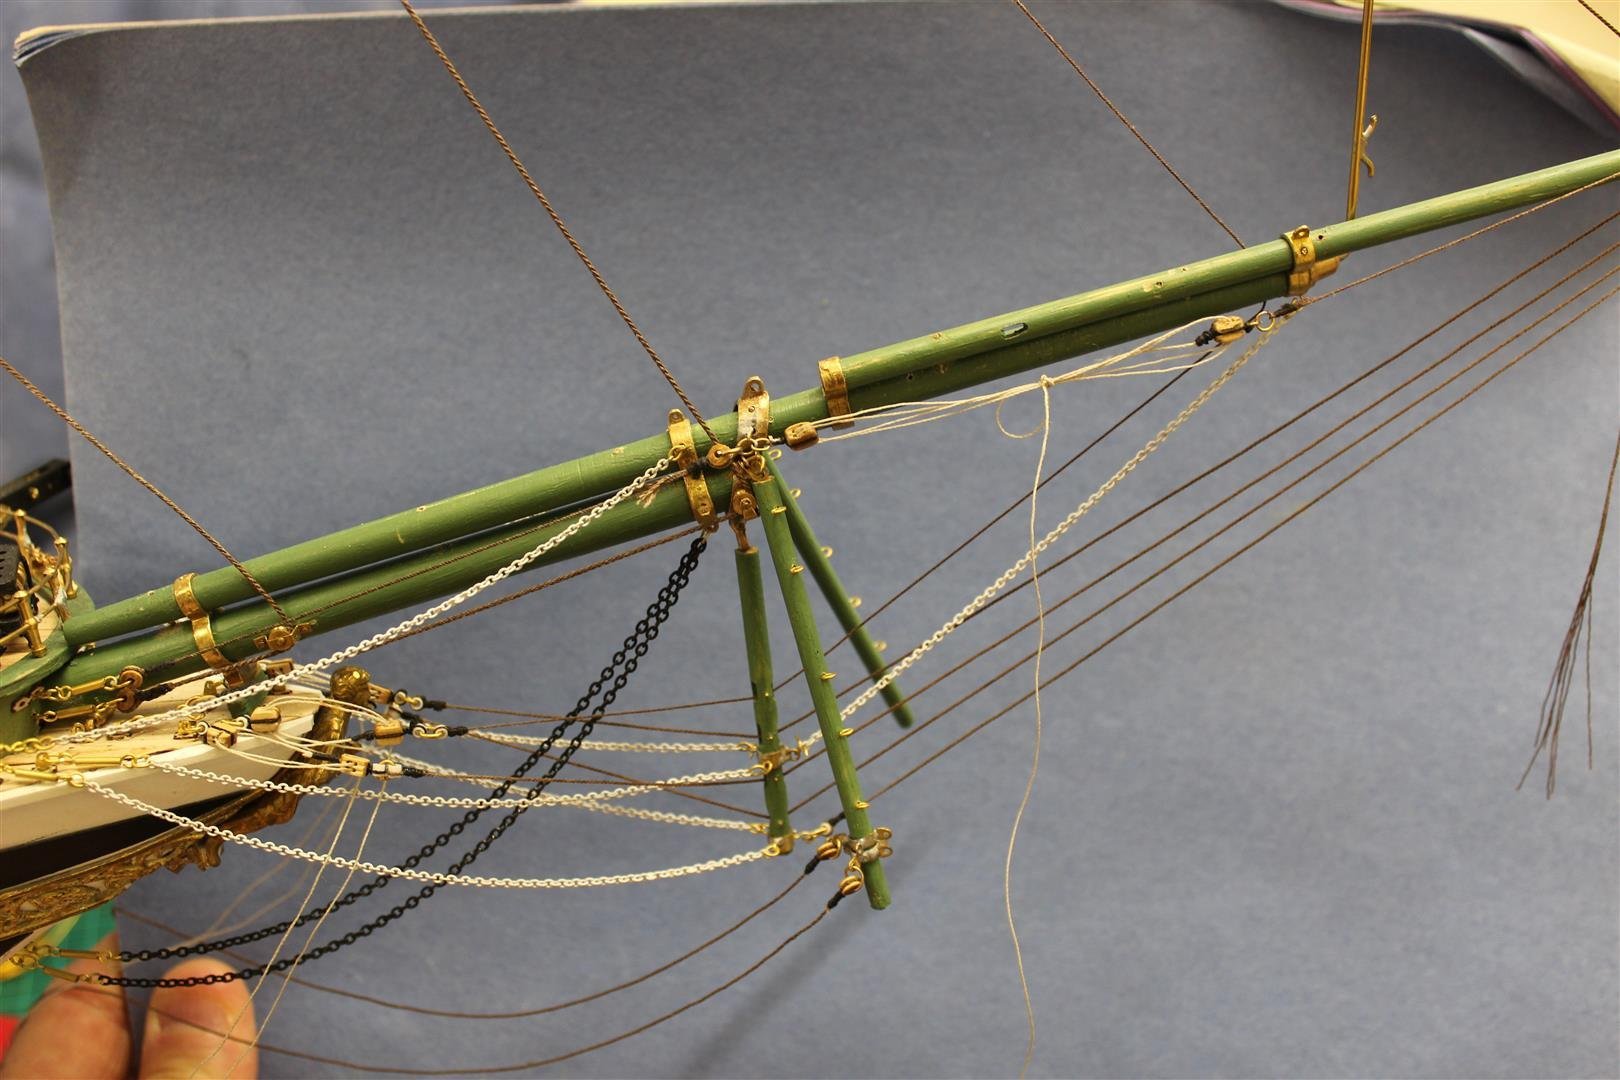
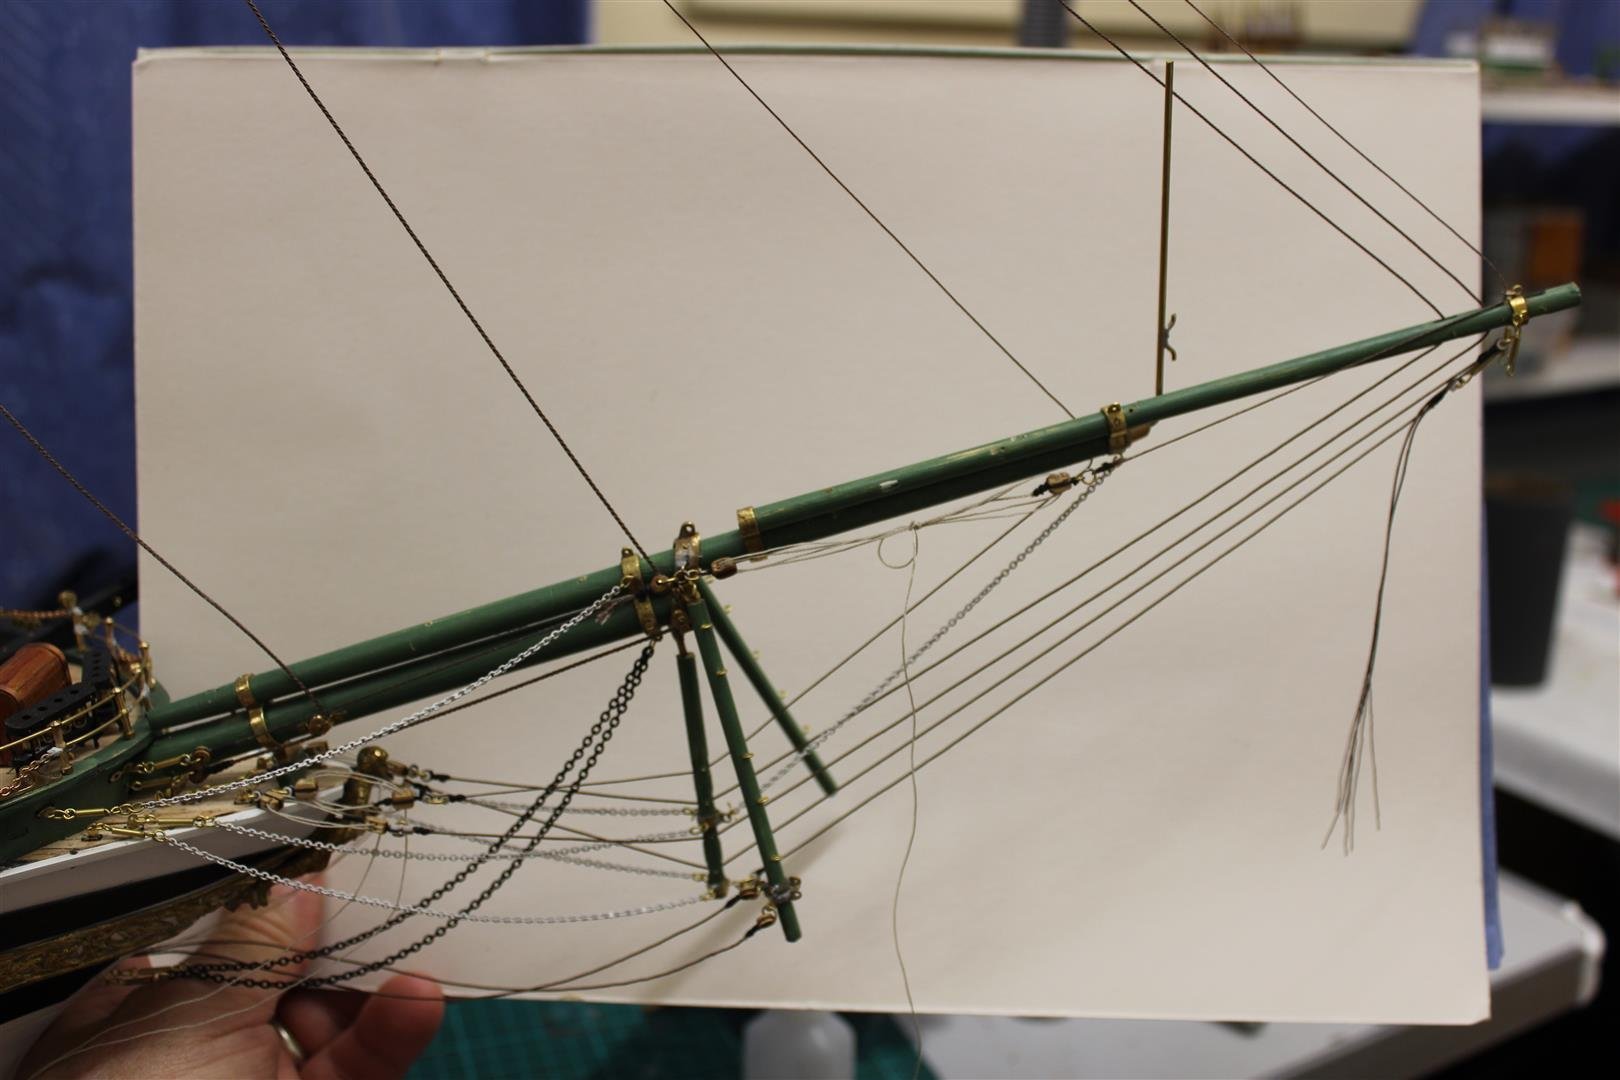
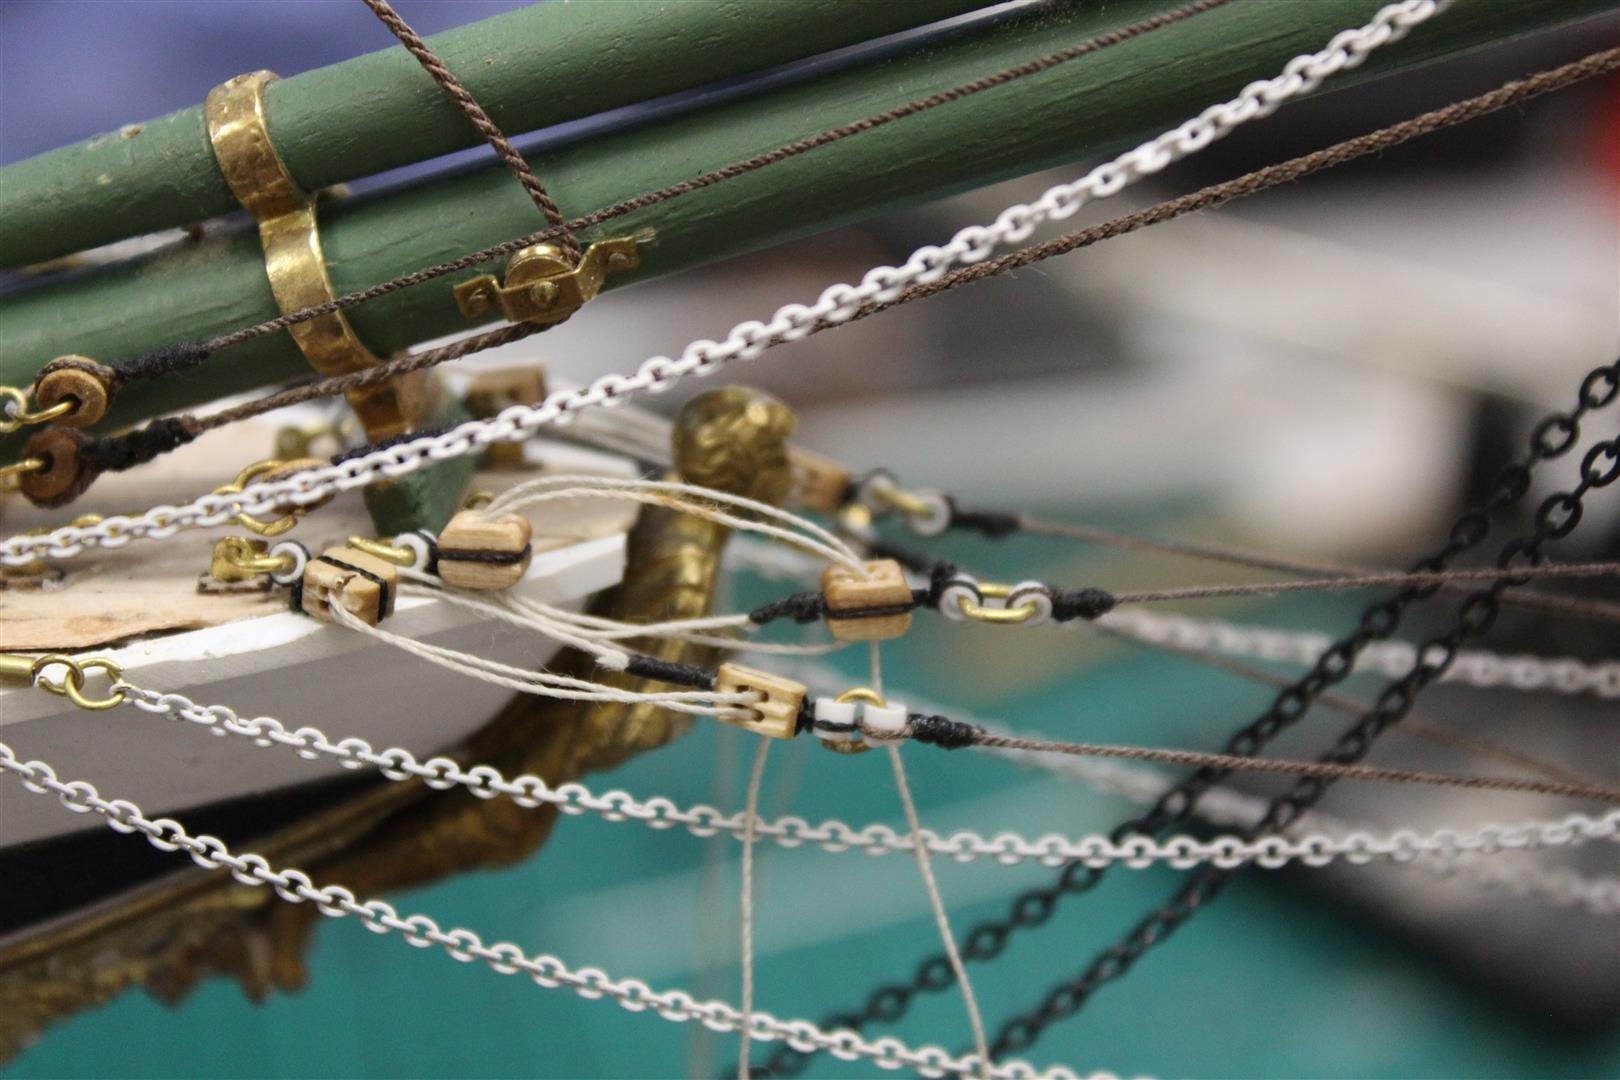
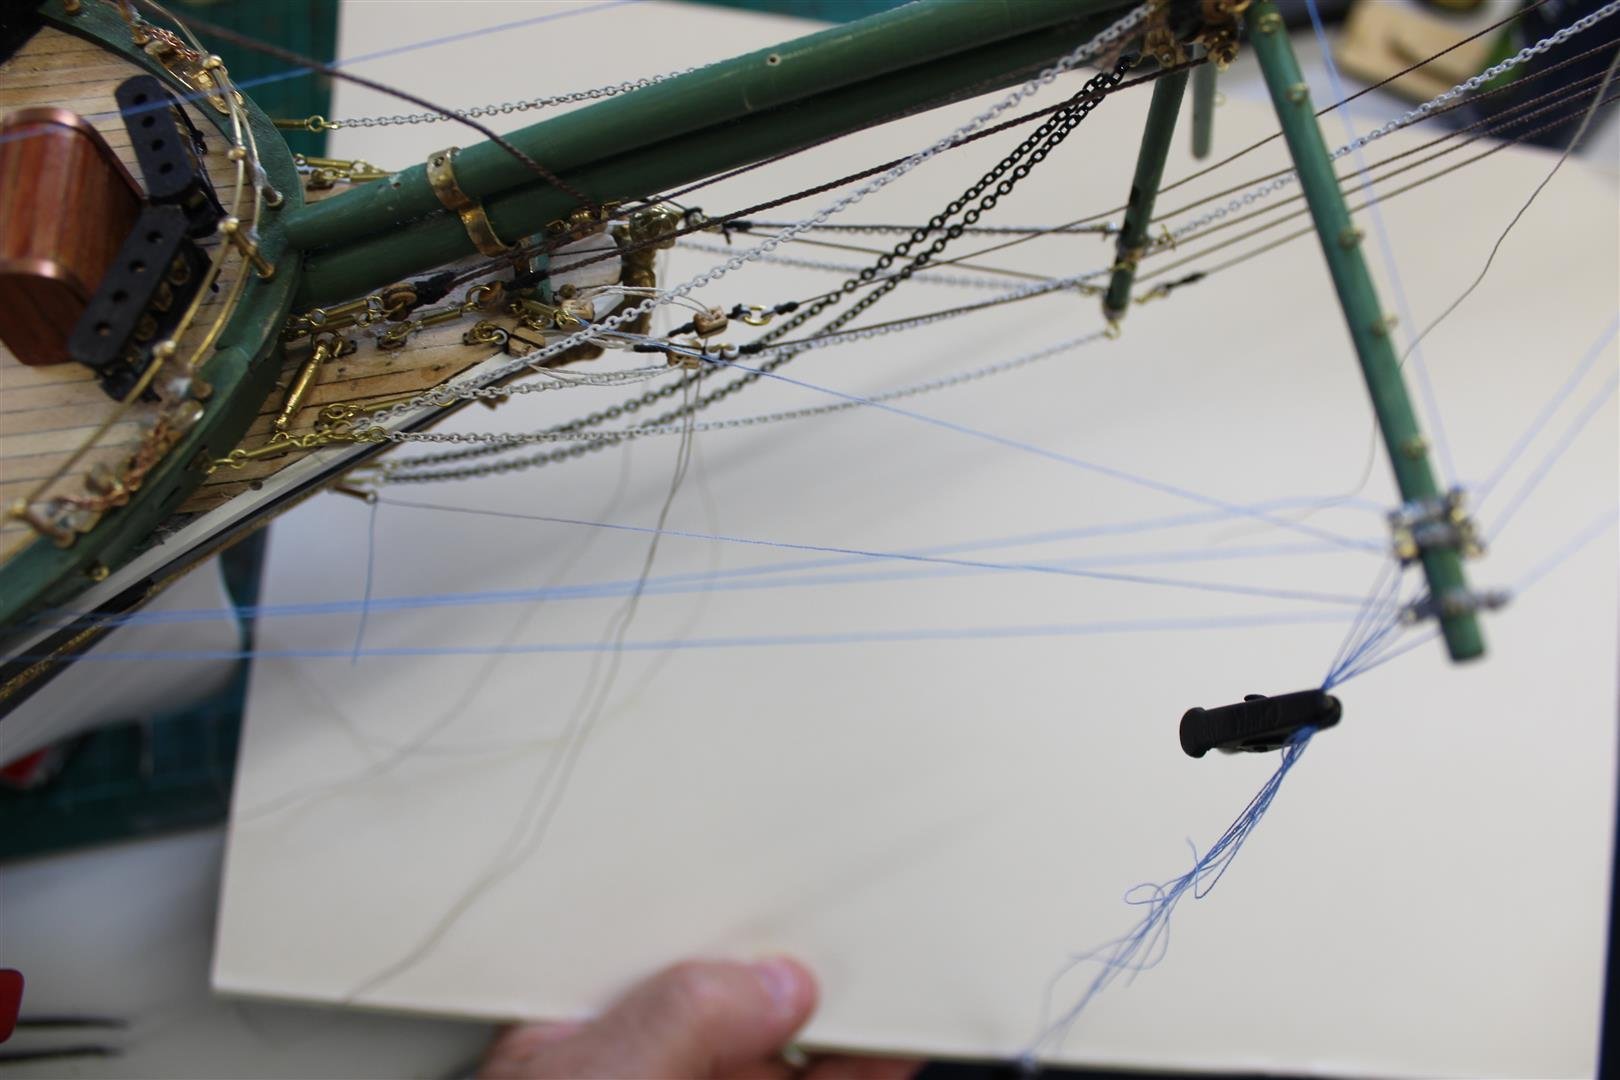
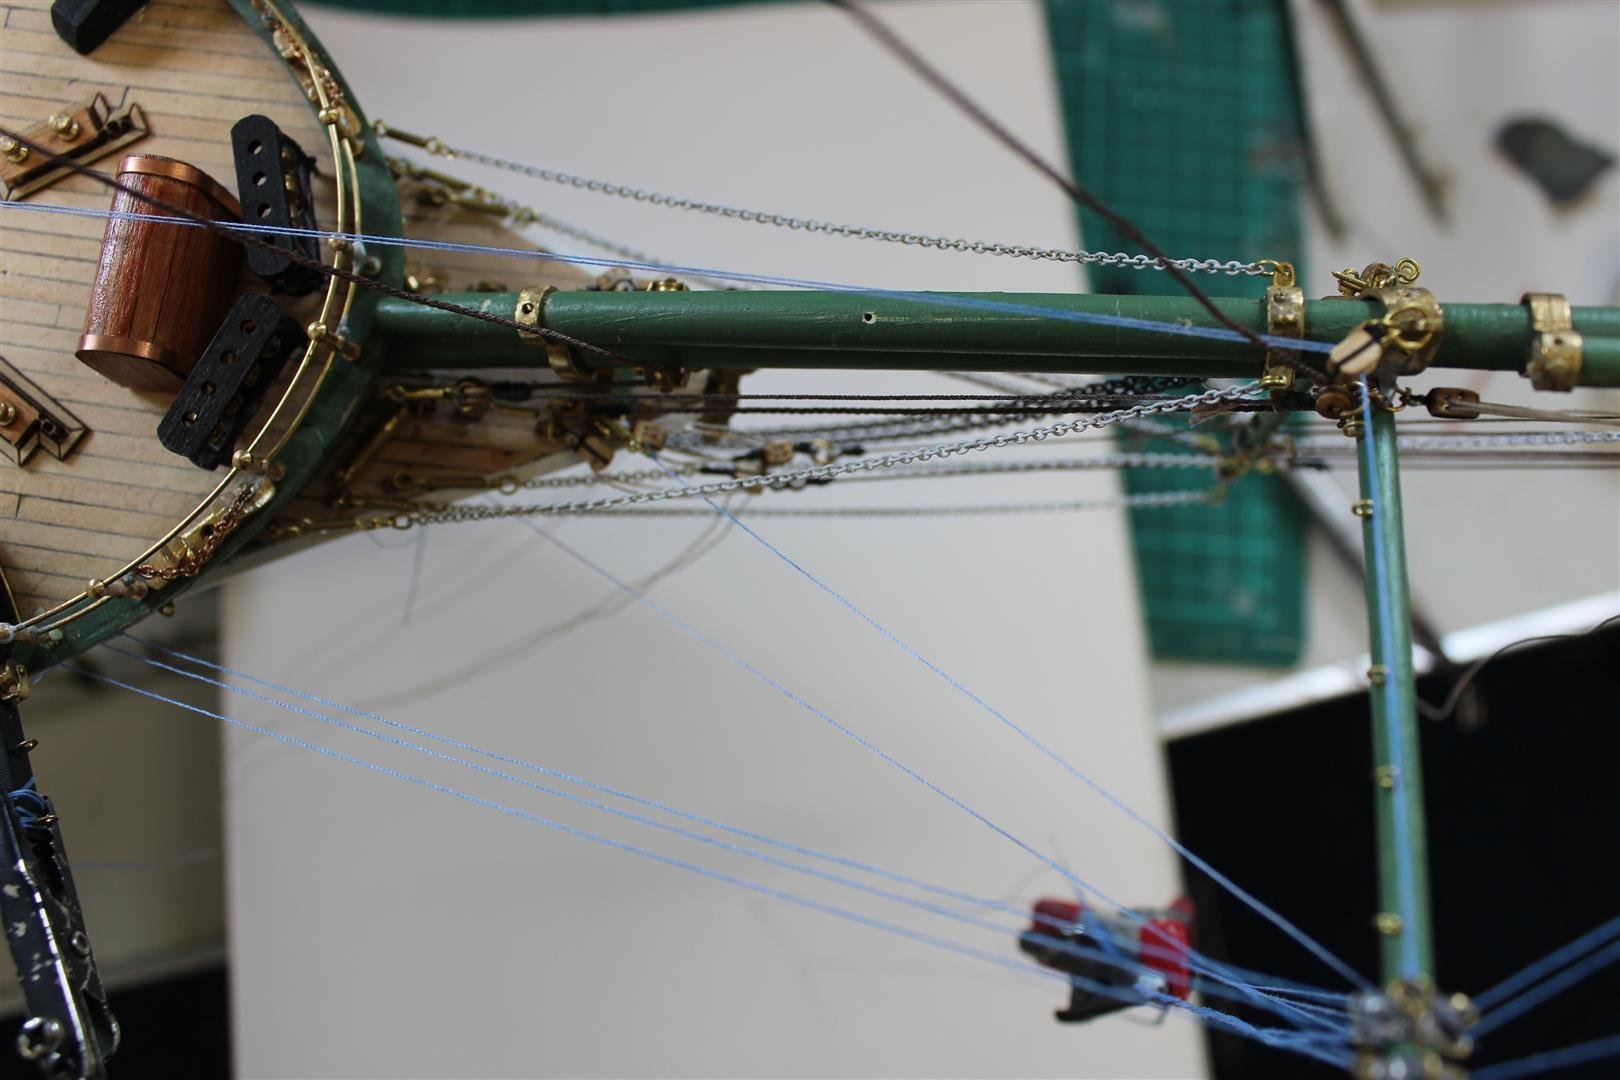
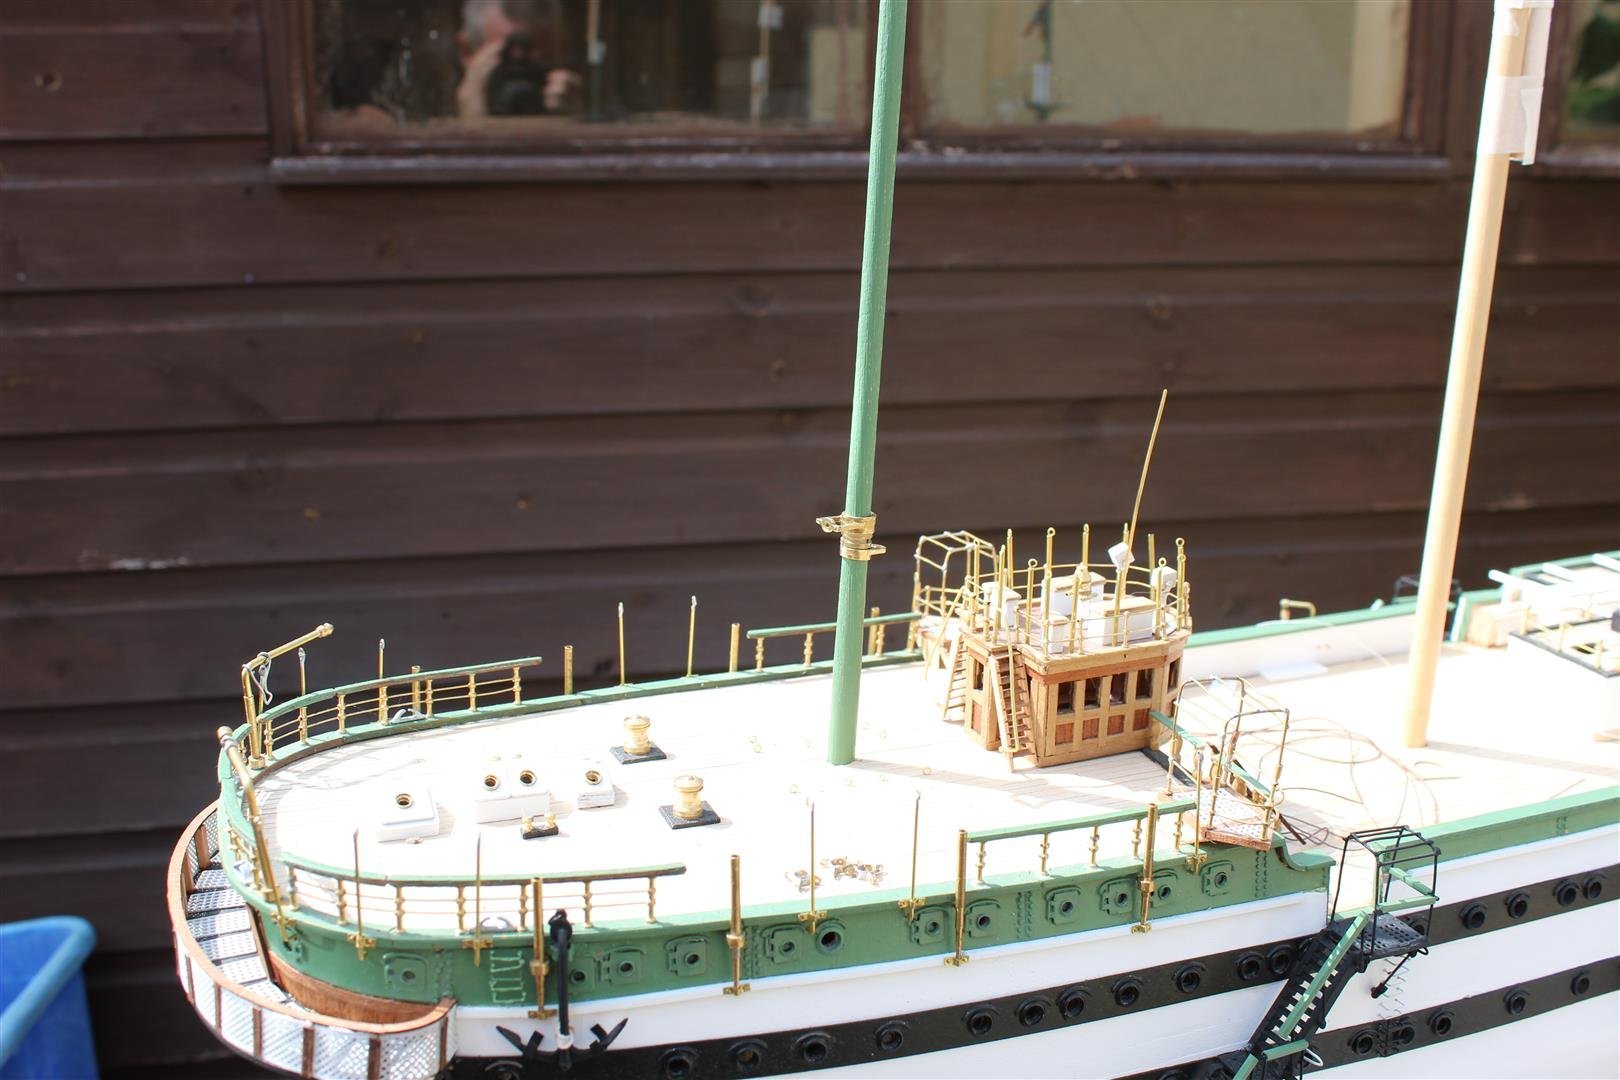
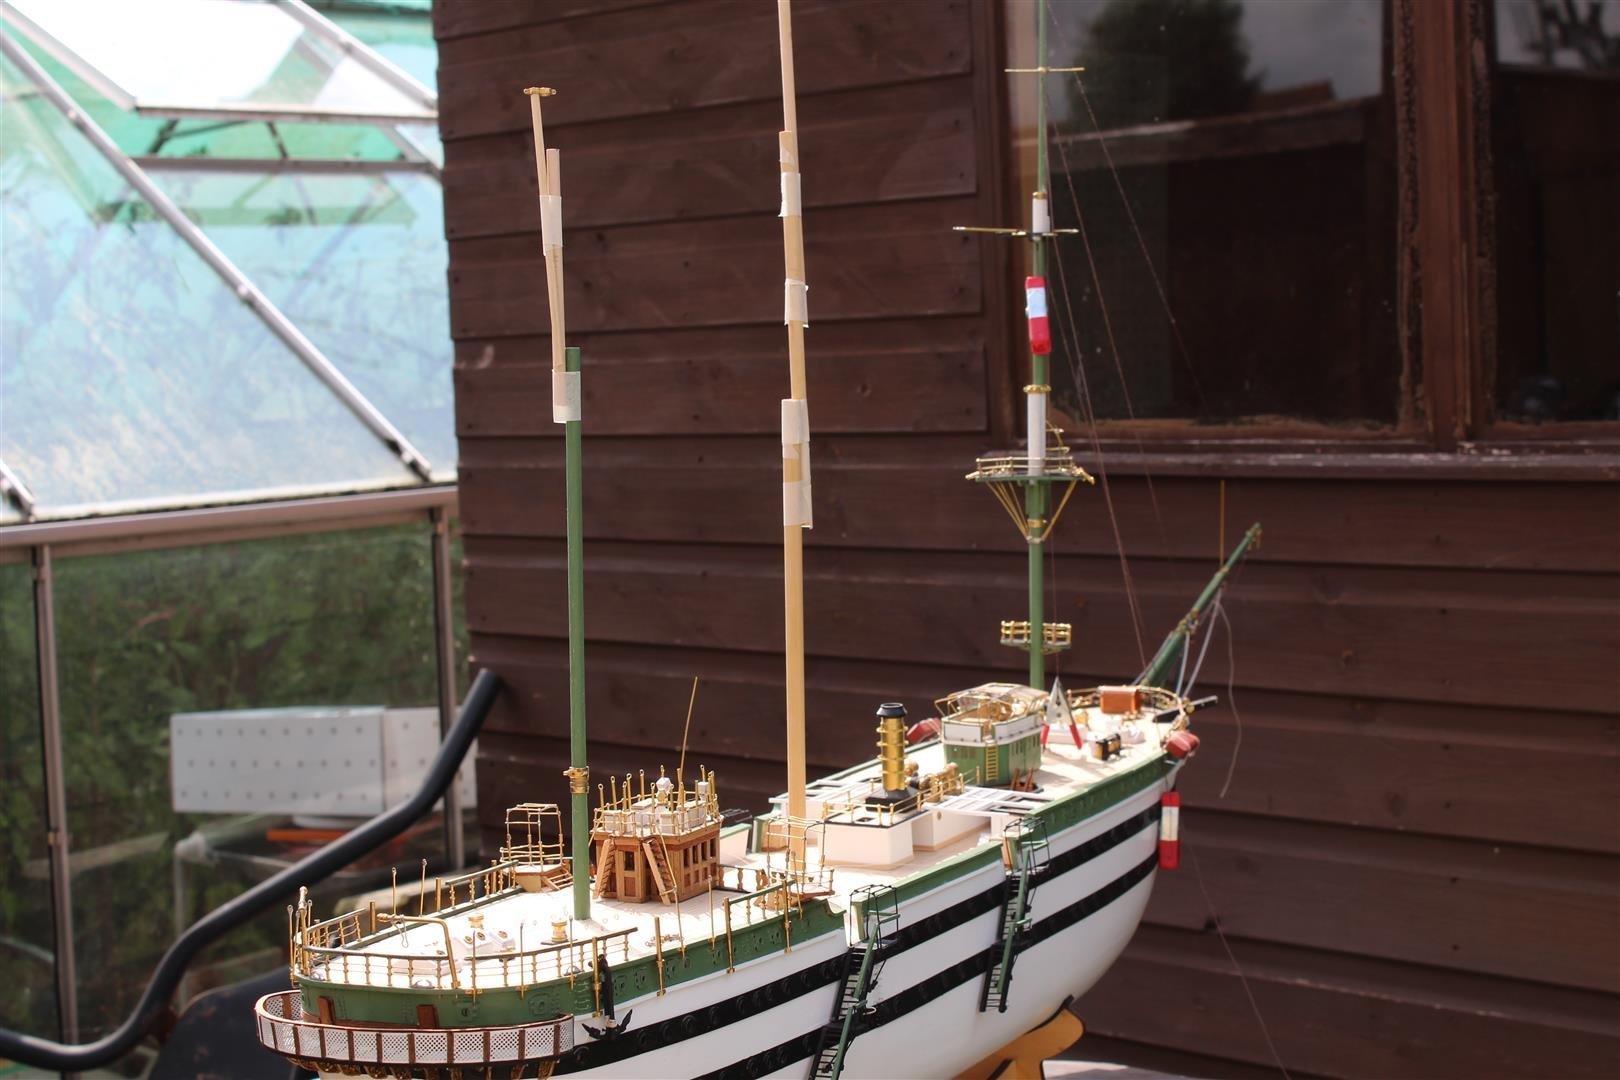
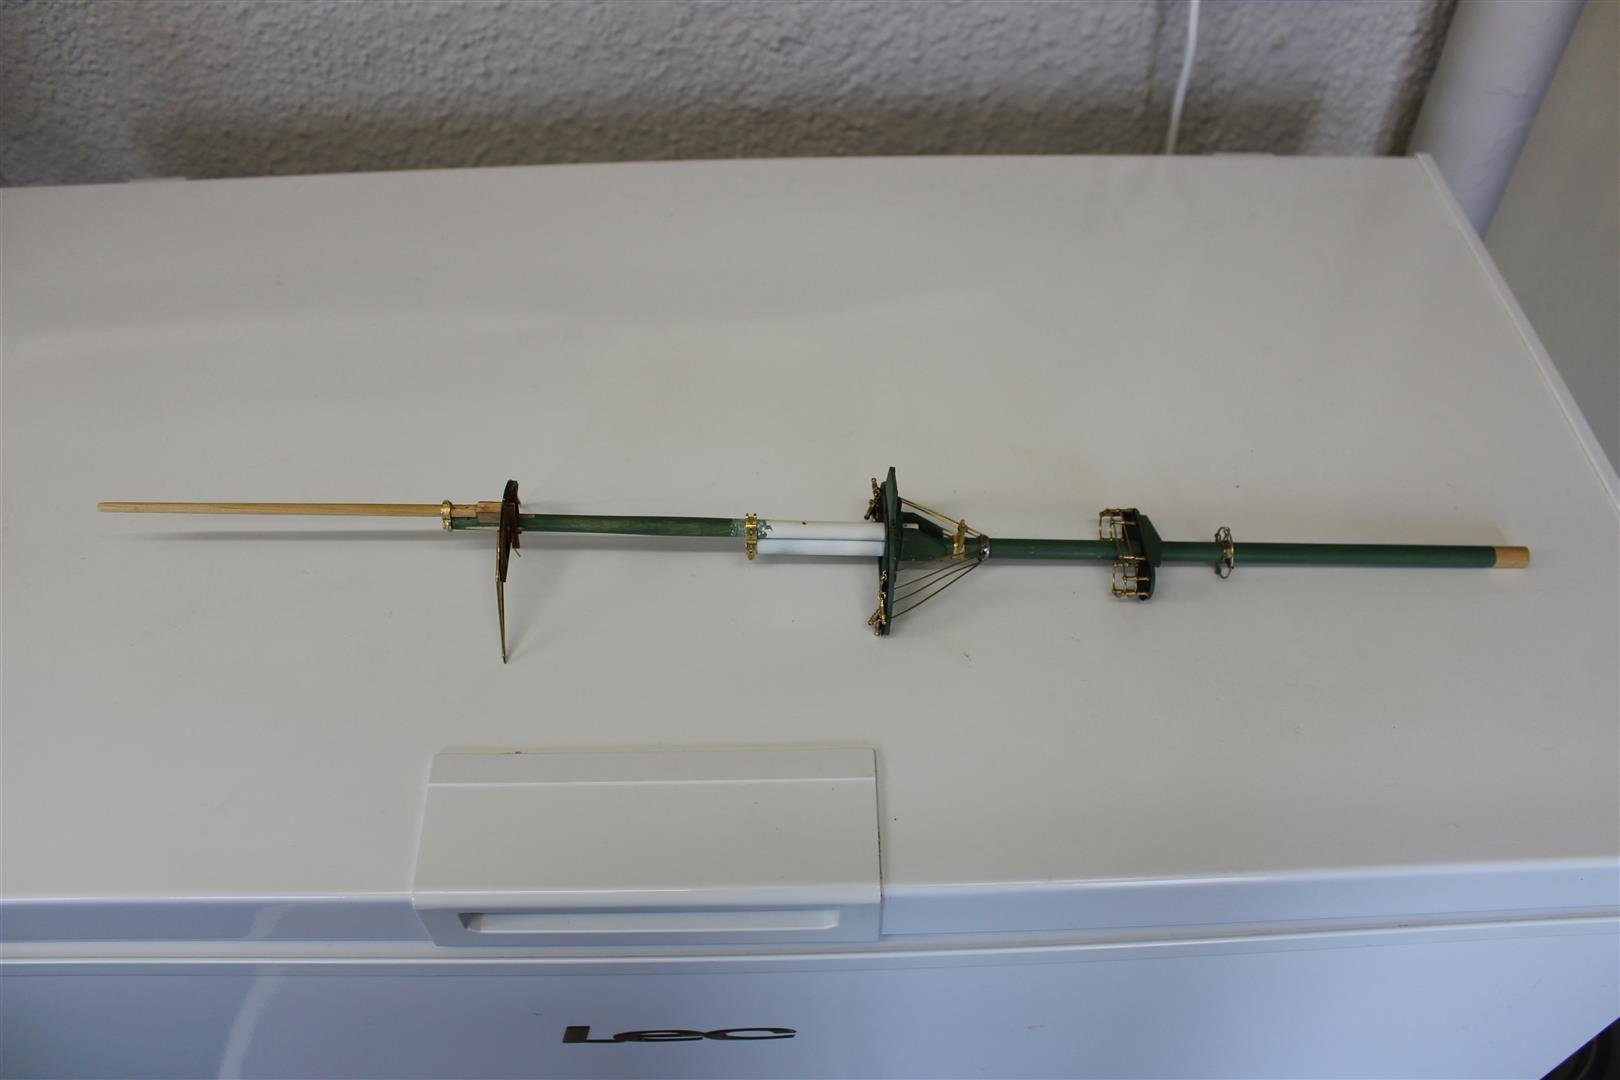
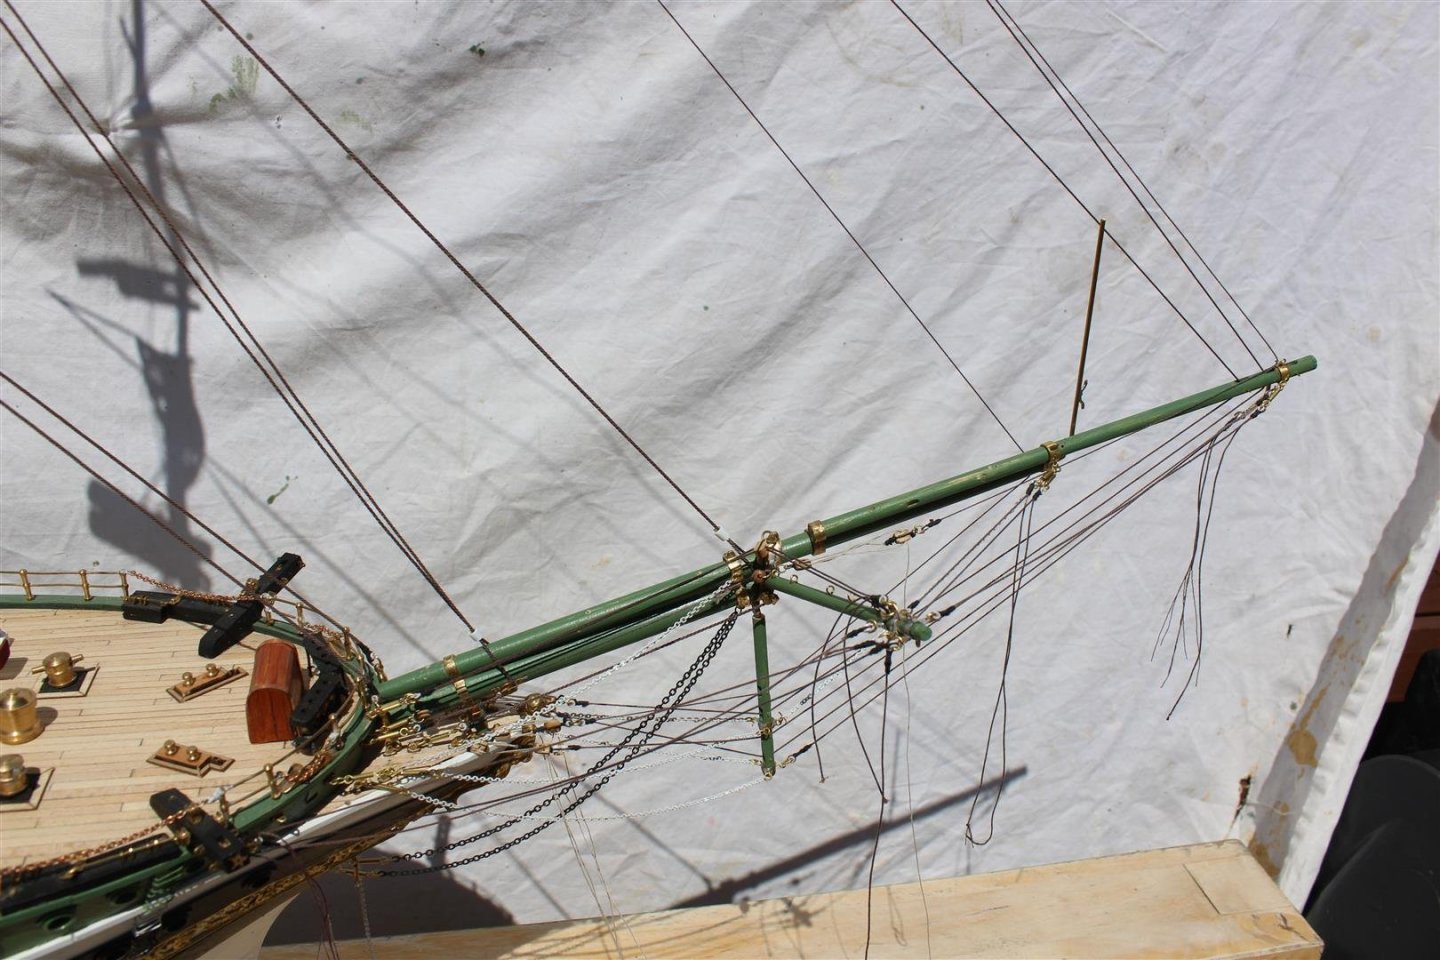
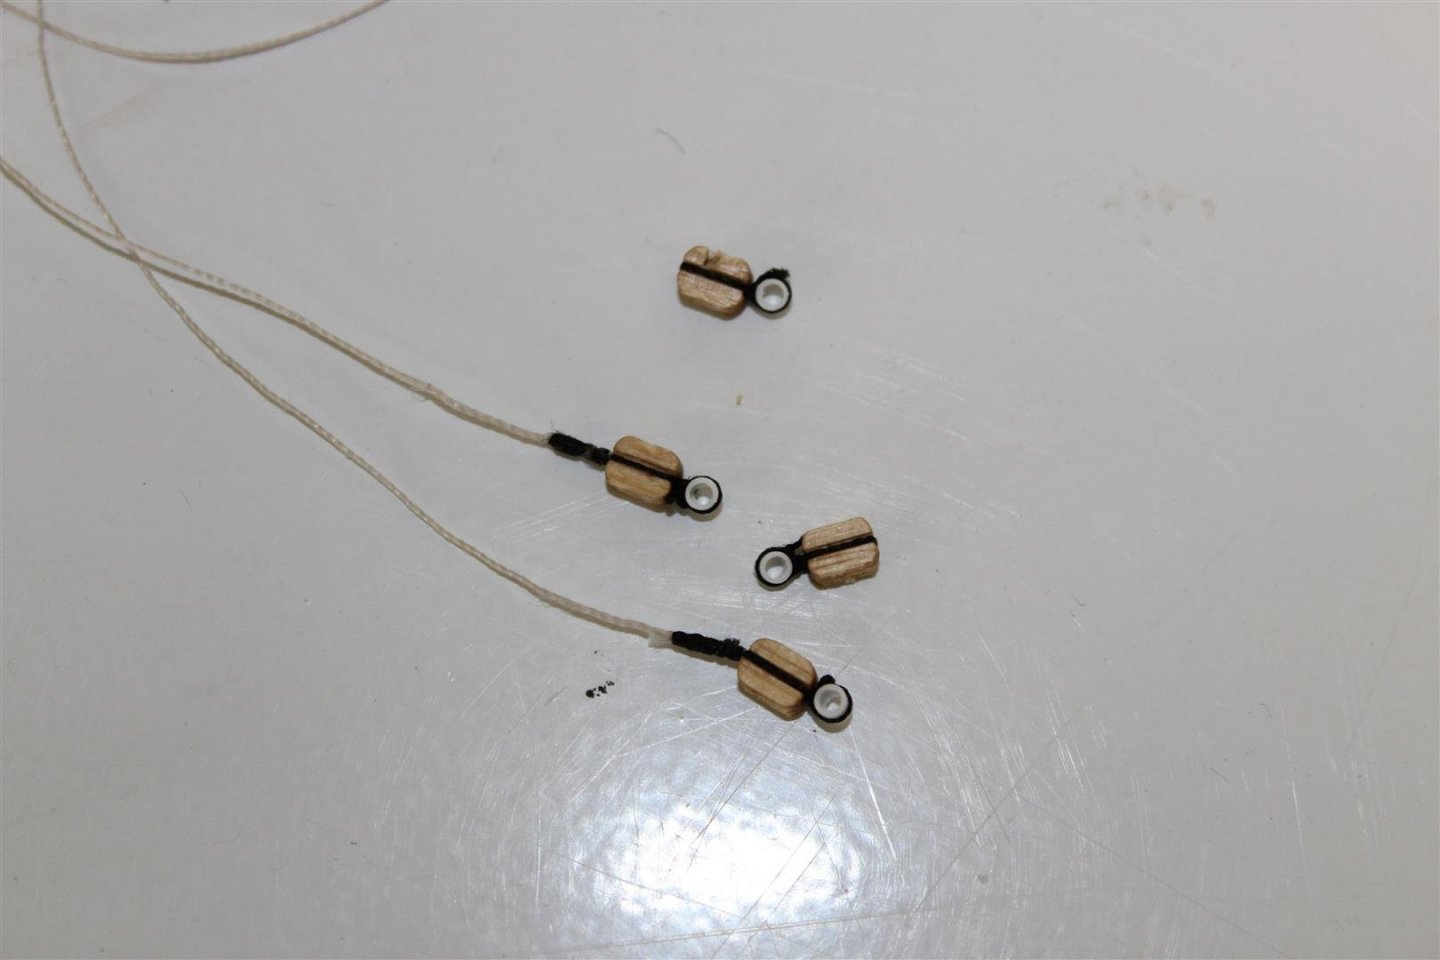
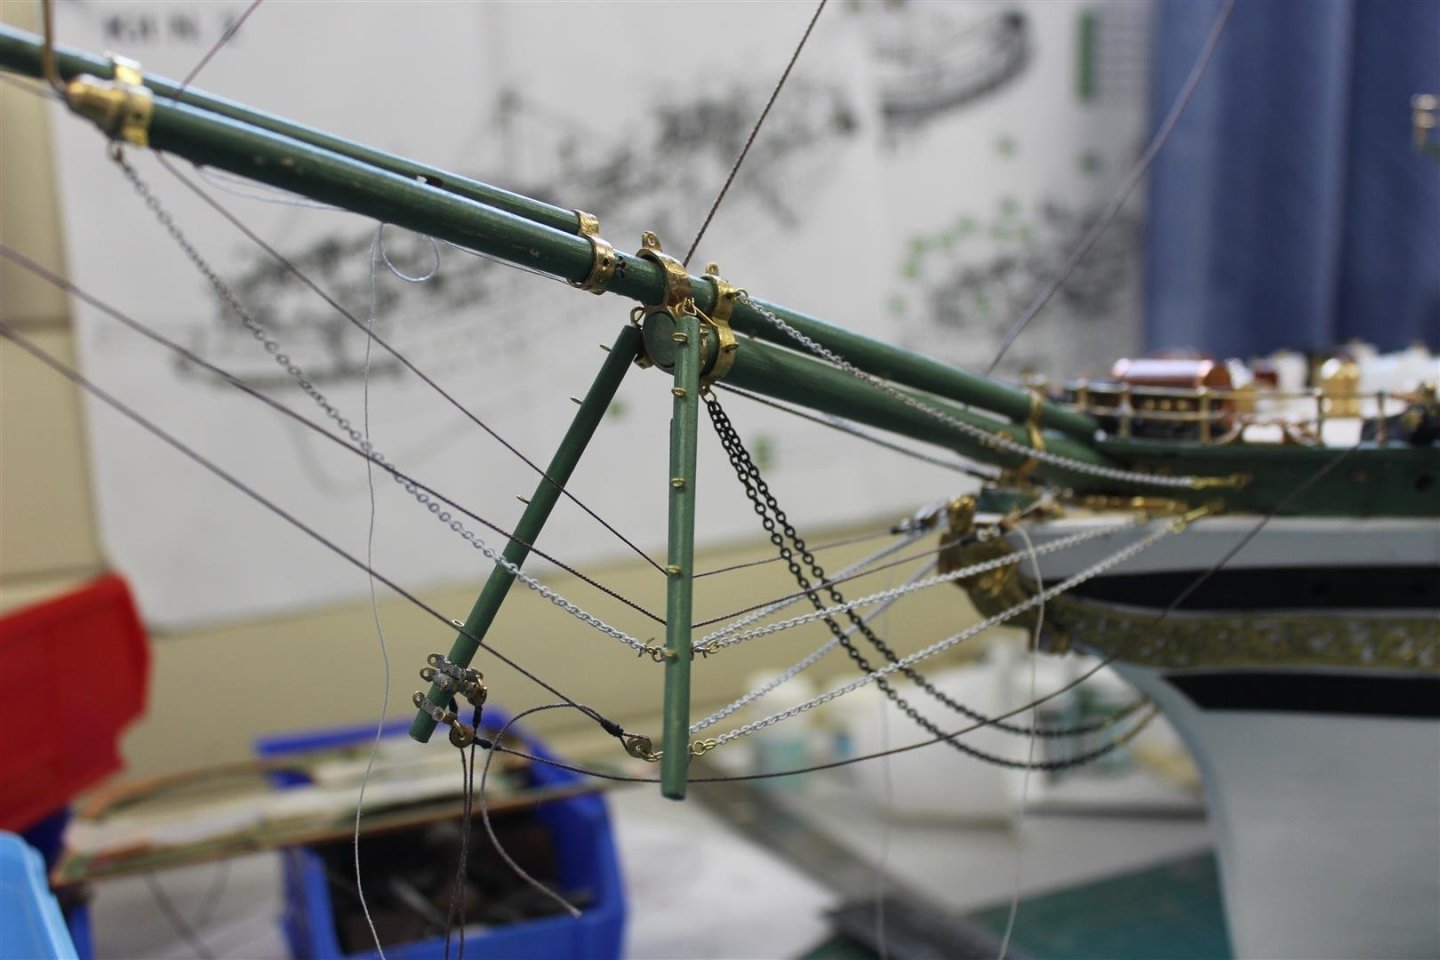
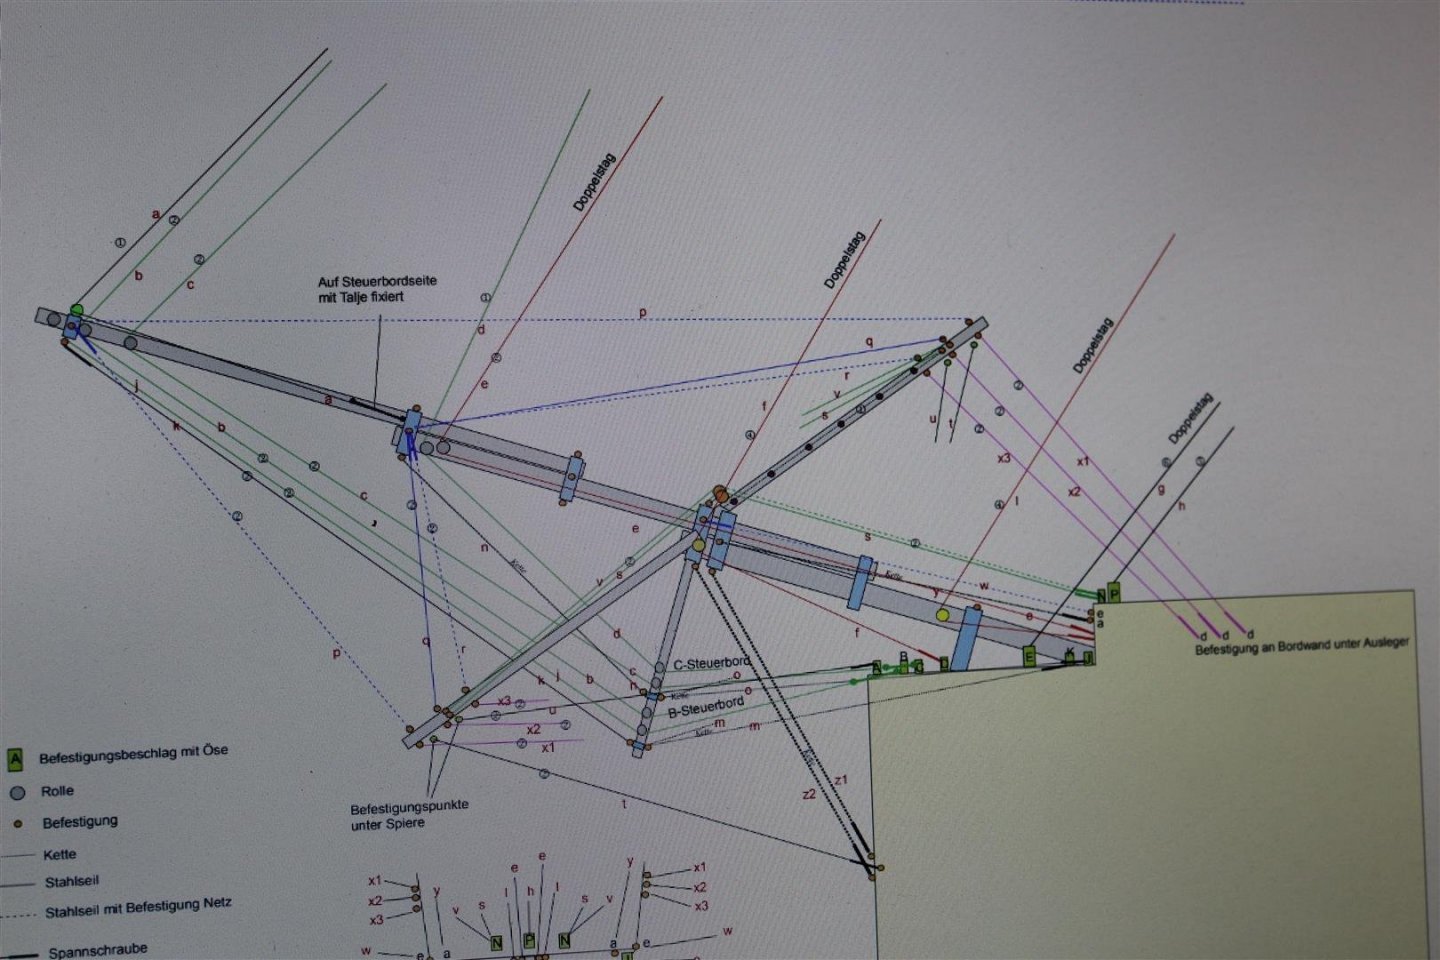
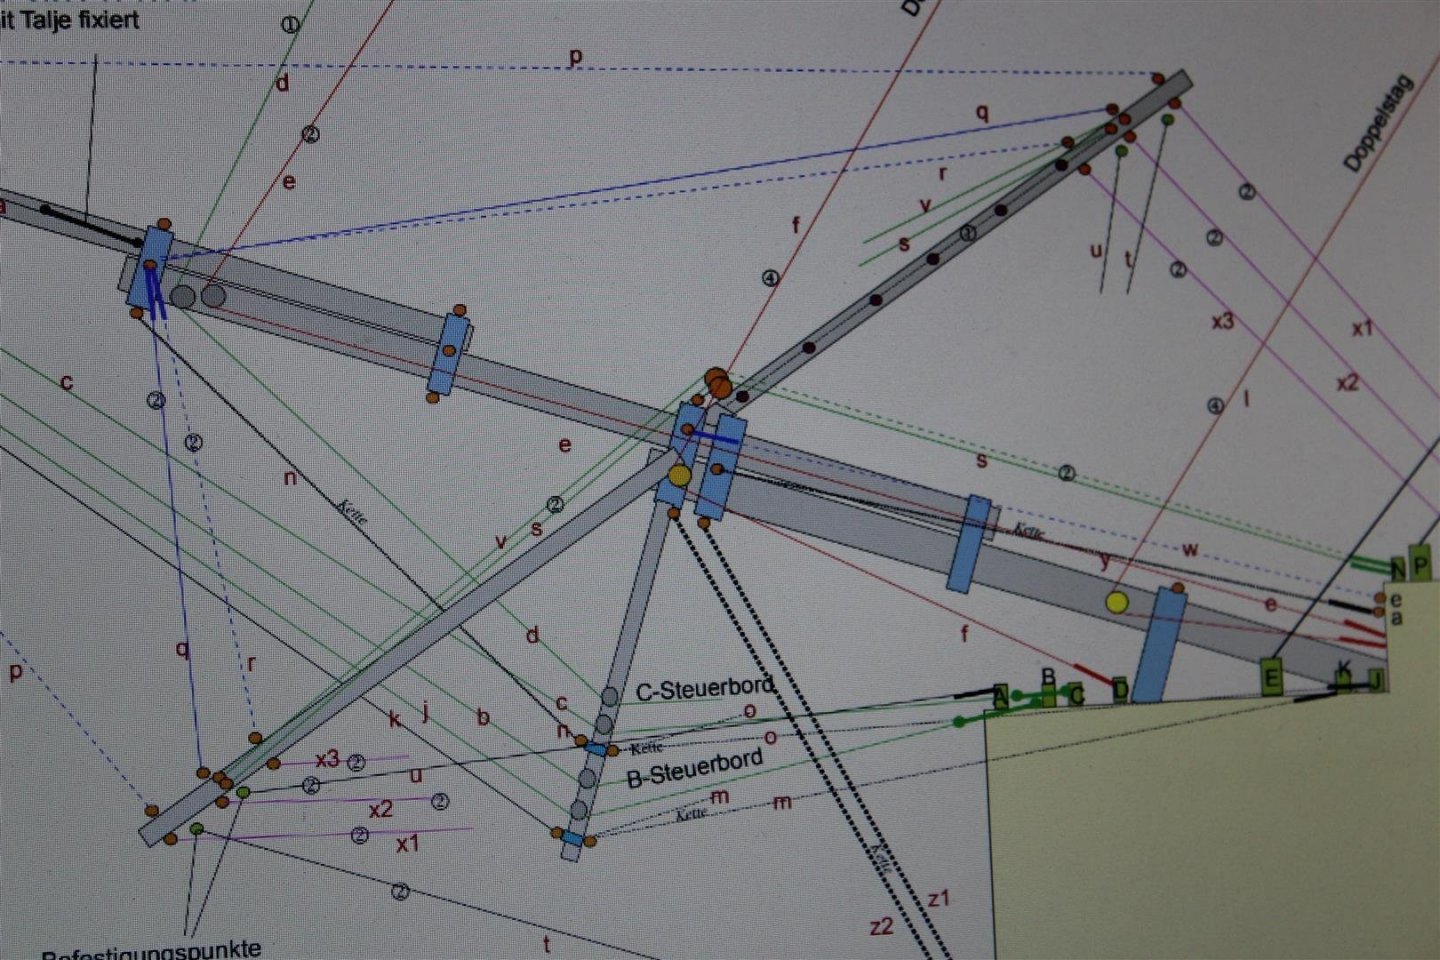
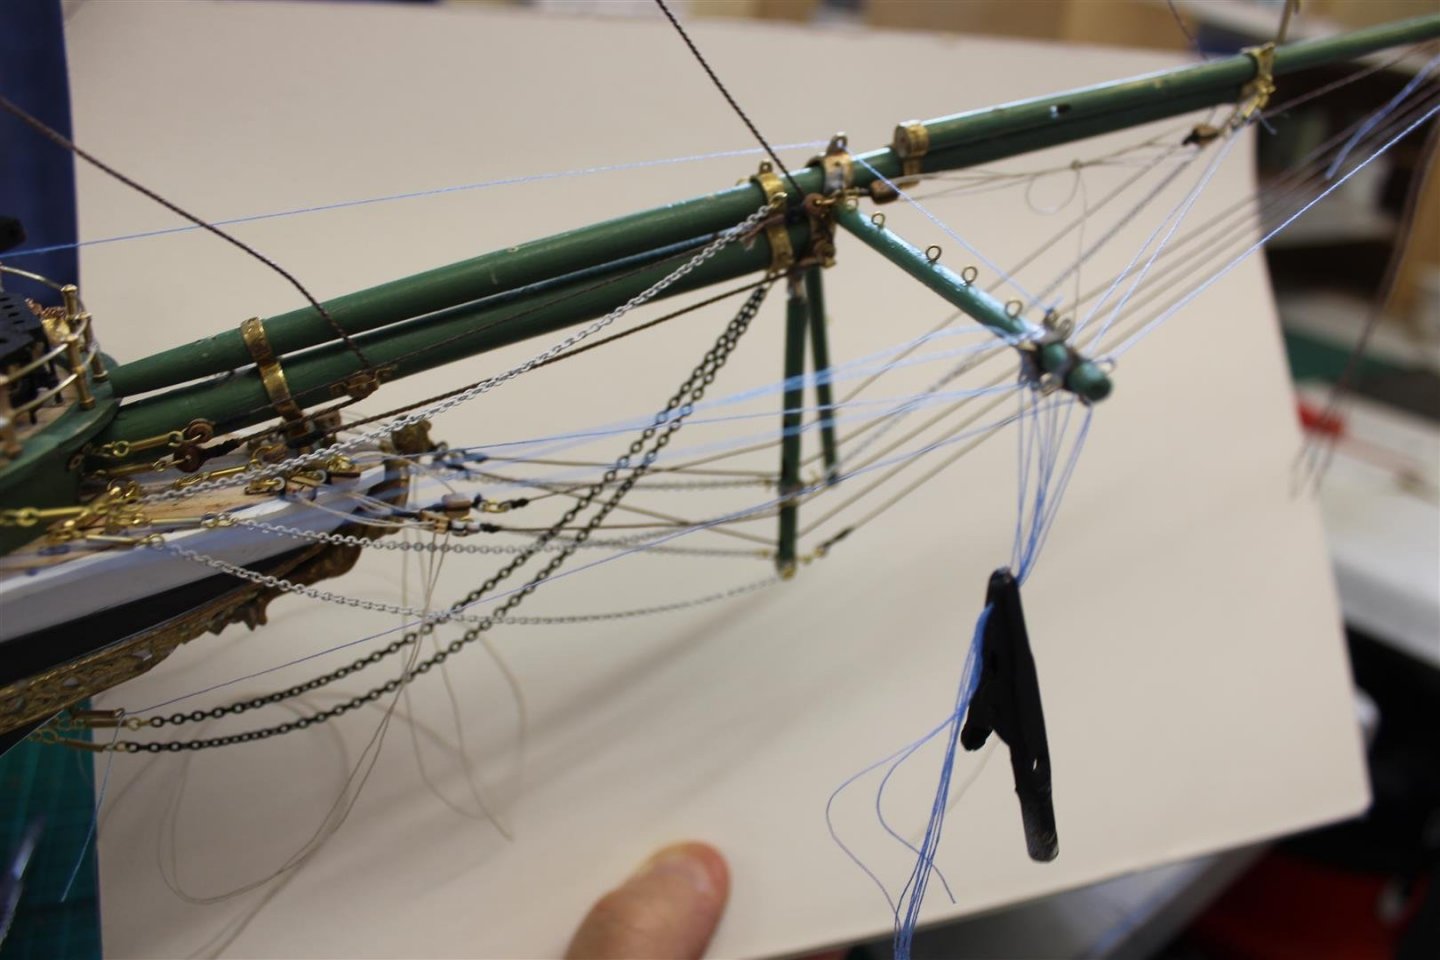
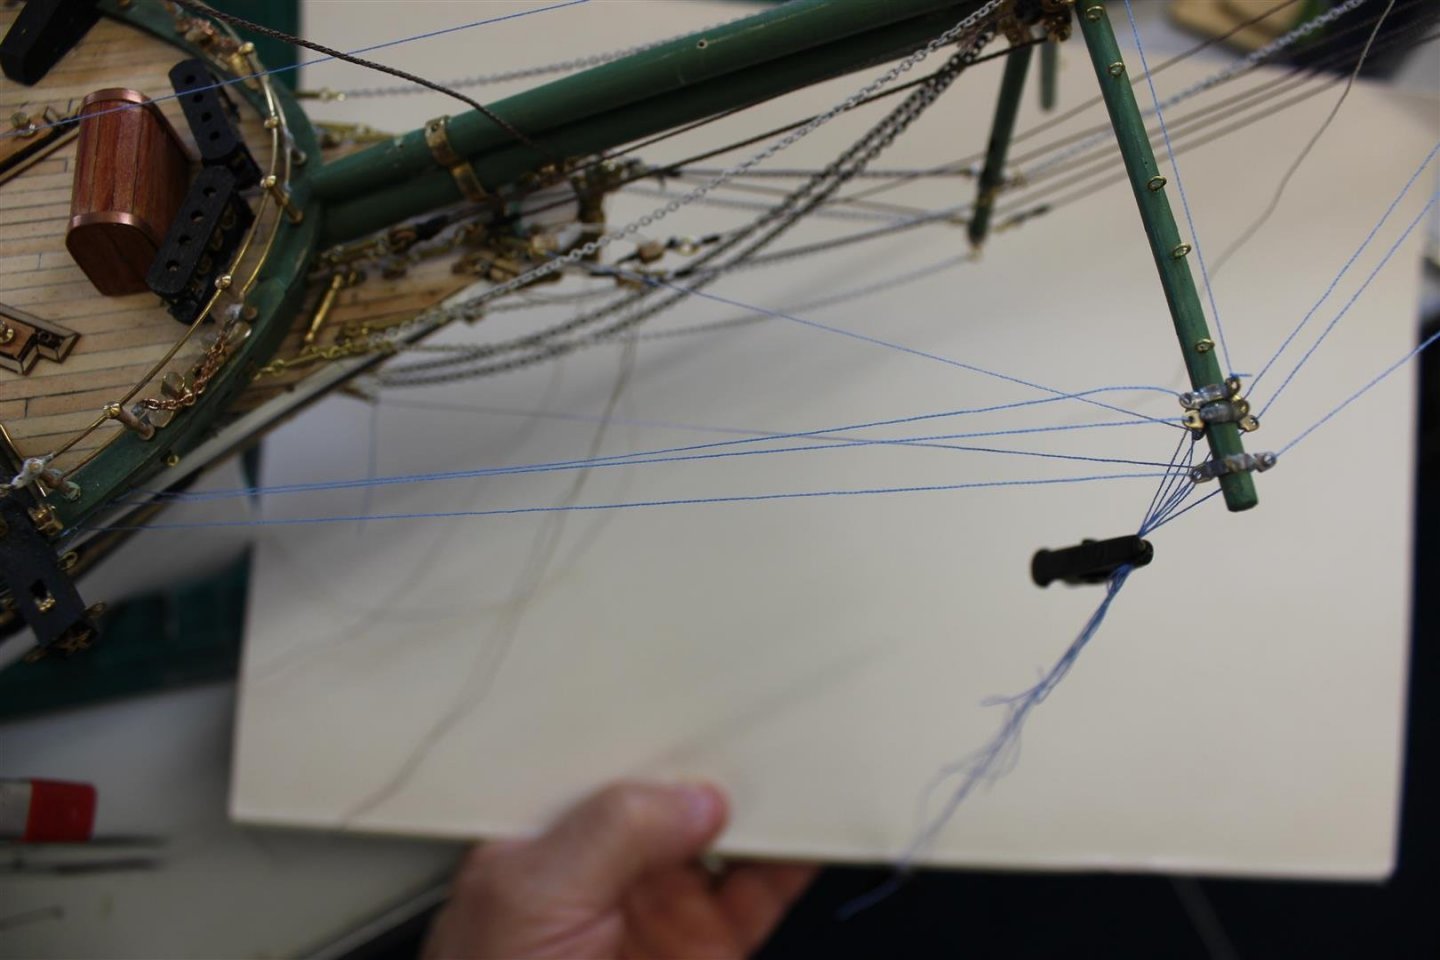
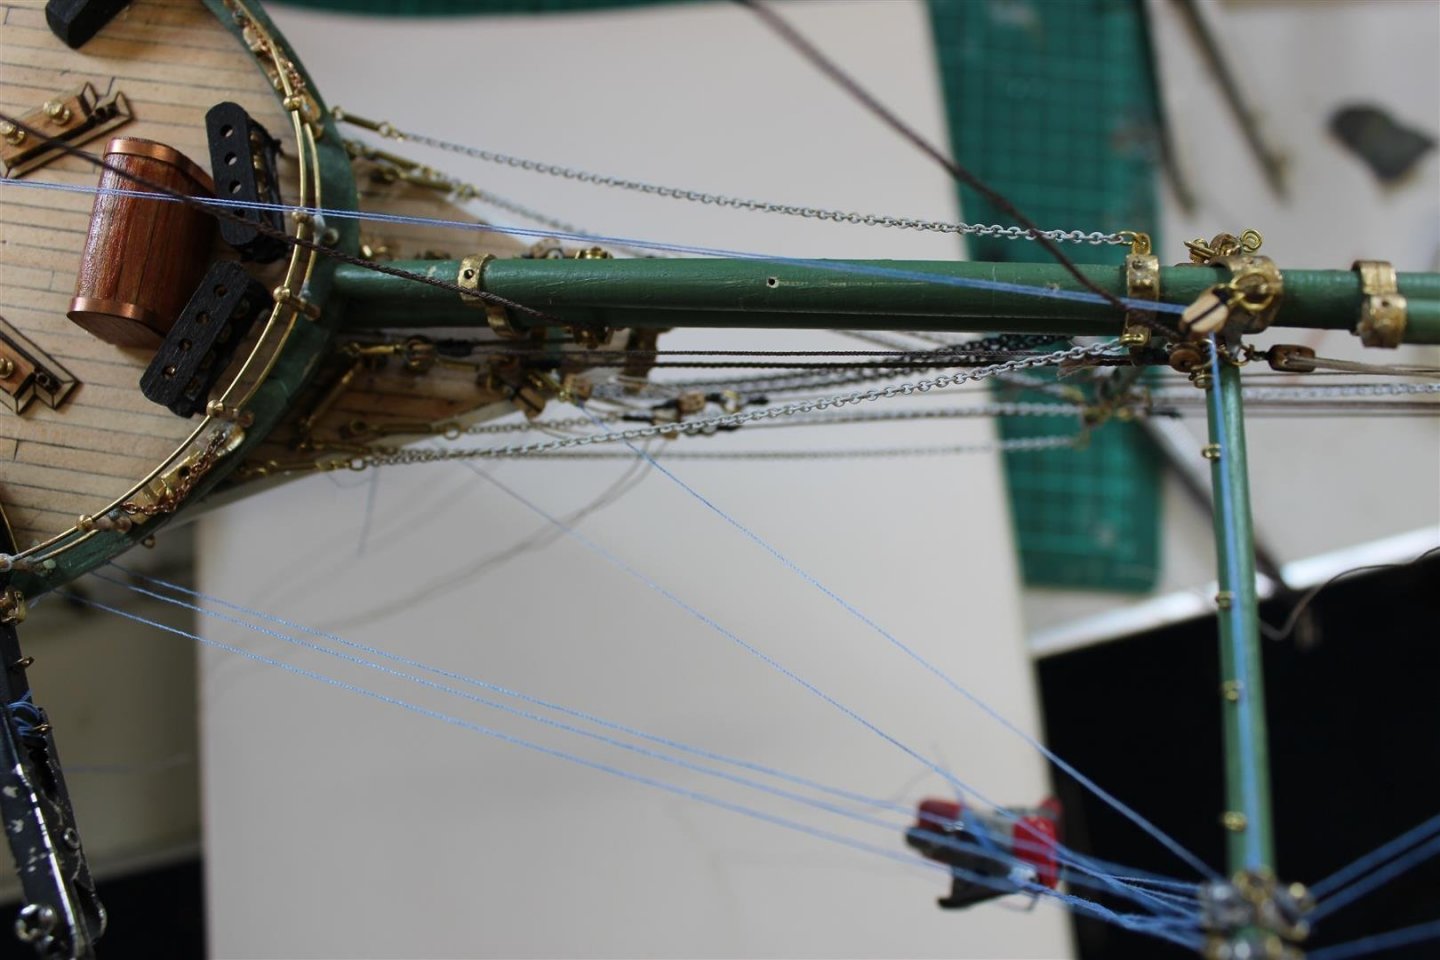
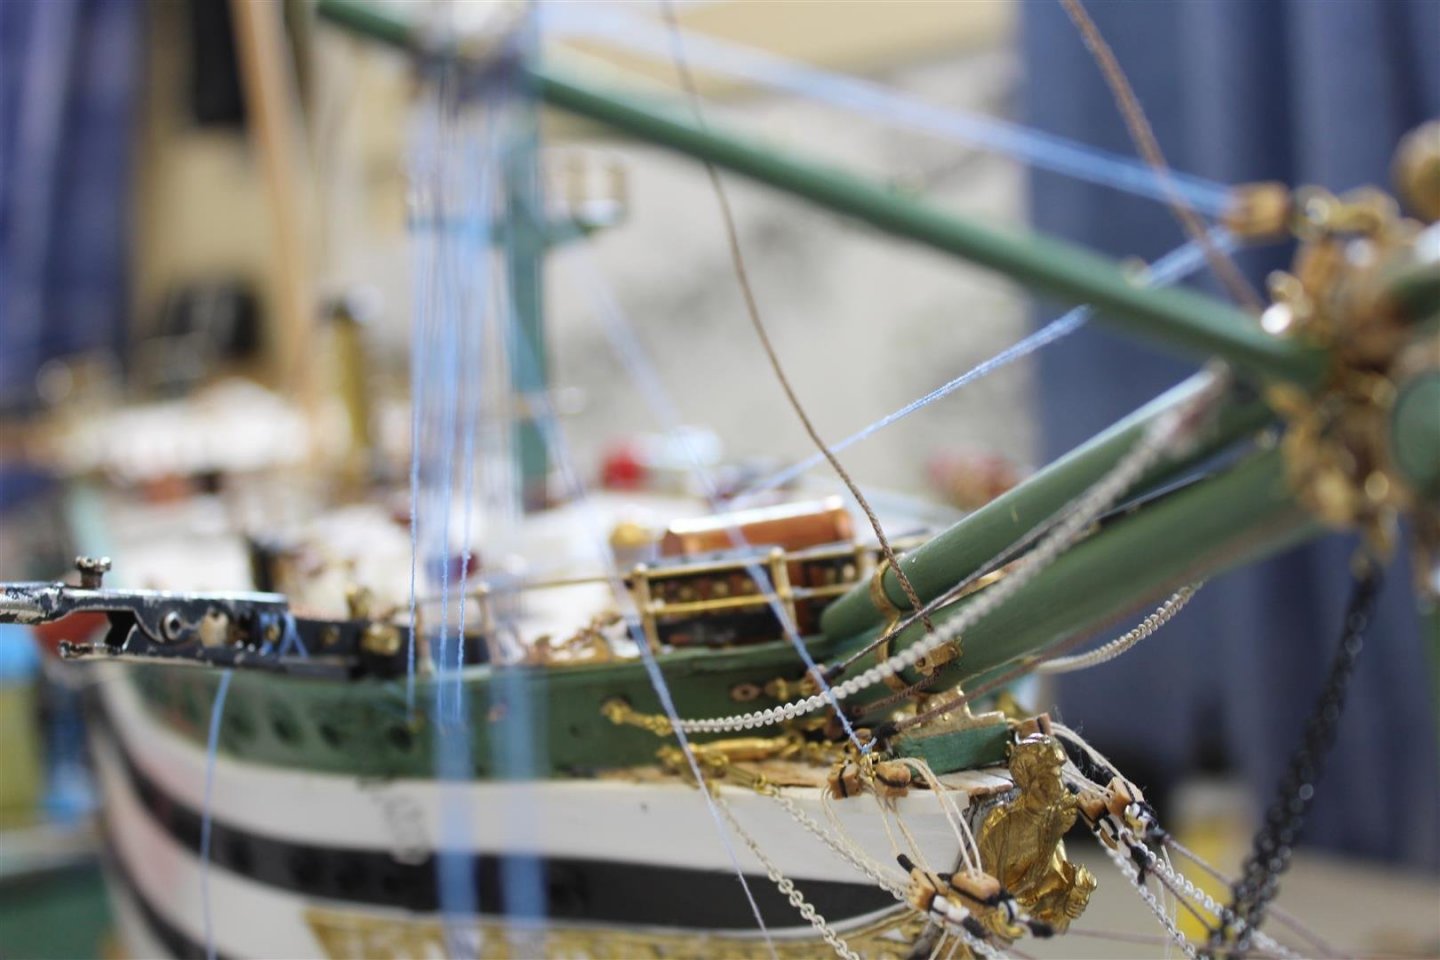
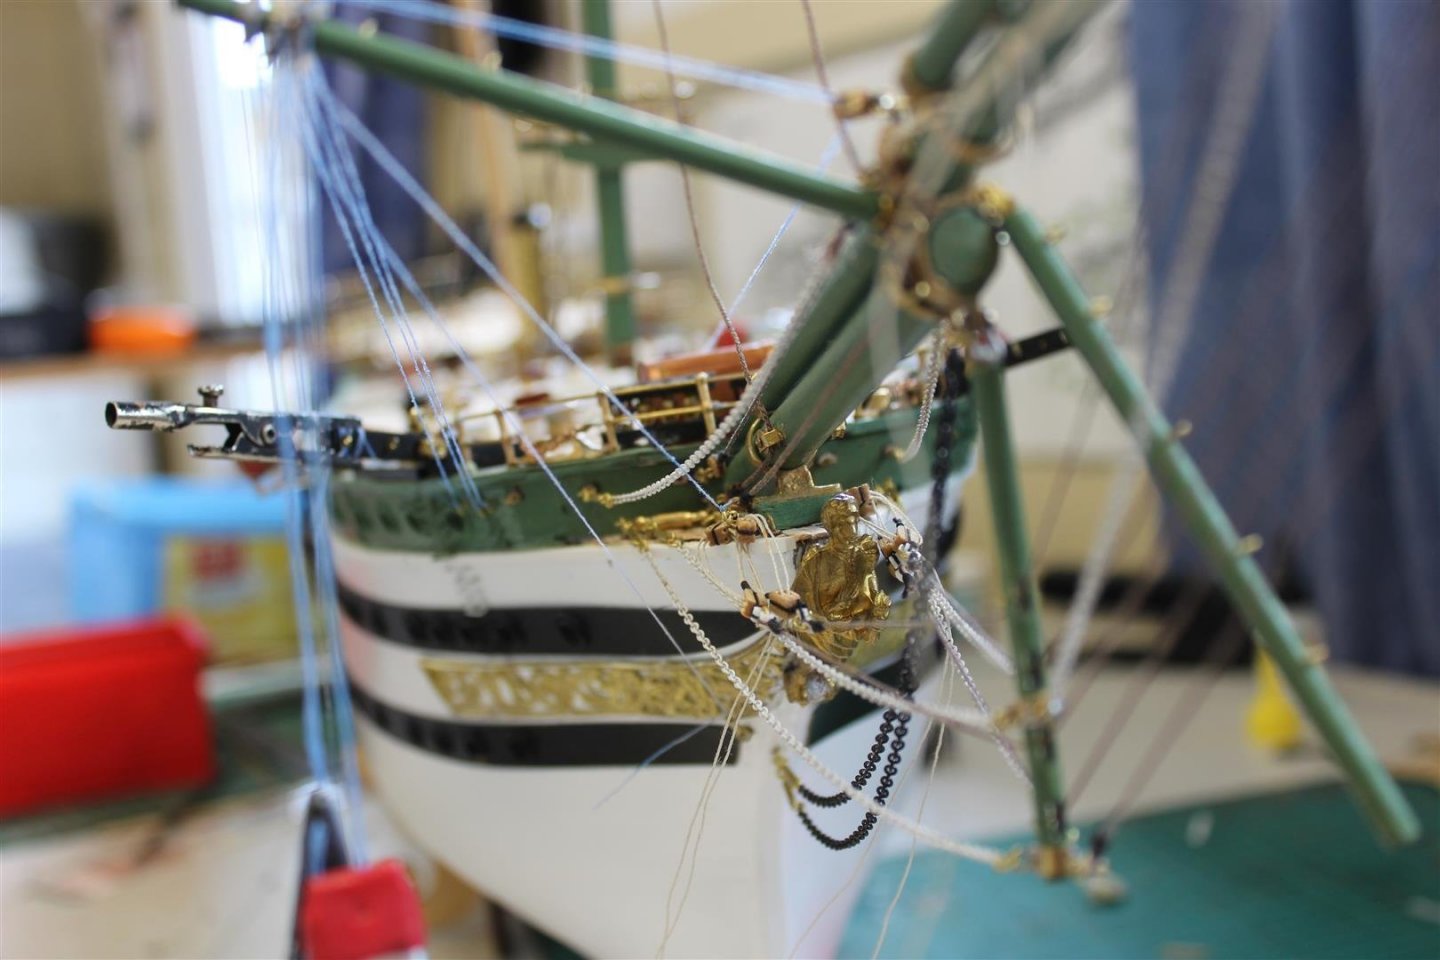
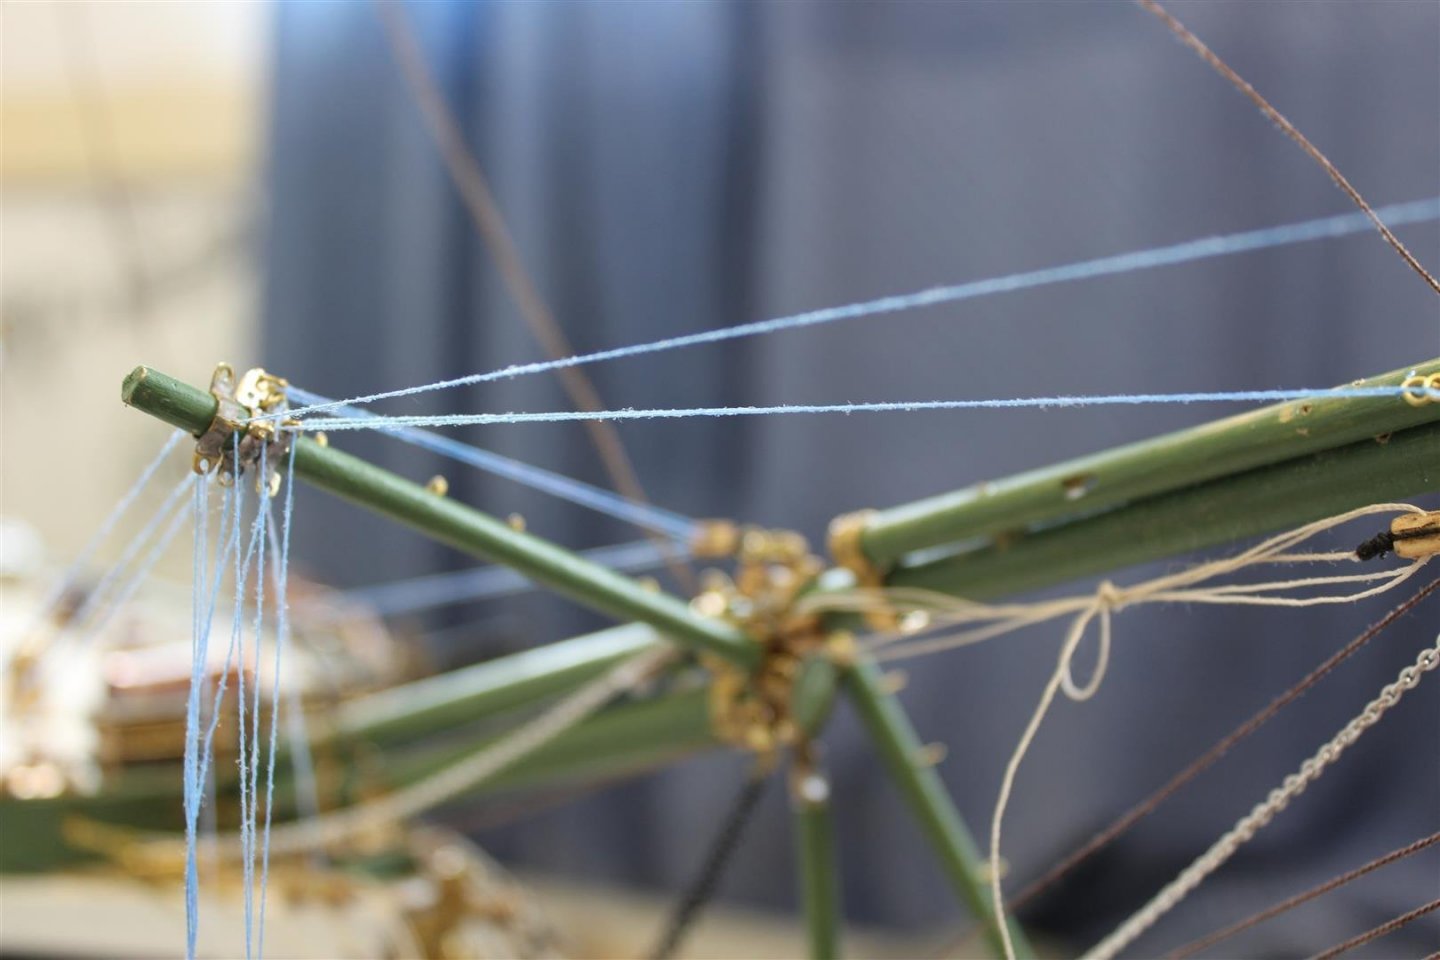
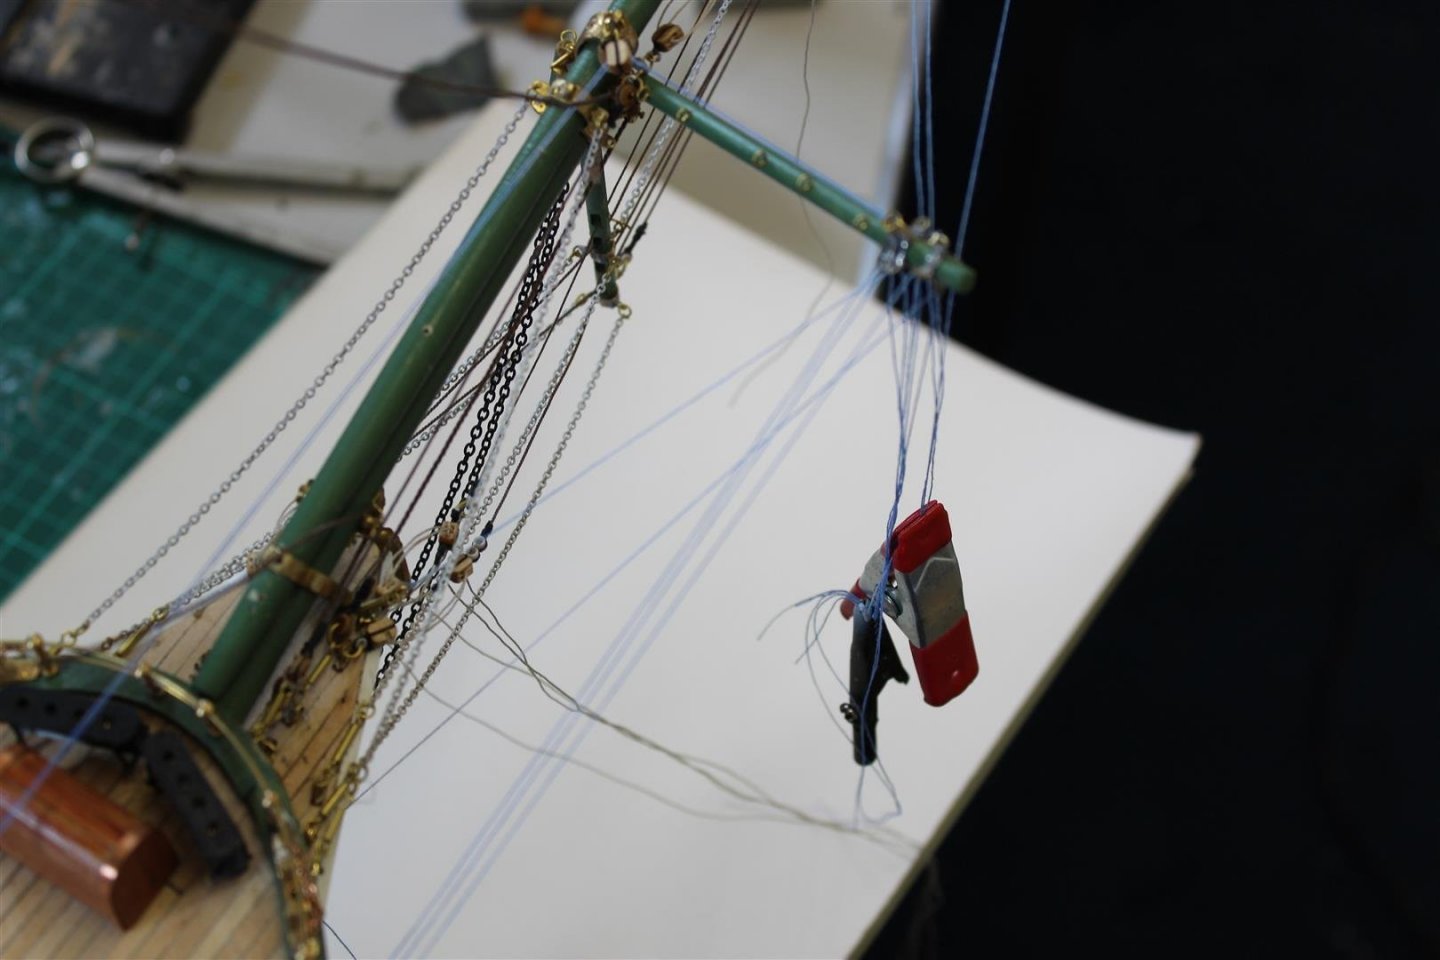
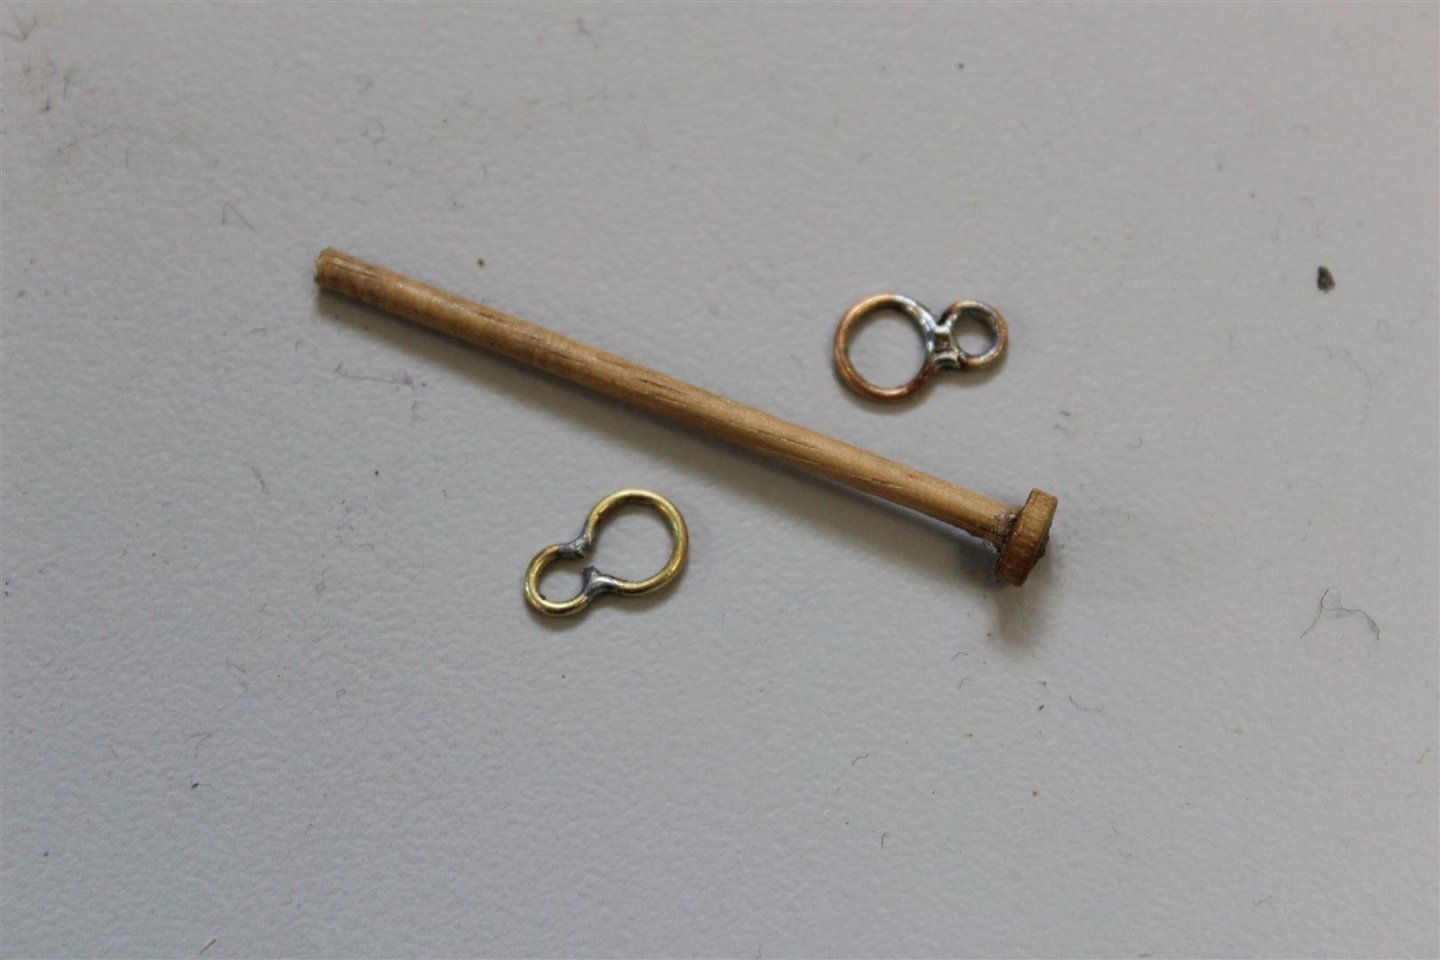
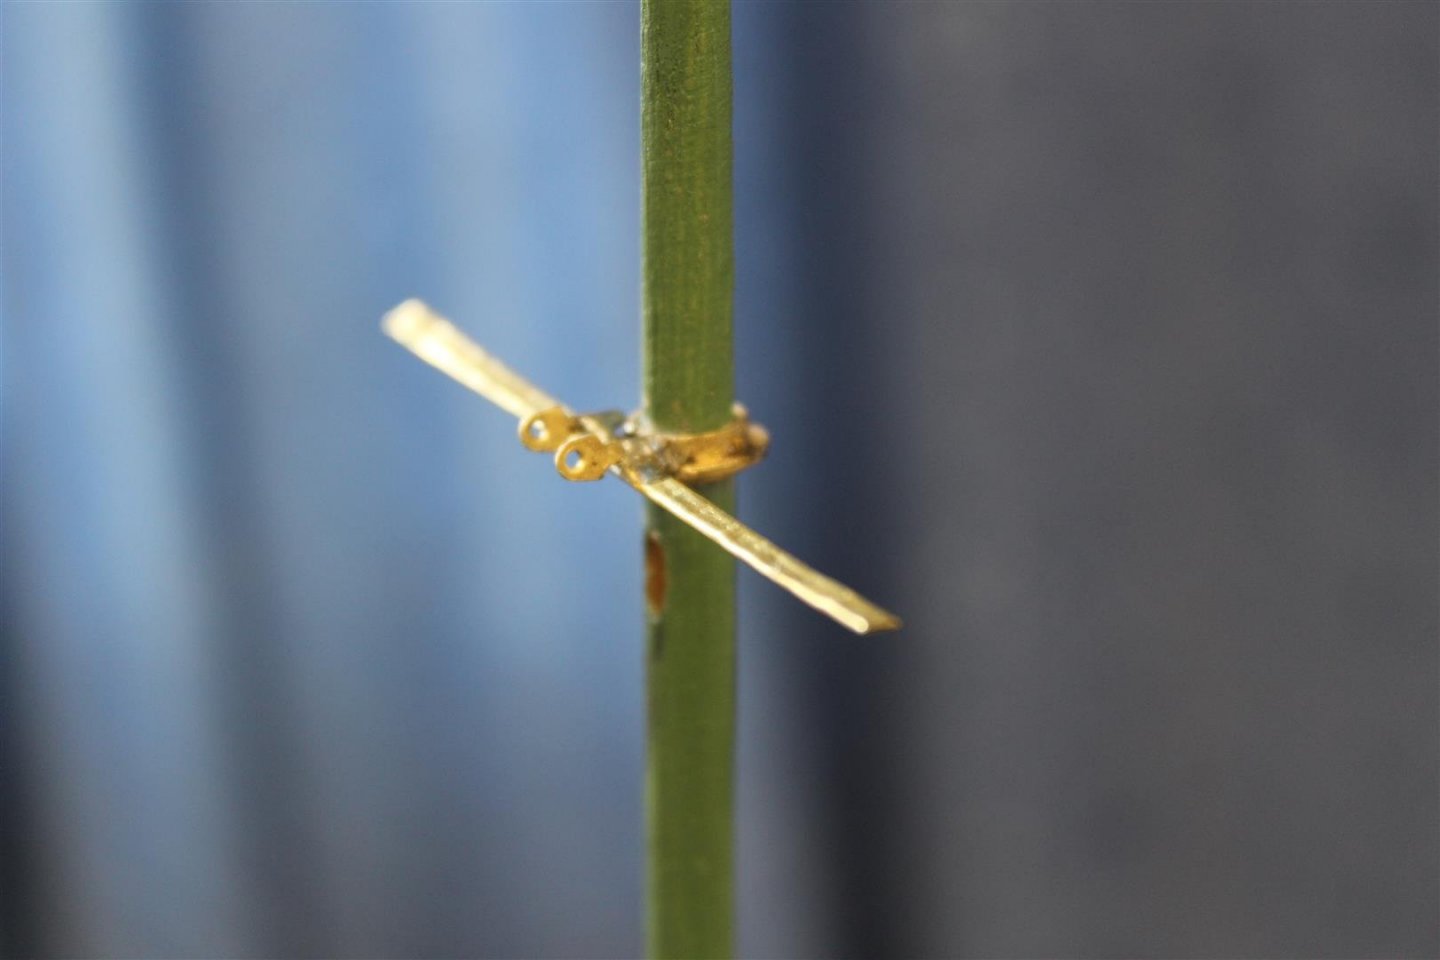
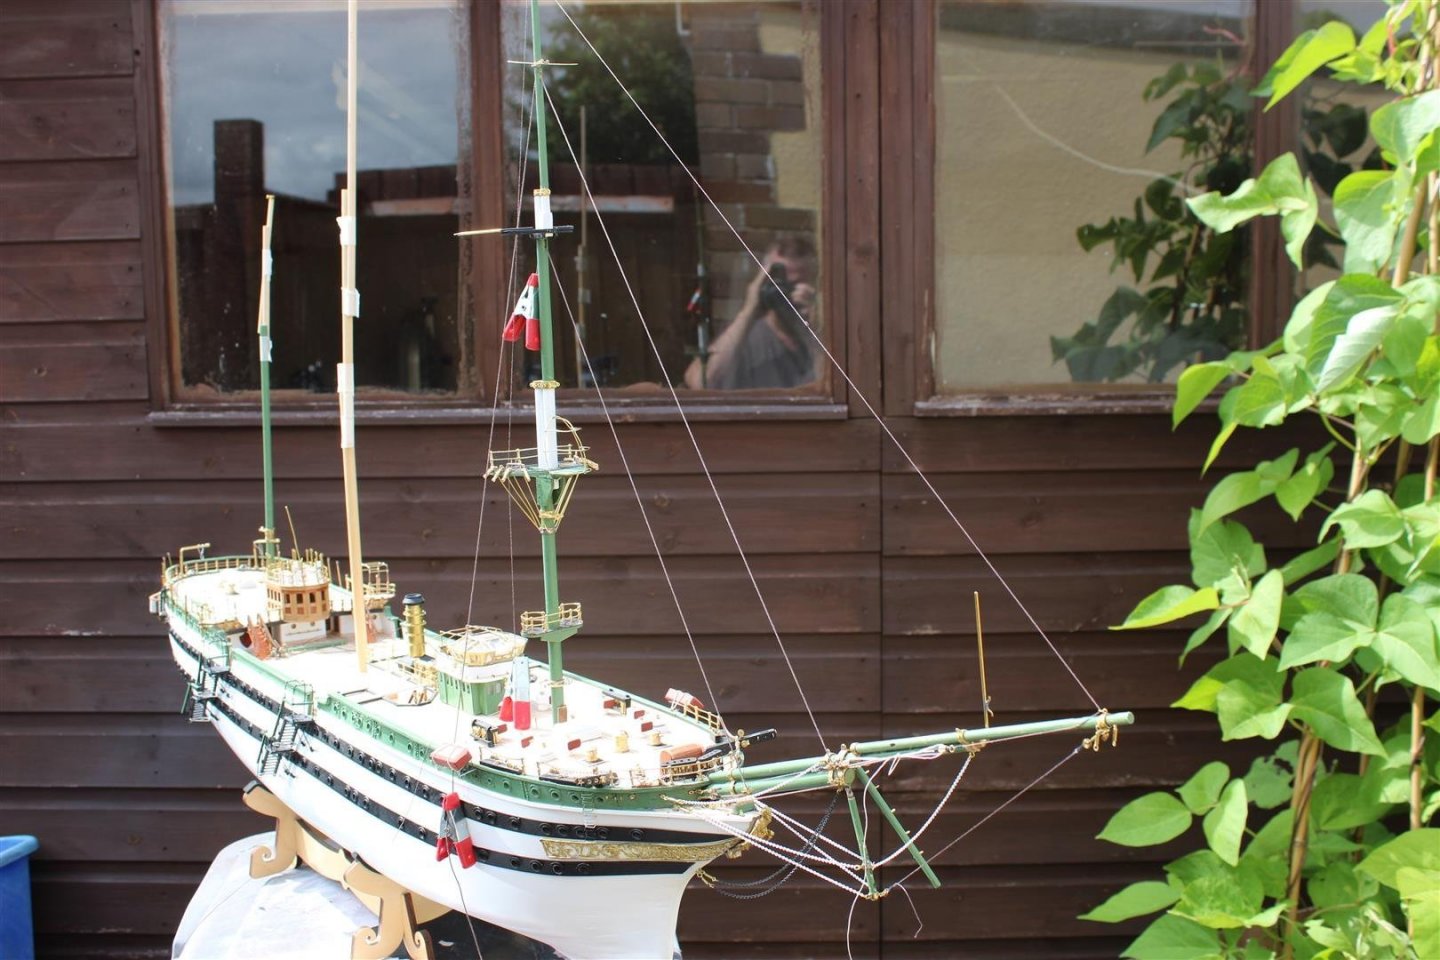
good afternoon everyone i decided to continue with the front end of the build and take the bowsprit towards completion, i might then move back onto the Enterprise, as some of the comments on here made me feel more confident towards taking her forward i had , what i thought was a good idea, but i guess it wasn't as no one else had tried it, that was to use a different coloured thread to use as templates to ensure everything was snag free, for that purpose it works fine, but to get a sense of what its going to look like (dont work) as it carries no weight all blocks that attach to pintles or none rope tend to have round collets, i have tried to replicate this using and alternative evergreen tube this is my bowsprit rigging plan, and bears absolutely no resemblance to the kit plans, to tells me the size of rope and where it is belayed/ fixed to start of my coloured thread experiment to get a snag free runs some lines go to the same fixing point, so i am having to adapt my work (lol again) not a briiliant photo as the collets have bunched up up the middle one has to fixing point on the top


- 273 replies
-
- 9
-
-
- panart
- amerigo vespucci
- (and 1 more)
-
Good morning OC, coming along so very nicely, going to look stunning when finished
-
once printing has started, can it be paused, or switched off over night?
- 321 replies
-
- 5
-
-
- Finished
- Flower-class
- (and 1 more)
-
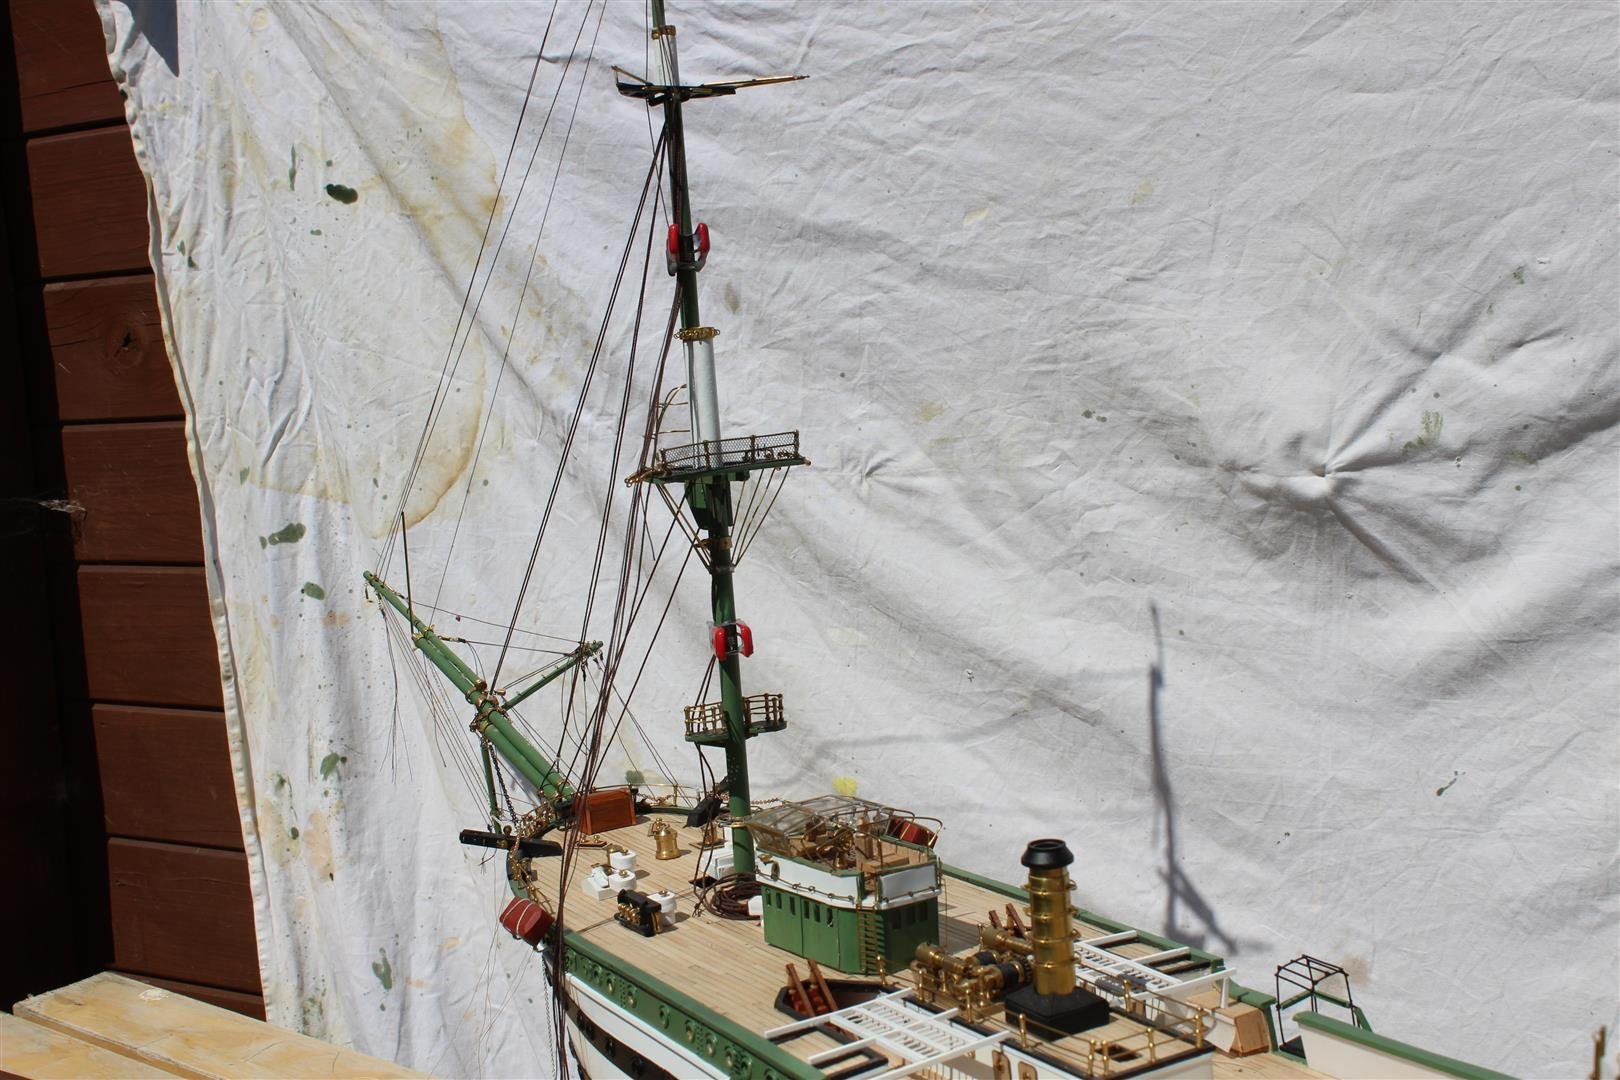
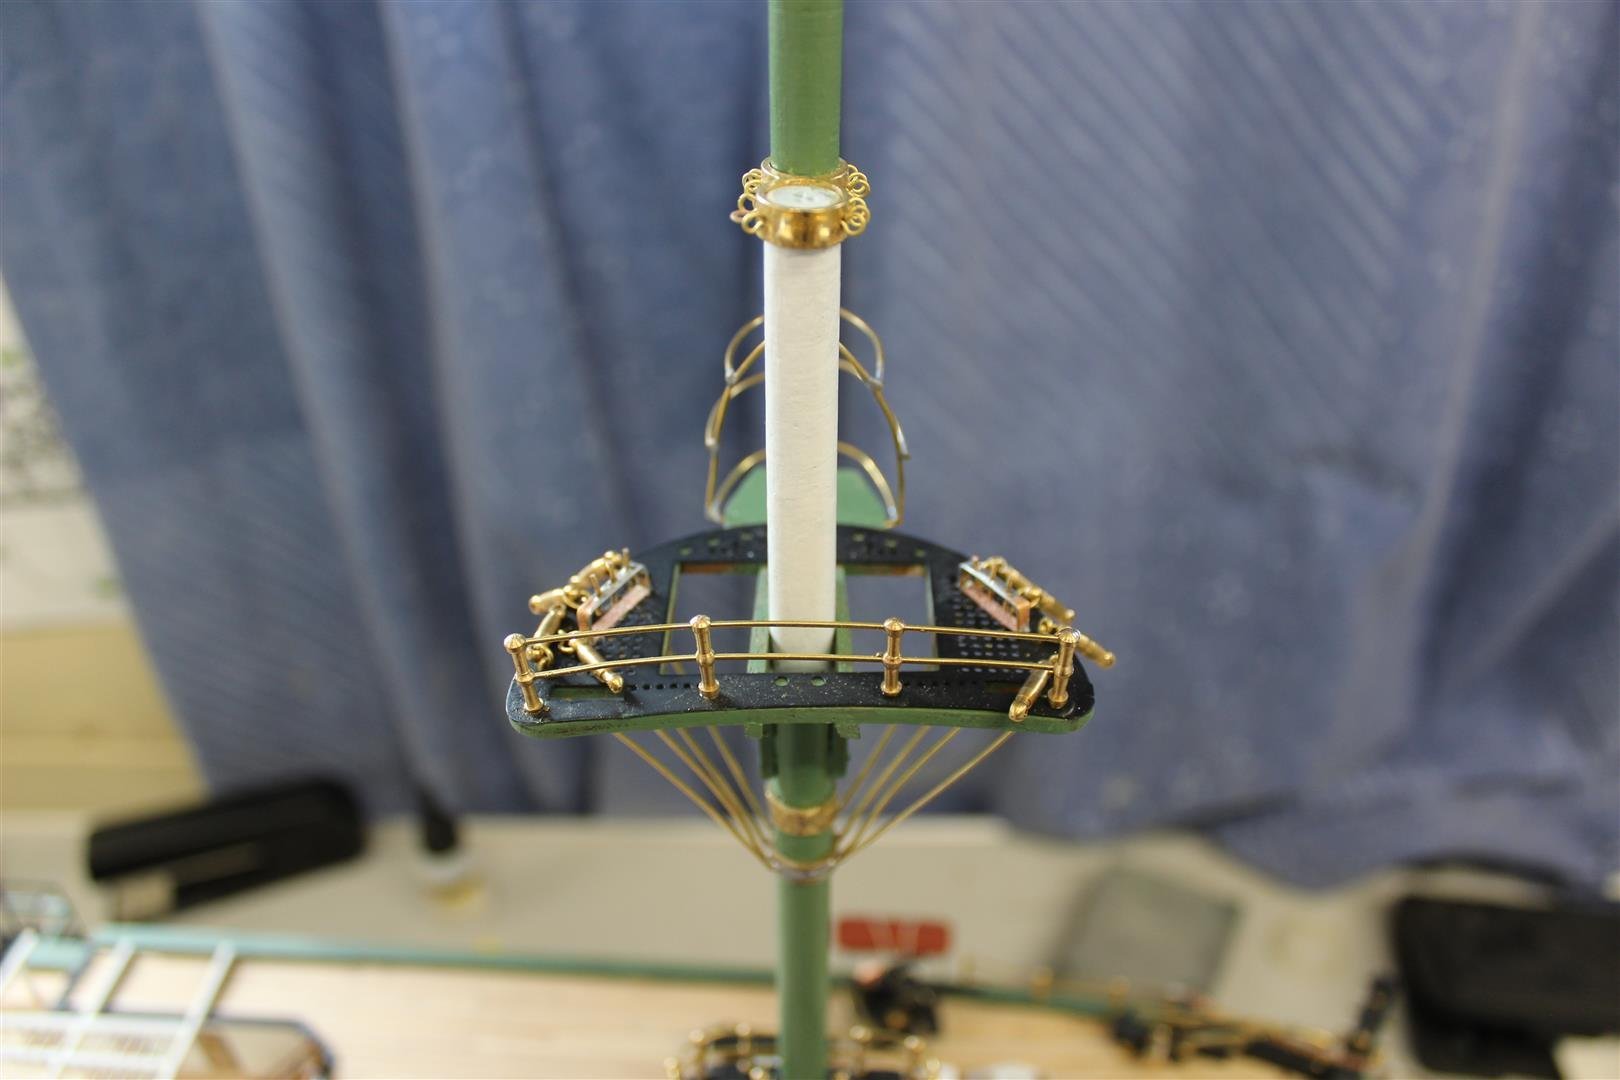
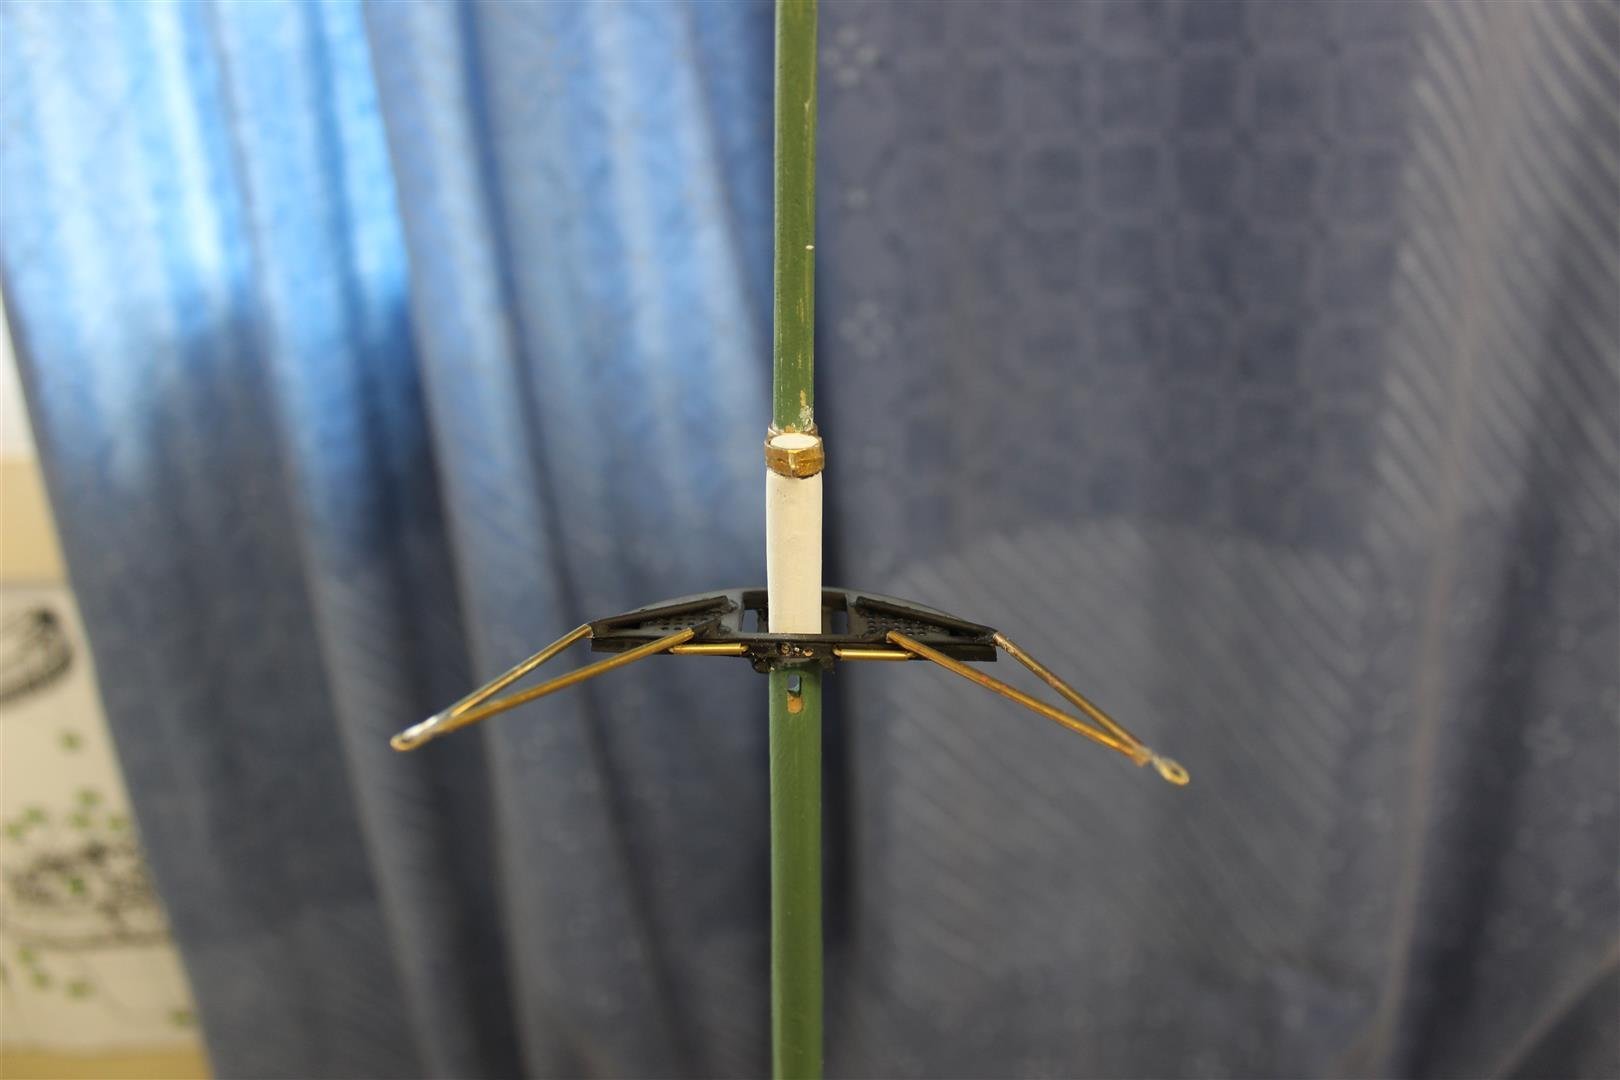
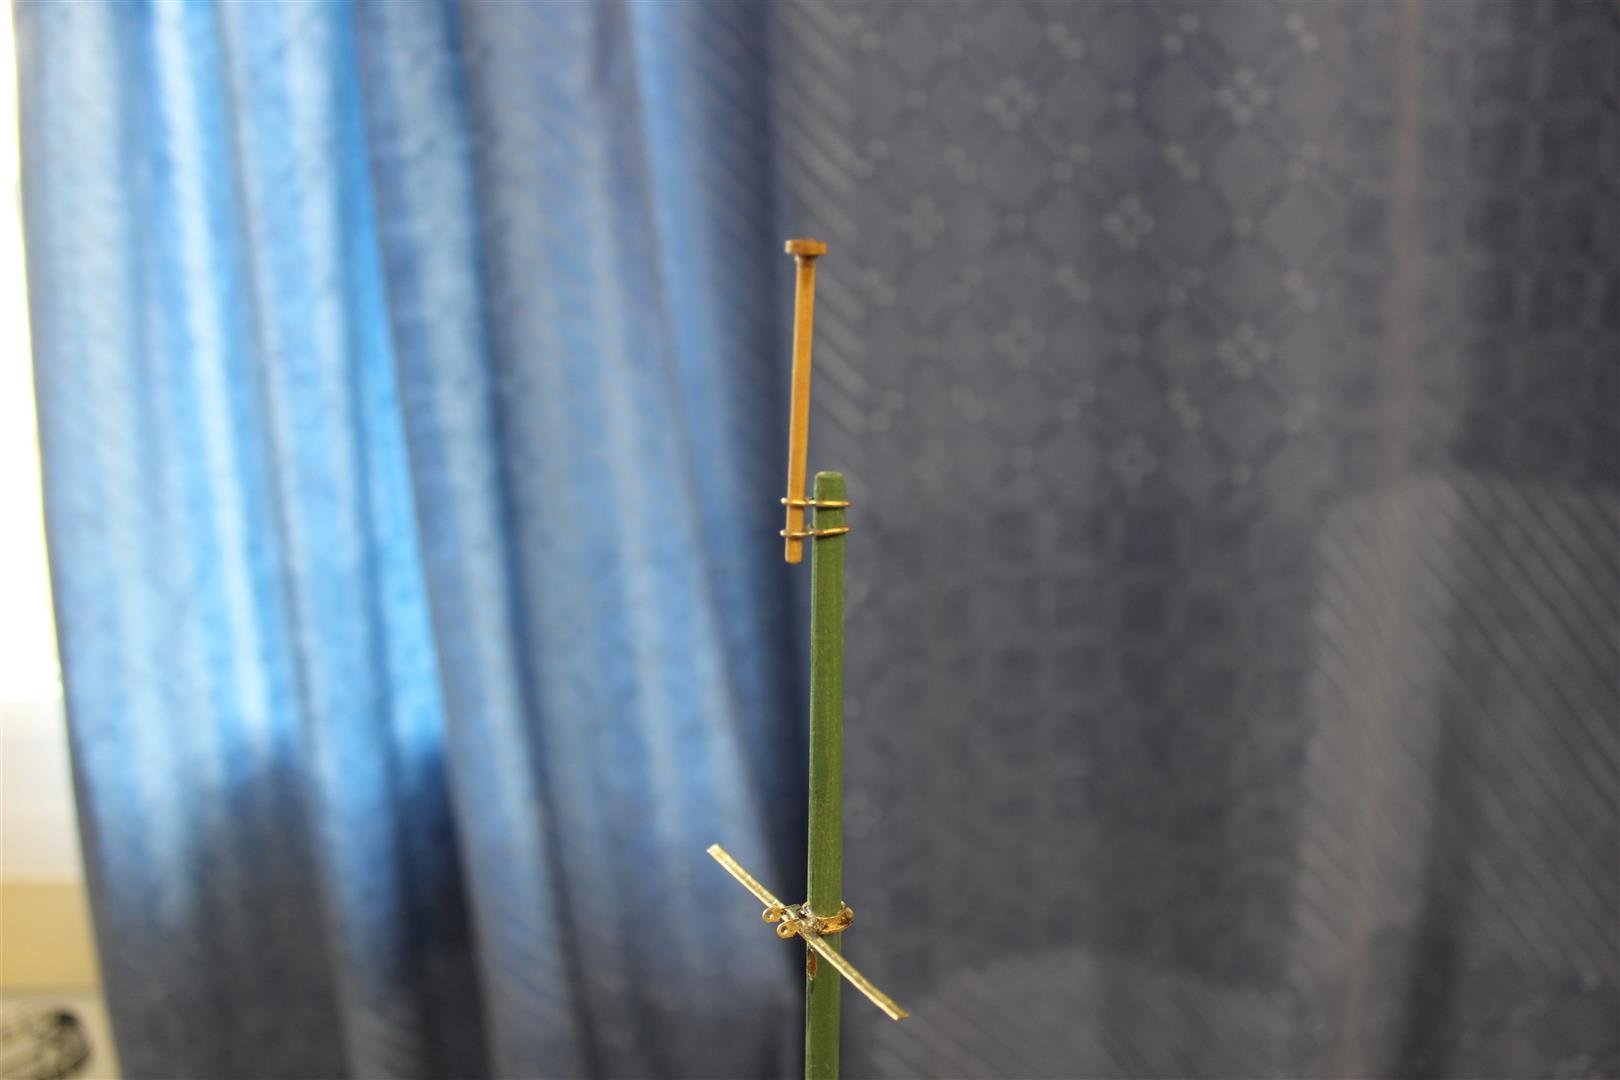
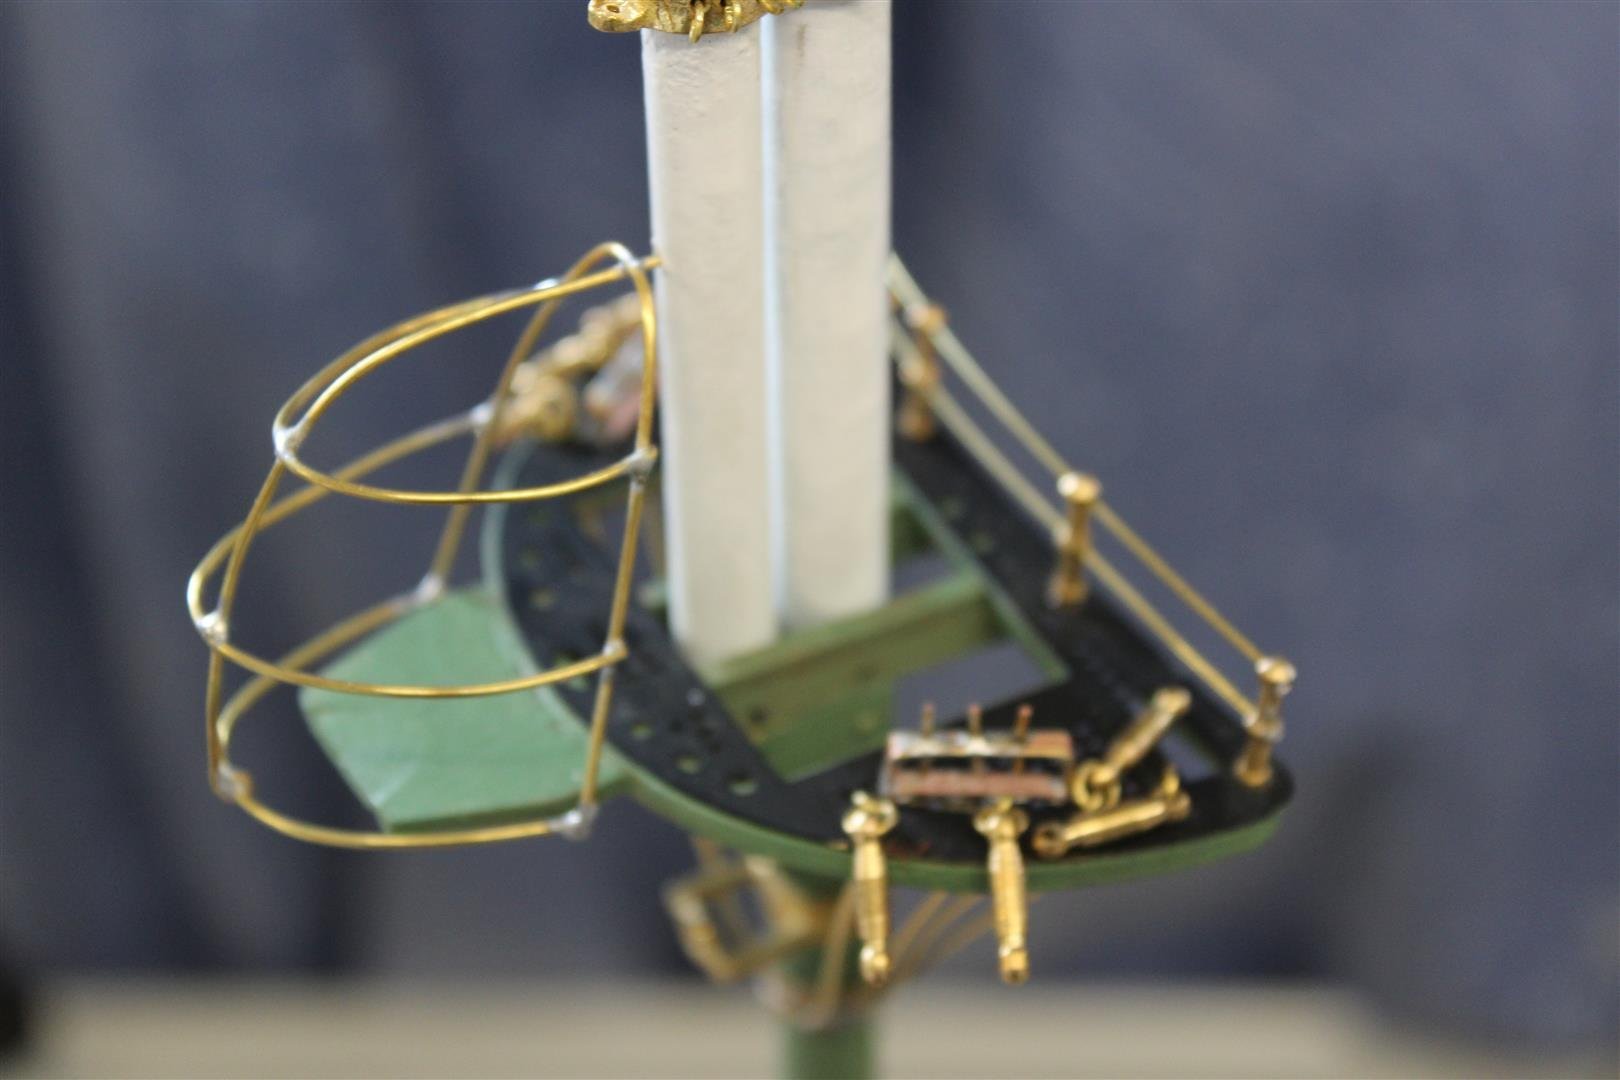
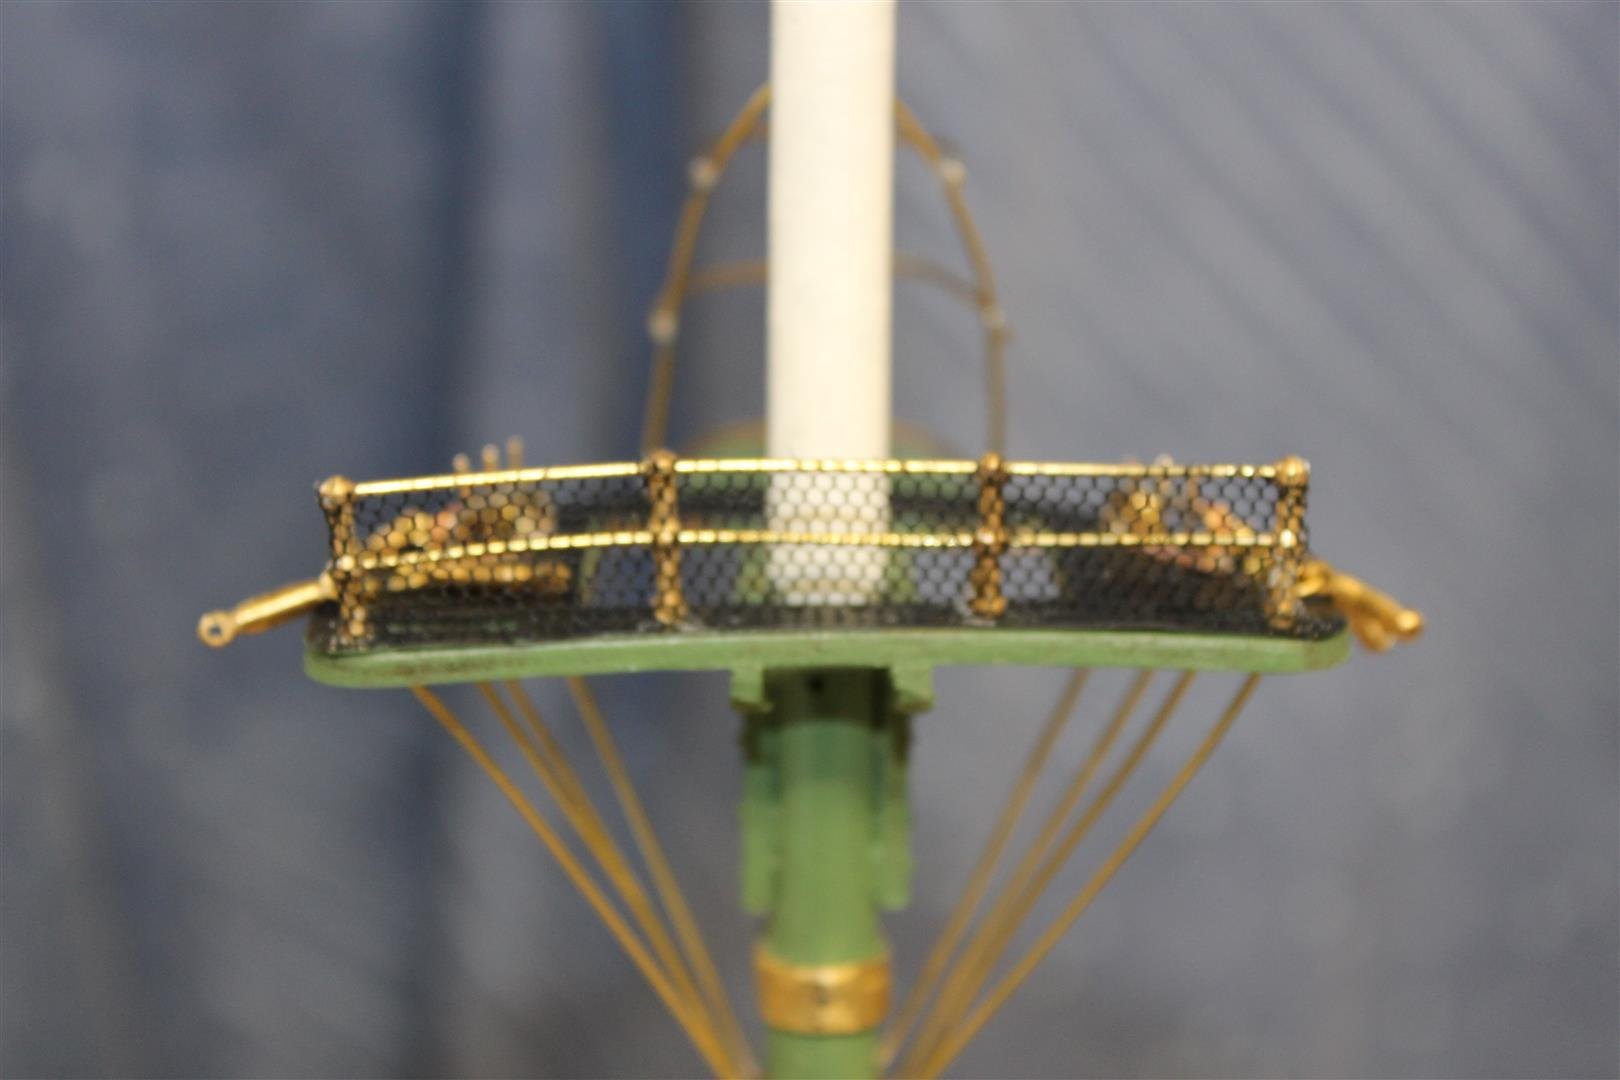
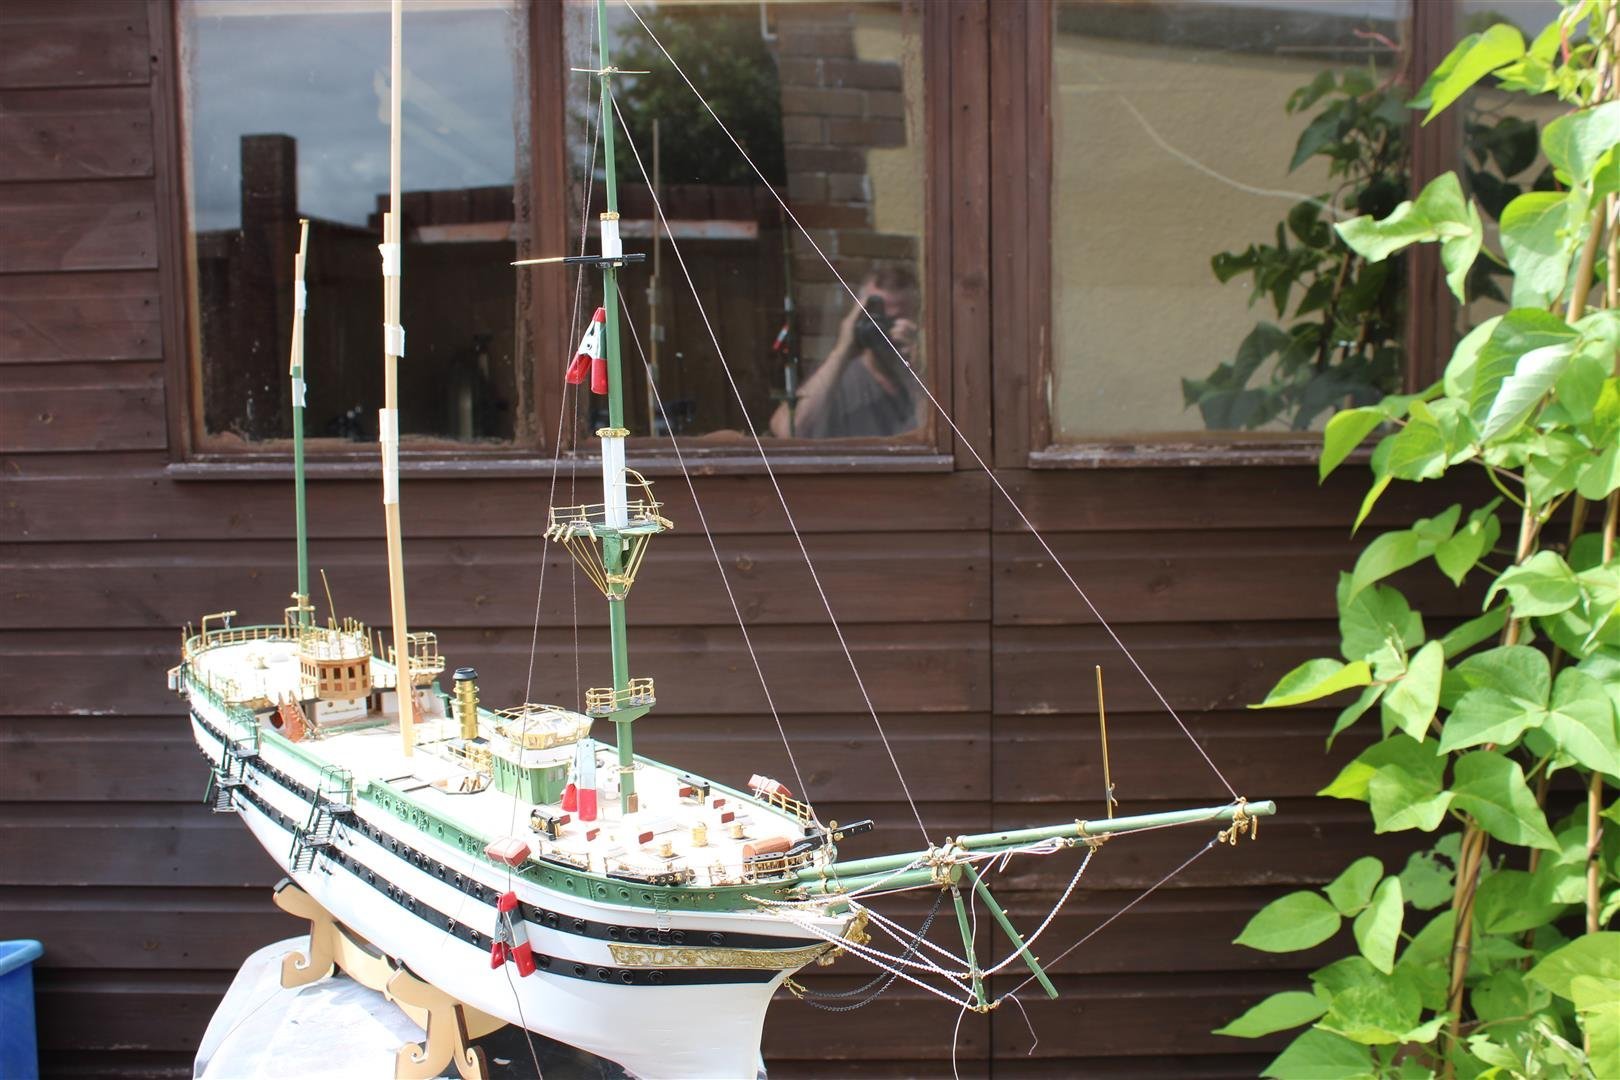
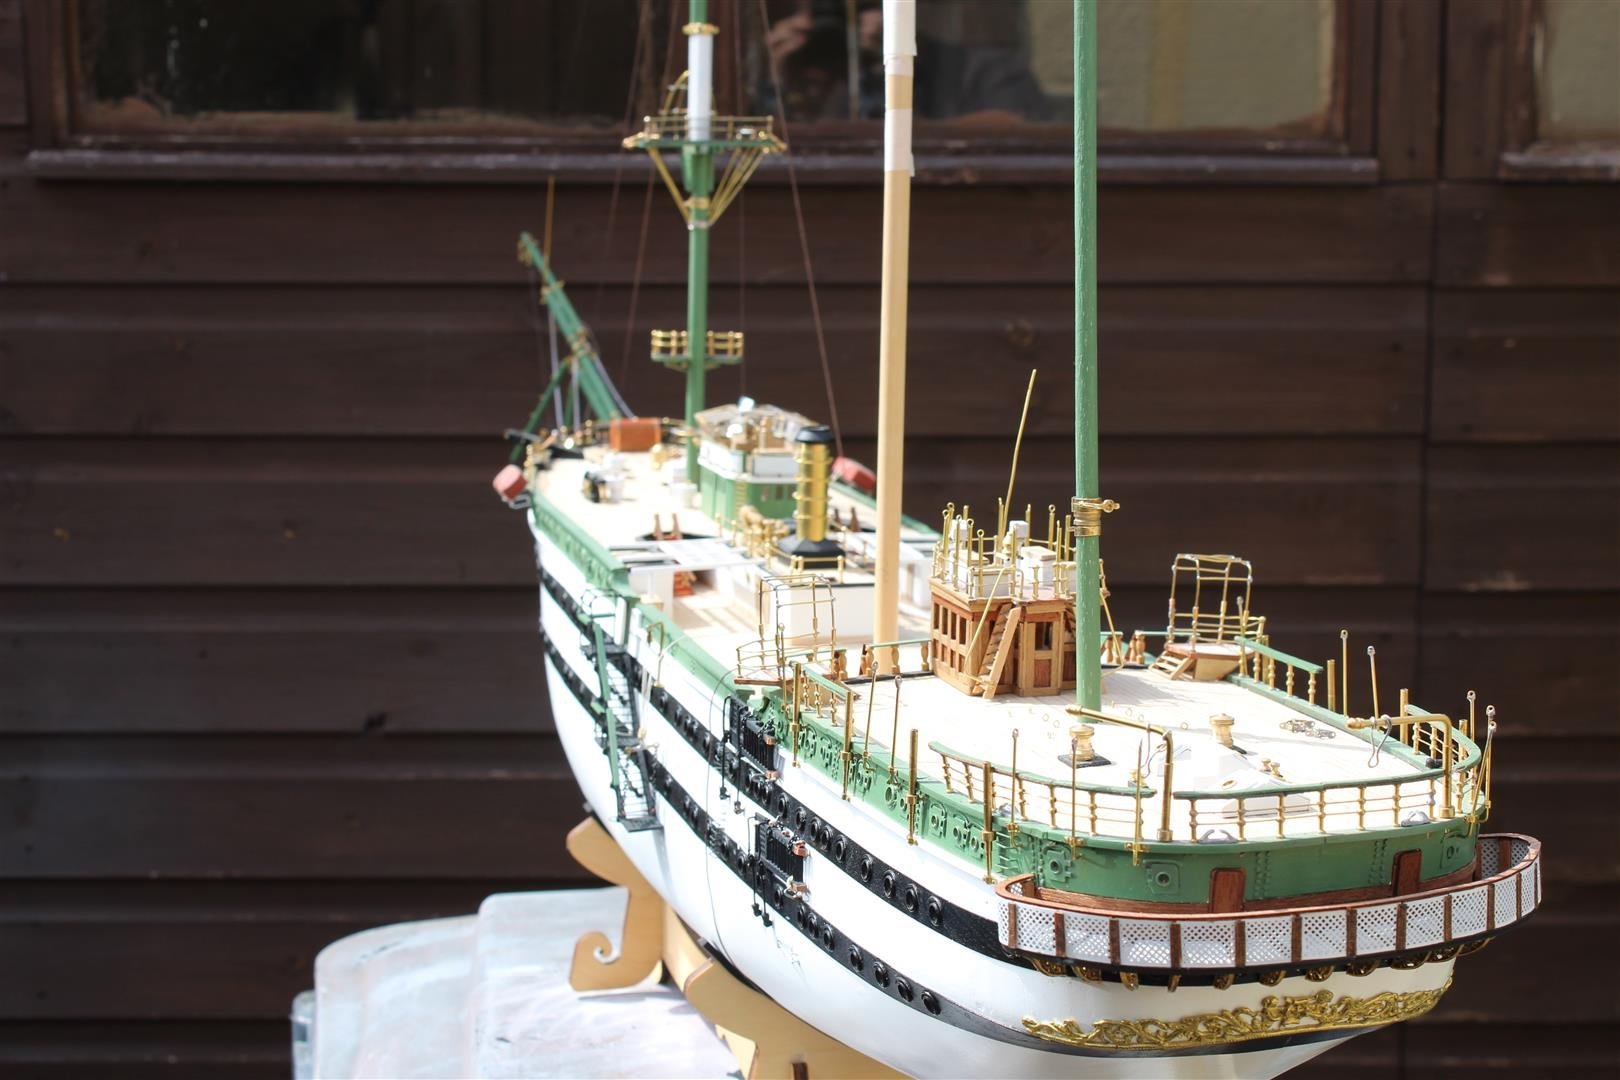
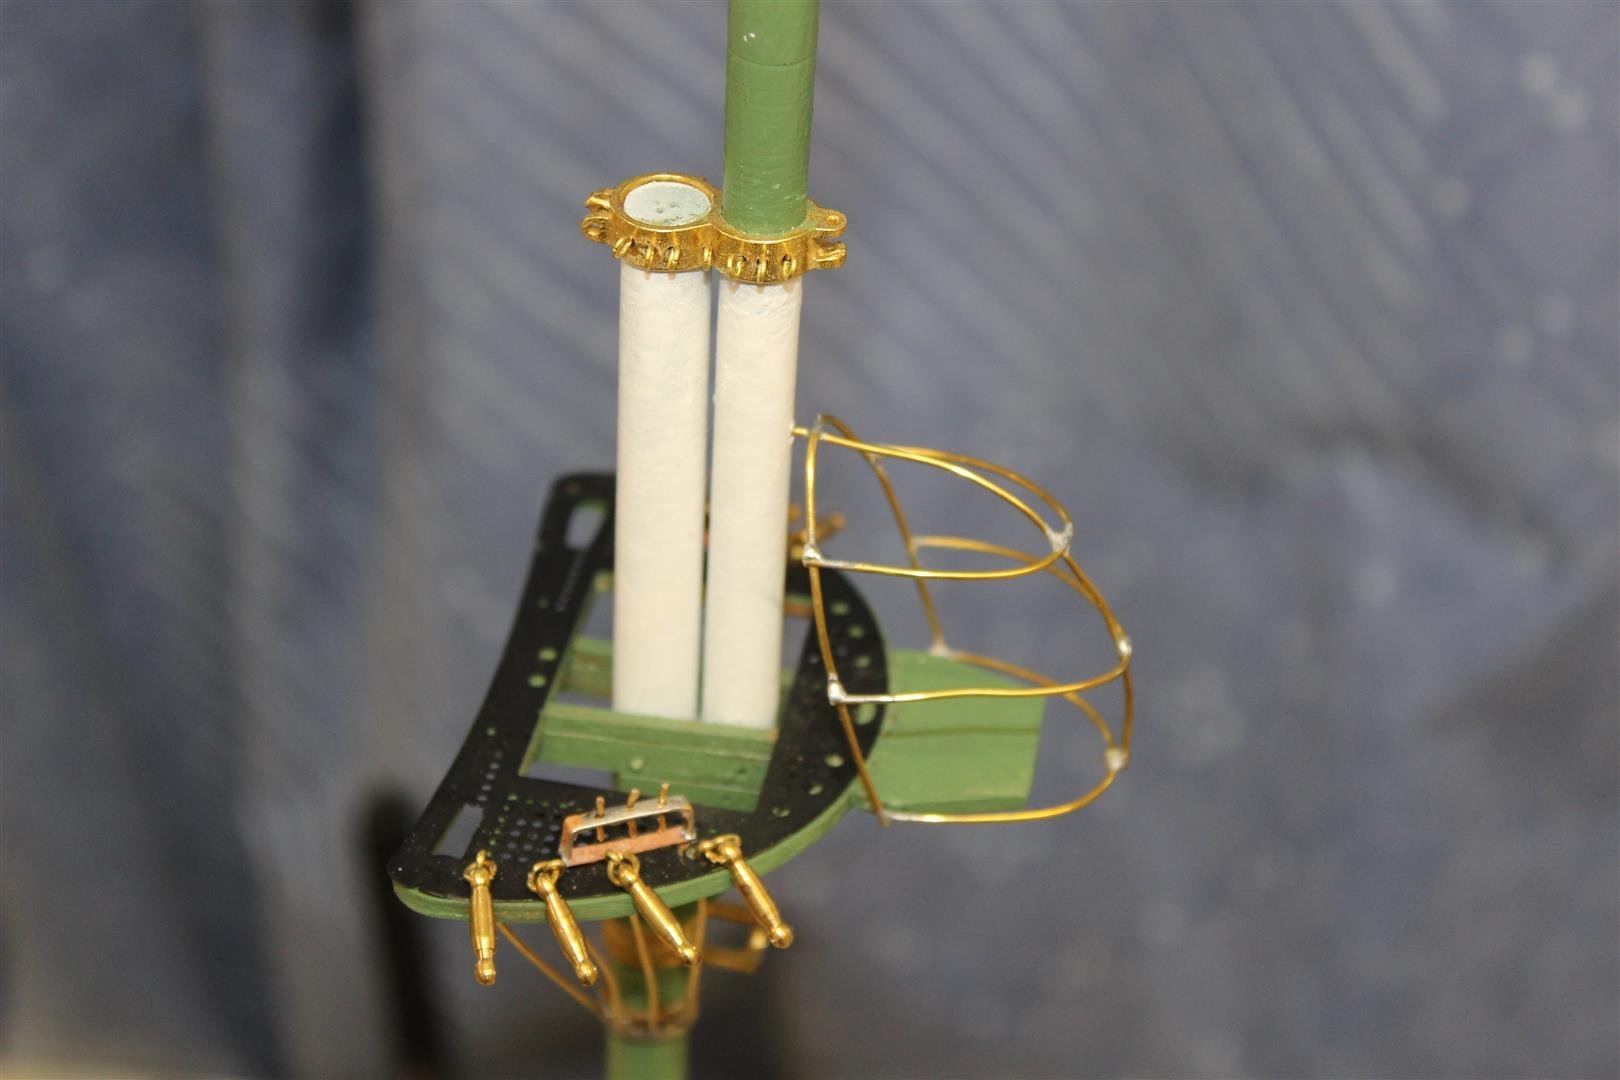
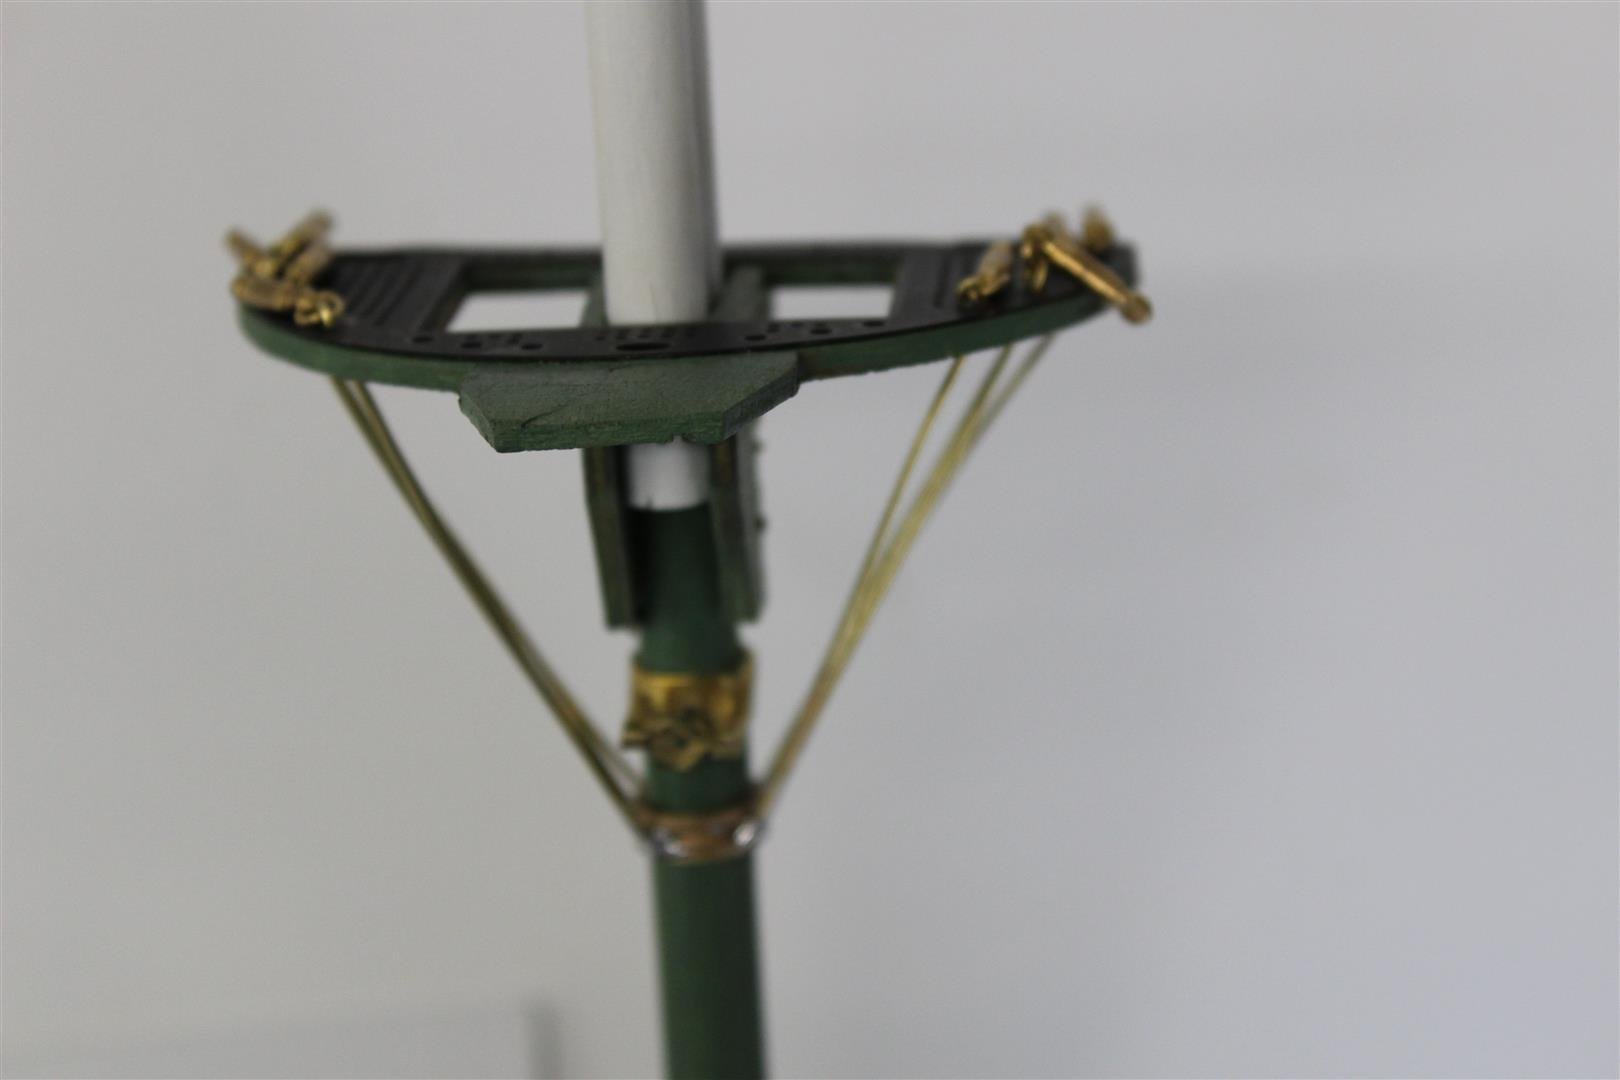
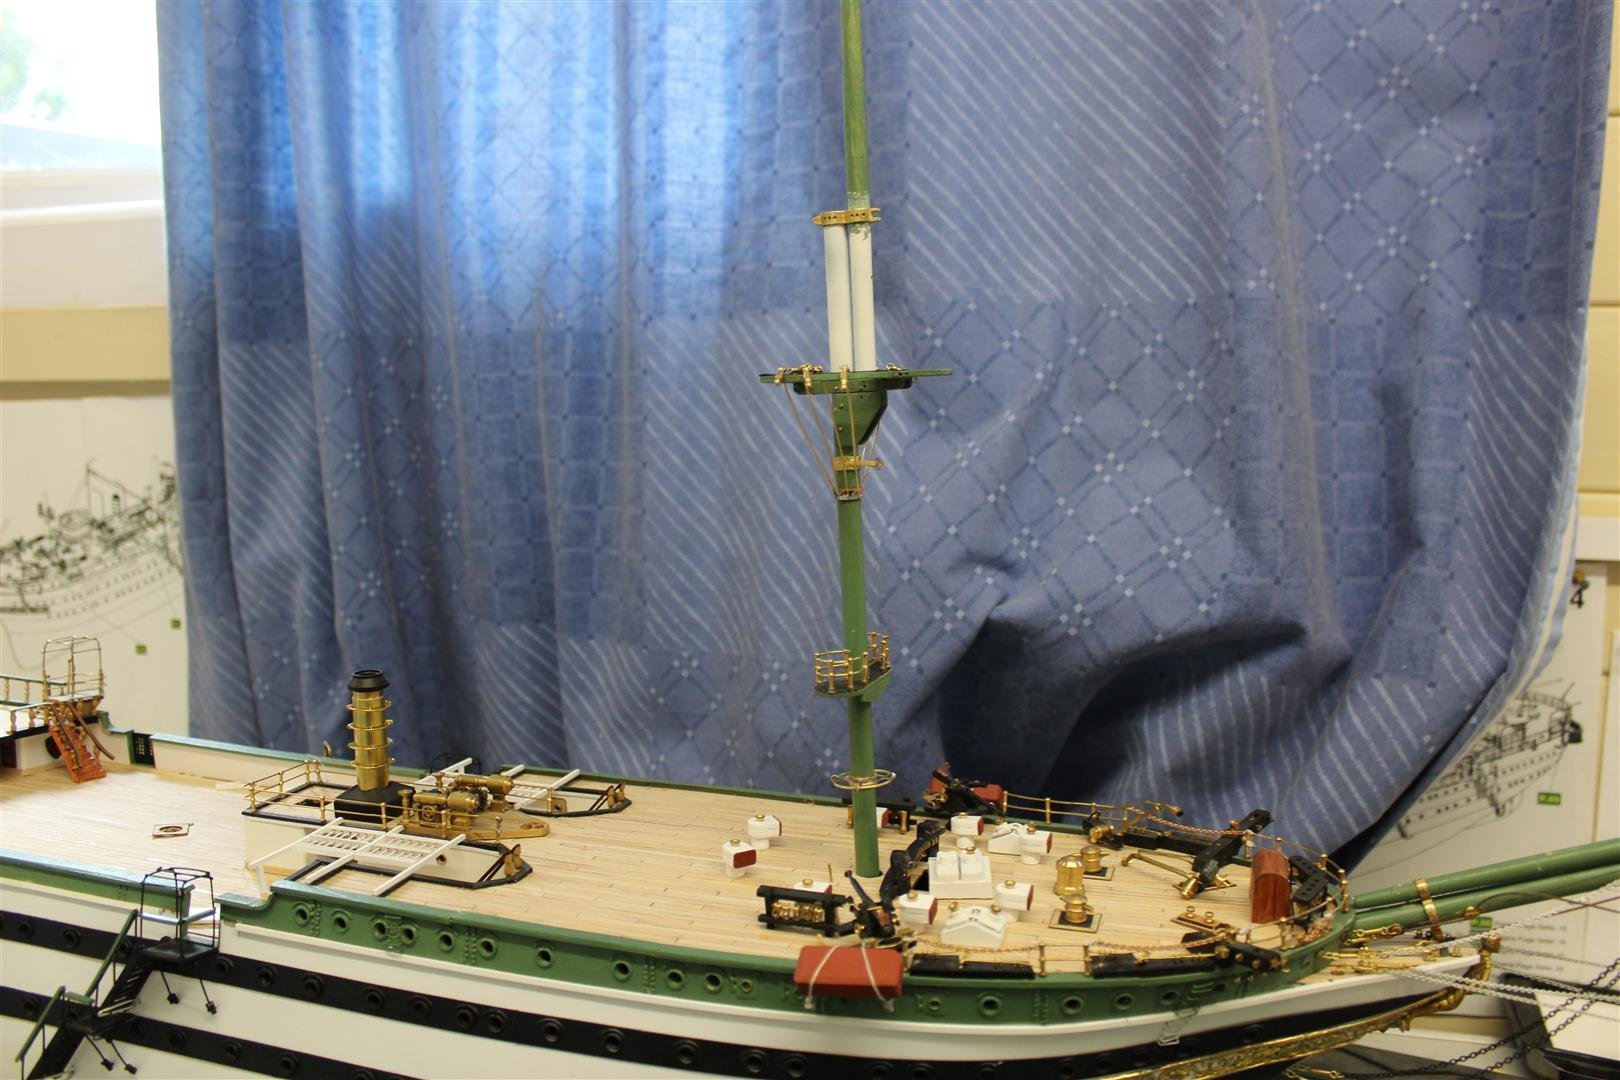
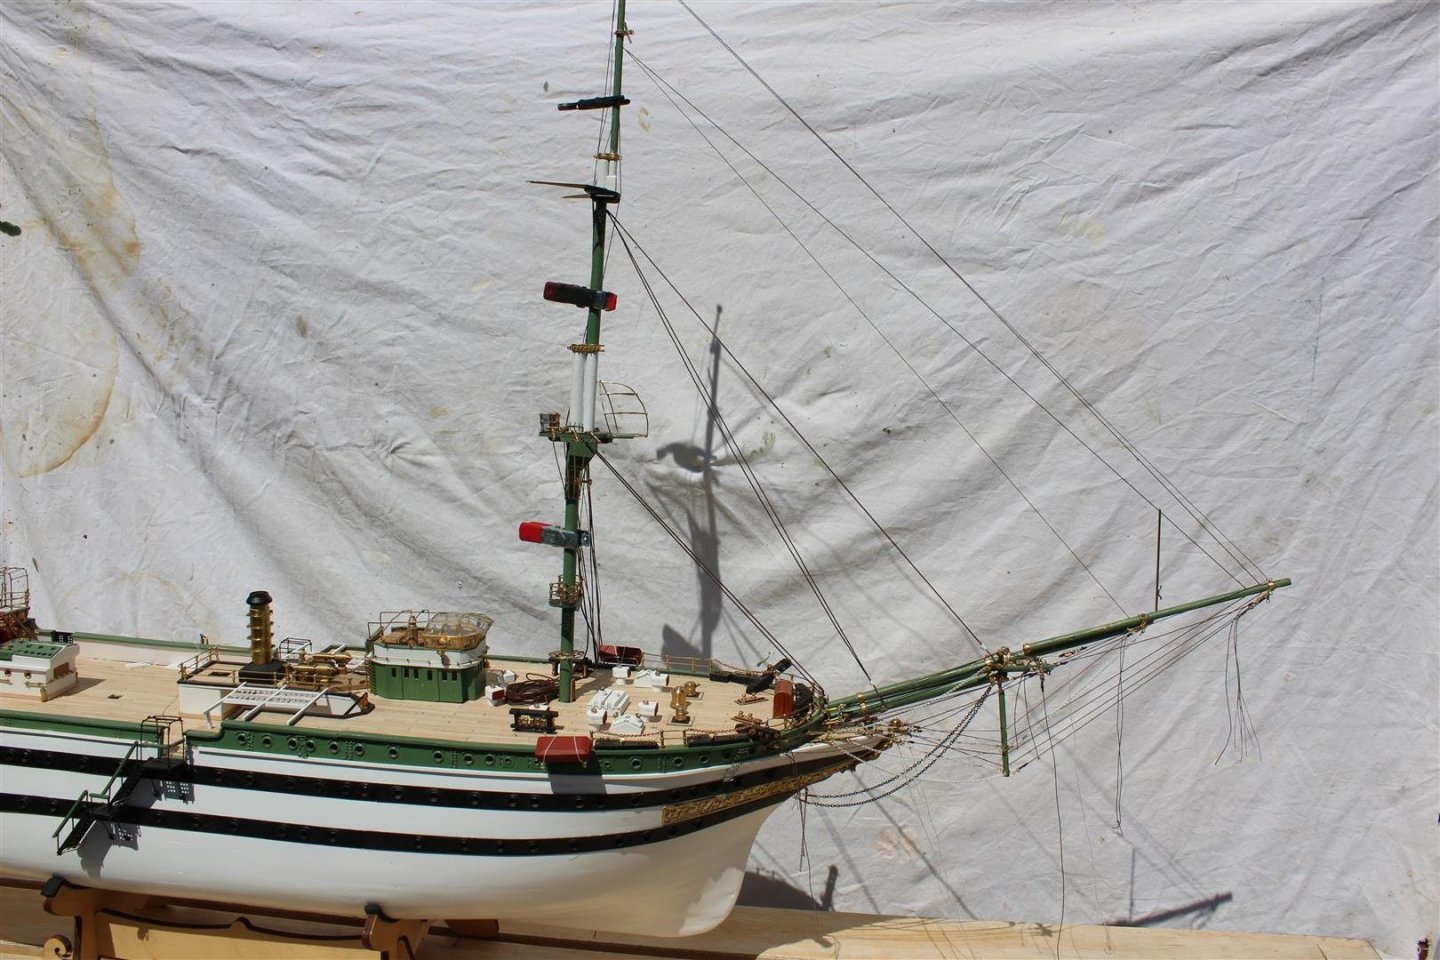
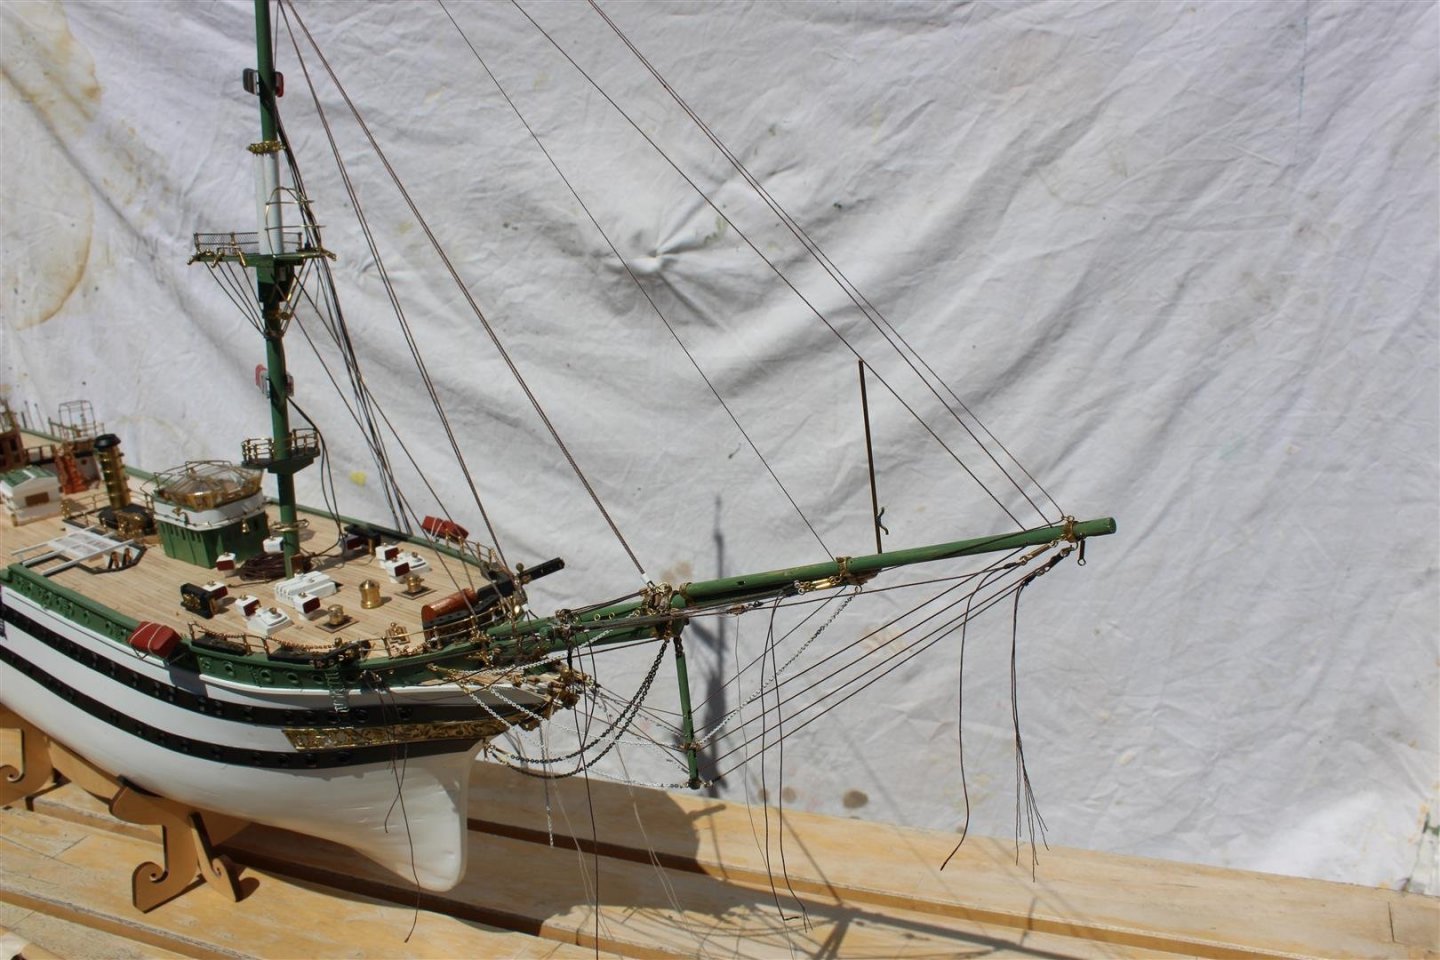
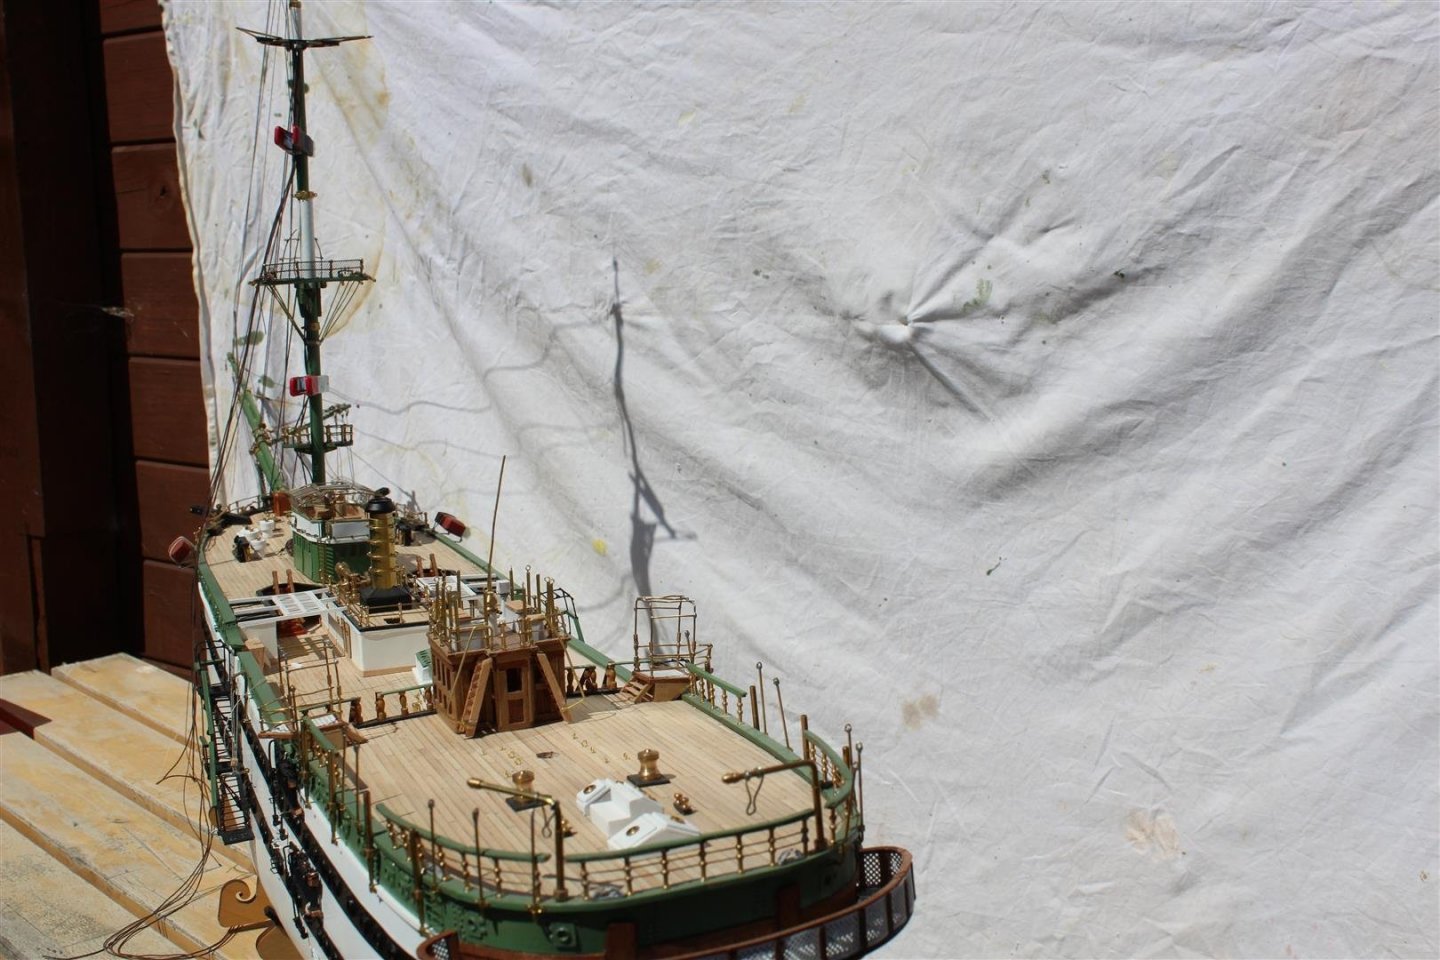
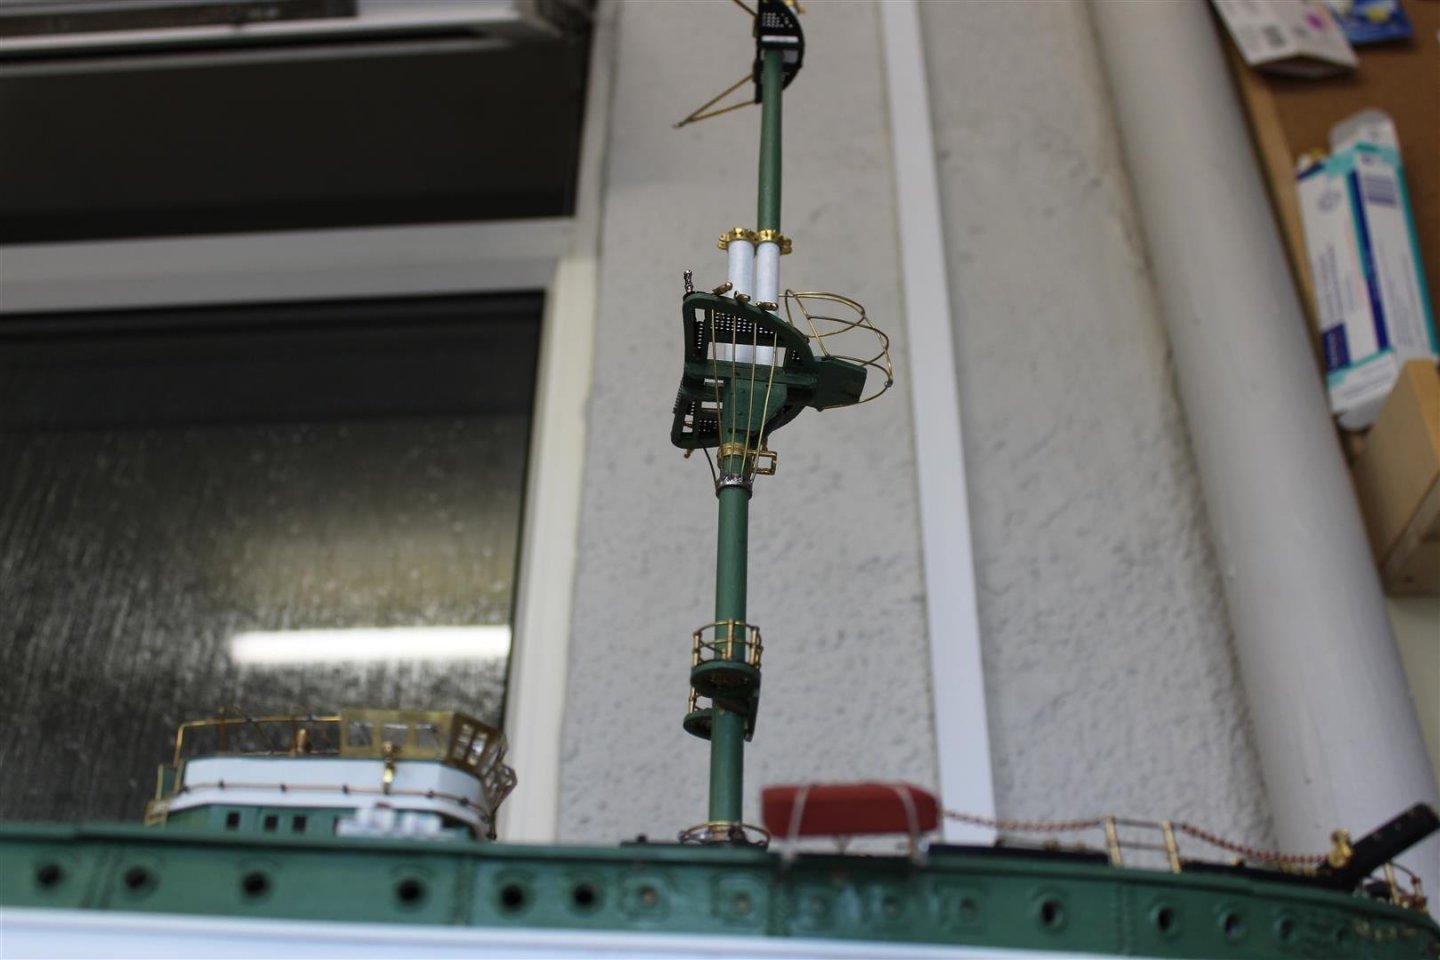
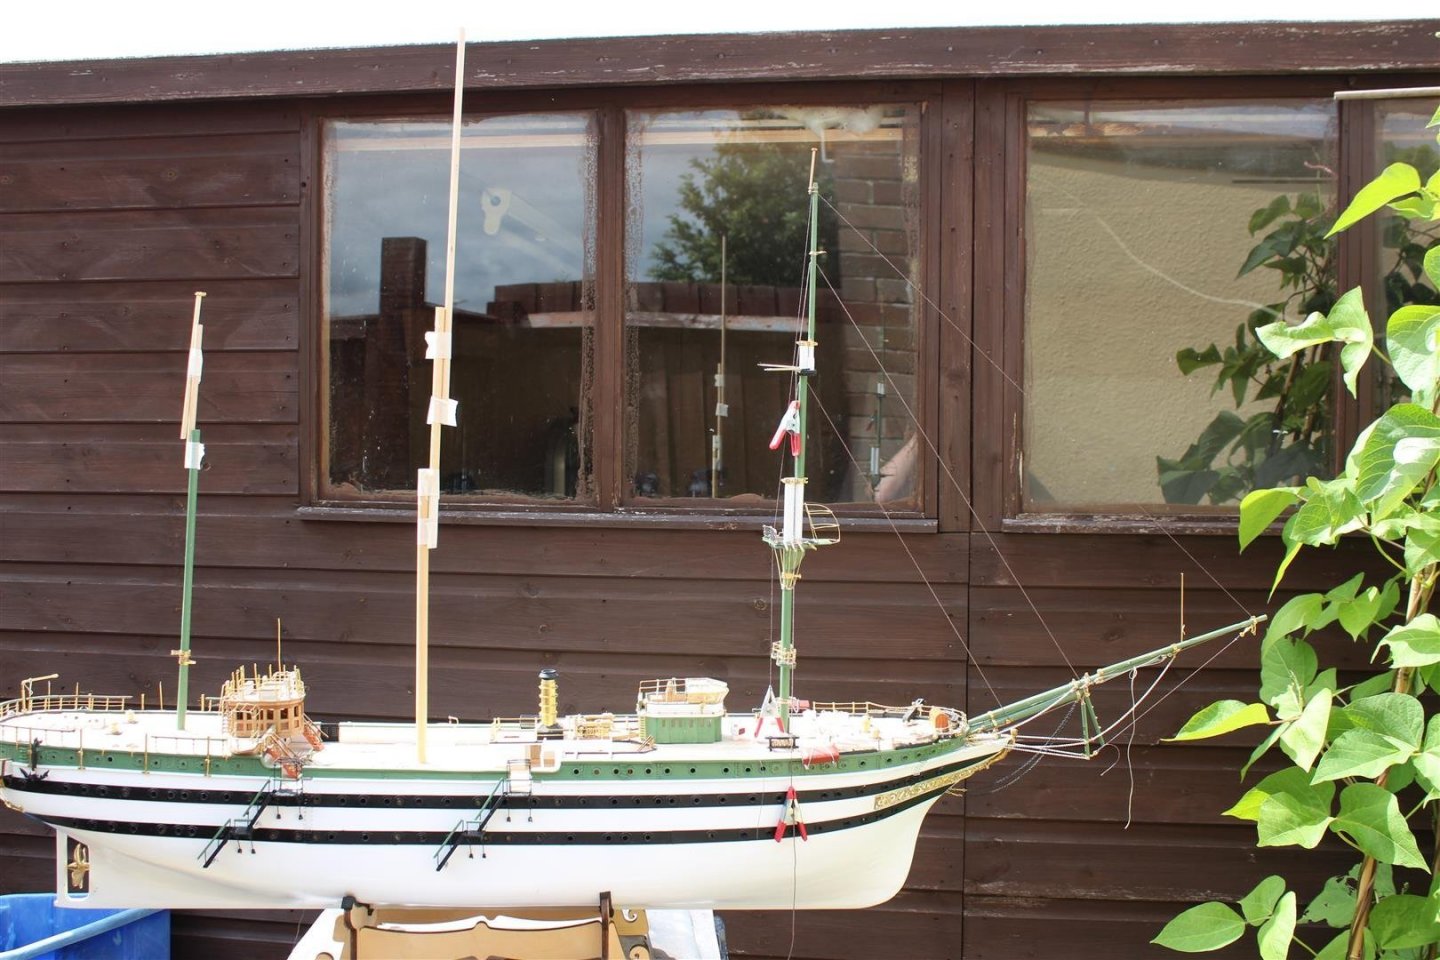
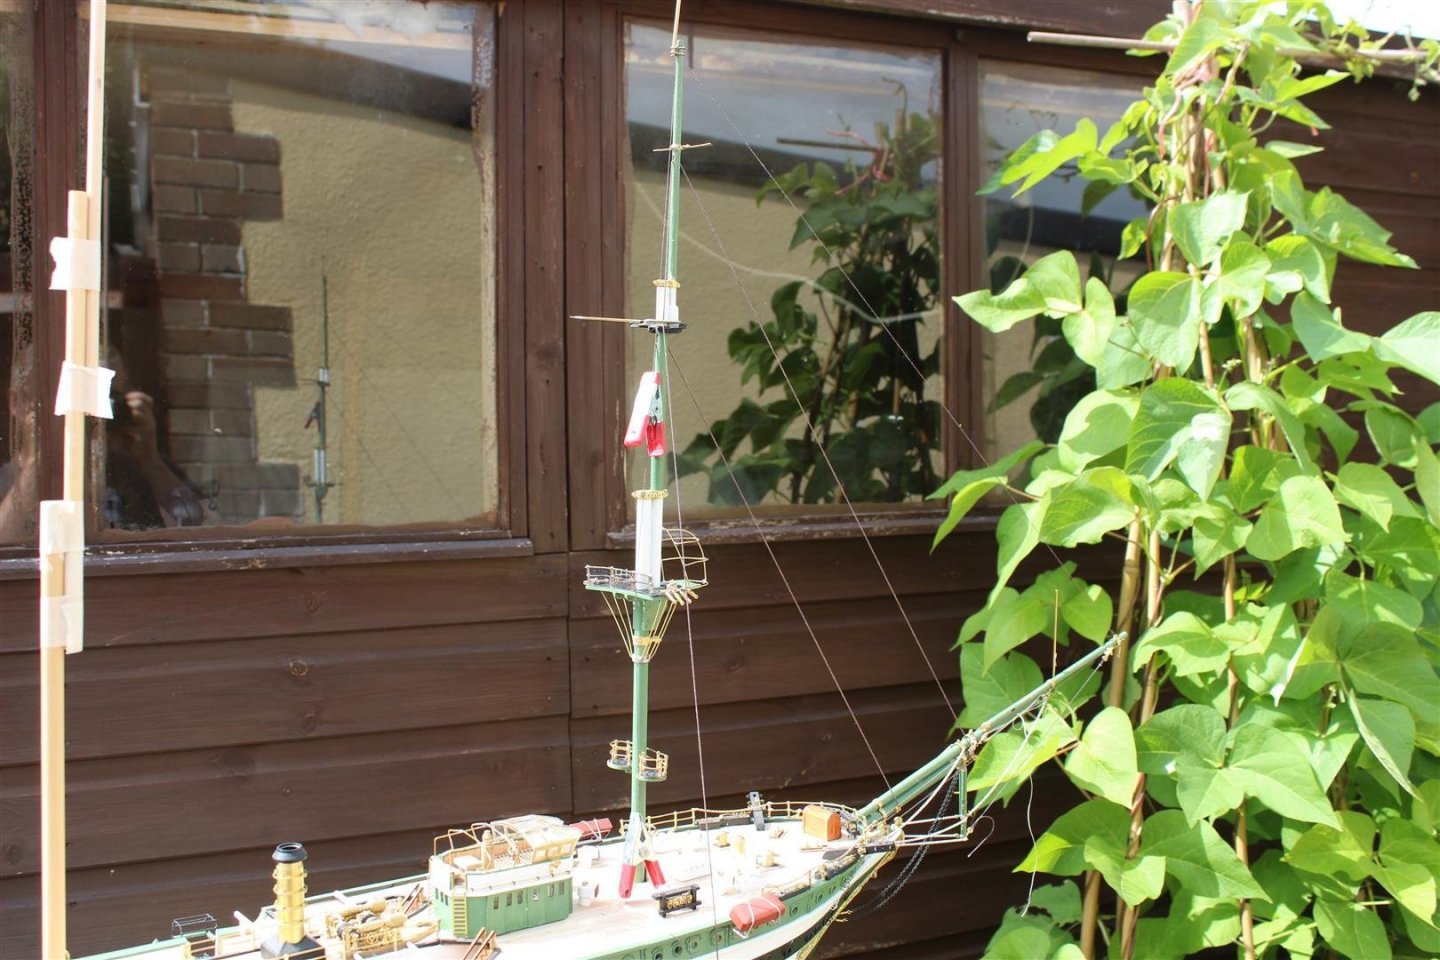
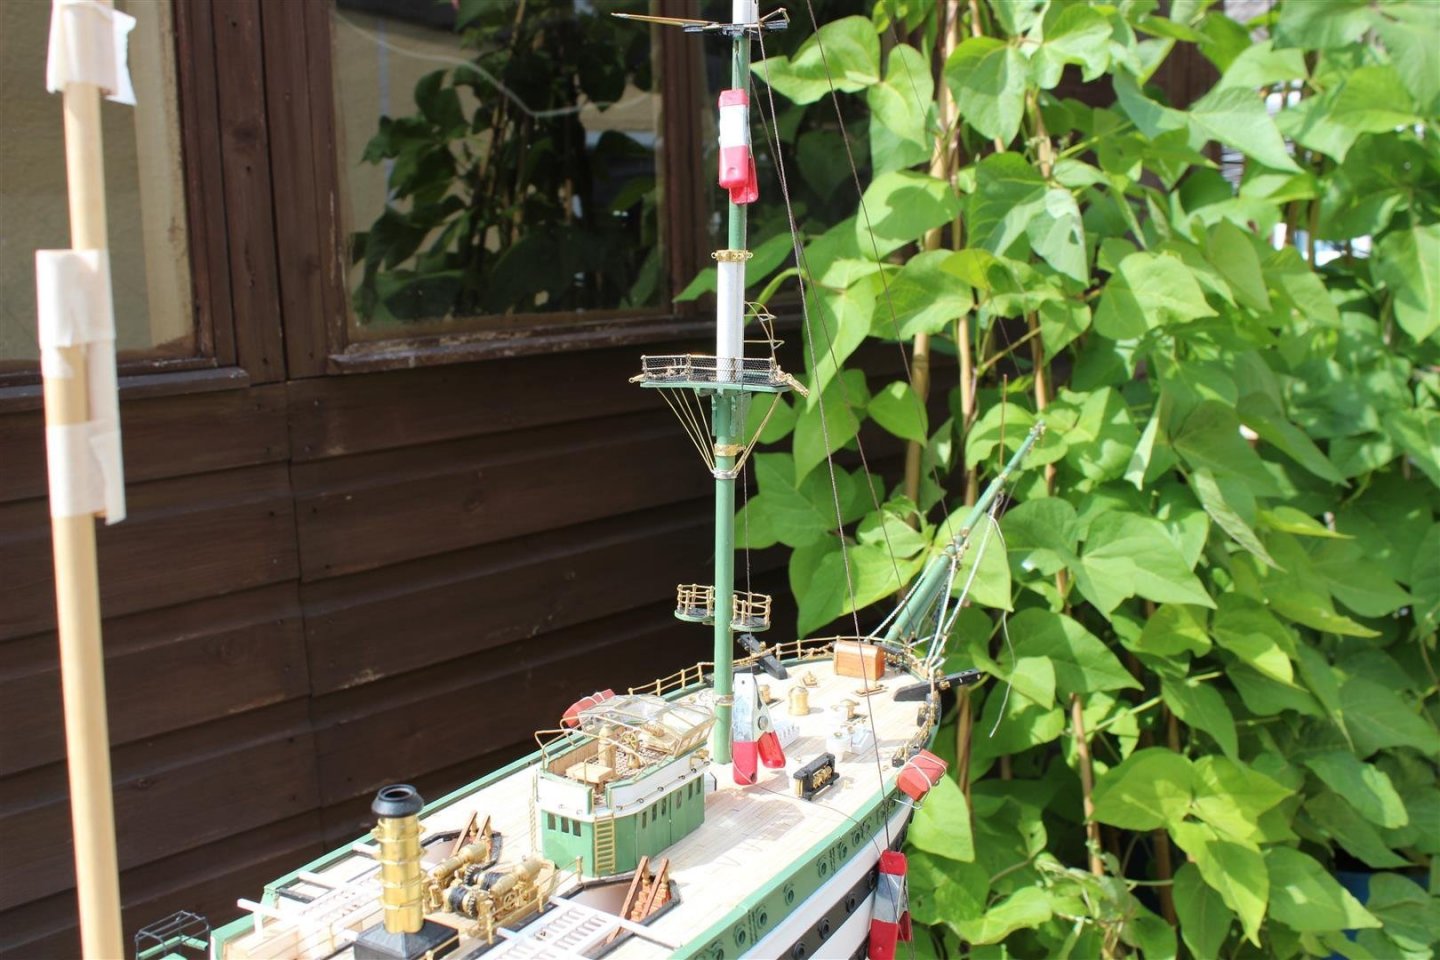
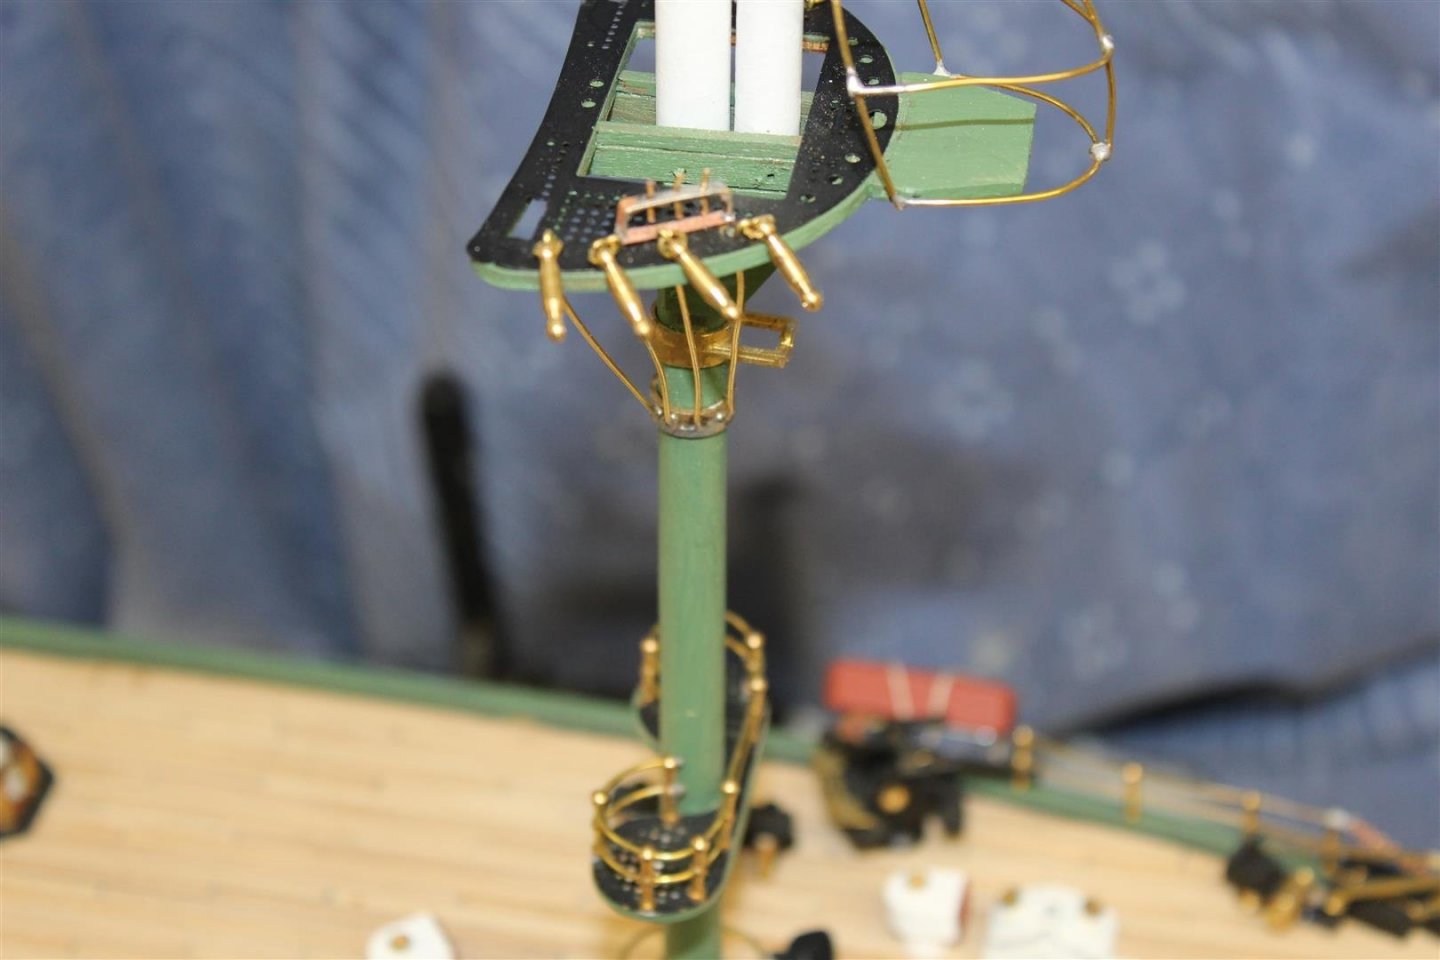
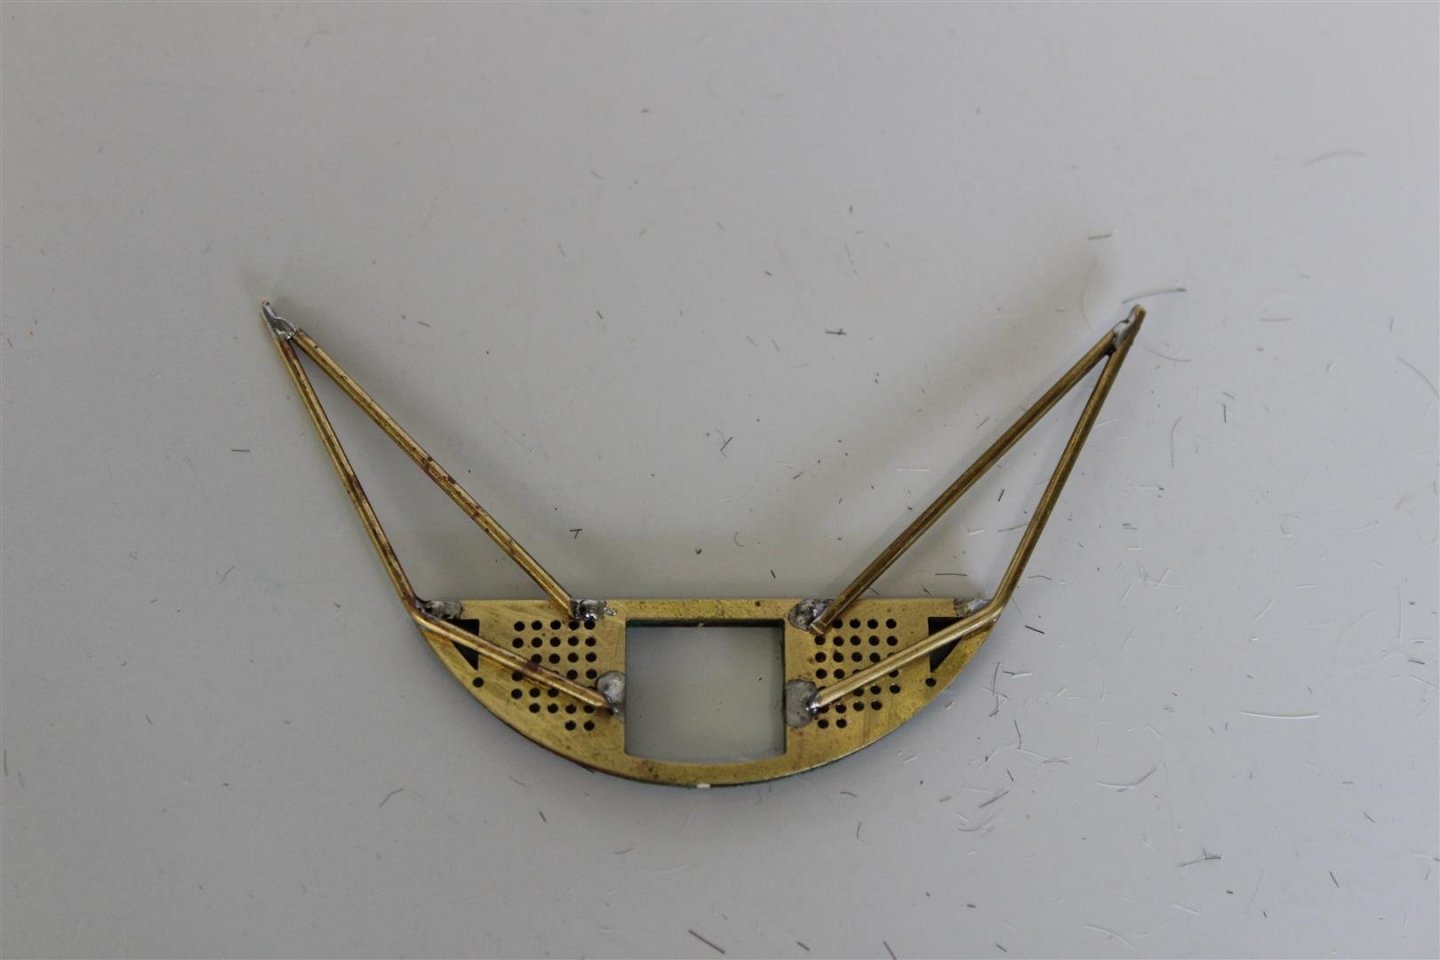
good evening everyone well most of the foremast is complete now, brackets for navigation lights, and placing some of the blocks, along with rope ladders still to be made although temp in place for now i then run a few of the lines from the bowsprit through and im quite happy with the result next im thinking of making up the main and mizzen im getting used to just making bits, they are not always pretty netting completes the foremast top


- 273 replies
-
- 9
-
-
- panart
- amerigo vespucci
- (and 1 more)
-
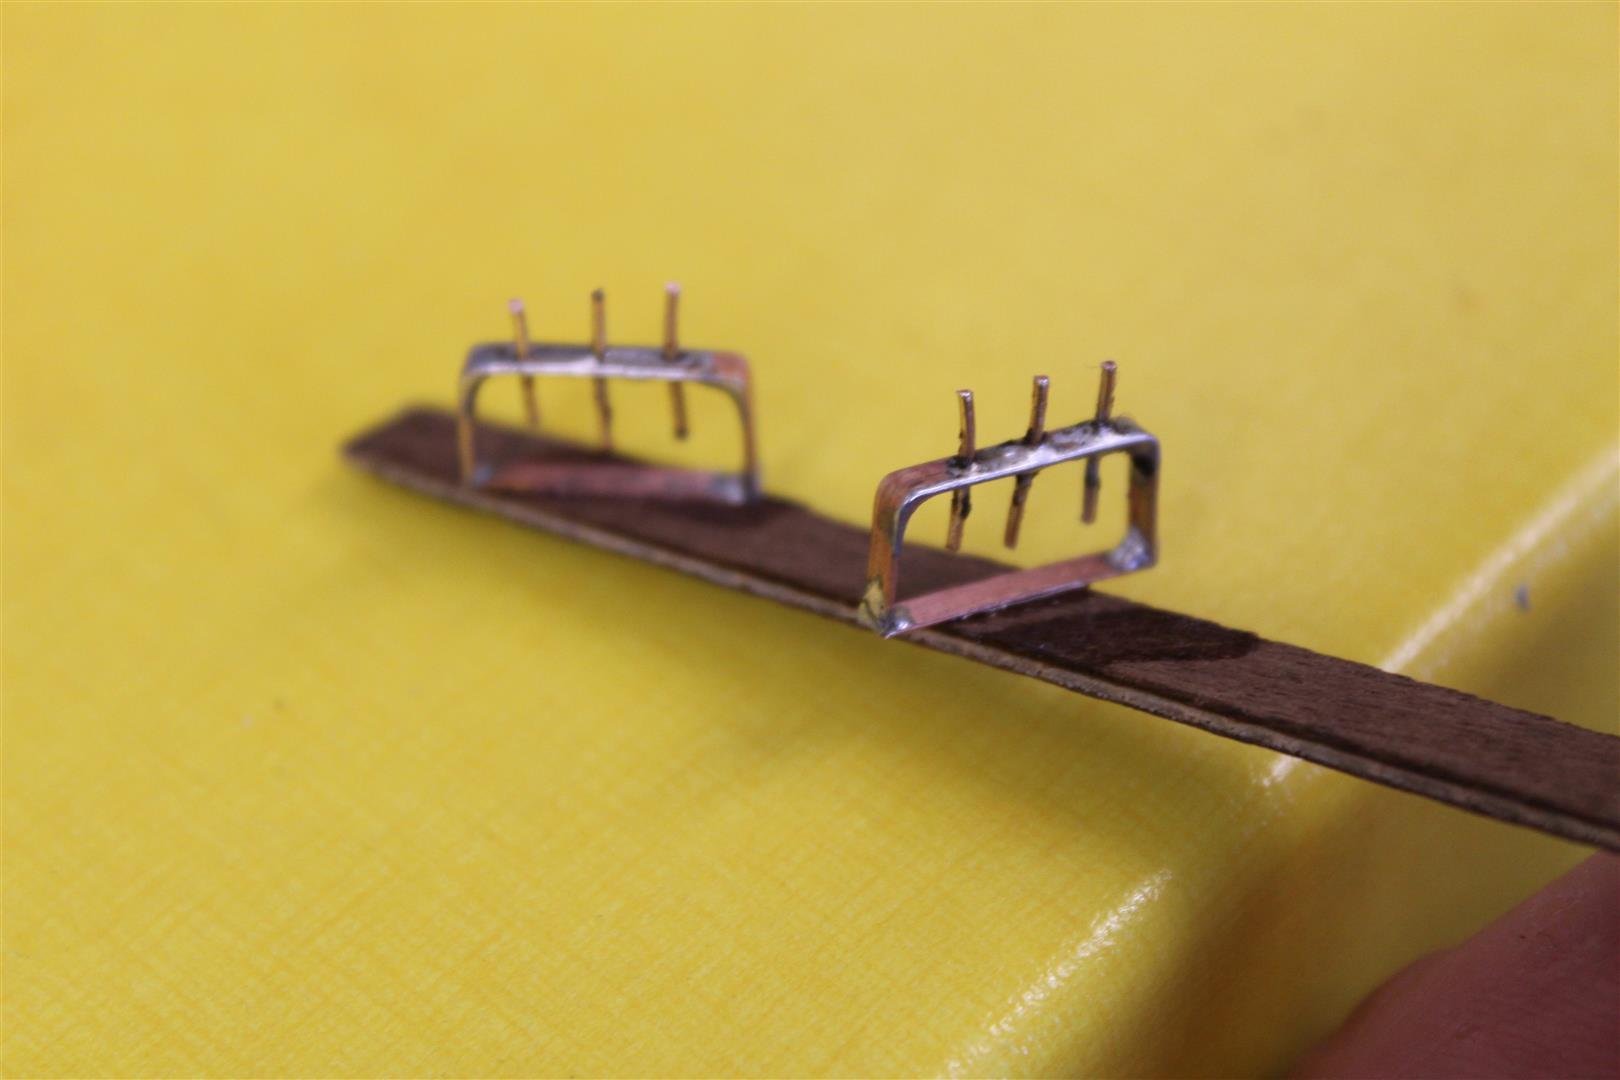
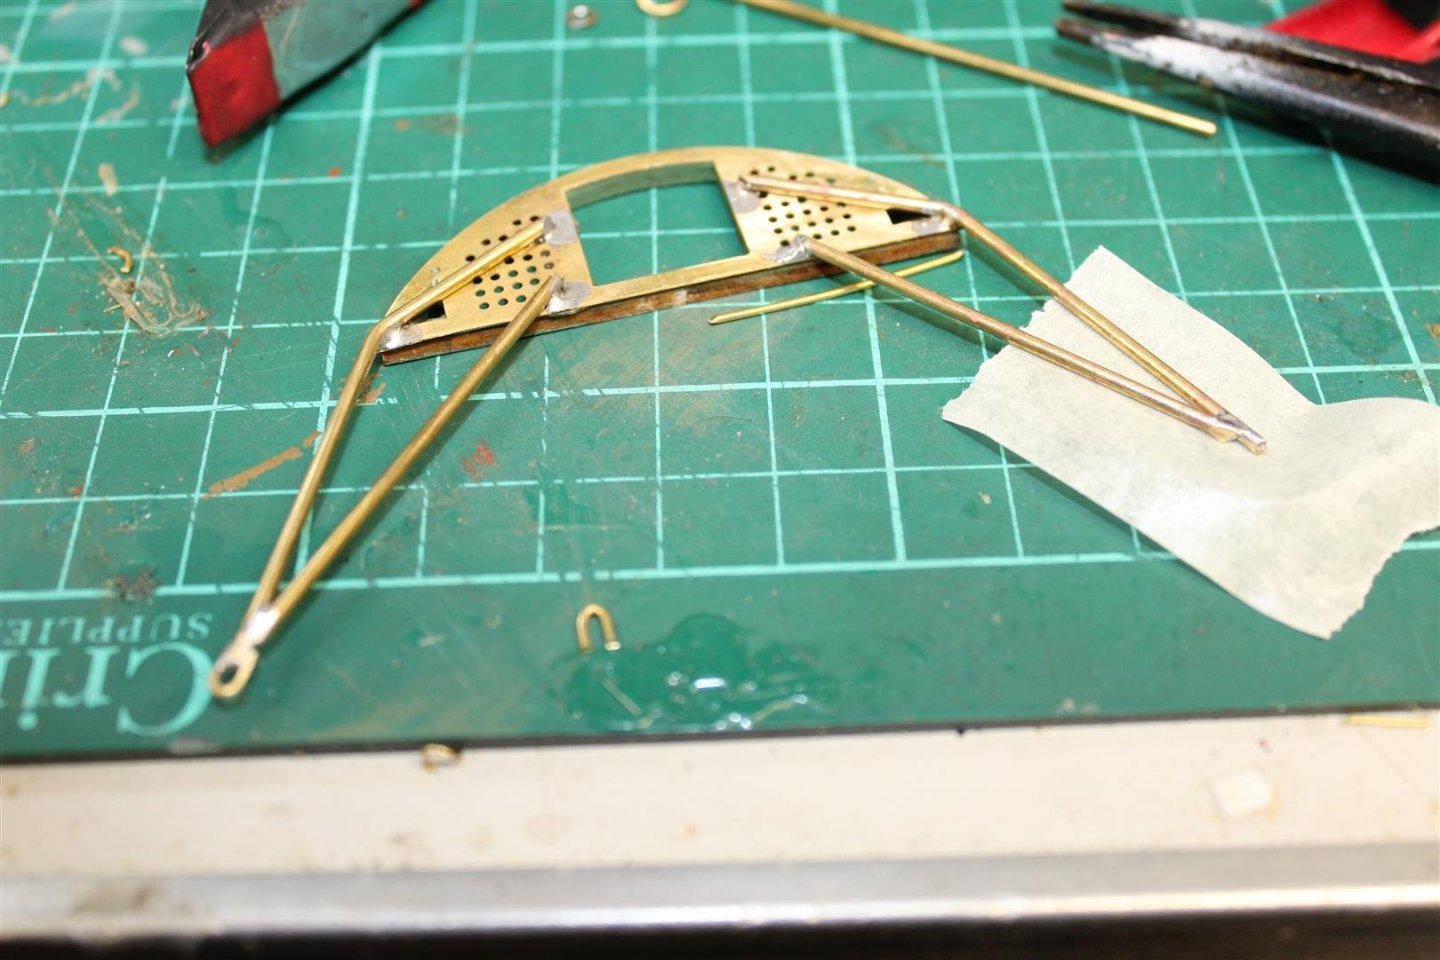
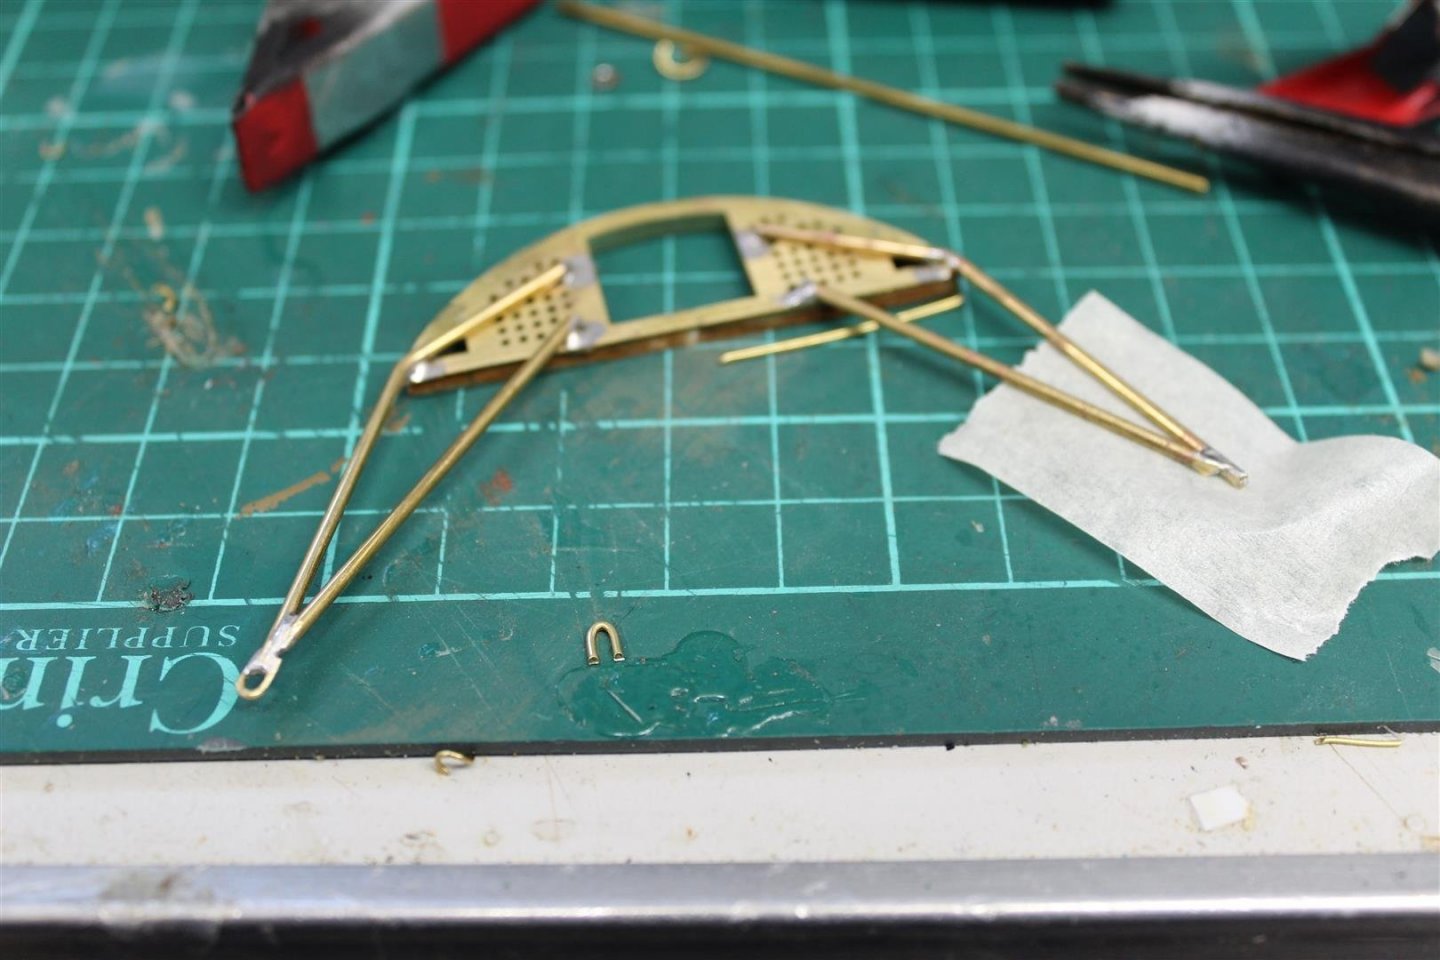
thank you i am perhaps doing more soldering than required, and i think i am getting better, the one thing about the metal work, is that its a lot stronger than traditional Evergreen (other plastic bits are available), and once i left the bare metal on the upper deck it seamed to make sense to me to follow it on through the build
- 273 replies
-
- 2
-
-
- panart
- amerigo vespucci
- (and 1 more)
-
thank you for the comments, makes me feel much better i have always wanted to avoid sounding childish over comments made, but thats the main reason i switched to doing the Aedes Ars diorama over the charismas period, whilst i decided on actually getting on with the AV it is slightly more difficult to avoid the trolls and comments some times, being a MSW Social Media Moderator, and perhaps i over reacted, but the comments at the time went much further i have still quite a way to go on the AV, and would love to completed her now rather than switching back
- 317 replies
-
- 9
-
-
- enterprise
- caf
- (and 1 more)
-
thank you Jason, i stopped doing it when i was slated on a FB group, comments like how i should have left it to someone who knew what they were doing etc, kind of upset me in a way, im not sure if the confidence will return, and if it does i certainly will think twice before showing others
- 317 replies
-
- 9
-
-

-
- enterprise
- caf
- (and 1 more)
-
YOUNG AMERICA 1853 by Bitao - FINISHED - 1:72
Kevin replied to Bitao's topic in - Build logs for subjects built 1851 - 1900
So sorry i never followed this build, she looks fantastic, well done- 257 replies
-
- 3
-
-

-
- young america
- Finished
- (and 1 more)
-
wow permission to follow, i will provide the popcorn for everyone
- 321 replies
-
- 6
-
-
- Finished
- Flower-class
- (and 1 more)
-
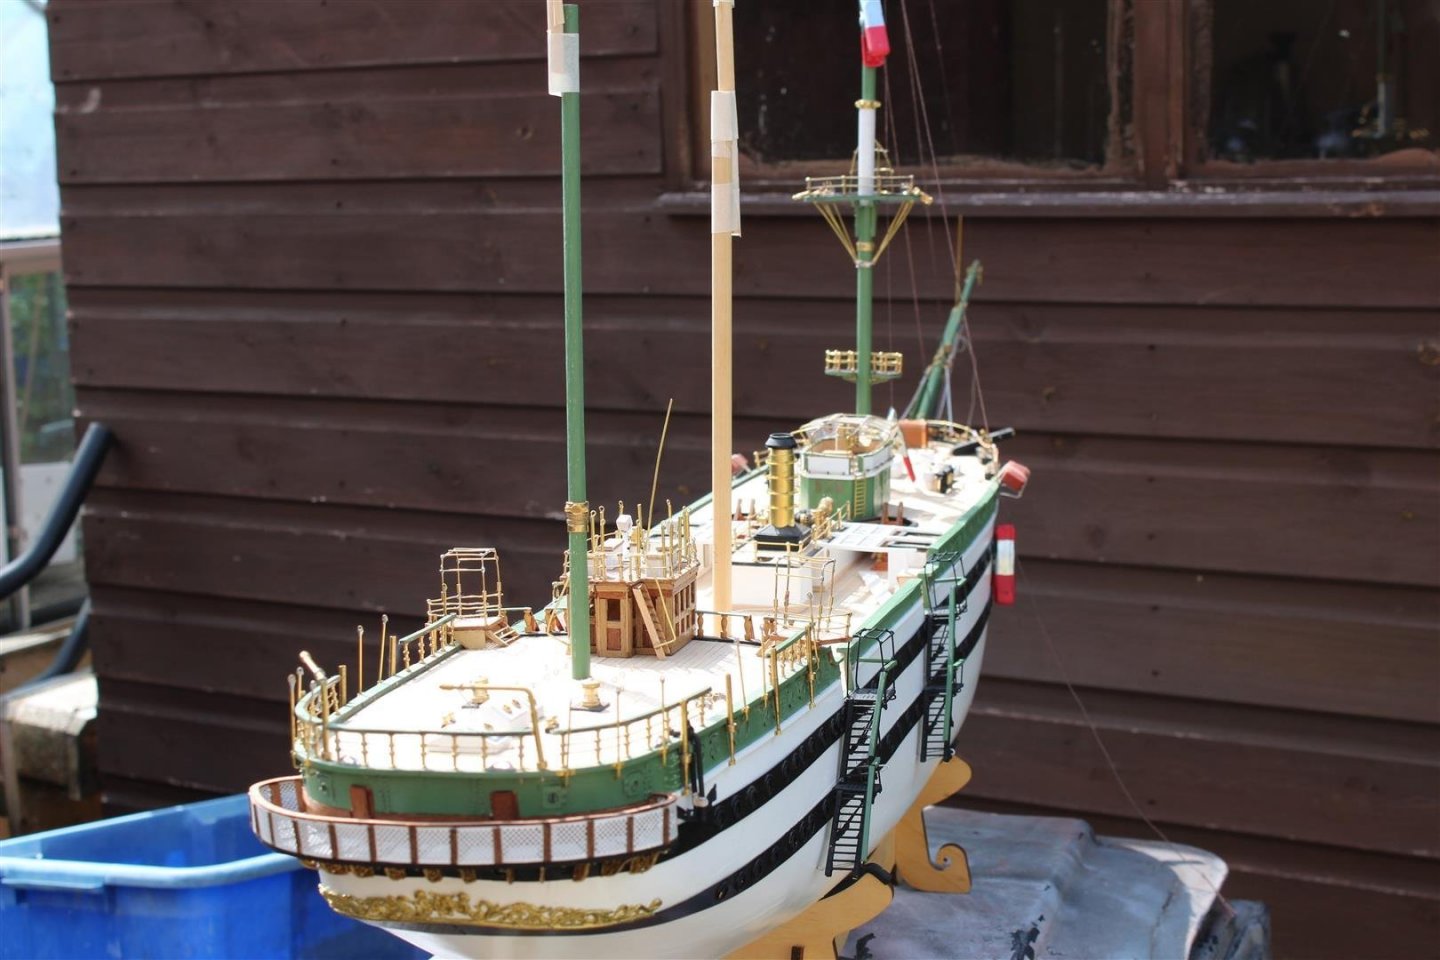
good evening everyone the foremast continues, everytime i look at the donar build, i see something new to add, looks like rope ladders next seams like a lifetime away from getting close to this


- 273 replies
-
- 7
-
-
- panart
- amerigo vespucci
- (and 1 more)
-
kit review 1:65 Santa Maria – 1492 - Artesania Latina
Kevin replied to James H's topic in REVIEWS: Model kits
thanks James, i can see a few experienced builders redoing this, and bringing to an even higher level -
thank you OC i am quite happy with what i am doing, i would be over the moon, if i knew what being done was the right size
- 273 replies
-
- 2
-
-
- panart
- amerigo vespucci
- (and 1 more)
-
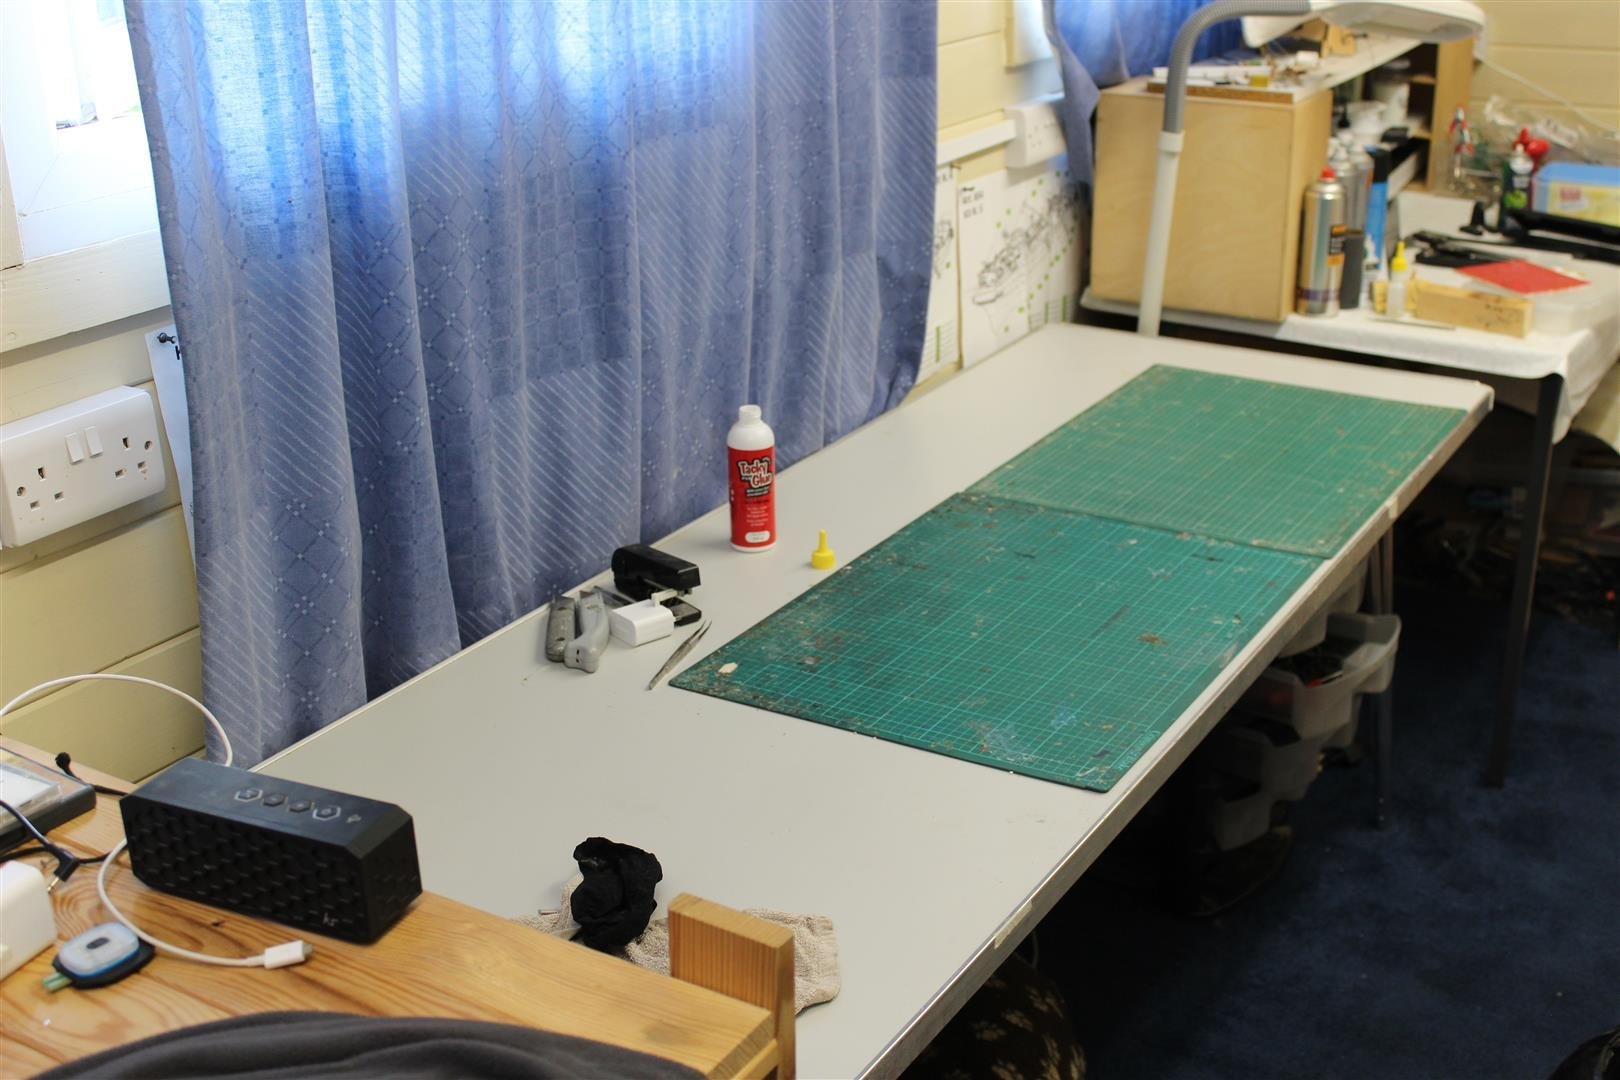
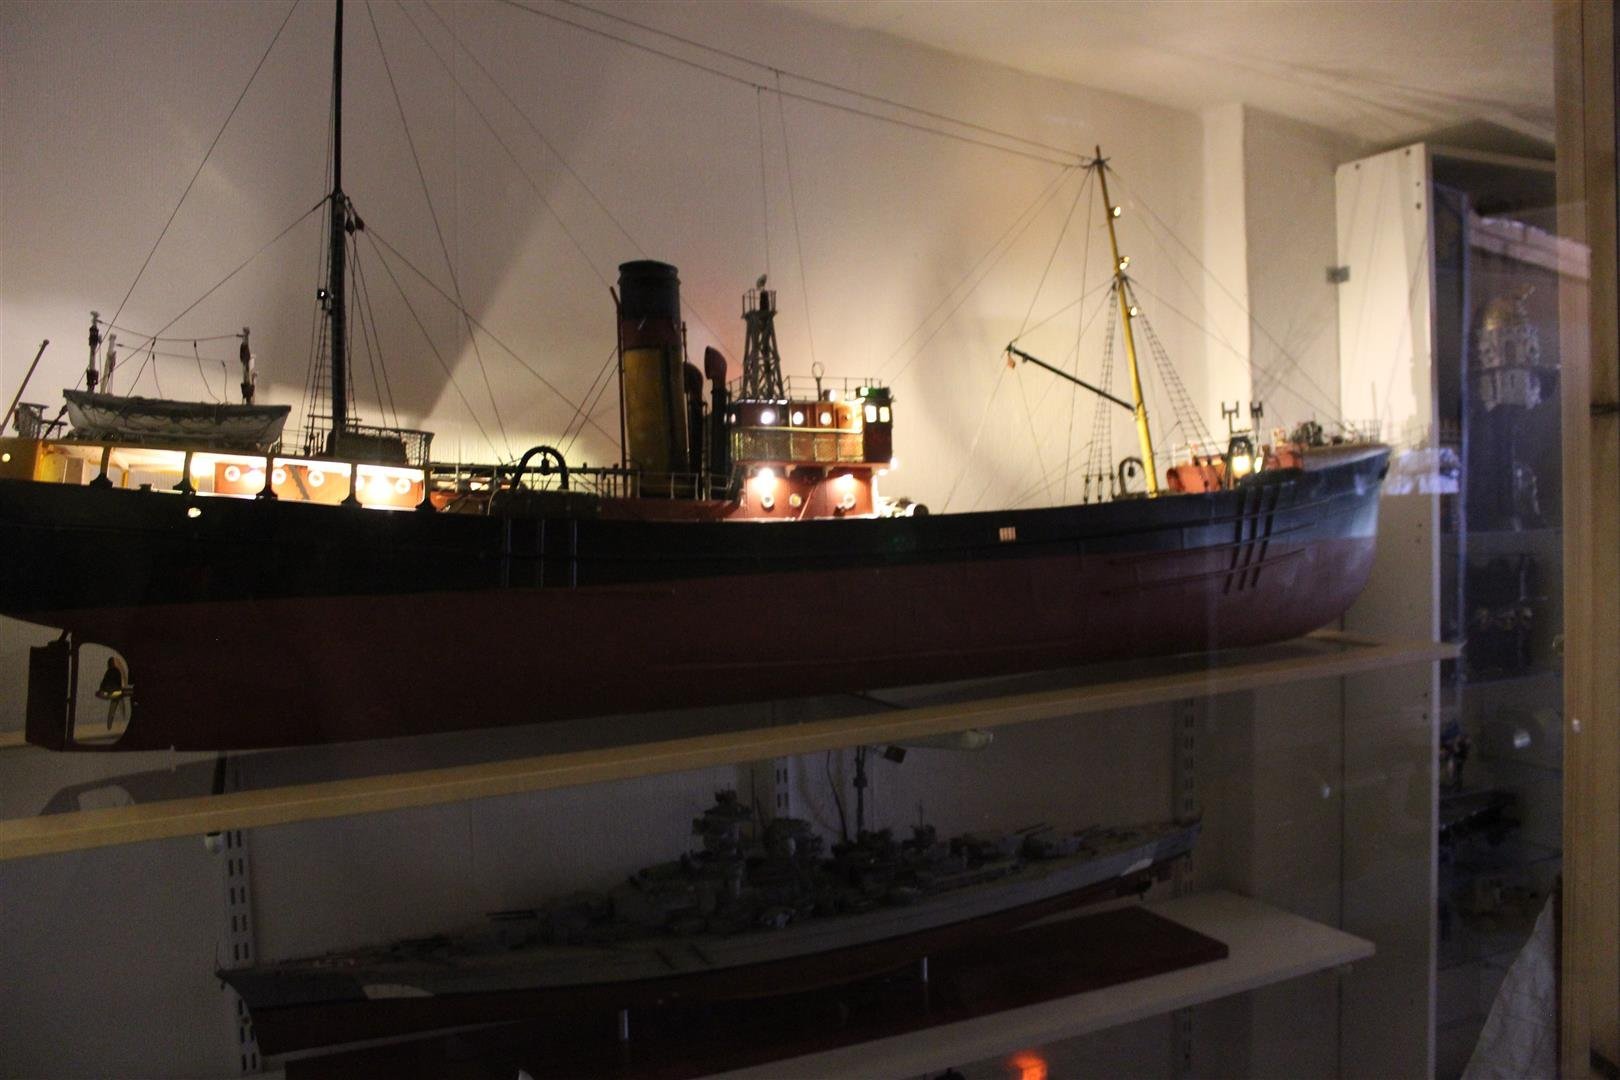
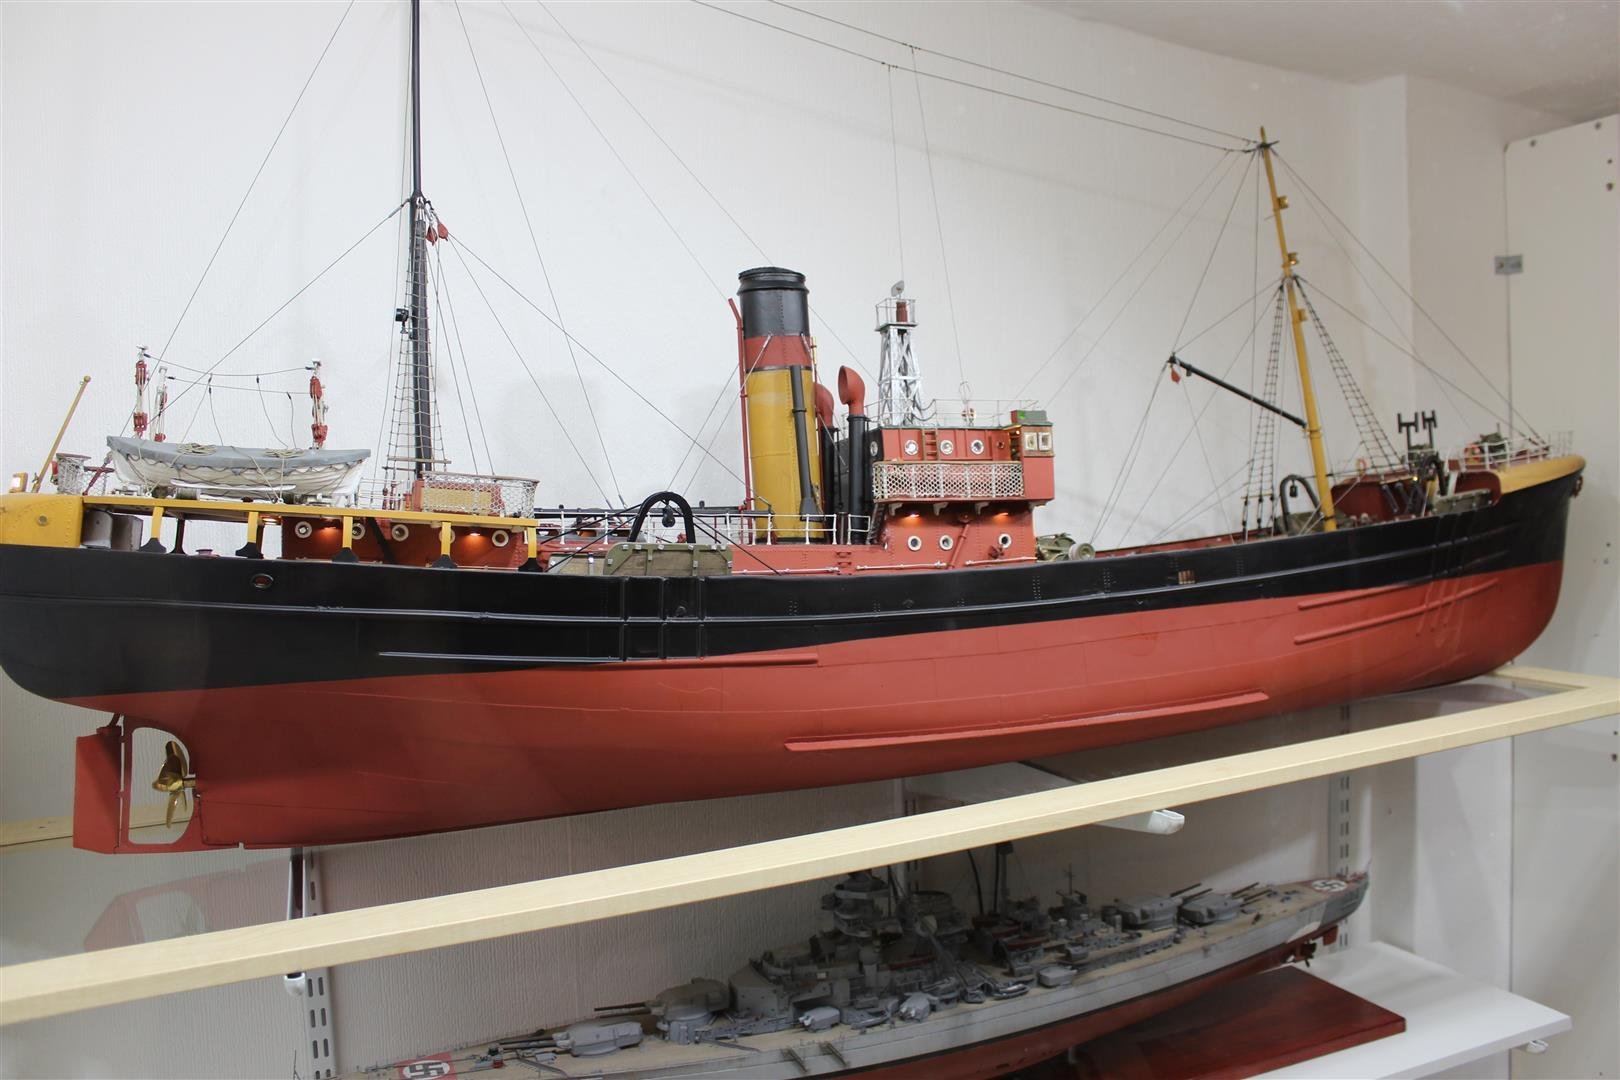
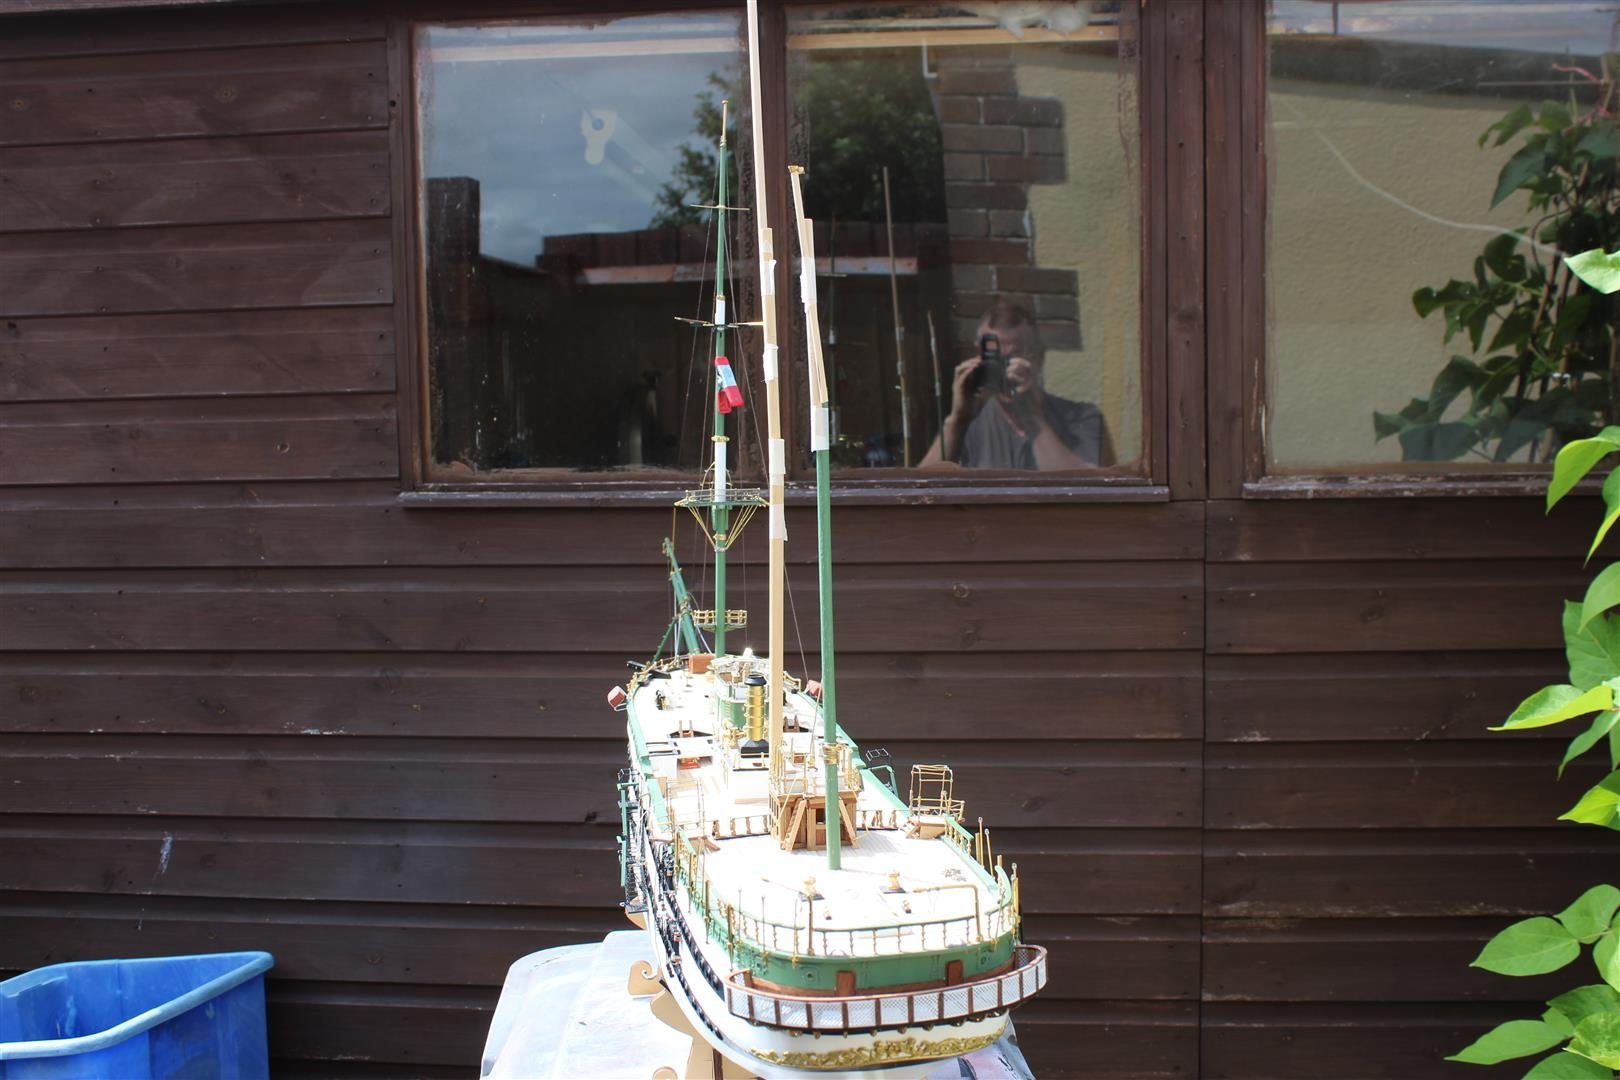
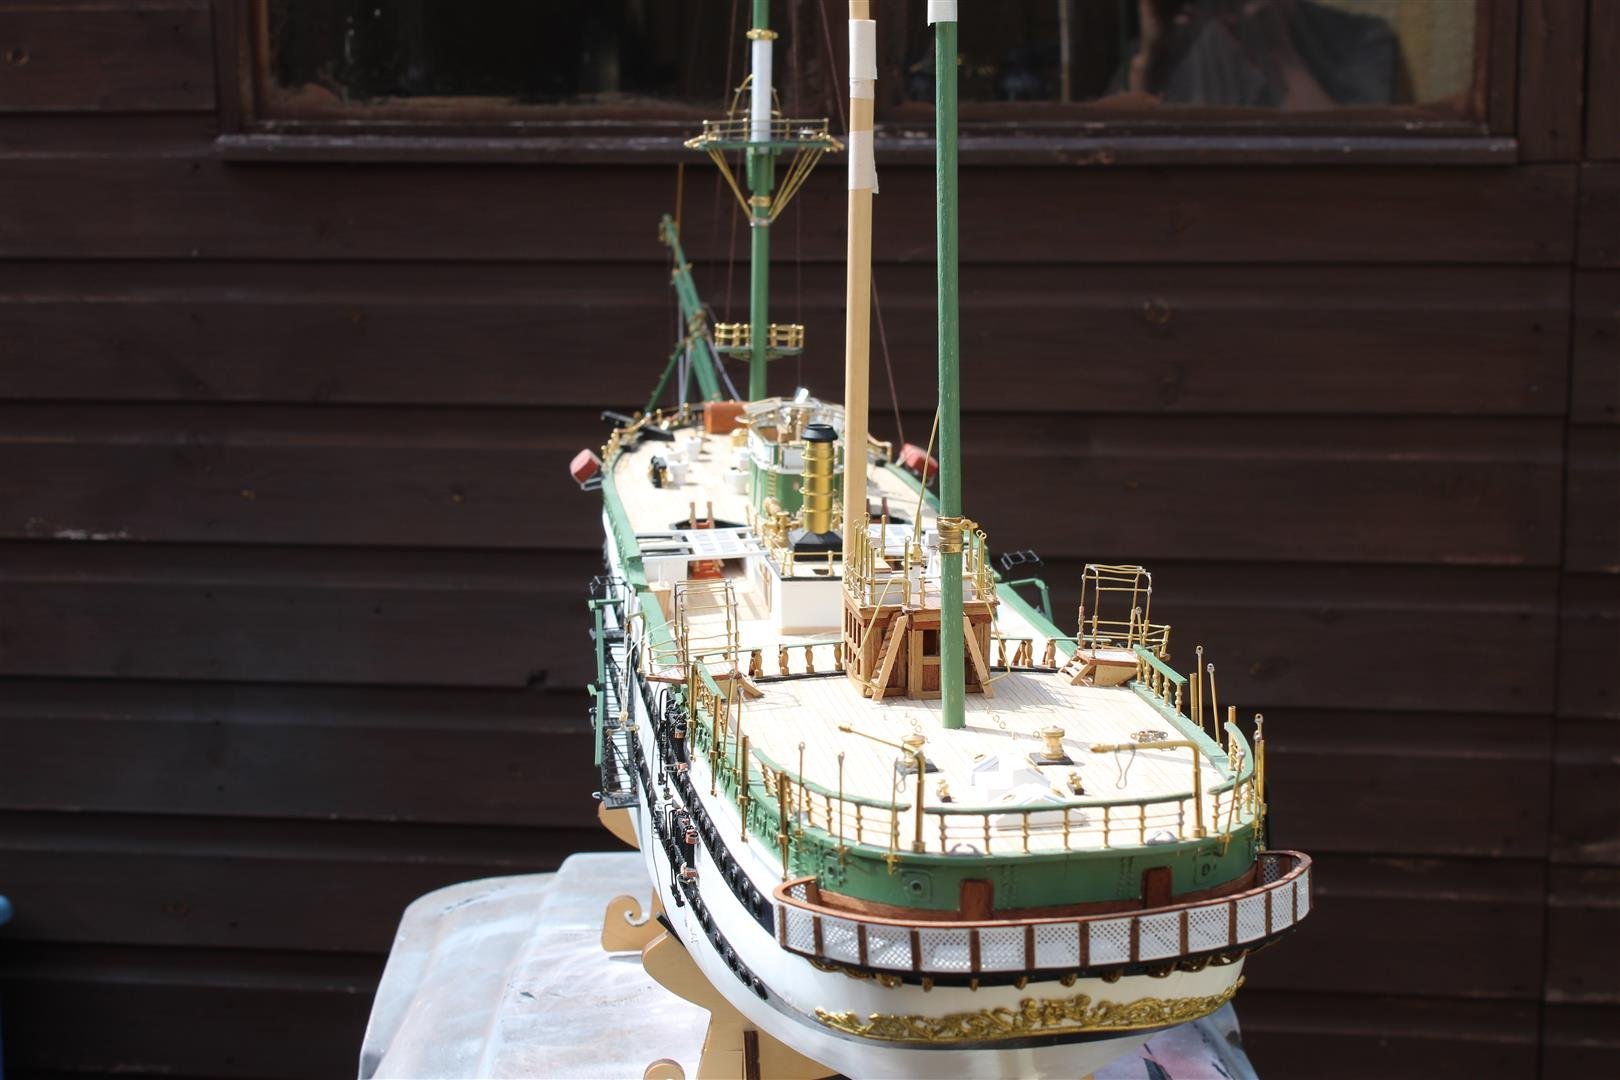
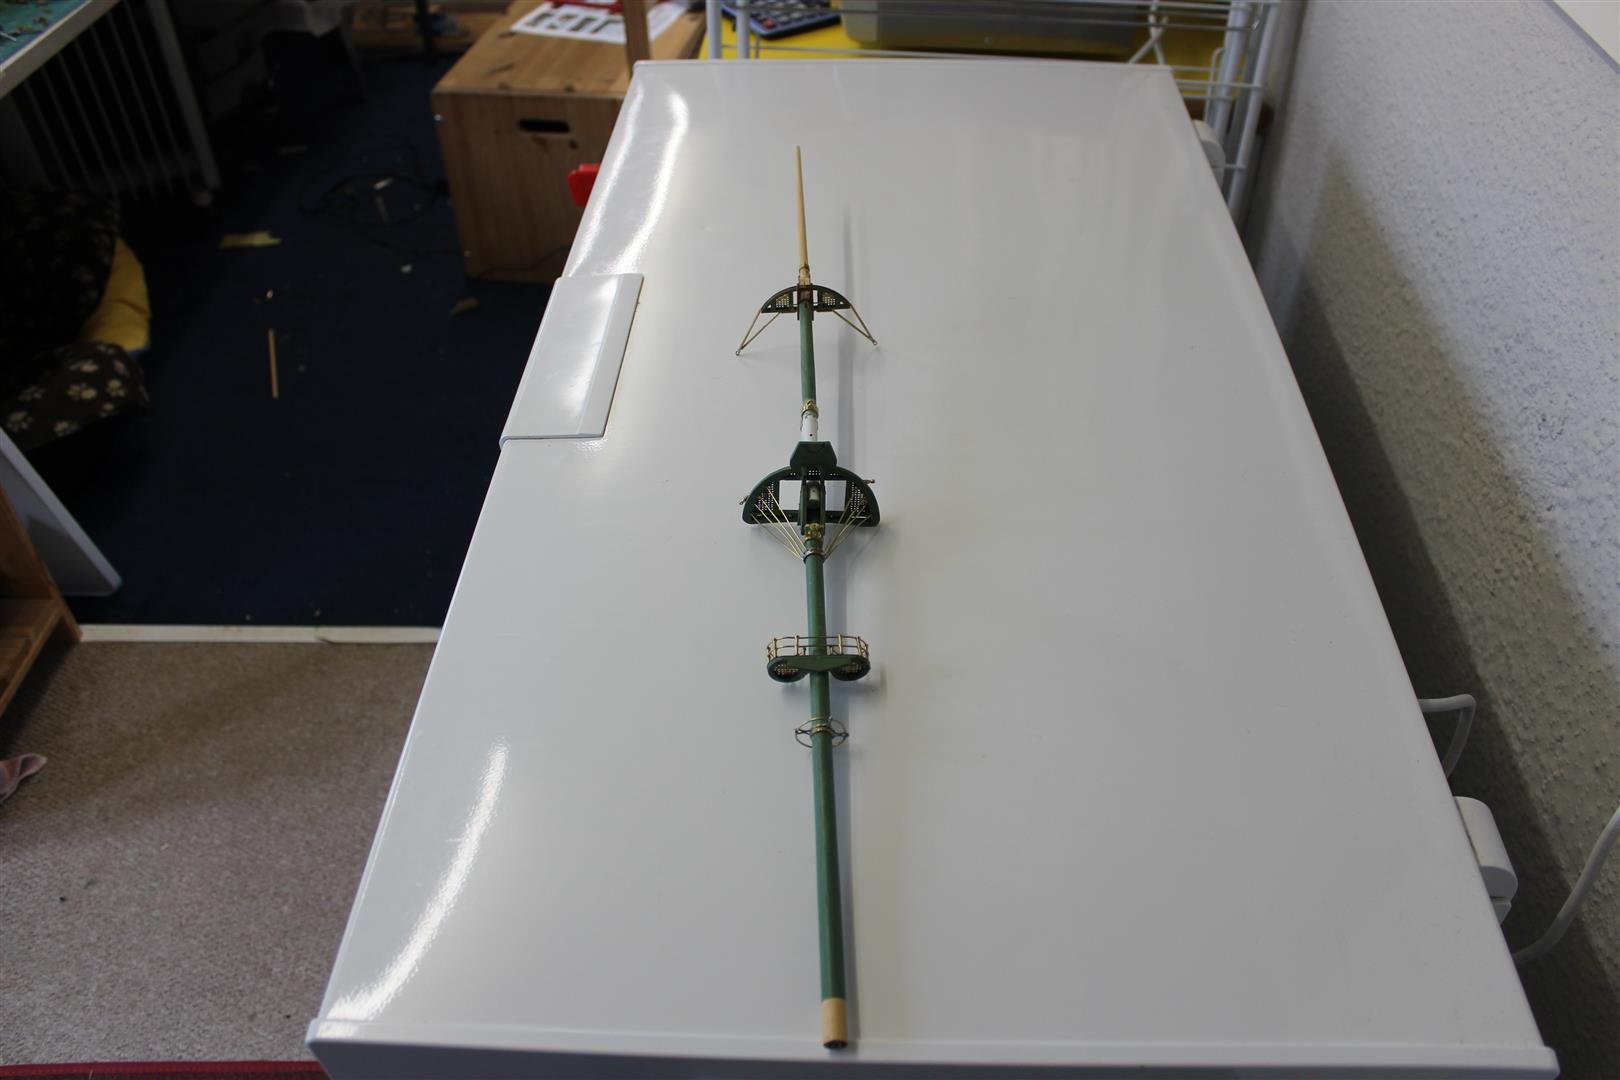
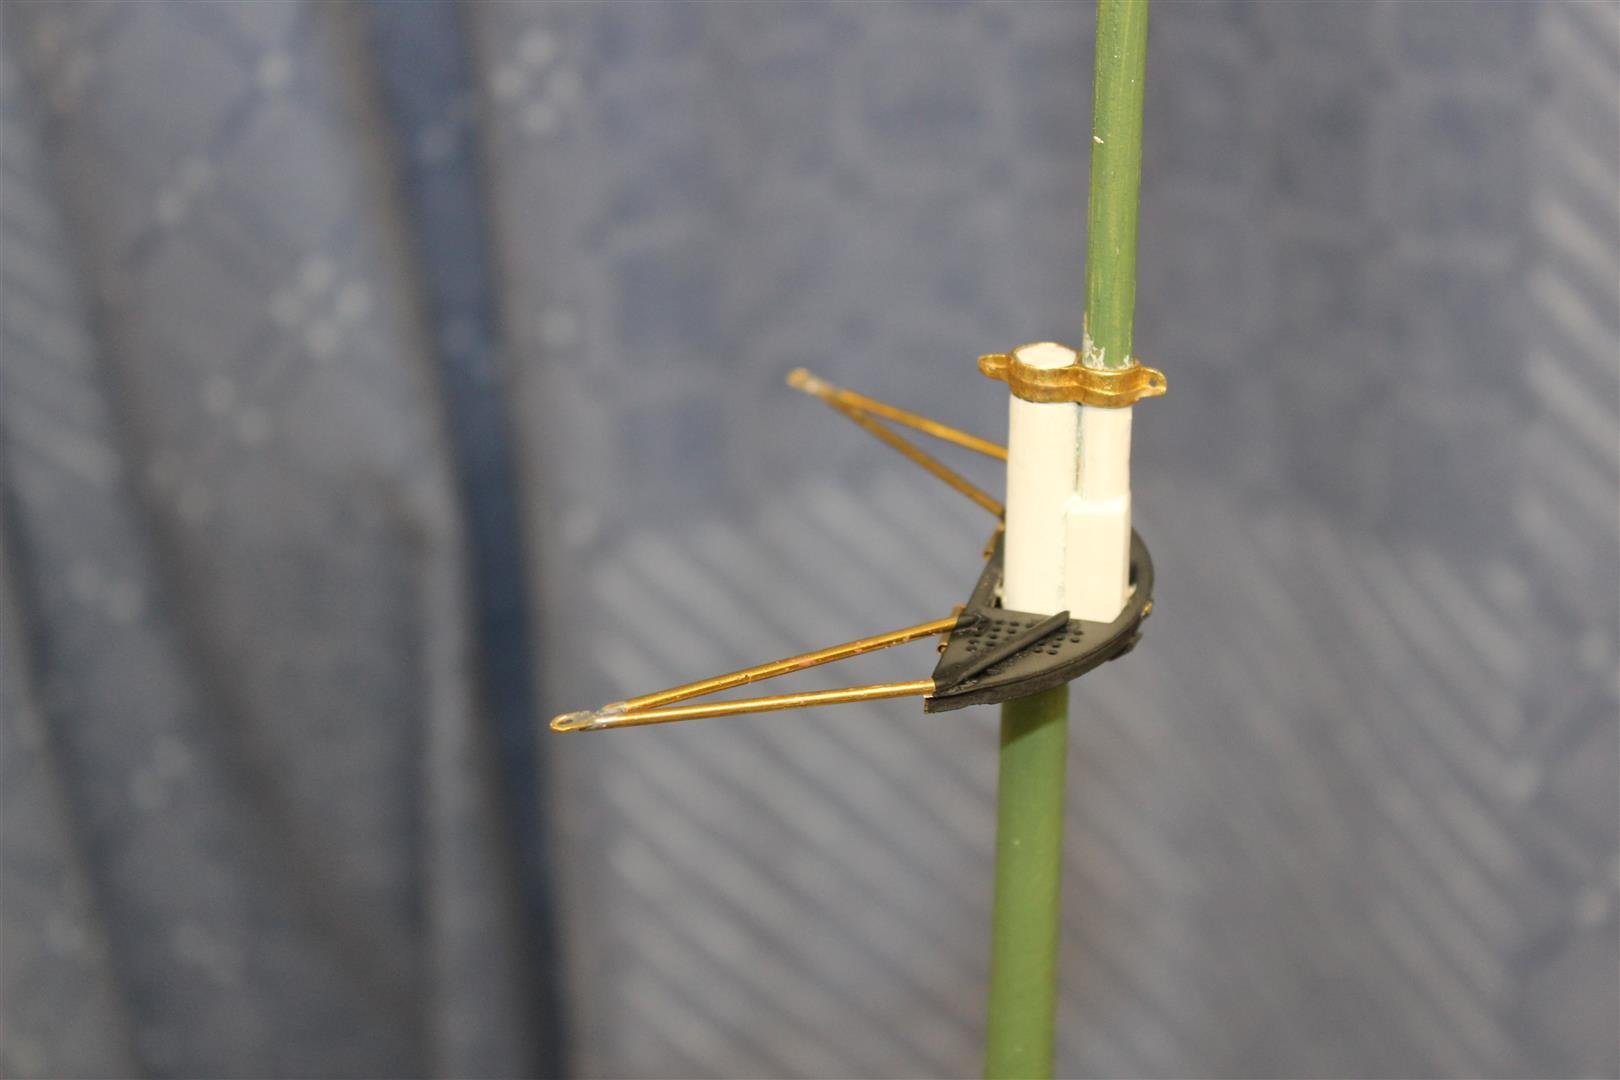
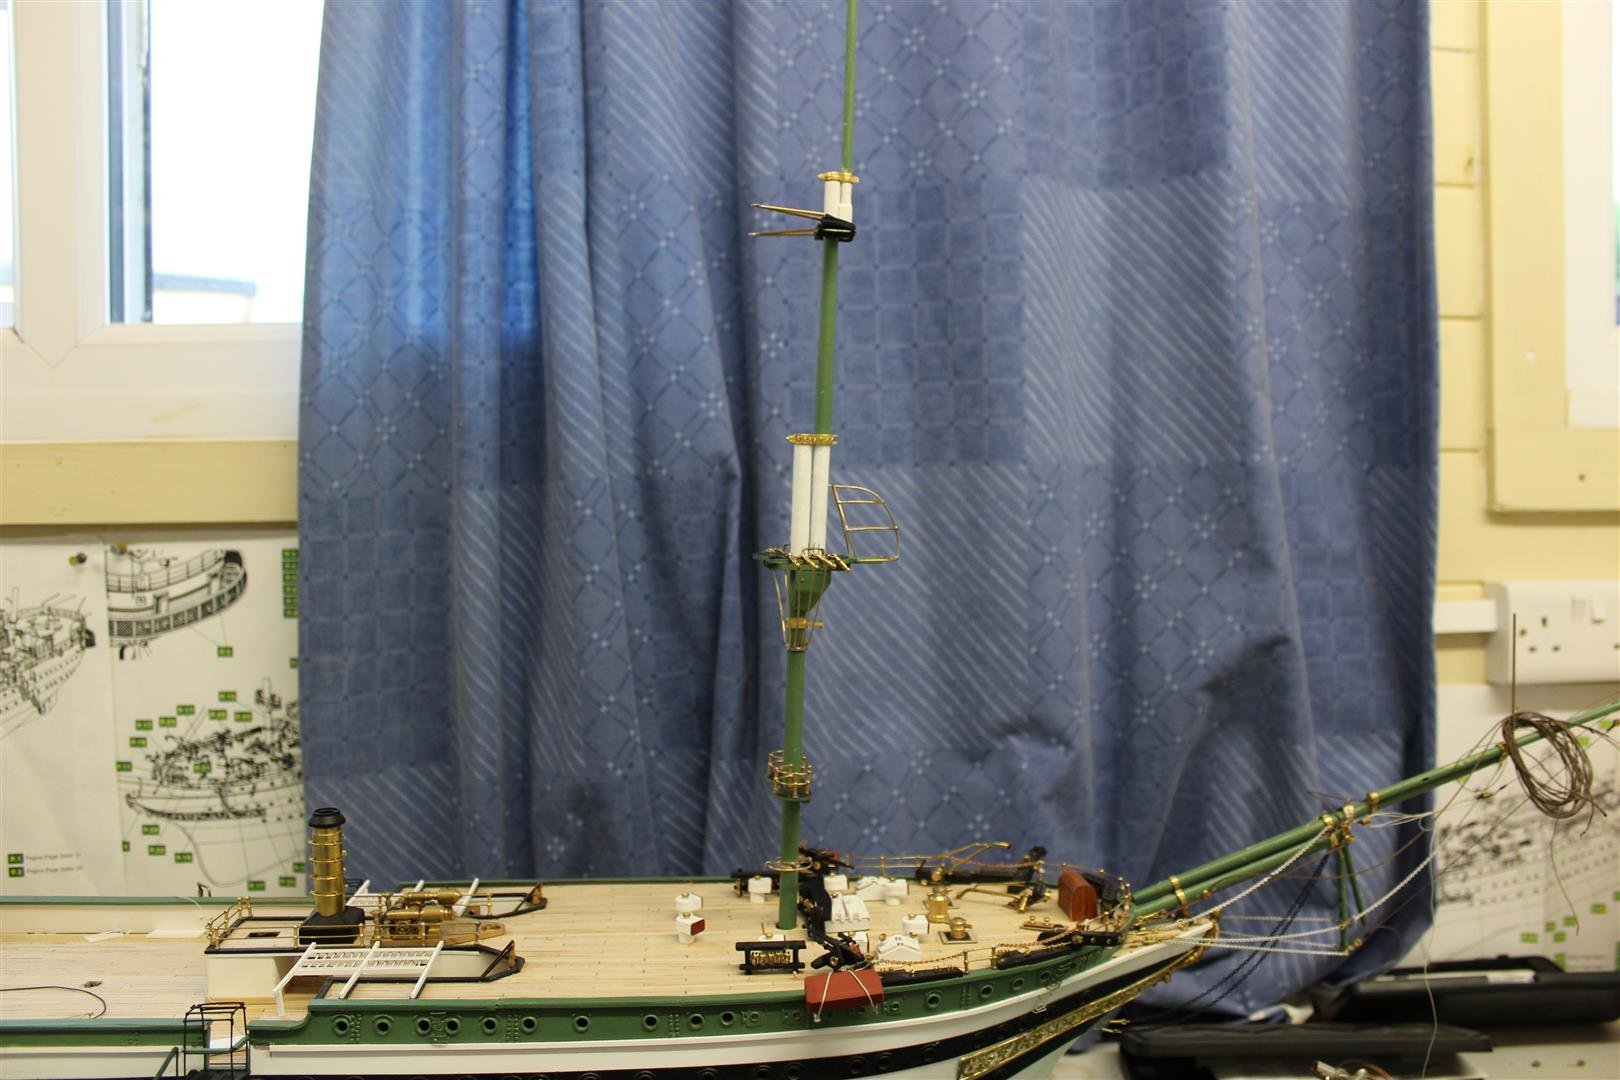
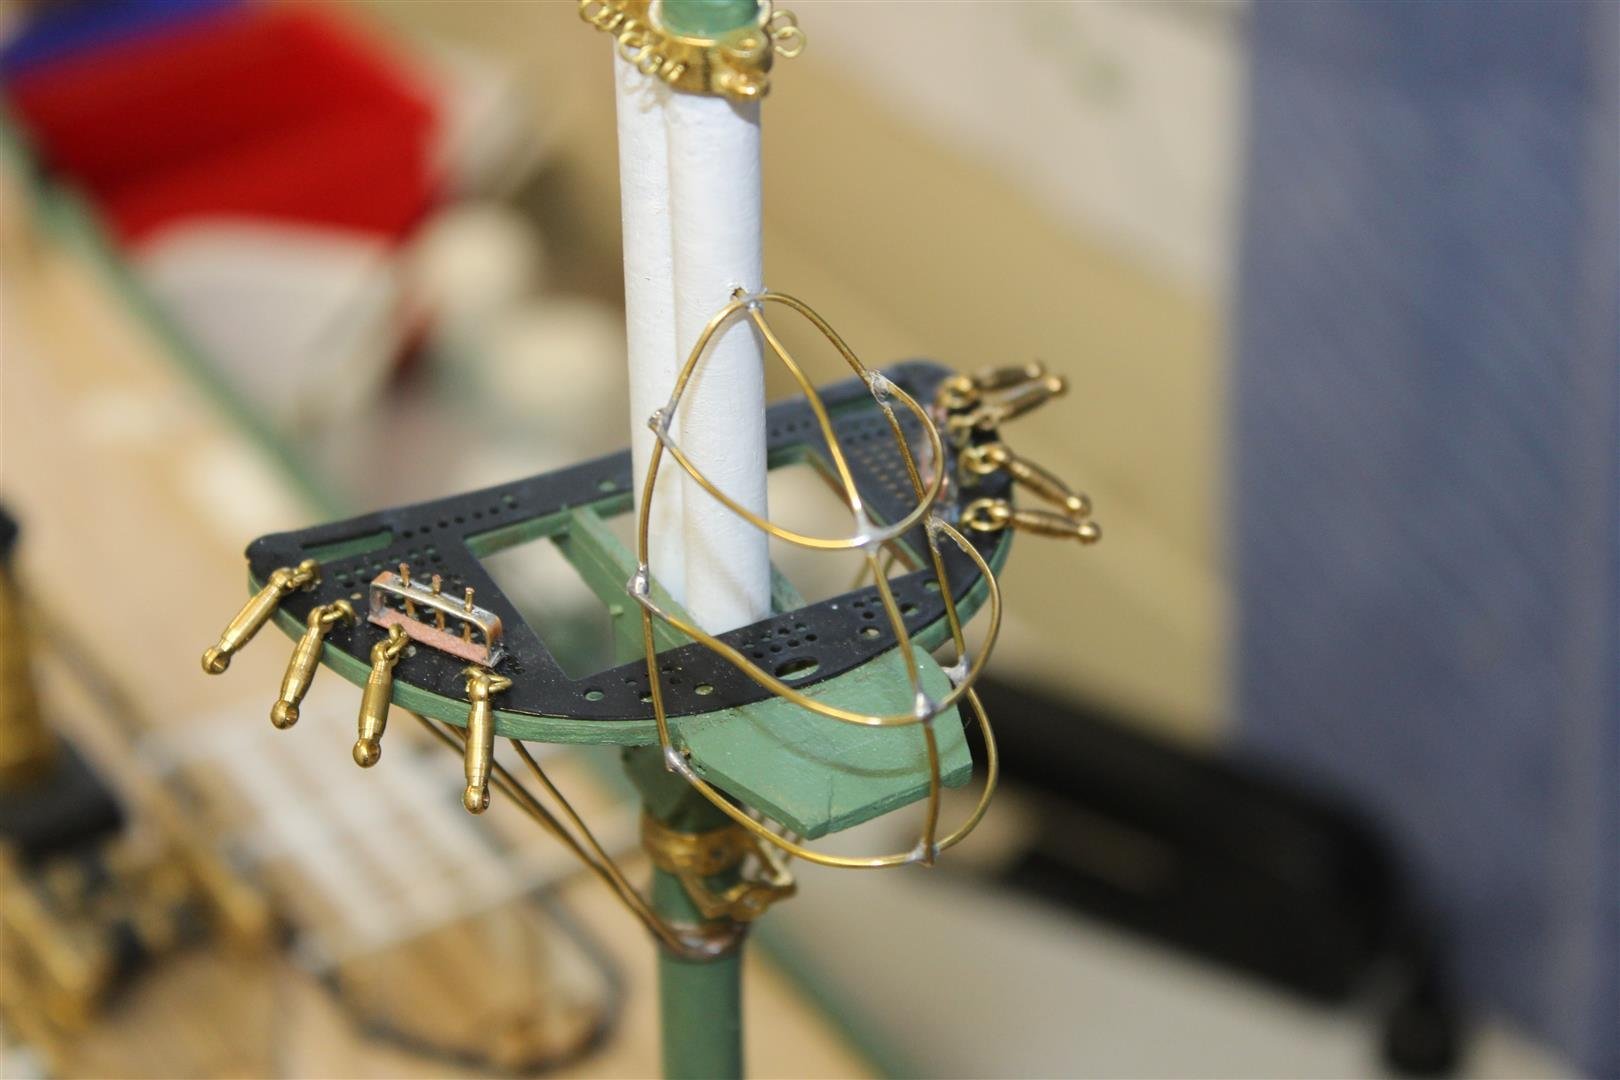
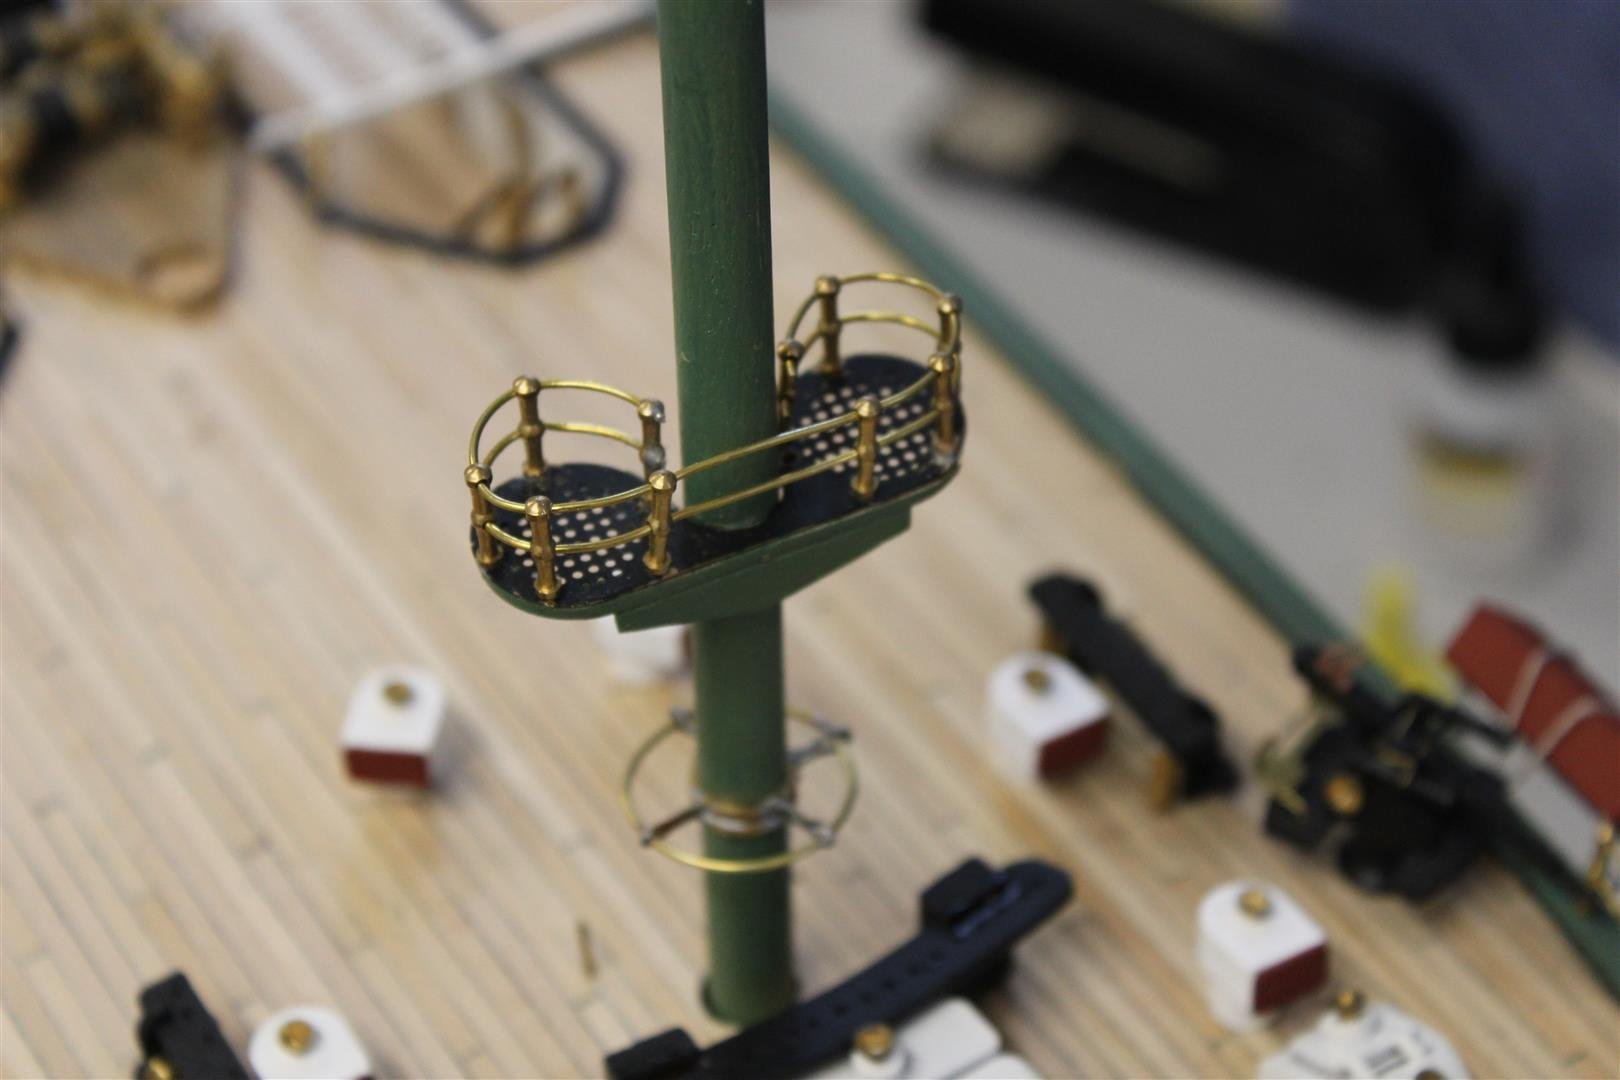
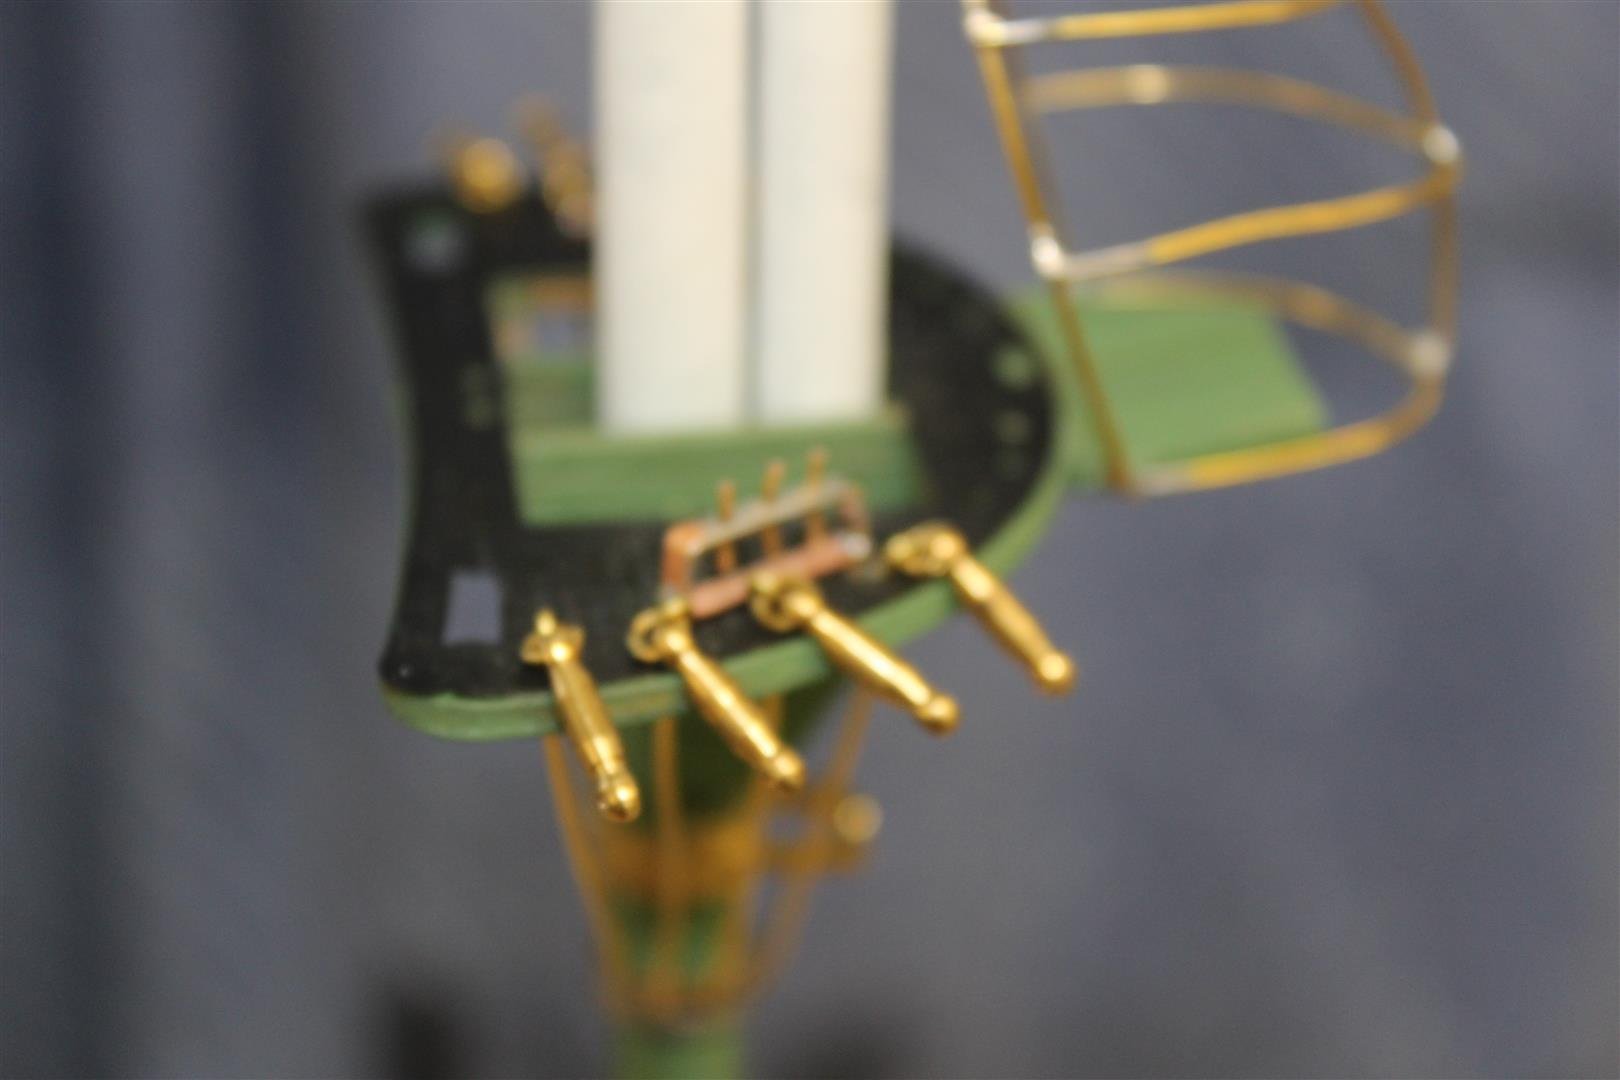
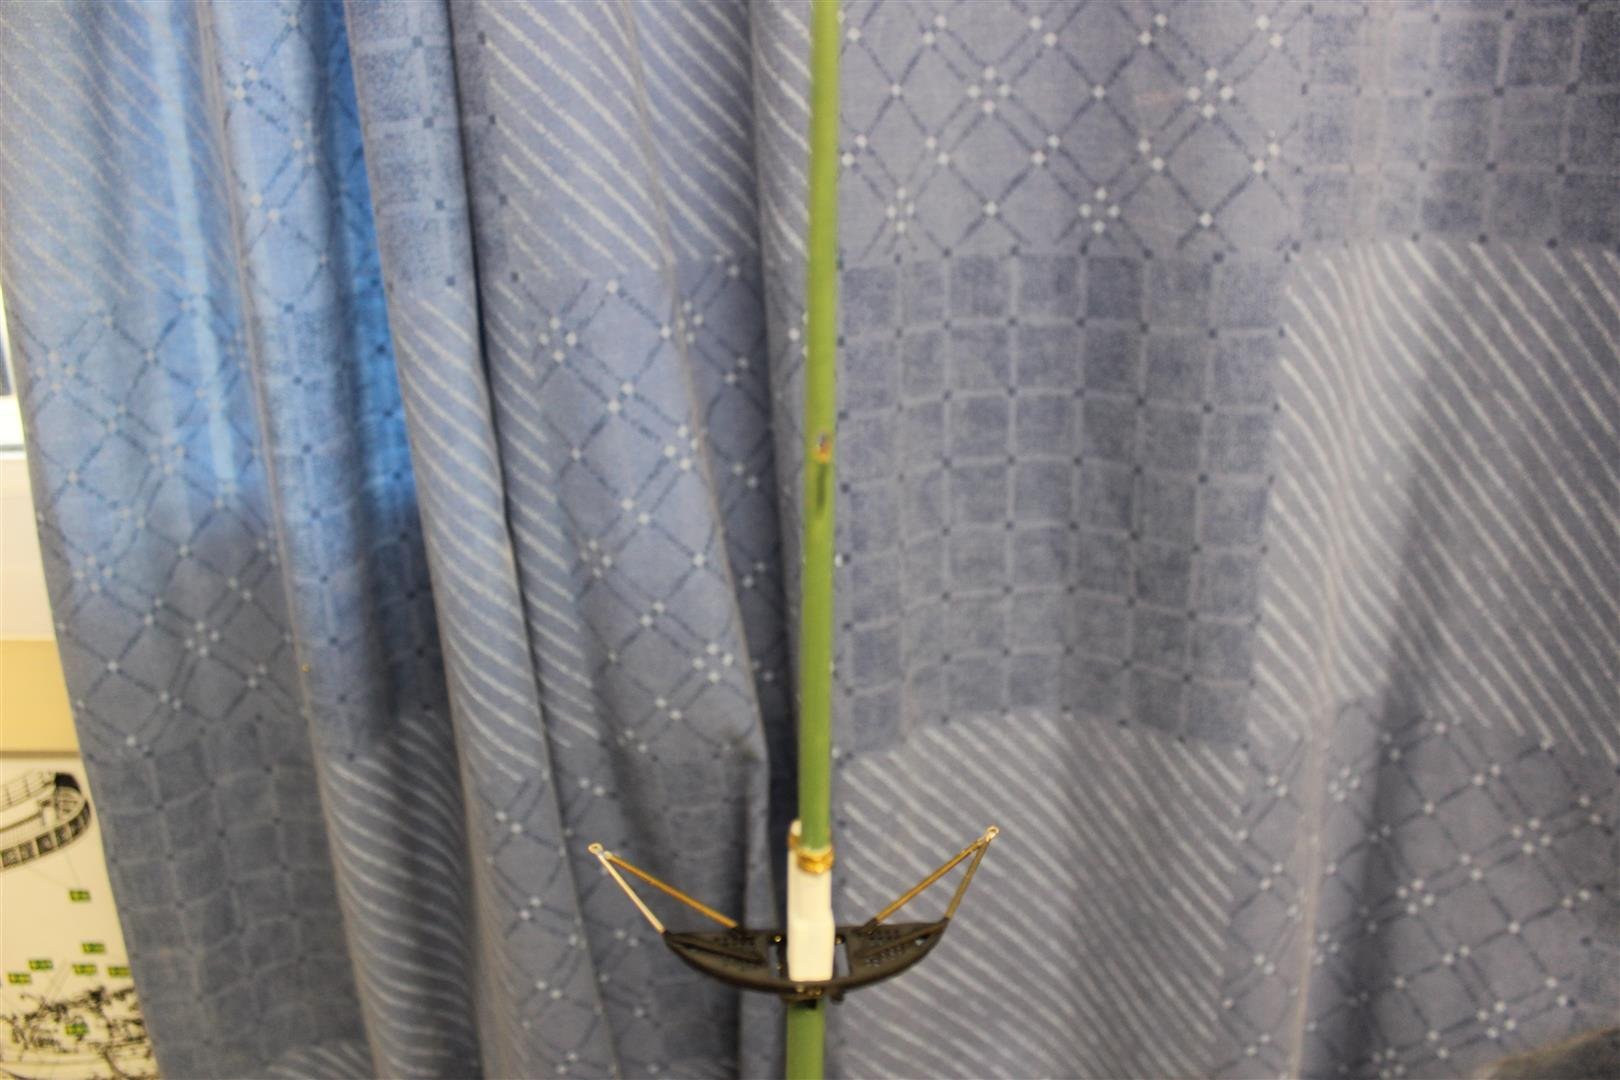
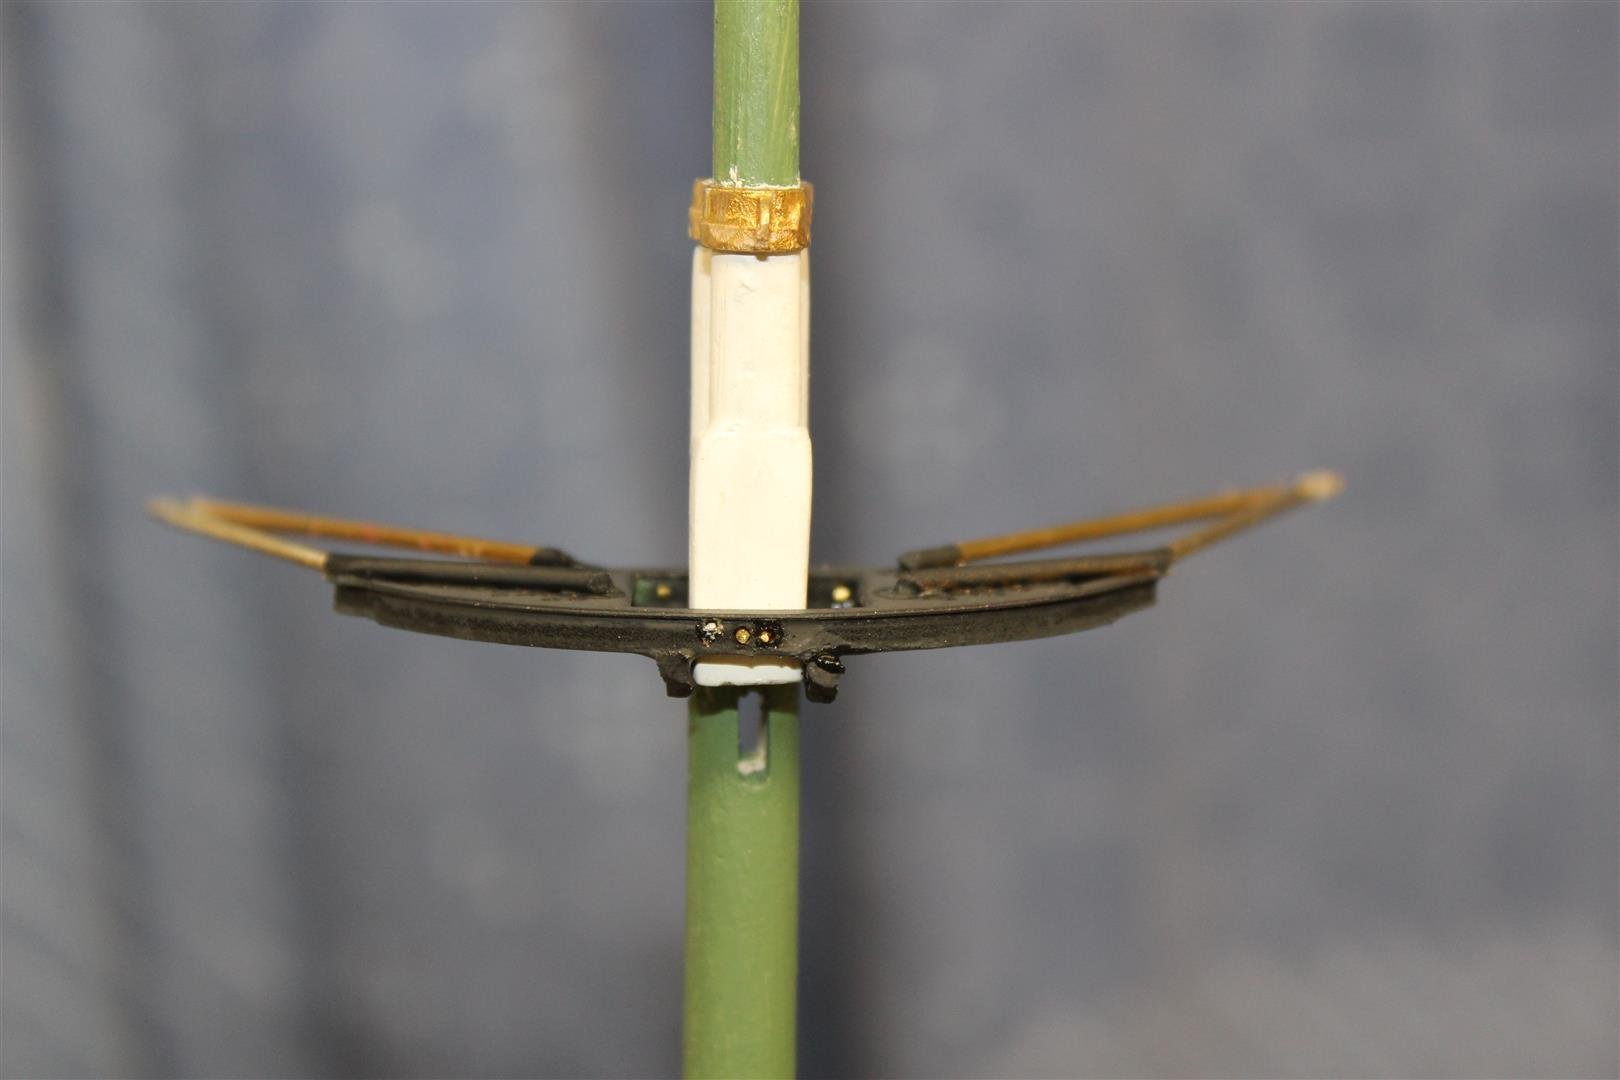
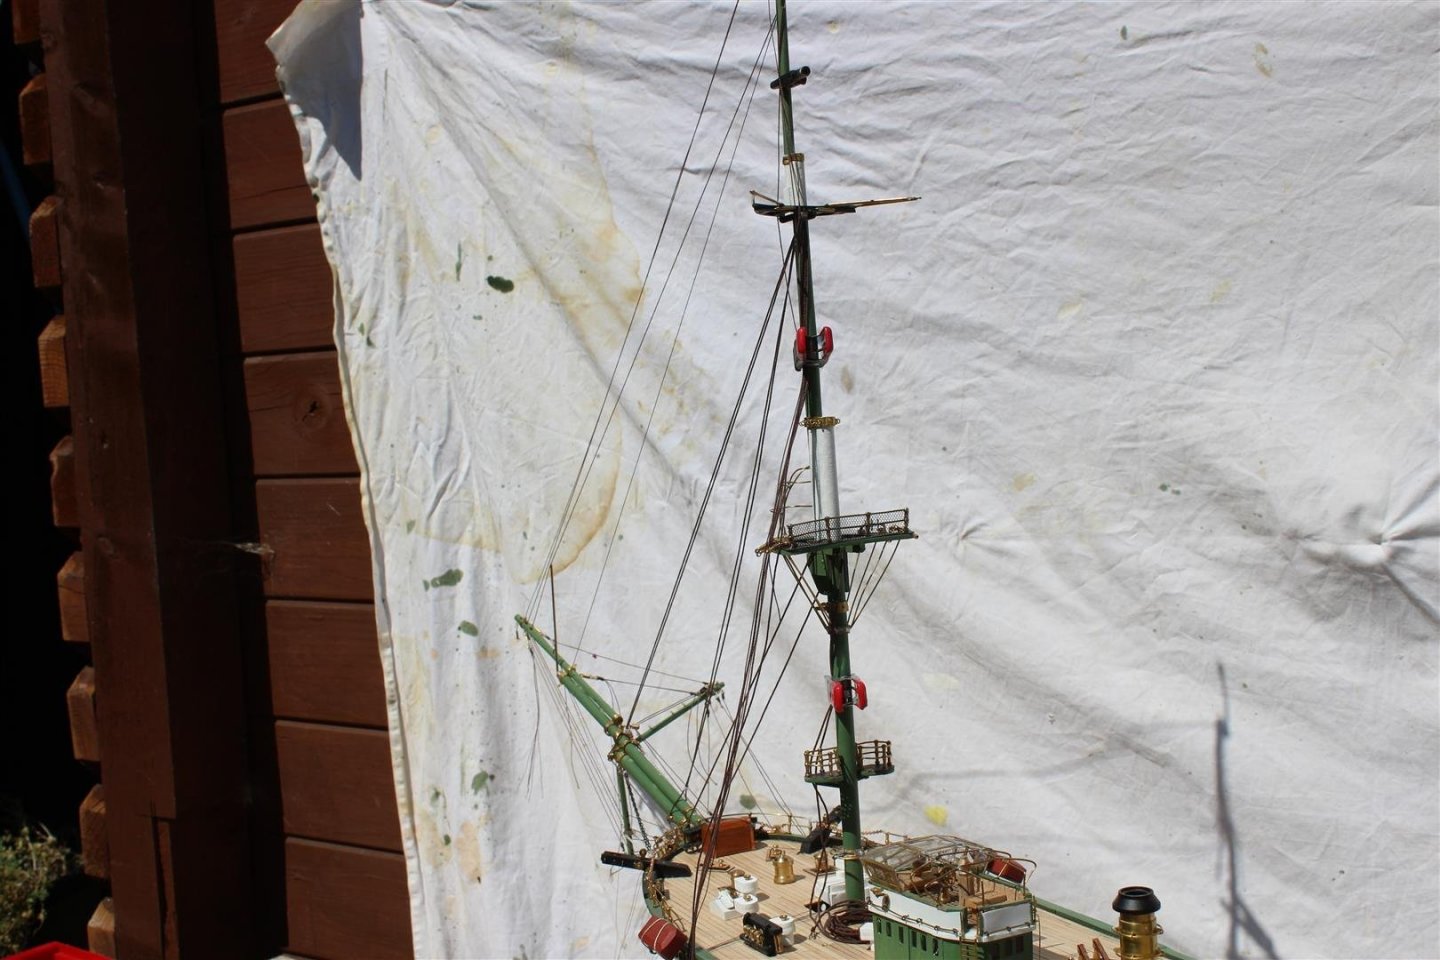
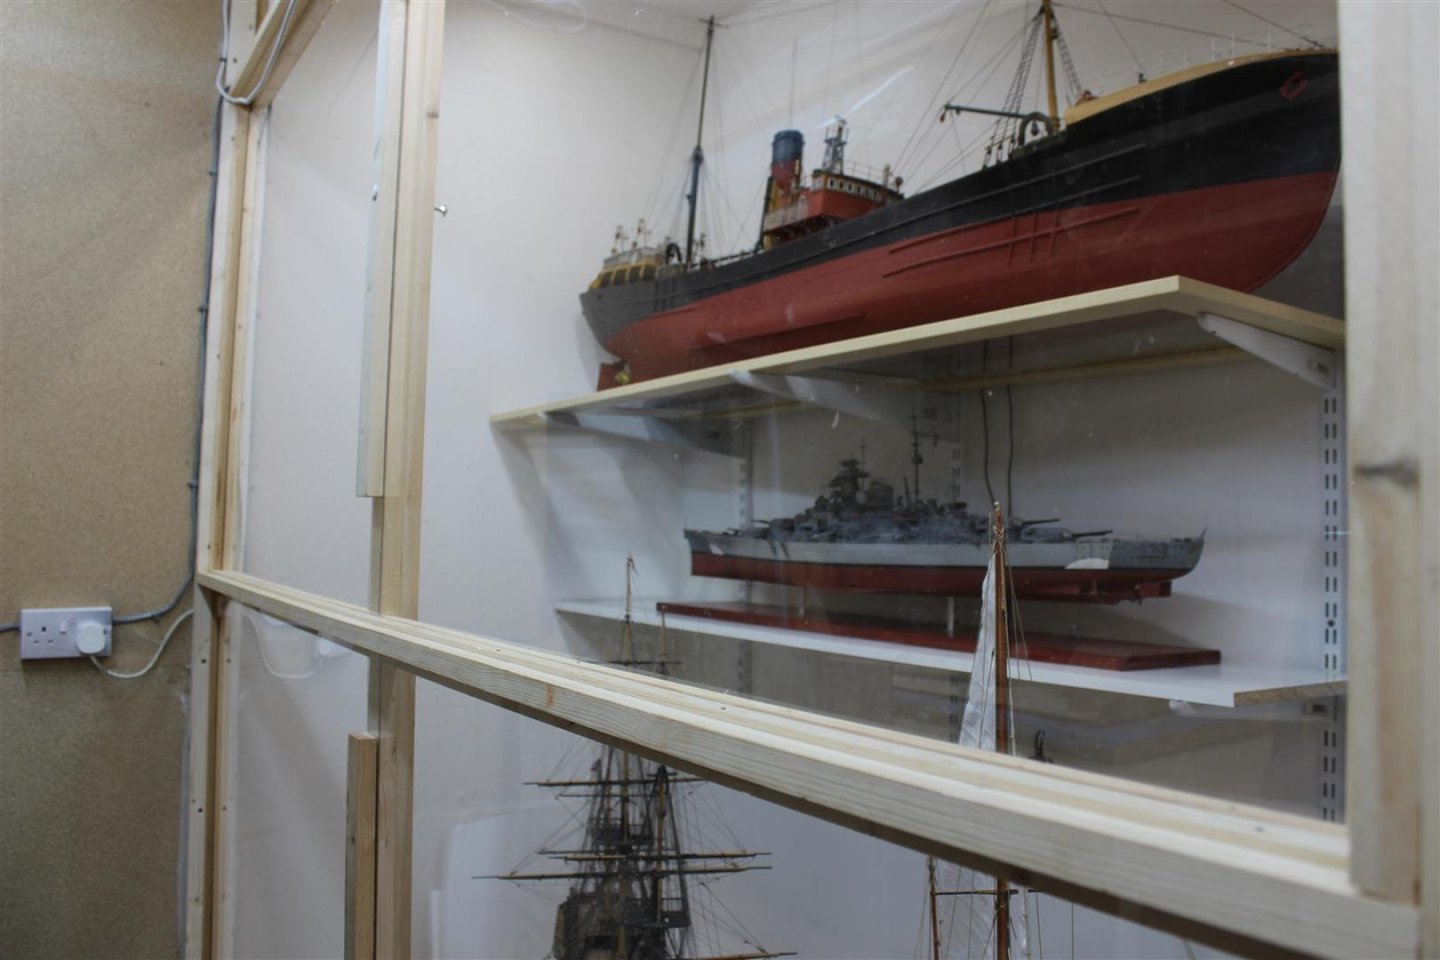
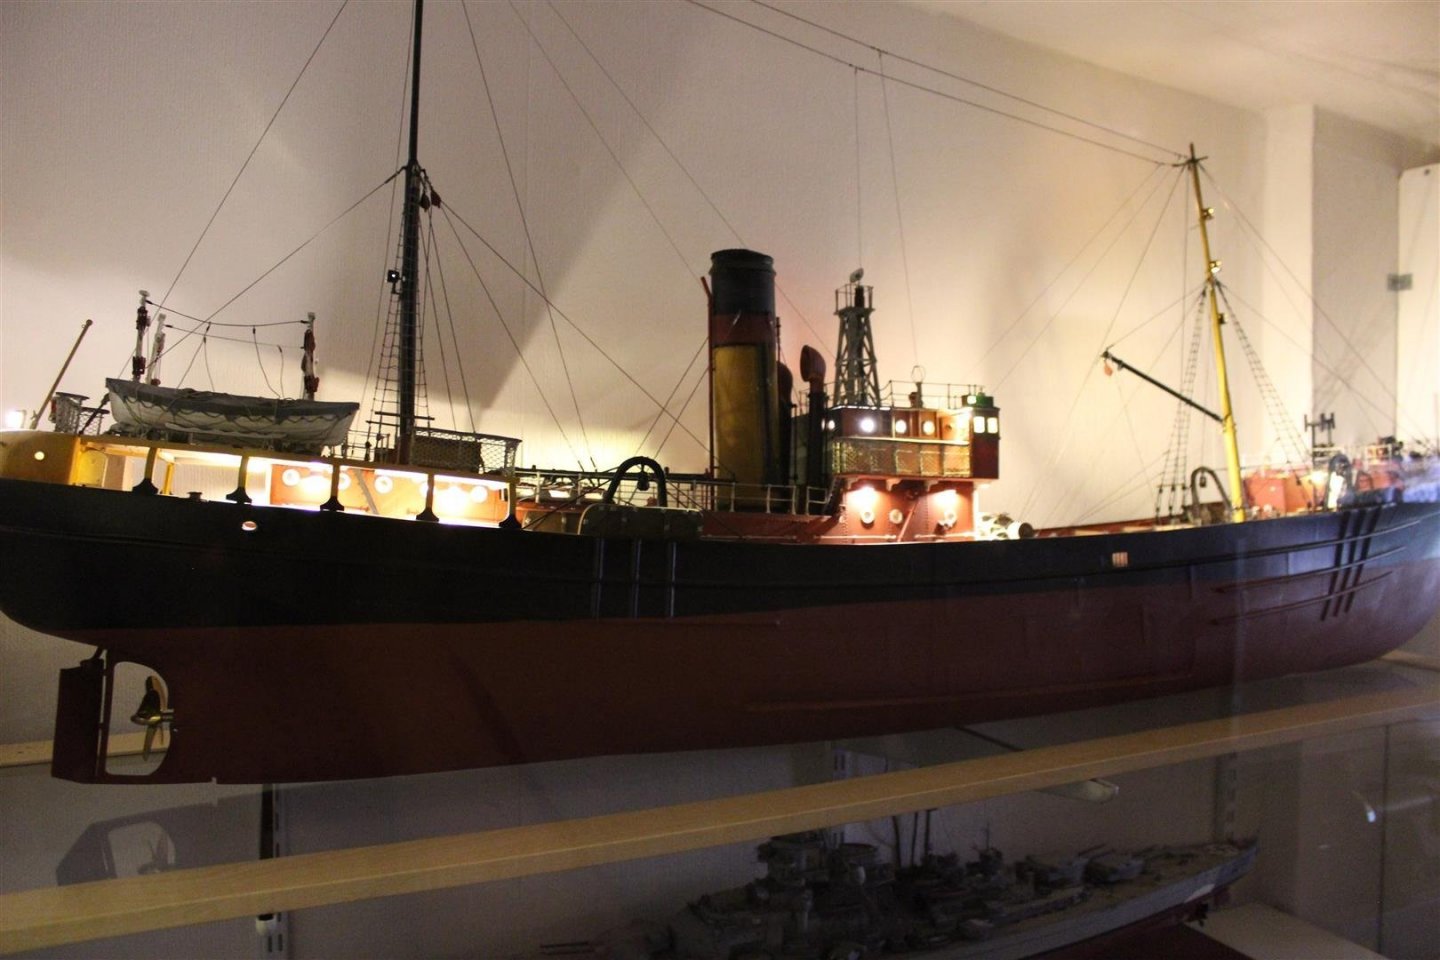
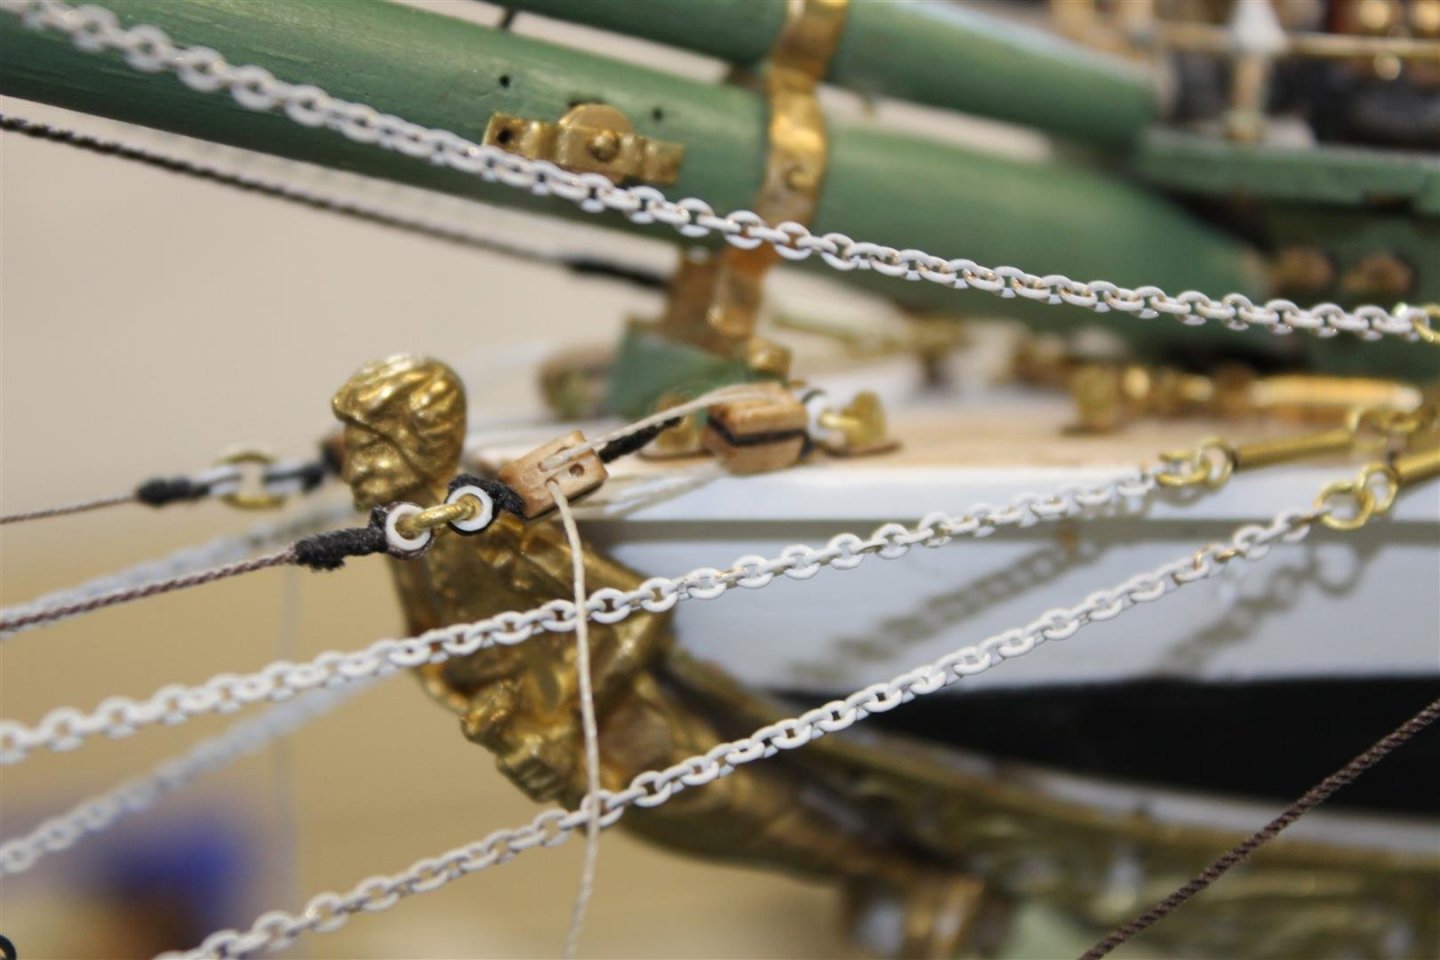
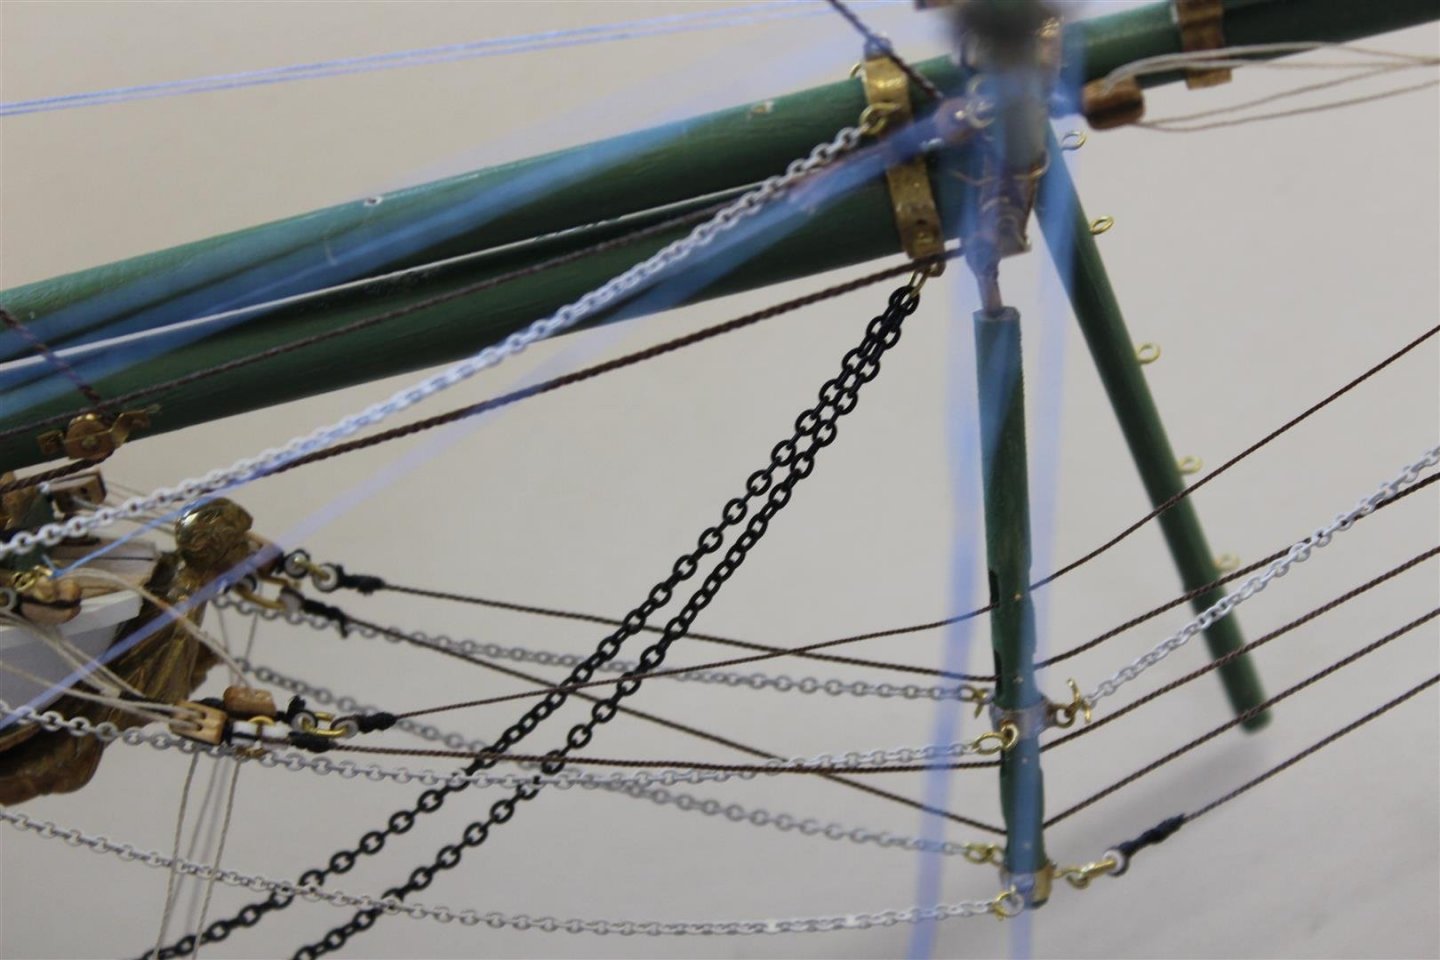
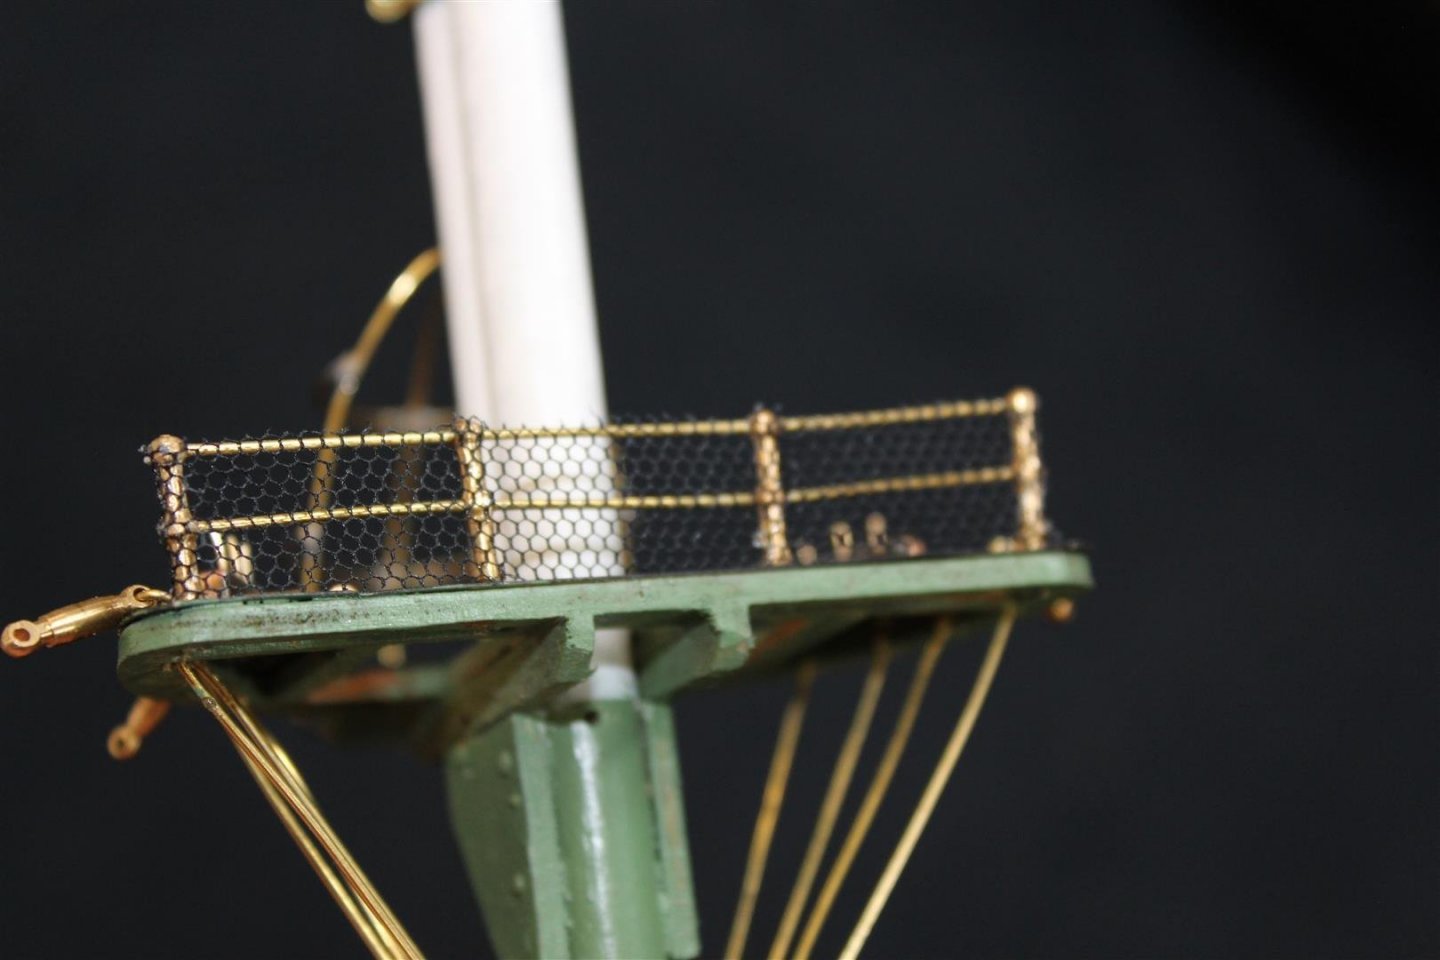
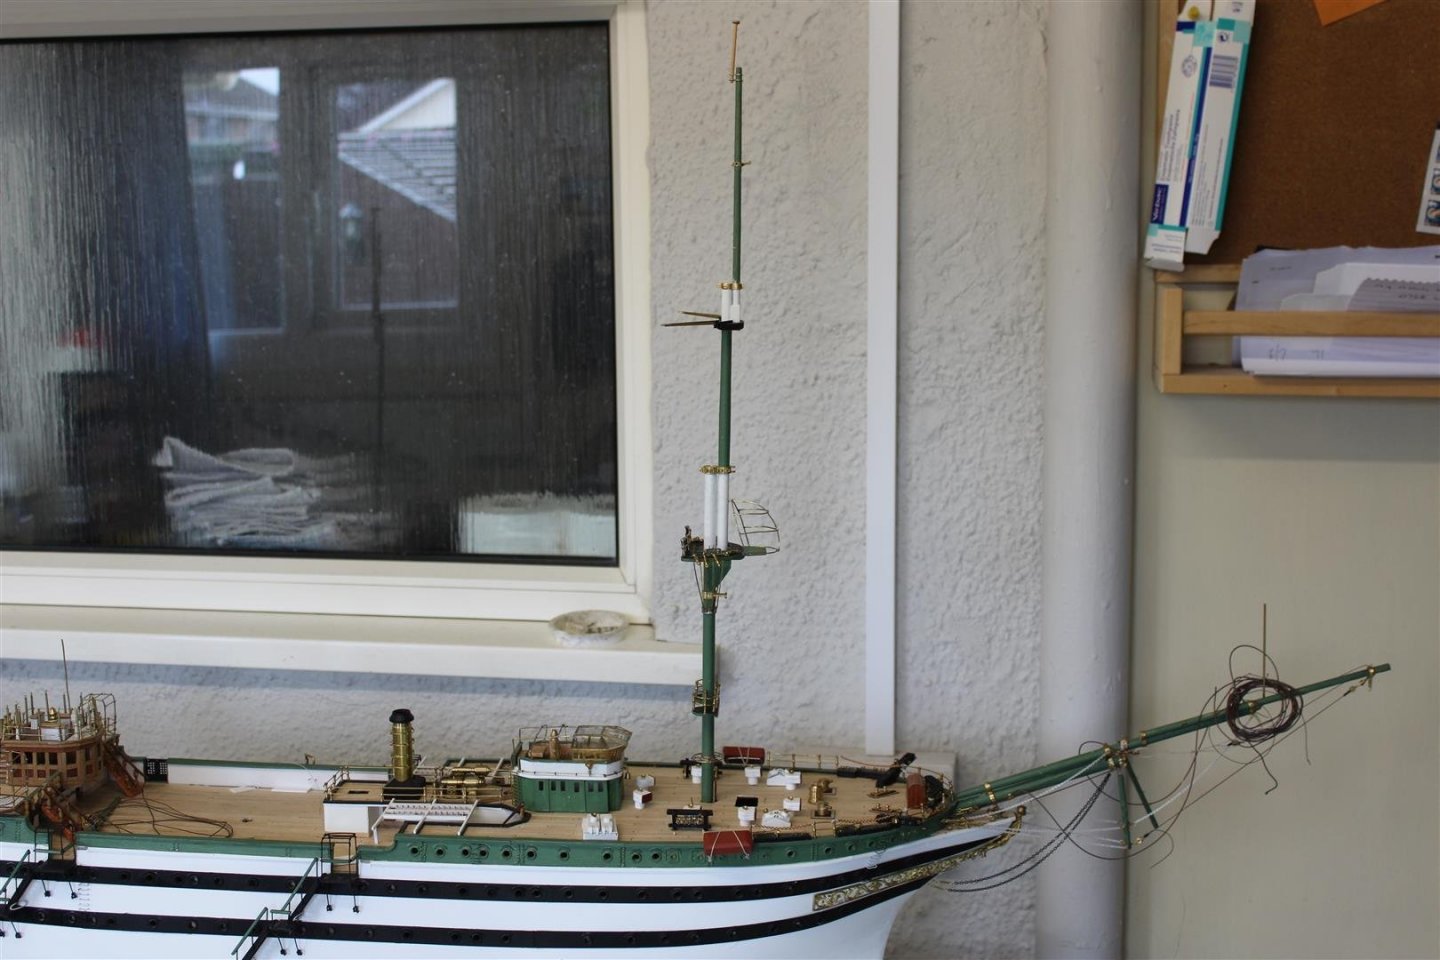
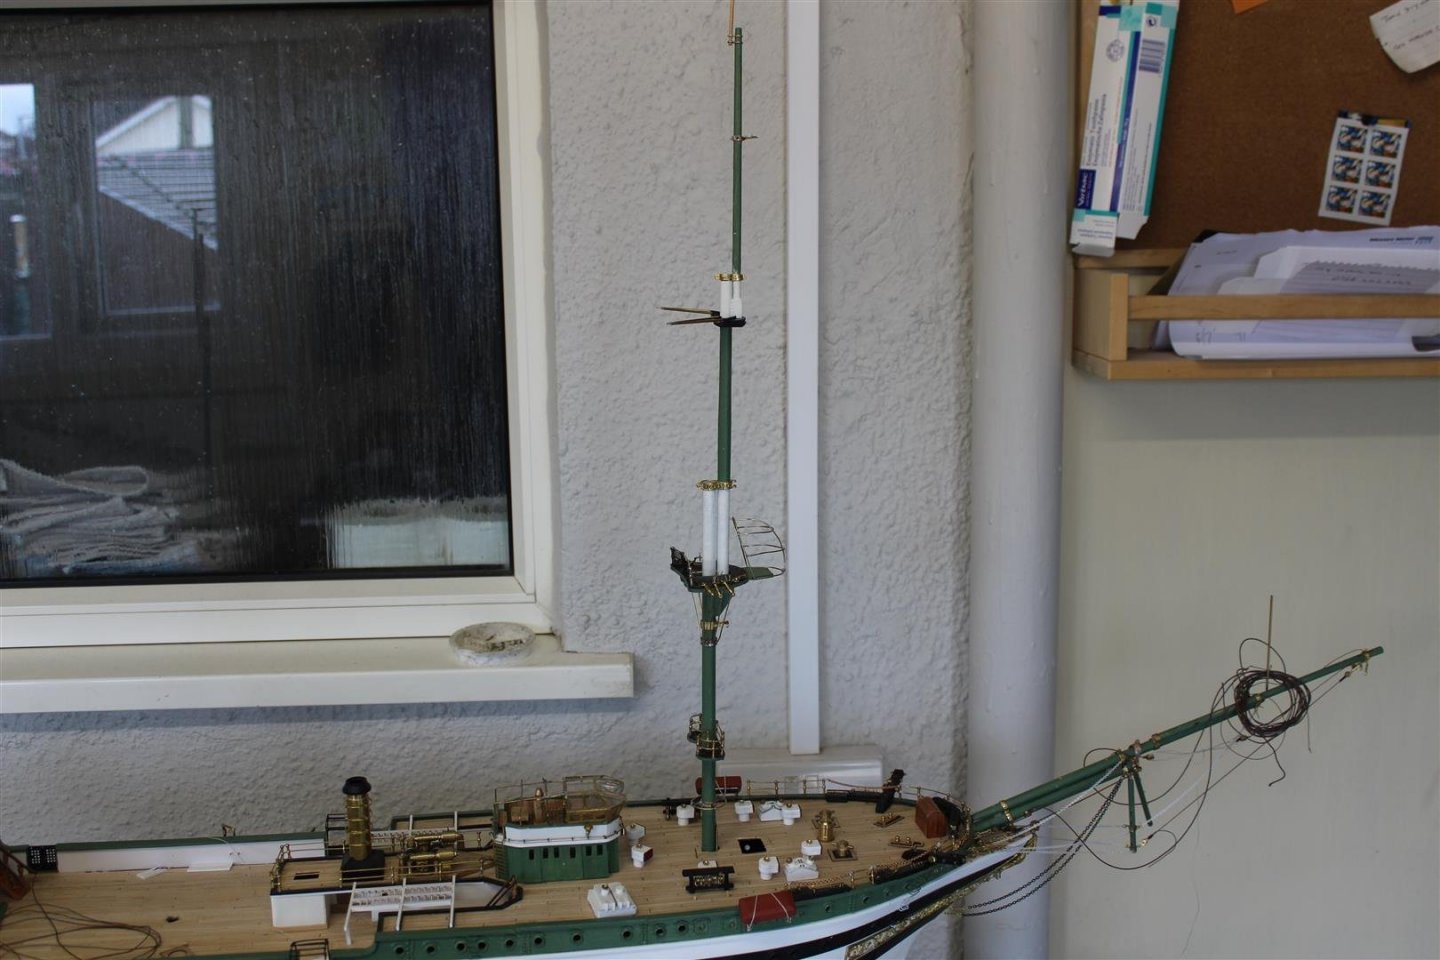
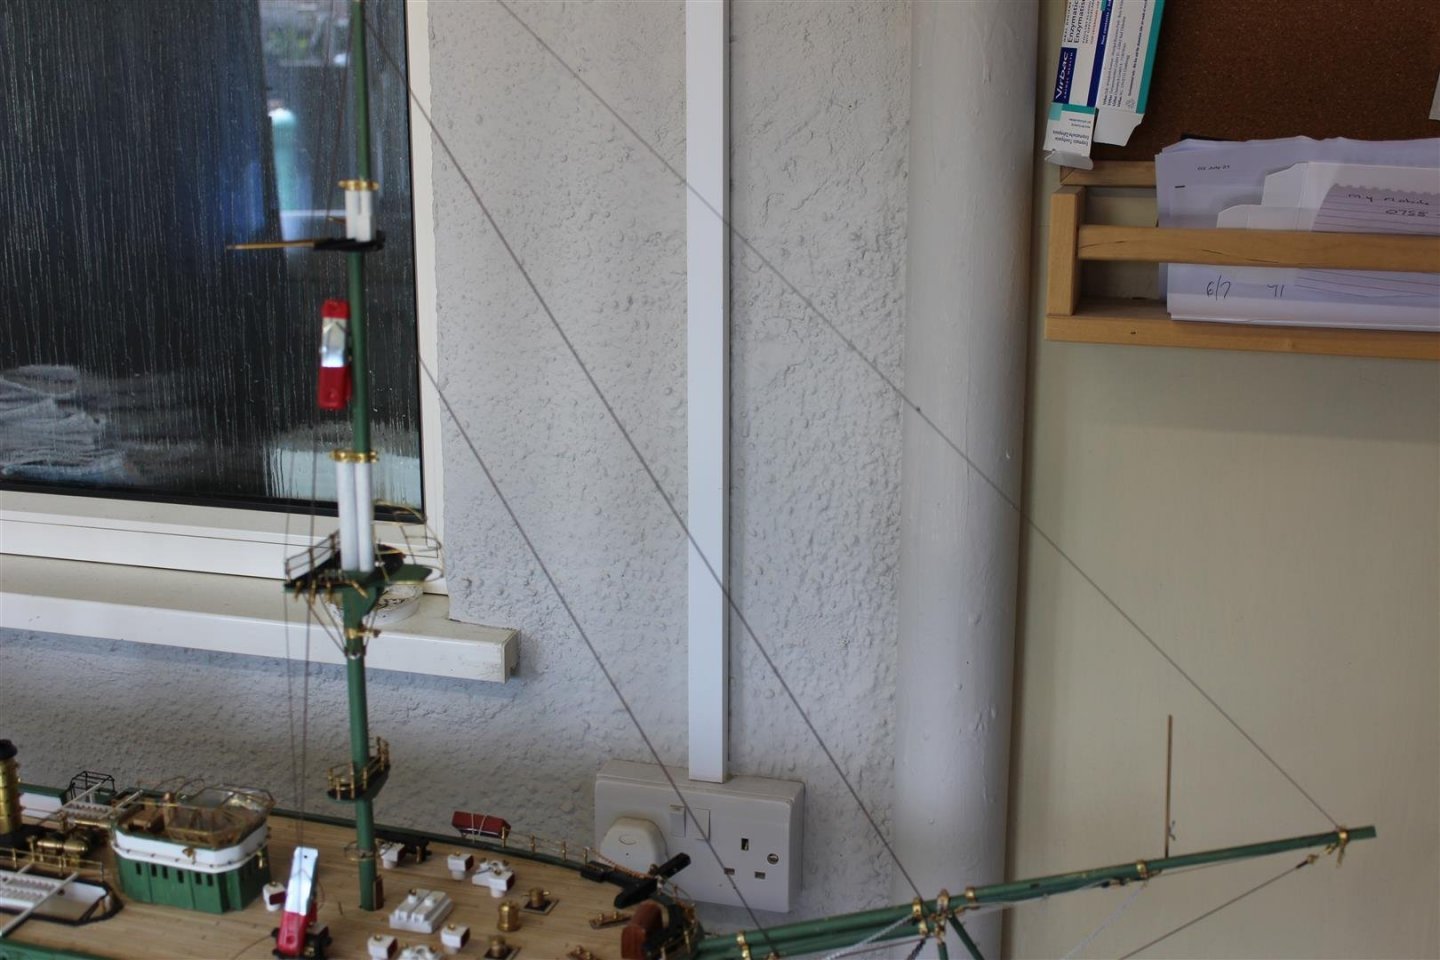
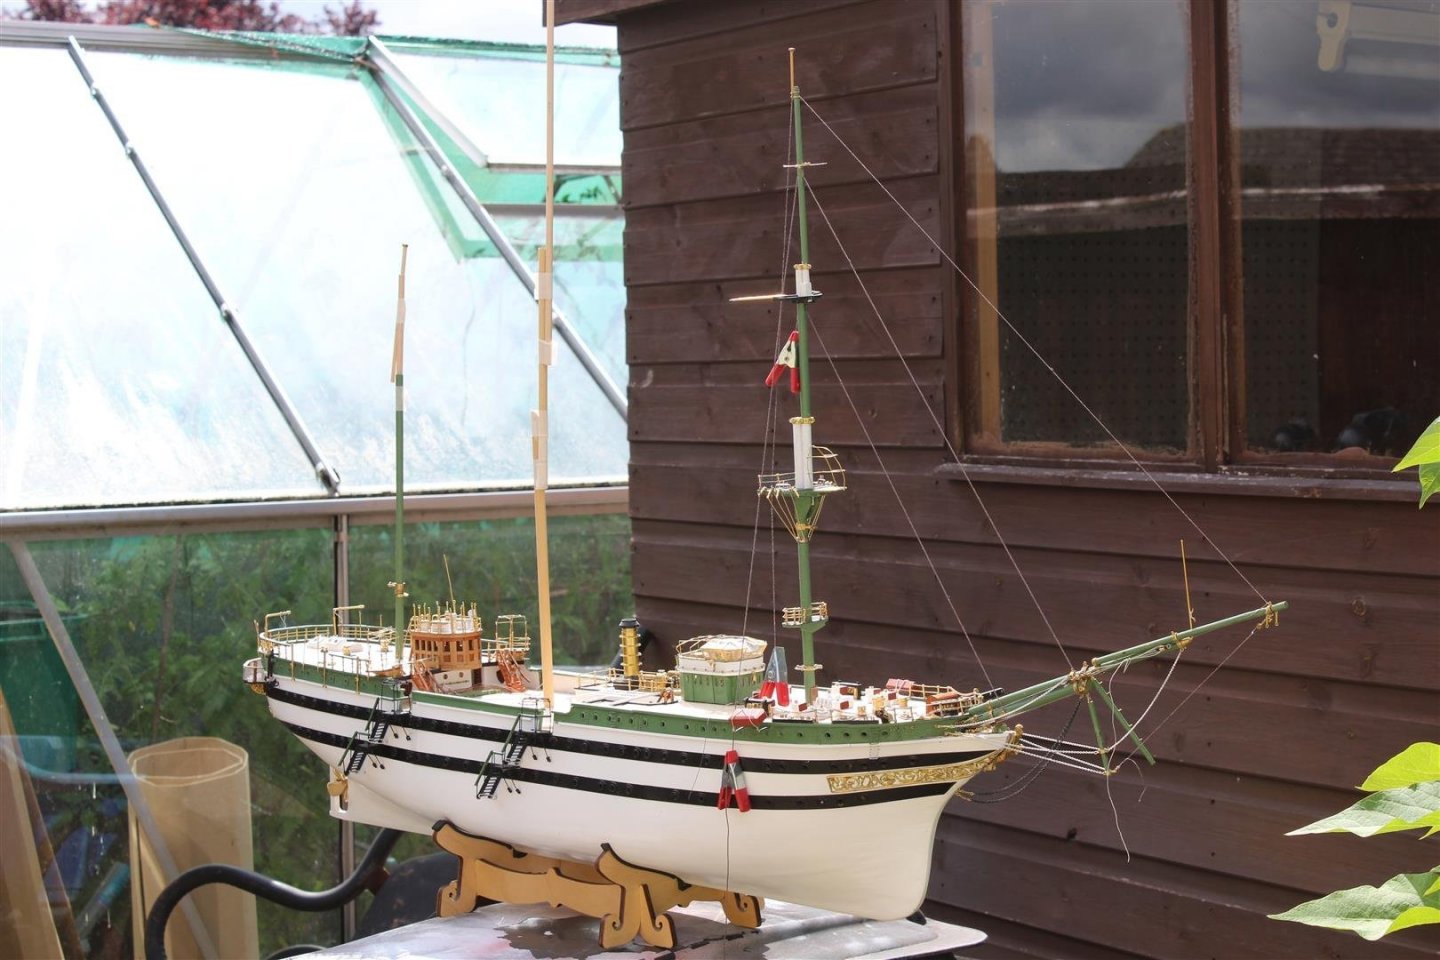
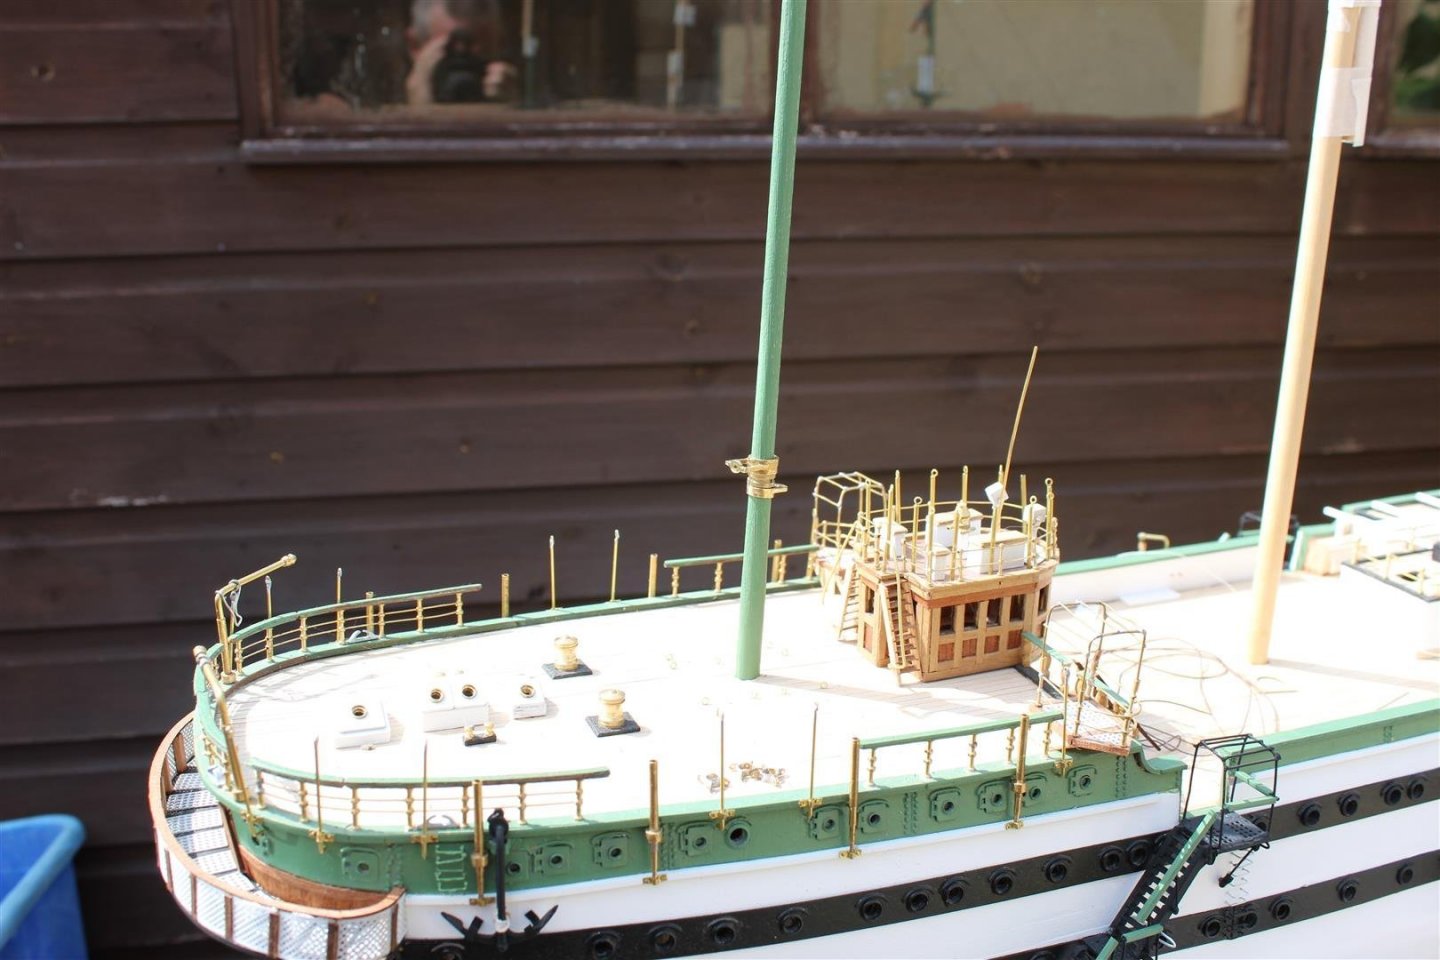
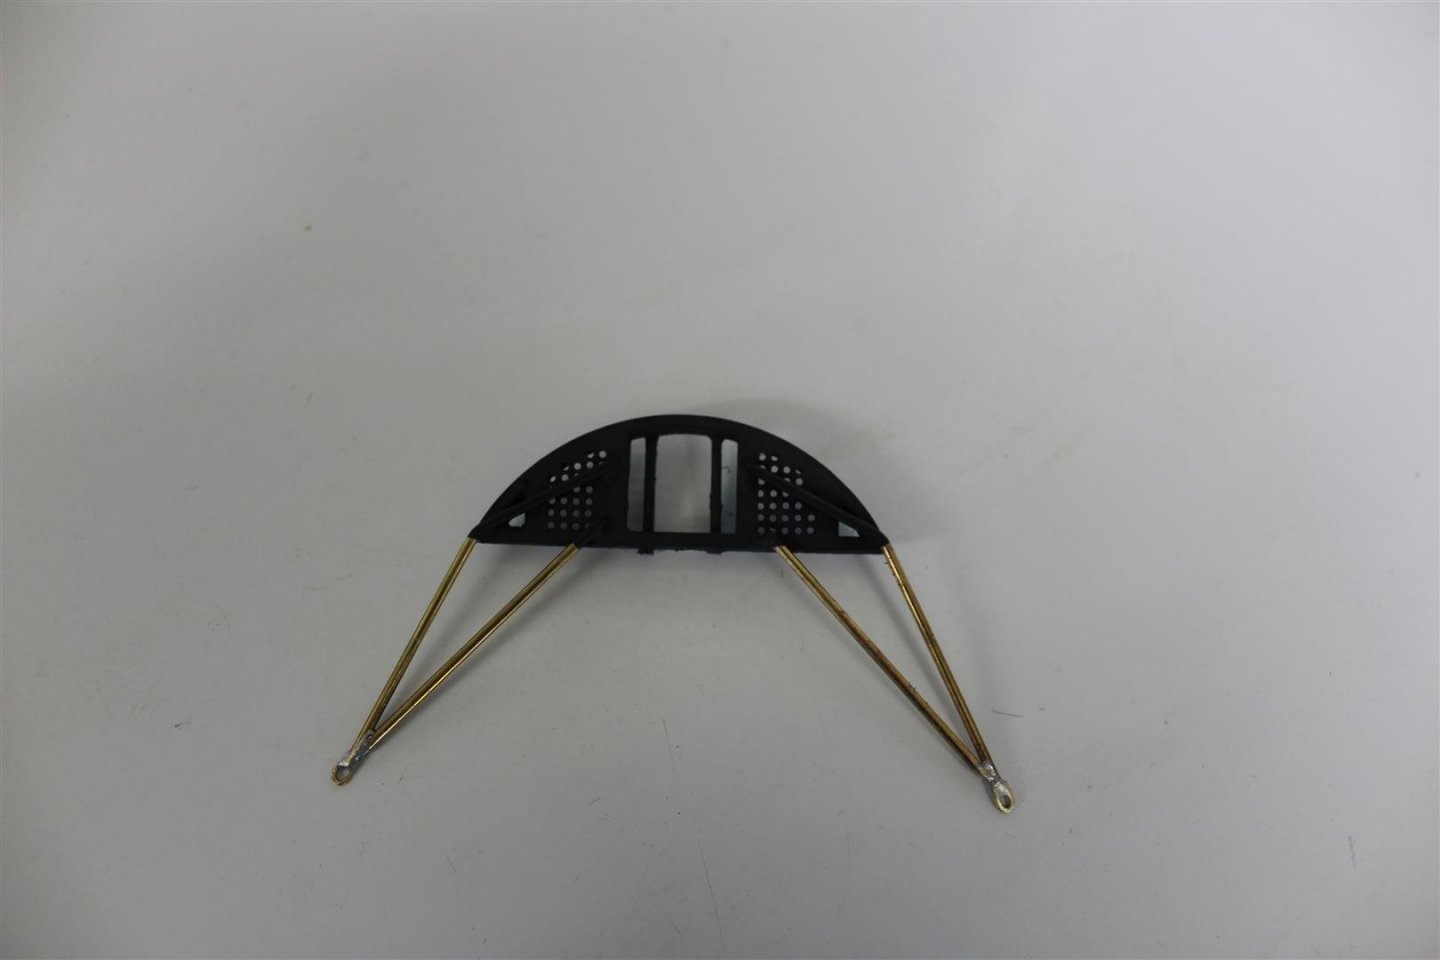
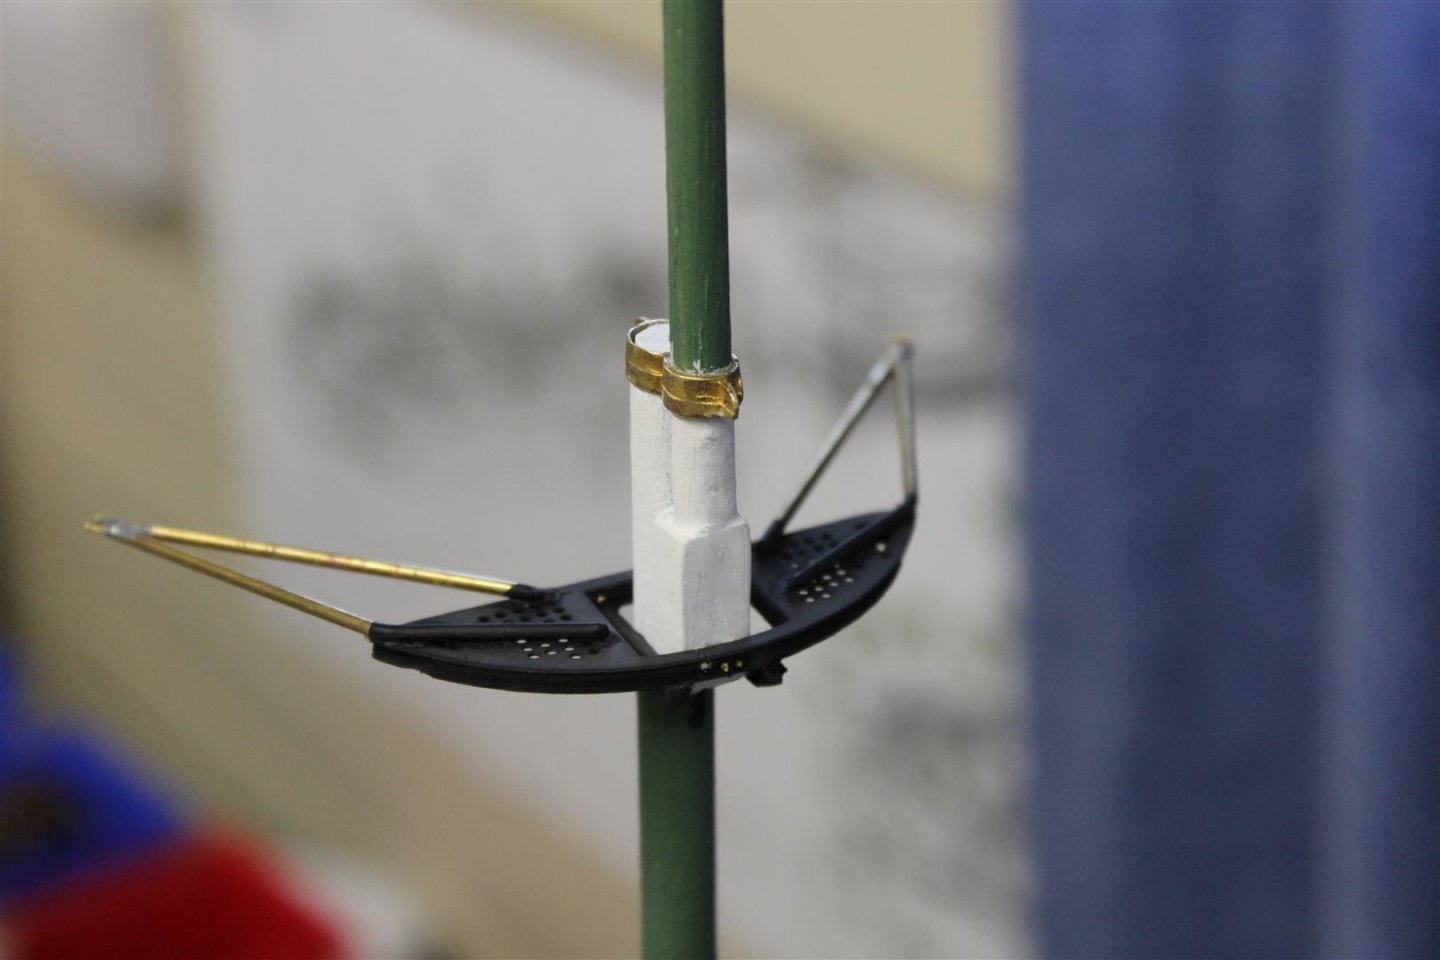
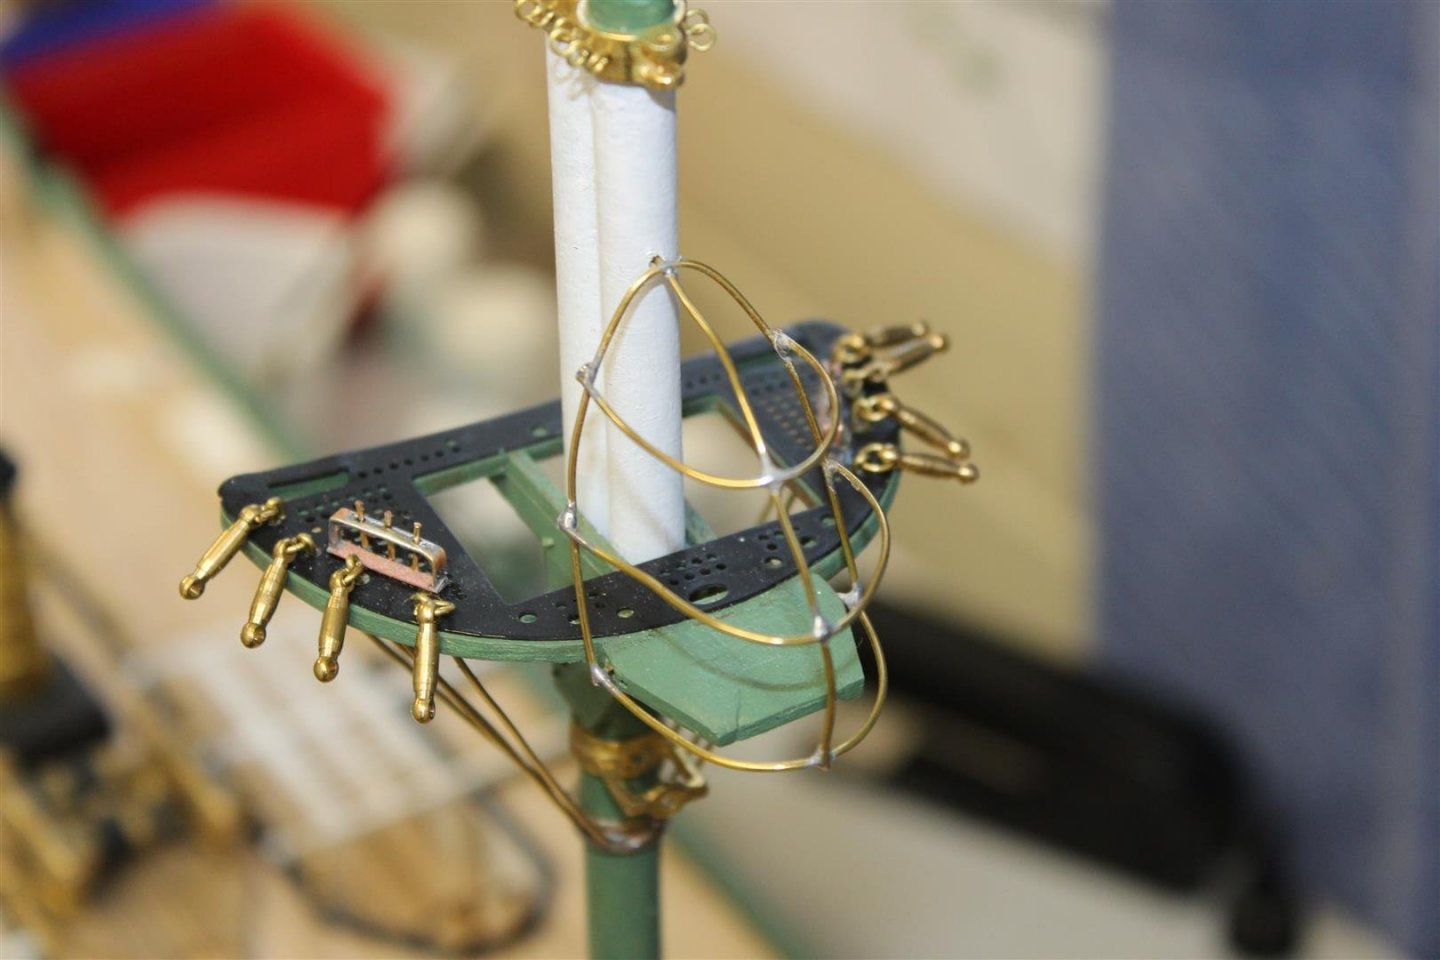
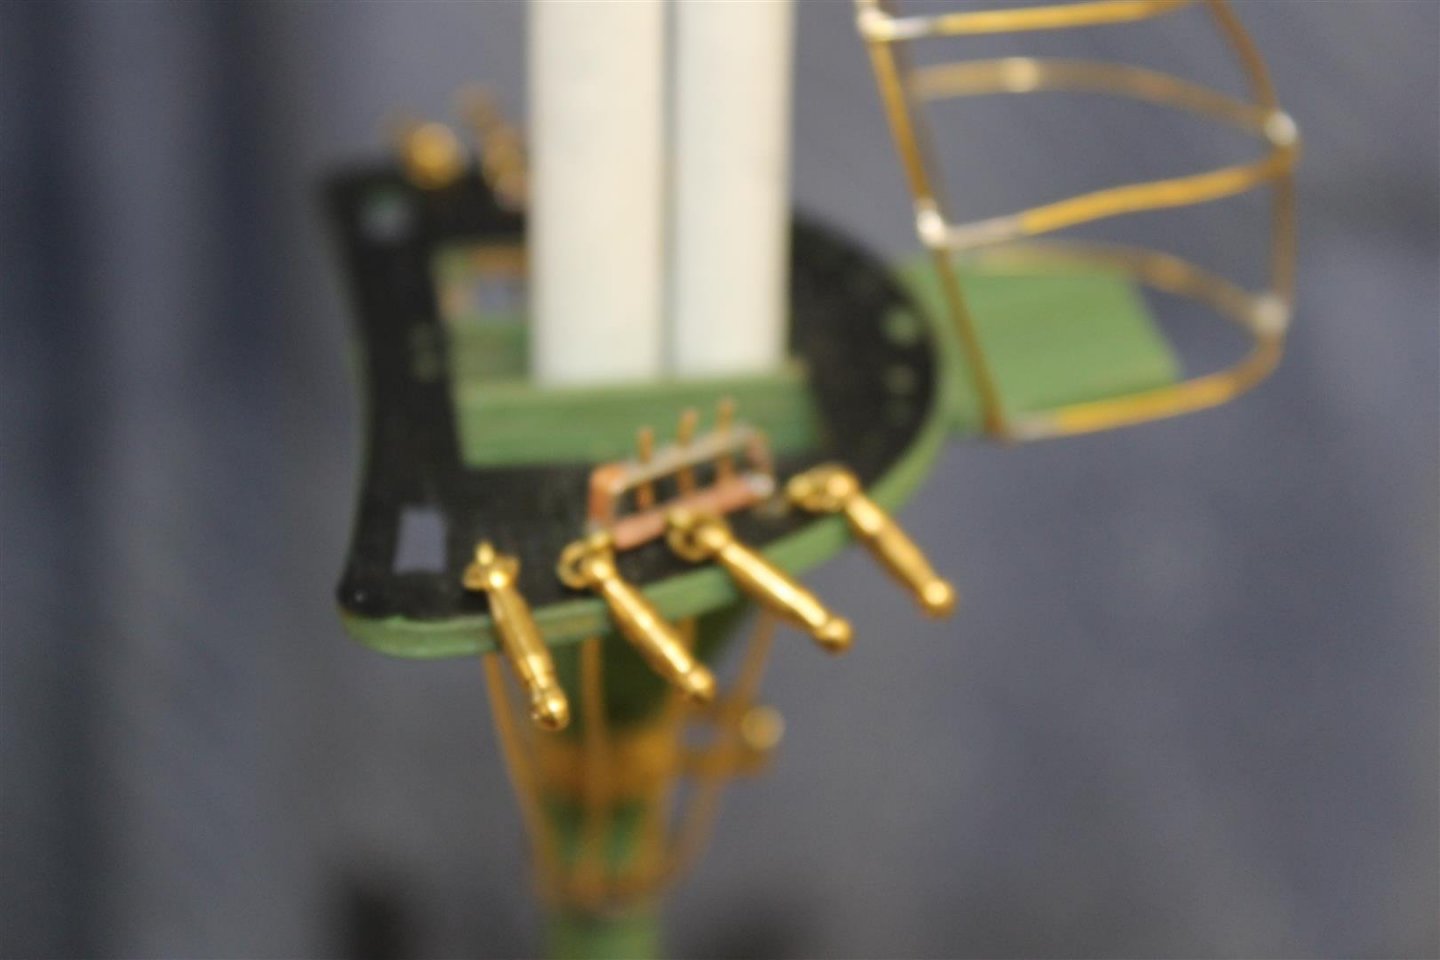
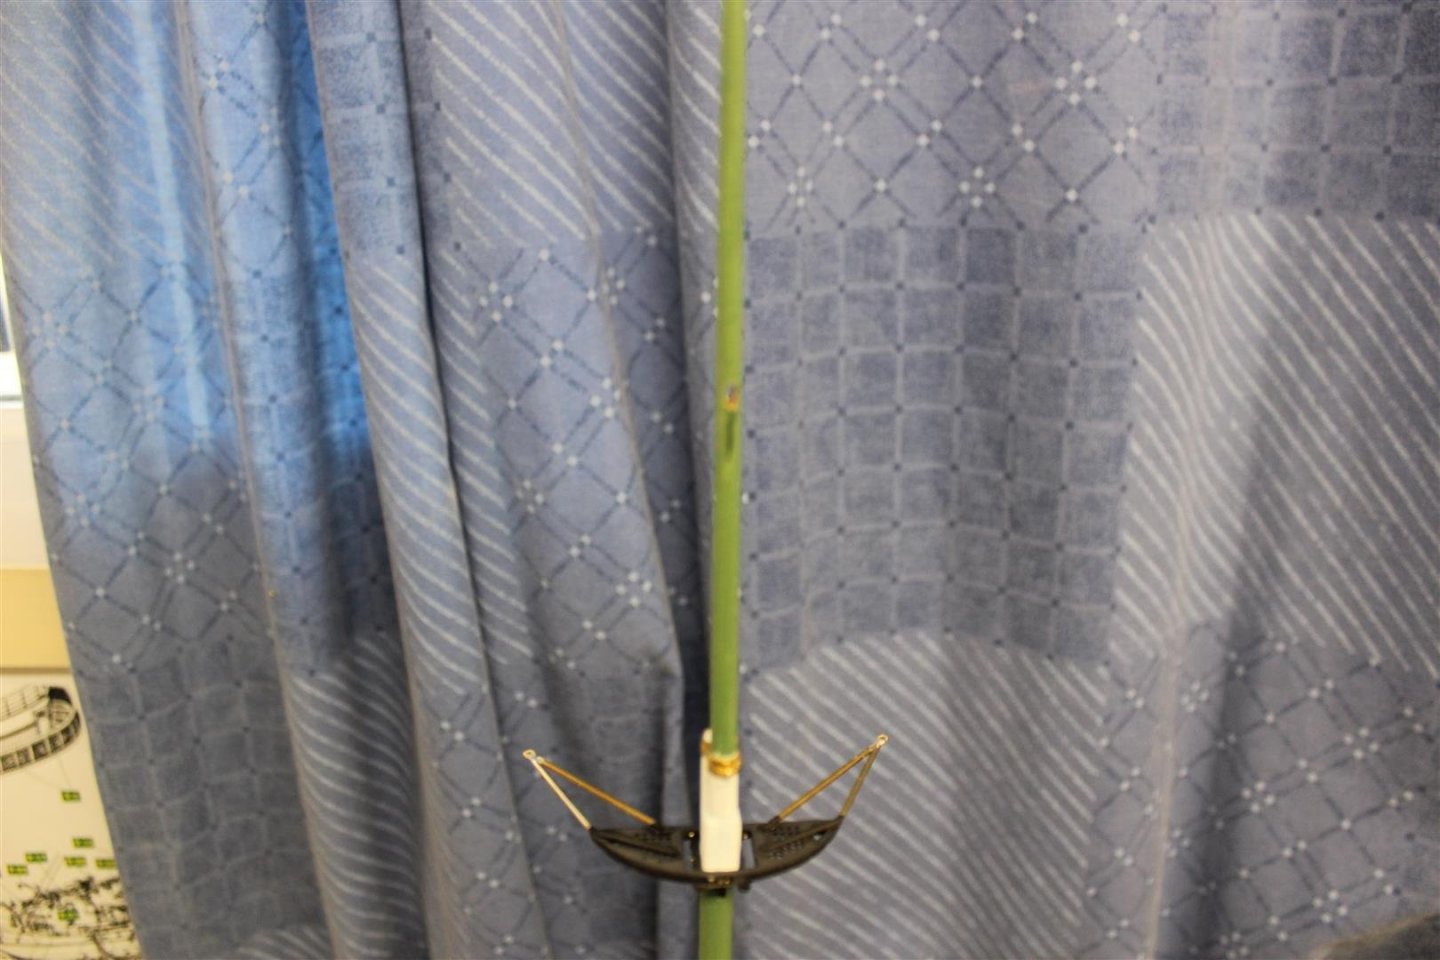
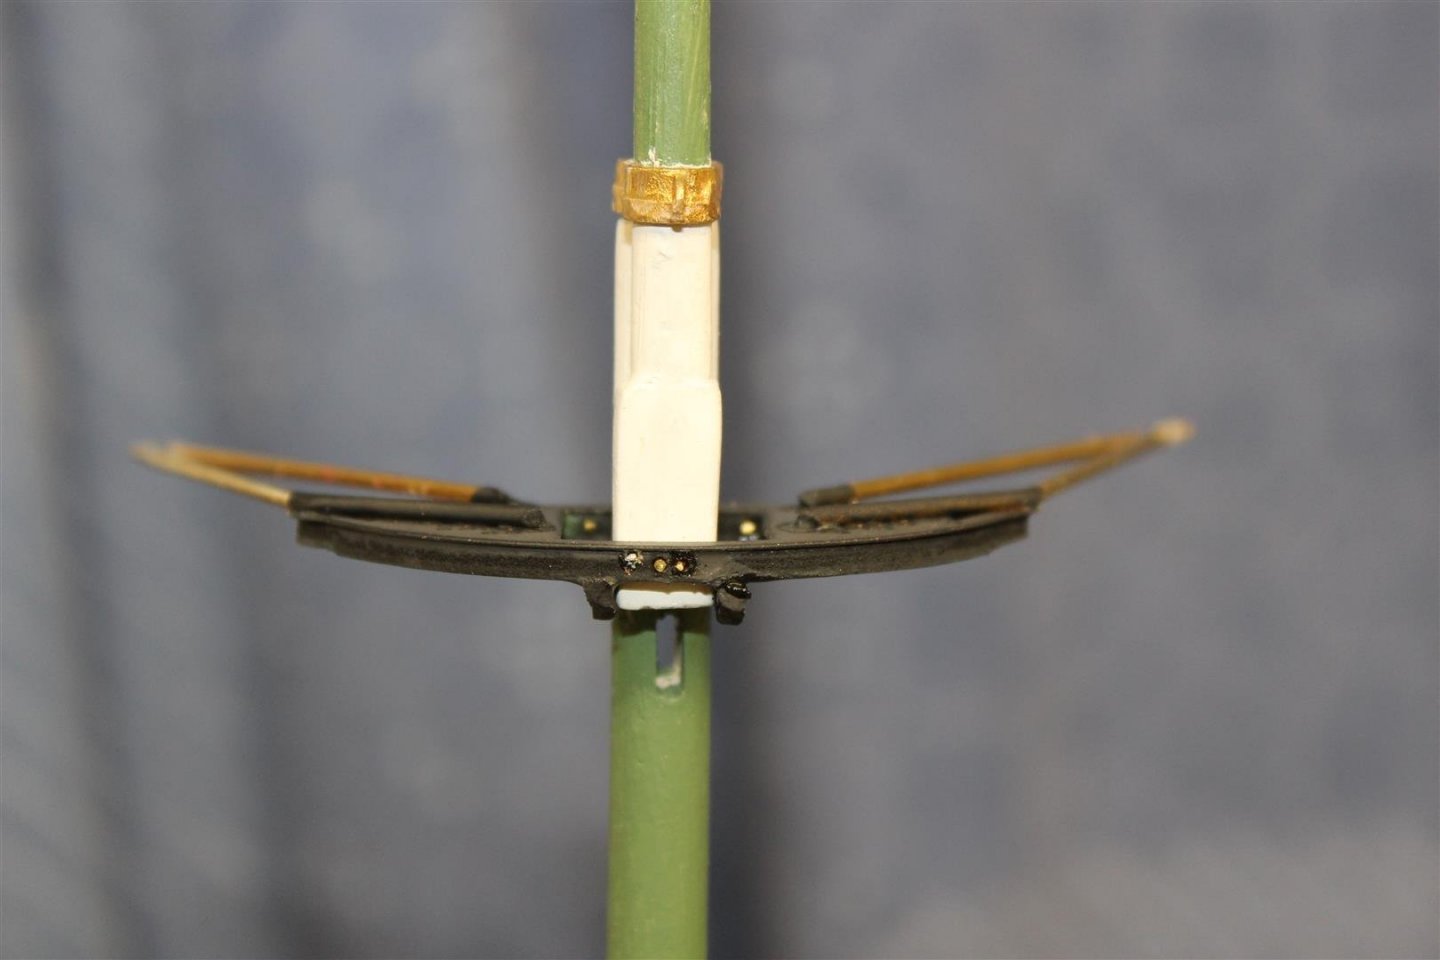
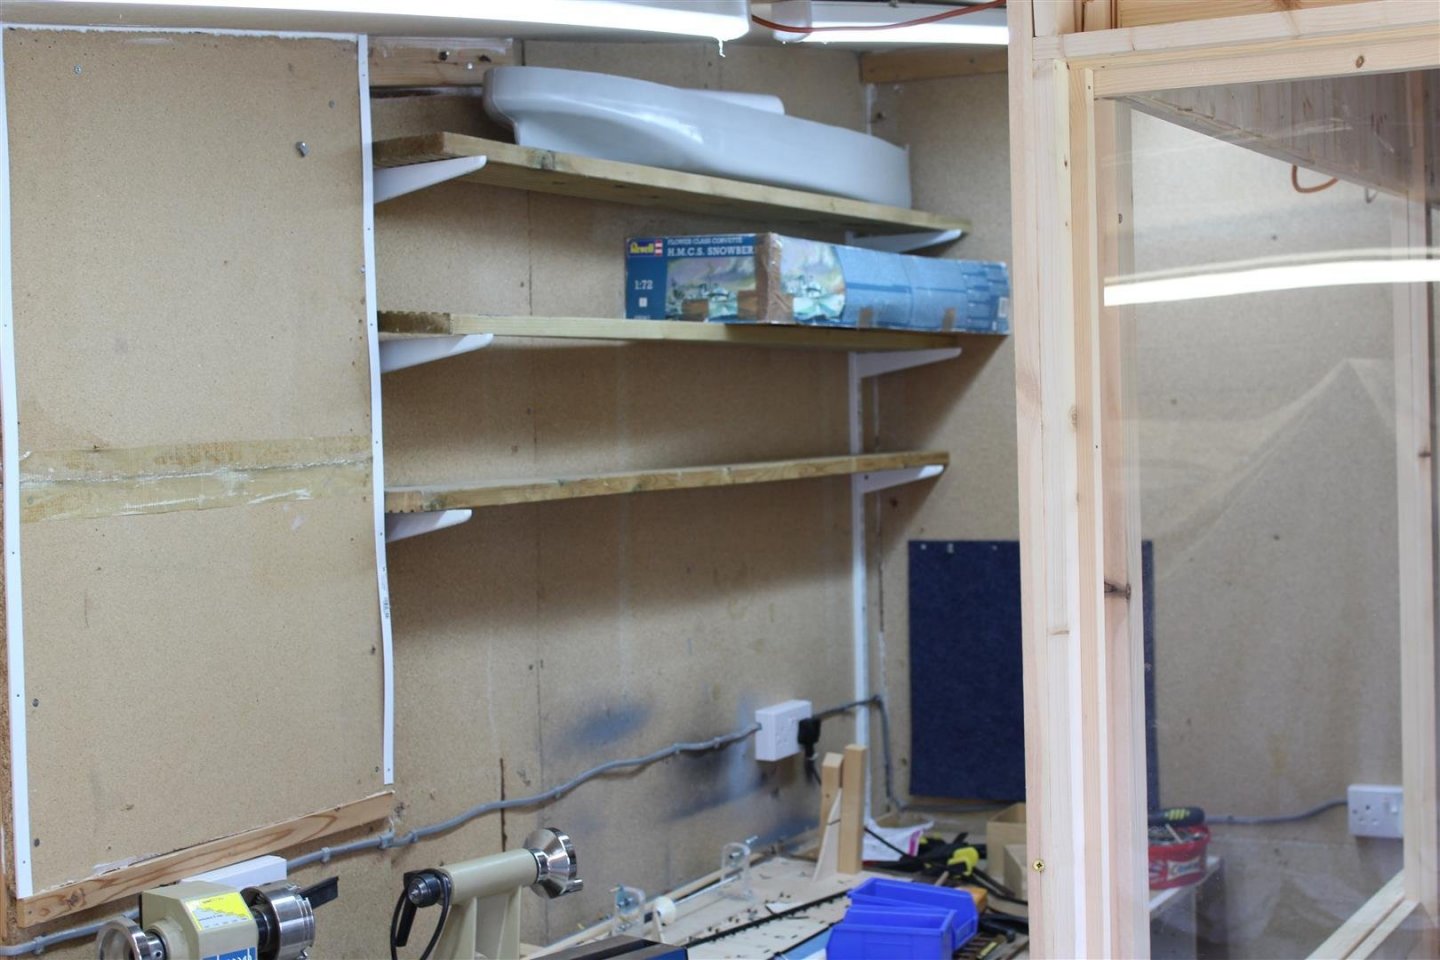
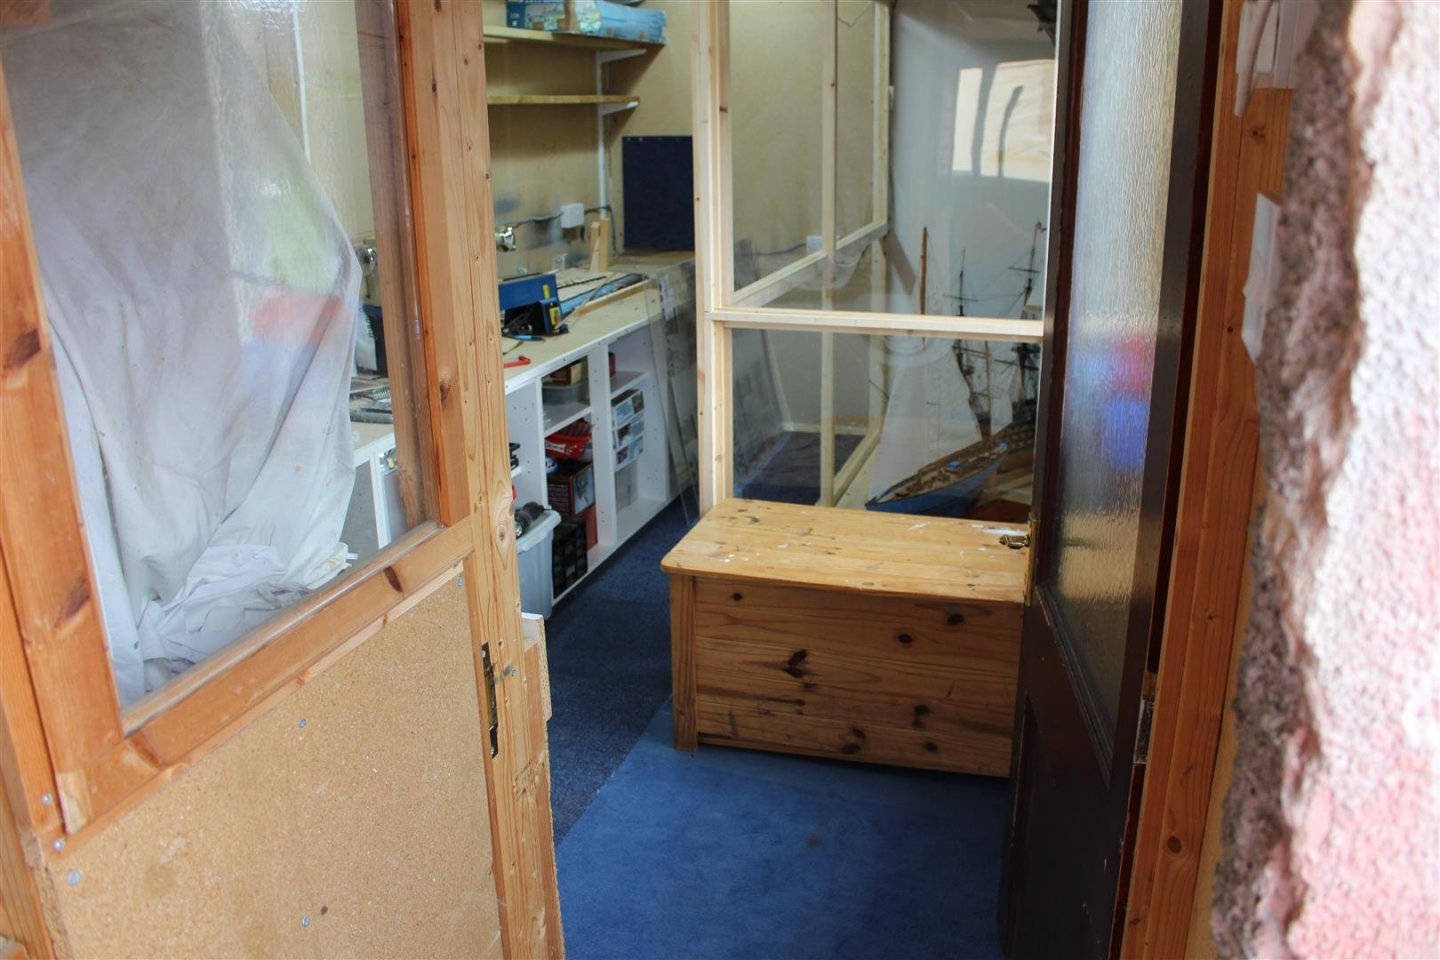
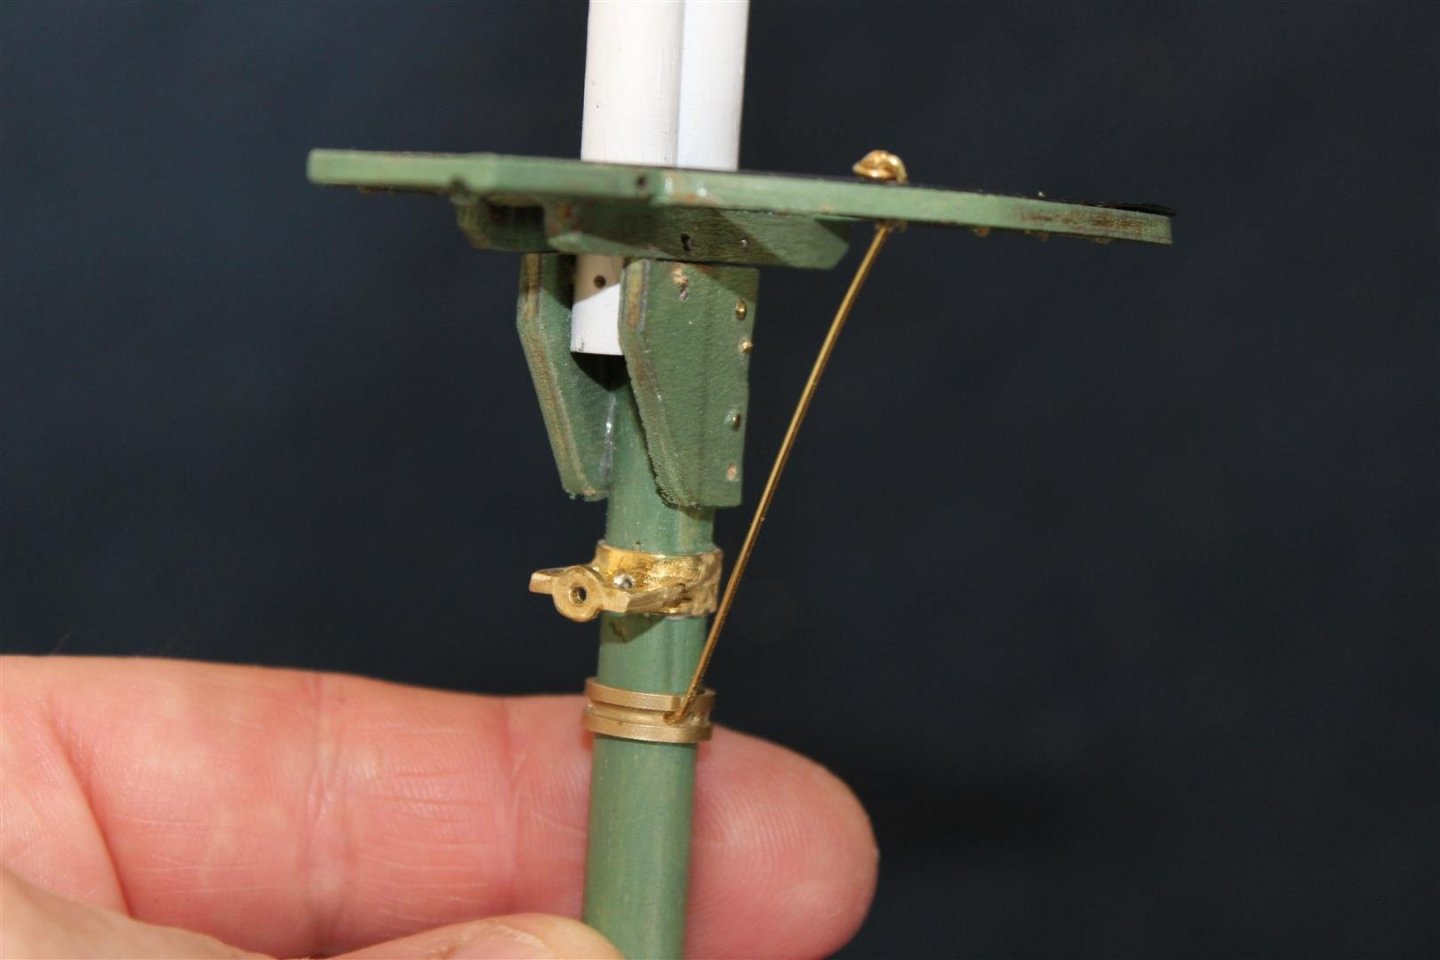
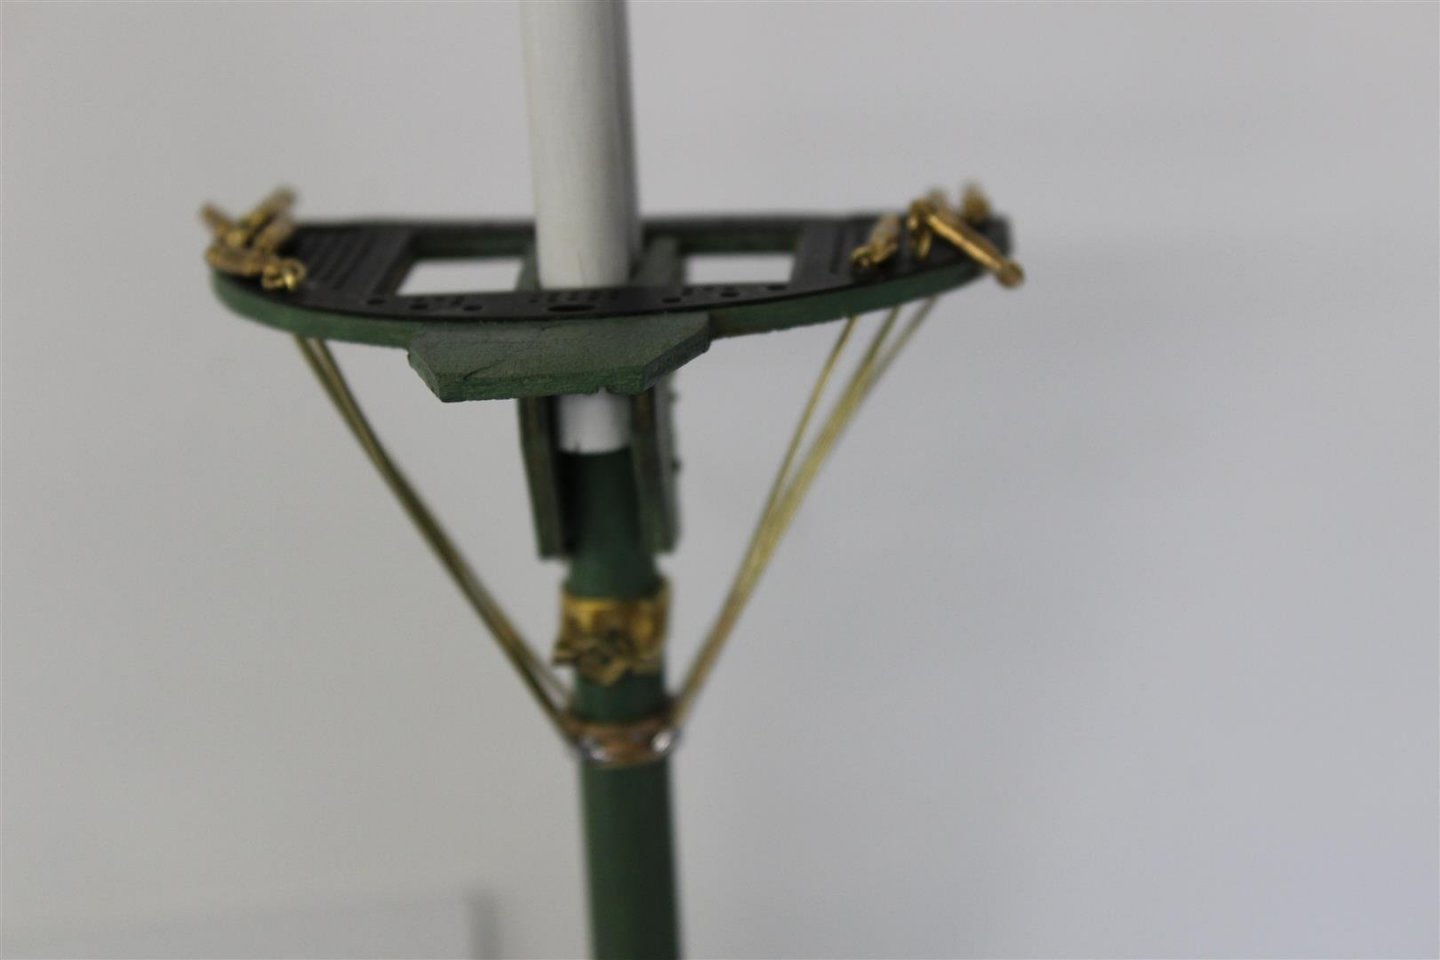
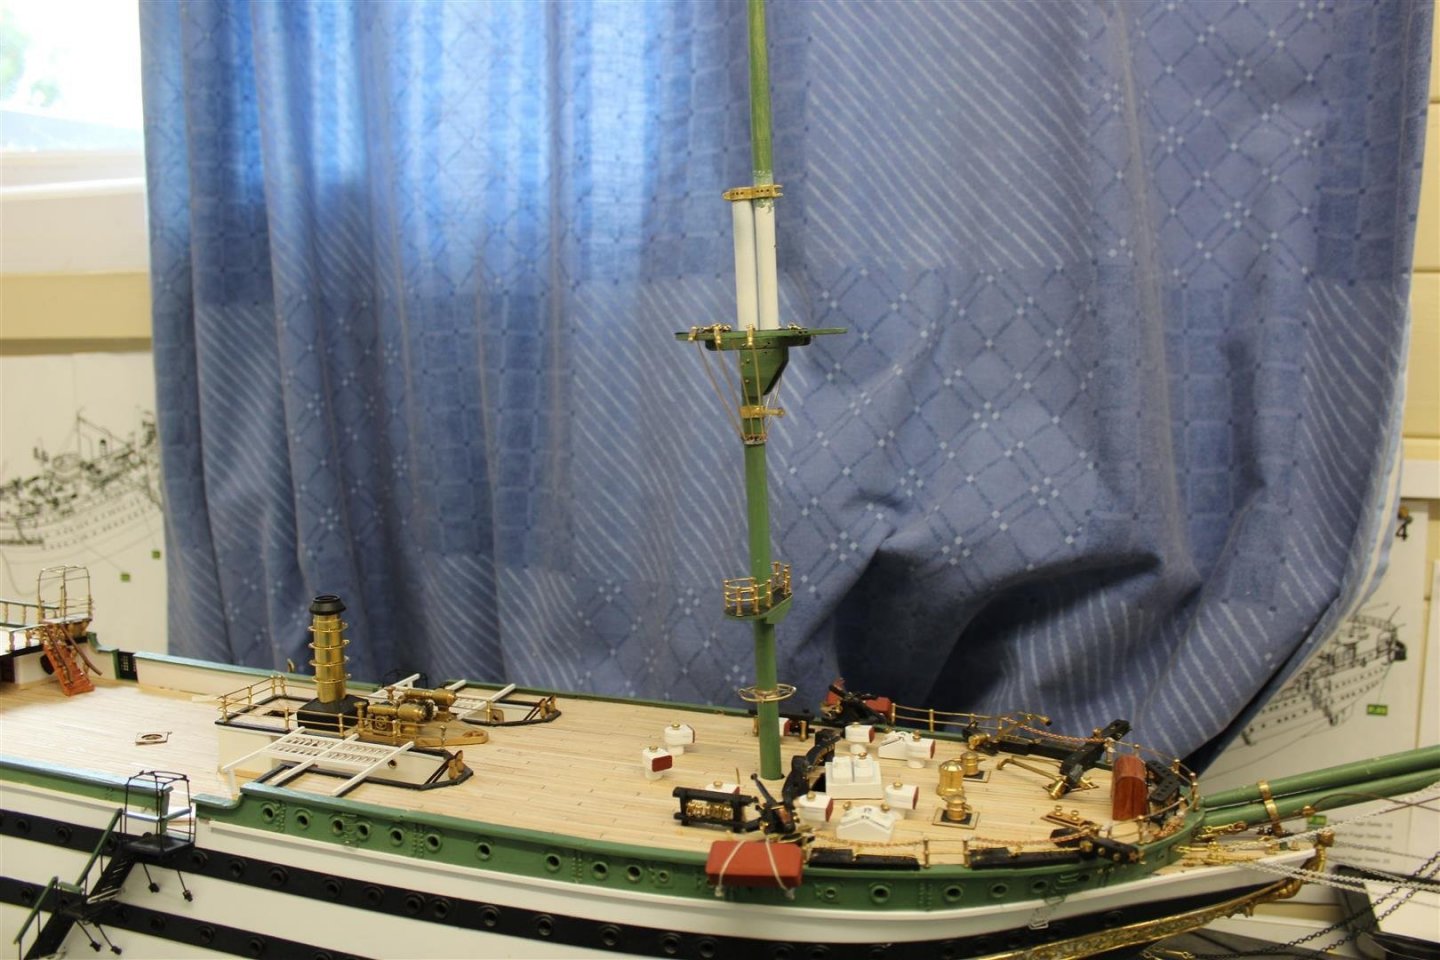
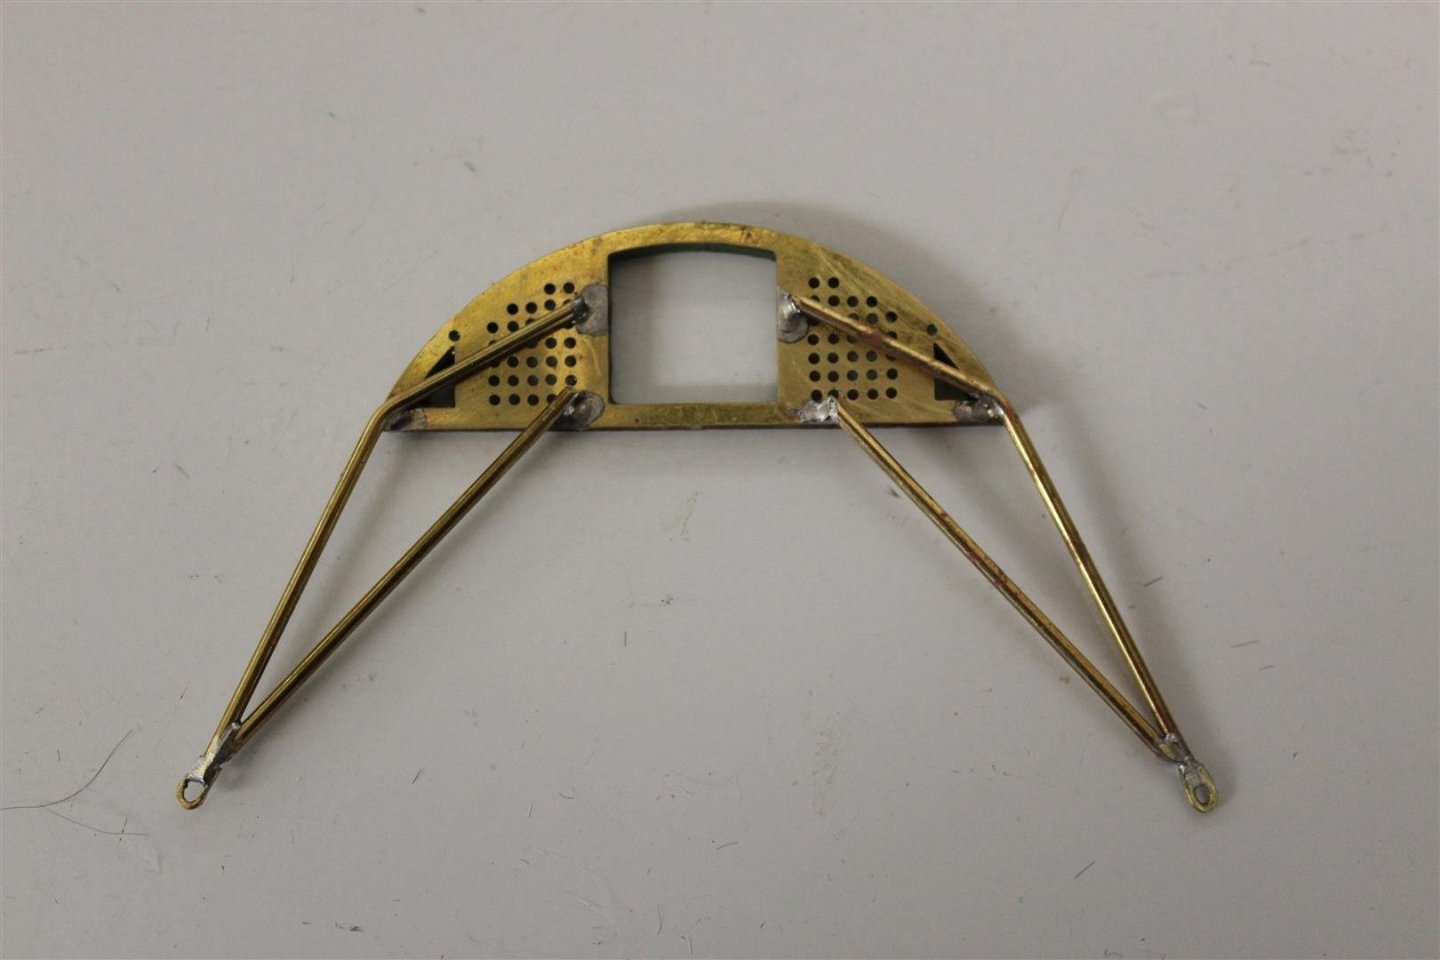
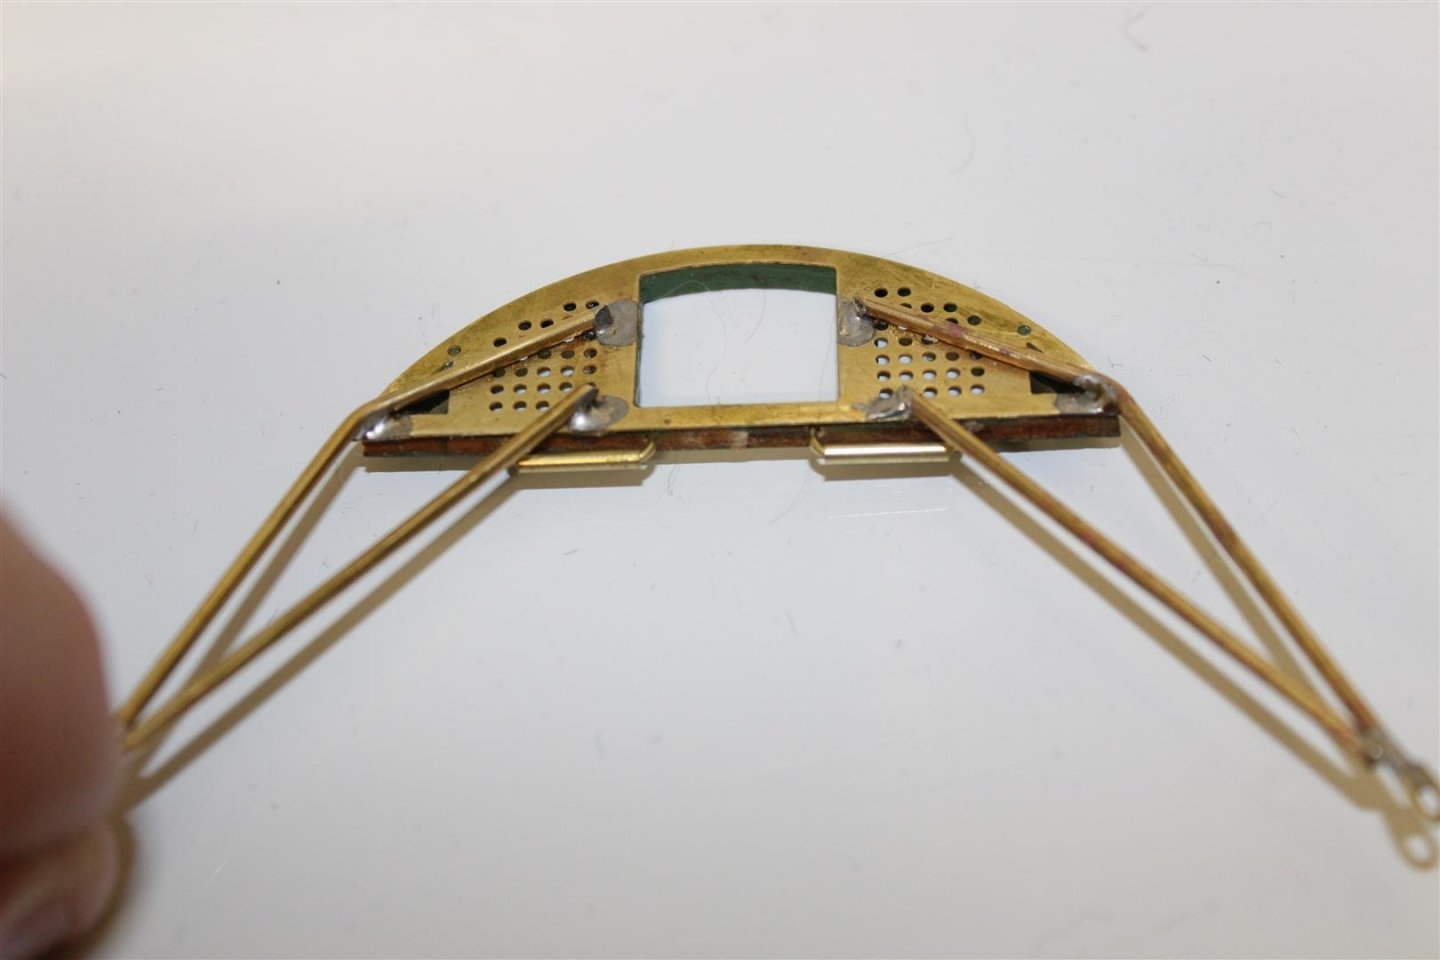
good evening everyone did a bit more to the display area, including rearraigning the ring main and ,moving eclectic sockets, i just want to put a extension lead in there to power the St Nectan and any other build that might have lights fitted, and fit the windows back onto the build today, and the foremast i presume the futtock shrouds are the right name for this type of vessel the top platform on all masts has spreaders fitted, another item not mentioned in the kit, aft of the platform is what i presume to be another line guide, i have no measurements for any of this, just trying to follow another build, but if wrong, i will do again futtock shrouds


- 273 replies
-
- 8
-
-
- panart
- amerigo vespucci
- (and 1 more)
-
are you going to cut the doors out and remake them look a bit battered, or you could weather then to get an aged look, its going to look great . because you are good at what ever you do