HOLIDAY DONATION DRIVE - SUPPORT MSW - DO YOUR PART TO KEEP THIS GREAT FORUM GOING! (Only 66 donations so far out of 49,000 members - Can we at least get100? C'mon guys!)
×


Kevin
-
Posts
7,010 -
Joined
-
Last visited
Content Type
Profiles
Forums
Gallery
Events
Everything posted by Kevin
-
 happy birthday Vanguard Models
 -
lol thinking hard about re-naming her, the green is just not working for people, any suggestions?
- 273 replies
-
- 2
-

-
- panart
- amerigo vespucci
- (and 1 more)
-
very nice i found the same issue on my Victory with the channels and mouldings, it might be worth considering pinning the channels, as they will be getting in the way from now on,
-
welcome to the best forum please start a build log, plenty of help and advice here,
-
what lathe did you get?
-
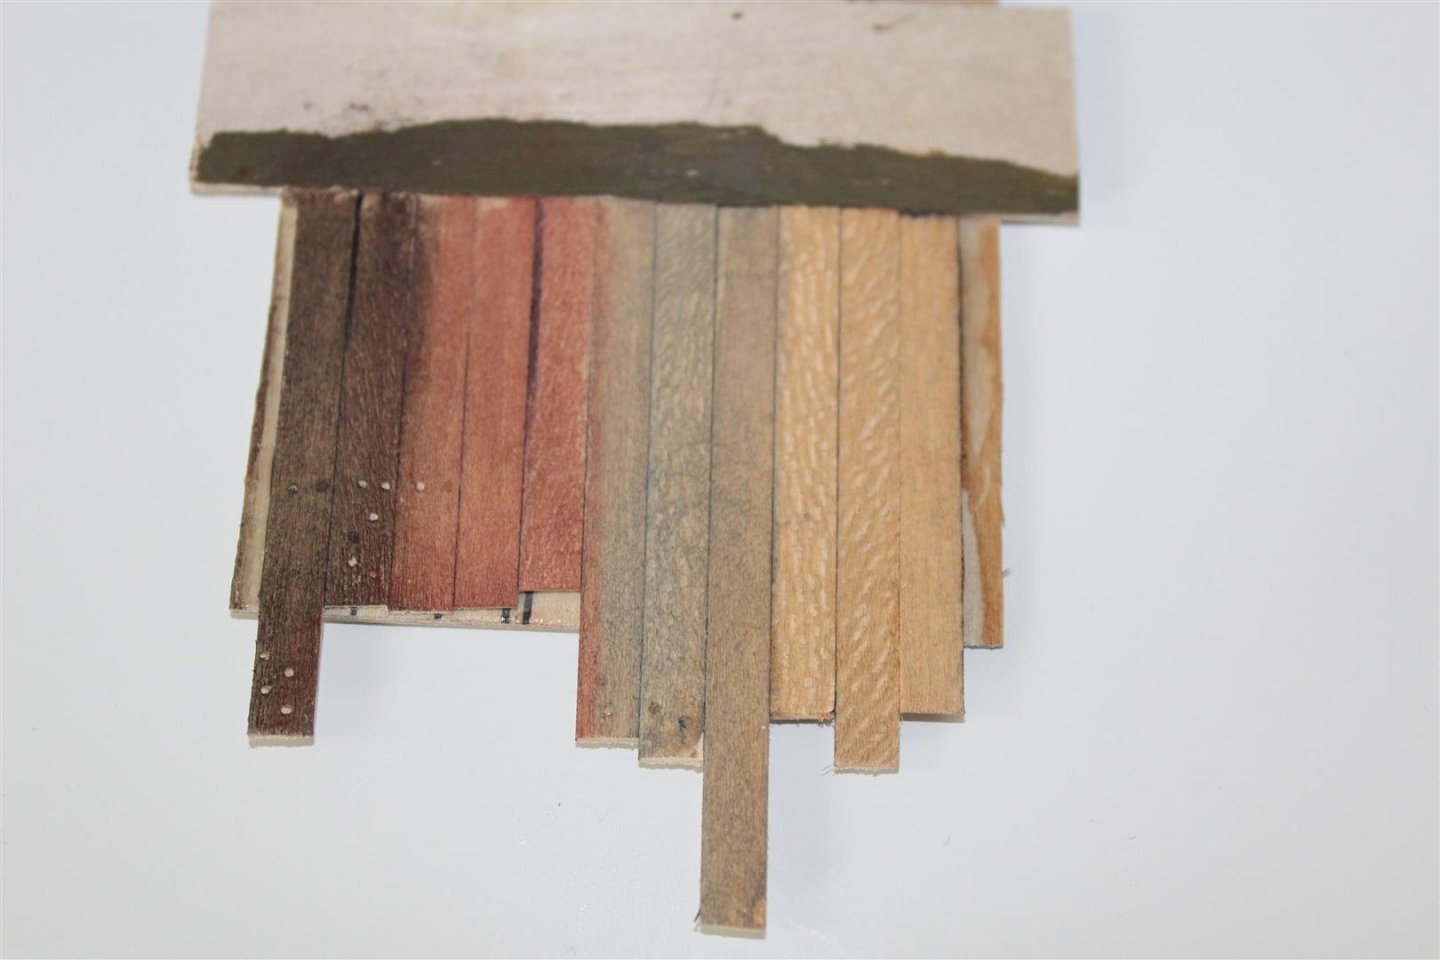
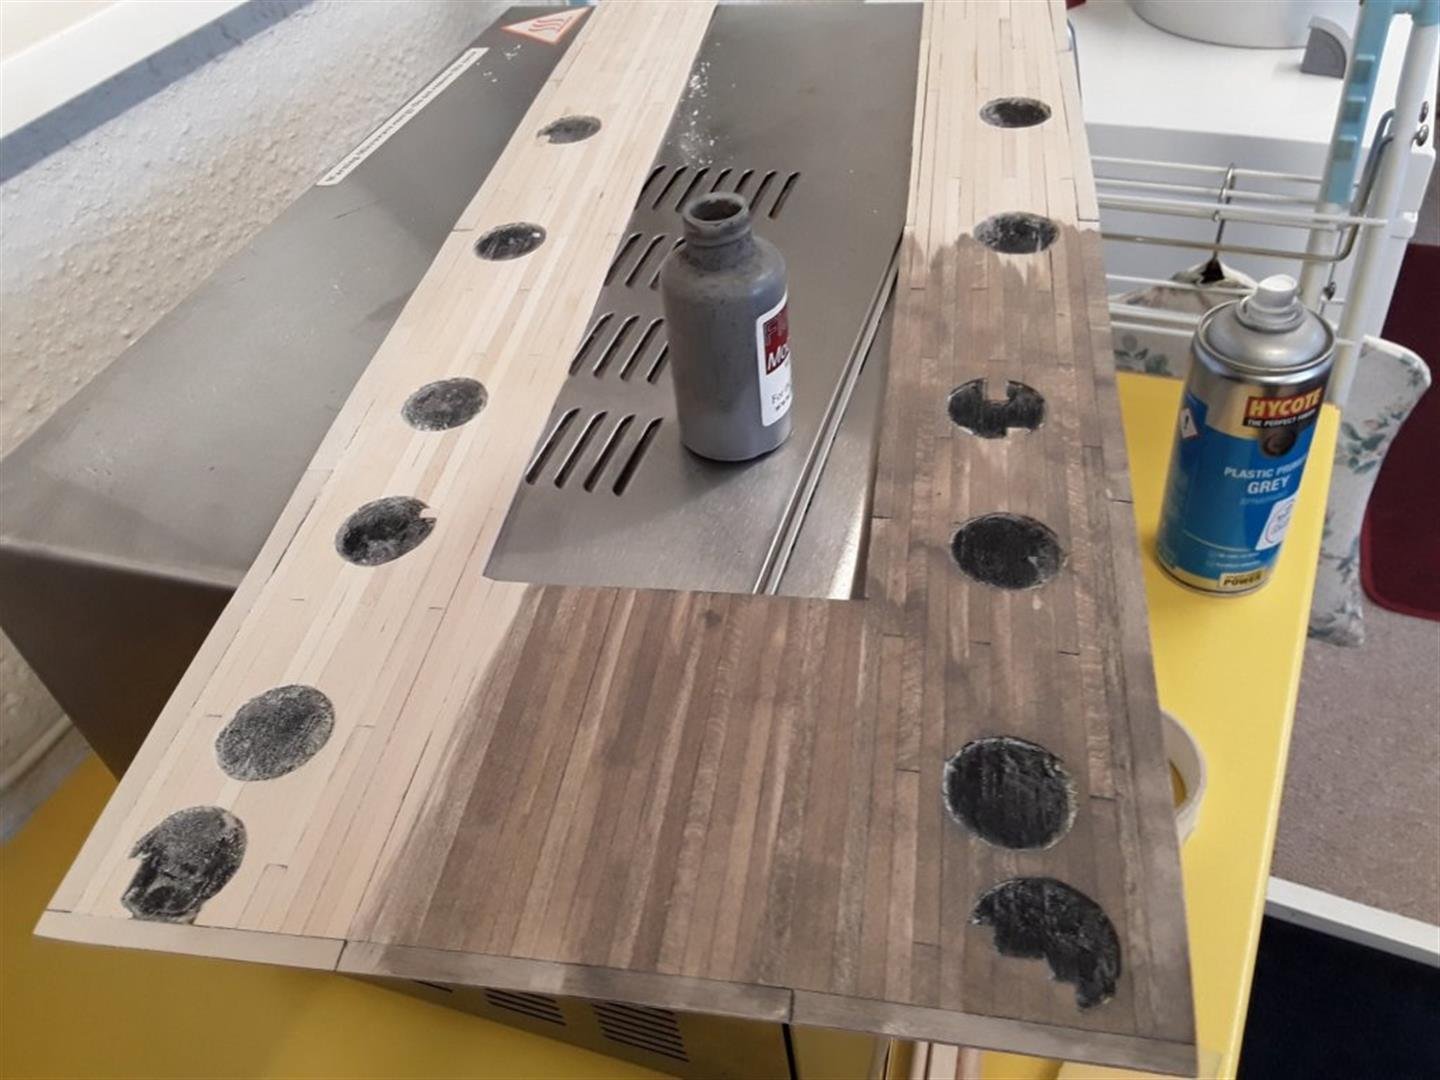
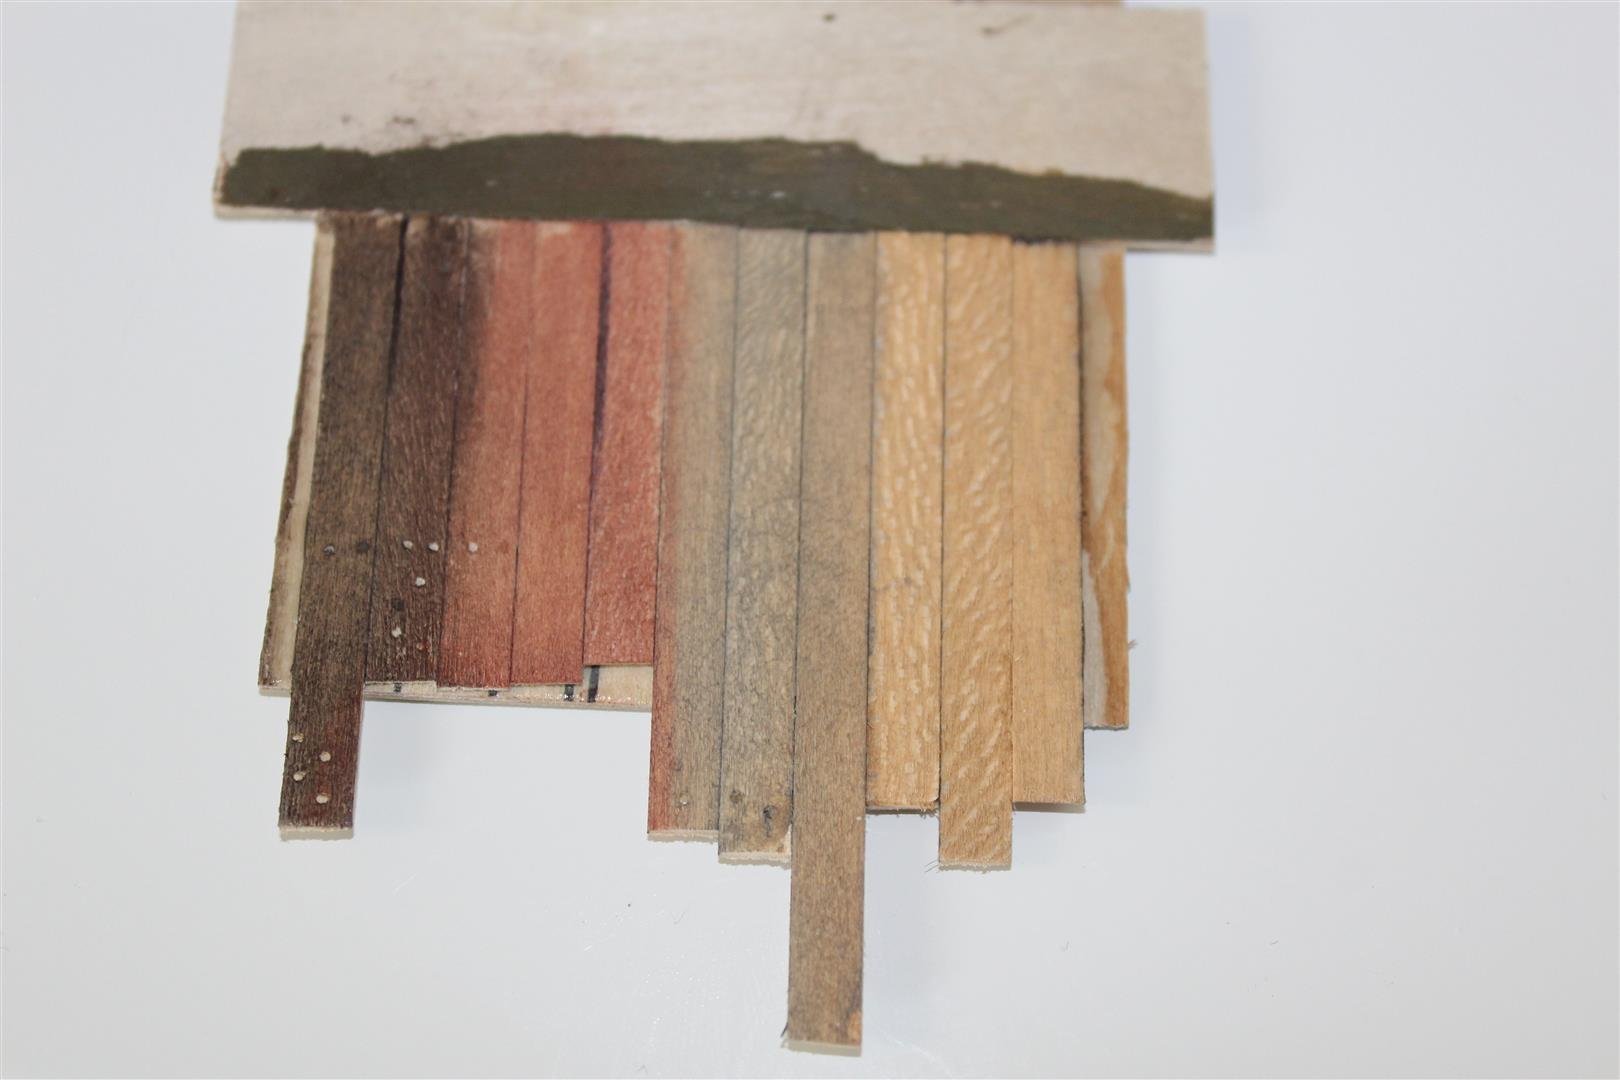
i use flory stuff all the time, as my modelling skills are quite bad this is a couple of the colours grime, rust, grey, sand are on this test peice for my St Nectan build, i use grime a lot as its water based it can be made up in layers or watered down, desigbed purposely for plastic as it can be wiped of when dry, obviously not with wood having said that though i painted my mast tops in black primer
.thumb.JPG.28683911c3c3848450d8515c0b167ba9.JPG)
-
Flory Models Products — PM Models (pmmodelsuk.com)
-
You could just replank it, but to be honest by the time the treads, blocks and deadeyes are attached its going to get busy in that area, so put it down to experience Personally i dont stain much, but i do weather the wood by using a clay based colour from Flory, brilliant stuff
-
Good evening and than you, yes i did, all metal is now being soldered, lol i should get quite good by the end of this build
- 273 replies
-
- 4
-

-
-
- panart
- amerigo vespucci
- (and 1 more)
-
thank you and i found the post
-
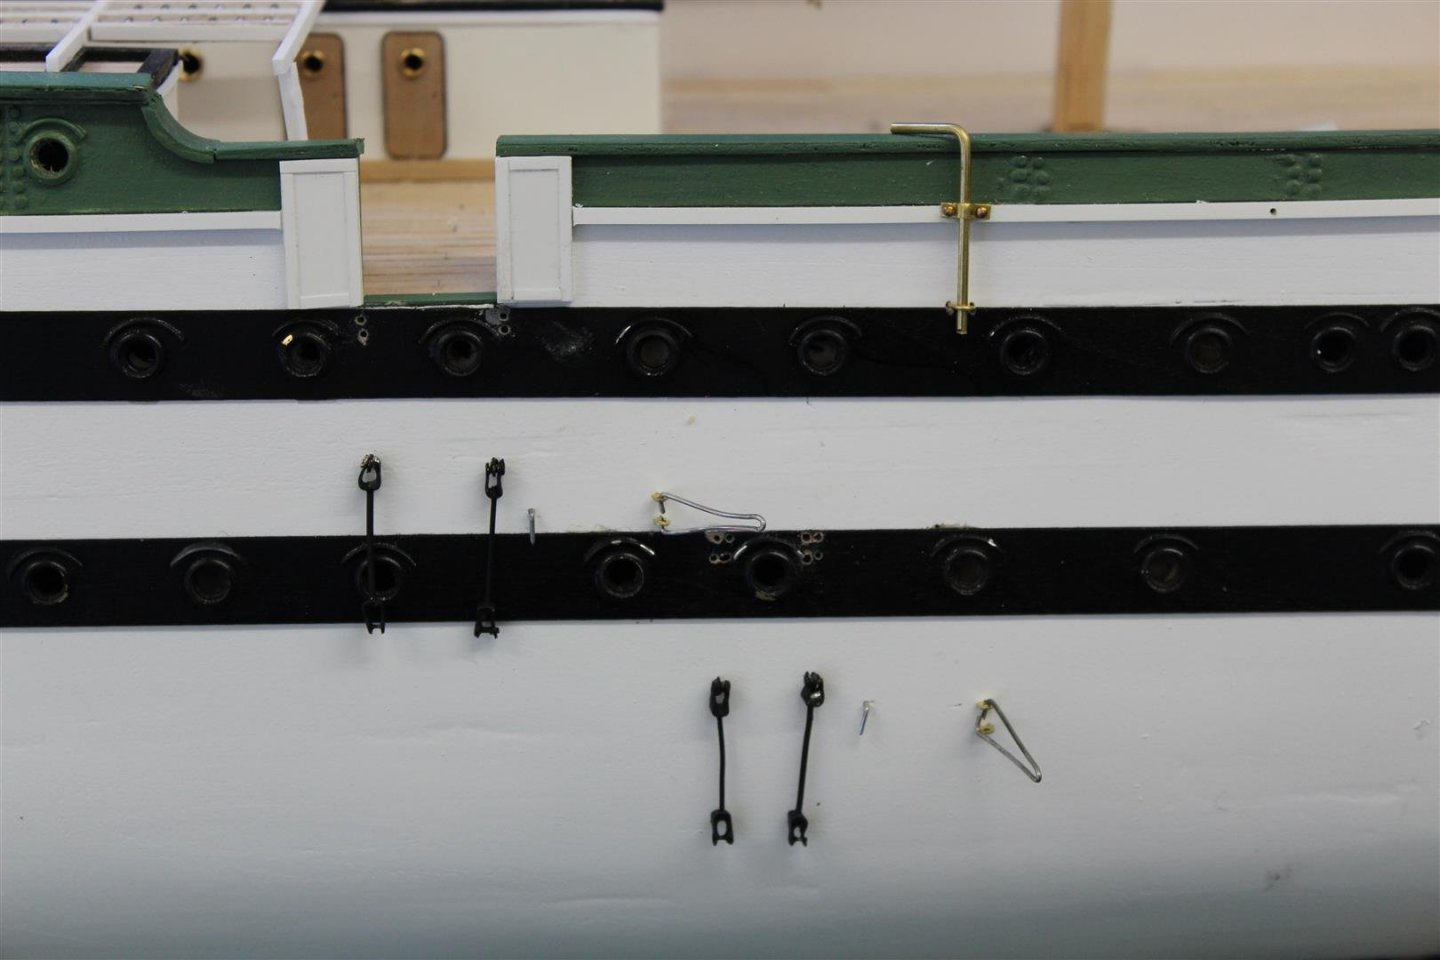
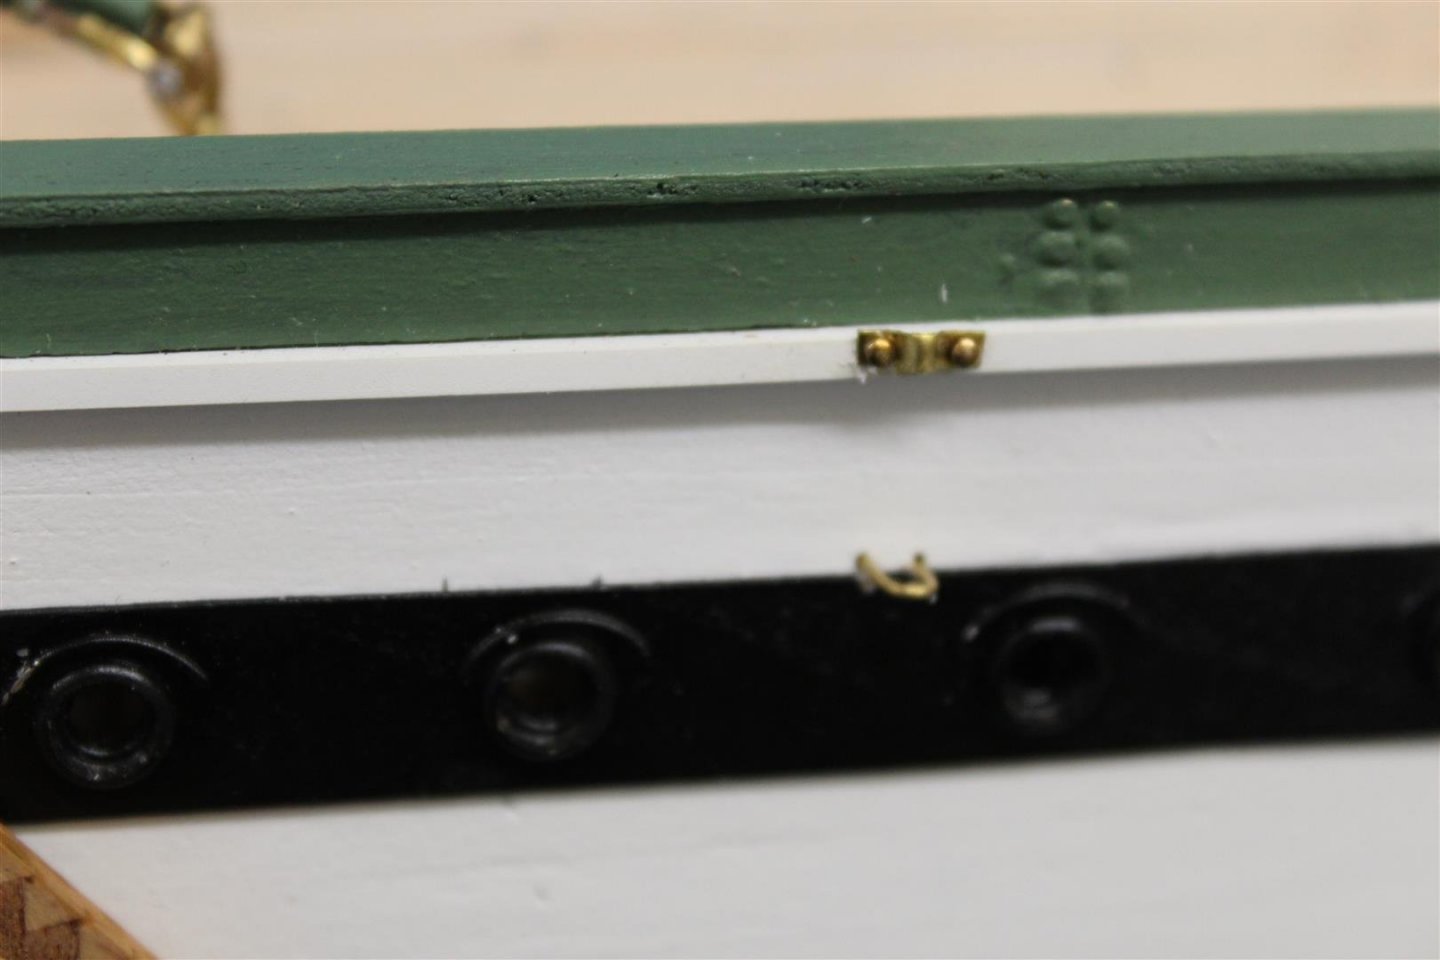
im having the same issue on the Amerigo getting 20 pins into a rail where the kit has provided room for 7
-
good luck with the project @AdamNelsonPreston and all those who will supporting this project @dafi have you seen this
-
coral fishing boat by maurino
Kevin replied to maurino's topic in - Build logs for subjects built 1901 - Present Day
thats a very nice build -
im signed up and awaiting more updates we need Adam Preston as a member
-
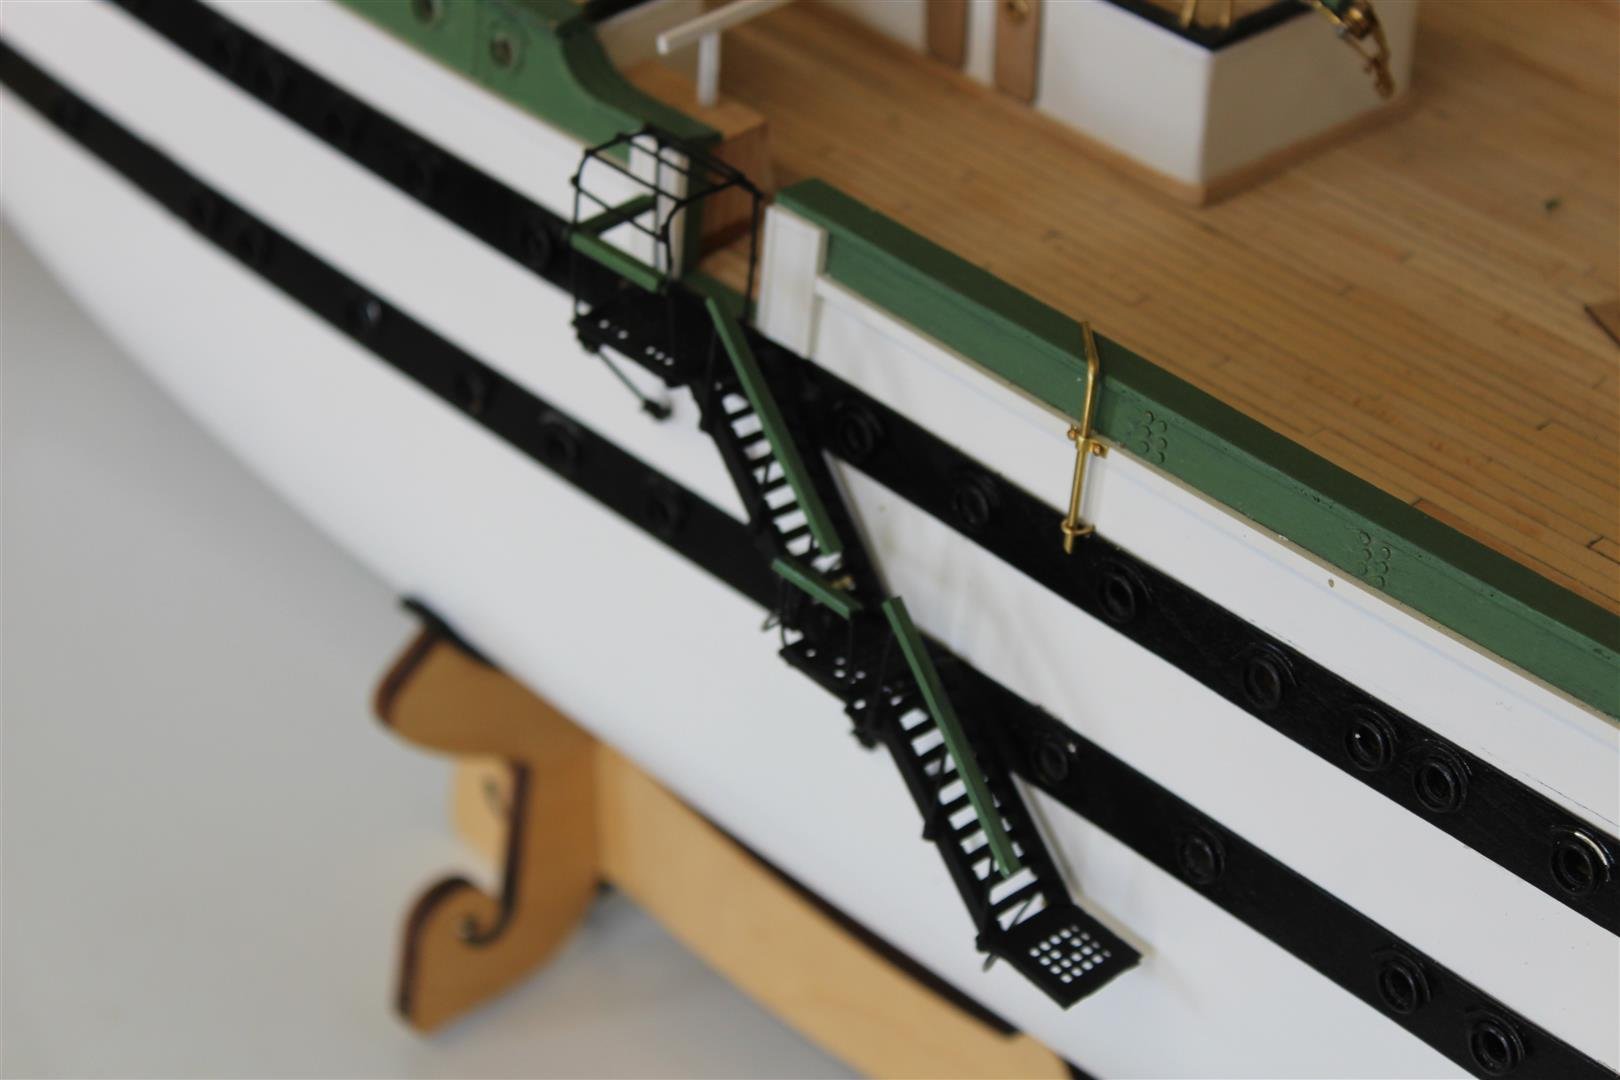
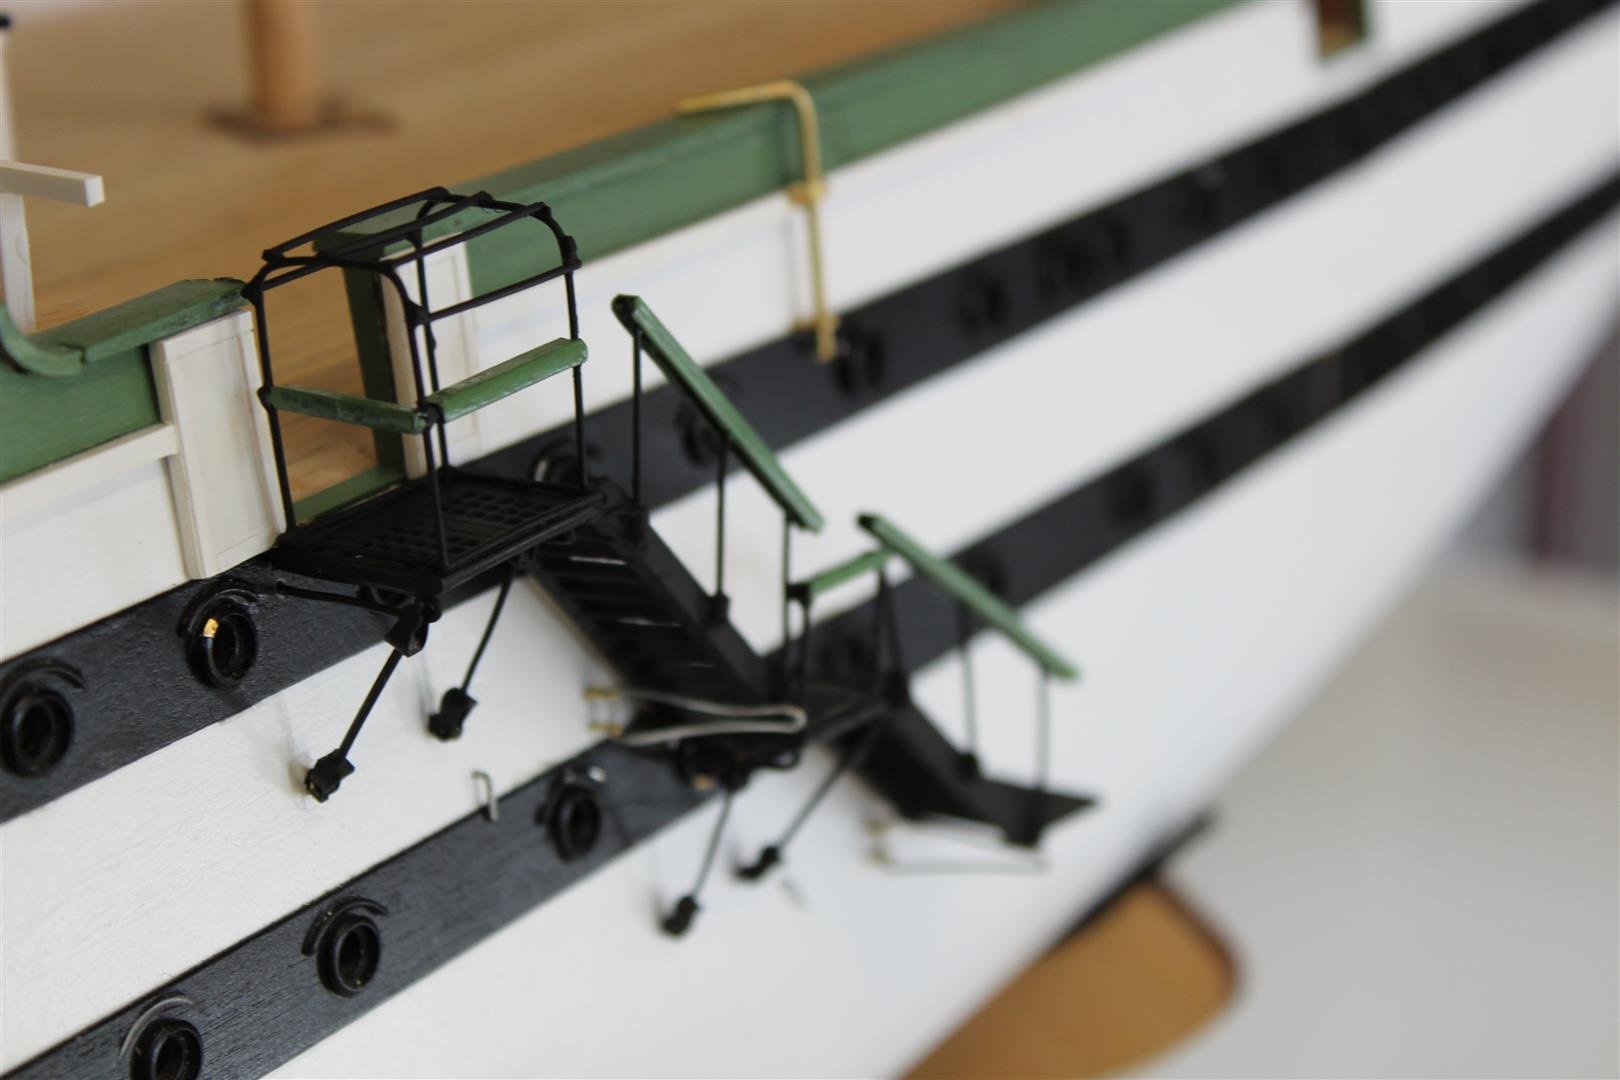
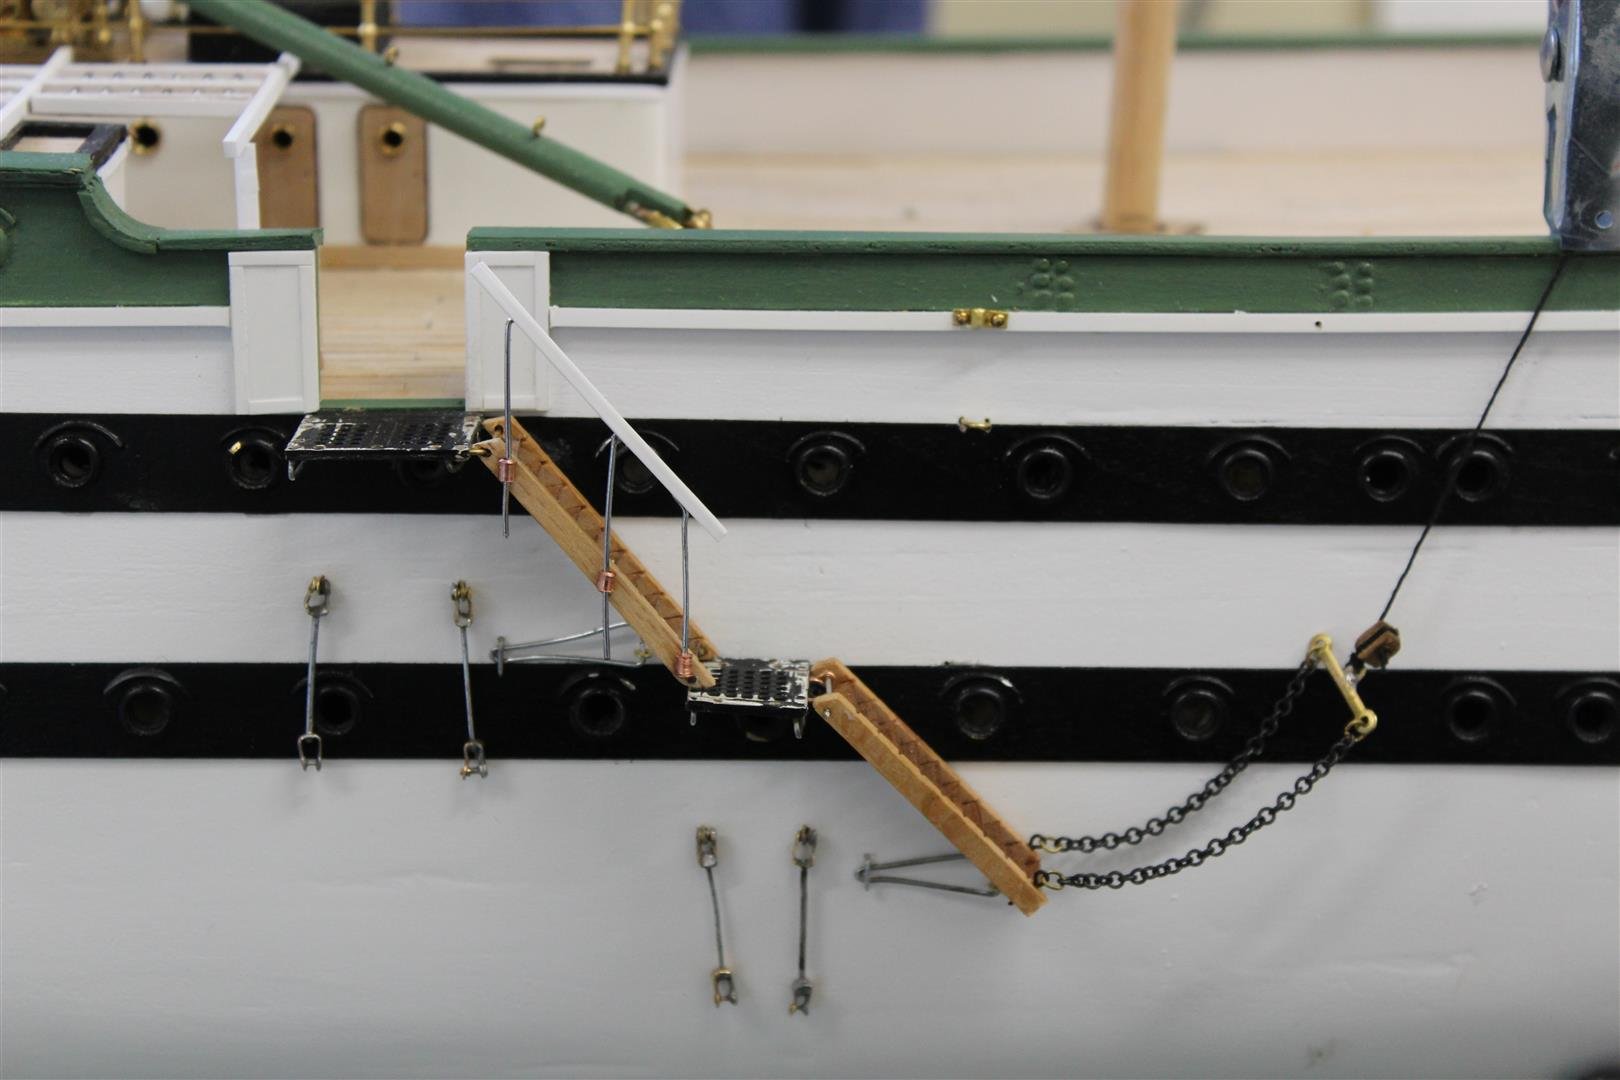
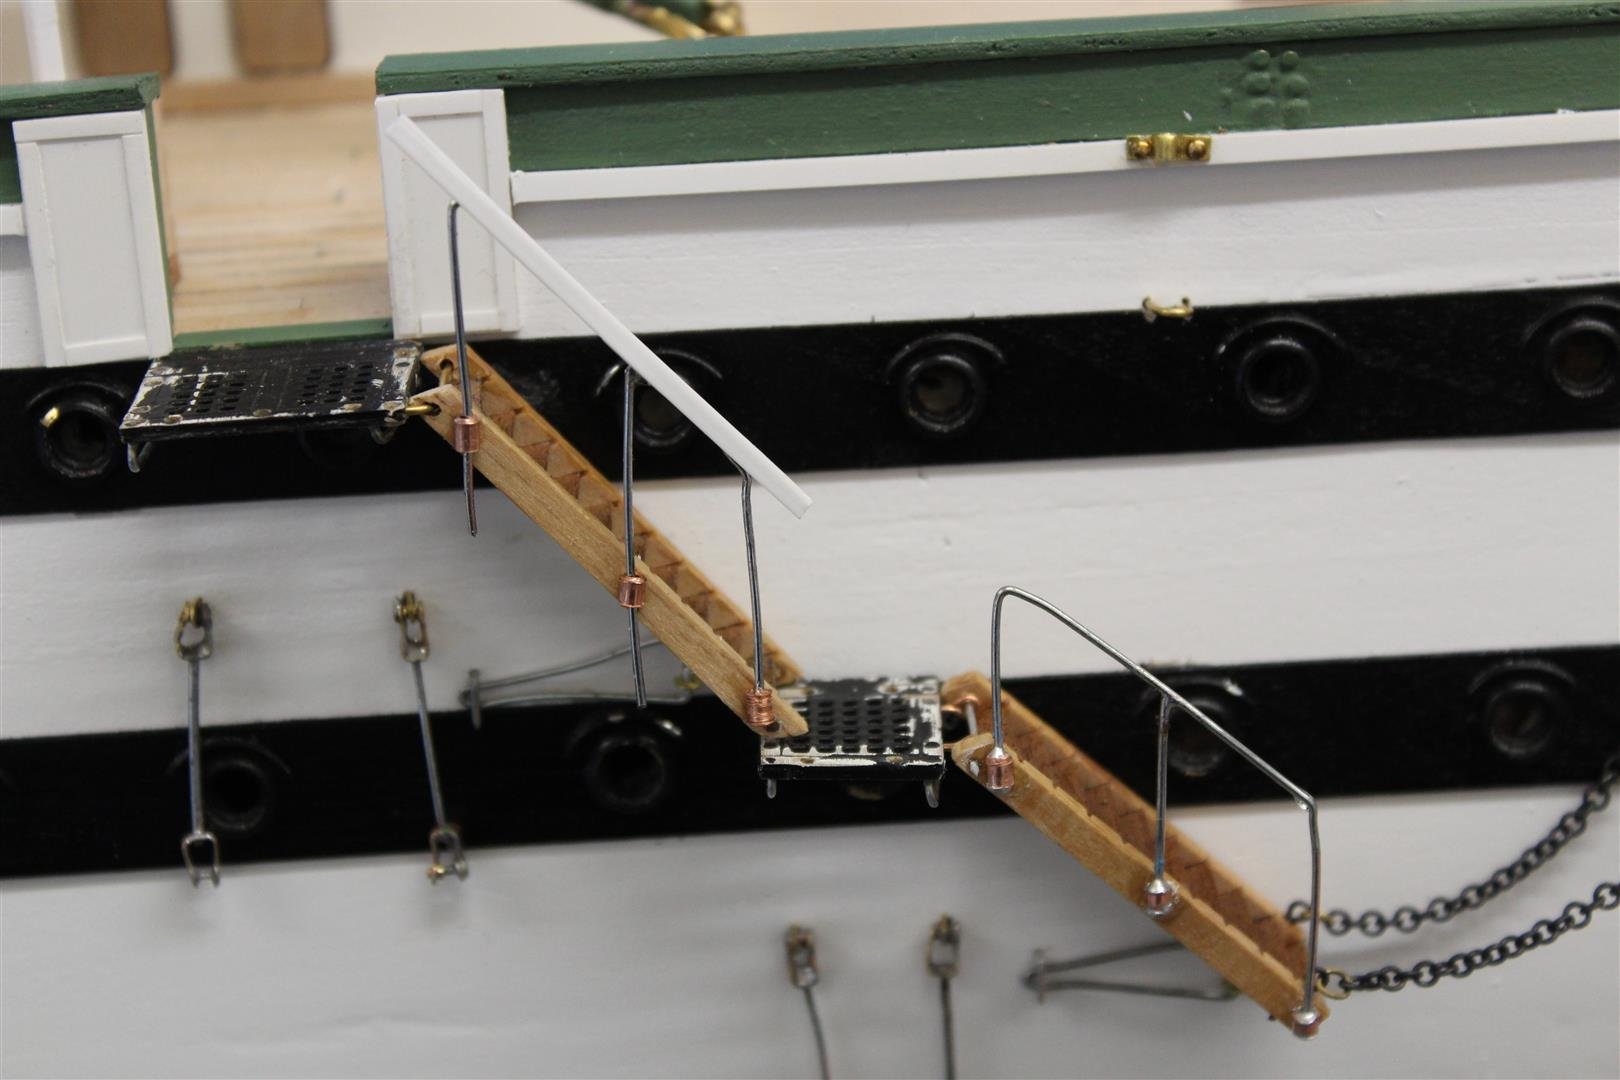
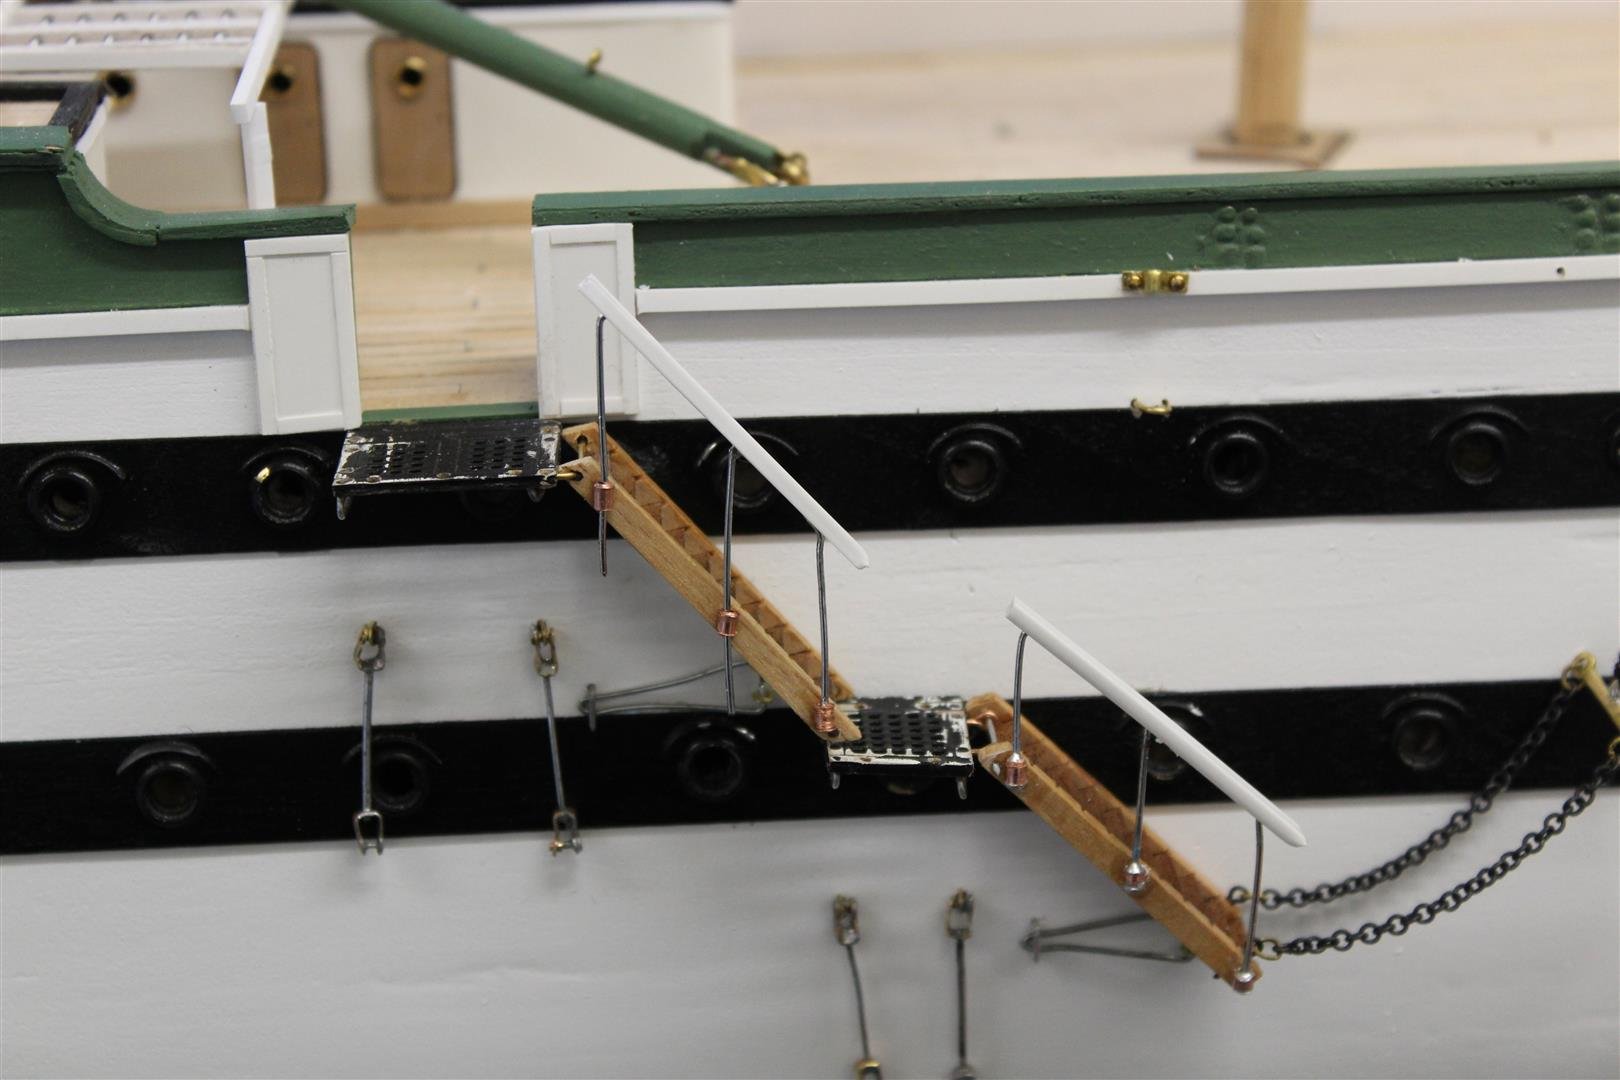
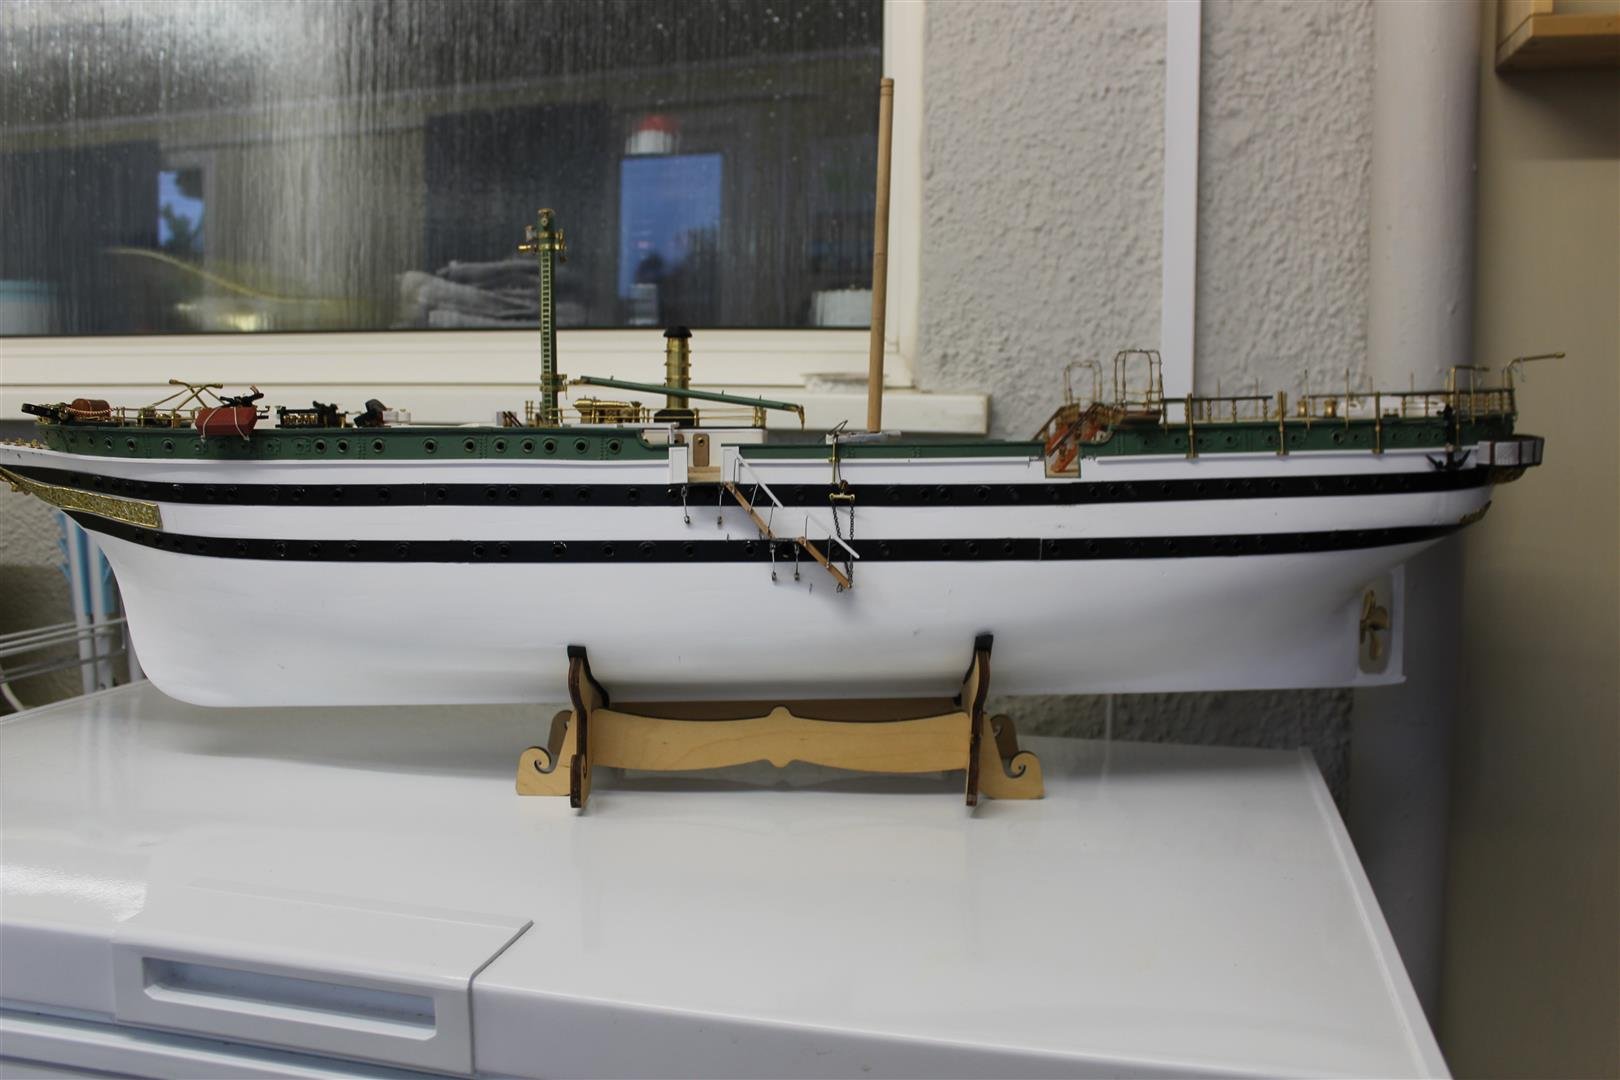
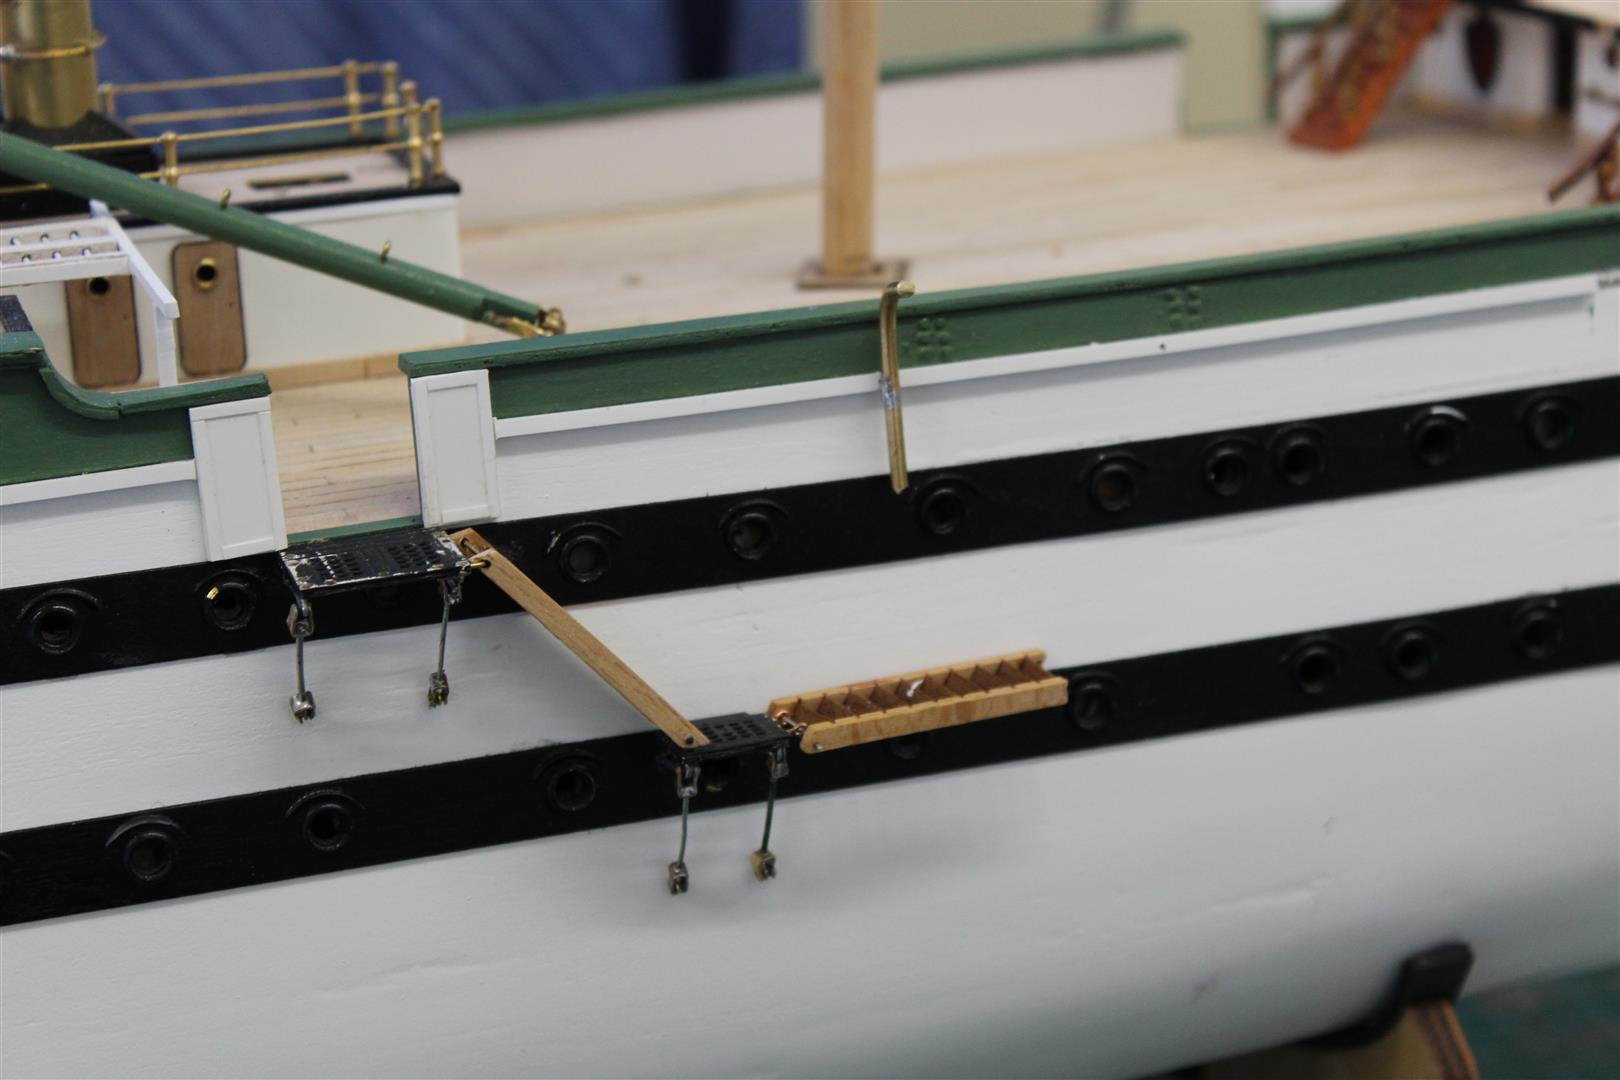
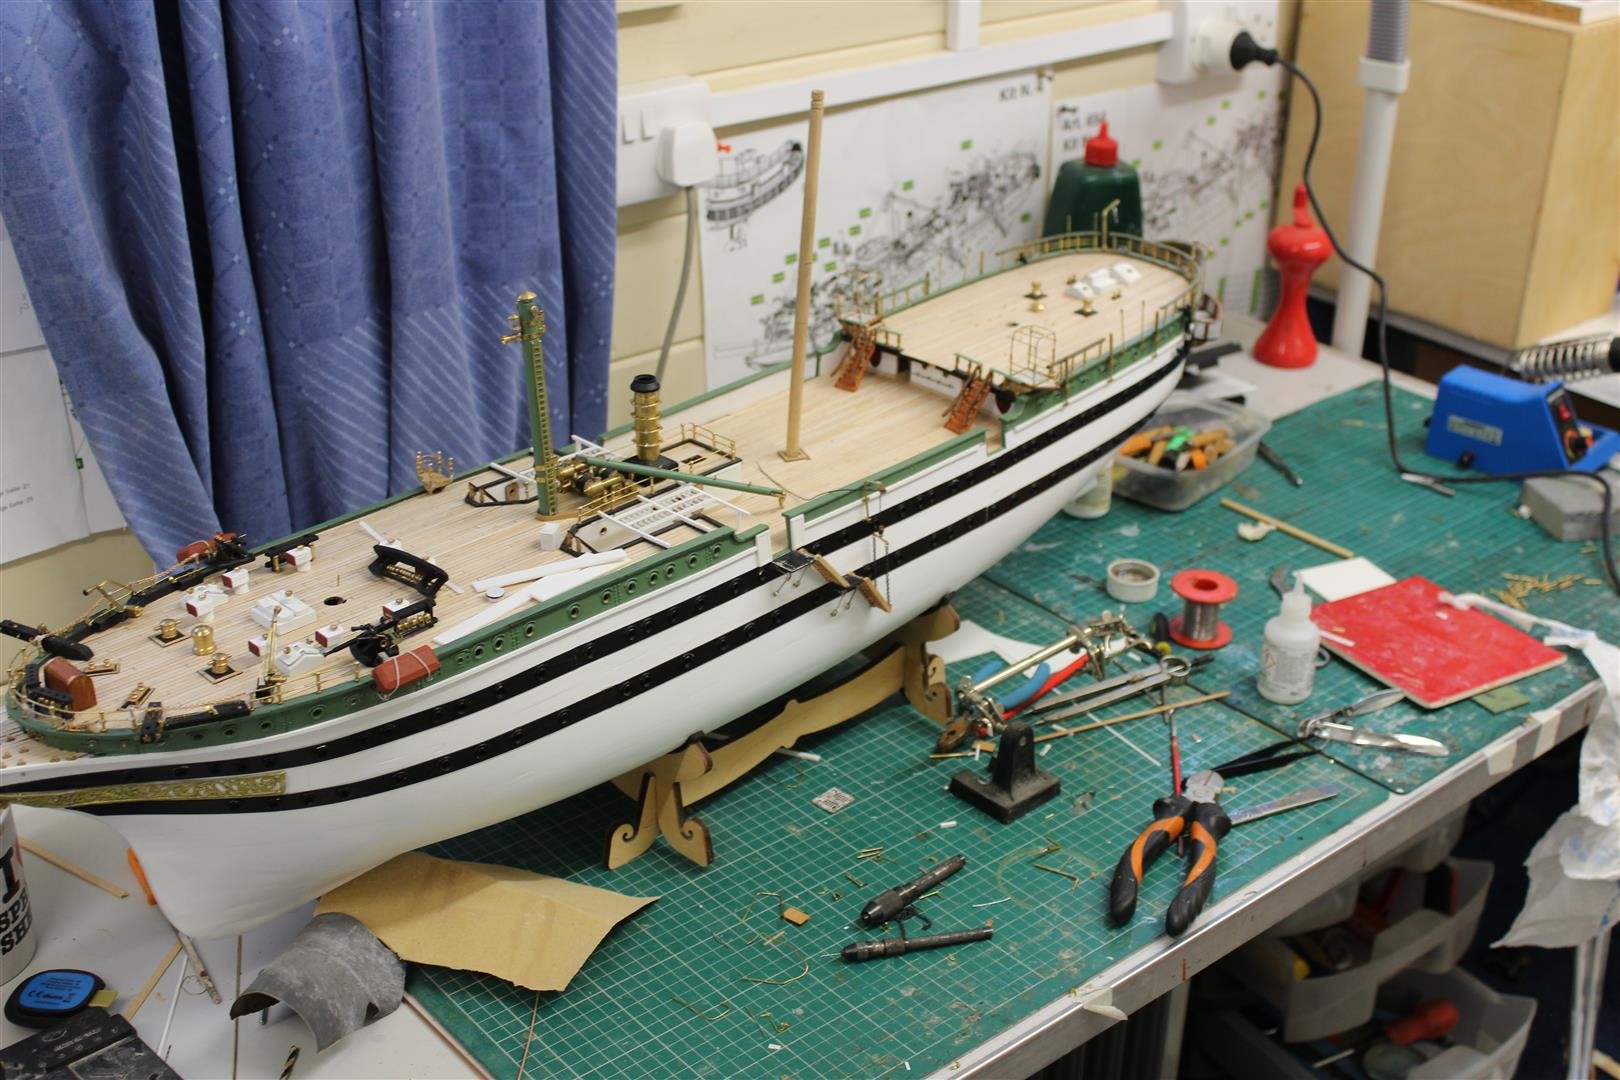
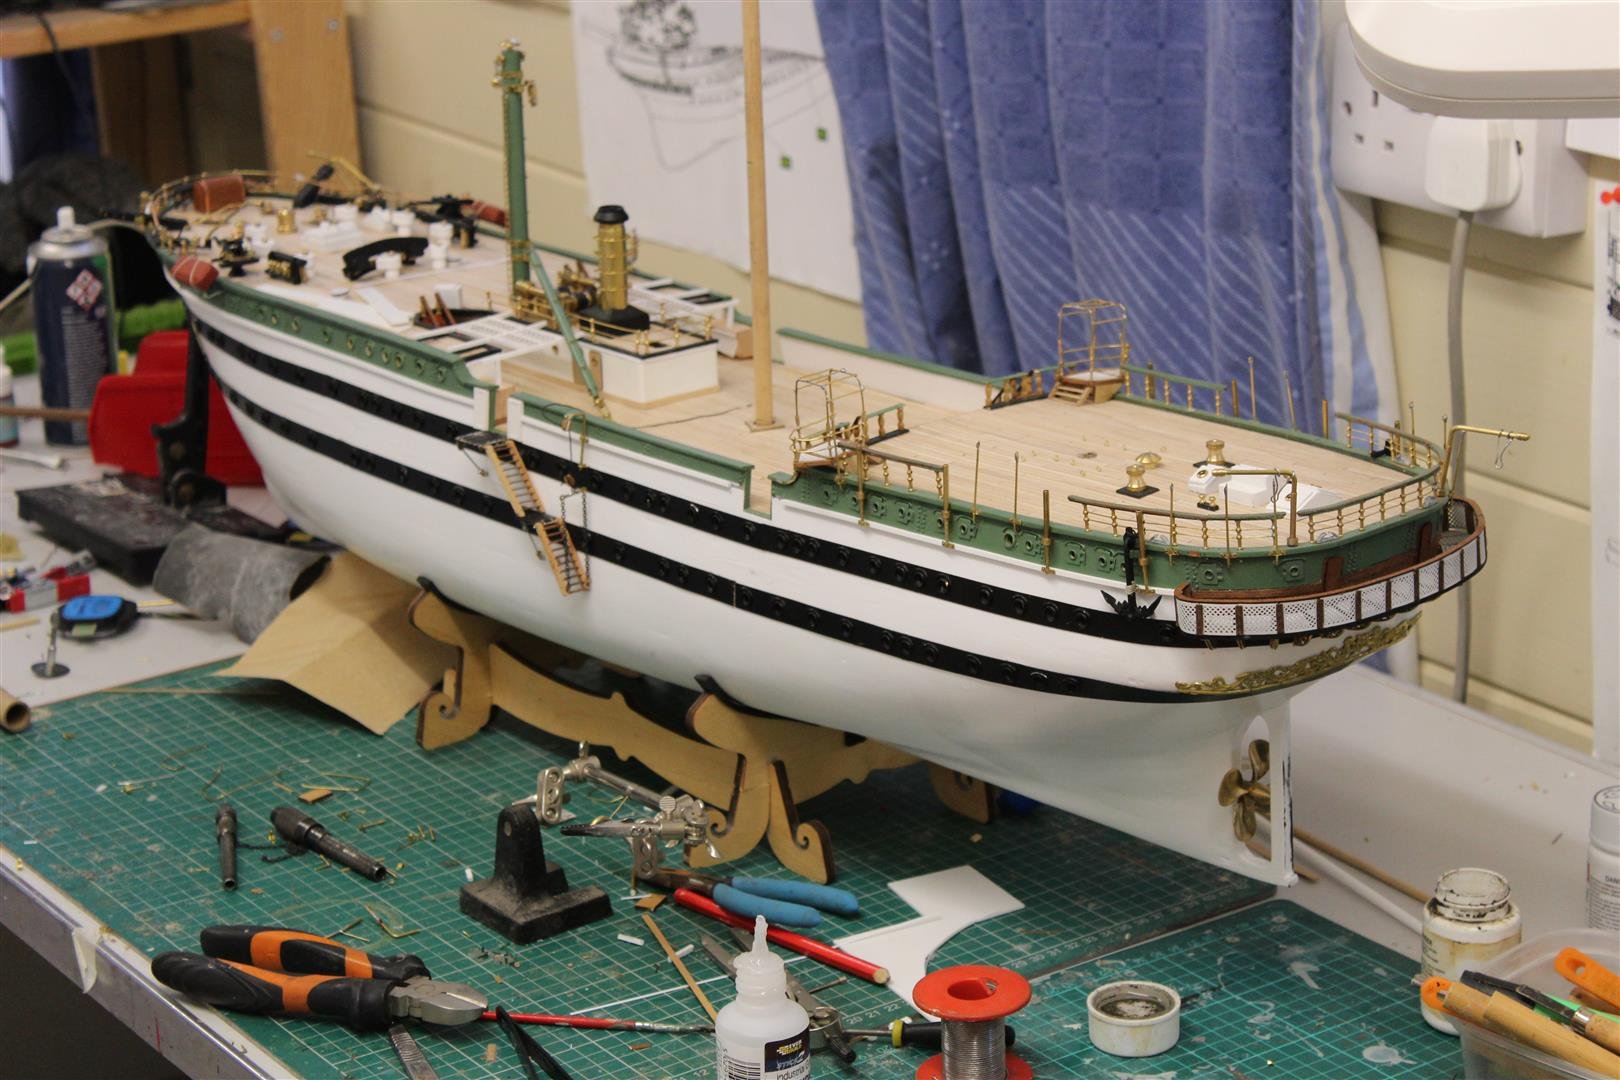
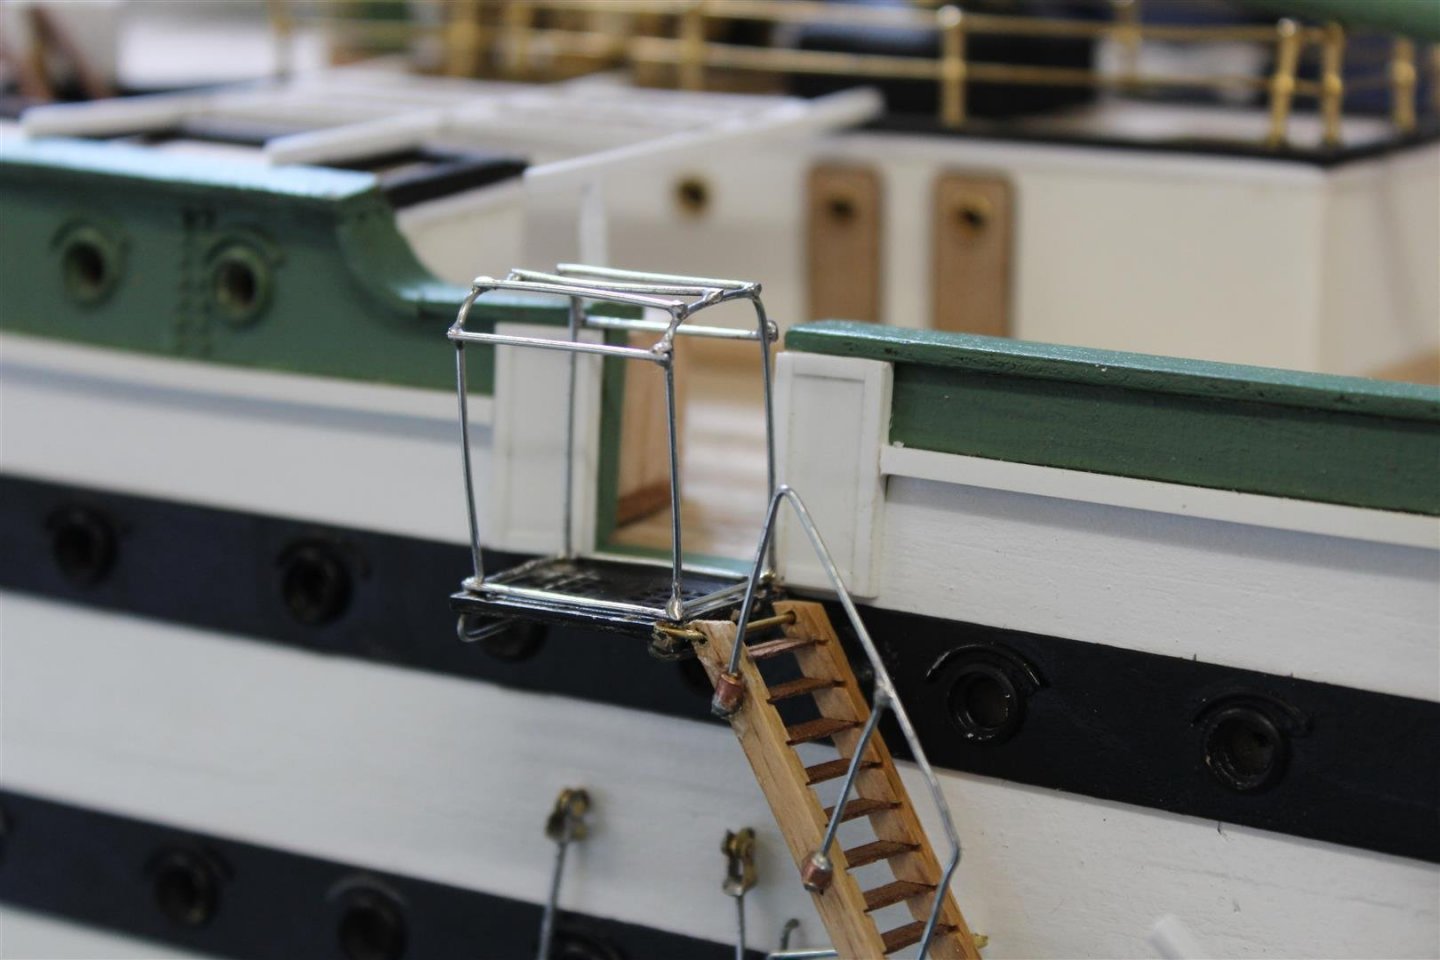
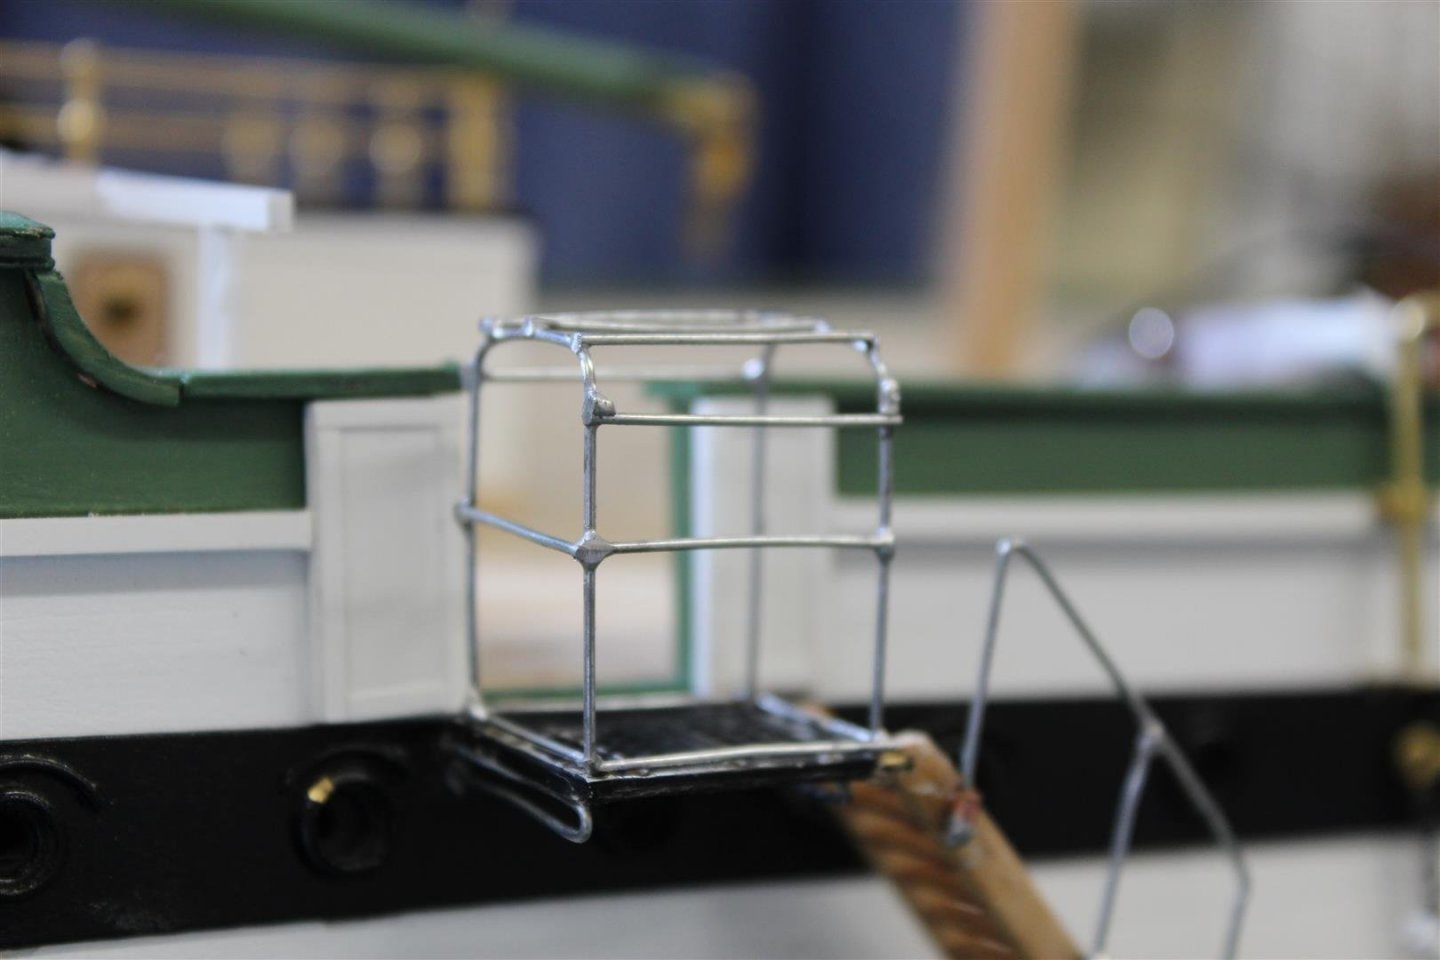
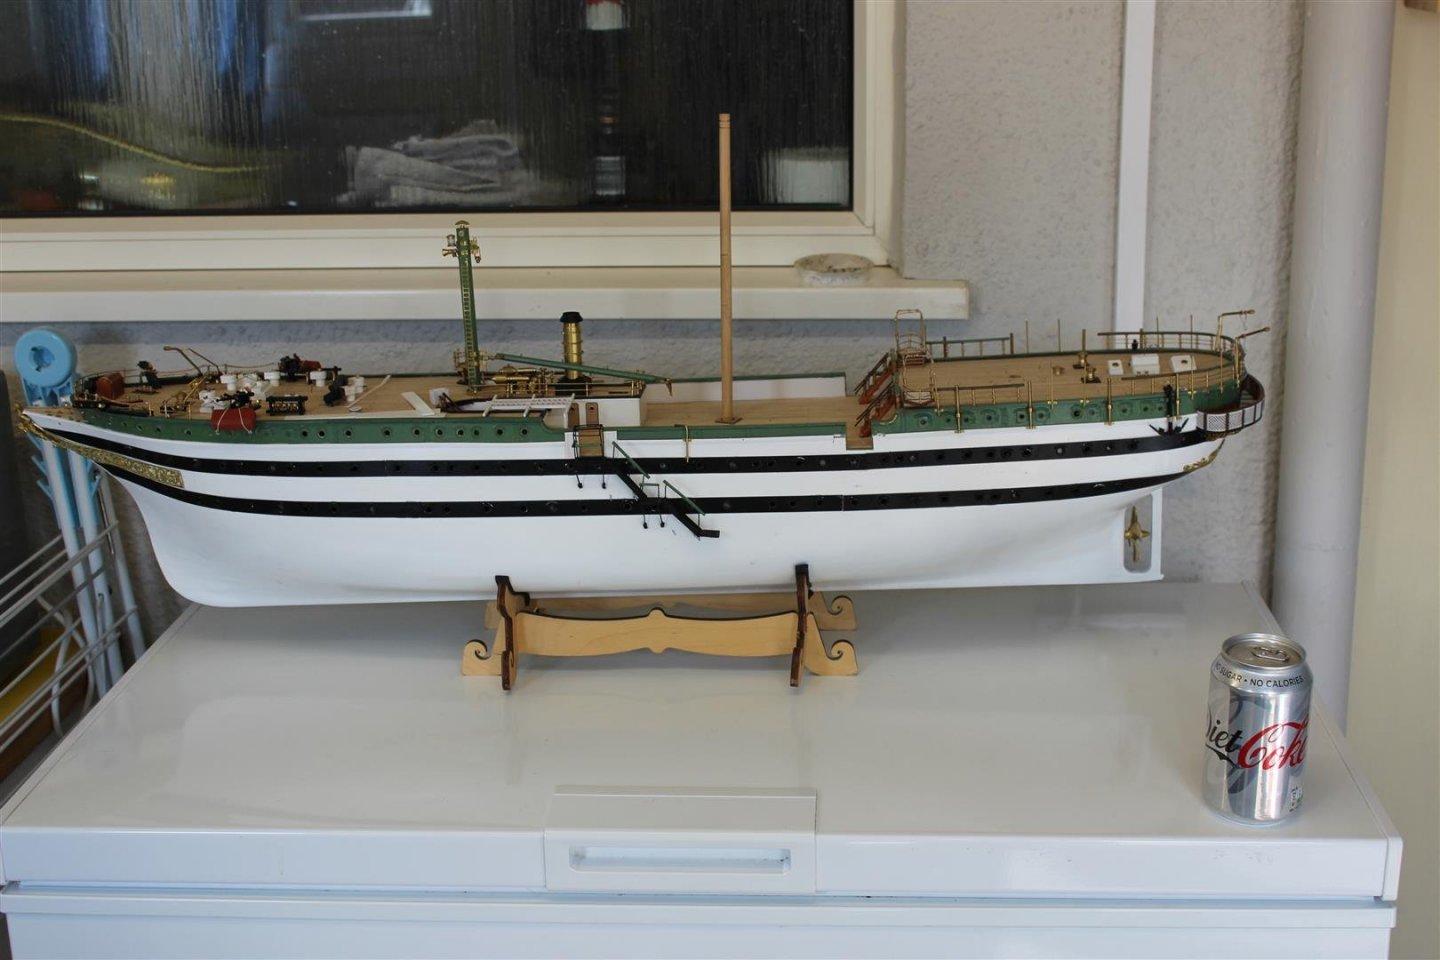
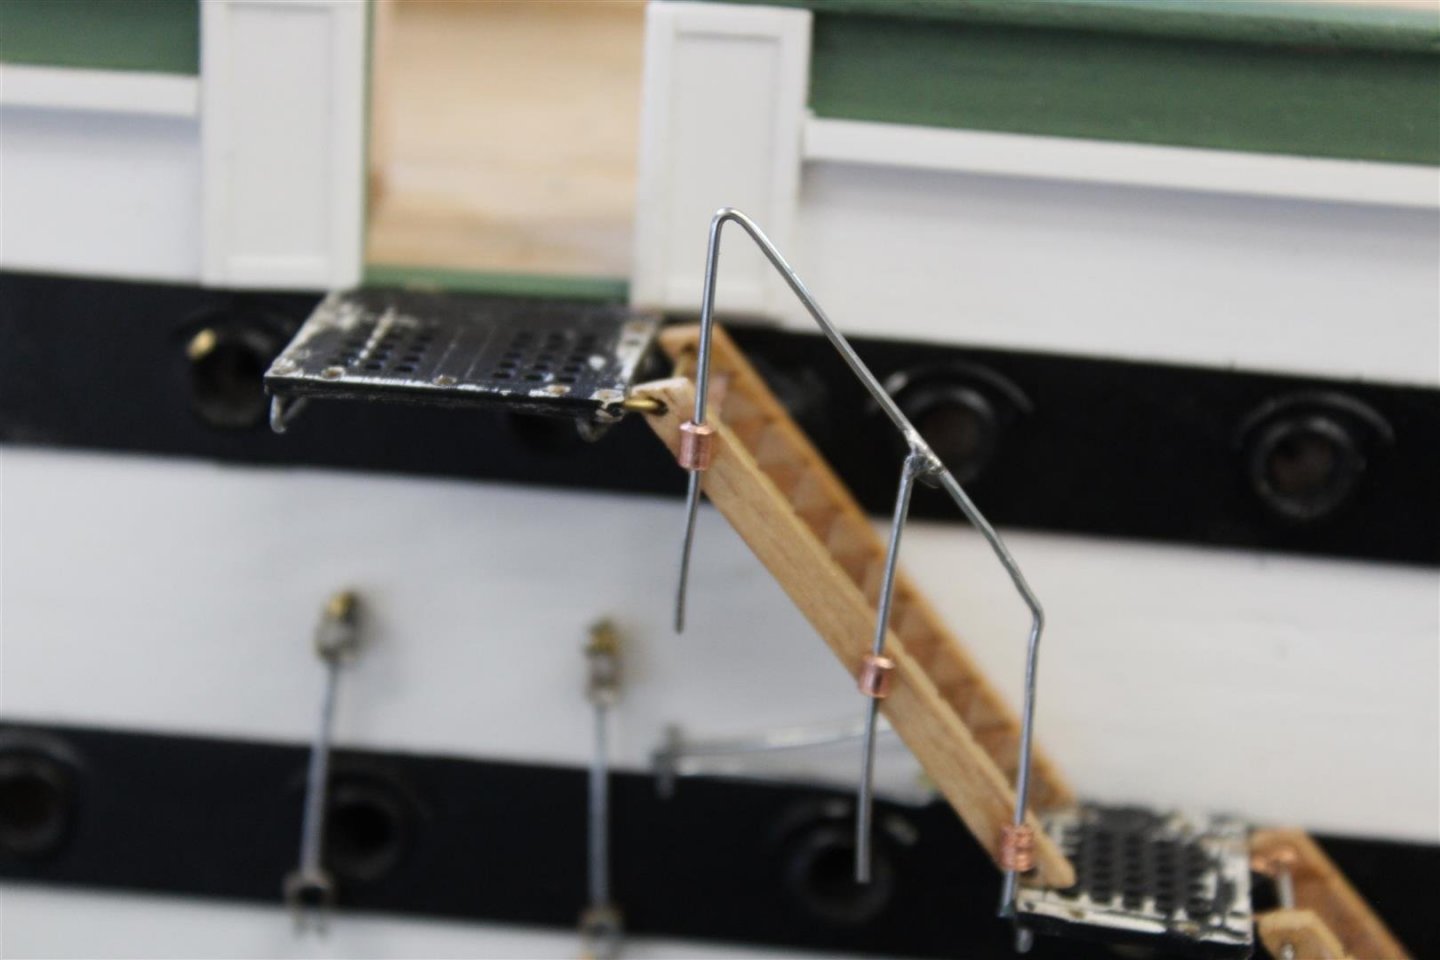
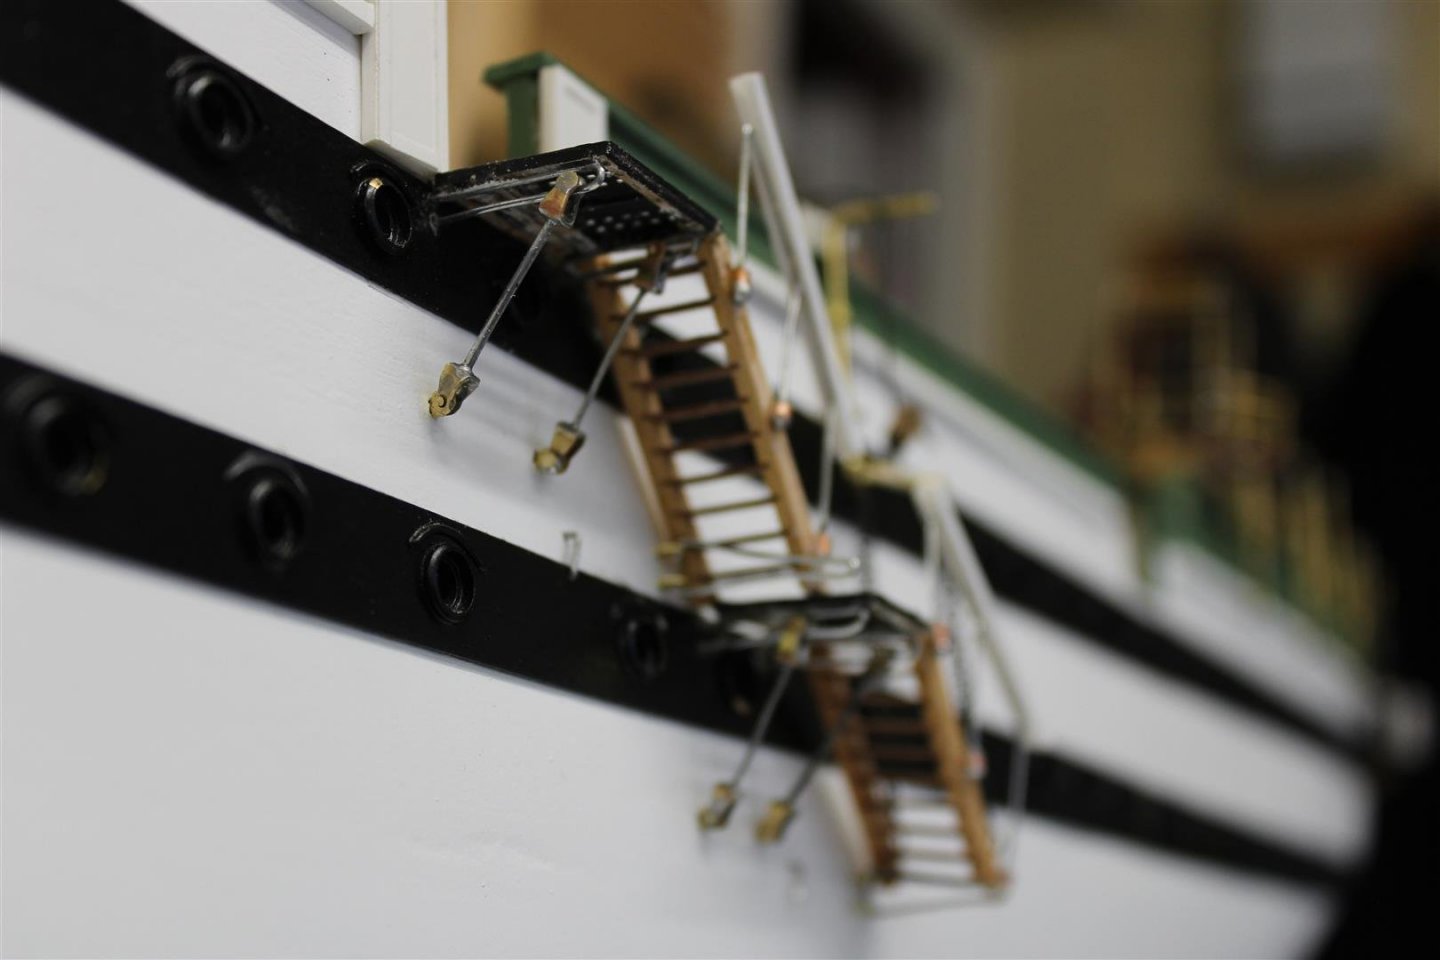
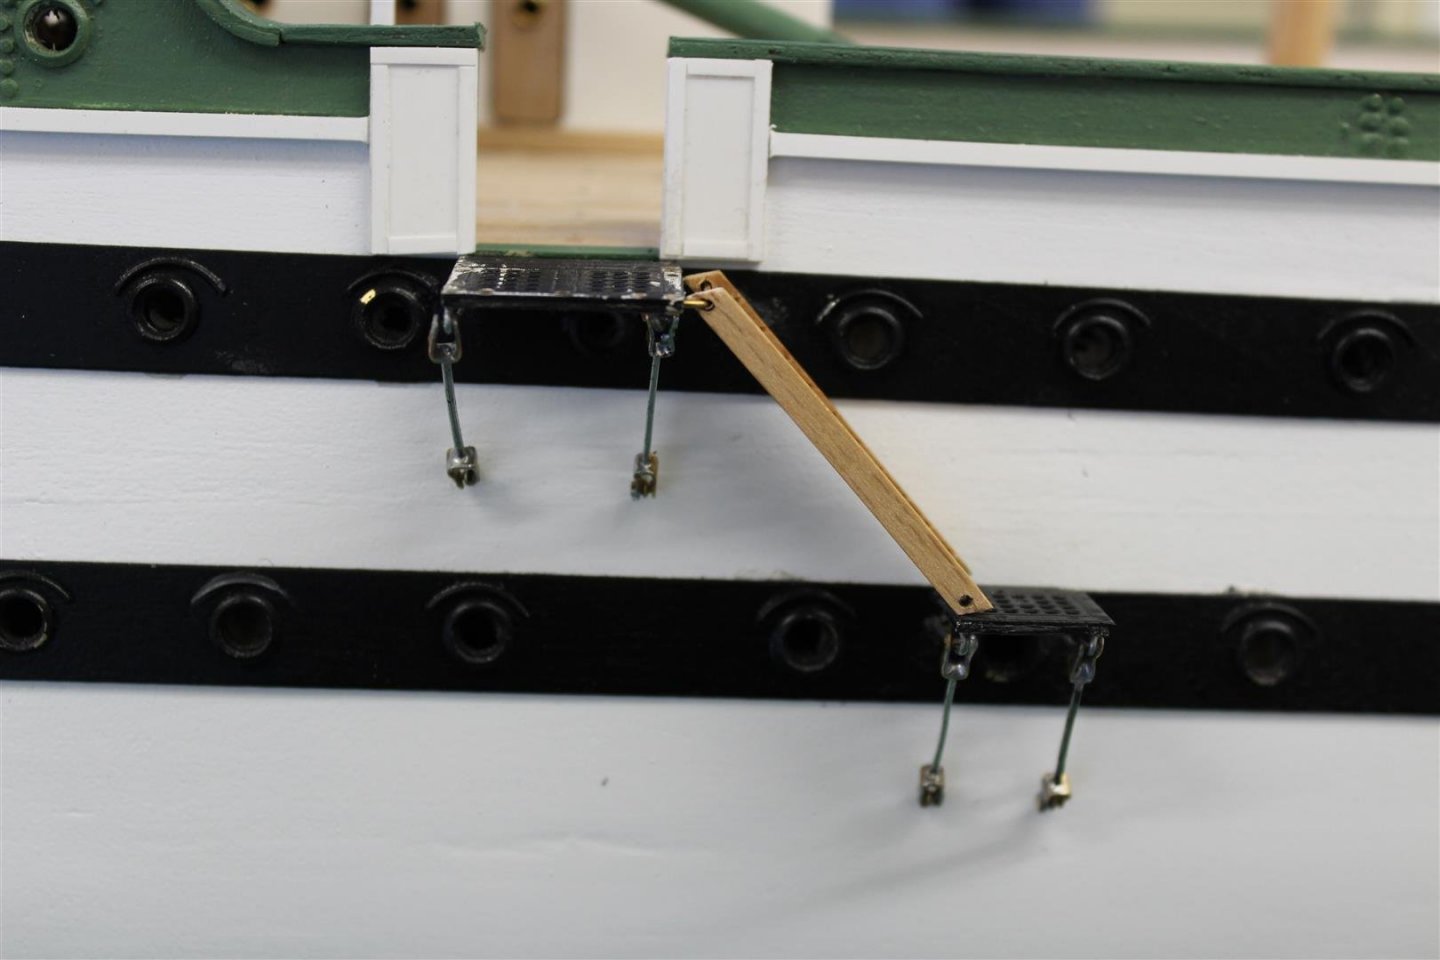
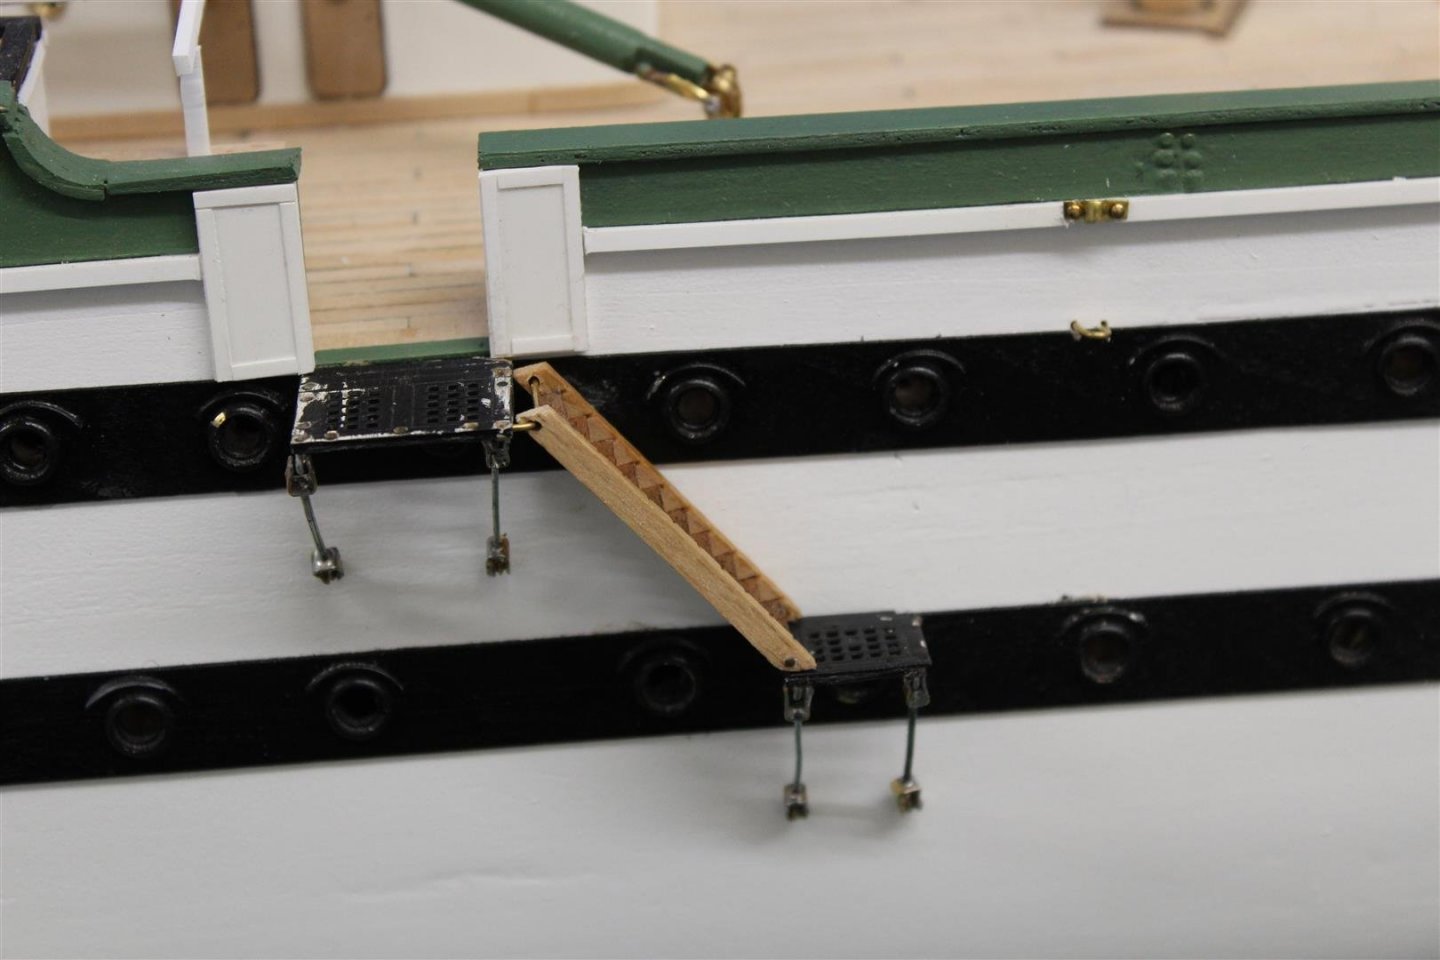
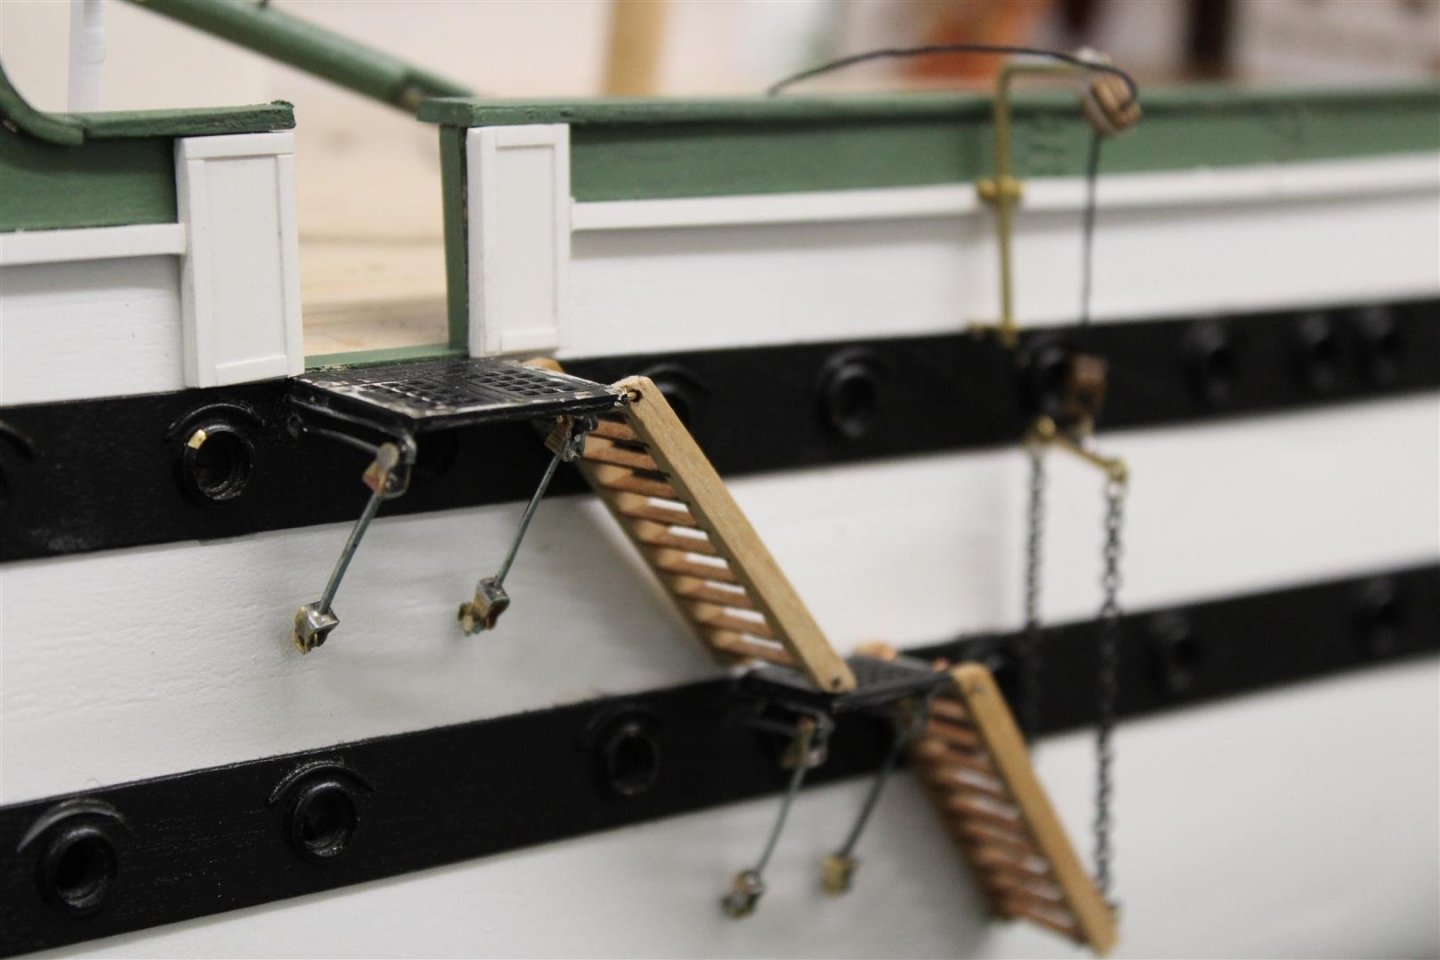
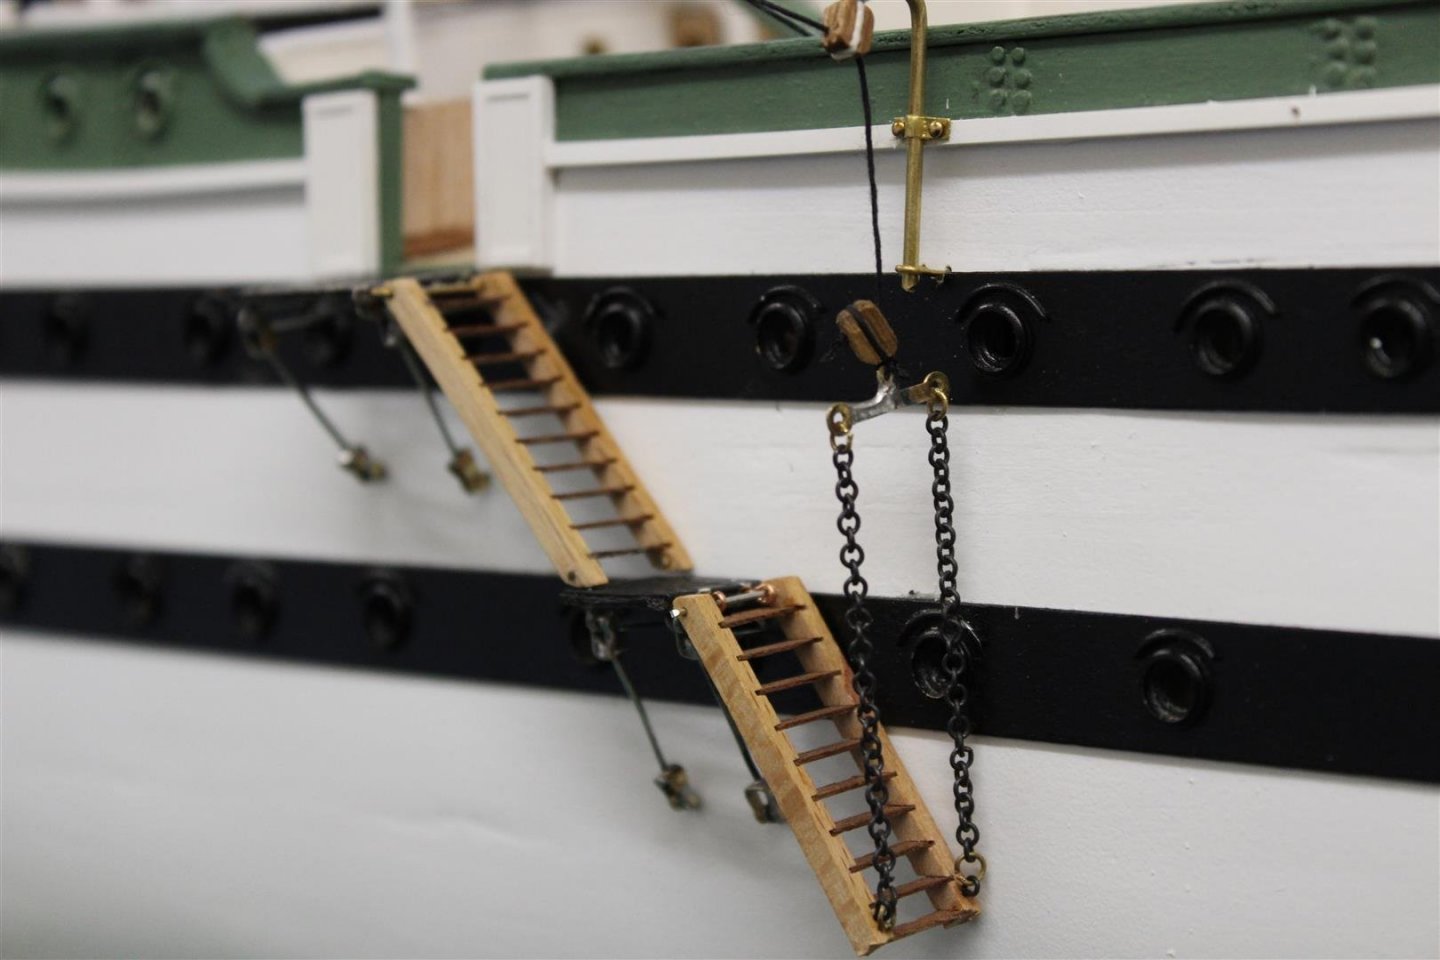
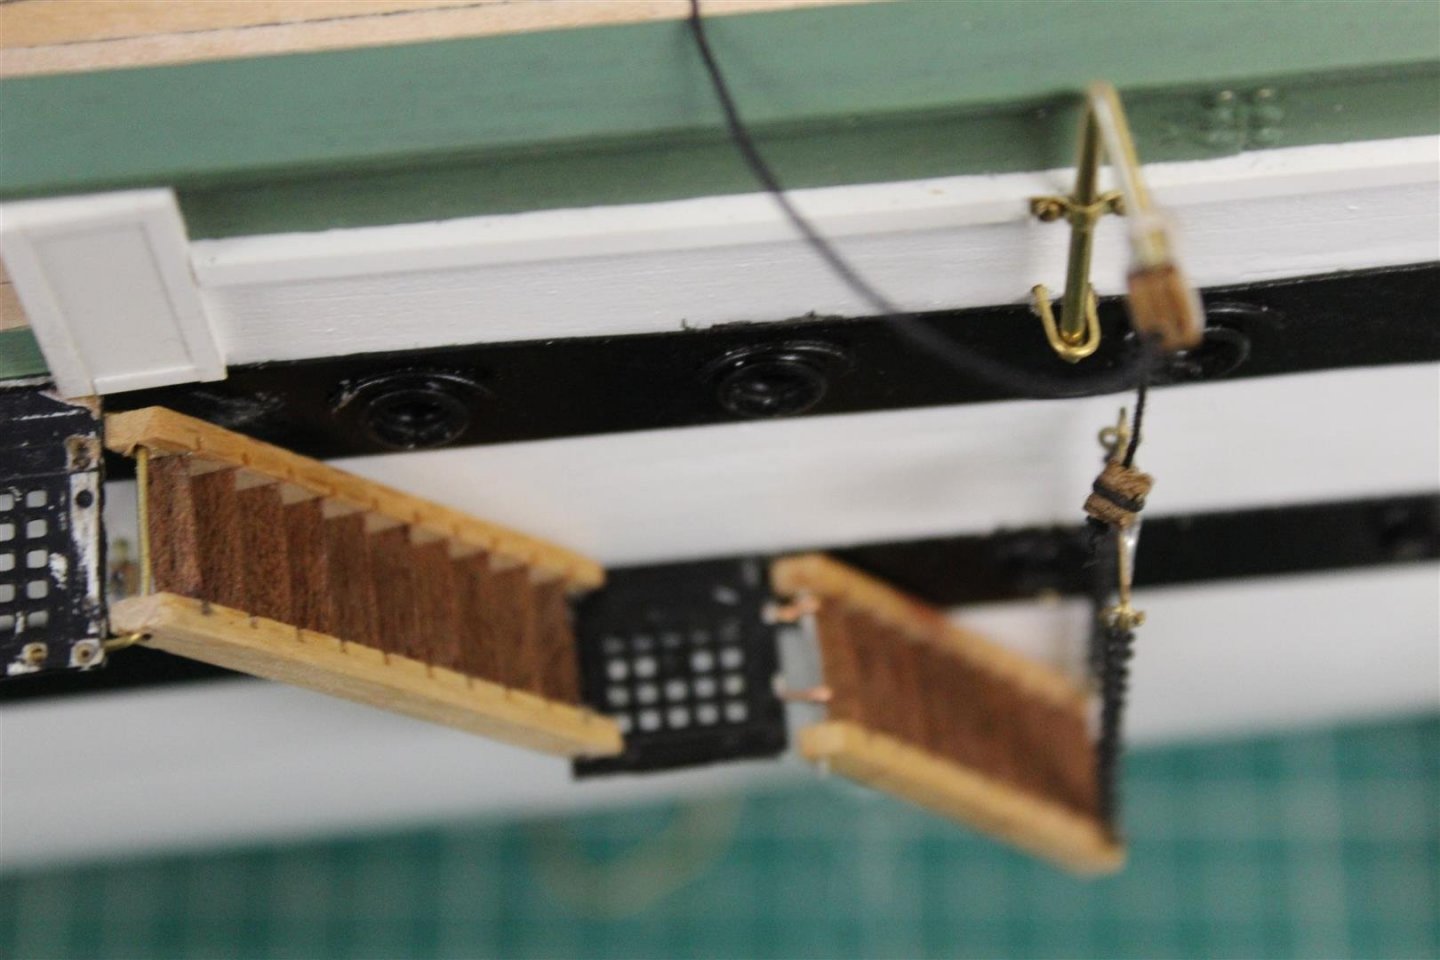
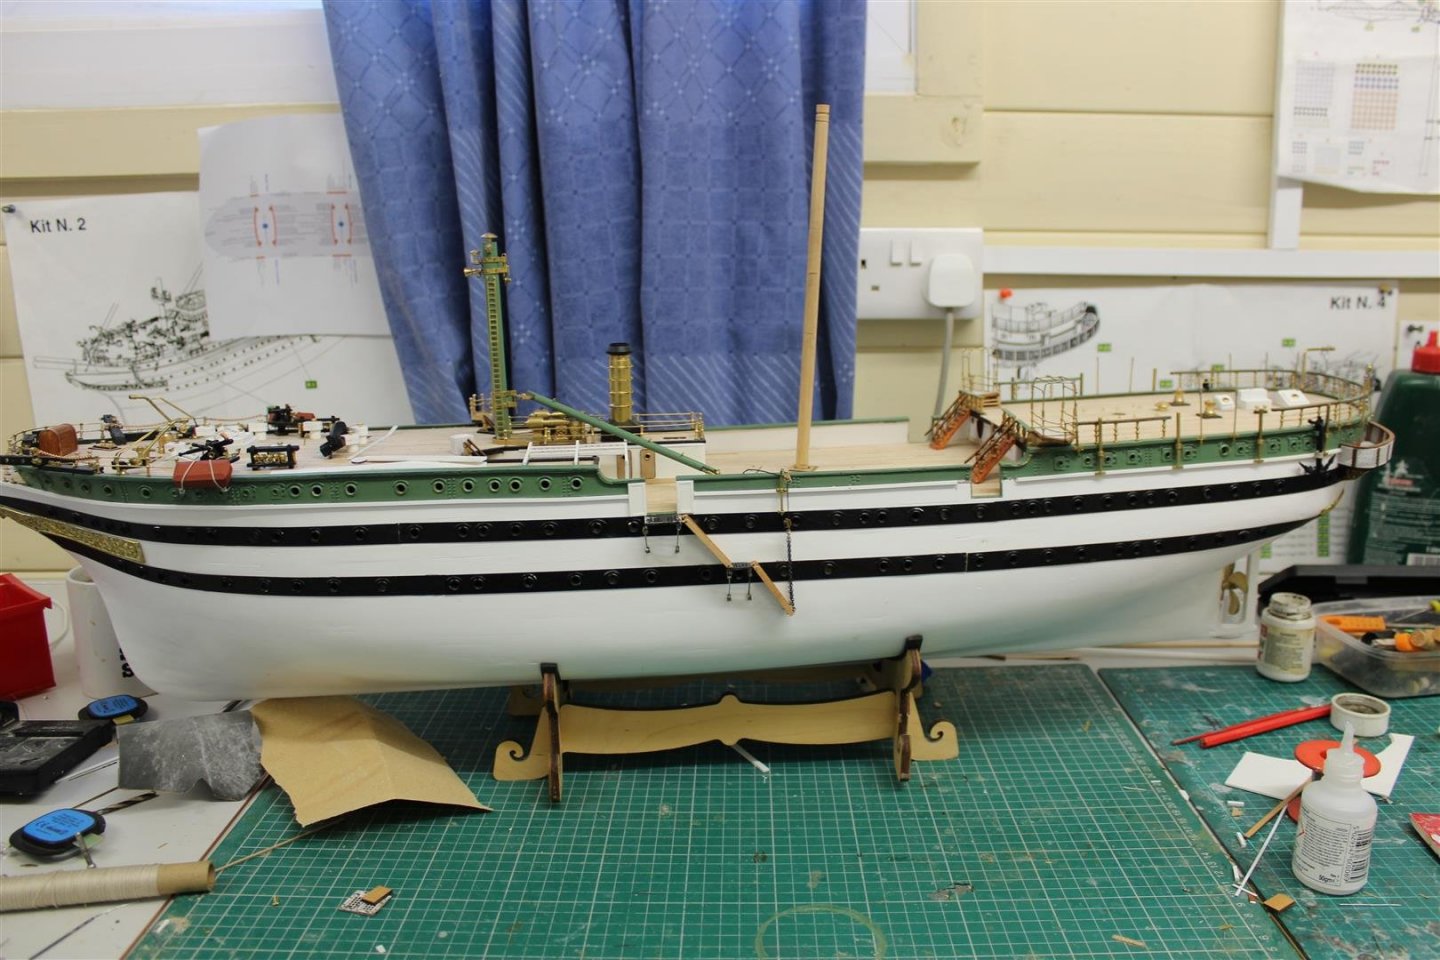
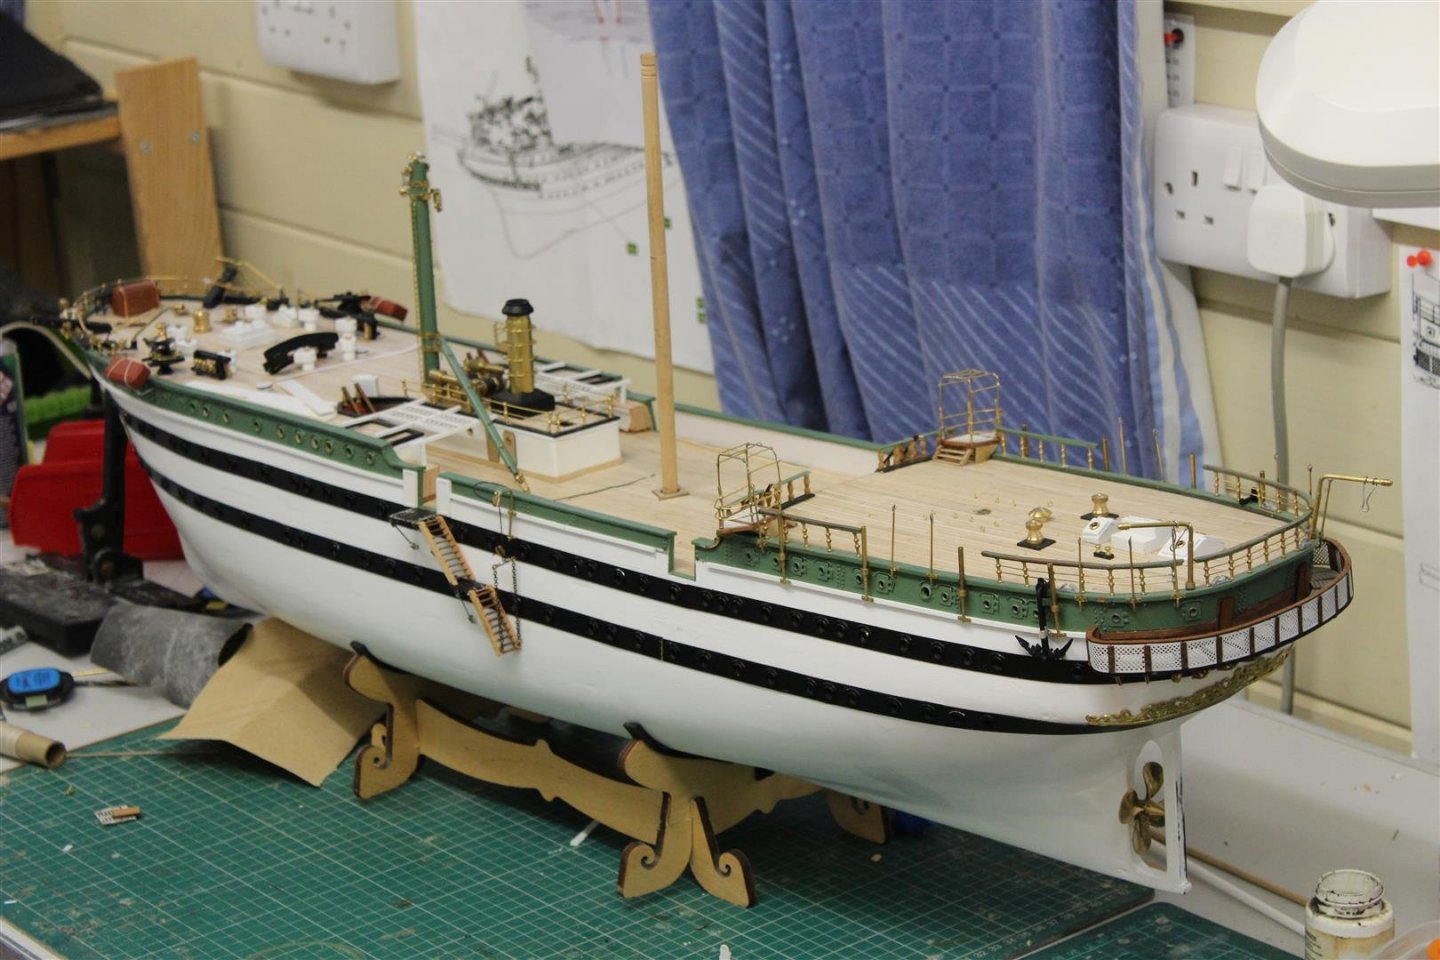
good afternoon everyone still a few fittings to sort, but i now have possibly a ladder im happy with,amother 3 to go but will all be slighly different in the way they are rigged if in the long term i do make it again, i will use the original idea of more brass, but for now this is staying


- 273 replies
-
- 9
-
-
- panart
- amerigo vespucci
- (and 1 more)
-
lovely project Good luck Sjors
-
is that a majority of the armies completed now, they look great lol dont forget all the spectators taking videos for the social media networks
-
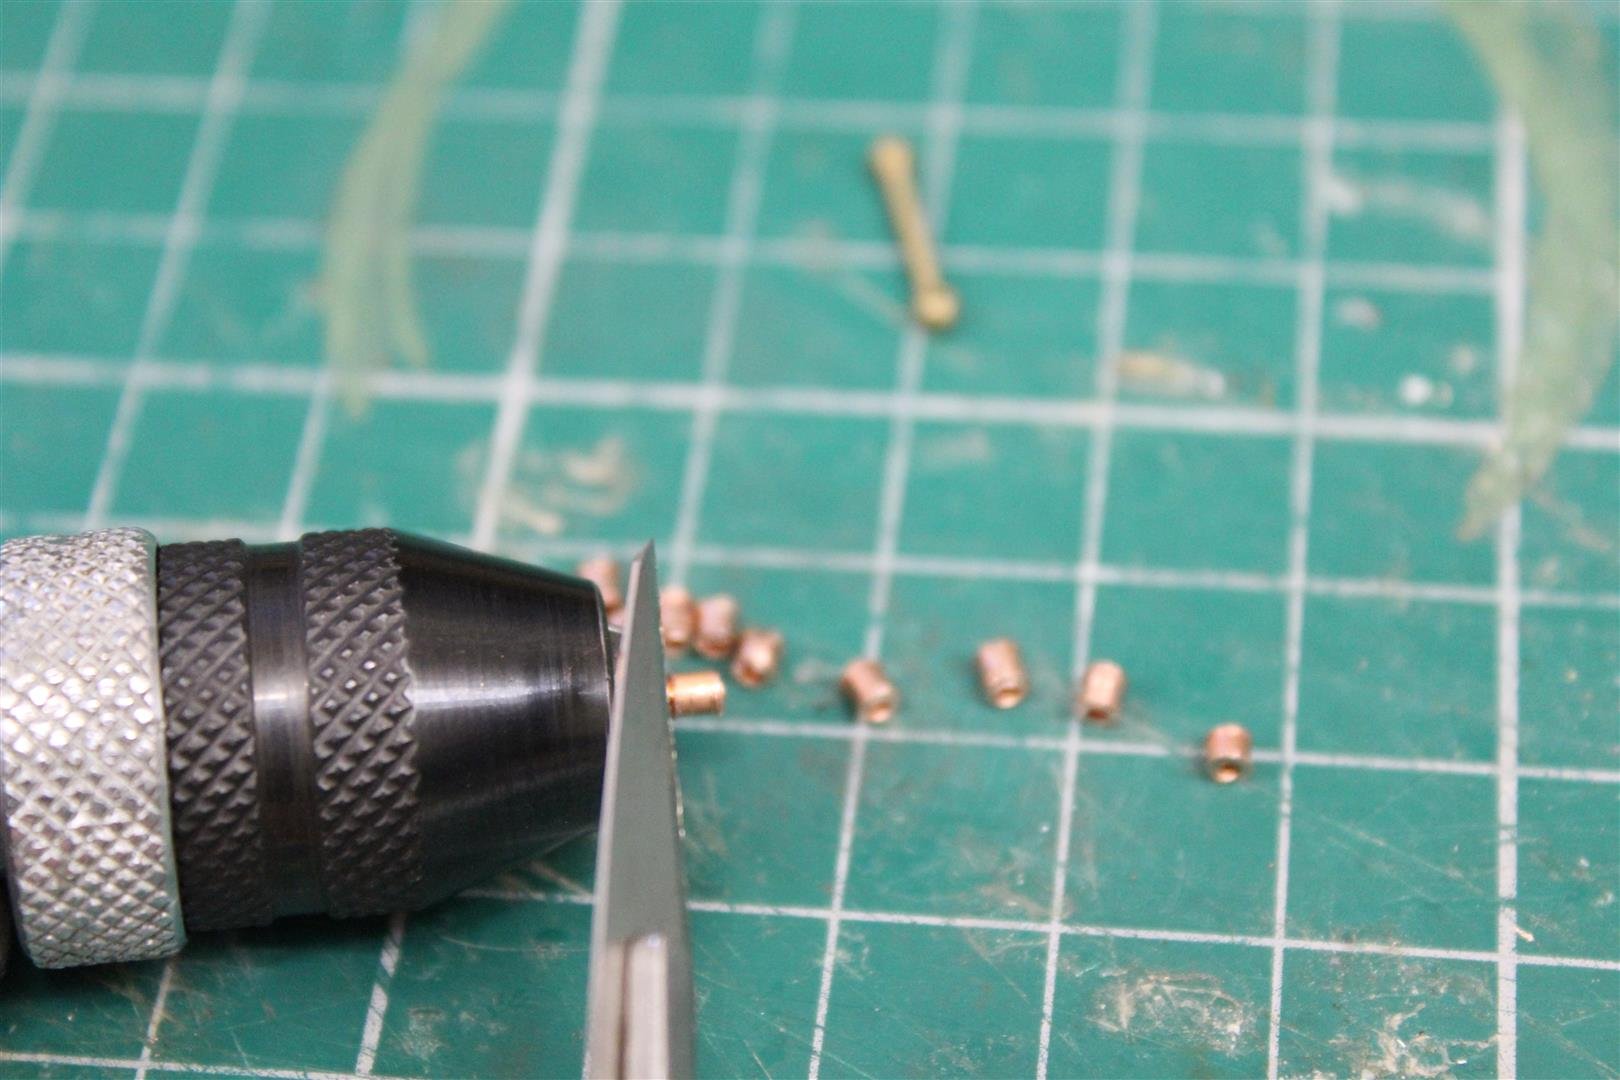
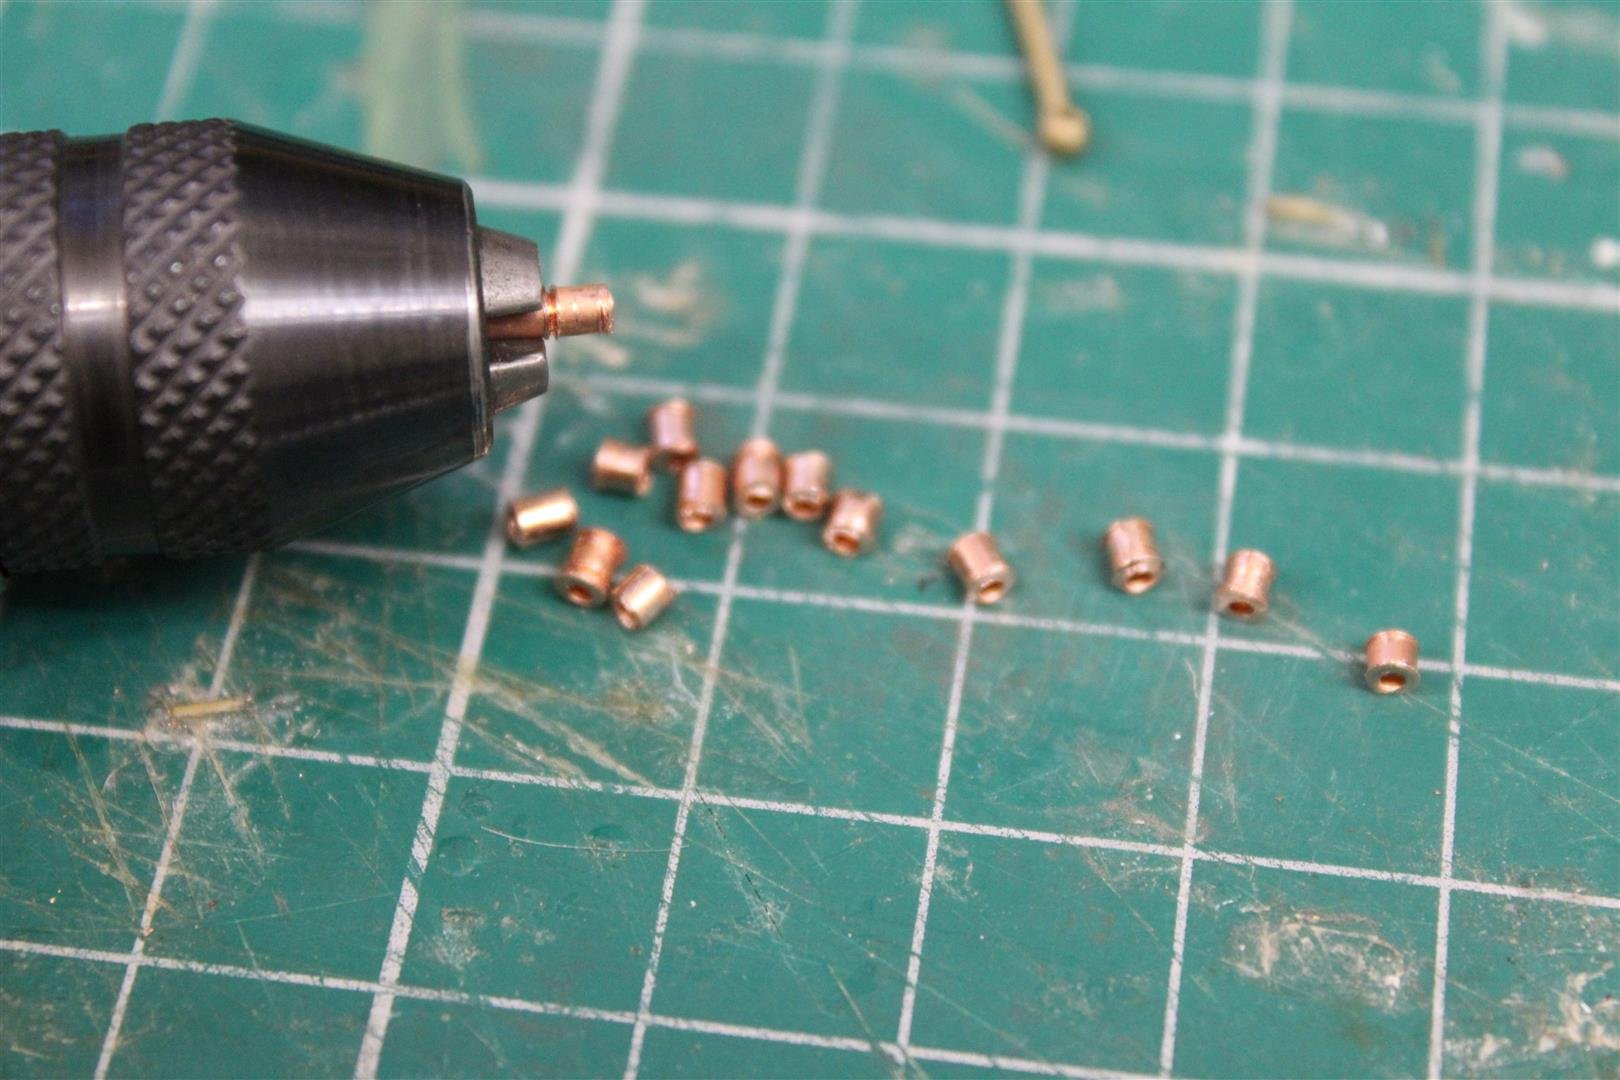
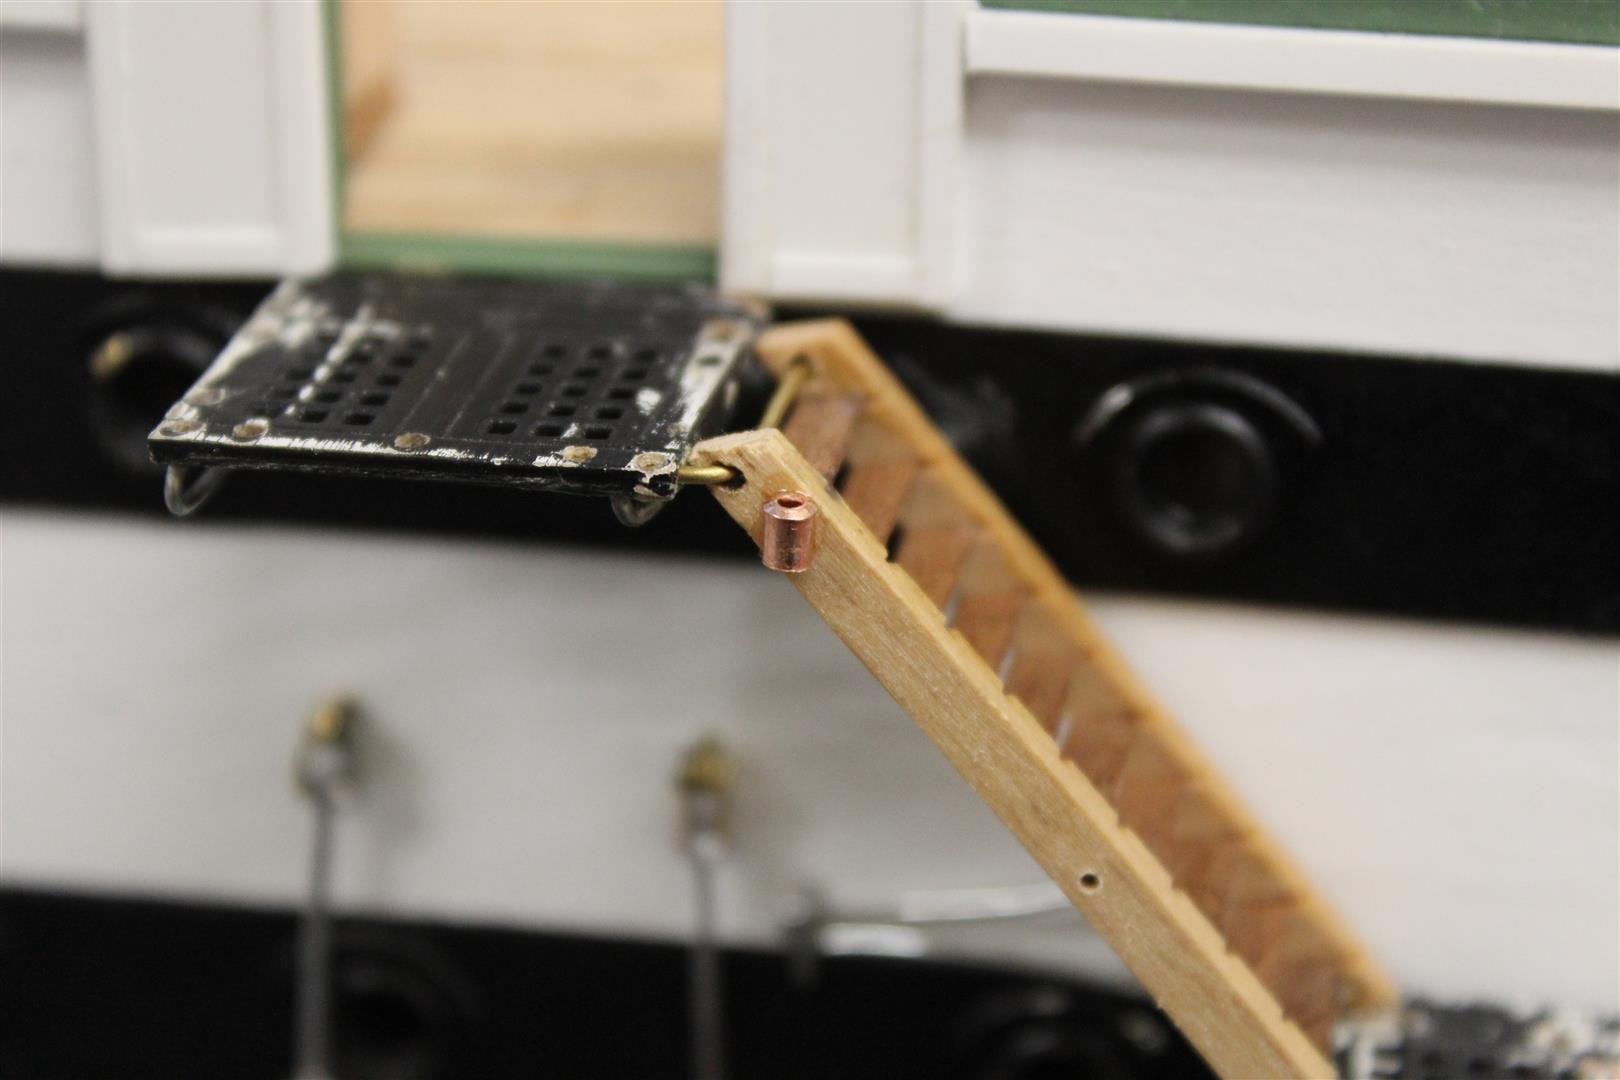
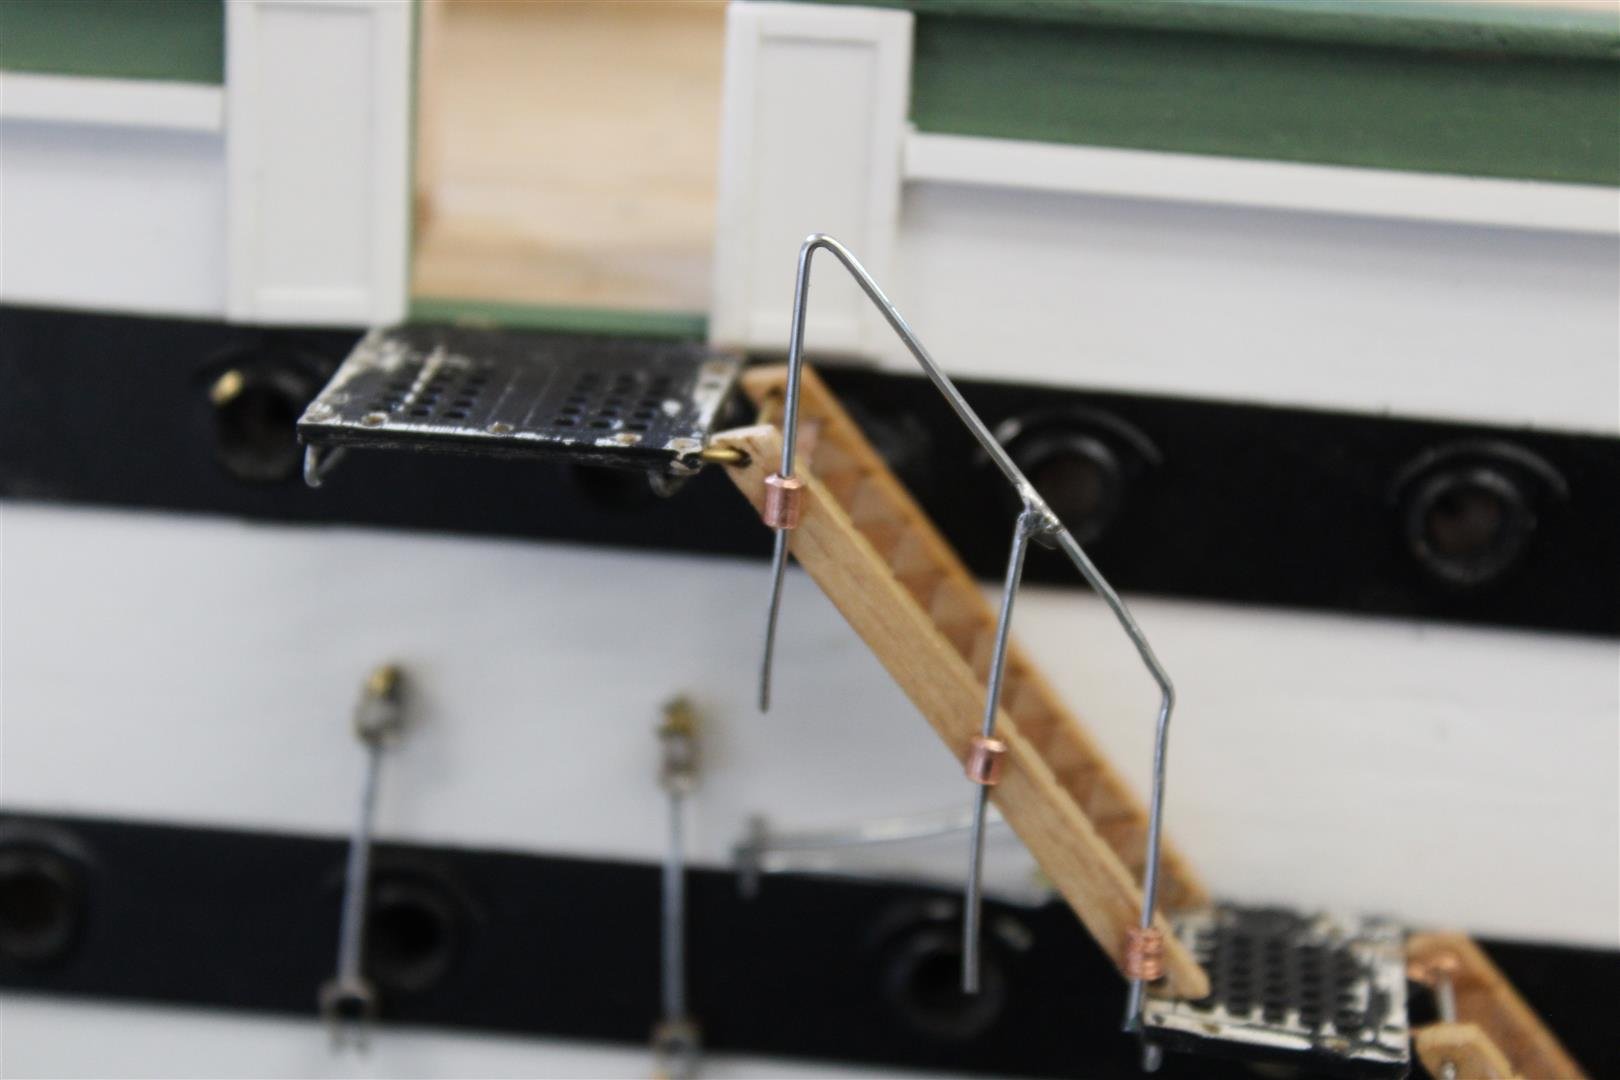
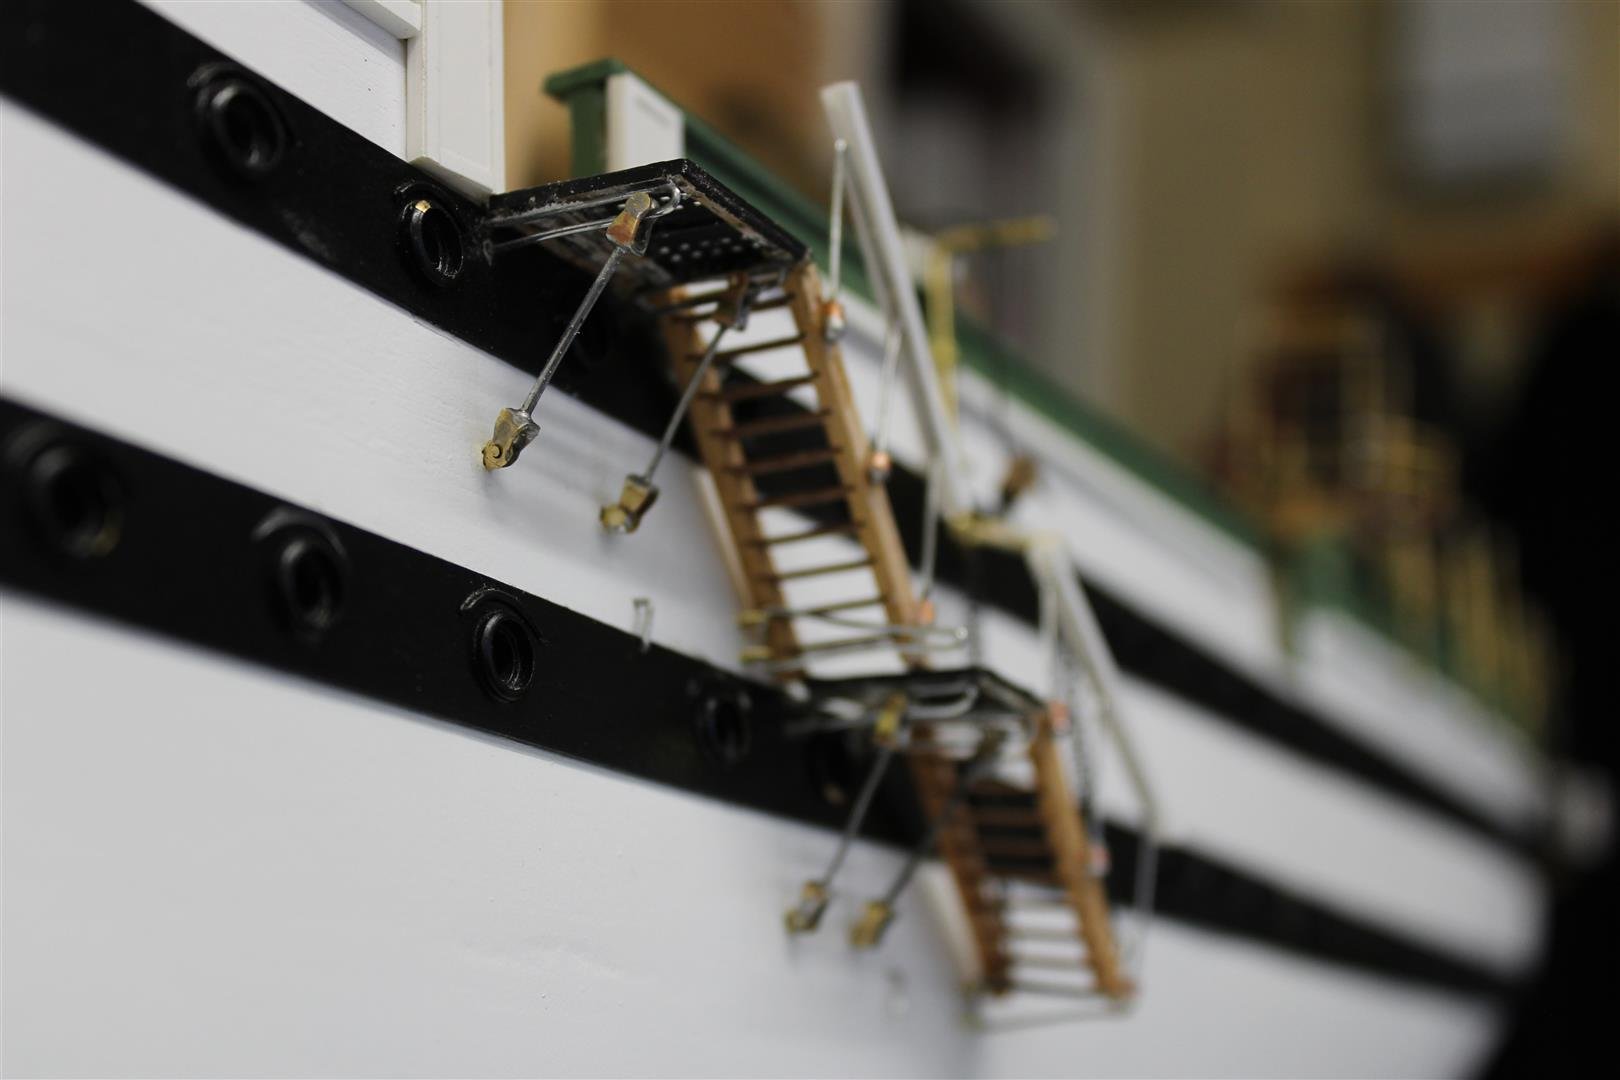
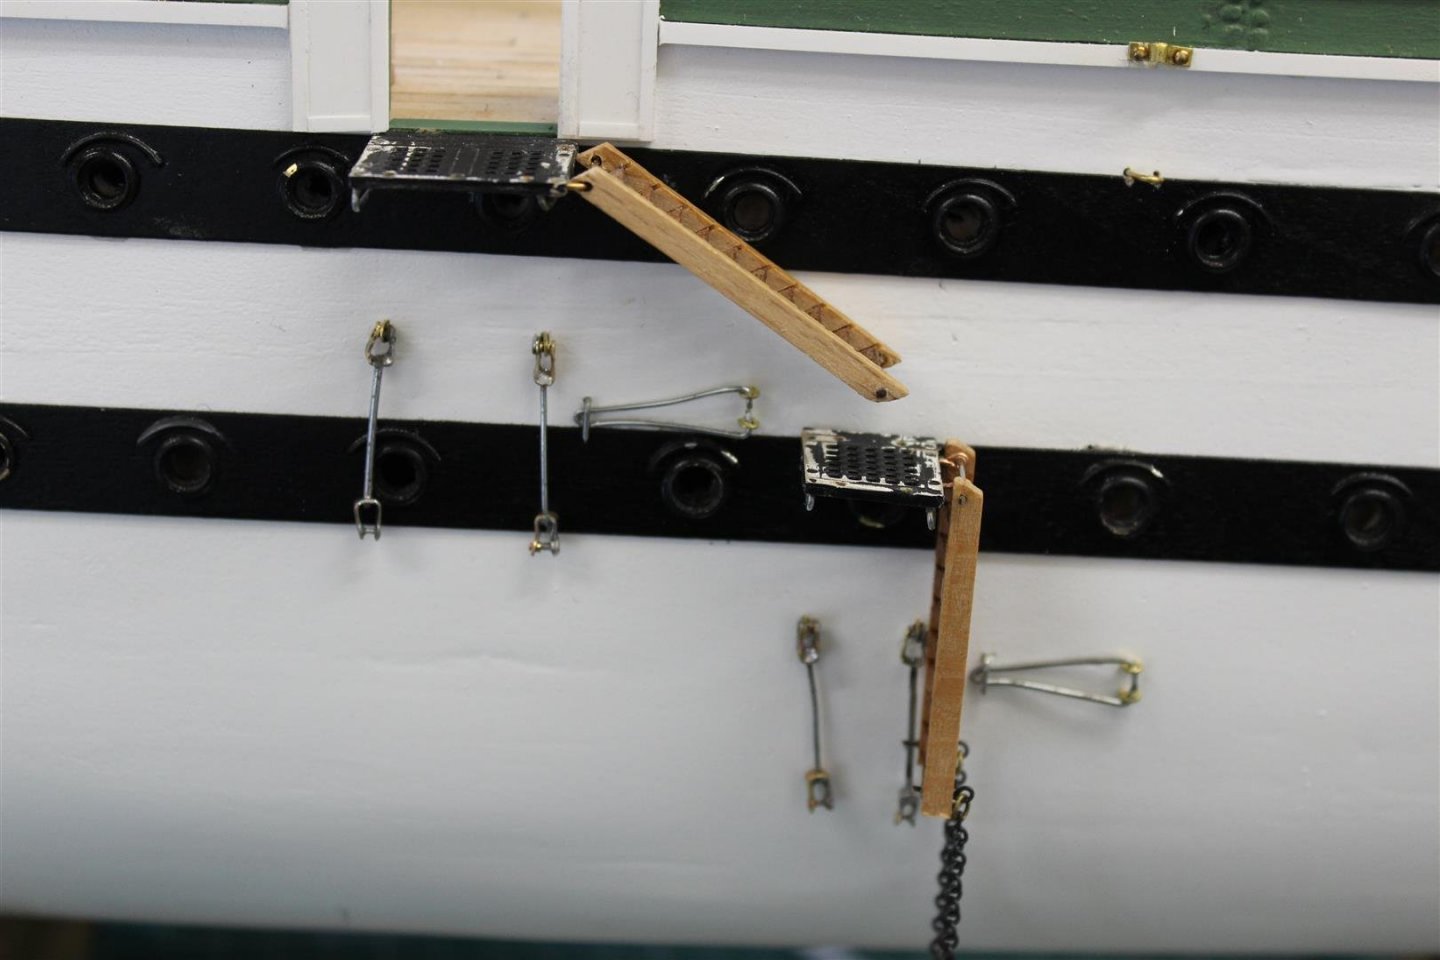
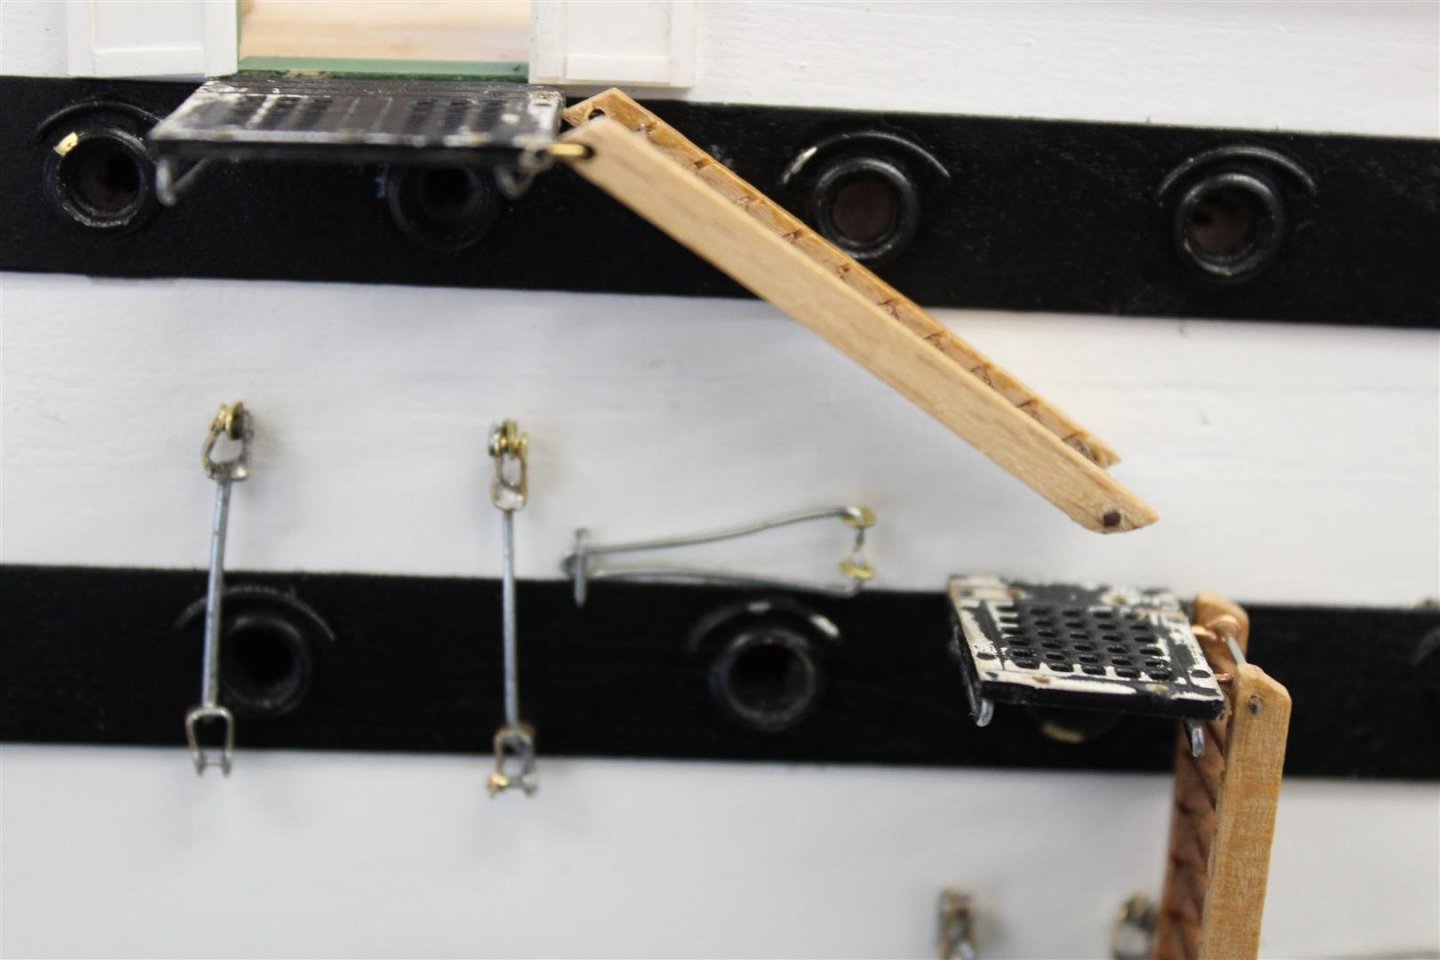
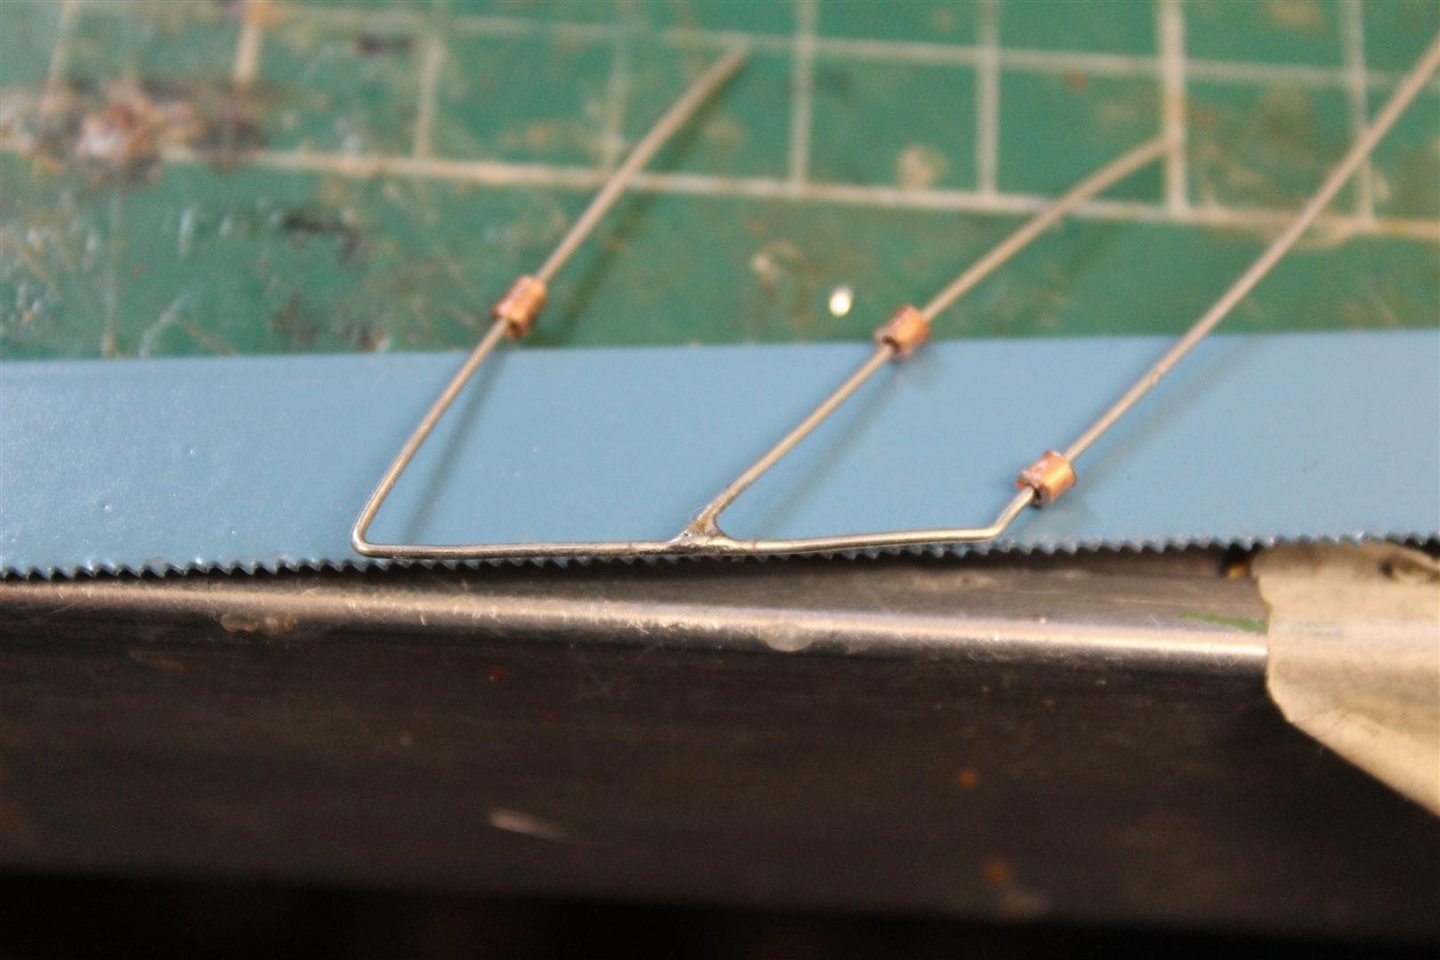
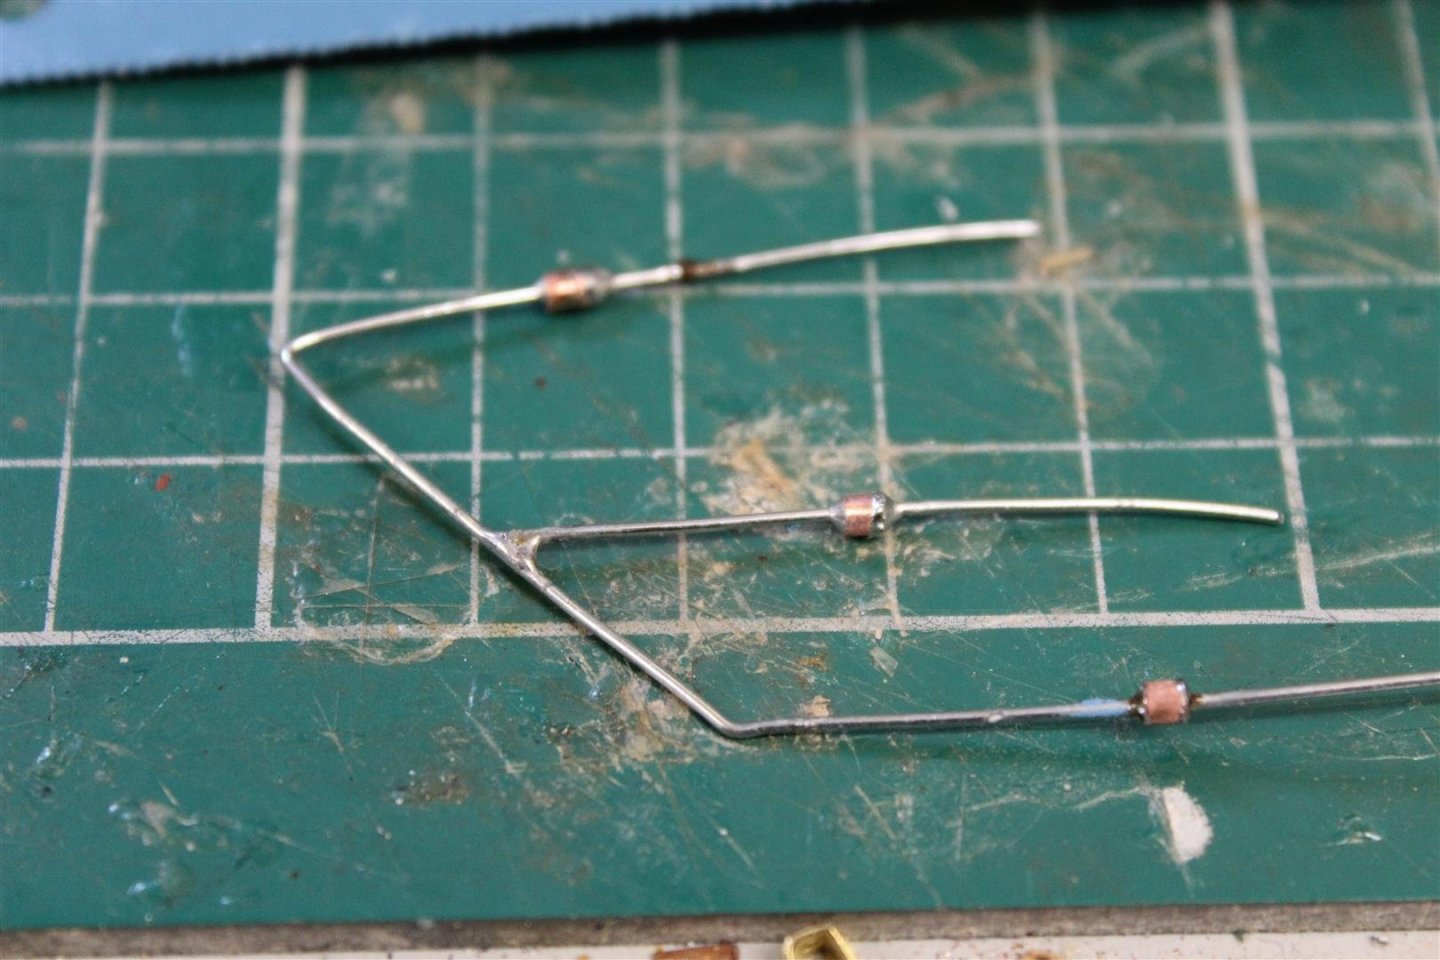
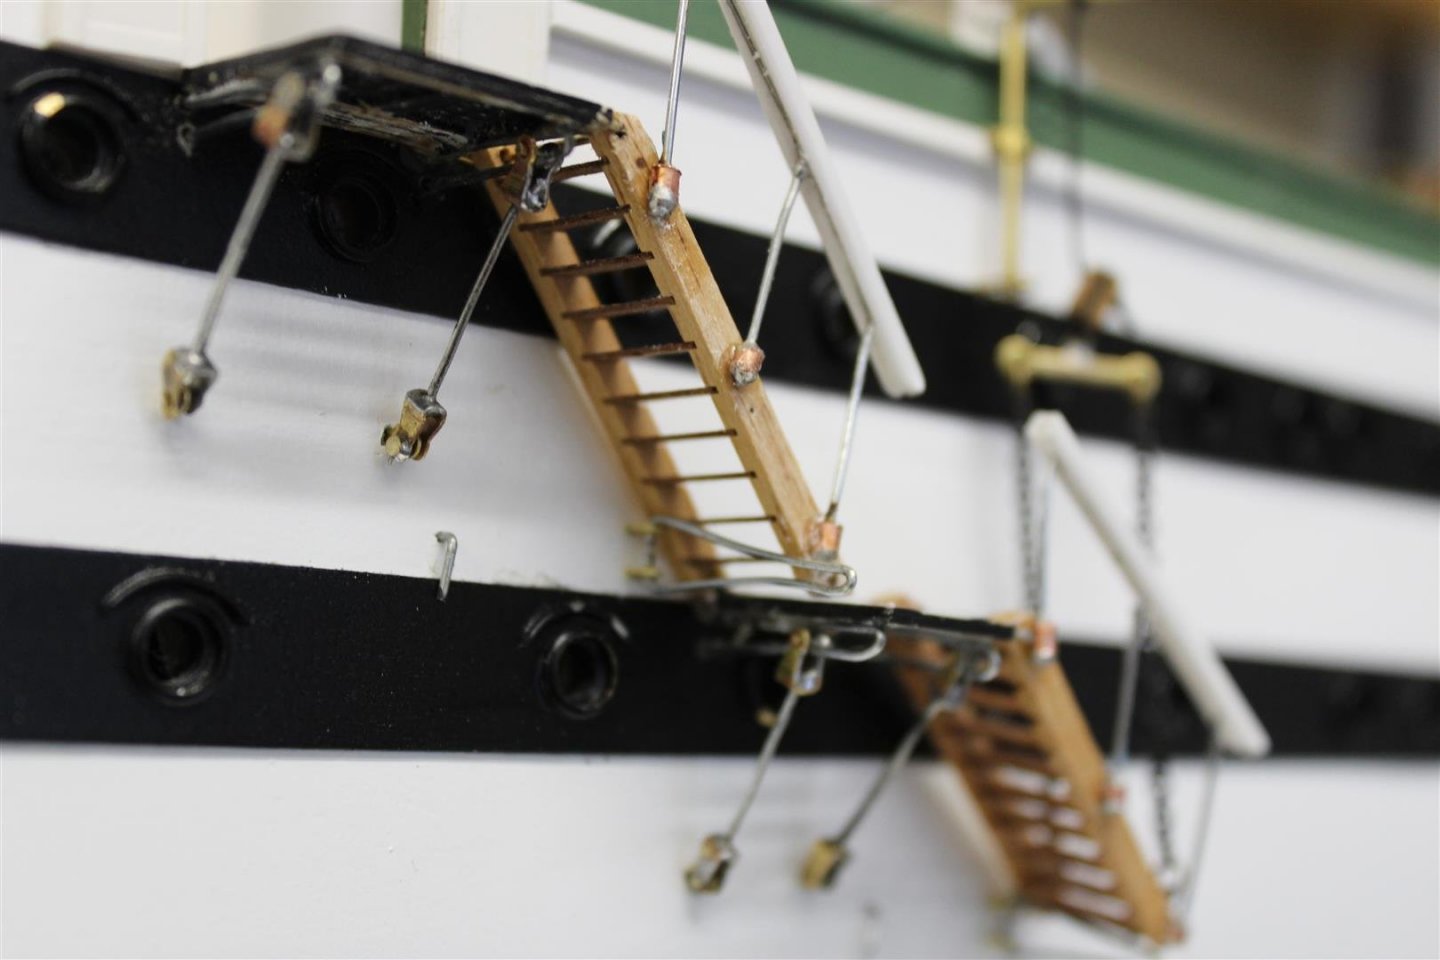
good evening everyone must admit I never realised just how much extra work i have given my self i am still working on the first of 4 accommodation ladders, and every time i look at @schiffebastler build i see more detail to be added. i was asking about how to cut brass tubing into small sections to make the Stanchion supports and found out if i put small lengths into a rotary drill i can score the lenghts quite accurately with a x-acto blade


- 273 replies
-
- 5
-
-
- panart
- amerigo vespucci
- (and 1 more)
-
stunning build, and made even better with decent clear photo,s well done
- 950 replies
-
- 2
-
-

-
- syren
- model shipways
- (and 1 more)
-
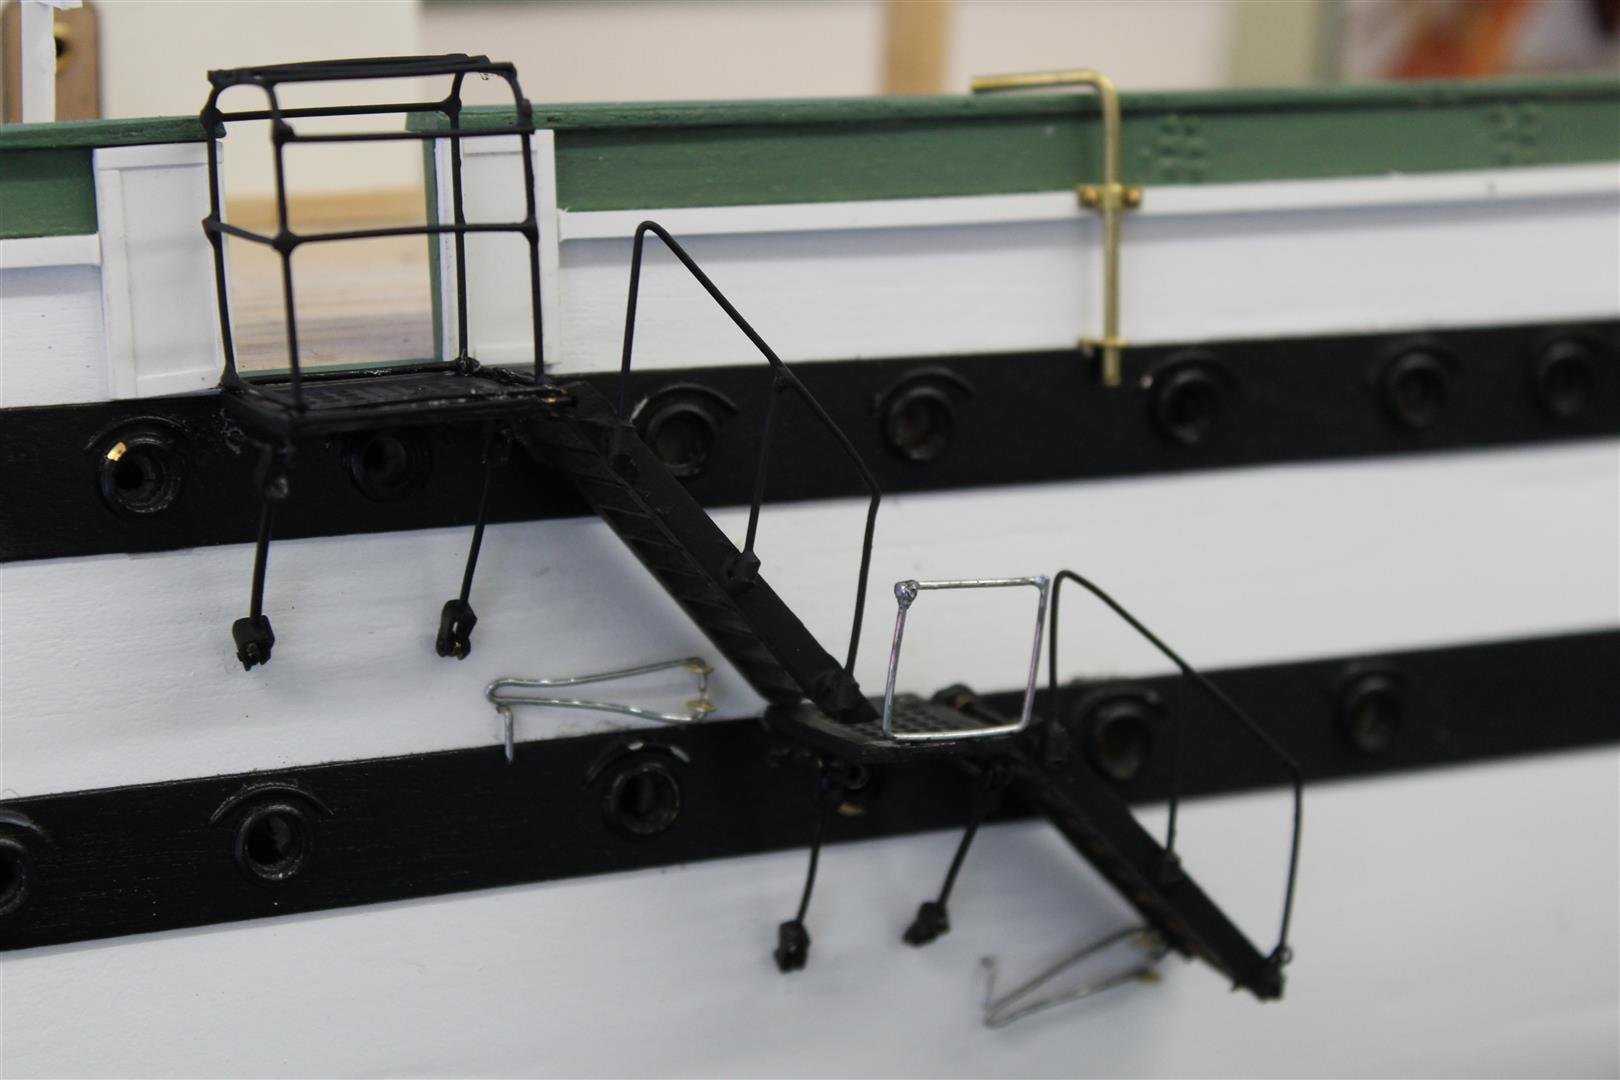
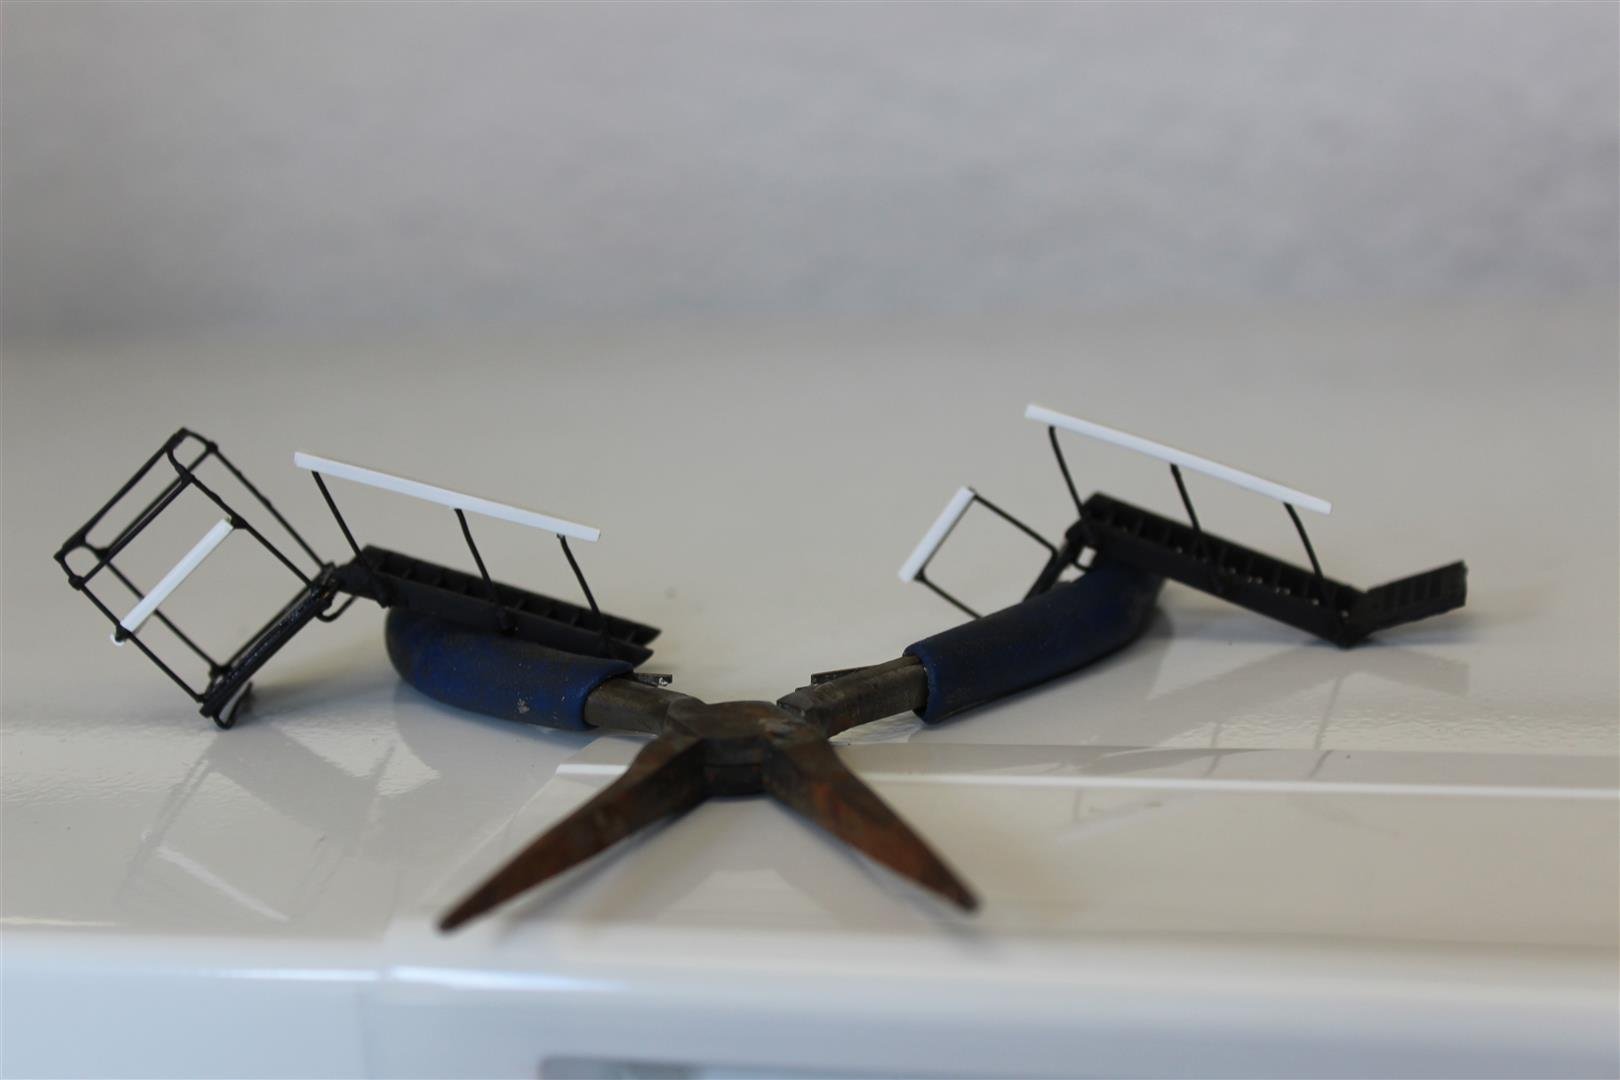
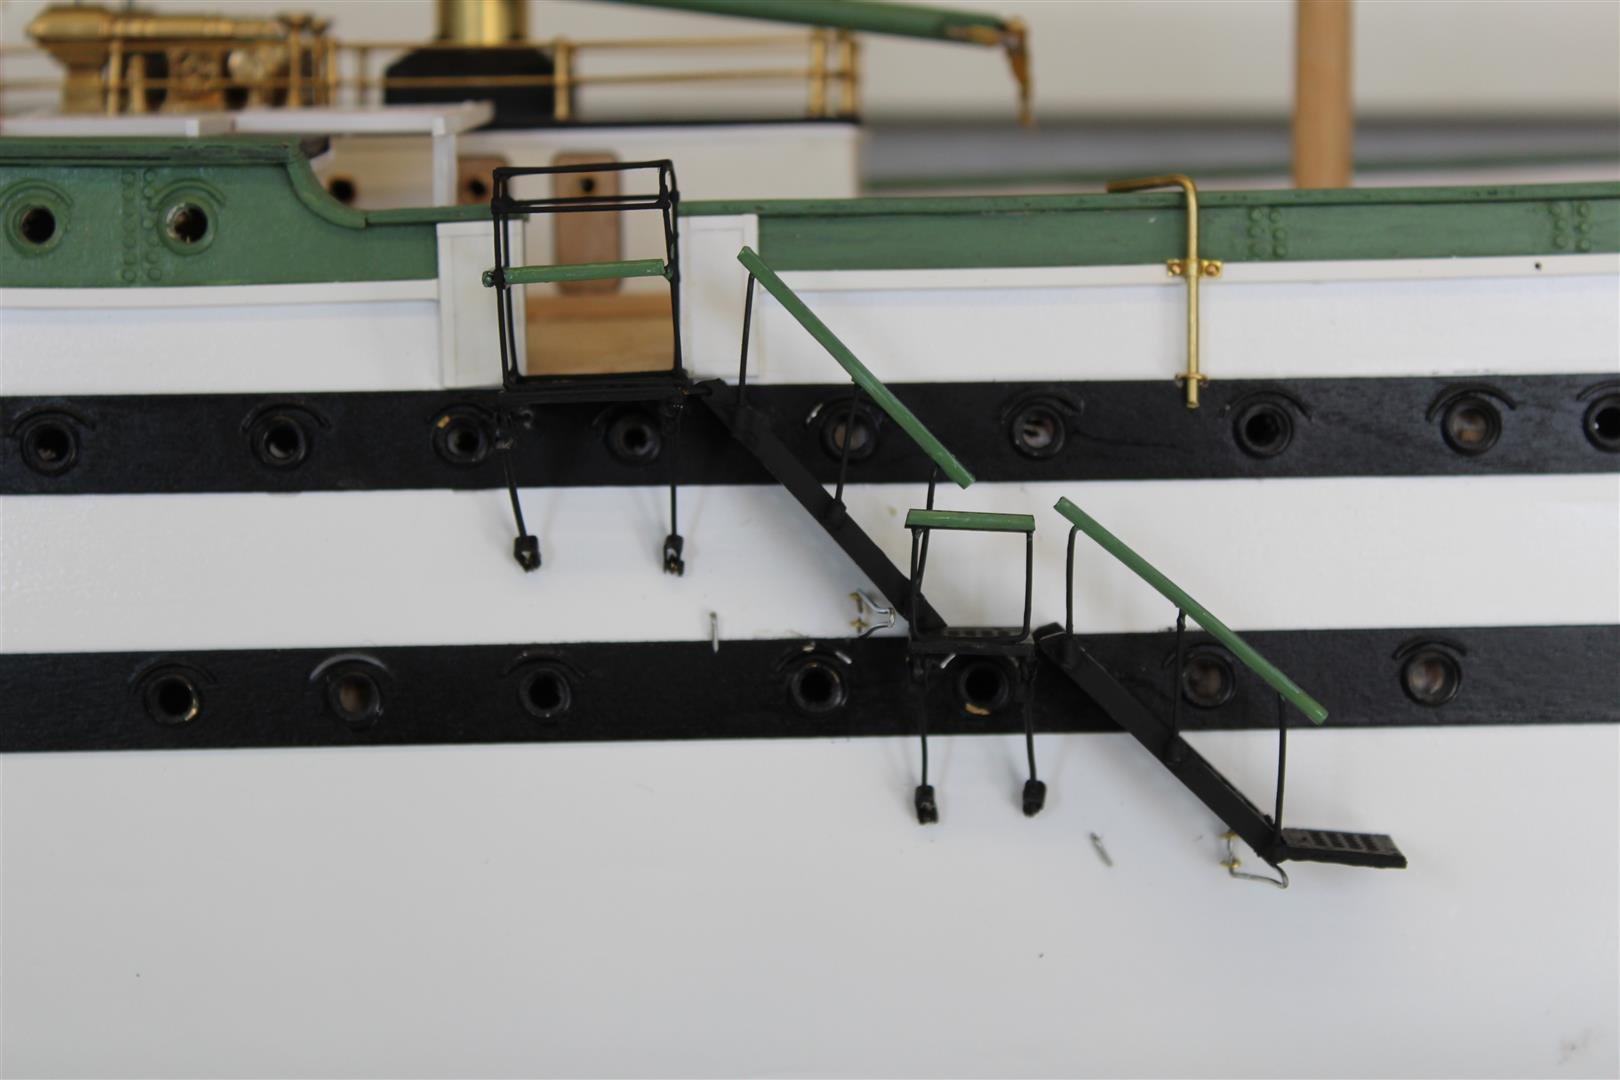
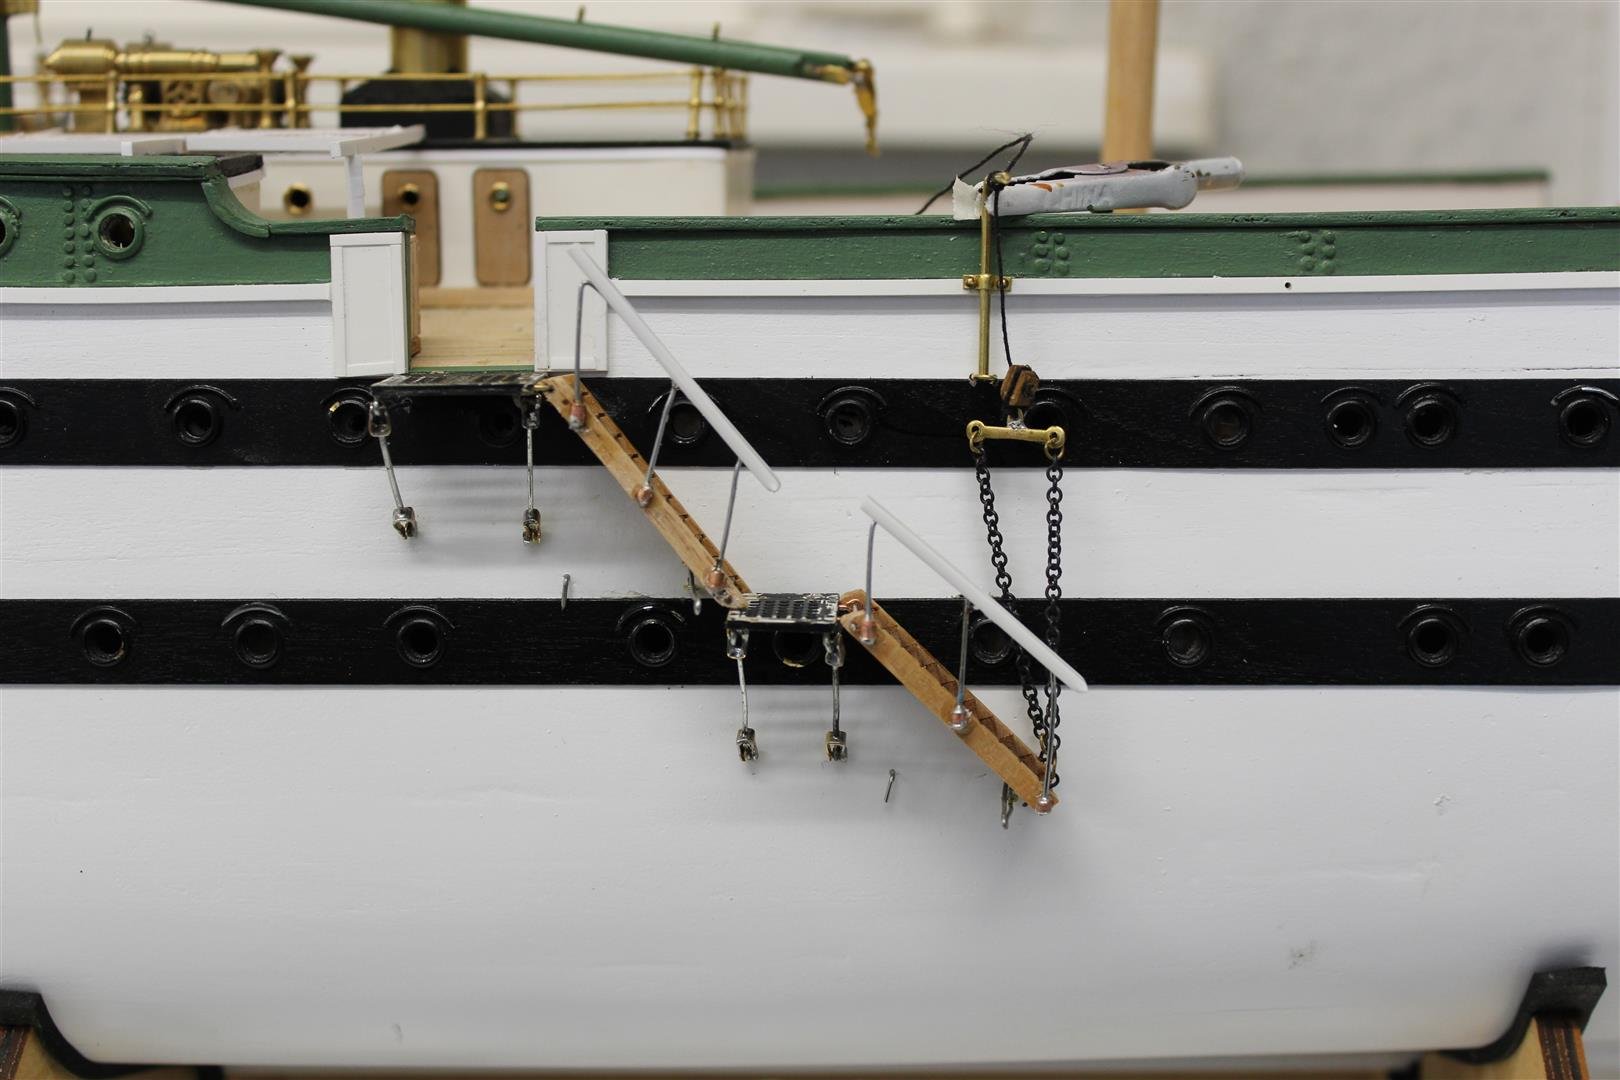
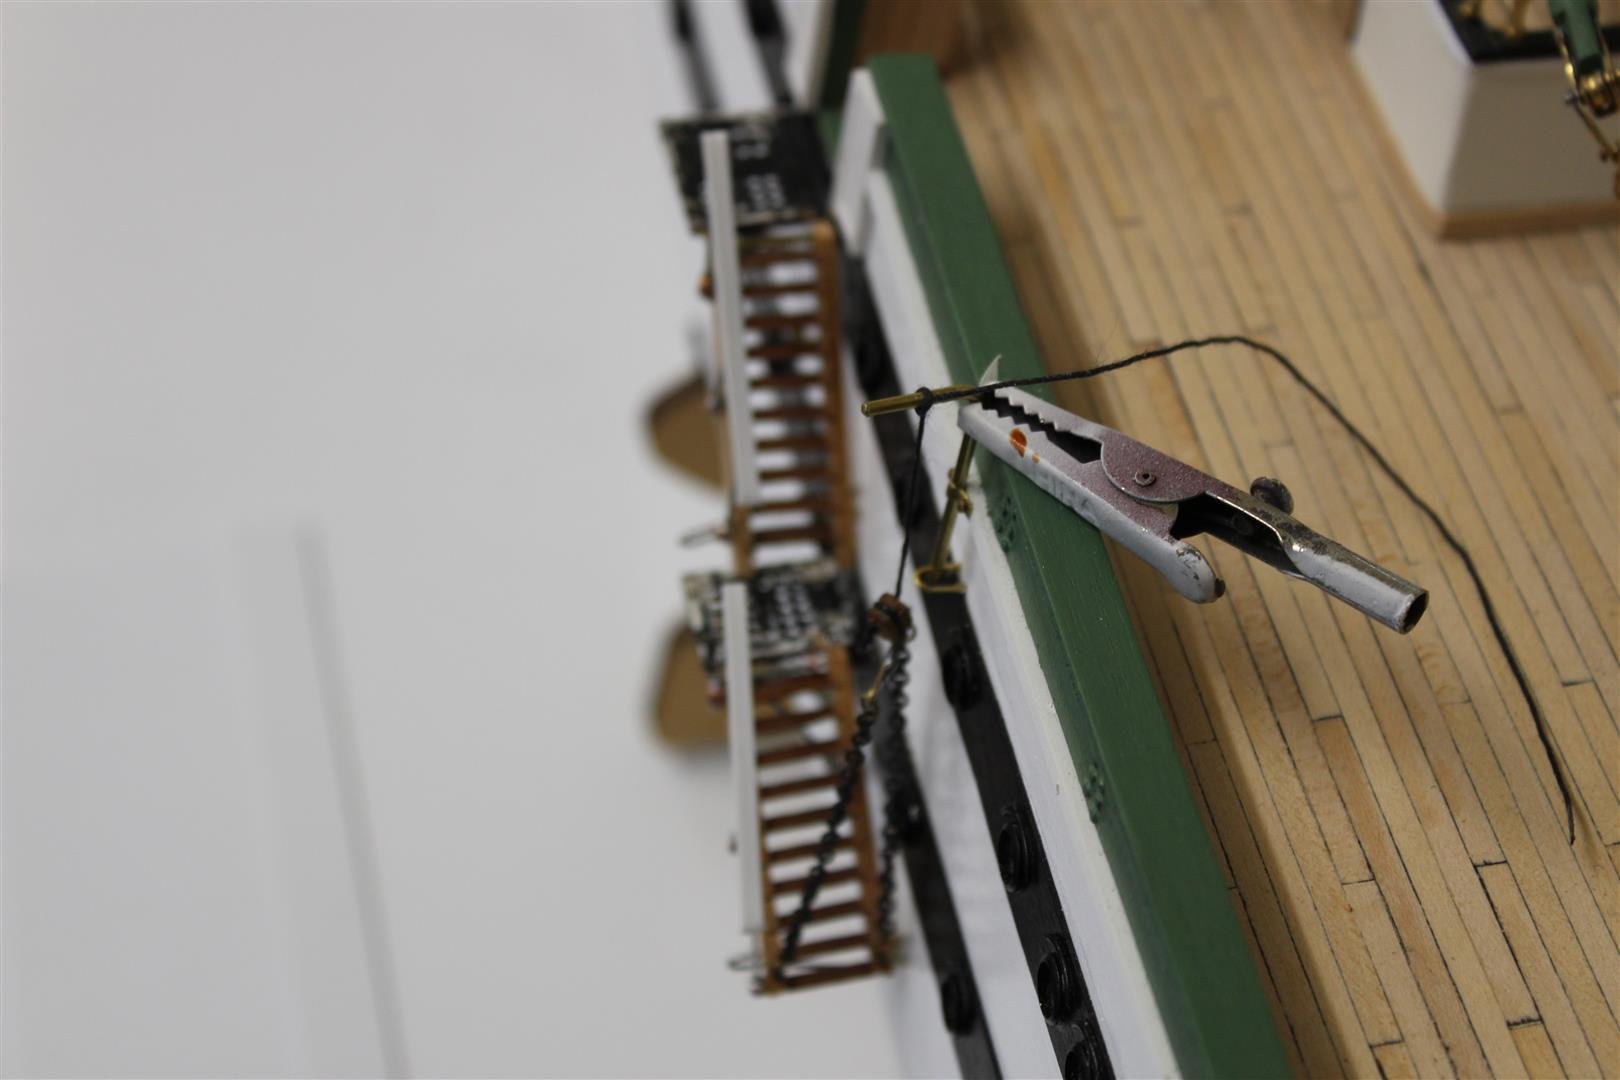
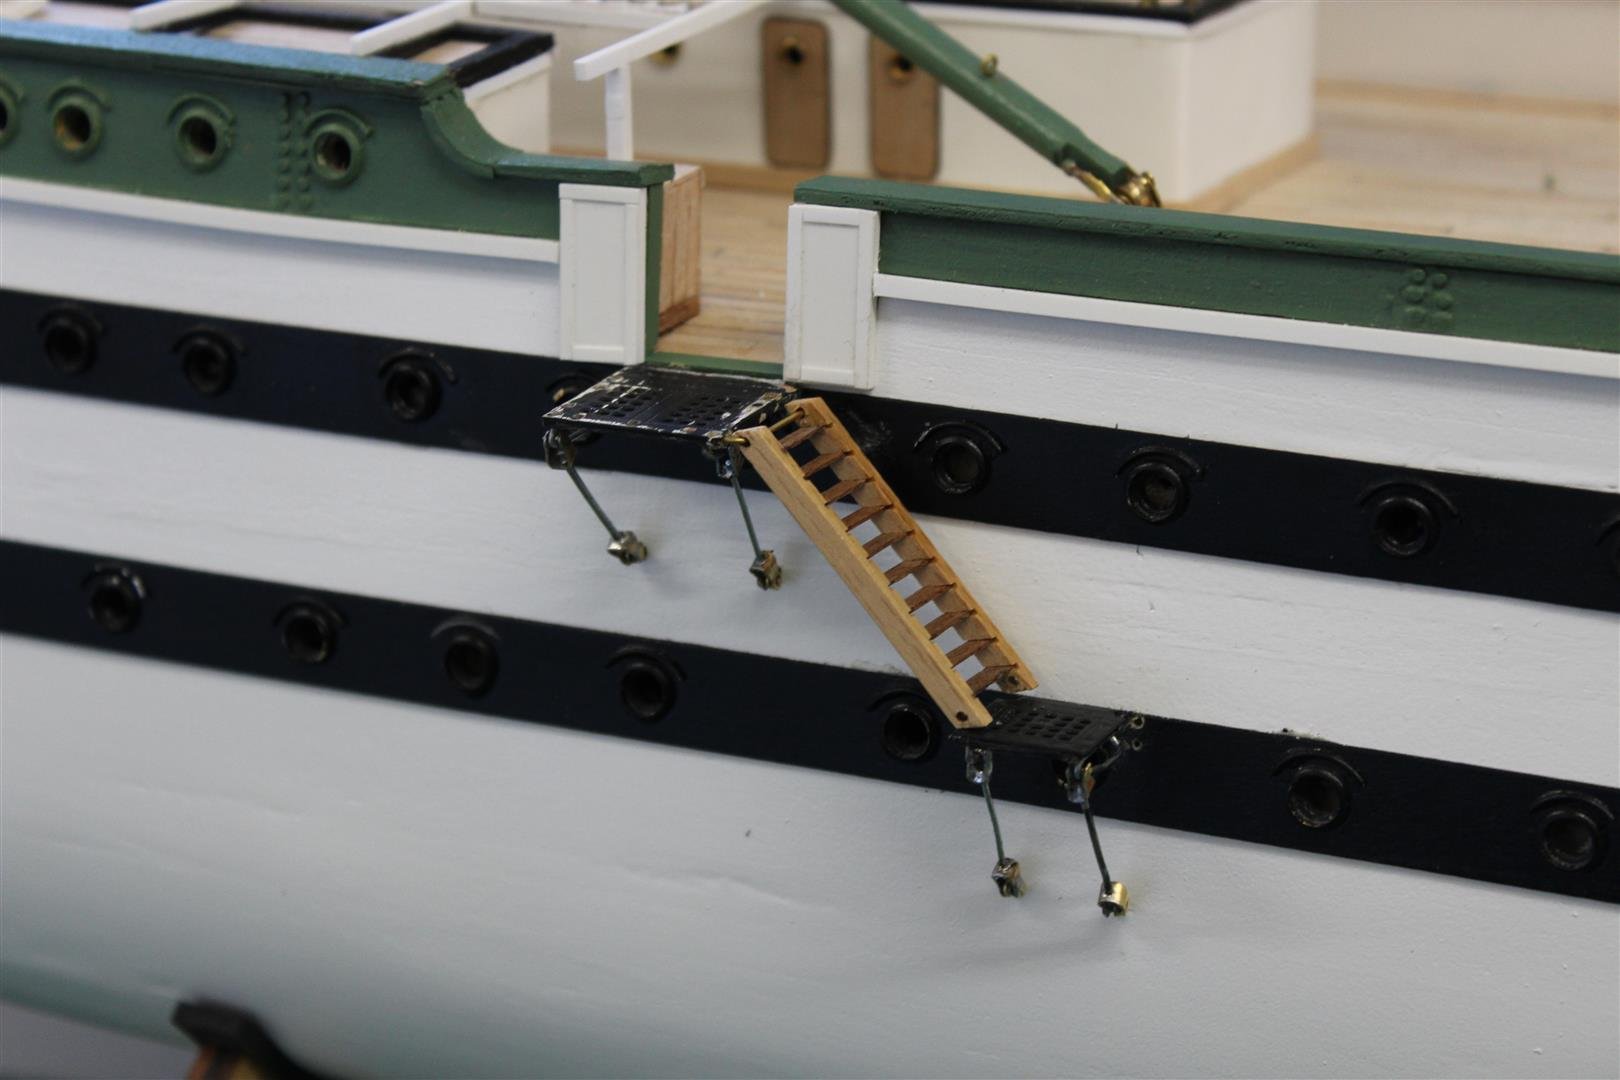
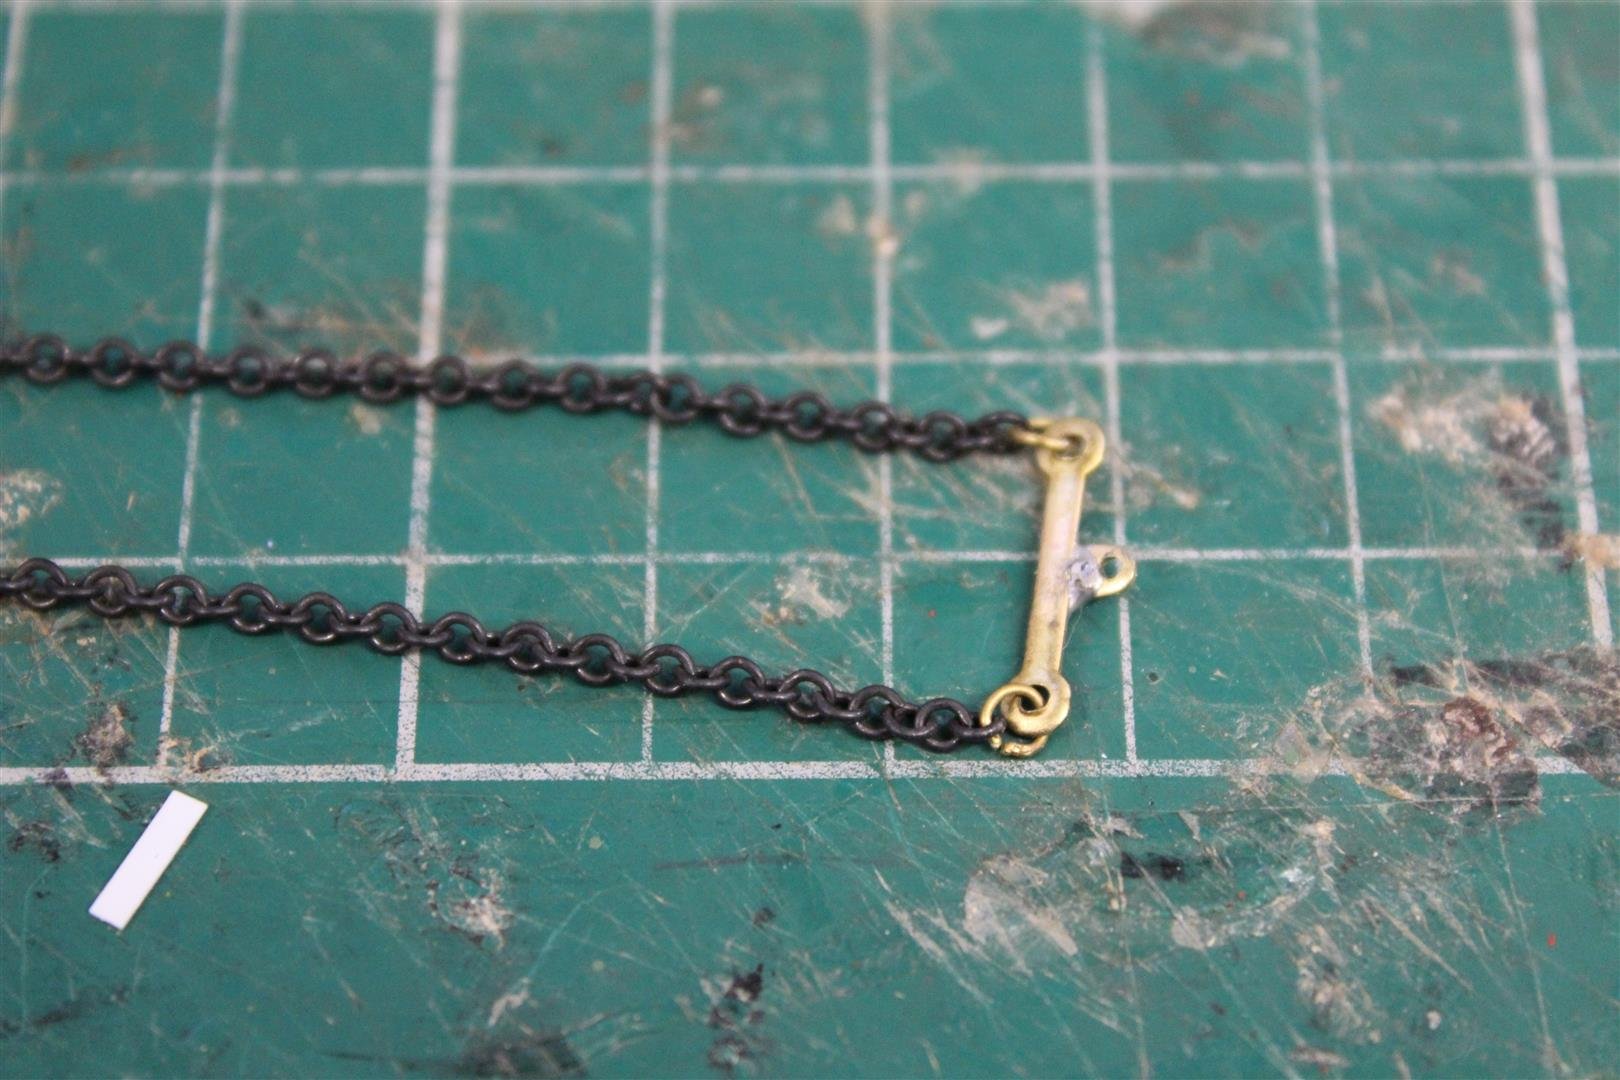
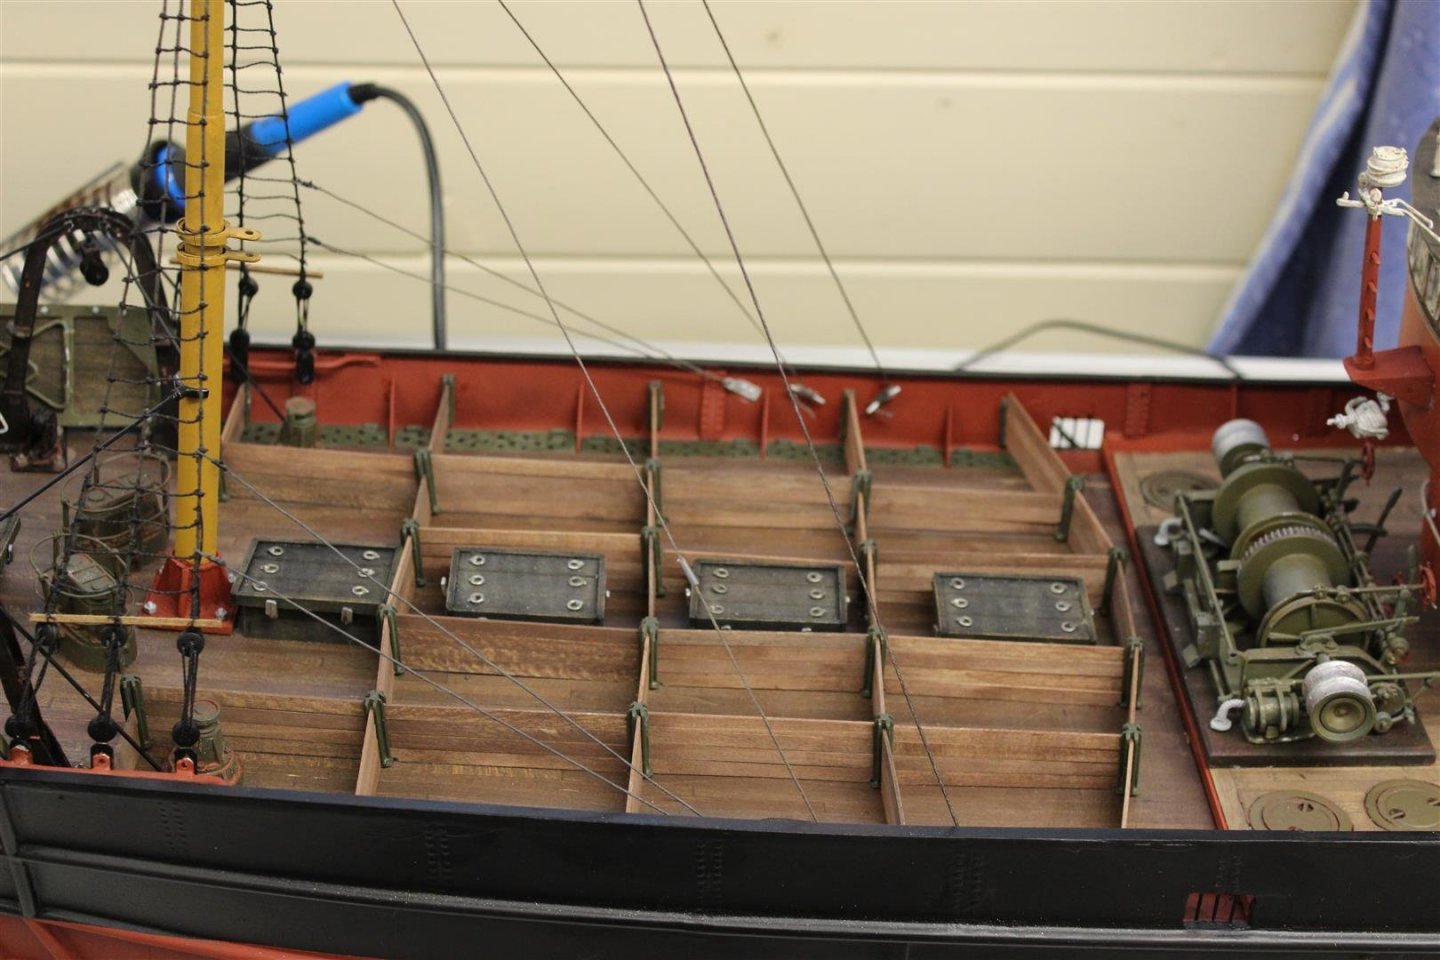
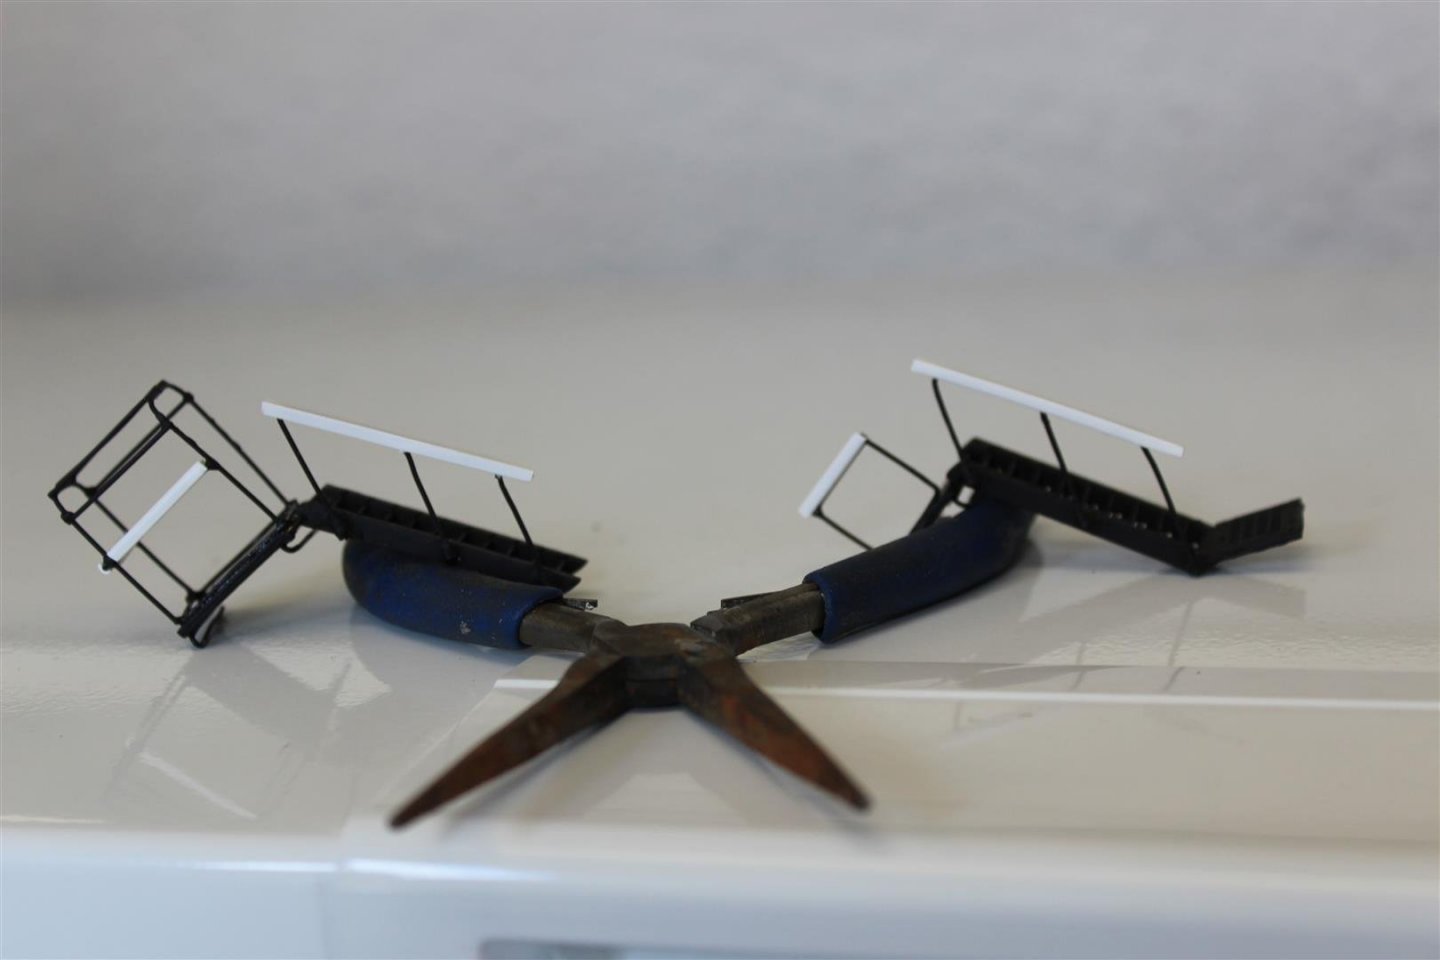
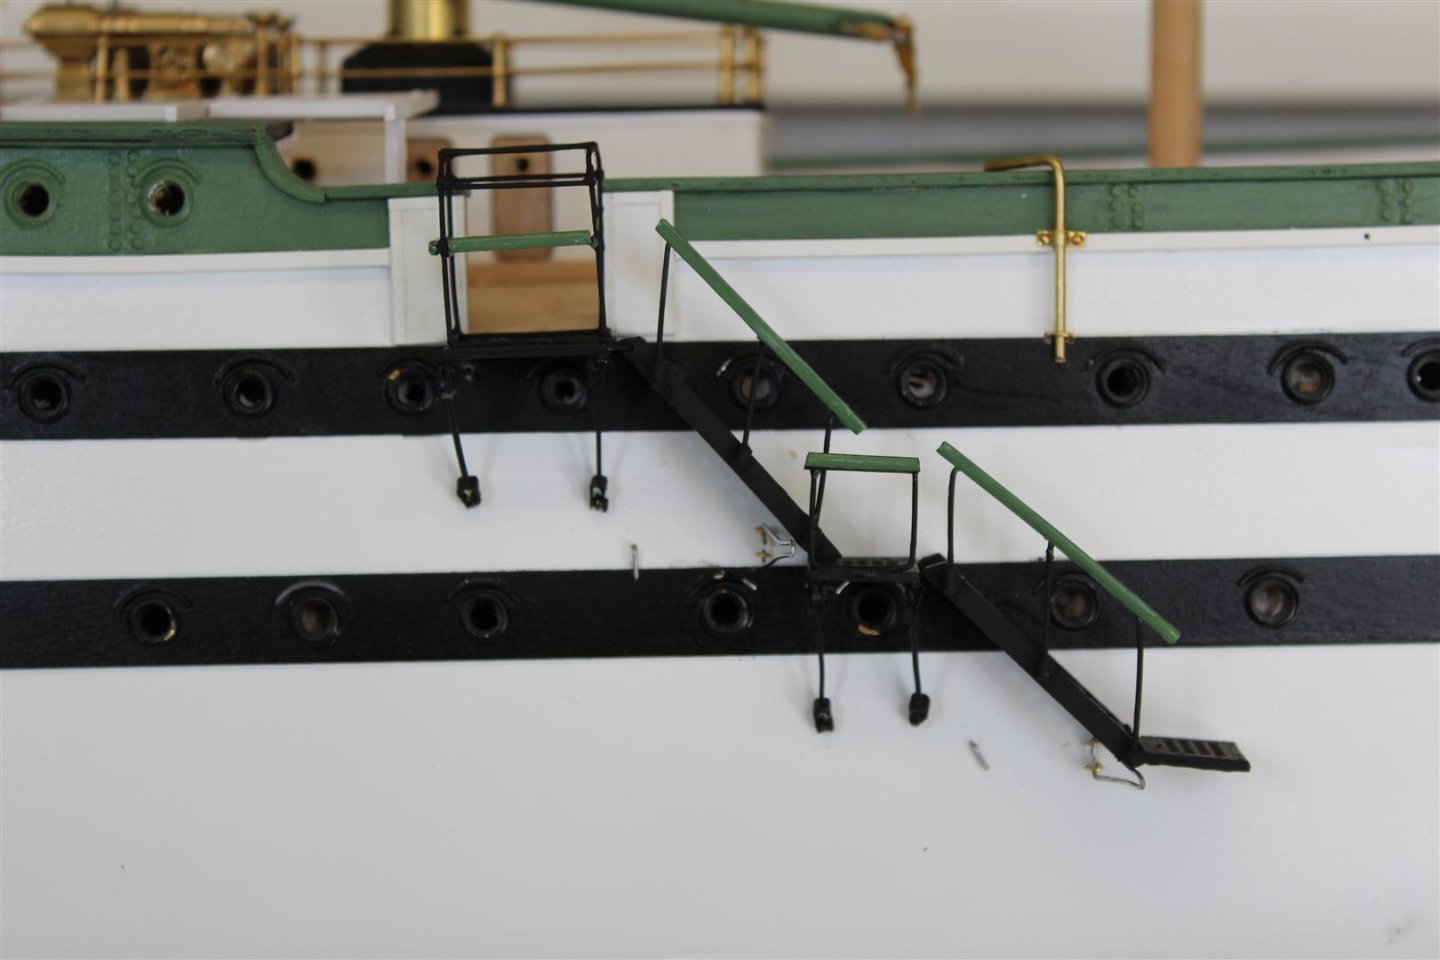
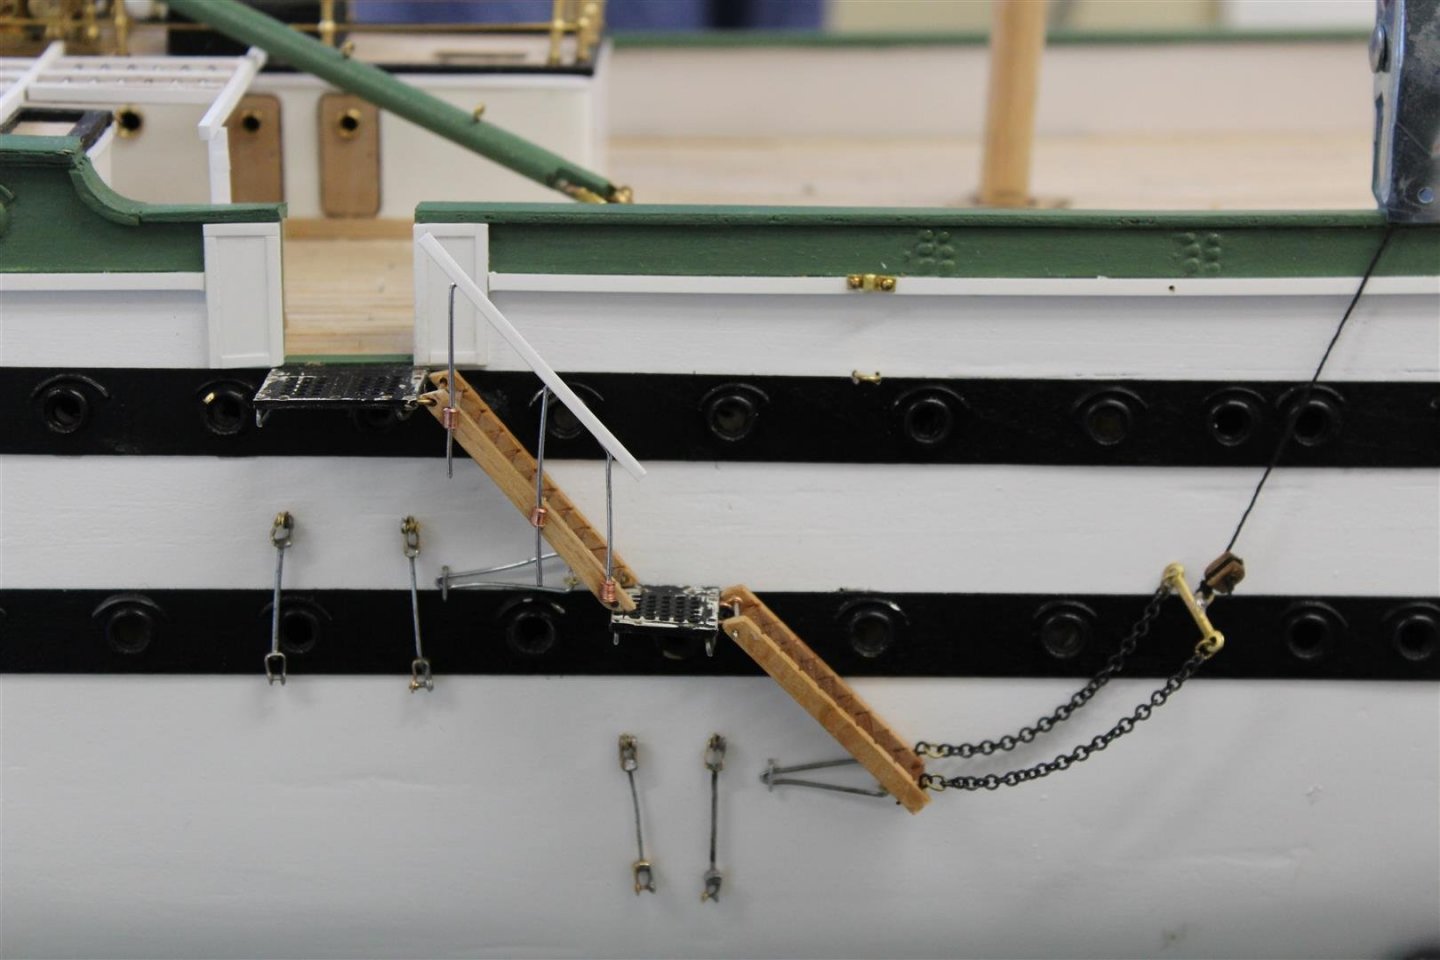
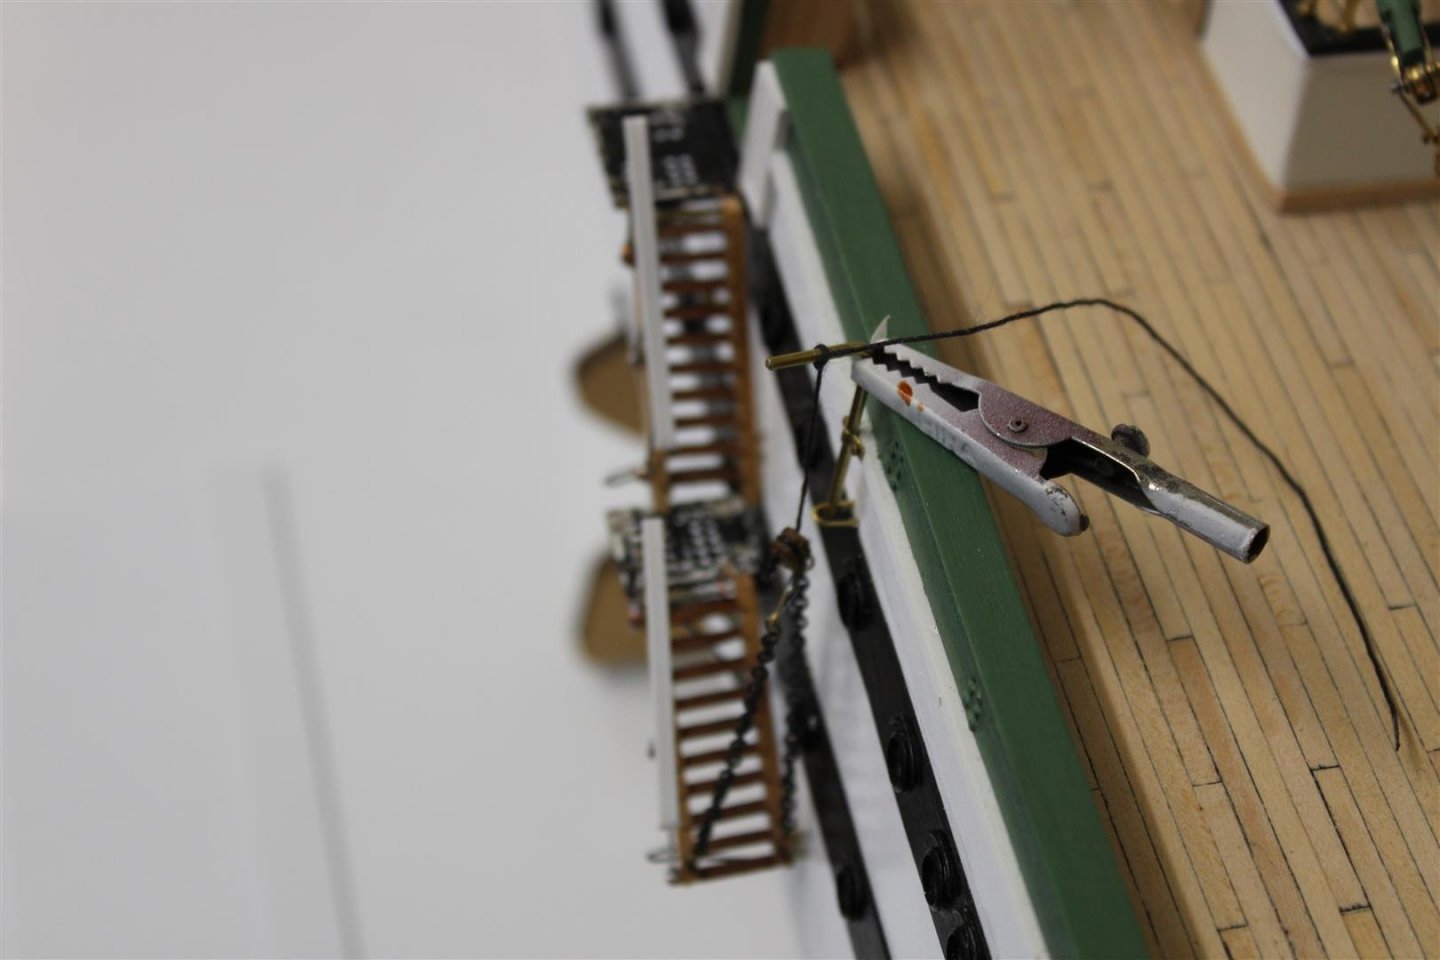
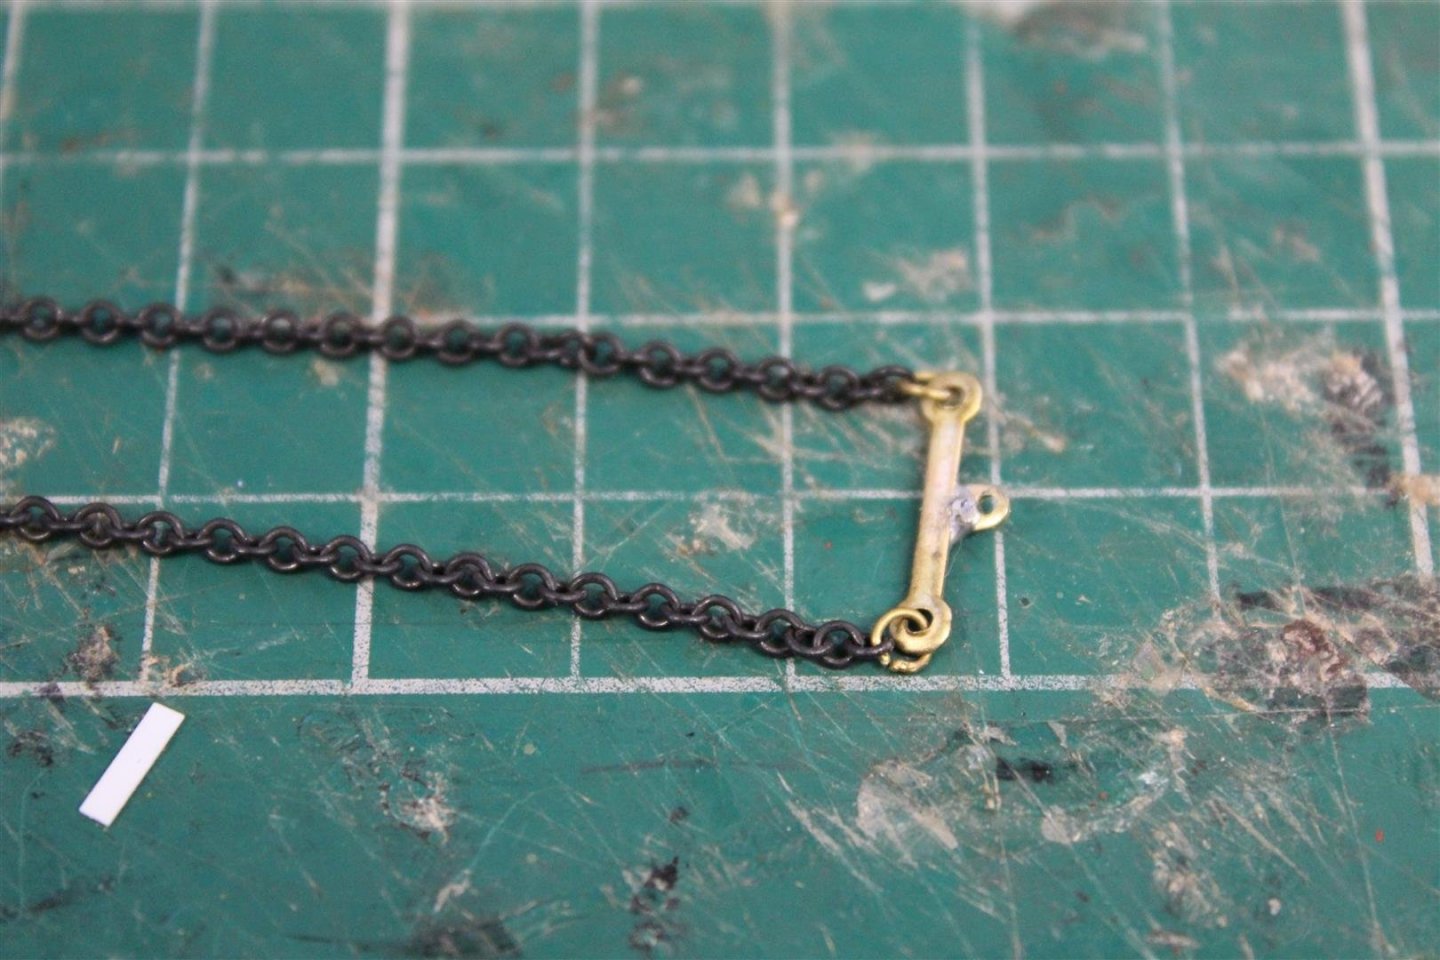
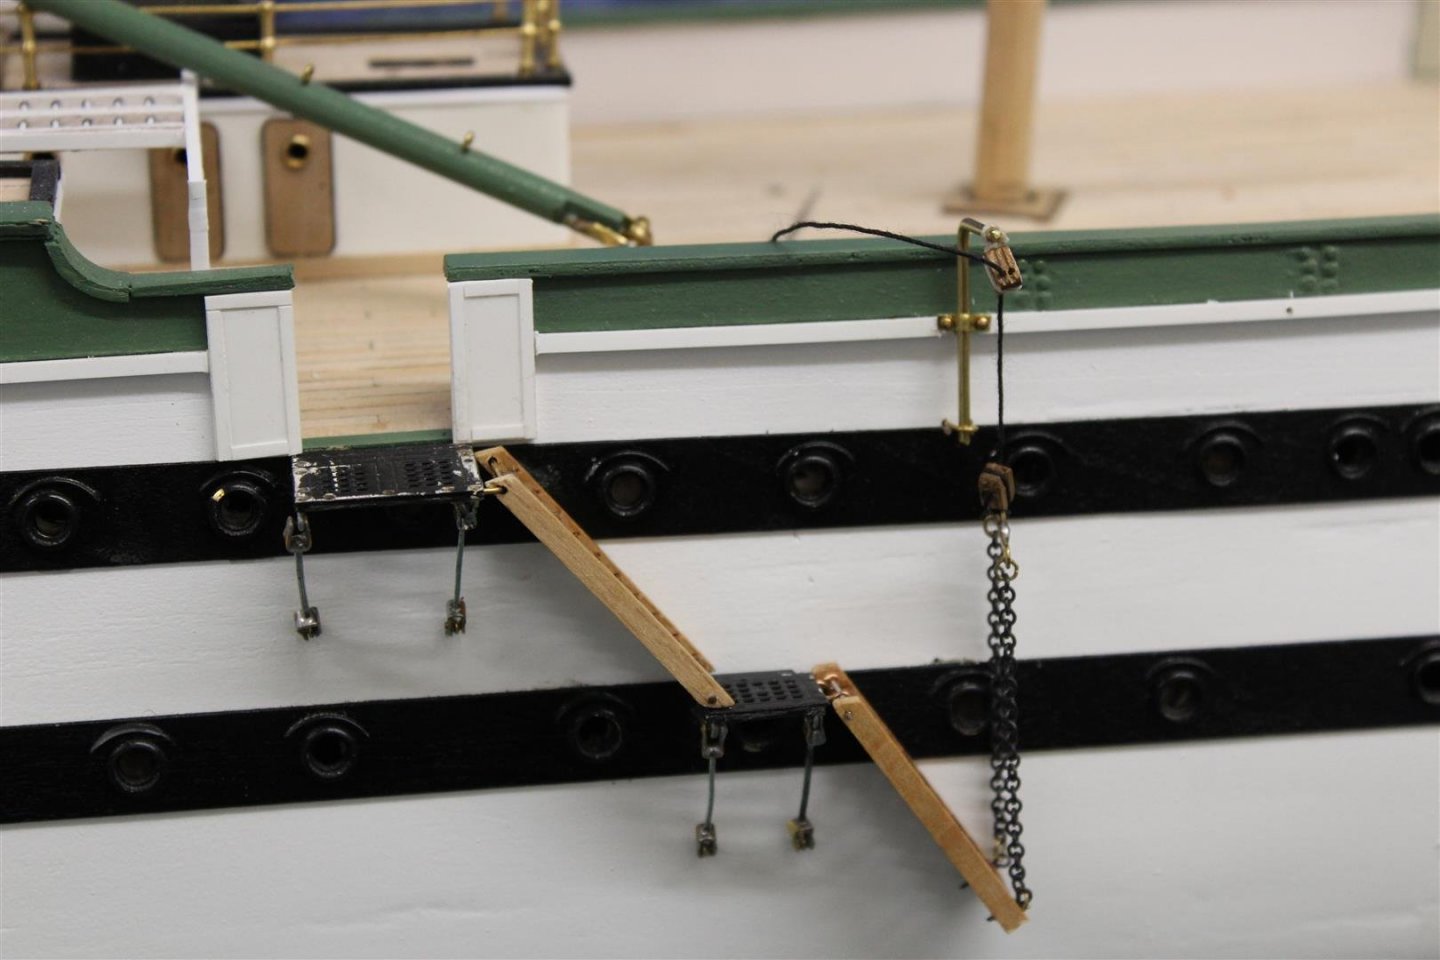
good evening everyone ladders continued i made up a second set of platform supports, but had to reposition the lower platform slightly to allow the upper ladder to rest on it the lower ladder is lowered and raised by a block and tackle derrick so a couple of brackets made up to support it made up a chain spreader the chains are to long and blocks oversized and the spreader could do with being not quite so wide or i may make the platforms a little wider, which might be the best option a messy desk tonight


- 273 replies
-
- 8
-
-
- panart
- amerigo vespucci
- (and 1 more)
-
Building a Medieval fortress - by Waitoa - Del Prado 1/87
Kevin replied to Waitoa's topic in Non-ship/categorised builds
thats lovely -
Thank you Grant

.JPG.9584eb7c525d0d677b085661da3b70bb.JPG)