BareHook
-
Posts
430 -
Joined
-
Last visited
Content Type
Profiles
Forums
Gallery
Events
Everything posted by BareHook
-
My point exactly, the Hannah has a windlass where the barrel is enclosed in the frame, so the only way to get turns of rope on the barrel to haul the anchor is for them to already be there, also how many turns? 2, 3 or 4? ken
-
How is the anchor cable rigged to a windlass? The cable must be free running when the anchor is dropped, so how do you get it wrapped around the windlass to haul in the anchor? Only way I can think of is to hook a loop on a pin and double wrap it to haul the anchor, but then it would be a big mess to unwrap and stow it away. On the schooner Hannah, I plan to have the anchors hanging from the catheads with cables attached, but am not sure how to route the cable through the windlass and then below. Thanks, Ken
-
Looking really good, remember all planking appear rough looking initially, but when you sand it and add finish it really brings it to life. BTW, don't forget to do the bottom band with the garboard strake, you don't want to leave that till last... much easier to do the final fitting of planks in the middle band. Ken
- 831 replies
-
- 1
-

-
- Armed Virginia Sloop
- Model Shipways
- (and 1 more)
-
I prefer to use scale length planks with a proper butt shift and spiling near the bow as required. I believe it is easier the get a full length fit when doing it in two or more pieces than trying to cut and bond a single full length plank. Ken
-
Do you plan to move-ahead with rigging or are you waiting for kit and plans to come available?
-
Black Prince may be mixed up with the CNS Alfred a BlueJacket Kit CNS Alfred: copied from www.shipmodelersassociation.org "The ALFRED was a converted merchantman of 440 tons which carried a compliment of 220 men with 20 each 9-pounder guns and 10 each 6-pounder guns. They think John Wharton of Philadelphia originally built her in 1774. She was originally the merchantman BLACK PRINCE which first made two voyages to England as a merchantman before being requisitioned for a warship by the Continental Congress on November 4, 1775. She was renamed for Alfred the Great, the ninth-century British king credited with building England’s first fleet. Her first commander was Captain Dudley Saltonstall. The Alfred was the first flagship of the new Continental Navy in 1775, flying the Grand Union Flag of the United Colonies. She was made flagship of Commodore Ezek Hopkins’s eight-ship squadron (including COLUMBUS, CABOT, ANDREW DORIA, PROVIDENCE, FLY, HORNET, and WASP), which occupied Nassau for two weeks in March 0f 1776. On board the ALFRED on her voyage on October 26, 1776, was one lieutenant John Paul Jones, when the ALFRED left New London for a cruise off Nova Scotia during which ALFRED captured nine enemy ships before successfully returning to Boston on December 26th. The British supplied many of the supplies and war material needed by General George Washington and his army by just such seizures of British supply ships originally intended for the British. The following August, under Captain Elisha Hinman, ALFRED and RALEIGH sailed for France for military supplies. Returning via the West Indies, the two ships were engaged by the British ships HMS ARIADNE (20 guns) and CERES (14 guns) on March 29, 1778. As a result of this battle, ALFRED was captured and acquired by the Royal Navy at Barbados. She only lasted in the Royal Navy for four years, however, as she was then sold out of service in 1782. There is a fine kit of this model put out by Bluejacket Shipcrafters based upon the research of Larry Arnot who produced the instruction booklet for this kit model that is a textbook on the details of 18th century naval design and outfitting. The model is to the scale of 1:96, is of solid hull construction and comes with brass etching details. This is not a model for a beginner if the modeler intends to fully rig the model." P.S. I have this kit on my shelf waiting...
-
Gaff peak flag
BareHook replied to Ian B's topic in Discussion for a Ship's Deck Furniture, Guns, boats and other Fittings
On the AVS, it is a cleat on the boom -
I just finished the "Nathaniel Drinkwater" series and found it to be right up there with the "Aubry-Maturin" series. Though the villians in drinkwater are a lot more hatefull. Its a shame Patric Obrien passed as a series of prequels about Jacks' carrer as a midshipman and lieutenant would be a nice read.
-
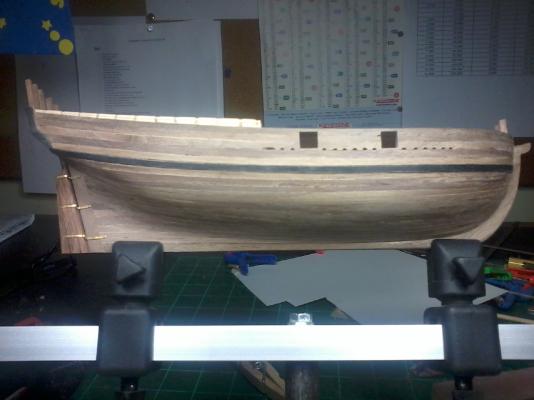
I've completed the swivel posts, catheads, timberheads and channels. I'll add the slots and facing on the channels when I do the chainplates and deadeyes. Next I'm going to get a coat of minwax waterbase satin on all the wood and that should really bring out more color in the hull. I'll wait to coat the deck until after mounting the deck furniture to have a better adhesive bond to the bare wood of the deck. Ken

-
Nice AVS! welcome to the club BTW regarding mast hoops, Bluejacket sells a variety of laser cut hoops made of wood. Ken
-
Looks great, yes beware the magnified photo, but 99% of people enjoying your creation will be using the naked eye, I had to force myself to "move-on" at times when the fine details were killing me.
- 831 replies
-
- 2
-
-
- Armed Virginia Sloop
- Model Shipways
- (and 1 more)
-
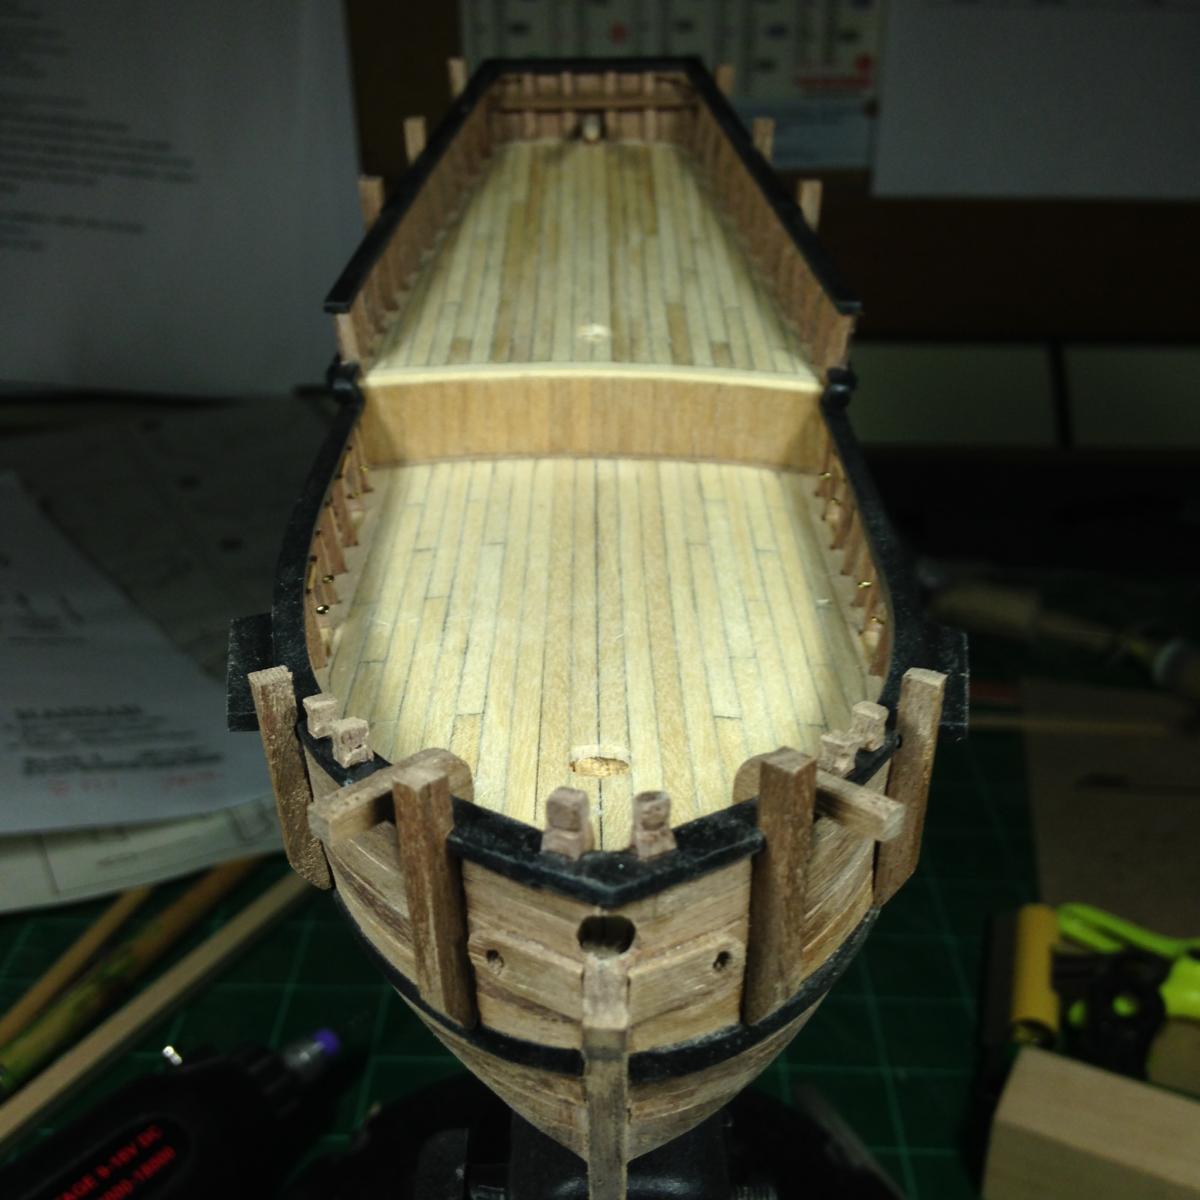
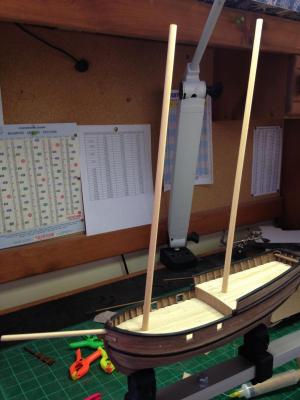
I've completed the Bulwarks and Cap Rails, please don't look too close at the scroll work! I don't know how some of you do that fine carving, but simple scrolls came out pretty rough for me . I installed the rudder, pintle/gudgeons and loose fit the tiller, Bow Sprit and Masts. The pintle/gudgeons each were made from a single brass strip that was slit cut at each end and bent in opposite directions and am happy with how they turned out. I tried blackening the swivels and pintle/gidgeons, but it just doesn't seem to stick well, so its flat black enamel for me. I'm now working on the catheads, timberheads, swivel posts and channels, then I'll put a coat of satin finish on all the exposed wood and its on to the deck furniture. Ken P.S. I finally got a new phone and I think the camera takes much better pictures
-
The only problem I find with using better wood is that it ruins me for building with kit supplied wood in the future and I feel the need to upgrade at least the finishing wood.
- 831 replies
-
- 1
-
-
- Armed Virginia Sloop
- Model Shipways
- (and 1 more)
-
Looking good, you'll probably find the second layer much easier to work with, the thin walnut is much easier to bend, just make sure it has dried out before bonding it. also when you sand the final veneer of walnut, be careful not to sand through it, its easy to do.
- 831 replies
-
- 1
-
-
- Armed Virginia Sloop
- Model Shipways
- (and 1 more)
-
Brian, Those blocks bring to mind another fix for the AVS kit, the blocks specified for the cannon rigging are too large and should be downsized to 1/8 to be in scale. This is something that came up in many build logs from MSW1.0 so I figure is worth repeating here. Ken
- 831 replies
-
- 1
-
-
- Armed Virginia Sloop
- Model Shipways
- (and 1 more)
-
My first 4 builds will be ficticious ships due to my naming each after one of my kids, that being said, my "Hannah" as based upon the Schooner Hannah but the accuracy is limited by my kit bashing and ability, since the kit is very limited at best and I didn't feel ready for a full "Hahn" scratch build though I think it will be a fair representation of the vessel. If I were to try to build a "museum quality historically accurate" vessel, the stress of trying match everything perfectly would likely turn me off somewhat from the hobby during the learning stages of these first builds, but as I develop technique and learn my limits, I will likely take up the challenge of a true historical build in the future. Ken
-
I found a free downloadable app for my phone from woodland scenics that has most of the standard model scales as well as being able to create custom model scales. Ken
-
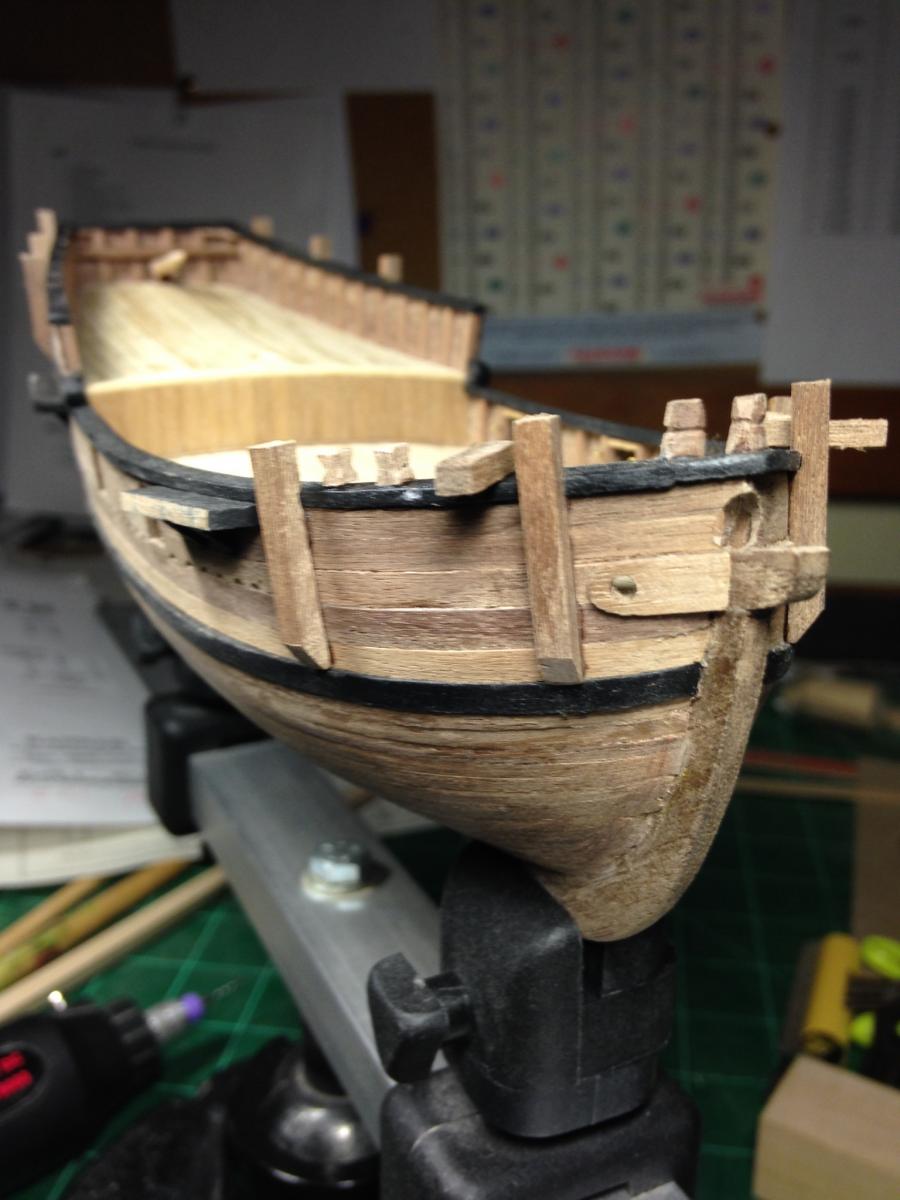
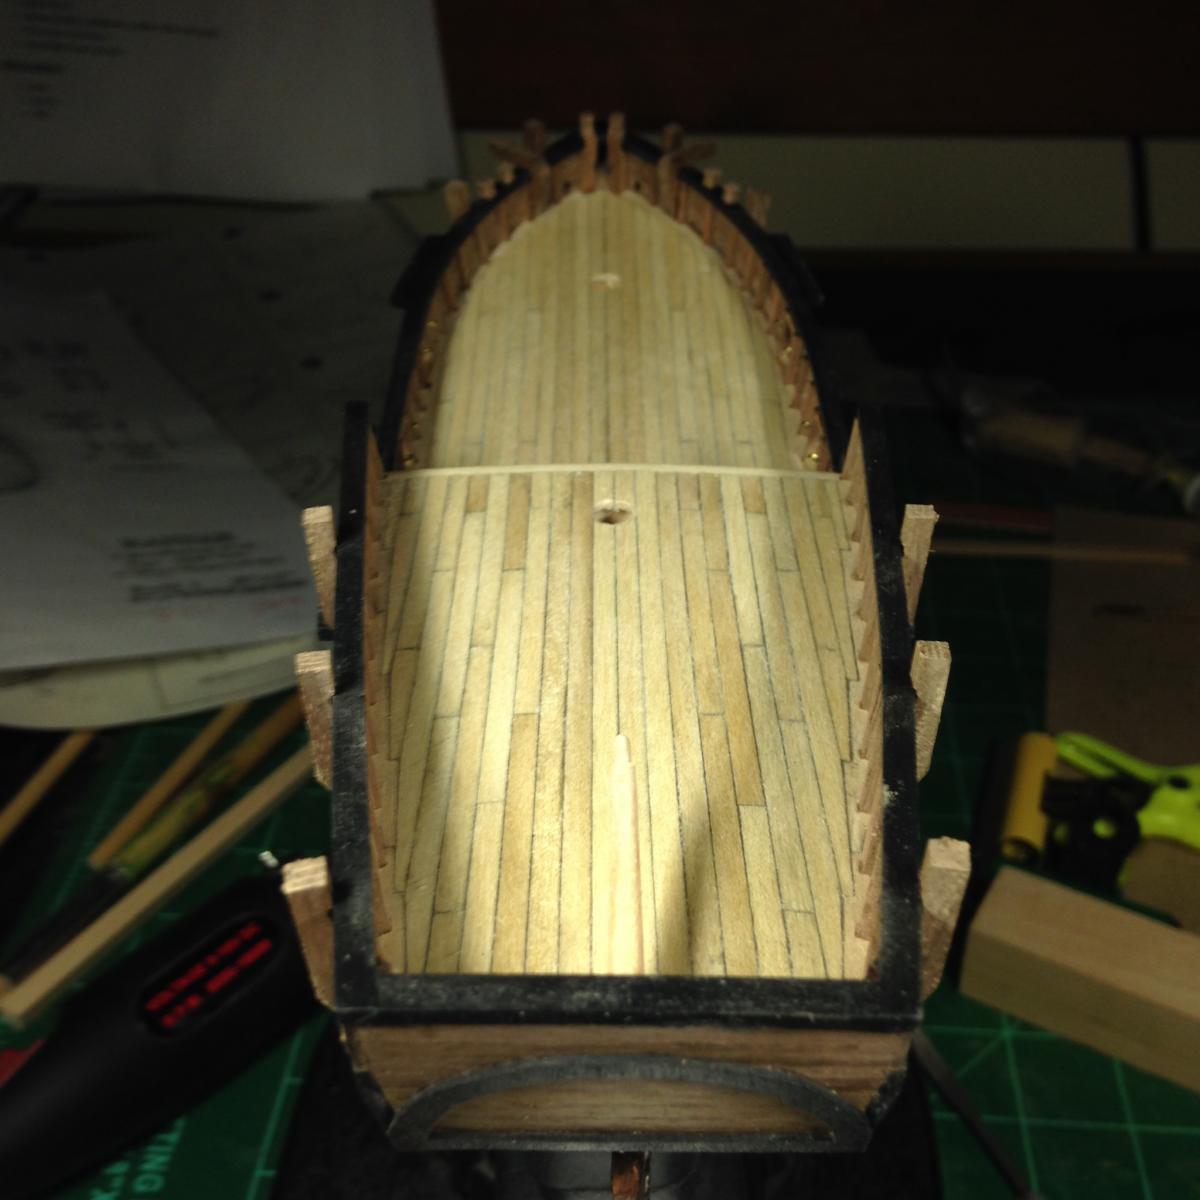
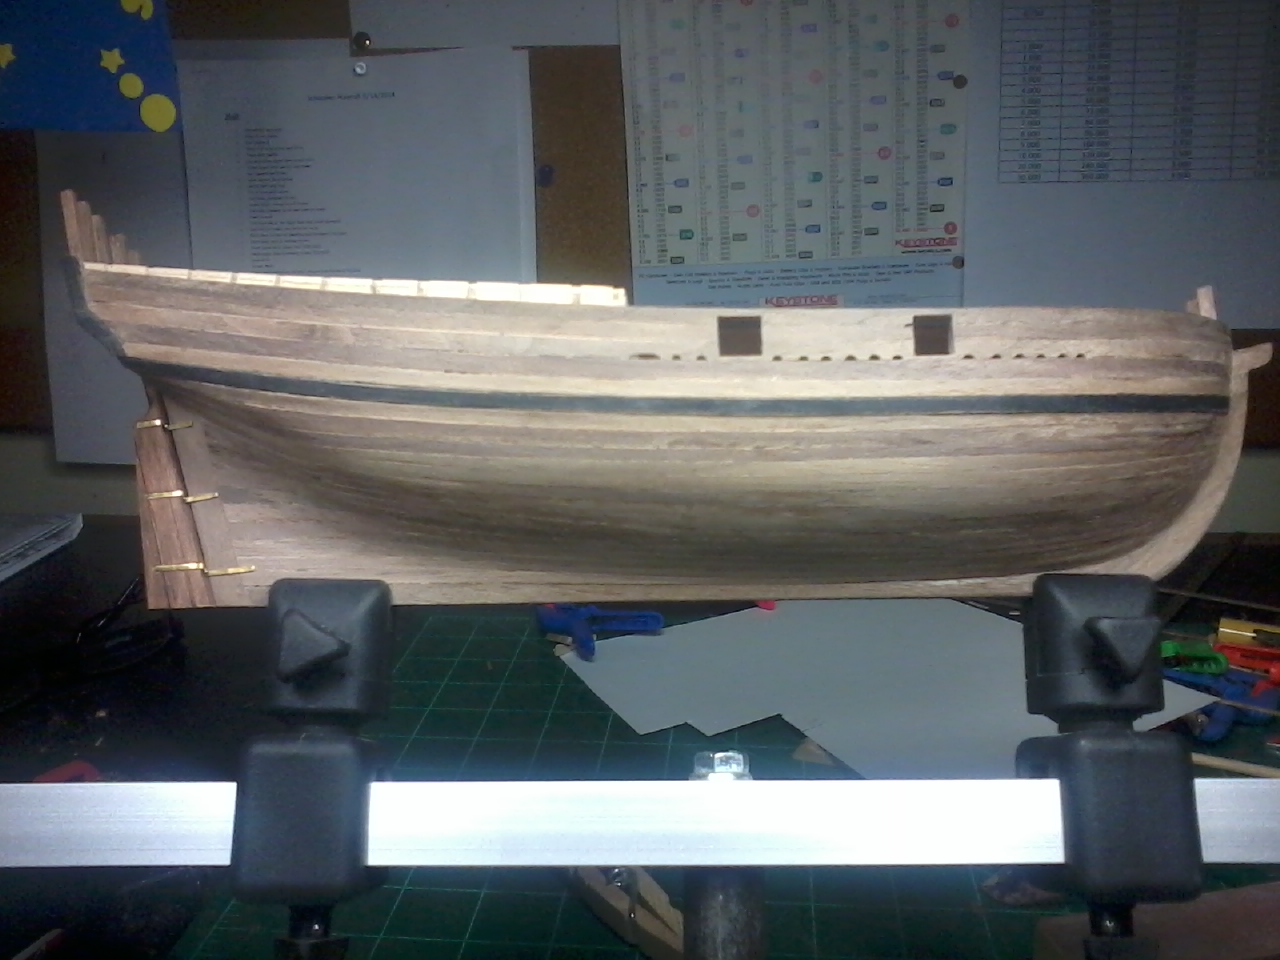
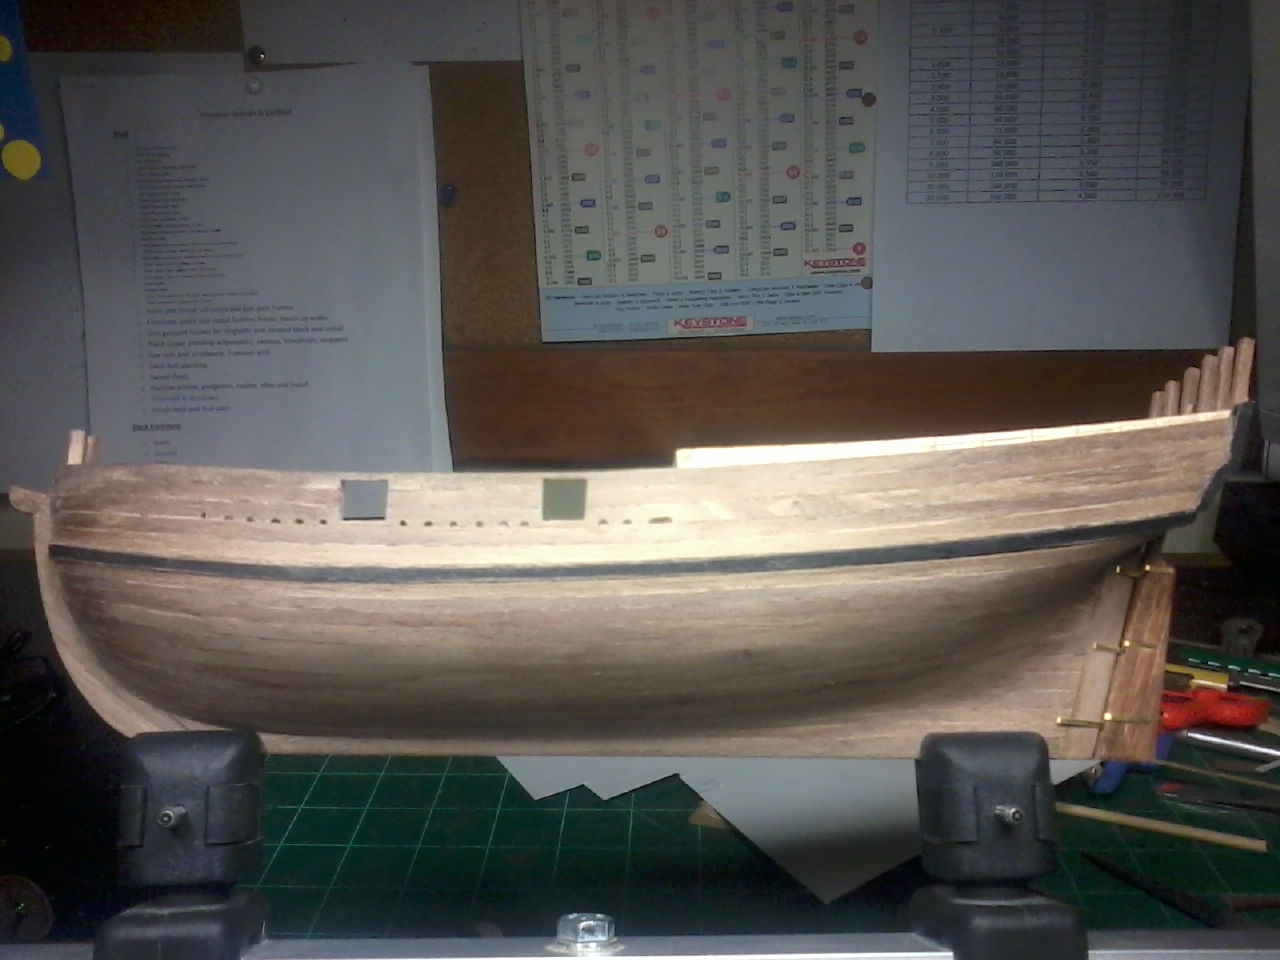
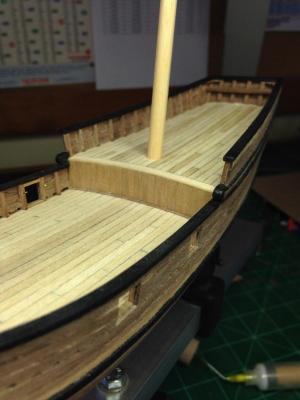
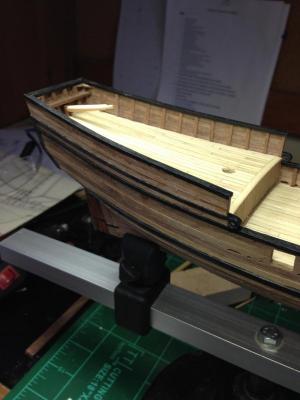
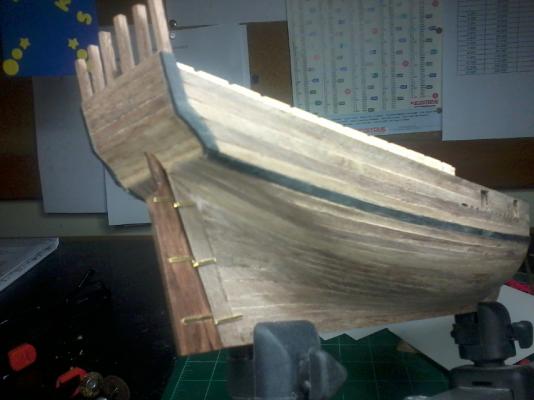
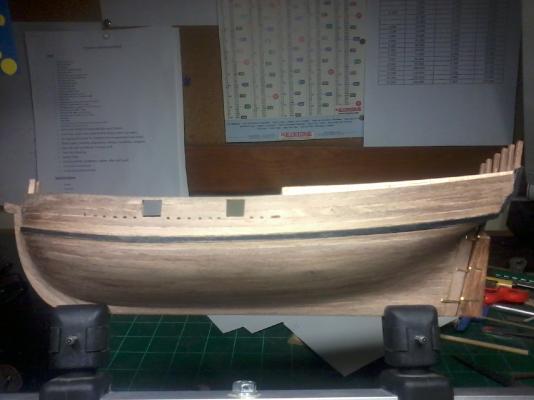
I added the cap rails and upper deck rail frames, so now I can complete the planking. I created a small separate nose rail peice at the bow that allowed me to have the knight heads as solid frames down through the deck. I just need to trim the tops and shape them. I have a bit of scroll work to carve, I plan to try it on walnut and see how it goes. There is also a black arch on the transom that is a thin plank over the transom planking, but at this scale, I think painted card stock will work for that. I hope to have the hull complete and finished soon, then I can start to focus on the deck furniture and fittings. Ken

-
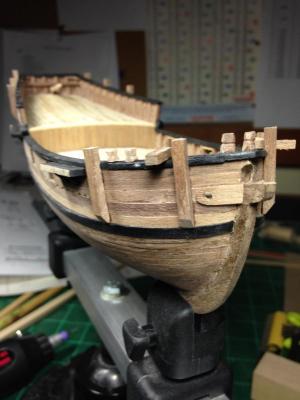
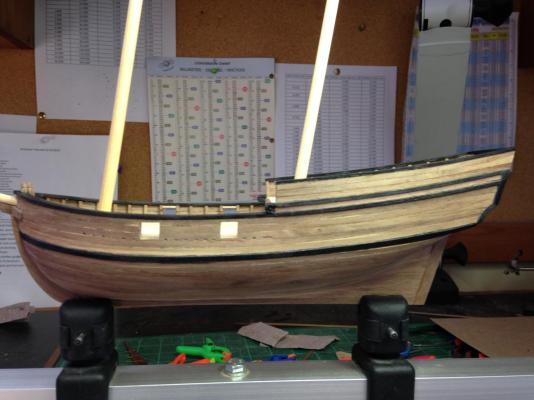
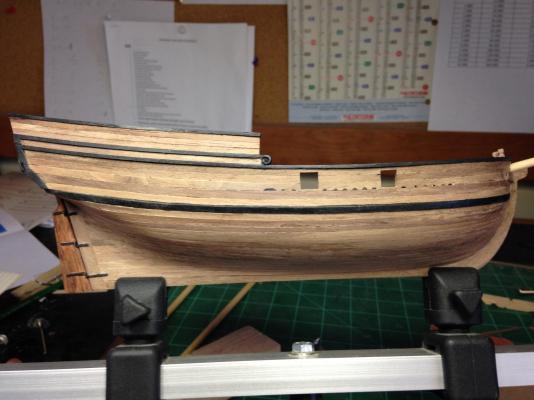
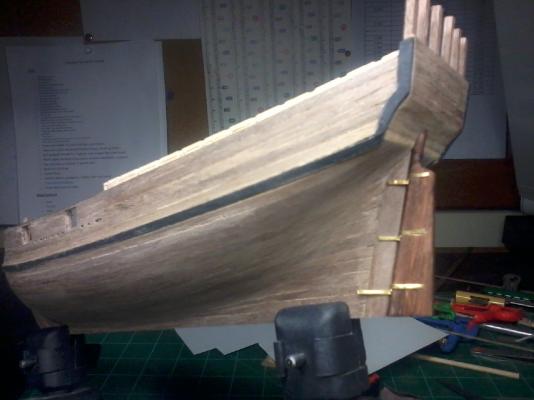
I've loose fitted the rudder, pintiles and gudgeons. After blackening the brass, they wil be bonded in place. I came up with an easy way to create the rudder hardware, I cut a strip of brass the combined width for pintle and gudgeon and slit it down the middle with a dremel cutoff blade, leaving a center section the width of the rudder solid and bent the strips opposite around the rudder and hull to form the assembly. The rudder is stained to match the walnut hull after it is finished, so appears darker at this time. I've completed the upper planking to the main caprail and am pretty happy with the results in planking to the frames. Next is the main caprails which are fabbed and painted (no pic).On many models of the Hannah, the next plank above the cap rail is of a lighter wood, then a false rail with scroll work, I may keep the plank walnut as the rest, since all the cap/false rails will be black.
-
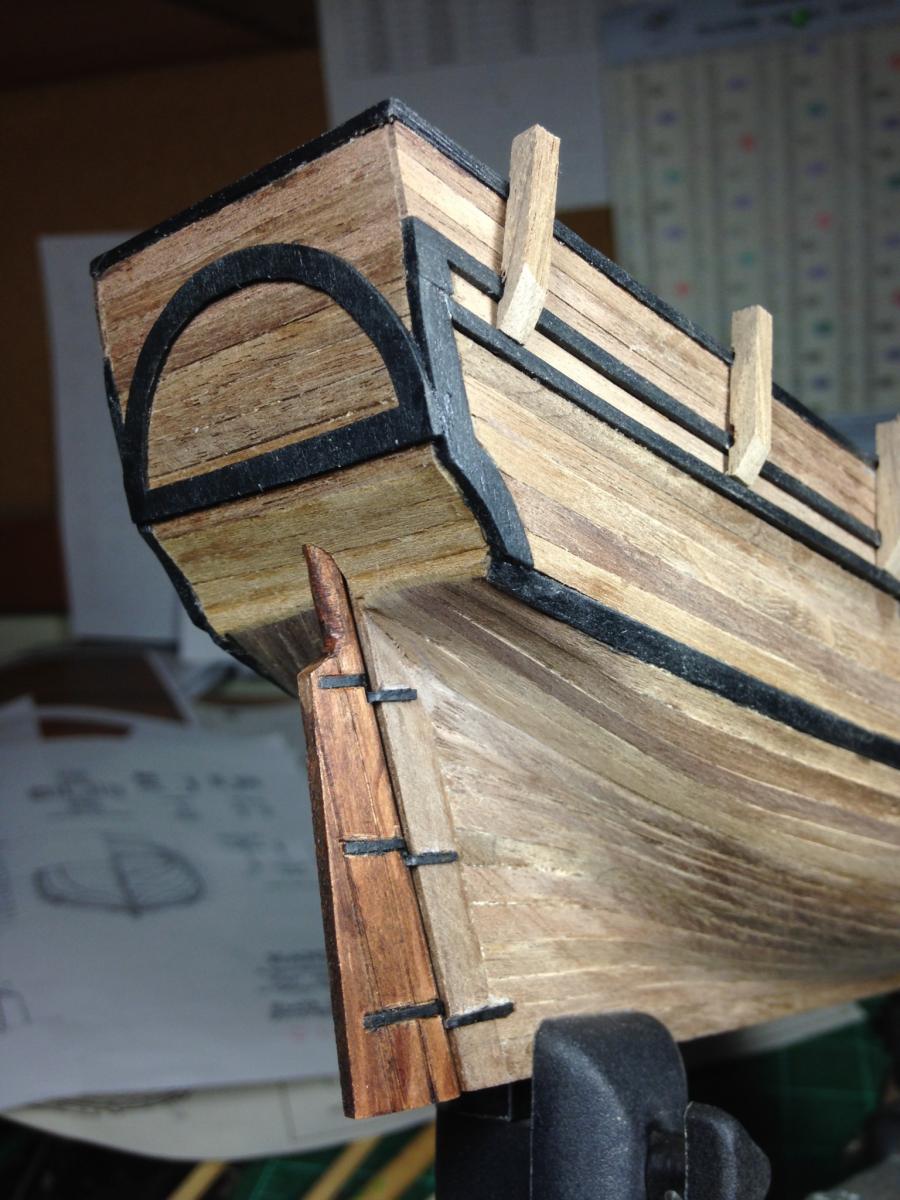
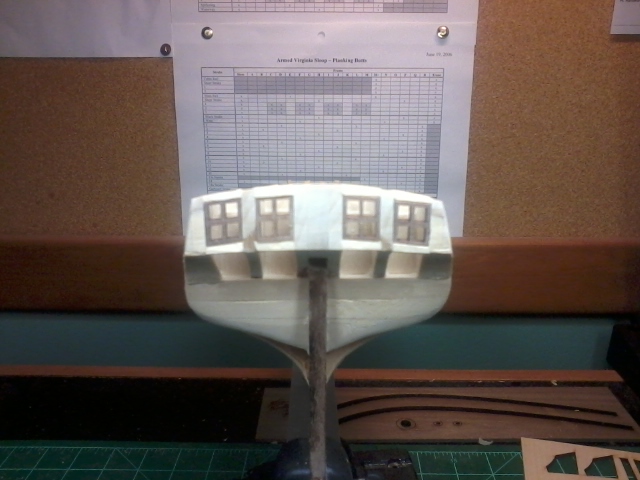
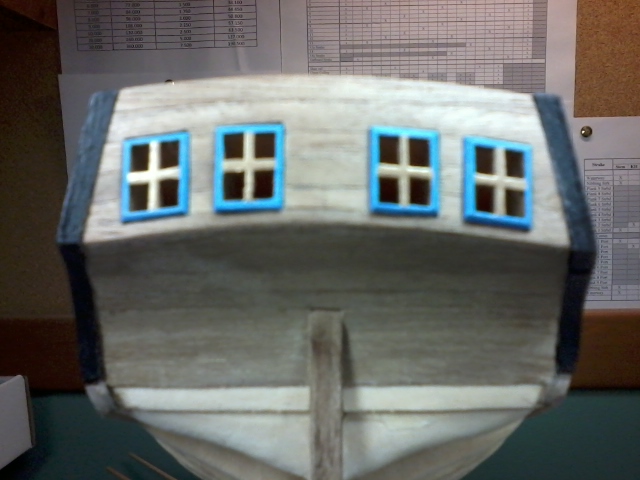
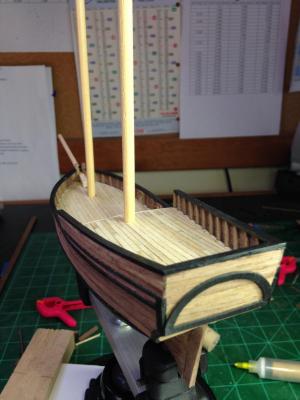
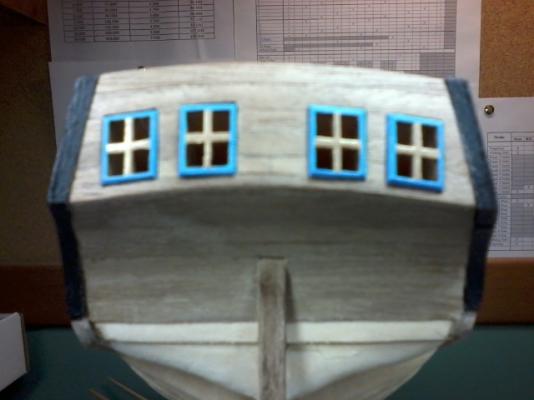
Found another pic that shows the stern framing. Plans call for the window bottoms to be parallel, I ended up with the sides parallel and vertically offset to form an arch. I discovered my misinterpretation of the plans too late and was happy with the look anyway.

-
Brian, This is where almost every AVS build differs, depending on the interpretation of the plans by the builder. I ended up with the sides of my windows vertical and the angles forming an arch along the top and bottom (see pic). I also chose to round the frame edges and have them protrude out instead of being flush mounted. I think any way you do it will look good, just remember to keep the window frames identified in their laser cutouts because the inboard and outboard port and starboard are slightly different.
- 831 replies
-
- 2
-
-
- Armed Virginia Sloop
- Model Shipways
- (and 1 more)
-
Or inspire Chuck at Syren to create a molded upgrade figurehead as was done for confederacy.
- 1,477 replies
-
- 1
-
-
- essex
- model shipways
- (and 1 more)
-
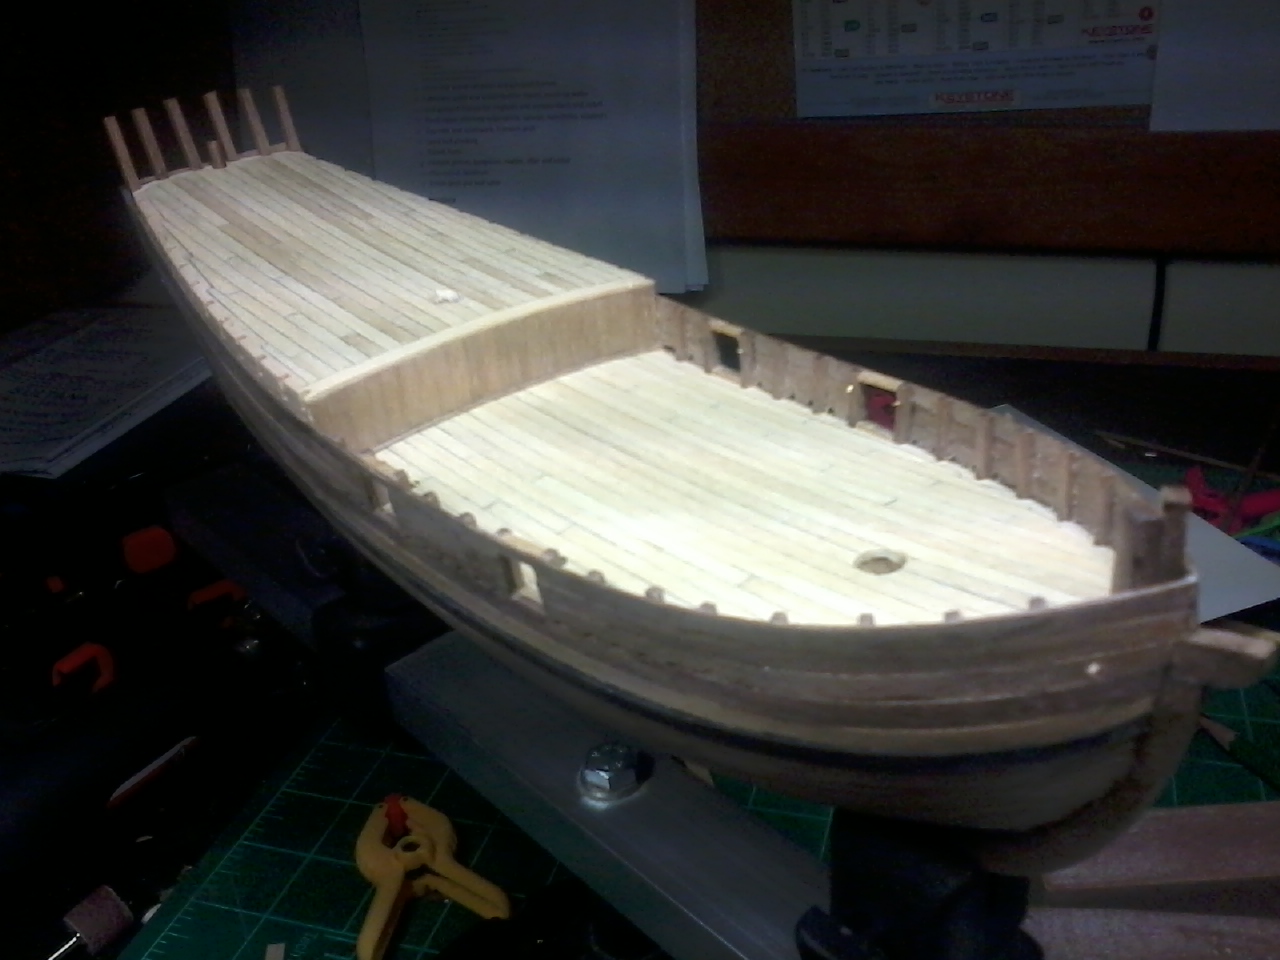
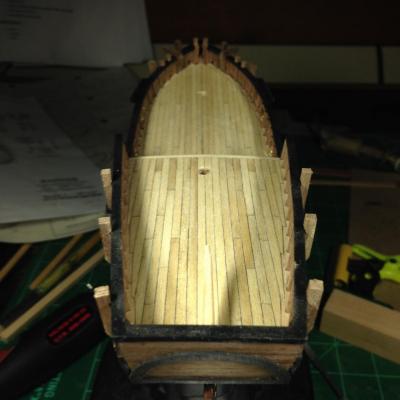
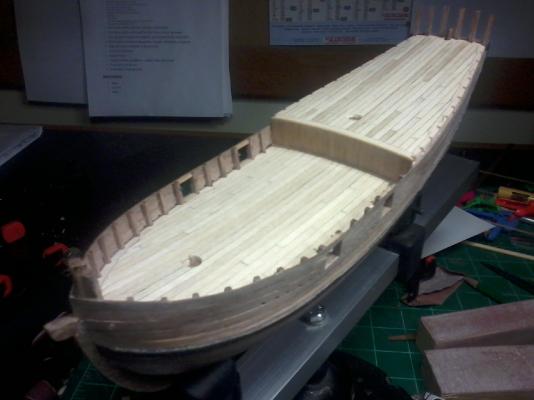
Don't worry about the subdeck details, just make sure your final details are located and centered, Its all covered by the deck planks anyway. Ken
- 831 replies
-
- 1
-
-
- Armed Virginia Sloop
- Model Shipways
- (and 1 more)
-
Looking great, I like yoyr clamping and bonding ideas and plan to use them myself. Don't forget to bond a block on each side of the mast step bulkhead before planking, they enclose the mast footing. Ken
- 831 replies
-
- 1
-
-
- Armed Virginia Sloop
- Model Shipways
- (and 1 more)
-
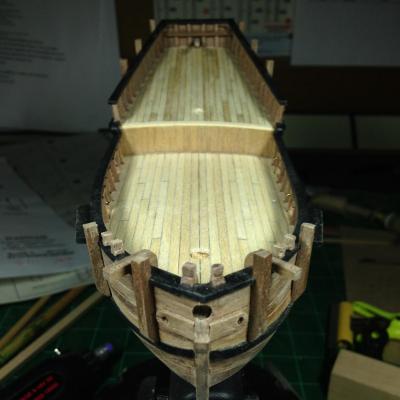
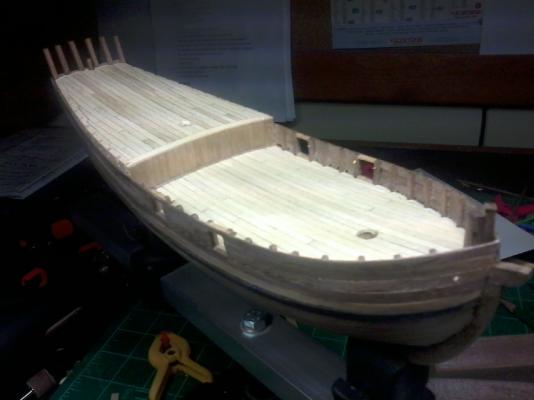
Dont forget to fair the deck camber on the bulkheads before installing the sub-deck, you photo appears to show one bulkhead "F" i think that is a bit high on the starboard side, but cannot really tell in a photo, just lay a few battens along the deck to determine how they lay. Ken