NRG Photographic Model Ship Competition - All eligible to enter - Reduced memberhsip fee - JULY 31 ENTRY DEADLINE
×
New Banner Ad Sponsor - Epic Engravers - Great plank bending machine (also bends thin metal sheets) and unique engraved coins to label your model displays!
×


BareHook
-
Posts
430 -
Joined
-
Last visited
Content Type
Profiles
Forums
Gallery
Events
Everything posted by BareHook
-
Looking good, you may want to add some support blocks bonded between the bulkheads to stiffen up and keep the keel strait while planking, Also make sure you take plenty of time in fairing the bulkheads, seems almost everyone who builds the AVS reflect that they could or should have done more fairing. Ken
- 831 replies
-
- 2
-

-
- Armed Virginia Sloop
- Model Shipways
- (and 1 more)
-
Thanks for the info! Ken
-
On my hannah build all I have for reference is the Sultana practicum as a similar type vessel and Lenarth Peterssons' rigging fore and aft craft. My problem is that i dont have a belaying plan and the fore and aft book shows pin rails which I dont think are present on the hannah. does anyone know where I can find this info? Thanks Ken
-
Bob Did you procure a full set of matching planks in boxwood before starting this build, or do you have the capability of cutting your own strips? She is looking great, but you must have a ton of basswood strips lying around. I cant get over how clean all your connections and joints are. Ken
-
Looks like you're off to a good start! Welcome to the AVS club!
-
I like the "made" rudder better, with the original, you had to cut grooves to give the impression of it being made from separate planks. Ken
-
Forming sail bellow aboard your models. (Moved by moderator)
BareHook replied to jud's topic in Masting, rigging and sails
I used dilluted white glue on the sails for my AVS and used a hair blow-dryer to dry them in shape. Ken -
Impressive bend on those rails! You inspire me to try a similar bend on the caprails for my Hannah build instead of cutting them from a sheet. Ken
-
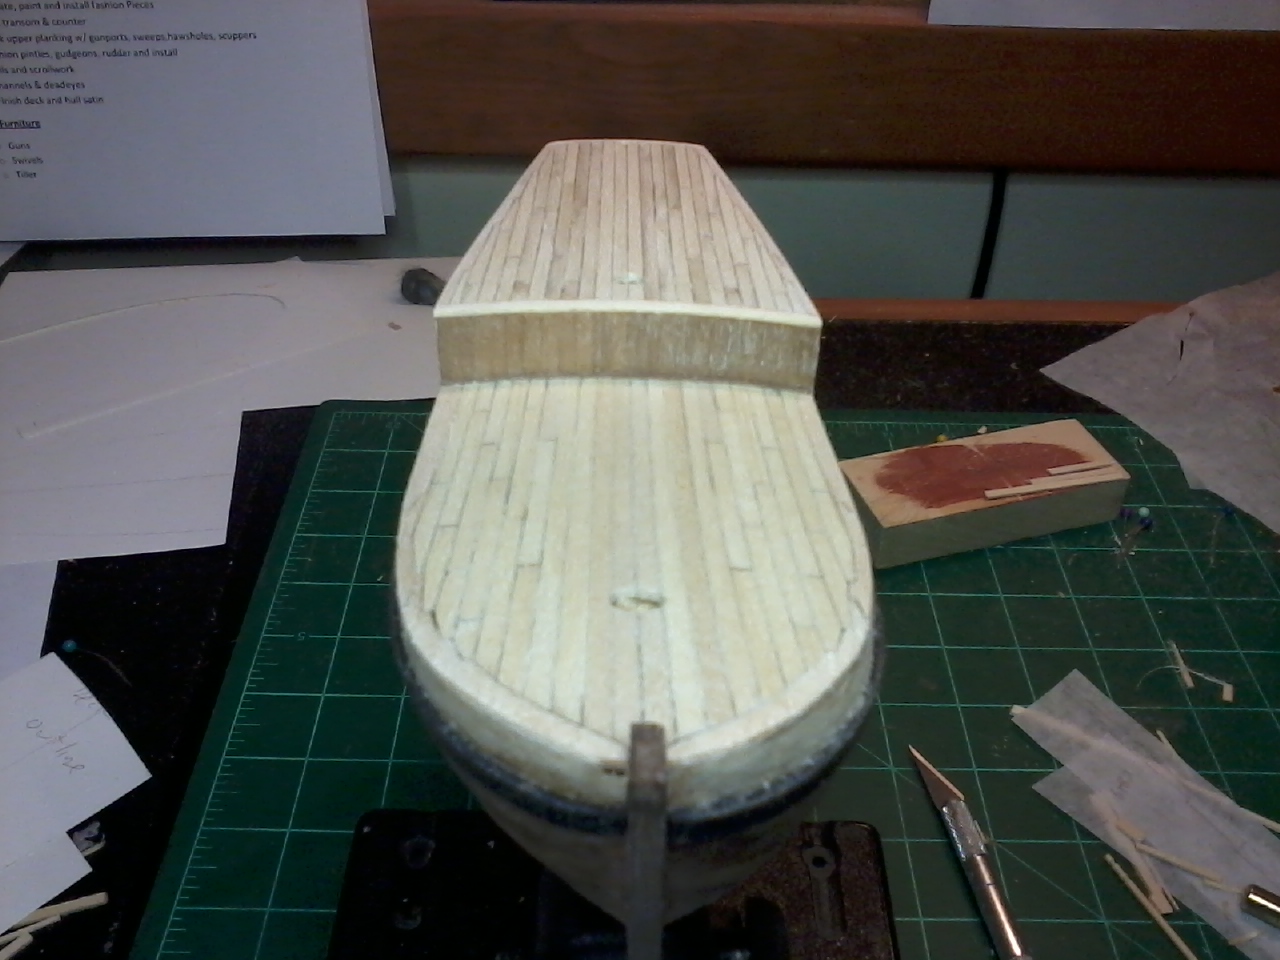
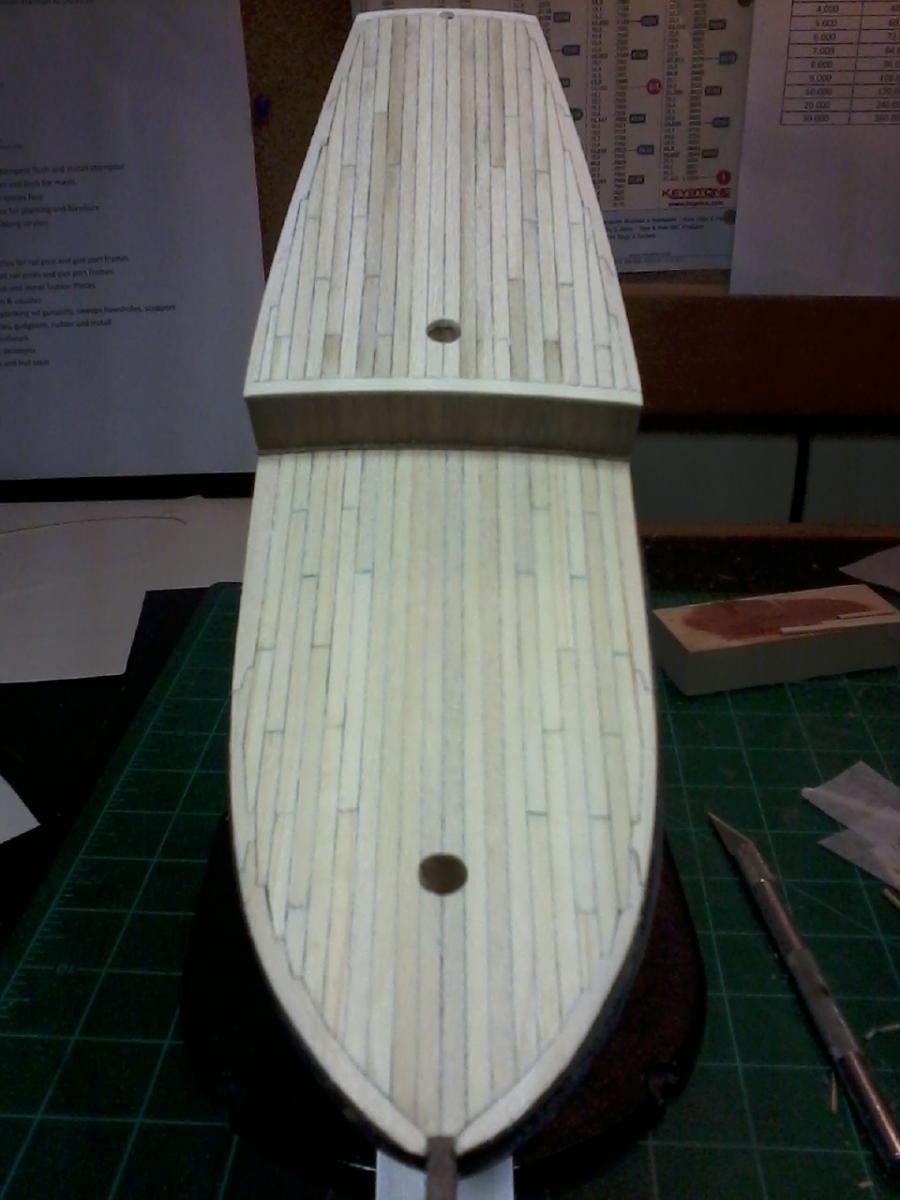
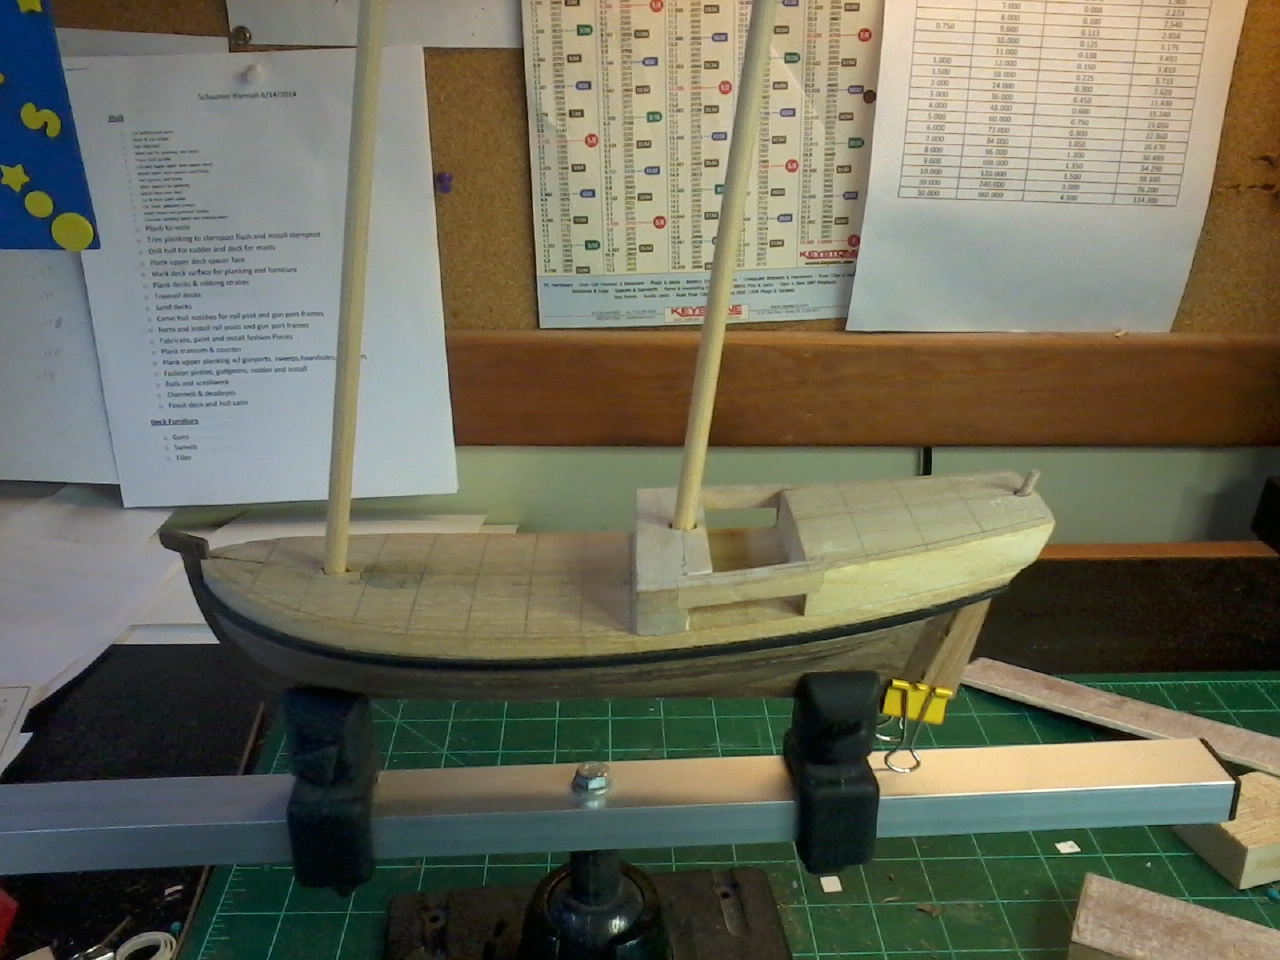
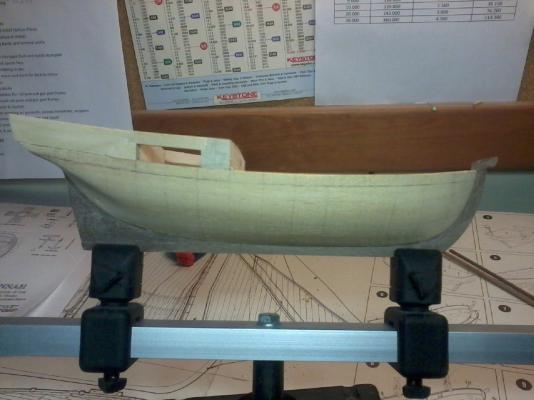
I've added notches for the bulwark and gunport framing. Next up is installing the frames and the fashion pieces then completing the bulwark, transom, counter planking and cap rails. I decided not to do treenails on the deck. I did a small experiment piece on a scrap of wood and was not happy with the look. I think the soft basswood used on the decks makes creating sharp details such as treenails very difficult, especially at 1:80 scale.
-
You can add a butt shift pattern to the deck if you want, just grind a flat edge blade to the width of the planks, then you can score them. Ken
-
I completed the deck planking and quarterdeck face planking. I used pencil graphite for the caulking and basswood for the planks. Next time I may try black colored pencil or crayon for the caulking, the graphite dust was messy and seemed to penetrate the grain of the wood. Though the basswood is a bit soft, I like how the grain shows up and has some color variation, you just need to be carefull not to splinter or gouge it. Next up is treenailing the decks, I'm not sure if the filler I have will show any contrast though considering the drill size will be a #76 (.020) in soft wood. I'm going to do an experiment with some planking on a block to try out treenail filler as well as the rail/gunport framing notches inside the upper planking. Ken
-
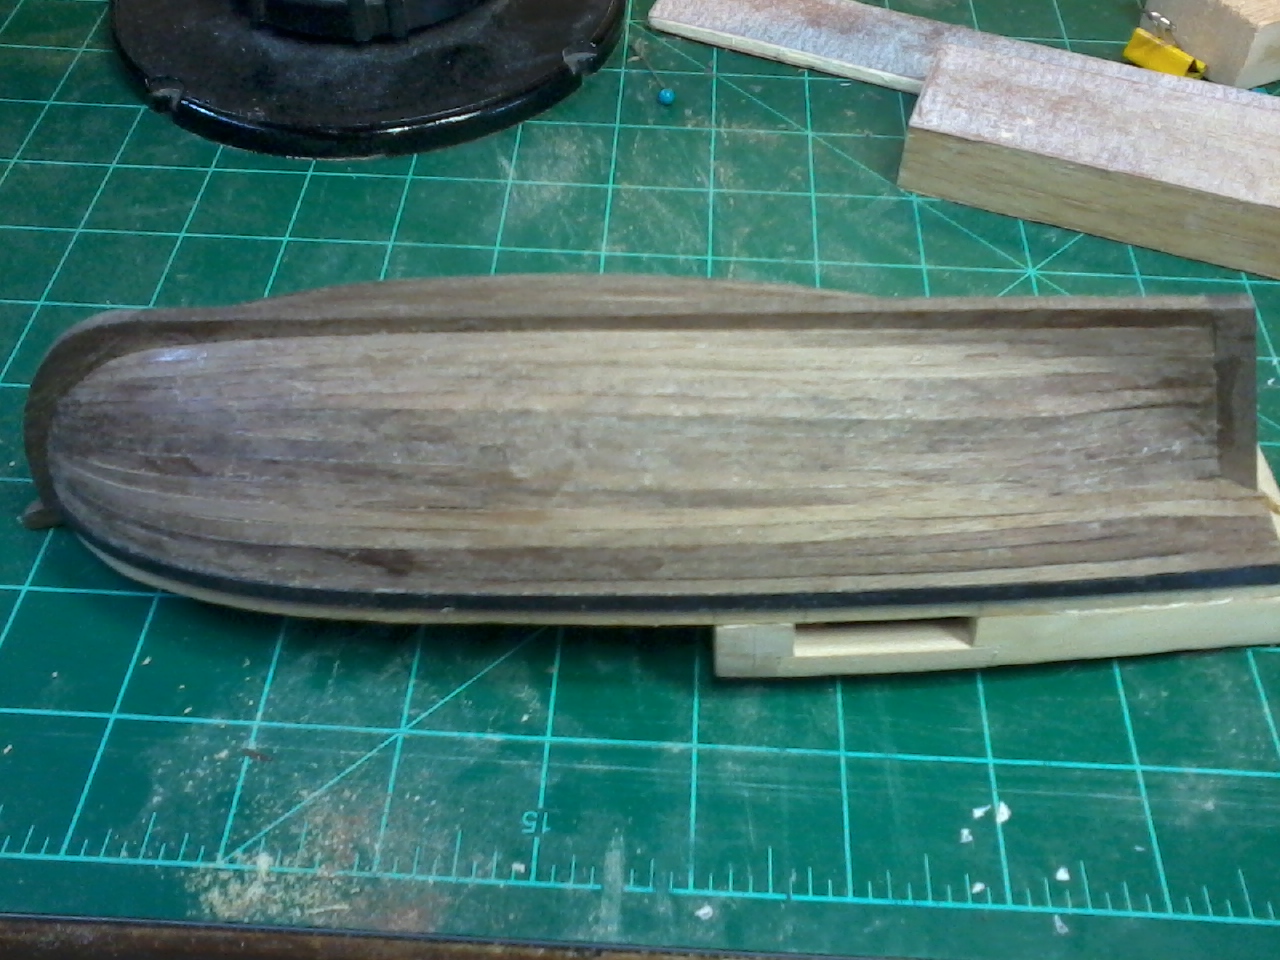
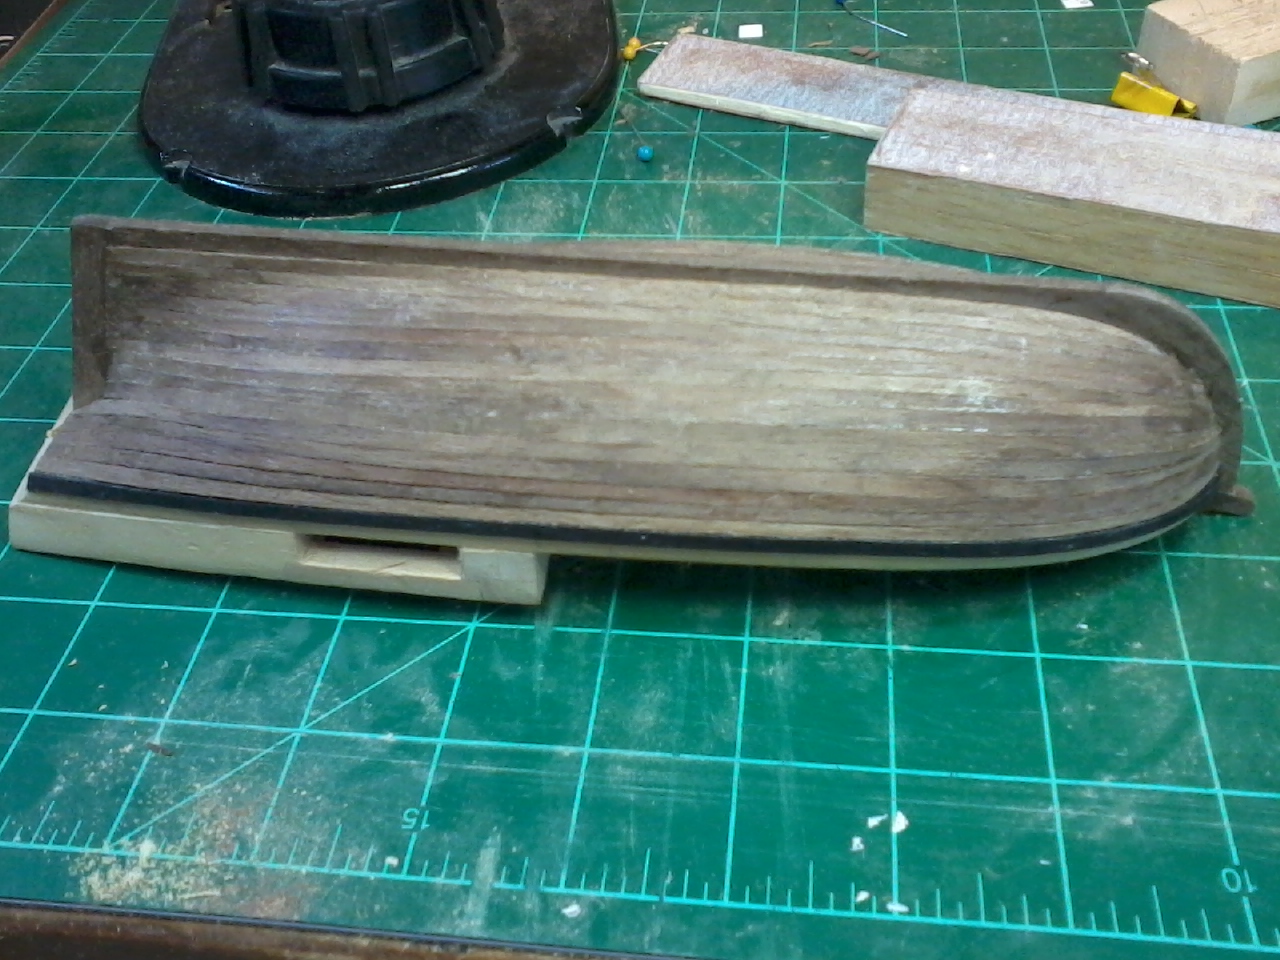
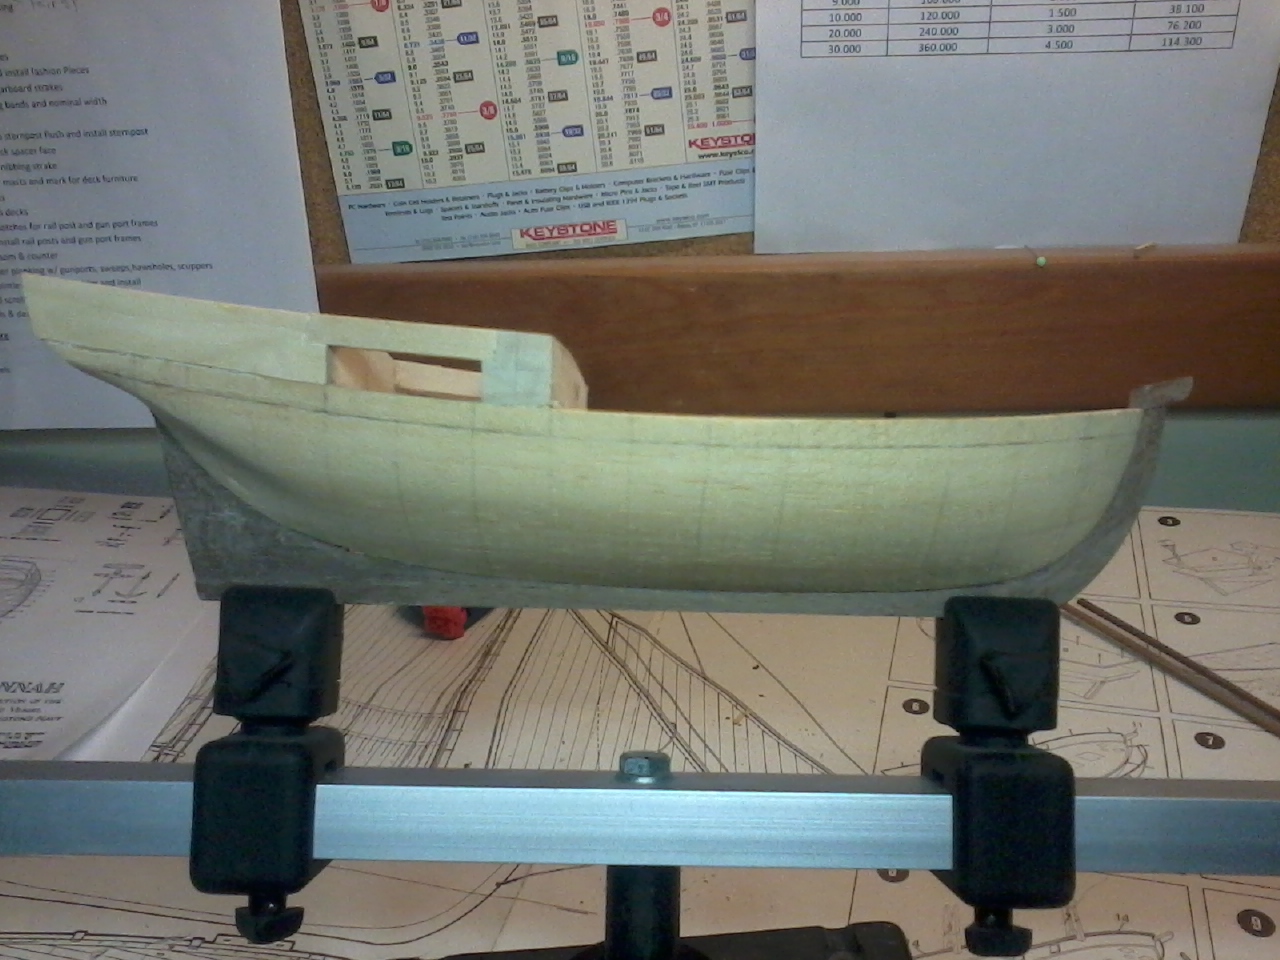
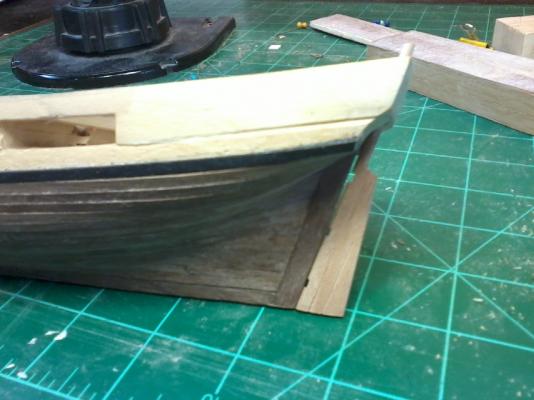
I've completed the planking from the wale down, but it still needs sanding. I shaped-up the rudder and drilled the hull for the rudder and masts. The rudder is a different wood than the walnut planking, so I may need to stain to match or leave as is? Opinions? Next up is deck planking and then the upper hull rail and gunport framing/planking. Ken


-
Re-bond them with thin stock to correct for the saw blade width.
-
David B, The bandsaw idea reminds me of one way I thought of to convert a solid hull to POB. Mark your bulkhead positions and just slice them out like a loaf of bread. With the centerline cut and bonded, it would be easy the create the keel slots and the keel could be cut from stock material using the plans. Ken
-
I'm currently doing a similar solid hull build. I measured a center width near the bow and stern on the deck surface and connected the two points, this became the master center for the hull. for the bottom, I placed the hull with the deck down and marked the deck center at each end and projected it along where the keel will be, this is where you need to "eyeball: it and do your best at keep the hull level when upside-down. It may help to mark an array of dots where you feel you can locate the center and work you way from there. Hull carving can be done with a dremel or bench sander and or a curved xacto blade, just be careful no to take too much off, though worst case you can add filler to low spots since the hull is painted. On my kit I decided to plank over the solid hull, so its more forgiving than getting the shape dead-on. Ken
-
Its intersting that the Jib and Flying Jib are sewn in a different pattern using two halves rather than full length strips. Is this an innovation developed in sail making? Beautiful work! Ken
-
What type of adhesive have you been using? all your natural wood and painted joints are really clean.
-
Nice hull! I used Holly for my deck, source: Hobbymill. Don't worry about using up your walnut supply, after completing my kit, I had a lot of leftovers. There isn't much left that will consume a lot of timber (other than the decks), the deck furniture uses various small bits and pieces plus the poopdeck is planked in walnut. When doing the deck, there were a couple schools of thought, you could plank the whole deck and add the deck furniture on top or plank around the deck furniture, either way works, but plan your layout and be careful not to oversize your coamings or the bow area can get pretty crowded for deck space. If you look at the varous builds, there are also some nice variations on the galley stack and grating being combined or separate. Ken
-
Your planking pattern is a standard butt shift pattern, they always have two solid planks between plank butts for strength.\ Ken
-
The sweep ports are tough, I made a drill jig with 3 hole inline on an angle to drill pilot holes for the cutouts, then trimmed away at it until complete
- 129 replies
-
- 3
-
-
- armed virginia sloop
- model shipways
- (and 1 more)
-
Leaving bits of skin looks more natural than gloves The planking looks great! Give her a light sanding to remove the excess adhesive. Ken
- 129 replies
-
- 1
-
-
- armed virginia sloop
- model shipways
- (and 1 more)
-
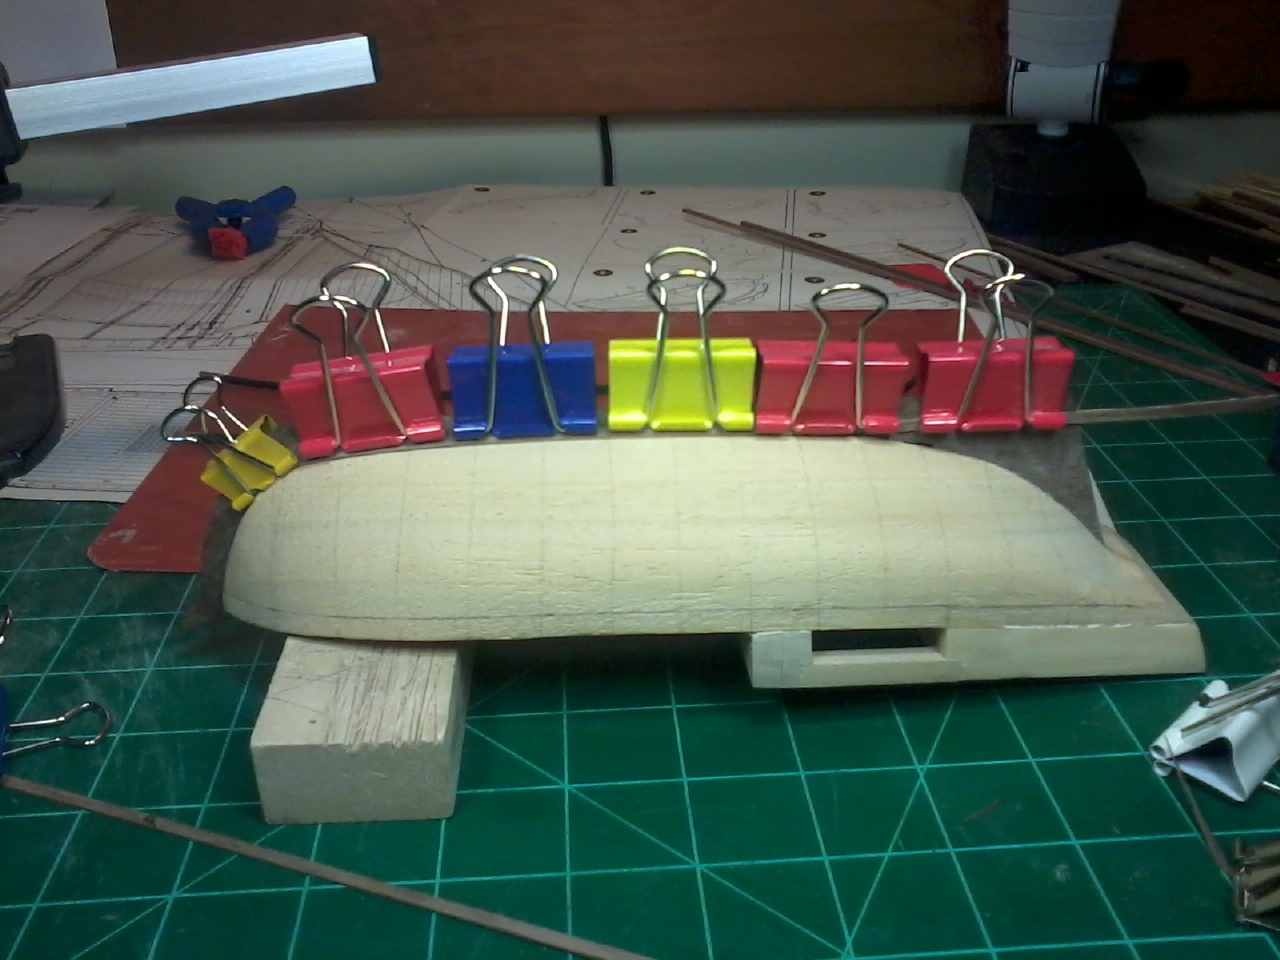
I've added the upper deck (would it be a poop deck on this vessel?) spacer blocks and faired them to the hull contours and deck camber. I cut the rabbets and installed the stem and Keel, but am waiting on the Sternpost until after planking the lower hull as this will allow me to trim all the planks even. The wales have been formed and painted and I'm in process of forming the Garboard strakes. Next up Install the wales and Garboard strakes Calculate planking bands and tapering - final adjust Plank lower hull Question, would it help with bonding the planking if I prep the solid hull with sanding sealer or dilluted PVA? I plan to use PVA for my planking. Ken Edit: Thought of the day, I got a great deal on this kit, but as it turns out, by the time I'm done upgrading, I should have just bought a more expensive version with more usable parts.


-
Yes, I couldn't remember, they also sell it labeled as debonder
-
All I can say is "Wow!" You are pretty much confirming my eventual build of this kit. I cannot recall, but is your deck and framing supplied wood or upgraded? The decks look like Holly and not sure of framing wood Ken
-
Dont forget CA glue can be removed with the debonder. I used PVA, but had sore fingers from holding the planks in place until the glue set enough to stay in place. You'll be suprised after a light sanding it will look fine. You will need to add a couple stealers at the stern though to fill in the extra gaps. Ken