BareHook
-
Posts
430 -
Joined
-
Last visited
Content Type
Profiles
Forums
Gallery
Events
Everything posted by BareHook
-
HMS Brilliant?
-
I beleive that after the windlass it would go below deck through a scuttle or hatch, check you deck plan and see what is in that area. There might be a small amount coiled on deck to allow for initial release. I'm not sure if the cable will be on the windlass when lashed in place to the rail though, that is usually rigged when hauling, but allowed to run free for a drop.
-
All I can say is "Awe Inspireing", I keep expecting to see workers walking around the build, although I'm not sure a full scale build would be as precise. Are you retired? You make amazing headway on your project, considering the speed and quality of work.
- 662 replies
-
- 1
-

-
- bonhomme richard
- frigate
- (and 1 more)
-
Nice planking! I wish I would have added simulated caulking to the hull planks on my AVS. The walnut joints ended up really tight and nice, but its really difficult to see the planking details such as the tapering, butt joints and stealers; although with the dark walnut, details may still be difficult to see. I did simulated treenails on the hull as well, but dont think I would do them again. I like them on my deck, but was dissapointed with the look on my hull.
-
Jason! you beat me to it!
-
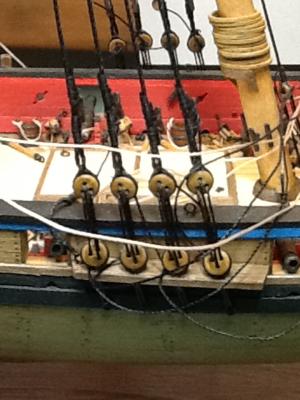
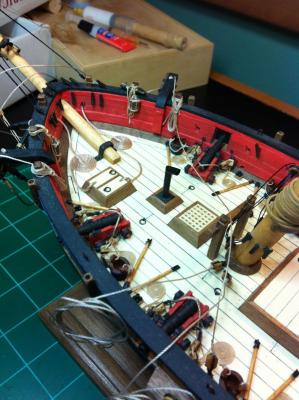
I've installed the Horse, Backstays, and Shrouds, but they are not tied off, but awaiting the forestays installation for final adjustments. She has a lot of lines all over the place, so watch your step! I'm waiting on the forestays to complete the sails, so I can slide the foresail hanks onto the stays rather than trying to install them after. My sailmaker has begun the sewing of the sails and completed the internal sewing, next is attaching the bolt ropes. I'm going to see if I can tack them in place with the fraycheck adhesive before sewing the zigzag, otherwise seems extremely difficult. After the boltropes, its cutting, hemming, reef lines, hanks, shaping/stiffening and rigging. Ken

-
If you look at rigging tools sold at Micromark.com or modelexpo.com, they may be similar. I've heard of some who have modified sewing needles as well to create various hooks and grabbers by glueing the point into a small wood dowel to act as a handle and trimming the thread slot at the other end in various ways. Ken
-
Sanding Block
BareHook replied to Hexomega's topic in Building, Framing, Planking and plating a ships hull and deck
I glued sandpaper to the smaller paint mixing sticks they give away at hardware stores, I like them because you can flex them some. Ken -
I wonder if it would be possible to run the frame pieces for the window frames through a thickness planer? Not sure how plywood will react to that process though.
-
Some do chemical blackening, check in the metal finishing section
-
One tip is to paint the parts or wood strips before installation whenever possible.
-
I did the second layer on my AVS using wood glue, If you thin the glue you might have trouble with it absorbing into the first layer wood and not getting a strong bond. Light sanding cleaned it up nicely after completed, just be carefull not to sand too deep, its easy to go thru the veneer.
-
You should also mark the bearding line on the keel, that will help determine whether one is too high or the other too low, also look at the level on top where the deck will be, that should have a smooth transition (but not necessarily level, decks are curved for water runoff to the sides). Are there plans 1:1 scale that you can overlay each bulkhead to verify its size? Either way, they're pretty easy to shim/trim to adjust for a correct fit once you determine it. Remember the extra time spent on this will greatly benefit the rest of the build, I've read many time where framing and faring the frames can take a lot of time to finally get right and shouldn't be rushed.
-
uss constitution which one - moved by moderator
BareHook replied to stevetuck56's topic in Wood ship model kits
I cannot remember the details, but the various kits out there also represent different era's for the Constitution. I think the Bluejacket kit is 1812 and is the earliest while some of the other kits are a more recent state. -
Deck planks are generally uniform in width, but hull planks can be tapered and or spiled (curved), so usually strips used on the hull get re-shaped before use.
-
The hoops are brittania castings included in the kit. i chemically blackened them then painted over with wood shade paint,
-
Current price for AVS seems high, I can't remember what I paid 2 years ago, but Model Expo constantly has sales, you can even ask if they'll price break, you never know but they have excellent cust service and a history of working well with MSW. Either kit is nice, Syren obviously more challenging and will take longer to build. The AVS is a ficticious ship based opon the design of that era where the Syren has actual history. I preferred ficticious AVS myself, so I could name it after my daughter and didn't have the pressure to maintain historical accuracy Ken
-
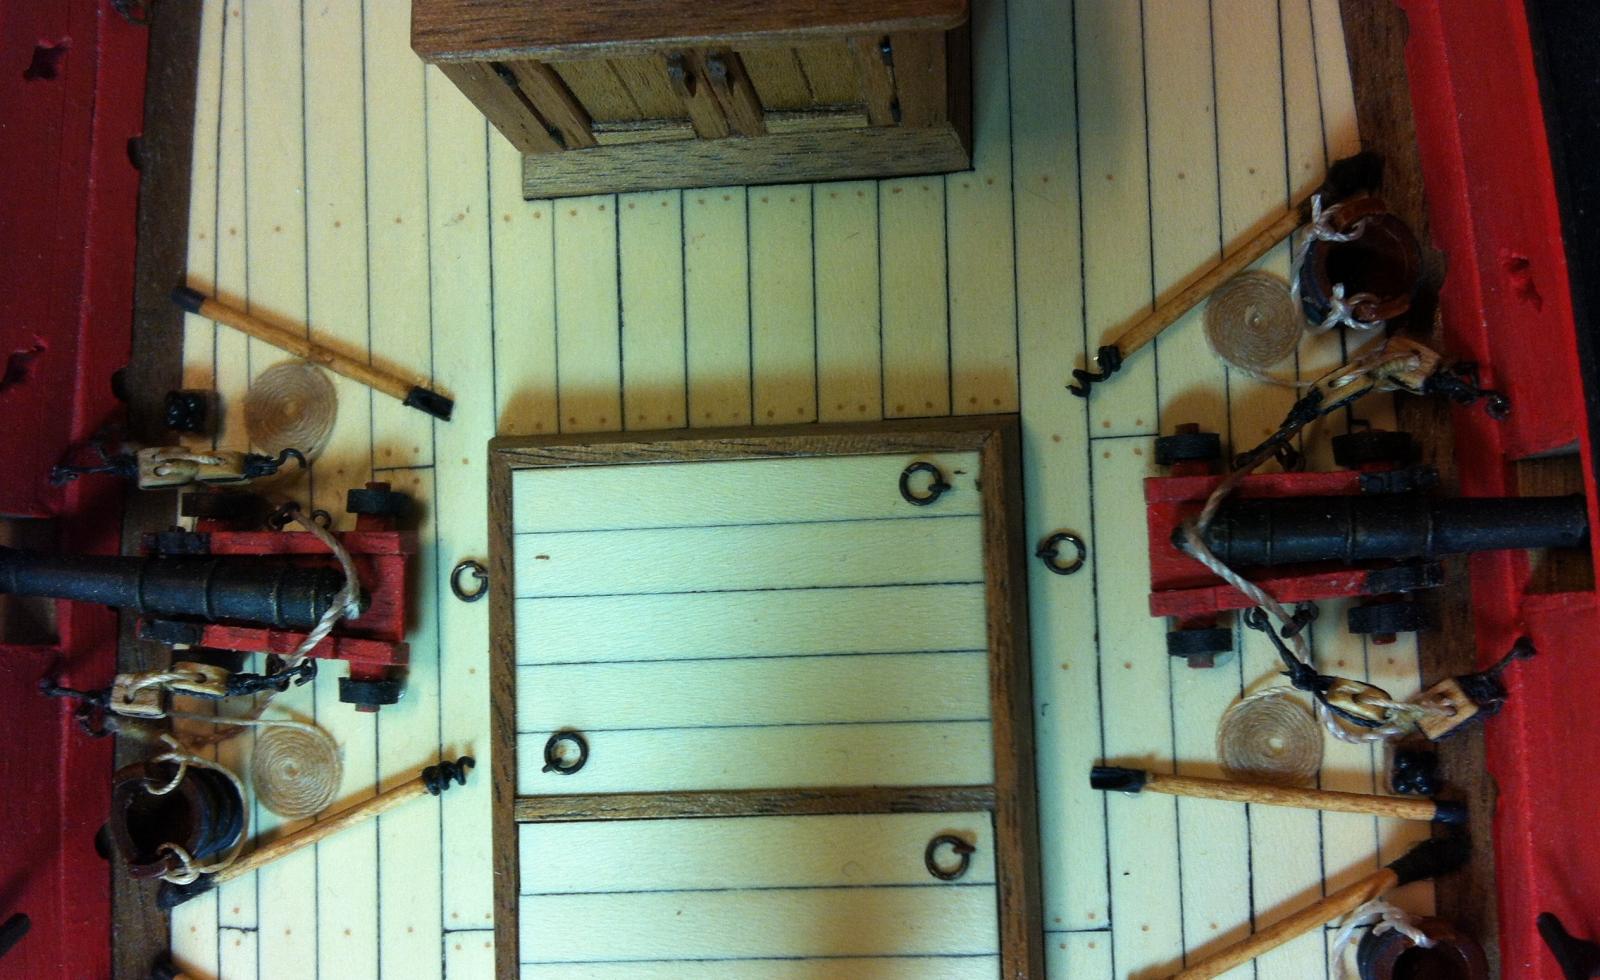
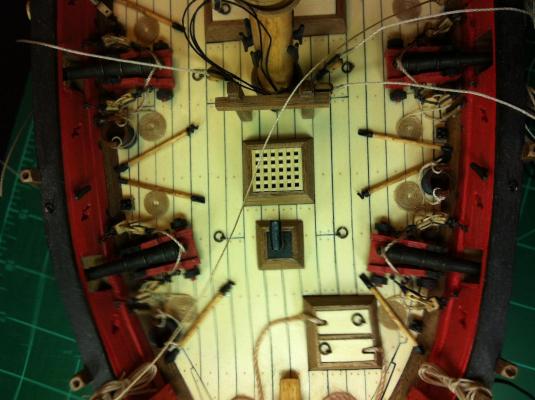
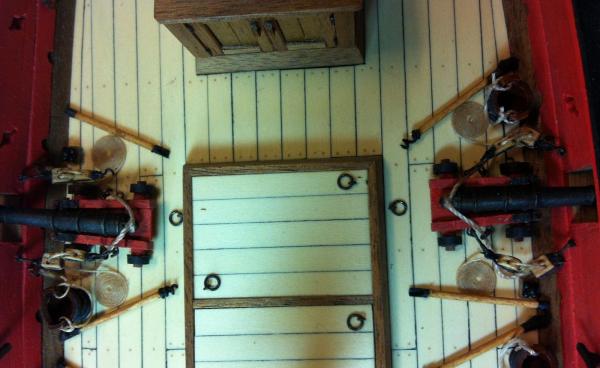
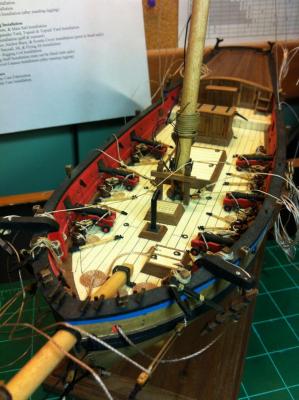
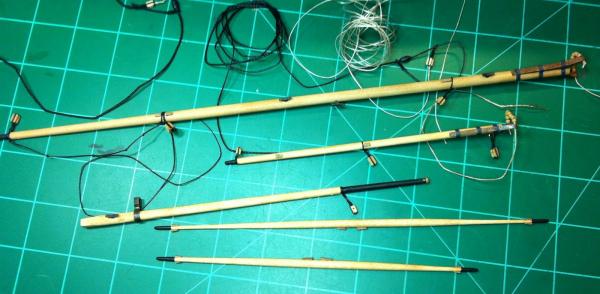
Well i've done just about all I can do until I get the sails fabricated. The spars are ready and lots of rigging line everywhere to confuse the issue. I finished the spars with minwax waterbase woodsheen in oak color, this is a rub-on stain/finish that I am happy with. So far I've used waterbase finishes everywhere except some metal parts that are touched up with oil base paint. I like the low odor of the water base finishes used. I decided to add cannon balls, bucket and tools to the battle stations (swab/worm & ram/loader). I can't imagine how the full square rigged ships get done! I'm doing so much rigging prep on everything but it will be a lot easier than once the mast and spars are installed. My main focus now is getting my sailmaker going on the sails, I need them complete before I install the standing rigging, as I plan to thread the fore sails hanks onto the stays to save me having to sew them on while on the ship. Ken
- 110 replies
-
- 2
-
-
- armed virginia sloop
- model shipways
- (and 2 more)
-
I've got a lot of build documentation that can be sent to you as well. This site has been a great resource. Ken
-
Rowan, Check out this site/practicum, I didn't use the bob hunt. http://www.modelboatyard.com/avs_articles.html Ken
- 55 replies
-
- 1
-
-
- armed virginia sloop
- model shipways
- (and 1 more)
-
Yikes! My gudgeons are sweating!!
BareHook replied to src's topic in Metal Work, Soldering and Metal Fittings
My guess is a reaction between the wood finish oil and the metal finish. If there is any blackening compound on it, the acid could cause the oil to coagulate into beads. -
Are those gunports along the side, heavily armed if so. That forward swept bow makes me think on an ironclad vessel.
-
I'll be adding flags to my AVS build and am not sure of the best way to attach cloth flags to the halyards. I'm using the cloth flags available from Model Expo. I figure I may need to use anti-fray on the cloth before cutting out the flag. I was planning on adding a half-hitch at the top and bottom junction point in the halyard and bonding with fabric glue or hand stiching it? The halyards will be .008 hemp colored line. Please comment or offer ideas and how this could or has been done Thanks! Ken
-
Standing rigging order of installation question on my AVS The order of stays and shrouds over the mast is: Horse Backstay Shroud pairs alternating P & S forstay Jibstay But in order to keep the rake of the mast accurate, it seems I need to install the fore and aft stays for the rake angle and then the shrouds for P&S alignment. Should I just approximate the length for the heart and deadeye attachments (keeping all shroud/deadeyes equal length) and use the lanyards for final adjustment? The back and Jib stays are on tackle, so easy to fine tune but dont want to be too far off for the others. Thanks Ken
-
San Diego? I don't think so but?