


Beef Wellington
-
Posts
2,245 -
Joined
-
Last visited
Reputation Activity
-

 Beef Wellington got a reaction from DaveBaxt in HMS Jason by Beef Wellington - Caldercraft - 1:64 - Artois-class frigate modified from HMS Diana 1794
Been a while since posting and felt like I needed to get up to date, and thanks all for the continued interest - and yes Carl, Mobbsie, simply making slightly wider transoms is the solution. Rather tedious which is why my fingers have been distracted as you'll see.
I feel like I should start with a "forgive me father its been 700 days since I've looked at the instructions or used a kit part" Haven't been completely idle but have got a decent start on couple of visually small but meaningful tasks that should allow of this to come together relatively quickly when the time comes. Main goal is to get items in place to allow me to give the sides a coat of wipe on poly for protection after gluing items in place but prior to touchup which will definitely be needed. I've decided that my next model will only have one side
Chesstree and fenders: These were made up to allow the sheer rail to be positioned and were cut from 3mm and 2mm sheet respectively. The Chesstree has a notable thinning in width as it goes down the hull which I tried to reflect. Felt these looked rather boring when shaped so decided to try and put a profile in these as is so apparent when looking at those on Trincomalee and Victory. These seem to ne features often missing on contemporary models...think I now appreciate why A scraper profile was made for each, the fenders proved much easier to do despite being smaller because of the constant width, the chesstrees much more challenging due to the steady reduction in width. Things are a little messy at the bottom but to the naked eye the defects are much less noticeable and these will not be redone. Chesstree sheaves will be simulated.
Photos below also show a slight miscalculation from way back nearly coming back to bite me. The sheaves for the sheets and tacks were placed a little too high and these nearly interfered with positioning the sheer rail.
Fore and Main Channels: The channels need to be placed at the same height as the sheer rail, so even though its not necessary to attach these until much later, its necessary know where these will be positioned before the sheer rail can be applied. I've decided to go with natural castello channel rather than painted black finish - the latter would at least have given me the option to use the kit part. Making my own allowed me to follow TFFM styling a little bit which is a bit more curvaceous and pleasing to the eye, it also allowed me to position the slots for the chains to reflect the positions of the gun ports - you can see small but noticeable differences in the comparison below. (Interestingly the kit fore-channel has 6 slots at the rear, where-as the AOTS plans show only 5). Holes to allow the pinning of the channels have been drilled so these just need final attachment.
Waist: As previously mentioned, I've been leaving the final position of the upper hull to be tweaked later. To be comfortable that the sheer rail was correctly positioned I needed to trim the waist height back to anticipate the position of the top deck, and allowing for a layer of planking. This was also necessary to finalise the height of the fenders and chesstrees.
Quarterpieces: These have been beveled to allow the placement of the figures, and also the quarterpieces were built up slightly to allow me more easily place and but up the top finishing molding for the taffarel when I get there. The figures with bent arms sit quite pleasingly now and there is a definite sense of depth rather than just plain bas-relief. Obviously lots of fine finishing and touch up still needed....curse you macro gods!
-
 Beef Wellington got a reaction from hamilton in HMS Jason by Beef Wellington - Caldercraft - 1:64 - Artois-class frigate modified from HMS Diana 1794
Been a while since posting and felt like I needed to get up to date, and thanks all for the continued interest - and yes Carl, Mobbsie, simply making slightly wider transoms is the solution. Rather tedious which is why my fingers have been distracted as you'll see.
I feel like I should start with a "forgive me father its been 700 days since I've looked at the instructions or used a kit part" Haven't been completely idle but have got a decent start on couple of visually small but meaningful tasks that should allow of this to come together relatively quickly when the time comes. Main goal is to get items in place to allow me to give the sides a coat of wipe on poly for protection after gluing items in place but prior to touchup which will definitely be needed. I've decided that my next model will only have one side
Chesstree and fenders: These were made up to allow the sheer rail to be positioned and were cut from 3mm and 2mm sheet respectively. The Chesstree has a notable thinning in width as it goes down the hull which I tried to reflect. Felt these looked rather boring when shaped so decided to try and put a profile in these as is so apparent when looking at those on Trincomalee and Victory. These seem to ne features often missing on contemporary models...think I now appreciate why A scraper profile was made for each, the fenders proved much easier to do despite being smaller because of the constant width, the chesstrees much more challenging due to the steady reduction in width. Things are a little messy at the bottom but to the naked eye the defects are much less noticeable and these will not be redone. Chesstree sheaves will be simulated.
Photos below also show a slight miscalculation from way back nearly coming back to bite me. The sheaves for the sheets and tacks were placed a little too high and these nearly interfered with positioning the sheer rail.
Fore and Main Channels: The channels need to be placed at the same height as the sheer rail, so even though its not necessary to attach these until much later, its necessary know where these will be positioned before the sheer rail can be applied. I've decided to go with natural castello channel rather than painted black finish - the latter would at least have given me the option to use the kit part. Making my own allowed me to follow TFFM styling a little bit which is a bit more curvaceous and pleasing to the eye, it also allowed me to position the slots for the chains to reflect the positions of the gun ports - you can see small but noticeable differences in the comparison below. (Interestingly the kit fore-channel has 6 slots at the rear, where-as the AOTS plans show only 5). Holes to allow the pinning of the channels have been drilled so these just need final attachment.
Waist: As previously mentioned, I've been leaving the final position of the upper hull to be tweaked later. To be comfortable that the sheer rail was correctly positioned I needed to trim the waist height back to anticipate the position of the top deck, and allowing for a layer of planking. This was also necessary to finalise the height of the fenders and chesstrees.
Quarterpieces: These have been beveled to allow the placement of the figures, and also the quarterpieces were built up slightly to allow me more easily place and but up the top finishing molding for the taffarel when I get there. The figures with bent arms sit quite pleasingly now and there is a definite sense of depth rather than just plain bas-relief. Obviously lots of fine finishing and touch up still needed....curse you macro gods!
-
 Beef Wellington got a reaction from Landlubber Mike in HMS Jason by Beef Wellington - Caldercraft - 1:64 - Artois-class frigate modified from HMS Diana 1794
Been a while since posting and felt like I needed to get up to date, and thanks all for the continued interest - and yes Carl, Mobbsie, simply making slightly wider transoms is the solution. Rather tedious which is why my fingers have been distracted as you'll see.
I feel like I should start with a "forgive me father its been 700 days since I've looked at the instructions or used a kit part" Haven't been completely idle but have got a decent start on couple of visually small but meaningful tasks that should allow of this to come together relatively quickly when the time comes. Main goal is to get items in place to allow me to give the sides a coat of wipe on poly for protection after gluing items in place but prior to touchup which will definitely be needed. I've decided that my next model will only have one side
Chesstree and fenders: These were made up to allow the sheer rail to be positioned and were cut from 3mm and 2mm sheet respectively. The Chesstree has a notable thinning in width as it goes down the hull which I tried to reflect. Felt these looked rather boring when shaped so decided to try and put a profile in these as is so apparent when looking at those on Trincomalee and Victory. These seem to ne features often missing on contemporary models...think I now appreciate why A scraper profile was made for each, the fenders proved much easier to do despite being smaller because of the constant width, the chesstrees much more challenging due to the steady reduction in width. Things are a little messy at the bottom but to the naked eye the defects are much less noticeable and these will not be redone. Chesstree sheaves will be simulated.
Photos below also show a slight miscalculation from way back nearly coming back to bite me. The sheaves for the sheets and tacks were placed a little too high and these nearly interfered with positioning the sheer rail.
Fore and Main Channels: The channels need to be placed at the same height as the sheer rail, so even though its not necessary to attach these until much later, its necessary know where these will be positioned before the sheer rail can be applied. I've decided to go with natural castello channel rather than painted black finish - the latter would at least have given me the option to use the kit part. Making my own allowed me to follow TFFM styling a little bit which is a bit more curvaceous and pleasing to the eye, it also allowed me to position the slots for the chains to reflect the positions of the gun ports - you can see small but noticeable differences in the comparison below. (Interestingly the kit fore-channel has 6 slots at the rear, where-as the AOTS plans show only 5). Holes to allow the pinning of the channels have been drilled so these just need final attachment.
Waist: As previously mentioned, I've been leaving the final position of the upper hull to be tweaked later. To be comfortable that the sheer rail was correctly positioned I needed to trim the waist height back to anticipate the position of the top deck, and allowing for a layer of planking. This was also necessary to finalise the height of the fenders and chesstrees.
Quarterpieces: These have been beveled to allow the placement of the figures, and also the quarterpieces were built up slightly to allow me more easily place and but up the top finishing molding for the taffarel when I get there. The figures with bent arms sit quite pleasingly now and there is a definite sense of depth rather than just plain bas-relief. Obviously lots of fine finishing and touch up still needed....curse you macro gods!
-
 Beef Wellington got a reaction from iosto in HMS Jason by Beef Wellington - Caldercraft - 1:64 - Artois-class frigate modified from HMS Diana 1794
Been a while since posting and felt like I needed to get up to date, and thanks all for the continued interest - and yes Carl, Mobbsie, simply making slightly wider transoms is the solution. Rather tedious which is why my fingers have been distracted as you'll see.
I feel like I should start with a "forgive me father its been 700 days since I've looked at the instructions or used a kit part" Haven't been completely idle but have got a decent start on couple of visually small but meaningful tasks that should allow of this to come together relatively quickly when the time comes. Main goal is to get items in place to allow me to give the sides a coat of wipe on poly for protection after gluing items in place but prior to touchup which will definitely be needed. I've decided that my next model will only have one side
Chesstree and fenders: These were made up to allow the sheer rail to be positioned and were cut from 3mm and 2mm sheet respectively. The Chesstree has a notable thinning in width as it goes down the hull which I tried to reflect. Felt these looked rather boring when shaped so decided to try and put a profile in these as is so apparent when looking at those on Trincomalee and Victory. These seem to ne features often missing on contemporary models...think I now appreciate why A scraper profile was made for each, the fenders proved much easier to do despite being smaller because of the constant width, the chesstrees much more challenging due to the steady reduction in width. Things are a little messy at the bottom but to the naked eye the defects are much less noticeable and these will not be redone. Chesstree sheaves will be simulated.
Photos below also show a slight miscalculation from way back nearly coming back to bite me. The sheaves for the sheets and tacks were placed a little too high and these nearly interfered with positioning the sheer rail.
Fore and Main Channels: The channels need to be placed at the same height as the sheer rail, so even though its not necessary to attach these until much later, its necessary know where these will be positioned before the sheer rail can be applied. I've decided to go with natural castello channel rather than painted black finish - the latter would at least have given me the option to use the kit part. Making my own allowed me to follow TFFM styling a little bit which is a bit more curvaceous and pleasing to the eye, it also allowed me to position the slots for the chains to reflect the positions of the gun ports - you can see small but noticeable differences in the comparison below. (Interestingly the kit fore-channel has 6 slots at the rear, where-as the AOTS plans show only 5). Holes to allow the pinning of the channels have been drilled so these just need final attachment.
Waist: As previously mentioned, I've been leaving the final position of the upper hull to be tweaked later. To be comfortable that the sheer rail was correctly positioned I needed to trim the waist height back to anticipate the position of the top deck, and allowing for a layer of planking. This was also necessary to finalise the height of the fenders and chesstrees.
Quarterpieces: These have been beveled to allow the placement of the figures, and also the quarterpieces were built up slightly to allow me more easily place and but up the top finishing molding for the taffarel when I get there. The figures with bent arms sit quite pleasingly now and there is a definite sense of depth rather than just plain bas-relief. Obviously lots of fine finishing and touch up still needed....curse you macro gods!
-
 Beef Wellington got a reaction from drtrap in HMS Jason by Beef Wellington - Caldercraft - 1:64 - Artois-class frigate modified from HMS Diana 1794
Been a while since posting and felt like I needed to get up to date, and thanks all for the continued interest - and yes Carl, Mobbsie, simply making slightly wider transoms is the solution. Rather tedious which is why my fingers have been distracted as you'll see.
I feel like I should start with a "forgive me father its been 700 days since I've looked at the instructions or used a kit part" Haven't been completely idle but have got a decent start on couple of visually small but meaningful tasks that should allow of this to come together relatively quickly when the time comes. Main goal is to get items in place to allow me to give the sides a coat of wipe on poly for protection after gluing items in place but prior to touchup which will definitely be needed. I've decided that my next model will only have one side
Chesstree and fenders: These were made up to allow the sheer rail to be positioned and were cut from 3mm and 2mm sheet respectively. The Chesstree has a notable thinning in width as it goes down the hull which I tried to reflect. Felt these looked rather boring when shaped so decided to try and put a profile in these as is so apparent when looking at those on Trincomalee and Victory. These seem to ne features often missing on contemporary models...think I now appreciate why A scraper profile was made for each, the fenders proved much easier to do despite being smaller because of the constant width, the chesstrees much more challenging due to the steady reduction in width. Things are a little messy at the bottom but to the naked eye the defects are much less noticeable and these will not be redone. Chesstree sheaves will be simulated.
Photos below also show a slight miscalculation from way back nearly coming back to bite me. The sheaves for the sheets and tacks were placed a little too high and these nearly interfered with positioning the sheer rail.
Fore and Main Channels: The channels need to be placed at the same height as the sheer rail, so even though its not necessary to attach these until much later, its necessary know where these will be positioned before the sheer rail can be applied. I've decided to go with natural castello channel rather than painted black finish - the latter would at least have given me the option to use the kit part. Making my own allowed me to follow TFFM styling a little bit which is a bit more curvaceous and pleasing to the eye, it also allowed me to position the slots for the chains to reflect the positions of the gun ports - you can see small but noticeable differences in the comparison below. (Interestingly the kit fore-channel has 6 slots at the rear, where-as the AOTS plans show only 5). Holes to allow the pinning of the channels have been drilled so these just need final attachment.
Waist: As previously mentioned, I've been leaving the final position of the upper hull to be tweaked later. To be comfortable that the sheer rail was correctly positioned I needed to trim the waist height back to anticipate the position of the top deck, and allowing for a layer of planking. This was also necessary to finalise the height of the fenders and chesstrees.
Quarterpieces: These have been beveled to allow the placement of the figures, and also the quarterpieces were built up slightly to allow me more easily place and but up the top finishing molding for the taffarel when I get there. The figures with bent arms sit quite pleasingly now and there is a definite sense of depth rather than just plain bas-relief. Obviously lots of fine finishing and touch up still needed....curse you macro gods!
-
 Beef Wellington got a reaction from egkb in HMS Jason by Beef Wellington - Caldercraft - 1:64 - Artois-class frigate modified from HMS Diana 1794
Been a while since posting and felt like I needed to get up to date, and thanks all for the continued interest - and yes Carl, Mobbsie, simply making slightly wider transoms is the solution. Rather tedious which is why my fingers have been distracted as you'll see.
I feel like I should start with a "forgive me father its been 700 days since I've looked at the instructions or used a kit part" Haven't been completely idle but have got a decent start on couple of visually small but meaningful tasks that should allow of this to come together relatively quickly when the time comes. Main goal is to get items in place to allow me to give the sides a coat of wipe on poly for protection after gluing items in place but prior to touchup which will definitely be needed. I've decided that my next model will only have one side
Chesstree and fenders: These were made up to allow the sheer rail to be positioned and were cut from 3mm and 2mm sheet respectively. The Chesstree has a notable thinning in width as it goes down the hull which I tried to reflect. Felt these looked rather boring when shaped so decided to try and put a profile in these as is so apparent when looking at those on Trincomalee and Victory. These seem to ne features often missing on contemporary models...think I now appreciate why A scraper profile was made for each, the fenders proved much easier to do despite being smaller because of the constant width, the chesstrees much more challenging due to the steady reduction in width. Things are a little messy at the bottom but to the naked eye the defects are much less noticeable and these will not be redone. Chesstree sheaves will be simulated.
Photos below also show a slight miscalculation from way back nearly coming back to bite me. The sheaves for the sheets and tacks were placed a little too high and these nearly interfered with positioning the sheer rail.
Fore and Main Channels: The channels need to be placed at the same height as the sheer rail, so even though its not necessary to attach these until much later, its necessary know where these will be positioned before the sheer rail can be applied. I've decided to go with natural castello channel rather than painted black finish - the latter would at least have given me the option to use the kit part. Making my own allowed me to follow TFFM styling a little bit which is a bit more curvaceous and pleasing to the eye, it also allowed me to position the slots for the chains to reflect the positions of the gun ports - you can see small but noticeable differences in the comparison below. (Interestingly the kit fore-channel has 6 slots at the rear, where-as the AOTS plans show only 5). Holes to allow the pinning of the channels have been drilled so these just need final attachment.
Waist: As previously mentioned, I've been leaving the final position of the upper hull to be tweaked later. To be comfortable that the sheer rail was correctly positioned I needed to trim the waist height back to anticipate the position of the top deck, and allowing for a layer of planking. This was also necessary to finalise the height of the fenders and chesstrees.
Quarterpieces: These have been beveled to allow the placement of the figures, and also the quarterpieces were built up slightly to allow me more easily place and but up the top finishing molding for the taffarel when I get there. The figures with bent arms sit quite pleasingly now and there is a definite sense of depth rather than just plain bas-relief. Obviously lots of fine finishing and touch up still needed....curse you macro gods!
-
 Beef Wellington got a reaction from Barbossa in HMS Jason by Beef Wellington - Caldercraft - 1:64 - Artois-class frigate modified from HMS Diana 1794
Been a while since posting and felt like I needed to get up to date, and thanks all for the continued interest - and yes Carl, Mobbsie, simply making slightly wider transoms is the solution. Rather tedious which is why my fingers have been distracted as you'll see.
I feel like I should start with a "forgive me father its been 700 days since I've looked at the instructions or used a kit part" Haven't been completely idle but have got a decent start on couple of visually small but meaningful tasks that should allow of this to come together relatively quickly when the time comes. Main goal is to get items in place to allow me to give the sides a coat of wipe on poly for protection after gluing items in place but prior to touchup which will definitely be needed. I've decided that my next model will only have one side
Chesstree and fenders: These were made up to allow the sheer rail to be positioned and were cut from 3mm and 2mm sheet respectively. The Chesstree has a notable thinning in width as it goes down the hull which I tried to reflect. Felt these looked rather boring when shaped so decided to try and put a profile in these as is so apparent when looking at those on Trincomalee and Victory. These seem to ne features often missing on contemporary models...think I now appreciate why A scraper profile was made for each, the fenders proved much easier to do despite being smaller because of the constant width, the chesstrees much more challenging due to the steady reduction in width. Things are a little messy at the bottom but to the naked eye the defects are much less noticeable and these will not be redone. Chesstree sheaves will be simulated.
Photos below also show a slight miscalculation from way back nearly coming back to bite me. The sheaves for the sheets and tacks were placed a little too high and these nearly interfered with positioning the sheer rail.
Fore and Main Channels: The channels need to be placed at the same height as the sheer rail, so even though its not necessary to attach these until much later, its necessary know where these will be positioned before the sheer rail can be applied. I've decided to go with natural castello channel rather than painted black finish - the latter would at least have given me the option to use the kit part. Making my own allowed me to follow TFFM styling a little bit which is a bit more curvaceous and pleasing to the eye, it also allowed me to position the slots for the chains to reflect the positions of the gun ports - you can see small but noticeable differences in the comparison below. (Interestingly the kit fore-channel has 6 slots at the rear, where-as the AOTS plans show only 5). Holes to allow the pinning of the channels have been drilled so these just need final attachment.
Waist: As previously mentioned, I've been leaving the final position of the upper hull to be tweaked later. To be comfortable that the sheer rail was correctly positioned I needed to trim the waist height back to anticipate the position of the top deck, and allowing for a layer of planking. This was also necessary to finalise the height of the fenders and chesstrees.
Quarterpieces: These have been beveled to allow the placement of the figures, and also the quarterpieces were built up slightly to allow me more easily place and but up the top finishing molding for the taffarel when I get there. The figures with bent arms sit quite pleasingly now and there is a definite sense of depth rather than just plain bas-relief. Obviously lots of fine finishing and touch up still needed....curse you macro gods!
-
 Beef Wellington got a reaction from toms10 in HMS Jason by Beef Wellington - Caldercraft - 1:64 - Artois-class frigate modified from HMS Diana 1794
Been a while since posting and felt like I needed to get up to date, and thanks all for the continued interest - and yes Carl, Mobbsie, simply making slightly wider transoms is the solution. Rather tedious which is why my fingers have been distracted as you'll see.
I feel like I should start with a "forgive me father its been 700 days since I've looked at the instructions or used a kit part" Haven't been completely idle but have got a decent start on couple of visually small but meaningful tasks that should allow of this to come together relatively quickly when the time comes. Main goal is to get items in place to allow me to give the sides a coat of wipe on poly for protection after gluing items in place but prior to touchup which will definitely be needed. I've decided that my next model will only have one side
Chesstree and fenders: These were made up to allow the sheer rail to be positioned and were cut from 3mm and 2mm sheet respectively. The Chesstree has a notable thinning in width as it goes down the hull which I tried to reflect. Felt these looked rather boring when shaped so decided to try and put a profile in these as is so apparent when looking at those on Trincomalee and Victory. These seem to ne features often missing on contemporary models...think I now appreciate why A scraper profile was made for each, the fenders proved much easier to do despite being smaller because of the constant width, the chesstrees much more challenging due to the steady reduction in width. Things are a little messy at the bottom but to the naked eye the defects are much less noticeable and these will not be redone. Chesstree sheaves will be simulated.
Photos below also show a slight miscalculation from way back nearly coming back to bite me. The sheaves for the sheets and tacks were placed a little too high and these nearly interfered with positioning the sheer rail.
Fore and Main Channels: The channels need to be placed at the same height as the sheer rail, so even though its not necessary to attach these until much later, its necessary know where these will be positioned before the sheer rail can be applied. I've decided to go with natural castello channel rather than painted black finish - the latter would at least have given me the option to use the kit part. Making my own allowed me to follow TFFM styling a little bit which is a bit more curvaceous and pleasing to the eye, it also allowed me to position the slots for the chains to reflect the positions of the gun ports - you can see small but noticeable differences in the comparison below. (Interestingly the kit fore-channel has 6 slots at the rear, where-as the AOTS plans show only 5). Holes to allow the pinning of the channels have been drilled so these just need final attachment.
Waist: As previously mentioned, I've been leaving the final position of the upper hull to be tweaked later. To be comfortable that the sheer rail was correctly positioned I needed to trim the waist height back to anticipate the position of the top deck, and allowing for a layer of planking. This was also necessary to finalise the height of the fenders and chesstrees.
Quarterpieces: These have been beveled to allow the placement of the figures, and also the quarterpieces were built up slightly to allow me more easily place and but up the top finishing molding for the taffarel when I get there. The figures with bent arms sit quite pleasingly now and there is a definite sense of depth rather than just plain bas-relief. Obviously lots of fine finishing and touch up still needed....curse you macro gods!
-
 Beef Wellington got a reaction from rusty b in HMS Jason by Beef Wellington - Caldercraft - 1:64 - Artois-class frigate modified from HMS Diana 1794
Been a while since posting and felt like I needed to get up to date, and thanks all for the continued interest - and yes Carl, Mobbsie, simply making slightly wider transoms is the solution. Rather tedious which is why my fingers have been distracted as you'll see.
I feel like I should start with a "forgive me father its been 700 days since I've looked at the instructions or used a kit part" Haven't been completely idle but have got a decent start on couple of visually small but meaningful tasks that should allow of this to come together relatively quickly when the time comes. Main goal is to get items in place to allow me to give the sides a coat of wipe on poly for protection after gluing items in place but prior to touchup which will definitely be needed. I've decided that my next model will only have one side
Chesstree and fenders: These were made up to allow the sheer rail to be positioned and were cut from 3mm and 2mm sheet respectively. The Chesstree has a notable thinning in width as it goes down the hull which I tried to reflect. Felt these looked rather boring when shaped so decided to try and put a profile in these as is so apparent when looking at those on Trincomalee and Victory. These seem to ne features often missing on contemporary models...think I now appreciate why A scraper profile was made for each, the fenders proved much easier to do despite being smaller because of the constant width, the chesstrees much more challenging due to the steady reduction in width. Things are a little messy at the bottom but to the naked eye the defects are much less noticeable and these will not be redone. Chesstree sheaves will be simulated.
Photos below also show a slight miscalculation from way back nearly coming back to bite me. The sheaves for the sheets and tacks were placed a little too high and these nearly interfered with positioning the sheer rail.
Fore and Main Channels: The channels need to be placed at the same height as the sheer rail, so even though its not necessary to attach these until much later, its necessary know where these will be positioned before the sheer rail can be applied. I've decided to go with natural castello channel rather than painted black finish - the latter would at least have given me the option to use the kit part. Making my own allowed me to follow TFFM styling a little bit which is a bit more curvaceous and pleasing to the eye, it also allowed me to position the slots for the chains to reflect the positions of the gun ports - you can see small but noticeable differences in the comparison below. (Interestingly the kit fore-channel has 6 slots at the rear, where-as the AOTS plans show only 5). Holes to allow the pinning of the channels have been drilled so these just need final attachment.
Waist: As previously mentioned, I've been leaving the final position of the upper hull to be tweaked later. To be comfortable that the sheer rail was correctly positioned I needed to trim the waist height back to anticipate the position of the top deck, and allowing for a layer of planking. This was also necessary to finalise the height of the fenders and chesstrees.
Quarterpieces: These have been beveled to allow the placement of the figures, and also the quarterpieces were built up slightly to allow me more easily place and but up the top finishing molding for the taffarel when I get there. The figures with bent arms sit quite pleasingly now and there is a definite sense of depth rather than just plain bas-relief. Obviously lots of fine finishing and touch up still needed....curse you macro gods!
-
 Beef Wellington got a reaction from ChrisLBren in HMS Jason by Beef Wellington - Caldercraft - 1:64 - Artois-class frigate modified from HMS Diana 1794
Been a while since posting and felt like I needed to get up to date, and thanks all for the continued interest - and yes Carl, Mobbsie, simply making slightly wider transoms is the solution. Rather tedious which is why my fingers have been distracted as you'll see.
I feel like I should start with a "forgive me father its been 700 days since I've looked at the instructions or used a kit part" Haven't been completely idle but have got a decent start on couple of visually small but meaningful tasks that should allow of this to come together relatively quickly when the time comes. Main goal is to get items in place to allow me to give the sides a coat of wipe on poly for protection after gluing items in place but prior to touchup which will definitely be needed. I've decided that my next model will only have one side
Chesstree and fenders: These were made up to allow the sheer rail to be positioned and were cut from 3mm and 2mm sheet respectively. The Chesstree has a notable thinning in width as it goes down the hull which I tried to reflect. Felt these looked rather boring when shaped so decided to try and put a profile in these as is so apparent when looking at those on Trincomalee and Victory. These seem to ne features often missing on contemporary models...think I now appreciate why A scraper profile was made for each, the fenders proved much easier to do despite being smaller because of the constant width, the chesstrees much more challenging due to the steady reduction in width. Things are a little messy at the bottom but to the naked eye the defects are much less noticeable and these will not be redone. Chesstree sheaves will be simulated.
Photos below also show a slight miscalculation from way back nearly coming back to bite me. The sheaves for the sheets and tacks were placed a little too high and these nearly interfered with positioning the sheer rail.
Fore and Main Channels: The channels need to be placed at the same height as the sheer rail, so even though its not necessary to attach these until much later, its necessary know where these will be positioned before the sheer rail can be applied. I've decided to go with natural castello channel rather than painted black finish - the latter would at least have given me the option to use the kit part. Making my own allowed me to follow TFFM styling a little bit which is a bit more curvaceous and pleasing to the eye, it also allowed me to position the slots for the chains to reflect the positions of the gun ports - you can see small but noticeable differences in the comparison below. (Interestingly the kit fore-channel has 6 slots at the rear, where-as the AOTS plans show only 5). Holes to allow the pinning of the channels have been drilled so these just need final attachment.
Waist: As previously mentioned, I've been leaving the final position of the upper hull to be tweaked later. To be comfortable that the sheer rail was correctly positioned I needed to trim the waist height back to anticipate the position of the top deck, and allowing for a layer of planking. This was also necessary to finalise the height of the fenders and chesstrees.
Quarterpieces: These have been beveled to allow the placement of the figures, and also the quarterpieces were built up slightly to allow me more easily place and but up the top finishing molding for the taffarel when I get there. The figures with bent arms sit quite pleasingly now and there is a definite sense of depth rather than just plain bas-relief. Obviously lots of fine finishing and touch up still needed....curse you macro gods!
-
 Beef Wellington got a reaction from Old Collingwood in HMS Jason by Beef Wellington - Caldercraft - 1:64 - Artois-class frigate modified from HMS Diana 1794
Been a while since posting and felt like I needed to get up to date, and thanks all for the continued interest - and yes Carl, Mobbsie, simply making slightly wider transoms is the solution. Rather tedious which is why my fingers have been distracted as you'll see.
I feel like I should start with a "forgive me father its been 700 days since I've looked at the instructions or used a kit part" Haven't been completely idle but have got a decent start on couple of visually small but meaningful tasks that should allow of this to come together relatively quickly when the time comes. Main goal is to get items in place to allow me to give the sides a coat of wipe on poly for protection after gluing items in place but prior to touchup which will definitely be needed. I've decided that my next model will only have one side
Chesstree and fenders: These were made up to allow the sheer rail to be positioned and were cut from 3mm and 2mm sheet respectively. The Chesstree has a notable thinning in width as it goes down the hull which I tried to reflect. Felt these looked rather boring when shaped so decided to try and put a profile in these as is so apparent when looking at those on Trincomalee and Victory. These seem to ne features often missing on contemporary models...think I now appreciate why A scraper profile was made for each, the fenders proved much easier to do despite being smaller because of the constant width, the chesstrees much more challenging due to the steady reduction in width. Things are a little messy at the bottom but to the naked eye the defects are much less noticeable and these will not be redone. Chesstree sheaves will be simulated.
Photos below also show a slight miscalculation from way back nearly coming back to bite me. The sheaves for the sheets and tacks were placed a little too high and these nearly interfered with positioning the sheer rail.
Fore and Main Channels: The channels need to be placed at the same height as the sheer rail, so even though its not necessary to attach these until much later, its necessary know where these will be positioned before the sheer rail can be applied. I've decided to go with natural castello channel rather than painted black finish - the latter would at least have given me the option to use the kit part. Making my own allowed me to follow TFFM styling a little bit which is a bit more curvaceous and pleasing to the eye, it also allowed me to position the slots for the chains to reflect the positions of the gun ports - you can see small but noticeable differences in the comparison below. (Interestingly the kit fore-channel has 6 slots at the rear, where-as the AOTS plans show only 5). Holes to allow the pinning of the channels have been drilled so these just need final attachment.
Waist: As previously mentioned, I've been leaving the final position of the upper hull to be tweaked later. To be comfortable that the sheer rail was correctly positioned I needed to trim the waist height back to anticipate the position of the top deck, and allowing for a layer of planking. This was also necessary to finalise the height of the fenders and chesstrees.
Quarterpieces: These have been beveled to allow the placement of the figures, and also the quarterpieces were built up slightly to allow me more easily place and but up the top finishing molding for the taffarel when I get there. The figures with bent arms sit quite pleasingly now and there is a definite sense of depth rather than just plain bas-relief. Obviously lots of fine finishing and touch up still needed....curse you macro gods!
-
 Beef Wellington got a reaction from BANYAN in HMS Jason by Beef Wellington - Caldercraft - 1:64 - Artois-class frigate modified from HMS Diana 1794
Been a while since posting and felt like I needed to get up to date, and thanks all for the continued interest - and yes Carl, Mobbsie, simply making slightly wider transoms is the solution. Rather tedious which is why my fingers have been distracted as you'll see.
I feel like I should start with a "forgive me father its been 700 days since I've looked at the instructions or used a kit part" Haven't been completely idle but have got a decent start on couple of visually small but meaningful tasks that should allow of this to come together relatively quickly when the time comes. Main goal is to get items in place to allow me to give the sides a coat of wipe on poly for protection after gluing items in place but prior to touchup which will definitely be needed. I've decided that my next model will only have one side
Chesstree and fenders: These were made up to allow the sheer rail to be positioned and were cut from 3mm and 2mm sheet respectively. The Chesstree has a notable thinning in width as it goes down the hull which I tried to reflect. Felt these looked rather boring when shaped so decided to try and put a profile in these as is so apparent when looking at those on Trincomalee and Victory. These seem to ne features often missing on contemporary models...think I now appreciate why A scraper profile was made for each, the fenders proved much easier to do despite being smaller because of the constant width, the chesstrees much more challenging due to the steady reduction in width. Things are a little messy at the bottom but to the naked eye the defects are much less noticeable and these will not be redone. Chesstree sheaves will be simulated.
Photos below also show a slight miscalculation from way back nearly coming back to bite me. The sheaves for the sheets and tacks were placed a little too high and these nearly interfered with positioning the sheer rail.
Fore and Main Channels: The channels need to be placed at the same height as the sheer rail, so even though its not necessary to attach these until much later, its necessary know where these will be positioned before the sheer rail can be applied. I've decided to go with natural castello channel rather than painted black finish - the latter would at least have given me the option to use the kit part. Making my own allowed me to follow TFFM styling a little bit which is a bit more curvaceous and pleasing to the eye, it also allowed me to position the slots for the chains to reflect the positions of the gun ports - you can see small but noticeable differences in the comparison below. (Interestingly the kit fore-channel has 6 slots at the rear, where-as the AOTS plans show only 5). Holes to allow the pinning of the channels have been drilled so these just need final attachment.
Waist: As previously mentioned, I've been leaving the final position of the upper hull to be tweaked later. To be comfortable that the sheer rail was correctly positioned I needed to trim the waist height back to anticipate the position of the top deck, and allowing for a layer of planking. This was also necessary to finalise the height of the fenders and chesstrees.
Quarterpieces: These have been beveled to allow the placement of the figures, and also the quarterpieces were built up slightly to allow me more easily place and but up the top finishing molding for the taffarel when I get there. The figures with bent arms sit quite pleasingly now and there is a definite sense of depth rather than just plain bas-relief. Obviously lots of fine finishing and touch up still needed....curse you macro gods!
-
 Beef Wellington got a reaction from BenD in HMS Jason by Beef Wellington - Caldercraft - 1:64 - Artois-class frigate modified from HMS Diana 1794
Been a while since posting and felt like I needed to get up to date, and thanks all for the continued interest - and yes Carl, Mobbsie, simply making slightly wider transoms is the solution. Rather tedious which is why my fingers have been distracted as you'll see.
I feel like I should start with a "forgive me father its been 700 days since I've looked at the instructions or used a kit part" Haven't been completely idle but have got a decent start on couple of visually small but meaningful tasks that should allow of this to come together relatively quickly when the time comes. Main goal is to get items in place to allow me to give the sides a coat of wipe on poly for protection after gluing items in place but prior to touchup which will definitely be needed. I've decided that my next model will only have one side
Chesstree and fenders: These were made up to allow the sheer rail to be positioned and were cut from 3mm and 2mm sheet respectively. The Chesstree has a notable thinning in width as it goes down the hull which I tried to reflect. Felt these looked rather boring when shaped so decided to try and put a profile in these as is so apparent when looking at those on Trincomalee and Victory. These seem to ne features often missing on contemporary models...think I now appreciate why A scraper profile was made for each, the fenders proved much easier to do despite being smaller because of the constant width, the chesstrees much more challenging due to the steady reduction in width. Things are a little messy at the bottom but to the naked eye the defects are much less noticeable and these will not be redone. Chesstree sheaves will be simulated.
Photos below also show a slight miscalculation from way back nearly coming back to bite me. The sheaves for the sheets and tacks were placed a little too high and these nearly interfered with positioning the sheer rail.
Fore and Main Channels: The channels need to be placed at the same height as the sheer rail, so even though its not necessary to attach these until much later, its necessary know where these will be positioned before the sheer rail can be applied. I've decided to go with natural castello channel rather than painted black finish - the latter would at least have given me the option to use the kit part. Making my own allowed me to follow TFFM styling a little bit which is a bit more curvaceous and pleasing to the eye, it also allowed me to position the slots for the chains to reflect the positions of the gun ports - you can see small but noticeable differences in the comparison below. (Interestingly the kit fore-channel has 6 slots at the rear, where-as the AOTS plans show only 5). Holes to allow the pinning of the channels have been drilled so these just need final attachment.
Waist: As previously mentioned, I've been leaving the final position of the upper hull to be tweaked later. To be comfortable that the sheer rail was correctly positioned I needed to trim the waist height back to anticipate the position of the top deck, and allowing for a layer of planking. This was also necessary to finalise the height of the fenders and chesstrees.
Quarterpieces: These have been beveled to allow the placement of the figures, and also the quarterpieces were built up slightly to allow me more easily place and but up the top finishing molding for the taffarel when I get there. The figures with bent arms sit quite pleasingly now and there is a definite sense of depth rather than just plain bas-relief. Obviously lots of fine finishing and touch up still needed....curse you macro gods!
-
 Beef Wellington reacted to mobbsie in HMS Jason by Beef Wellington - Caldercraft - 1:64 - Artois-class frigate modified from HMS Diana 1794
Hi Jason
I make no suggestions mate but I am really interested to see your remedy, thin the sides or make new Transoms.
Looking at the pics I reckon it's gonna be bigger transoms.
Nice jig by the way.
Be Good
mobbsie
-
Beef Wellington reacted to cog in HMS Jason by Beef Wellington - Caldercraft - 1:64 - Artois-class frigate modified from HMS Diana 1794
Bit of a setback ... can't you make the sides of your carriages thinner, (sorry) the front block wider (a new one) then you only have to make that part. If you keep the carriages. Or make new fronts and sand down the thicker sides ...
-
Beef Wellington reacted to Mirabell61 in Eagle of Algier 1753 by Mirabell61 - FINISHED - 1:48 - Chebec - Nils Langemann
Update : (status report)
made some additional supporting braces in the areas where the gunports will be cut into the bulwarks....
On the stb. side the template fror the gun plattform can be seen
Nils
the guns standing on rails, the barrels pointing upwards, where they will be strapped to the upper bulwarks
-
Beef Wellington reacted to Vegaskip in Ship paintings
HMS Suffolk Sights Bismarck.
a quote from 'An Eyewitness Account of the Sinking of HMS Hood' by Lt D. N. Paton
'Suddenly, at 7.22 in the evening of 23rd., one of the look-outs sighted Bismarck and Prinz Eugen emerging from a snow squall between Suffolk and the ice. There could be no mistaking the vastness of the battleship at the point blank range of seven miles, though the somewhat inappropriate remark of a midshipman – “Hood and Prince of Wales, I suppose” – subsequently became legendary. The enemy ships were moving fast in a S.W. direction parallel to the ice.'
When I read something like that, it makes me want to grab the brushes and paint it. Like here. Much more satisfying than the 'Eye candy' of the one above.
Jim
-
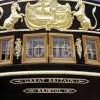
 Beef Wellington got a reaction from popeye the sailor in Sovereign of the Seas by Hennie - Sergal - 1:78
Looking great Hennie, still can't believe you did all this work without damaging the upper works, well done indeed, you must have a very delicate touch :-)
-
Beef Wellington reacted to Vegaskip in Ship paintings
The Channel Fleet off Plymouth 'at a time of great change'
Jim
-
Beef Wellington reacted to Vegaskip in Ship paintings
Thes two paintings were presented to the Governer of Arkhangelsk Provence, and the Mayor of the city, by the British Ambassador to Moscow. The presentation was to mark the beguining of the celebrations marking the 75th anniversary of the arrival of the first Convoy to Russia in WW2. (Operation Dervish)
Both paintings are of the arrival of SS Llanstephen Castle at Arkhangelsk from diferent angles.
Photo of the presentation (Grey beard is the British Ambassador, the other is Governor Orlov)
Jim
-
Beef Wellington reacted to marktiedens in Royal William by marktiedens - FINISHED - Euromodel - scale 1:72
Well,silly me for not reading Pete`s notes carefully. Re-did the spritsail yard braces. I did simplify them slightly as I could not get the aft block under the top installed - just not enough room to get my hands in there.
Mark
-
Beef Wellington reacted to Vegaskip in Ship paintings
Thank you Nils, however it is all based on being able to draw. When when you've mastered that, it's all down hill and practice.
For these I used a dental technician's drill with Dimond point and carborundon discs. I tried to do it for a living, but I'm no salesman.! Here' some mor but not maritime.
Jim
-
Beef Wellington reacted to Vegaskip in Ship paintings
Today's painting.
Battleship HMS Warspite in WW2.
jim
-
 Beef Wellington got a reaction from Hennie in Sovereign of the Seas by Hennie - Sergal - 1:78
Looking great Hennie, still can't believe you did all this work without damaging the upper works, well done indeed, you must have a very delicate touch :-)
-
 Beef Wellington got a reaction from robdurant in Sovereign of the Seas by Hennie - Sergal - 1:78
Looking great Hennie, still can't believe you did all this work without damaging the upper works, well done indeed, you must have a very delicate touch :-)