KenW
-
Posts
1,231 -
Joined
-
Last visited
Content Type
Profiles
Forums
Gallery
Events
Everything posted by KenW
-
 Chuck - I really like your hanging coils, but have never been able to get them right. So, do we get a tutorial on making proper hanging coils?
- 1,051 replies
-
- 6
-

-
- cheerful
- Syren Ship Model Company
- (and 1 more)
-
Thanks for the comments Dave, John and Greg; and to all the 'likes'. And John: I hope to bring the model to the April or May meeting when it is ready for launch. Cheers.
- 481 replies
-
- 1
-
-
- rattlesnake
- model shipways
- (and 1 more)
-
Good to hear from you Bob. Thanks.
-
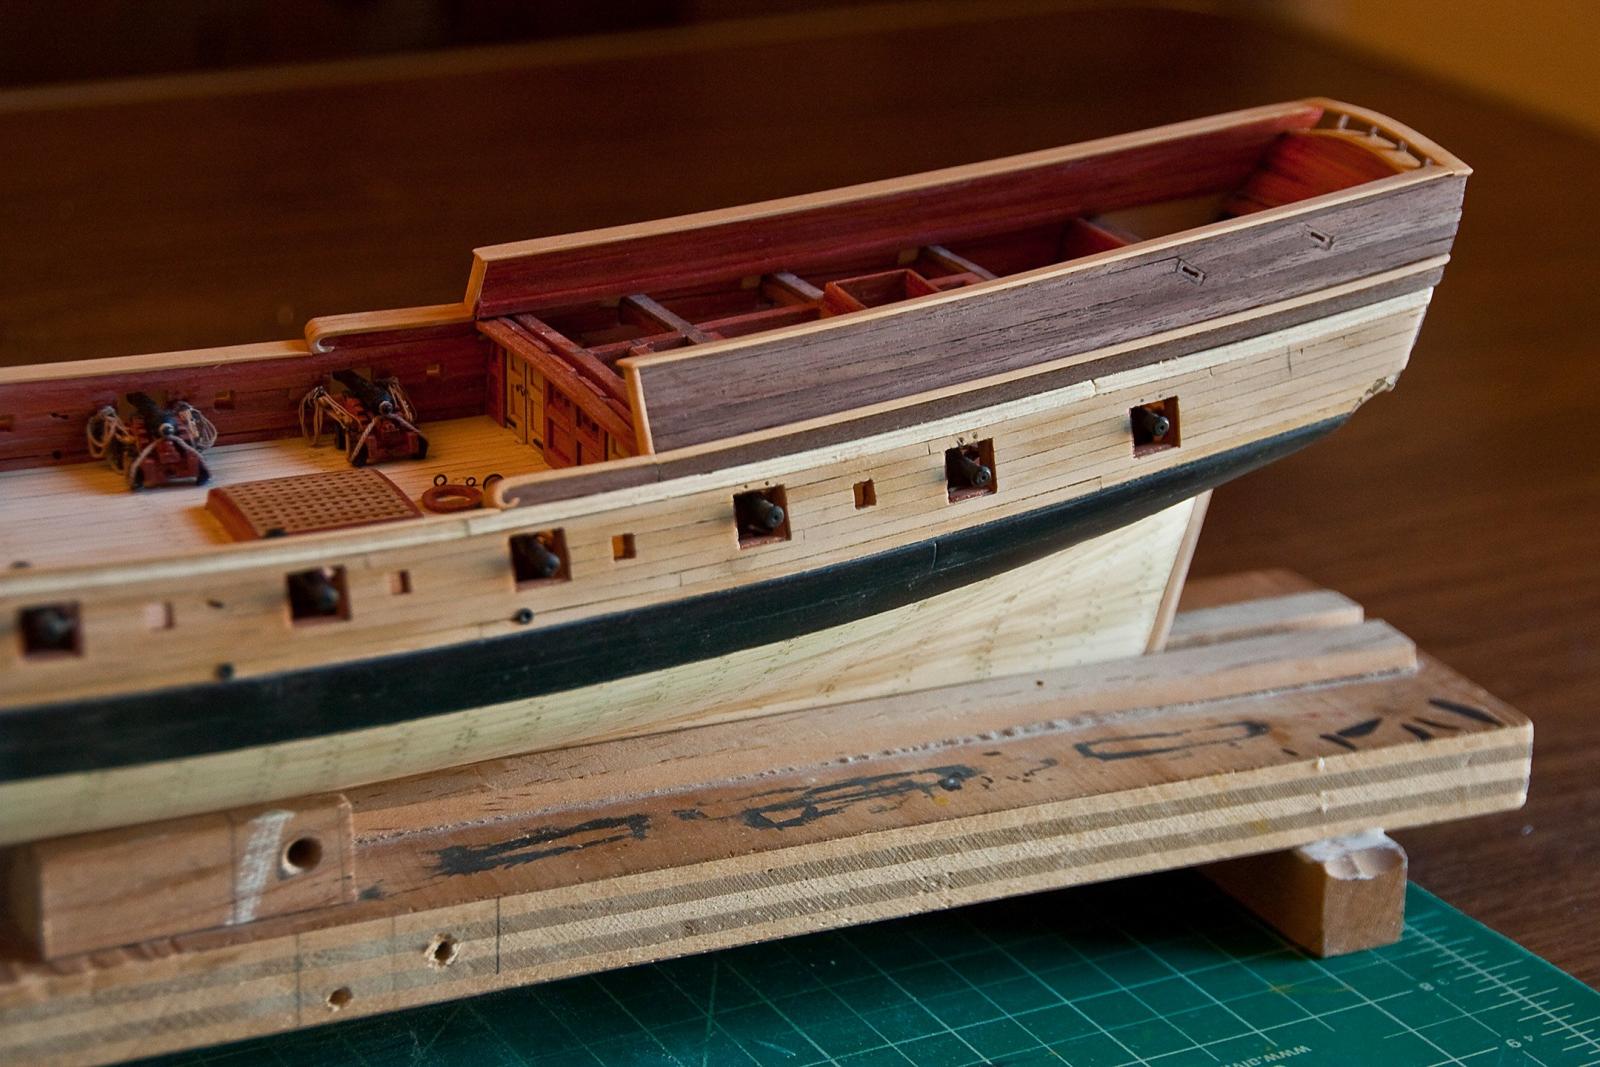
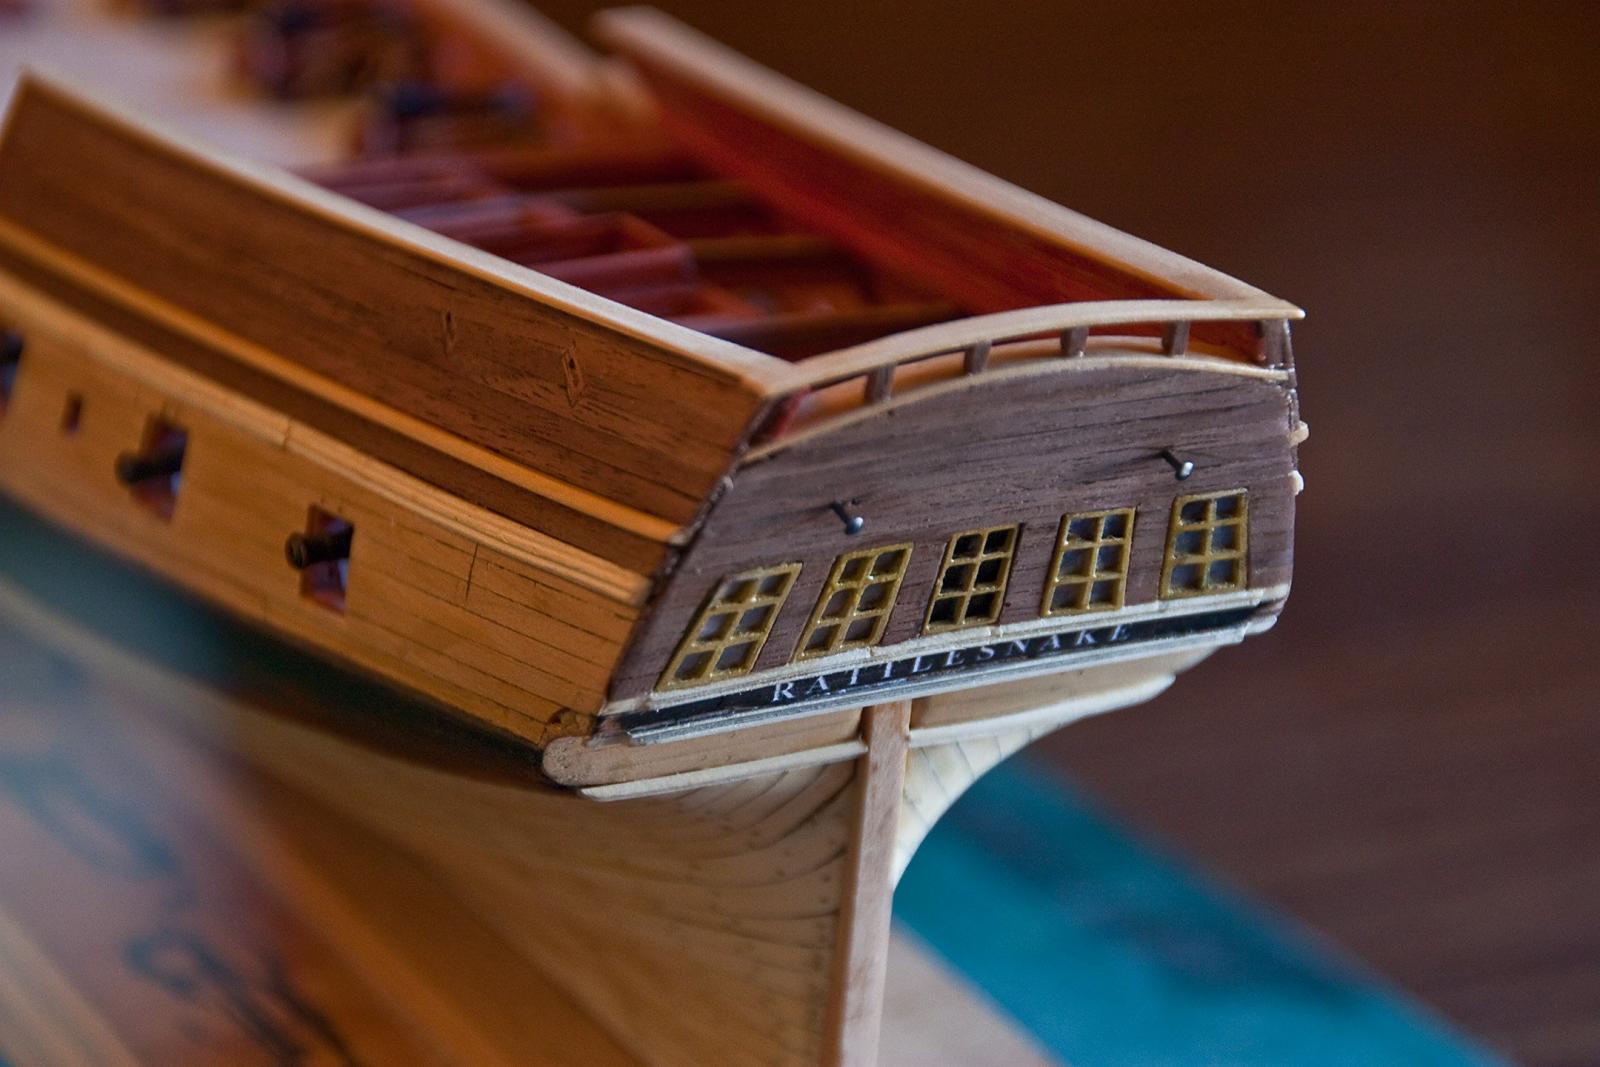
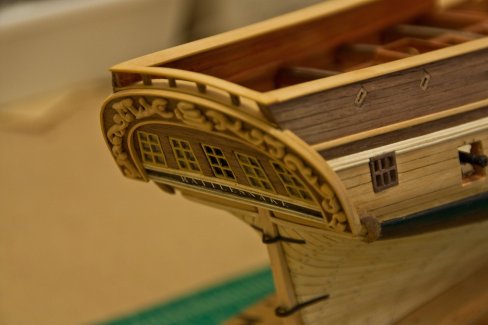
My stern is complete with the decorative carvings, forward transom and fashion pieces. I’m happy with the results. I also added the aft windows, as per the Hahn plans. The MS kit supplied die cast metal windows, but they were the same as the ones supplied with the Fair American kit. I can't have the same windows on two models. And, whenever there is a discrepancy between the kit and the Hahn plans, I go with the Hahn plans. So now it’s on to the planking of the forecastle and quarter decks. The first photo was actually taken with the boat upside down. Two more with the boat right side up.

- 481 replies
-
- 16
-
-
- rattlesnake
- model shipways
- (and 1 more)
-
Thanks Bob, Dave and EJ_L for your encouraging words. And thanks Jon for the push to attempt the carvings. I'm working on carving the forward part of the transom and the fashion pieces. Then everything will be glued together and, hopefully, look great. Cheers.
- 481 replies
-
- 2
-
-
- rattlesnake
- model shipways
- (and 1 more)
-
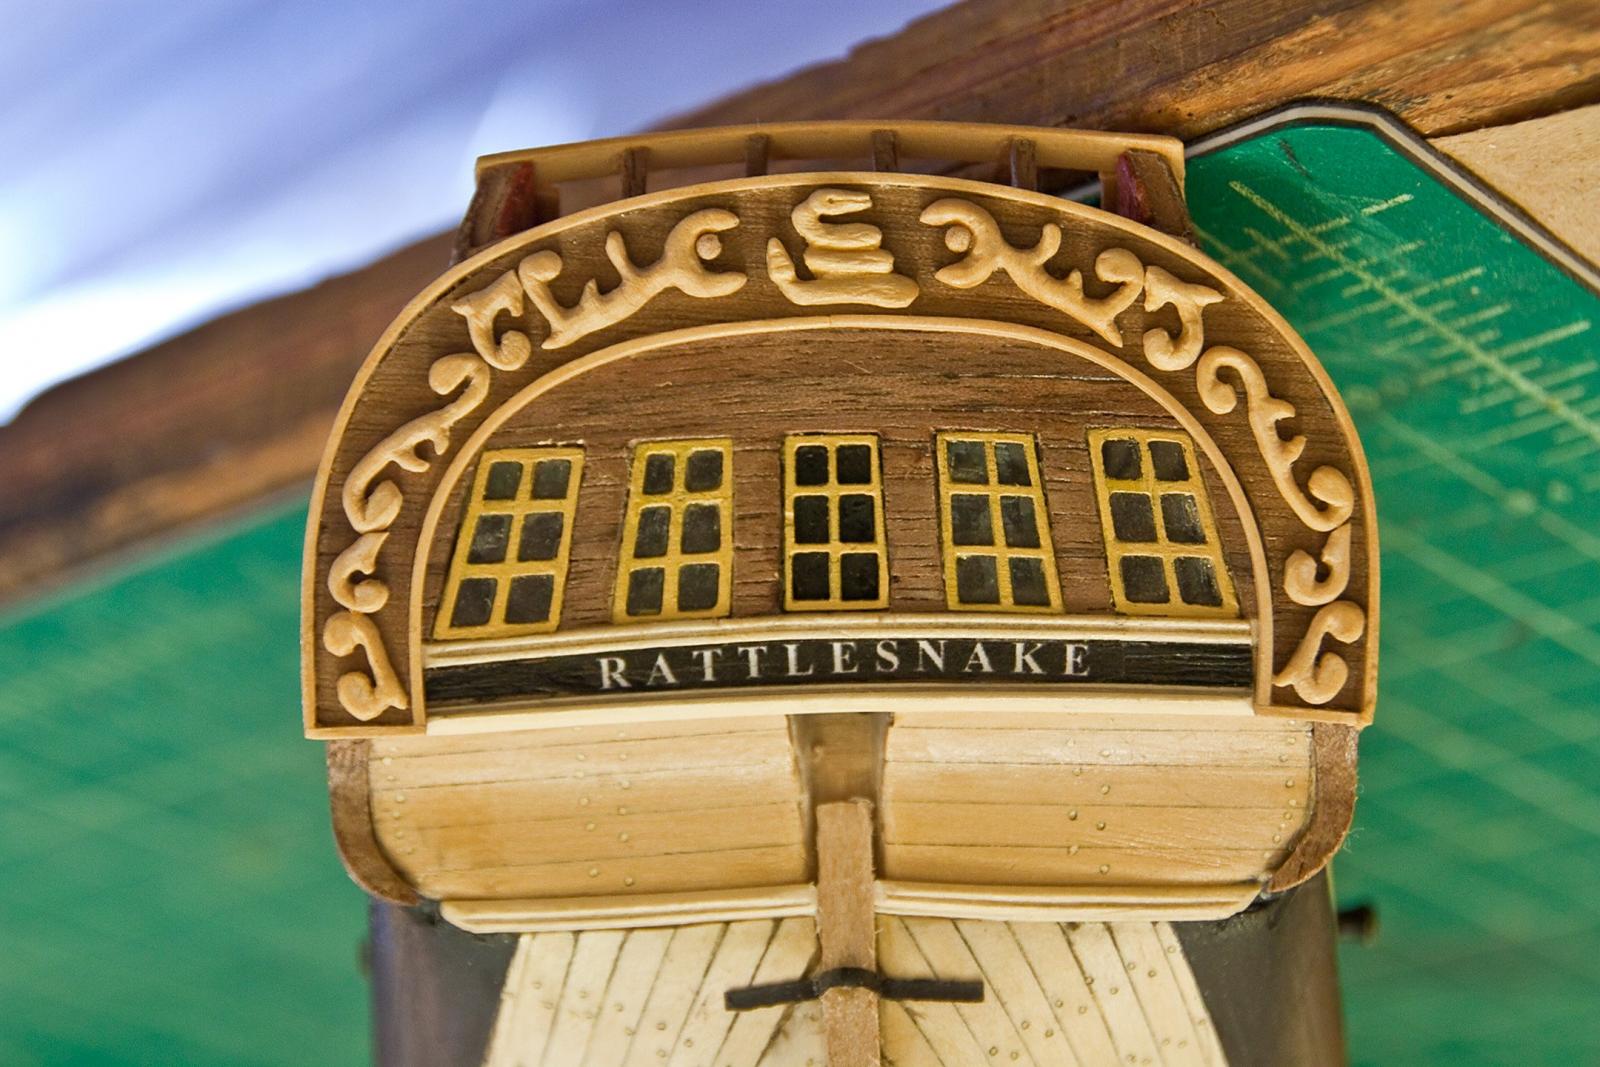
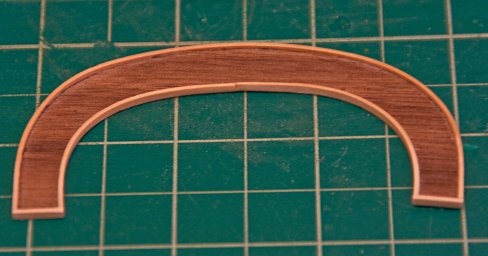
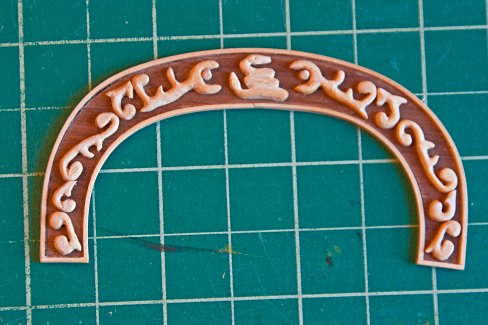
The walnut sheets arrived from Crown Timberland and I proceeded to create the ‘back splash’. I made some small floral-type carvings and put a trim around the ‘back splash’. Then glued the all carvings glued in place. The look is similar to the transom of several models including the Confederacy and Syren. The question is whether the carvings are one piece that extends beyond the width of the stern, or is the transom wide, like the kit supplied piece, with the carvings added. My solution assumes the later, and I like the look. However, I don’t know if what I did is historically accurate. Going by the MS and Howard Hahn plans, it’s hard to get an absolute answer.
- 481 replies
-
- 10
-
-
- rattlesnake
- model shipways
- (and 1 more)
-
Great work as usual. I think I'd go with natural trucks with red axles. Just my vote.
- 1,051 replies
-
- 3
-
-
- cheerful
- Syren Ship Model Company
- (and 1 more)
-
Thanks. I will try all of these techniques.
- 1,051 replies
-
- 4
-
-
- cheerful
- Syren Ship Model Company
- (and 1 more)
-
Your gun barrels look impressive. One problem I have, is that it seems no matter how many coats of paint I apply to the metal barrels, whenever I touch the barrel, some paint is removed and the brass color shows. Is that due to the paint I use? Or, do I need to apply more coats? I don't use an air brush. Thanks.
- 1,051 replies
-
- 4
-
-
- cheerful
- Syren Ship Model Company
- (and 1 more)
-
Thanks Jon and Martin. I definitely agree that the SMSNJ is a great club. And not only because of Chuck. There are a lot of top class modelers there. I think laminating is a great idea. Look at the MS model Confederacy's stern. You will see that the large decorations are individually made. The documentation for that model is available free from the Model Expo site. Cheers. Oh yeah, the snake was made using a drill, needle files and an x-acto knife.
- 481 replies
-
- 2
-
-
- rattlesnake
- model shipways
- (and 1 more)
-
WOW, great build and a really cool looking boat. That stern is very high. Were there any problems with the boat being top heavy? You're off to an excellent start. Cheers.
- 608 replies
-
- 4
-
-
- la couronne
- corel
- (and 1 more)
-
Thanks EJ. I'll check out your La Couronne.
-
This past Tuesday I displayed the Rattlesnake at the monthly meeting of the SMSNJ. During my talk, I mentioned that I intended to use the MS kit supplied dye cast metal stern decorations since I didn’t think I could make those intricate carvings. Chuck Passaro felt that was a mistake. His suggestion was to have a background or ‘back splash’ and laminate carvings onto it. The stern carving is really a bunch of small carvings, so it isn’t necessary to do one big carving. I liked the idea. So I decided to order a couple walnut sheets from Jason at Crown Timberland for the back splash. And last night, I carved the rattlesnake. I’m pleased with the carving, and everyone in my family could tell what it was. It certainly is better that the snake on the kit supplied metal decoration (although I guess I should have a higher standard than that). So on to all those floral carvings.

- 481 replies
-
- 6
-
-
- rattlesnake
- model shipways
- (and 1 more)
-
Thanks Jon. Good advice. I'm also not sold on clay. I also don't think I can produce the carvings that are on the Hahn or MS plans. But, there must be something in the middle. Your carvings look great, by the way. I would definitely be happy with your work. Cheers.
- 481 replies
-
- 1
-
-
- rattlesnake
- model shipways
- (and 1 more)
-
Thanks Jon and Martin. I gave Jonathan a 'like' even though it's more like an 'dislike' since I realize how hard it's going to be to create those pieces. You guys just reinforced my feeling of dread. However, this is a hobby and I will take my time and hope for the best. Like Angie said, 'Tain't a hobby if you hurry". Cheers.
- 481 replies
-
- 2
-
-
- rattlesnake
- model shipways
- (and 1 more)
-
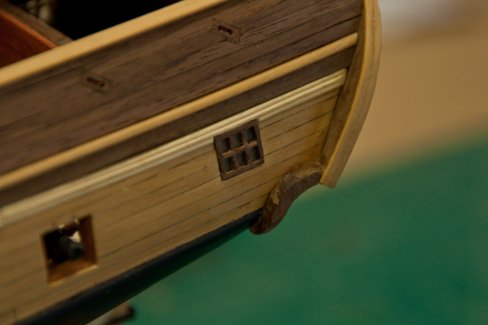
Well, I finished the stern planking. I like the look – colors, etc. But the real work is just beginning. I’m going to try and use the die cast metal decoration. I filed the MS piece so it is thinner (about 1/16th of an inch). I will paint the die cast metal using the same techniques as I used on the figurehead. I added two pins to help hold up the metal decoration (it also makes it easier to work with). The bigger problem is that on Hahn plans, there is another piece of decoration behind the supplied metal one. There are also fashion pieces with decoration that need to be created. Since they aren’t supplied, I’m going to have to create/carve them both.


- 481 replies
-
- 8
-
-
- rattlesnake
- model shipways
- (and 1 more)
-
Cutter Cheerful 1806 by rafine - FINISHED
KenW replied to rafine's topic in - Build logs for subjects built 1801 - 1850
Great work as usual, Bob. At the tip of the bowsprit, are that metal loops or eyes rather than line? How were then attached to the bowsprit? Thanks.- 525 replies
-
- 3
-
-
- cheerful
- Syren Ship Model Company
- (and 1 more)
-
Hey Jason. Looks like you have a great build going. Good to see you have time for some modeling. Cheers.
-
WOW! I just read through Blue Ensign's Pegasus blog. He did way more fancy stuff than I did! His is really impressive. I'll have to read more of his logs. Thanks.
-
Thanks Dave, Jack and Jon and the 'likes'. And Jon, what I say here stays here.
-
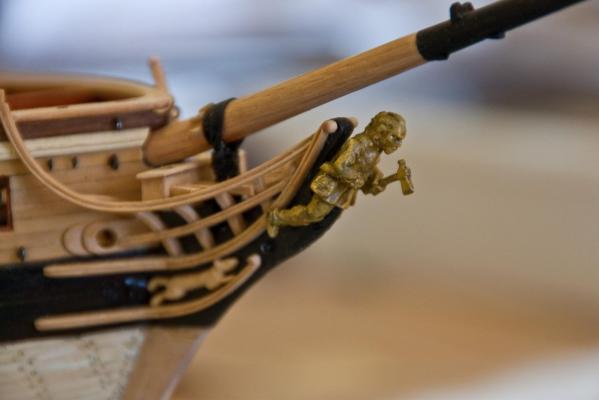
I finally finished with the Iroquois figurehead. I knew that I wouldn’t be able to carve it, but luckily I have a good friend who is a war gamer. He told me about a site that sold Native American figures that can be included as part of a revolutionary army. I bought twenty figures, and was very impressed with the sculptor. The problem was that all the ‘indians’ were holding a rifle, which I didn’t want on the model. Since the dye cast metal is soft, I cut away the rifle as best I could from the figure I chose. But, that left the left hand unusable. So I took a left hand from another figure, cut off the bad hand and glued the new left hand (which was holding a hatchet) onto the ‘stump’. I also replaced the head because the head feathers were too high. The result looked good. I then painted the figure the same way my friend paints his armies: paint the figure black and when it's dry, add a white dry brush. Next apply several coats of a yellow wash, followed by a black wash made of acrylic floor wax, water and calligraphy ink. The figurehead is not glued to the model yet since I have to make sure the hatchet doesn’t interfere with the bob stay. Over all, I think it looks just fine. I only hope my explanation makes sense.
- 481 replies
-
- 14
-
-
- rattlesnake
- model shipways
- (and 1 more)
-
I wonder if the place where your pieces go when they drop on the floor is the same place as where my pieces go. They never turn up - ever. There must be a place with lots of parts for model ships somewhere. Impressive chocks.
- 974 replies
-
- 1
-
-
- rattlesnake
- mamoli
- (and 1 more)