
HOLIDAY DONATION DRIVE - SUPPORT MSW - DO YOUR PART TO KEEP THIS GREAT FORUM GOING! (Only 20 donations so far - C'mon guys!)
×


Maury S
-
Posts
1,490 -
Joined
-
Last visited
Content Type
Profiles
Forums
Gallery
Events
Everything posted by Maury S
-
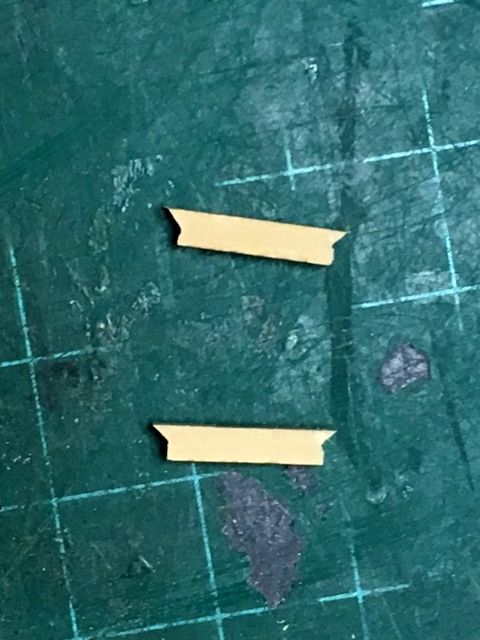
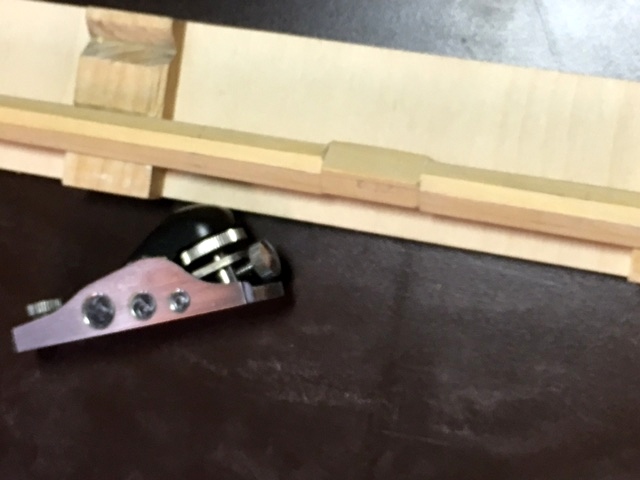
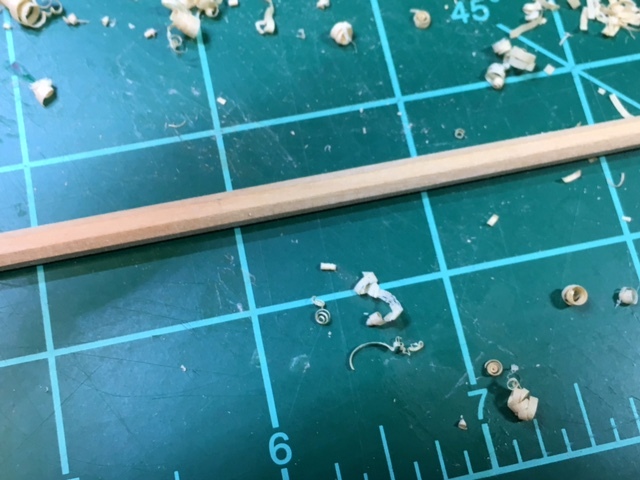
 Latest attempt at a hooked scarf. Long legs are parallel and the short notches are perpendicular to the long legs. This is before being glued, which tightens up the joint even more. Much better this time. Maury
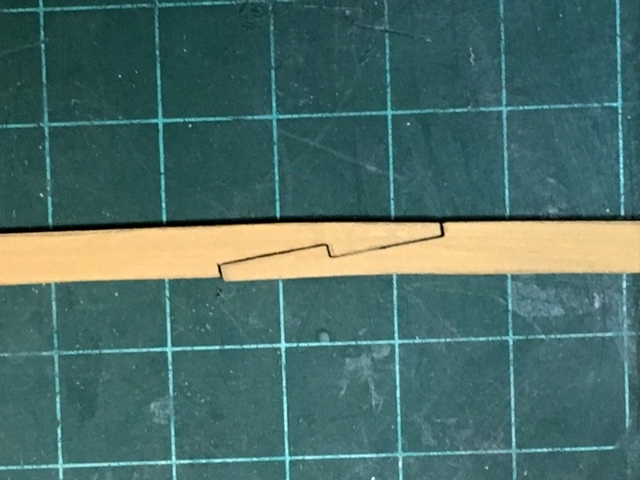
- 525 replies
-
- 11
-

-
- anchor hoy
- hoy
- (and 1 more)
-
I have a good set and never found them accurate enough at 1:48 scale. I was taught (by David Antscherl) that there is a lot of error in a pencil width (sharpen it more often) and by Ed Tosti who got his (CAD) lines down to one pixel width. All a matter of personal level of acceptance. Maury
-
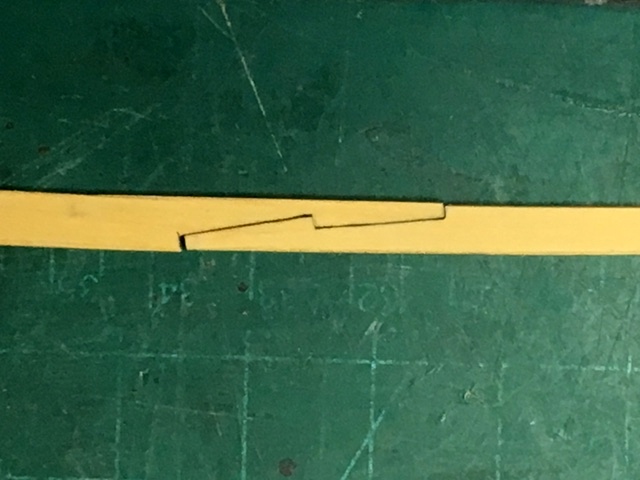
The waterways are 3" thick and 10" wide. I traced the shape to a piece of card stock, divided it up into three parts and cut them out on the scroll saw. Then came my first experiment with a hooked scarf joint. I laid it out in CAD first. Length of the joint is 5 times the width. The jogs in the joint are 1/5th of the width. I glued the pattern to some card stock and cut it into the two parts and used one to line out on the waterway. Once "satisfied" with the shape, I traced the opposing side from the waterway. The long cuts did not come out parallel. A few minor adjustments still need to be made but not bad for a first attempt. They are loosely set on the beams. Much tighter joint when held tight. The wide gap shown in the lower picture will be hidden by the spirketing. In any event, the joints may not be visible since the waterways will be painted. Maury
- 525 replies
-
- 8
-
-
- anchor hoy
- hoy
- (and 1 more)
-
Margin plank / waterways: What color might it be? Deck is "oiled" ...figure dark grey...Bulwarks are yellow ochre, rails are black, hatches, etc. are white. Would they match the deck or be some other color? Maury
- 525 replies
-
- 2
-
-
- anchor hoy
- hoy
- (and 1 more)
-
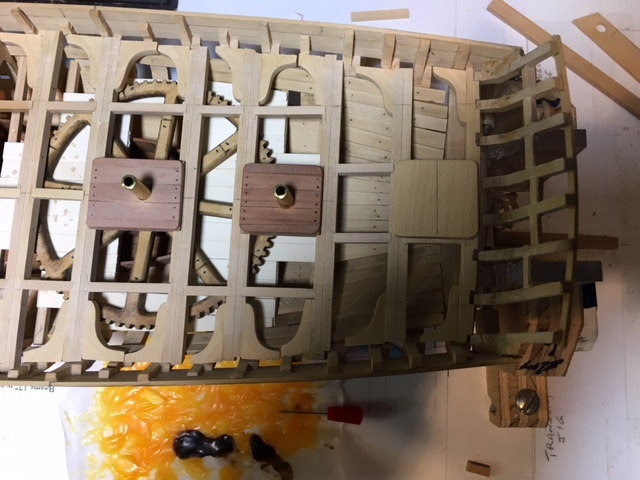
Carlings are finished and the knees abutting the mast step have been installed. Regarding ledges, I've looked thru Steel and do not find any guidance about whether they were between all beams or just those a certain distance apart. Any input would be appreciated. The hatch covers are done. There are no gratings on this boat. I've not decided about whether to show them open or closed. There is also an issue as to whether the forward and aft hatch covers were hinged or "lift-off". No decision made there yet. The orange blob on the paper in the lower part of the photos is yellow glue. When I work with glue, I squeeze a small amount onto a piece of paper and pick up what glue I need with the end of a pin. Eventually (soon) I move on to a new piece of paper. Maury
- 525 replies
-
- 9
-
-
- anchor hoy
- hoy
- (and 1 more)
-
Druxey, Re. Coamings, Right out of the Echo Section build instructions. M
- 525 replies
-
- 3
-
-
- anchor hoy
- hoy
- (and 1 more)
-
While waiting for the glue to dry on carlings I've done a few other detail items. The hatch coamings (4 sets) have been completed but not attached. The coamings surrounding the opening in the deck for the great cat may not be called "coamings" but they serve the same purpose. Keeping water from running over the deck and into the lower decks. None of these details are on the Grice drawings. Some are on Robt. Cairo's sketches, which are still speculative. Maury
- 525 replies
-
- 13
-
-
- anchor hoy
- hoy
- (and 1 more)
-
Capstan steps are finished and about half of the carlings are in. It's been slow with other things going on. I opened and started assembling the Shereline Lathe and mill I got for Christmas. Only one critical part missing so far. Maury
- 525 replies
-
- 18
-
-
- anchor hoy
- hoy
- (and 1 more)
-
If it's more than a couple of inches long, it goes into a scrap box. It's amazing how much I've pulled out and used over the years. Maury
-
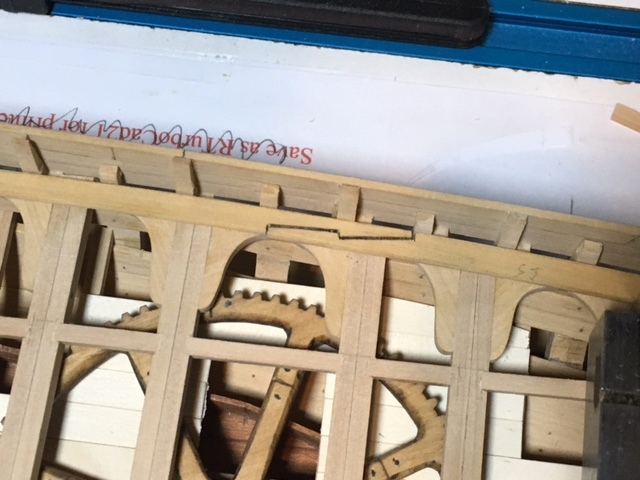
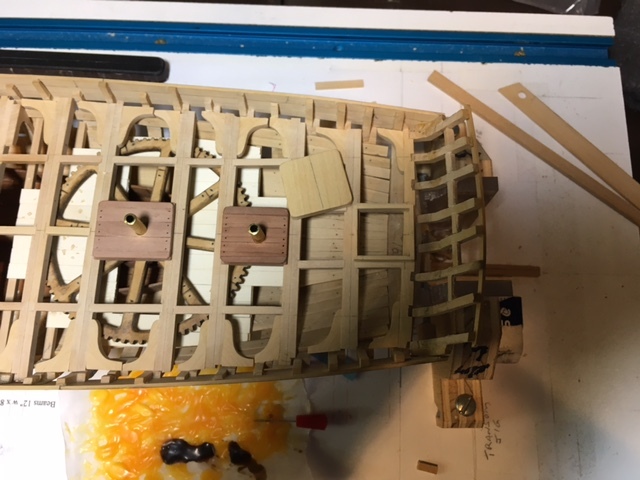
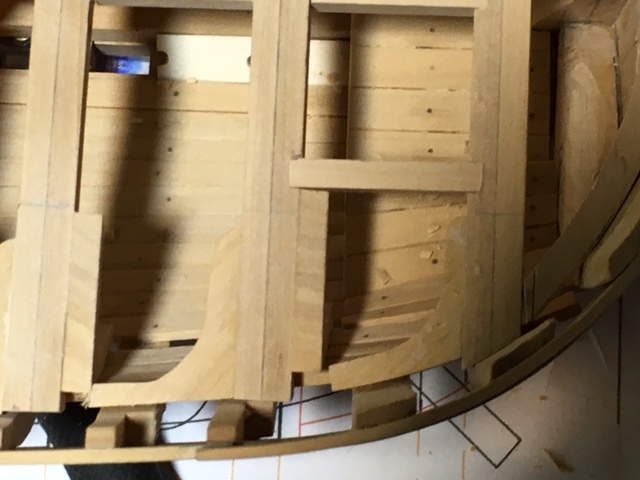
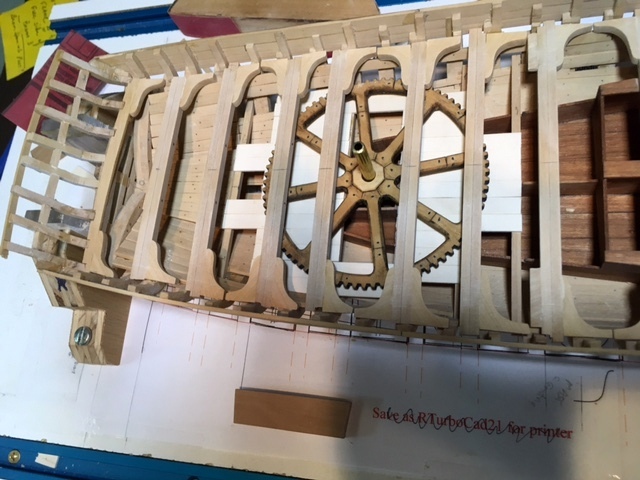
A few more carlings have been installed and I worked on the steps for the capstans while glue dried. The foreward (larger step) still needs to be trimmed. Both need another layer below fitting between the beams. A small challenge is to create a different sized block under the fore sides of the steps. They are parallel to the keel and perpendicular to the axles. The deck of course has an angle (different at both steps). There is a difference of about 1.5" on the fore and 3" on the aft. Looks like the meshed gears will not be very visible. The aft capstan will hide it anyhow. Maury
- 525 replies
-
- 14
-
-
- anchor hoy
- hoy
- (and 1 more)
-
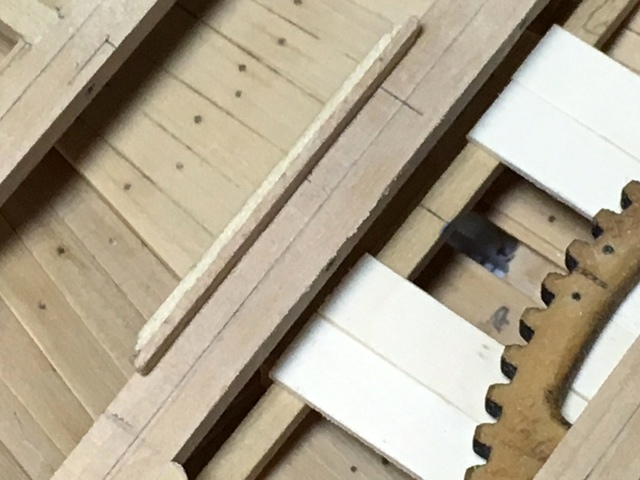
Details on the carlings: They are fit between the beams with a 45 + / - degree "flange". The beam is marked with a jig (a 1/32" strip glued to another piece) It is held against the beam and a pencil line is drawn, indicating the extent of the 45 degree cut into the corner of the beam. You can see it resting on top of the beam: One edge and the back of the notch can be seen. The other edge of the notch will be marked with a (# 11) blade while the carling is being held on the beam. The corner (edge) of the beams are then notched and the carling inserted. It usually take a couple of filing adjustments to get it to fit nicely. Maury
- 525 replies
-
- 12
-
-
- anchor hoy
- hoy
- (and 1 more)
-
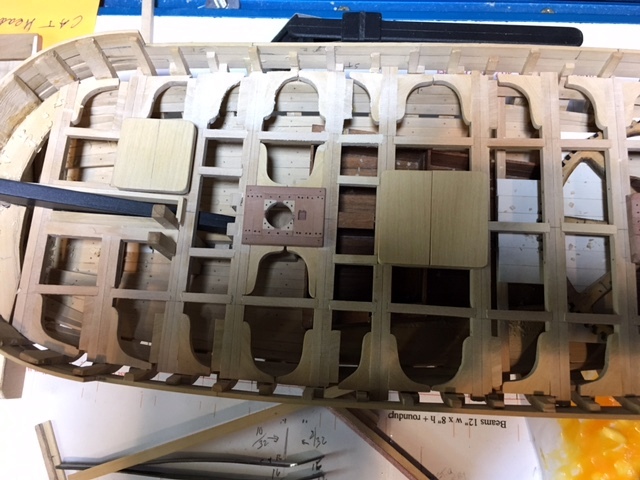
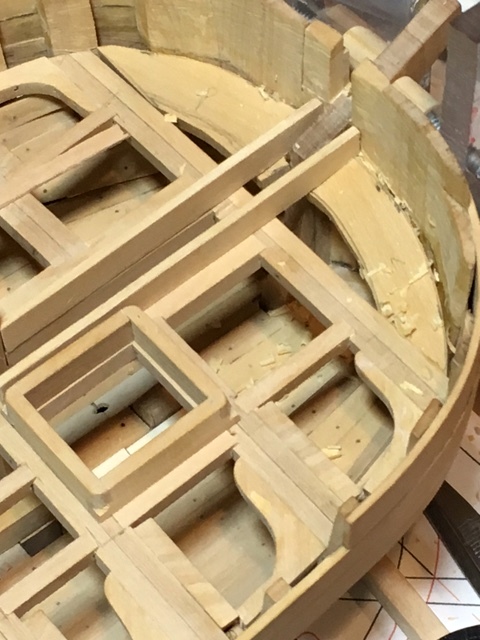
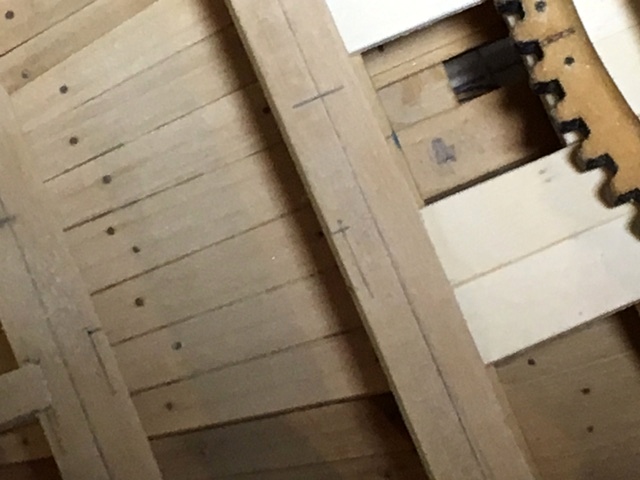
Starting on the hatch carlings. There are three hatches. The main hatch shown below, right above the dividing walls for the water tank, A forward hatch near the great cat (below) and an aft hatch between the last two beams (not shown). They are cut-in and glued. The next are probably at the capstans, then the outboard sets that run most of the length. Once all are in, I'll sand them flush with the beams. By the way, I'm selling my Proxxon Lathe. It's posted in the Traders (for sale) section. Maury

- 525 replies
-
- 14
-
-
- anchor hoy
- hoy
- (and 1 more)
-
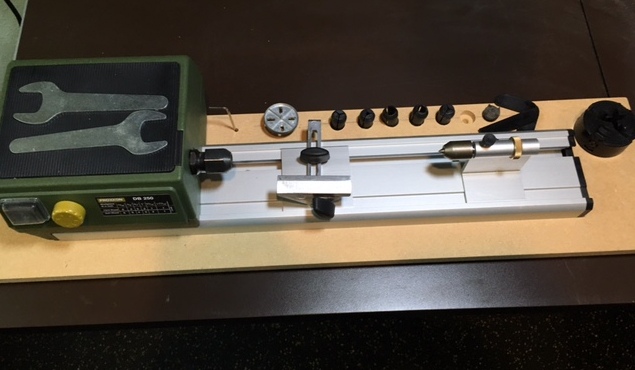
I am selling my Proxxon DB 250 lathe. The 4-Jaw Chuck and tool set have been sold. I used it a few times and I got upgraded to Sherline for Christmas. Send me a PM for a "member's price" http://www.ebay.com/itm/Proxxon-MICRO-Woodturning-Lathe-DB-250-37020-Lathe-Machine-/262856616351?hash=item3d3379a99f:g:UFQAAOSwopRYfnbkhttp://www.ebay.com/itm/Proxxon-MICRO-Woodturning-Lathe-DB-250-37020-Lathe-Machine-/262856616351?hash=item3d3379a99f:g:UFQAAOSwopRYfnbk You can have it in the original box or mounted on the special board. (You should mount it on a board anyhow). Offered on eBay Best price on Amazon for everything is about $280 I'll take $190 and I pay for shipping. Send me a PM if interested. Maury
-
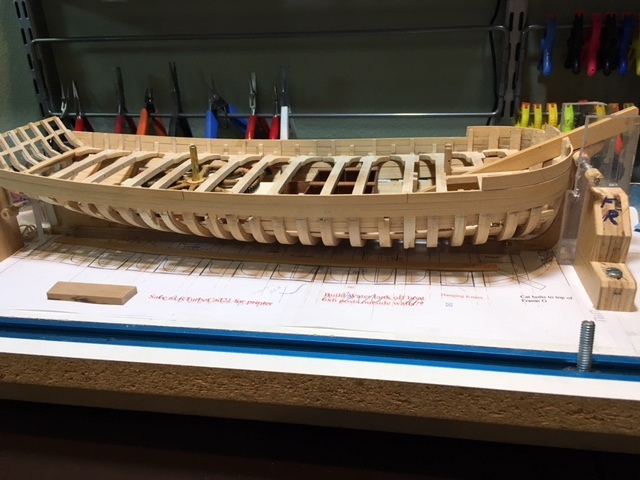
Recovering from a cold over the previous week, and I try not to work on the model if I'm not well. Coughing in the midst of a delicate exercise with a chisel could be dangerous. All of the knees have been installed and minor sanding to fair the deck beams is completed. I have some more work to do at the bow but all is proceeding well. Maury

- 525 replies
-
- 19
-
-
- anchor hoy
- hoy
- (and 1 more)
-
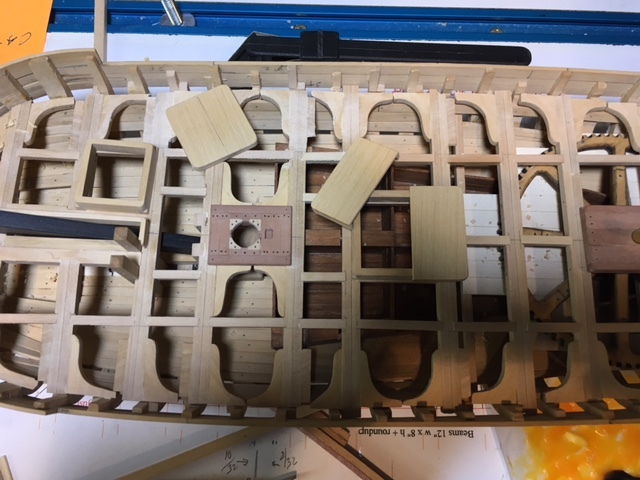
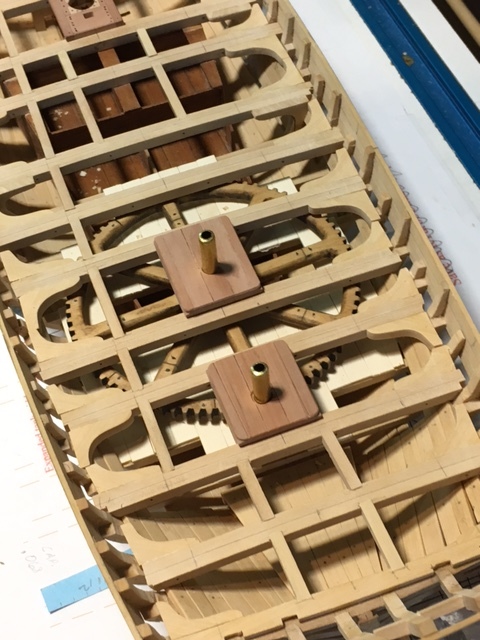
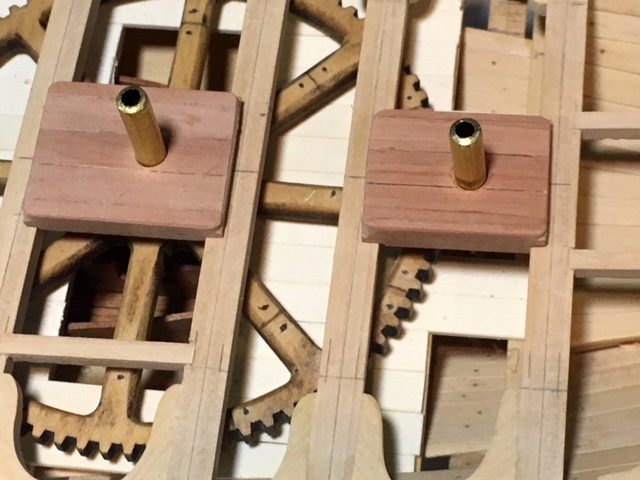
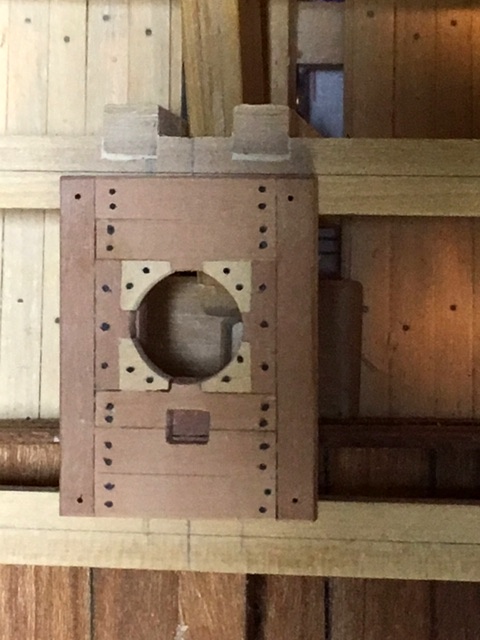
Partners are finished. I used 20 lb. test (.01875") monofilament line for the bolts. They seem a bit large, but these are the heads of the bolts. The holes at the corners are for eyebolts. The piece is 36" wide and 52" long to put in perspective. I'm much happier with this version than the first. It's just set on the beams at this stage...not permanently attached. Continuing to fill in the knees on all the beams. I'm about halfway back from the bow. Looking way ahead to the rigging, the Grice drawing and the info. from the National Archives shows only (running) back stays and a forestay, but no shrouds for the topmast. No trestle trees (spreaders) appear in any drawing. Does this seem reasonable? My Emma C. Berry has basically the same rig and it has one spreader and one set of shrouds. Any comments? Maury
- 525 replies
-
- 12
-
-
- anchor hoy
- hoy
- (and 1 more)
-
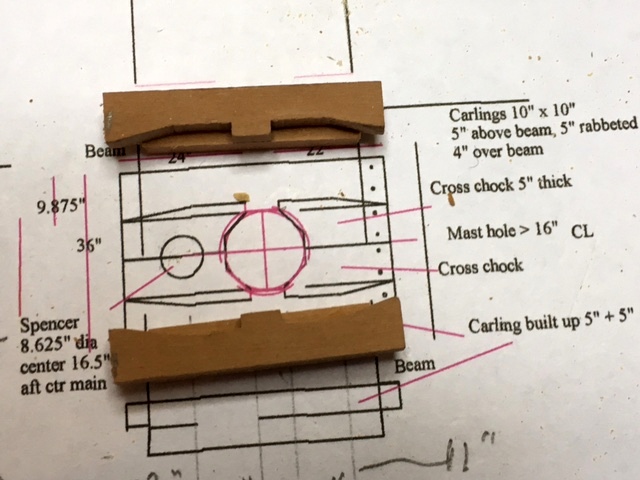
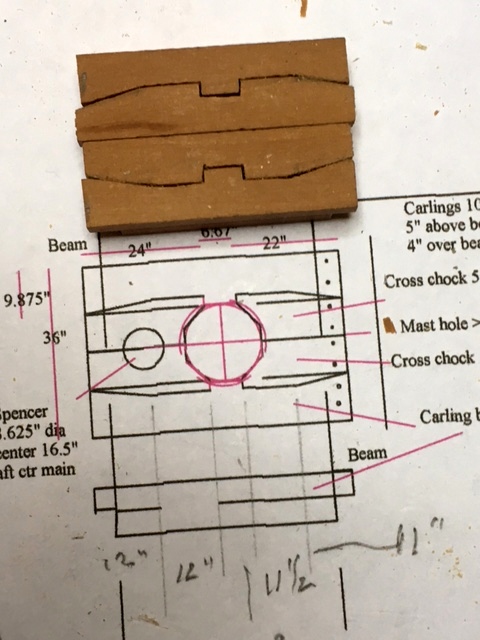
I finished installing the remainder of the deck beams. Knees need to be installed. I got to thinking about the mast partners. Very few items on the deck reflect much detail and after looking at the enlarged photo of the partners, I decided to try another design. This one is based on Ed T's Naiad. It consists of two layers, each 5" thick. The lower portion fits between the beams and the upper above. I still need to add more cross chocks and the carlings to the sides of the upper piece as well as the simulated bolts. The center will be rounded and the step for the Spencer mast added. It may be a bit fancy, but historically, we have no information so it's my discretion. Maury


- 525 replies
-
- 13
-
-
- anchor hoy
- hoy
- (and 1 more)
-
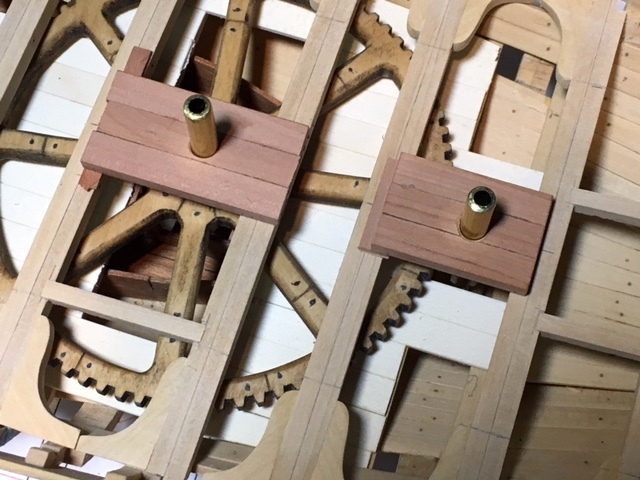
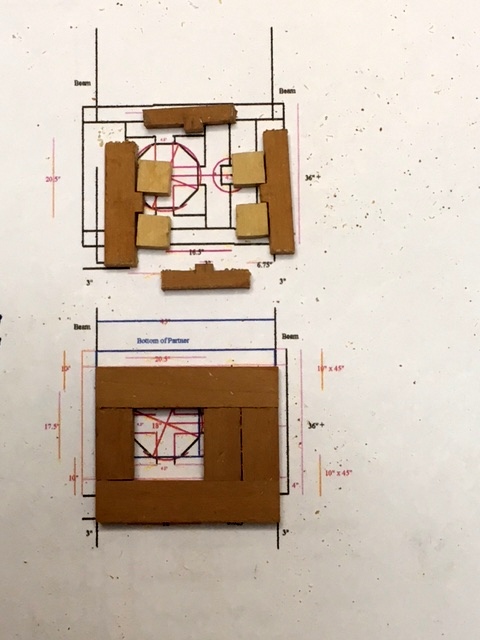
The spars are mostly done except to the jaws on the boom and gaff. While waiting on glue to dry for the beams, I put the partners together. They are taken from the plan for the Echo section, although there could be any number of layouts. The carlings are two pieces of 5" x 9 7/8" material, one on top of the other to create a ledge for the cross chock pieces. The cross chock pieces are mated. The hole for the mast and the step for the spencer will be cut next. The partners are made from Swiss pear, for a little contrast. Happy New Year's to all. Maury
- 525 replies
-
- 13
-
-
- anchor hoy
- hoy
- (and 1 more)
-
All the spars have been shaped to 8-sided. I worked on the main some more, taking it to 16 sides, then down to round. The cheeks blended in well. They stick out only on the sides to catch the shrouds. The doubling is square and will be tapered very slightly and the tenon at the heel will be cut later. After planing, it was sanded with 150, then 220 grit. Merry Christmas and Happy Holidays to all. Maury

- 525 replies
-
- 16
-
-
- anchor hoy
- hoy
- (and 1 more)
-
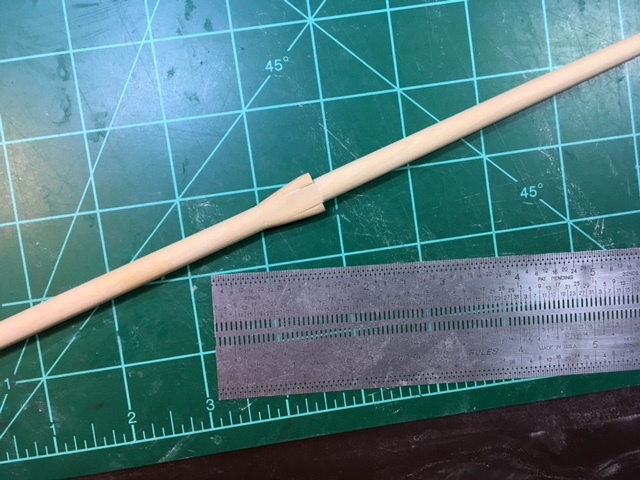
Spar-making continues...Here lies the main mast in the jig for transforming 4-square to eight-sided sticks. The chunky square section in the middle of the picture is where the standing rigging for the cat support goes around the mast. It is situated 20' above the deck. One cheek on both the port and starboard side will be added so the rigging won't slide down the mast. See drawing on the first post in this log. Maury
- 525 replies
-
- 9
-
-
- anchor hoy
- hoy
- (and 1 more)
-
Ed, Thanks. The obvious reason for the Spencer Mast is the standing rigging that provides support for the use of the great cat. Look at Grice's drawing on the first post in this log. The main sail extends twice the height of the standing rigging. The unusual rigging was another reason for selecting this boat. Maury
- 525 replies
-
- 5
-
-
- anchor hoy
- hoy
- (and 1 more)
-
Thanks for the comments. My sticks were cut two weeks ago and only three of the 10 have a bow in them. I guess I'm good to continue with the box. Roger, I have that photo (and have discussed the model with Eric Jr.. I'm not sure the "block of wood" is not the partners (that are raised up higher than the decking. Maury
- 525 replies
-
- 3
-
-
- anchor hoy
- hoy
- (and 1 more)
-
After an hour of planing, the boom is now (almost) a perfect octagon. Then I read the latest NRG journal where I learn that Box wood is Bad for masts (it warps?). Anyone else have this experience before I shape four more spars. Maury
- 525 replies
-
- 7
-
-
- anchor hoy
- hoy
- (and 1 more)