vossiewulf
-
Posts
1,477 -
Joined
-
Last visited
Content Type
Profiles
Forums
Gallery
Events
Everything posted by vossiewulf
-
 I'm not sure either without a drill press that can handle #61 bits. The problem with the narrow strip is that it's really hard to mark it enough to prevent the drill bit from skating without also distorting the strip. Not to mention distorting the strip in the actual drilling. I think you used magic. Did you use magic?
 -
Welcome back!
-
The starting grit is defined by how rough the material is, and deck planking shouldn't be very rough. You should be able to sand your deck reasonably using 220 and 400 grit sandpapers.
-
And go to Domex Hardwoods for holly lumber. As I understand it, most of the holly lumber in the US passes through Domex and they have the best selection.
-
Hmm I contacted him before Christmas and he said he could do holly strips as a special order. Try emailing him and asking.
-
A micromotor is a very good tool to have and the Nakanishi is excellent. It's so quiet that it can be running at 10k rpm and you can't hear it at all, and it has plenty of torque. Basically brushless micromotors are highly improved Dremels, smaller, lighter, higher rpm, torquier, just better all around. Only problem is they're pretty expensive but if you get one, I promise you won't regret it.
- 53 replies
-
- 3
-

-
- Drill Press
- Milling
- (and 1 more)
-
BTW your best plan is to start a build log so you can ask ship-specific questions and get help from lots of people.
-
Yes. if you glued something with CA, it's not coming off again, trim it off and make a new piece you can glue on correctly. I'll let others answer the planking questions, as I did my planking in a totally different way involving tapering the planks once they're already on the ship. But it requires very sharp matching single-bevel knives to work, so it's not something I would recommend to most builders.
-
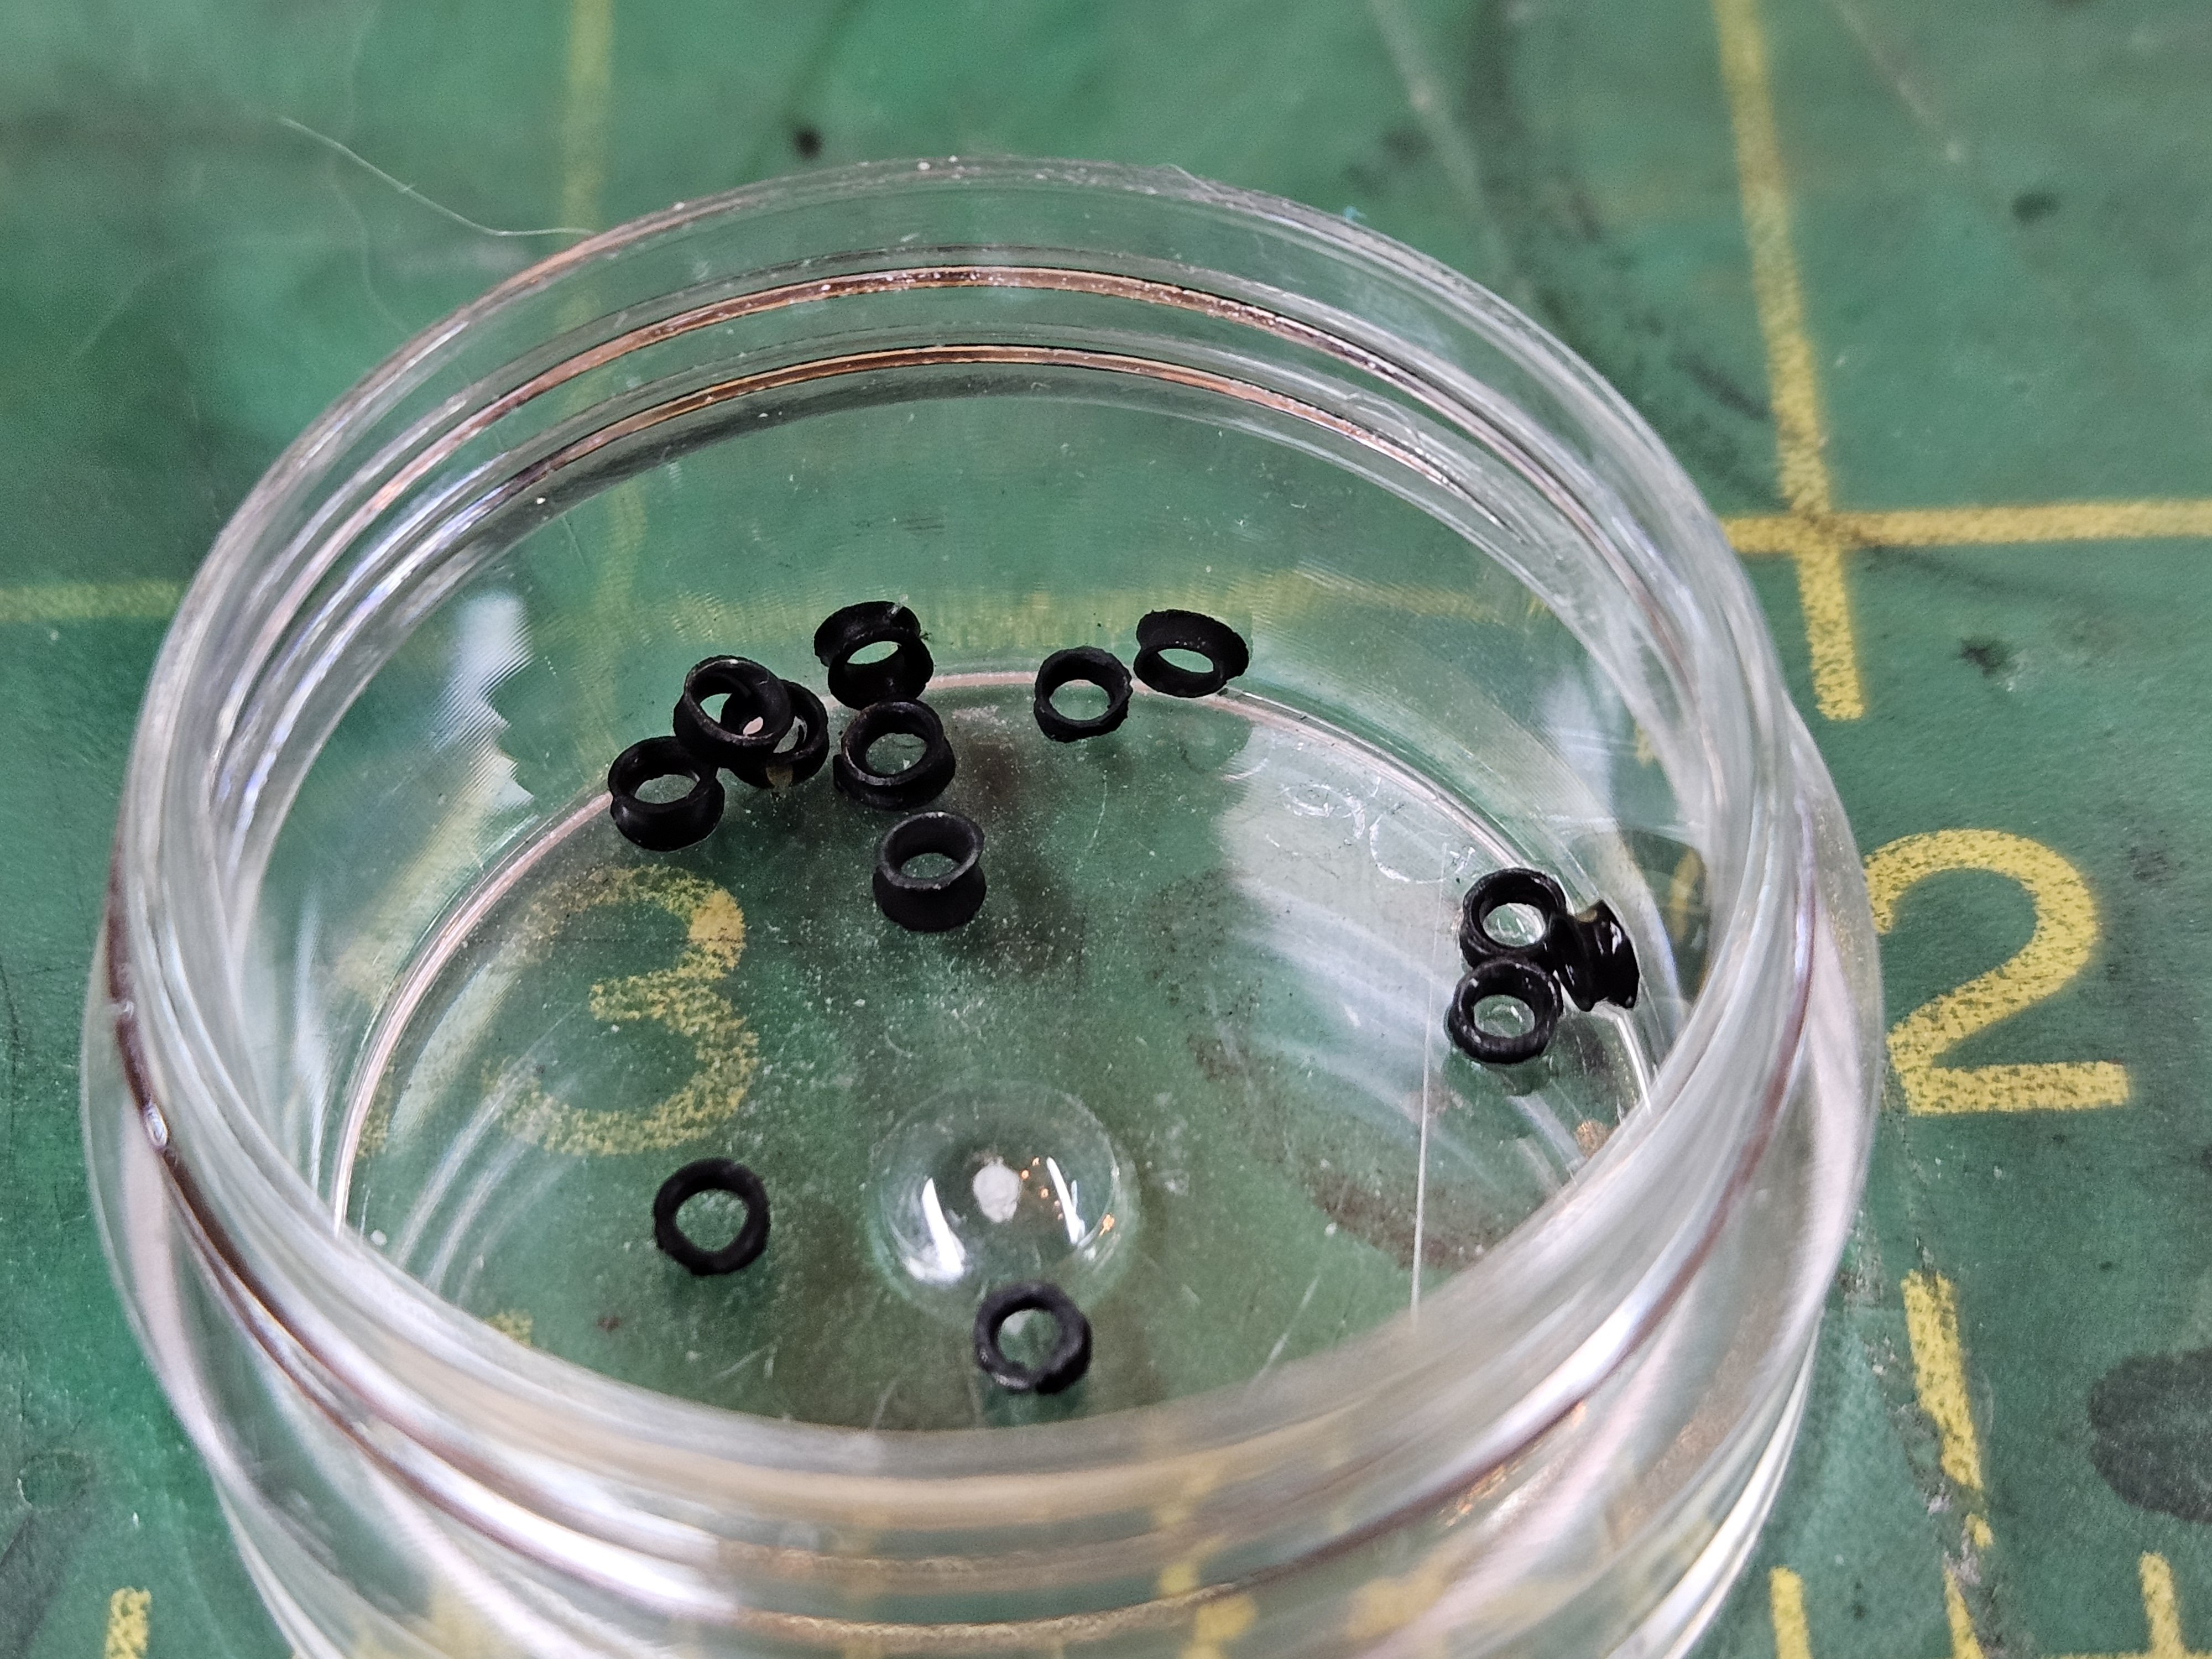
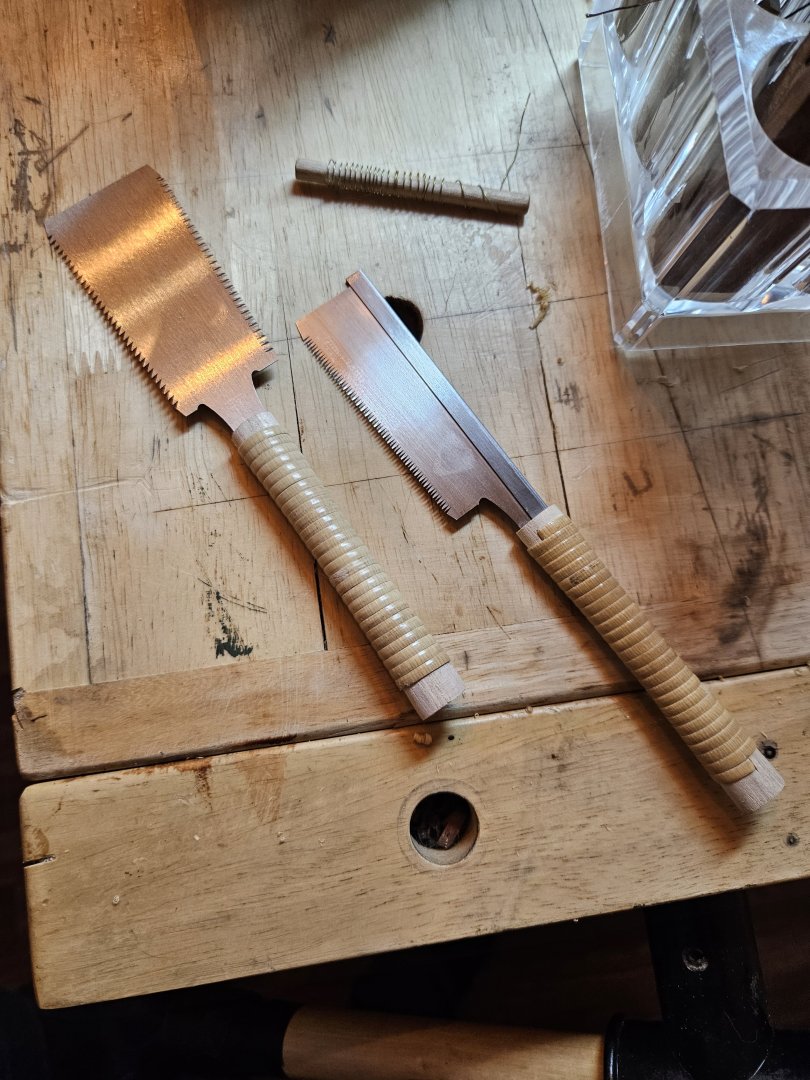
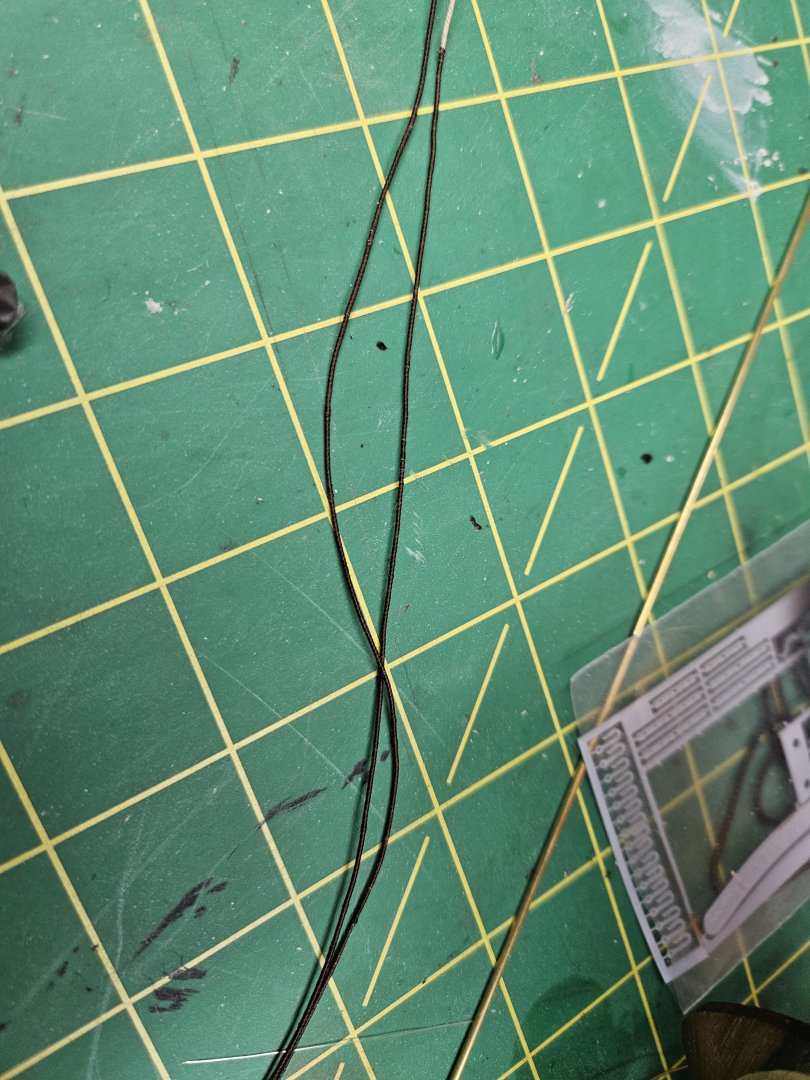
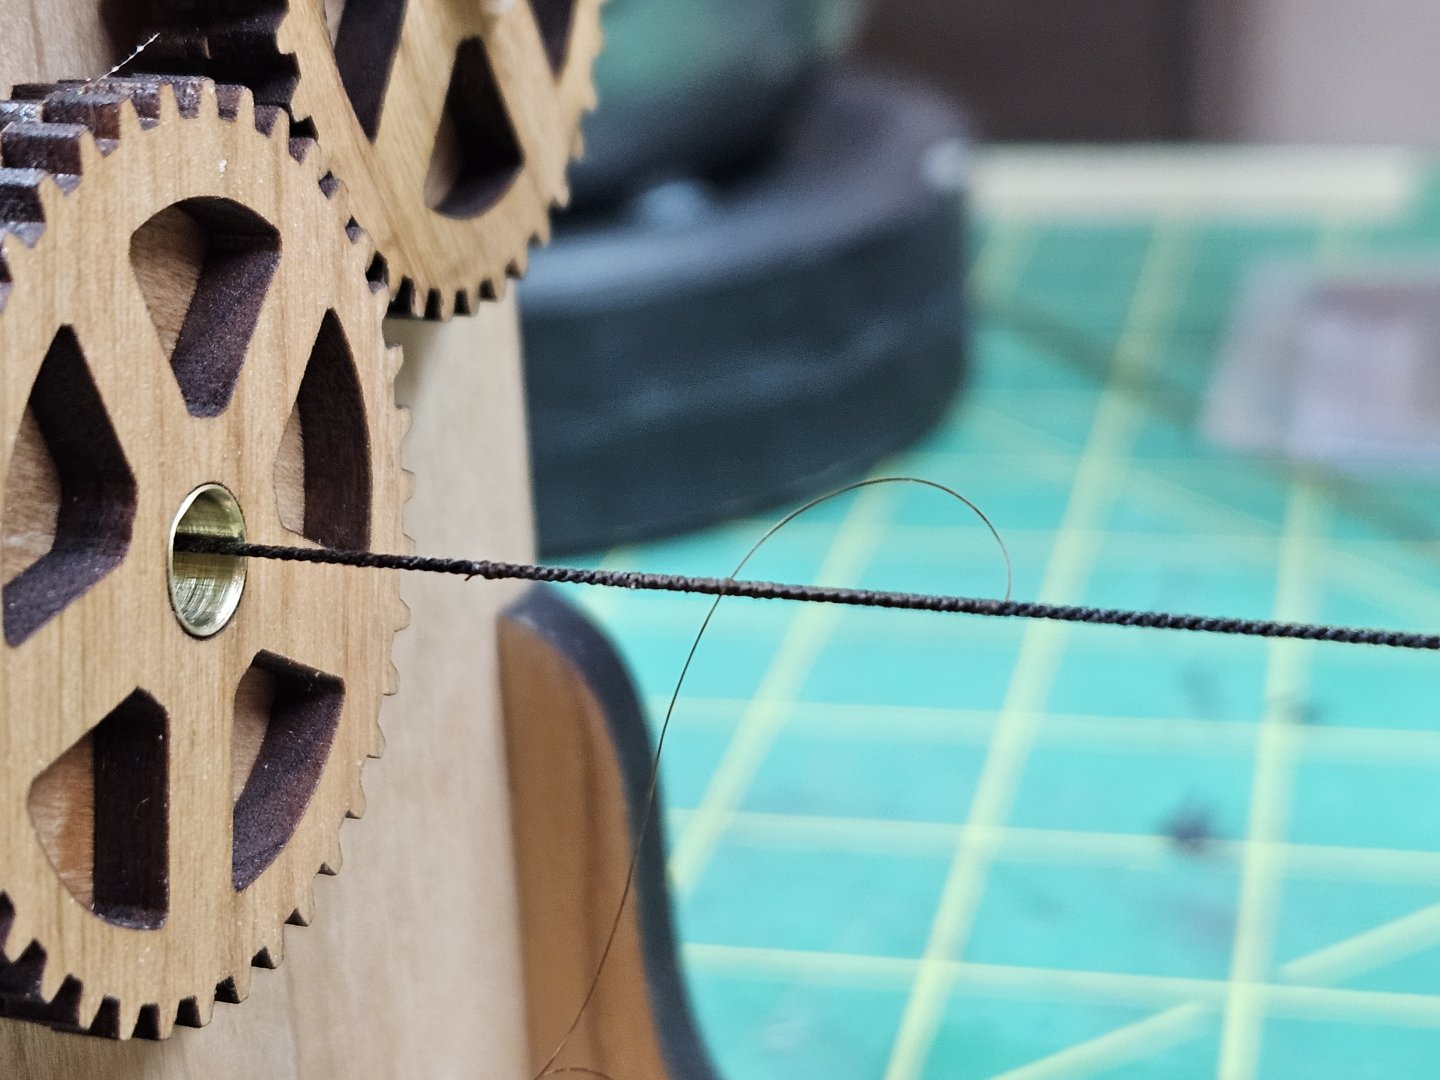
Some progress using the Servomatic. I can't say it's quick but that's because I am using very fine serving thread. After spending a few hours with it, I think the Servomatic is well worth the $60 or so that it costs. But first, my tool addiction demanded I buy these cool baby Japanese saws from Lee Valley. They're made just like the full sized versions so they should last quite a while. Now back to the thimbles that I made out of 1.2mm OD brass tube a couple weeks ago, I blackened them so they're ready to go. And two fully served jib guys, or at least that's what they're going to be. And we bring them together and we have thimbles at 1/64. I'm sure I couldn't do them at any smaller scale.


- 714 replies
-
- 7
-
-
- lady nelson
- victory models
- (and 1 more)
-
Your Lady Nelson is a very nice model, you just built yours more out of the box than me Keep at it! Thanks! As for putting some twist on the line, I'll try that, thanks
- 714 replies
-
- 2
-
-
- lady nelson
- victory models
- (and 1 more)
-
The weight of the machines pretty much tells the tale, the Little Machine Shop 3990 is a serious machine that can do serious machining with sub-.001" accuracy and is power-feed and DRO ready. Yes 124lbs, 177 ship weight. It's a two man job to move it in its crate and it will come covered in oil that needs to be first stripped.
- 53 replies
-
- 4
-
-
- Drill Press
- Milling
- (and 1 more)
-
Yes, that is the Little Machine Shop exclusive HiTorque version of the original Sieg mini-mill. Compared to the Sieg, the HiTorque has a 500 watt motor vs the 350 of the Sieg, and has belt drive vs. gears, which is much quieter. My MicroLux version of the Sieg just died recently after about 15 years and I'm replacing it with the model 3990 HiTorque milling machine. Another advantage of going this direction is that these mills have standard tapers on the spindle and standard T-slots and the like so you can buy tooling anywhere. If you're starting from scratch and I think OP is, assume another $300-$500 of stuff you need along with the mill to be fully operational. And of course my previous caveat of this only makes sense if you intend to do scratchbuilding/kitbashing still holds.
- 53 replies
-
- 3
-
-
- Drill Press
- Milling
- (and 1 more)
-
It depends on what you're going to do. If you intend to do lots of kitbashing and scratch work, you will want a lathe for its machining capabilities. Note Erik W uses his Proxxon mill on joinery in his very excellent Cheerful, for example. OTOH if you're just assembling kits using the kit parts, you probably don't need a mill and can get away with just having a small drill press.
- 53 replies
-
- 4
-
-
- Drill Press
- Milling
- (and 1 more)
-
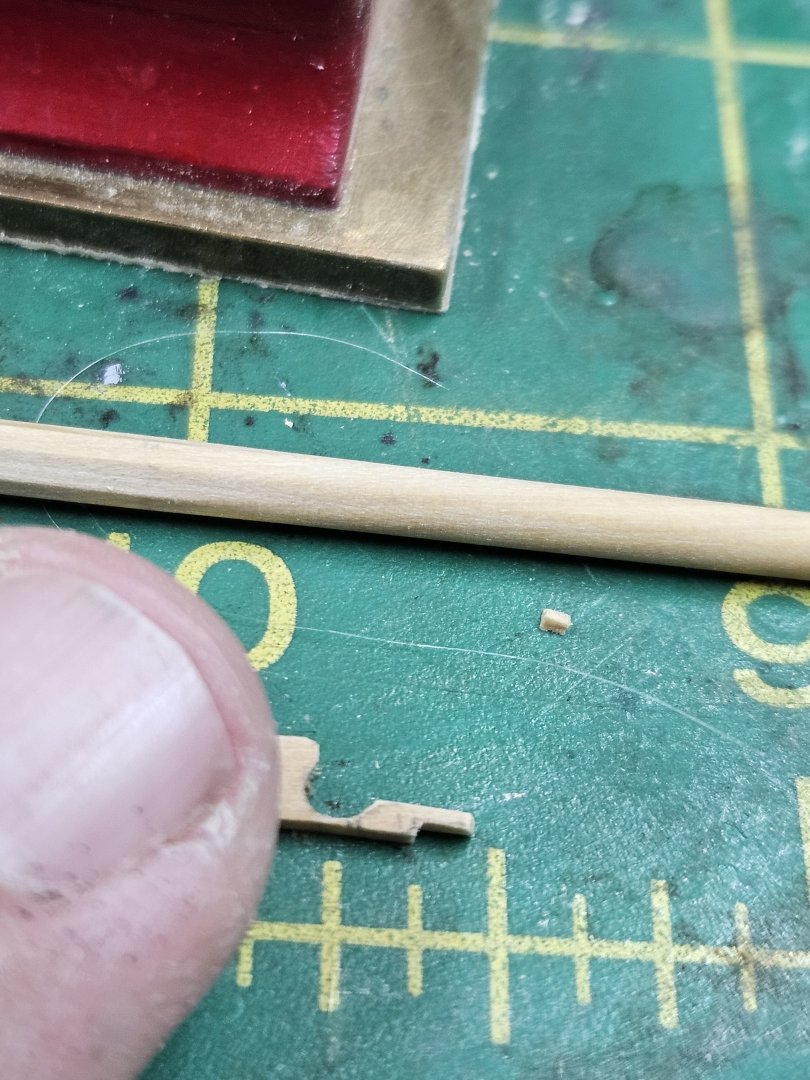
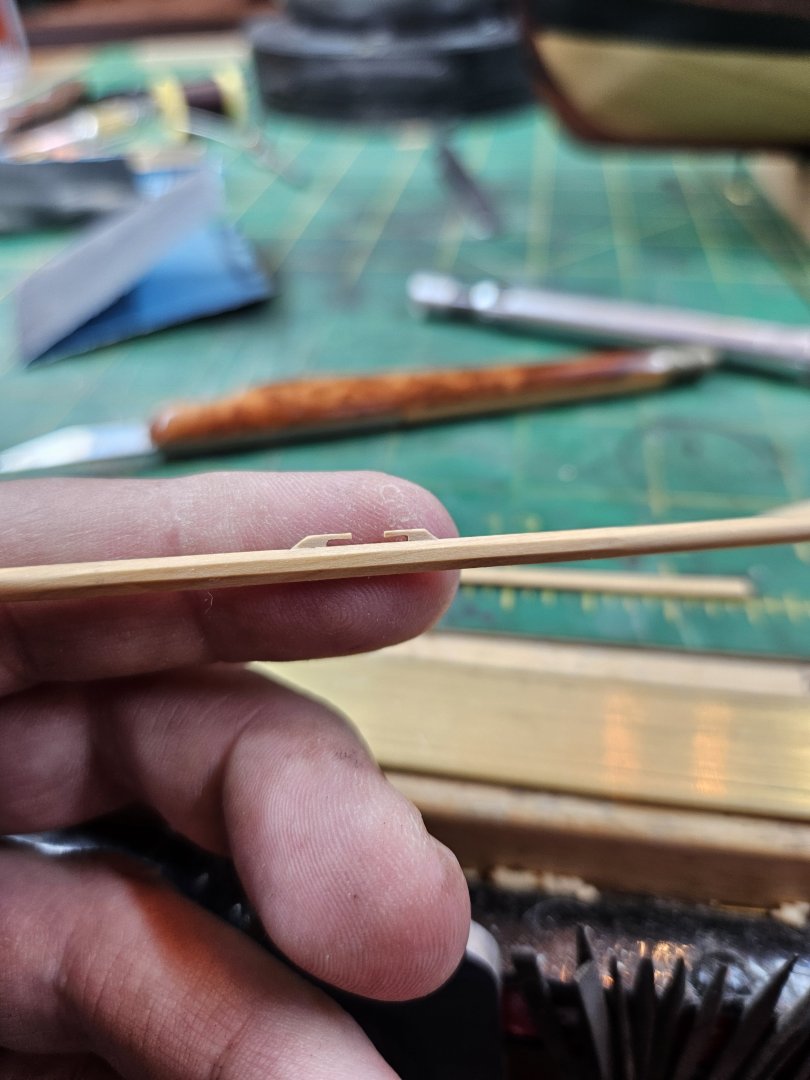
You know I'm glad I am doing the yards and masts in castello boxwood, not only can it be scale smooth, but it's strong and you can make tiny parts with it. Like these sling cleats... I think they're called that. Otherwise, I received my Syren Servomatic from @Chuck. Chuck, it went together reasonably well and it turns easily and almost fully smoothly. And it's working with the fly-tying thread I wanted to use. The only downside is with your dark brown thread I need magnification just to see my serving I may need to use the tan rope just so I can accurately serve the ropes. And I intentionally did not sand the char. I like cherry with black trim, going back to a customer furniture shop that I worked at 35 years ago that frequently used that look.
- 714 replies
-
- 10
-

-
-
- lady nelson
- victory models
- (and 1 more)
-
If you're going to get a mill, get the Sieg X2D mini mill. It's a real machine that is very capable in small and medium-scale work. I don't think you'd be happy with the Sherline in the long run.
- 53 replies
-
- 4
-
-
- Drill Press
- Milling
- (and 1 more)
-
Yep you got it, airbrush has a high maintenance ratio making it a pain to use at times, but it's also the only tool that can produce a quality finish for a scale project. Spray cans are like firehoses, airbrushes provide much more control. Also you can decant finishes and paints from spray cans and then apply them elsewhere with the control of an airbrush.
-
The first thing I learned about airbrushes was that every time you use one, you disassemble it entirely and clean each part like your life depended on it before putting everything back together. At least you do that if you want your airbrush to work predictably. The planks and the engine look good
-
You're right, it doesn't. Ah well, once less piece of P/E to attach to a curved surface.
-
When I worked in a customer furniture shop many eons ago in college, we called that a "wind" pronounced like winding a clock. If you used CA, god himself is not getting that hull back apart, you can either stop or keep going but there's no fixing it. At a minimum it's an object lesson to watch closely for that next time.
-
Thanks @SardonicMeow again for taking time to take all those pics and for uploading them here. It's yet another variant- two yards like Cheerful, spreaders and no mast top like Lennarth Petersson, lots of other variations that others will be better at spotting then I am. What I've concluded from this exercise is that there was not a standard cutter rig, at least in detail. Either the third yard was standard but only carried in light weather, or there were at least two basic cutter rigs- three yards and two yards, both on just two masts. Forestays terminated in either three-hole or five-hole deadeyes. Main backstays either had a simple rig or a seemingly unnecessarily complex one. There could be a mast top and ratlines for the topmast, or there could be simple stays with no shrouds. It goes on One thing interesting about Surly is that it does in fact say Surly on the stern. I had given up the idea of putting the Lady Nelson P/E on the stern as none of the contemporary models had their names on their sterns. Now I'm going to rethink.
-
Hmm yeah somebody hit the wrong toggle, there's no attach images functions.