MORE HANDBOOKS ARE ON THEIR WAY! We will let you know when they get here.
×


vossiewulf
-
Posts
1,477 -
Joined
-
Last visited
Content Type
Profiles
Forums
Gallery
Events
Everything posted by vossiewulf
-
 Thanks Phil! With respect to the eyes on the mast bands, bah, I should have seen that, thanks. Ok on the clue line and sheet, I'm pretty sure I understand what you're saying. I think I'm mostly following you on the mystery sheave in the lower yard at least in that you also don't see an obvious use for it, although I also wondered about the fiddle block on page 28 (in fact I was proud of myself for knowing it was called a fiddle block☺️) . You're right that that is another unaccounted for sheave that may be related to the one in the lower yard. The real question I have is do I make the lower yard with two sheaves and attempt one of your suggestions or do I make it with only one sheave? Also, do you have any ideas on the hexagonal center yard sections vs. octagonal? The Masting and Rigging of English Ships of War shows only octagonal yard center sections, and I'd really prefer going with octagonal since it would be considerably easier to do.
 -
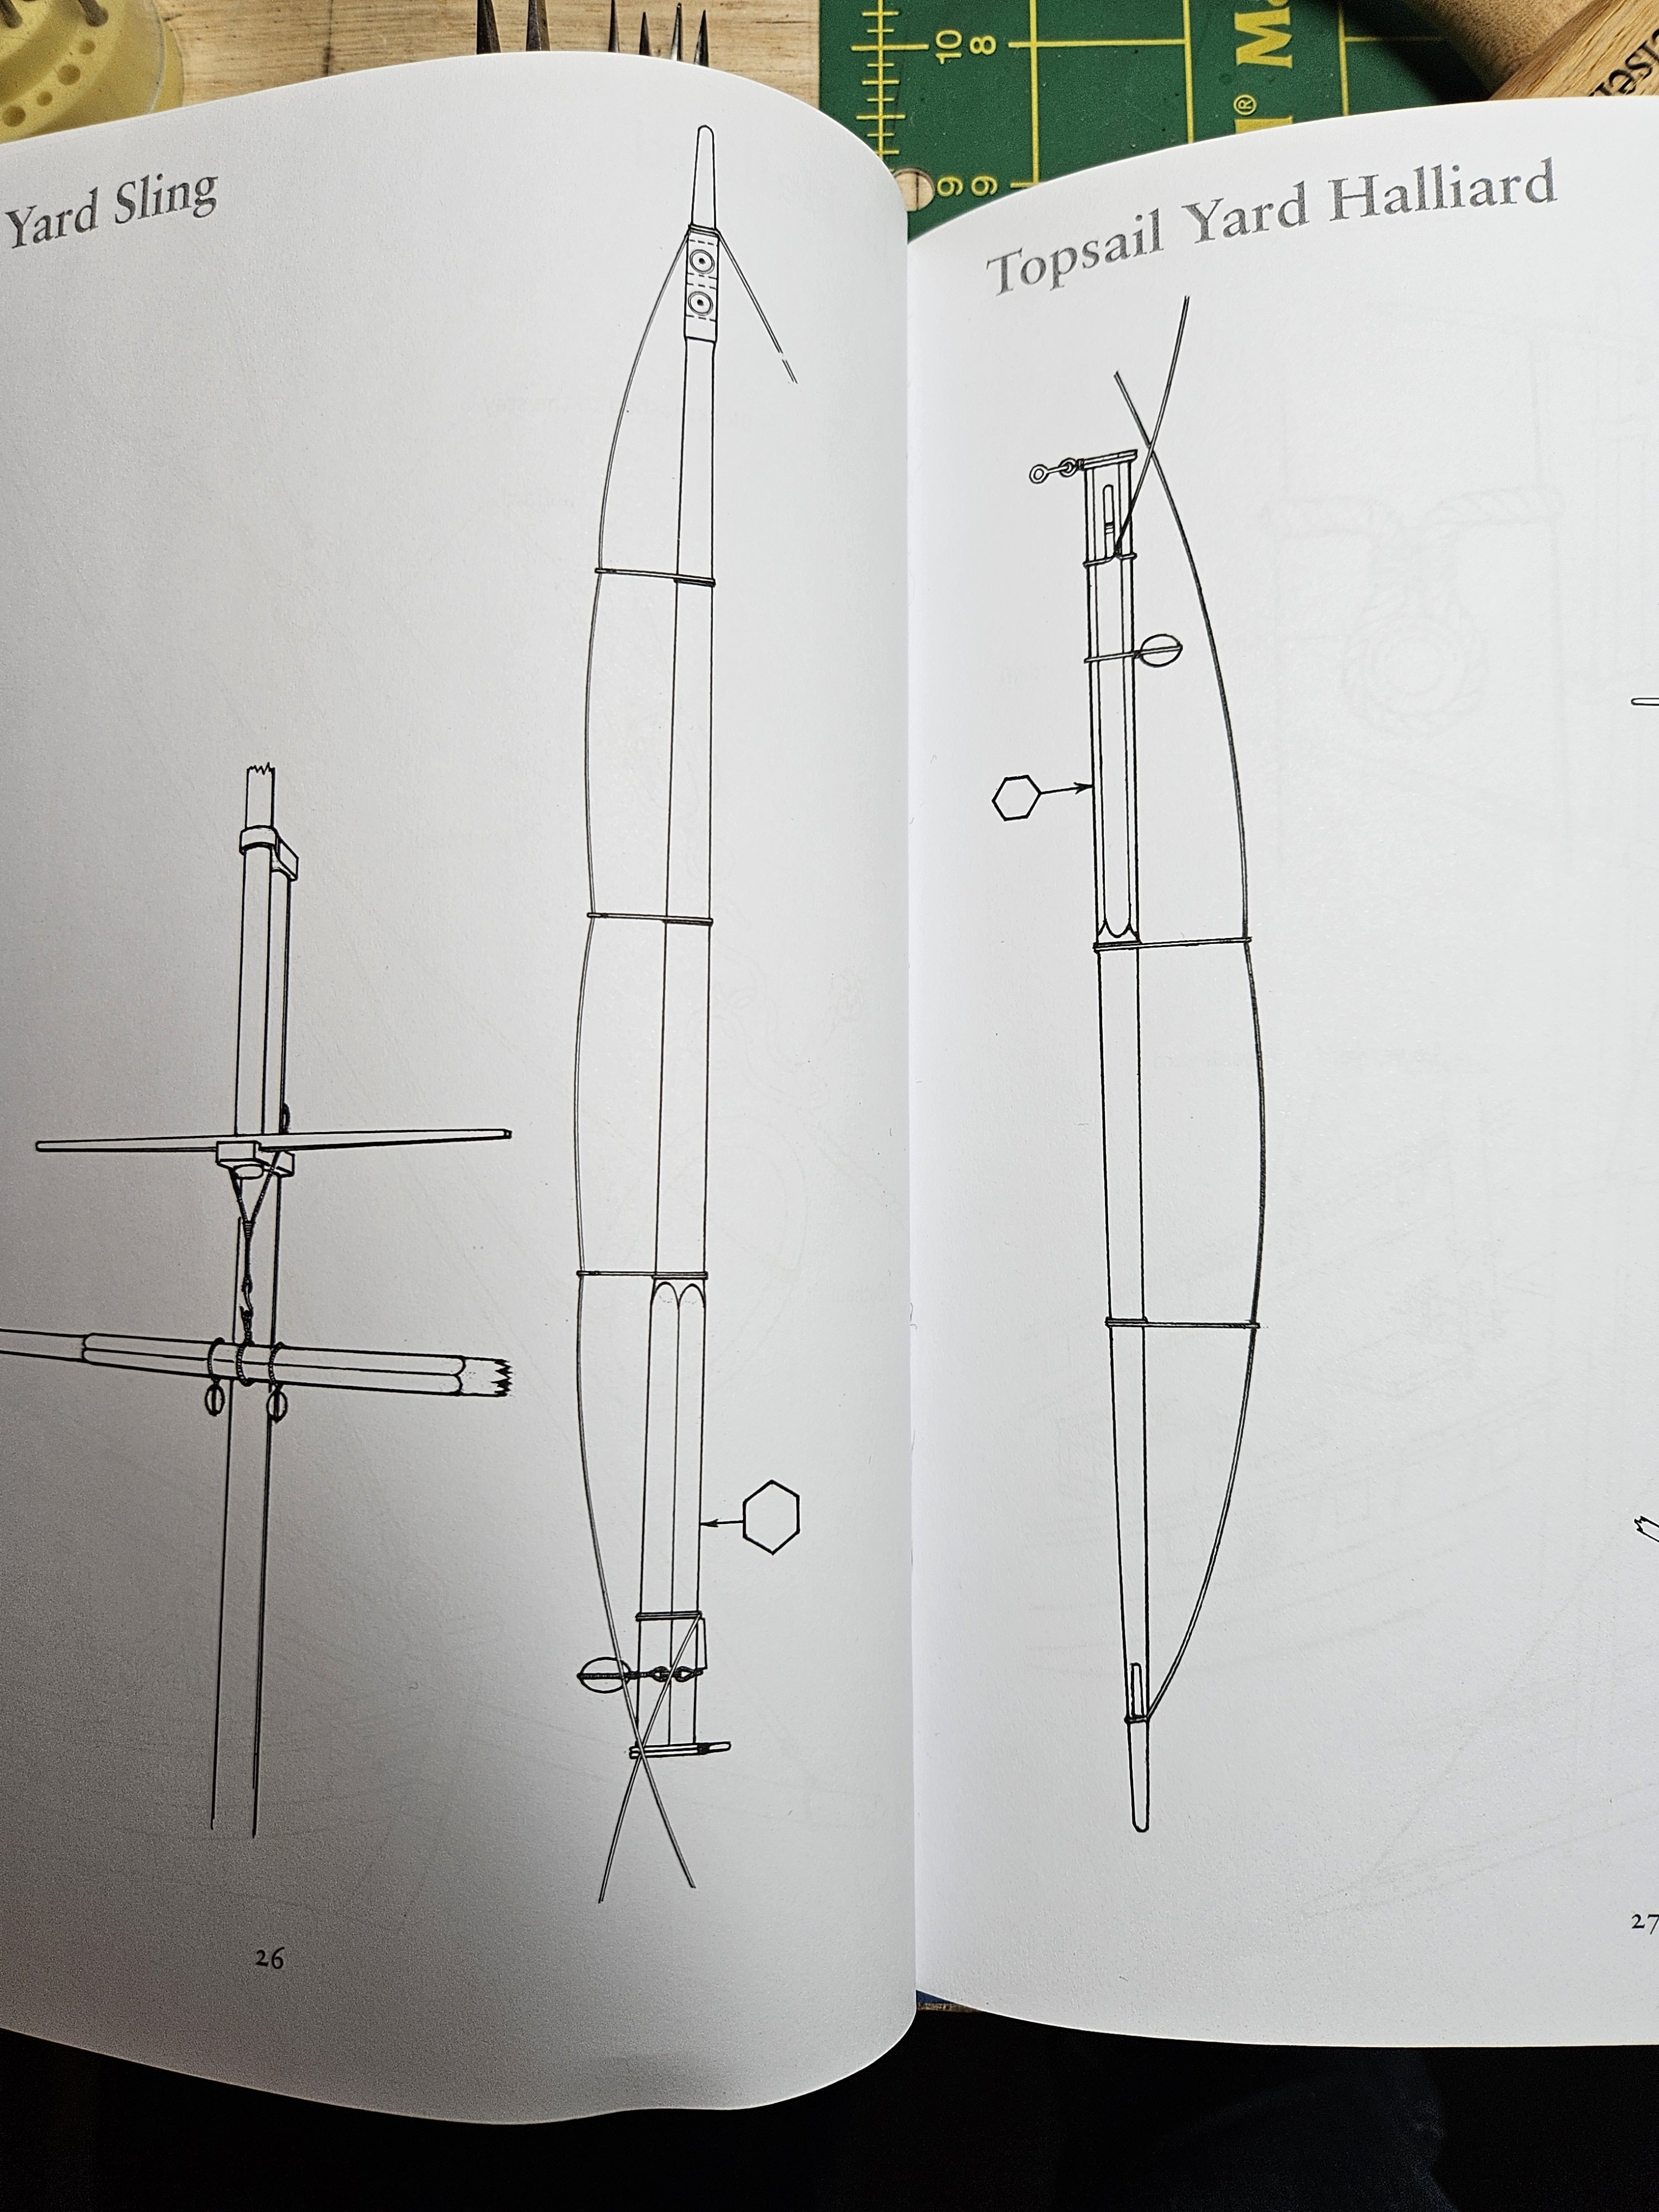
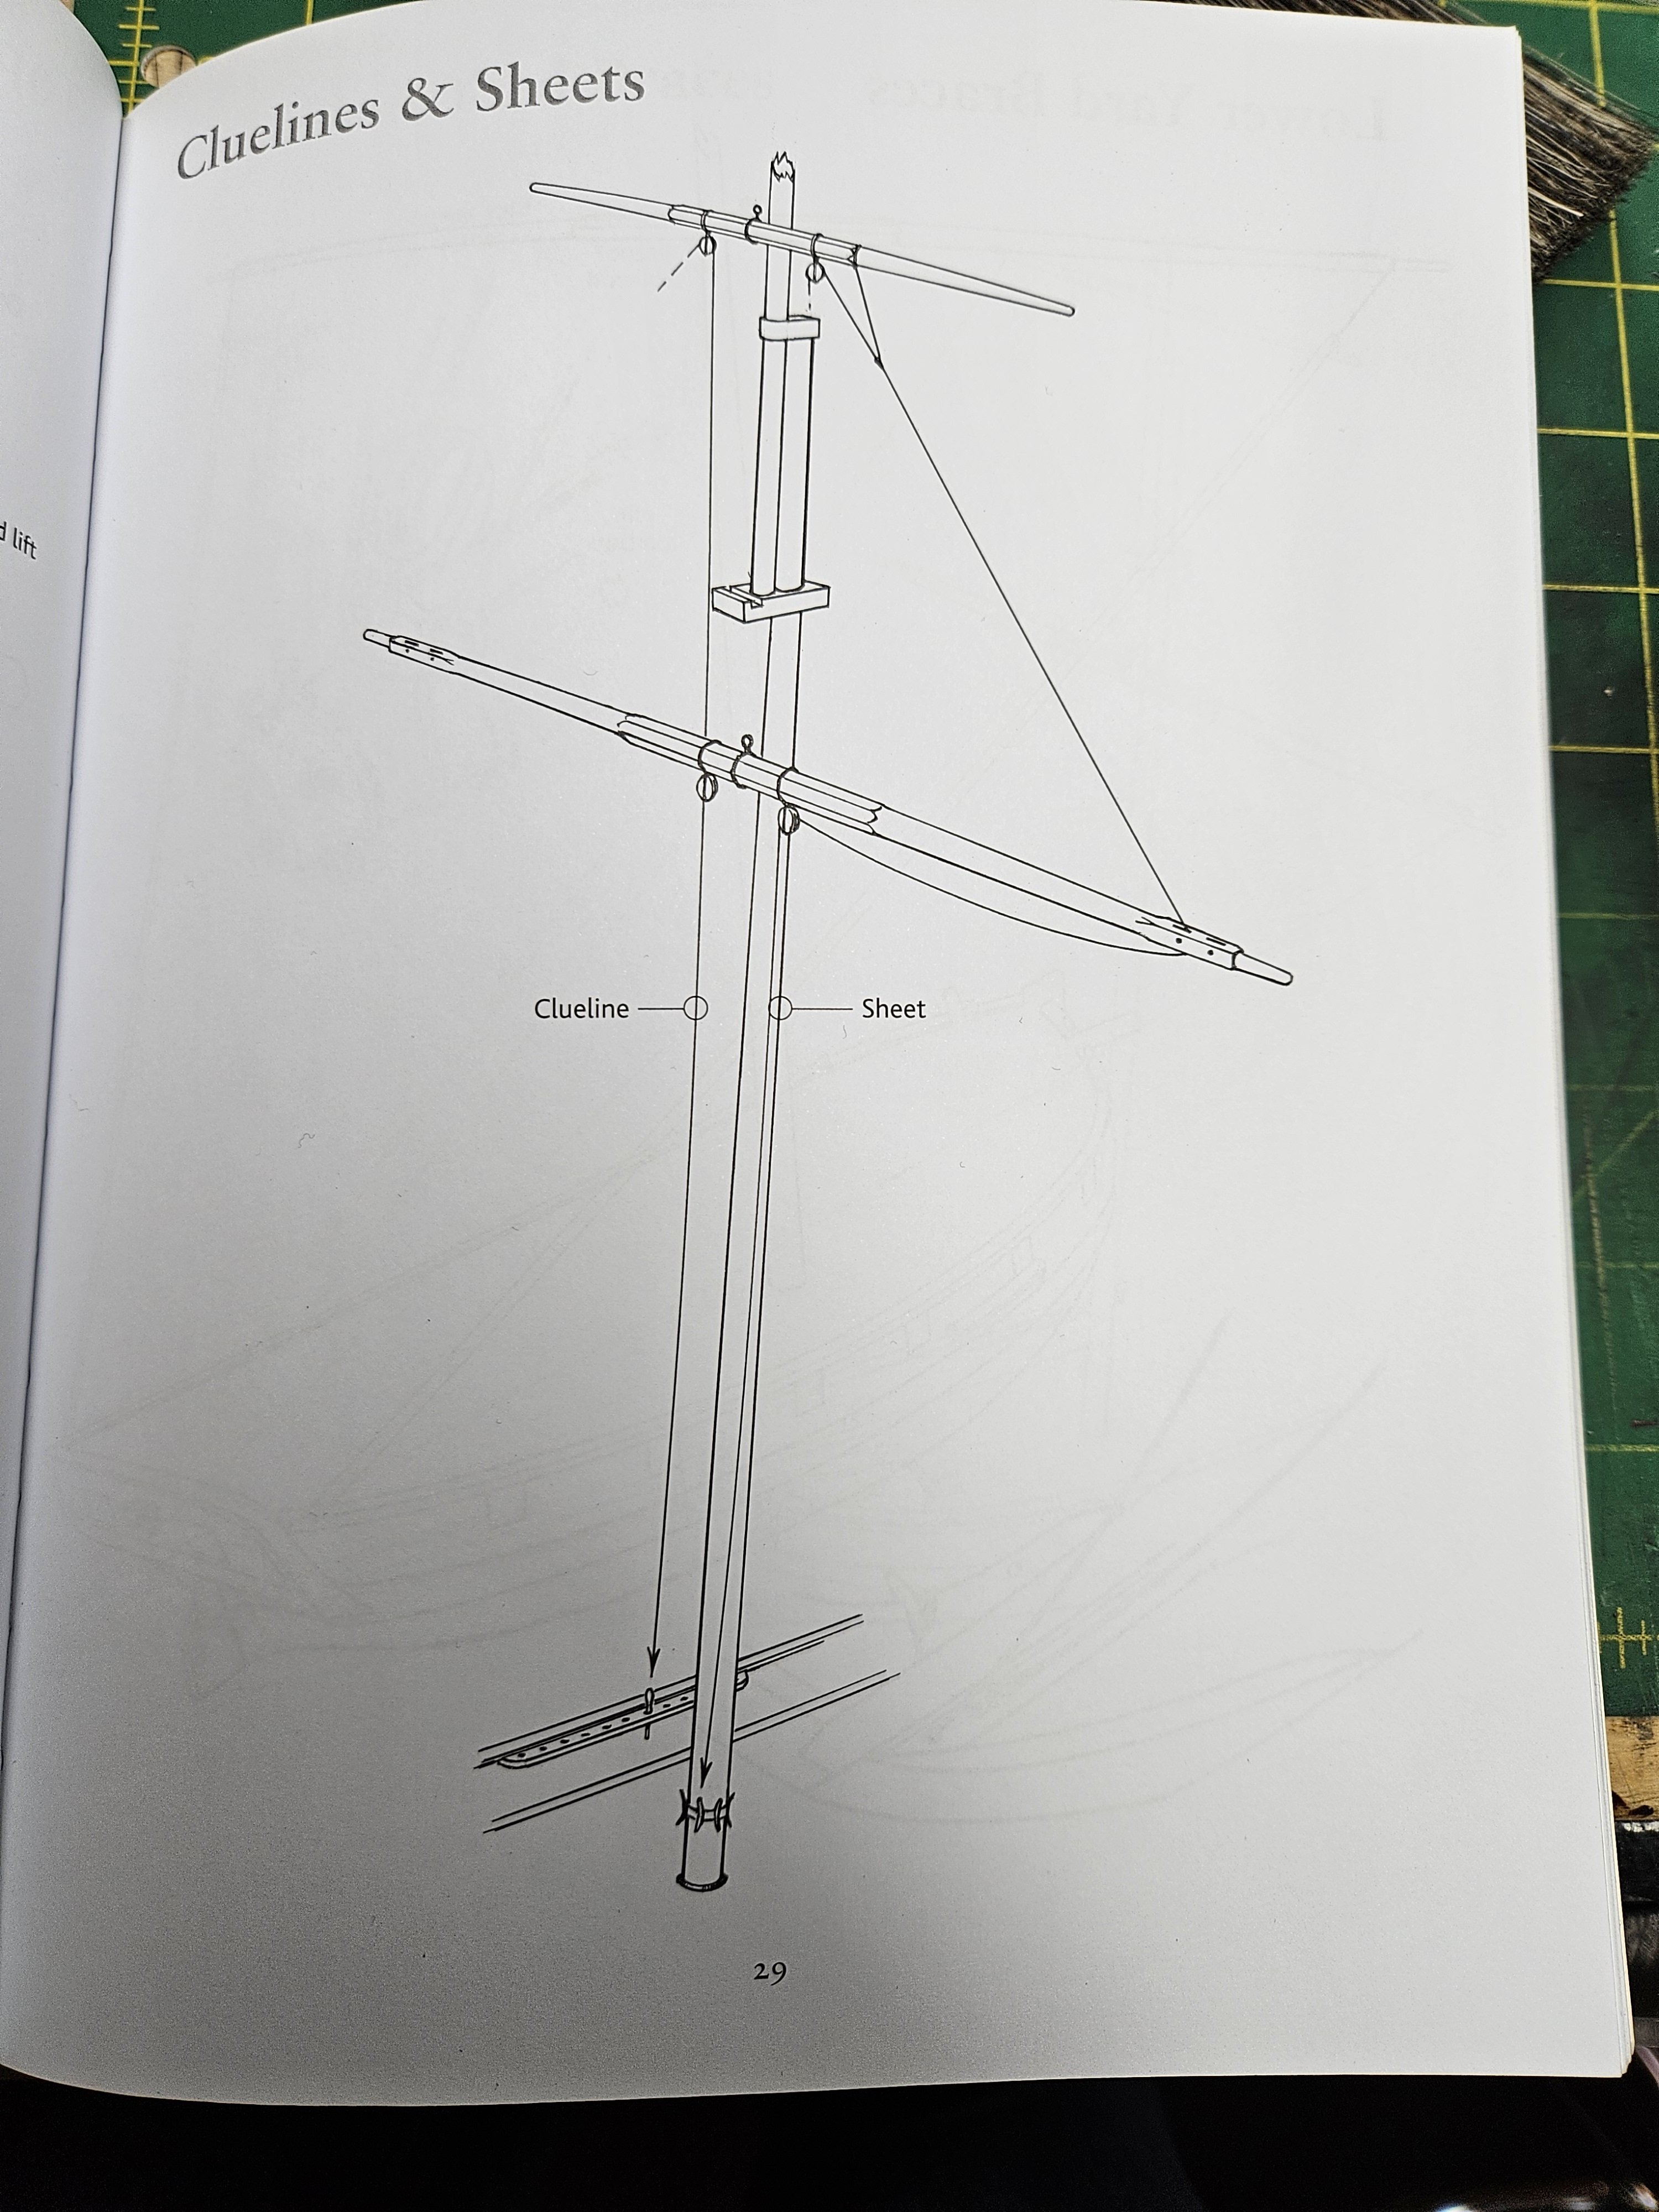
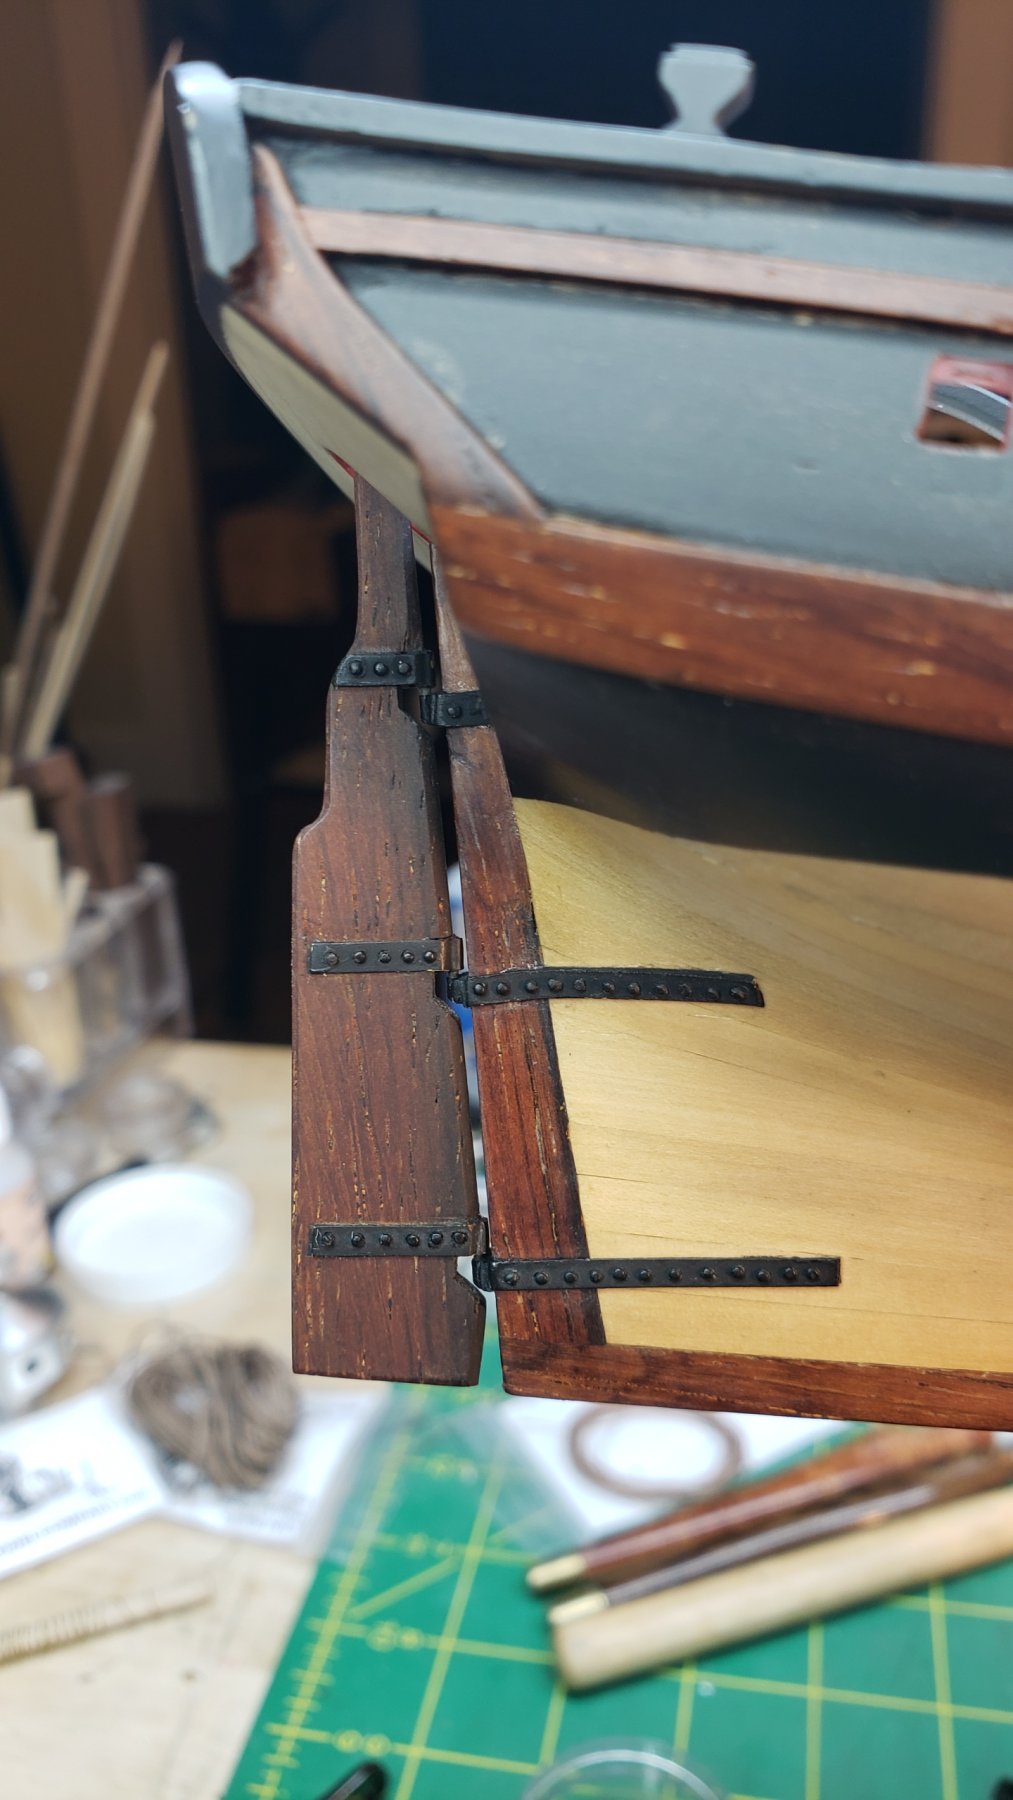
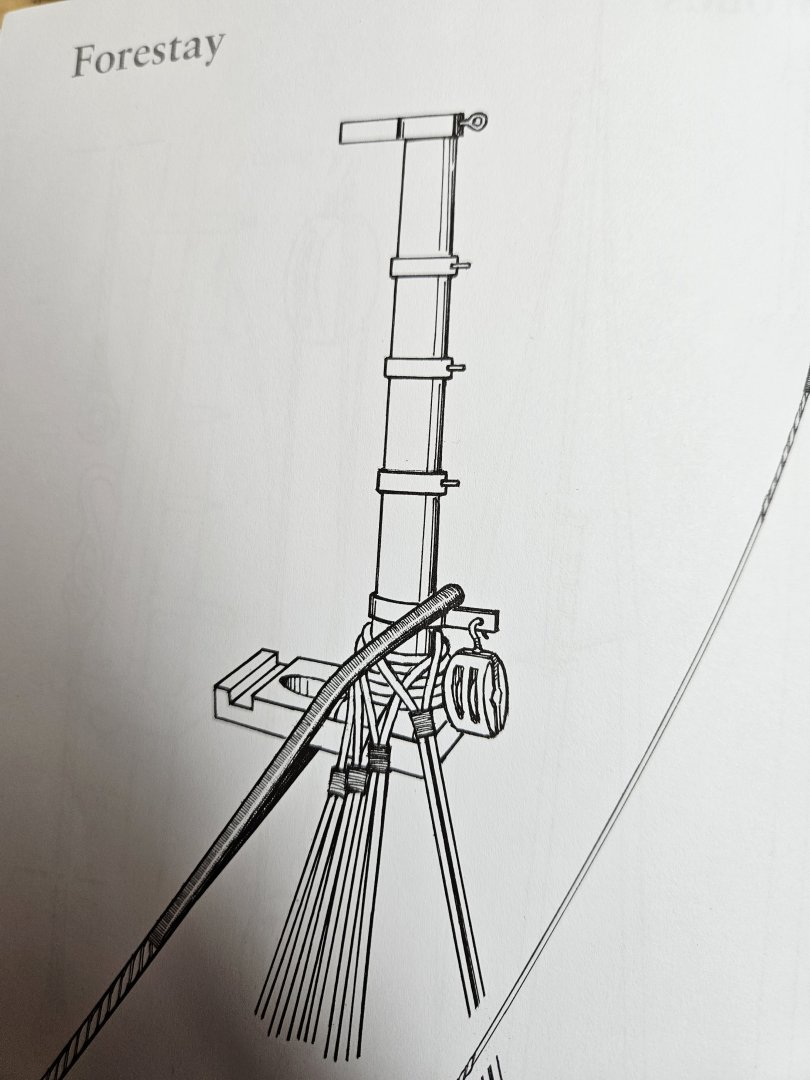
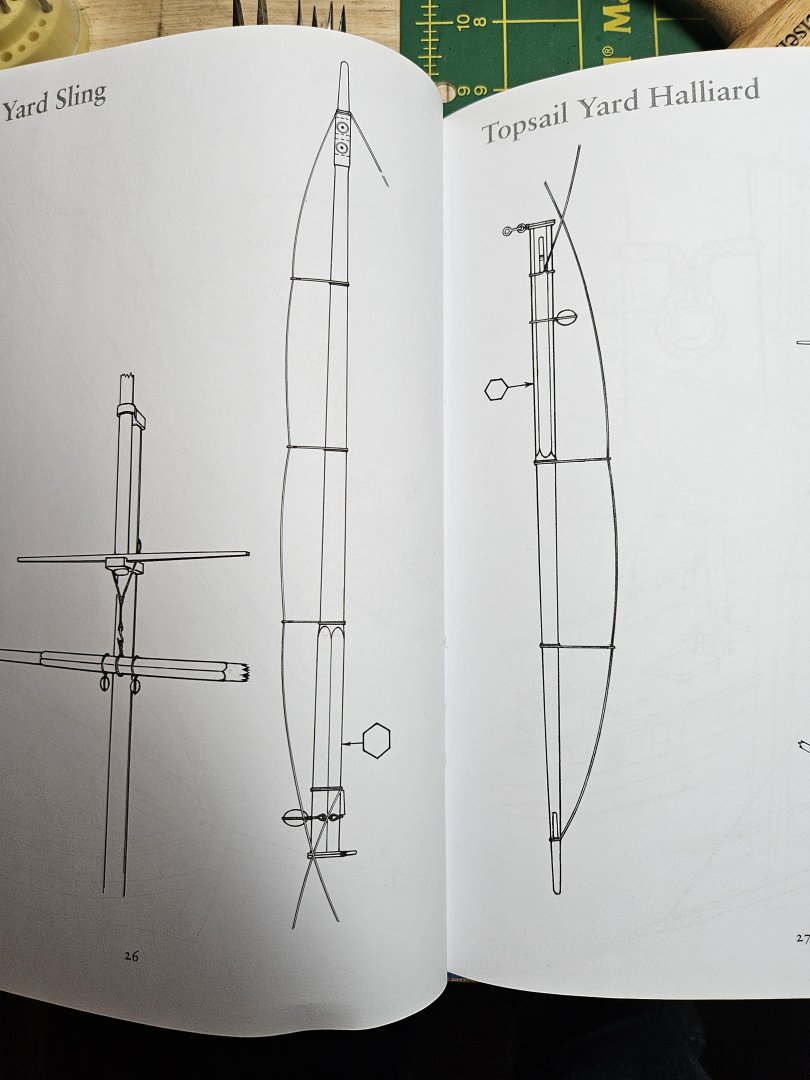
I have reached the point where I am venturing into rigging my Lady Nelson, my first rigging effort and I want to get it reasonably right. As such have been reviewing Chuck's Cheerful instructions as well as the cutter rig found in Rigging Period Fore and Aft Craft. With respect to the latter, I have some questions: Here I'm assuming those are iron bands around the top of the mainmast. However, what are the projections going aft from the hoops? Also, the mast cap appears to be iron as well or maybe iron and wood together. It looks like there is a square-section part of the cap that goes on the top of the mainmast and a simple hoop shape for the base of the topmast. Is that correct? On this page, first there is the hexagonal center section of the lower and topsail yards. I've seen octagonal sections before but not hexagonal. Is hex correct? Also the pic shows the lower yard oriented so a point of the hex pattern is forward, while the topsail yard is rotated 60 degrees so a flat of the hex is facing forward. Is this correct? Further, there are two sheaves shown let into the lower yard, but he shows only one in use with the clue line/sheets drawing. What was the second sheave for? Finally there is the clue line/sheets drawing. This one I'm finding confusing, are the clue line and the sheets two ends of the same line? If not, I don't understand this drawing at all, as it seems the clue line and sheet both go through the same single blocks on the topsail yard. Thanks in advance for any advice, as noted this is my first project so my knowledge is minimal.
-
Very high quality work, Erik, very nice, keep it up. Doesn't hurt to have the kit designer helping out as you go along either 😁
-
I'm sorry to hear that, Rick, that must be very frustrating. I will be keeping my fingers crossed also.
- 714 replies
-
- 2
-

-
- lady nelson
- victory models
- (and 1 more)
-
Haha! Sorry Rick, but I'm very glad to see you're still kicking around this forum 😀
-
Thanks! And yes, I expect the final rig to be a mishmash of Cheerful and Petersson's illustrations. One thing I noted in both is they have belaying points both on the stern and the bow that my Lady Nelson doesn't have, I'm going to have to do some kind of surgery on the existing ship to belay all the required lines. Thanks Mike, and of course I remember you. And I agree with you, brushless micromotors are teh shiznit when you're doing precision work like ship modeling. They're just so much better than Dremels. I look forward to you joining me here 😀 Hey Pat, great to see you! When I was packing for my move here, I was both laughing at myself when for example I counted no less than 11 different sets of needle files in different sizes and cuts and manufacturers and crying at the time it would and did take to organize and protect everything for shipping. You can't have too many tools until you have to move 3500 miles.
- 714 replies
-
- 2
-
-
- lady nelson
- victory models
- (and 1 more)
-
Round-nosed pliers, standard jewelry-making tool mostly for making chains. In ship modeling they're useful for making eyes and hooks.
-
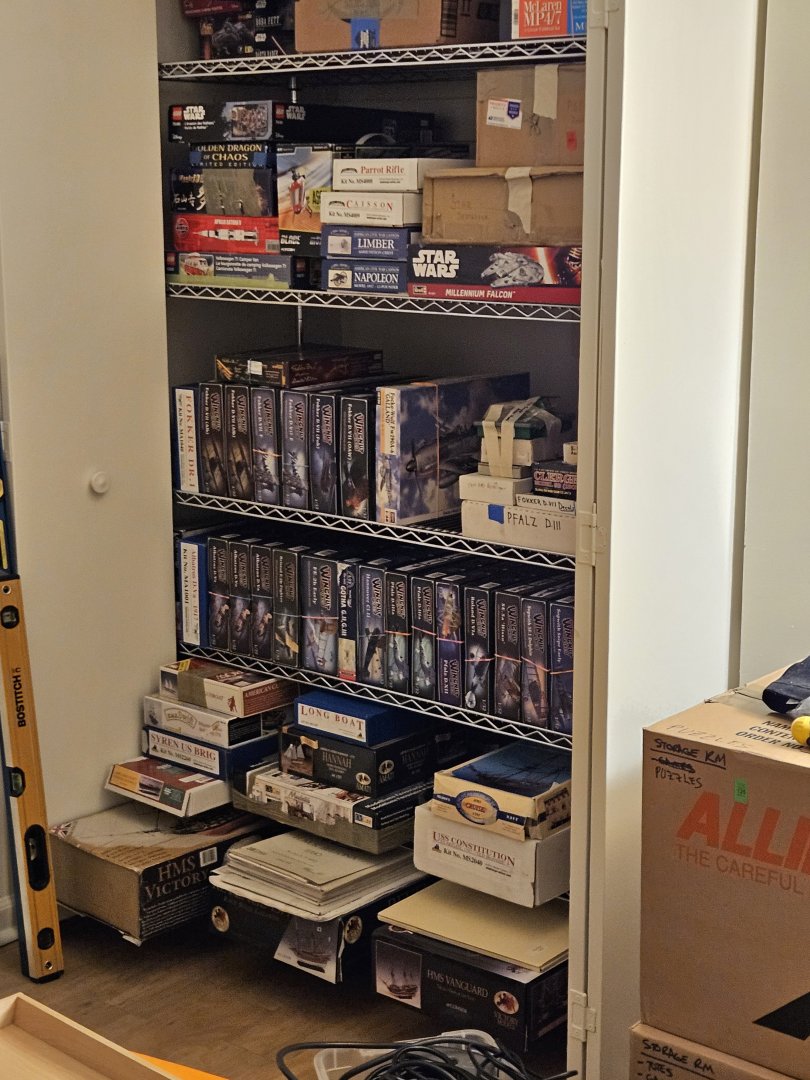
Thanks for the kind words folks, it was a minor five year layoff. The fact is that work became even more time consuming and stressful and I couldn't spin down enough to manage the precision I strive for daily, so I stopped spending time in the shop. The good news (from my perspective at least) is that I retired from Visa in June, and after much preparation I have finally moved away from the stress of working in Silicon Valley for the relative peace, quiet, and much lower living costs of Charlottesville, VA. I and my partner have spent the last month working every day all day to unpack, and considerable time was spent setting up my new workshop. Um first question is why is inserting an image from an Imgur URL failing? I tried inserting the link wrapped in BBCode too and that didn't work either. I guess I will just attach images to the post until I figure out how to insert them inline again. Anyway, one pic is my new workshop finally fully operational, the other is the agenda- as you see I have a few kits piled up including three ships of the line (Vanguard, Victory, and Montanes), a race-built galleon in HMS Revenge, and Model Shipway's Constitution. That's not even counting the three brig models or all the rest, the point being I have enough to keep me busy for quite a while. I may not have been able to work the last five years, but I kept stocking the kit closet 😀 With respect to the workshop, not seen on the other side of the room are the three Byrnes machines- the saw, the disc sander, and the thickness sander. I was saddened to see he had passed away and I feel even luckier to have his machines. Anyway, as I wrap up the final steps of unpacking I will finally have time to start spending my days on the Lady Nelson and getting her rigging done so I can move on to one of the brigs. I have been reviewing Lennarth Petersson's Rigging Period Fore-and-Aft Craft which is excellent, but I have questions about the cutter rig described within. I'm going to post a separate thread with the questions as I think that will get more answers than just asking them in one of many many build logs.

- 714 replies
-
- 11
-
-
- lady nelson
- victory models
- (and 1 more)
-
adapt this idea for a small spray both?
vossiewulf replied to Bob Blarney's topic in Modeling tools and Workshop Equipment
At the custom furniture shop I worked at, we used solvent lacquer, did have TEFC motors on the spray room fans, but the spray room guy typically turned off the fans before spraying the final coat, more than half the time without wearing a mask. It would literally be a cloud of lacquer in there through which the spray room guy could only dimly be seen. He thought he got a better finish doing it that way. I and all the other people told him he was completely whackadoodle to do that, he never listened. No idea what happened to the guy but I assume he didn't live to a very old age. On the up side the spray room never exploded, but we were waiting for that too as he was a smoker. -
Otto Frei is where I've bought many, many things. The Venn diagrams of professional jeweler's tools and ship modeler's tool needs overlap quite a bit. Contenti is another very good supplier, I just tend to use Otto Frei as they're just on the other side of the bay from me so I get next day delivery with standard UPS. If you know anything about the Bay Area you'd know why driving over myself is a seriously less than entertaining option, getting anywhere around here now means fighting 8 and 10 lane wide 20mph traffic everywhere, even on weekends. About 3AM Sunday night is the only chance you ever might be able to use cruise control for more than a few seconds. I've had a 535 for over a year and I haven't even figured out how the cruise control works, much less used it. I'd go completely crazy from the traffic if I didn't take the car up into the hills near me on the weekends for some back road, no traffic, windy road driving at irresponsible speeds. In fact when I went up to see the new Dockyard Supervisor, it required crossing the hills north of Santa Rosa, very windy with lots of switchbacks, and some serious fun was had. On the way back, some 20-something in a Hyundai Veloster thought he was going fast until the old dude in the BMW twice as heavy as his car made it clear that said old dude could pass him if he wanted It's not threadjacking if it's your own thread! I forgot to answer this also Davy, sorry. You maybe have better luck than I did with epoxy, I tried two different kinds on brass that was brightened just before bonding and the damned things still popped off with the slightest stress. The key with brass is the first thing you said, you mechanically pinned it. If you pre-drill holes in the straps and use mini brass nails to mechanically attach them, all is good. I considered that too but I didn't think the nails at 1/64 would be strong enough to get them into pressure-fit holes, I might have been wrong about that. I have more 1/64 kits sitting in the closet so we may revisit this, but at least I'm sure now that if I get annoyed with brass I can make something strong enough with good detail in styrene.
- 714 replies
-
- 4
-
-
- lady nelson
- victory models
- (and 1 more)
-
That's amusing, I thought Dalmatians had their spots from day one. I love dogs just as much as cats, but I never replaced my last dog who lived to be voting age. Also people in the Bay Area love animals, but there are houses and cars packed together in every spot possible, so you have to either work at getting them proper room to run or take them to doggie daycare which dogs love but it's expensive. With my job I just don't have the predictable time required, we have emergencies at all hours and I can be directing the application side of the response for many many hours and that's a weekly thing at least. I hope I'll be settled down again one day someplace dog-friendly.
- 714 replies
-
- 2
-
-
- lady nelson
- victory models
- (and 1 more)
-
Keep in mind that although it's fairly strong, rice glue will still fail before the wood, and western joinery generally assumes the glue is stronger than the wood. If you look at traditional Japanese joinery, in general it is much more complex than western, and usually includes one or more mechanical interlocking features so the joint will have the full failure strength of the wood. However, that's only applicable to building furniture or anything else that will take significant stresses. I see no reason why it wouldn't be an excellent ship modeling glue for those who generally use PVA, at least for anything besides the hull planking.
-
I think it looks great, much more accurate than almost all sterns you see on cutters built here, including mine.
- 241 replies
-
- 1
-
-
- mermaid
- modellers shipyard
- (and 1 more)
-
I do also, but Chris needs to be cautious while building a small business. Chris, your initial plan sounds good, my suggestion is to keep adding figures to those available at a slow pace that won't distract you from your main kit development goals, and continue to do so as long as they sell reasonably well. Go captains > say three crew figures > lieutenant > bosun > more crew figures. And even if French ships aren't on the docket, if the rest of the figures sell well I would think about doing the same for the French navy. The argument for is that even though I'm not much interested in figures, I've seen thread after thread of people looking for quality figures and not finding much. I think we rarely see figures on ship models partially because there isn't a viable option to put figures on deck of a similar quality to that of the ship build. The other argument is if no one is really serving this market, it's possible without too much cost and difficulty to become the premiere supplier. And that drives traffic to your site from people looking for figures, and a portion of them end up buying ships too.
-
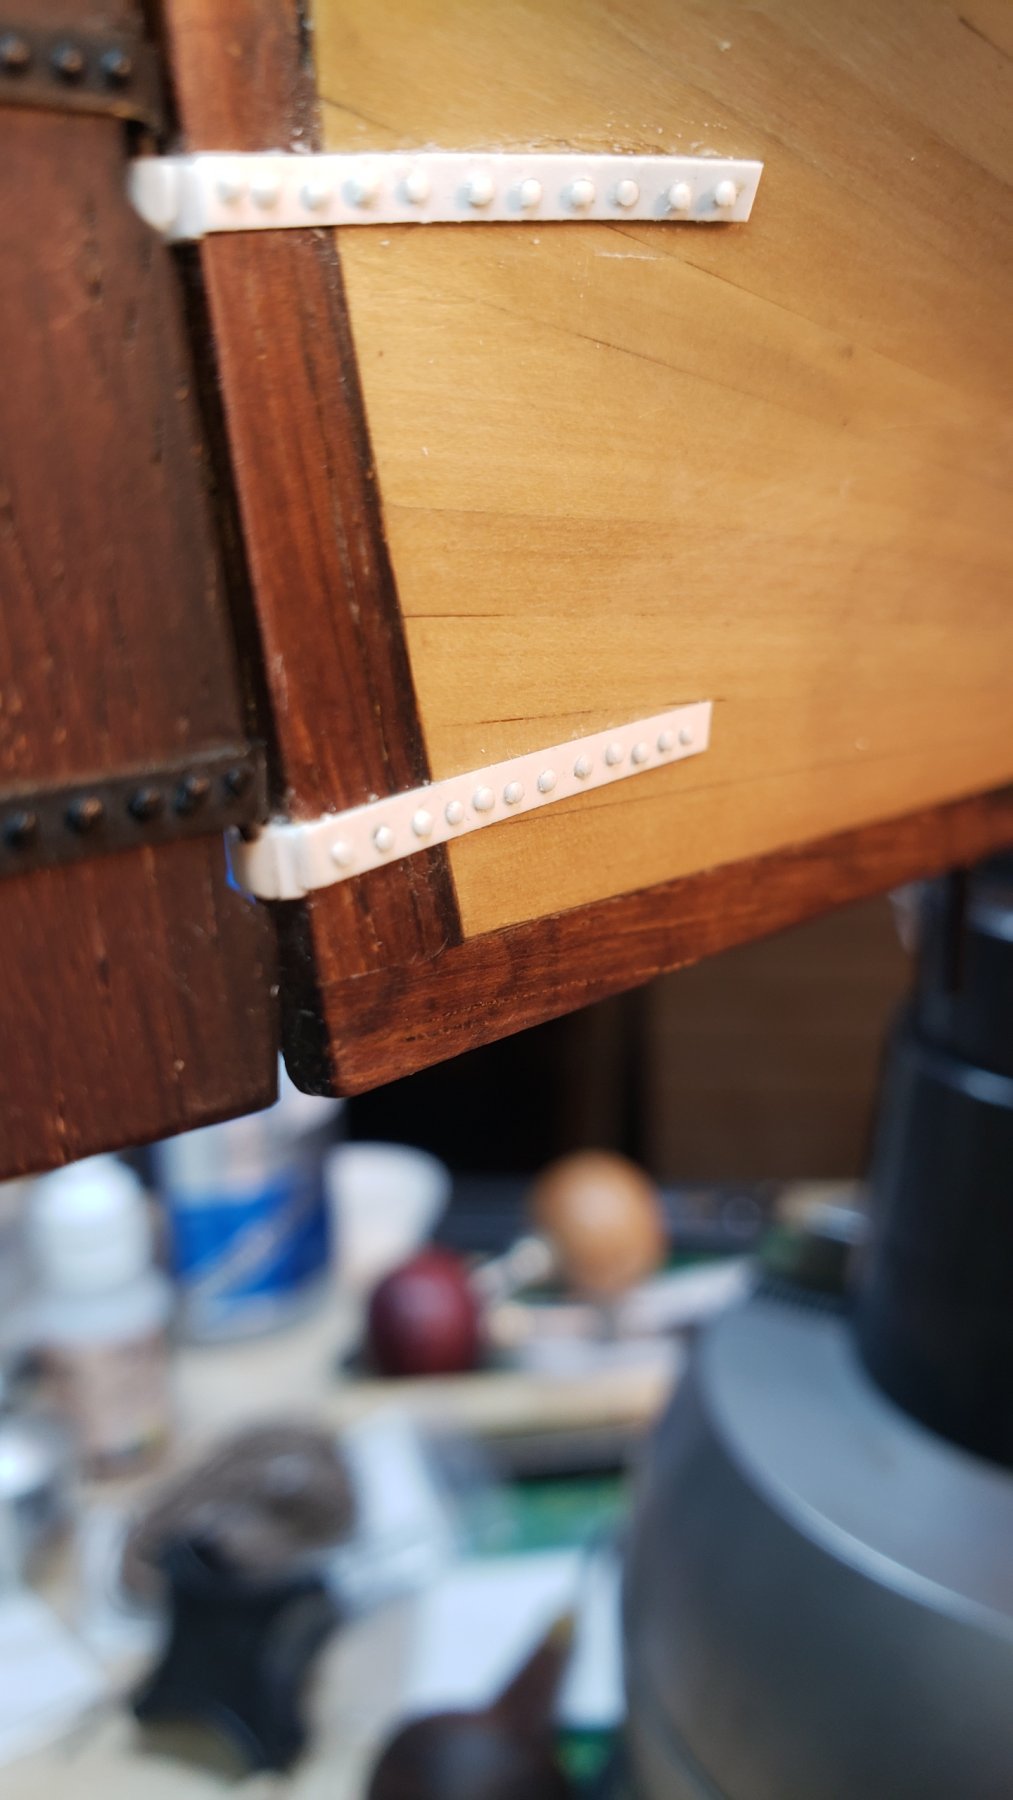
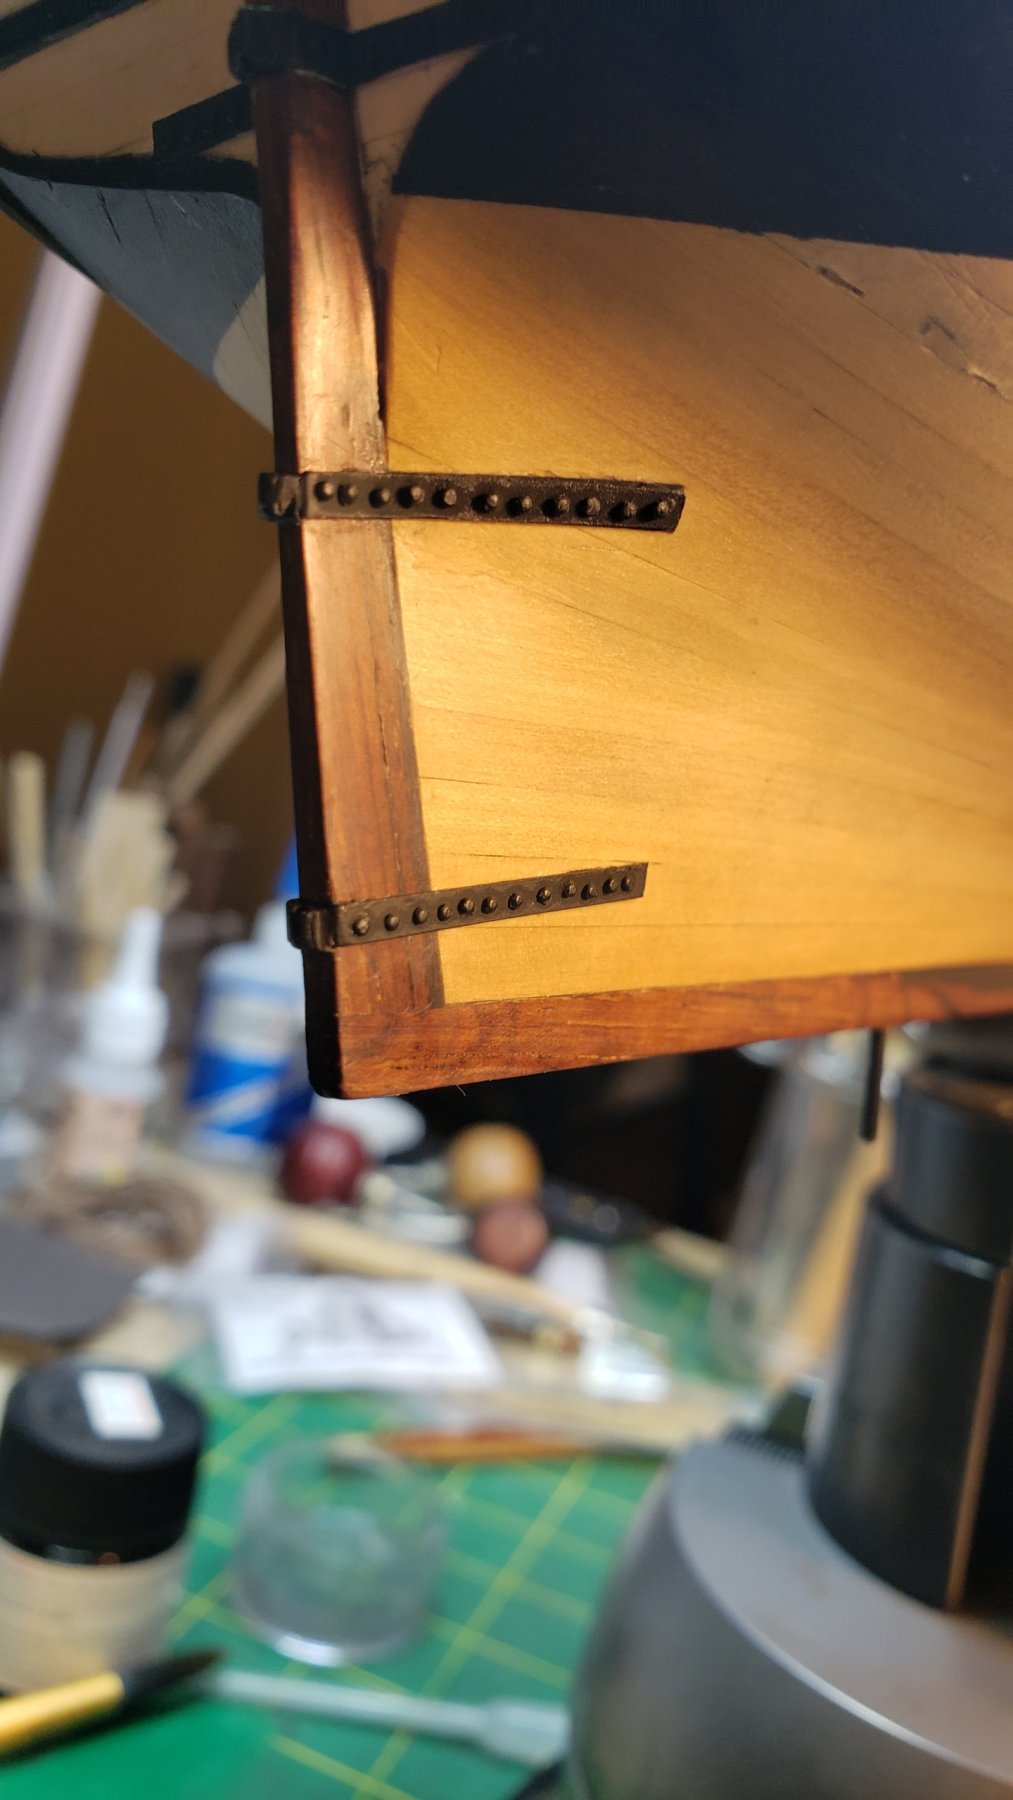
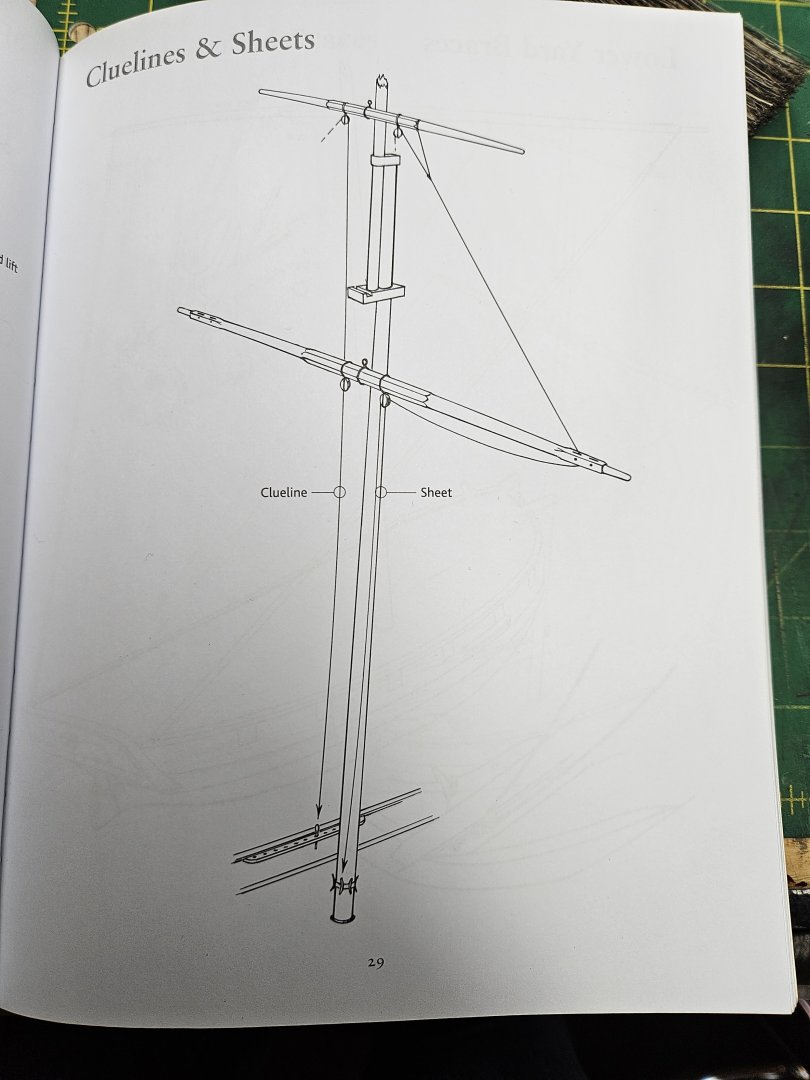
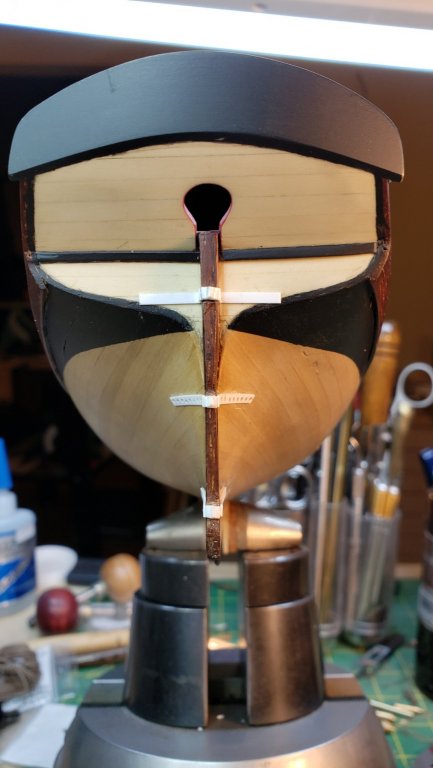
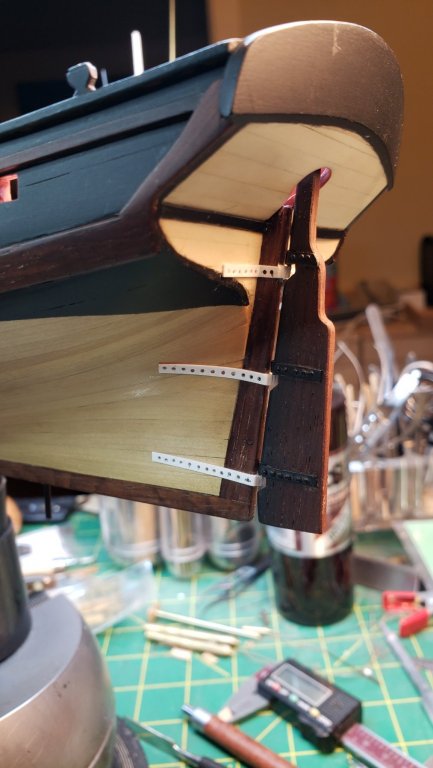
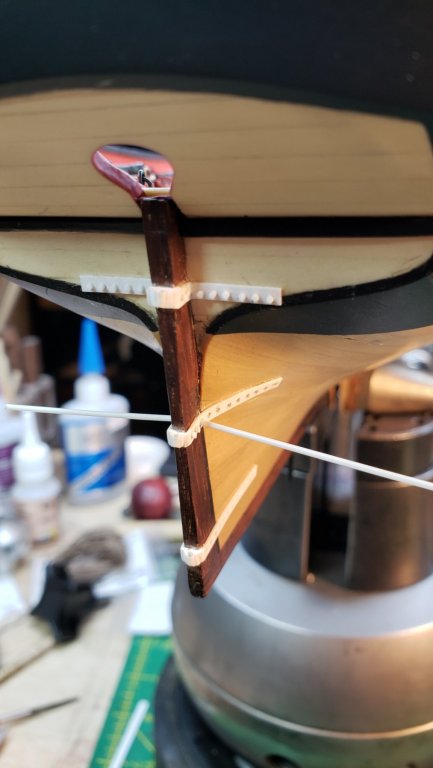
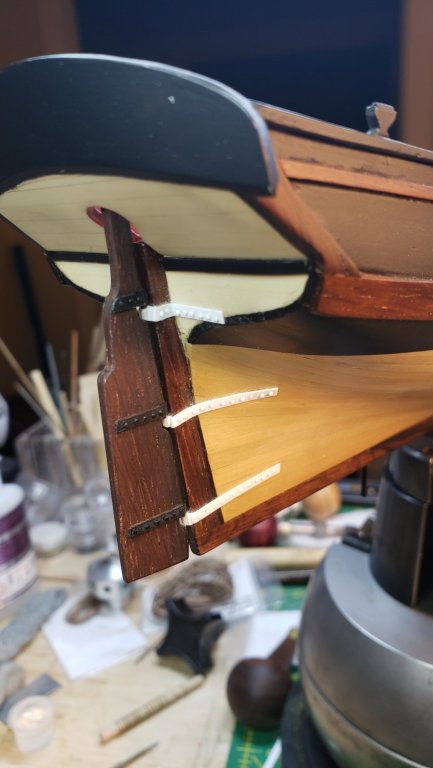
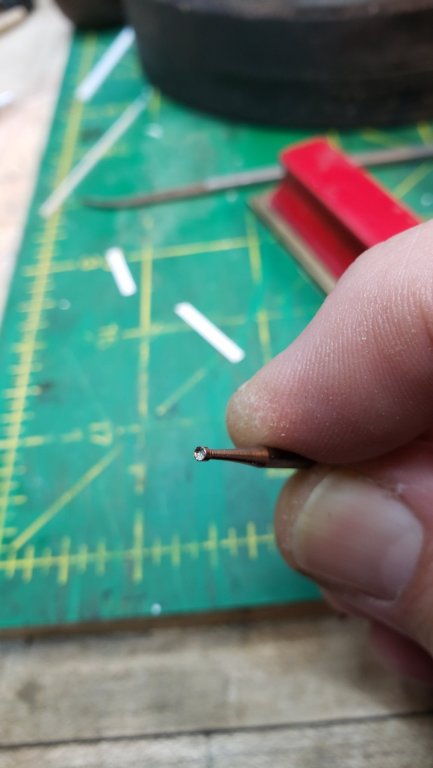
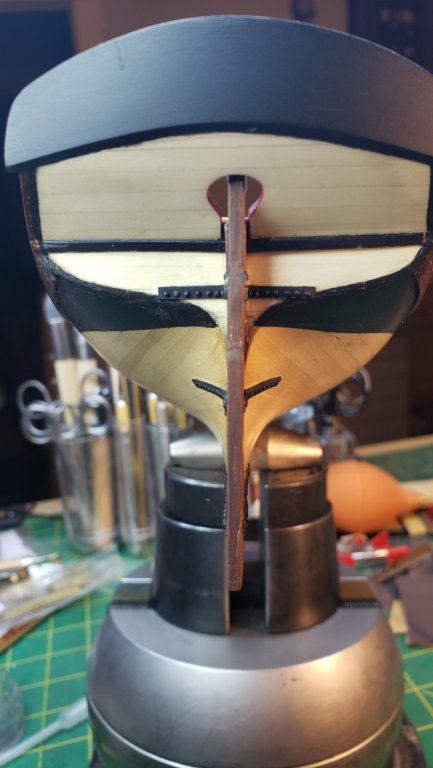
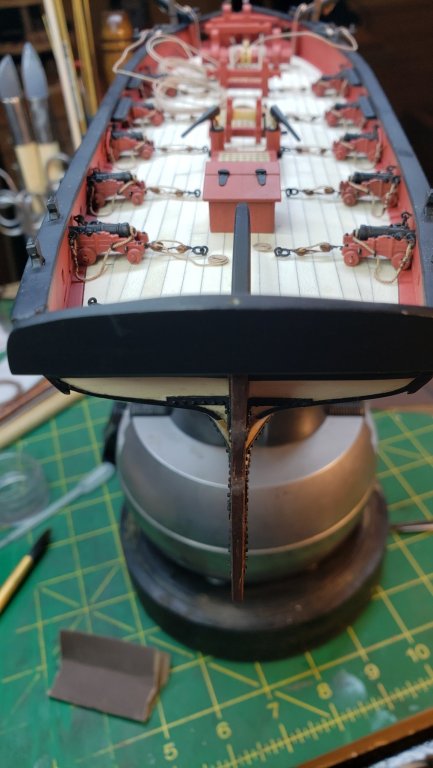
Unfortunately in my place I made the workshop impossible to cut off, seeing as it's the house's alleged dining room I've had no problems with cats knowing that there are places they aren't allowed on, but of course the young ones will jump up just to prove they can the second you leave the house. So extra safety measures will be required at least until she gets out of bratty cat teenager phase. I didn't have cats until I was 21, when I moved into a house with a girlfriend after college, and pretty soon there were four cats and three dogs. For whatever reason I picked up cat language pretty quickly and have had them since. My wives have always laughed at me having regular conversations with them as they follow me around the house and monitor my activities. Progress remains slow, just haven't had much time to work on it, but steady in that I try to move forward a little bit every day regardless. Unless I talk myself into rudder pendants, the rudder is done. I just don't see pendants on the contemporary models, but I still find it hard to believe they'd go into the North Sea and the channel with nothing holding the rudder on but gravity. At least I'd feel like a colossal moron for drowning in a capsizing ship because the rudder just fell off and I had no backup to catch it. This was also one of those cases where cup burs come into play. I don't use them super regularly, but when I do, boy howdy do they speed along the process. Here as you see below, after I tore off the brass and started using styrene, I drilled holes for .030" styrene rod, and after letting the CA set for 30 seconds on those rod pieces, I just clipped each one off close with a good nail clipper. Then I went over them all with the right size cup bur in the rotary tool, and we have reasonably even nice rounded bolt heads very quickly. By the way, I drilled the holes in situ instead of on the mill or something to give it a more handmade look, but I ended up wobbling more than intended in a couple places. Rarely does a good idea go fully unpunished. Next up is deadeyes, which I've started but am at the moment wondering how to chuck them somehow to properly round them off. I've tried a few things so far with no luck, I'm considering just drilling a hole through the danged things and then filling them later with side grain wood.


- 714 replies
-
- 12
-
-
- lady nelson
- victory models
- (and 1 more)
-
Sorry Sam, somehow missed your reply here. Yes, this is going to be a challenge Right as I cross into doing rigging, I'm going to have a 12 week old fuzz-covered energy bundle that some people call Tonkinese kittens. With Takita when she was little, I had to keep an array of pens on the edge of my workbench so she could entertain herself while sitting in my lap by throwing the pens on the floor. I have no idea why cats think that is the funniest thing ever, but they do. I had to keep continuously replacing the pen supply or the next thing on the floor was an important part. I can only hope the new one doesn't decide that ship parts are prey items like yours did. Speaking of the rudder, it's finally more or less done, will post some pics tomorrow.
- 714 replies
-
- 2
-
-
- lady nelson
- victory models
- (and 1 more)
-
This actually reminded me that I built that as a kid in the early '70s. It was the first time I tried to do camouflage painting by hand, as I recall it came out awfully, but I learned a lot. I may go buy one just to see it again after all these years.
-
I don't know how complete your testing is on your site, so this may be expected, but the slideshows in particular were behaving very oddly in Chrome.
-
The whole "article" was a paid advertisement for Artec Eva, something you see more and more. The Team Chooses to Use the Artec Eva Scanner to Study the Viking Shipwreck And so, upon Auer’s strong recommendation, the team moved ahead with using Eva for working with the Big Ship. Experts using the faster 3D scanner Artec Eva to scan and document the discovery before damage set in to the Viking shipwreck. (Thomas Van Damme)
-
We're going to need more boxes.
-
Chris where exactly are we ordering this stuff once you have all the parts?
-
MONTAÑES by Amalio
vossiewulf replied to Amalio's topic in - Build logs for subjects built 1751 - 1800
Globalization is making acronyms way complicated. -
I got to fly a Stearman at an airfield north of Charlottesville where you could rent various biplanes and aerobatic planes. You had to take an instructor with you, but if you were certified for tail draggers you could take the entire flight. Really a wonderful airplane to fly, controls very responsive without being too much and control forces are not huge, although I never approached the Vne (don't go this fast) speed, so they might get heavier at high speed. But on a nice summer evening in Charlottesville with the sun setting over the mountains, it's a really fun experience being in a sweet biplane with an open cockpit and a giant radial in front of you, you end up flying big arcs back and forth because it feels like you can point the nose anywhere you want so you get to pointing the nose around. And easy in a loop, don't have to dive much for the needed speed and it just has the to be expected significant rudder input up and across the top and back down as the p-factor of the big prop tries to yank the nose around. People tend to think of gyroscopic forces from the prop would be a problem, but in reality the vast majority of the time the p-factor that varies continuously with your angle of attack is what the pilot is fighting. It basically causes asymmetric thrust that yaws the nose one direction the higher you point the nose, and in the opposite direction the lower you point the nose. Jack, that one was in USAAC blue and yellow also, your colors look good, I recall the yellow being on the green side. You've also done very well with the assembly, nice and clean and the decals are well done so they'll look very good once they get their final flat coat. It's a nice model to put up on the shelf and if you want to get rid of it for some reason I'll find room for it on my shelf