


Jond
-
Posts
758 -
Joined
-
Last visited
Content Type
Profiles
Forums
Gallery
Events
Posts posted by Jond
-
-
-
-
Pete
i find there are several sites with nice sitka spruce. they cut stock to many dimensions so the first work is done for you without waste. also it is straight and stays straight. I use if for all my spars. I think I do more because when you get to the wooden boat shows and around the beautiful yachts have it. So a few dollars extra for model side makes me feel better.. I can not image replacing a real mast..$$$$$
this build is really looking good.
cheers
- Piet, michael mott, mtaylor and 3 others
-
 6
6
-
Michael
I am happy top read this post. i think it means we need not carve our boats names. I found the old sign board for my real boat and both my rear admiral and i vetoed it. The font was cartoon like and all small letters.The were decals on mahogany. We spent a while thinking about carving a sign board since last year we got one for our catspaw dinghy and it was great.
to my point...we have agreed to go with vinyl marine paste on from DIY on line lettering for BITTERSWEET. it will be about 24 inches long. They also allowed me to down size to model boat scale [ 1;6 so 4 inch name]and buy them to match.
anyway keep going the crisp clean lines are a joy to watch as this wonderful large scale comes together
cheers
-
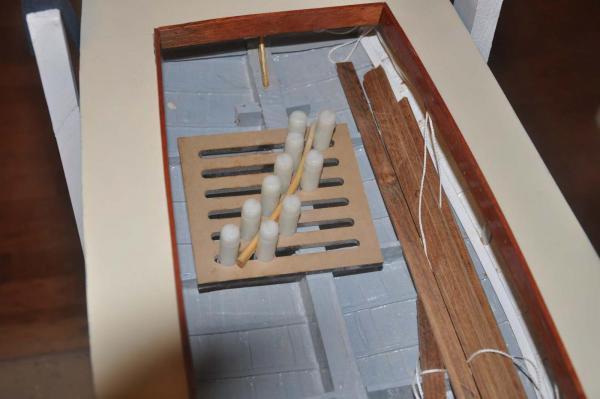
OK today I finally decided to fix the winches. I made them in an early post just to have something and to experiment with different materials. I never really liked them; painted wood just doesn't get it for me. In the end everything else except the 10 blocks are brass. So here we go on the next effort to make them in brass. I was encouraged while scrounging at the local hardware store by finding architectural posts and next to them small brass note book binding pins. Round head with post and screw in end.
-
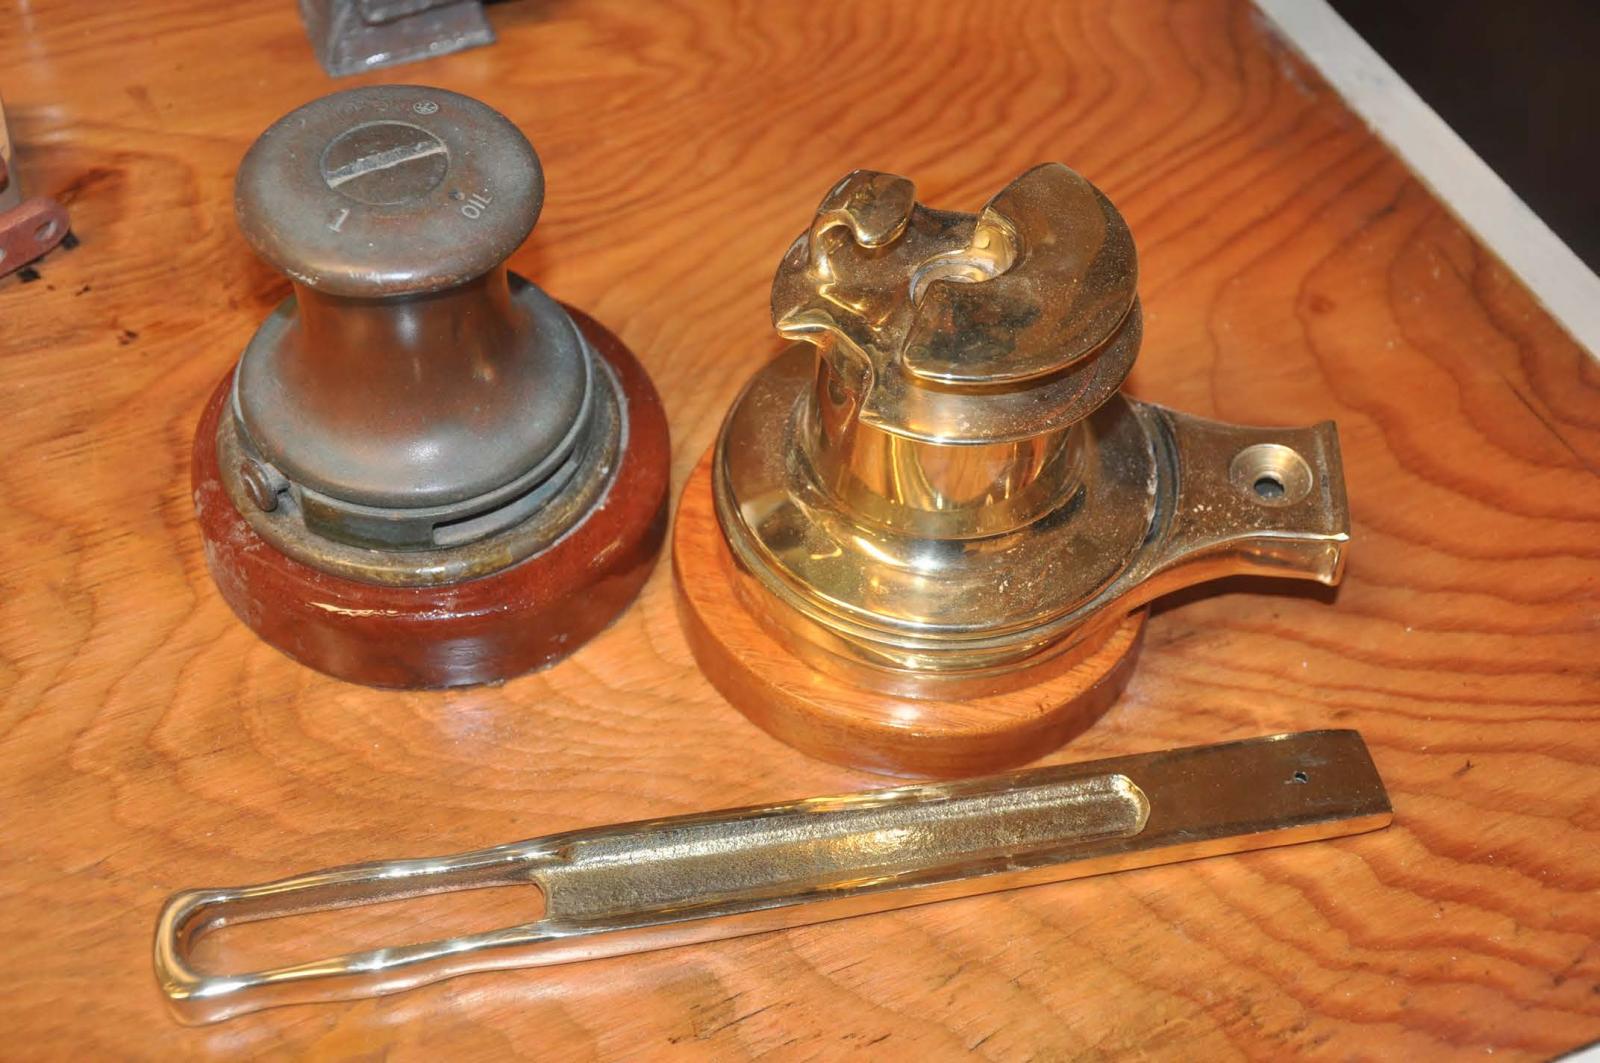
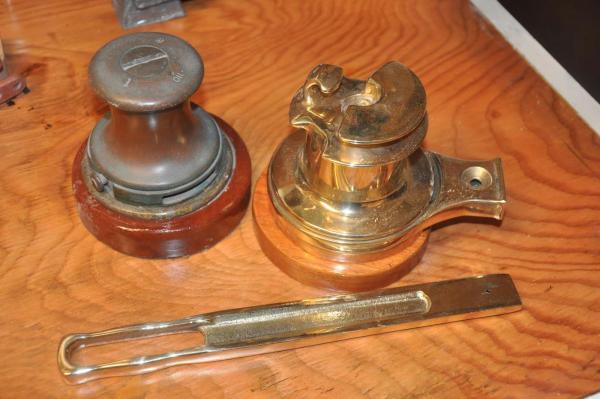 Here we have the real fittings. Please note for the foreward deck we have a new Murray winch with a jam cleat top. This design option avoids adding two more jam cleats to the fore deck just forward of the combing where folks likely stand or sit. With two or three sailors in the boat the jib sheet is managed off this winch and cleat and the side winches enjoy the ride. Murray has effectively become the vendor for small boat bronze winches. FYI it cost $65 just to ship it here from New Zealand
So first lets look at the regular side deck winch,
-
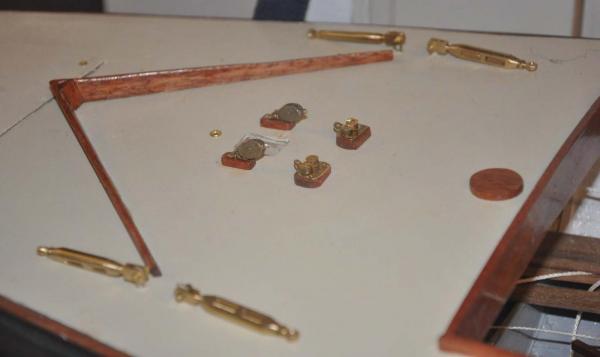
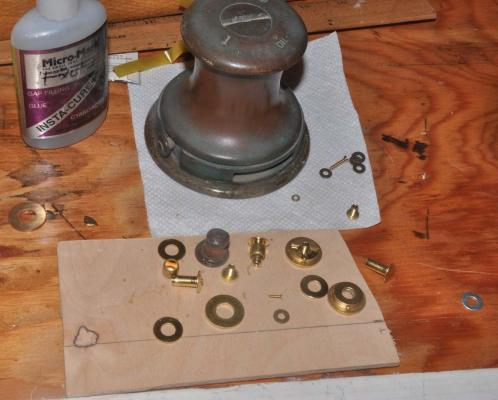 here we see the wood proto type, the new binding pins, various washers, cut pipe for barrels and the glue up stage of the bottom brass washers creating the bottom handle slots and set screw for one of the new winches.
-
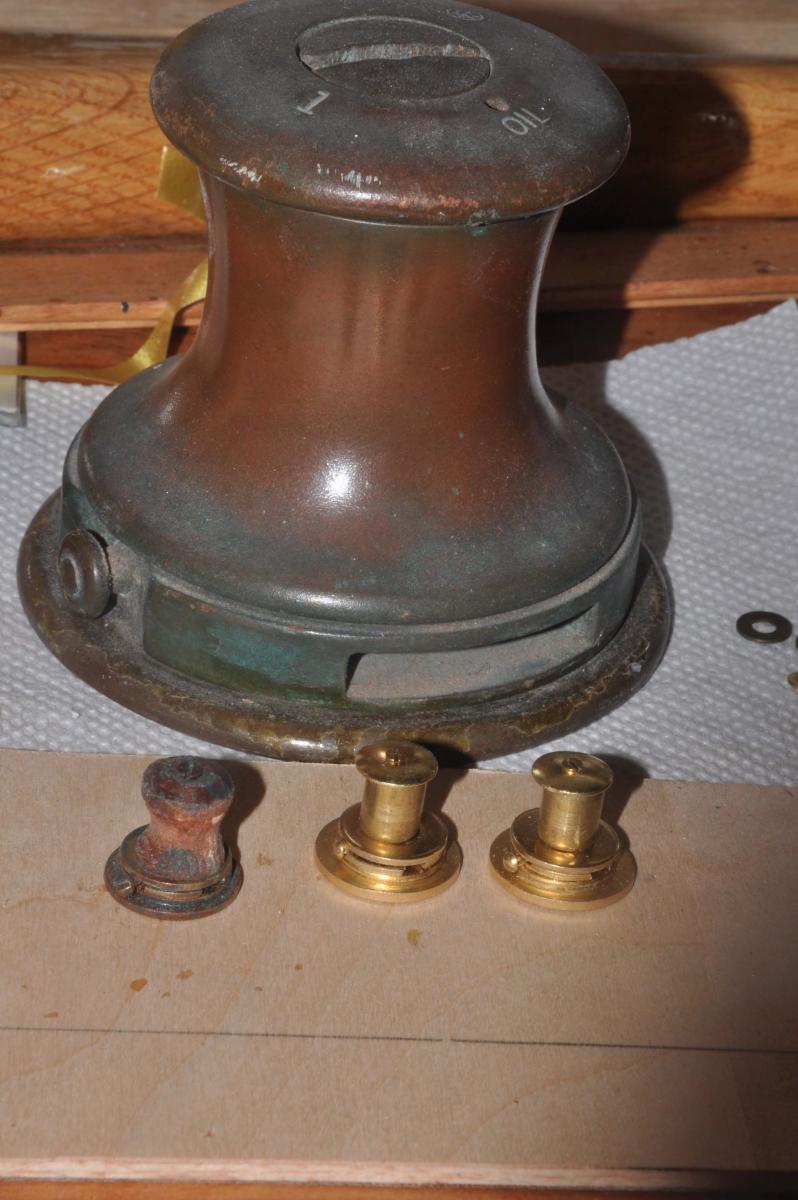
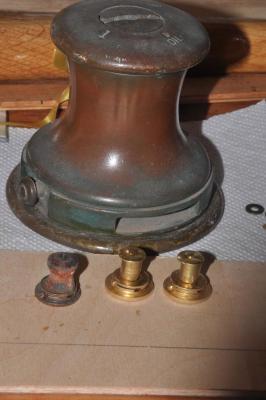 here are the two new winches under big brother. They are not anywhere as nice as turned brass especially due to the straight barrels. I may get to that later in the spring. I hope these are good for now. . For the 2 side winches I turned the binding pin upside down so I could drill the round end and add the small top screw.
-
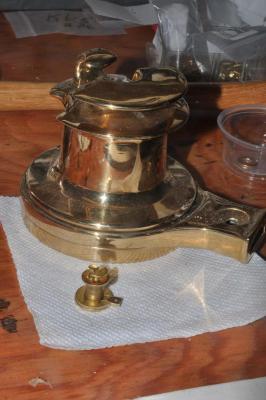 Here I turned the pin screw right side up. I used a side grinder to cut a way the screw head to simulate the cleat. I added two barrels. I need to get another size 6 brass washer that is filling the hole. I just used AC to hold the washers etc. and by screwing the pin together it is very firm; sort of a sandwich.
-
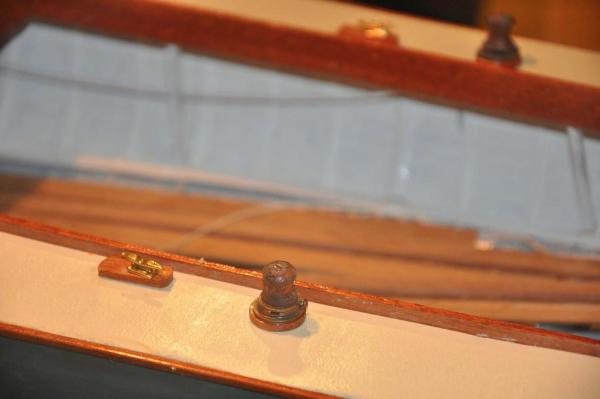
 I could not wait to put them on the boat. There is nothing but glue holding them down. If I loose one, I can replace it easily enough. Then I will figure how to add a screw to screw it down.
cheers
- mtaylor, michael mott, hexnut and 4 others
-
7
-
-
Pete and Bob
Thanks for the encouragement and concern on the cover. I like you sticky or rather viscous approach of Vaseline. I was thinking to stretch a rubber band around the legs and push it down. I would rather not mechanically secure it. we'll see. I will likely be a chicken for a while regarding serious wind .
We still have ice on the pond though so lots of time to think
cheers
- captainbob, mtaylor and Omega1234
-
3
-
Patrick
the current sails will go on the second hull. if and when there is opportunity to build more it will be simple to communicate with Rod Carr and get another set with a number. If the group decides on a number for hull 2 and a name we can add that or get a new sail leaving the proto type for future hull or spare.
cheers
-
Time for another update.
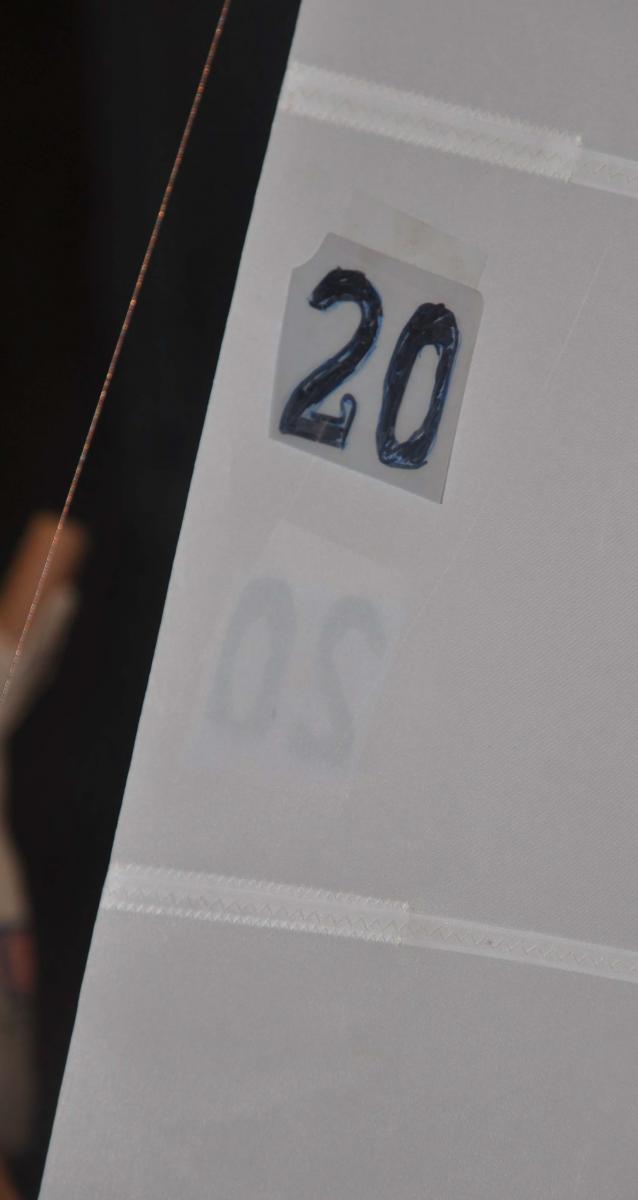
This time we reviewed the prototype sail, made a few changes and ordered bittersweet sail 20.
-
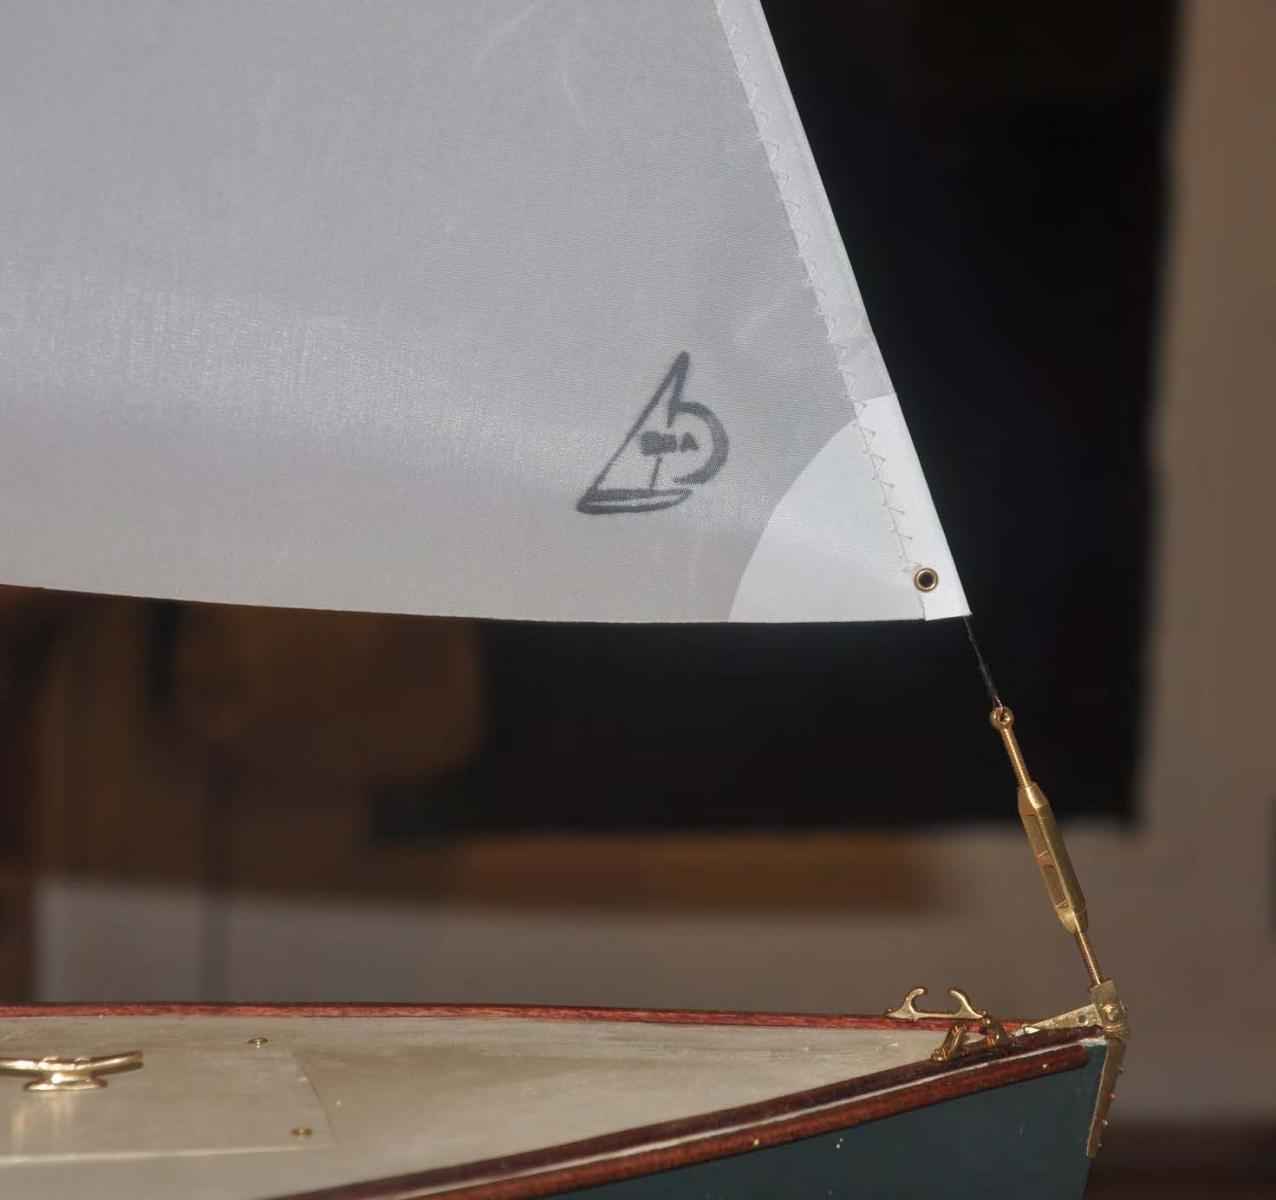
 the jib rides the fore stay and thus sits above the turnbuckle. this is wrong. the tack should be 1 inch above the deck. it attaches to the rear hole in the stem cap. we have two solutions. i will discuss when I decide.
-
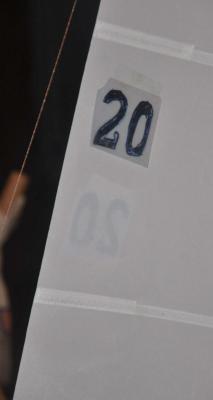 we confirmed the sizing and placement of numbers. We combined batten and seam [ the real sail has 5 seams and 4 battens on different lines but it would have been too much at this scale. Best performance Rod explained would have been 3 seams that form the shape. So we compromised with 4 and merged them with the battens. the battens are only for show
-
 Here I just had a problem. I had done everything in CAD and looking at the sail they were just not right. The boom was too horizontal....too flat. I took two sticks and made the lines based on the 1938 design. The foot of the jib rises and then the foot of the Main sail keeps the same line up about one inch.
-
 looking at this I decided to reduce the leech one inch and increase the foot one inch. One needs to remember we previously discussed cutting the foot, to bring it forward 4 inches to reduce area.
-
 Finally just to help out as a final tweak, I reduced the luff 1/4 inch
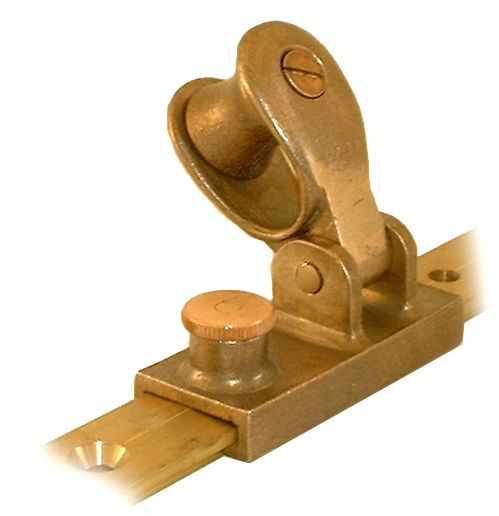
Making the jib track. This was a fun project. The real Bittersweet had a stainless track and mismatched blocks, so we were able to start from scratch. It shall be 1 inch bronze sitting on a teak strip that gets painted with the deck.
-
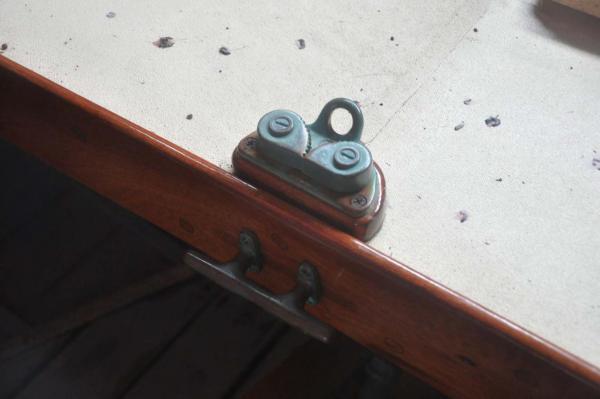
 here is the combined slide and block fitting we chose that is really sweet when you compare it to all the other combinations.
so let's try to make one of these.
-
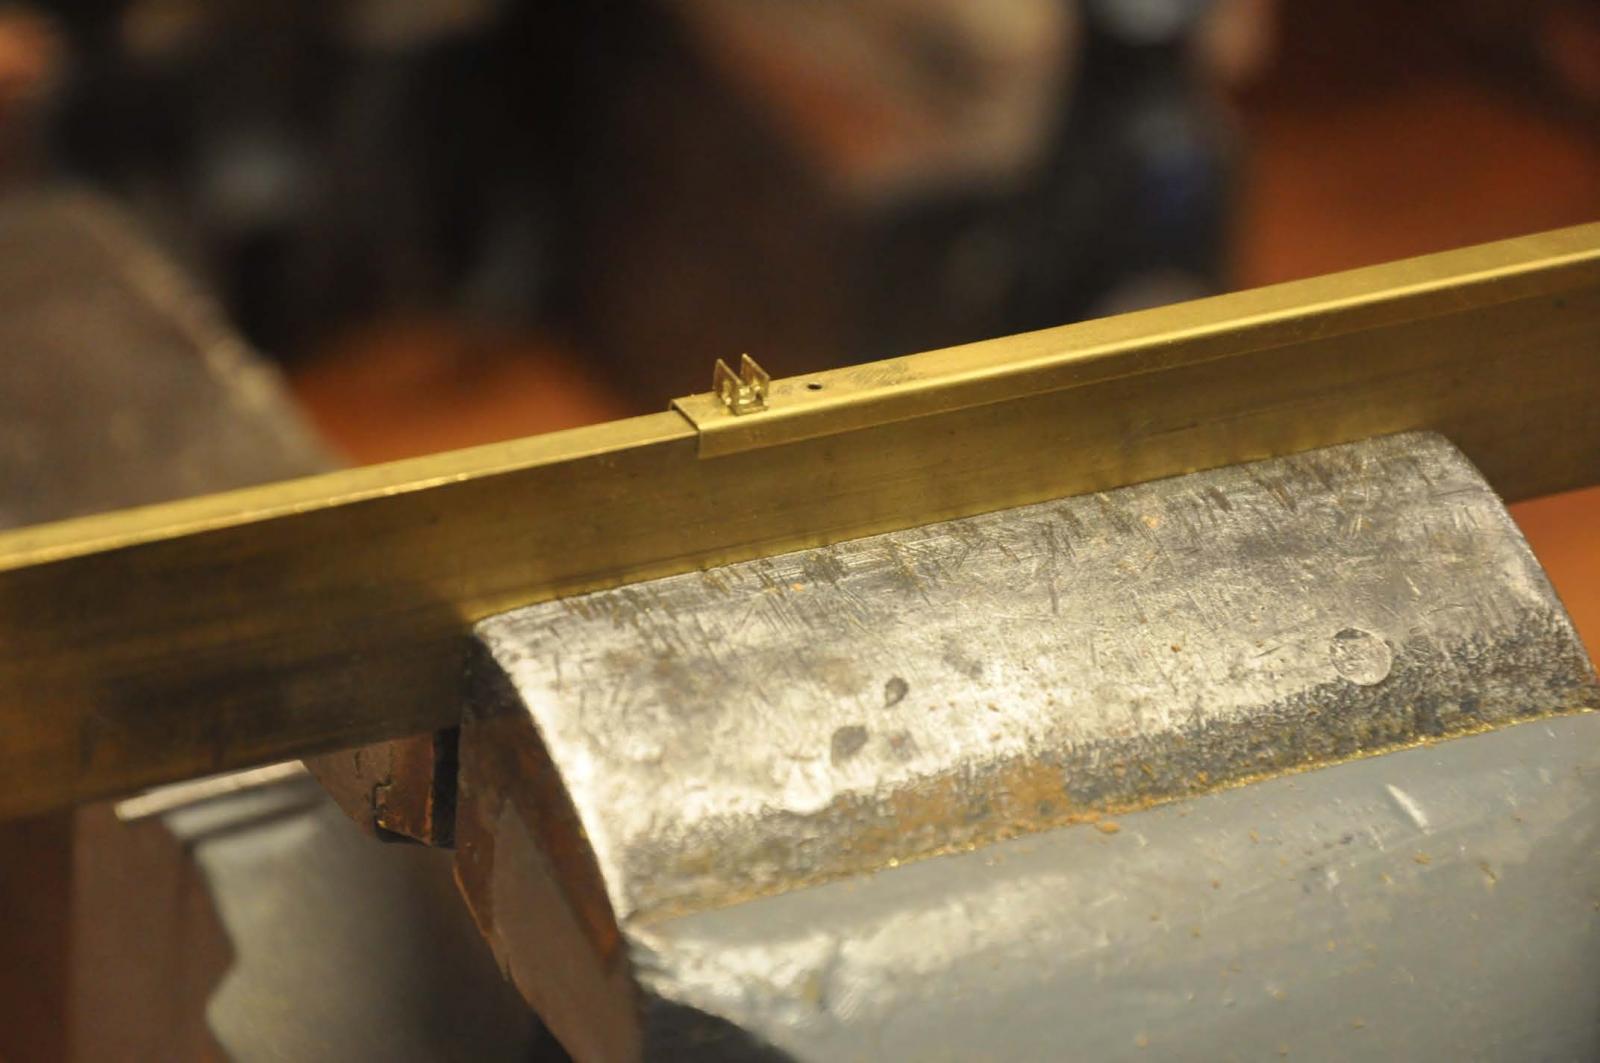
 As I have said I can rivet. Soldering remains a mystery to me. so where I can I avoid it. Here are back to back channels being riveted together.
-
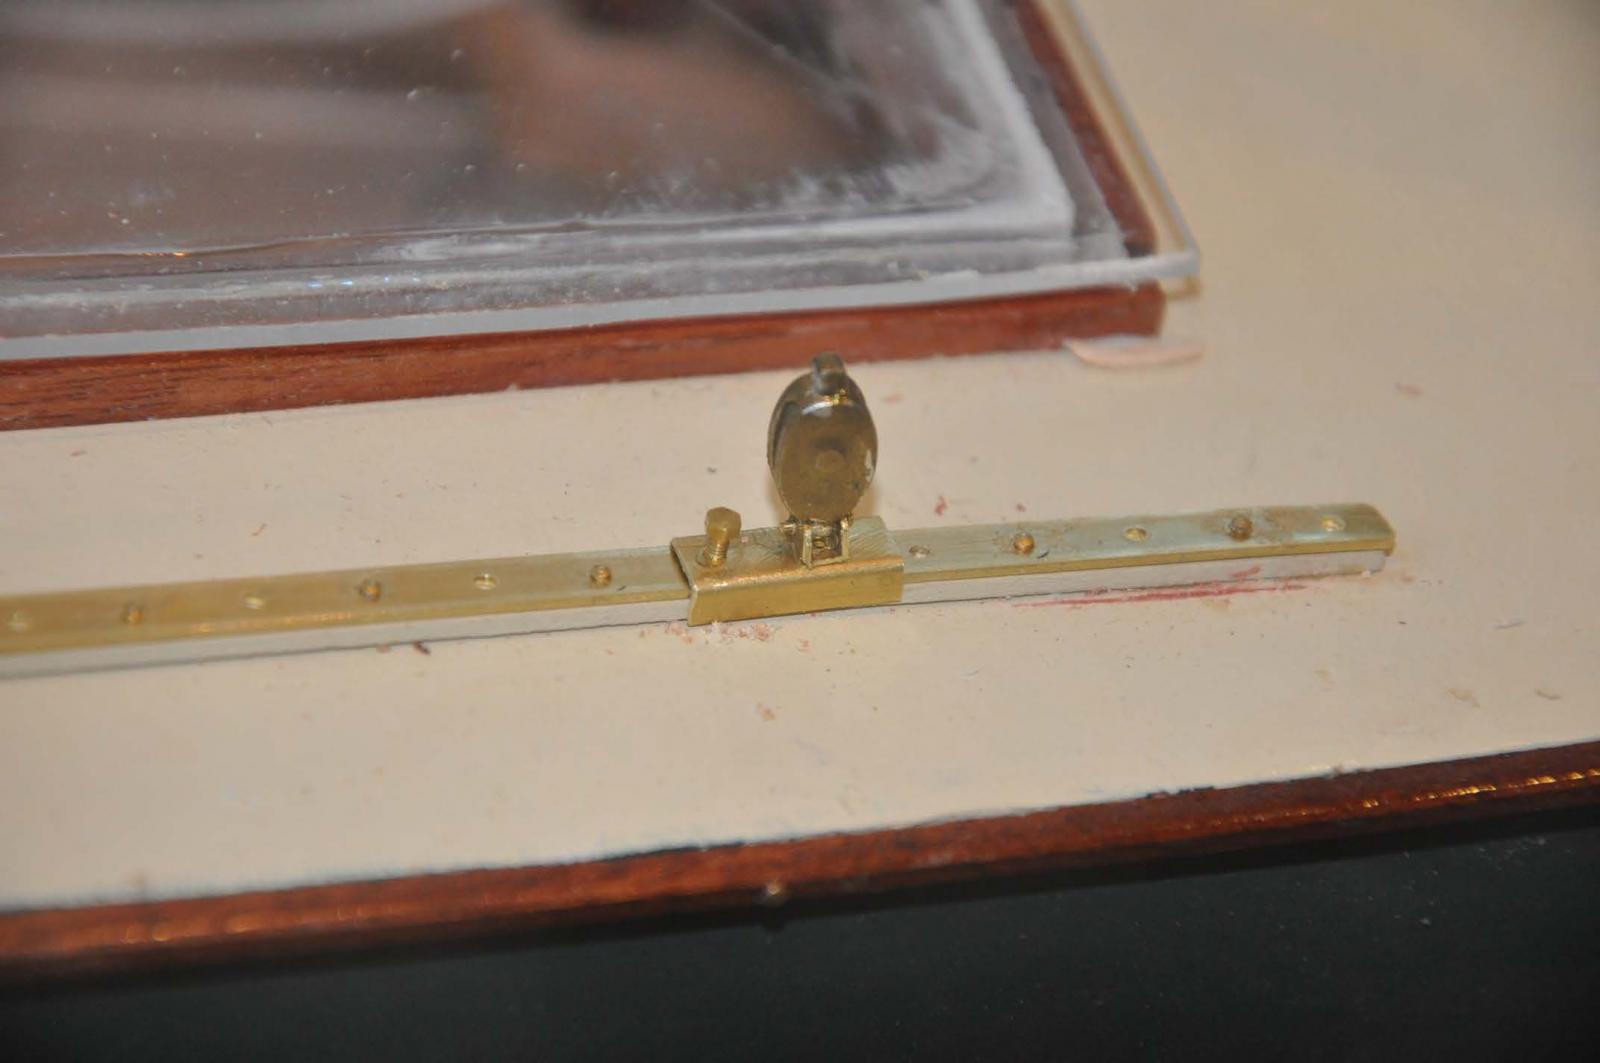
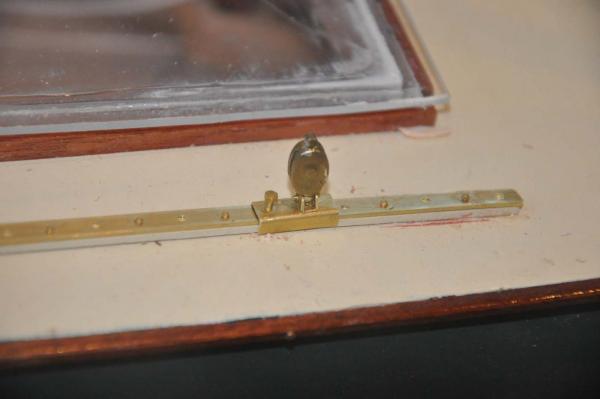 here we are in place. the track is cut down from 1/4 to get to scale one inch. it is sitting on a strip painted like the deck, It nicely fits inside the the 1/4 channel slide. The bronze painted blocks still work out and are pinned to the top channel. The machine bolts go through the deck making this a stable fitting.
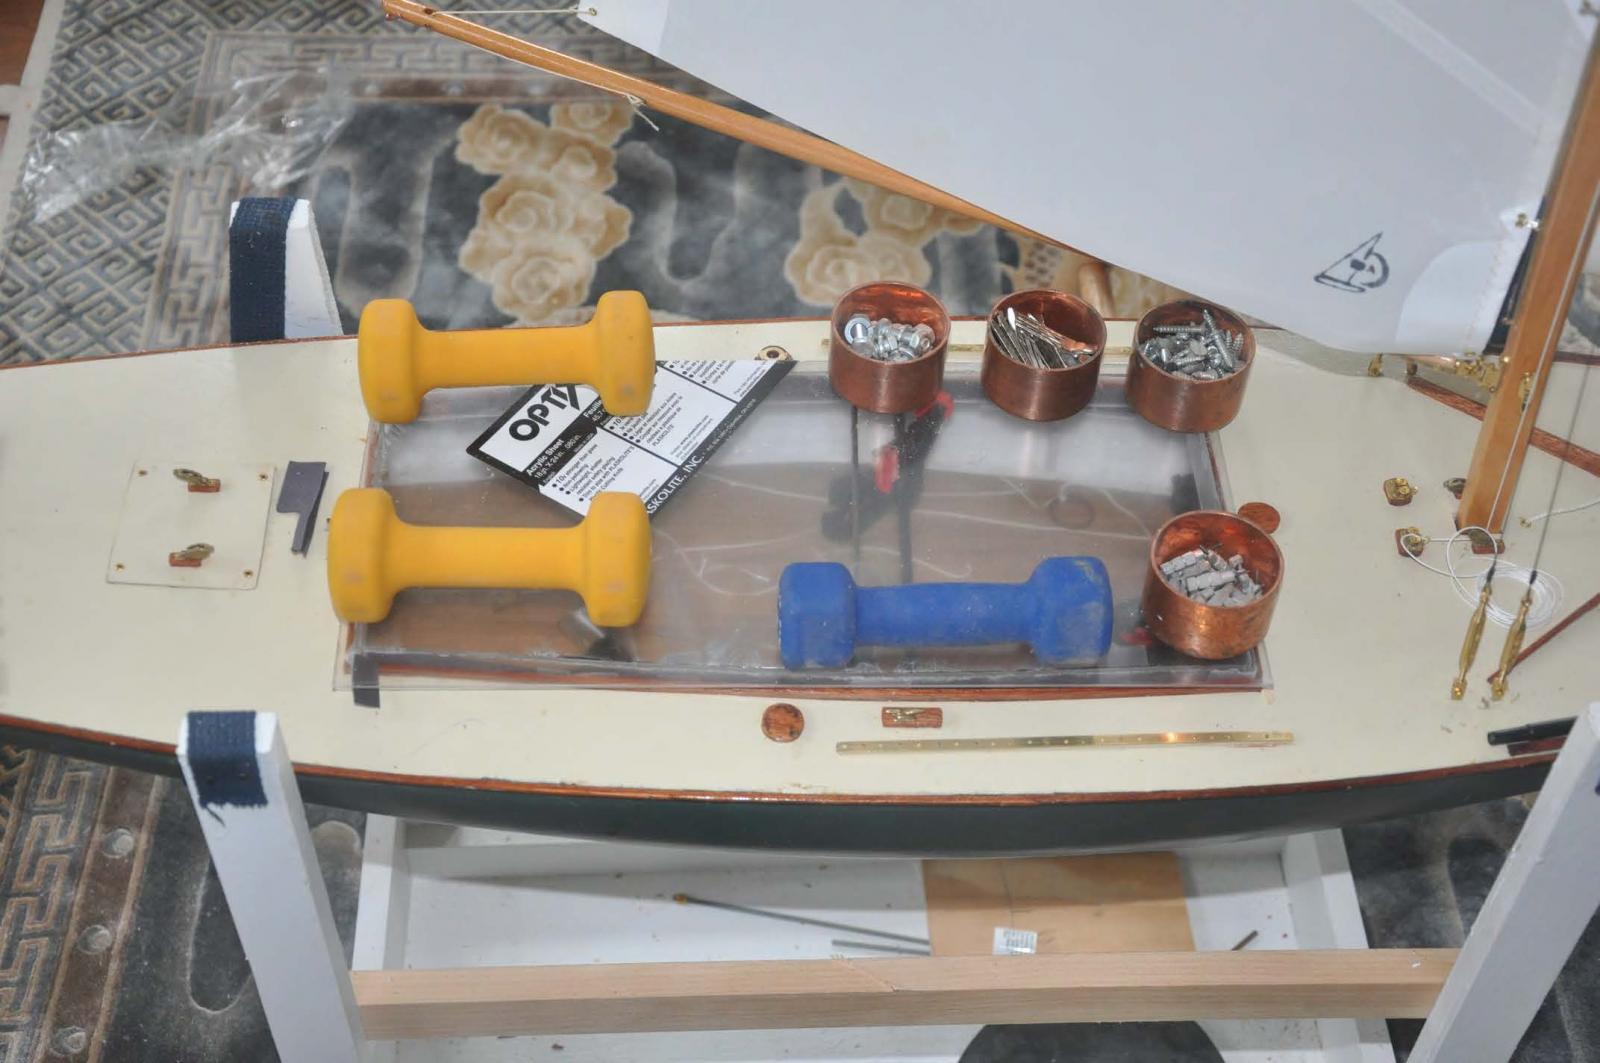
Now its time to make the cover. I went ahead and made up my experimental cover. I am doing this just following a hunch. I hope it works.
-
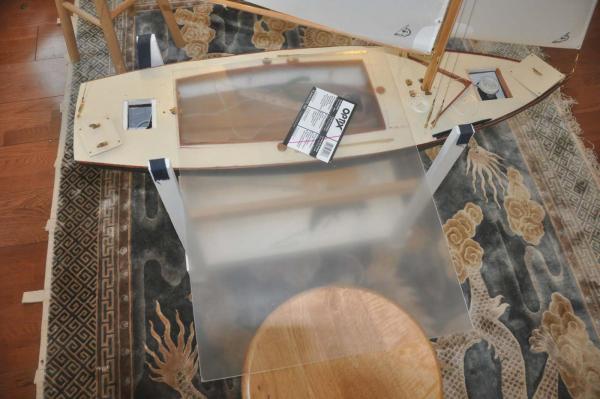 I went to big box and bought the lightest and thinnest plexi-glass.
-
 the first step was to make strips for the sides and fix them to the inside of the combing. I used construction paper to give a little gap and used CA to stitch the ends.
-
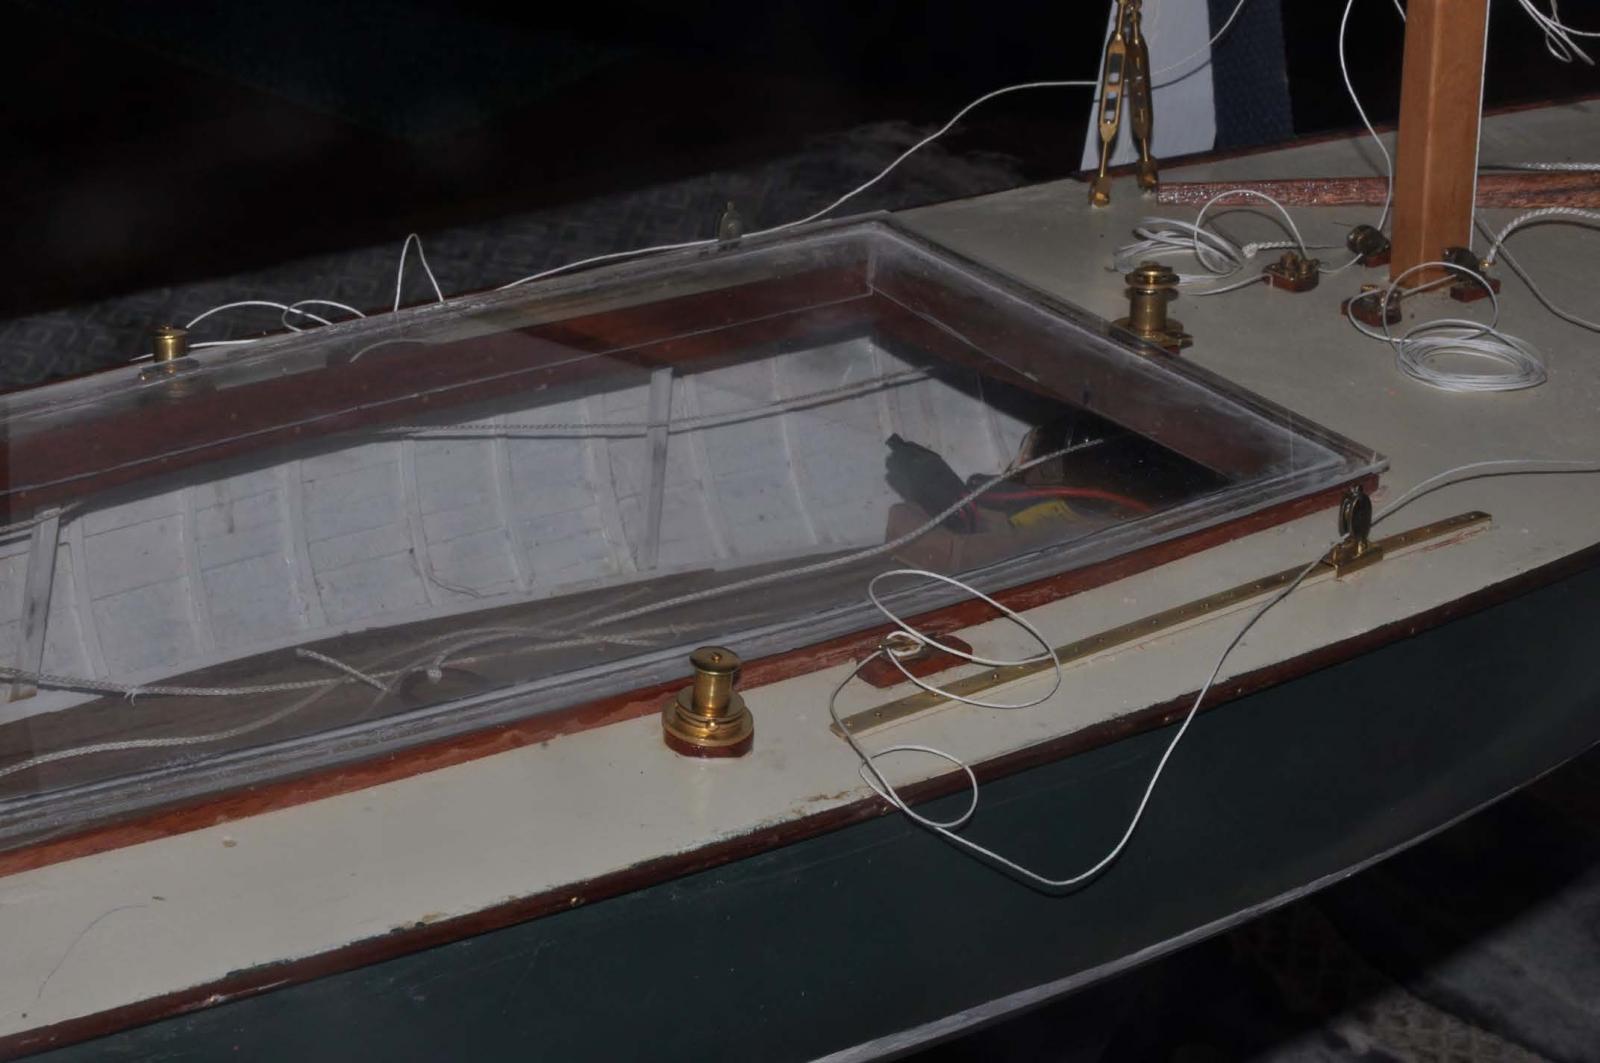
 Here I rough cut the top to fit and glued it down. after setting I took it and liberally made glue fillets on the seams. I then made the outside just larger than the combing. I took it to the kitchen and yes it holds water. Now does that mean it can keep it out?
-
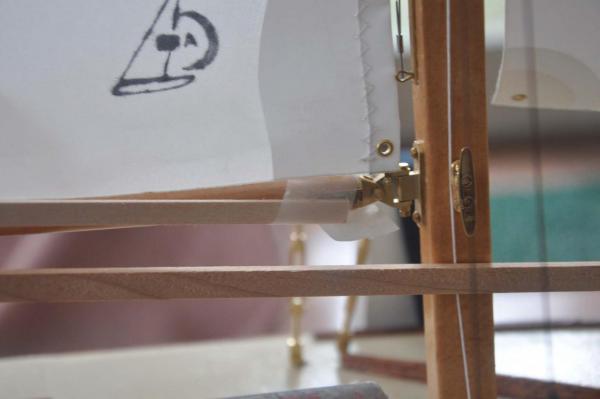
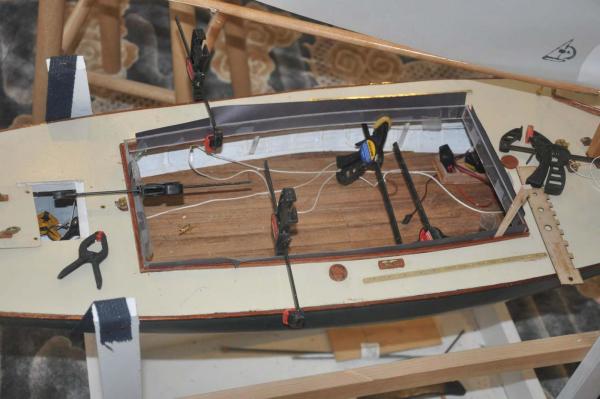
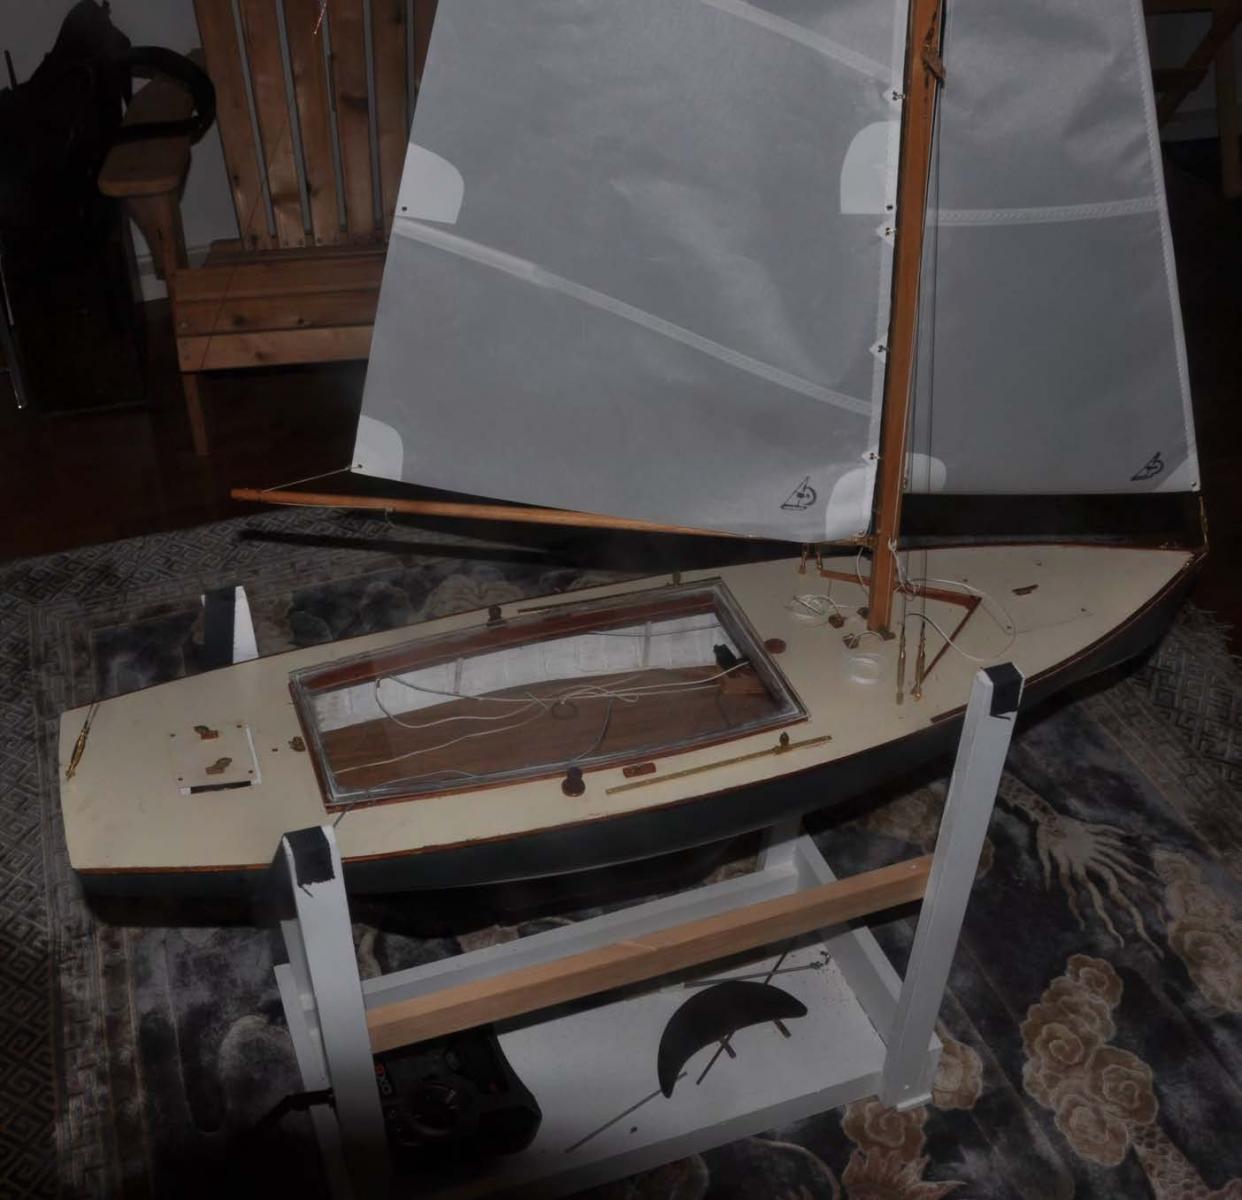
 here we are with he cover on, halyards rigged and jib track done.
cheers
- popeye the sailor, pete48, mtaylor and 1 other
-
4
-
-
Pete
thanks for comment... the sails I made are on Charles Notman and other schooners. these sails though I worked on the design were made by Rod Carr. Rod is a popular supplier to the AMYA sailing folks....and yes he is good.. They are 2 oz Dacron and shaped etc. for true pond yacht racing performance. It is hard for casual builder to get into performance Dacron sails. He is now making the sails for Bittersweet junior. They should include the number. I will cut and fix what I showed and move them to hull two. Once we name here she too will get a number.
I feel good in simple metal work for cutting, bending and bolting, screwing and riveting. I still am true amateur when it comes to soldering. I got a whole bunch of different shapes to experiment with and have a mini drill press. That small stable drill makes all the difference and remains my numbner obne recommendation.
I was on your site yesterday and I really like your form [ mold] work. I plan to work on that for my next build
cheers
-
Pete and Michael
I applaud you guys who do it all. I have a friend who says i should also learn to cast lead. I probably could but we have a true artist who runs a foundry 30 miles up the coast. I will go there in April and he will cast the keels. I love visiting his shop and will share the experience.
cheers
- michael mott, mtaylor, pete48 and 1 other
-
4
-
-
Pete
Absolutely you will see the attempt to sail. this log will stay active through the sailing season and into what get's fixed next fall. There are still big guesses like the ballast. The local foundry just shut down for a winter break so there is still some time to get ready.
There should also be fanfare and fun at the yacht club with other BHOD owners.
cheers
-
Jim
great and scary question
I bought sheets of 1/16 clear plexiglass. I plan to make covers sitting on with their sides sliding inside of the combing. While in place i hope one can still see inside.
I plan to make it up for hull two as soon as I get the deck on. then if it works make it for hull one.
the hatch covers will be screwed down after trimming the sail gear. my RC guru is visiting later this week to work on that aspect
cheers and thanks for the concern
- michael mott and Omega1234
-
2
-
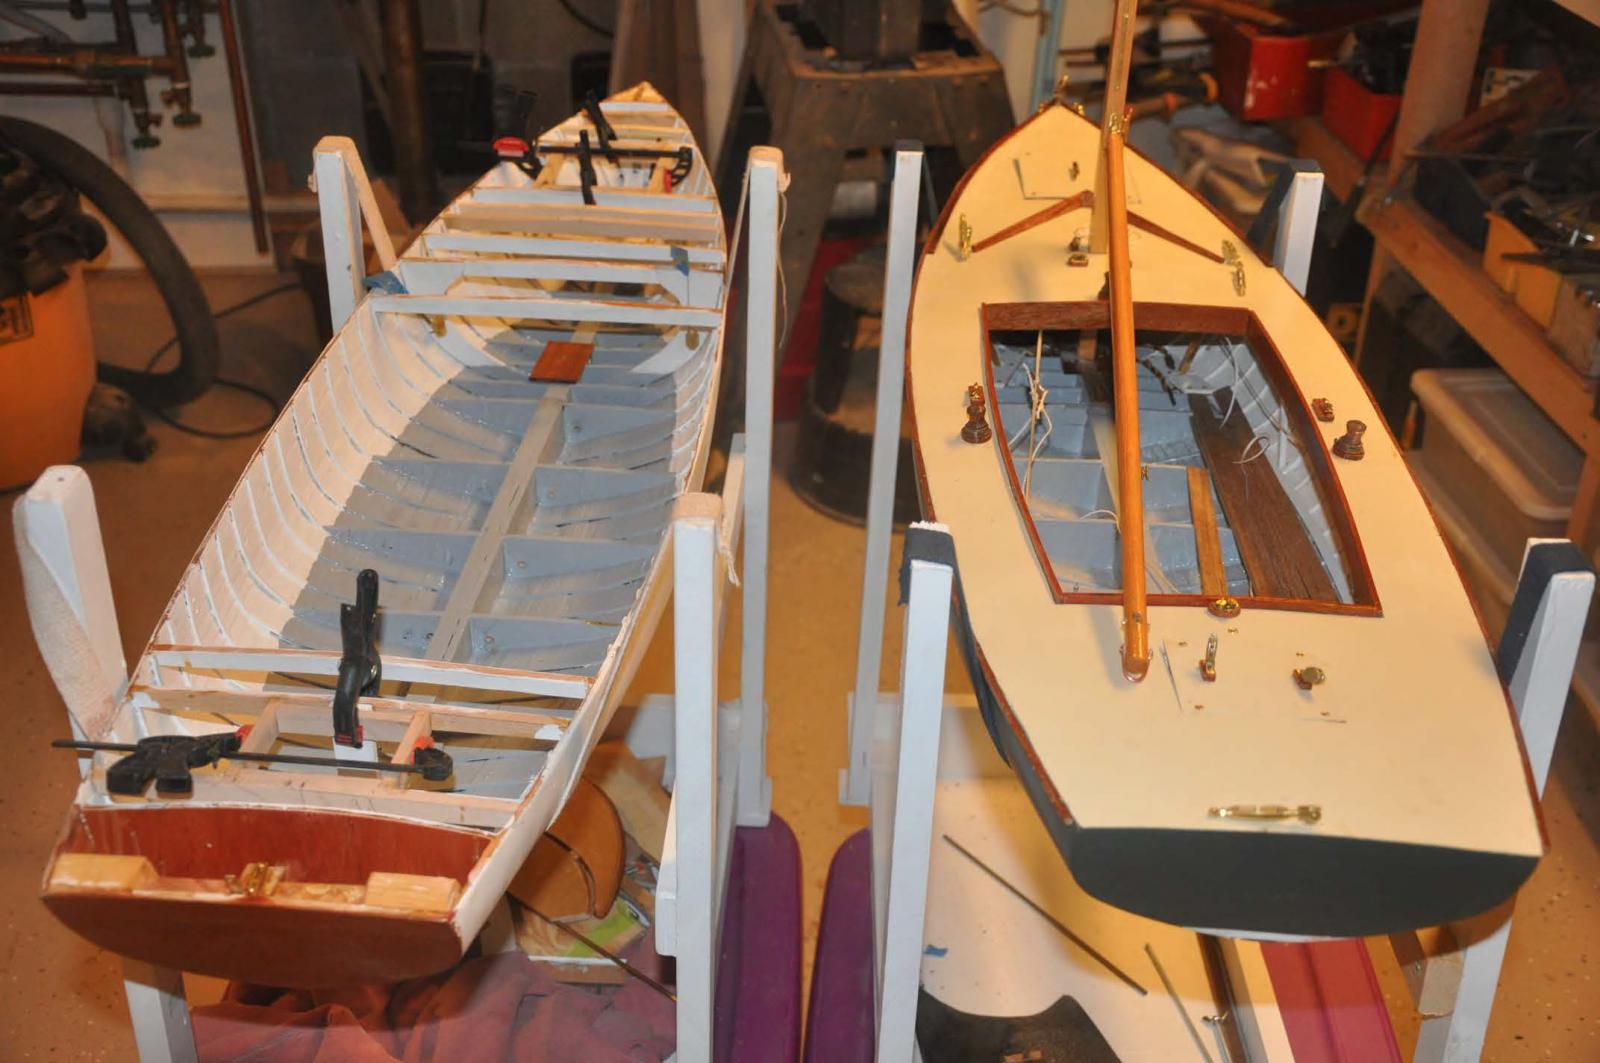
Well a big day arrived, a small milestone. Bittersweet junior has left the shop and made it to the sail loft. here are a few updates of how it went.
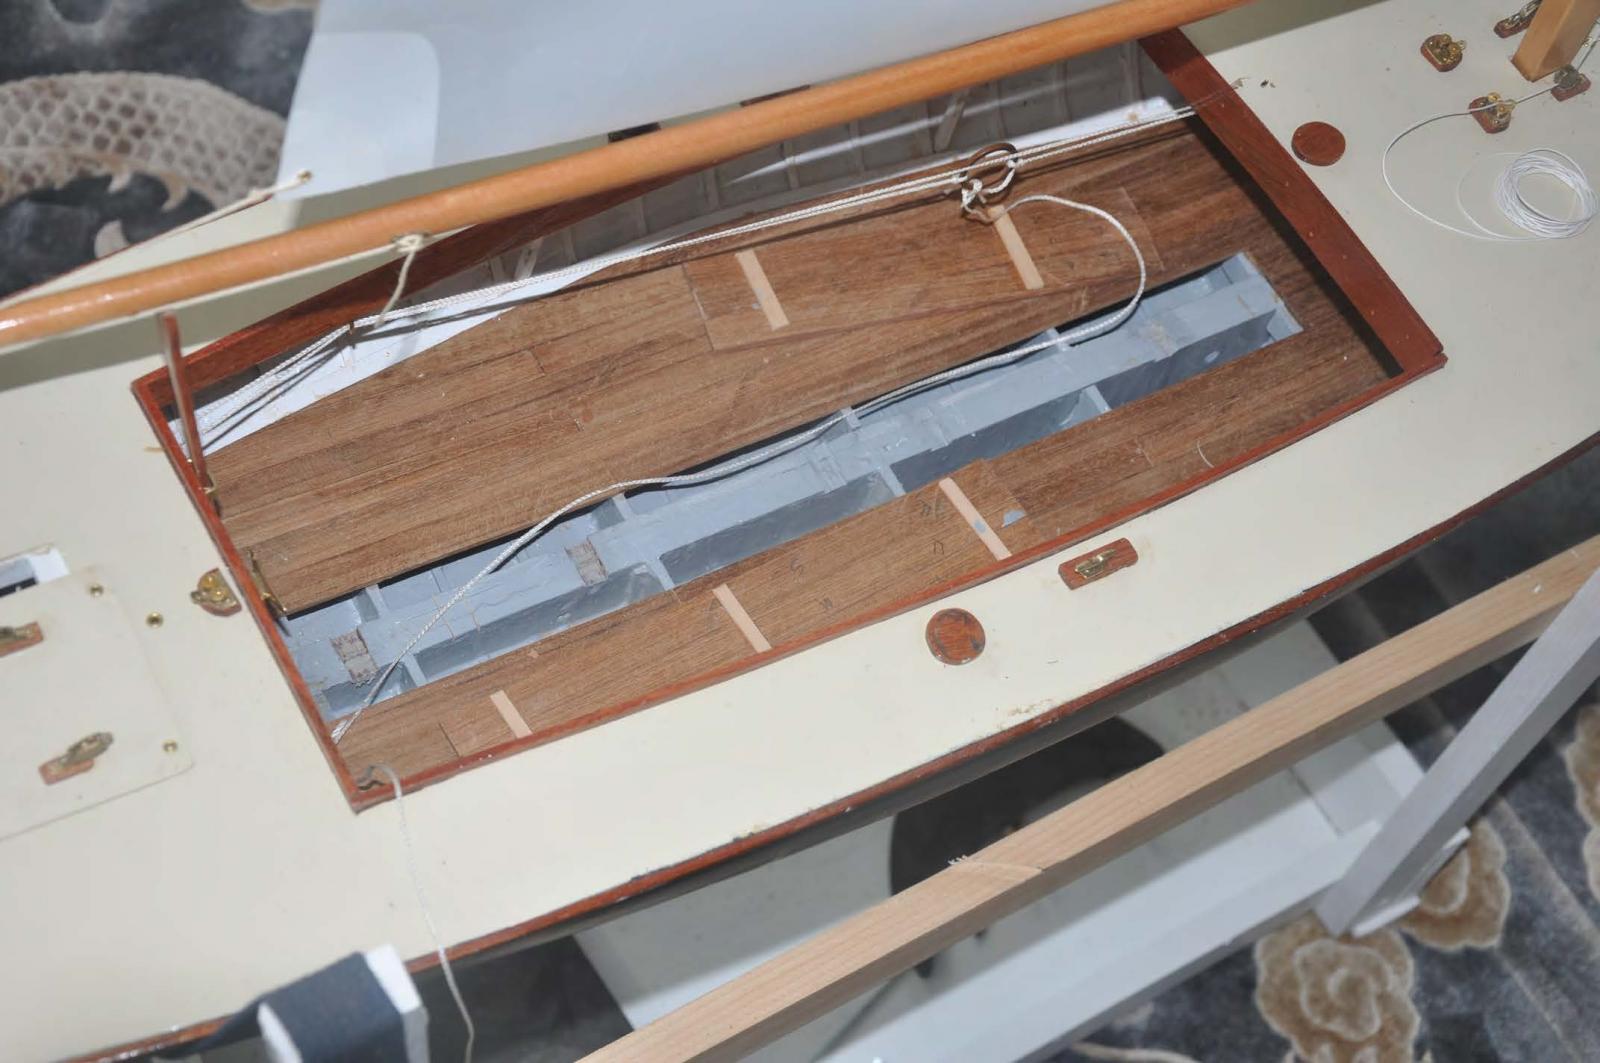
the final task in the shop was to install the teak sole.
-
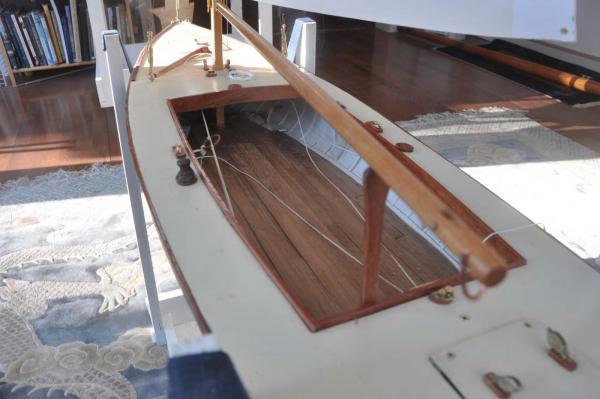 here we can see that pursuing the cutting of the real thing worked out. the color is so real it just looks right to me. I look forward to David getting the new sole in Bittersweet so i can show the comparison.
-
 here the center three planks are joined to cleats and they are opened. This is a first task entering the real boat as they are moored fully open. One always needs to bale the bilge before sailing.....FYI even pond yachts may need to be inspected if not baled after sailing. A lessen was I needed to notch the finished keelson for the cleats so late in the process. oops
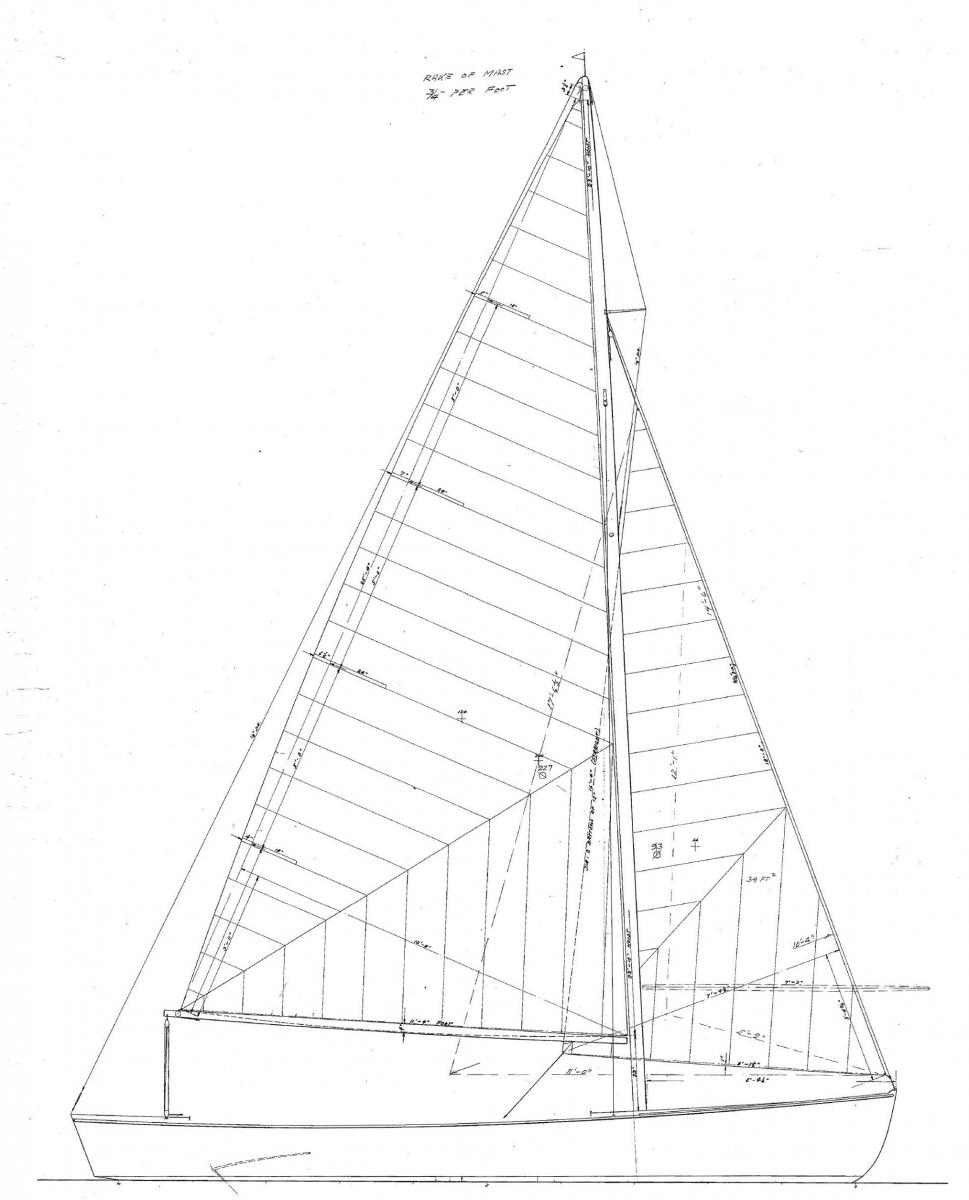
So let's get the standing rigging up and the sails bent. First of all let's discuss the process of the sail design for this model. First of all we have the original design of 1938
-
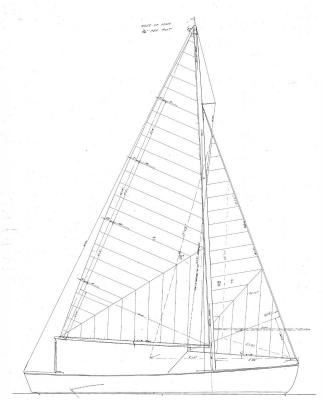 So here it is. i have hinted and here will show that we need to make changes in this design to make a reasonable RC sail boat.
- the first thing to understand if we reduce the size of the boat to 1/6 and do the same for the sails, we will be over powered. I have read, I wish I could quote, that a 10-15% reduction in size of sail area makes for better sailing on a scale model.....
- the second item is the wrap around jib is extremely unfriendly to RC sail racing. We need to keep the jib forward of the mast so the line is controlled with the same action as the main sail. I will show that later
my conclusion was to eventually make a sail exactly like this drawing, and the photo early in this log for display only. for sailing i will work with a real RC class and use 2 oz Dacron .made by a pro.
step one was to request panel drawings of the current class design for the boat. Sailing Partners of Vermont now have the rights and host the design of our sails. They kindly sent me images and were supportive of my effort and agreed with me that it is best to reduce the area for a scale model to sail better.
- The new class Dacron sails have revised panel layouts for both the main and the jib. Sailing partners shared their panel design sketches so i could use them to update the model. I am not showing them here as I have no rights to them.
Now came my work and decisions. i took the new panel layouts and embedded them into TurboCAD. I scaled both up to full and then down to model size.
-
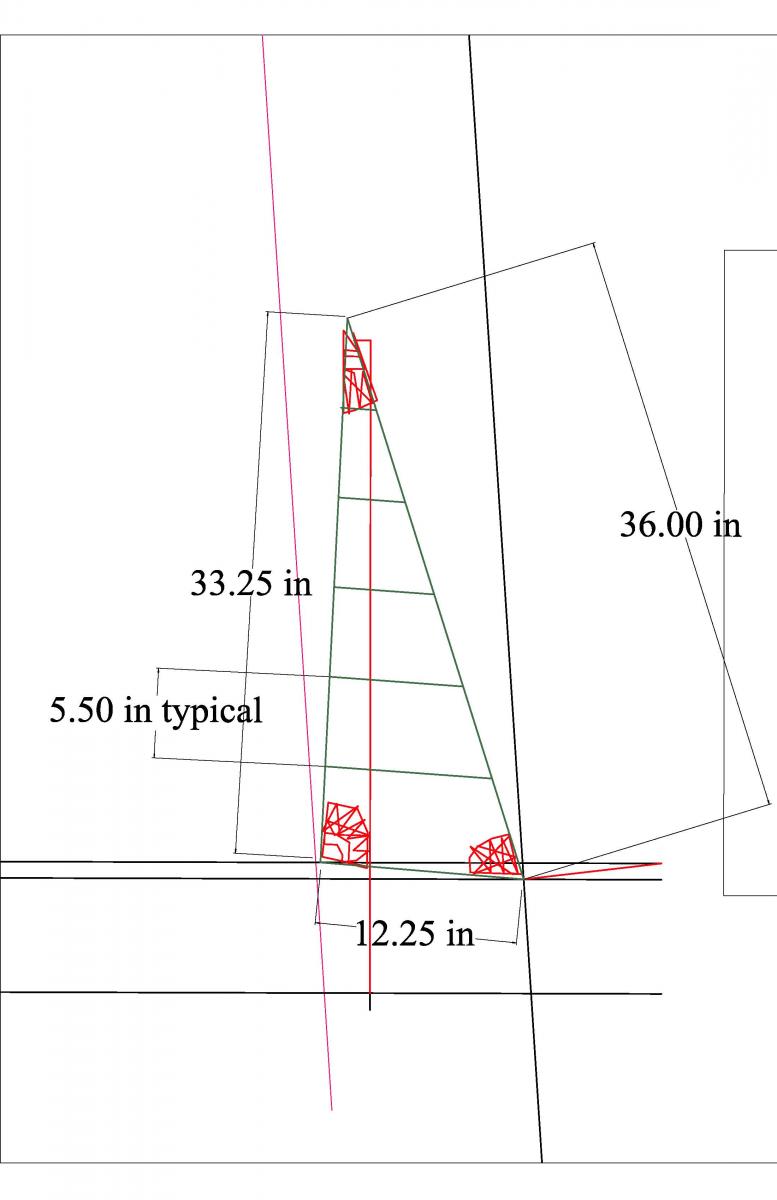
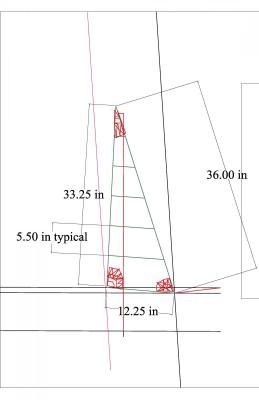 here is the design of the jib. this one came first. I maintained the height and cropped the sail to be parallel with the mast. It is similar to a "self tacking" jib. the results were almost 20% reduction in area
-
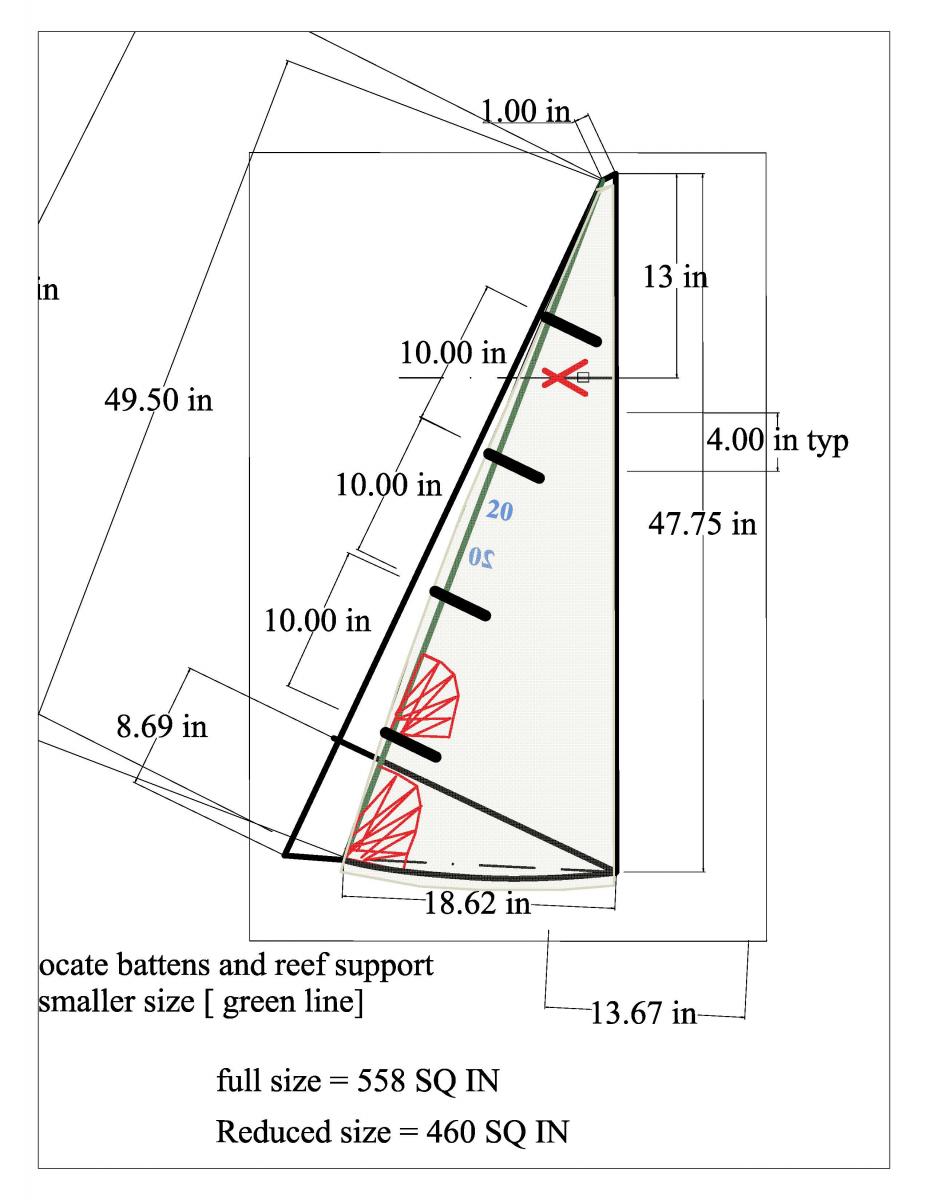
 here is the resulting sketch that I made for the mainsail. I chose to keep the reduction less, a compromise of 15%. I did that by bringing the clew forward 2 feet or 4 inches in scale. Note I added the reef points and supports and after much discussion we have 4 joints concurrent with the battens.....not 5 joints and 4 battens as the on real sails.
- I spent time and discussed with Rod Carr. He is on the web and a real pro. He made my Marblehead sails a few years ago and his work is top notch. He explained the critical nature of using and locating joints to create and maintain sail shape. My request to replicate the class design he said would reduce the sailing a bit, but he understood we were going to make this a fun replication. Rod also confirmed with me that self tacking jib is the way to go. He has seen many, and me a few, boats that manage Genoas and they are very tricky. One adds a third servo that has different timing. I want to get the sailing youth to use these to learn sailing; not fight servo controls. That means one stick is throttle...with sails in and out and the other is rudder. two thumbs only.
drum roll please
-
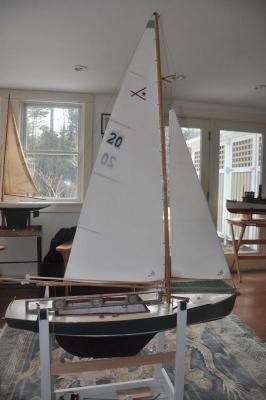
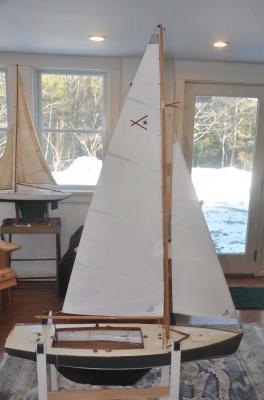
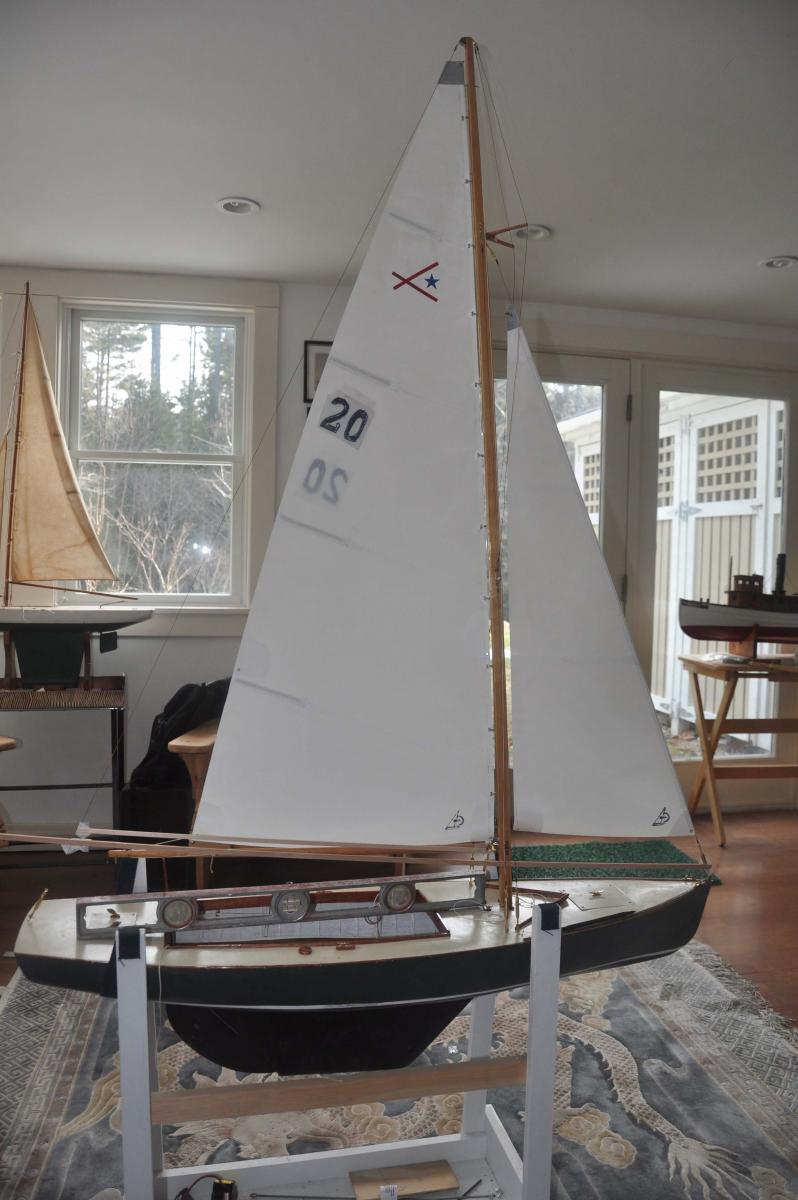
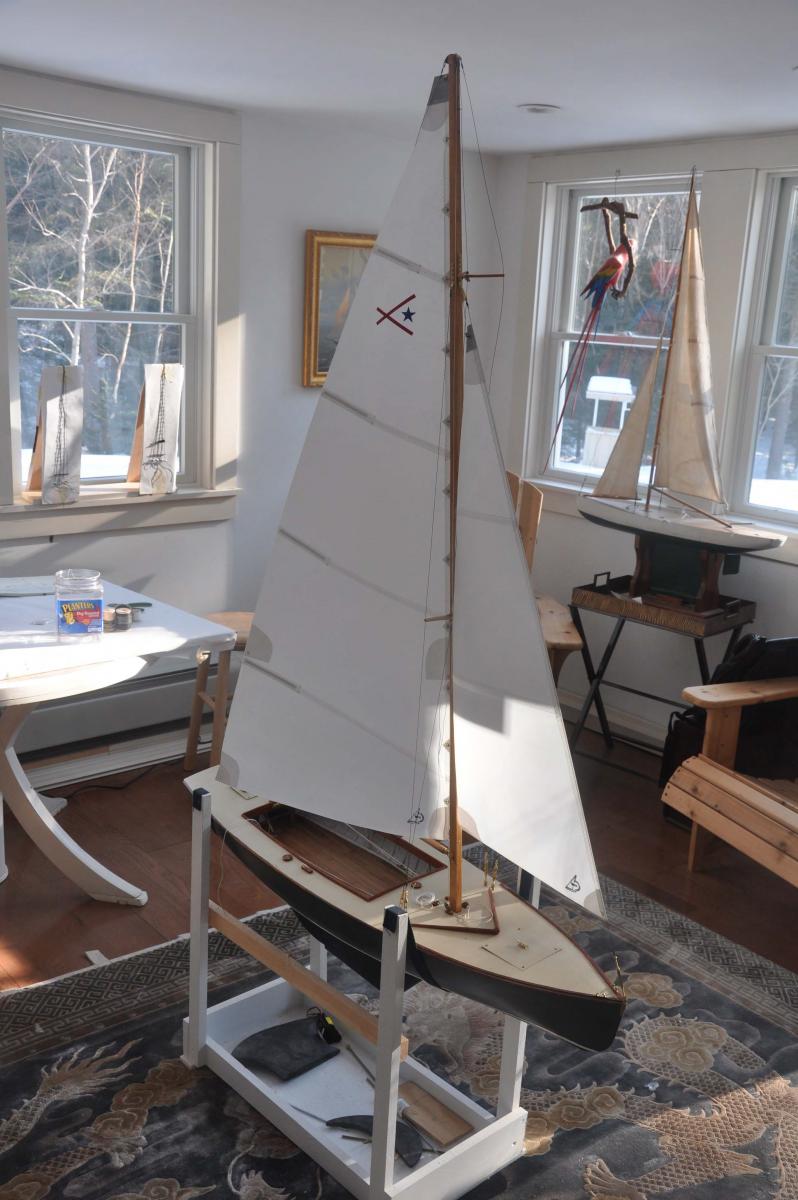
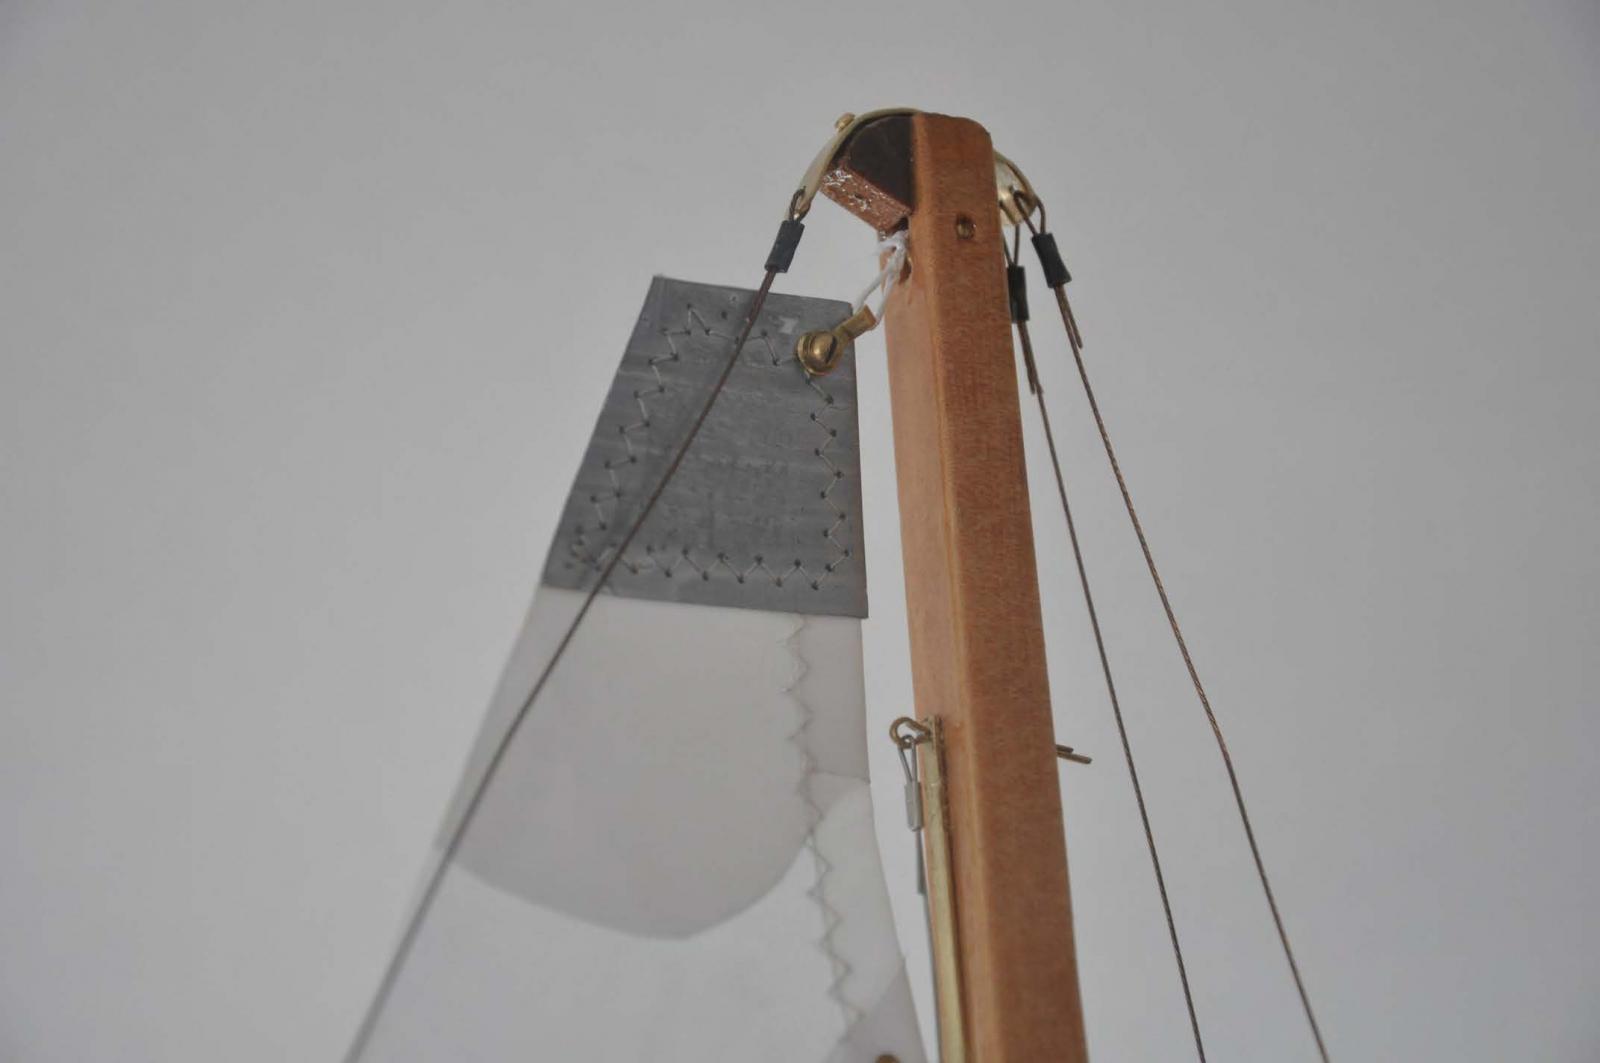
 here you go. this is what we are after. I used the copper rigging wire and swedges by Proctor enterprises. They are easy to use and nice to look at. The small boat in the back ground has similar cable I used as a kid in 1960 rigging my first boat.
-
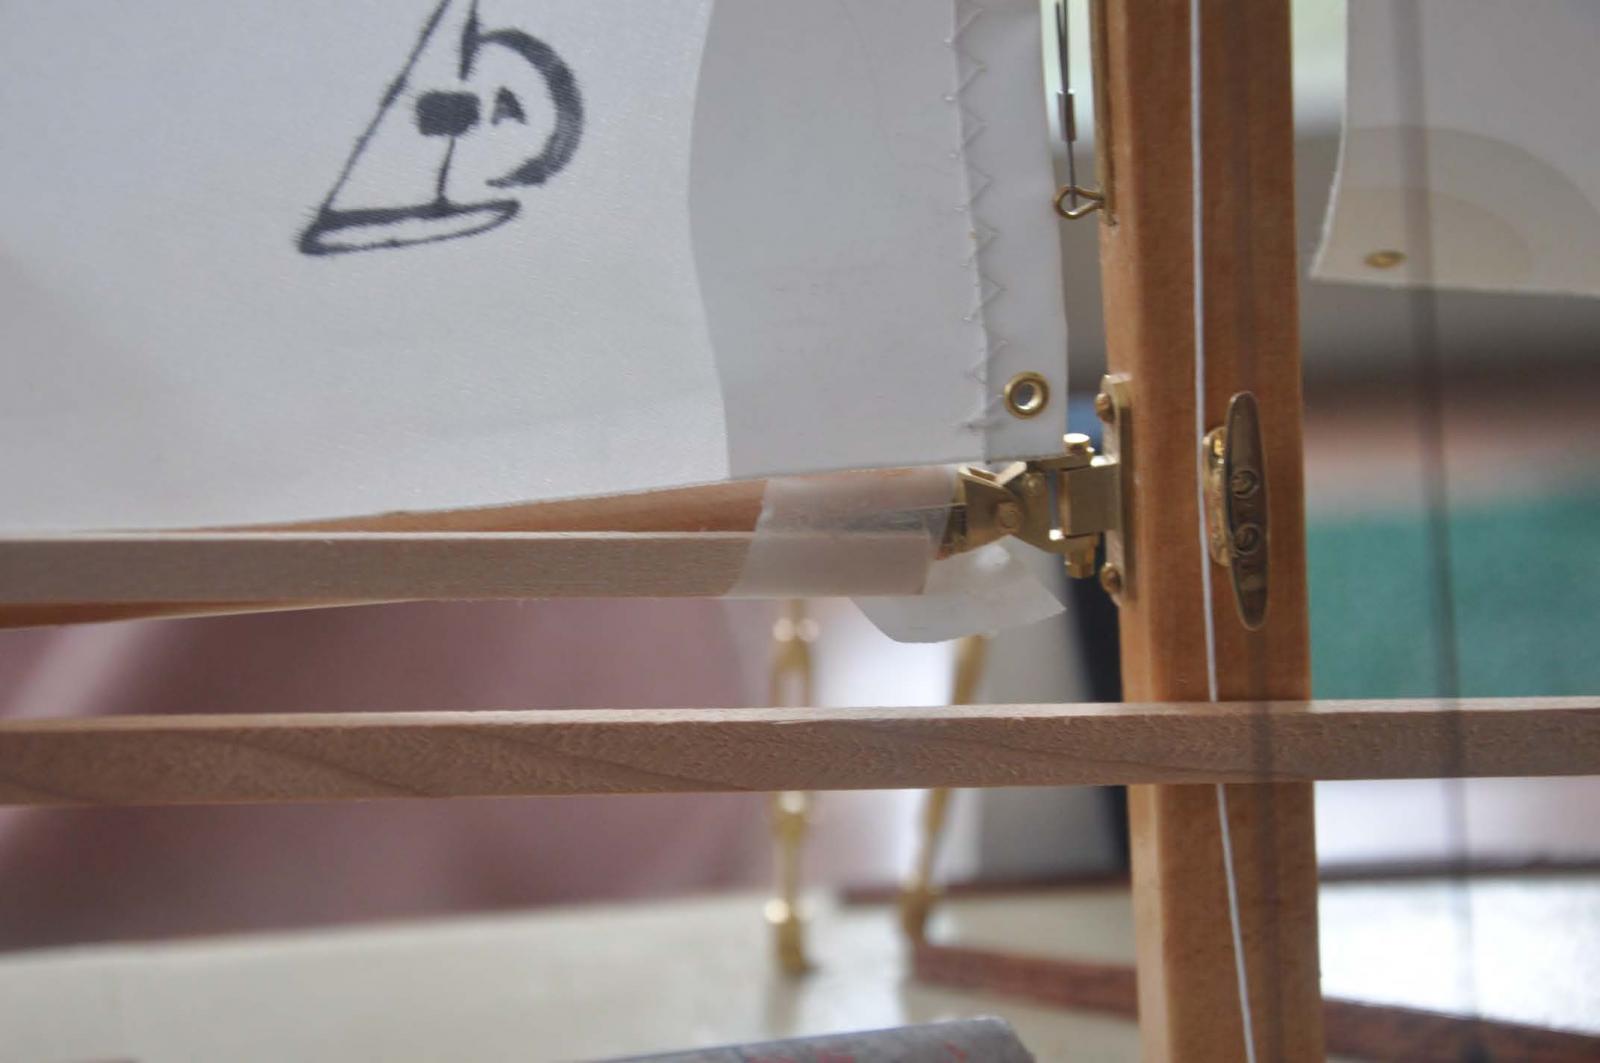
 This jib head came out well. hopefully the next sail can raise the grommet a bit so the shackle is vertical. The sail is bent on the forestay acting as its jack. This process gives a crisp look and the best sailing performance
-
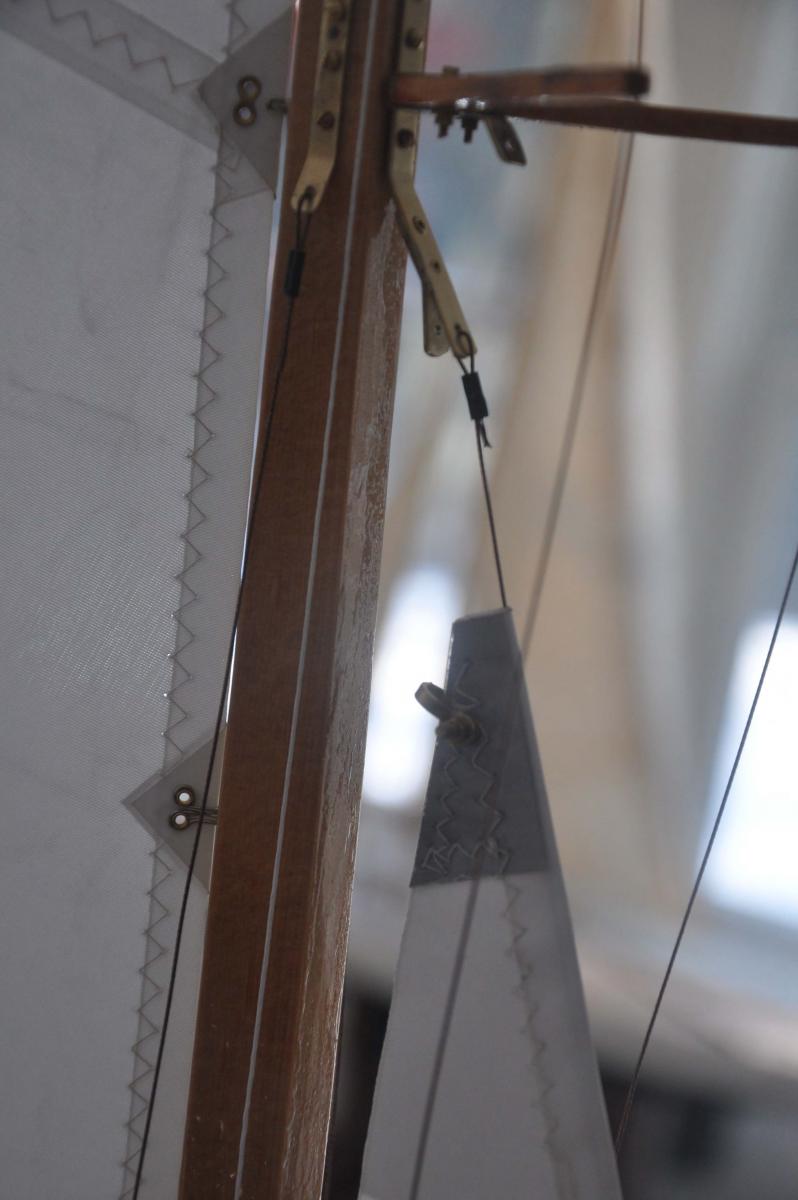
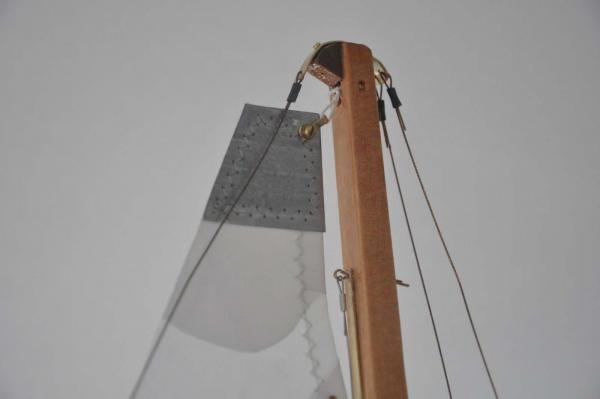 The main sail head looks great though a little work . the horizontal dimension should have been 1/2 inch and then the leech line comes in just under the back stay. The halyard works well up through the sheave and i think Rod did a great job replicating the aluminum sail head. Note the stainless jack stay terminates at the peak of the brass simulated track. There is a dress hook [ visible in upper photo} that attaches sail to the jack stay every 4 inches. It is combined with the the brass eye as we are simulating hanking the sail.
-
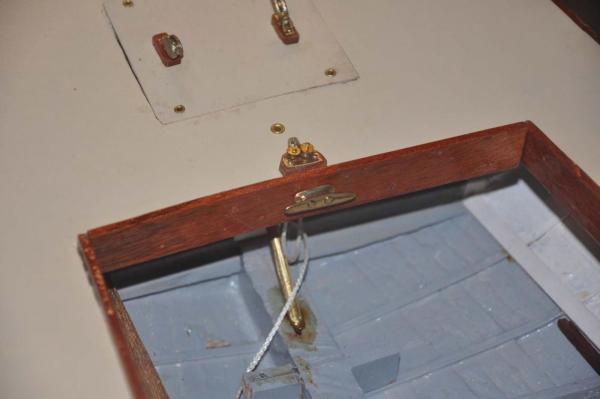
 Here the main halyard comes down , goes through the stand up block and is made fast to the cam cleat. I coiled enough spare to lower the sail. On real boat that coiled line is tossed under the deck while sailing. fortunately there is no need for teeth on a cam cleat this small. It actually holds up the sail on its own.
-
 here I spread it out with a temporary out haul. Hopefully you can see the reinforced reef points. this reinforcement is a requirement for loose footed sails. I think the reduced sails are fine for sailing but if you look back to the graceful look of the 1838 design drawing above in the post, or the image in the first post you can see why I probably will make a full size set of sails to display. I would use muslin to replicate the 1938 Egyptian cotton and stitch the one foot [ 2 inch] seems.
cheers
-
-
I remain awed with some of the beautiful planking I find. I love you lessons on using more heat too.
Congrats she looks great. Be sure if you use Wes system to opt for the clear hardener. My can says 207 for natural wood. I have not been using it where I use filler and plan to paint.
Cheers
-
Pete
When I was a kid I sailed in Buzzard's Bay, Ma. Herreshoff 12.5 's were there along with 14's, 15's and many others. I always thought that the 12.5 was the boat for me whenever I retired here in Maine. . Now that I am here and had experience in the harbor however, the 21 feet of the BHOD is a really nice add to the 16 foot 12.5. We point higher and are also faster. We were designed to race. We have a few Herreshoffs in the harbor and they remain gorgeous. The newest are the reissued Pisces 21 built up north in Brooklin maine. They are incredible and I recommend you check them out. We have two in the harbor and they beat everyone.
cheers
-
mark
thanks for the comment. I knew I read somewhere on one of these strings that preheating brass can make it easier to use. I need to get more brass stock to replace the damaged ones I started and then I will try the annealing approach to 1/16 brass rod before attempting to make it a rivet. I will eventually need the same thing as I attach the lead half bulbs to the sailing keel
cheers
-
-
Yesterday was eventful. Our new England Patriots got beat and now we have two months before baseball. The Boston Bruins hockey team is very up and down, so thankfully there is model boating. This post is a little catch up on completing the fittings...sort of anyway....
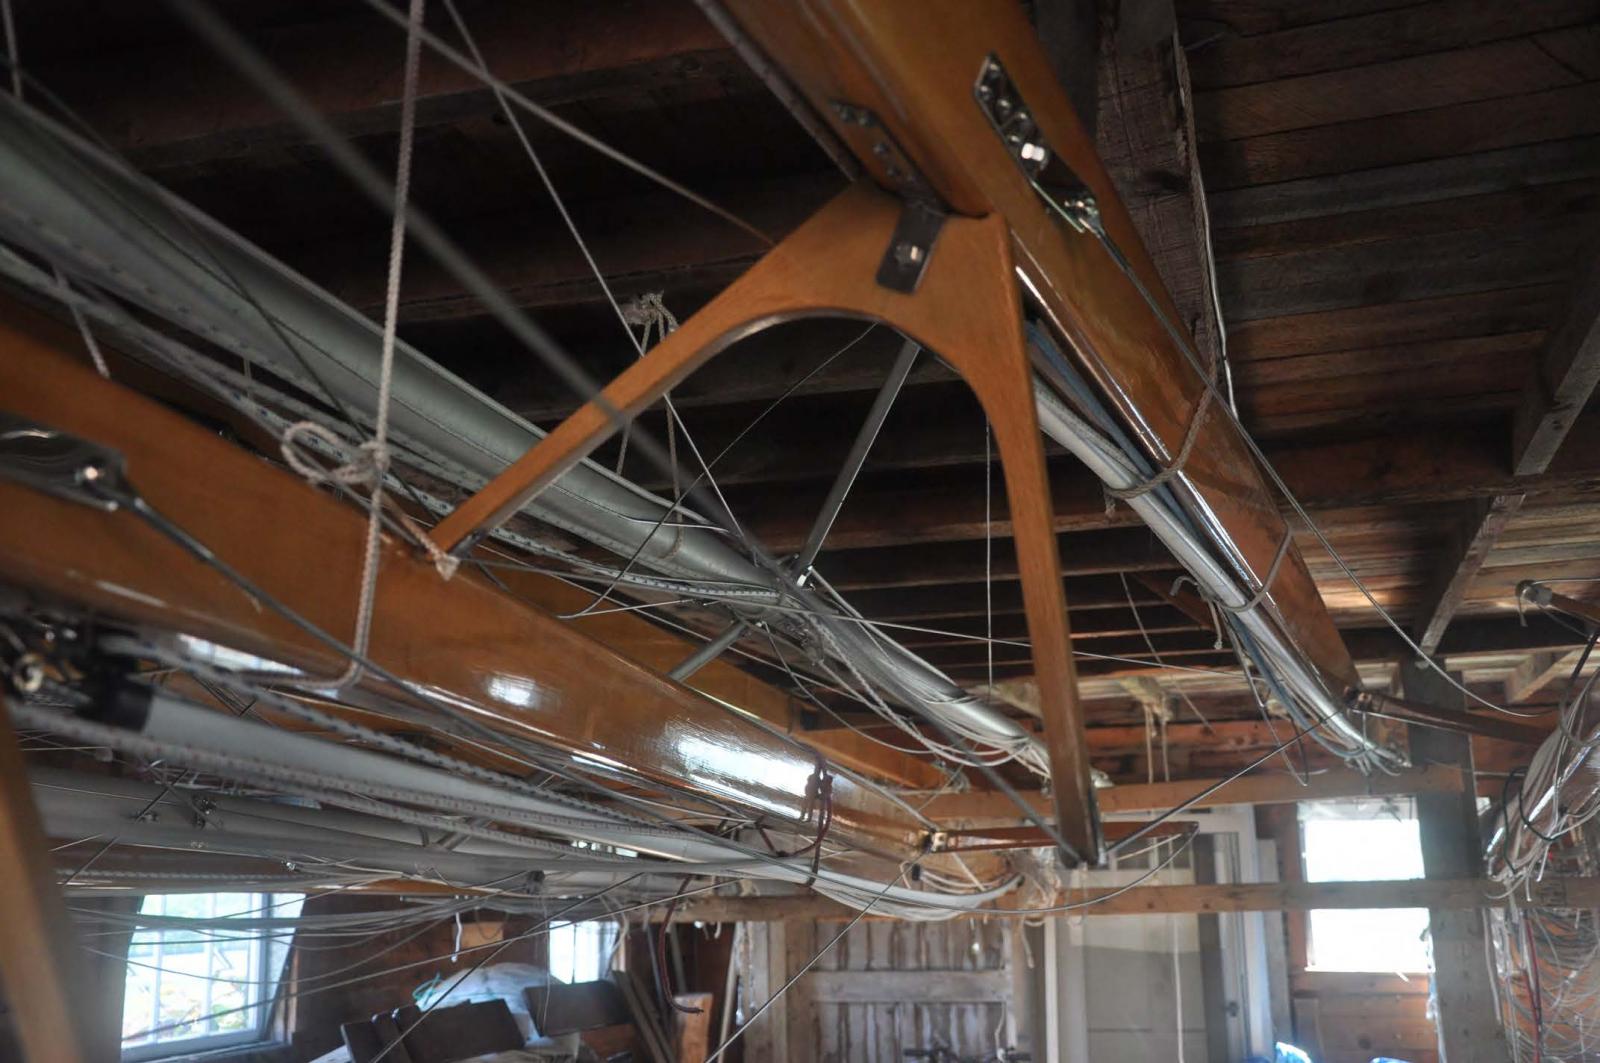
Here is the Jumper strut [ upper] on a new mast in Davids storage barn.
-
 The photo of my old mast did not come out clear. It would show a similar design, but it is all bronze. The old drawing said the struts were oak and my real boat has old oak. That grain is not good at this scale and I preferred to the look of the spruce.....so
-
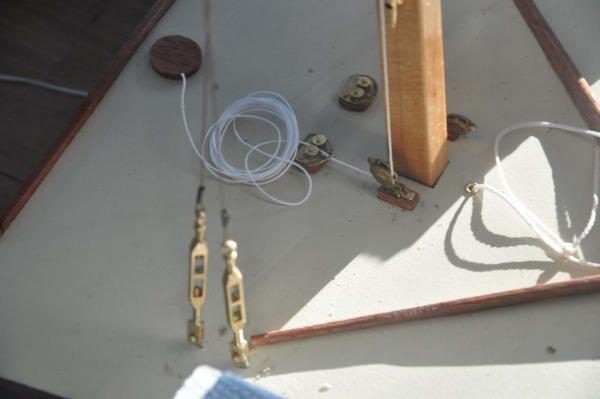
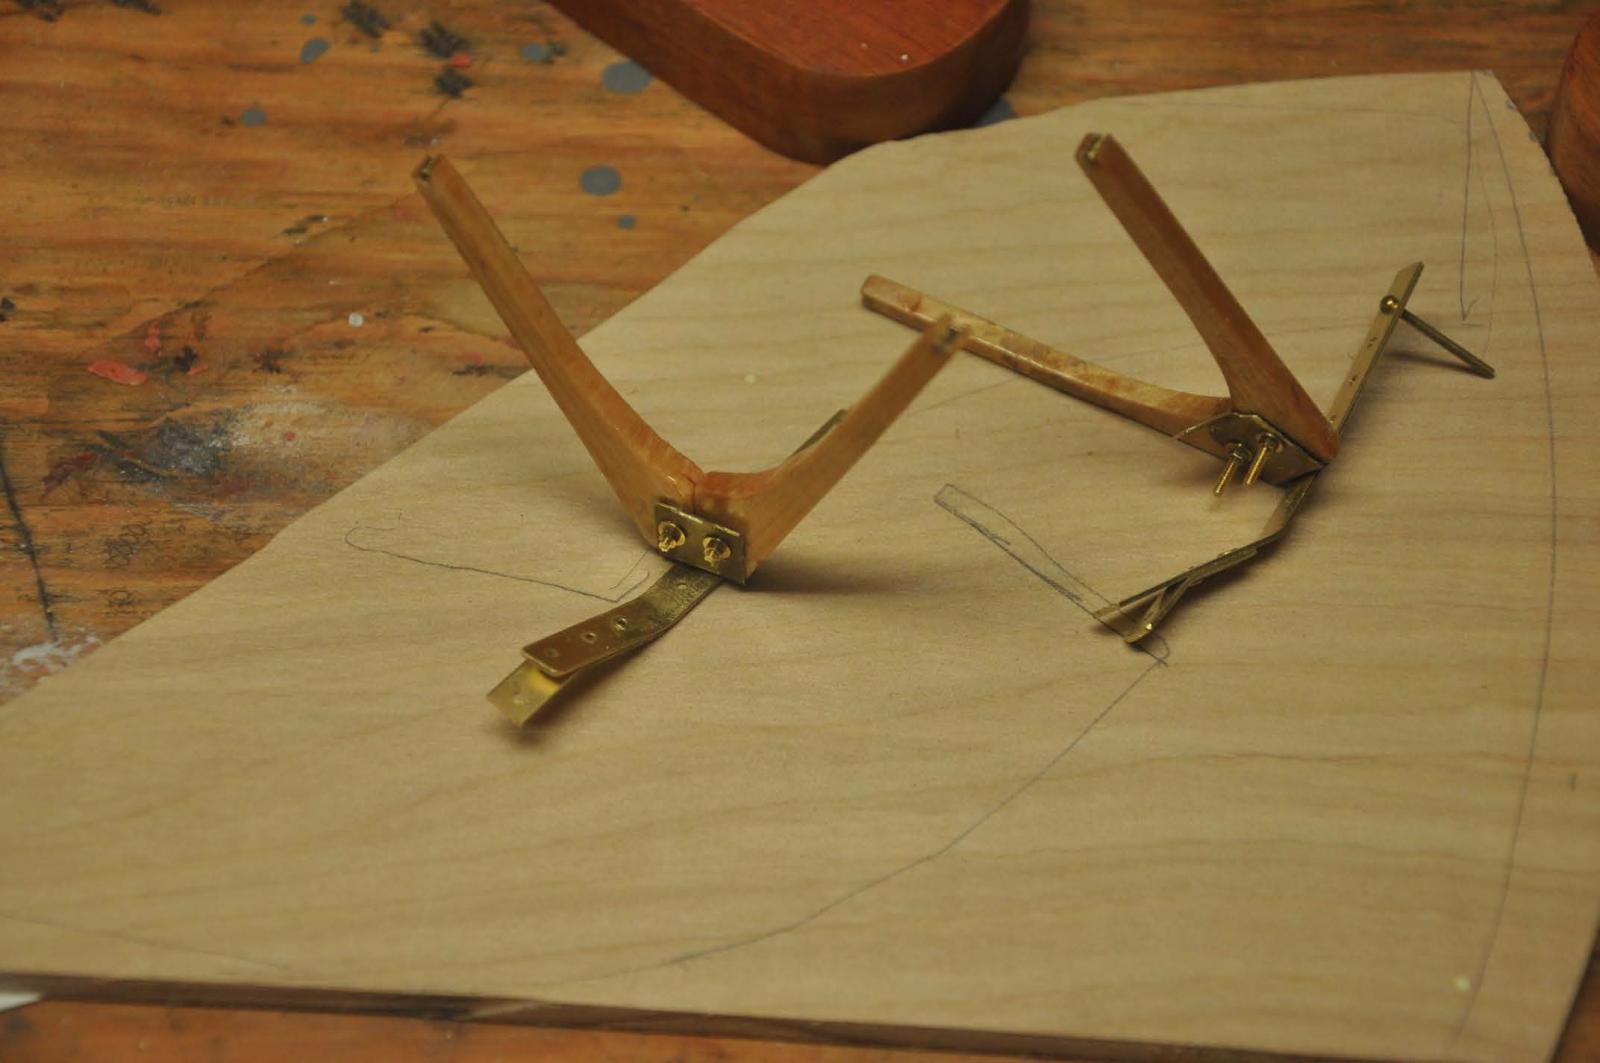
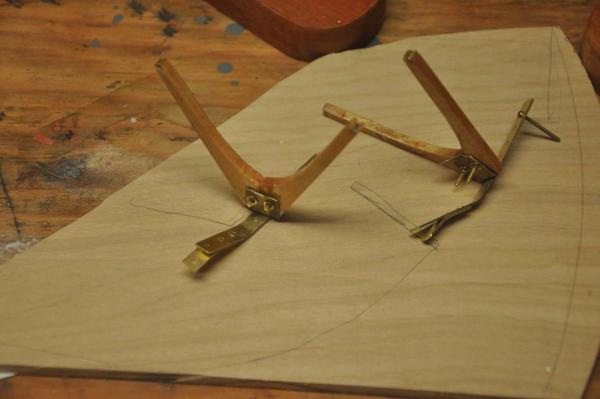 Here are my made up struts for both boats. I used sitka spruce and brass. I used the cut off form the mast and it was the perfect size.
-
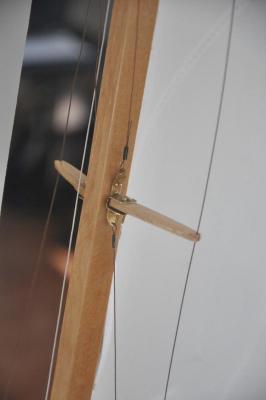
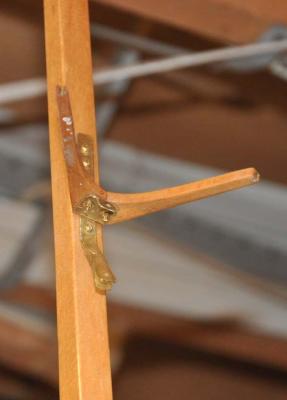 Here the jumper strut is mounted to the mast. I bought a bunch of 00 wood screws and the 1/4" were perfect. On the side tangs where there is a pair of shroud connections we have a through bolt, and I used the brass 00 cap screw only because my hex head bolts were too short. I actually used a 1/16" brass rivet to hold the 1/64" brass clip to the brass strap. I wonder if it will last??? the rivet was so short there is very little metal engaged.
to complete the mast here is the new spreader that I am making for the real Bittersweet. It is sitka spruce. Thsi is not part of the 1938 design but was added in the 1970"s I believe.
-
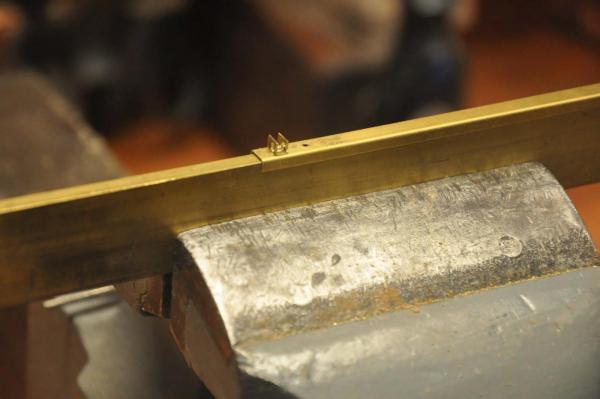
 I am struggling getting 1/16" brass rods to cooperate and act like a rivet because of the light gauge of the strap. I can not hammer very hard. I tried copper 14 gauge electrical wire but it was not soft enough either. we'll get there. I may have to preheat the rods before inserting them.
-
 here is the new lower assembly complete and mounted on the mast. This again has a weak connection of the clip. I used copper wire staple glued into the mast because this clip is 1/32" and too thick to try a rivet. we'll see what a breeze does to it.
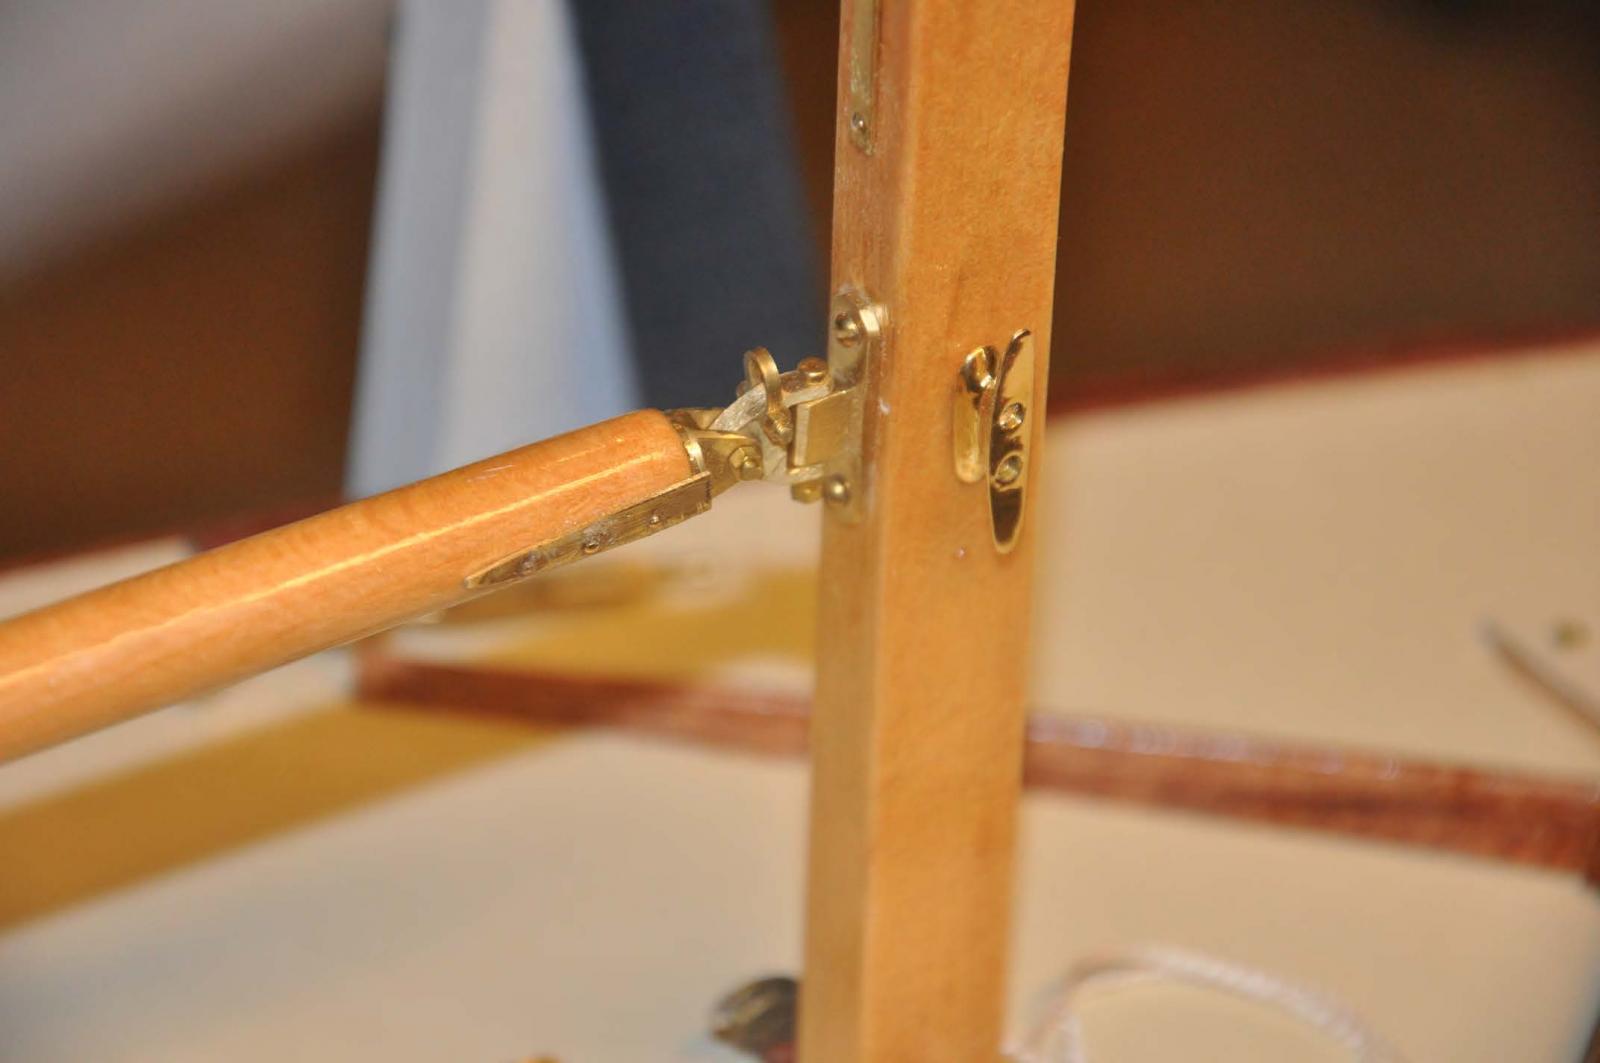
I started the tillers. They are very simple and slightly curved and tapered. There is a simple brass connection to the stuffing box to be made....
-
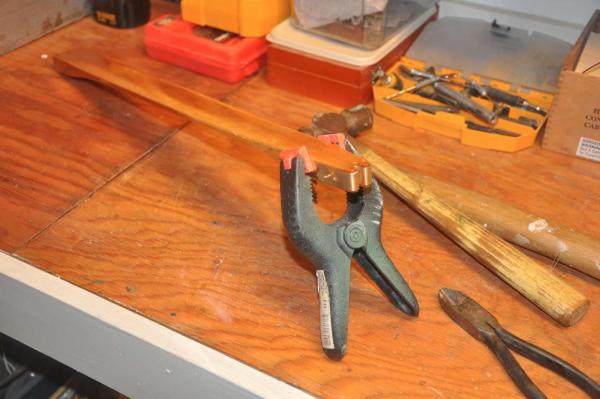
 I, like may others, bought this plank bender from a great vendor. I find it difficult to use for that purpose and it sat on the shelf for years. Here it is the perfect tool to make two tillers bend the same.
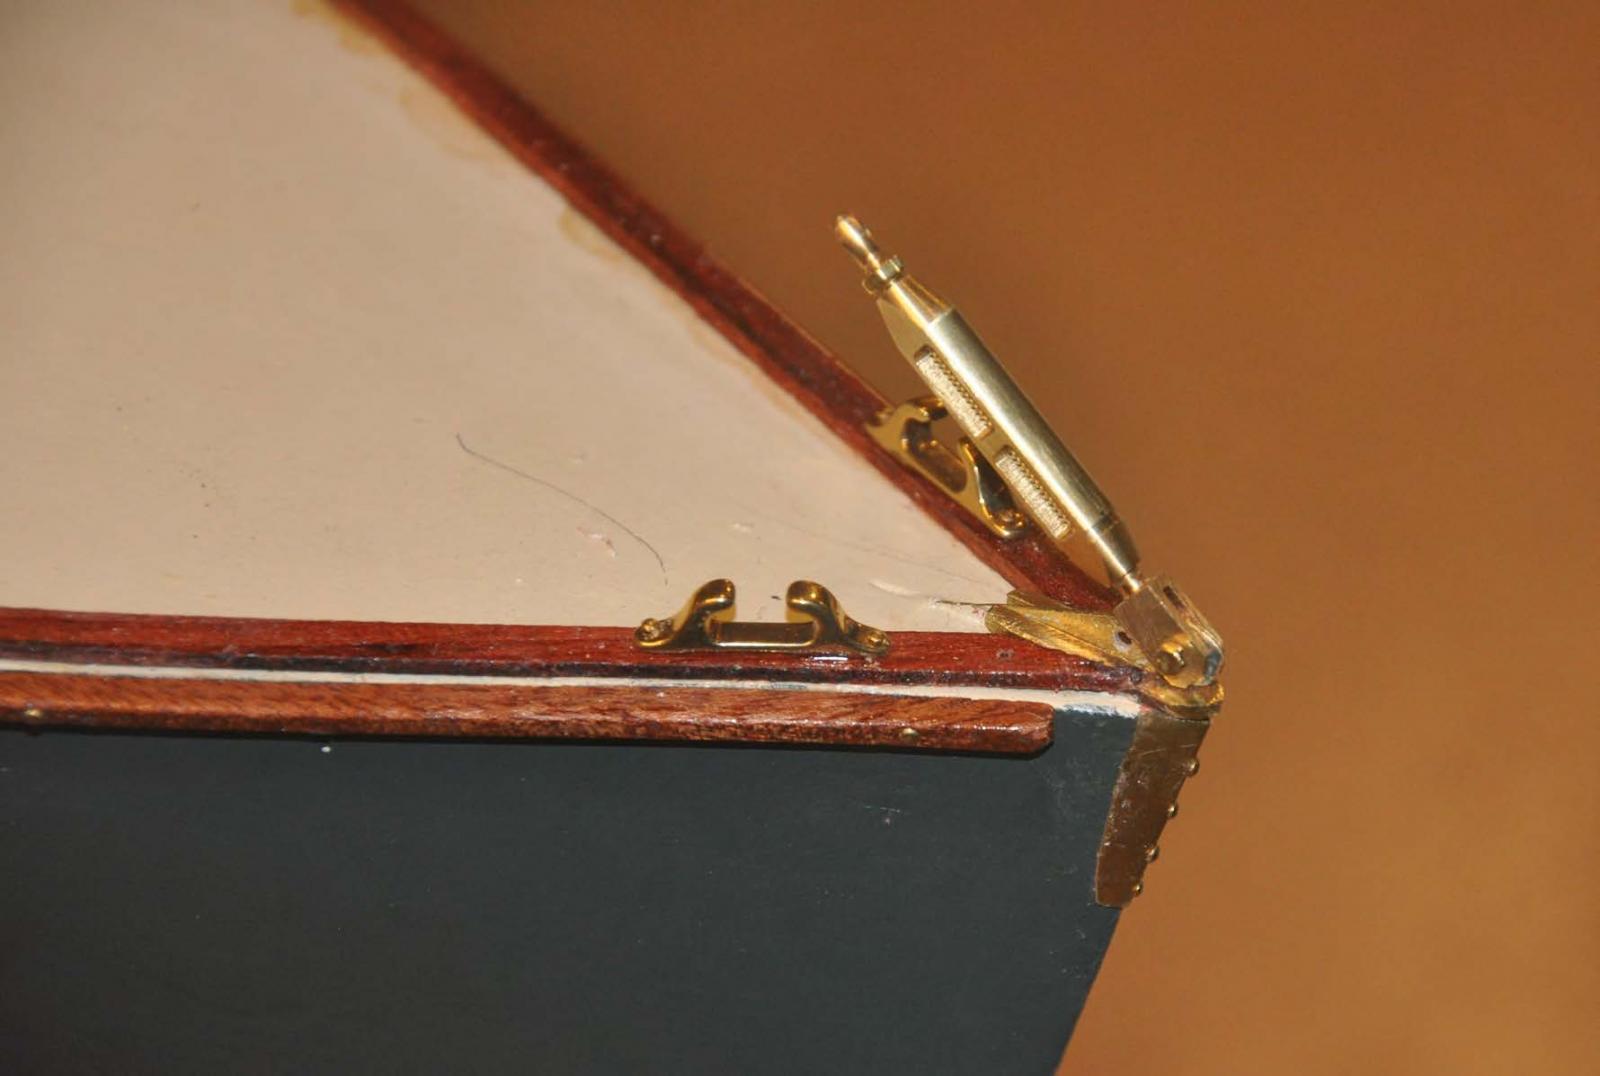
To complete the deck...again sort of...here is the addition of the mahogany bow strips and completion of the stem cap
-
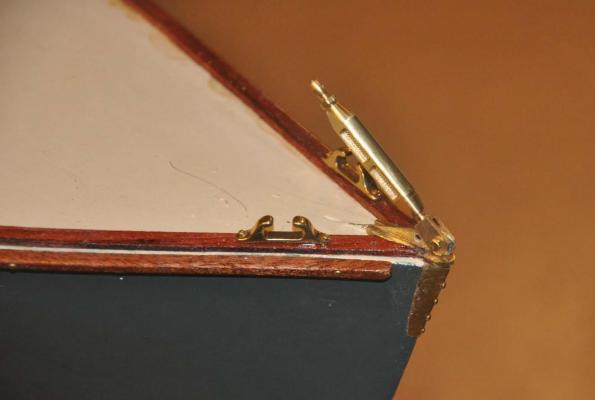 I added a second layer of brass to bring up the fitting to the mahogany. after adding the turnbuckle and the chocks I think is works. just not elegant.
So here is progress update for last week.
-
 One can see our last tasks before leaving the boat shop for the sail loft will be to install the teak sole. i have decided not to use the recommended African substitute.
cheers
- captainbob, G.L., pete48 and 3 others
-
6
-
-
-
-
Here is an update with more fittings and progress. I will try to consistently show the real boat fitting and then my attempt to replicate it. so here we go...this is a real learning experience for me
gooseneck:
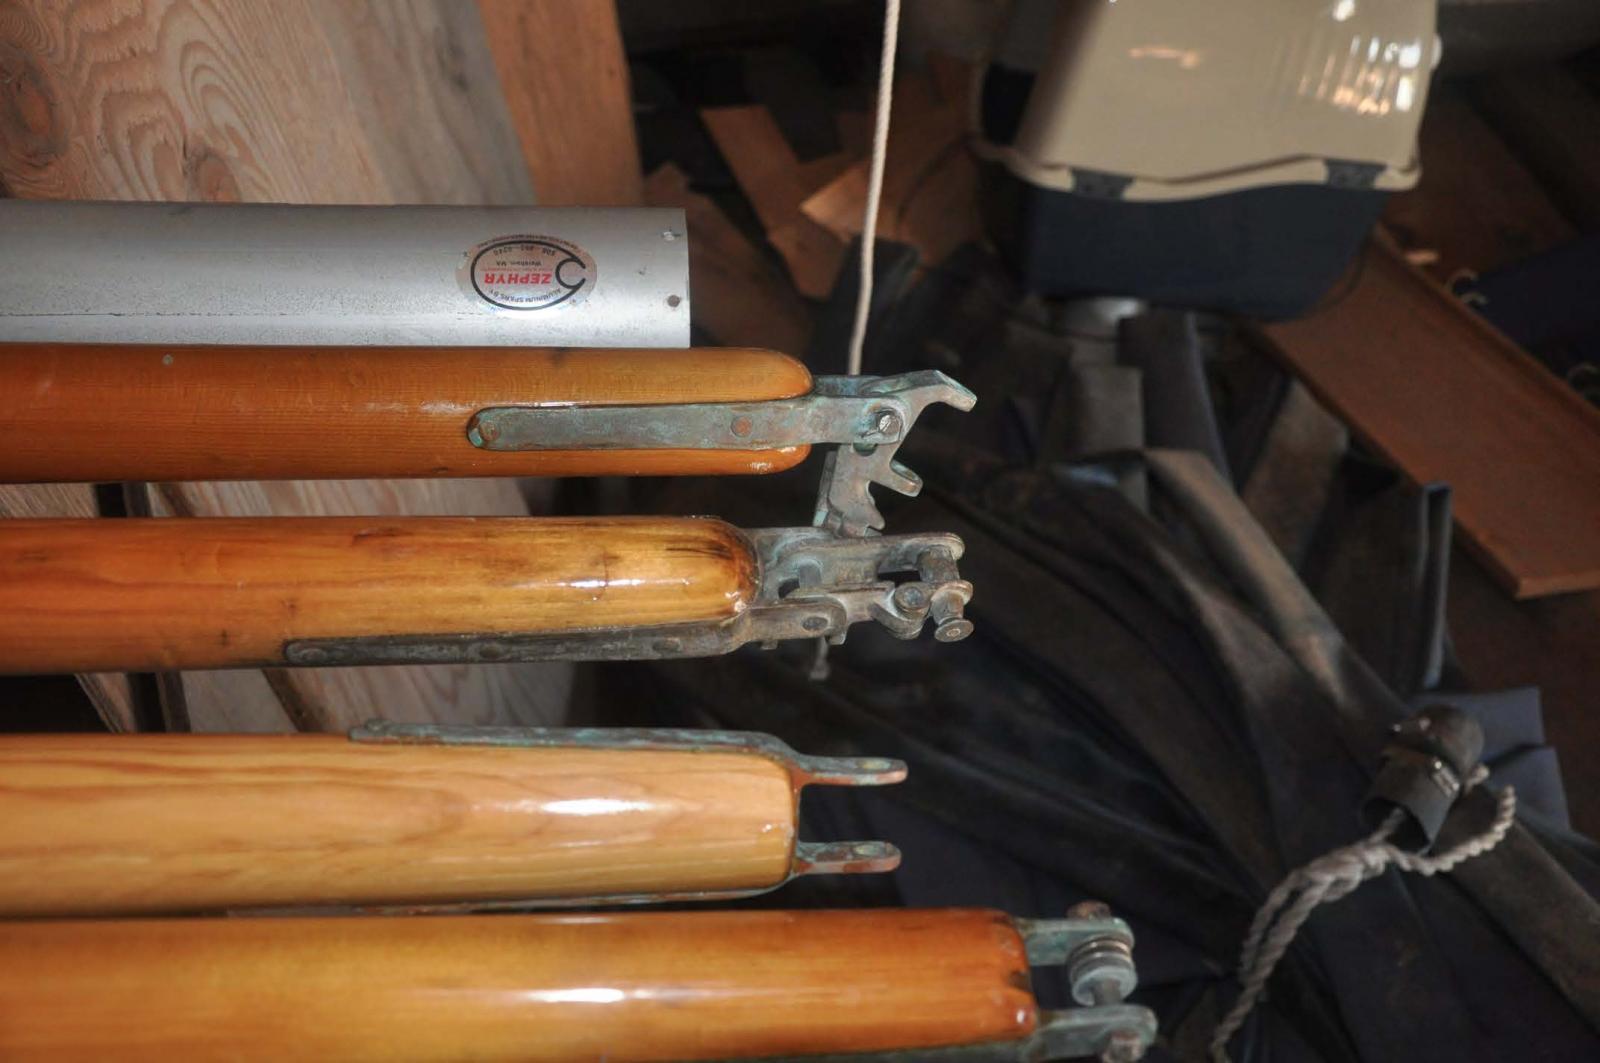
here are some views from the mast and boom as they hang in David's barn. He is currently storing 13 BHOD boats.
-
 Here are several booms; they are not all the same. In fact the 1970'ish boats switched to aluminum masts and fiberglass hulls.... I needed to combine function with look.
-
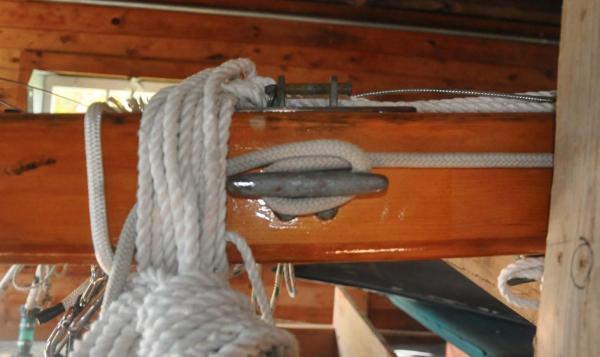 Here is Bittersweet's Mast. The cleat is for the spinnaker halyard and located here in the solid mast section adjacent to the gooseneck
-
 I shared before the idea that I would buy from Roger Cousineau a good working gooseneck made for vintage Marblehead Pond yachts. It has a brass insert that is embedded a good inch into the boom and will last a long time and avoid stressing soft spruce with screws and things.. I then added wings to get the look. To stay with brass cleats, I opted to use Wet Goose cast fittings. Hopefully they will age gracefully. Both Mast and boom are Sitka Spruce as is Bittersweet
Cam Cleats
I thought this was going to be impossible. I then took on the task of starting and realized that even at the large 1:6 scale the need to replicate a tear dropped, toothed gear is subjective. hopefully the 3/16" brass rods will age and suffice.
-
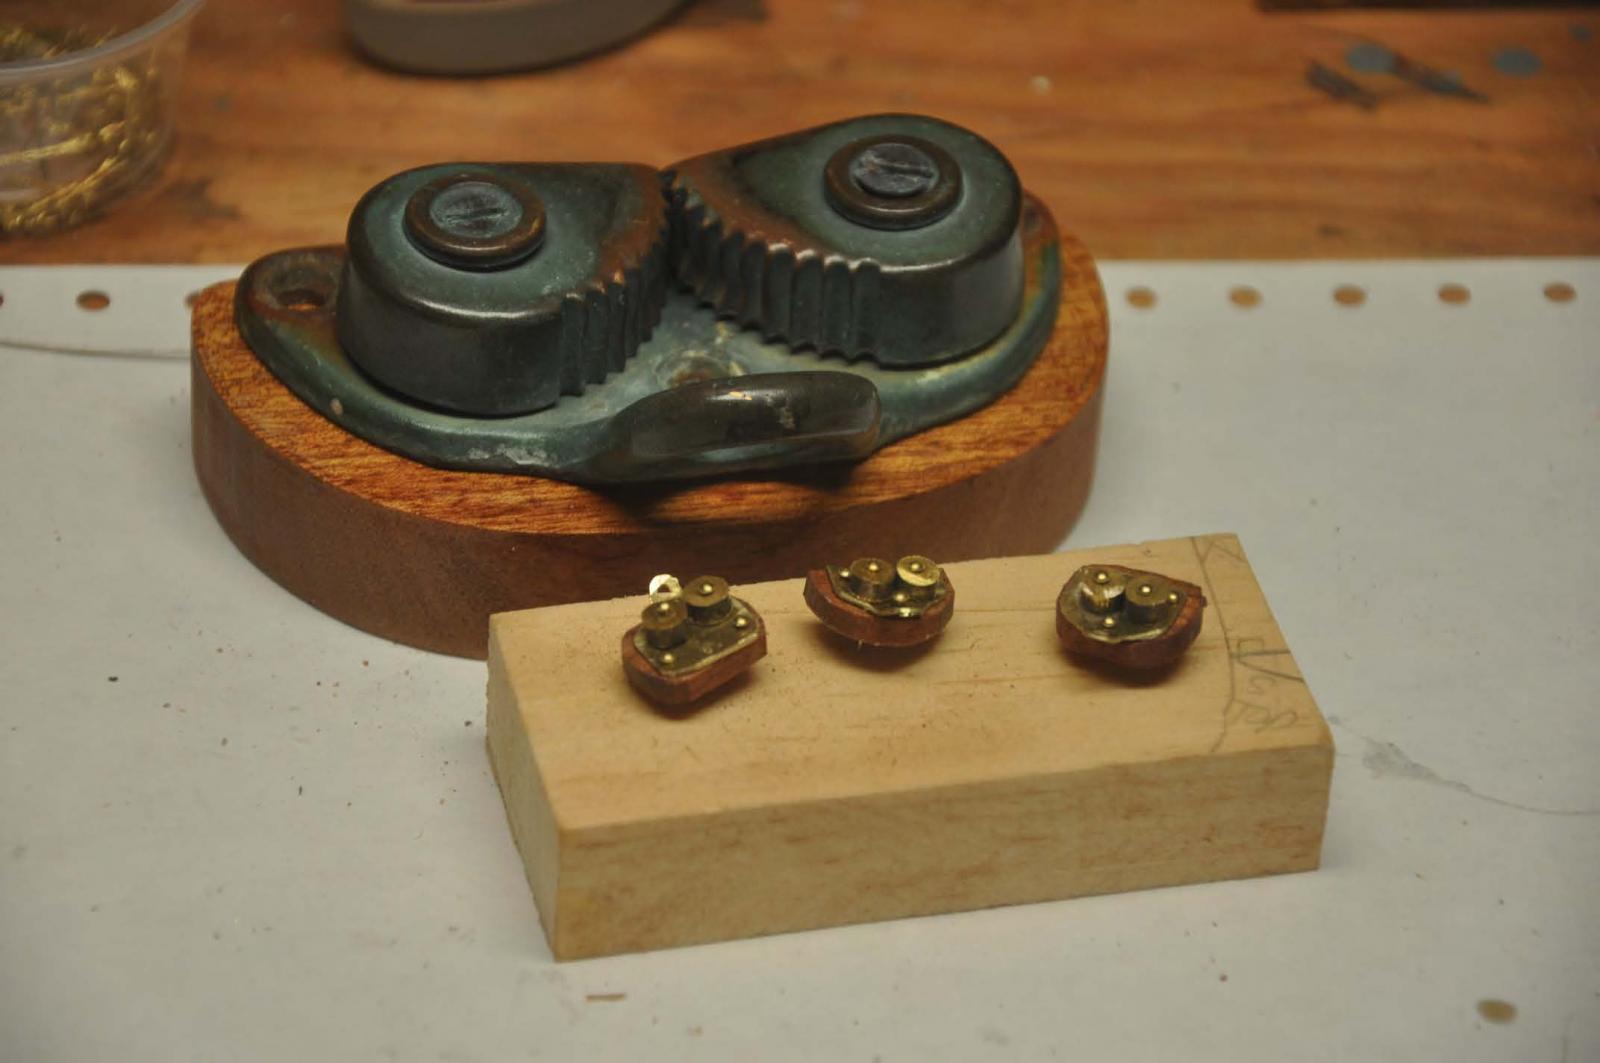
 Here is the challenge. The boat had only one cam cleat for the main sheet. David and I agreed to go to three and include the two halyards. They are safe user friendly and respect the classic design.
-
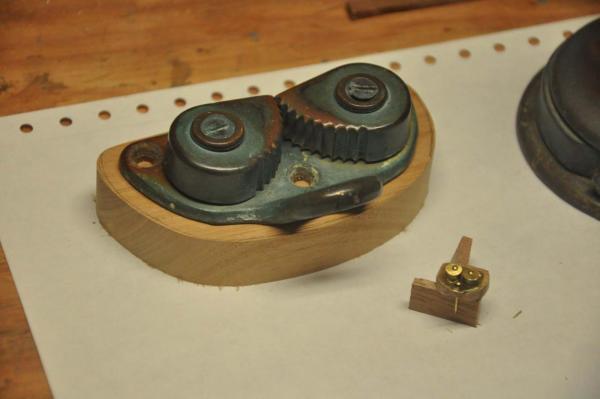 I need to make the new bases for the real boat for the two new cleats. here one is under the existing cleat. I then worked through a proto type.
-
 Here I have all three made up. Don't look too close they are not identical....
  Their mahogany mini bases were were stained and varnished just like the real ones.
-
 Here I have installed the cam cleat for the main sheet. I moved it a bit aft of the combing to leave clearance for the cockpit cover I may need to use for sailing. The combing cleat is used to secure the boom when moored or to tie off to a dock when docking. The boom crutch is not there yet.
-
 Here I have installed both the stand up halyard blocks and their cam cleats near the mast. You can also see the turnbuckles are in place as well.
winches
I shared earlier in the log my attempt to get something made as a place holder. I am no machinist so I made the turned barrels of wood and tried aging with brown and green paint. I have a friend who said he would help make them in brass later.
-
 Here I have installed the side jib sheet winches along with the jam cleats. I have not made up the jib sheet tracks yet.
cheers
-
-
Pete
thanks for showing this. I am most interested in the method to size the forms to allow full ribs before planking. I look forward to following along. I also love your large collection of photos that show up on your logs.
cheers
- michael mott, mtaylor, pete48 and 1 other
-
4
-
Michael
I am amazed as i read this log. The solution of steaming has given me courage to think about possibly trying something similar. I need to figure out how to use wider and thinner planks on my hulls so i can consider letting the planking show through on the outside. Currently I sand the hull smooth and avoid the issue. Thanks for sharing. I look forward to watching and learning some more
jon
- Piet, Jack12477, michael mott and 2 others
-
5


Boothbay Harbor One Design 1938 by Jond - FINISHED - 1:6 - RADIO - 21' racing sloop
in - Build logs for subjects built 1901 - Present Day
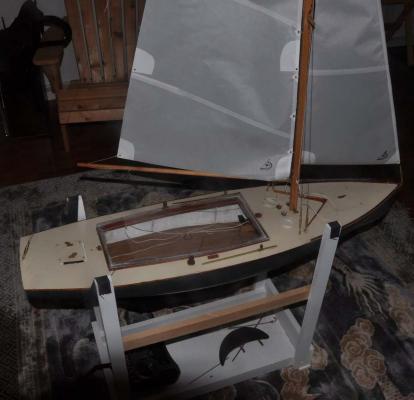
Posted
Hi all. I had hoped for a sunny day to take some sail and rigging pictures but it snowed. I went and found a screw on fish eye attachment and had some fun making some images. I am not very good at it and being inside is a bumbler. So here we go
This was fun for a snowy day. I will up date my progress on hull 2 on the next posting
cheers