JerryTodd
-
Posts
879 -
Joined
-
Last visited
Content Type
Profiles
Forums
Gallery
Events
Everything posted by JerryTodd
-
 If was made from Legos you wouldn't have to worry about sawdust and you'd be a feature in the international news.
 -
Brig USS Enterprise 1799 info gathering
JerryTodd replied to CharlieZardoz's topic in Nautical/Naval History
It was never U.S.S. Niagara - the designation USS didn't come into common usage until the 1860's or official usage until the 1900's. -
Why sew them? If you managed to maintain 1mm stitches - how long would each stitch be in your model's scale? How wide would the thread be in scale? There's seam lines already printed on the sail, leave it at that.
-
It's supposed to be "as launched." He's doing something about 15 years later.
- 446 replies
-
- 1
-

-
- Revell
- Constitution
- (and 1 more)
-
After your teaser images of the McNarry model, I posted some images I took of it in 09 in the gallery.
- 446 replies
-
- 3
-
-
- Revell
- Constitution
- (and 1 more)
-
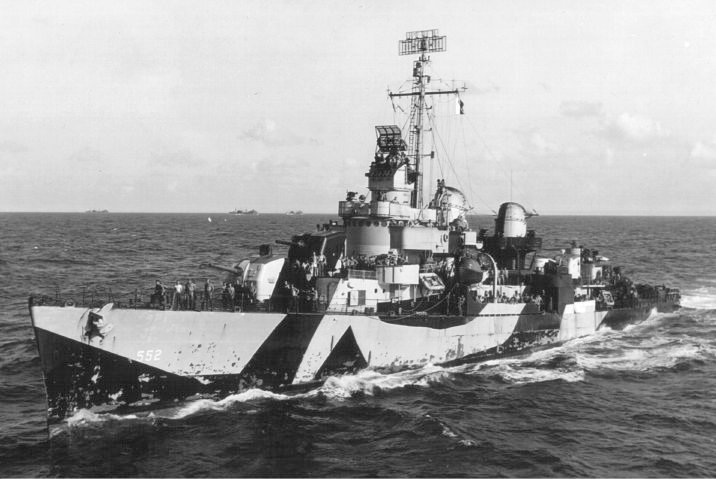
It's back to the rear of the stove again. I have to build a Revell 1:144 Fletcher kit into the Uss Evans to replace the old Lindberg model I slapped together back in 1981. There's a section for this on my site and I might start one here once I get a bit further into it.

- 553 replies
-
- 6
-
-
- sloop of war
- constellation
- (and 3 more)
-
Quite often the glue, like epoxy, is harder than the wood. Using sandpaper will scour out wood faster than it removes the glue, where a scraper will take everything down evenly.
-
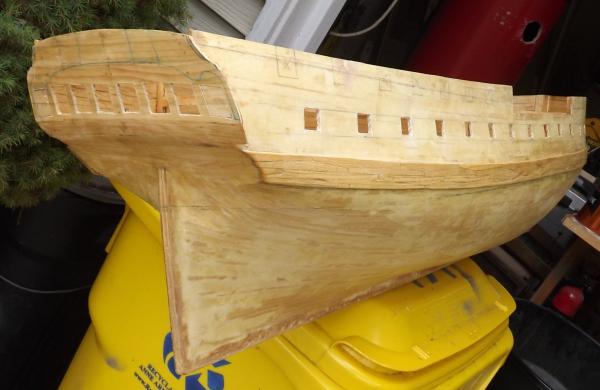
All the main deck gunports and windows are finally cut out. The focs'l and quarterdeck port will be cut after the inside is framed up a bit. Thought I had forgotten about this one, eh?

- 97 replies
-
- 7
-
-
- macedonian
- frigate
- (and 2 more)
-
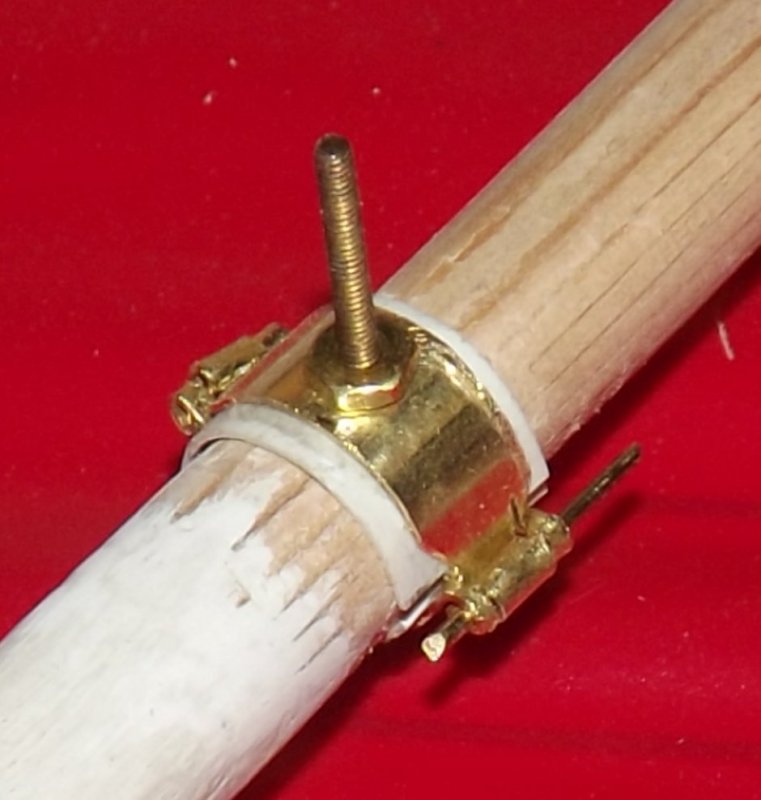
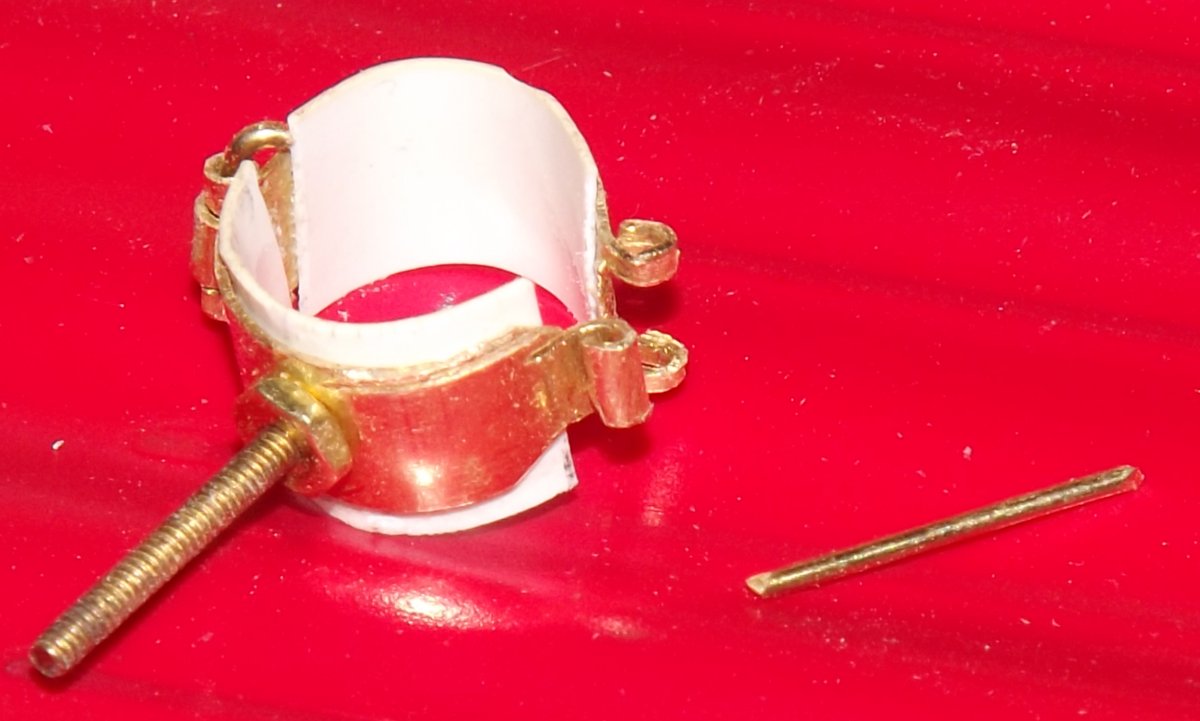
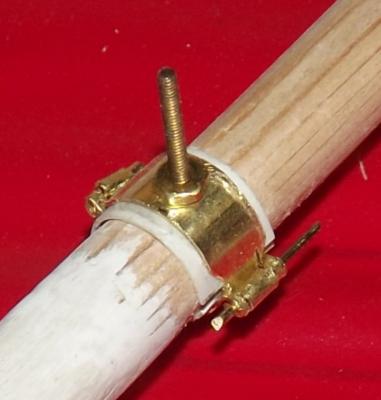
Spent some time at the post awful picking op a package that allegedly couldn't be delivered on May 14 because no one was home to sign for it - despite being in the garage with the door open and waving at the carrier when he drove up. He also didn't leave any notice in the box, and I had to contact the shipper to find out it's been sitting at the post awful for two weeks. This isn't the sort of thing I ought to work on after an aggravating morning, but I used the trip to go and get some brass and just got immersed in trying to figure this out. If you're wondering, it's the mizzen tops'l yard parrell collar thing

- 553 replies
-
- 8
-
-
- sloop of war
- constellation
- (and 3 more)
-
What tkay shows is only present on loose footed sails where it is a clew -outhaul and apparently serves as part of the reefing tackle. The sheet attaches to the boom. A sail who's foot is laced, lashed, jackstayed, etc to the boom wouldn't have this gear as such, though it could be reefing tackle. The original sketch didn't show the tackle connected to anything in this manner which is why it looked to me like a stowed preventer.
- 15 replies
-
- 1
-
-
- Cutter
- Sherbourne
- (and 2 more)
-
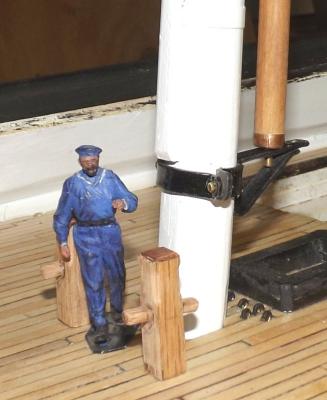
Sea chests nearly always had loops of line for handles at either end, often covered in fancy knotwork and held on by a vertical cleat. Take a look at this site for a variety of chests and their beckets - there's a couple that date to the early 1800's. Often a painting or carving, or even something on paper was pasted inside the lid where it was protected from the abuse the chest was bound to get. A fellow digging in his sea chest with a little painting inside would be nice in your wonderful scene of happy marines. http://www.frayedknotarts.com/chests.html
-
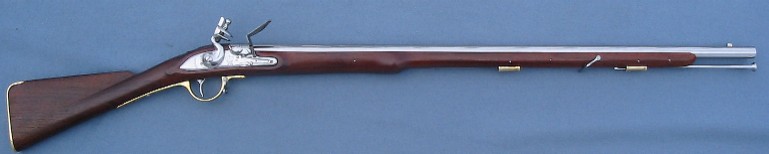
Here's your musket Dafi... It was 136 cm long with a94cm barrel - a little shorter than the Land pattern issued to infantry. There was also a grenade launcher that could be fitted in lieu of a bayonet: The most noticeable and identifying thing about the Brown Bess was the swell in the stock about 1/2 way between the trigger and the end of the barrel. And some info on it and it's family: https://en.wikipedia.org/wiki/Brown_Bess I did the Bicentennial of the American Revolution back in the 70's as a seaman and carried an original sea service Bess, loved that old girl The Penobscott Expedition 1979 Me and my Bess are on the right


-
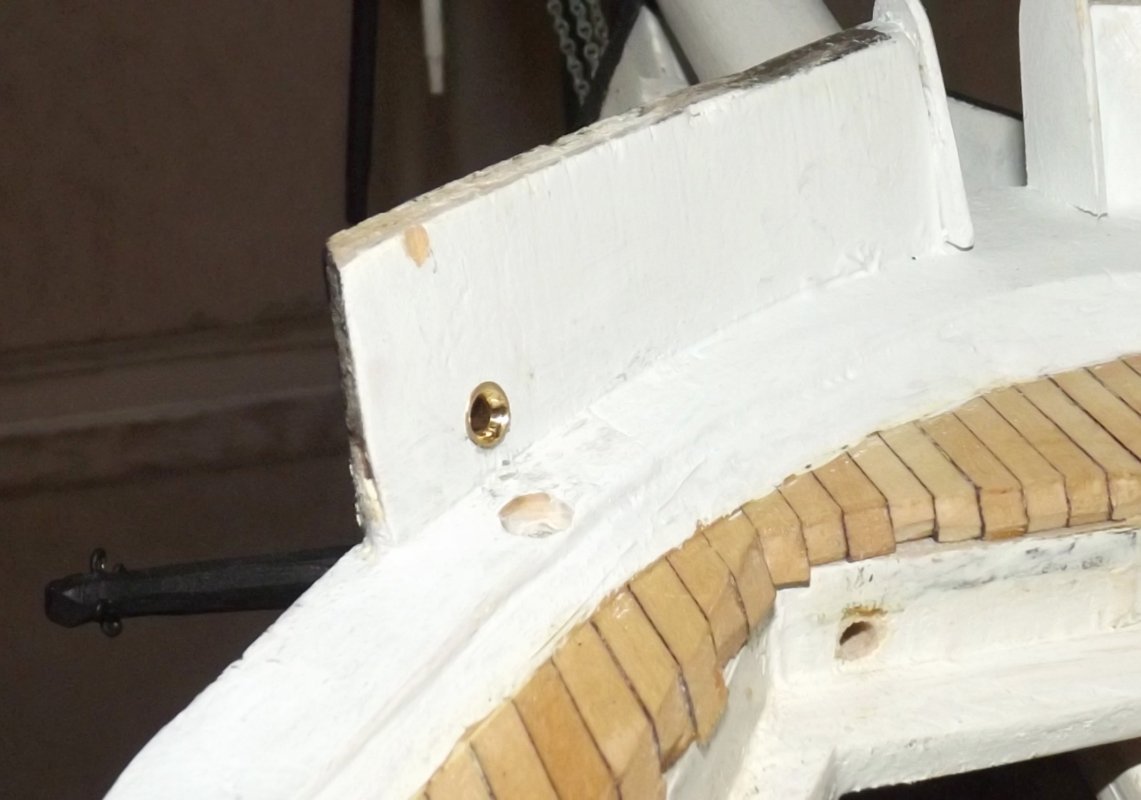
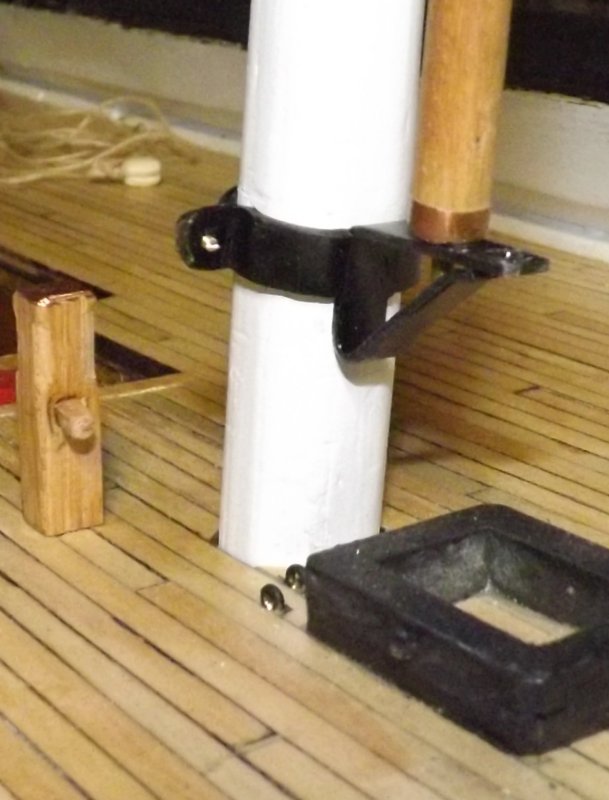
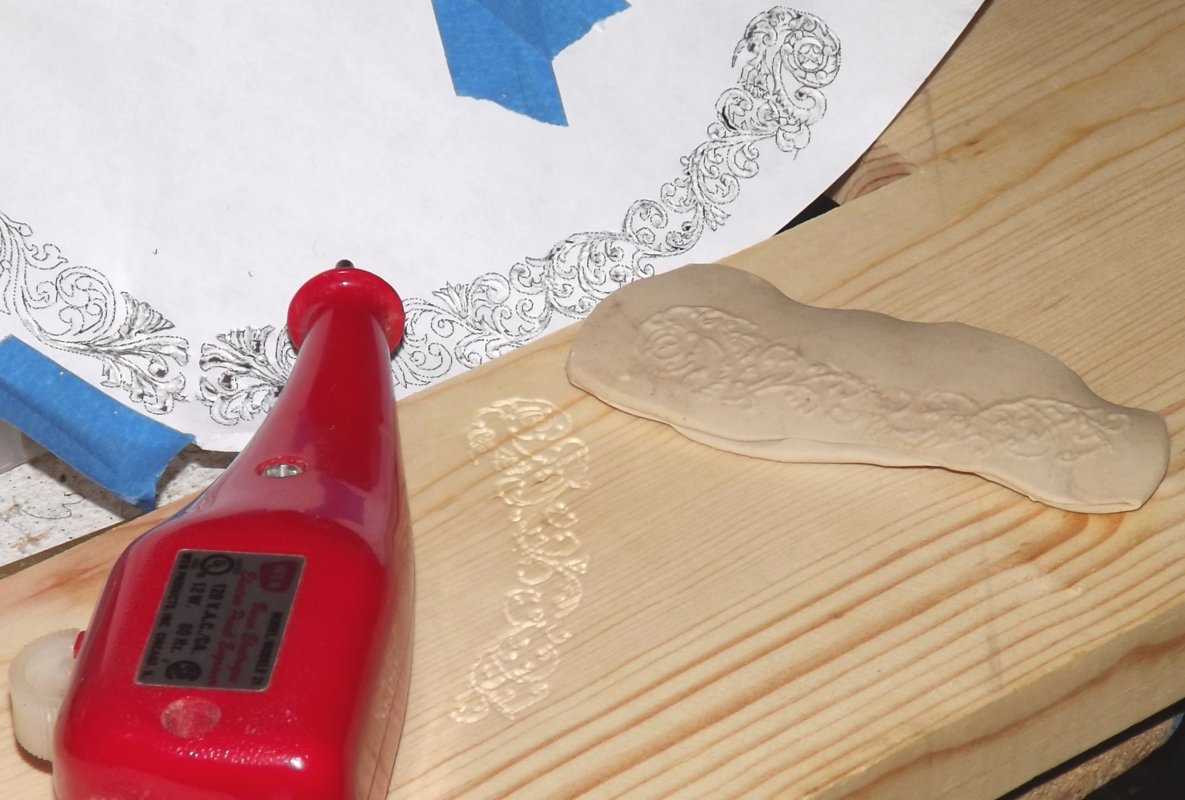
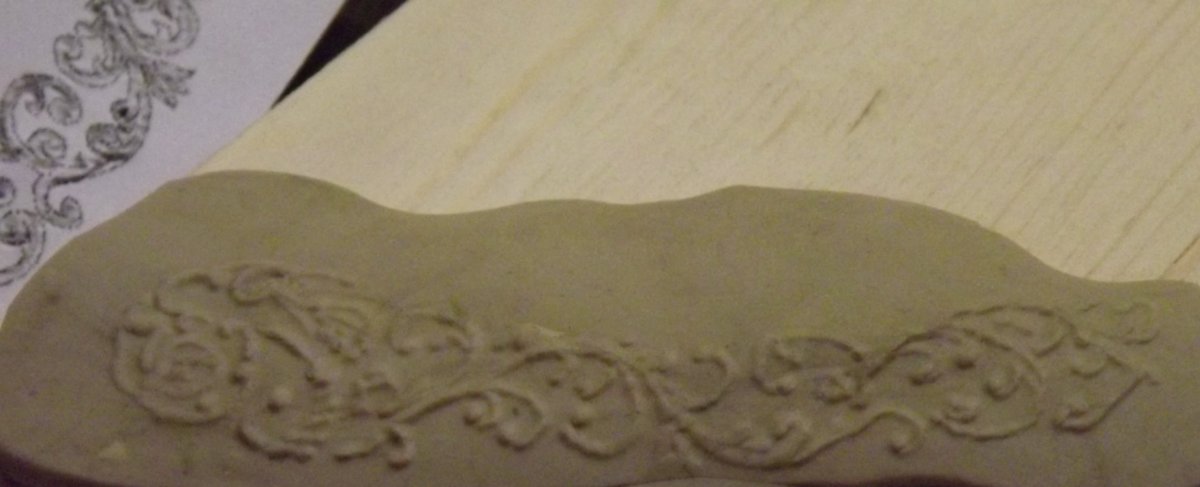
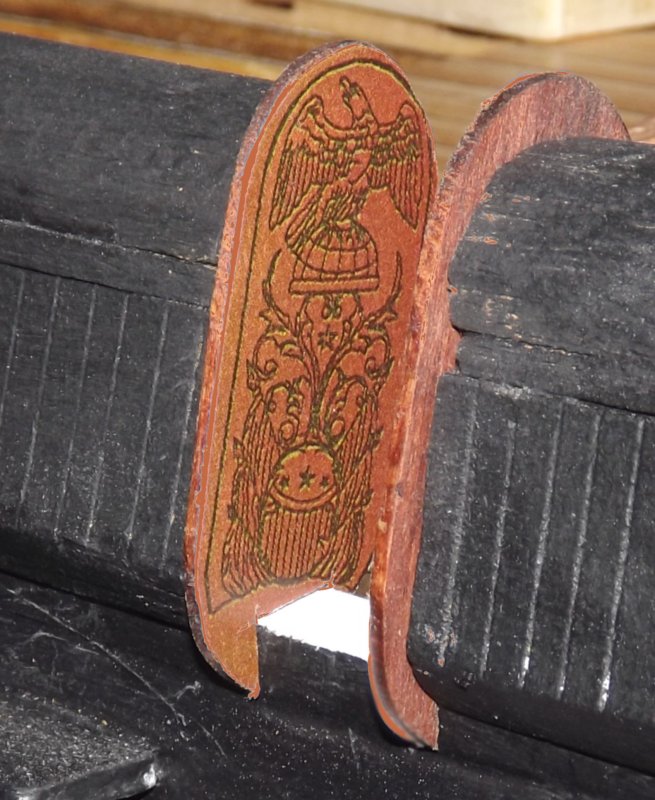
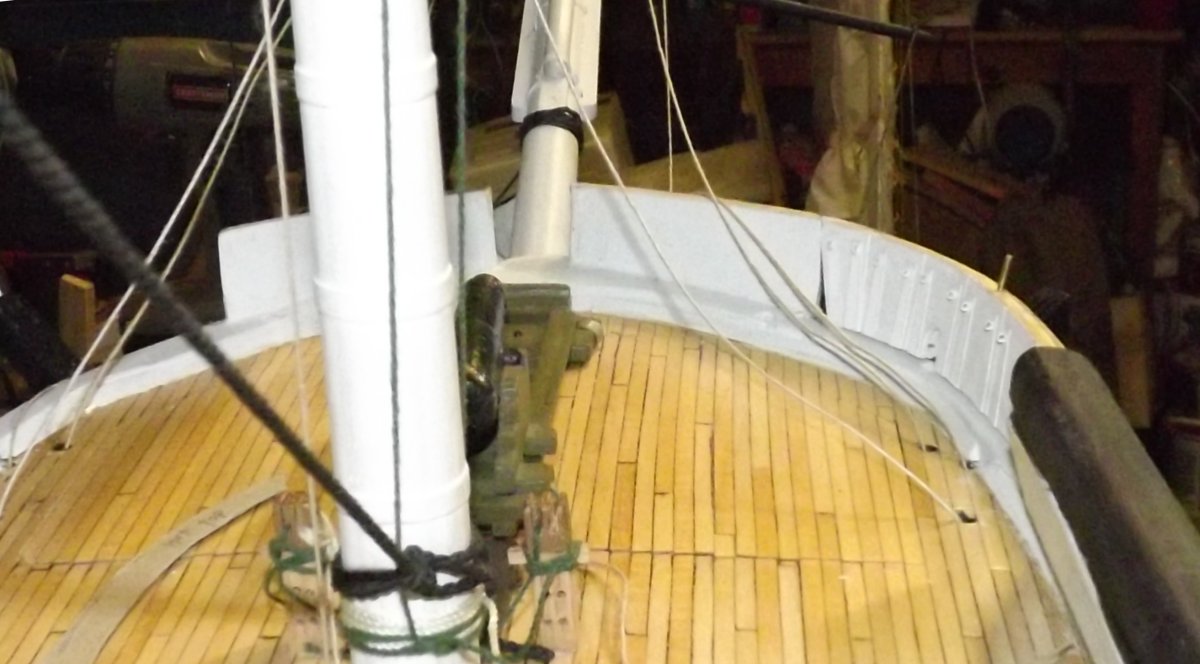
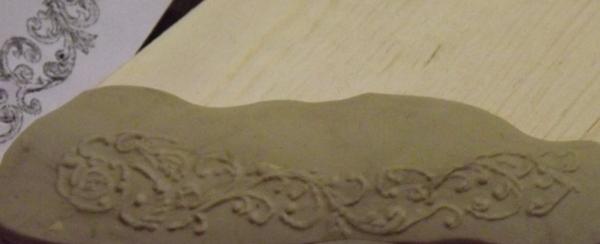
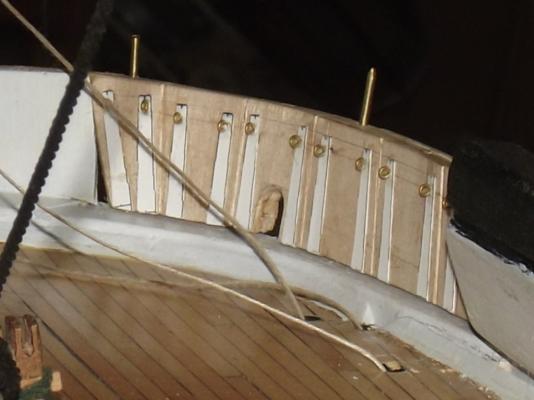
End boards at the bow Fairlead for the fore-tack Mizzen spencer step cleaned up, painted, and installed and an experiment. I finally found my engraver again while digging through the shop looking for something else. I used it to trace the scroll-work of the trailboard into some pine. I pressed some modeling clay onto it to see what sort of impression it would make. I think it may do the job. I'd frame around the carving and pour resin into it to take the engraving and form a backboard that would get attached to the stem knee of the model.


- 553 replies
-
- 7
-
-
- sloop of war
- constellation
- (and 3 more)
-
I cut the sound on the vid because it was mostly the radio playing in the background - Baltimore radio, even the so-called "classic rock" station sucks. Next time I'll put in a Stan Rogers or Gordon Bok CD. In the sailing portion there was some guy on a loud-speaker introducing Helen Bentley to the crowd. I have a hard time finding decent music that YouTube won't block for copyright, so I just leave it out.
- 553 replies
-
- 3
-
-
- sloop of war
- constellation
- (and 3 more)
-
If I could come up with a multi-shot system for the pivots, I'd jump on it - but I'm not interested in a single-shot system where I have to bring the boat in and reload it each time. I'm going to get the hull detailed and get controls in order - I can always toss the rig together if something comes up. The hull needs: the rest of the folding bulwarks made the scroll work trailboards on the head pin-rails, including turning the posts for the ones behind the fore and main masts eyebrows over the gun-ports boarding steps gratings glass in the skylight rails on the deck for the guns, new/reworked gun slides Chain-plates stern boomkin repaired - schooner knocked it off last sail ships wheel made - which is a matter of making the 20 spokes. Capstan made davits and the rest of the boats galley stack weather cloths on the head I think that's it, not including rigging
- 553 replies
-
- 6
-
-
- sloop of war
- constellation
- (and 3 more)
-
Well, it's not the best video ever made, but it may be of interest to some RC square-rigger nerds You may note that the Semaphore Sheeter only travels a total of 90° in the video, that's upgraded to 180° now with the "Servo-Stretcher."
- 553 replies
-
- 6
-
-
- sloop of war
- constellation
- (and 3 more)
-
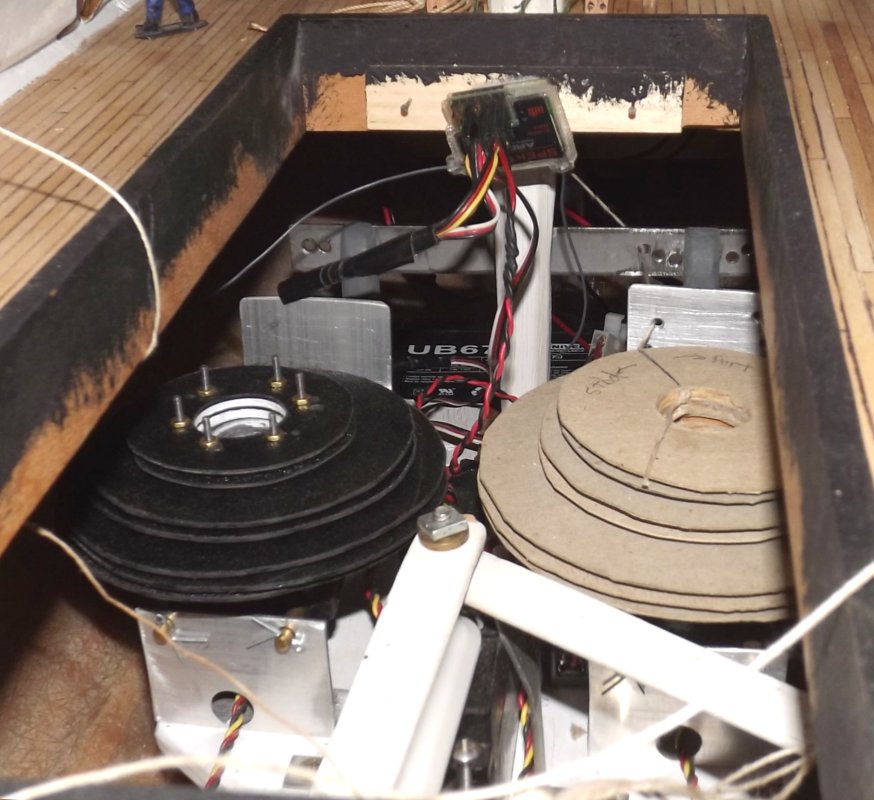
After all that work to get her ready for Port Fest, it took some effort to get up the gumption to take it all down - but down it had to come. After getting some specs for the fore and main course tacks, and making the extra disks for the winch drums, I pulled the servo tray out of the boat. Both drums are complete, parts wise, but I still need to cut slots in the drum disks for threading the braces into the center of each stack. Today the rig came down so I can move her about and open the door again. A good portion of today was spent, after planting tomato plants; in tracking down a fault in the wiring of one of the winch servos, which wasn't responding to input. I got a "servo-stretcher" which I'll use to increase the travel of the fore-n-aft servo that controls the heads'ls and driver from 90° to 180°. I rigged it up to test and set it when I realized the foremast winch wasn't working. Using a meter set for continuity and a pair of needles stuck in the wiring, I could not find a fault anywhere, and the servo worked fine on another channel. I was about to conclude the problem was a bad channel on the receiver when I rmembered that I had fiddled with some of transmitter settings trying to slow down the heads'l servo. I apparently slowed the wrong channel down to nothing. Resetting that to 100% solved the problem, though I still haven't managed to slow down the heads'l servo. Again, learn from my mistakes.


- 553 replies
-
- 7
-
-
- sloop of war
- constellation
- (and 3 more)
-
The purpose of this log is so folks can learn from my mistakes, and occasional successes.
- 553 replies
-
- 5
-
-
- sloop of war
- constellation
- (and 3 more)
-
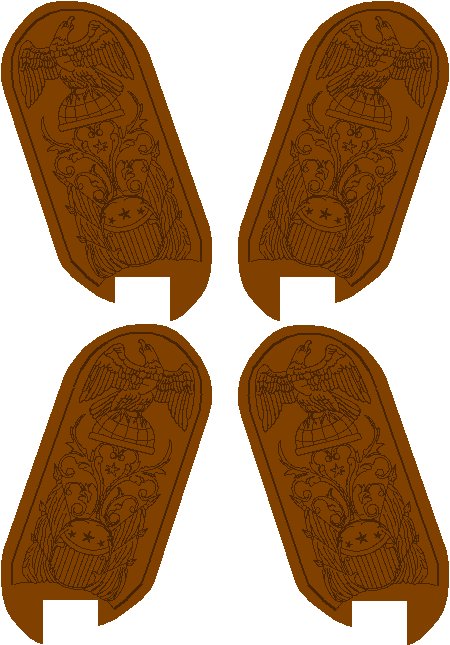
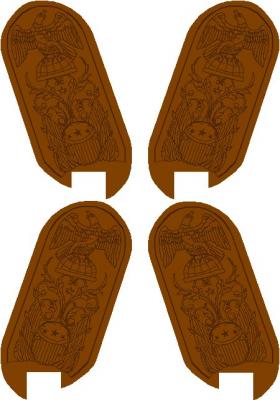
The fore mast winch drum is getting close to done - I need to cut the slots for threading the braces and it'll be complete. The main/mizzen drum is underway. The threaded rod isn't thread over it's full length, only for about 1-1/2" at either end, so I need to tap the threads further along to get the length of rod I need for the now taller winch drum. Drilling stack of plastic is aggravating at best, so I quit before I took the hammer to it and worked on something else. In this case I traced a photo in Paint Shop Pro that I took of the ship's original end-boards that were mounted in her entry ports. I scanned one of the end-boards I made from basswood and resized the tracing to fit it. I printed them on the color laser and glued them onto the basswood pieces. Here they are sitting in place on the model. They need a couple of coats of poly on them yet.


- 553 replies
-
- 11
-
-
- sloop of war
- constellation
- (and 3 more)
-
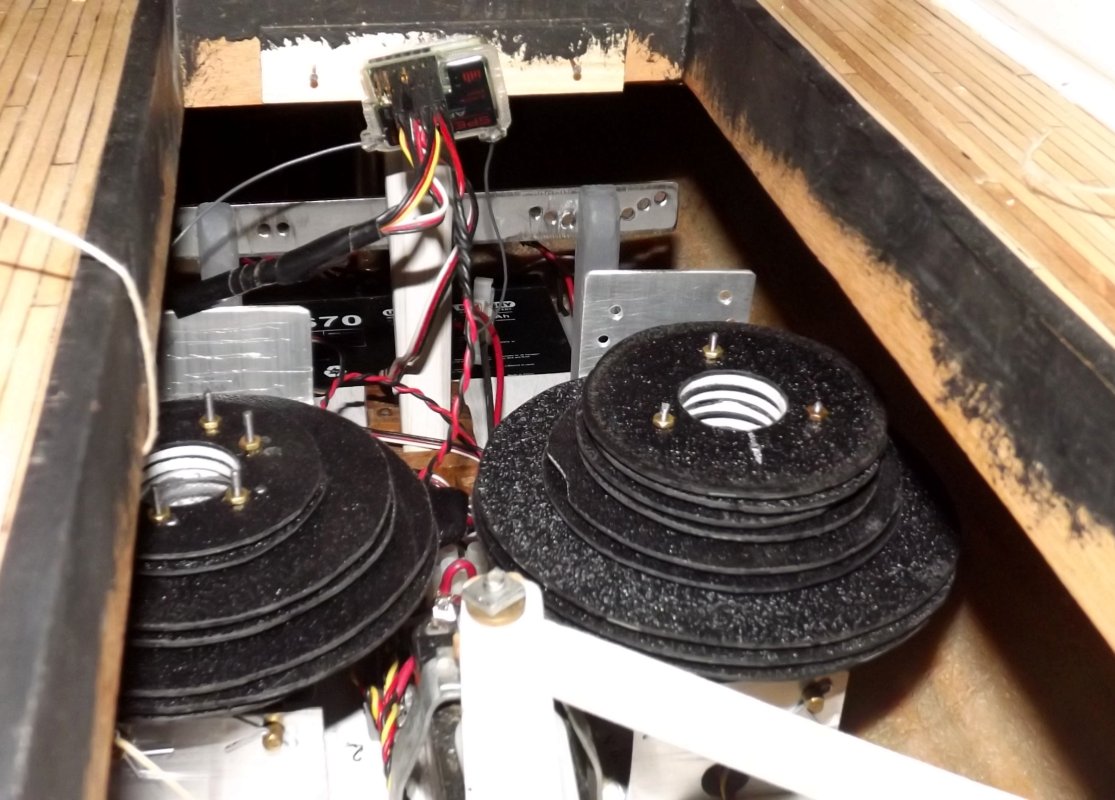
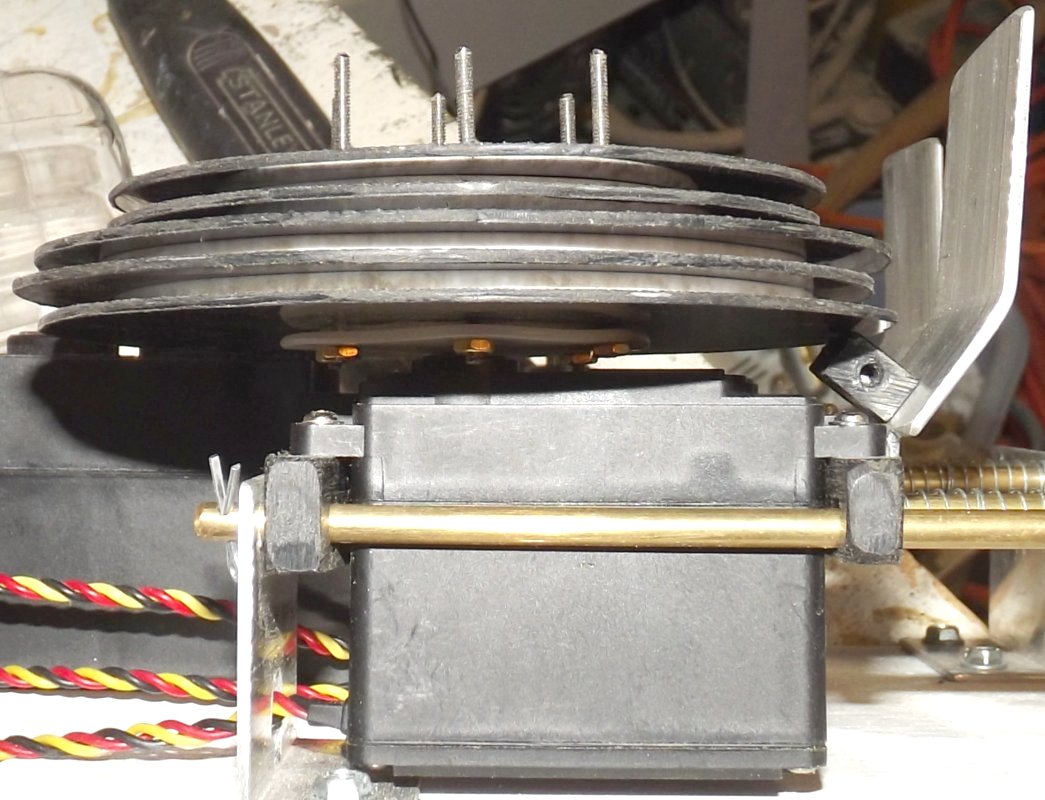
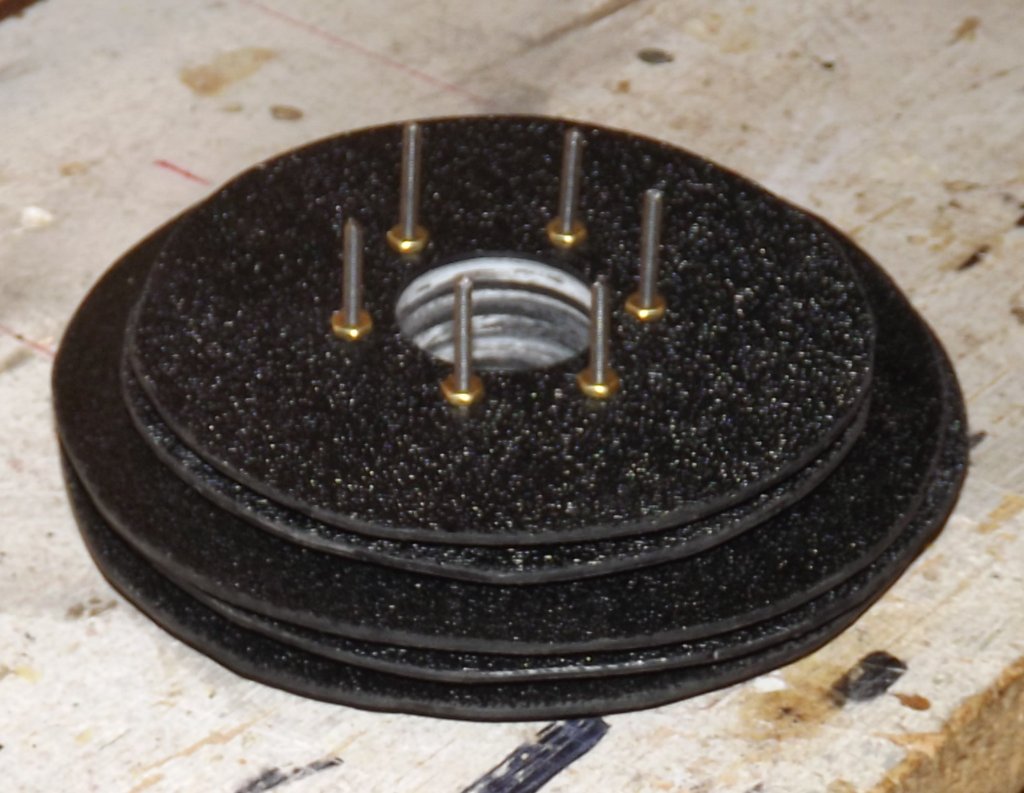
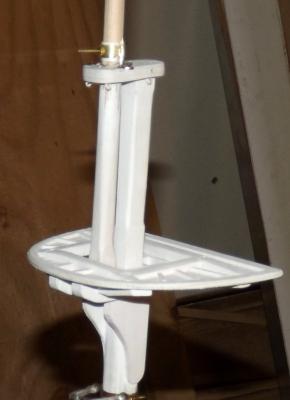
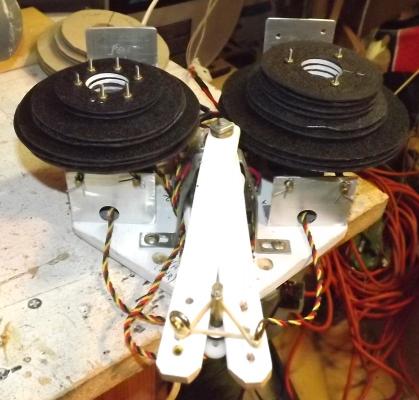
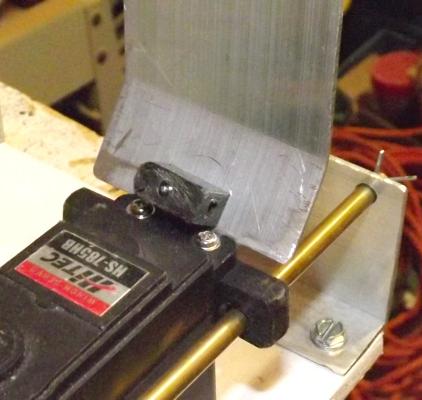
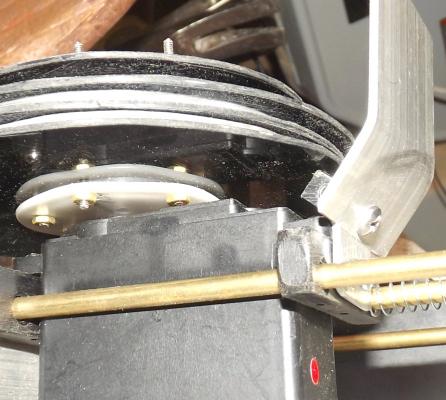
The drums have two disks for each controlled yard plus the flanges in-between. Adding two more for the coarse tacks will make the main/mizzen drum 8 disks high, and the foremast drum 6 disks high. I was a little concerned with the braces all pulling to one direction against the servo's spindle, so I got the idea of adding a bearing block to the fairlead plate that the bottom of the drum would slide against. The block is Delrin plastic and at that angle the bottom of the drum touches only a relieved corner of the block. What's pictured is Macedonian's servo tray, but the experiment being a sucess, I'll wrangle it into Constellation's set-up in due time.

- 553 replies
-
- 9
-
-
- sloop of war
- constellation
- (and 3 more)
-
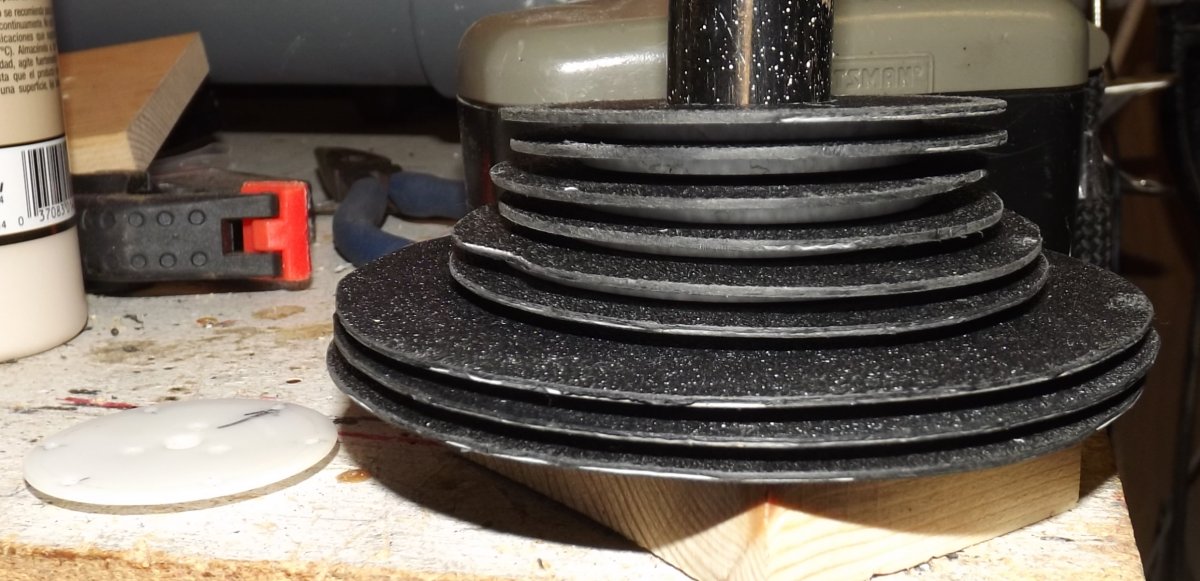
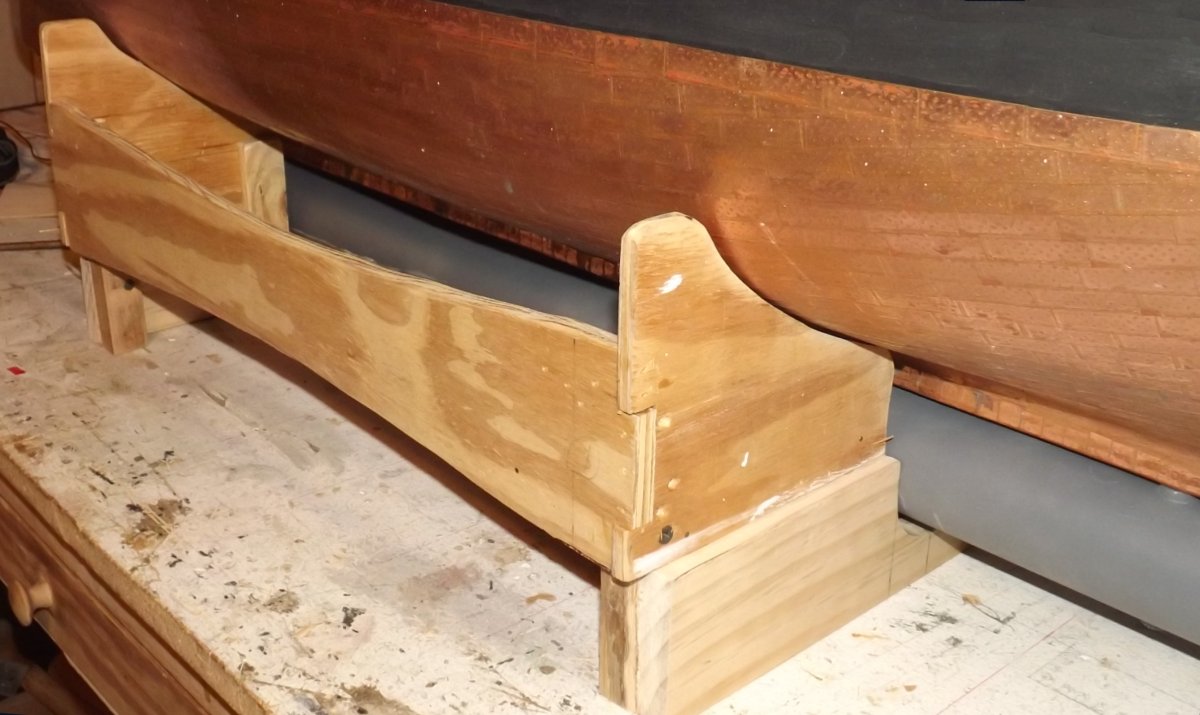
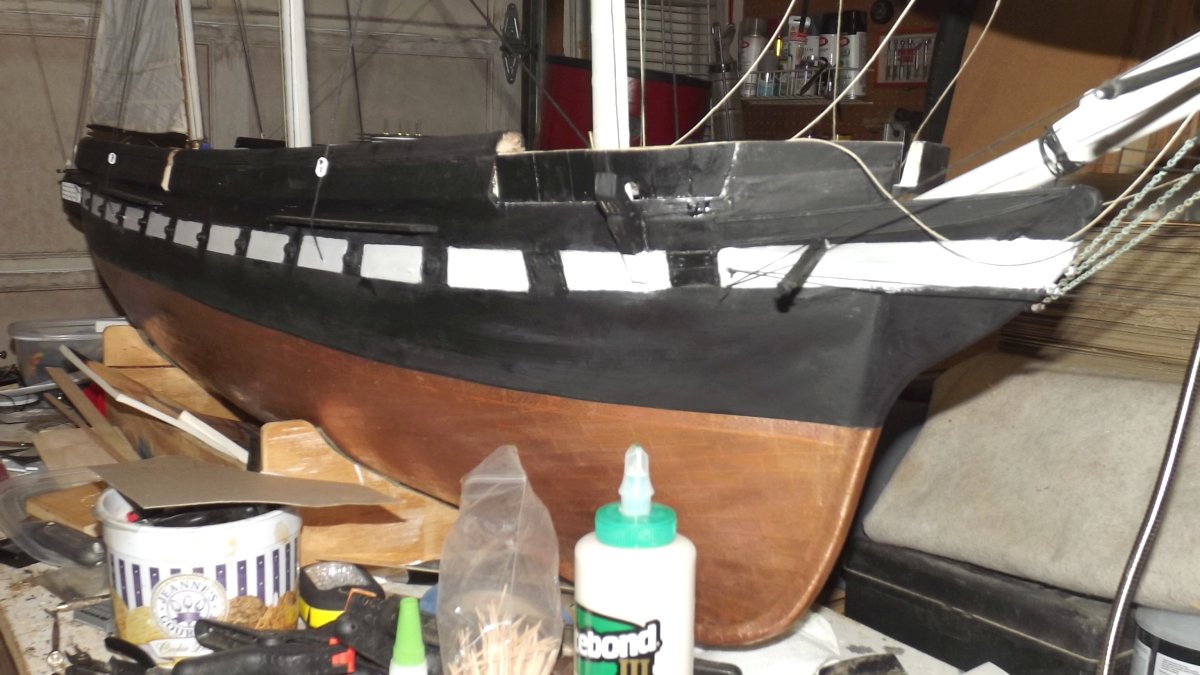
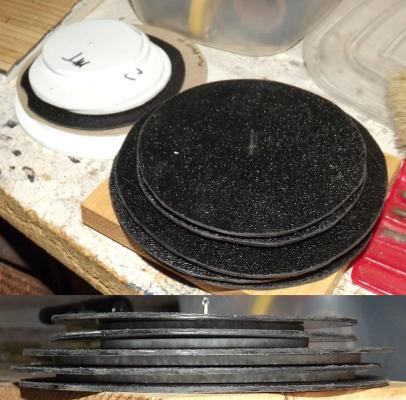
The foremast winch drum, as promised. The rods will be trimmed back after I figure out the section for the fores'l tacks. Further back I detailed making the first set of drums from wood with CD's for flanges. These are 1/8" styrene with some sort of thin sheet plastic with a texture on one side. The fore mast winch will control the fore and fore tops'l yards. There's two drums per yard, one for the port brace and one for the starboard brace, so there's four drums and 5 flanges separating them. As the drum turns it takes up on one side and pays out on the other. Adding the fore tack will mean adding two more drums and flanges. The main mast drum has a third set of disks for the mizzen's crossjack and adding a set for the mains'l tacks will make it 8 drums and 9 flanges tall. Because this pulling to one side concerns me a bit, I'm thinking or adding a bearing under the drum on the side where the braces come out, ie: the direction of pull, to prop up the stack. The ends of the bulwark were trimmed back to allow for the end boards of the hammock rail and fixed bulwark The cradle was rebuilt to allow the ballast keel to lay under the model.

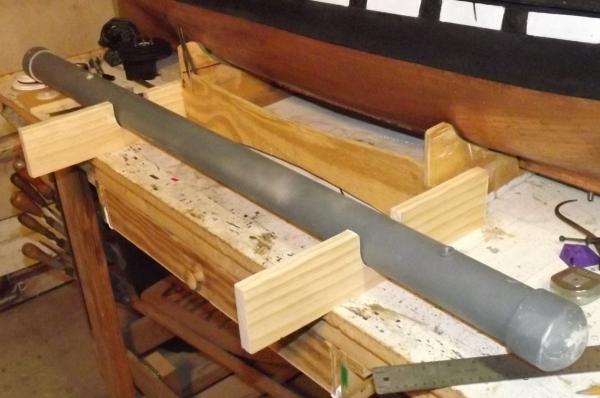
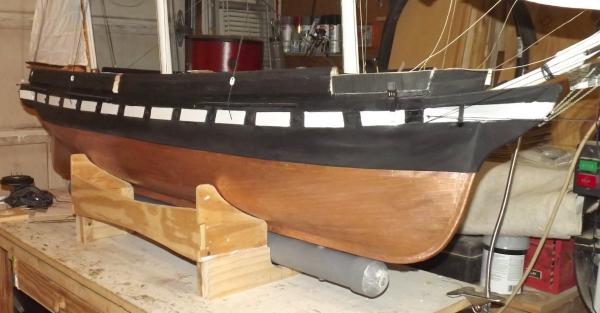
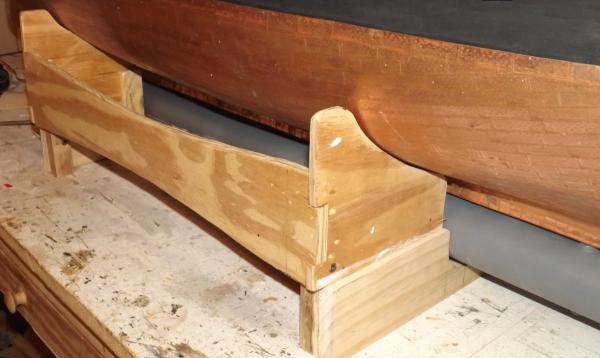
- 553 replies
-
- 8
-
-
- sloop of war
- constellation
- (and 3 more)
-
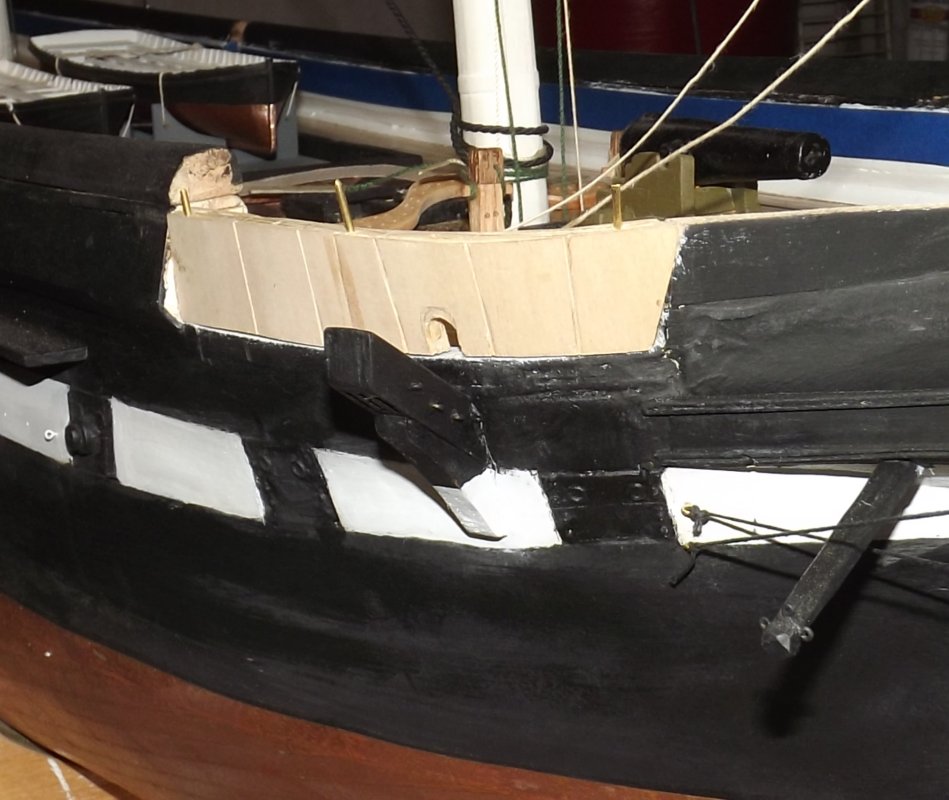
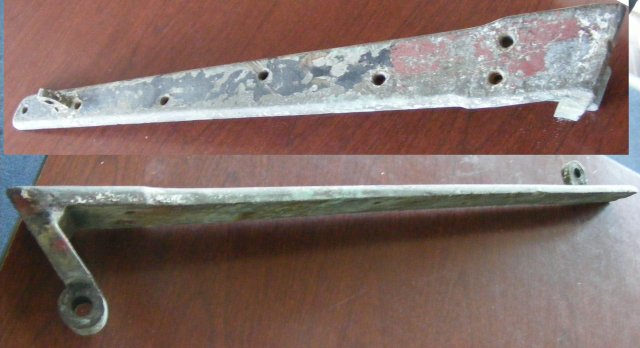
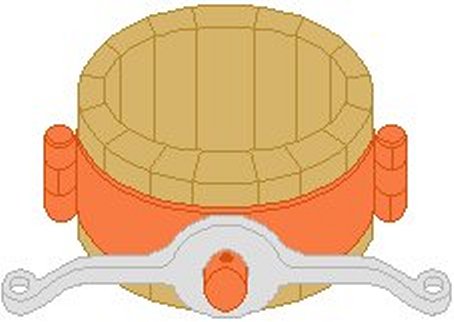
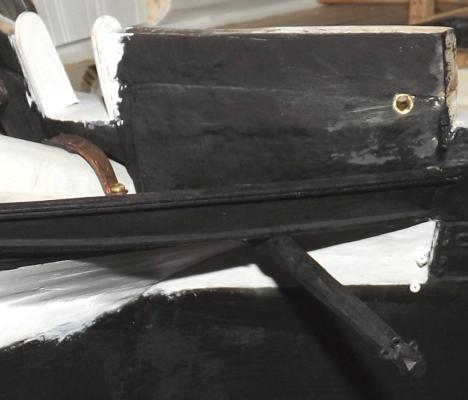
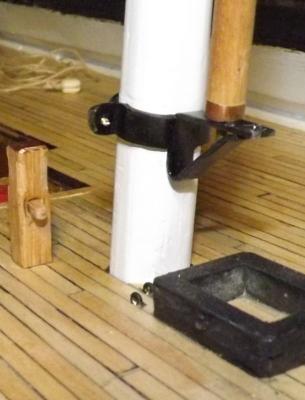
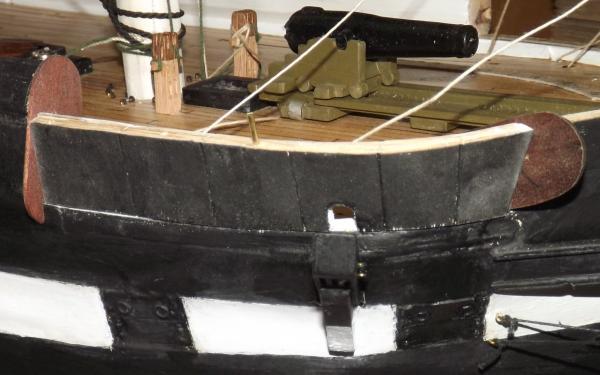
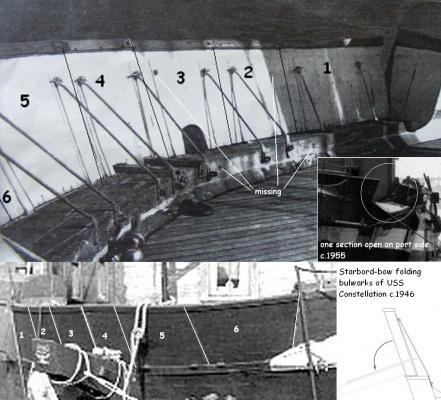
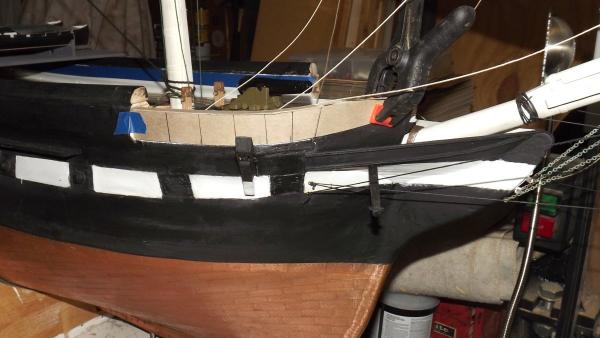
I opted to install the drop bulwarks here as a single unit. I'm considering opening the aft-most panel on the port side, and will have several open and the gun trained back aft. I guesstimated the size of the hinges based on the photo below and of the actual hinge I was shown at the ship. I printed them on card-stock and glued them inside the panels along with a eyebolt. I also cut the notch for the catting tackle lead in one panel. Then it got some paint. The formast winch drum was bolted together, but the picture came out badly, so I'll get into that more tomorrow.


- 553 replies
-
- 7
-
-
- sloop of war
- constellation
- (and 3 more)
-
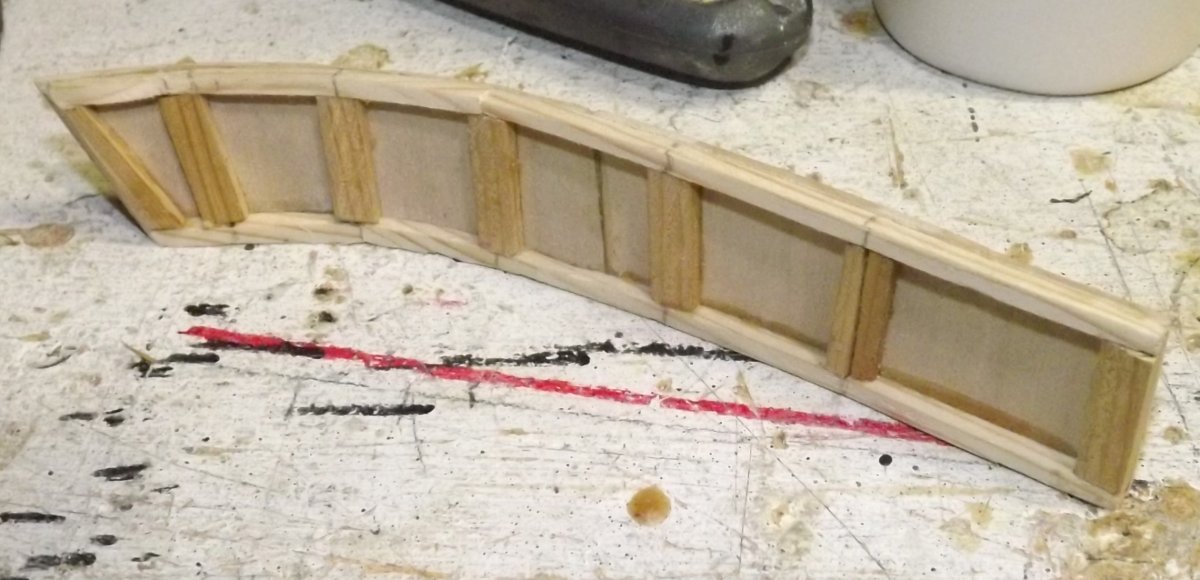
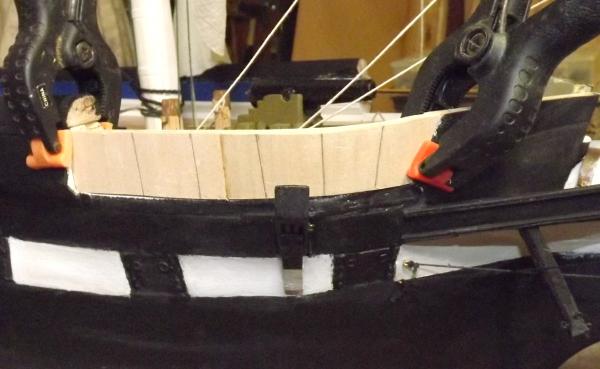
I started cutting out parts for a new set of winch drums. I still haven't found the last "new set" I had made. I clipped on the coarses to make measurements and figure out if I wanted to control the tacks by adding a new portion to the winch drums for them. In the meantime... I started working on making the fold-down bulwarks forward. Starting with a card-stock template... I made an upper and lower plate and glued 1/16" sheet bass to it. I framed it inside and covered the inboard side with basswood sheet. It's built as a single unit, but I can separate the panels with a jeweler's saw. That will depend on whether I'm willing to tackle the hinges. I'm thinking of just opening one panel forward, and several aft - but unless I concoct some hinges, these will be fixed open.


- 553 replies
-
- 8
-
-
- sloop of war
- constellation
- (and 3 more)
-
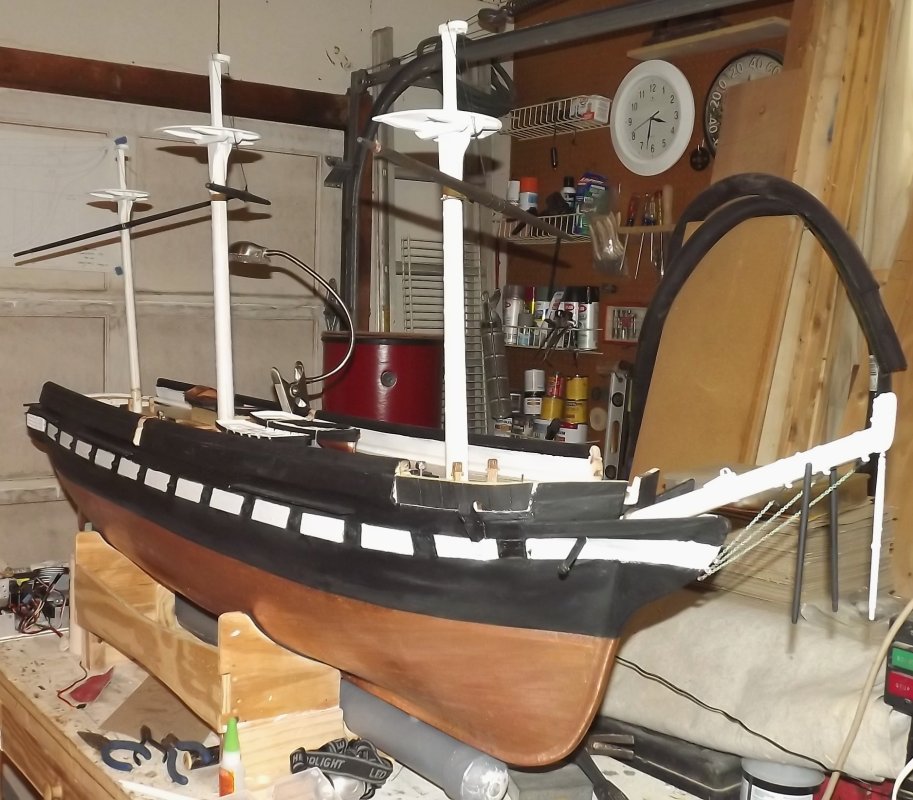
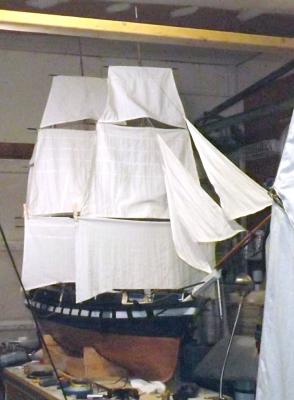
I want to sail her next to the real one, and I'm shooting for August, on the anniversary of her launch. The real test will be having some method of transporting, launching, and retrieving her ready in time. I can't get a vehicle close to the launch site there, and there's bulkheads, a floating pier with a gangway, and various other challenges to getting her in the water there. I'm really considering getting one of those kit trailers from Harbor Frieght or someplace and building a box on it to put two, or maybe three models in it fully rigged. Here's a video of the Stad Amsterdam model, of a similar size with just such a trailer (starting at 0:47): The sliding servo, talked about starting a few posts ago, worked great, as did the semaphore-arm heads'l sheeter. She also handled the wind very well. It gusted up over 15 a few times and she hardly heeled more than a strake or two of copper to it, even while grounded broadside-to with nothing to do but heel, and shy of a few pounds of ballast. Just last night I started cutting the disks to make her new winch drums (a temporary wood and card version was used last Sunday). The new set I made some time ago vanished in my moving, so I'm finally giving in to fate and making a new set. Since I'm going this route, I'll probably add space for the fore and mains'l tacks so she can set her coarses. I'll detail why I'm concerned more with tacks than sheets on the coarses later.
- 553 replies
-
- 5
-
-
- sloop of war
- constellation
- (and 3 more)
-
I had a couple of people ask if I took commissions - whatever that means. I took some Damn Yankee Workshop cards along - we'll see if something comes of it. Last year someone was bubbling over wanting to write an article for some local magazine - never heard from them either.
- 553 replies
-
- 2
-
-
- sloop of war
- constellation
- (and 3 more)