HOLIDAY DONATION DRIVE - SUPPORT MSW - DO YOUR PART TO KEEP THIS GREAT FORUM GOING! (Only 20 donations so far - C'mon guys!)
×


Ulises Victoria
-
Posts
1,790 -
Joined
-
Last visited
Content Type
Profiles
Forums
Gallery
Events
Everything posted by Ulises Victoria
-

Buying an Expensive Kit and throwing most of it away
Ulises Victoria replied to pirozzi's topic in Wood ship model kits
People often see my ships and many times they ask me "how much a kit like this costs?" When I tell them that a good kit for an experienced modeler costs around 1,000 dlls, they usually rise an eyebrow and say... "Wow, that is expensive" I then make them do the following arithmetic: Cost of kit = x, hours invested in building thus, hours of fun = y x/y = z... z is usually lower than the cost of going to a movie. As has been said, all is relative. -
Buying an Expensive Kit and throwing most of it away
Ulises Victoria replied to pirozzi's topic in Wood ship model kits
Janos. I may be at an advantage here. The part I enjoy the most on building a ship is masting and rigging. This keeps me going past the hull planking and deck furniture, which I like the less. The wish to get to the "meaty part" of my building is what keeps my interest going. -
Buying an Expensive Kit and throwing most of it away
Ulises Victoria replied to pirozzi's topic in Wood ship model kits
My POV... To me scratch-building is the pinnacle of our dear hobby. It is something I have not dared to attempt....yet. It is one of my dreams: being able to get a set of plans, and starting from there end with a fully planked, rigged ship. But at this moment, I feel my abilities are not up to par to do that. Will I ever start and finish a scratch build project? I don't know. I'm 67 years young now and still have several kits that I really want to do: Chris' 1/64 Victory, Soleil Royale, Sovereign of the Seas... these are my dream ships. Those kits I have in my stash are OK, but they are not my dream ships. (I think I'm digressing here.... LOL. ) Anyway, at this moment I build kits. I somewhat modify some of the stuff, but I am far to consider myself a scratch builder. I feel I modify more and more things in every new kit I build, so.... maybe I will scratchbuild a ship if I have enough life and abilities to do it. Bye Ulises -
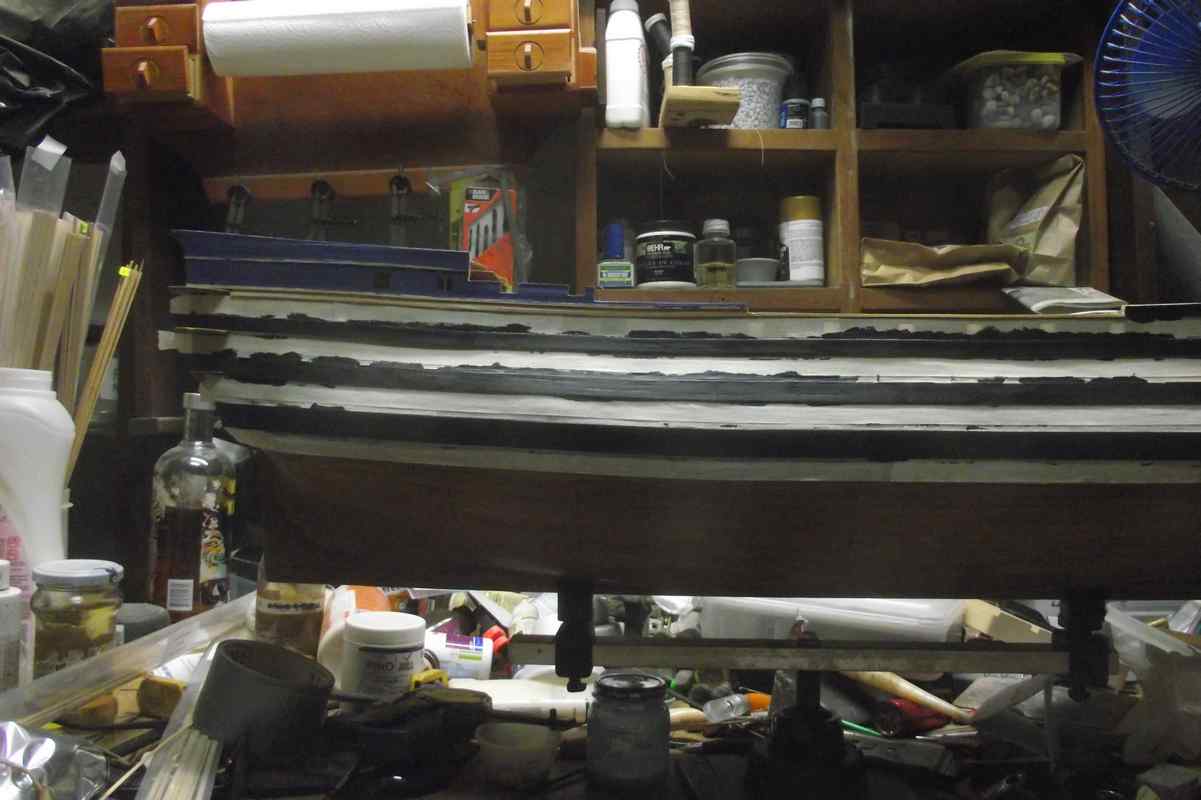
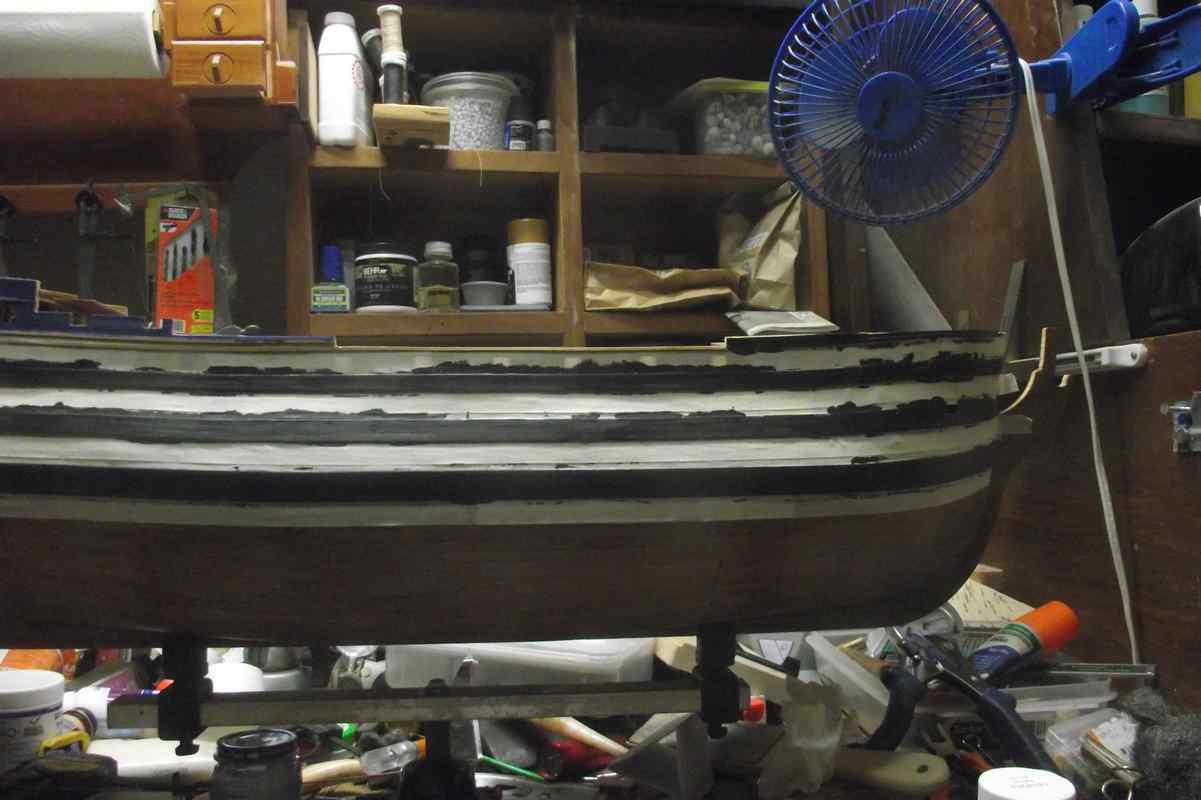
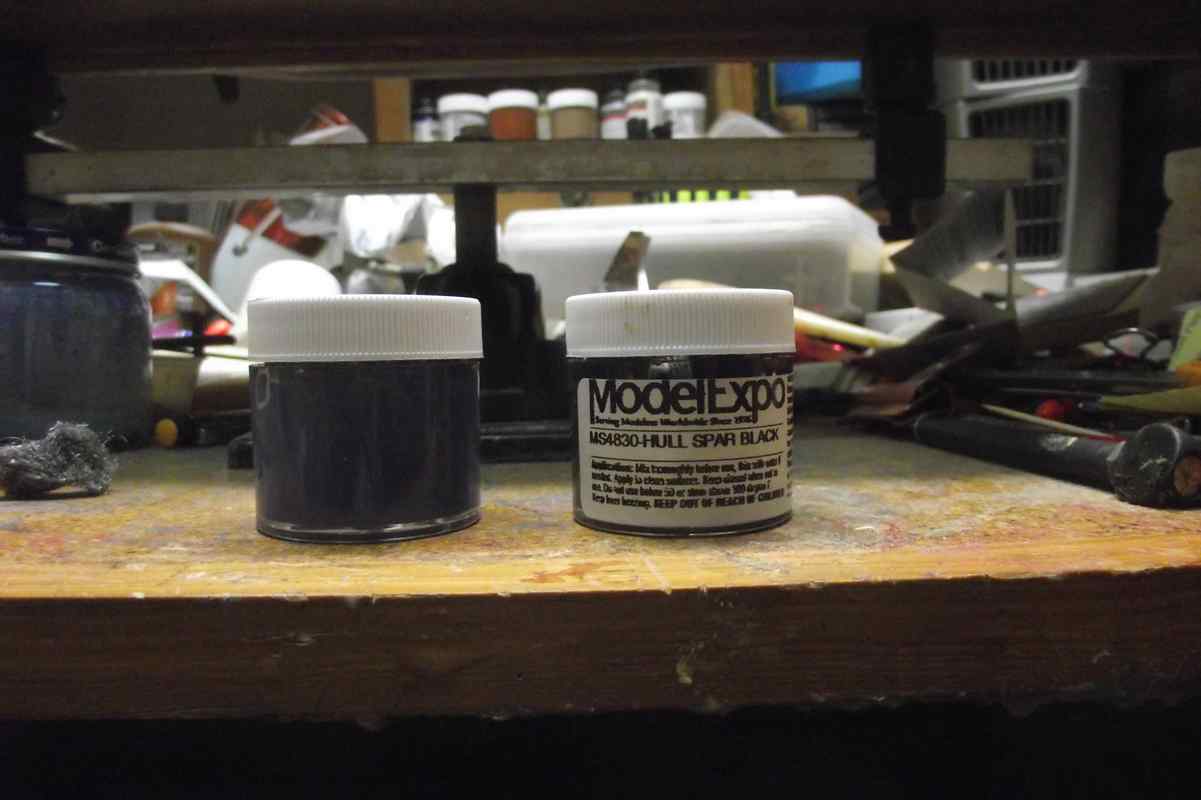
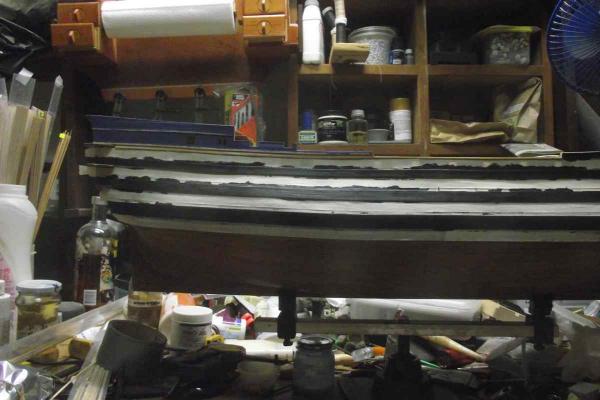
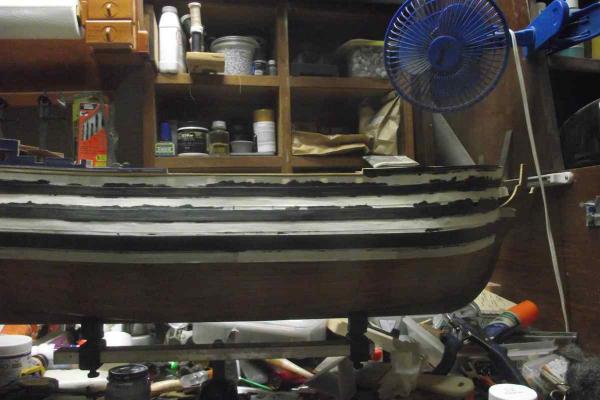
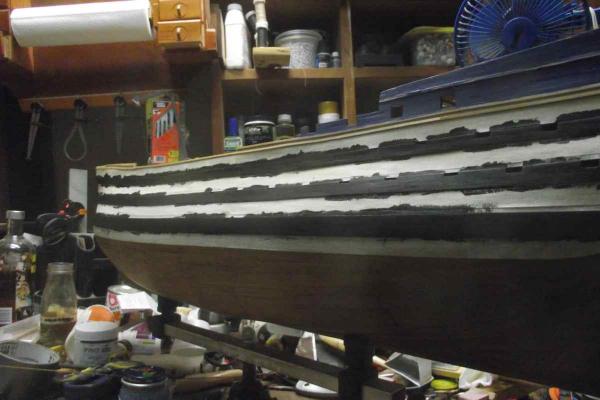
First of all, I want to make a comment about my above statement: Statement: Painting the hull will be a 3 to 4 day job. Comment: Aha! Yeah, right! Well, between the experiments, the DOs and DON'Ts and REDOs it will definitely take me more time. So here are some photos of the painting process. I decided to use Model Expo's Royal Louis set of paints for the black and blue. The Milk paint I boasted about sometime ago, just did not cut it in the end. Still undecided about the ochre color, which apparently came out fine with the milk paint. (It's under the tape) If paint looks uneven when zooming, it's because it's still wet. Thank you for visiting. Ulises

- 786 replies
-
- 9
-

-
- Royal Louis
- Finished
- (and 1 more)
-
Thanks all for your comments and patience. Sorry Sjors... photos will be up soon. I am painting the hull at this moment. This is a 3 to 4 day job, so photos should be up pretty soon. In advance I have to say that I am pleased but not totally satisfied with the way this whole planking job came out. Main culprits were those metal frames for the gun ports. I don't know if this is Mamoli's general practice, but in any case, if I ever stumble upon such method in any of my future builds, I will have to find an alternate method. Best wishes to all. Ulises
- 786 replies
-
- 3
-
-
- Royal Louis
- Finished
- (and 1 more)
-
Hello all. Finally, after 9 months and 18 days, today Jan. 7 2016 I placed the last bit of wood to finish the second planking in my R.L. This is just a simple update. I will post photos once it is fully painted, which I estimate will take me just a few days. Just couldn't wait to post this milestone.
- 786 replies
-
- 9
-
-
- Royal Louis
- Finished
- (and 1 more)
-
Wow! I have this kit in my "Will-I-ever-build-this-kit" stash. Only work I have done is gluing both sides of the hull. I wish you luck with this issue!
-
Mark... these sanding pads go from 1500 to 12,000 grit. I use them extensively in my pen turning hobby, specially when finishing acrylics. Not for use in my shipbuilding, though. http://www.amazon.com/Micro-Mesh-Assortment-Pack-18-Pieces/dp/B00HJC156U/ref=sr_1_2?s=hi&ie=UTF8&qid=1451400577&sr=1-2&keywords=sanding+pads
-
Looking for replacement parts...
Ulises Victoria replied to Randlette's topic in Masting, rigging and sails
With that little information, you are going to have a really hard time trying to find the exact original pieces, I'm afraid. My suggestion would be to try to make them yourself out of putty or even wood. Edit: a more drastic solution would be to get rid of all of them altogether. -
Hmmm good question. The hard part is when you have a straight piece of wood and try to bend it into a sharp curve. Once you bend the wood using whatever method you like, even if its not at the exact curve, the strain in the wood to accommodate to the curve is very little compared to when it is straight. So a little extra bend or unbend has no big effect on it. At least, this is what I do. Edit: And I use a hair curling iron, by the way.
-
Something like this happened to me with the deadeyes in the mast tops of my Vasa. No one has noticed so far.
- 1,616 replies
-
- 6
-
-
- caldercraft
- agamemnon
- (and 1 more)
-
I think he had a problem when he tried to "format" the sanding disk to use it again.
-
Sjors.That would be an even bigger accomplishment than building the kit itself. Mark. Well my ship is built as it was just two weeks before the coppering actually started.
- 786 replies
-
- 9
-
-
- Royal Louis
- Finished
- (and 1 more)
-
Apologies Daniel. Changed your name to David in my last post. Both names are exactly the same in Spanish.
-
Dang! I will have to throw away my present stash of kits and concentrate the rest of my life to build David's Santísima and Chris' Victory. Any of these guys has plans for a Sovereign of the Seas and a Soleil Royale? (My other dream ships, by the way)
-
Sjors. That would be a double pleasure!!! You can bet on it!!! Oh, and about the updates. I am almost finished with the second planking. Unfortunately, life has had another plans. Still working almost every day but at a slow pace. Best regards
- 786 replies
-
- 5
-
-
- Royal Louis
- Finished
- (and 1 more)
-
Welcome back, my friend. As always, expecting to see your build which is a pleasure to behold.
- 1,616 replies
-
- 4
-
-
- caldercraft
- agamemnon
- (and 1 more)
-
Never ever ever approach a line with your scissors open. Scissors always closed until they actually touch what you want to cut. Don't ask me how I know that!
-
I just love these paints, specially formulated to be used on raw wood. http://www.milkpaint.com/ For your decks, these may work also. http://www.amazon.com/gp/product/B013WXH8EM/ref=s9_simh_gw_p21_d5_i1?pf_rd_m=ATVPDKIKX0DER&pf_rd_s=desktop-1&pf_rd_r=0E1HWK04Z87JAQ29WMJC&pf_rd_t=36701&pf_rd_p=2079475242&pf_rd_i=desktop
-
Hi Giant. Just before you go any further. I can see where the wet wood joints the dry wood, that the butt ends of the planks are aligned. Butt ends should never be adjacent one to another. Plan to have them staggered, just like you did on your walls. Much more realistic and correct. Hope this helps. Ulises
-
Awesome! Thank you very much! Will follow with interest!
-
Thank you Christian. One more question if I may: What paints did you use? Can't wait for your review of that lathe.
-
Many Thanks, Christian. Found exactly what I need! Now... making them as you did, that's a whole different story.
-
Christian... would it be too much to ask of you to put a link where to buy the Caldercraft mini kits?