Jump to content

Recommended Posts

Posted

Hopefully i finally figured out how to make an MSW title. Well, this is it. If you're expecting anything like what Kirill did, think again. I am not even half as skilled and talented as he is. This will not quite be an out-of-box build, but it will be close. In the last few days, i have begun painting the hull with the paints Kirill recommended to me: Plaid Folk Art paints. The antiquing medium has yet to arrive. 


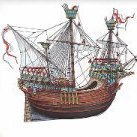
Kirill built a galleon that would have sailed in the era of the Spanish Armada, while the vessel i am building is the "1607" version, i.e. a ship that would have fought in the Dutch Independence. 


This build should be a very interesting one. I have never built an Imai kit, and i am blown away by the attention to detail and the quality of their molding. This is the hull being painted, as well as the new toys i bought to aid in her construction:

20230309_150132.thumb.jpg.10190d939fc6c6074b8d9b7a6787ddbc.jpg

The fields, wales, and futtock riders are done, as well as the gold trim at the top. 

Posted

Well, these images should make Kirill happy. I finally got the Antiquing Medium paint, which arrived in the mail yesterday. I applied it to the entirety of the paint job: 

20230316_153301.thumb.jpg.19177b841f5a41ab662bda2aa88d26f8.jpg20230316_153313.thumb.jpg.df1e8dc20fd6415f2857e876ffeee1e8.jpg20230316_153318.thumb.jpg.50add335af54744c9fa06f1deb353550.jpg20230316_153339.thumb.jpg.6e0124becd2186394e51dfed2d051b36.jpg

I also drilled some sheave holes into the hull with my pin vise:

20230316_153353.thumb.jpg.a8cb4c5ca161f353e438a089707012ef.jpg

I have yet to paint inside the holes. Anyway, that sums up the progress I made yesterday and today. The hull actually looks a little more like wood now. 

Posted

Feel free to participate in the conversation! techniques, advice, and comments would serve a huge purpose. Build logs are meant for everyone to enjoy, not just the builder. Anything you say will be of good use and will serve to further the progression of the build. 

  • 1 month later...
Posted (edited)

Apologies for my absence on this build. Designing the Senora Fielden has taken up all my modeling time, and i am just now getting back to the Spanish Galleon. I am thinking i may do something new when i get to the sails. I may order sails from HiSModel, or i might try my hand with silkspan sails. 

Edited by Ferrus Manus
Posted (edited)

I used antiquing medium, but i thinned it down a ridiculous amount with water. After application, i wiped some of the excess off with my fingers. The nice thing about this antiquing medium is that you can considerably alter the tone of the paint by adding water. The grand total was likely 1 part water to 1 part medium. I still have yet to paint the details on the deck, which will be in two shades of brown. 

Edited by Ferrus Manus
Posted

The stupid decal was piece of junk and disintegrated almost instantly. I was MAD. Luckily i have spare decal paper, and i went to the craft store today to pick up some decal sealant. Next, I had to find a decent image of the Virgin Mary to put on the stern of the galleon. Looking back, i am glad i decided to do this because the original decal featured an artwork that was Orthodox in origin, not Catholic. 


I will likely choose from these images:

The Virgin Mother By William Dyce Stock Illustration - Download Image Now -  Virgin Mary, Jesus Christ, Religion - iStock

The Virgin with angels Painting by William-Adolphe Bouguereau - Fine Art  America

Botched Art Restoration Renders Virgin Mary Unrecognizable | Smart News|  Smithsonian Magazine


As a staunch Protestant, I was greatly interested in the nature of Catholics' veneration of Mary, and where it comes from. Which image do you think should go on the back of the galleon? I wanted to do something different for the aft mural, something that i had never seen before. 

Posted

I ended up choosing the first image to set as a mural on the transom of the galleon. First, i printed out a decal: 

20230427_203645.thumb.jpg.c5044ac2972386a78ee2b977fe64d170.jpg

Then, i painted the background of the transom white where the decal will be:

20230427_203519.thumb.jpg.6fe3cf80ee96194ee932848acba77984.jpg

Then, after that, i set the decal, before painting brown around the border of the decal:

20230427_212708.thumb.jpg.1b7b9662ecc53198c2143e5ef245b3ba.jpg20230427_212713.thumb.jpg.f006bf6df8e33327492778969e454e30.jpg

What i quite enjoy is that the decal is thin enough to set into the recesses of the molding, making it appear as though it has been painted onto the wood of the transom. 

Posted

Guess I'm alone again. Yesterday i did some work on the galleon. First, i made up and installed the aft balcony. Then, i made up and installed the rudder, which i used my own spare eyebolts on. 

20230429_143841.thumb.jpg.c8e5c4f36af389e6789334aa19b85912.jpg20230429_143848.thumb.jpg.c419a33f0690d8aef0650ae634df4b17.jpg

Afterwards, i installed all the ship's channels: 

20230429_190722.thumb.jpg.581a5195357459ee4533205768547140.jpg20230429_190740.thumb.jpg.8dd626651b9a55894ecf37d6ede8083a.jpg20230429_190751.thumb.jpg.101ee54103794d450ea8b81ef5e0bbb8.jpg

I figure today i may as well see how some of my rope looks on the ship for the courses. The only ropes that need to go in before the decks are the anchor line and the running parts of the main course sheets. I also have to drill a million holes for eyebolts for the guns and deck stuff.  There will be plenty of blocks that go on the decks for certain high-tension lines, that would require sailors to pull up on to belay. I am debating on whether or not to add spare spars and a boat. Your input would be helpful. 

Posted

Does the kit include a boat?  It has been a while since I researched it, but I think Spanish  galleons sometimes may have had their boat on deck and sometimes may have towed it behind.  This is a link to a short article by a historian of the Florida Keys that mentions that a small boat or lancha could have either been stored on the deck of a larger ship or towed:  

http://www.keyshistory.org/SS-Sp-Sail-ships.html

I think it would look nice on the deck if you think you have room to include it.  My Revell 1/96 Spanish Galleon kit comes with a boat that is mounted on deck and I plan to use it.  Including the spare spars may demonstrate practicality (in case they would need to be replaced en route) but you would need to find room for them, too.

Posted

Kirill made a small shallop for his galleon. I might go in much the same direction, albeit having the boat be stowed on deck instead of displayed seperately. The spar and mast, as well as some ropes, will be stowed alongside the boat on deck.

His boat looked like this:

Fully restored Shallop returns to Plymouth Harbor after 2-year absence


My boat will likely have either a square sail or lateen rig, but it wouldn't matter anyway. Either way, it won't have leeboards. The boat will be disassembled with oars and spars on the side. 

Posted (edited)

Something good for once! Will there be anyone here to celebrate with me? Who knows. 


Now, i didn't want to do the same exact thing Kirill did with his boat. I wanted the boat to be a part of the ship, with the spars and oars on the deck lashed down. However, take a look at this image and then tell me, with a straight face, that there's enough room for this thing onboard. 20230503_180628.thumb.jpg.cac481b78cfeba0daaba1008e07c0b08.jpg

This thing goes all the way up to the capstan and down to the main fiferail. There's no way in hell this thing would fit. Cross-ways, it runs afoul of the ship's guns. Mind you, this is the smallest boat i could find in my collection. It's the boat from the Man O' War, which was comically underscale for that ship, but perfect for the galleon. 


So, i was forced to compromise. I wiped the dust off, repainted almost the entire boat, and fitted it with cleats, eyebolts, and a mast step i made myself, out of card.

20230503_180725.thumb.jpg.2c54a56ce52fcc6f19e8ec6a62624d03.jpg20230503_180708.thumb.jpg.df98cfe519f211fda4c8af3c6432ae30.jpg

Keep in mind, this construct is stupidly small. Also, i probably got the thickest, sturdiest card on the market. It was insanely hard to cut, even with a brand new Xacto blade. I sanded the ends down to a reasonable shape, drilled a hole for the mast, painted it, and glued it in place. 


Then, i stole some spare timbers from my United States, trimmed them to size, and they became the mast, bowsprit, and yard (not pictured)

20230503_204622.thumb.jpg.5a8d1fb29342af1fbf92d23e2d41fb85.jpg20230503_204636.thumb.jpg.2ece40eb5a0362e93d172ebce584a92c.jpg


The cool thing is, this boat will be rowed. I will glue the oars in place as if the boat is being actively rowed, and i will put a clear gloss on the underside of the boat and ends of the oars, to simulate being wet. 


There will be ropework, and lots of it, but not today as i am out of superglue. 


Edited by Ferrus Manus
Posted

I like what you did with your boat.  I agree that it looked a bit big to be stowed on the ship.  Sometimes it can be very difficult to get everything exactly correct in terms of scale, especially when you are doing a lot of modifications and additions, using parts from other kits and even scratchbuilding.  I have decided that for my own build, it's ok with me to have a few things out of scale, as long as they are not too radically different in size and they fit with the overall theme.  In those cases, I think that it is better to have them rather than eliminate them because they are not quite technically in scale.

Posted (edited)

Let's get one thing straight here. The goal was never to copy Kirill's homework. However, i have watched him build his own ship, and adopted his methods for use in my own kit. Should anything be similar in our builds, it is because he did something right, and i took notes. My goal is to, someday, be able to make my ships look like his. A good teacher's students copy his work detail by detail, learning and using their master's techniques. 


Now, let the ropework begin! 

First, i grabbed a spare rudder, made a tiller for it, painted the assembly and glued it to the stern of the boat: 

20230504_103309.thumb.jpg.c1f6962bf93a70c4174ffdf18d9ee117.jpg

Then, i lashed the bowsprit to the mast step. 

20230504_104000.thumb.jpg.591cc80caaa4028880e555a2e37a2164.jpg\

After that, i made up a rope parrel for the yard, and lashed it to the mast as shown. It will end up laying lengthwise on the boat's frame. 20230504_103810.jpg.f1a1c60c816078e6d88d8ded2df91558.jpg

Finally, i made and painted two thimbles, one of which is tied to the mast to accept the halyard. The other one is a double thimble and will be used as part of the halyard. 20230504_103822.thumb.jpg.86a1b338513f2dfd9f1d0db135b07b01.jpg

Tonight, i will do the rest of the running rigging, as well as the shrouds and stays, which will have single blocks as deadeyes/lanyards. 

Edited by Ferrus Manus
Posted
31 minutes ago, Jeff T said:

I have decided that for my own build, it's ok with me to have a few things out of scale, as long as they are not too radically different in size and they fit with the overall theme.

You will be using the same boat as i am for your galleon. Trust me, it is ridiculously underscale. Your galleon, although advertised as 1/96 is actually more like 1/64, with the boat being closer to 1/96. Please, use a different boat or scratchbuild one that's actually the right scale. 

Posted

Here we go again! I rigged the halyard on the boat's sprit. I started the tye at the mast top:

20230504_145247.thumb.jpg.1ec8ad7ee653fbe4cb93d141b99f2176.jpg

Then, the halyard went down through the double thimble, and back up to the single thimble at the top:

20230504_145255.thumb.jpg.a79574971a043816dcd9a7aad7627c42.jpg

Then, the halyard belayed down to the cleat at the foot of the mast:

20230504_145316.thumb.jpg.7ea7ce6756cedc4b2a1c523a4f3ab16d.jpg

I will do all the necessary rope hanks at the end of the rigging phase. 

Join the conversation

You can post now and register later. If you have an account, sign in now to post with your account.

Guest
Reply to this topic...

×   Pasted as rich text.   Paste as plain text instead

  Only 75 emoji are allowed.

×   Your link has been automatically embedded.   Display as a link instead

×   Your previous content has been restored.   Clear editor

×   You cannot paste images directly. Upload or insert images from URL.

  • Recently Browsing   0 members

    • No registered users viewing this page.
×
×
  • Create New...