Search the Community
Showing results for tags 'plastic'.
-
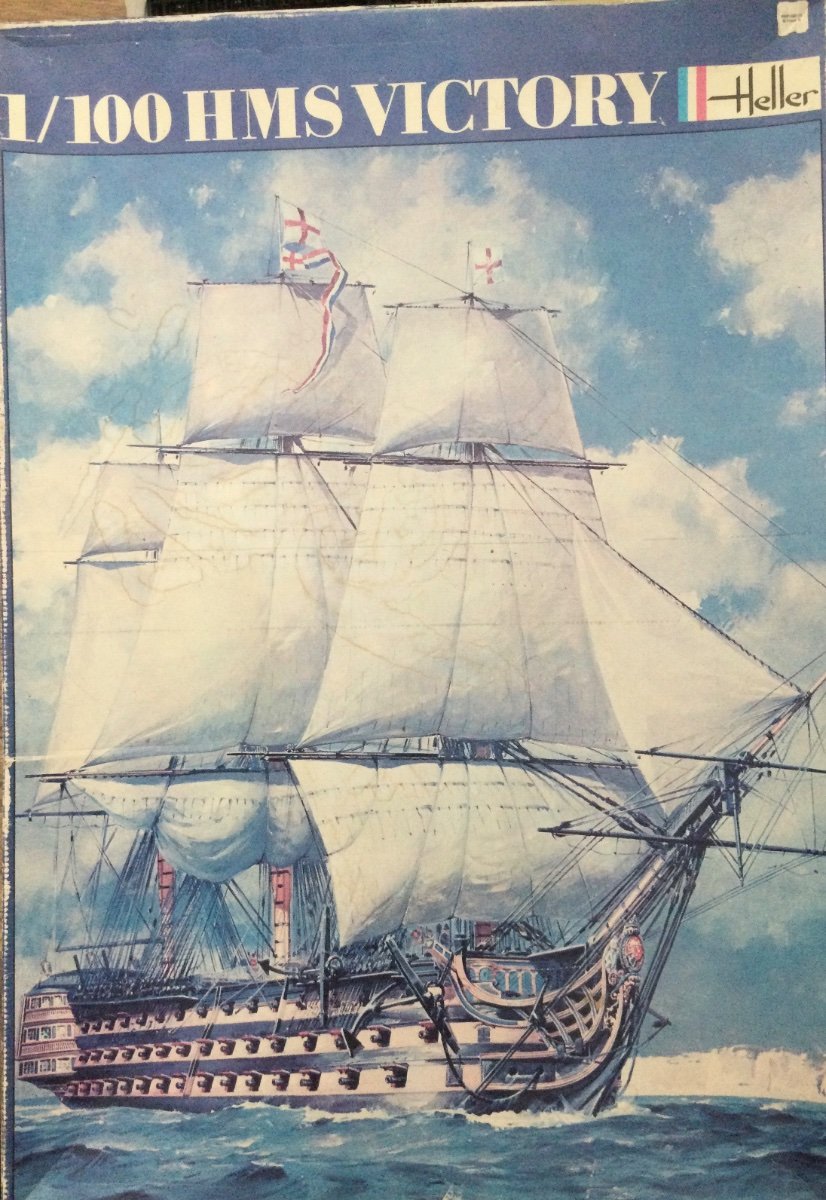
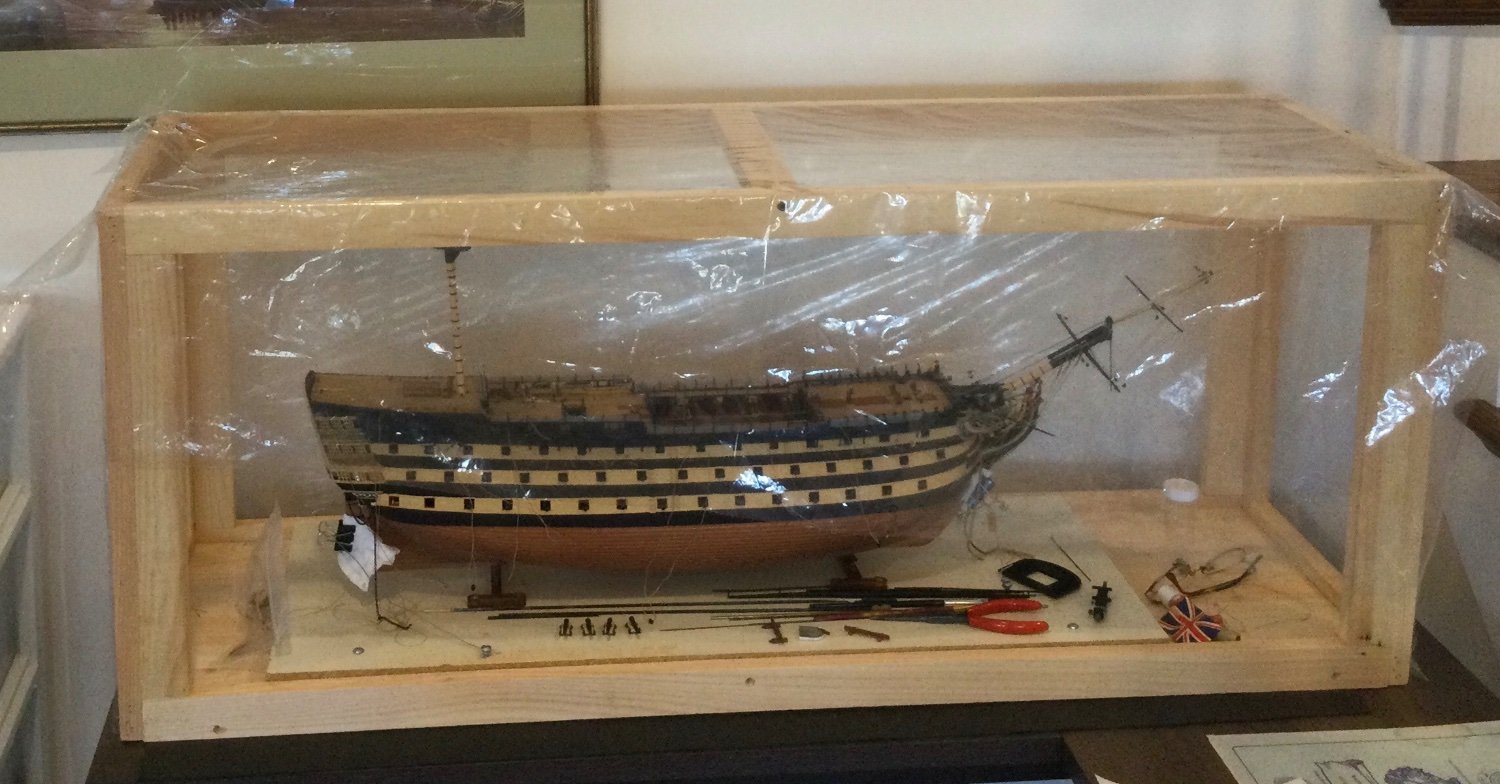
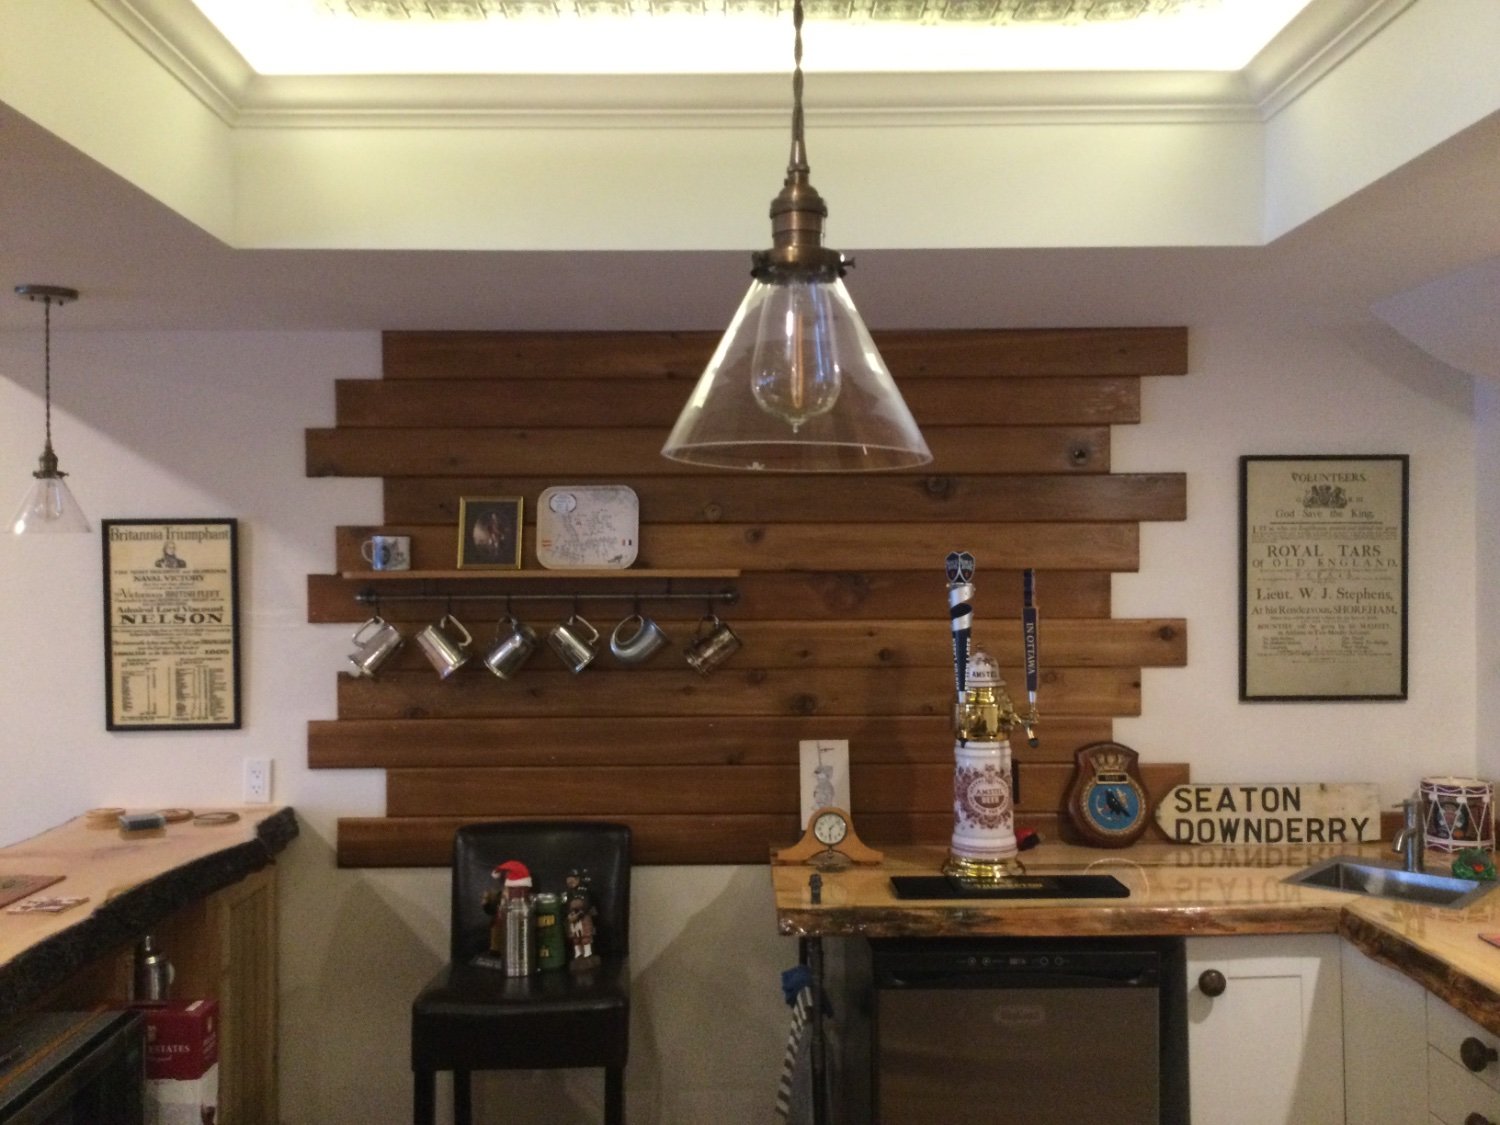
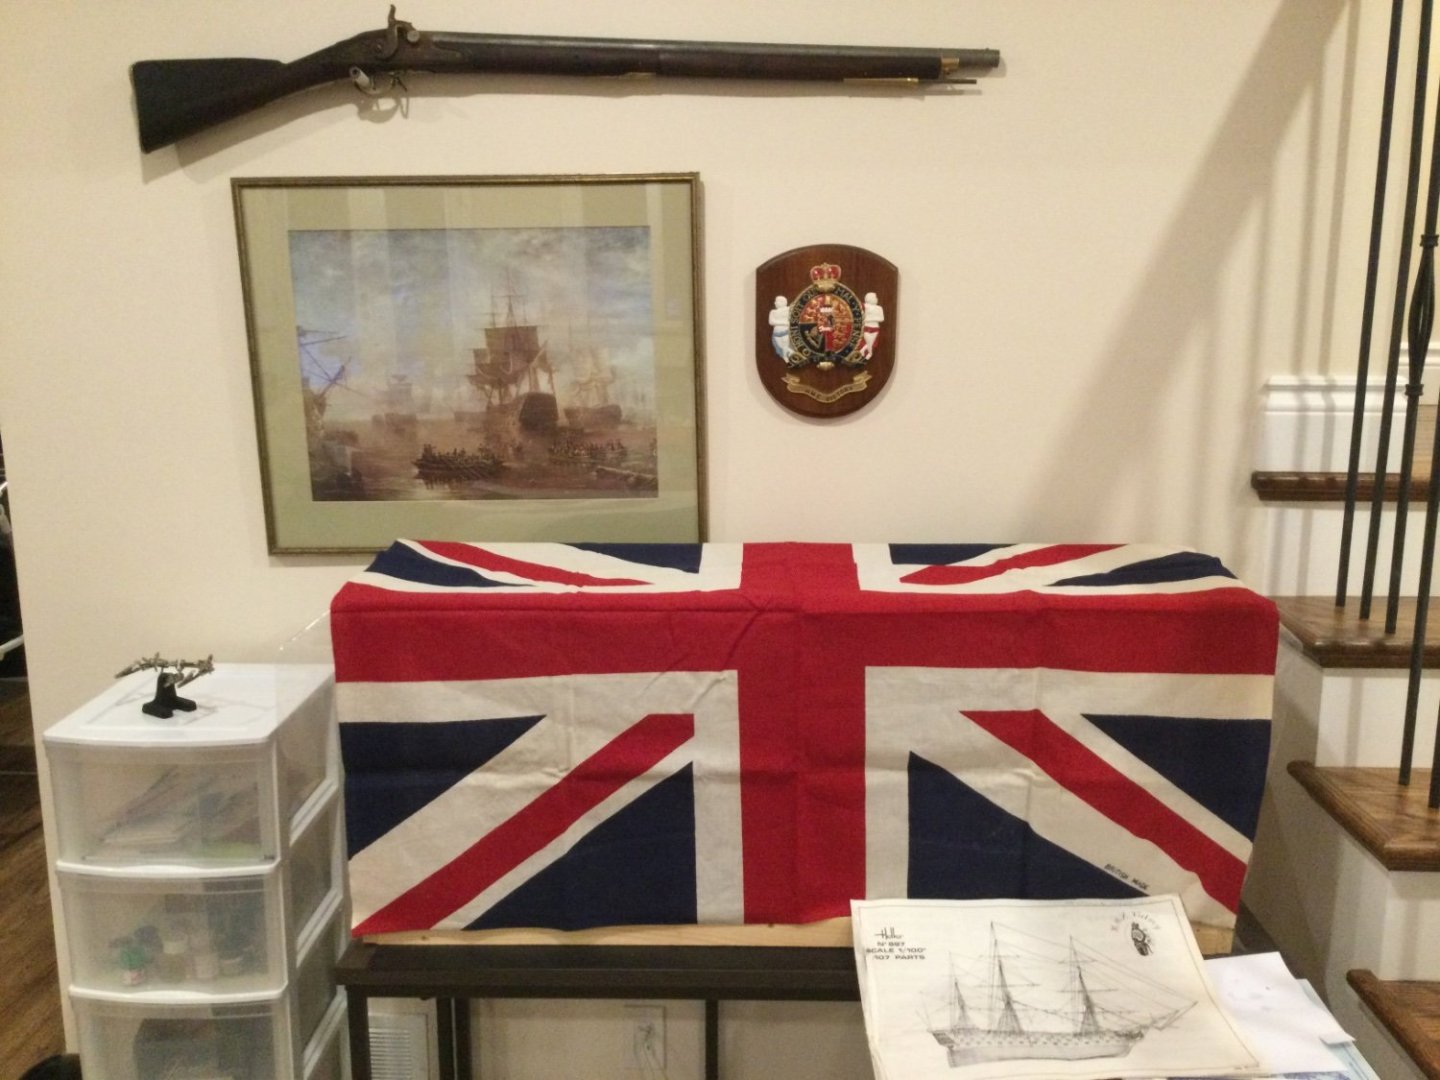
 While I’m new to MSW I am not new to model ship building. In my earlier life, I built two period sailing ships: Heller 1/200 L'indomptable and the Revell 1/96 Elizabethan Man ‘O War. Sadly, these did not survive the decades since I built them. My current project is the Heller 1/100 HMS Victory. While I say ‘current’ my story is similar to that of others in this forum. I bought my kit around about 1984 but a busy career and family life meant the project became an on-again off-again proposition. Clearly, more off than on. I am now retired and motivated to push this project to completion. The hull of my model is mostly complete but the rigging is a whole other challenge and I will need help. And lots of it. Ian Grant, who completed a fabulous rendition of this model has already been immensely helpful to me. A few pictures follow: . I’m told this is a 1st generation kit, C1979. I believe Heller is now into its 3rd iteration. Hard to believe but in 1984 this kit was $CDN180! I am re-doing the bowsprit standing and running rigging since I originally rigged it per the kit instructions. That is simply no longer acceptable 😊 I’m glad I completed most of the finicky painting - aft gingerbreads, balusters, coats of arms, etc. (quoting Billy Joel) “when I wore a younger man’s clothes” 😉 Good news is, while my eyesight isn’t as sharp as it once was, my hand is still pretty steady. I built this temporary enclosure to protect the model while also helping to keep it dust free. It still managed to collect dust! My main work area (I have another for sub-assemblies) looks quite ‘proper’ with the Brown Bess musket on the wall (I fashioned a whole new forestock for it), the contemporary picture of Victory in Portsmouth Harbour and the Victory crest. My wife says it looks like a shrine…and I’m ok with that too 😁 You can tell by this picture of my bar area that I’m all things ‘Nelson’ - the Britannia Triumphant poster, the rum ration cup with Nelson’s image, Nelson’s portrait (I also have a same sized portrait of Lady Hamilton) and the battle line serving tray. Since I was a very young lad, Horatio Nelson has always been my #1 hero. In my adult life I can honestly say I have never missed recognising Trafalgar Day (Oct 21st). Whether in quiet contemplation or a raised glass. Or both 😁


-
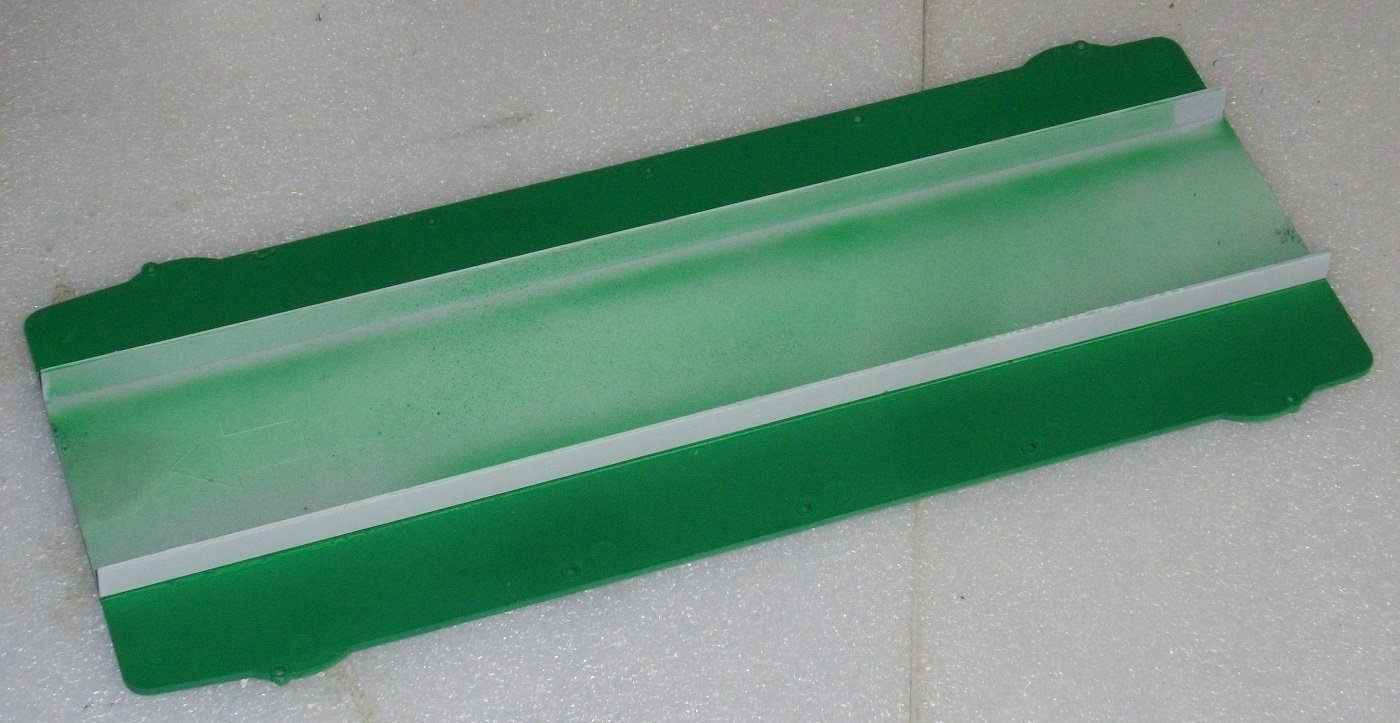
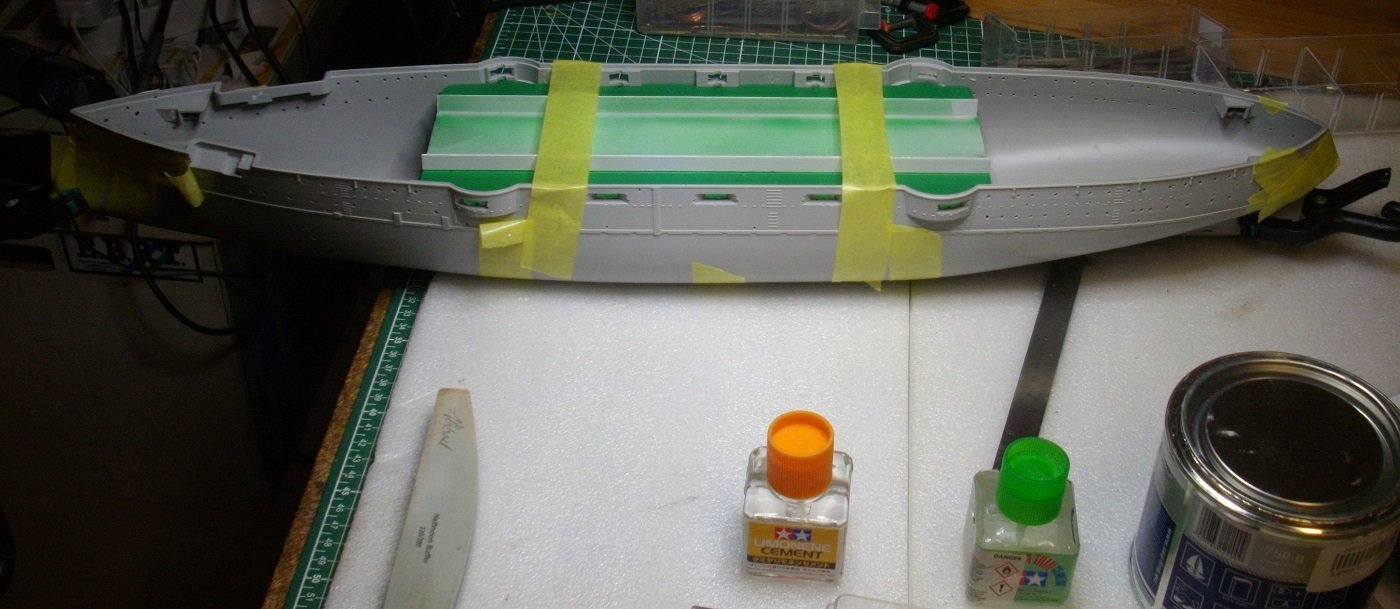
 After visiting Japan in 2019, and searching for a 1/200 plastic model of HMS Dreadnought, I discovered that the only remaining pre-dreadnought was still laying there, open to visitors. I found the kit at a reasonable price and ordered the Pontosset from Australia. The aim of building this kit is mainly to practice the extensive use of photo-etch in order to make a stunning model of the Bismarck. I finaly started this build, painting the underdeck bulckheads Insigna White and the floor Dark Green. Then joining the two hull halves, the bulckheads and underdeck together. Kind regards,
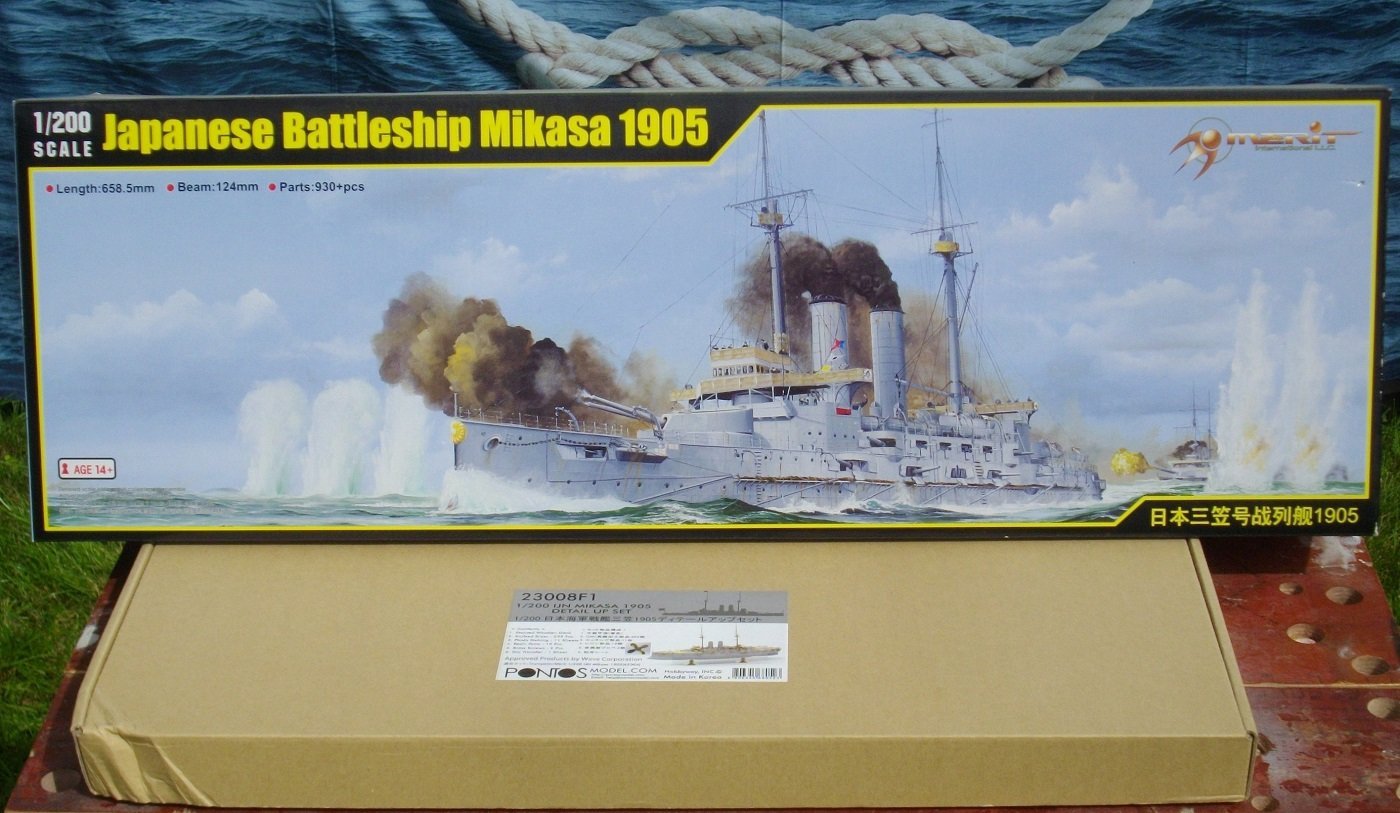

- 84 replies
-
- 11
-

-
- Mikasa
- Merit International
- (and 1 more)
-
 I've bought the kit. Have the gear. Hope to share with others when I start in a few weeks. It should be a great change to the boats and planes I have made to date. I plan to weather this model as it had quite a distinguised history.
- 18 replies
-
- 10
-
-
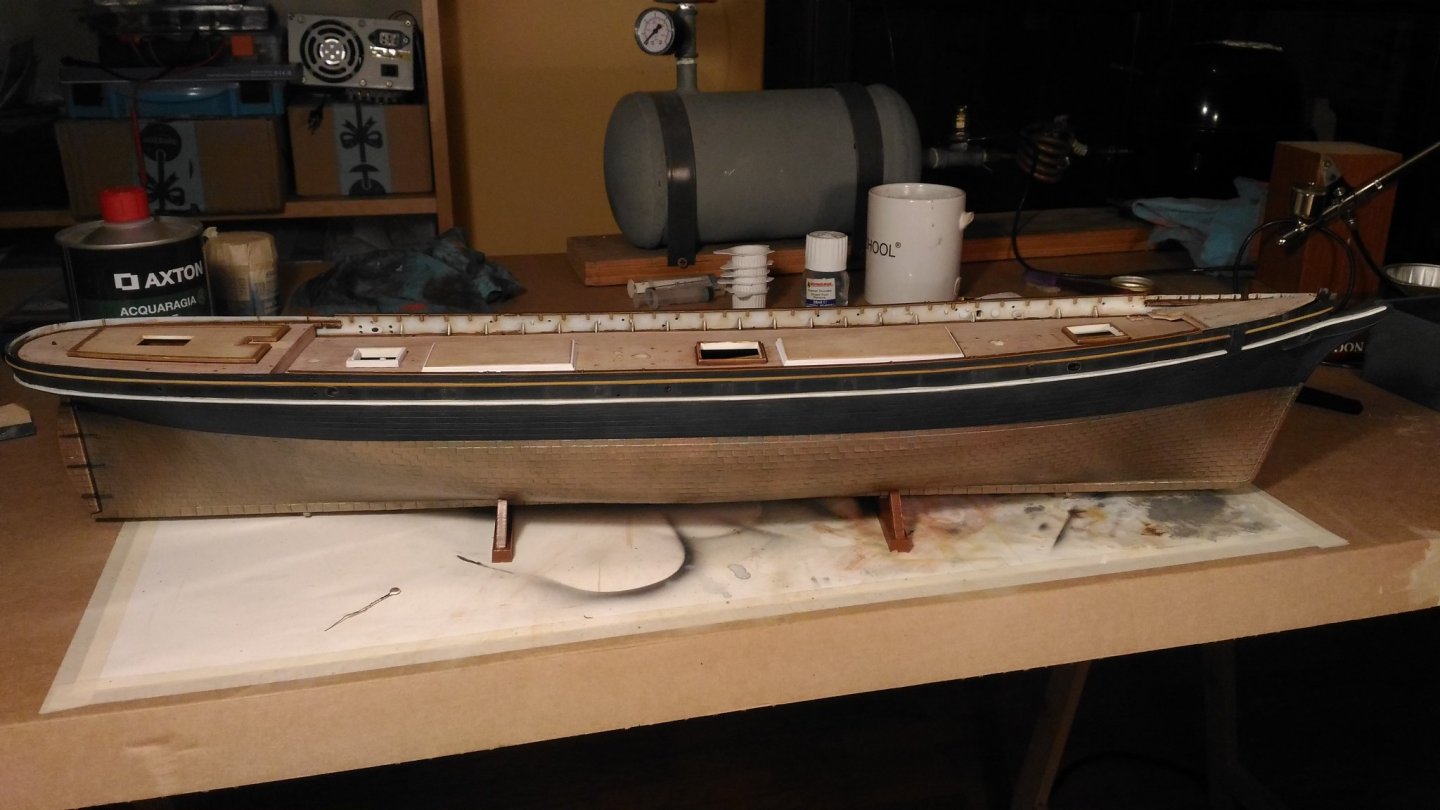
 Hello everyone. This is my first model ship and my first build log here. English is not my native language, so sorry for any mistakes. I started more than one year ago but I’ll start the log from the beginning, hoping to help other members not to do the same mistake I did. As suggested by the instructions, I started from the hull: The base coat was made by airbrush, acrylic colors (gunze and tamiya), followed by oil filters, dry pastels and oil dry brush in order to simulate the wood planking and to highlight some details. Tyre black was used for the hull, highlighted with gray. A mix of copper and gold, washed with green/blue oil were used for the Munz metal planking. Buff, desert yellow and similar tones were used the base for the wood. Burnt umber filters helped to break the uniformity and bring the wood a better look (at least I hope…) and the details were highlighted by pastels and oils (remember that the detail are raised and not recessed in this old kit). That's it for now. Hope you like it and don't be afraid to criticize!
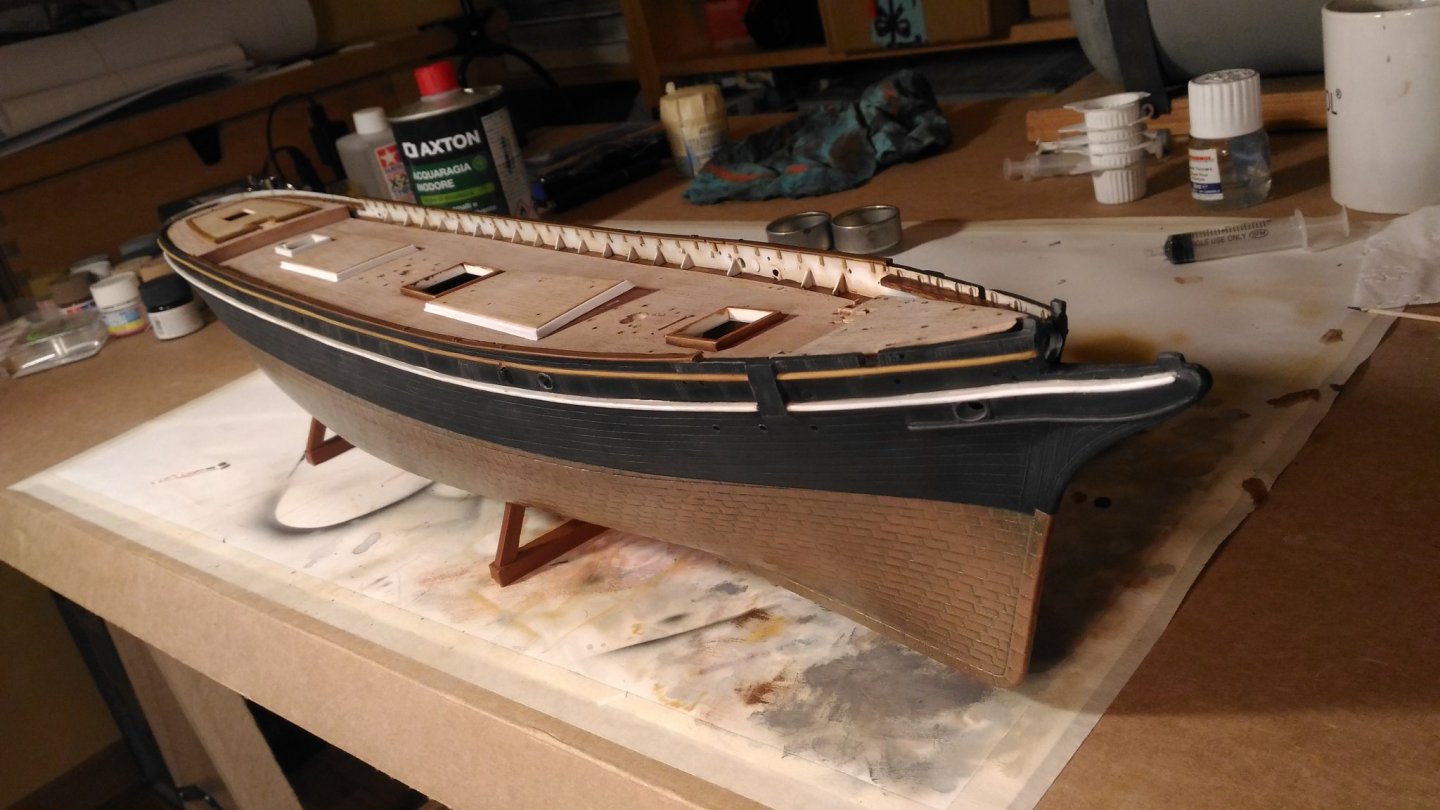

- 399 replies
-
- 12
-
-
- cutty sark
- revell
- (and 2 more)
-
 I'm going to try and do a build log as I go, I set up this post vs. piggyback off Bill97's excellent Build. I just placed an order from True North Paints (enamel like Model Masters) , once I get those in I'll be able to pick up the pace a bit. Since I'm doing this for a client, I'll need to work as directed, one side will have the cannons extended and one side will have the ports closed (they can turn it when they like). I'm going to strip the paint off the stern and probably remove the fish and redo the wood grain detail (client is undecided as of now and understands there is no information either way on the matter). I'll also need to figure out if I'm going to use the stern gun ports. I've ordered the Parrell rollers needed for the yards, I'm researching the correct blocks needed, the small ones in the kit are strange. My reference is the "Rigging and Masting of 16th. century ships. The deck detail technic I used came from "How to Build Plastic Ship Models" by Kalmbach. Base coat flat black, let dry 24 hrs. then topcoat in your choice of tan/browns, I perfect Testors Armor Sand due to being light enough to detail the caulking on the planks and still give a dark water wash. I've also pre-prepped the deadeyes and other various parts in a basecoat of flat black.

-
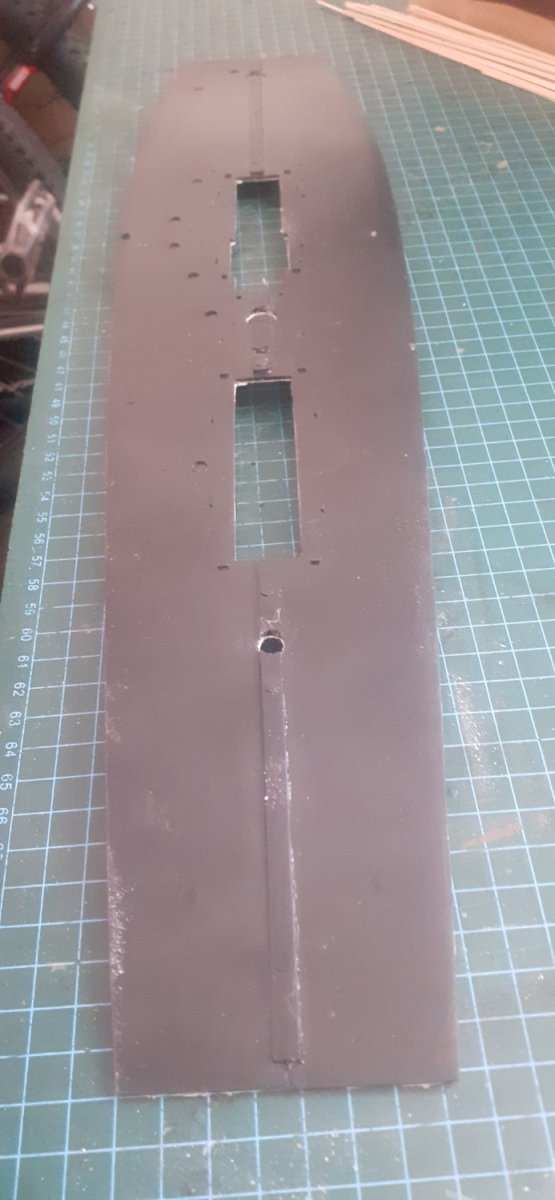
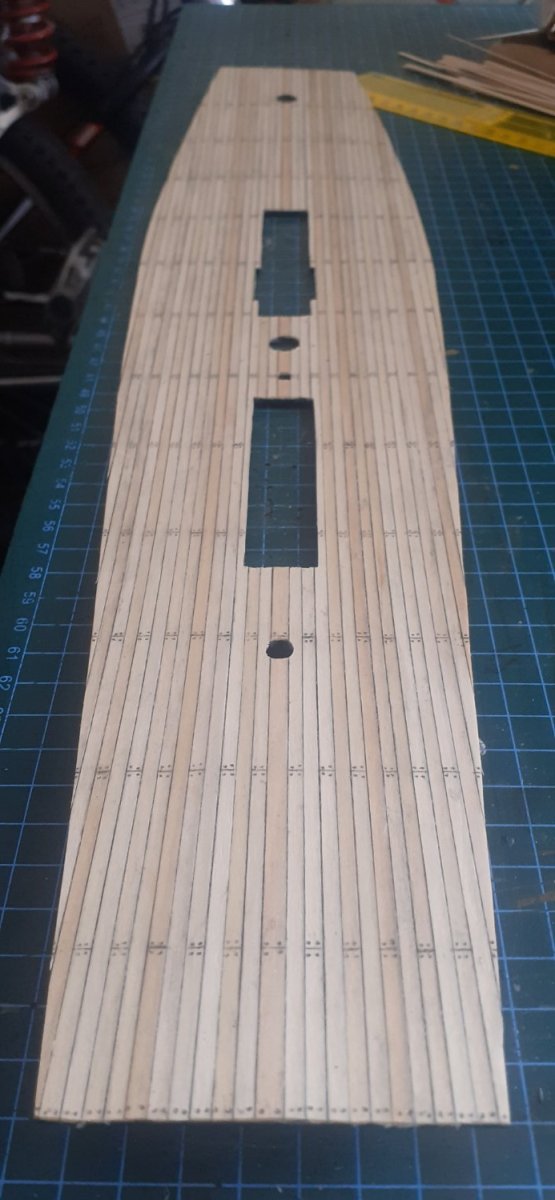
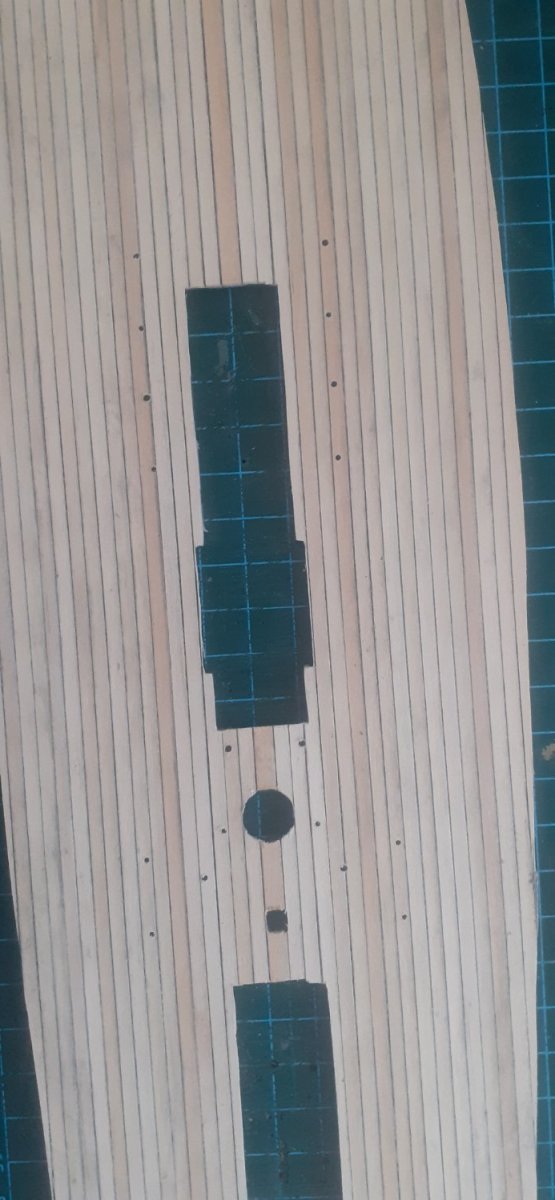
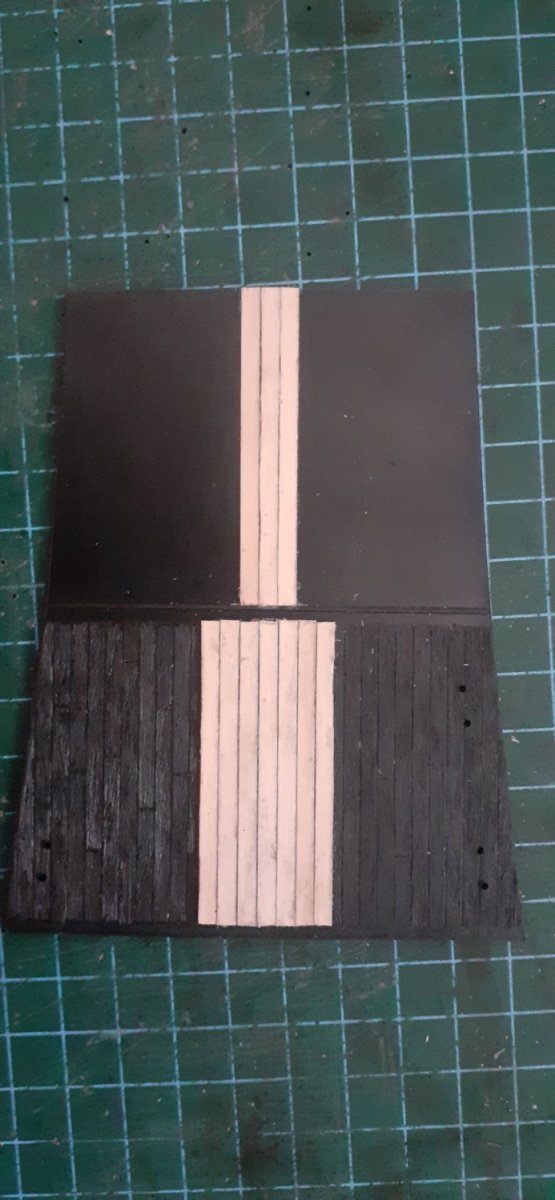
 Hello all. It's my first post here so a little about myself. Like many here, I suspect, I returned to the model hobby in my late twenties after a hiatus of 15 yrs or so. Since then I have made a number of wooden vessels, from kits, and I also very much enjoy bringing plastic kits mechanically to life - which is the main theme of my Youtube channel 'Gonzo mechanic'. This current project was spurred by reading about the naval campaigns of World War Two. I was fascinated to find out that the Duke of York (Capt. Guy Russell) took on and destroyed the Scharnhorst at night, in an Arctic storm, with gunnery controlled entirely by radar. Before reading about this, I had not realised that such a thing was possible in this period of the war. Indeed, it turns out Russell specially trained his gunnery teams to fight at night having discovered weaknesses in night-time drill during his time on the Nelson. Unluckily for the crew of the Scharnhorst, the Royal Navy presented the right man with right ship in the right place at the right time. I had planned to convert the Tamiya Prince of Wales to show the Duke of York in her post '44 re-fit form as the amount of anti-aircraft weaponry was truly awe inspiring: 12 pom-pom mounts (!) 2 quadruple bofors mounts and eight or so twin powered oerlikon turrets plus numerous single emplacements for the same weapon. It almost seems a pity this was never tested. However, over time, I decided to do the more familiar 1943 look as this is a rare example of a paint scheme mainly intended for fighting fight in the dark of the Arctic winter when the Russia convoys tended to run. Having bought an addtional KGV kit to borrow the waist boat platform I decided to build this later and she will form a later posting. Sources So what did she actualy look like? I bought the KGV series book by Witold Koszela and a book of drawings of the DoY by the same author. I also found this site https://www.naval-history.net/xGM-Chrono-01BB-Duke of York.htm which turned out to be vital. Finally, there are the pictures from the IWM website of which the series taken at Rosyth 'from the 100 ton crane' are easily the most important. However, beware pictures from the IWM site. Several turned out to be mirror images which resulted in quite a lot of wasted time. Some aspects of the ship are 'handed' - like the roof of the cabin abaft the main director and the mysterious little tub thing on the stbd. side of the forward superstructure and these need to be checked. Also the date appears to be wrong because on the 1 November 1943 the DoY was in Scapa not Rosyth. The pictures more likely date from around January to March that year. The Koszela material is helpful in many ways but many details are wrong or missing. We'll come to those later. Finally the Pontos set while also hugely helpful is also missing a number of items and is also wrong in detail in some places. In other words this project has required careful synthesis from disparate and sometimes conflicting sources. Some aspects remain unresolved and it will be most interesting to see if others here can shed light on them. It is, then, a source of some surprise that is can be so hard to piece together a reasonably faithful image of one of the largest warships the UK has ever put to sea - even within living memory. First up: the hull This, like all my plastic projects, is going to be rc so it can be filmed. There are various conversion kits for other vessels available but I decided to use my 3D printer to make a motor and servo mount. Anything to do with rc has to be maintainable because the first law of sod is that anything inaccessible will break first. In addition, and without disrespect to the many very fine modellers who use them this way, I could not face having the wooden deck show up with a 'real-world' 10" step - so joined the plastic deck together and cut a rebate around the edge so that it, with the wooden deck added, would fit flush with the hull sides. Here you can see the 3d printed motor mount and dog bones. I inserted small brass washers where the dog-bones met the mount. Stern glands Rudder pintle On the right you can see, just about the rebate cut into the under edge of the deck. This was a tiresome process involving a mini-router. N.B. the hull on the left is for the KGV hence stern windows but is otherwise identical to my DoY Next up: alterations to the forward superstructure.
- 24 replies
-
- 13
-
-
- pontos
- king george v class
- (and 5 more)
-
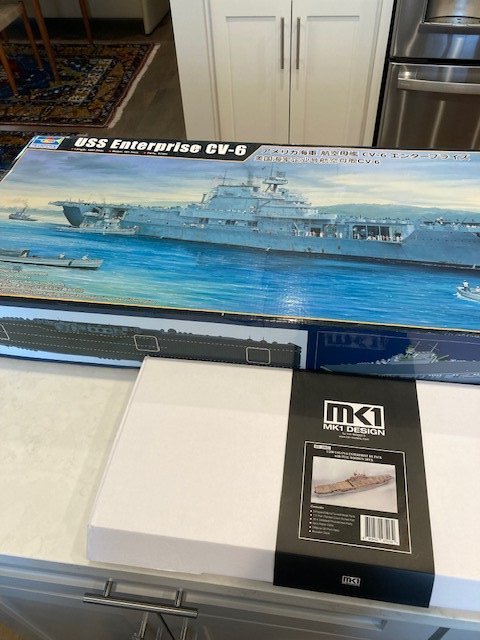
 Next in my set of major WW II Combatants. Started with Bismarck, then Yamato. After Enterprise is done, it'll be capped off with USS Missouri. Dobbed in a pair of Subs for good measure. All in 1:200. Except for the Amati Bismarck they are all plastic because that's the only available kits in 1:200 scale. Looked through all the build logs for another 1:200 CV-6 and found none. I'll skip unboxing as I did find videos on Youtube from Midwest Model Shop and the first three are excellent "unboxing" descriptions. Episodes 4 and 5 start the building process, and will continue. I selected the KA-Models detail set with full wooden deck over the Pontos set because it seems to be more aligned with my skill set. According to the Midwest video, the Pontos set has a lot more PE, is finer scale brass, and does not have 3-D printed small caliber guns. After struggling with the PE from Fujimi for the Yamato (very fine brass and gobs of little bitty pieces), I am going with the KA set. I am not going to chase absolute accuracy or any particular date, but am just going to build it as it comes in the kit. I am also going to please myself by painting it a traditional peacetime gray and use the natural wood decks because I like the looks best. If I were a better modeler, I would chase those ideals, but I'm not. To start, I've attached the hanger deck to the hull at the outset. I've learned that getting a good hull to deck join with minimal need for filling gaps requires some brute strength pressing hull sides in and the deck pieces down. I'm doing that before I put anything else on the hull and deck. In looking over the instructions from Trumpeter, I could not see any reason why I shouldn't do this. If one does appear later, I'll be sure to mention it so that future builders can benefit from my experience--one of the main reasons for a build log, I think. Unlike the Amati Bismarck, which has a detailed step-by-step set of instructions, the Trumpeter instructions show which pieces fit where, but there is no "assembly" instructions, per se. Photos show how I have used masking tape to do an initial fabrication before gluing. More hand-pressing together is needed as the joints are glued. After a day of curing, I'll remove the tape and put solvent glue down the previously-covered joints. A note about solvent glue. I show "The Same Stuff" from Micro-Mark and a bottle of "Plastruct" Even though the Plastruct is about the only solvent that works on ABS plastic, it does a very good job on Styrene as well. It is actually a stronger solvent than the MM stuff and better for the hull/deck join in my opinion. It's too hot for small pieces, though.
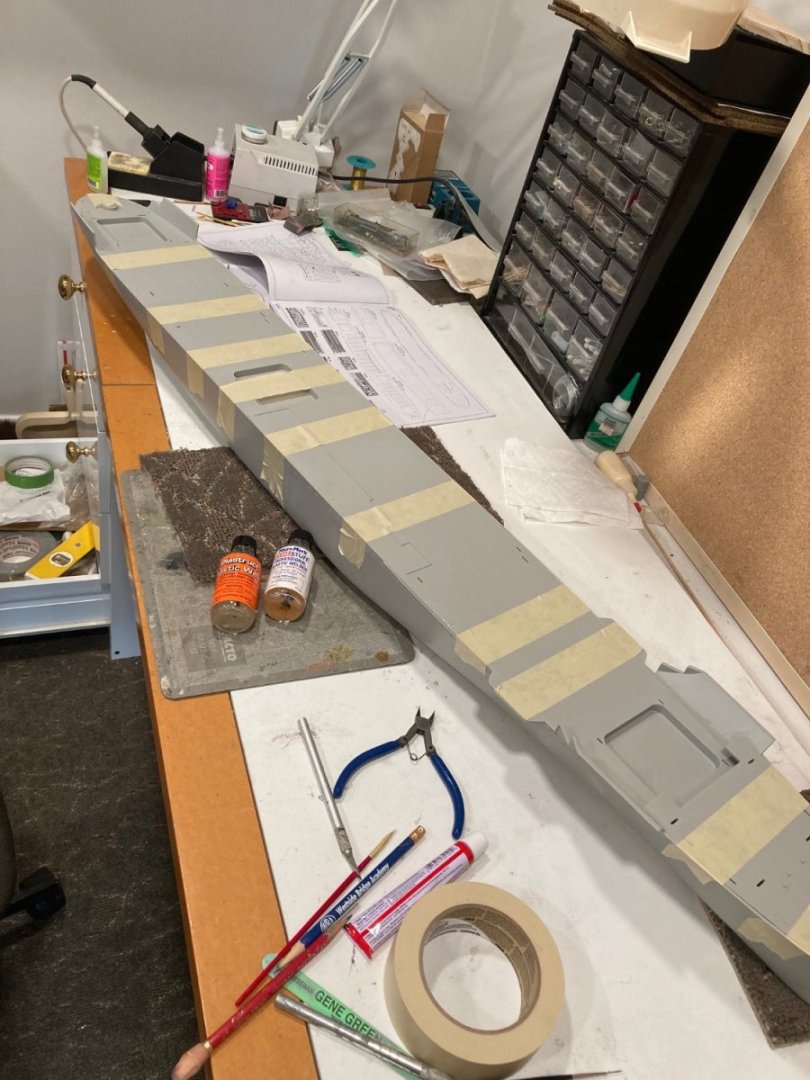
- 147 replies
-
- 11
-
-
- Enterprise
- Trumpeter
- (and 1 more)
-
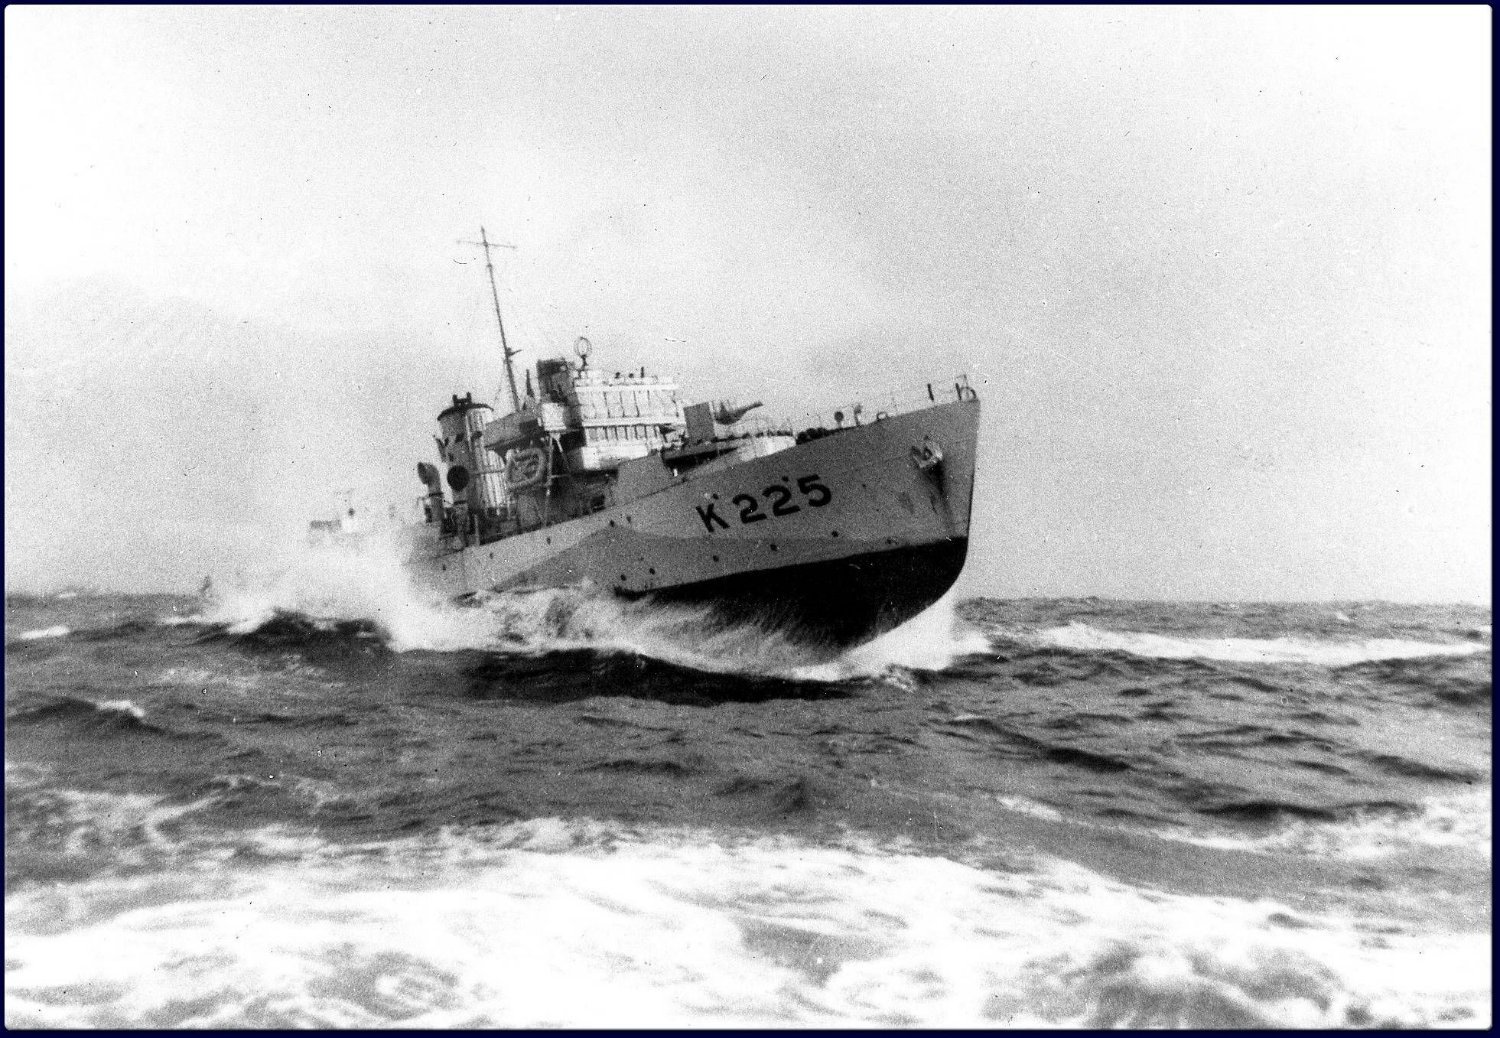
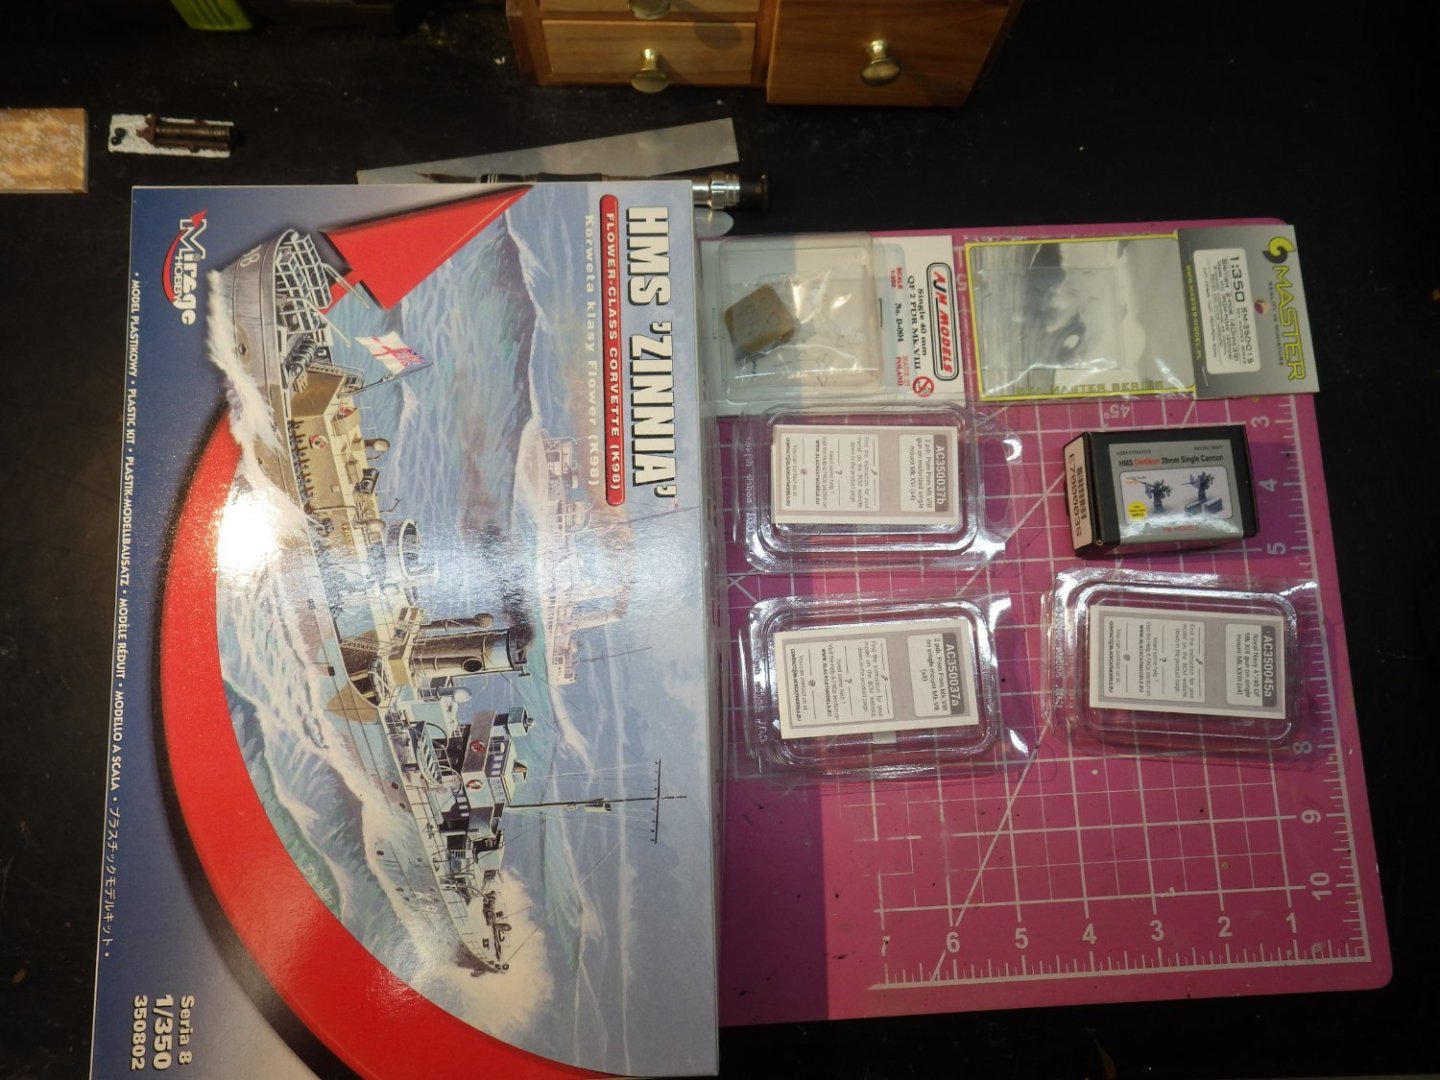
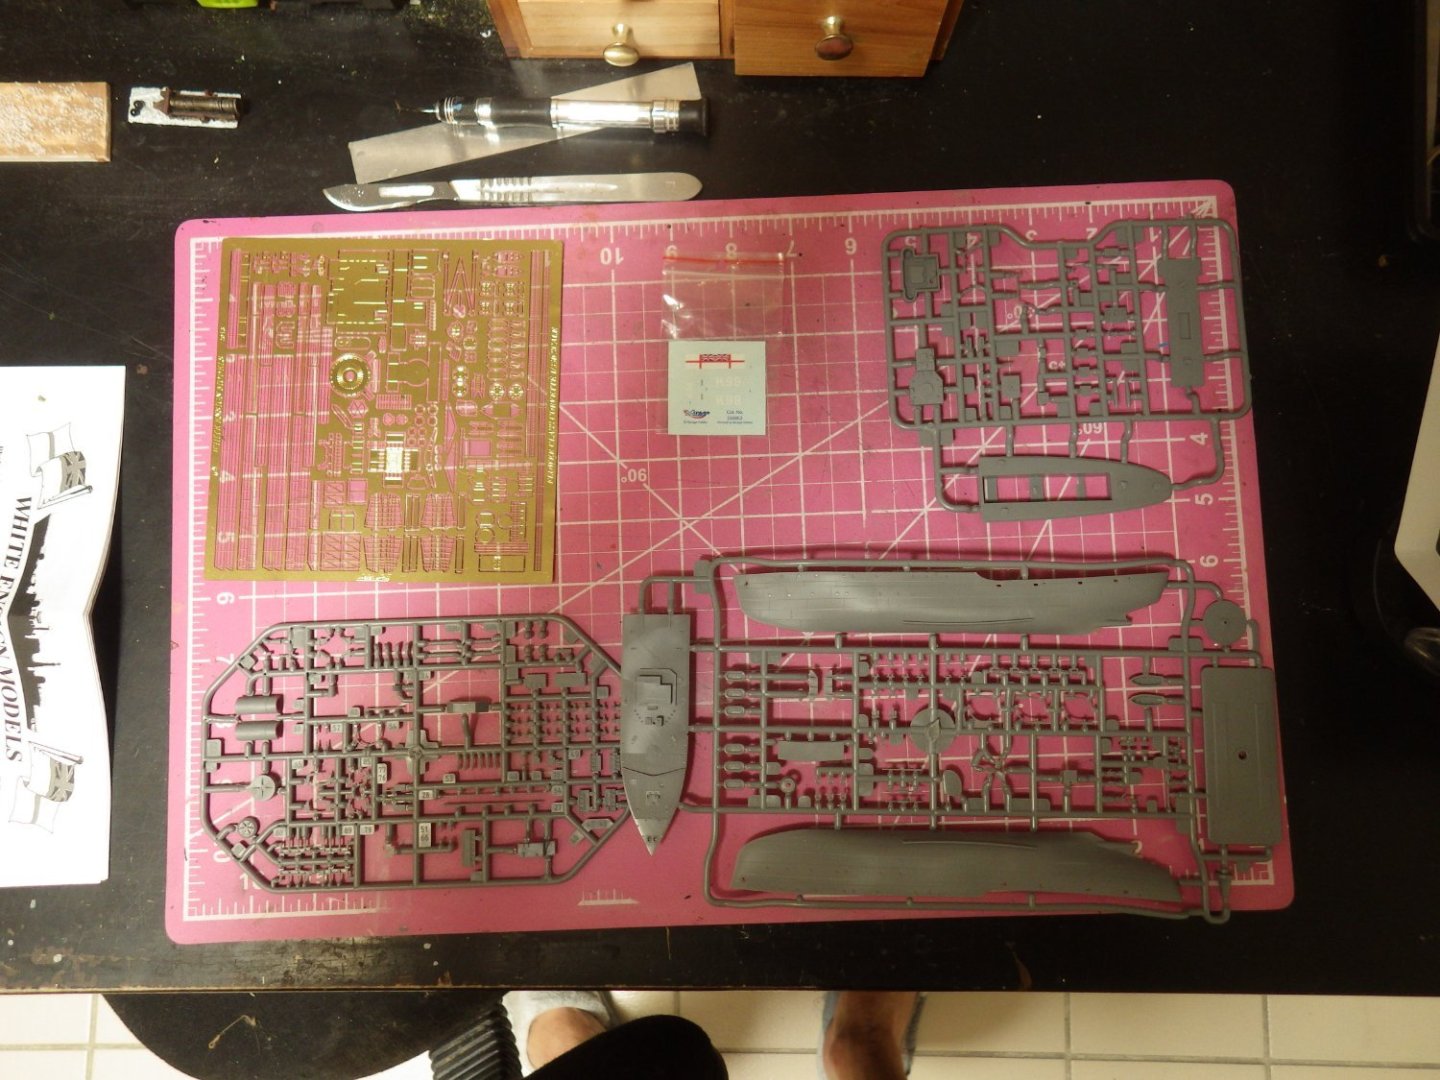
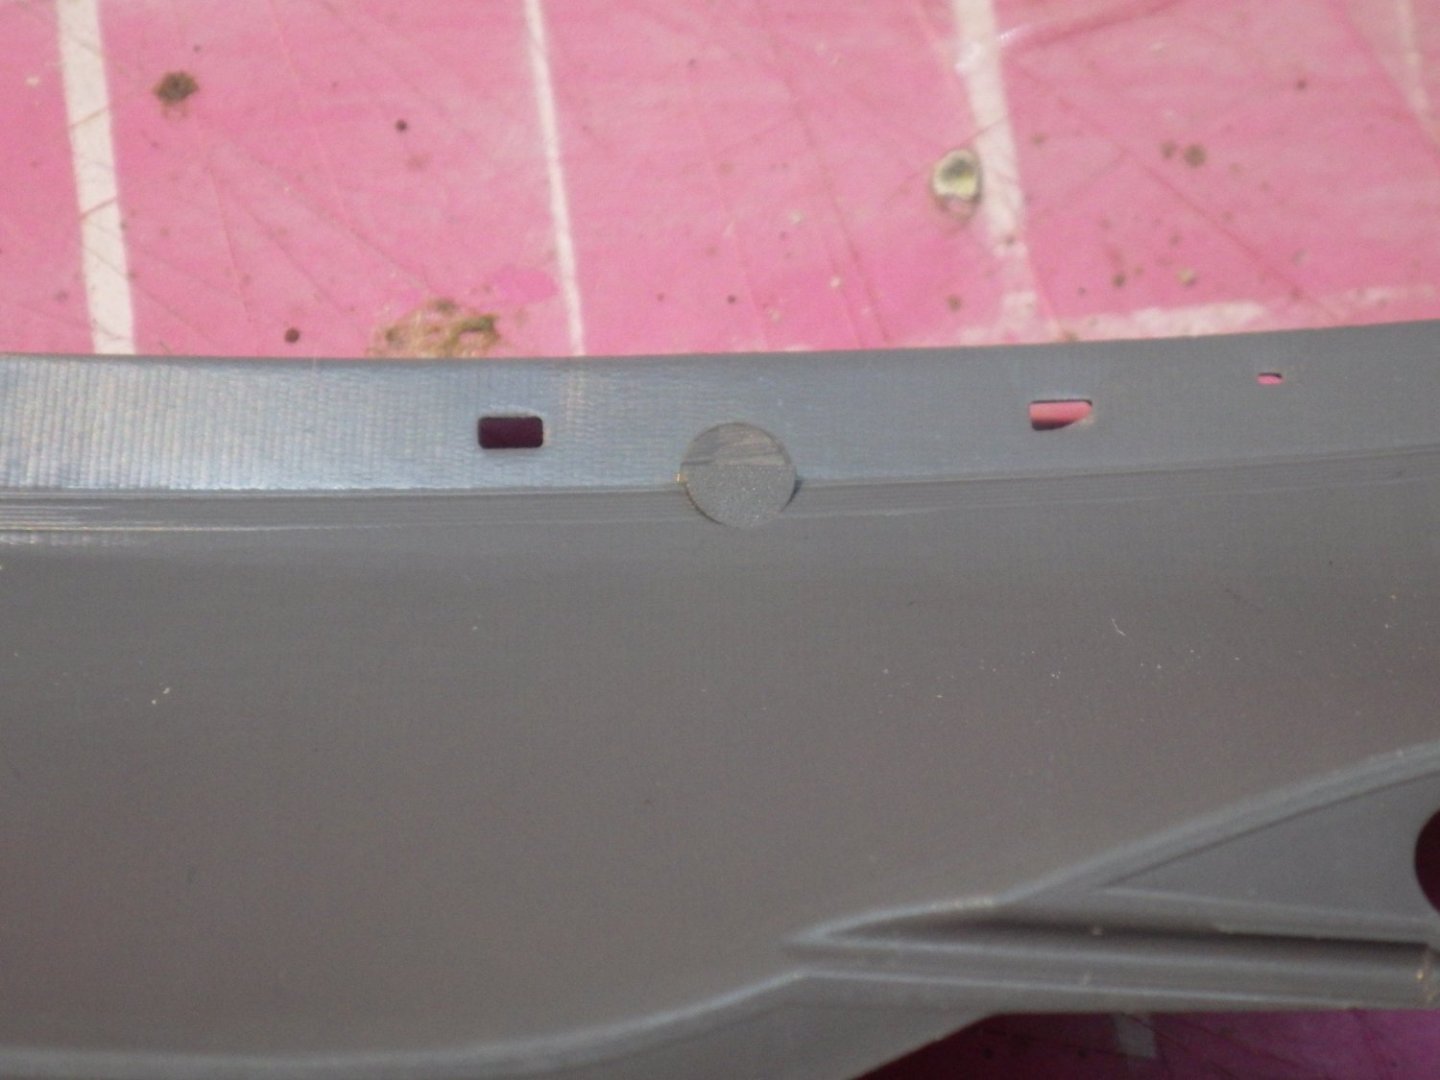
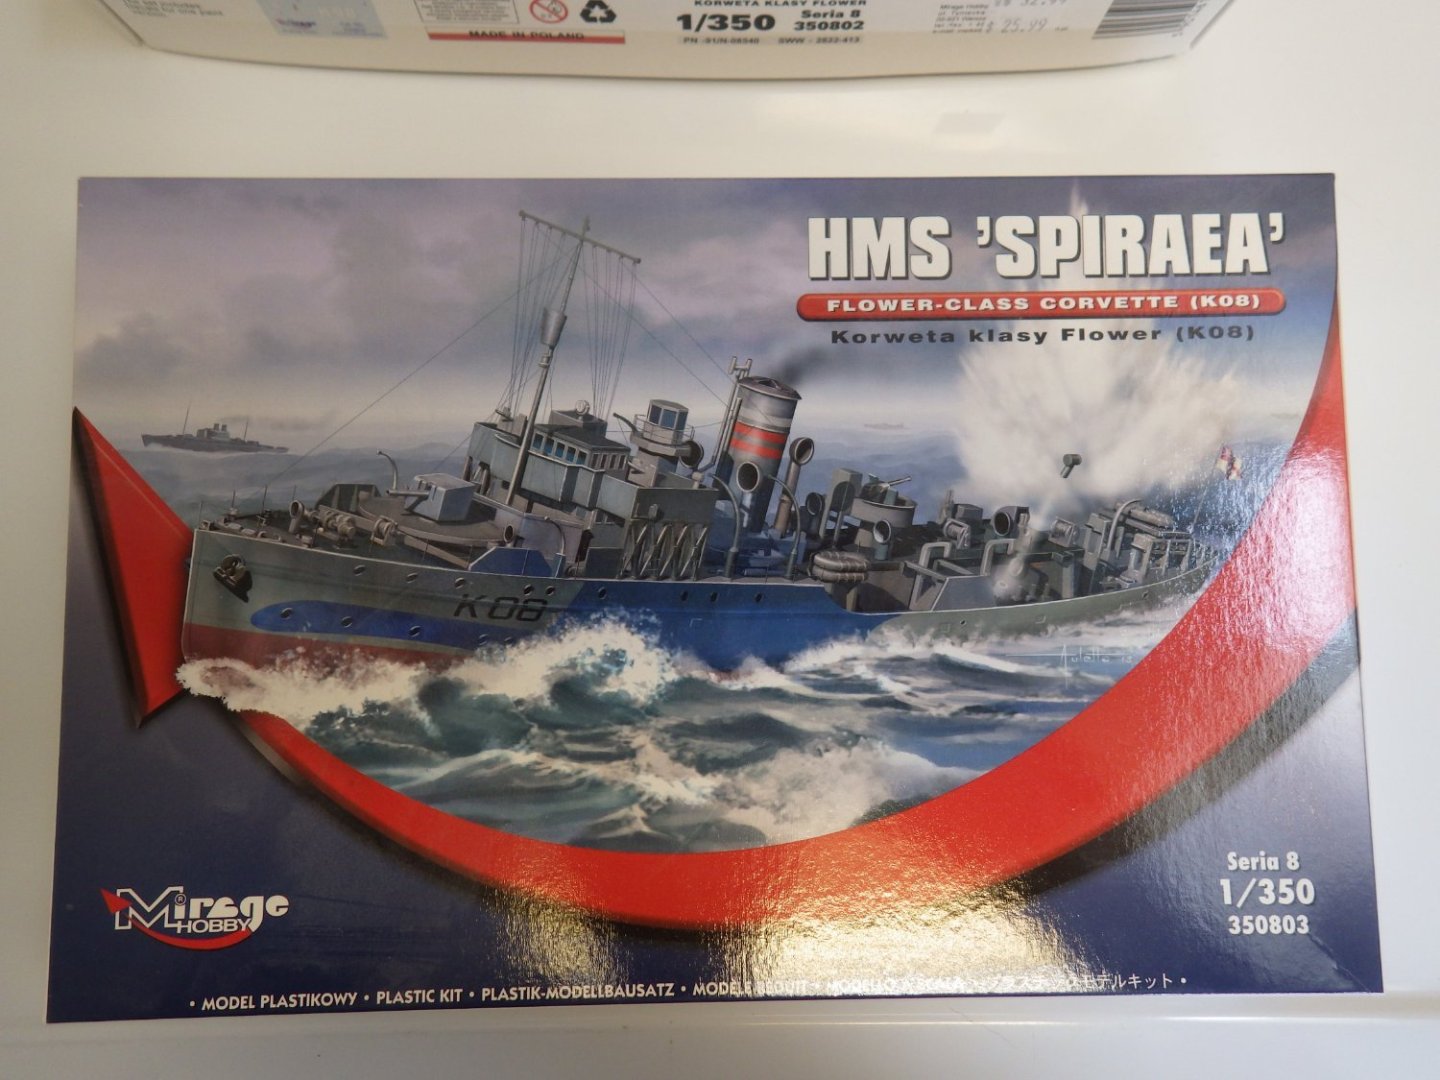
 Well, its been a slow start after completing the Loarre castle. Cleaning a years worth of sanding dust off the work bench and pretty much everything else in the garage took some time. Then its been difficult deciding where to start again. I had lots of ideas and several boxes were opened and put away again. I wanted to build a ship but also wanted something relatively short but interesting with some PE to rehabilitate myself. The final choice was the Mirage Flower Class corvettes The initial choice was HMS Zinnia and I got as far as assembling the hull before realising this was a relatively early Flower and didn't have the later style bridge so down came HMS Spirea and I started again. Mirage make four Flower kits and it looks like they all share the same hull but have different decks, superstructure and details. Zinnia was an early Flower but I can't determine whether she should have had a short forecastle or not. I think its just about possible she could have been built to the long forecastle standard. She was commissioned in April 1941 and sunk in August 1941 so she certainly was never refitted The kits look quite good although there are some annoying placements of the sprue gates on the hull halves requiring some clean up before the deck can be fitted. Curiously Zinnias hull was horrible to fit together and adding the aft deck was even worse. Spirea was much better and only a tiny mount of putty was needed to smooth it out. Otherwise there are some lovely delicate details like the galley stove pipe and some clunky parts too. I am planning to use the White Ensign PE set as appropriate and some PE or resin substitutes for the armament. I've been pondering the build order, trying to decide what to assemble before the basic painting (its been a while). I think the replacement PE bridge, radar and gun tub / bandstand will be too delicate to stand a lot of handling so I decided to add the basic plastic superstructure to the deck and paint the hull first and then the deck and then follow with the superstructure and details. I may paint myself into a corner! So, the two hulls ready for primer. Spirea in front. This is my first attempt at 1/350 scale so some new techniques for me. I drilled out the portholes and the engine room ports and opened out the anchor fairleads Then some Mig One Shot black primer From here on I plan to concentrate on Spirea and work Zinnia if there is a pause. Its going to be too hard to get the wrong stuff on the wrong hull otherwise I masked the hull and added the red bilge and then sprayed the decks Next up some serious masking of the deck, paint the wooden deck sections and dip into the PE My ambition for one of the models is a diorama (I can't seem to break the habit - but it will only be a small one - honest) Here is the tease This video has motivated me and I have had the photo in mind since building the 1/48 scale Campanula Thanks for looking in. Alan
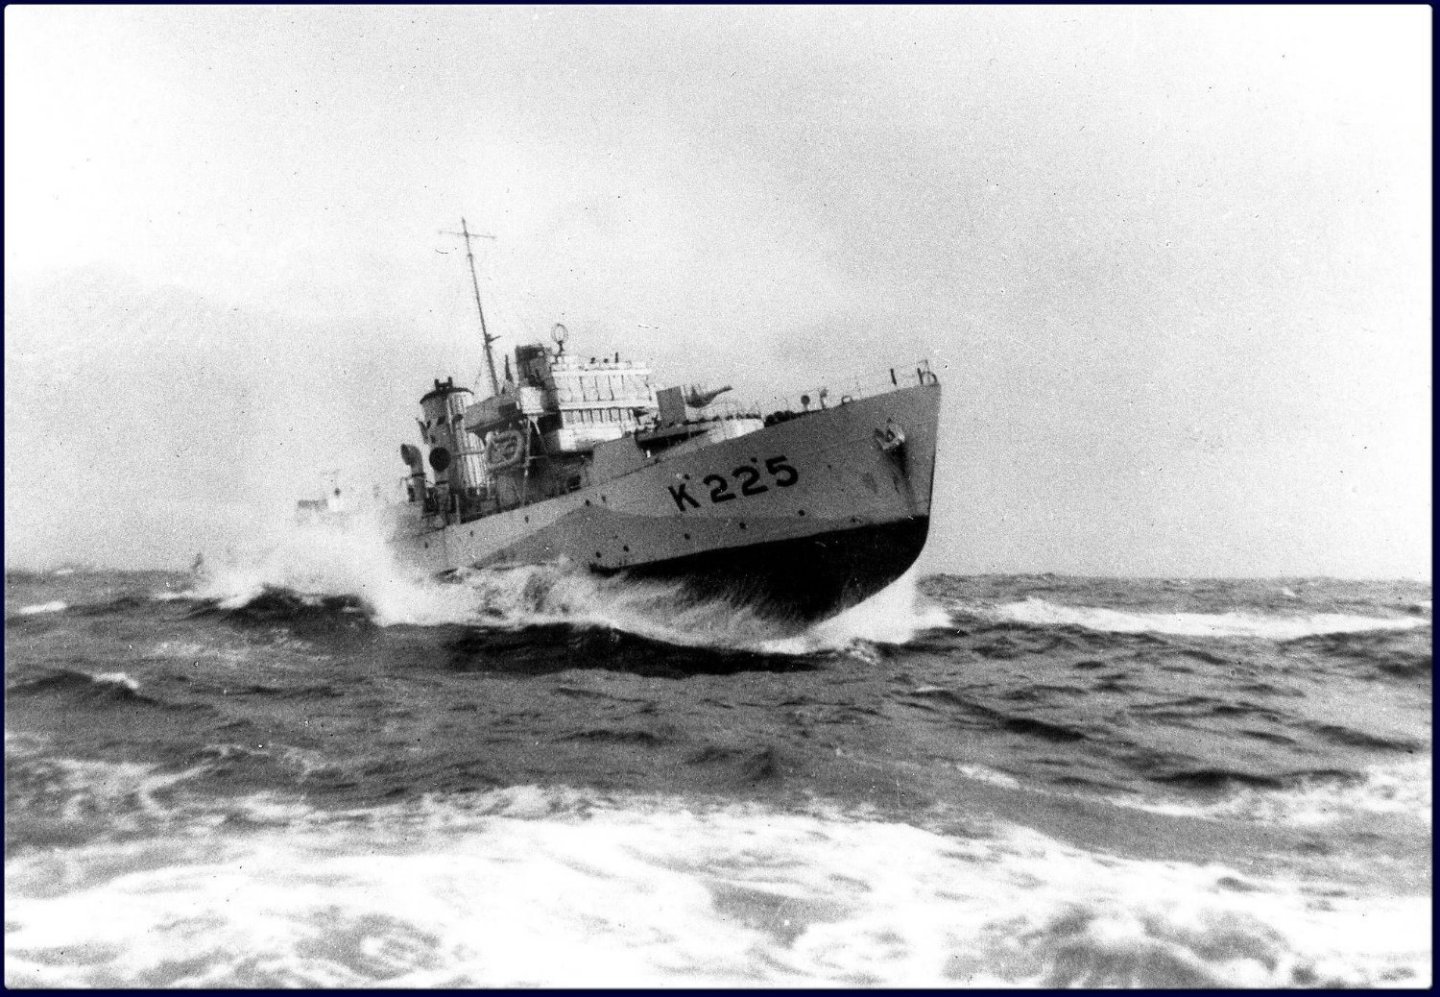


-
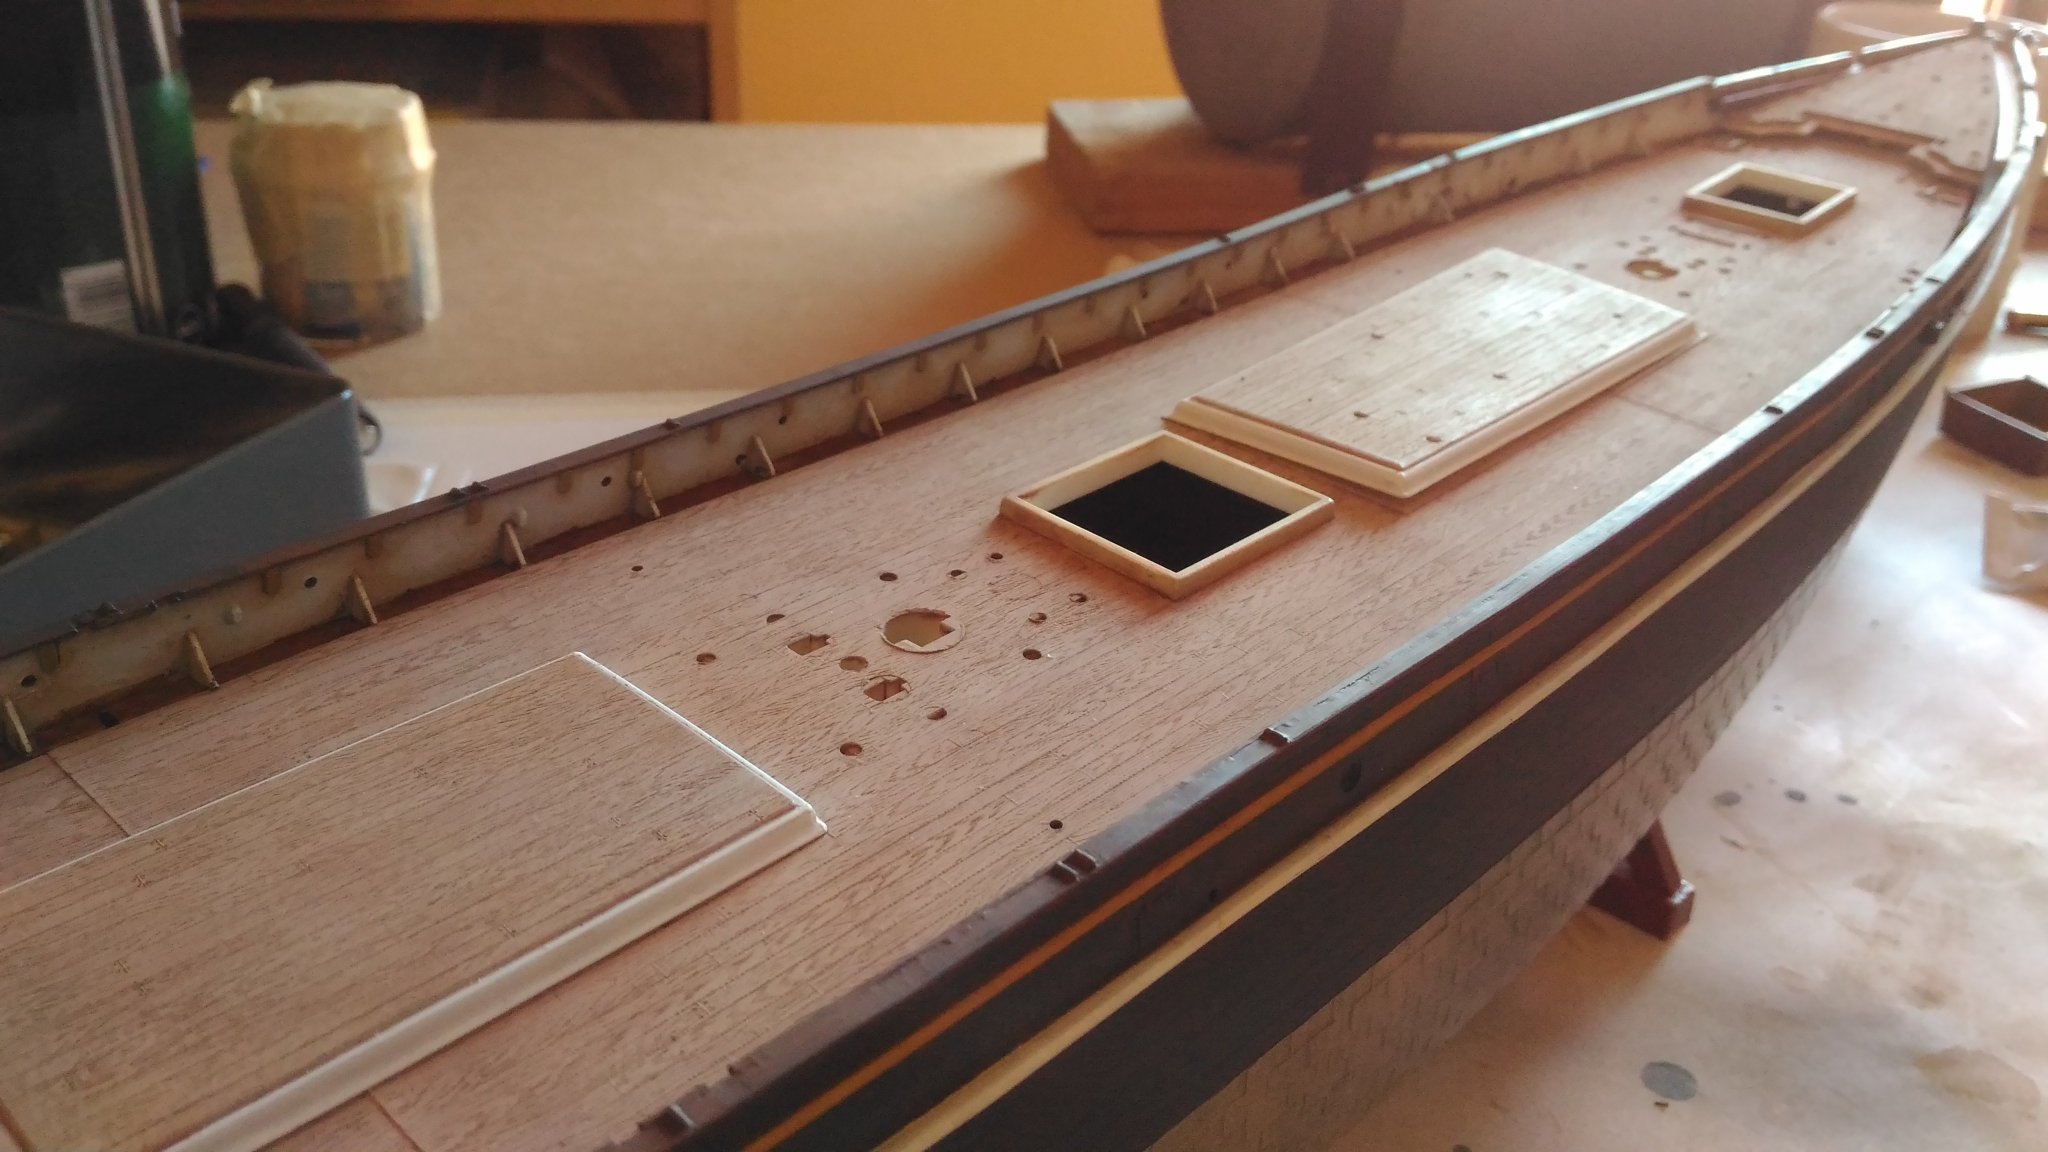
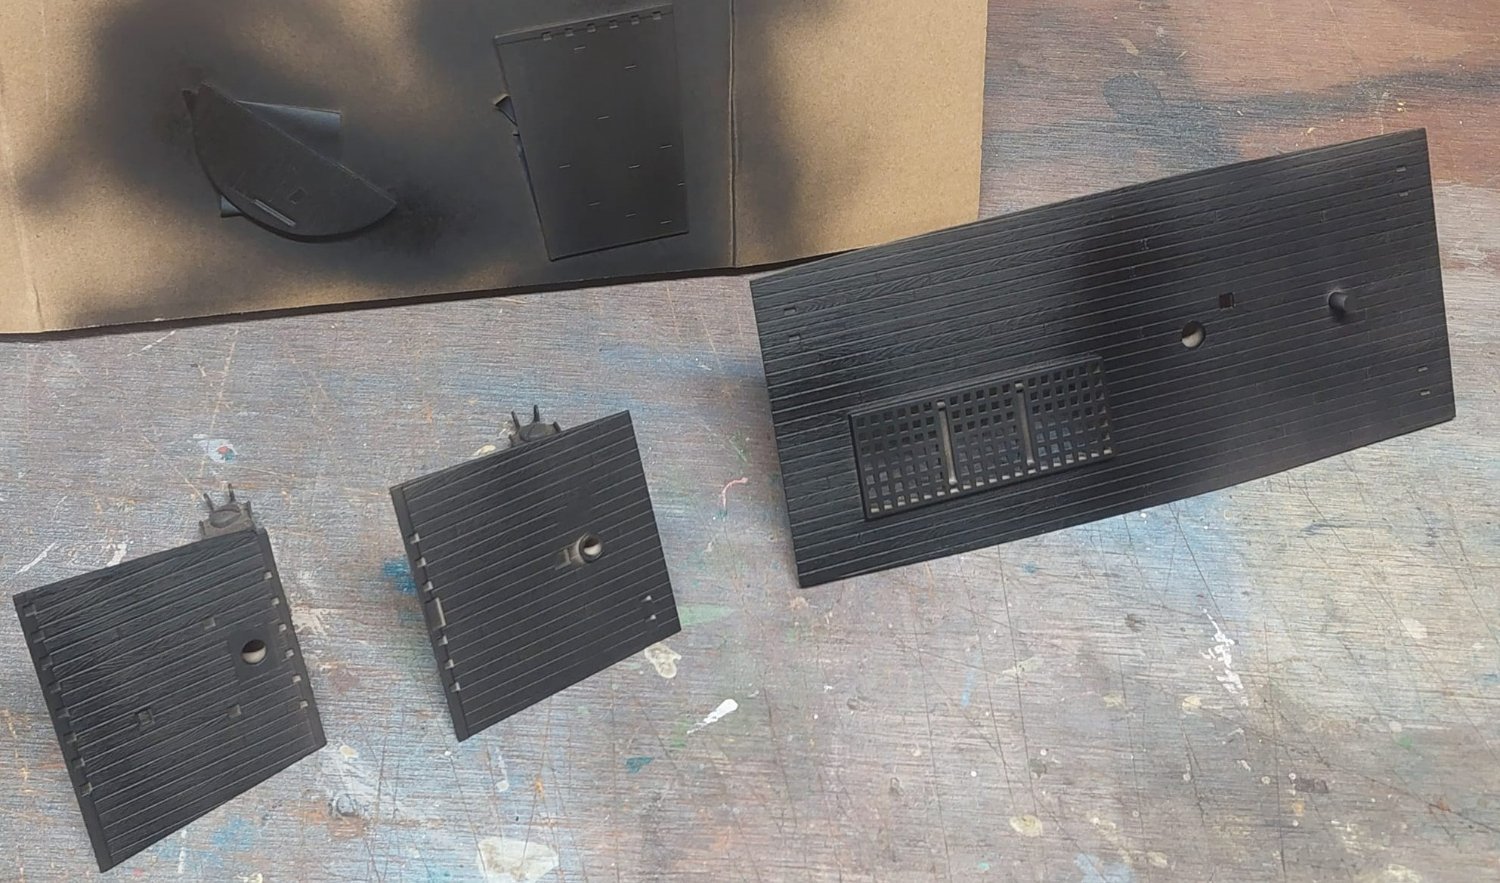
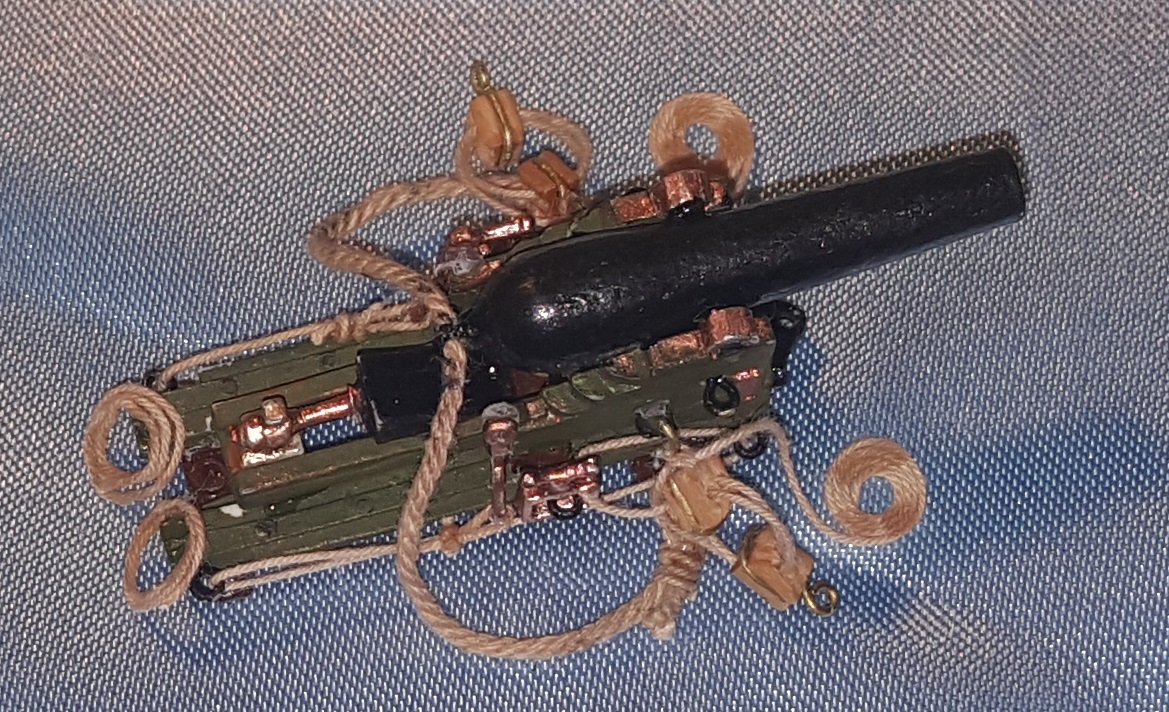
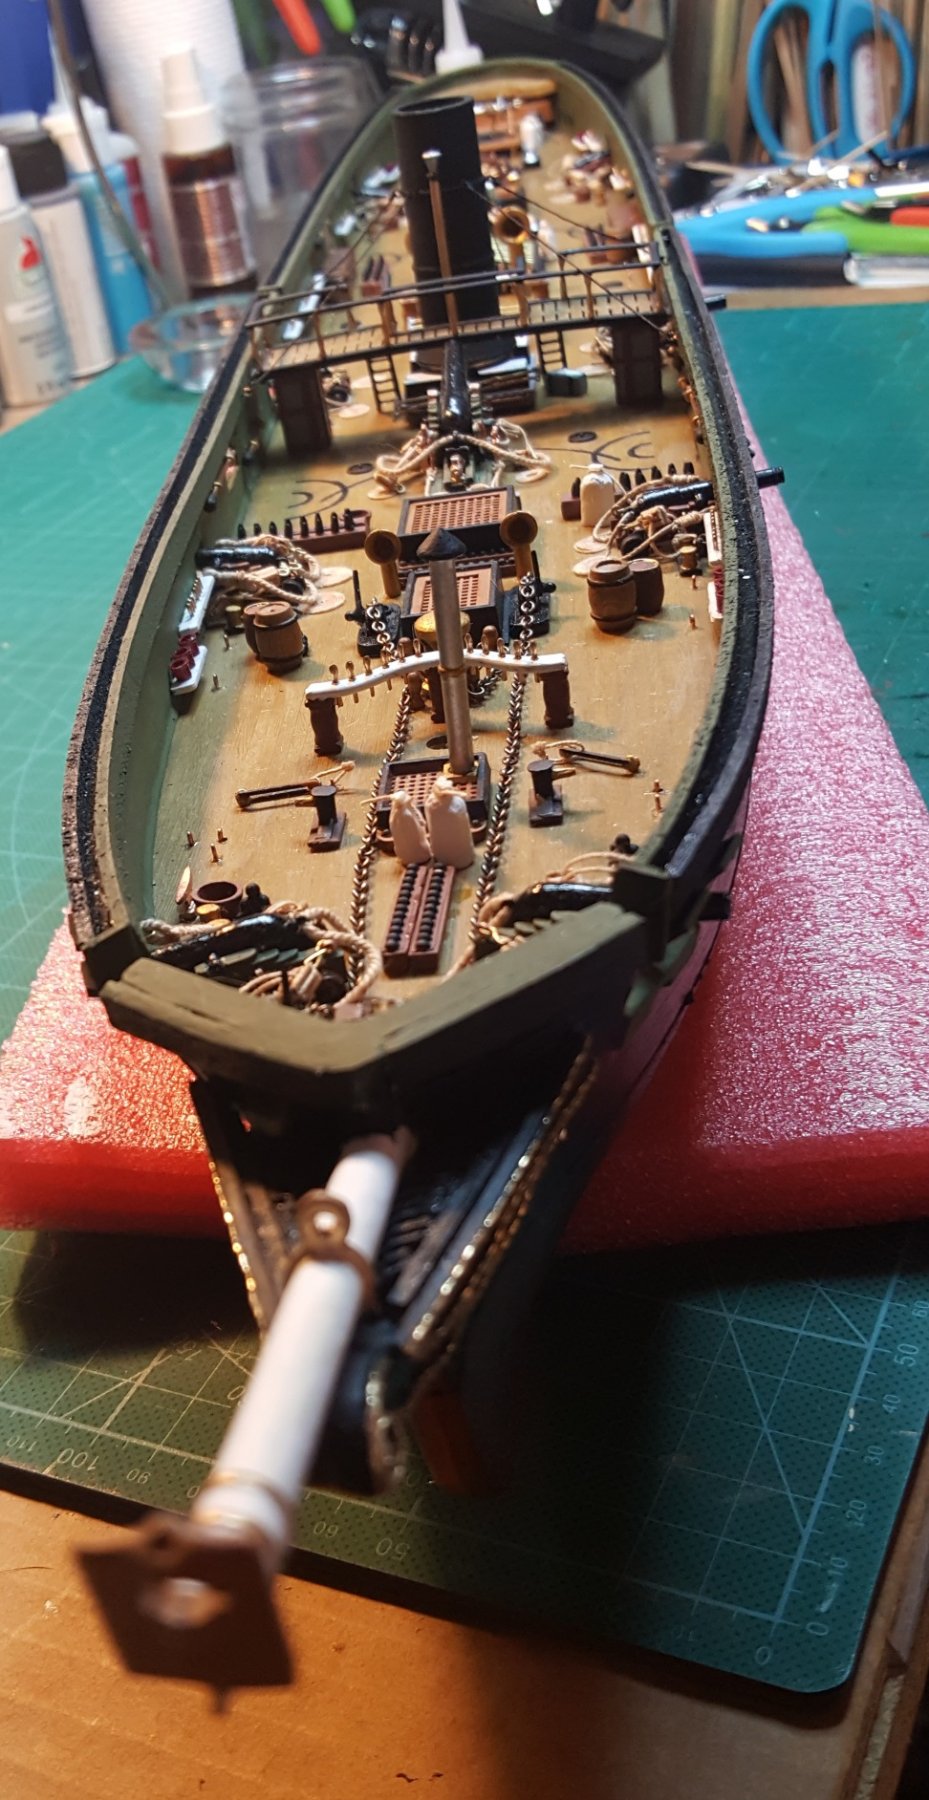
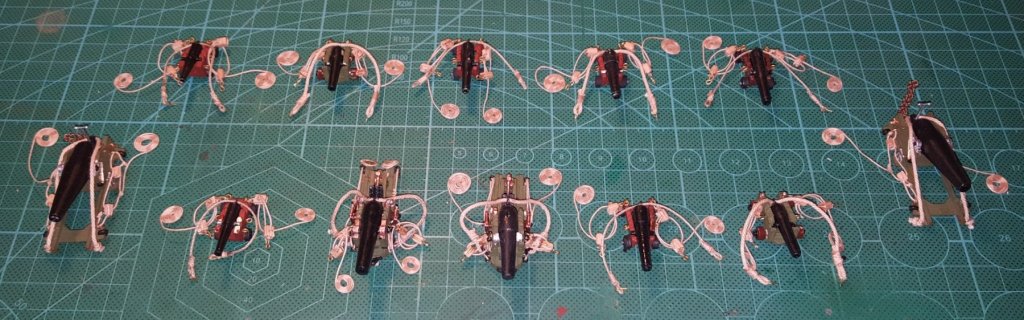
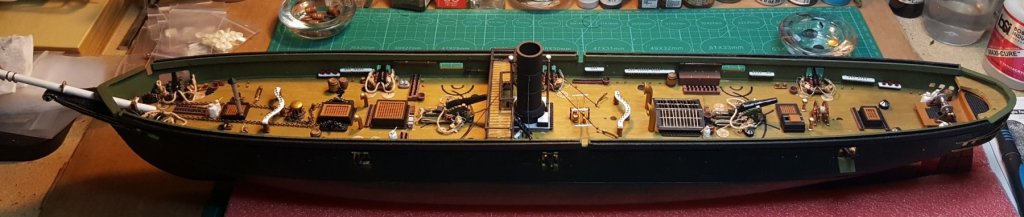
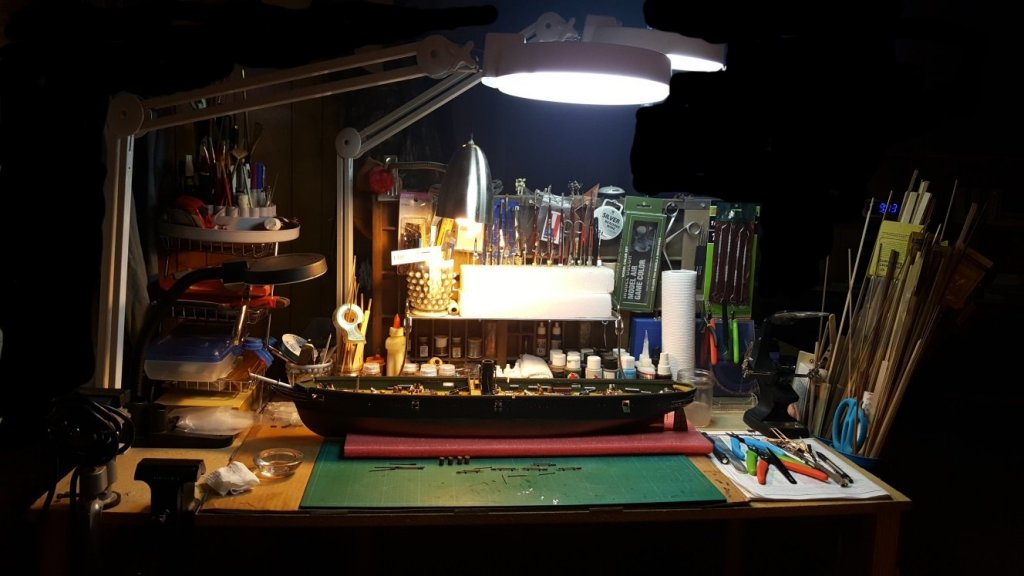
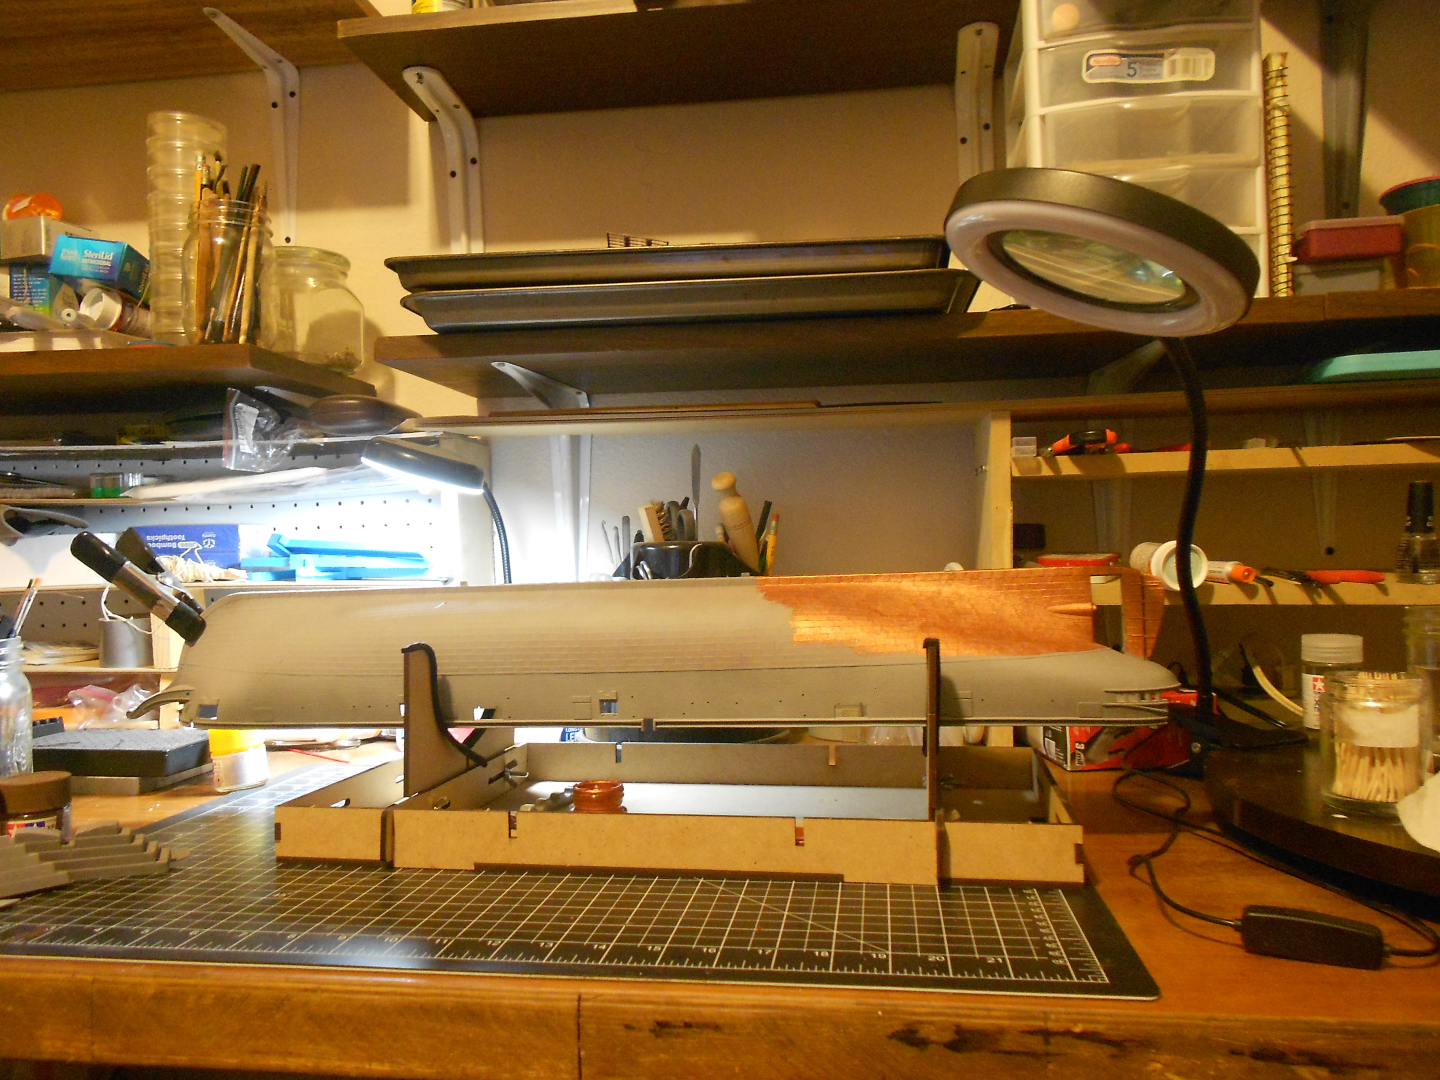
 Since she is at the half way point for the build I'll keep this brief for a start. Research in depth along with custom and scratch built parts is in progress. Rigging and masts per BlueJackets model plans. I am changing some colors for a show model style IE mast colors and other smaller boats along with deck detailing enhancements. Cannon's: Ship deck detail (In progress): My humble dry-dock (Mobile): I'll post updates periodically, any questions please ask. The kit was found in shelf perfect condition and is a joy to build. The best CSS Alabama kit out there I feel is the Bluejackets model of her but was to expensive for me to purchase. But I do have the plans from the kit which are historically excellent. Time to complete is another 4 months.
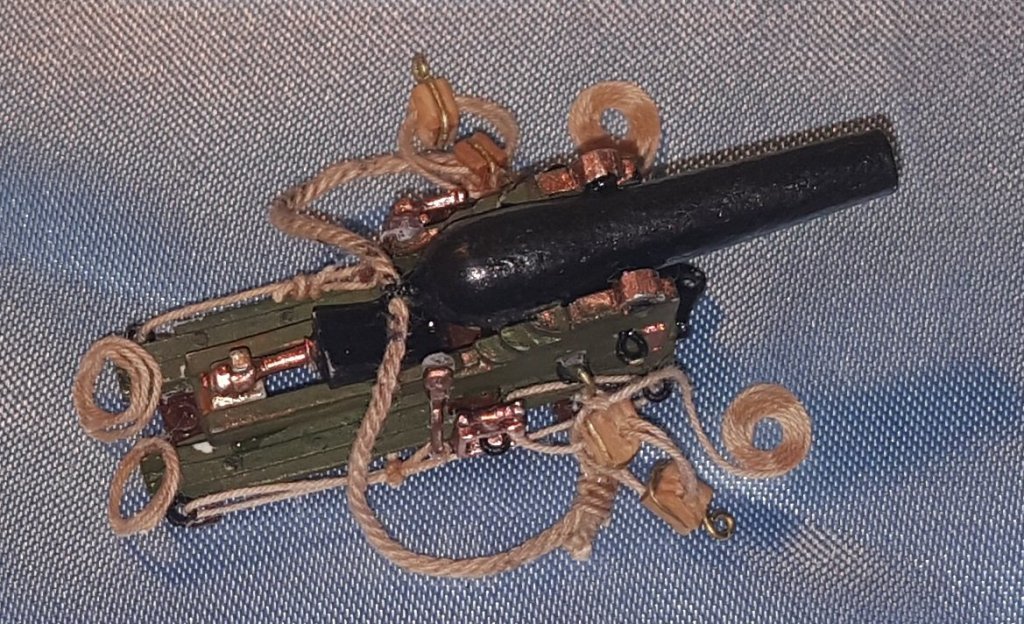


- 380 replies
-
- 20
-
-
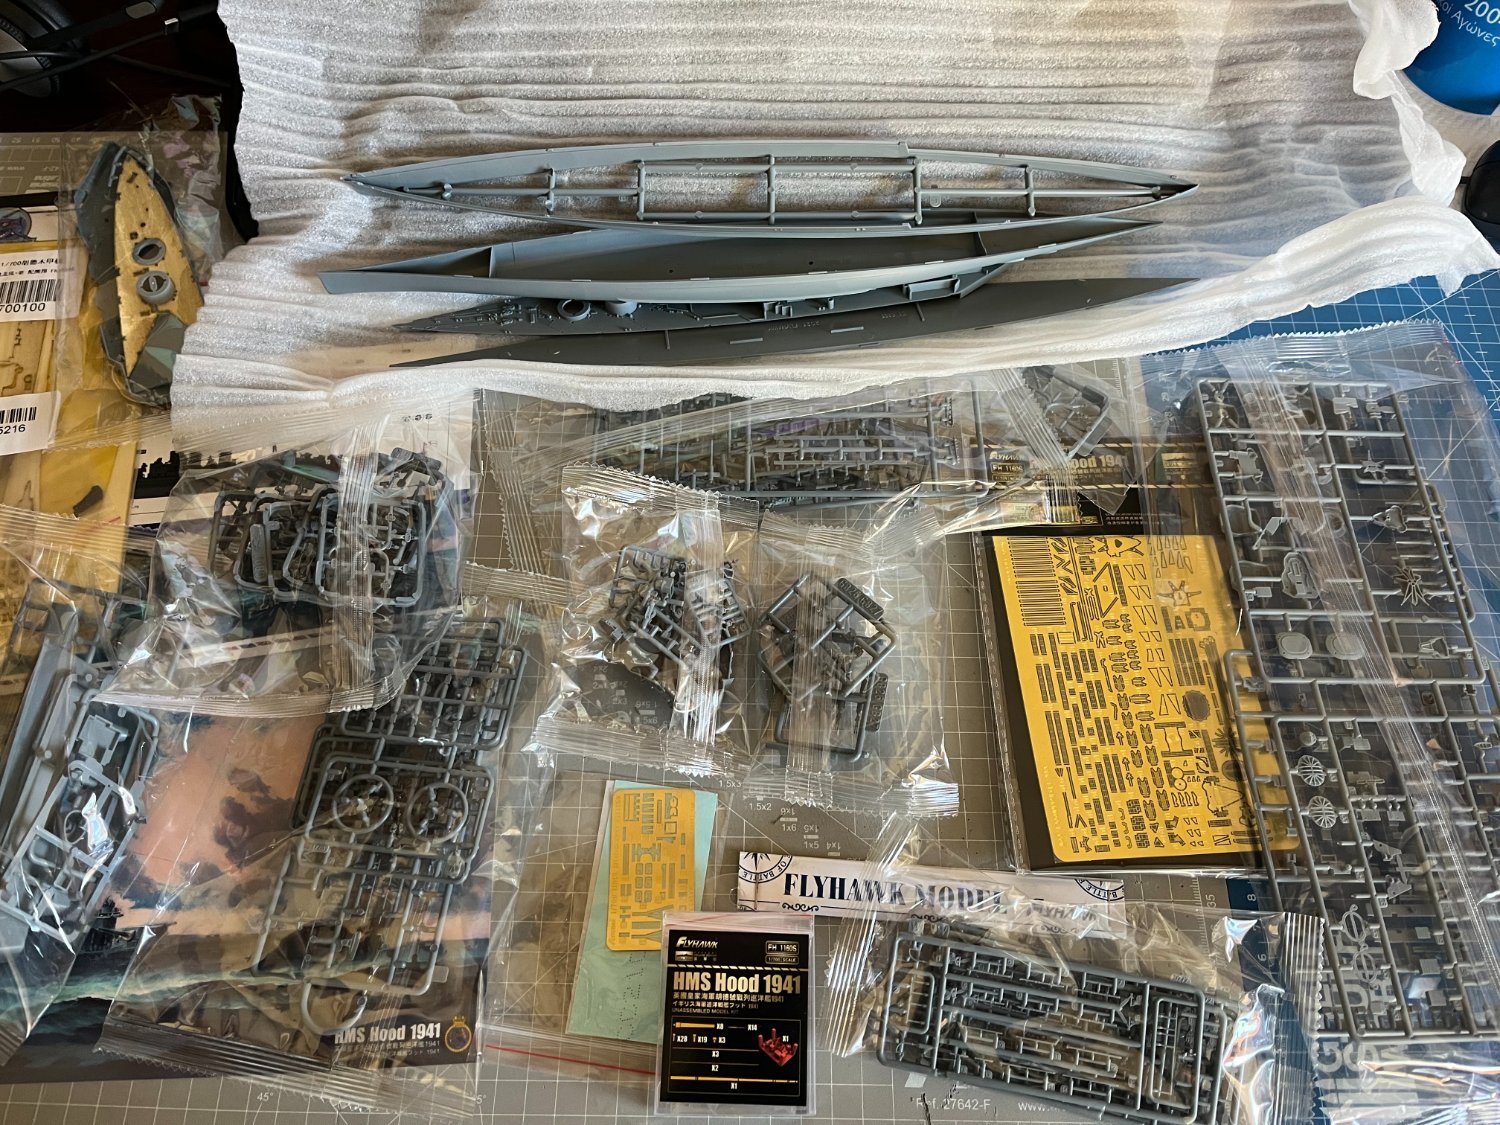
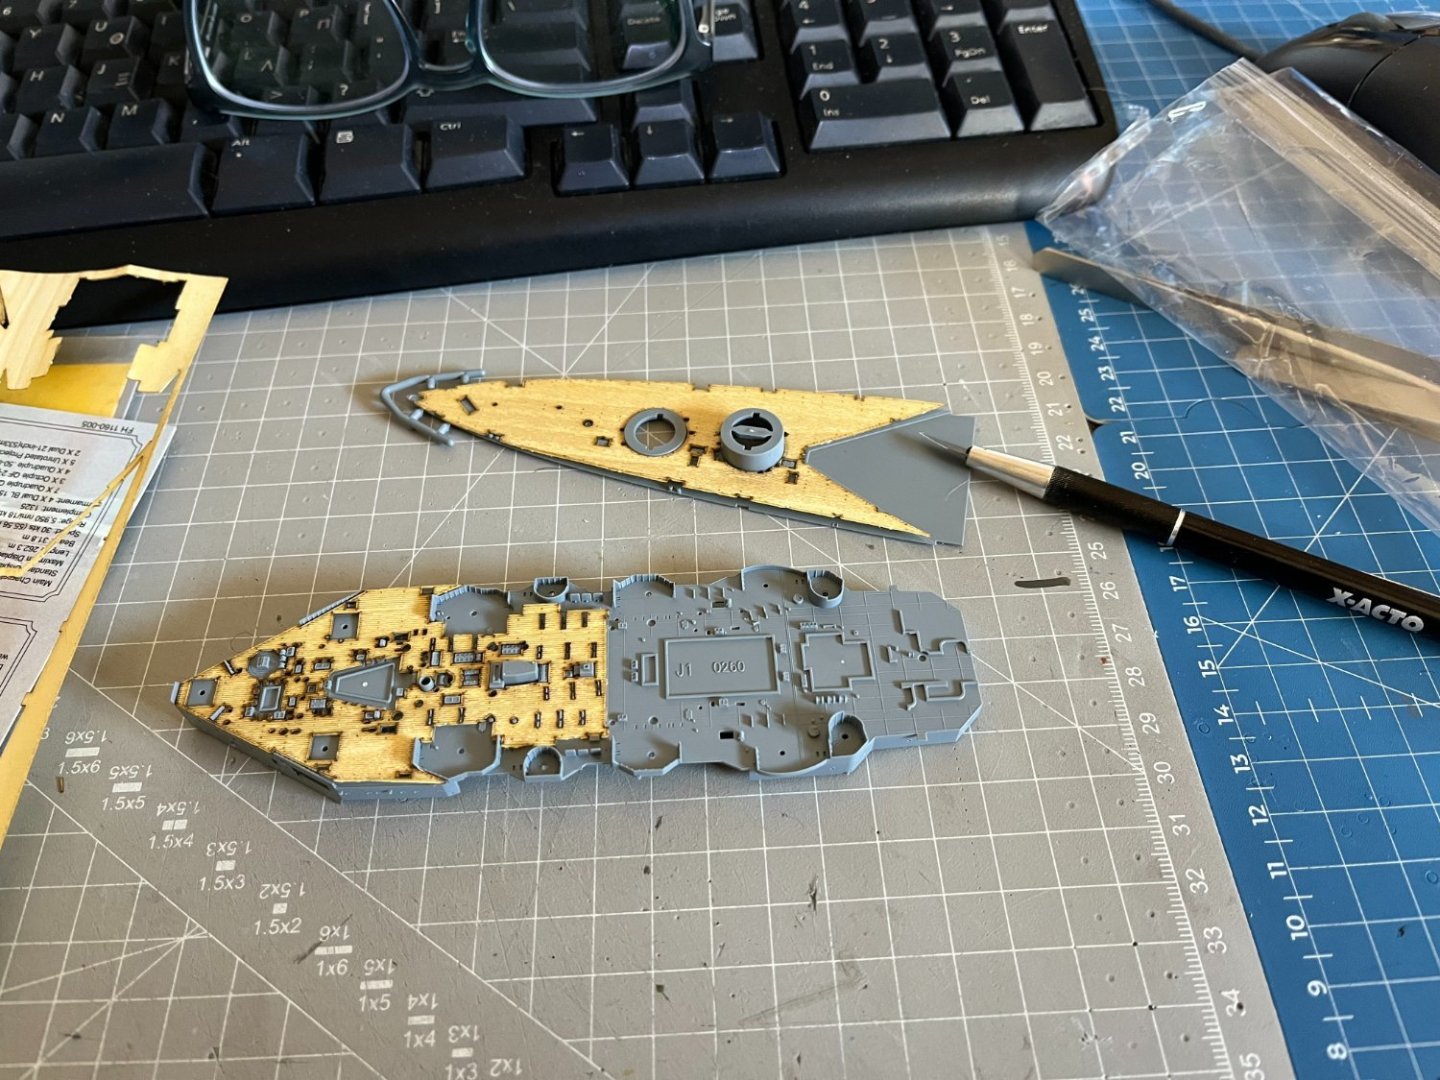
 HMS Hood 1941 - FlyHawk - 1:700 After two paper models and since the weather was more suitable for painting, I started the HMS Hood. I also added a wooden Deck and masking Sheet kit at a very good price for more realism. The kit has a lot of small parts and seems to be very well detailed. First I tried the application of the wooden deck and it seems to be excellent.
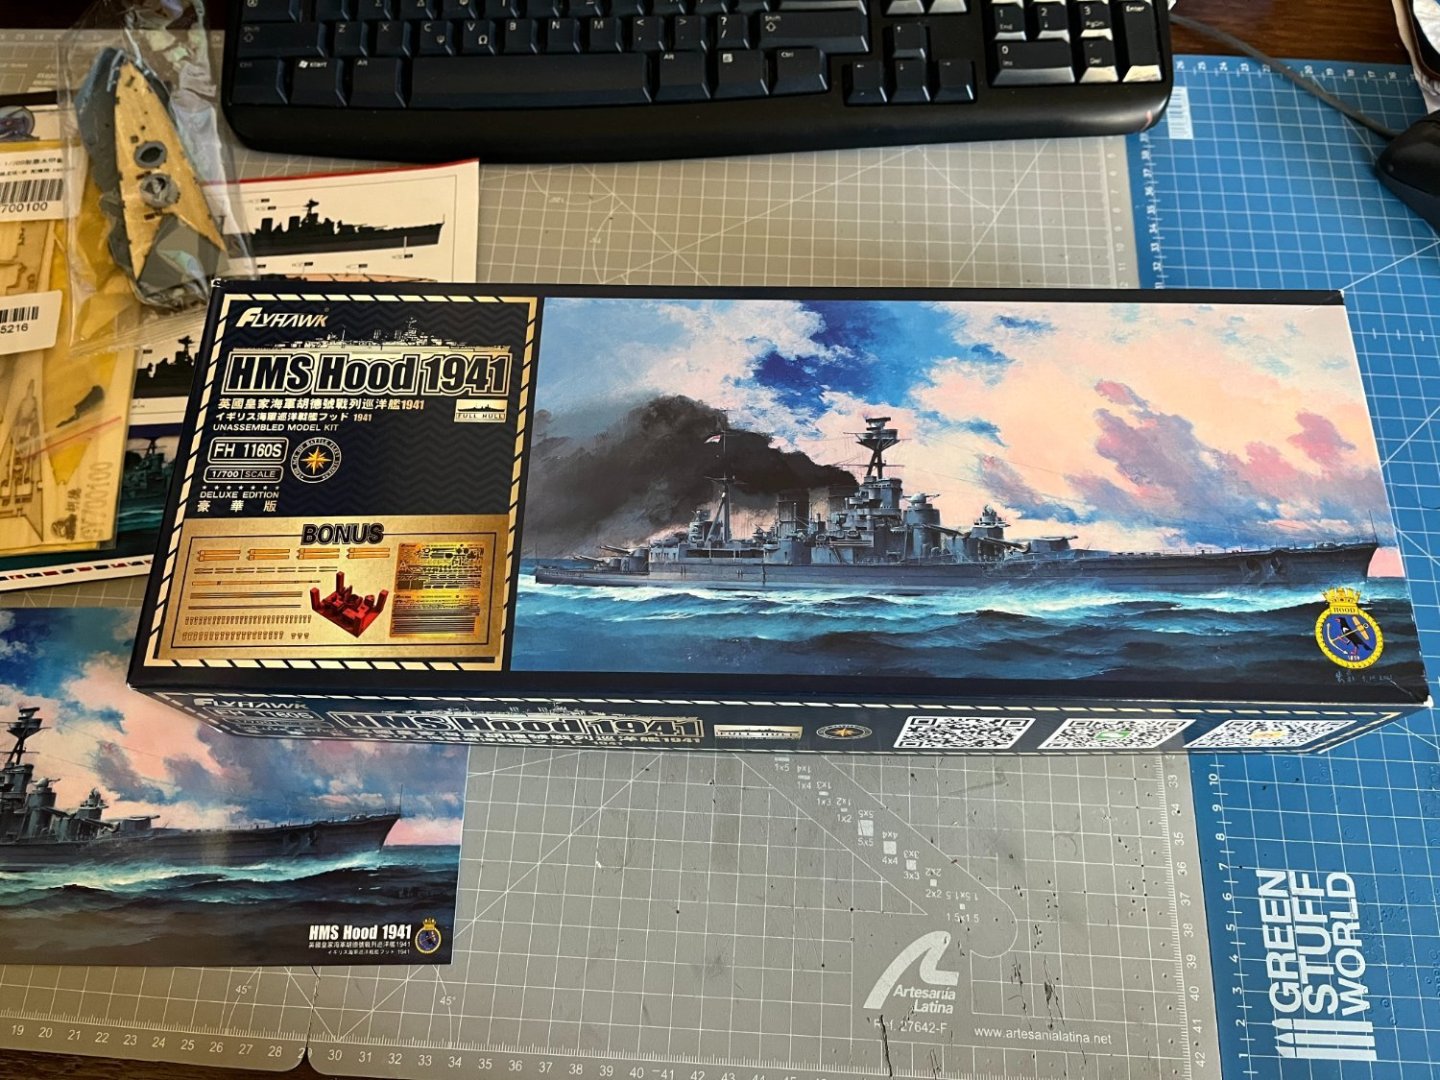

-
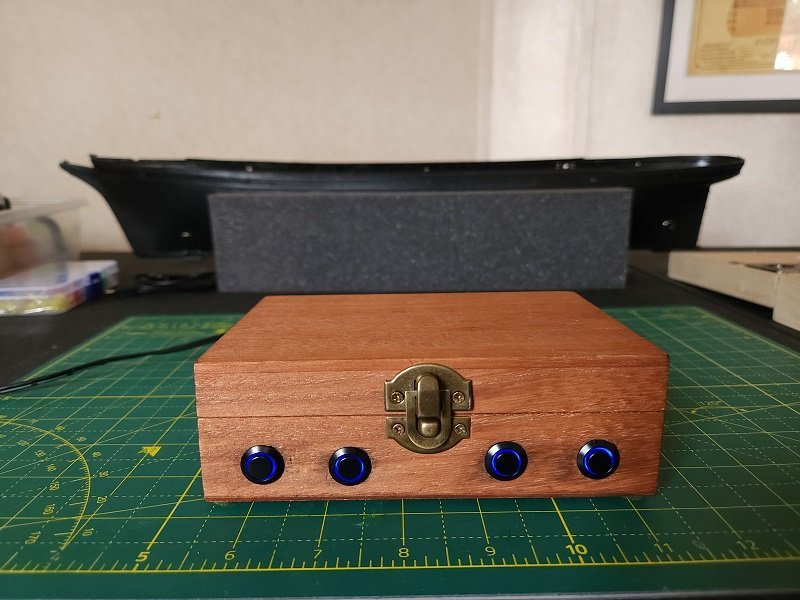
 Well, I have been lurking here and meddling in others' build logs for quite some time. Most of you know I abandoned my previous Cutty Sark build and I'm very anxious to start anew. I have the kits (one as a working kit, the other is spare) and almost all of the necessary extras. However, I'm still awaiting one more delivery consisting of a wood deck, windows, rope and a few other accessories. They're coming from Radimir at HiSModel in the Czech Republic and, though he's a bit late, I am confident they will arrive soon. Until they do, I have finished the control box for the lighting. The lighting will consist of navigation (running) lights and interior illumination of the three deck houses. Power is a 12-volt 2-amp wall wart that plugs into a socket in the back. Output voltage is currently set at 6 volts for each regulator. I haven't installed the box-to-ship connectors yet, I need to determine the pinouts and that's a tedious process. The wood is very soft so I have some tearout from the drill but not enough to make me do it over. I may make another one in hardwood at some future time. I debated with the boss over labels for the switches and she won out (she always does). They're not really necessary and detract from the aesthetic.
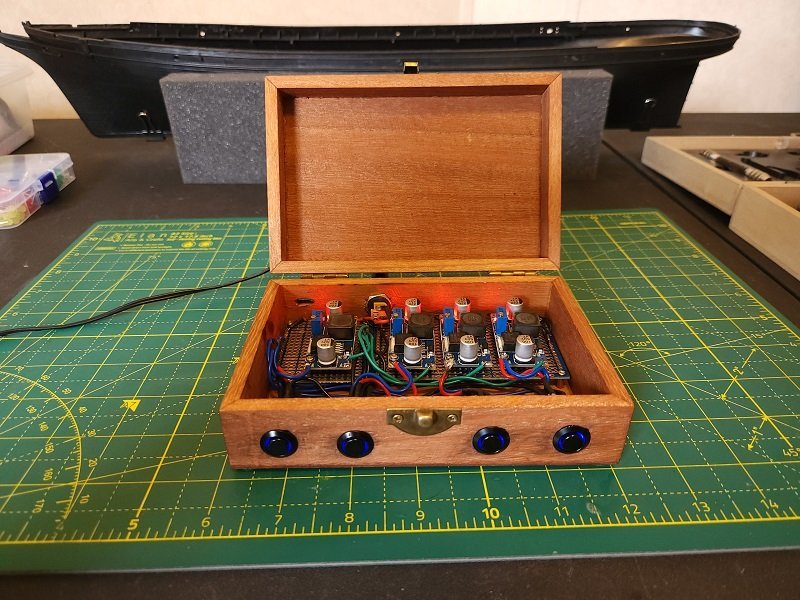
- 89 replies
-
- 5
-
-
- Cutty Sark
- Revell
- (and 2 more)
-
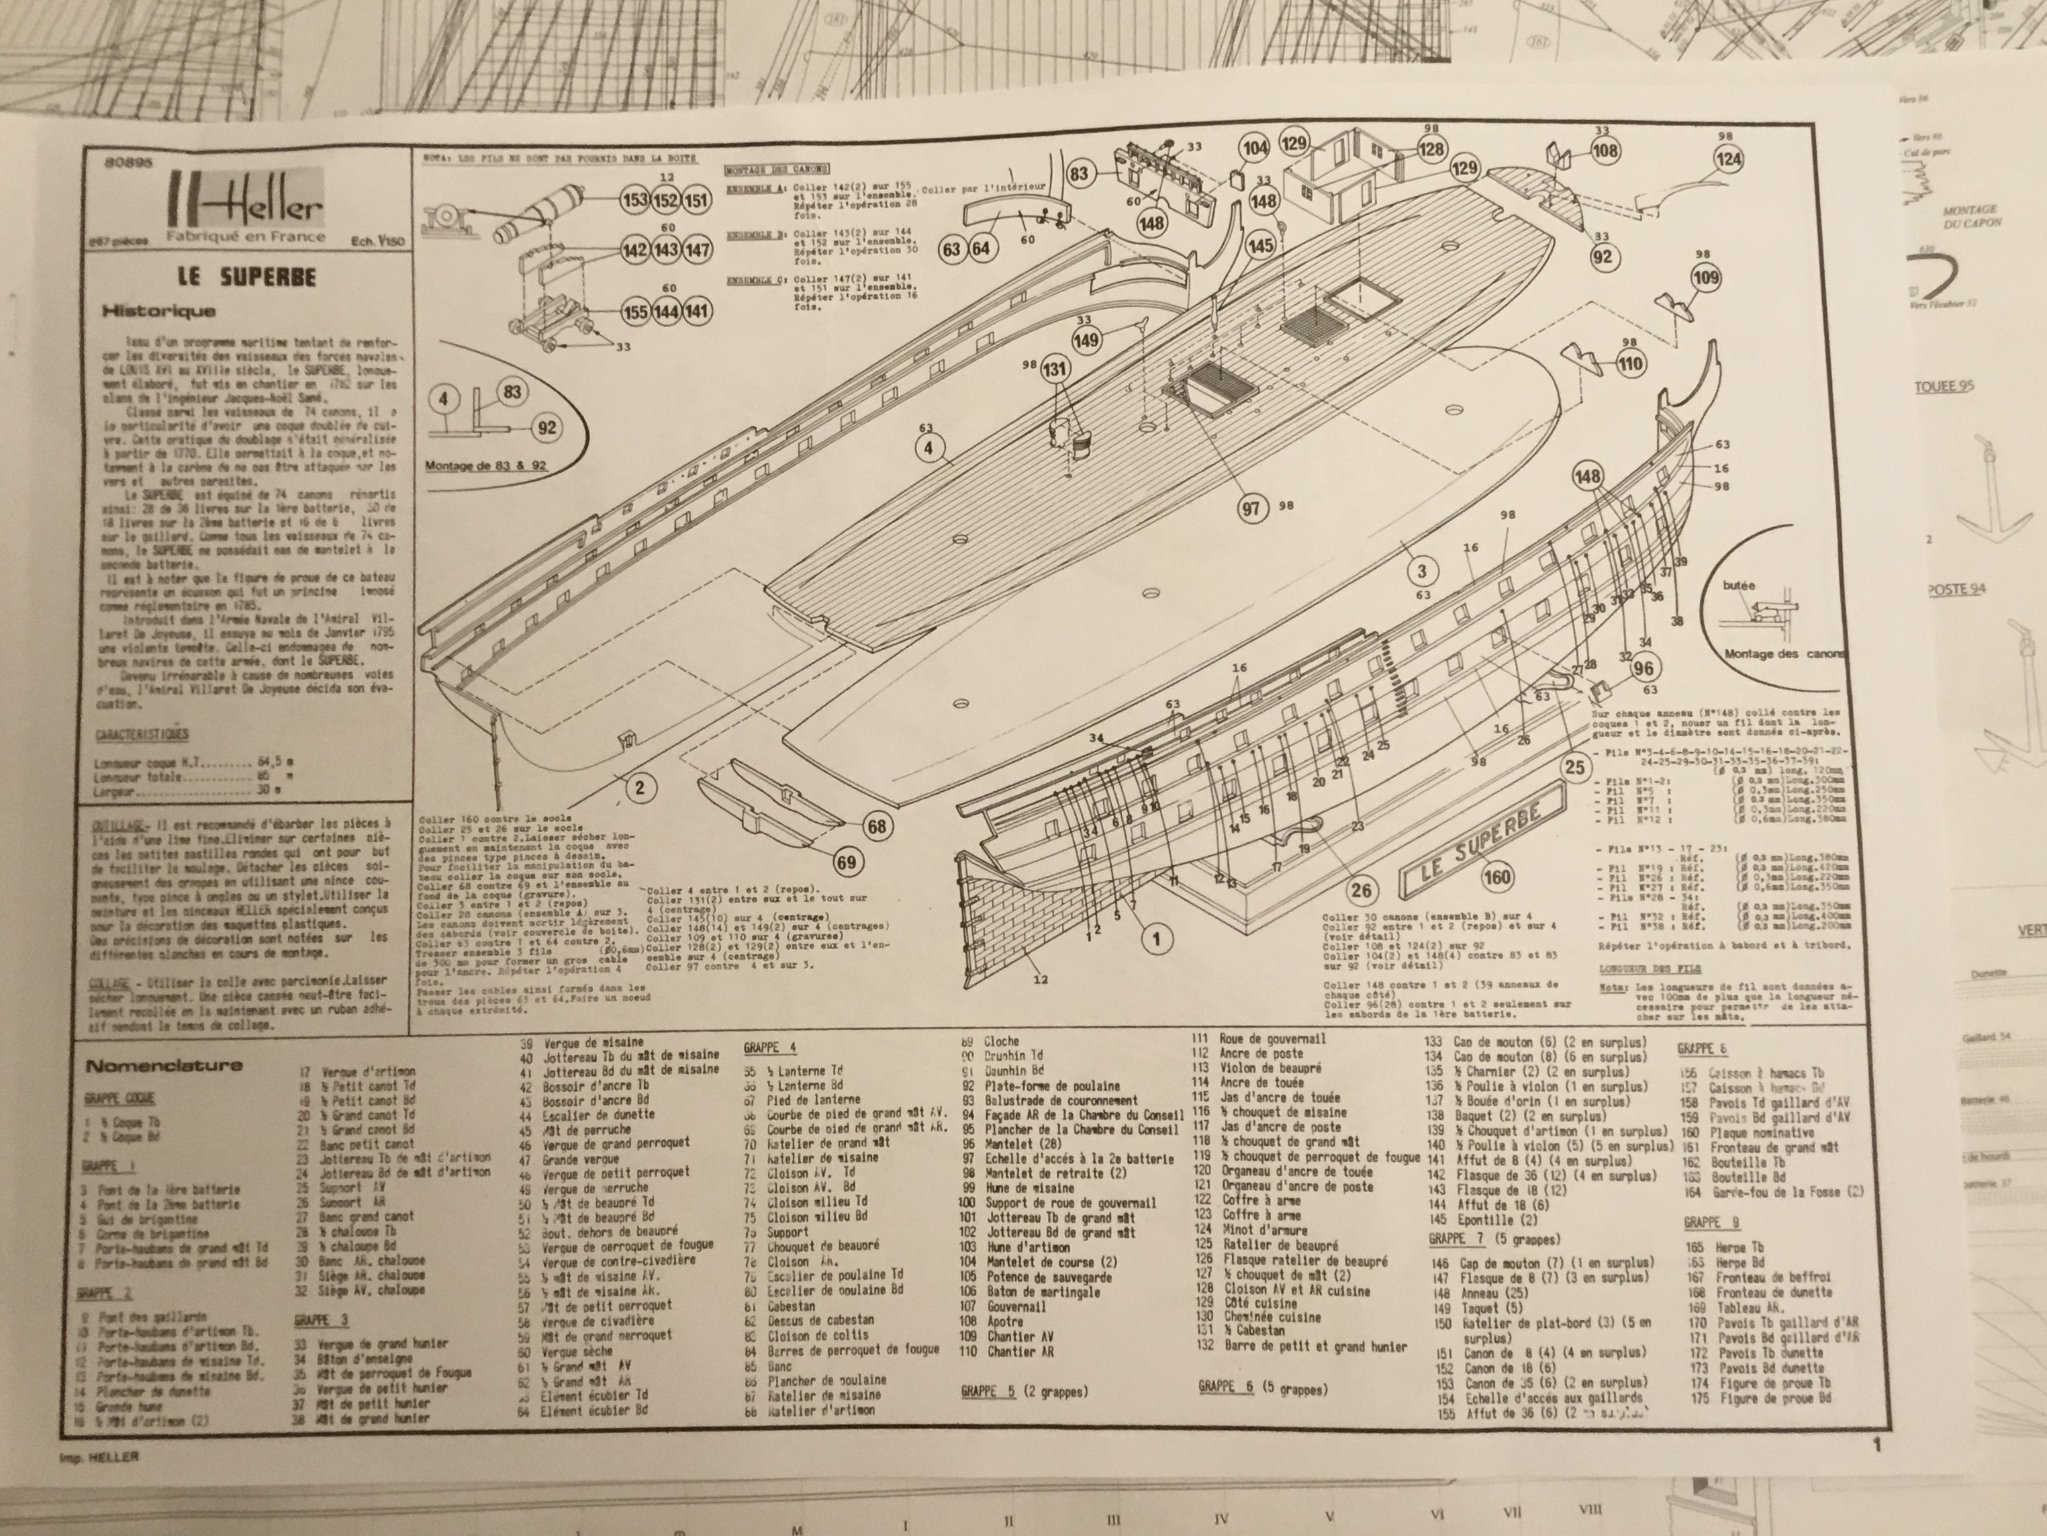
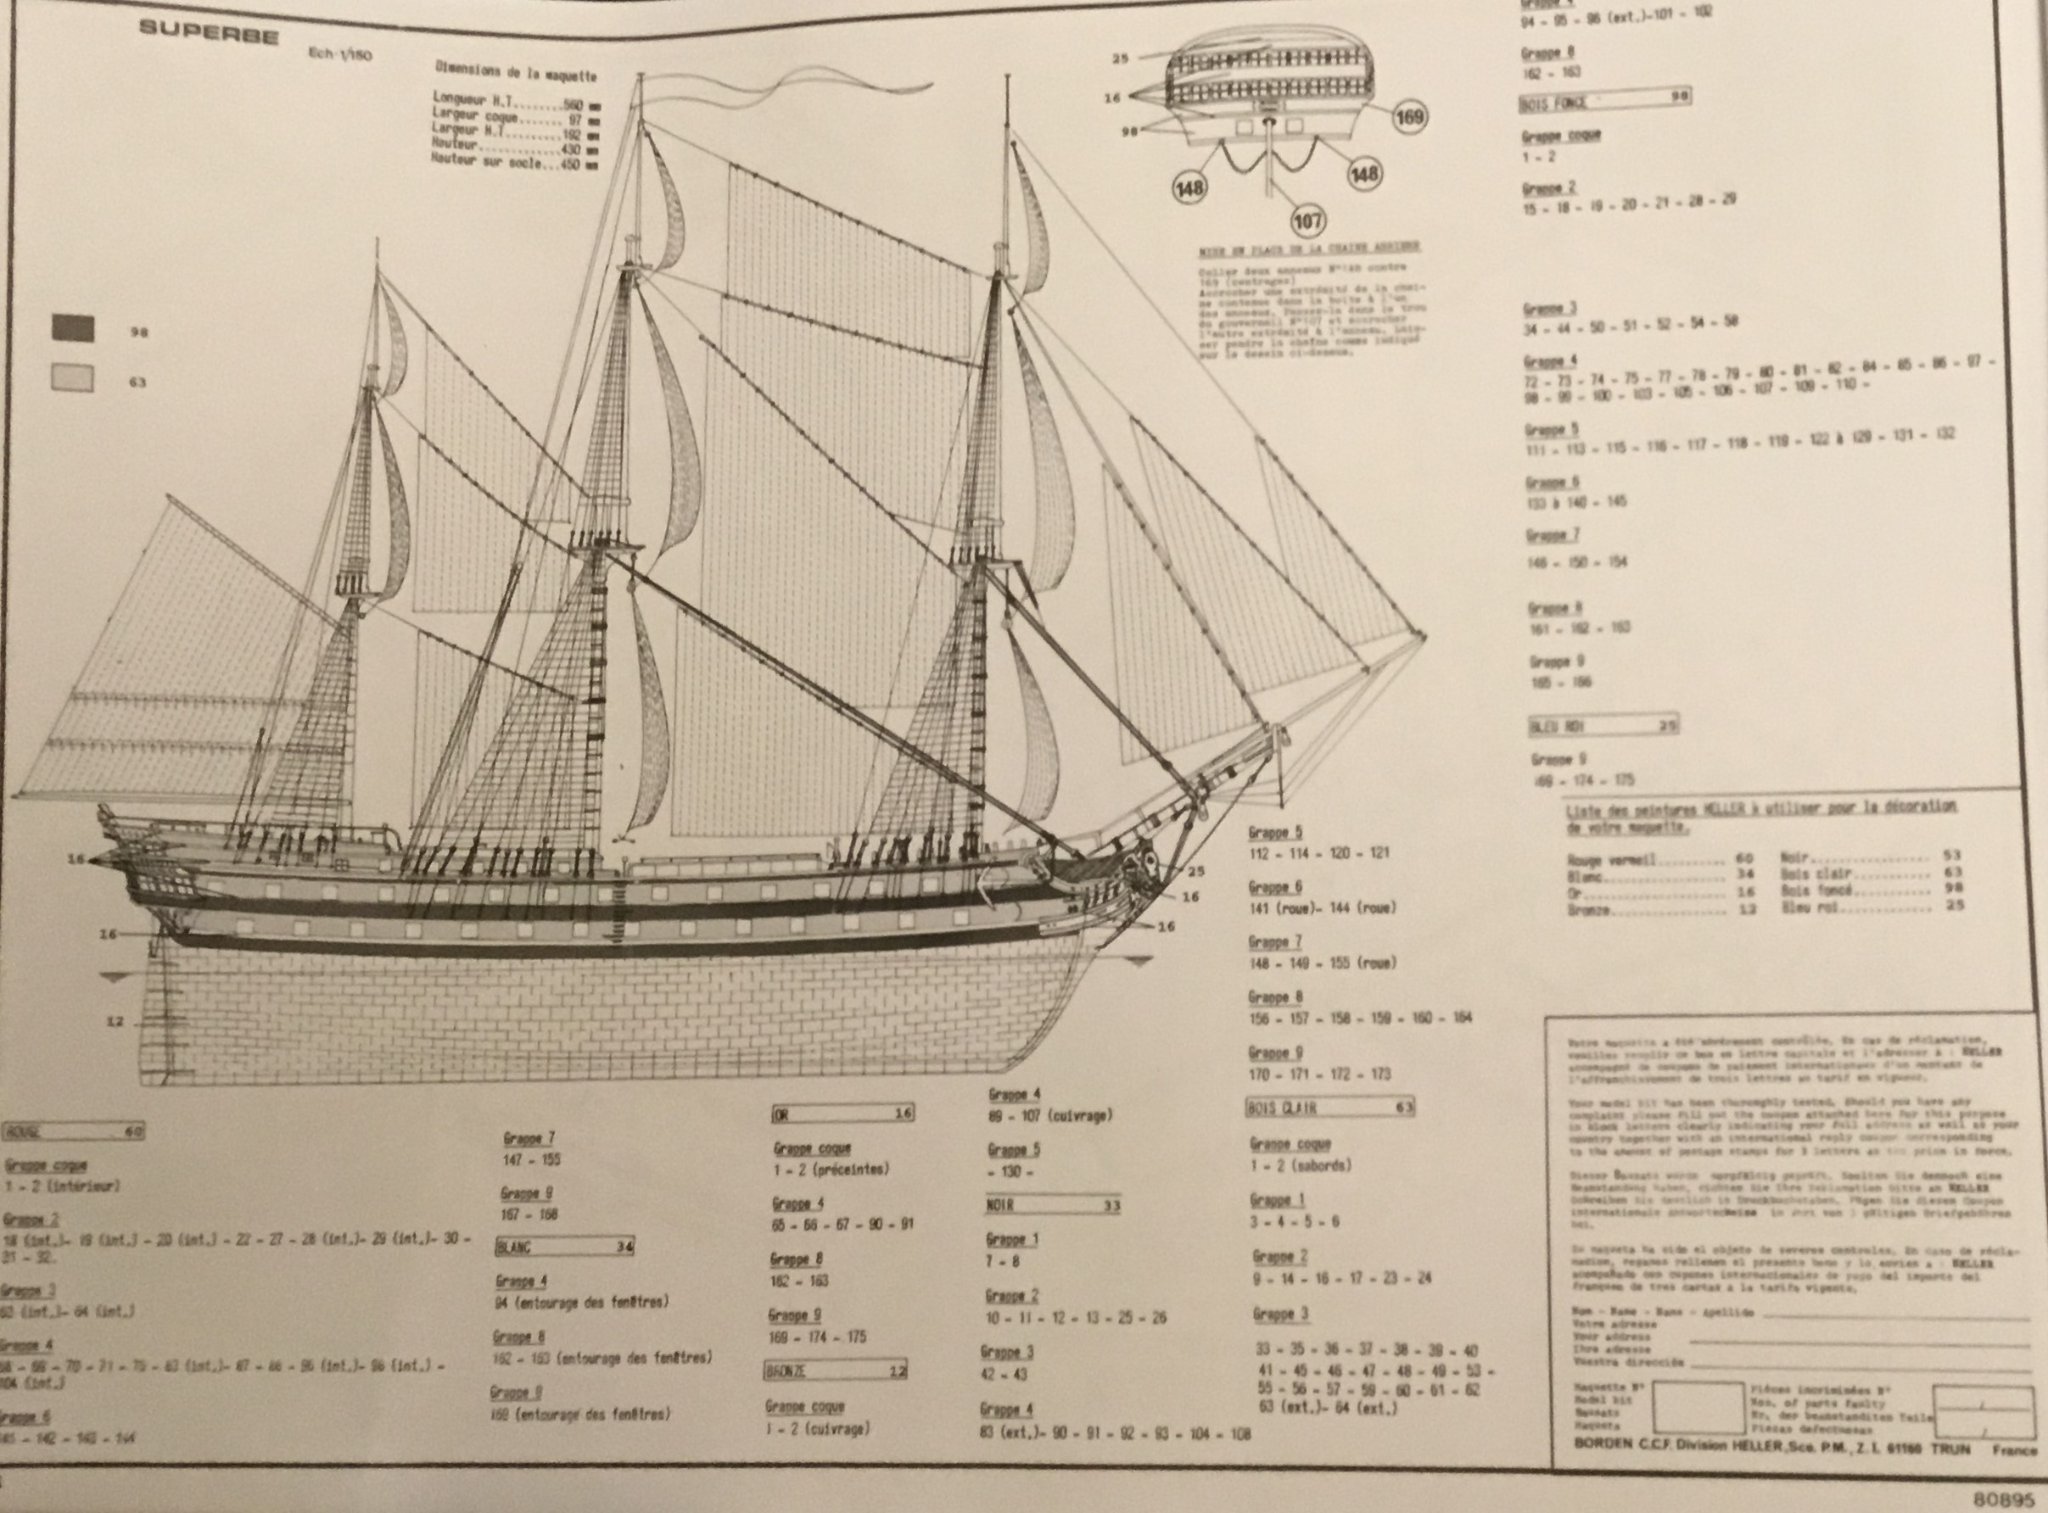
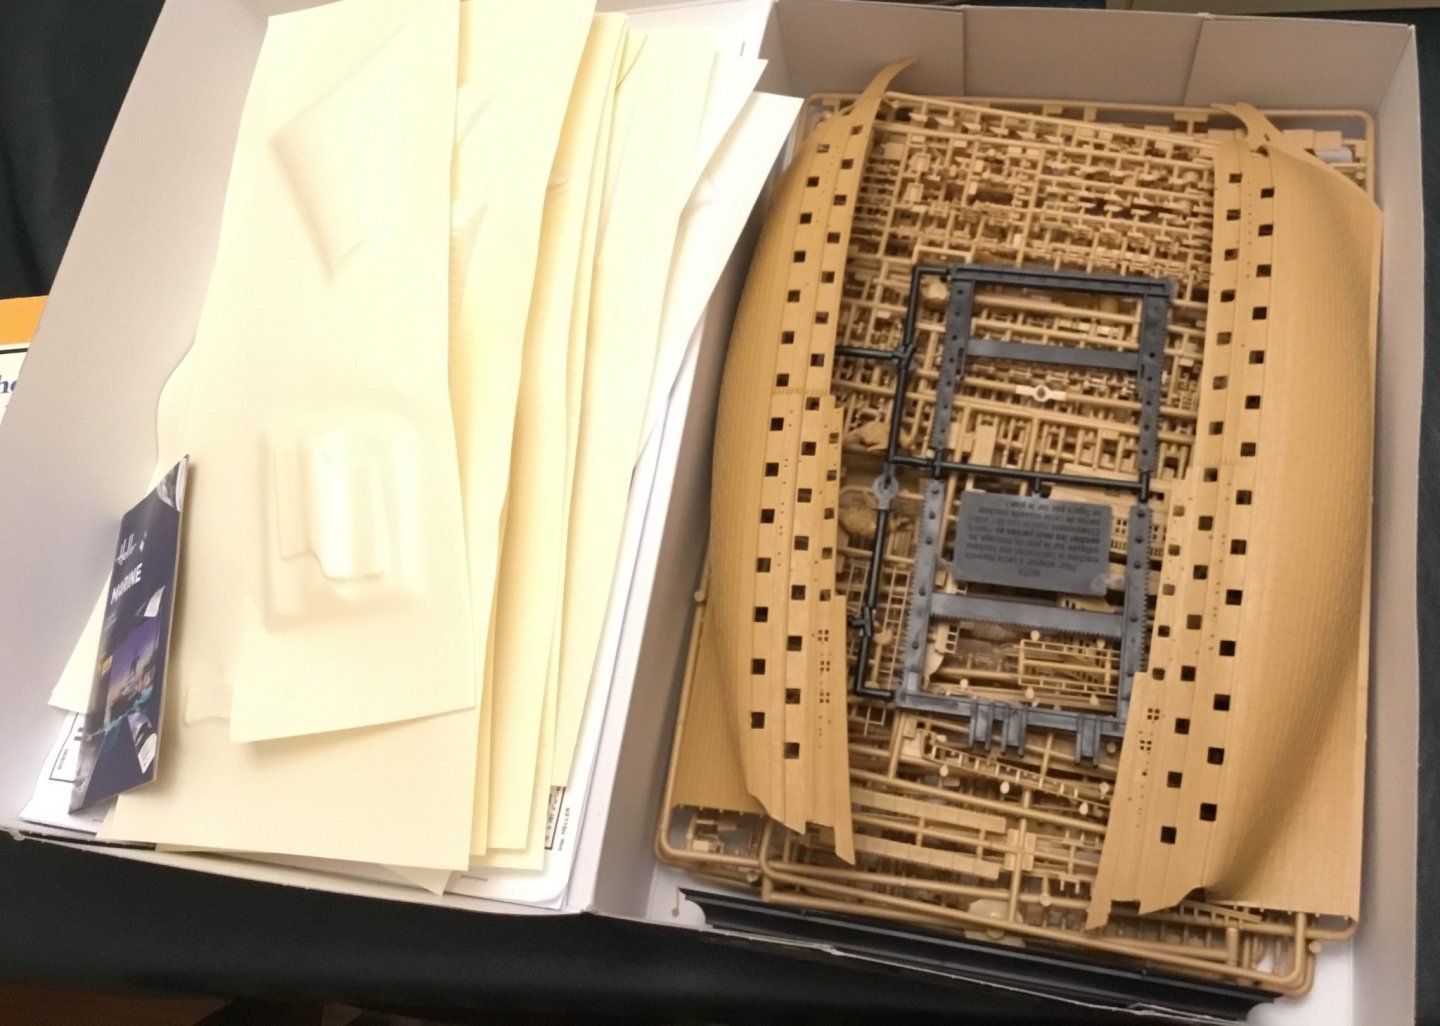
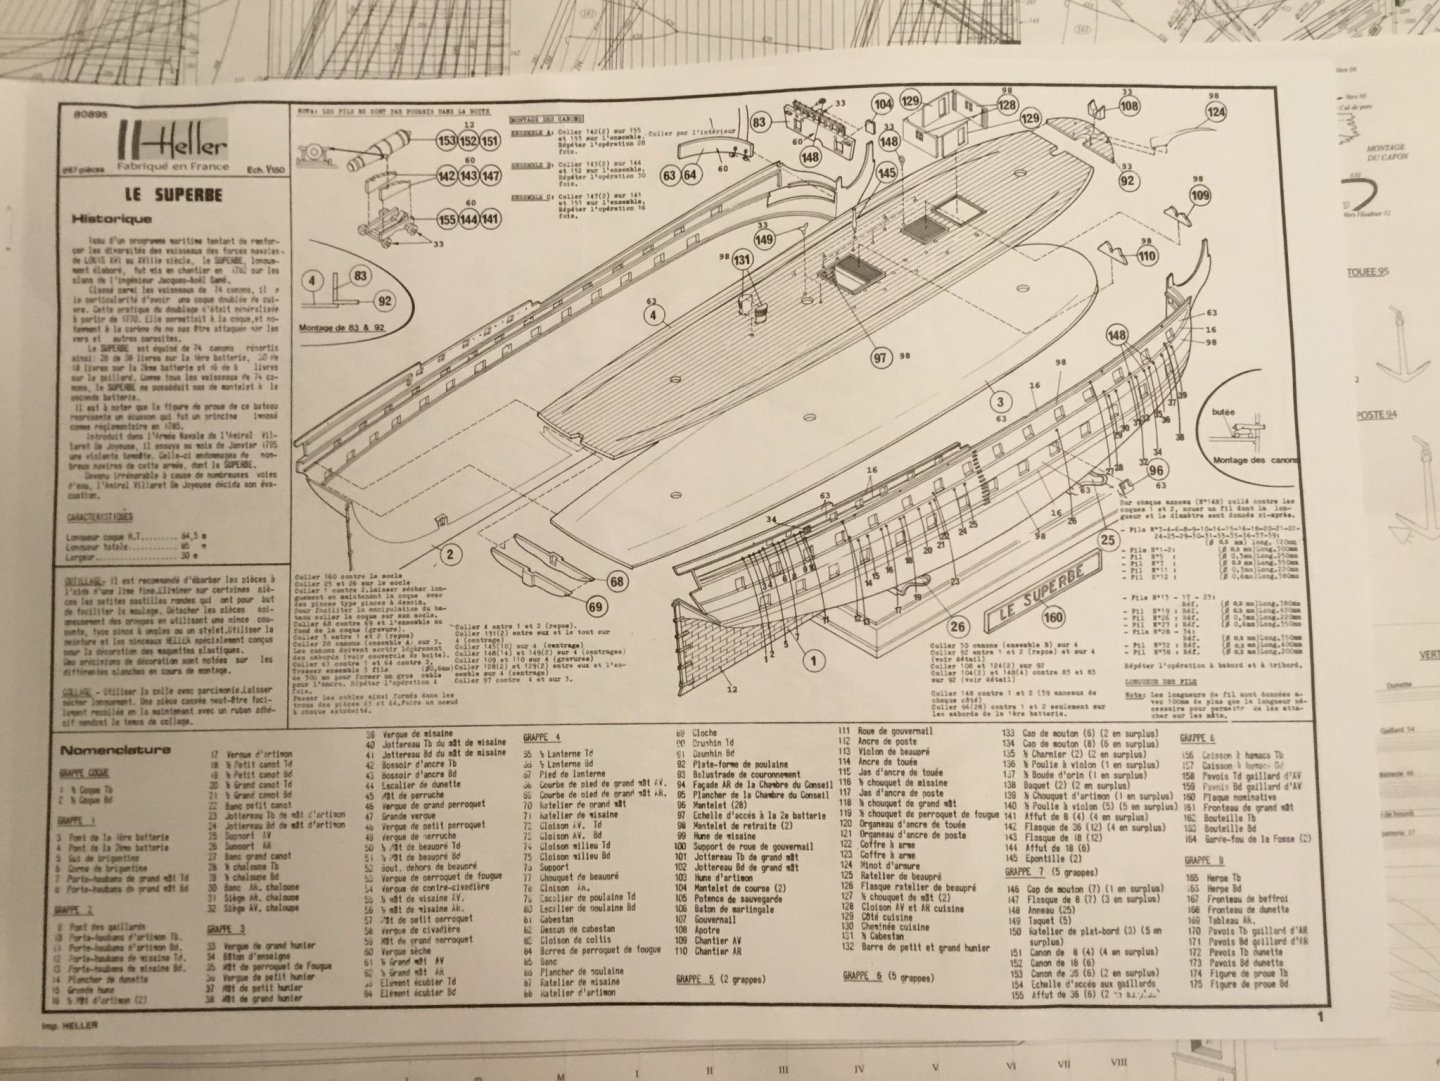
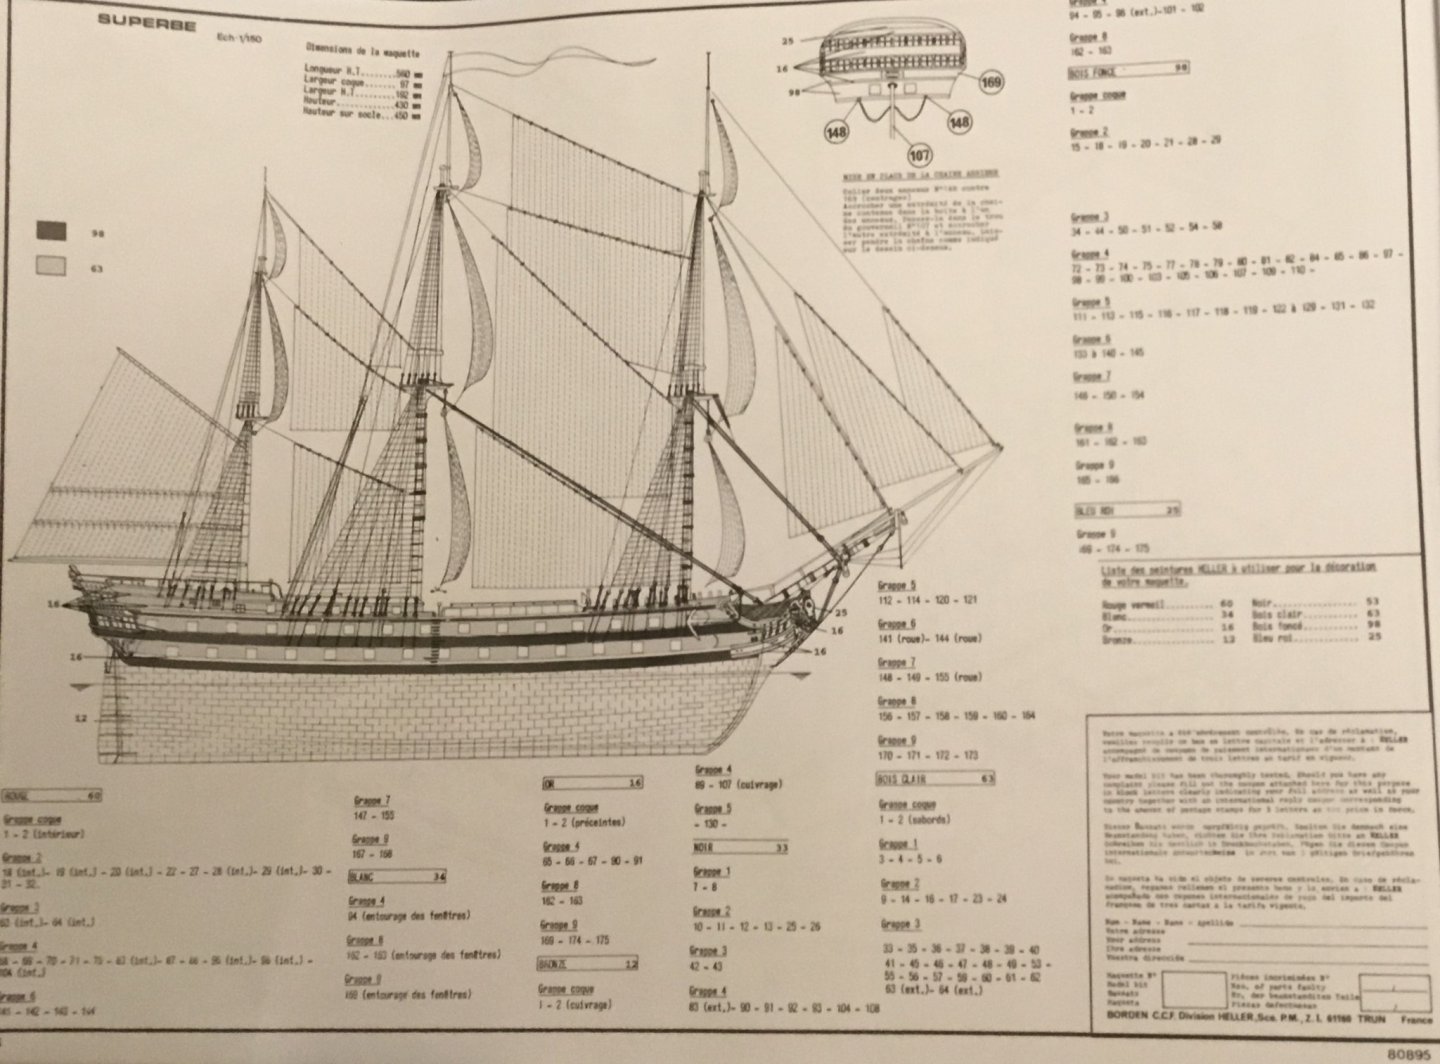
 After an 18 year paternity leave I am returning to model ships with Heller's 1/150 scale Le Superbe. I am a British-born Canuck who spent many days in the 1980s at the https://www.historicdockyard.co.uk/ waiting for the ferry to my grandparents on the Isle of Wight, and am a fan of all things RN/RCN. I will be completing the kit as HMS Spartiate as I imagine she may have looked at Trafalgar. For colours I plan to use this excellent model of HMS Vanguard, as I like the blue side railings, red on the stern, and the yellow ochre sides (rather than the orange used until recently on HMS Victory). The instructions are in French, but they have an English list at the back. Still, as a good Canadian I have a smattering of French language buried away from my university days that may prove useful. I've chosen HMS Spartiate as my goal as she was one of the approx. twenty French Téméraire-class captured by the British, but one of only two that served with Nelson at Trafalgar. She then went on to serve as British flagship to the South Atlantic squadron well into the 1830s. A good, long history of service, unlike the actual Le Superbe.
-
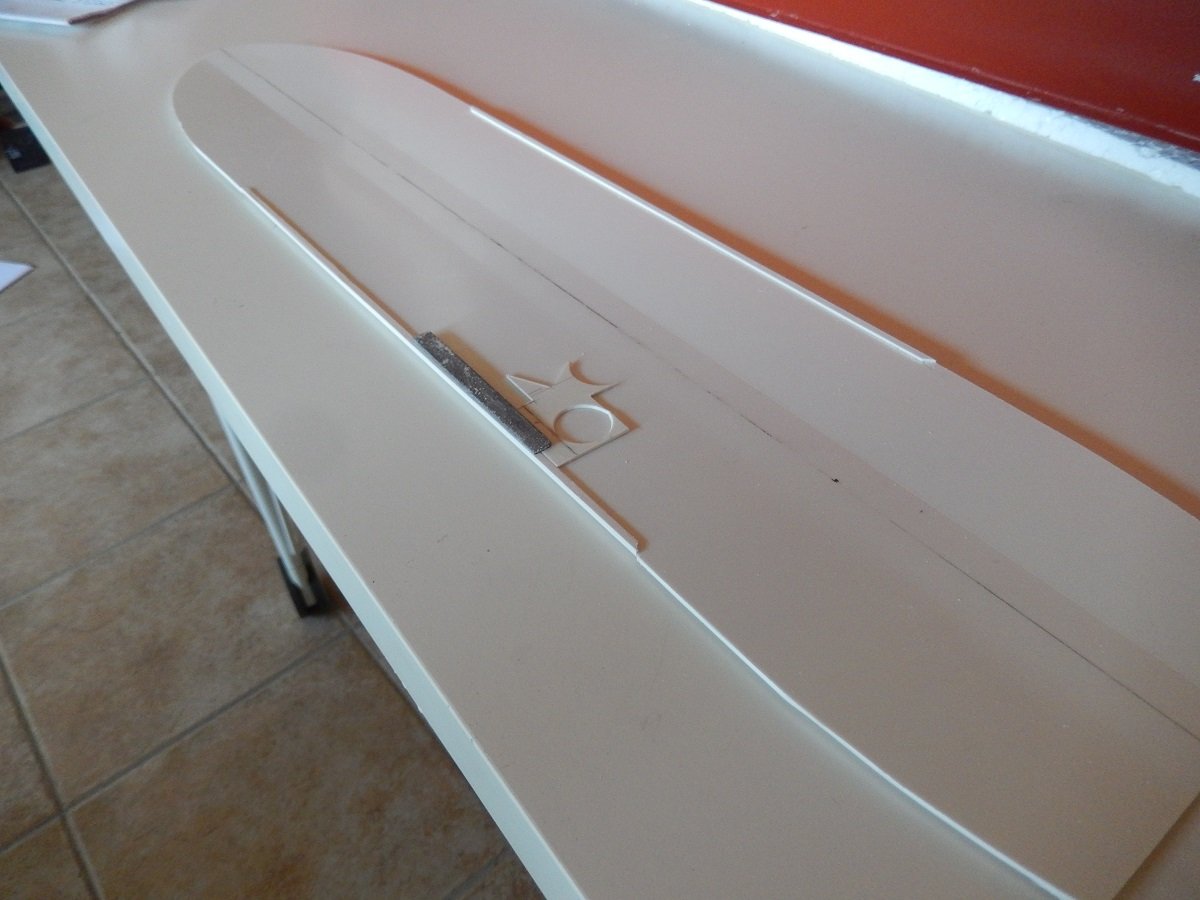
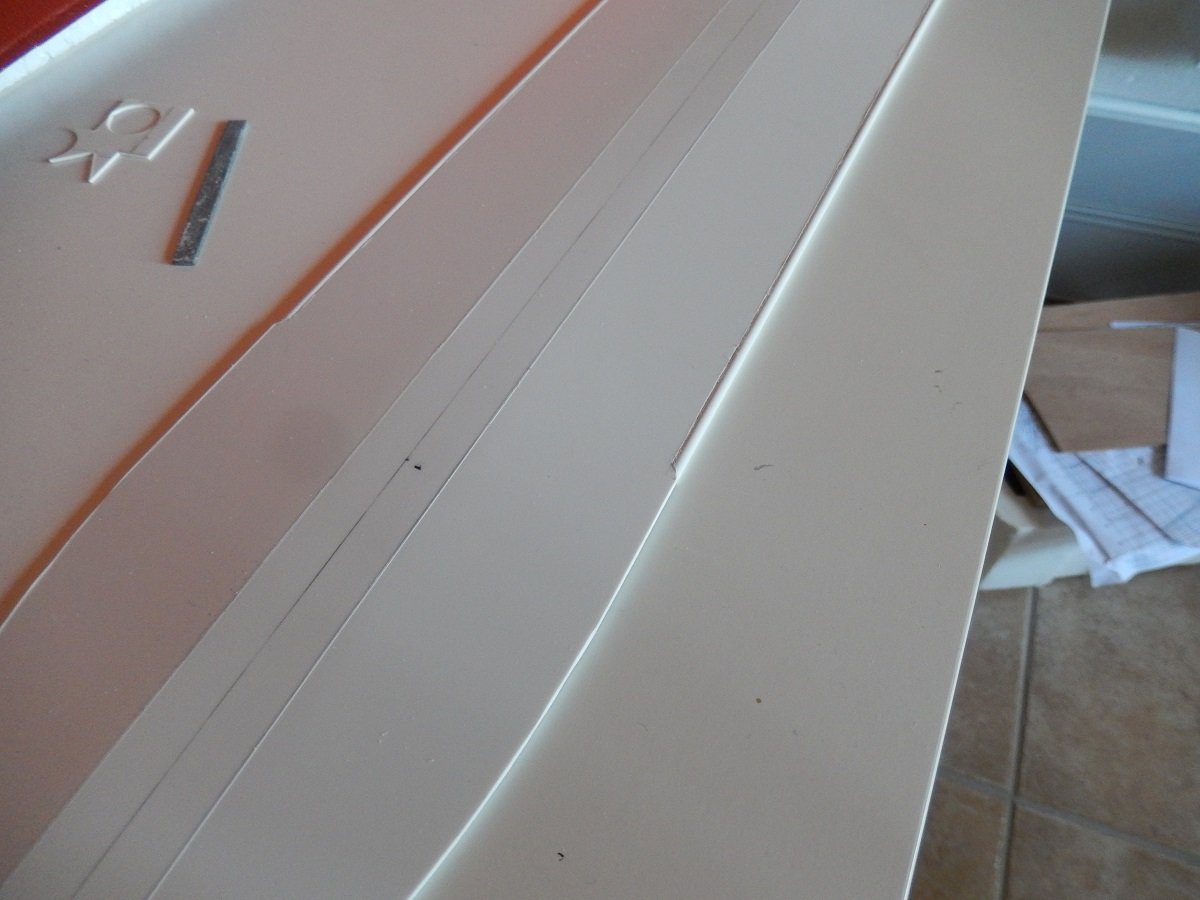
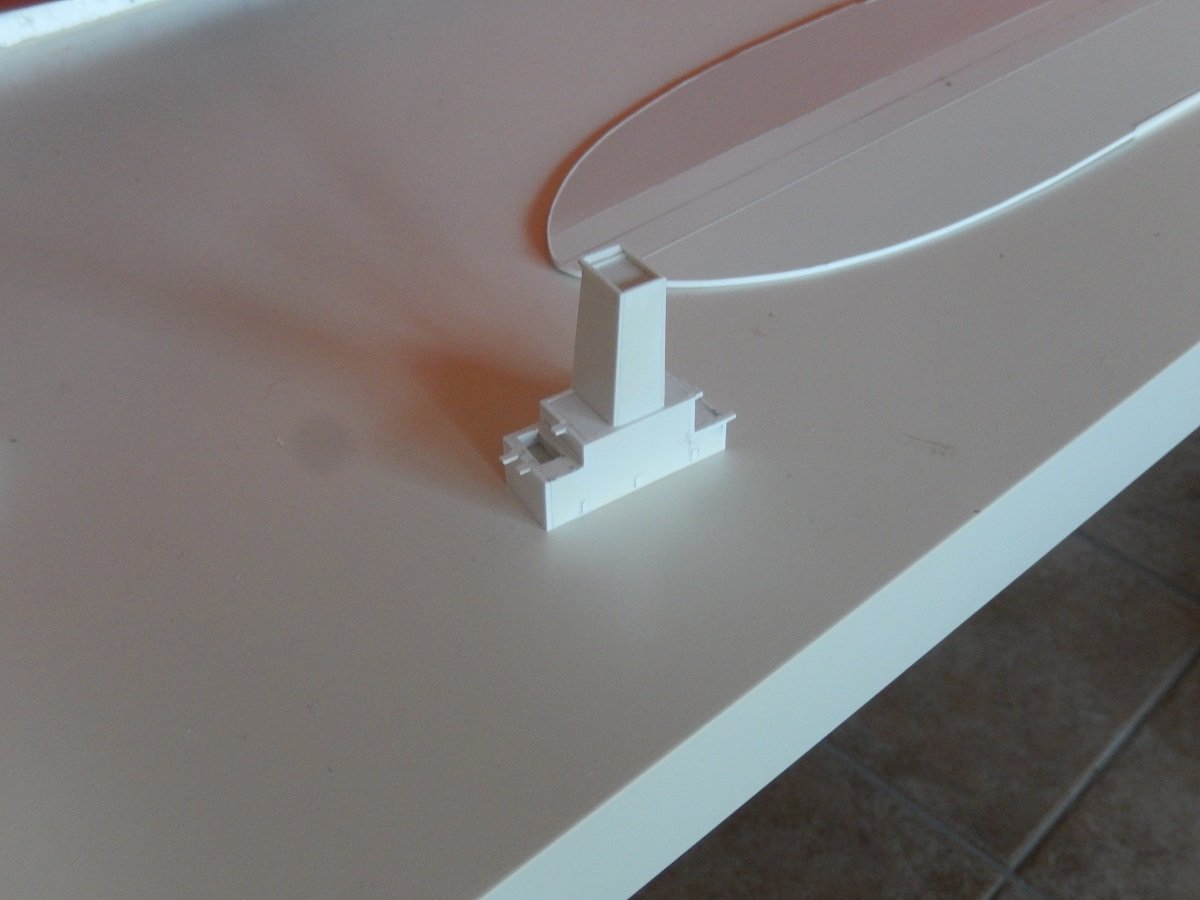
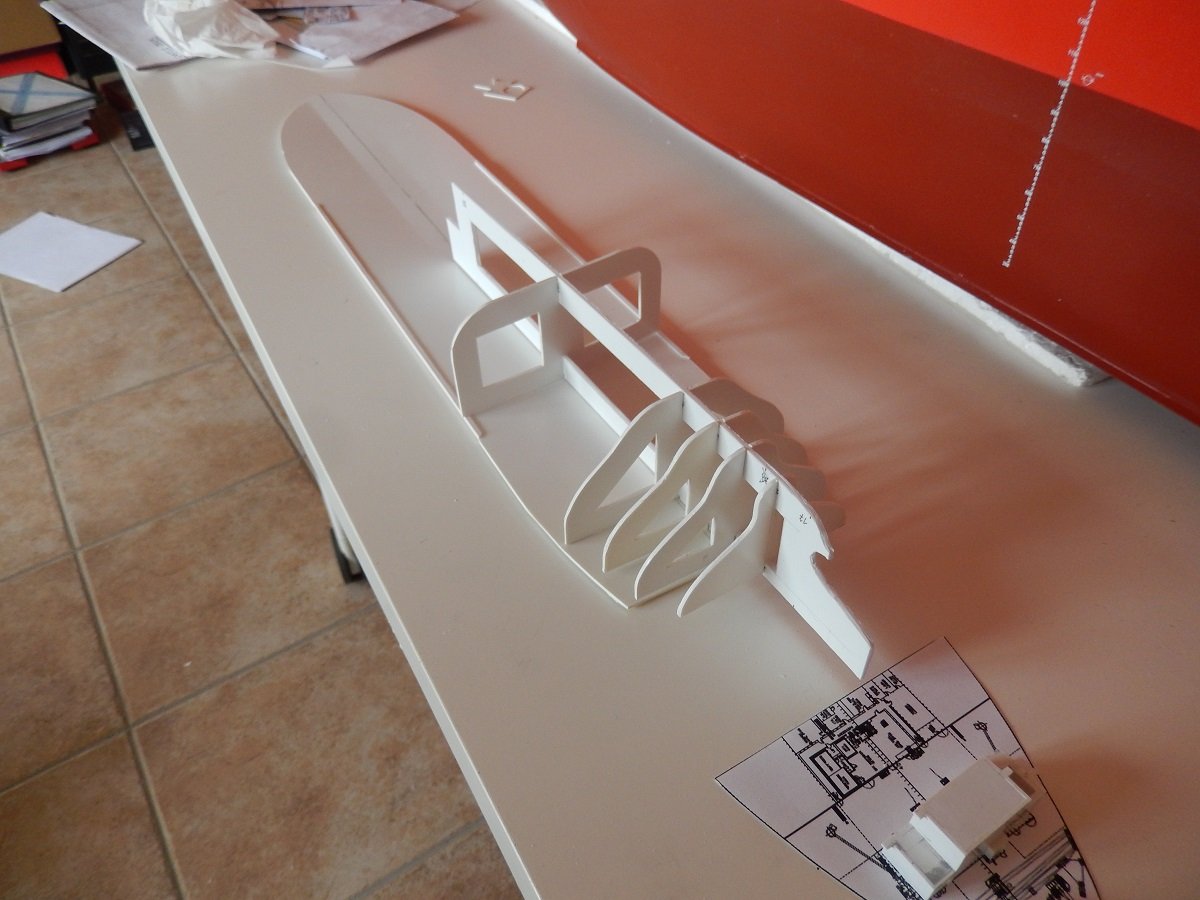
 Well since I'm longer onboard, without the possibility to show new progress. I'd thought I'd fuel @KeithAug newfound love for complex piping a bit further. I consider this build, for an unknown reason, still as one of my best builds. It's an eye catcher in my display closet, probably by its color and size. As the title says, I'm talking about the TI Europe (TI standing for Tankers International, an oil tanker company pool). The TI Europe is an Ultra Large Crude Carrier, one of 4 sister ships built by the Korean Daewoo yard. They were built for the Greek company called Hellespont, but were sold after a few years to the larger company called Euronav and renamed as TI Africa, TI Asia, TI Europe and TI Oceania. TI America was deliberately left out for fears of terrorist attacks since this all happened in the beginning 2000's. When built they were the largest double hulled ULCC's in the world and still are some of the heaviest ships around. Their size, 380m (1247ft) long on 68m (223ft) wide, was huge for those days (nowadays however this is not such an exception with many container ships measuring around 400m long x 56m wide), however their full load draft of around 24.5-25.5m (80-85ft) made them huge. With that full load draft they were unable to pass Singapore Strait, the English Channel etc. in a safe way. Due to that size, they were also restricted in amount of ports that they could enter. These vessels weigh about the same as 5 US Carriers together when fully loaded. When I went onboard, we were doing Ship-to-ship transfers off the coast of Los Angeles to smaller vessels. The voyage then went to Saudi Arabia, where loading happened on buoys connected to the actual terminal by submerged pipelines. Other voyages she often did, took her to Europe, discharging part of her cargo in France before transiting the English Channel to go to Rotterdam with the remainder of the cargo. The model. I built her, using the experience I built up with frame on keel methods from plastic. Size and rigidity was the real challenge here. Since that's also an issue in the real design of such vessels, some solutions were given by the original. The main deck of the beast, can easily fit a US CVN on top of that deck. I've made the main deck of 1.5mm styrene, this was still not very rigid over such a length. However, on the real ships, the corners are rounded, this help divide the forces over a larger surface instead of a single angle. A square angle would simply break loose under such forces. To simulate this rounded corner, I cut a piece of styrene rod and glued it flush with the deck. This added to the rigidity of the deck where it was most needed (the central part). Additionally you see the deck is divided in 3 parts, creating a camber like the real ship. On the real thing, that camber is truly large as well. Then I started building up the skeleton structure bellow, using the table surface and deck to keep everything flat. At the same time I started building the (small-ish) superstructures for this vessel. That's it for today. Since I can't get home for a while, I'll continue soon.
-
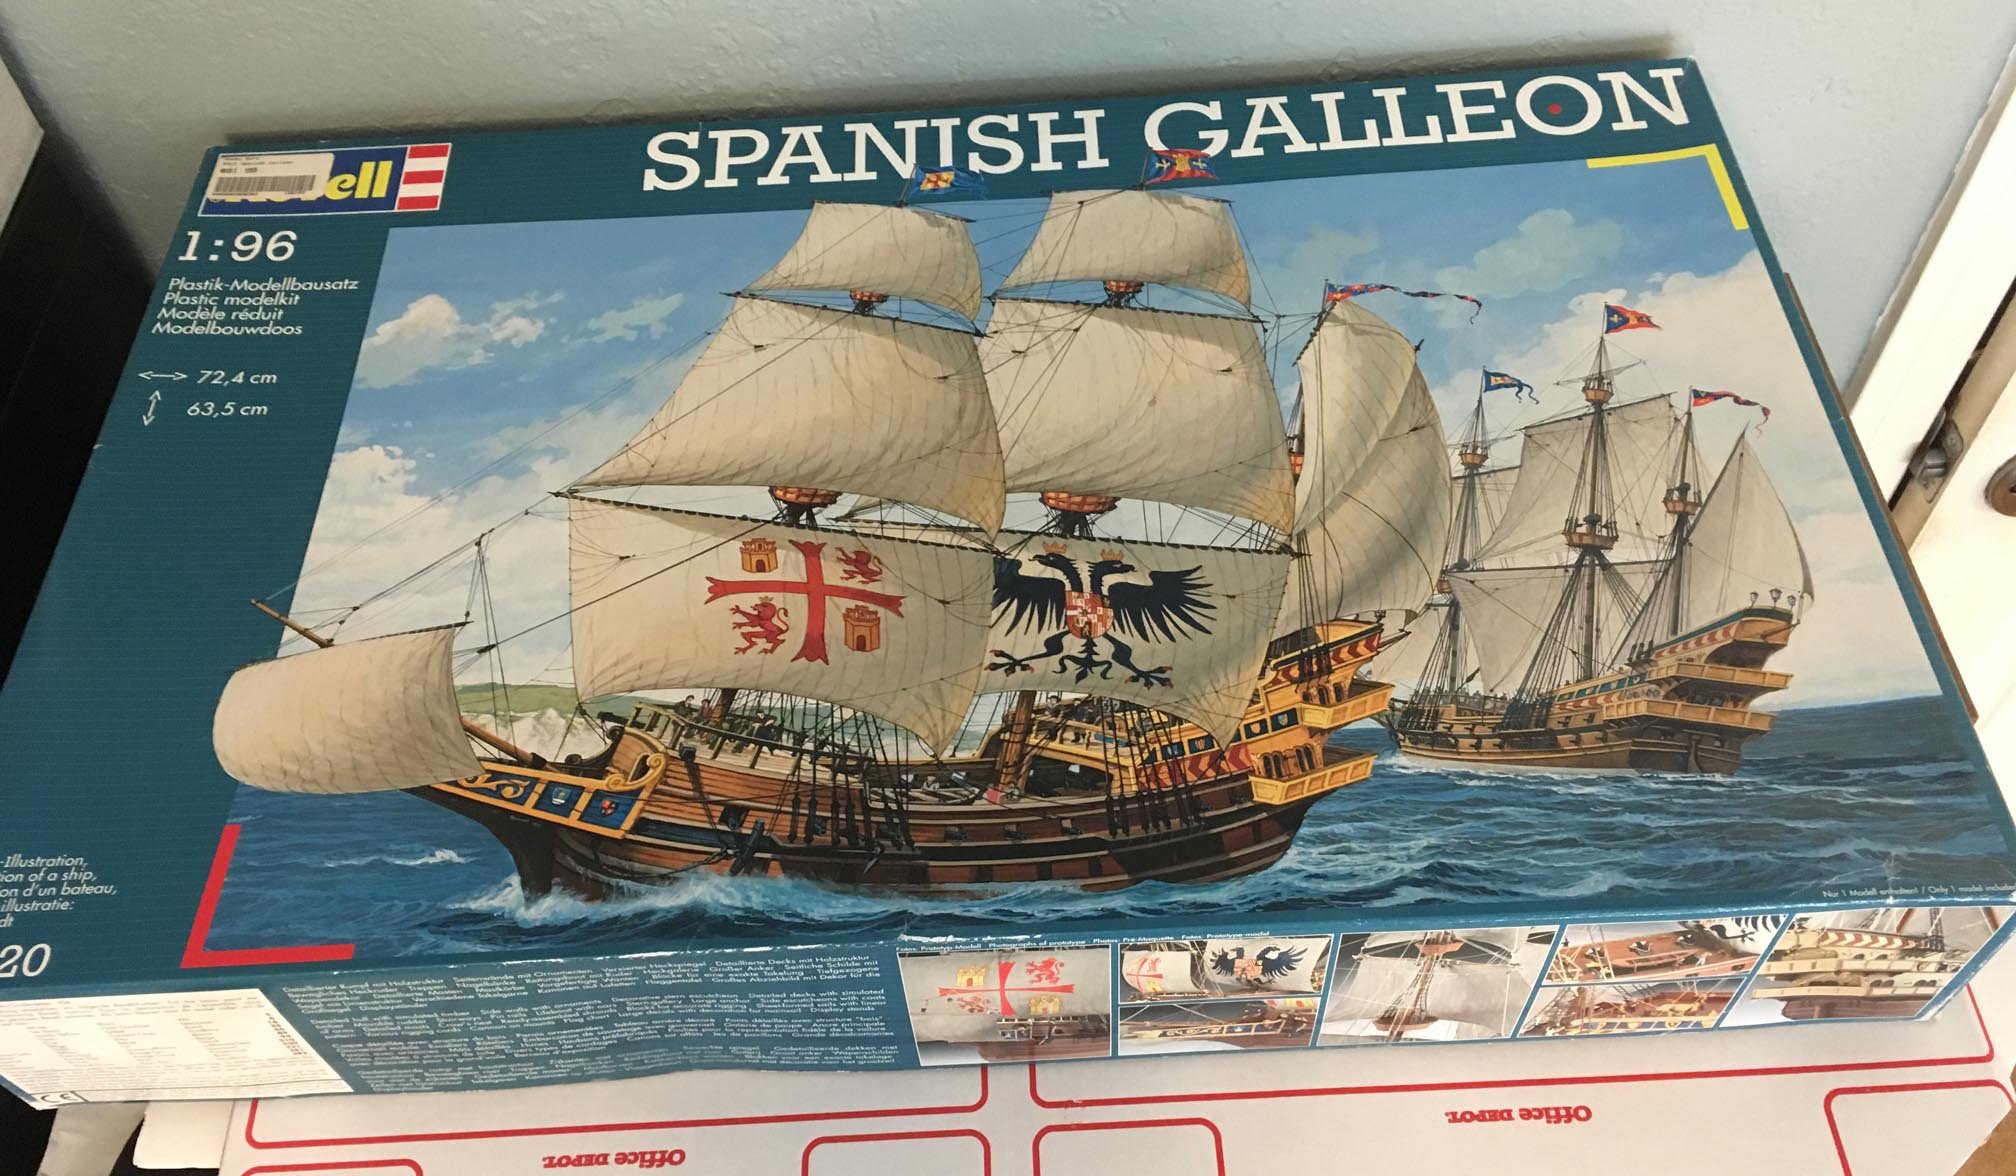
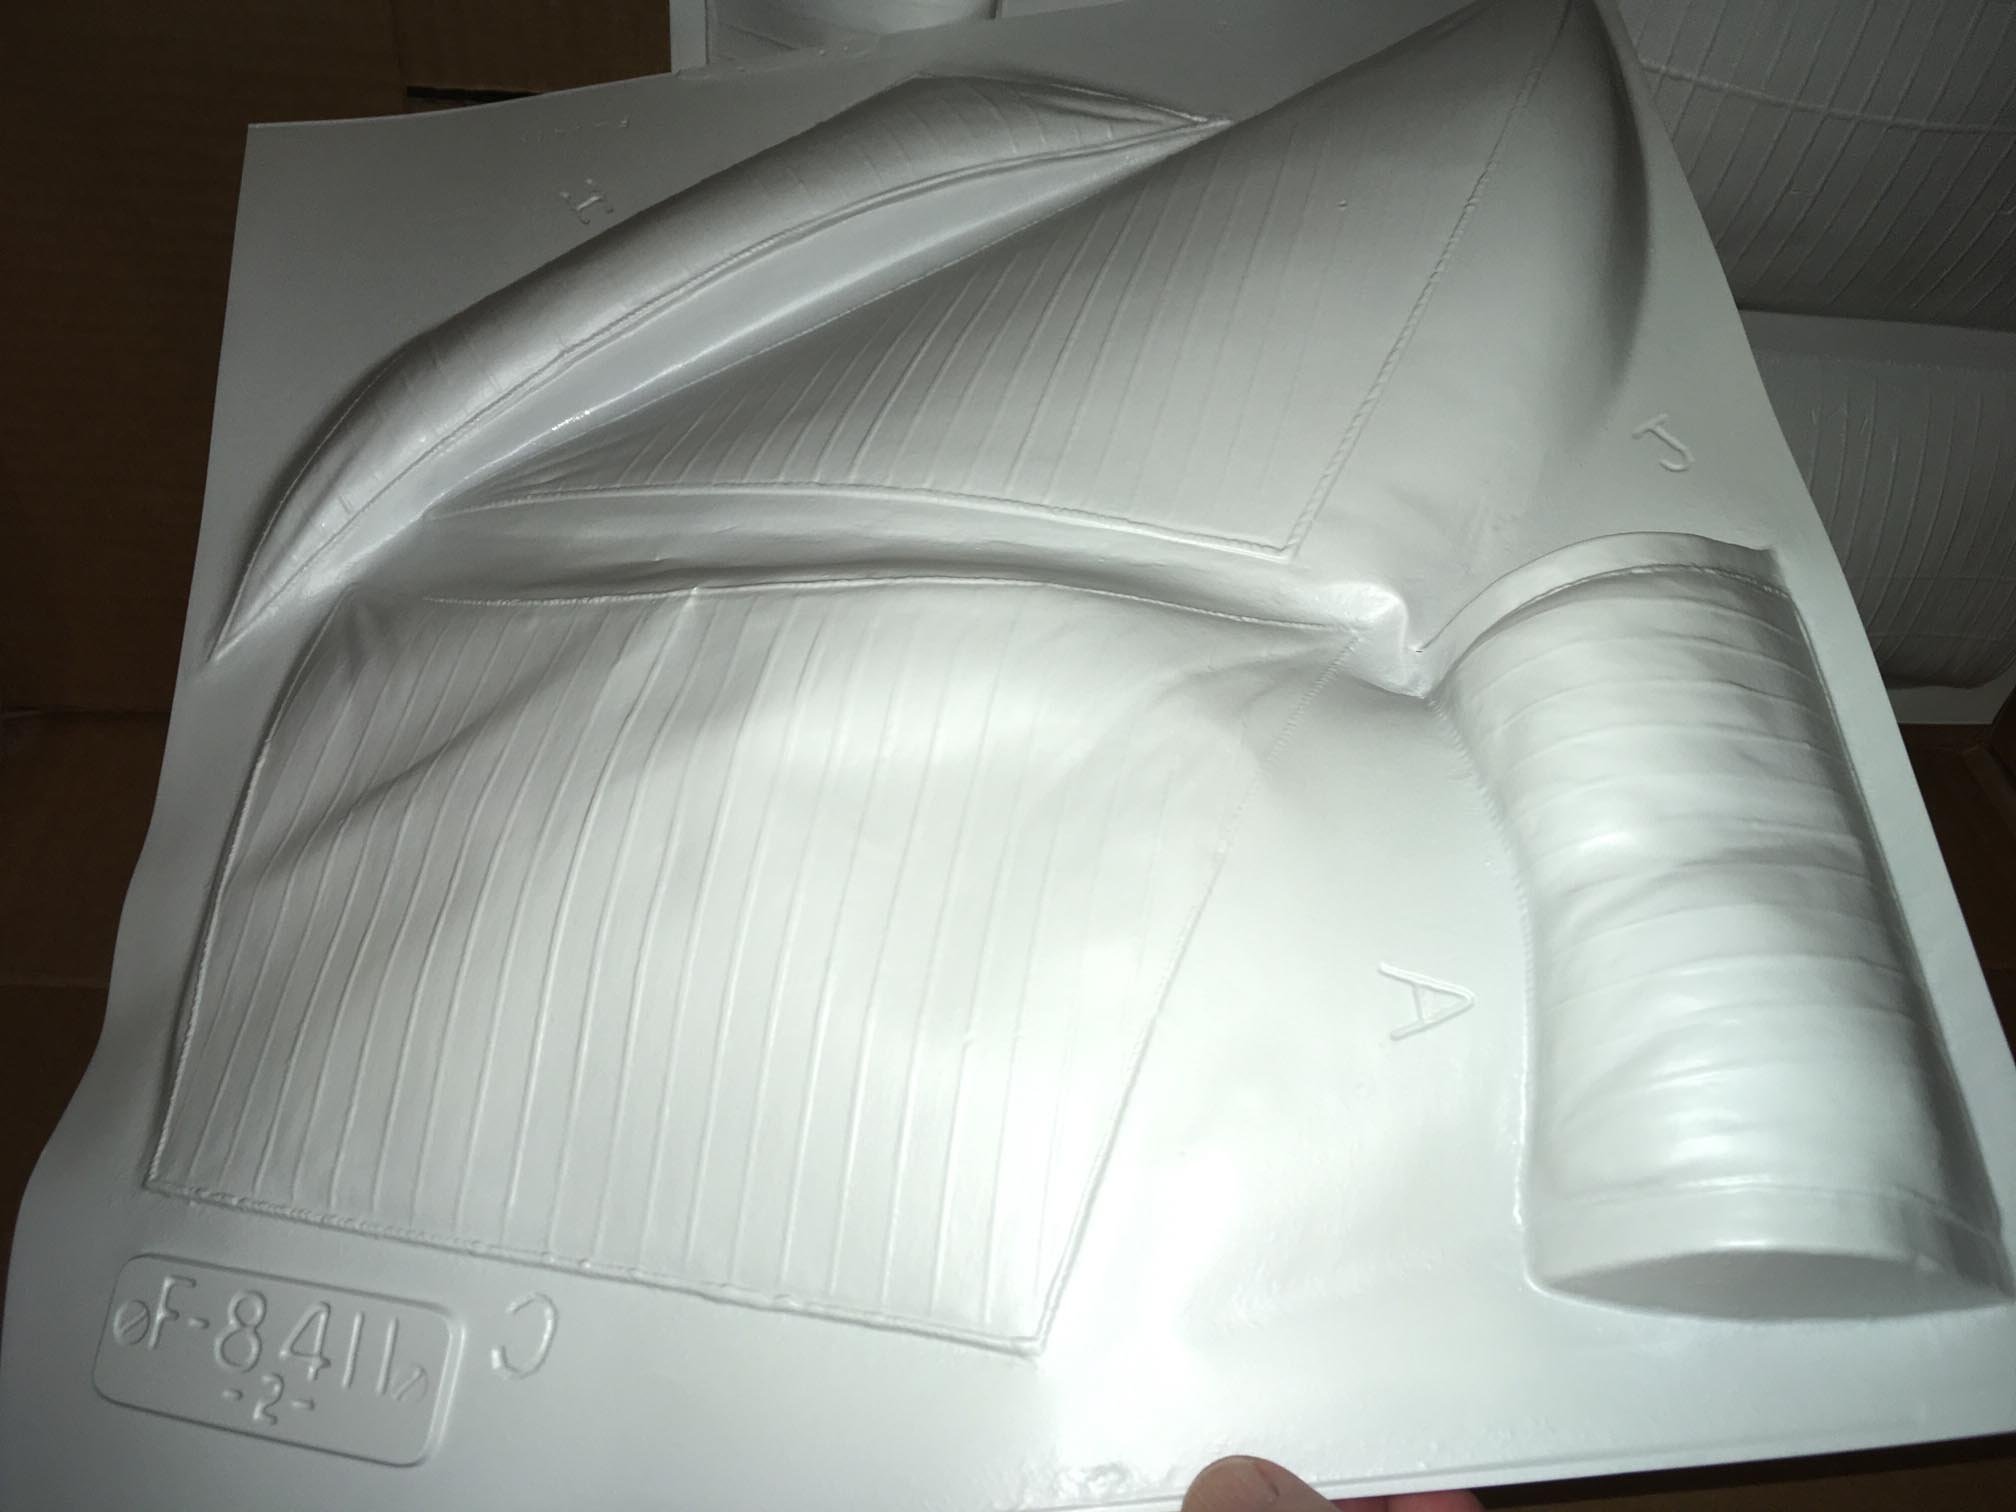
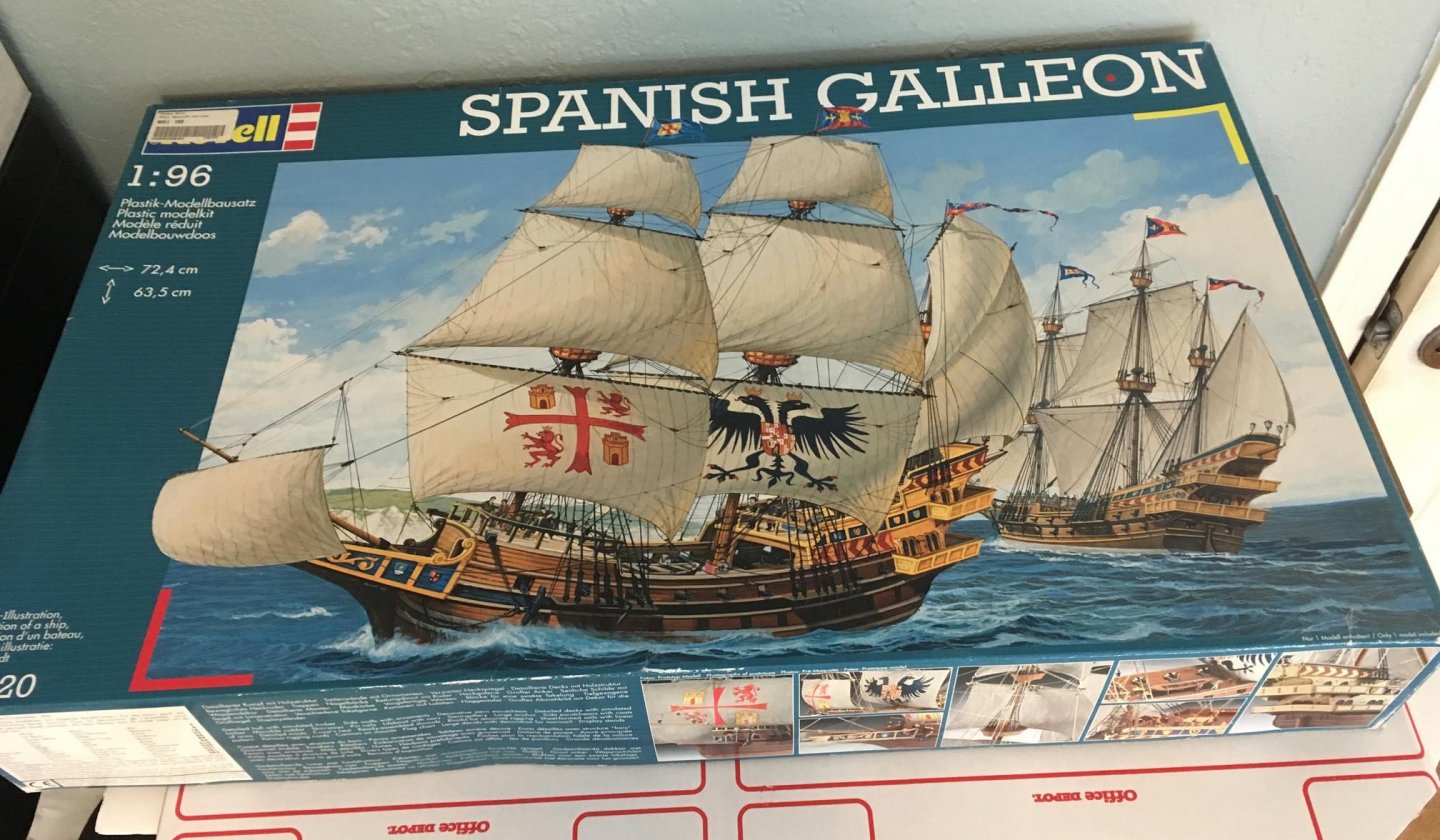
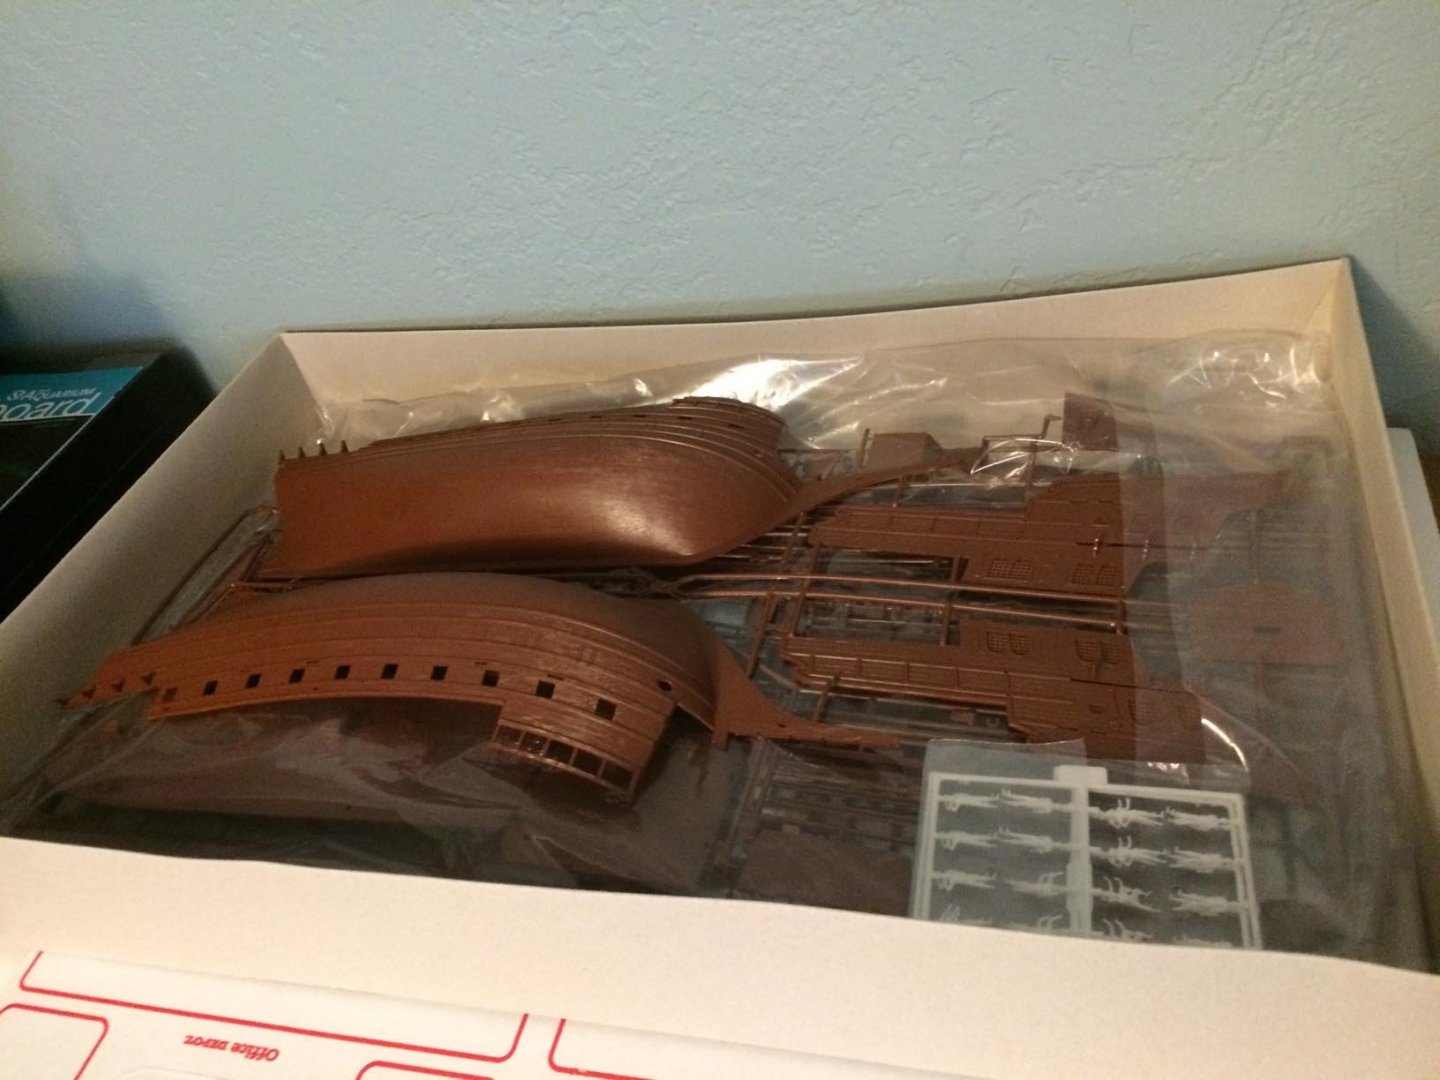
 This is my first build log here in Model Ship World, but it is about a plastic ship model that I have already been working on for about three and a half years. I may have have many years to go on the project, because I am only working on it here and there and I am doing some modifications as well, which add time. First, some background information. As a child and teenager, I built a number of plastic models. Some of my favorites were plastic sailing ships, and I still have a couple of them that I built over 30 years ago: I also tried to build the Monogram 1:120 USS United States at the time, but never completed it. My interests changed, and I left the hobby until December 2016. Then, I began to build the Revell of Germany 1:96 Spanish Galleon (which, I understand from my research on the internet, is more like a 1:64 or 1:65 scale). It's not a model that depicts an actual ship that once sailed, but more like a general idea of a type of ship from a bygone era (Armada era in the late 1500s). We have a replica ship of a Spanish Galleon here in San Diego at the Maritime Museum of San Diego. I saw it being built, and completed, and I have been on it under sail, and am excited about building a Spanish Galleon of my own. This model has some features in its shape that some may say are not very accurate for a Spanish Galleon from that period. Well, in my modifications, mainly with masts and spars, I hope to change some of that, but I would like to think of this more as a "fantasy" version of a Spanish Galleon -- embodying some of the "romance" of the ship type. Here's what the box looks like: And what was inside it, minus the sails: I originally was thinking of building it out of the box, but decided to do modifications when I realized that I wasn't going to use the plastic sails, because one of them was wrinkled, so it wouldn't convincingly "billow":
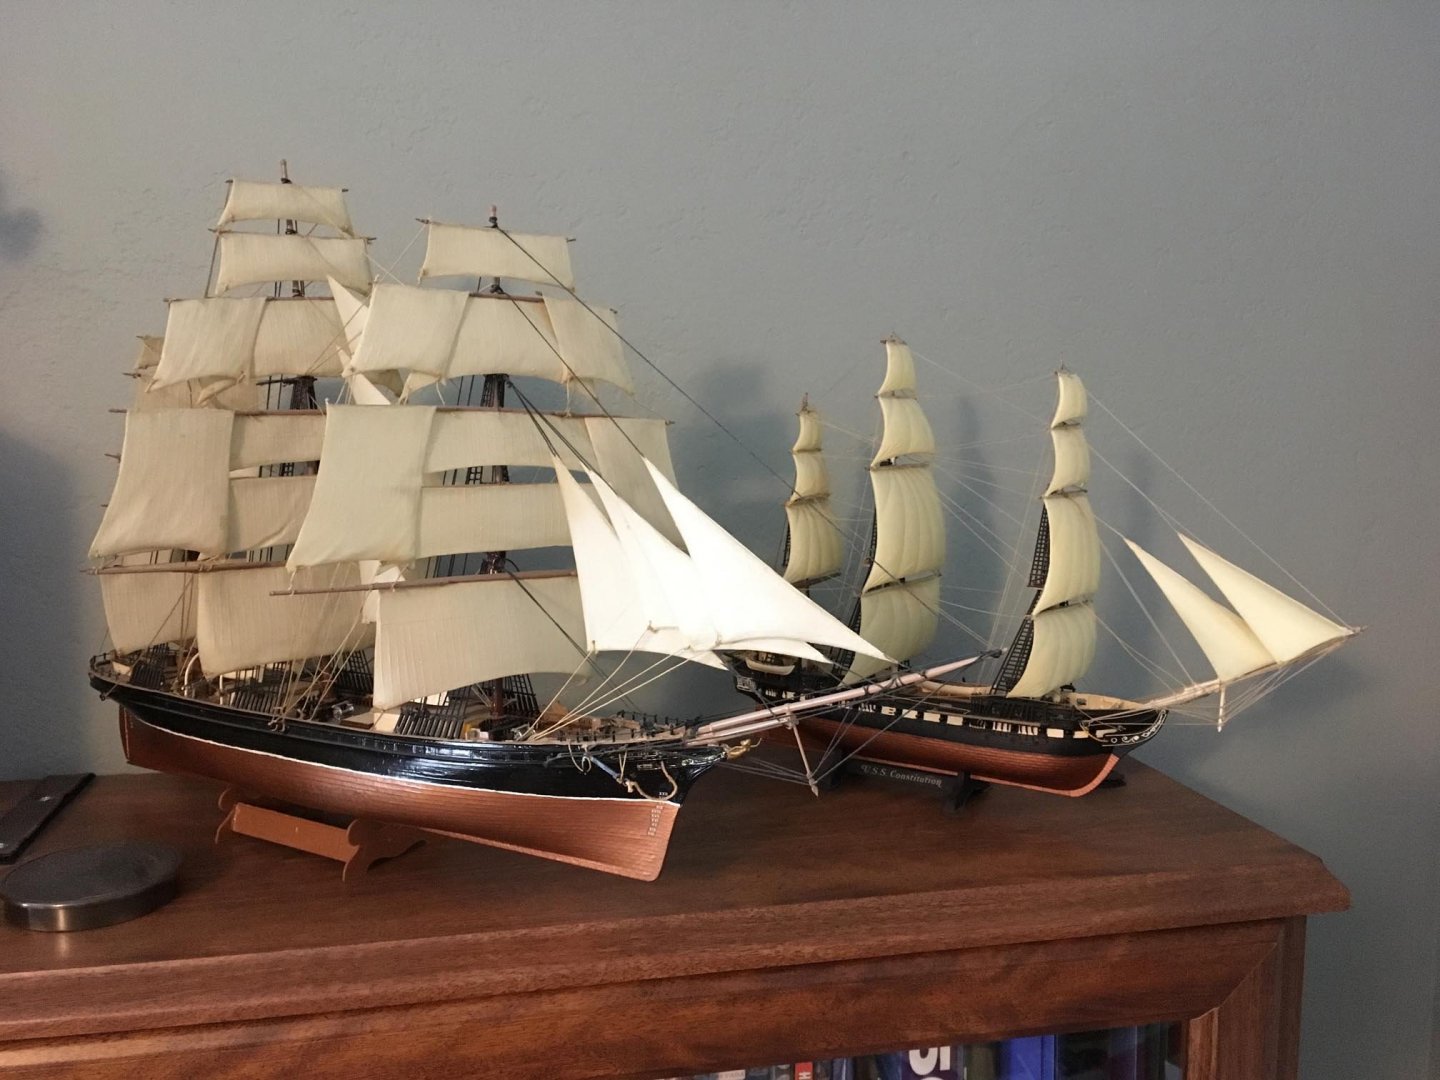

-
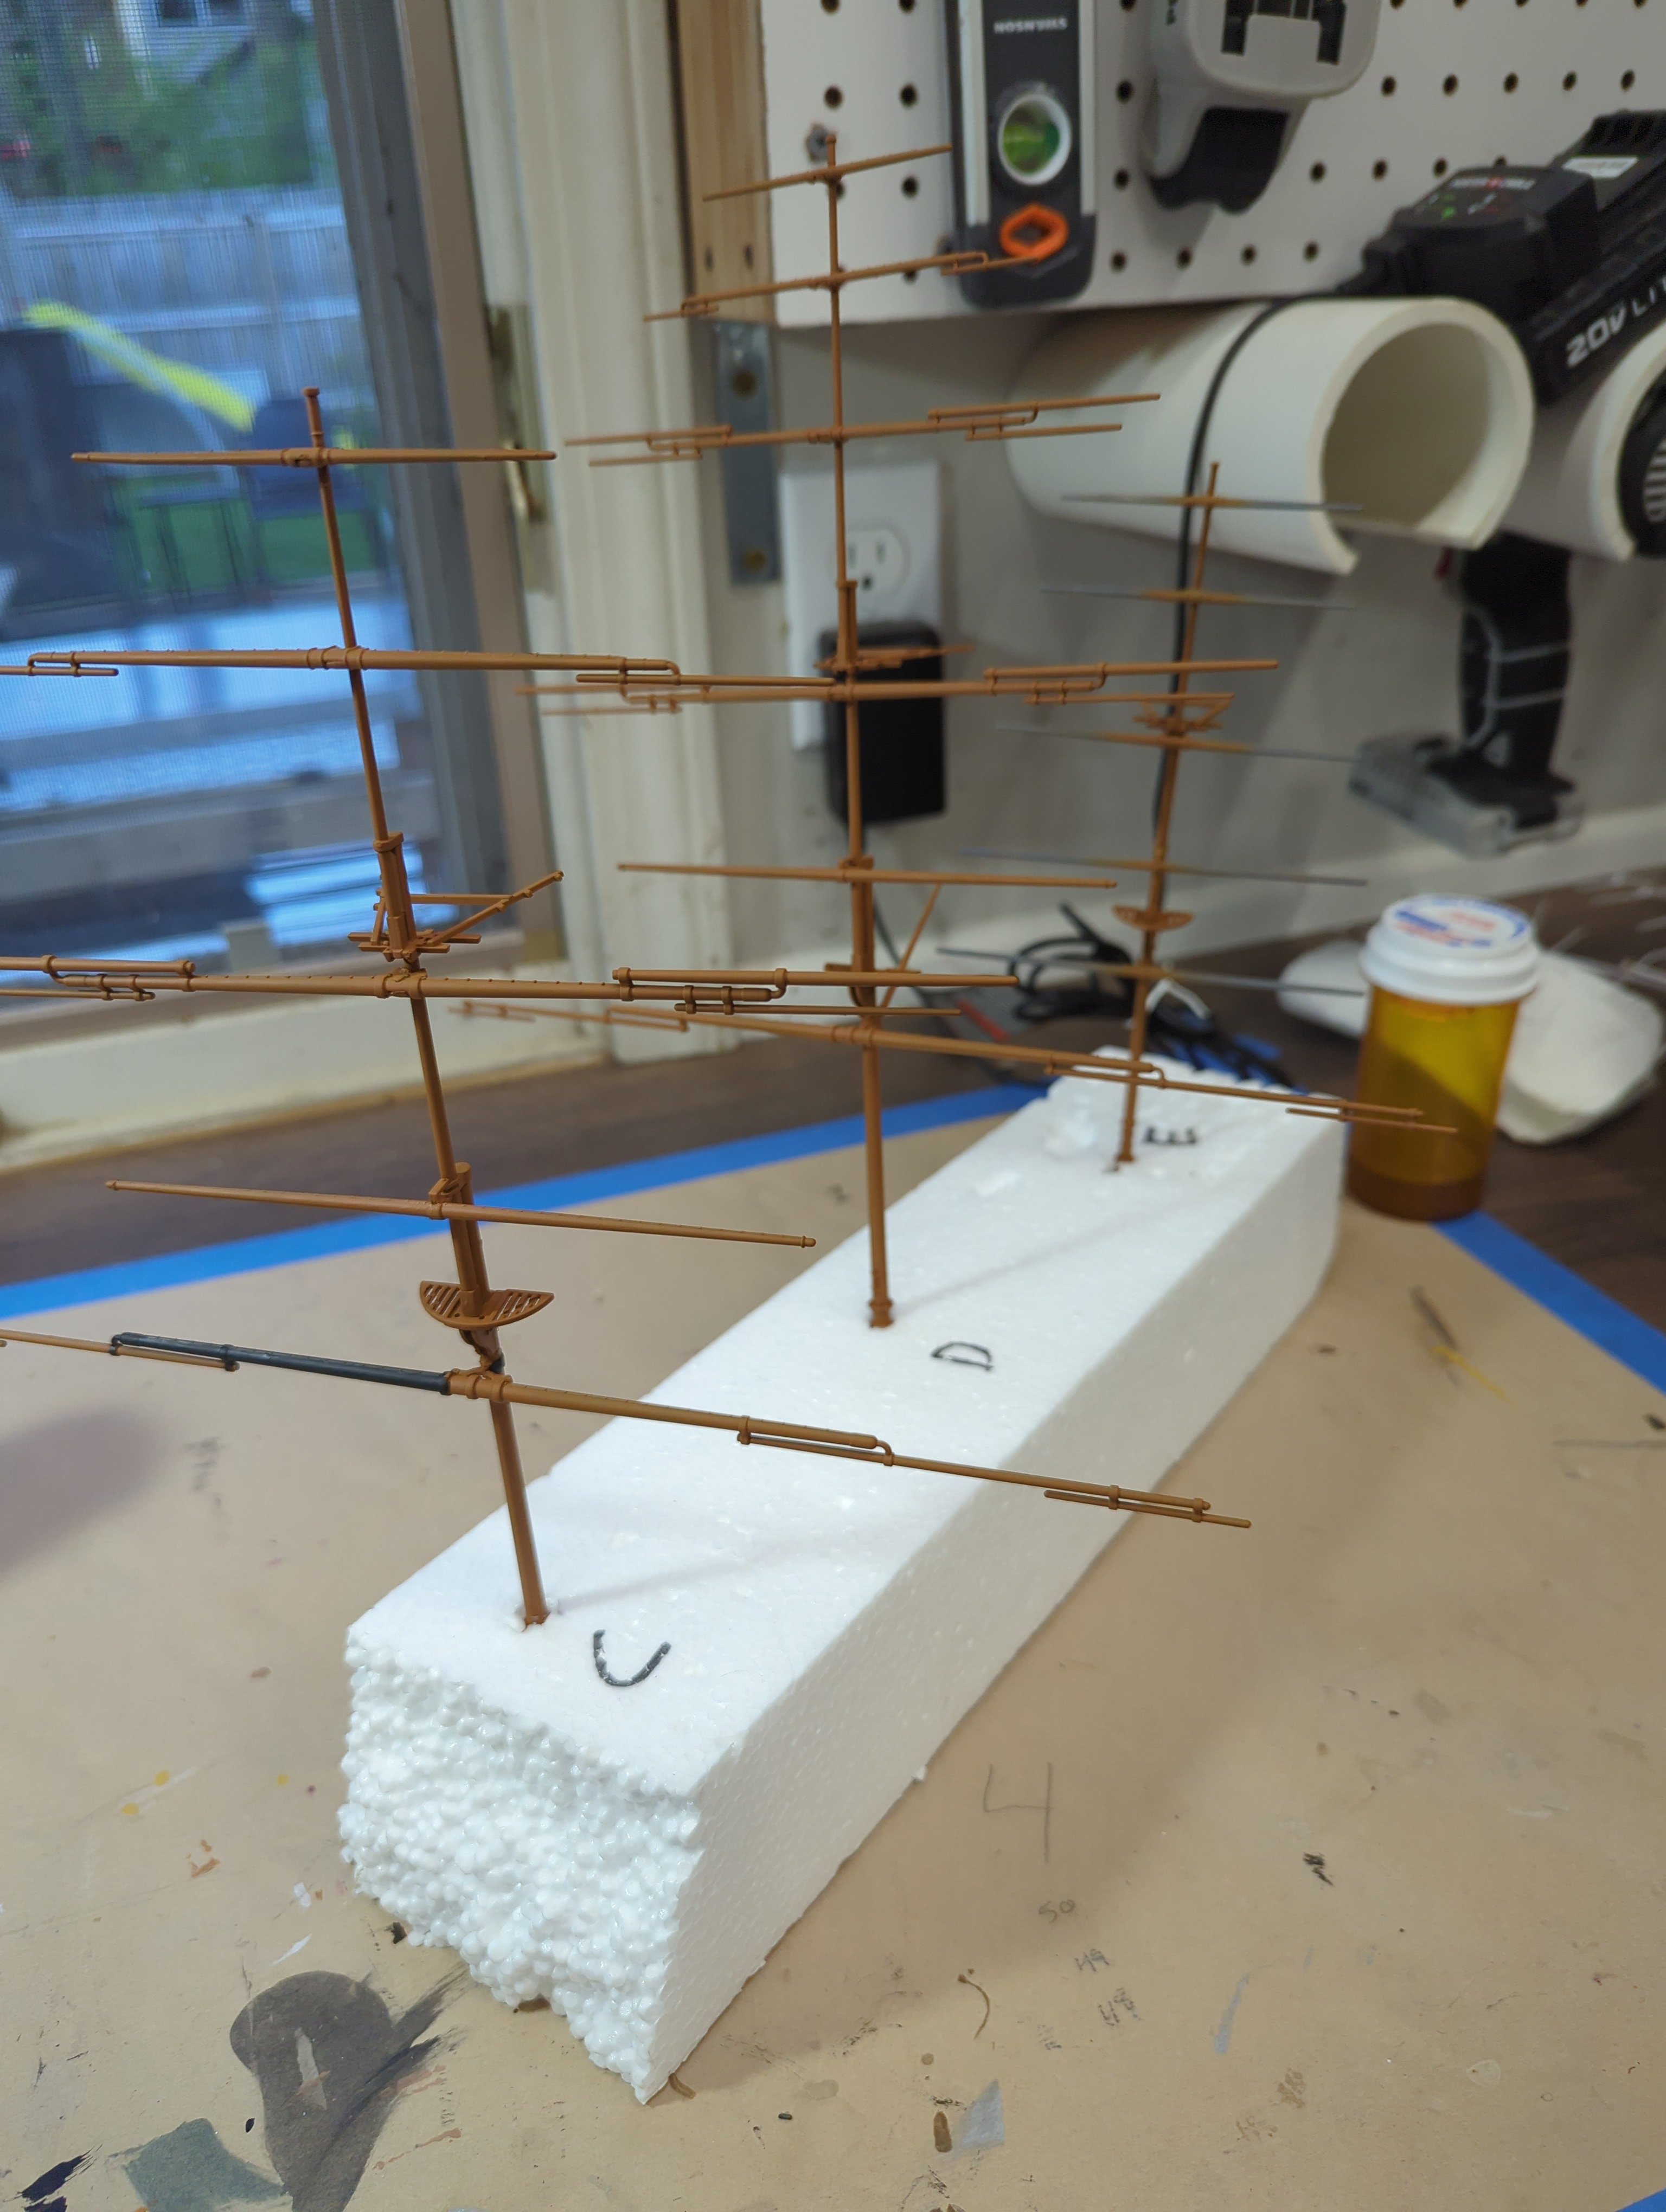
 Hi all, I'm new here. First build log. Got back into modeling of late and finally joined the forum. I tinkered around a bit with some other kits to build some skills and I feel like this one is where the practice and patience is starting to pay off. I actually kind of feel guilty about how well this kit has gone, almost too easy. Anyone else have experience with this kit? Zero flash. All parts have fit perfectly so far. I know this is not how it usually is. I have been bumbling my way back into the hobby and have made lots of mistakes and am probably still doing things incorrectly, so constructive criticism is welcome from all of you, masters. Obviously I need to do a lot of touch up painting. One question I have is how to paint the masts? The instructions say to paint everything brown, but I think that looks kind of dumb and probably isn't accurate. Any suggestions or good sources to go to for ideas? Starting this build log part way into the project already, so apologies for no earlier pictures. But here is where it lies today.

- 8 replies
-
- 4
-
-
- Cutty Sark
- clipper
- (and 2 more)
-
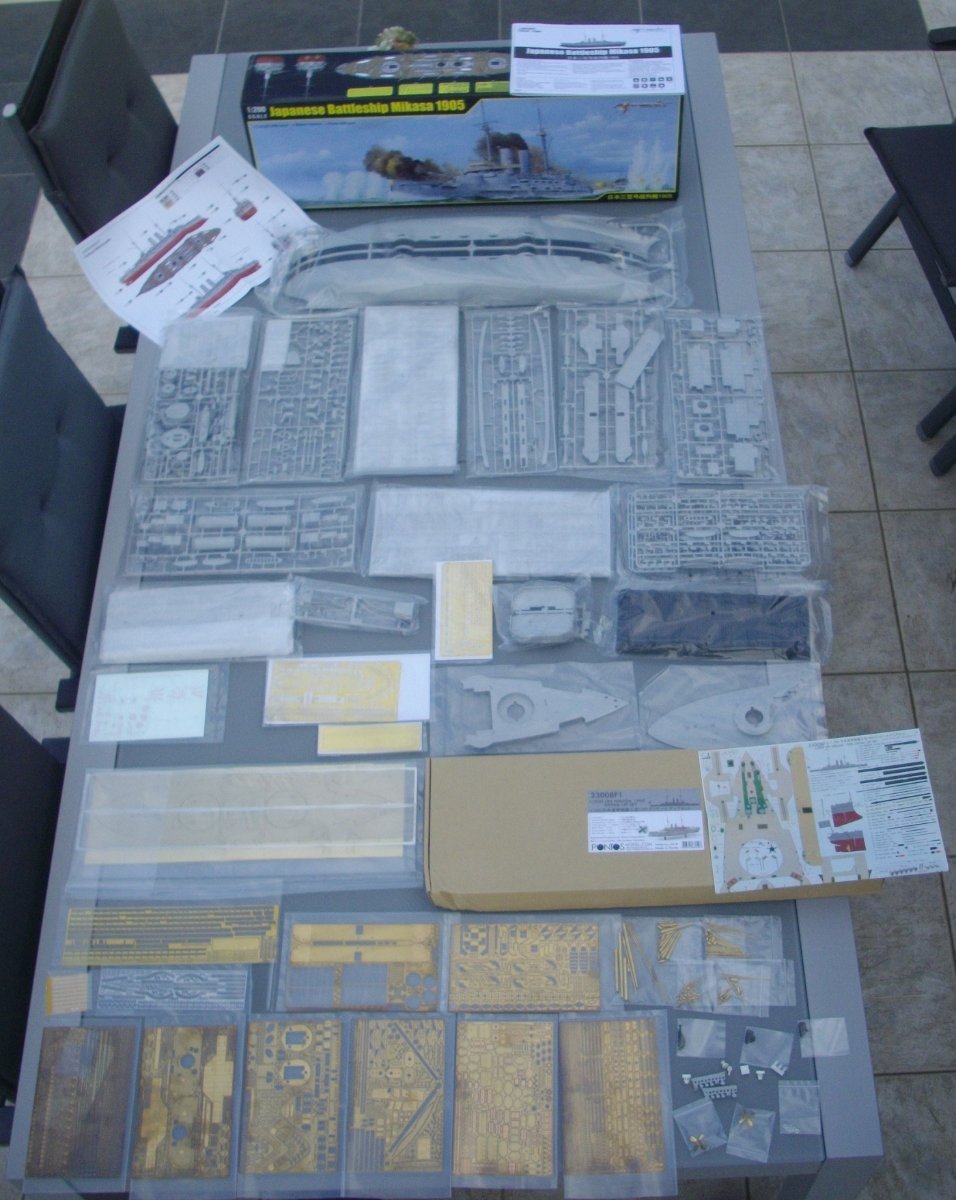
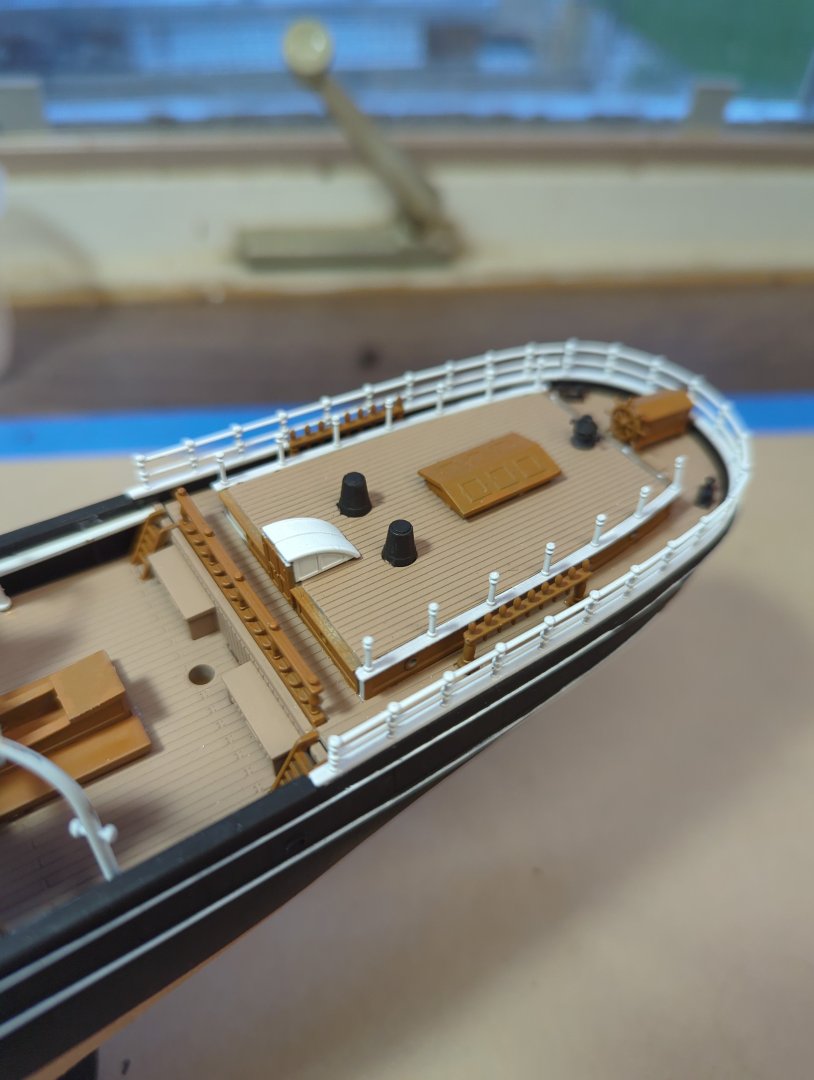
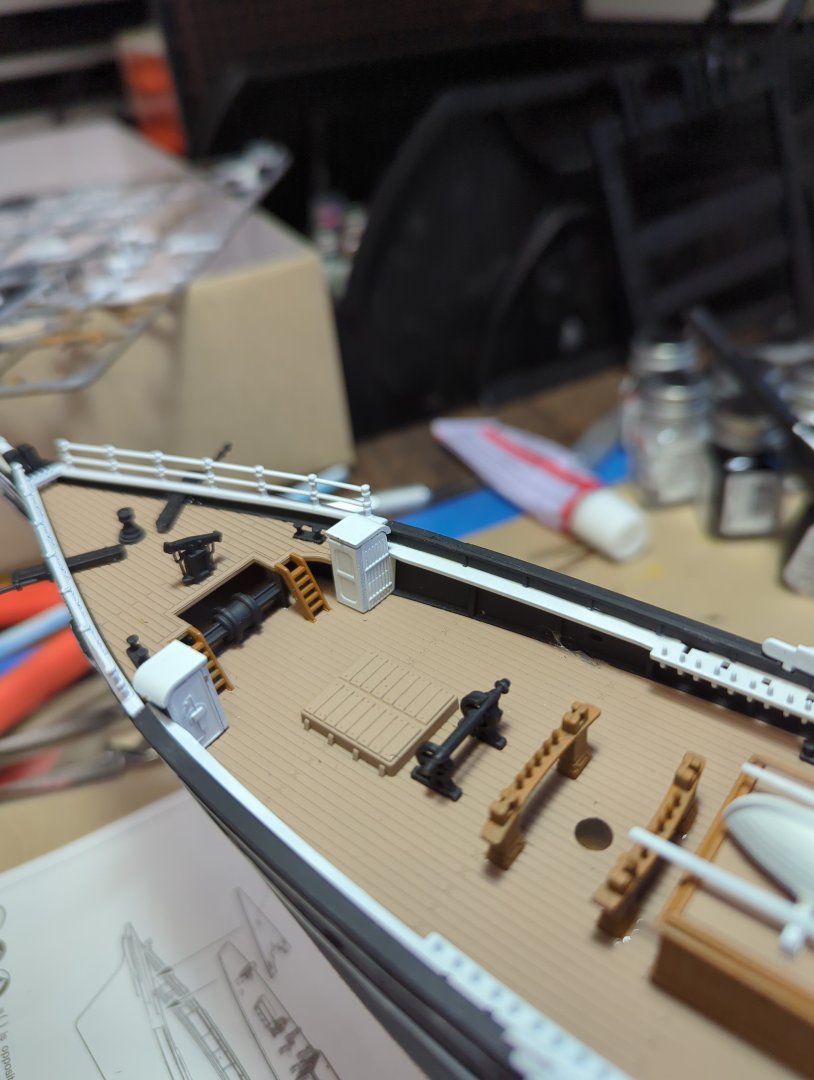
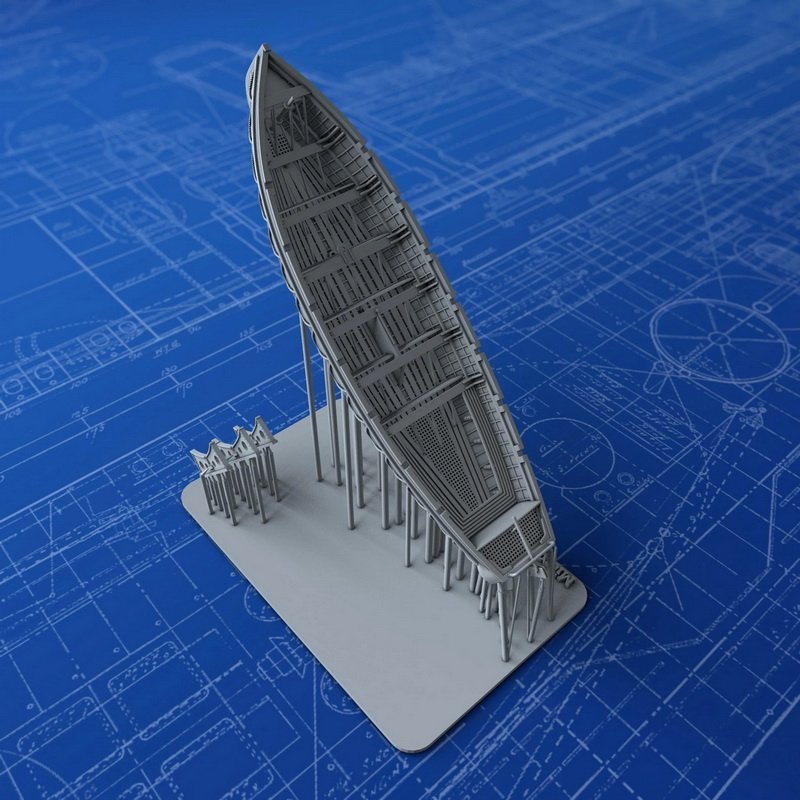
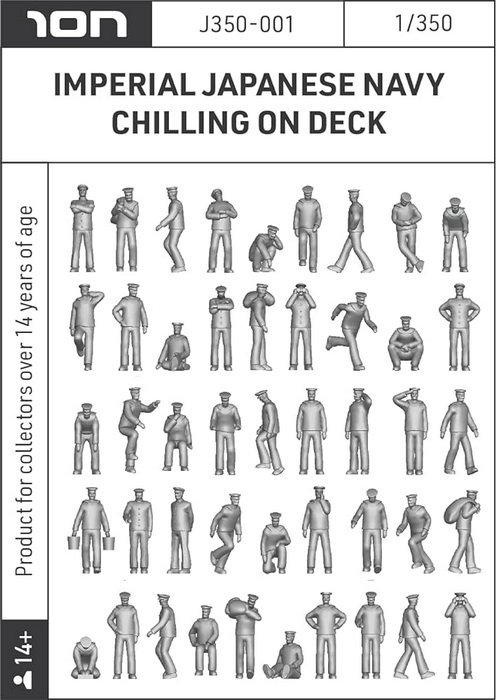
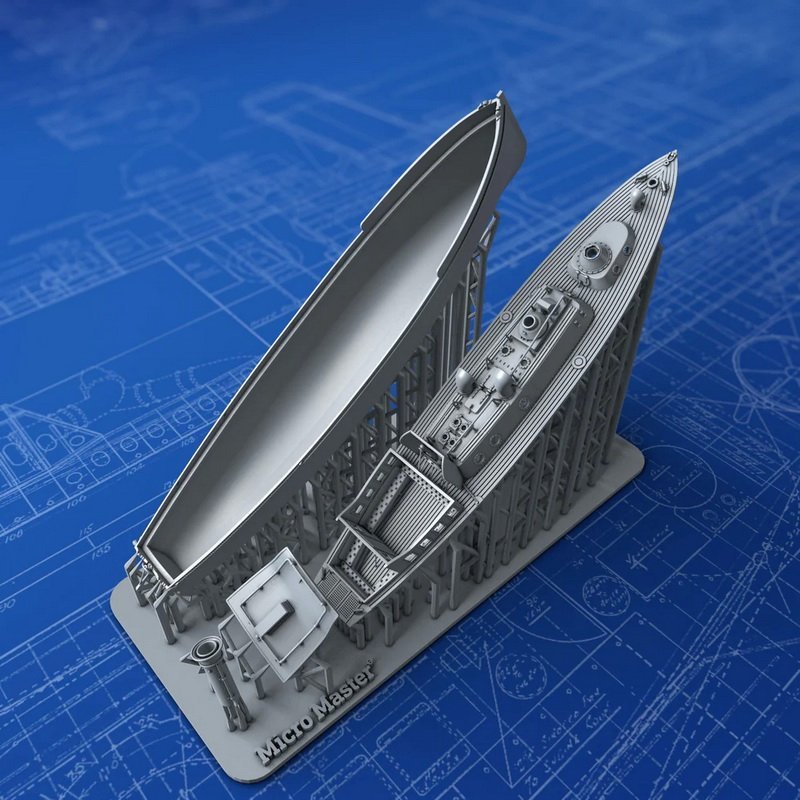
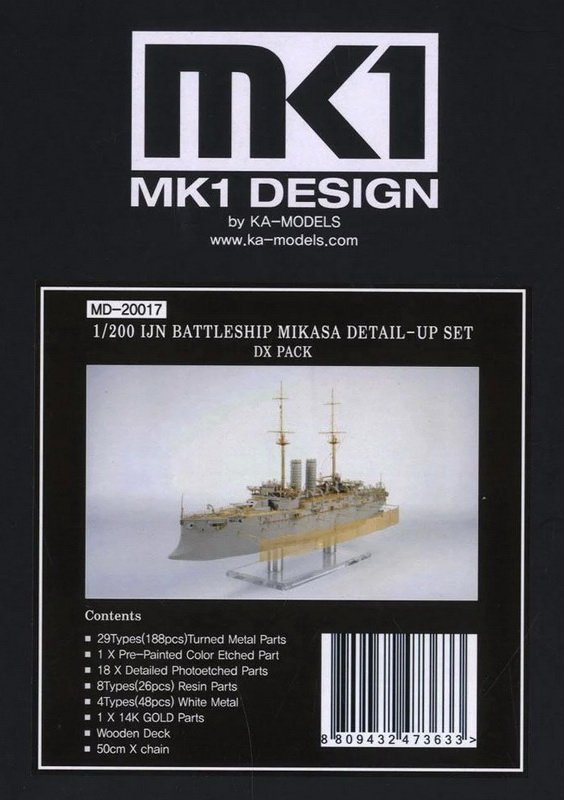
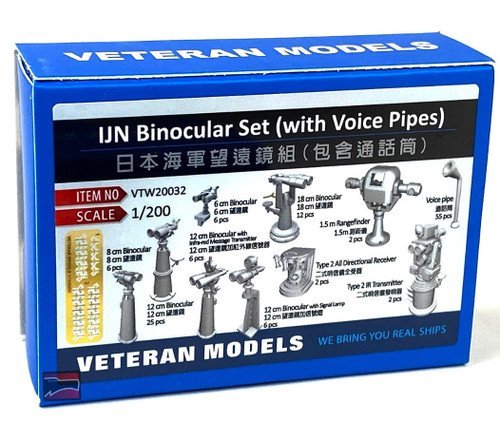
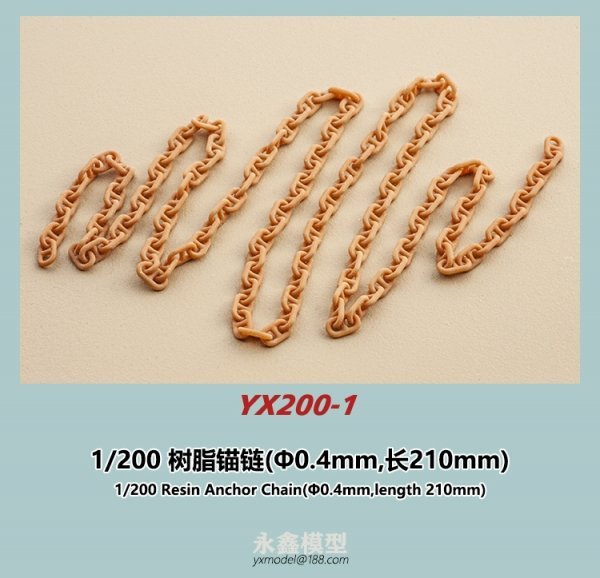
 Ahoy, friends of the adhesive guild. Back to my roots, building model ships. It was a nice excursion into the Star Wars universe and I had a lot of fun. But now I’m looking forward to a real ship that I’ve had in the pipeline for a long time. The pre dreadnought battleship Mikasa of the Imperial Japanese Navy (IJN). I know, nothing new for most. There are so many construction reports about this boat and yet it remains a must for me. And that for two reasons. First there is the shape of the hull. Really archaic. Reminds me of a Greek trireme because of the suggested ram. I like it incredibly much. And on deck everything on this ship is so different than on my Bismarck, for example. Secondly, I don’t just have a Pontos Detail Up Set for this model. No, as a bonus there is also the MK1 Deluxe package from KA Models. There are a few details that are missing from Pontos. Probably not researched thoroughly enough, or what?!. But more on that later. Well, it’s going to be an etching orgy in the very first cabin. What fun. Then I would like to introduce you to the available material for this project. First of all, the model. This is available from a number of manufacturers such as I Love Kit, Wave Corporation or HobbyBoss. But everything is definitely Trumpeter, which you can see immediately when you open the box. After all, my Mikasa comes from Merit International. It’s amazing how many names this model is sold under. The picture shows the box from the company I Love Kit, as I no longer have mine. Of course there is also my favorite etched part set from Pontos. And now I’m exaggerating, I know, but this model also comes with the MK1 Deluxe package from Ka Models. I’ll explain what motivated me to do this later in my construction report. Unfortunately there isn’t much from Veteran Models for this model, but at least this: This time the figures come from the company ION, which I appropriately won as a prize for my Bismarck. It is still incomprehensible to me that the manufacturers, regardless of whether it is the model or the expensive aftermarket products, that anchor chains have double bar links. So they became worried. Let's come to another exquisite accessory that I only discovered through Jeff59´s first-class construction report. These fantastic dinghies from Micro Master from New Zealand. A little dream. So, this is the first list of ingredients for my new project. Although I can’t or don’t want to rule out the possibility that one or two particles could come along. On to the next two years of fun.
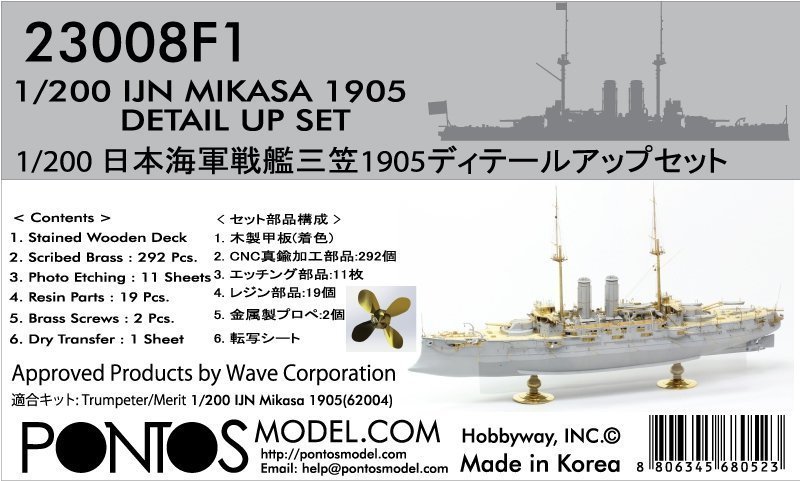
.jpg.99a5b8e8c089e65f8bf377eed0fa4238.jpg)
- 27 replies
-
- 7
-
-
- Russo-Japanese War
- Mikasa
- (and 2 more)
-
 Question, In the instructions it shows gluing the ship to the stand early in the build. I worry that might restrict flexibility in painting. Can/should I wait until closer to installing masts etc? David
- 97 replies
-
- 2
-
-
- Cutty Sark
- plastic
- (and 3 more)
-
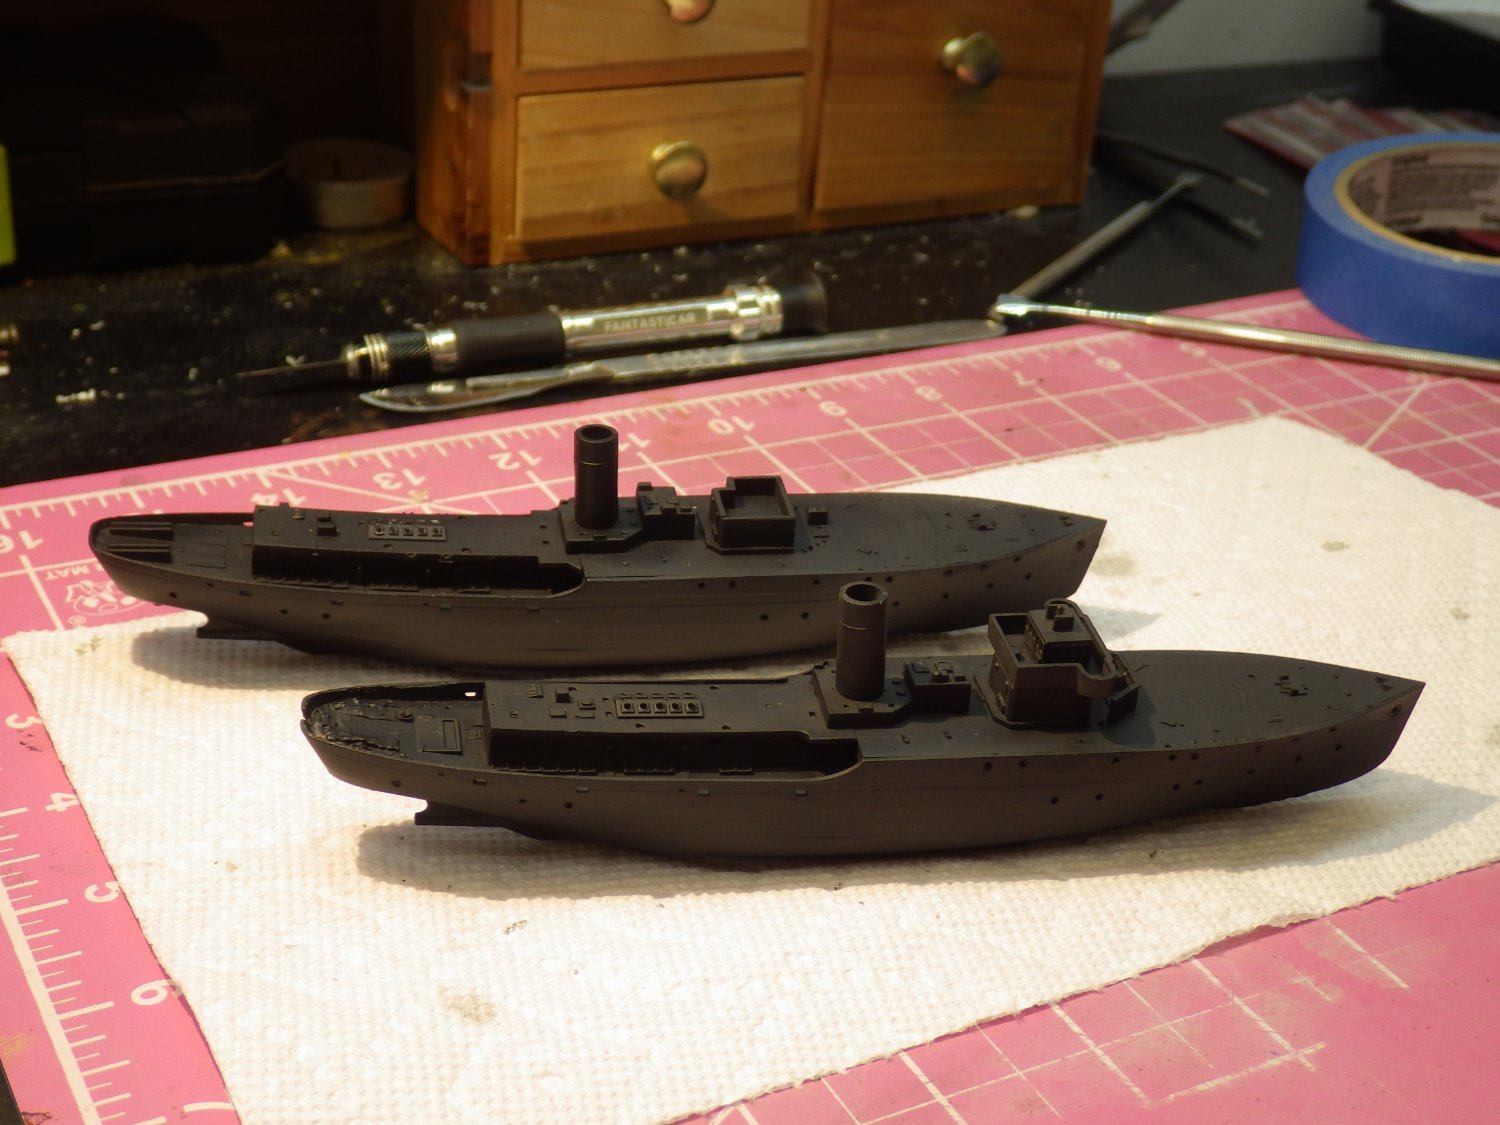
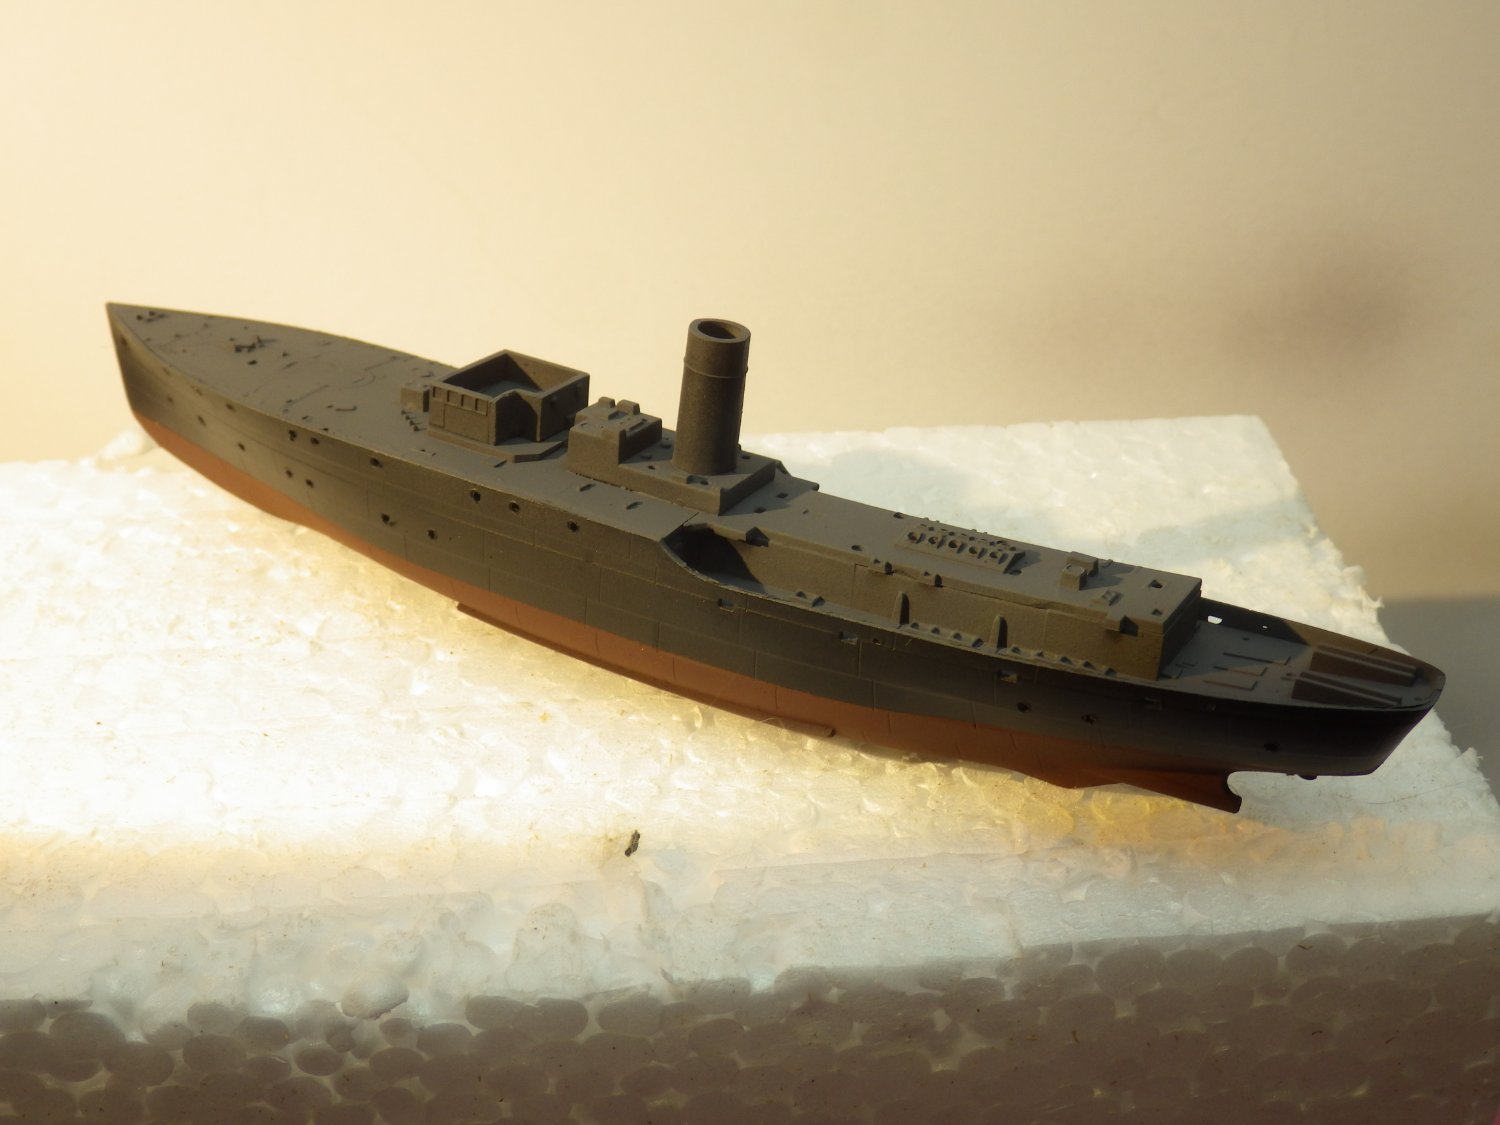
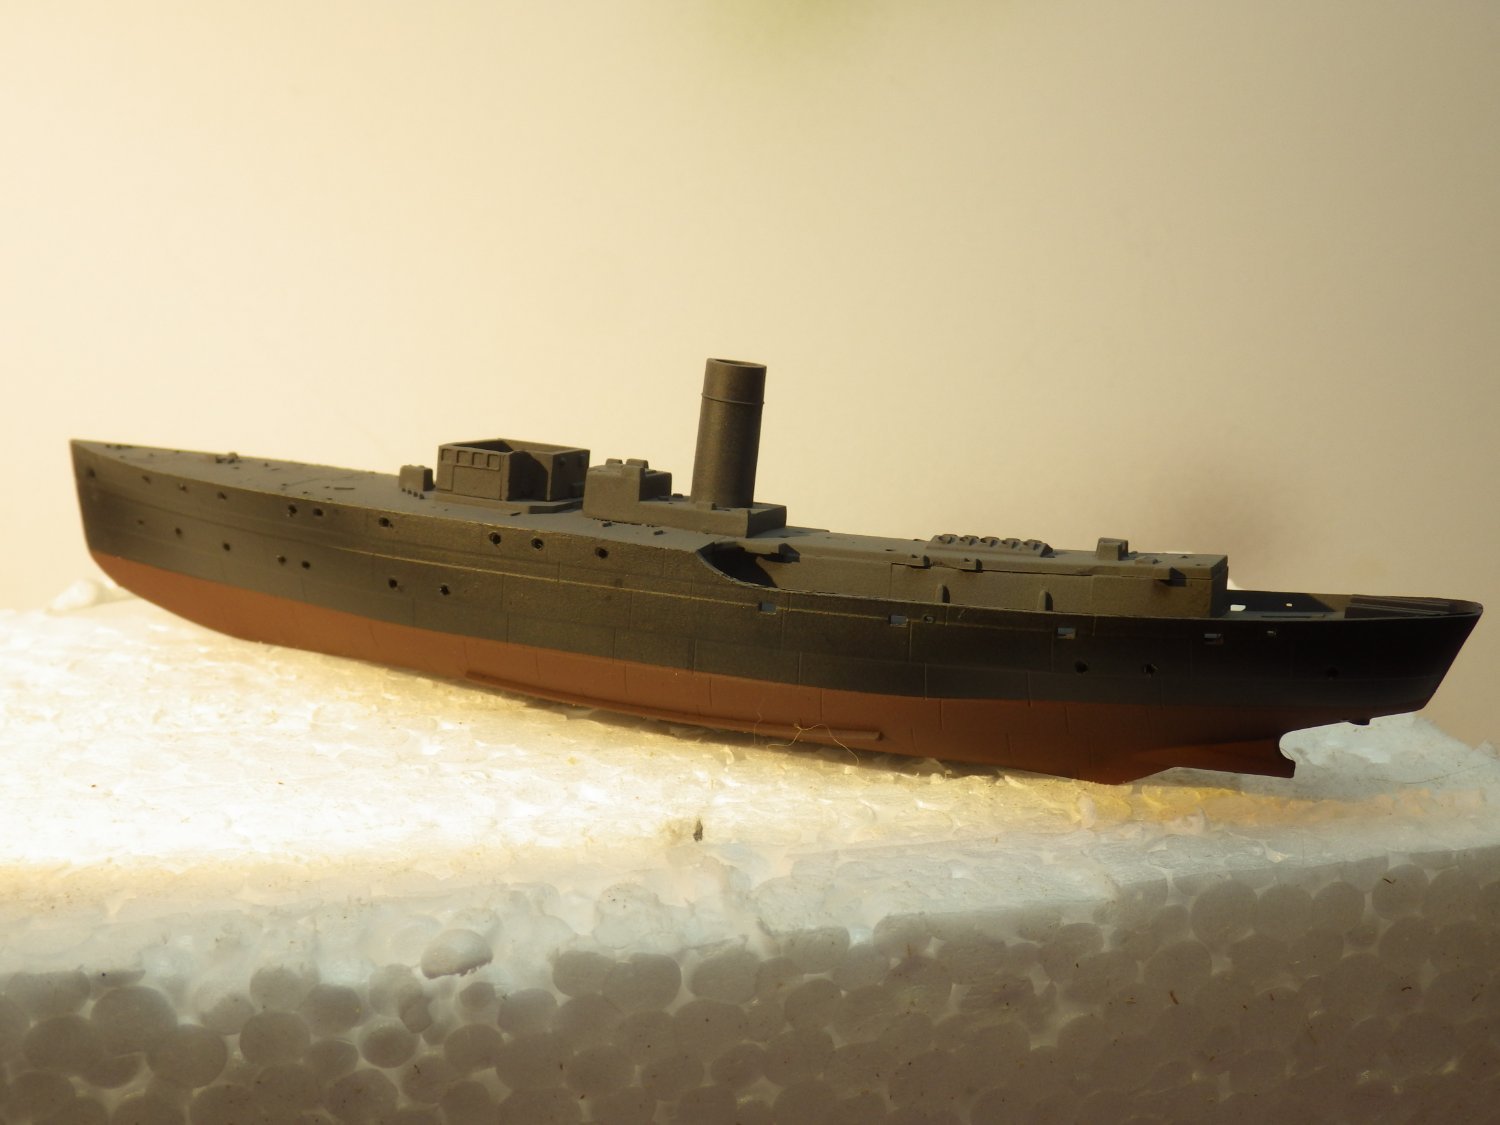
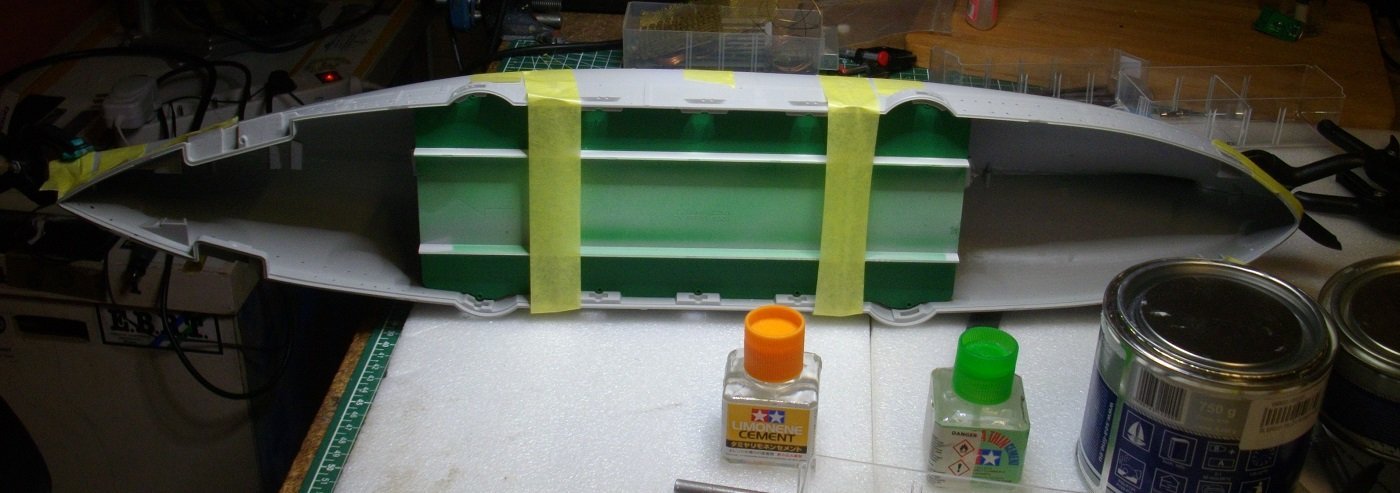
 This 1961 plastic kit is preowned. It cost $115 plus shipping. This was quite the deal. The first run of a model injection mold is the best. From there on each casting is sloppier. This model is a first run with few missing parts. The History The Confederate Navy needed ships to run blockades and raid enemy merchantmen. A British shipyard began building Hull 290 to be a merchantman. The ruse lasted just long enough to beat the authorities. It slipped down the river to sea a day before the raid. A ship was waiting to arm Hull 290 at sea. “ CSS Alabama was a screw sloop-of-war built in 1862 for the Confederate States Navy. It was built in Birkenhead on the River Mersey opposite Liverpool, England by John Laird Sons and Company. Alabama served as a successful commerce raider, attacking Union merchant and naval ships over the course of her two-year career. She was sunk in June 1864 by USS Kearsarge at the Battle of Cherbourg outside the port of Cherbourg, France. “ Wikipedia The ship was primed with auto primmer. Tamiya acrylic paint is being used on this model. The next model will use Citadel acrylic paint. It is more expensive than what is used now. However, it is made for hand painting. I will probably never invest in airbrushing.
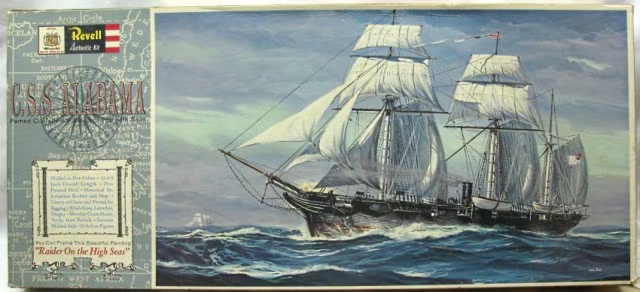
-
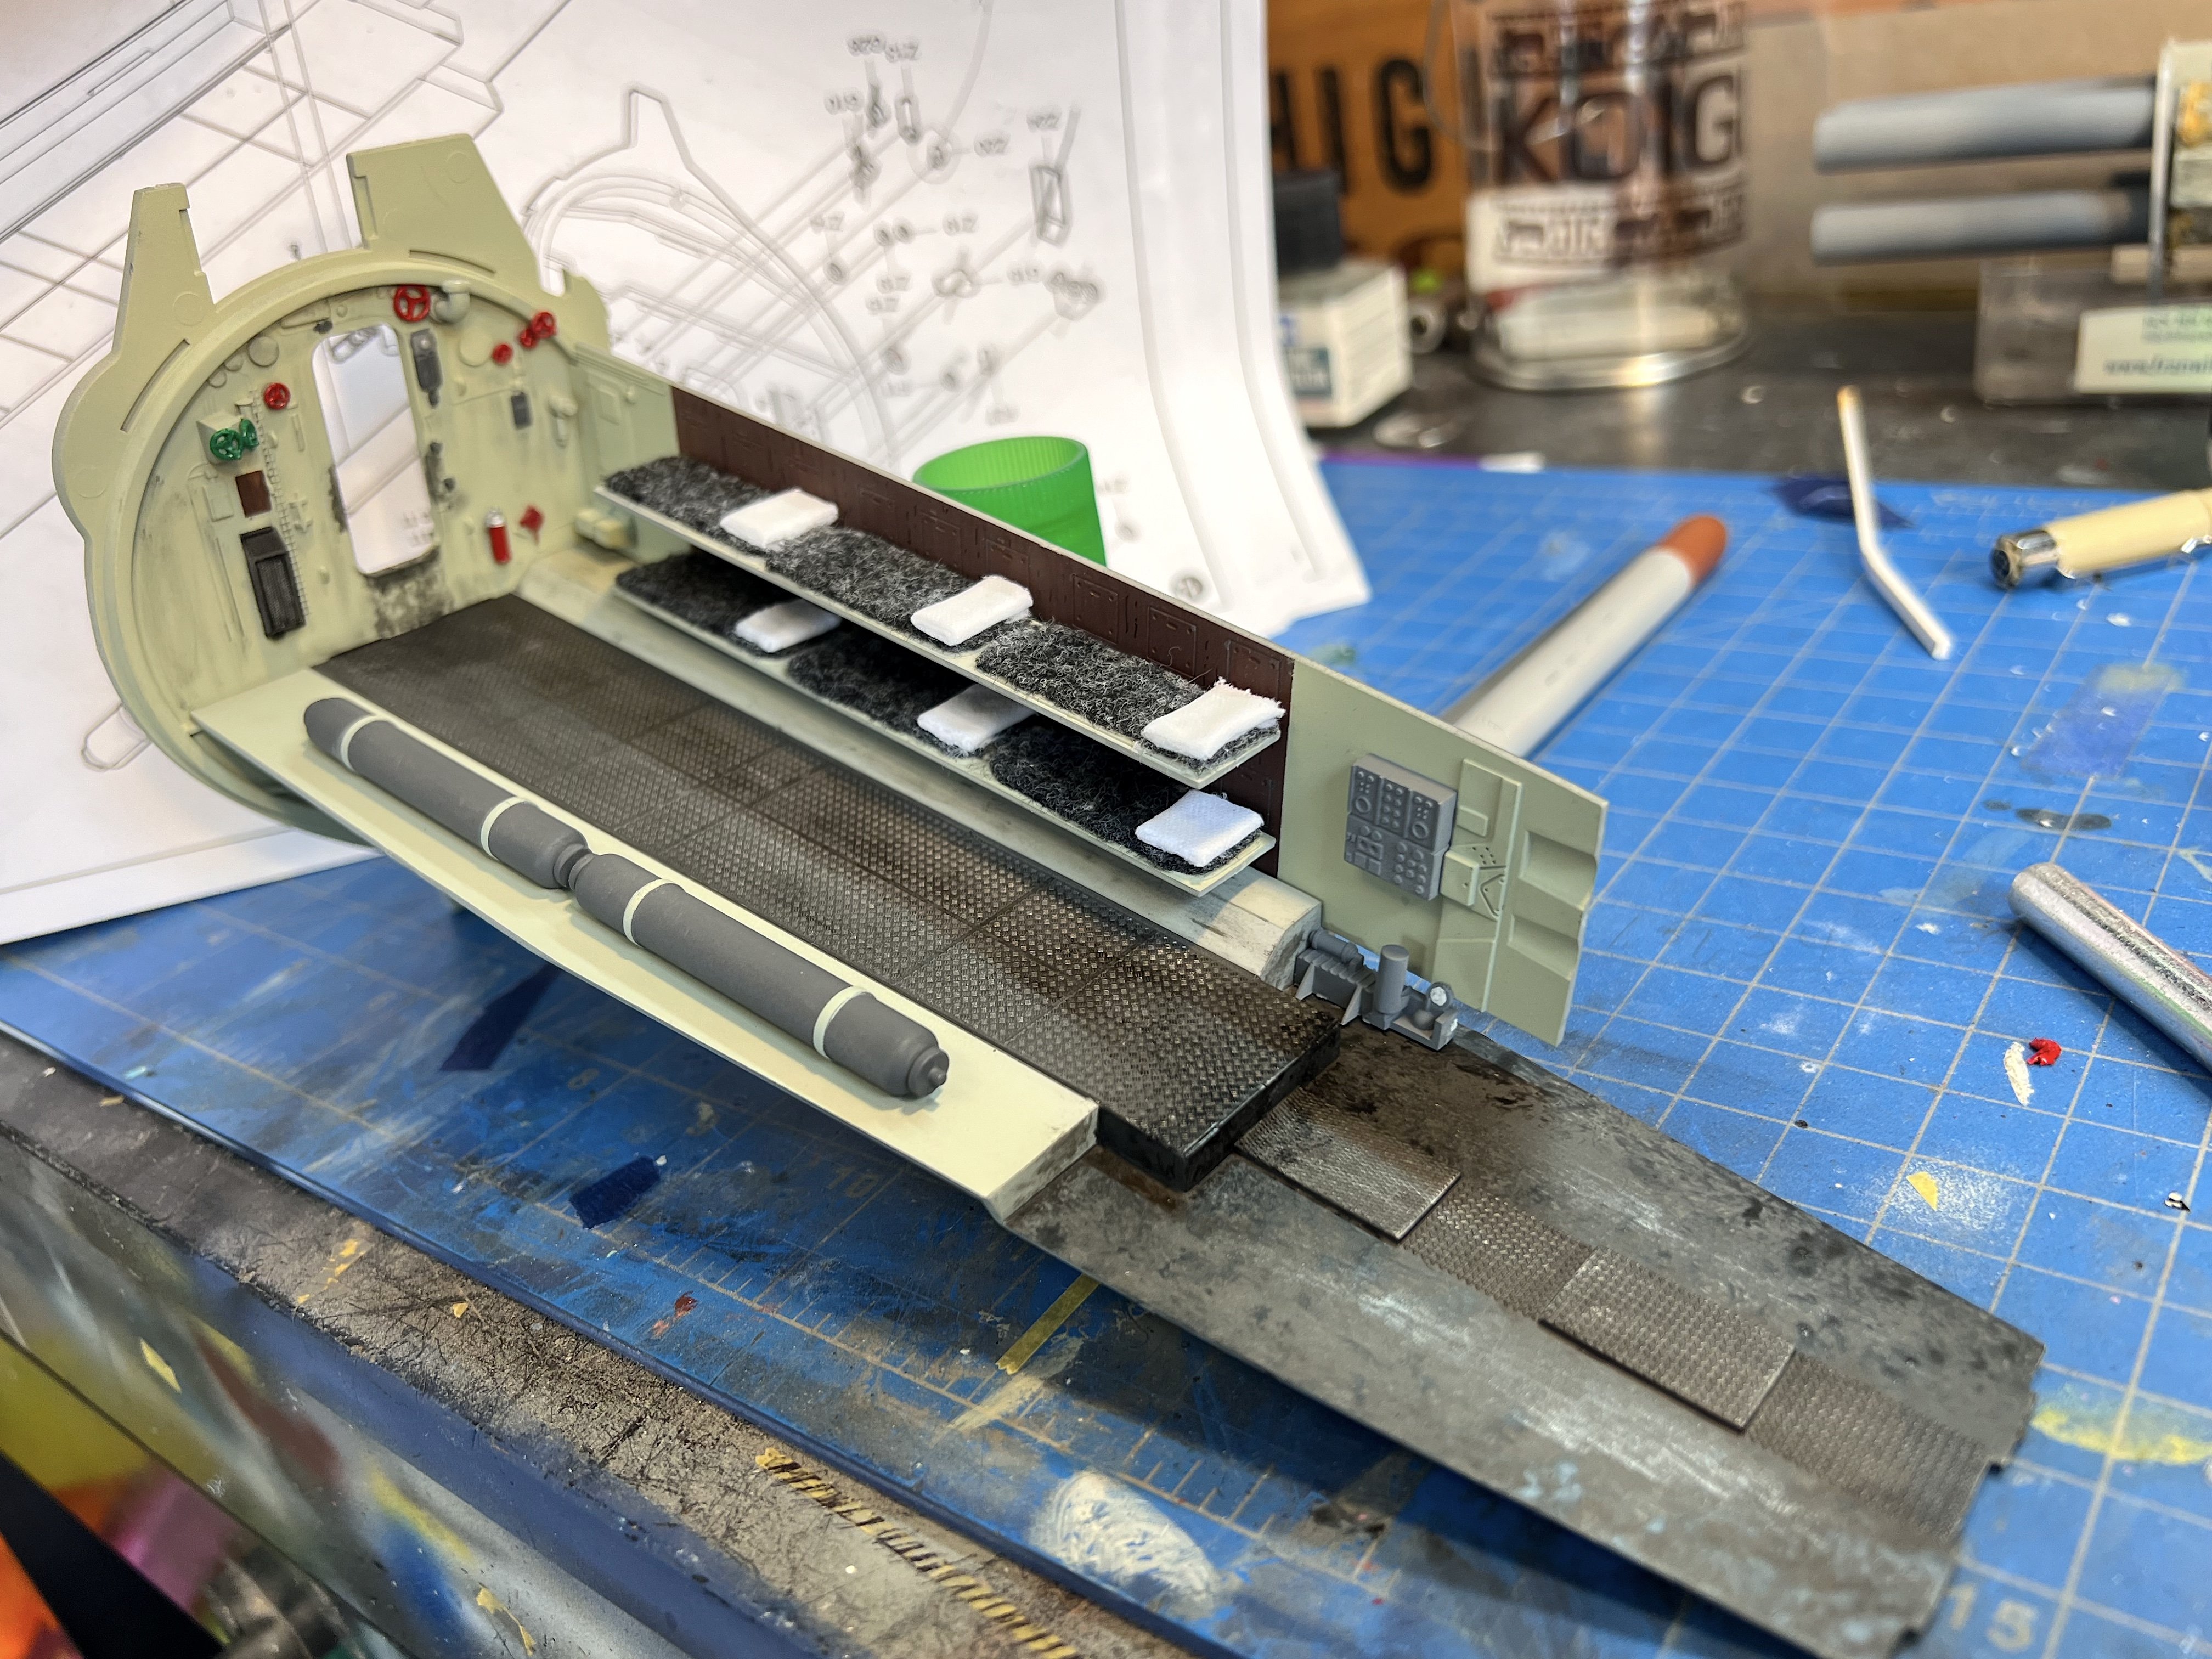
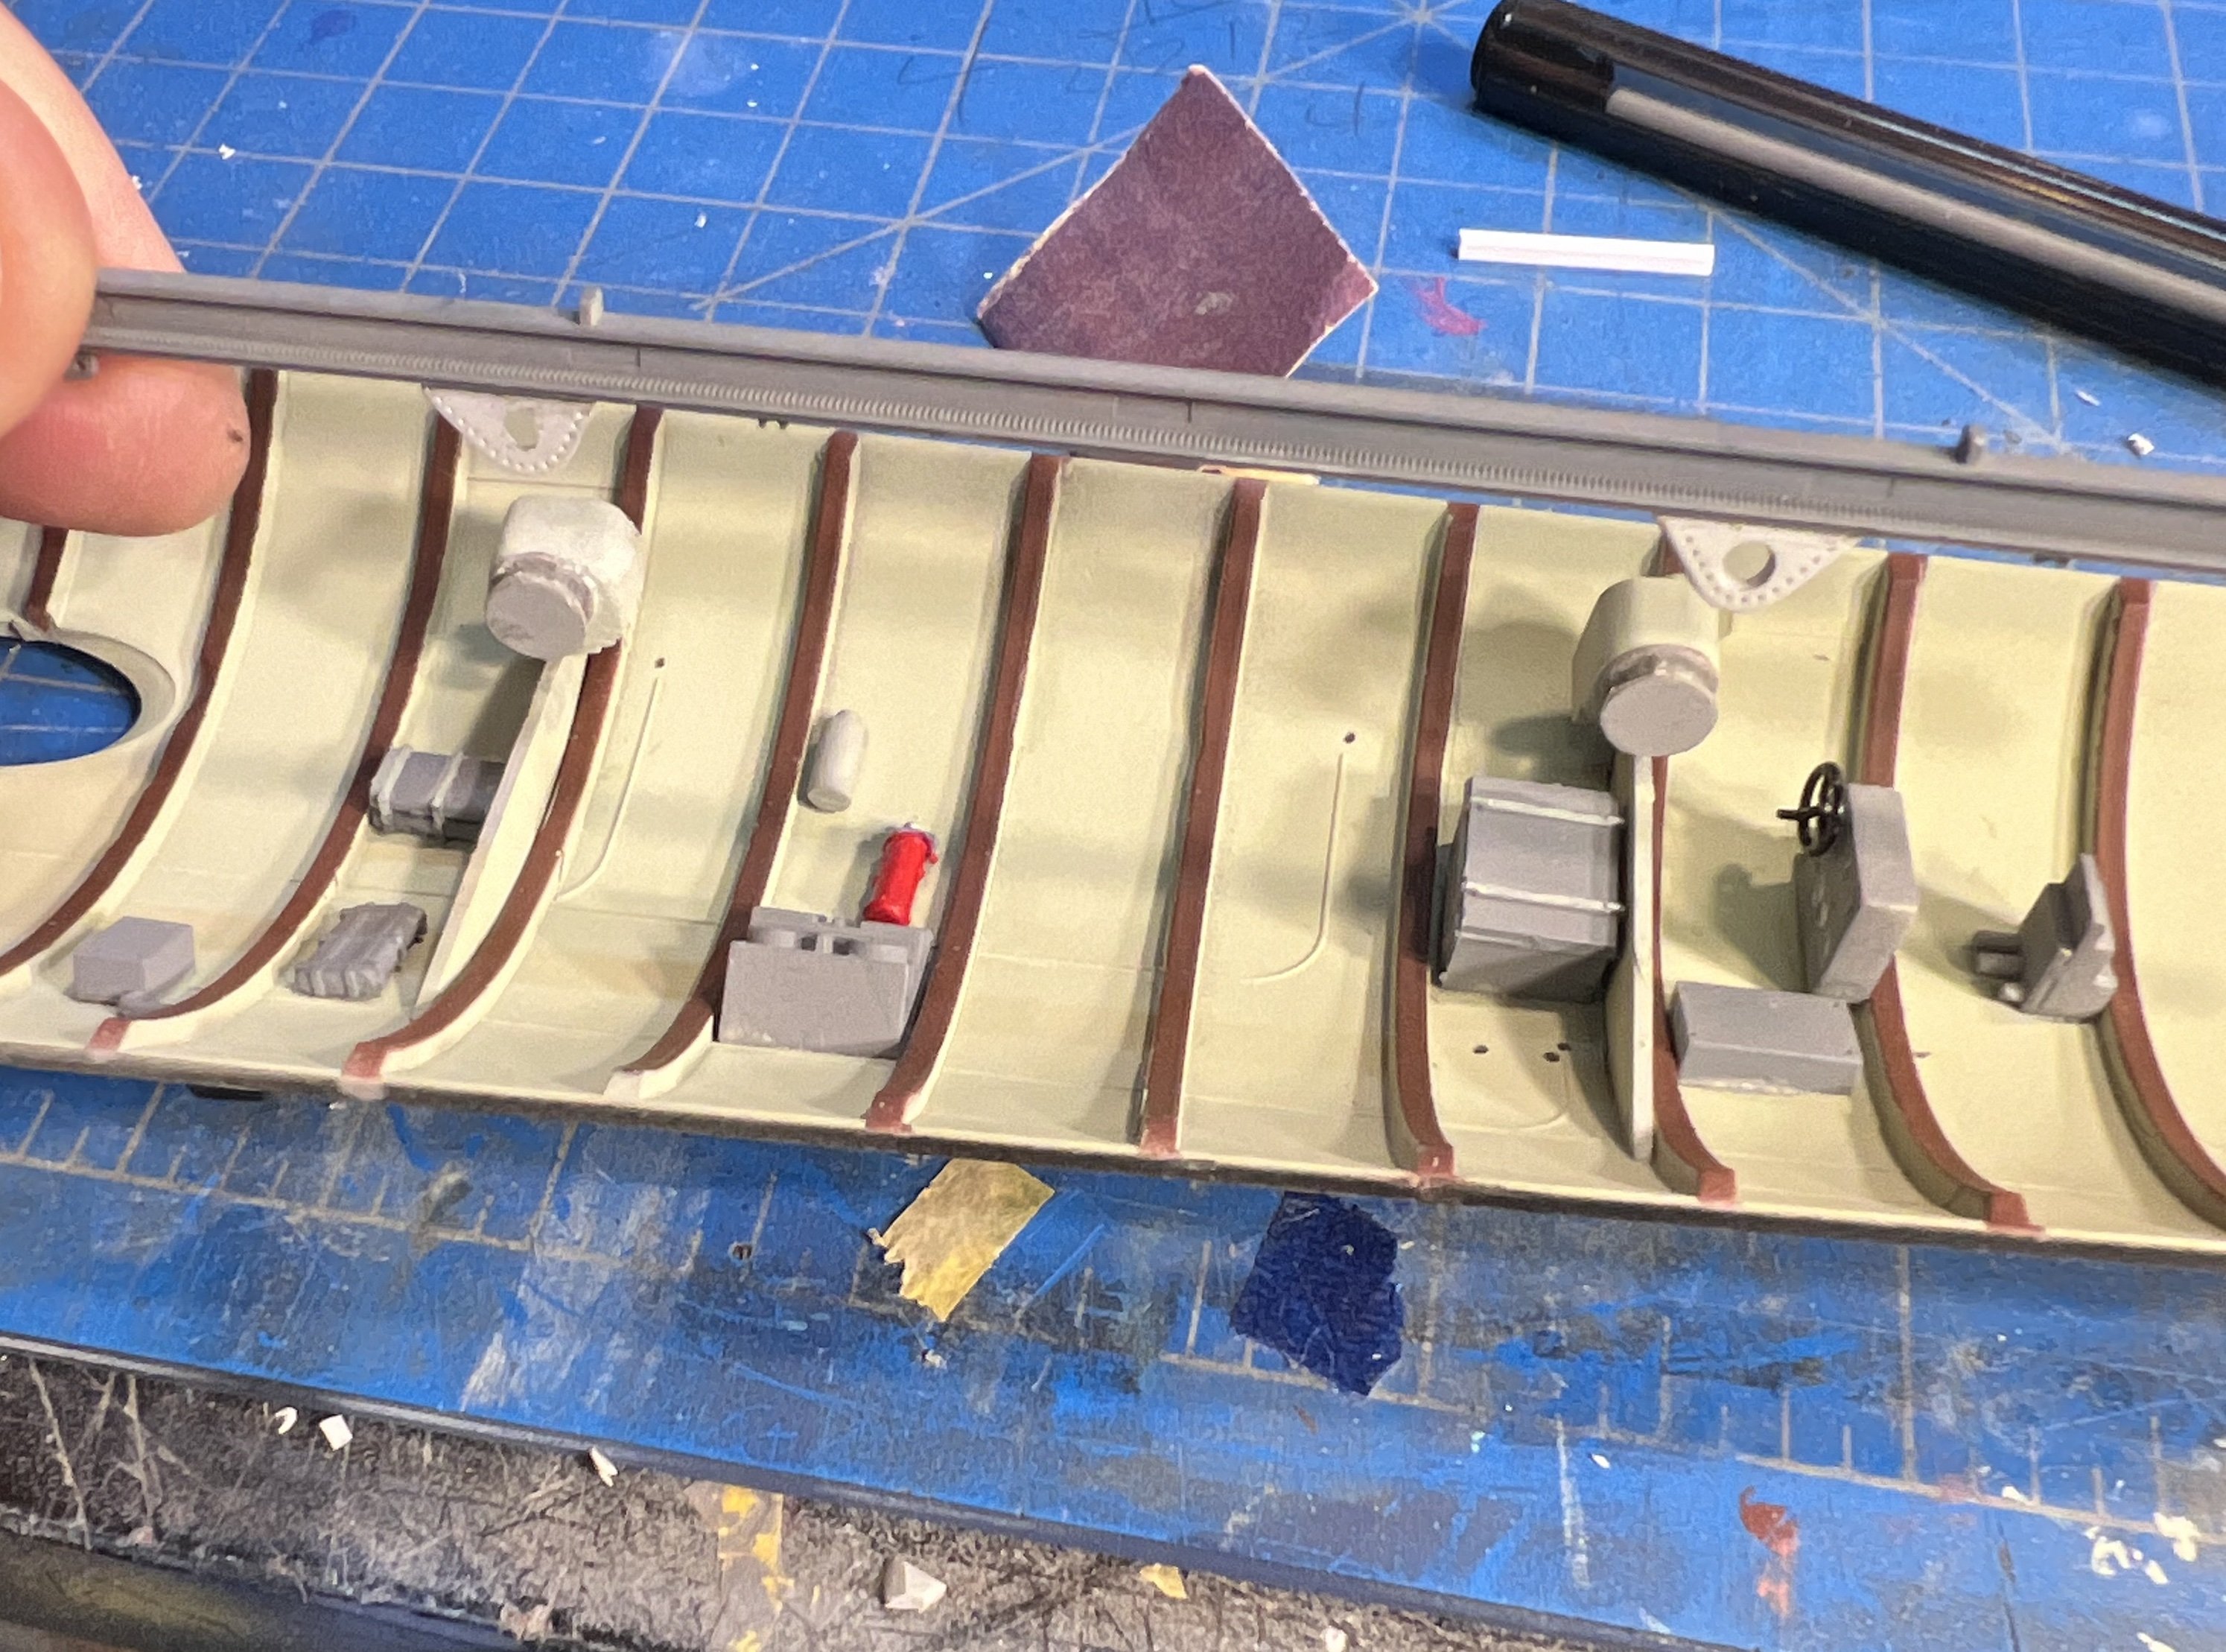
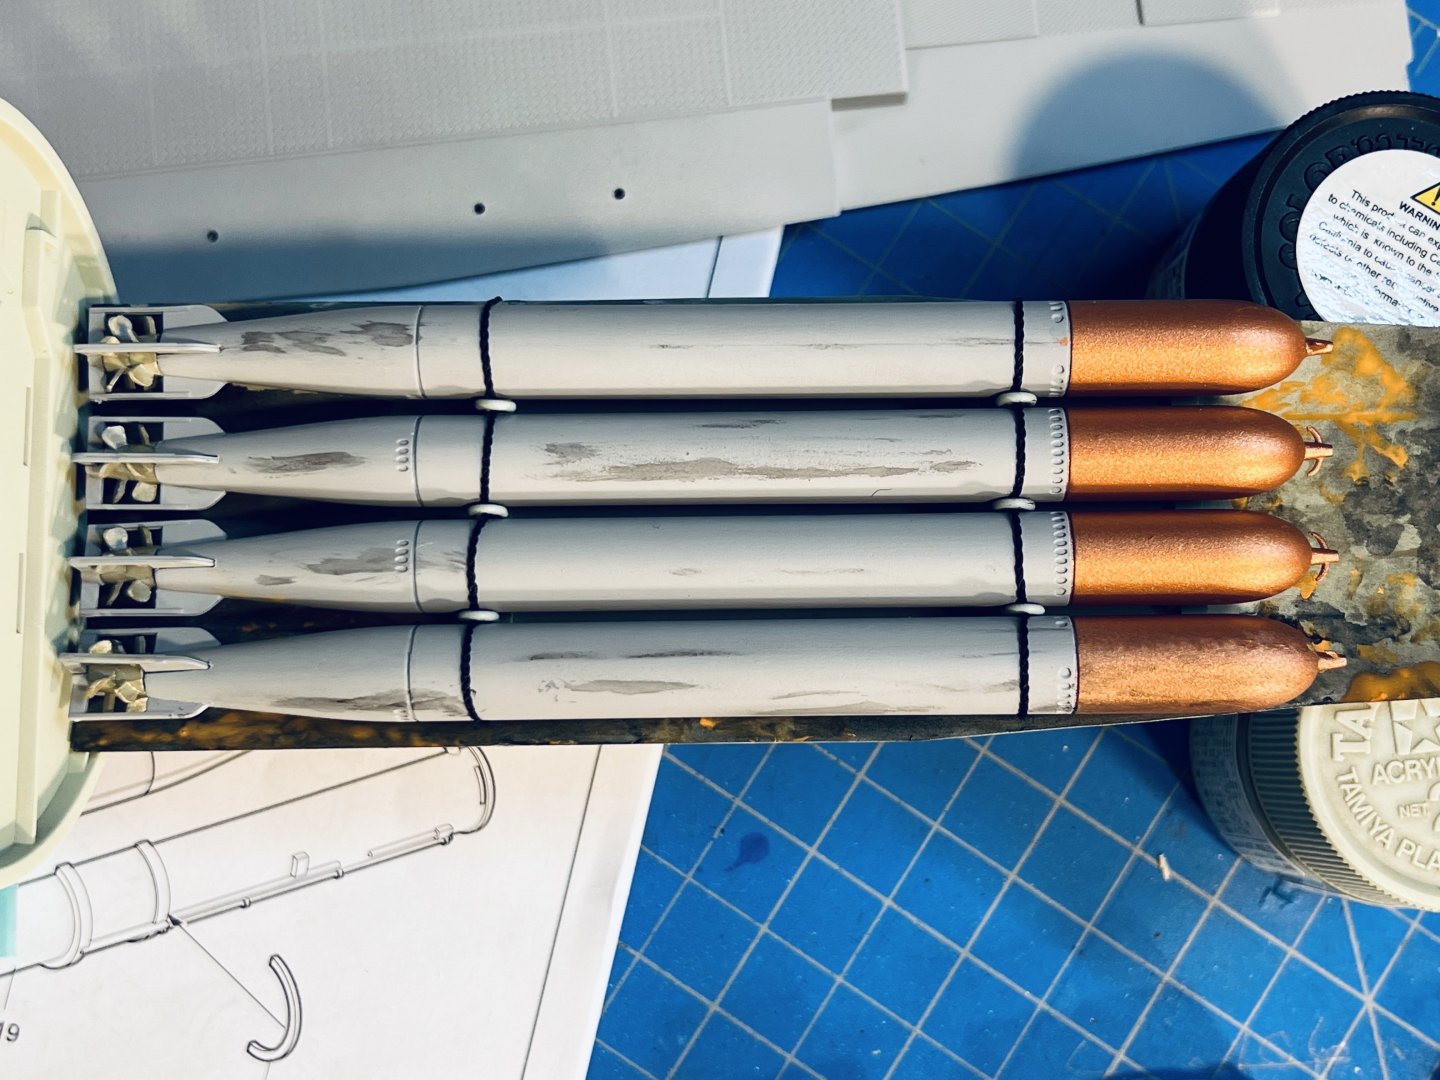
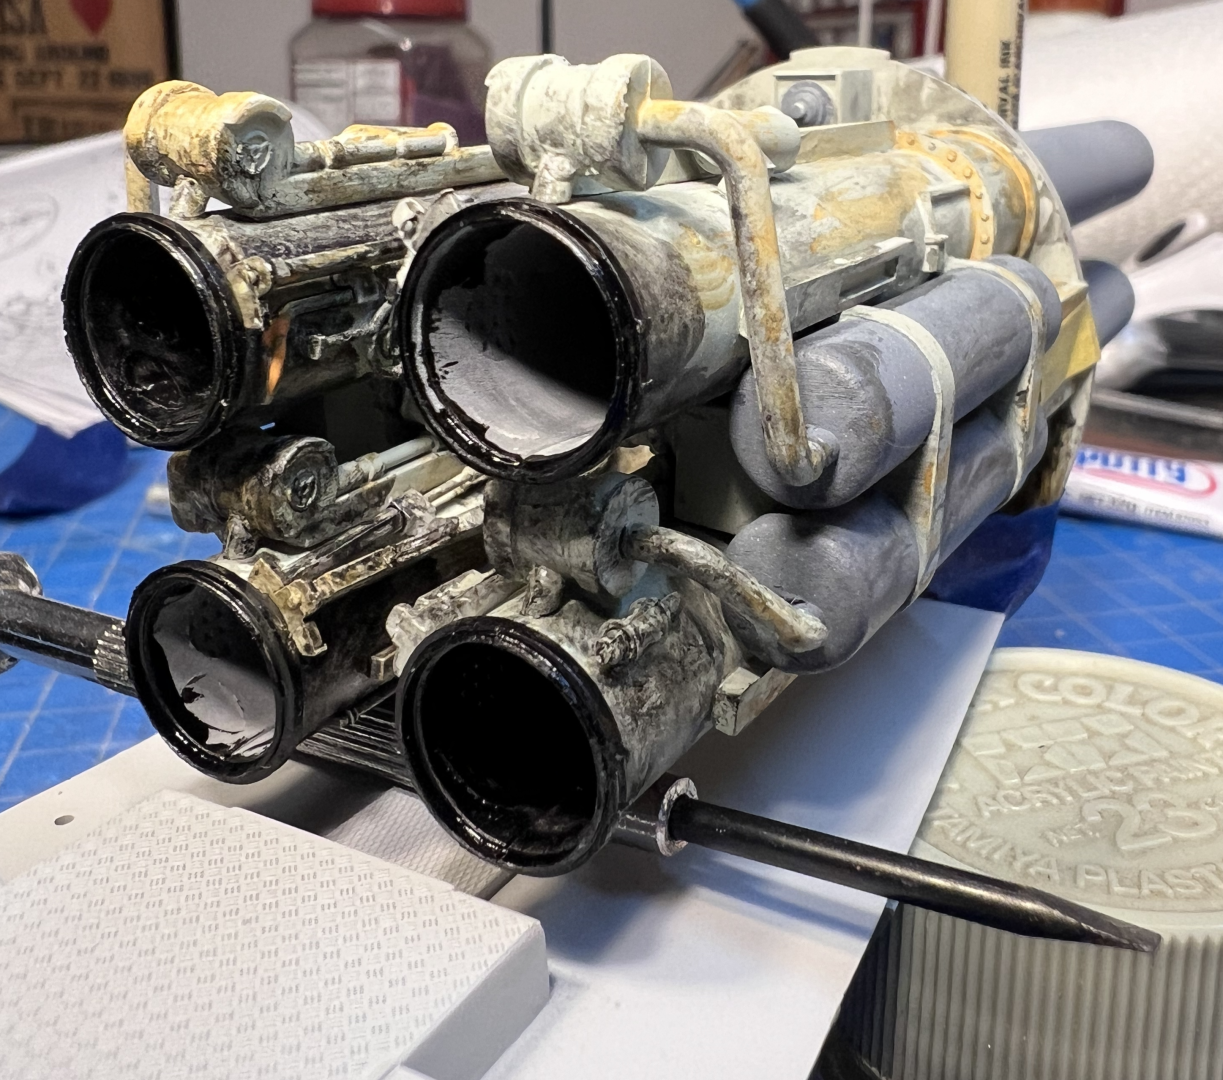
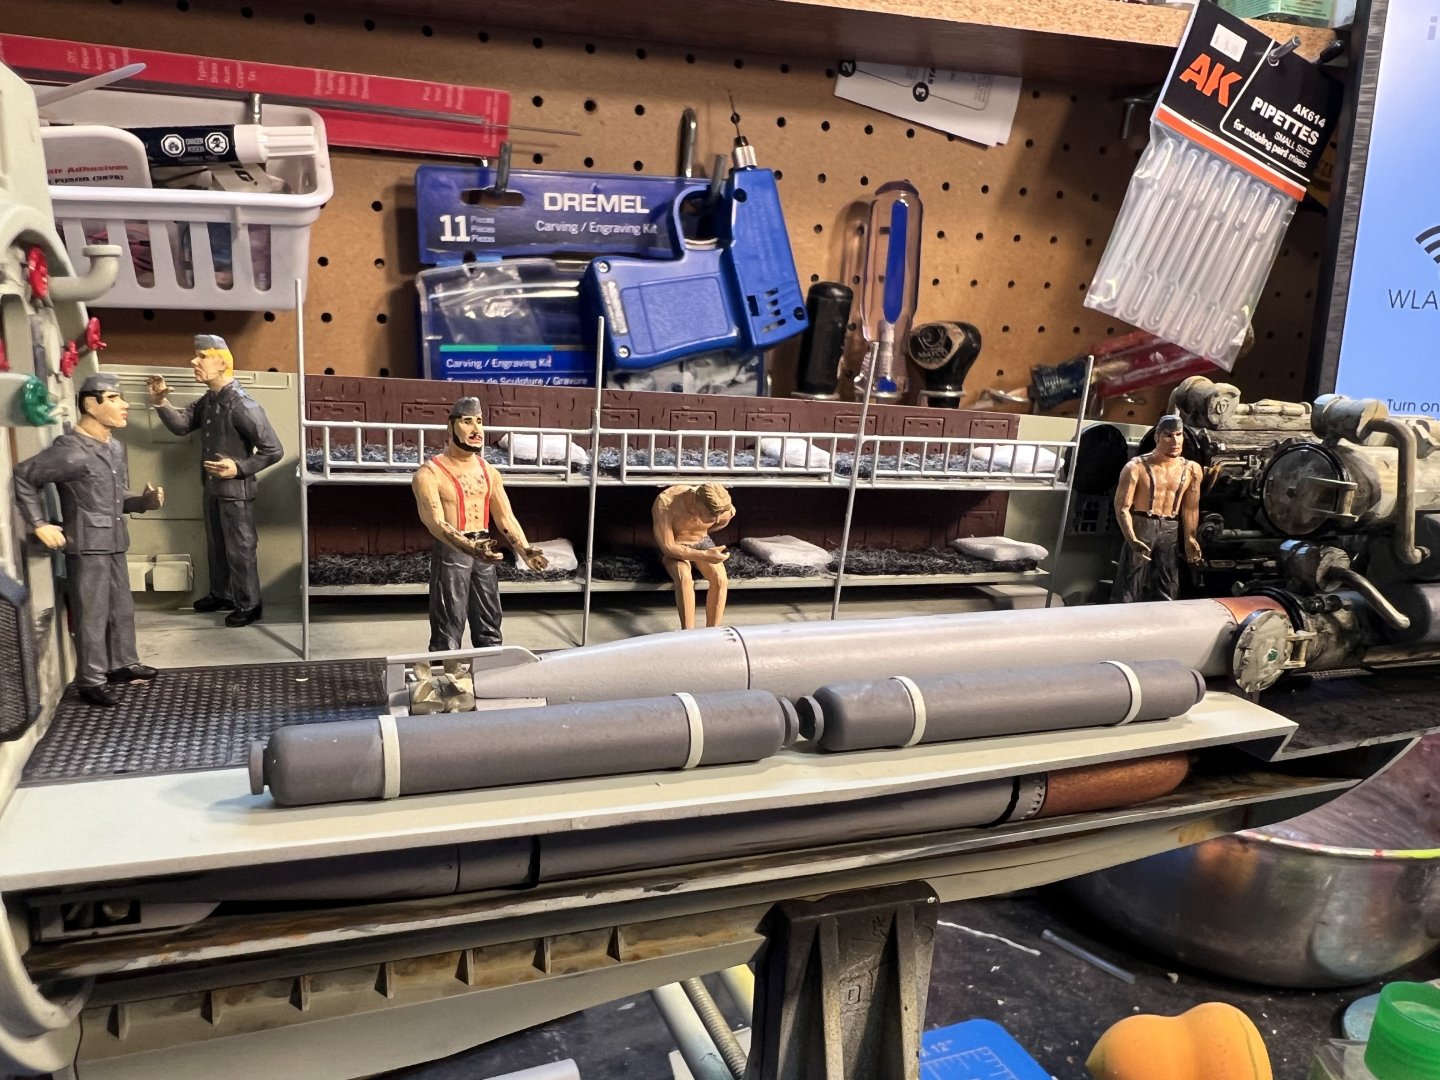
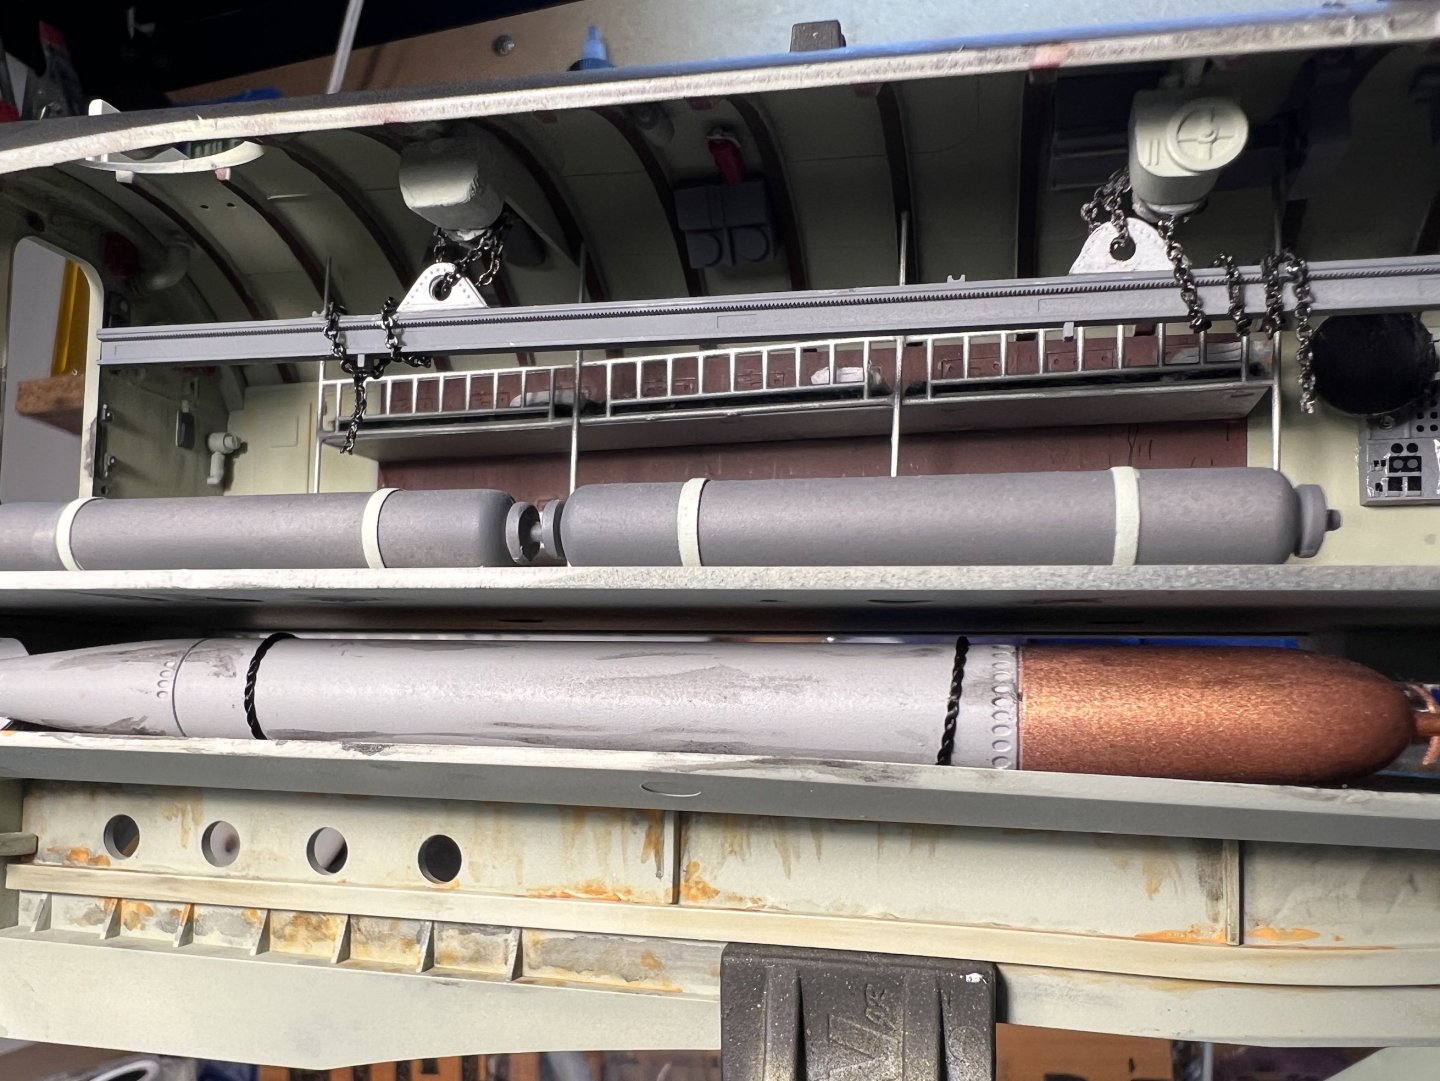
 FORWARD TORPEDO ROOM I received this monster kit for Christmas 2023 and I'm heavily involved in its construction. I'll start off with the Forward Torpedo Room. Tamiya paints and AK weathering used exclusively. If you have any questions on anything, please ask and I will try to help you out the best I can. 12 "Eels" 4 spares arranged on lower tray below floor boards Forward tubes with their grease and other assorted yuck. Crew bunks with great felt and pillows made from folded white polyester. Floorboards weathered with AK bearing grease, panel liner, and ground up pastel chalks (brown & black). Crew members added You will need to scratch build a second winch unit to be used for the I-Beam on the overhead. Here, I used an ankle bracelet chain (courtesy of my wife) to use for the chains on the I-Beam torpedo lift. You can actually find these chains (ankle braclets) fairly cheap at WalMart - $3.00. I had her get another pack of them since I will be using them in the other modules. Adds a real nice touch to the module. Here we have some of the crew added.
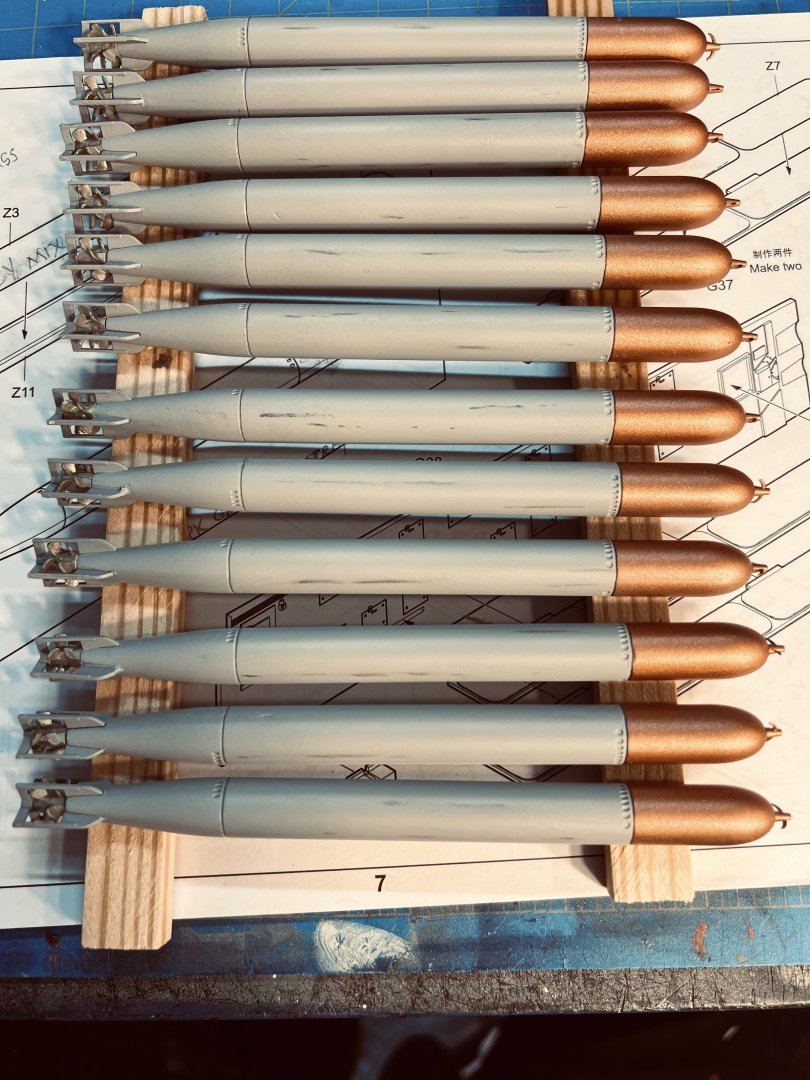


-
C.S.S Alabama, Revell 1:96 85-5621, is my next model now. I found it on Ebay. Two Men O' War were going to be my ladder to experience. After thinking it over, my time would be better served with a greater challenge. I can give the two other model kits away to a kid who wants to get started in ship model building. I bought these two books to get started with: CMS Alabama: Builder, Captain, and Plans by Charles Grayson Wolf of the Deep: Raphael Semmes and the Notorious Confederate Raider CSS Alabama by Stephen Fox What is the difference between CSS and CMS? So, the plan is to build three 1/96 scale plastic models after finishing Charles W. Morgan whaler. CSS Alabama, USS Constitution and then Cutty Sark before my first wooden kit.
-
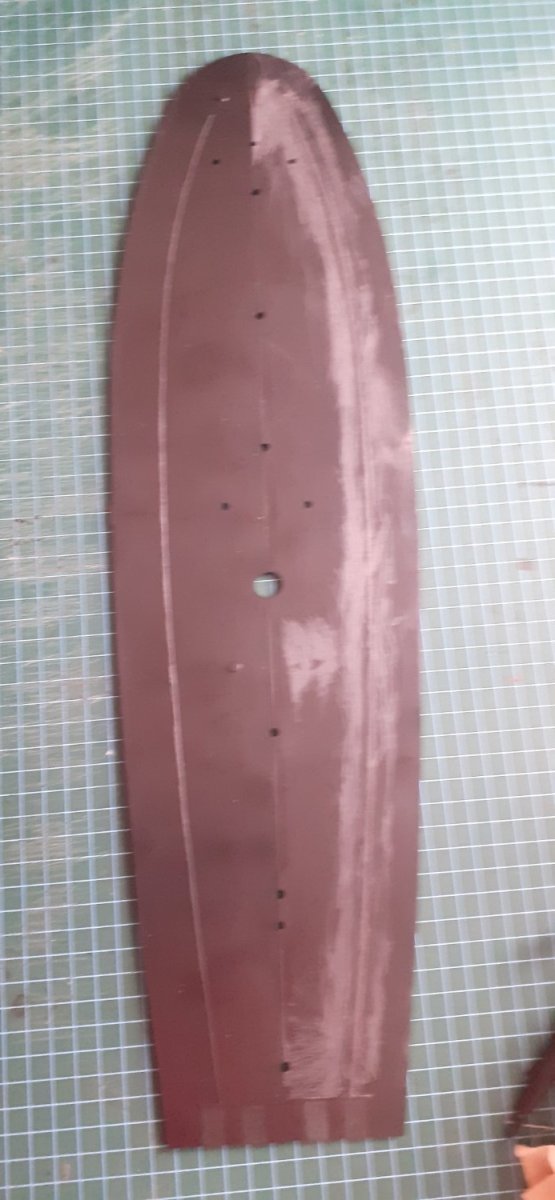
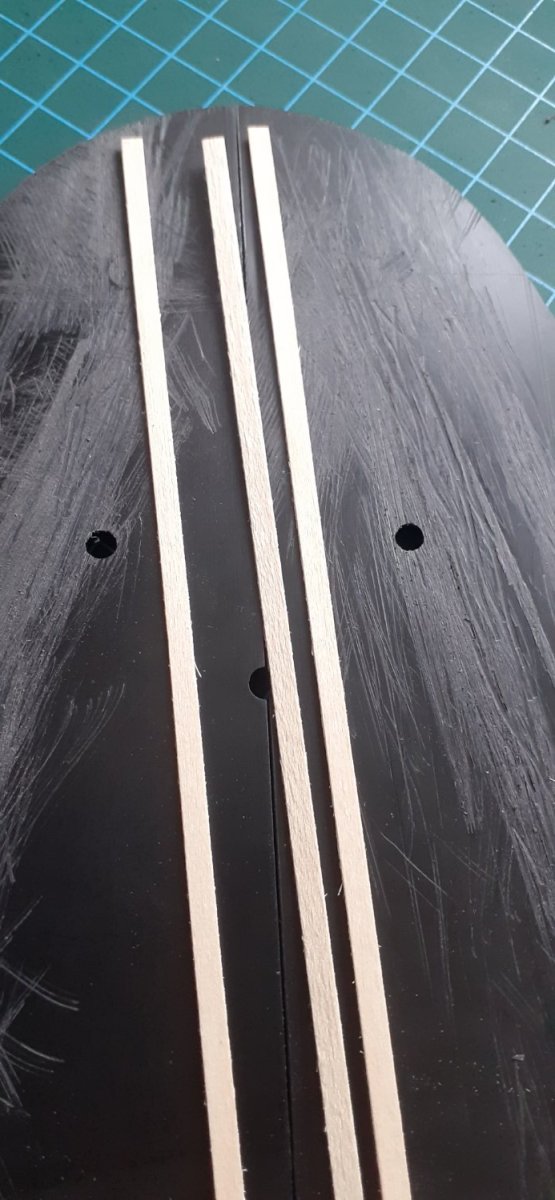
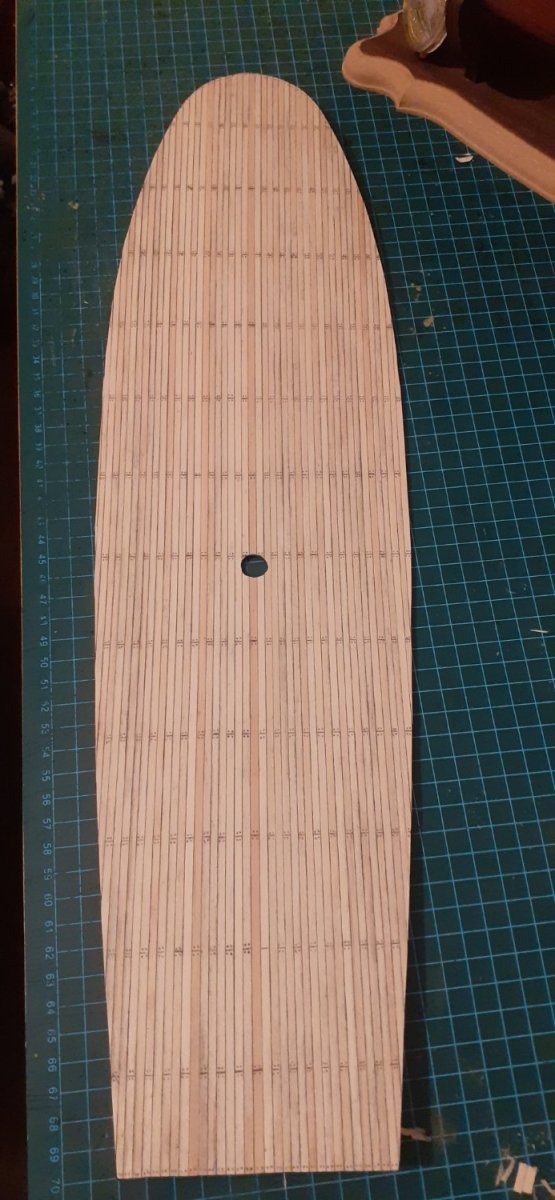
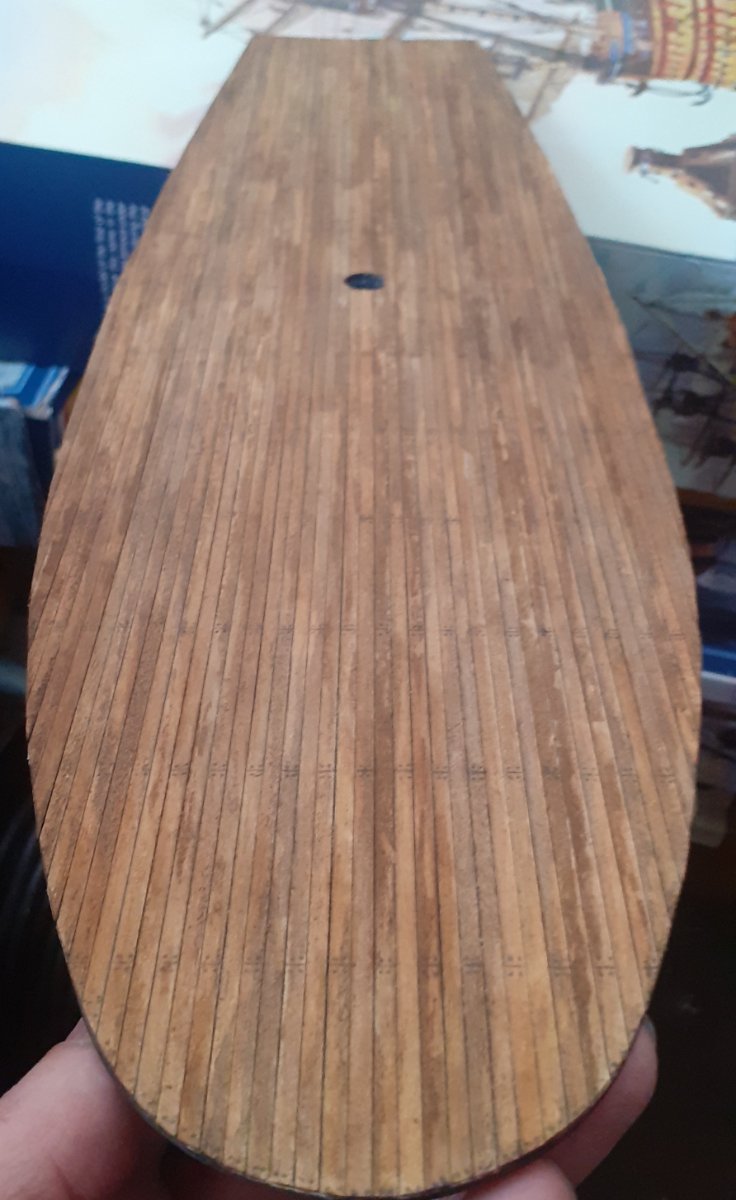
 The next project is this vintage 60's Airfix kit # 1908-400, this looks to be one of the first releases molded in black. This model is void of any planking so I'm proceeding with scribing in some above the waterline only, I'm not too concerned with the remainder of the hull as it will just receive some texture using 80 grit and be finished with the tallow coating, also another area in question is whether or not I want to create the round tuck, but I still have time to make that decision . Thanks for looking. Michael D.
- 104 replies
-
- 10
-
-
- Sovereign of the Seas
- Airfix
- (and 1 more)
-
 Hello everyone, Here is the start of another NY Harbor waterline model. 'Blairstown' was operated by the Delaware, Lackawanna and Western Railroad in New York Harbor from approximately 1914 to the early 50's when it was sold. She was an open decked, self-propelled, vessel equipped with a derrick boom rated for 35 tons. These lighters, being self-propelled as opposed to ordinary 'stick' lighters, were used to transfer important cargo from the railroad piers to ships around the harbor. 'Blairstown' will be built from photographs for the most part as was my previous model 'Isis'. I am preparing a crude drawing to work from using a good broadside photograph. I may paint this model as she was after she was sold to a non-railroad lighterage firm (and still working in NY harbor at least into the 1960's). The sources I am using are the same ones I used to build 'Isis' which I will list at the end of this project. Unfortunately, I only have a couple of photos that I am able to post which are of the 'Blairstown' soon after being built. My model will have among other things a pilothouse added above its former location, a narrower engine house etc. Photos below are from National Park Service, Steamtown DL&W glass plate negative collection, Watson B Bunnell Thanks, mcb
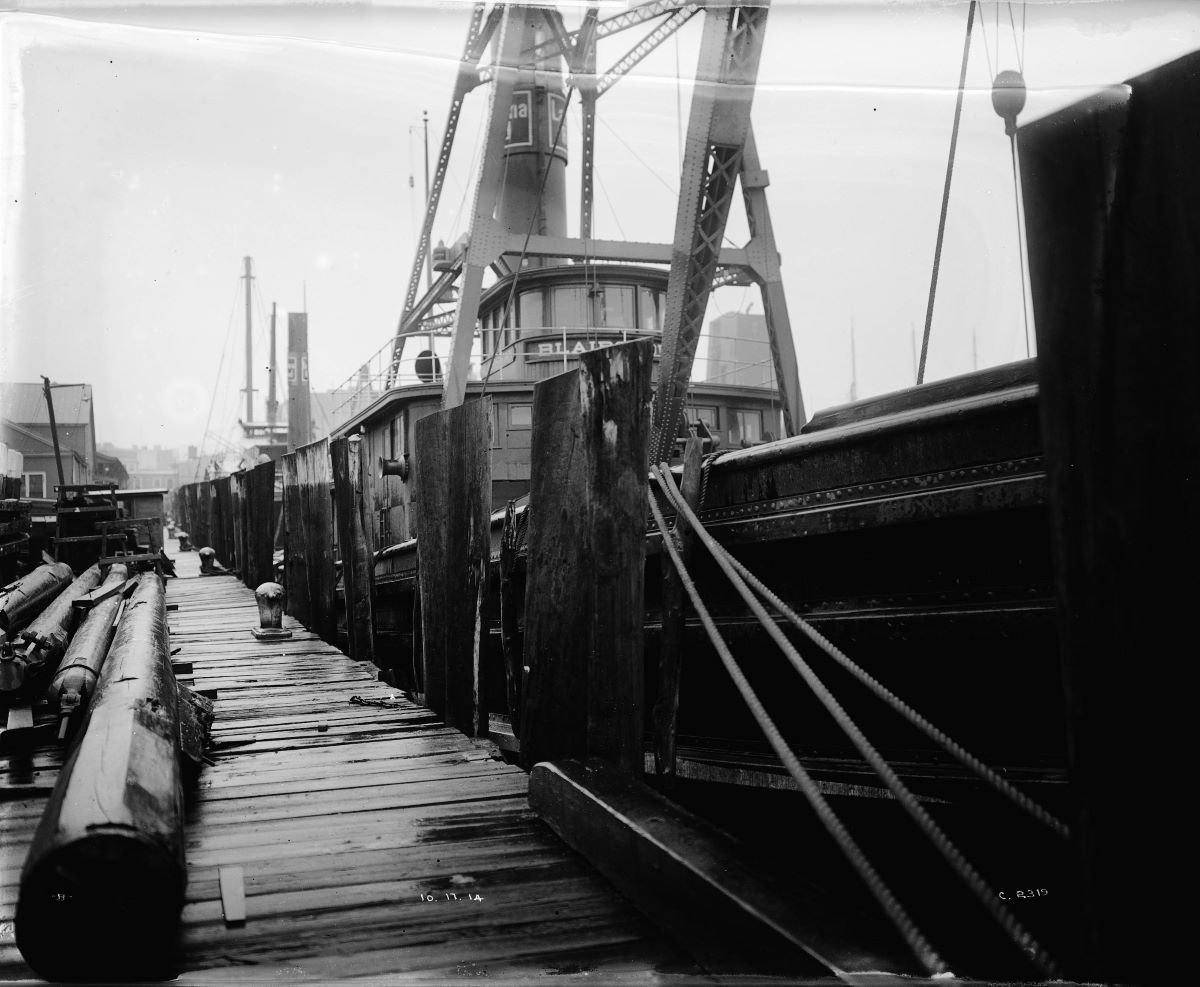

-
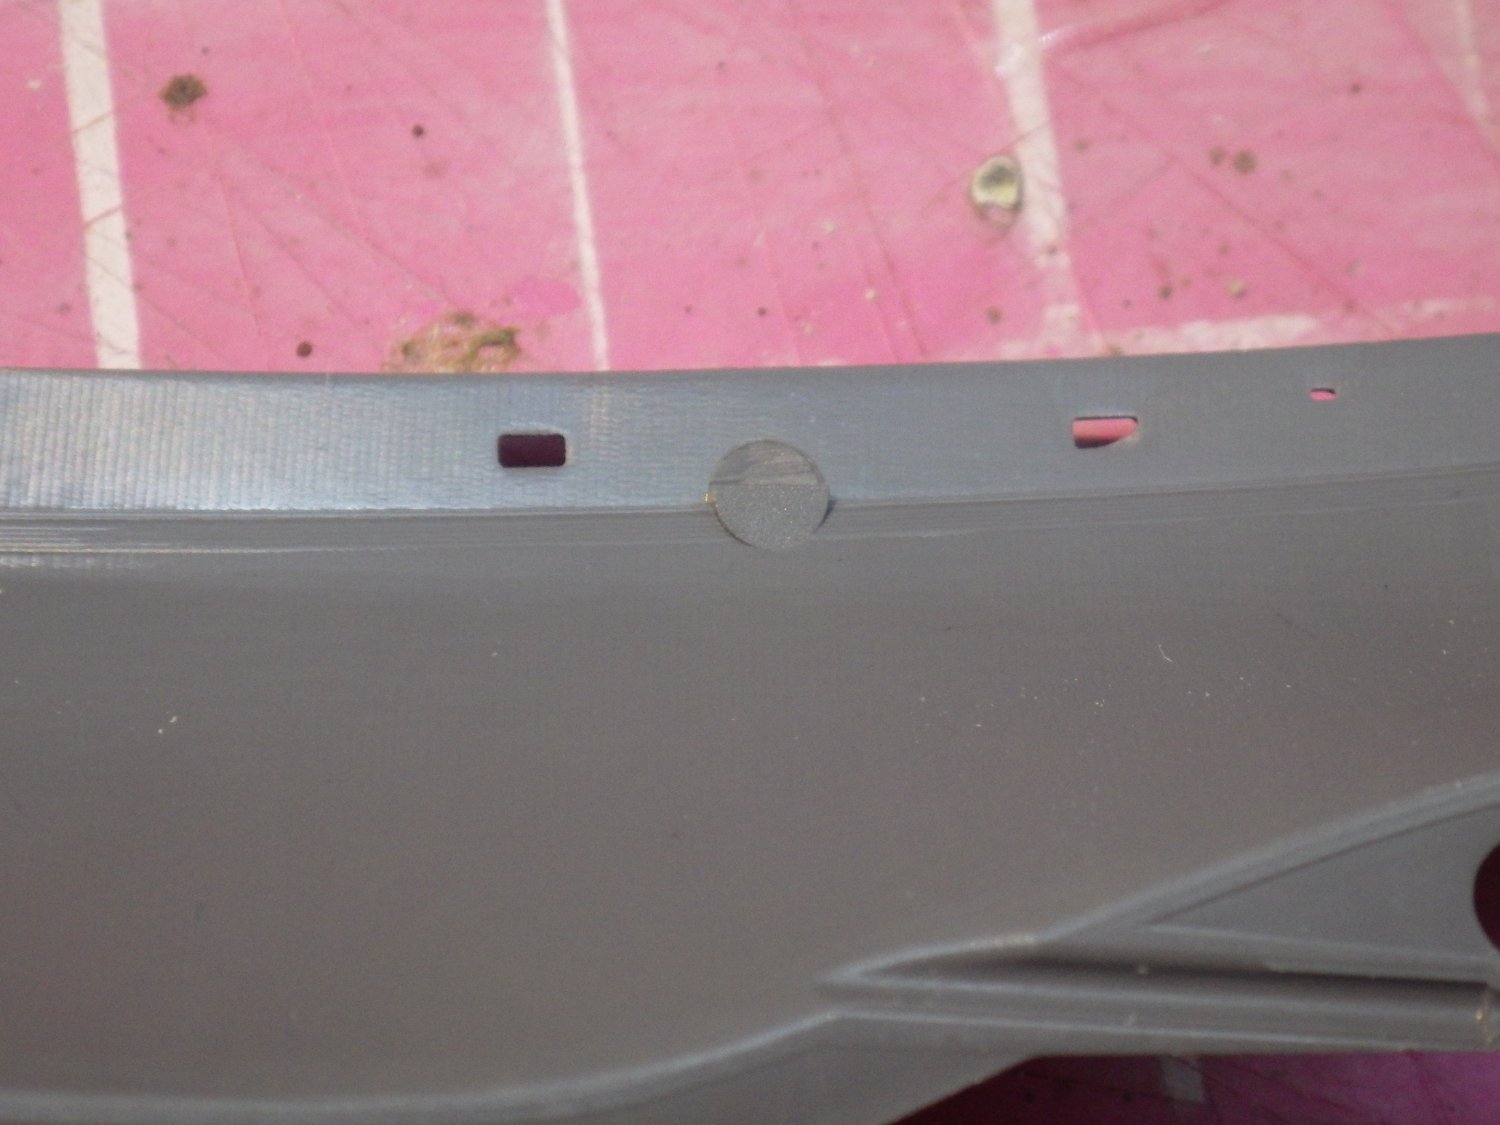
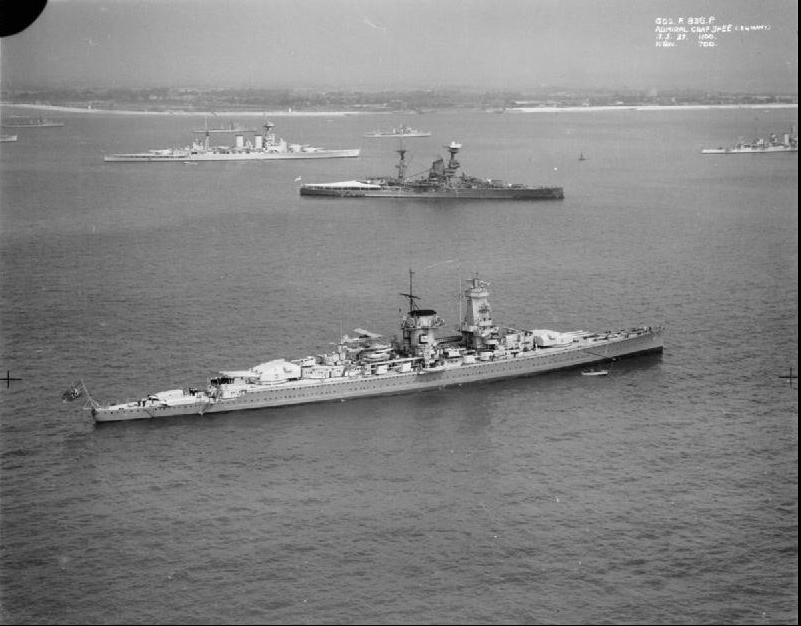
 After my failed attempt at the 1:700 scale Dragon Z-39 I poked around the interwebs and found a site that presented skill levels in their reviews. ‘CyberModeler Online’ is a very nice review source. <sarcasm>Surprisingly</sarcasm>, the Dragon kits are ‘Expert’. But, the Academy Graf Spee kit I bought concurrently was a ‘Beginner’ kit. I've been lurking this site for about a year. It has kept my interest in the hobby going. So, here I go again!!! I’m going to model her as she was while ‘showing the flag’ just before WWII. She, and her captain, were caught out by the start of WWII. It is not likely a good thing to be in the wrong hemispheres (both of them) as an unescorted cruiser against the world’s best and largest navy. Her crew applied many hasty, at sea, camouflages – some of which are cool. I really like the brush painted bow wave she sported on her final sorties, but I don’t know if she also sported the fake second funnel at the same time. Regardless, she did not take fire till the Exeter, Ajax, and Achilles plinked her at the Battle of River Plate. Thus, she probably should not be heavily weathered, and she had been well cared for. That means just two main paint colors and no camo pattern. I’m going to whale this one a little bit. I mean, I paid for her a year ago so any mullah spent now just seems like a justifiable new kit purchase. I’ve never used 3D printed parts but I think working those in will be easy and effective. I could not imagine bending PE for all those secondary guns. The Eduard PE will be used for railings and for some easy PE stuff – I did OK with the Z-39, but it was difficult. The plastic rails provided in the kit provide a nice and easy template for the PE. Regretfully, the Eduard PE doesn’t have the ‘CORONEL’ plaque that was placed on the superstructure while the WEM PE does – but the Eduard instructions are derived from the Academy kit instructions and I’m thinking that will make things much easier for a noob like me. I have never tried a wood deck, but there is no time like the present and the Artwox deck seems to fit no fuss, no muss based on build threads I have read. And, I’m going to ‘nope’ on porthole covers and whatever – I want to have a win here. Another thought for the more skilled and ambitious. There is a really cool photo out there where the Graf Spee is anchored near the HMS Hood and Resolution for the coronation of King George VI in 1937. I think that will require back dating her secondaries since she was refit to include the below aftermarket secondaries in 1938. Look at this beautiful photo: If any of you see anything amiss, please comment. I have yet to click the ‘Buy’ button and will probably not do so for a couple of days. I am planning on using Squadron.com for the purchases. If anyone has better sources please inform me. They seem ok though. Aftermarket: Item Cnt Manufacturer Part No Main Guns/Turrets 1 Micro Master MM1743P 8x1, 150mm SK C/28 Kit Provided 3x2, SK C/33 Twin 105mm Dopp.LC/31 2 Black Cat Models AC350071A 4x2, 37mm FLAK SK 30 Twin, Dopp Mount 1 Black Cat Models AC350068A 10x1, 20mm FLAK C 30 2 Black Cat Models AC350064A Artwox Wood Deck 1 Artwox AW10049 Eduard 1 Eduard 53050 Paint: Color Hellgrau 50 (light gray) Vallejo Model Color 990 (light gray) Hellgrau 51 (dark gray) Vallejo Model Color 905 (blue gray pale) Happy Hunting and Pray for Me...
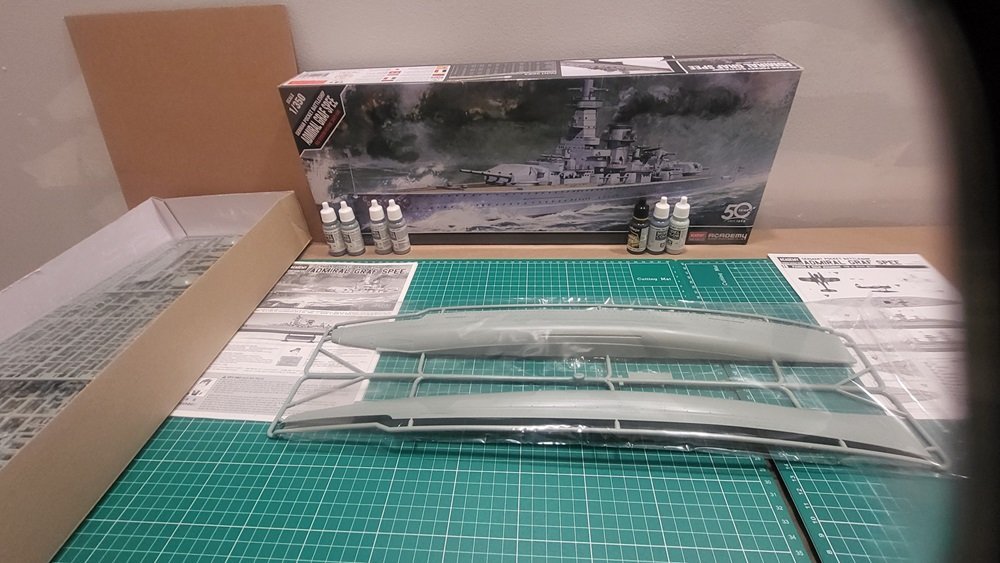
- 27 replies
-
- 7
-
-
- academy
- Admiral Graf Spee
- (and 5 more)
-
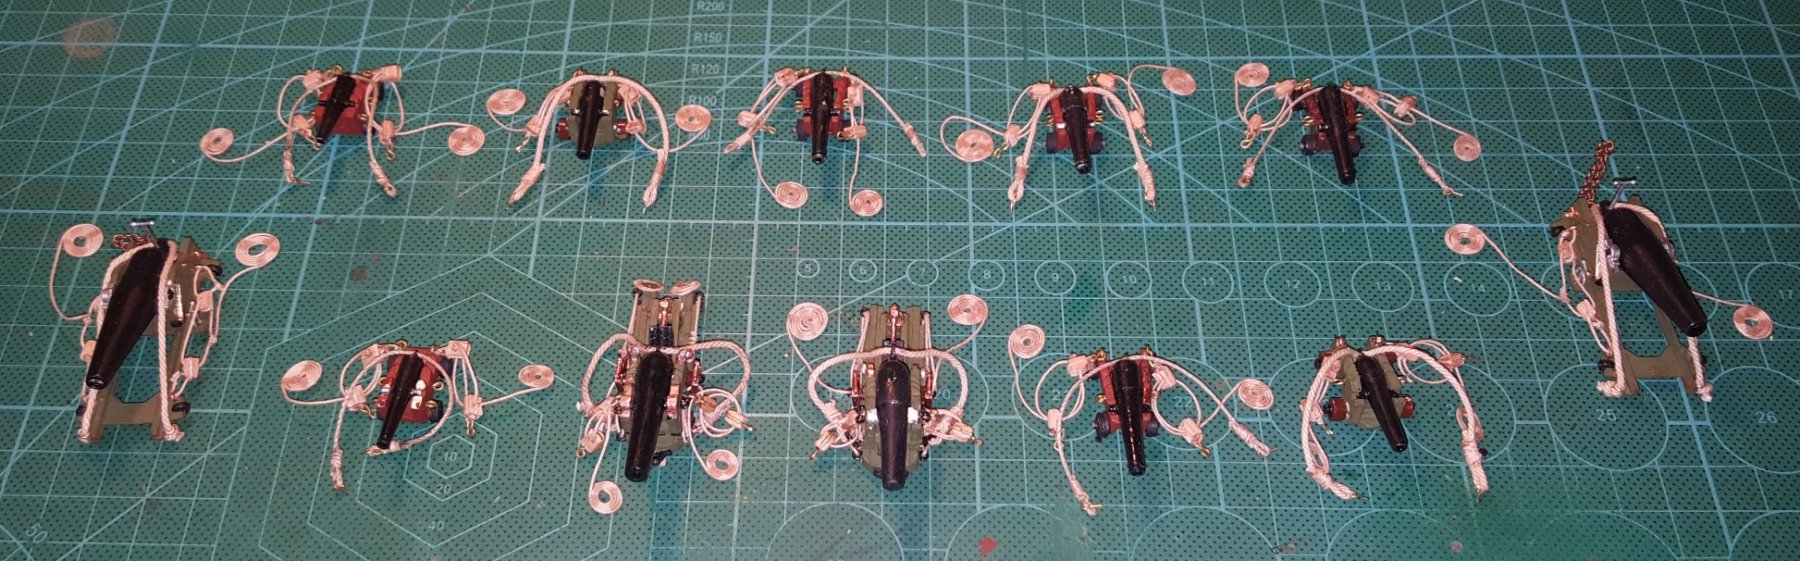
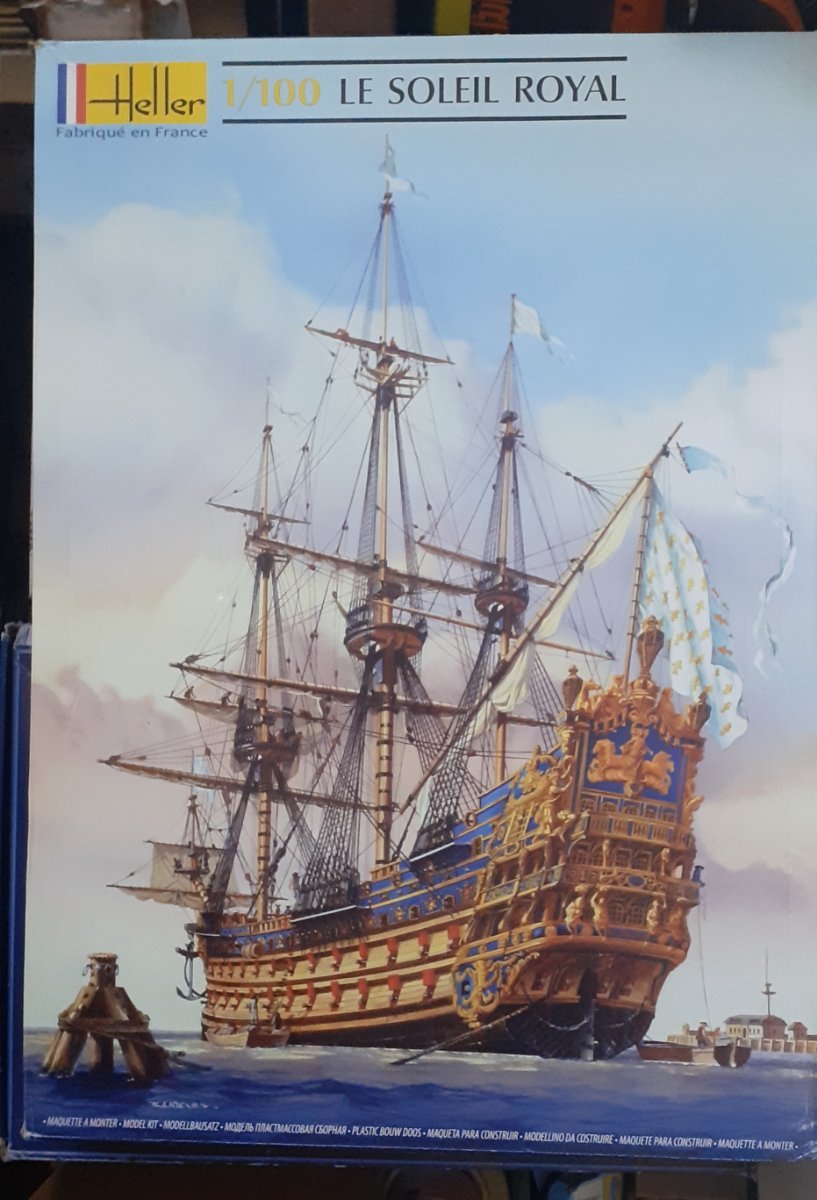
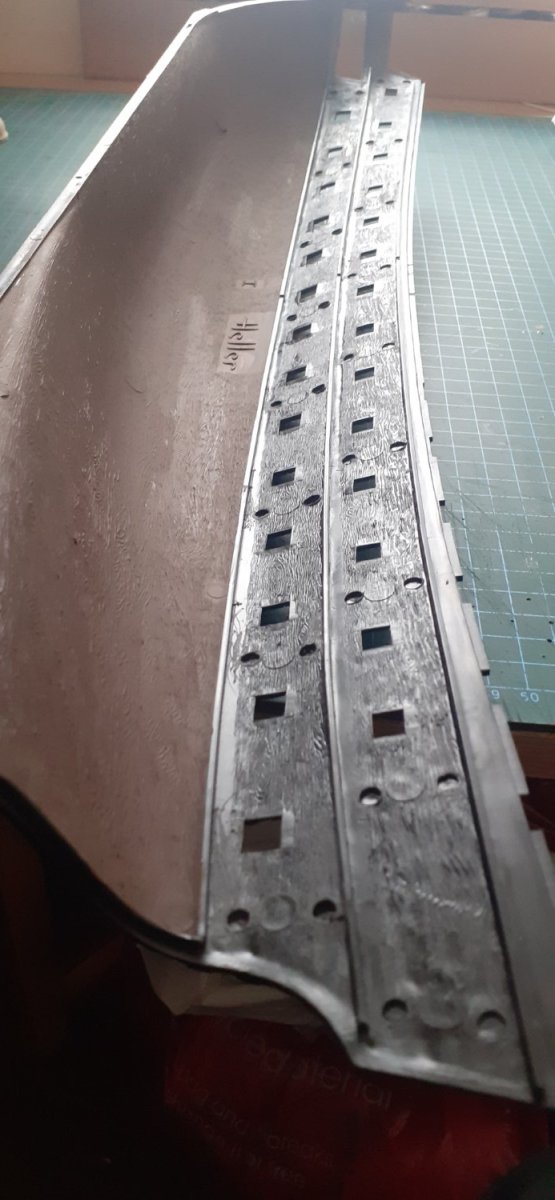
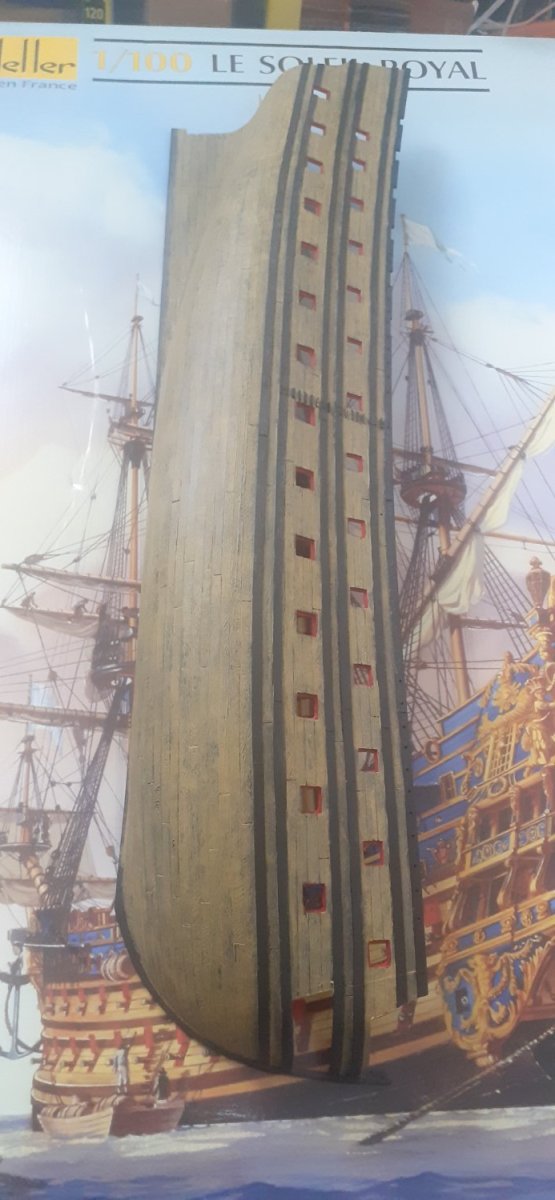
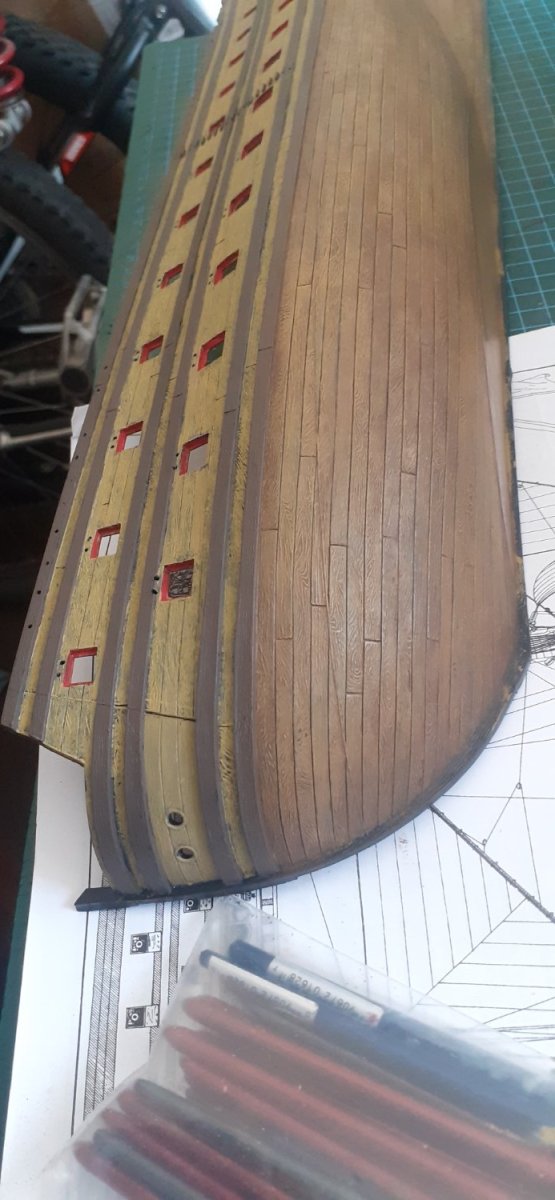
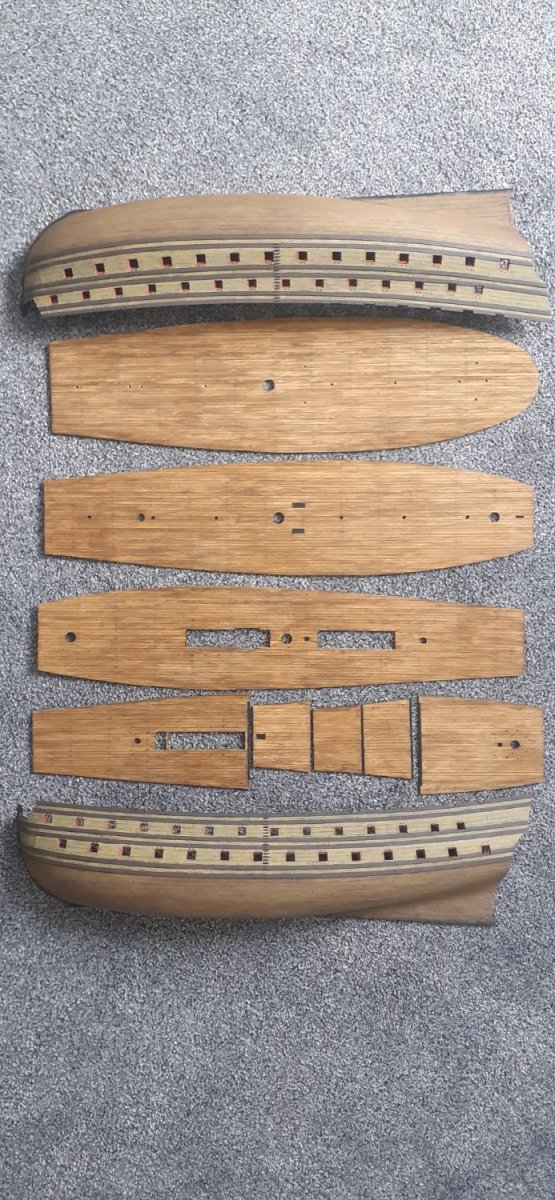
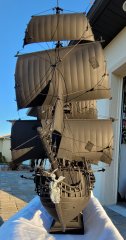
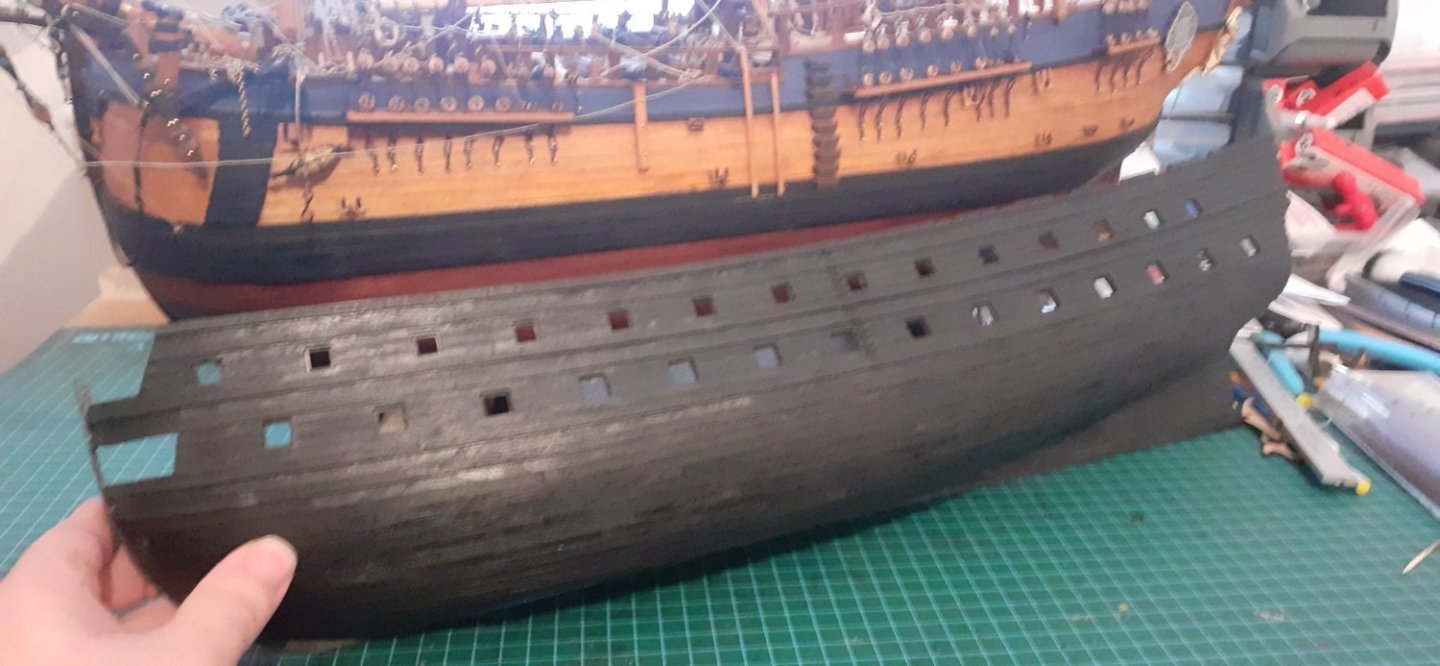
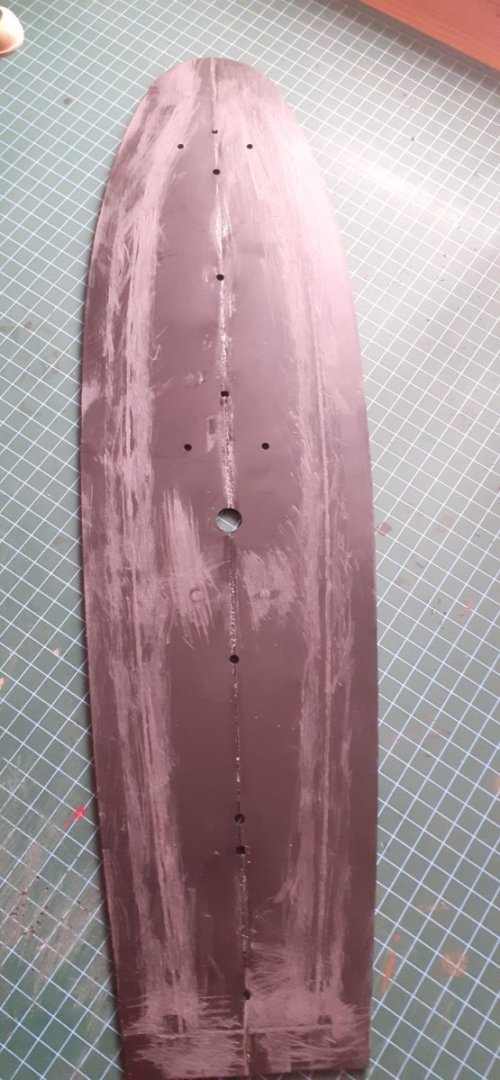
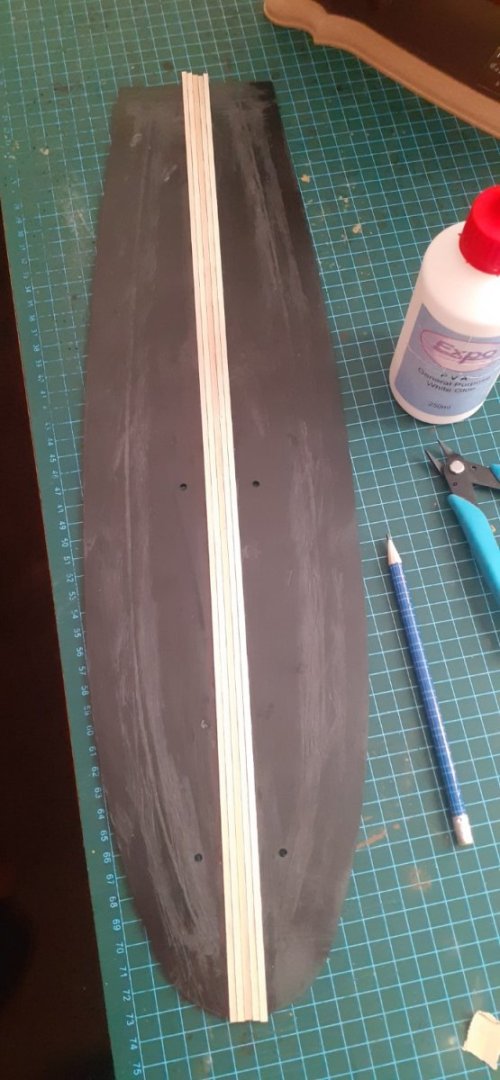
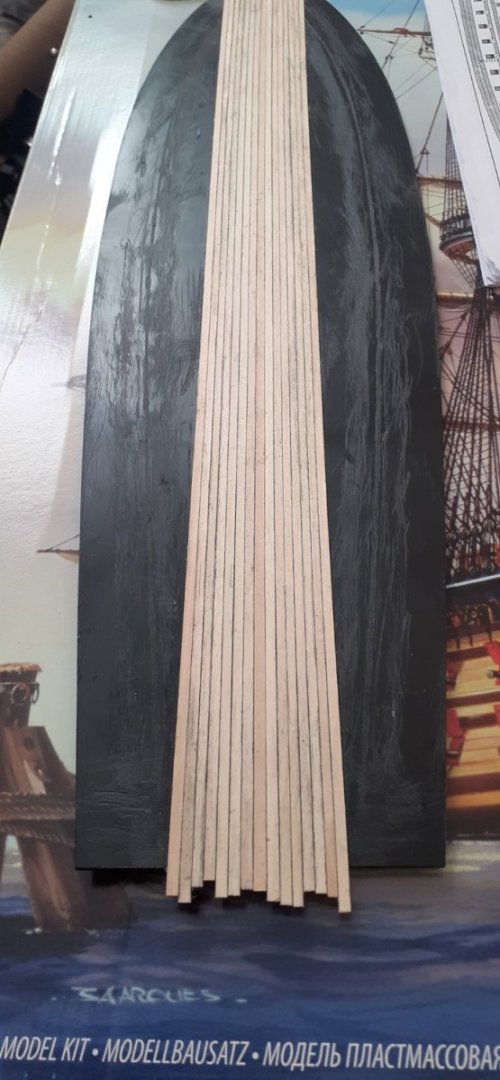
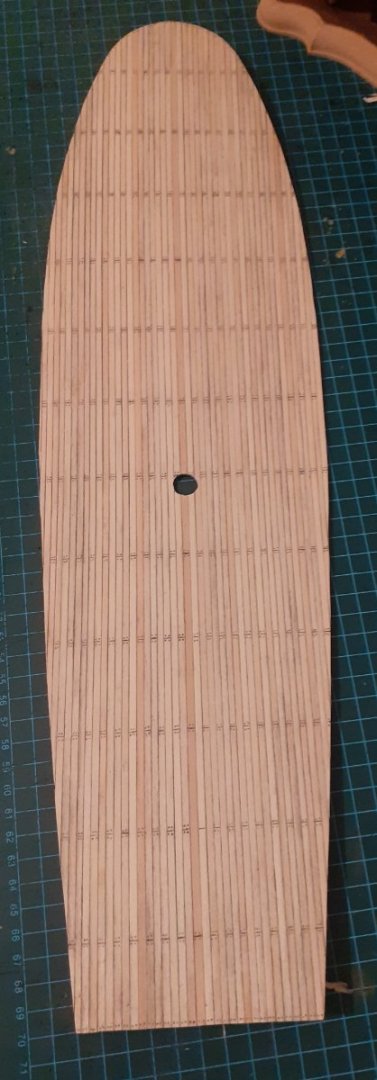
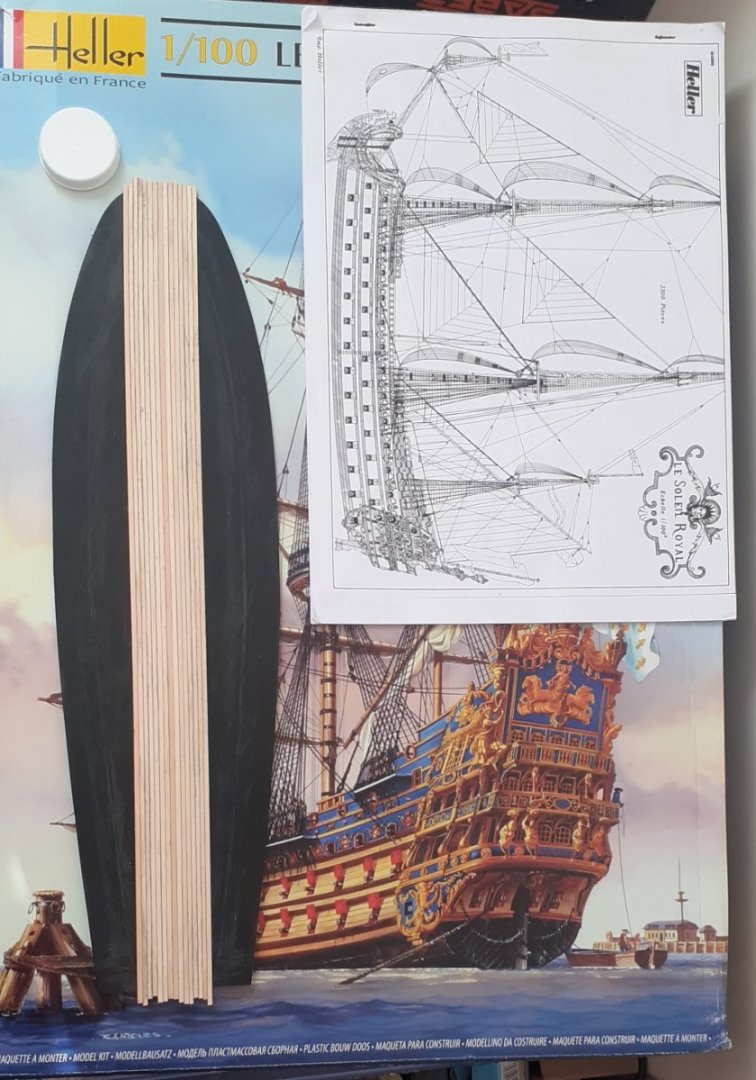
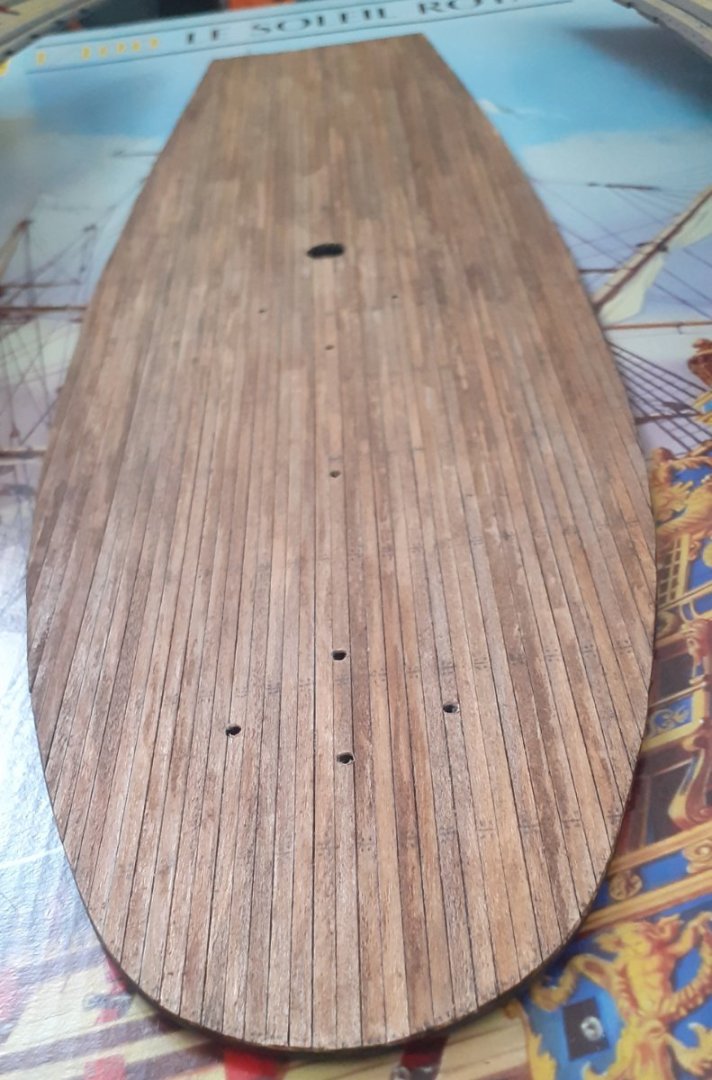
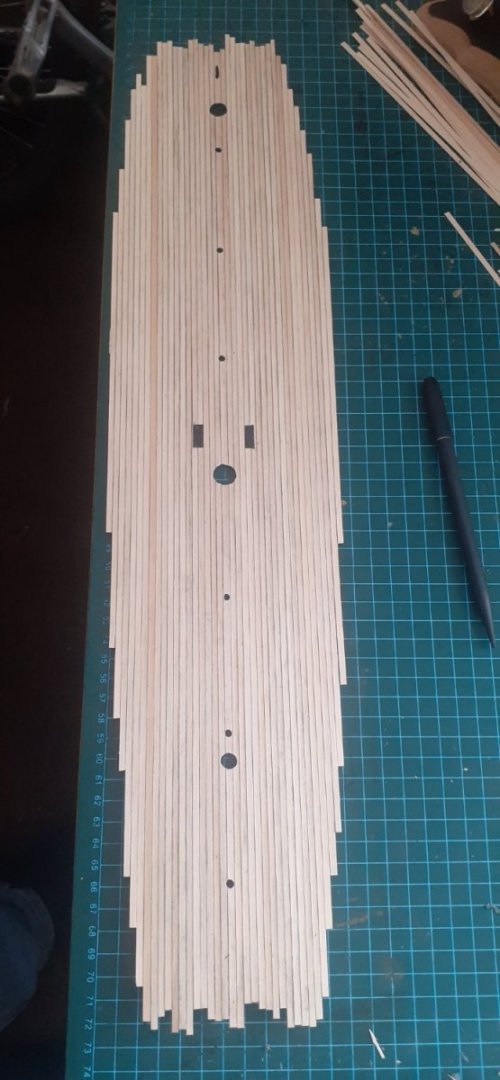
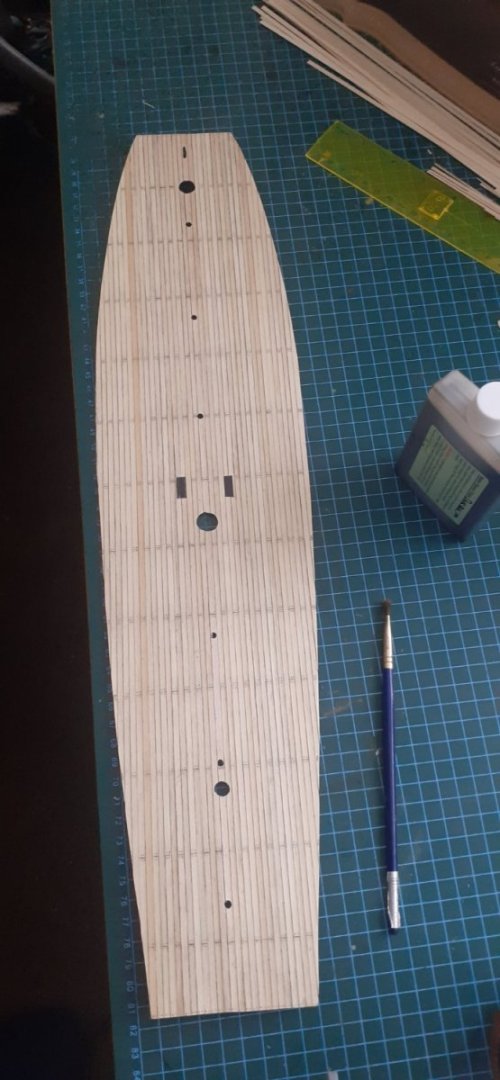
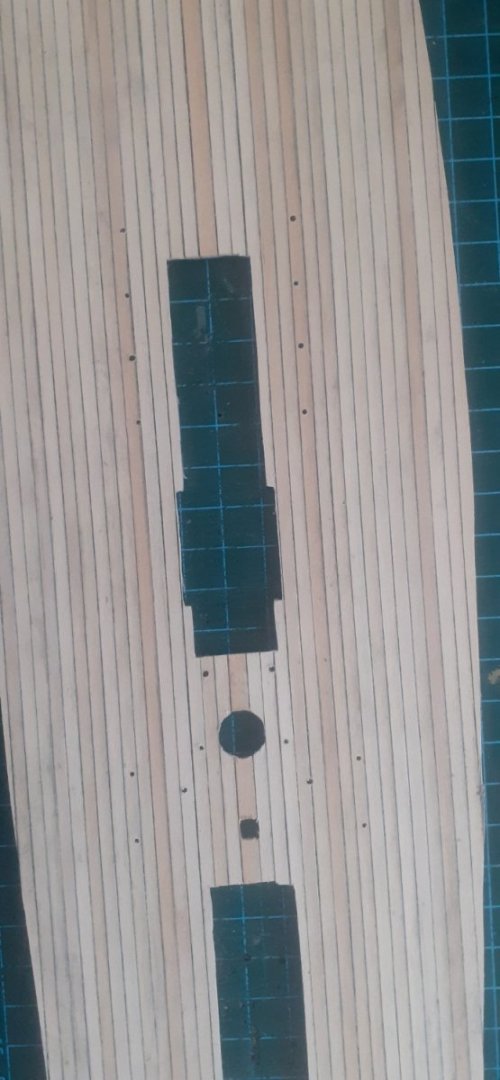
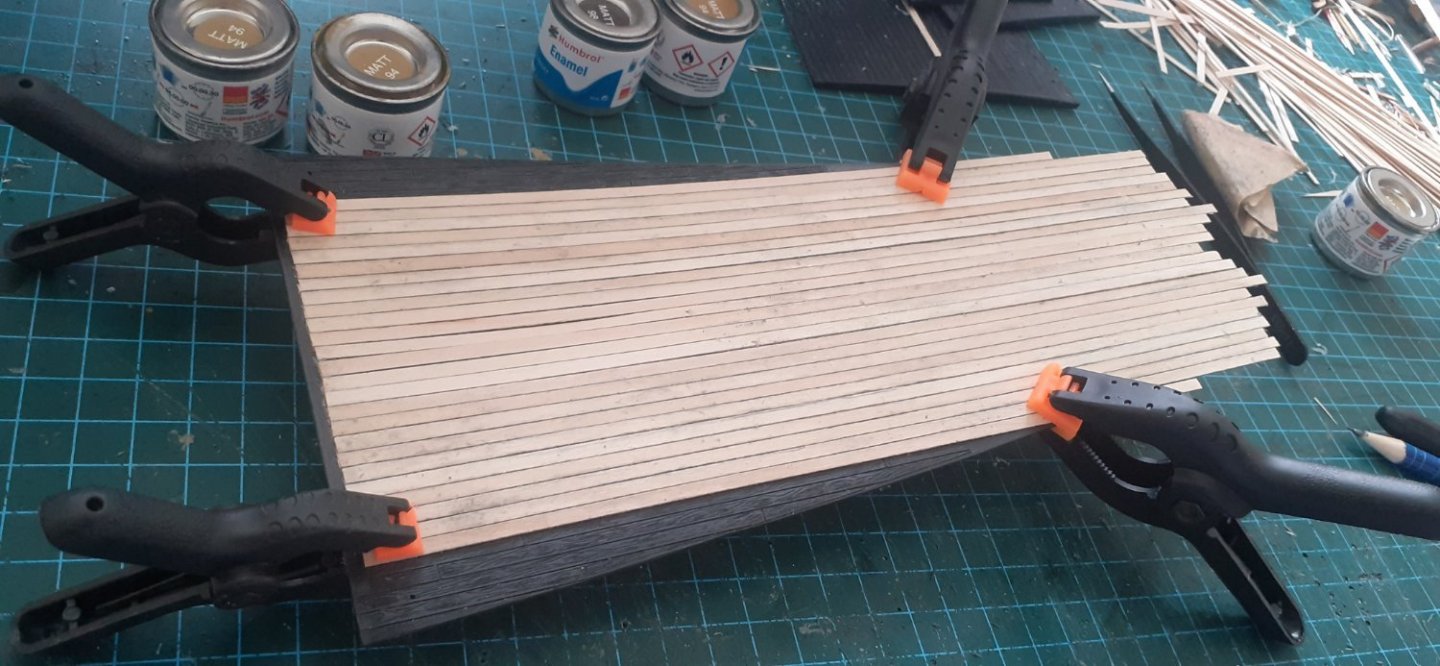
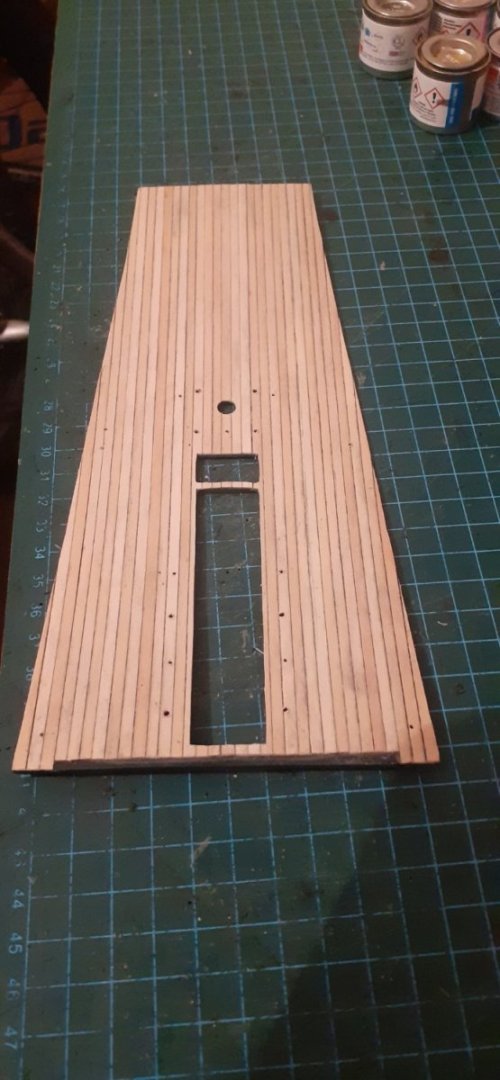
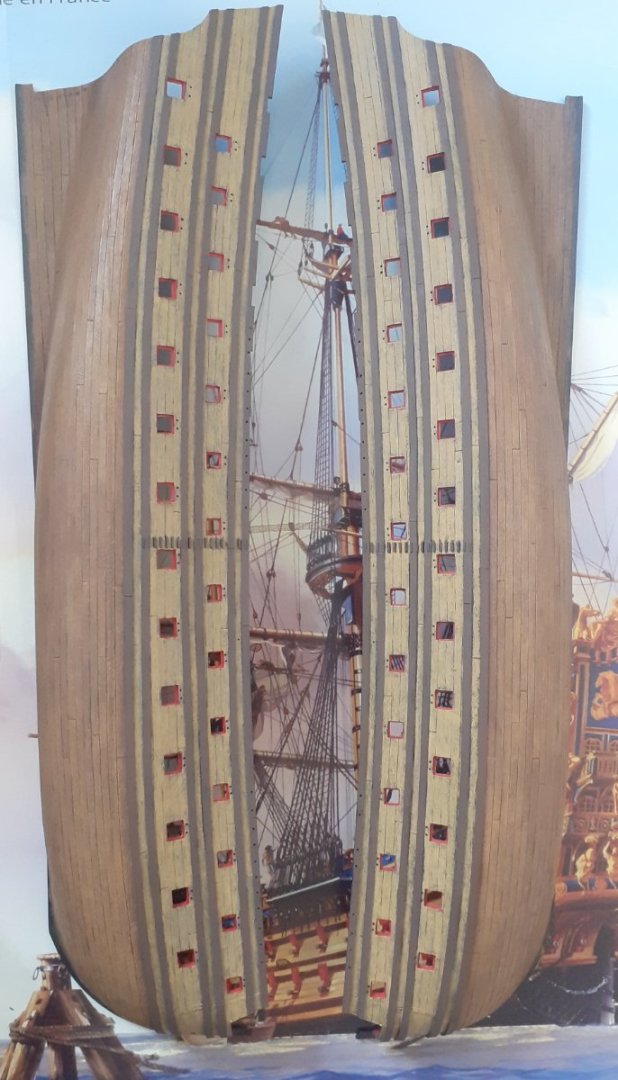
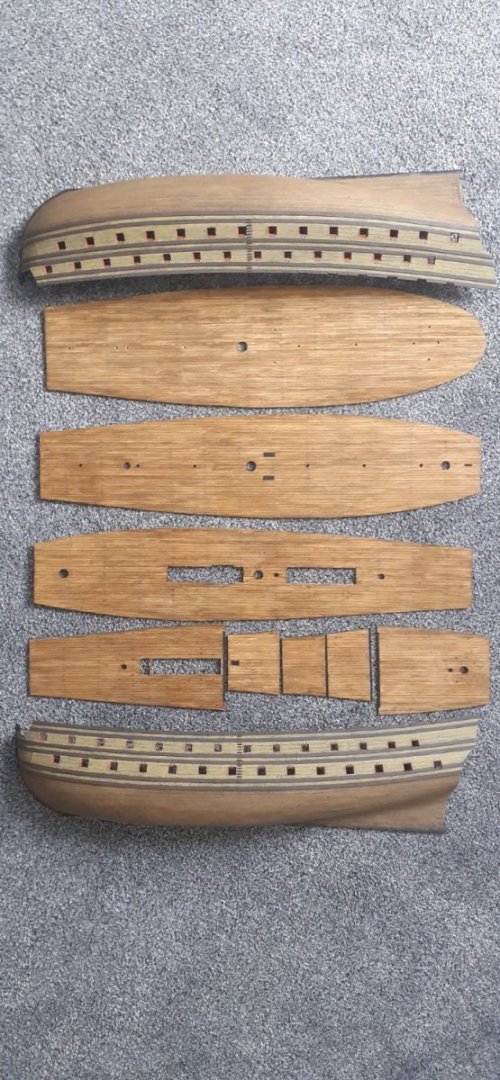
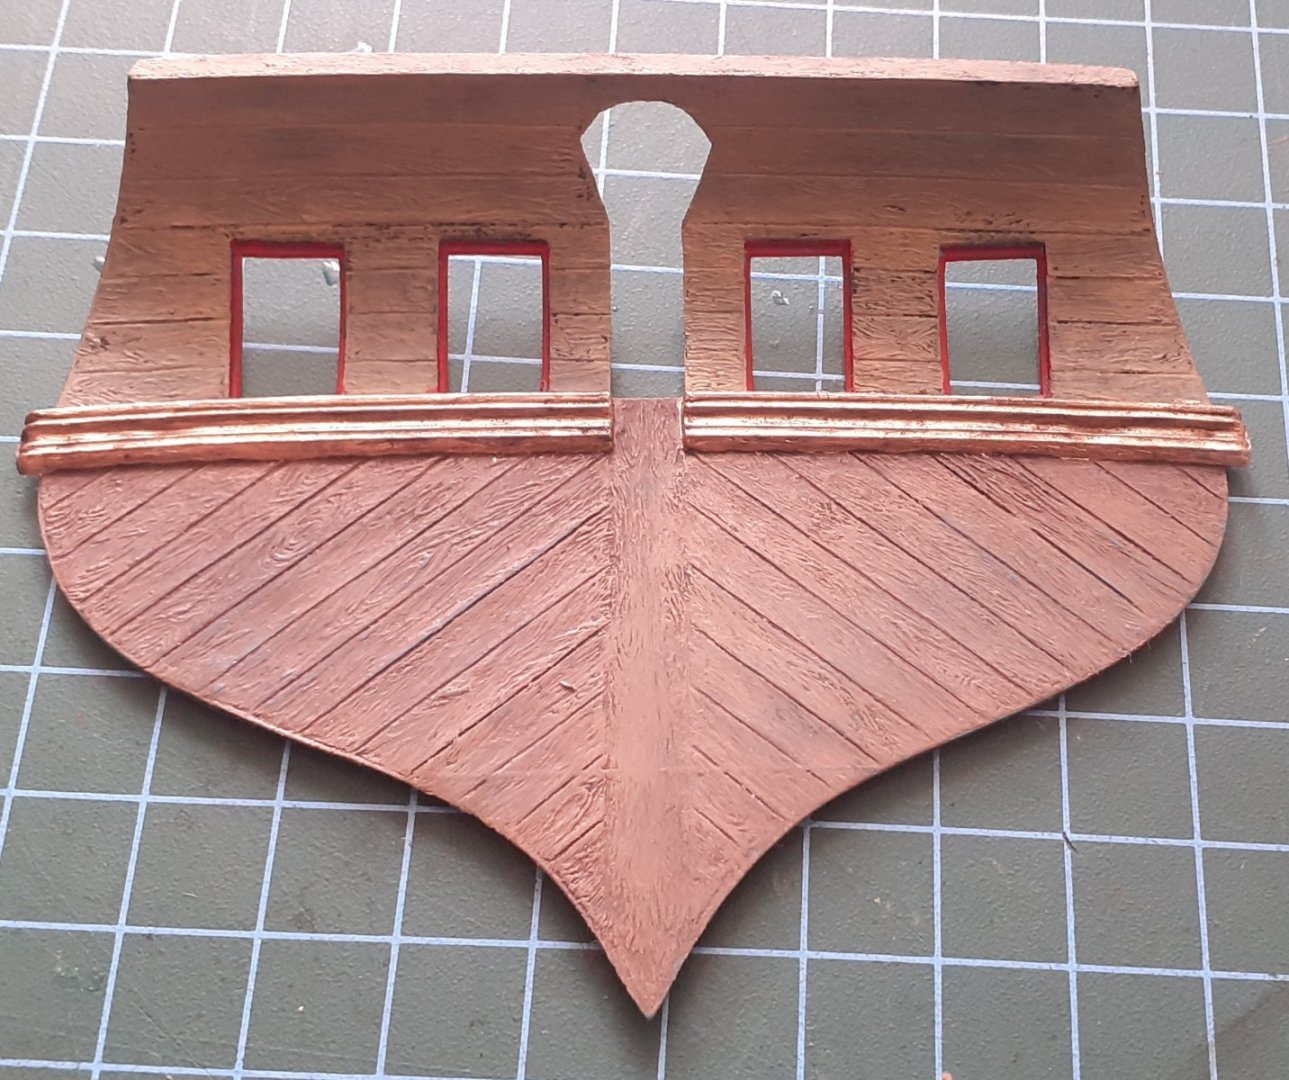
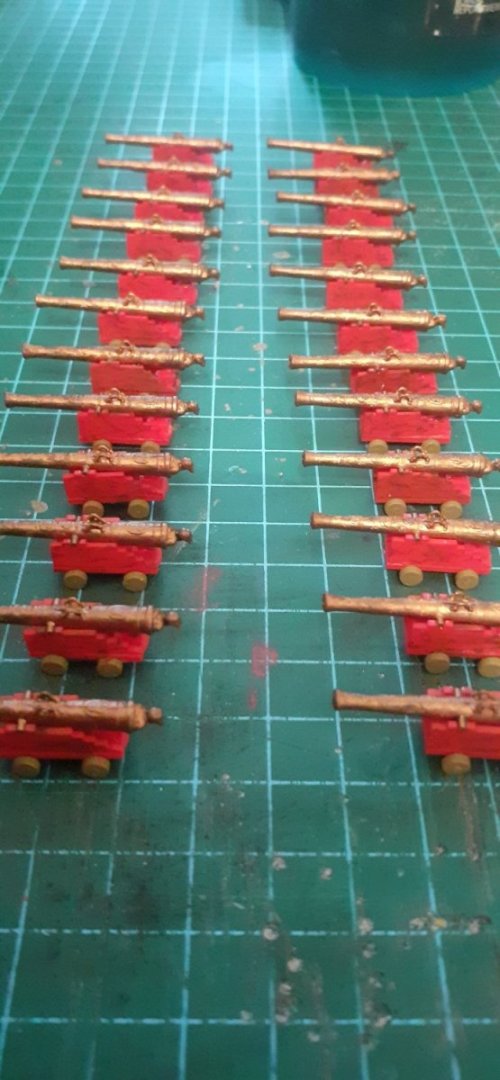
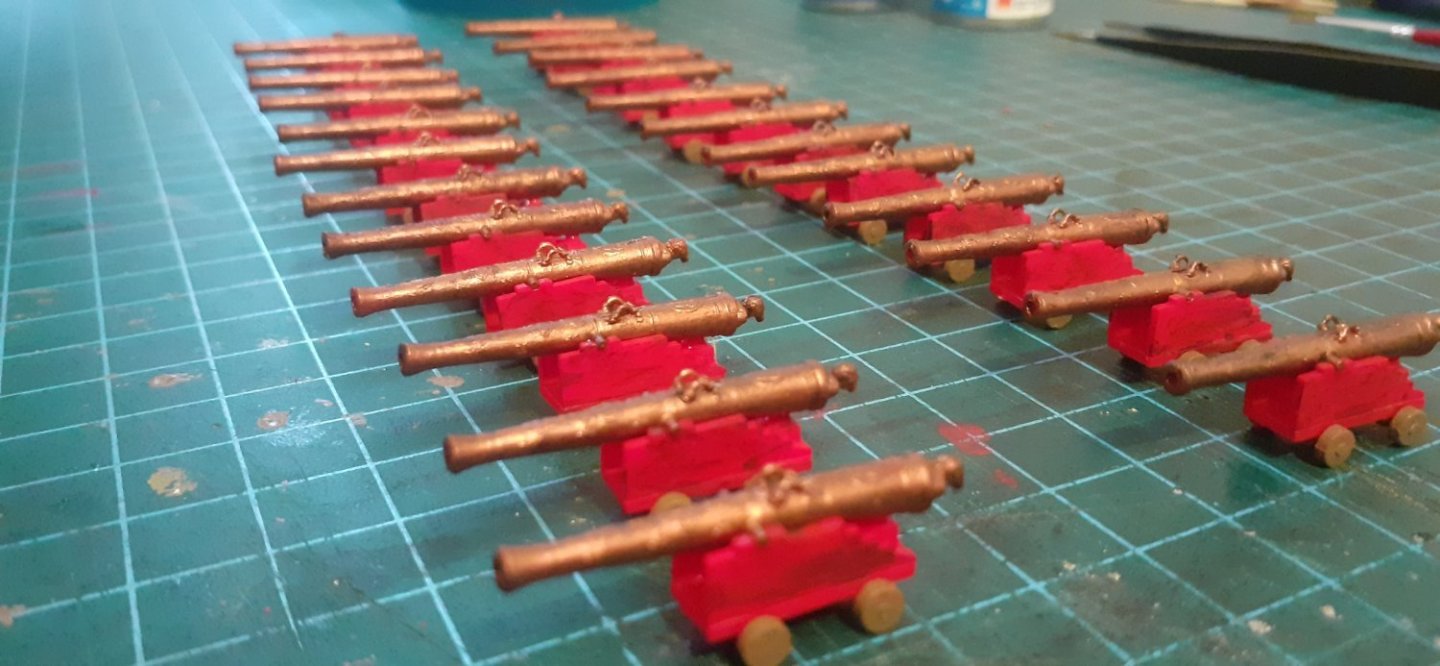
 SOLEIL ROYAL - HELLER 1/100 (side project) At the moment I am refurbishing part of the house including my humble workroom. So atm I haven't technically been doing any major construction work regards to my kit. This is a big project but A SIDE ONE for me as when my workroom and other refurbish are bk to normal I will be starting a main project in wood. I actually started this a few weeks ago but didn't want to start a build log for obvious reasons, plus the fact even now I still don't have a true picture of where I will go with this, other than the fact I will be to a certain extent heavily improvising on her, which I have started. I wanted to have wooden decks throughout so I meaured the sizes of the planking on the decks, calculated how much I needed and bought in 80 x1metre lengths 3mm x 0.5mm lime wood. The planking has gone really well and I have now finished it all, I also stained this with a Dark oak stainer. The Hulls I was unsure about but went with the kit instructions using Humbrol brown yellow and a lot of drybrushing, this came out darker than expected but realising this was because the mouldings of my kit Hulls are solid black(I used the same brown yellow on my complete Royal Louis but since that mould was in white hence the colour originally close to what it should be). That said I was quite pleased with the darker finish and it gave it more of a weathered look. I thought the bottom of the Hull needed to be slightly darker though so I used a Humbrol Dark brown wash over the brown yellow and it really came up to what I wanted. I have also drilled holes in the hull sides for the addition of pulleys for the Gunport Hatches. Atm I am now just building and painting the guns. I've finished the 24lb(x24) and have just started the 18lbers. I was originally thinking to replace them all after sales but found it well nigh impossible to get the correct type of gun and in 4 different correct sizes, so I've had to stay with the kit supplied ones. I have also bought in relevant wooden Deadeyes(triangular), cloth flags and rigging thread. Looking a bit further forward I want to replace all the masts and yards with wood other than that I don't know exactly where I will go with her, other than keep painting and weathering parts, I may well add other things like metal anchors and Rudder chain etc... Apologies for the long intro and in hindsight I probably should have posted earlier, but this will be a long drawn out build a bit like this post lol... On to the photos.....


- 20 replies
-
- 4
-
-
- soleil royal
- Heller
- (and 5 more)