

Gregory
-
Posts
2,729 -
Joined
-
Last visited
2 Followers


Recent Profile Visitors
6,891 profile views


-
 Gregory reacted to a post in a topic:
NRG Rigging Project by tlevine
Gregory reacted to a post in a topic:
NRG Rigging Project by tlevine
-
tlevine reacted to a post in a topic:
Planking techniques and tutorials and videos, etc.
-
robert952 reacted to a post in a topic:
Planking techniques and tutorials and videos, etc.
-
Gregory reacted to a post in a topic:
La Créole 1827 by archjofo - Scale 1/48 - French corvette
-
mugje reacted to a post in a topic:
Planking techniques and tutorials and videos, etc.
-
Gregory reacted to a post in a topic:
Prince de Neufchatel by Coyote_6 – Constructo – 1/58 scale - American privateer
-
CiscoH reacted to a post in a topic:
Planking techniques and tutorials and videos, etc.
-
mtaylor reacted to a post in a topic:
Planking techniques and tutorials and videos, etc.
-
Gregory reacted to a post in a topic:
Prince de Neufchatel by Coyote_6 – Constructo – 1/58 scale - American privateer
-
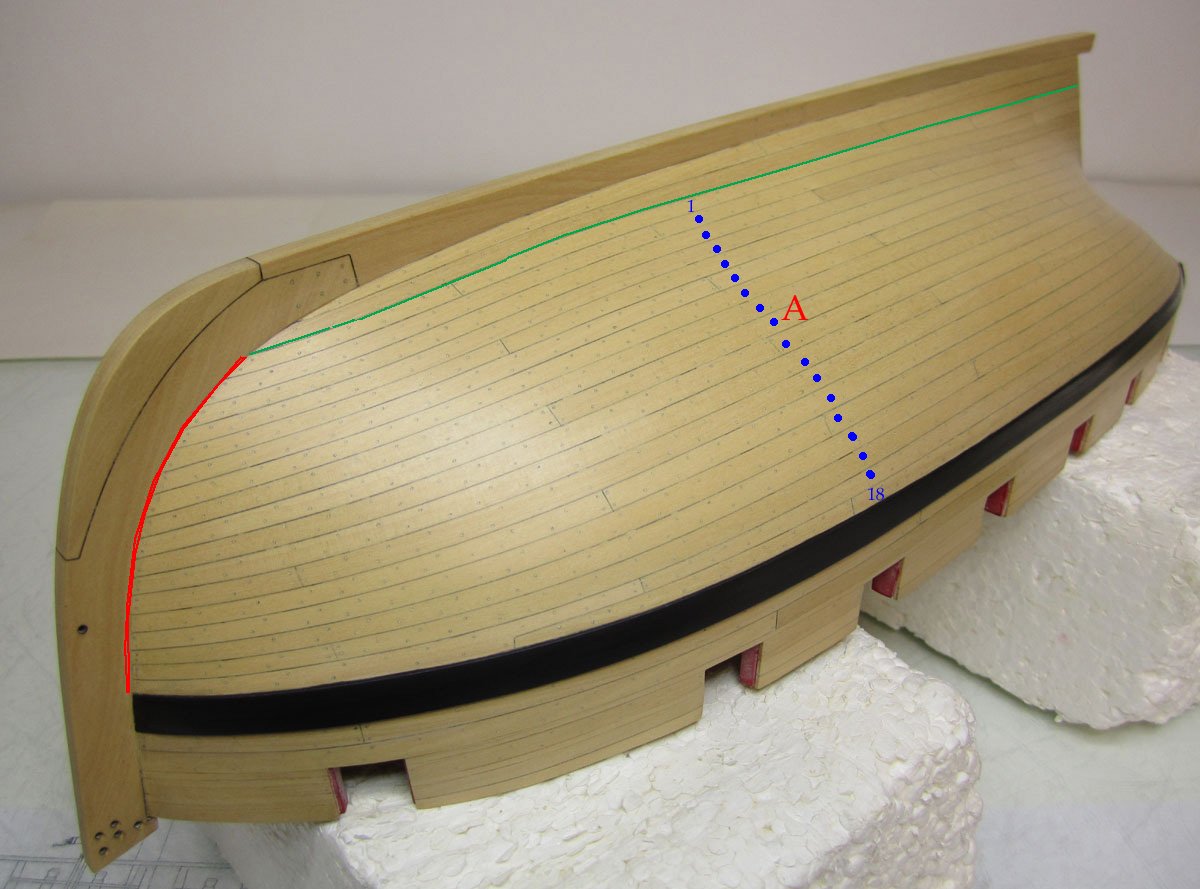
 I think your best bet for understanding the Garboard will be to look at the Half Hull Planking Project.. Talk about the garboard starts here: I agree the garboard has caused a lot of grief, but I think the main mistake people make is how far forward it should run. The black strip shows the placement of the garboard. Toni says " The garboard is the only strake with a straight edge. " The image is misleading due to perspective. As it runs forward you have to account for the space it covers on the curved bulkheads. As I mentioned, where the garboard meets the stem is critical, but if you just lay a straight line , accounting for your plank width, from the stern to the stem, it will be perfect. The mistake most often made is letting the garboard fall to far aft , which result in planks that curve upward too much as the planking moves up the bow. Practice making your planks with paper or card before committing your wood stock.
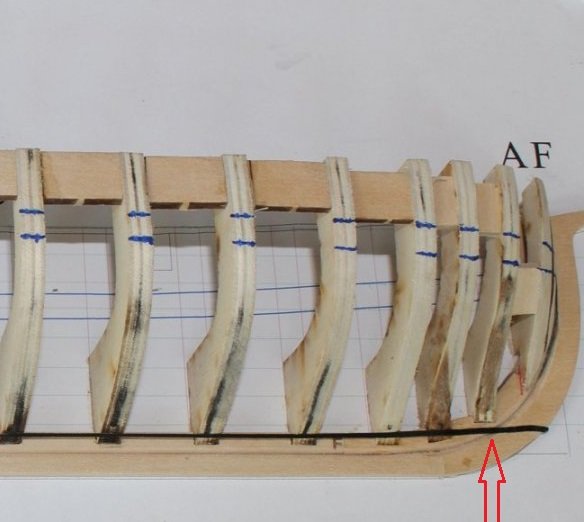
-
Isaiah reacted to a post in a topic:
Sherbourne blocks
-
Thukydides reacted to a post in a topic:
Sherbourne blocks
-
mtaylor reacted to a post in a topic:
Sherbourne blocks
-
We have this information from a recent discussion. https://modelshipworld.com/topic/36354-gun-positions-and-their-associated-tackle/?do=findComment&comment=1042700
-
Gregory reacted to a post in a topic:
Planking techniques and tutorials and videos, etc.
-
Gregory reacted to a post in a topic:
USS Constitution by BruceWayne426 - Mamoli - 1/93
-
Ryland Craze reacted to a post in a topic:
Armed Virginia Sloop by CiscoH - Model Shipways - 1:48
-
catopower reacted to a post in a topic:
rigging in front of yard arms?
-
Gregory reacted to a post in a topic:
HMS Tiger 1747 by Siggi52 - 1:48 - 60 gun ship from NMM plans
-
Gregory reacted to a post in a topic:
Armed Virginia Sloop by CiscoH - Model Shipways - 1:48
-
I hope my comments were not taken as being critical of your work. To the contrary, your planking and now, the mitered joints are an inspiration, and I think it great that you are adding a detail that sets your model apart from the crowd.
-
Gregory reacted to a post in a topic:
How to measure and line off at the bow
-
Your work looks very good, but who is George Stockwell? I seem to recall seeing the mitered joints on a contemporary model or two, but for the most part they were the lap joints we see on a lot of models here and elsewhere. I borrowed these from Chucks Cheerful. Of course, the builders of the Virginia Sloops may have followed a different practice, of which I have no expertise.
-
Gregory reacted to a post in a topic:
Armed Virginia Sloop by CiscoH - Model Shipways - 1:48
-
Considering earlier discussion it should easily fall within 1501-1750.
-
.. Forbid it should be 8.6..😁 For modeling purposes, I think once the shape of the block is good, while keeping the size of the rope in mind, I think the size of the block is more a matter of " what looks good, is good"..
-
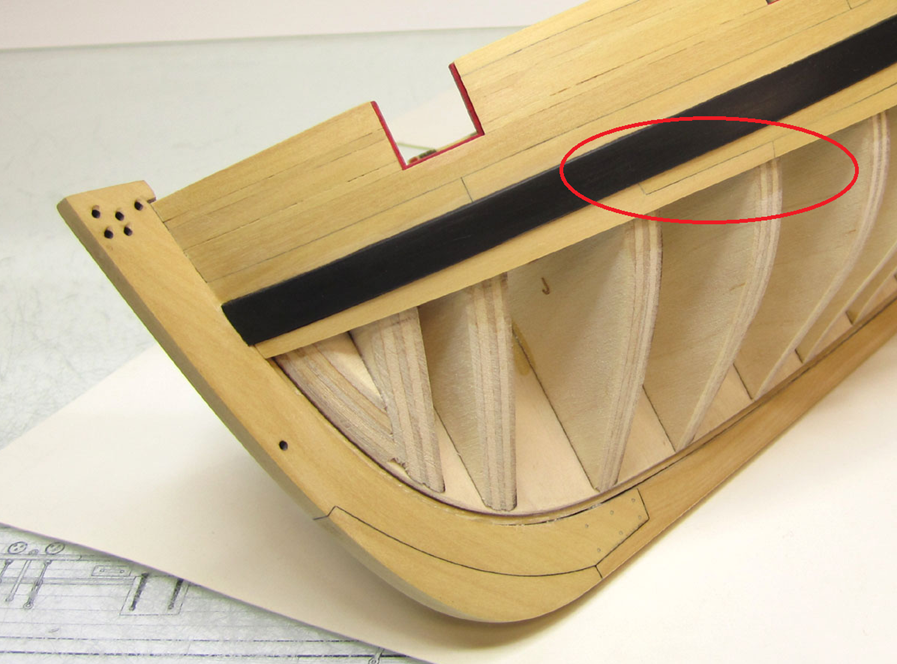
I'm sure it is implied somewhere. You should have the information you need to proceed with your planking.. The image I posted couldn't be more clear about the space to be covered and how it should look. Look forward to seeing your progress.
-
Hopefully you will take the advice to look at the references given . Here is another example from Chuck's Cheerful. The green line shows where the first two planks next to the keel are. The first plank next to the keel is the garboard, and you may want to look at Thukydides reference for establishing the garboard plank. I also discounted the next plank because it doesn't lend itself to measuring a width where it meets the stem. You will have to try to achieve the look you see on those two planks and taper them accordingly. The red line is the distance you will measure to determine the width of the planks at the bow. If you measure the red line to be 55mm, then would divide 55 by 18 to get 3.05 mm for the width of your planks at the red line. Since your number may be something that is really hard to measure for cutting, such as 3.05 mm, then you may want to use just 3mm ( just an example as your actual number will probably be different ), and have one or two planks a little bigger. You could just fit them in at the end. Unless you follow the planking practices you have been given, you will not have an easy time achieving something like the picture above. Look at the many build logs for Cheerful and Alert. The planking details may not be well documented in all of them, but it will be in a few like the one Thukydides pointed you to.
-
Use a piece of string, then measure the string with a ruler. Divide the length of the string by the number of planks used to cover a midship bulkhead. Here is a post I made about tapering planks from mid ship to bow. Your measurements should be different than my example.
-
Do you have any illustration of what you mean by this? It's basically a matter of dividing the space available by the number of planks. Have you looked at the planking videos by Chuck? They show how to get a better fit of the planks by 'edge bending'. Sometimes a " drop plank " at the bow will help you avoid planks that become too narrow at the stem. A drop plank reduces two planks to one. The problem with doing this with a kit is that it requires wider stock than the basic planking stock, so it may not be practical with the kit you are building. You should be able to work around this by just making the ends of the planking more narrow than the drop plank would provide. I assume we are talking bout the Sherbourne you are building, so I think you could get some ideas by looking at Chuck's Cheerful. The lines are very similar. It is a single plank model, but the run of the planking will be much the same as your 2nd planking on the Sherbourne. Chuck has the instructions for Cheerful at his Syren Ship Model Co. Here is a link to Chapter 4 which covers the planking below the wales.
-
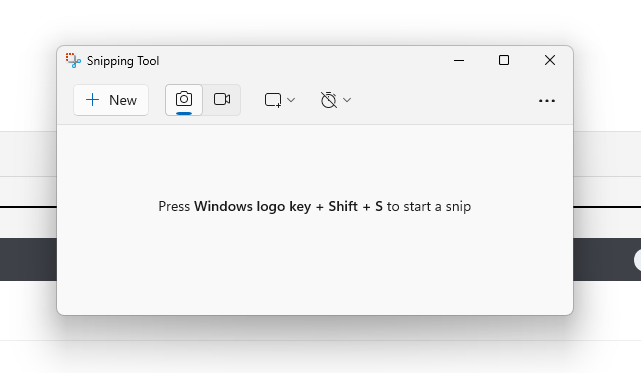
Go to Windows search and type " snipping tool ".. You can copy any part of the screen you are looking at. It goes to the clip-board, so you can paste it directly into the discussion. You can edit in "Paint", or do whatever you like. Even though it's telling you to press all those keys, all you really need to do is press Ctr+N..
-
You don’t have the “Snipping Tool”?
-
One of the images at the web site apparently serves as the instruction…
-
Frayed lines
Gregory replied to Dindsy's topic in Building, Framing, Planking and plating a ships hull and deck
Perhaps if you go over the lines with a brush using diluted white glue or clear/matte acrylic it will make it look a lot better. I would dilute about 4 to 1.. Your model looks really great for a first time build. -
When I ordered from Malco in the past, they required a $100 minimum order. I like their blades. $100 buys several..
