HOLIDAY DONATION DRIVE - SUPPORT MSW - DO YOUR PART TO KEEP THIS GREAT FORUM GOING! (89 donations so far out of 49,000 members - C'mon guys!)
×


James H
-
Posts
6,112 -
Joined
-
Last visited
Content Type
Profiles
Forums
Gallery
Events
Everything posted by James H
-
 Ok, fixed.
 -
Just so beautiful. Wonderful workmanship. She really looks superb.
-
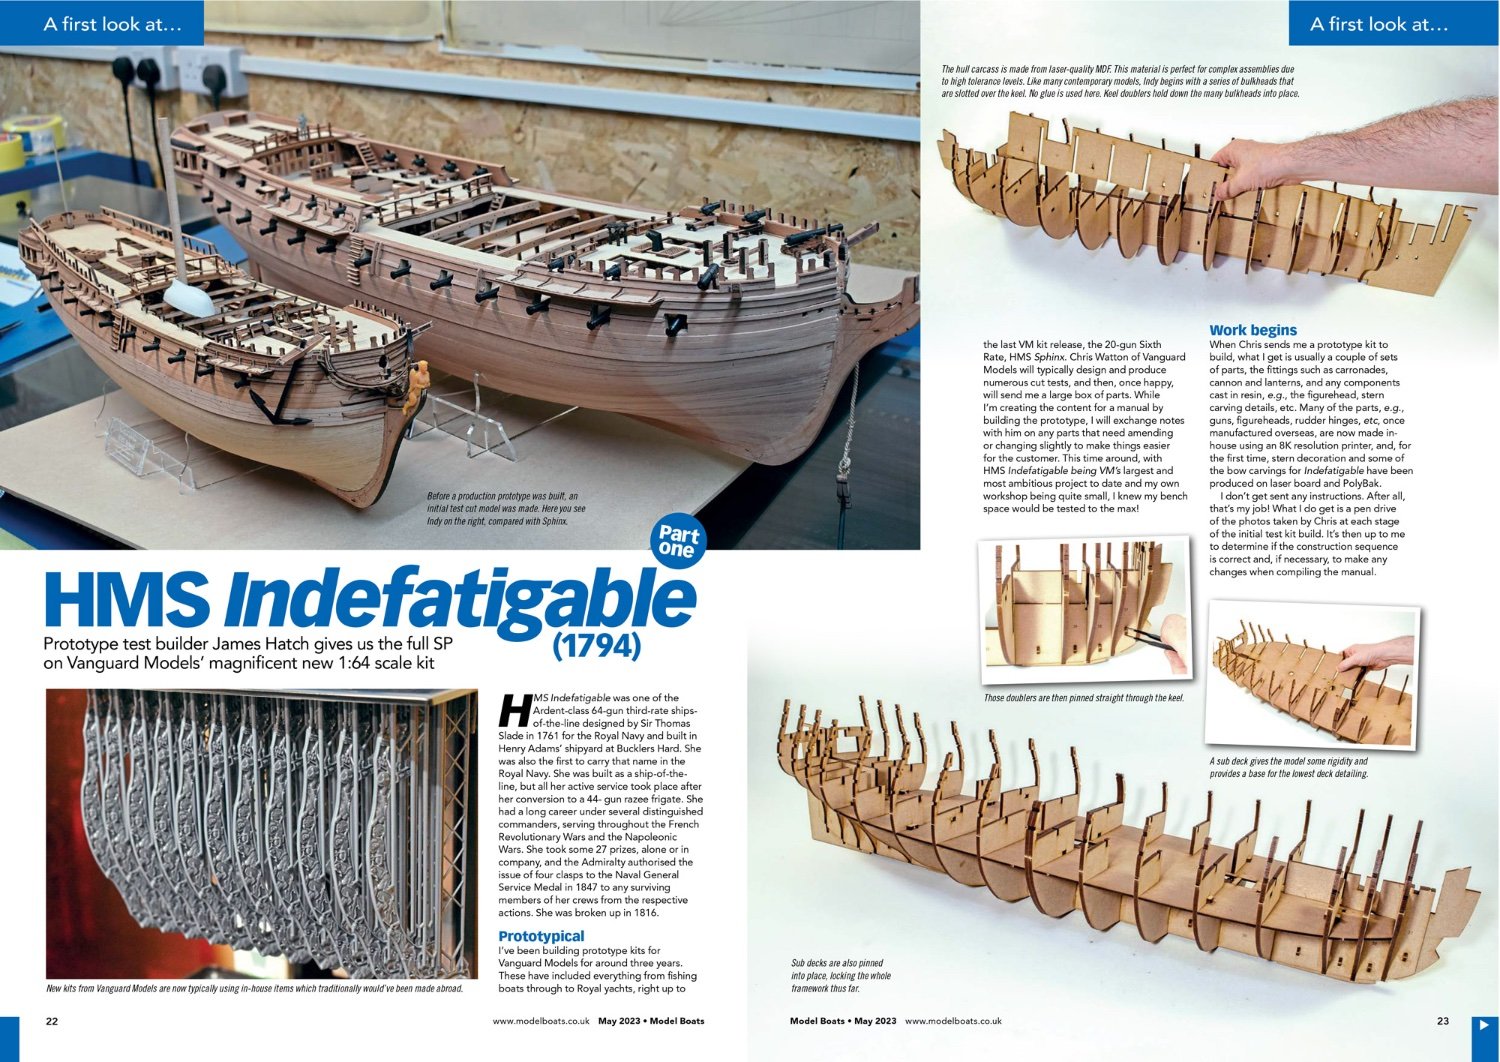
For your info, my HMS Indefatigable build will be published as a two-part article in the Model Boats magazine, with the first part available in this month's mag. It's the Model Boats mag that first drew me into this hobby with Keith Julier's period ship builds. If it wasn't for him, then I doubt MSW would exist, and my interest in this hobby. https://www.modelboats.co.uk Here's the intro pages for Part 1 of my article.

- 488 replies
-
- 46
-

-

-
- Indefatigable
- Vanguard Models
- (and 1 more)
-
That is just incredible. 😍
-
Sorry, I thought you were referring to something else. That part you show last has a lot compound curve in it and the plan can can only show a flat projection and not the curves in that area. The only sanding those parts need is to ensure that they sit on the deck and also underneath Any of the structures that might protrude over that area.
- 488 replies
-
- 4
-
-
- Indefatigable
- Vanguard Models
- (and 1 more)
-
Yes, the lower edge of that pear bulwark sits along upper edge of the main deck gun ports and also aligns with those frames ports in the cabin area.
- 488 replies
-
- 3
-
-
- Indefatigable
- Vanguard Models
- (and 1 more)
-
You really are doing a lovely job with this and I always look forward to your updates.
-
Those planks look great as they go under the tuck.
- 443 replies
-
- 5
-
-
- Indefatigable
- Vanguard Models
- (and 1 more)
-
No, not upset at all. Perhaps a little bemused. This was such a complicated venture, mostly undertaken by myself while I could barely breathe or spend time in the cave. It's likely a reminder of how bad my mind was working at that time.
- 648 replies
-
- 3
-
-
- Indefatigable
- Vanguard Models
- (and 1 more)
-
I get it. I attributed some parts to 3mm MDF when it was supposed to be 4mm. No biggie. That I had to flick between 3 or 4 open pages when writing, plus being badly ill with long covid at the time, it's a wonder I got anything finished. Thankfully all parts numbers are laser engraved too, so it's hard to get wrong. Carry on! 😆
- 648 replies
-
- 1
-
-
- Indefatigable
- Vanguard Models
- (and 1 more)
-
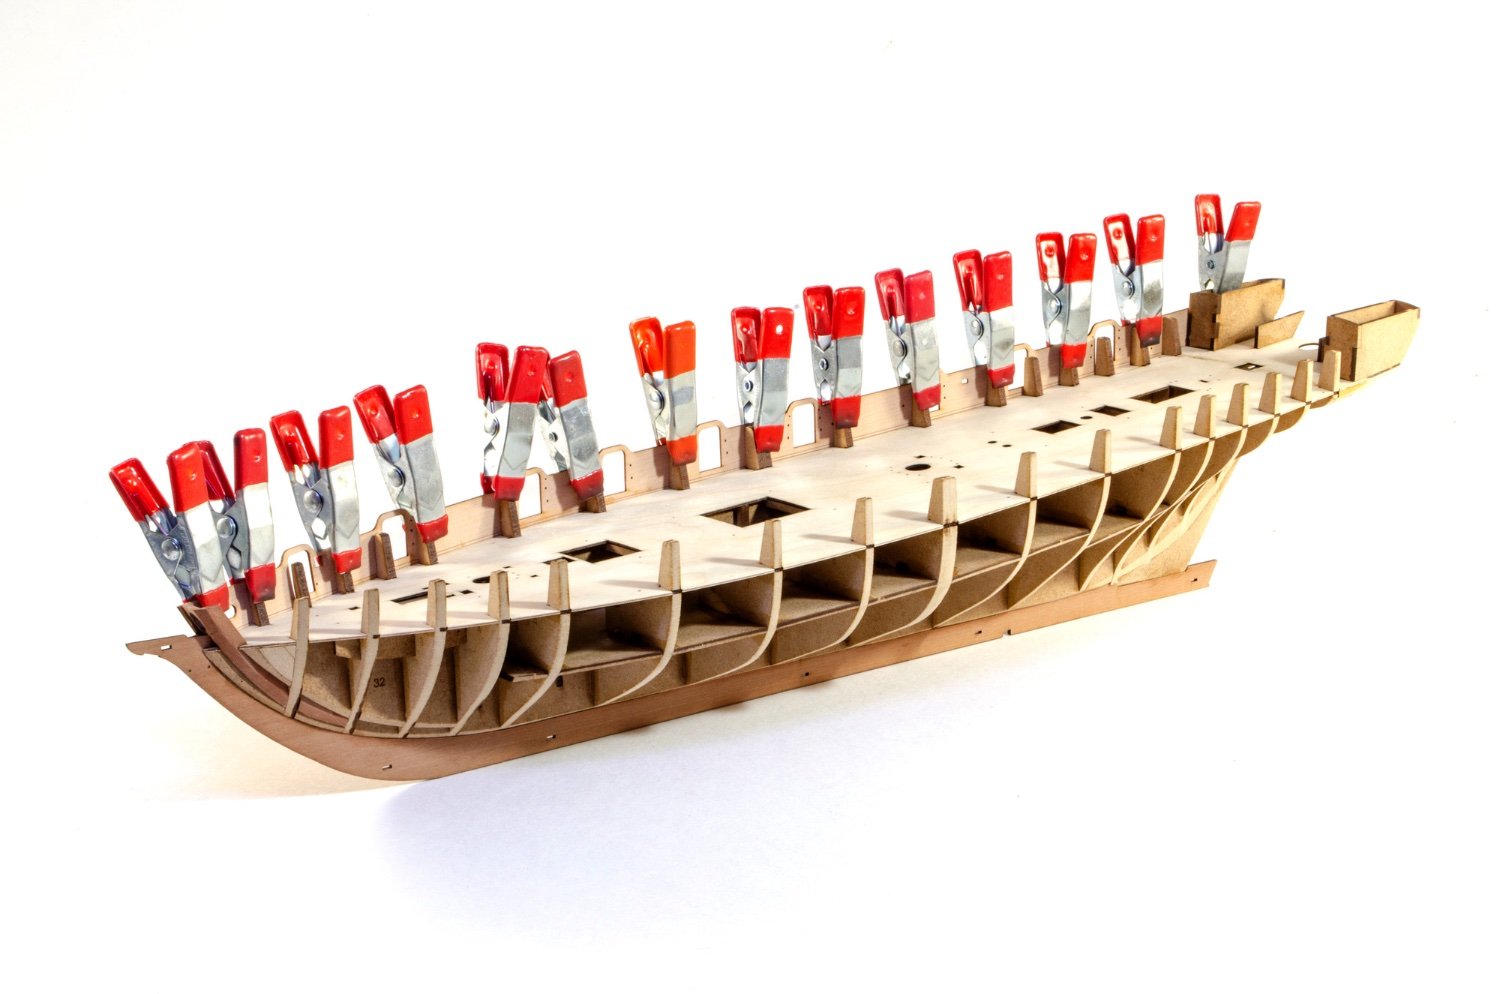
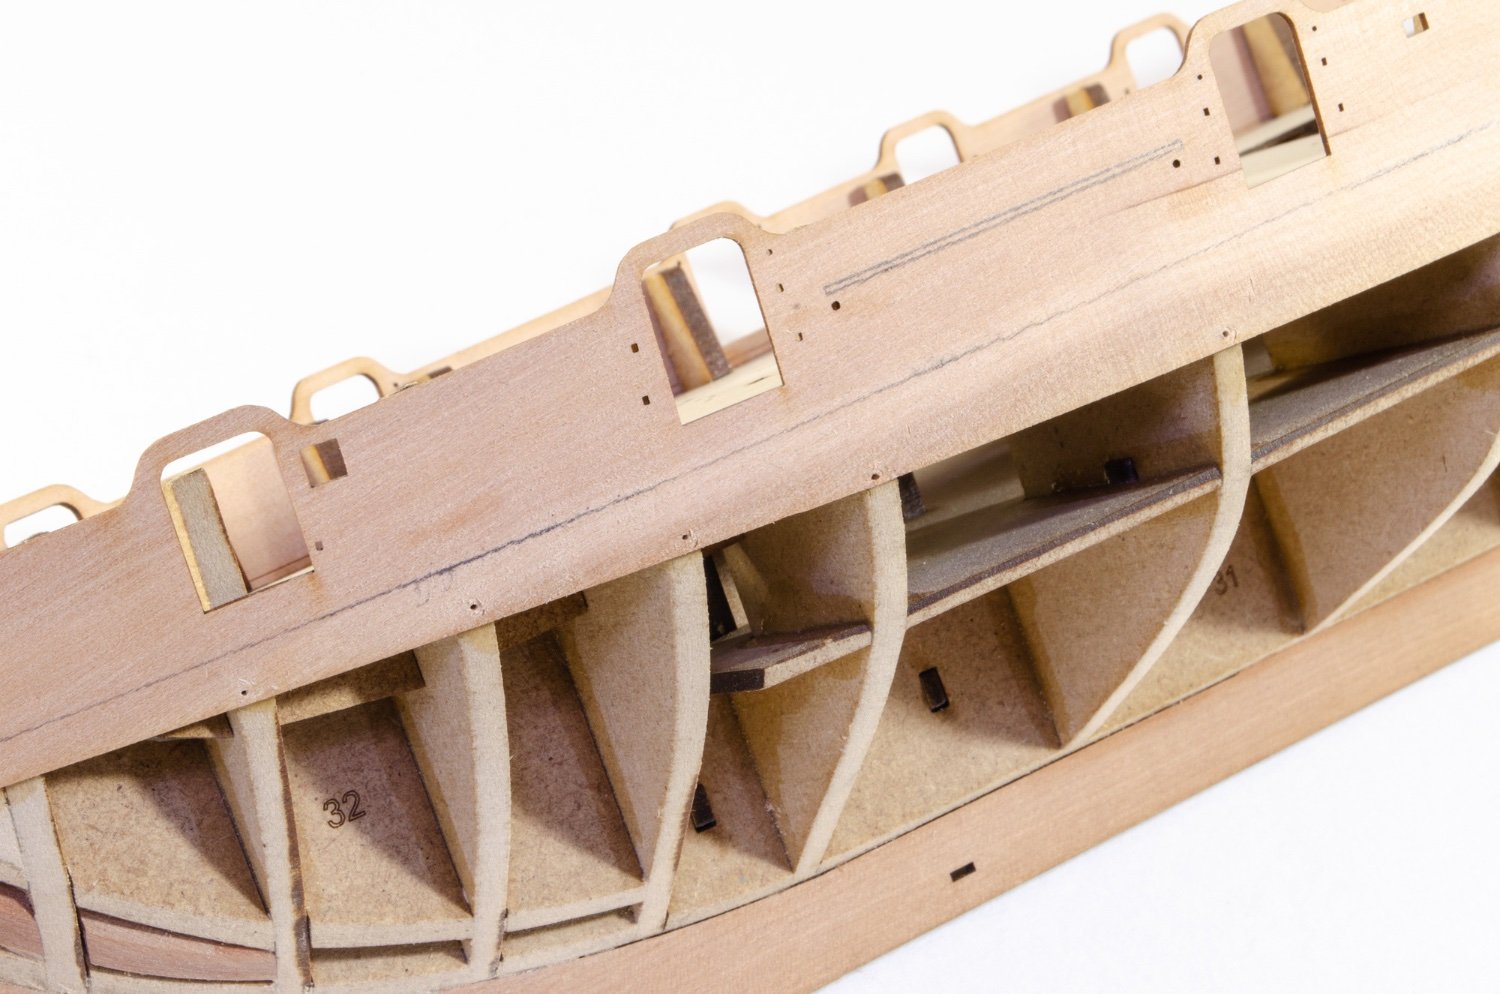
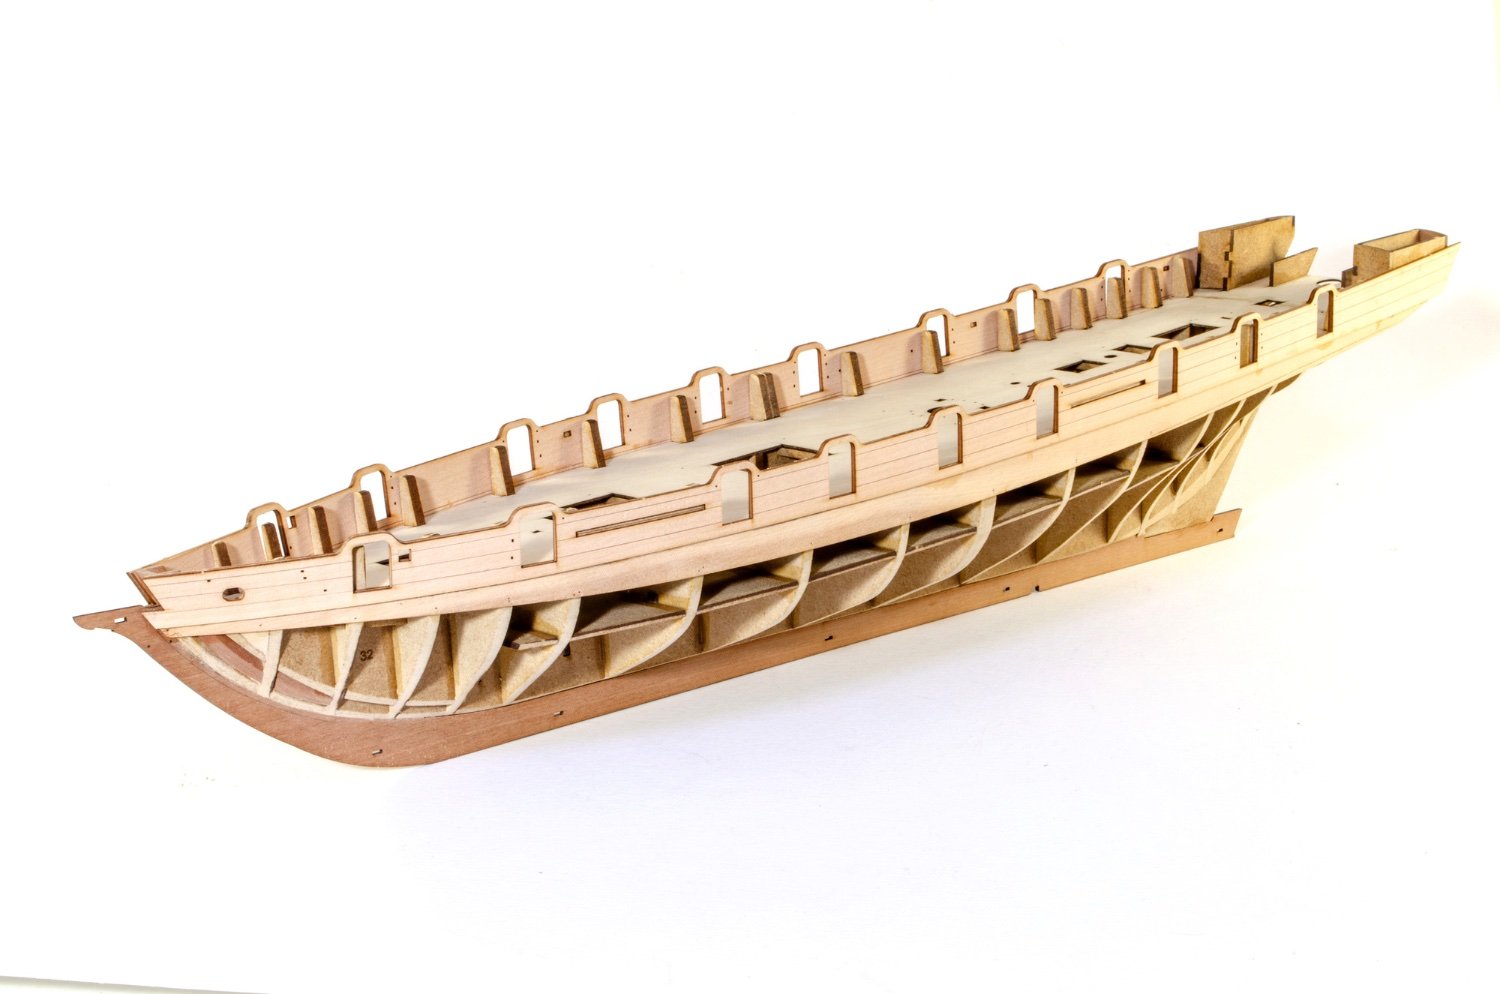
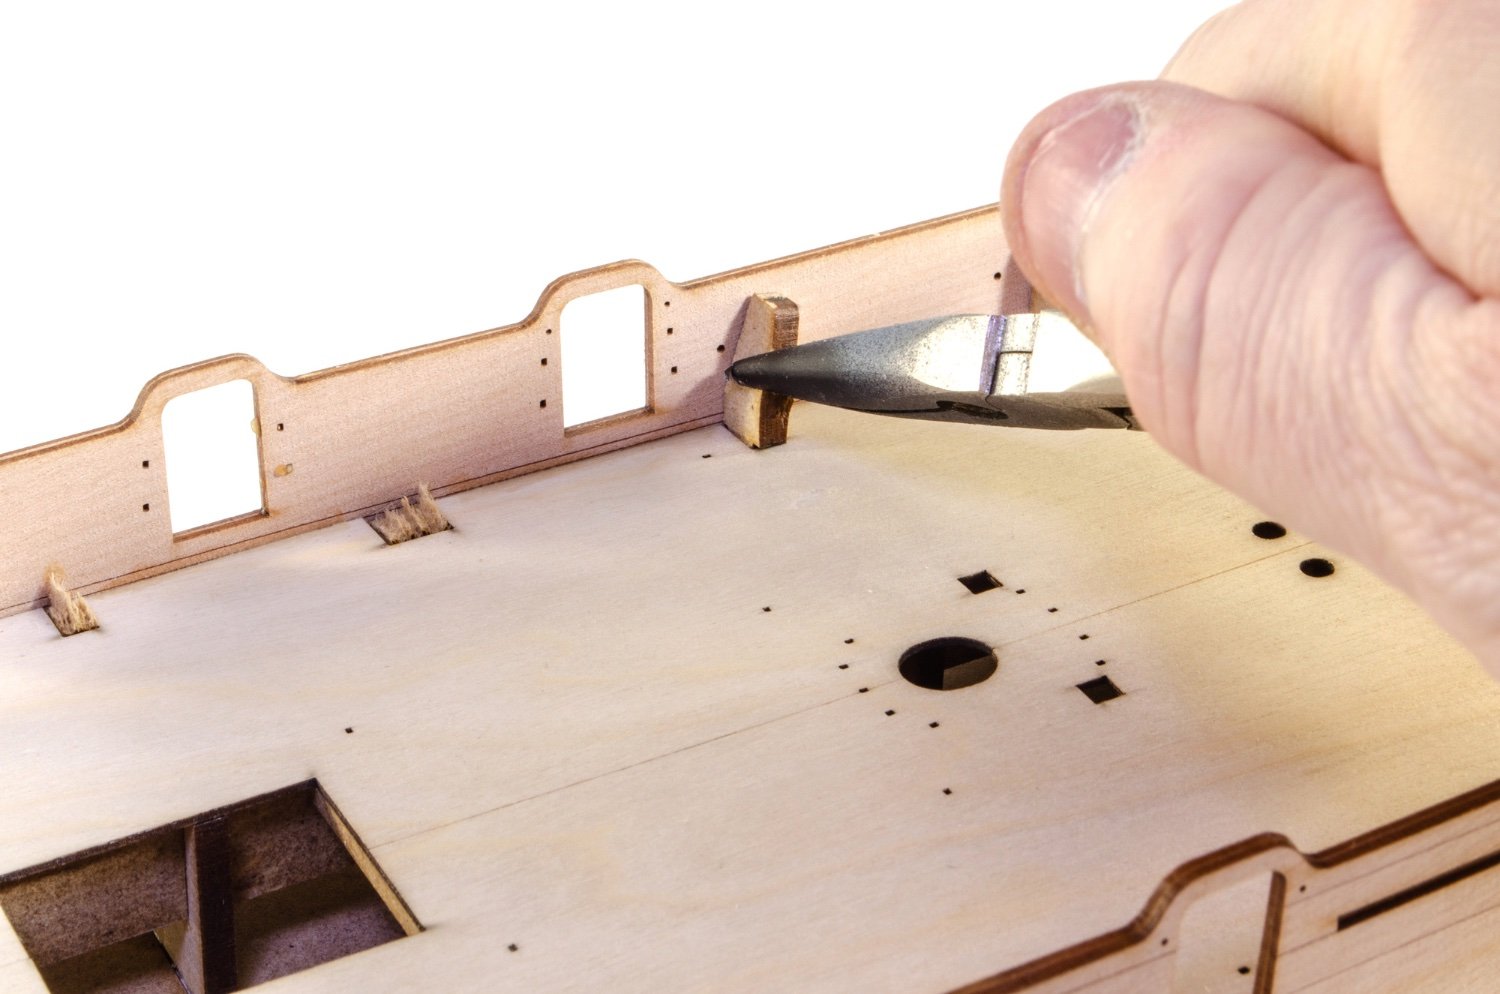
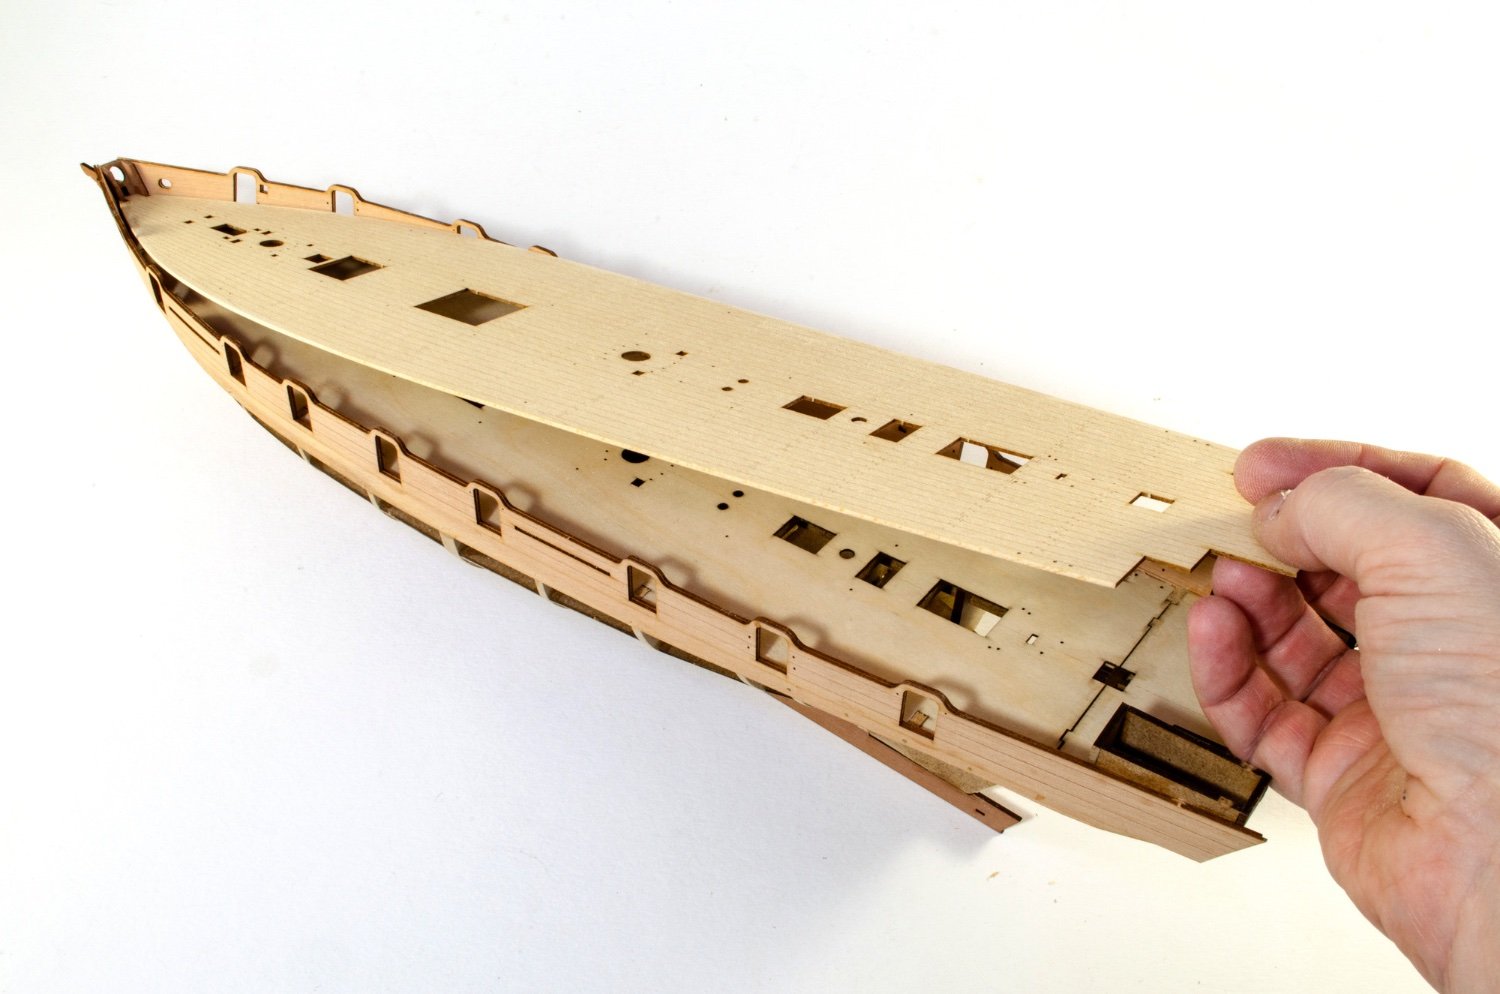
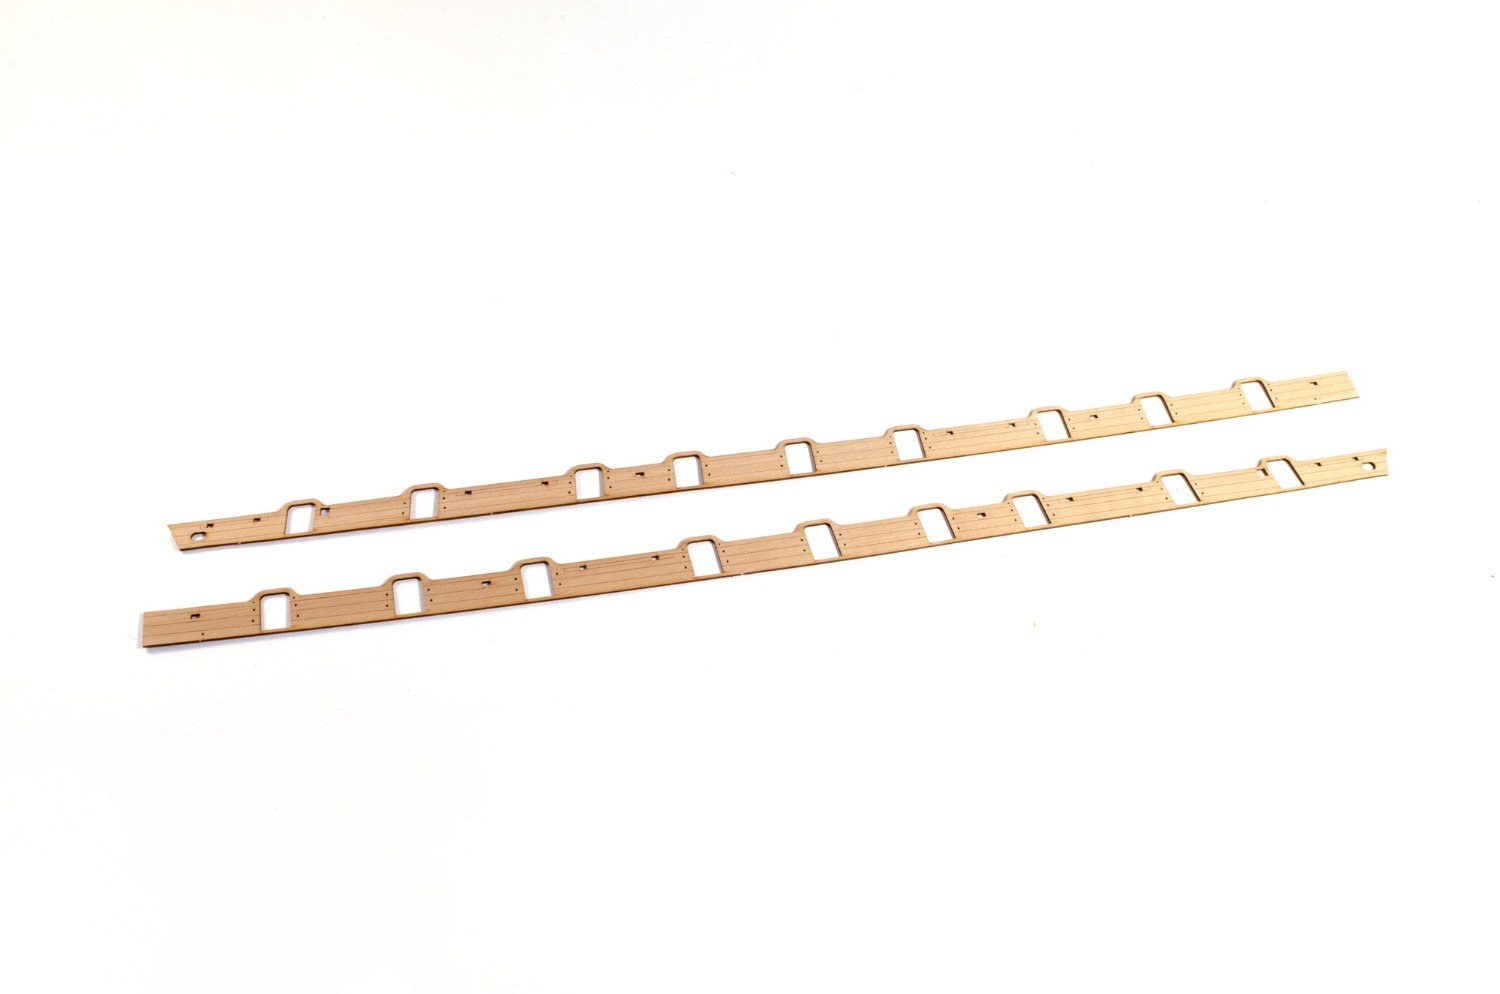
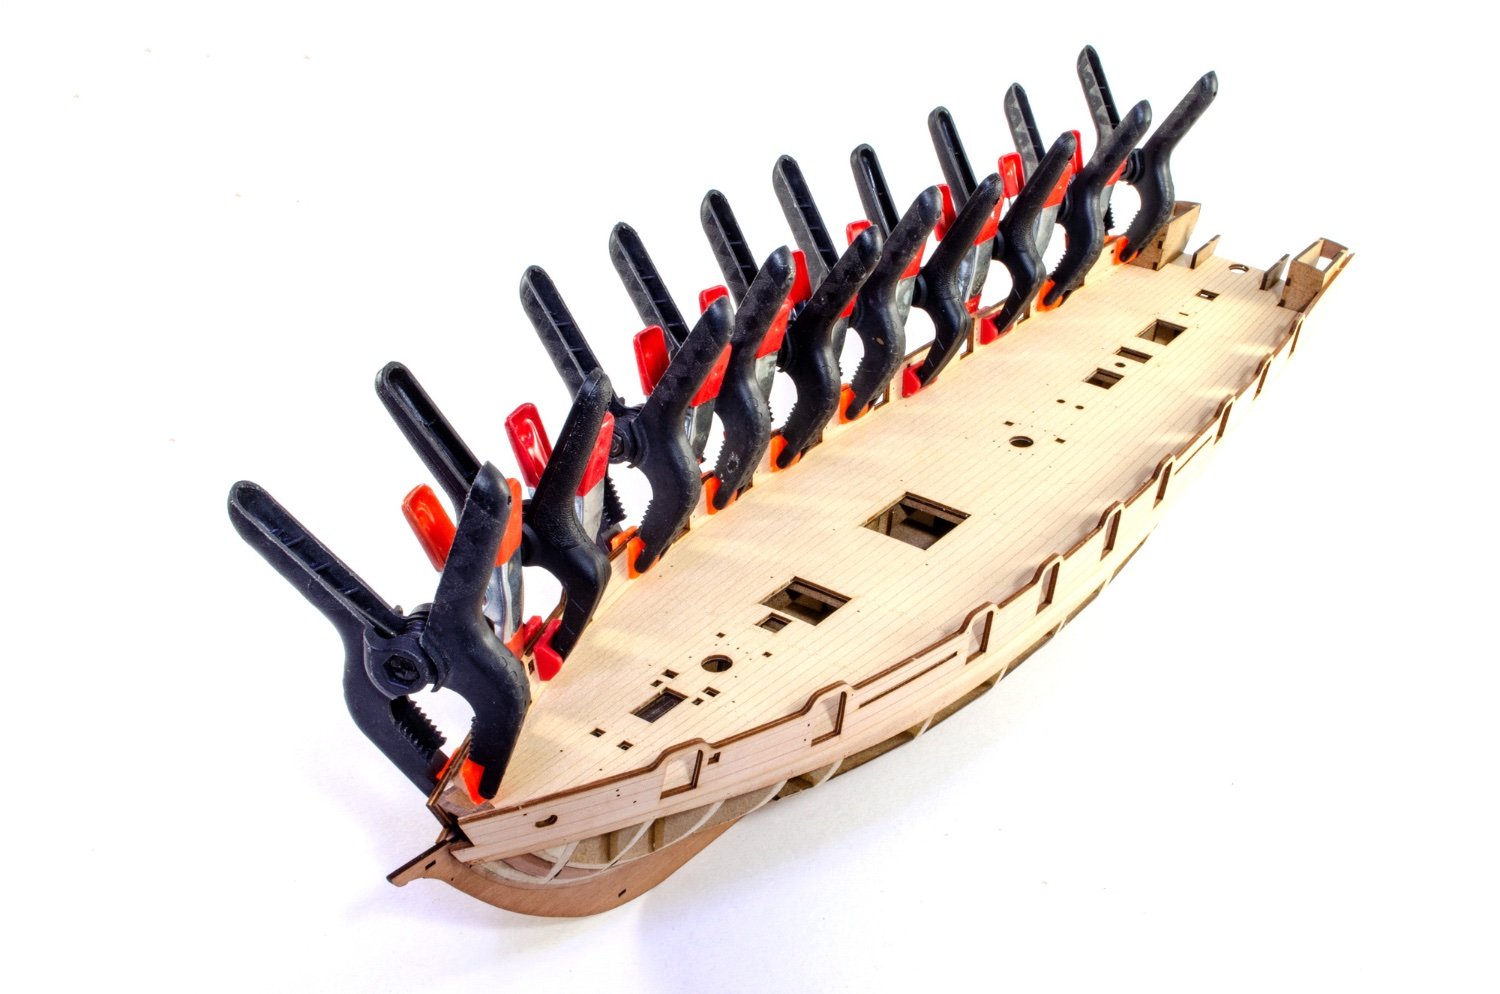
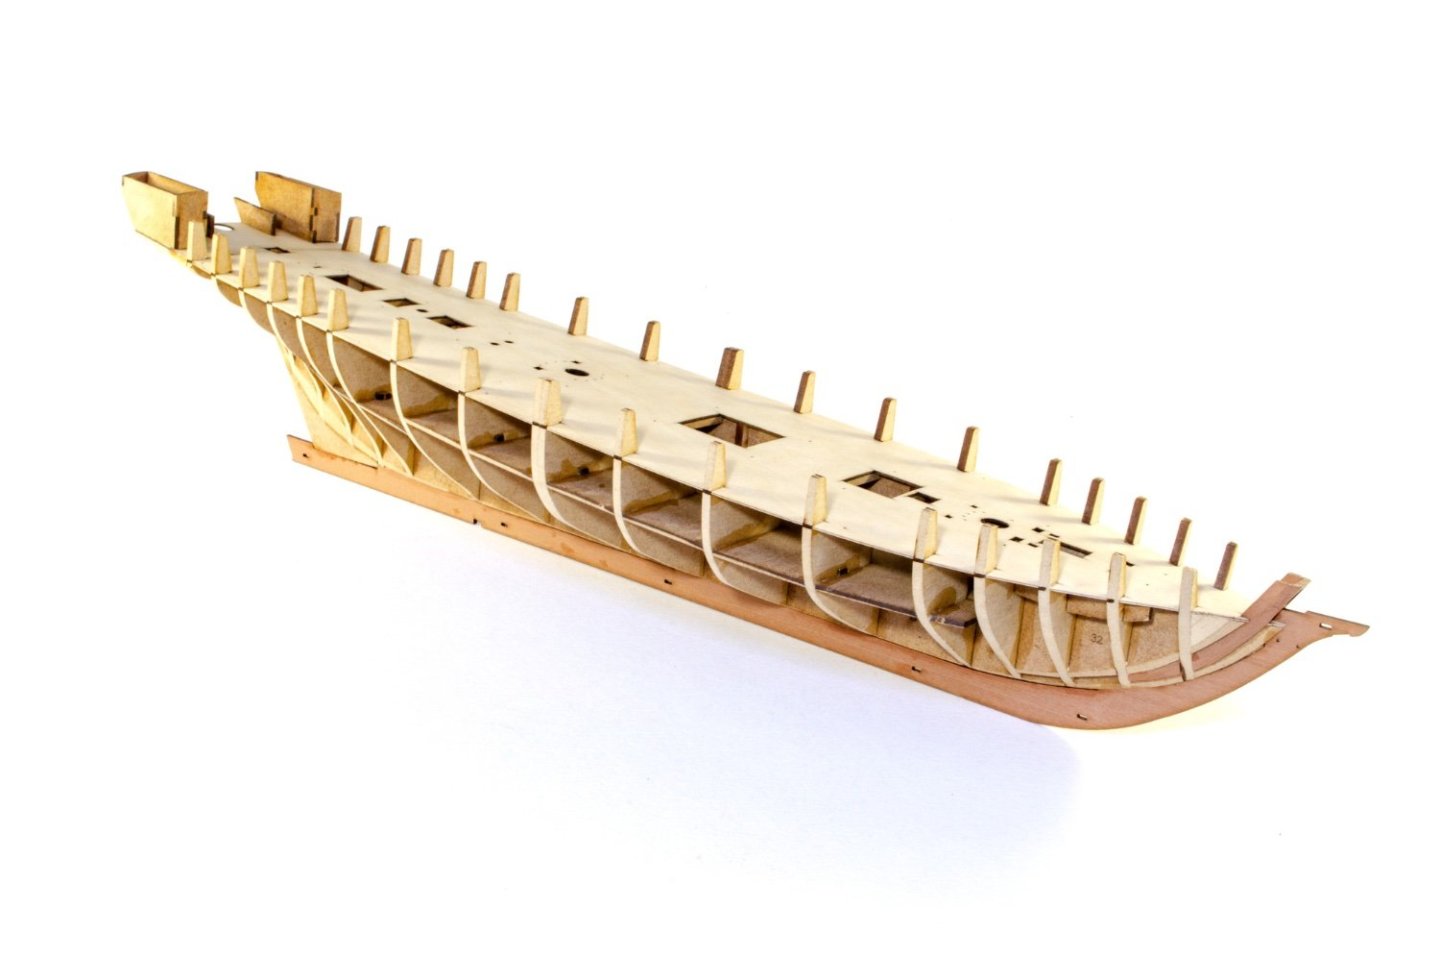
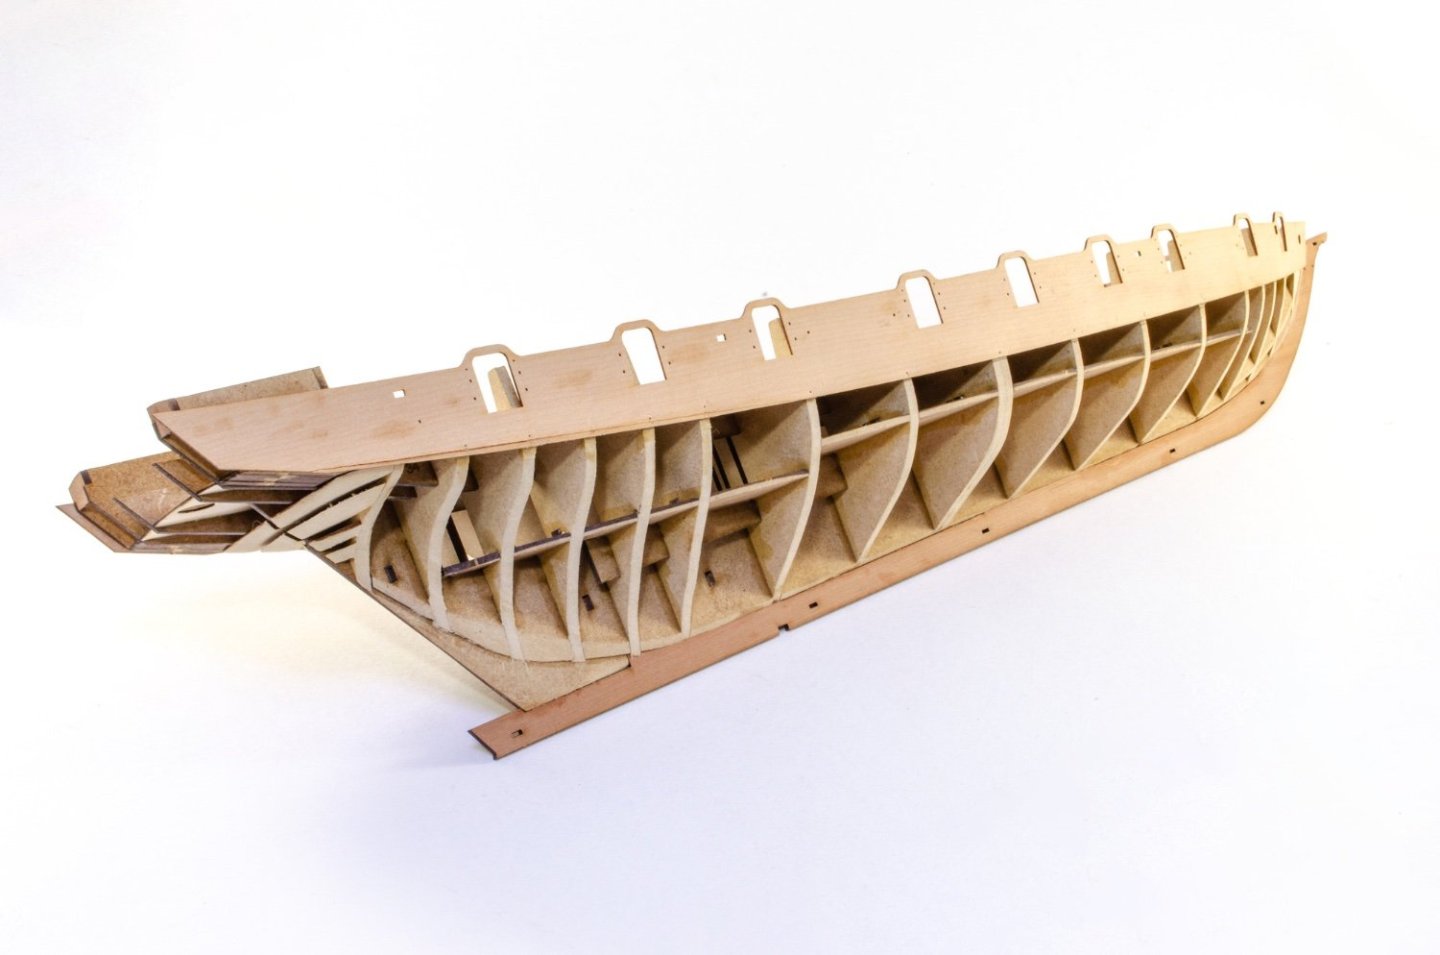
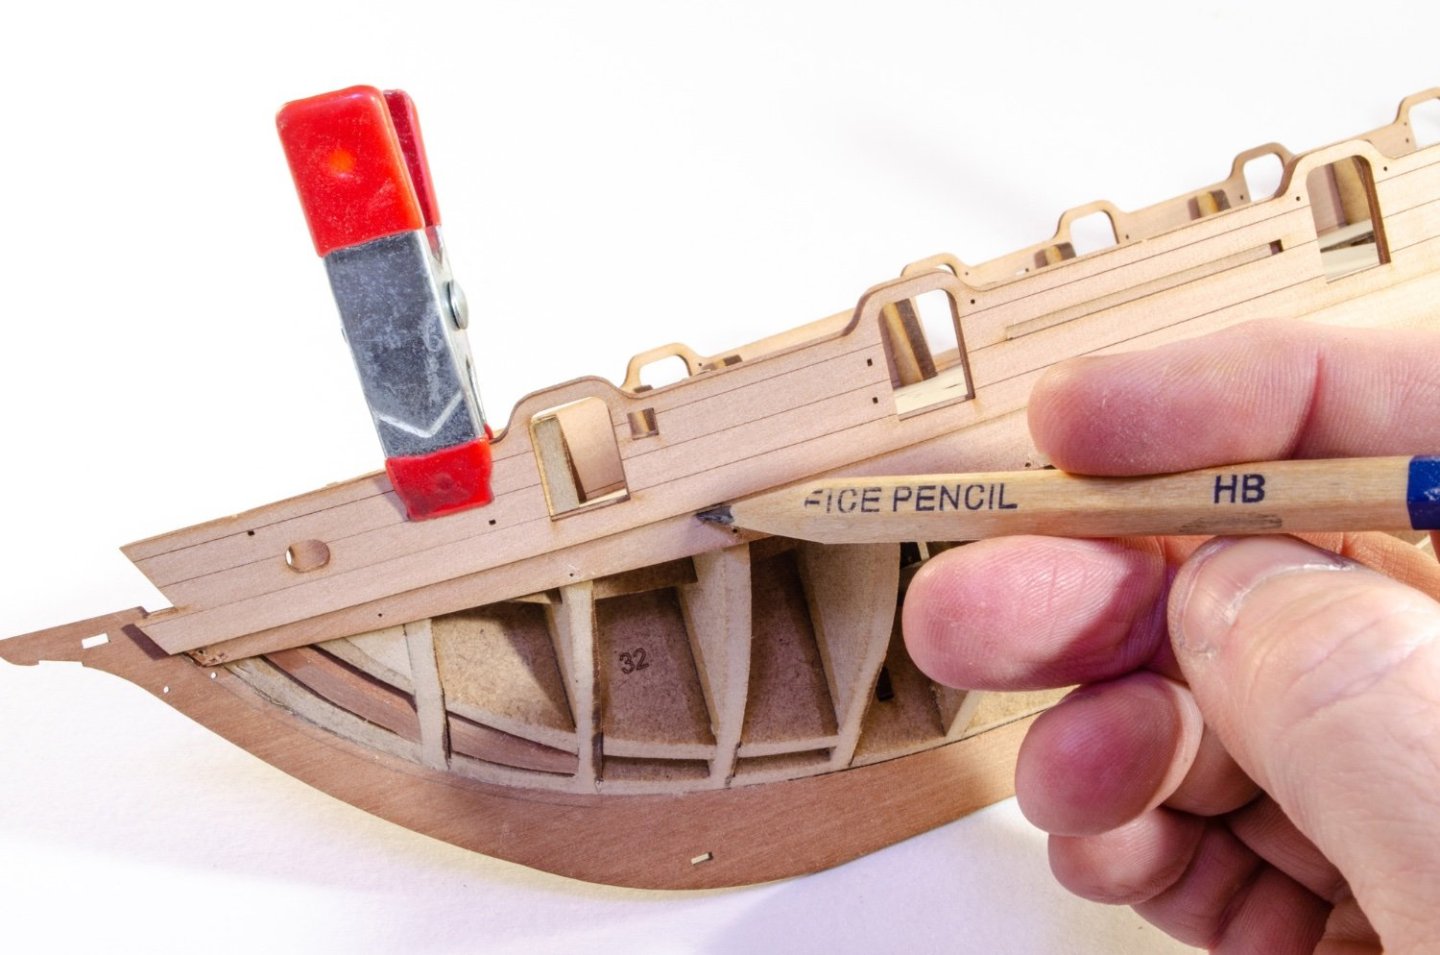
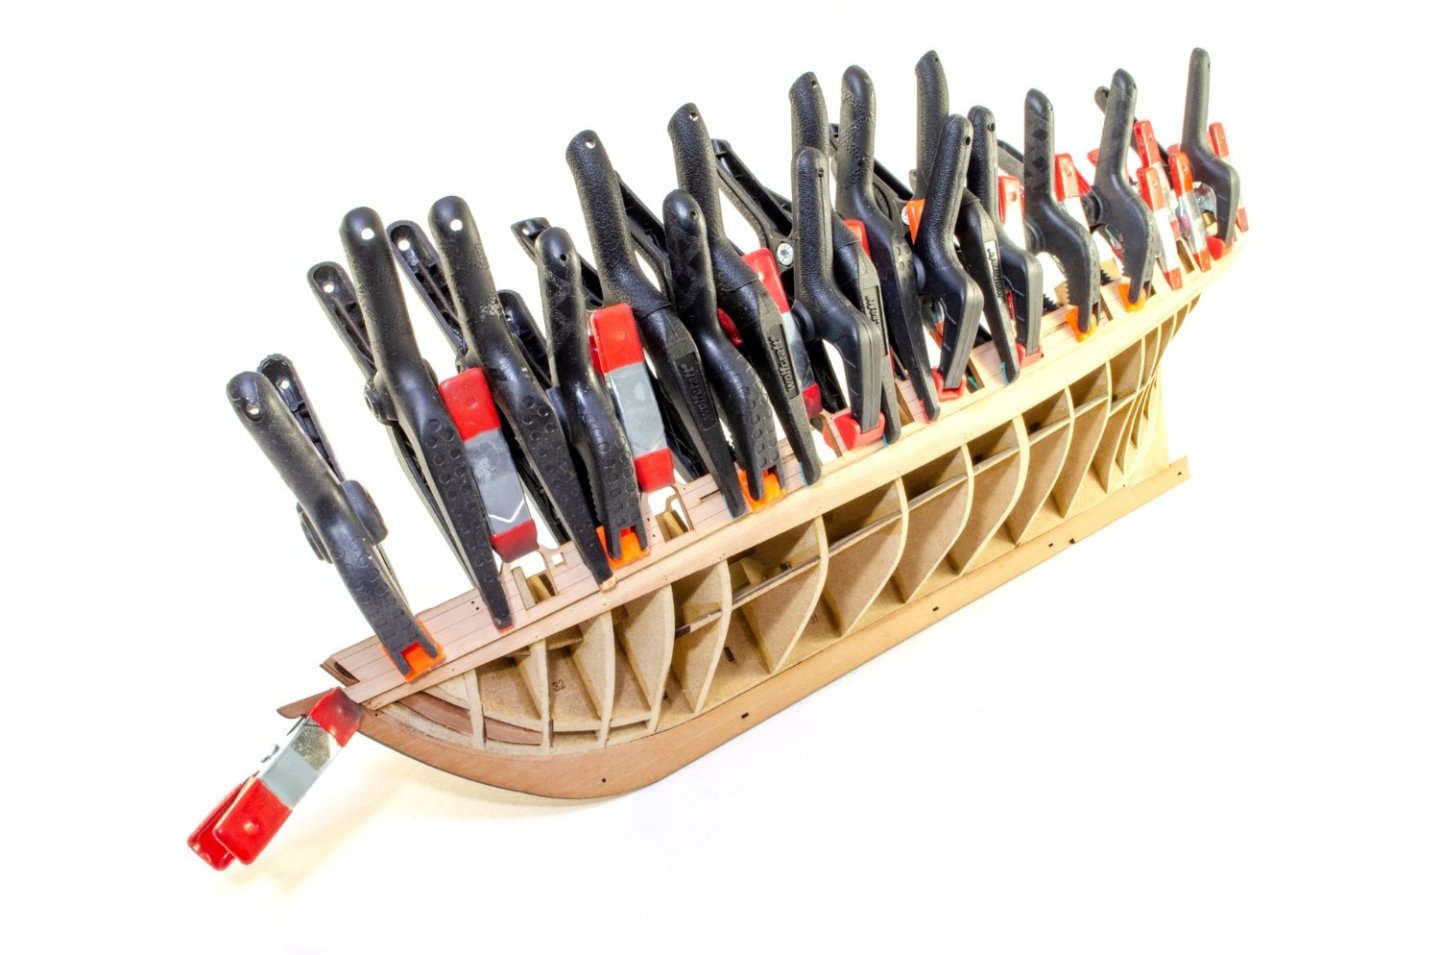
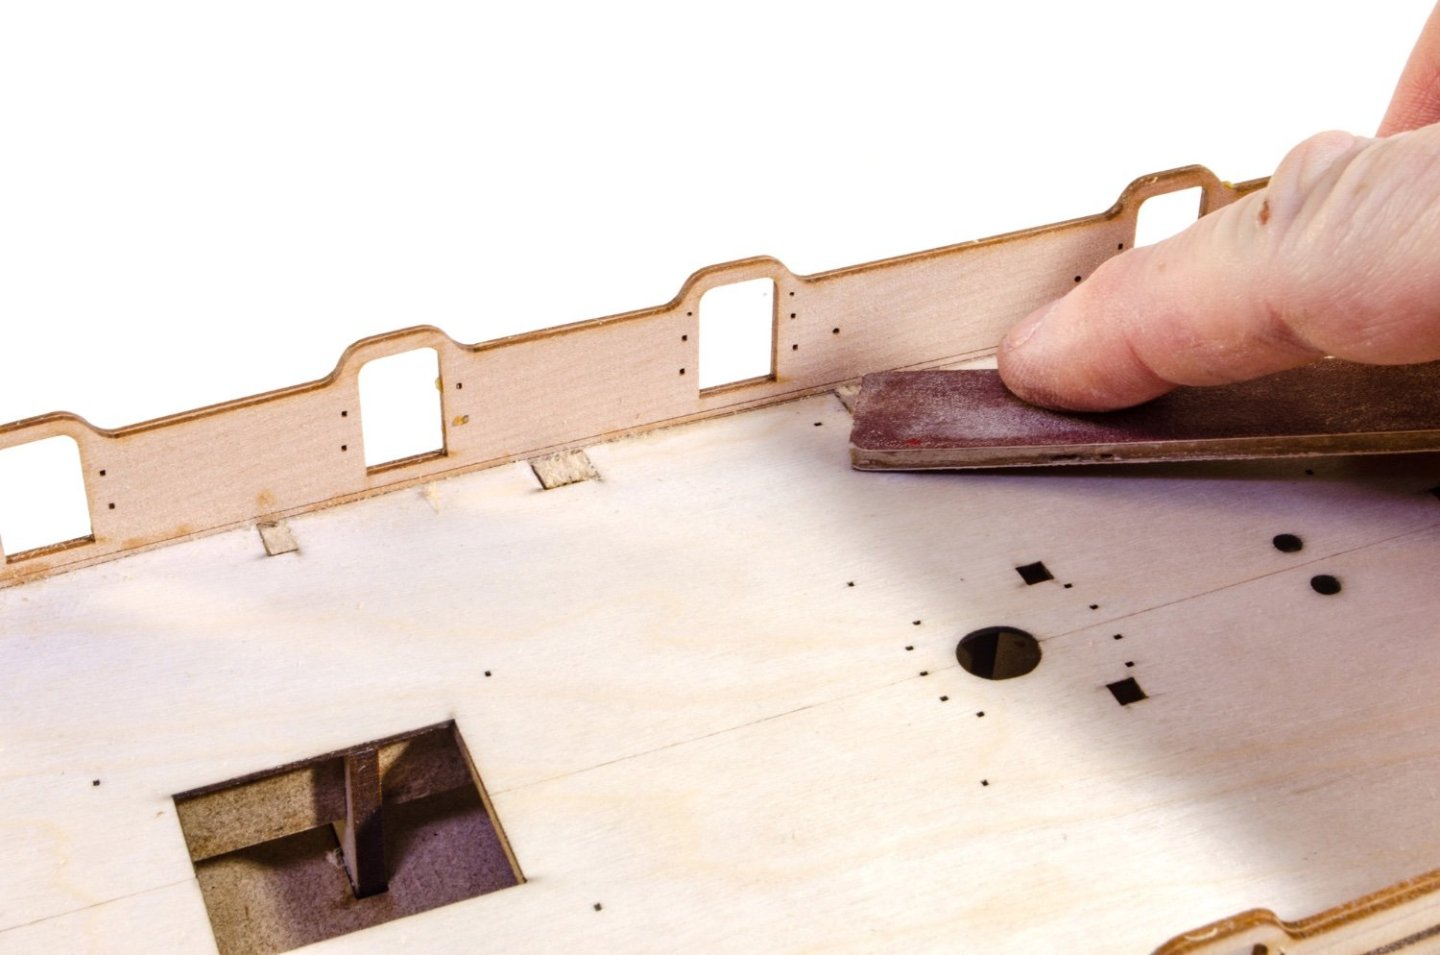
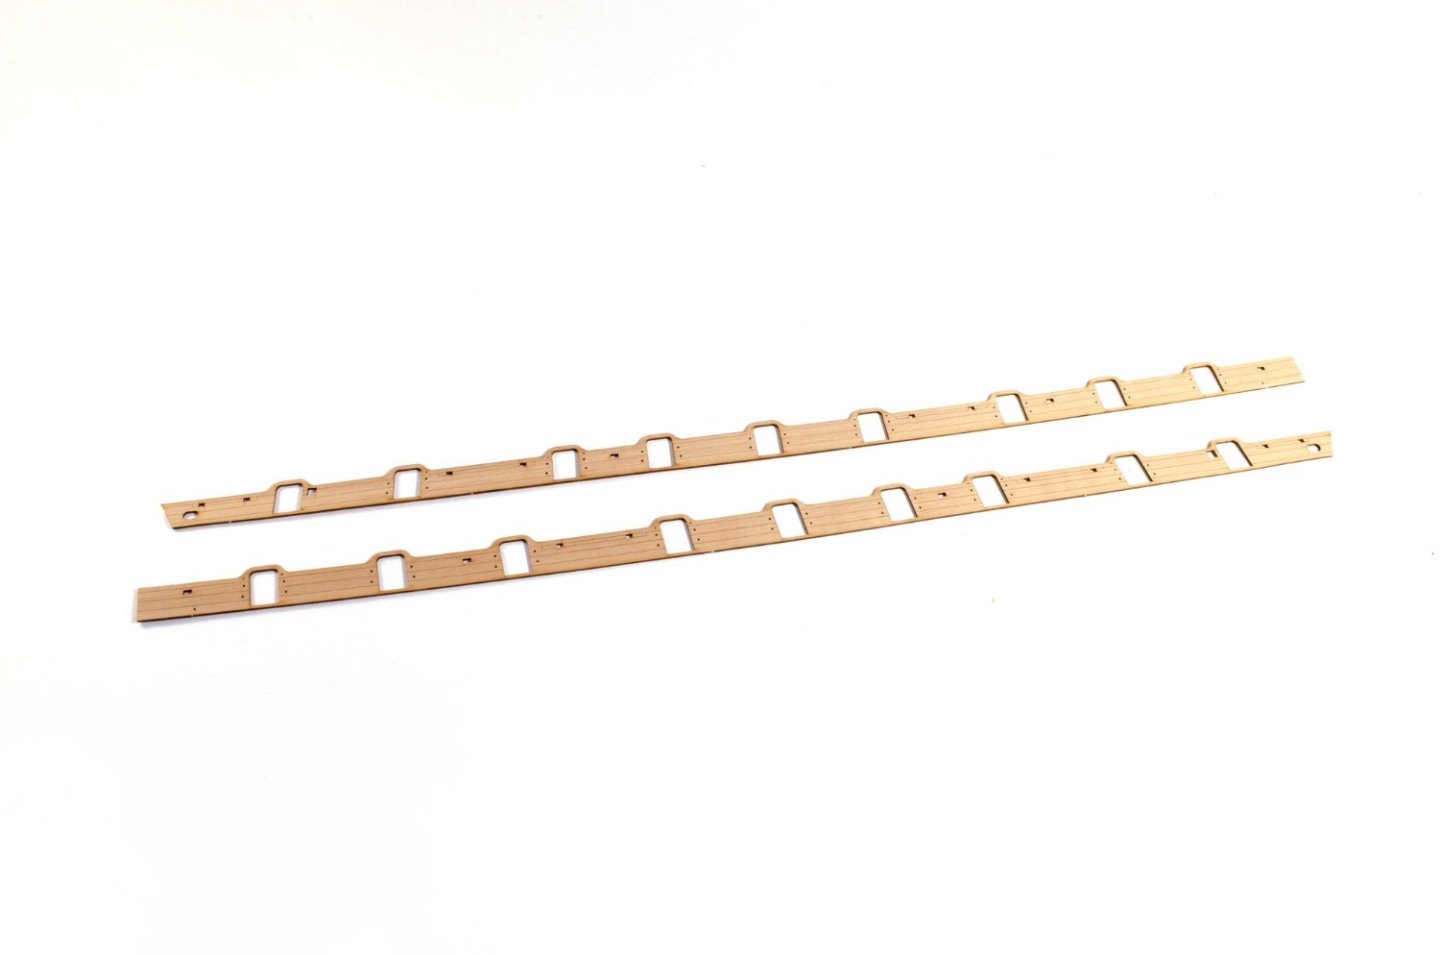
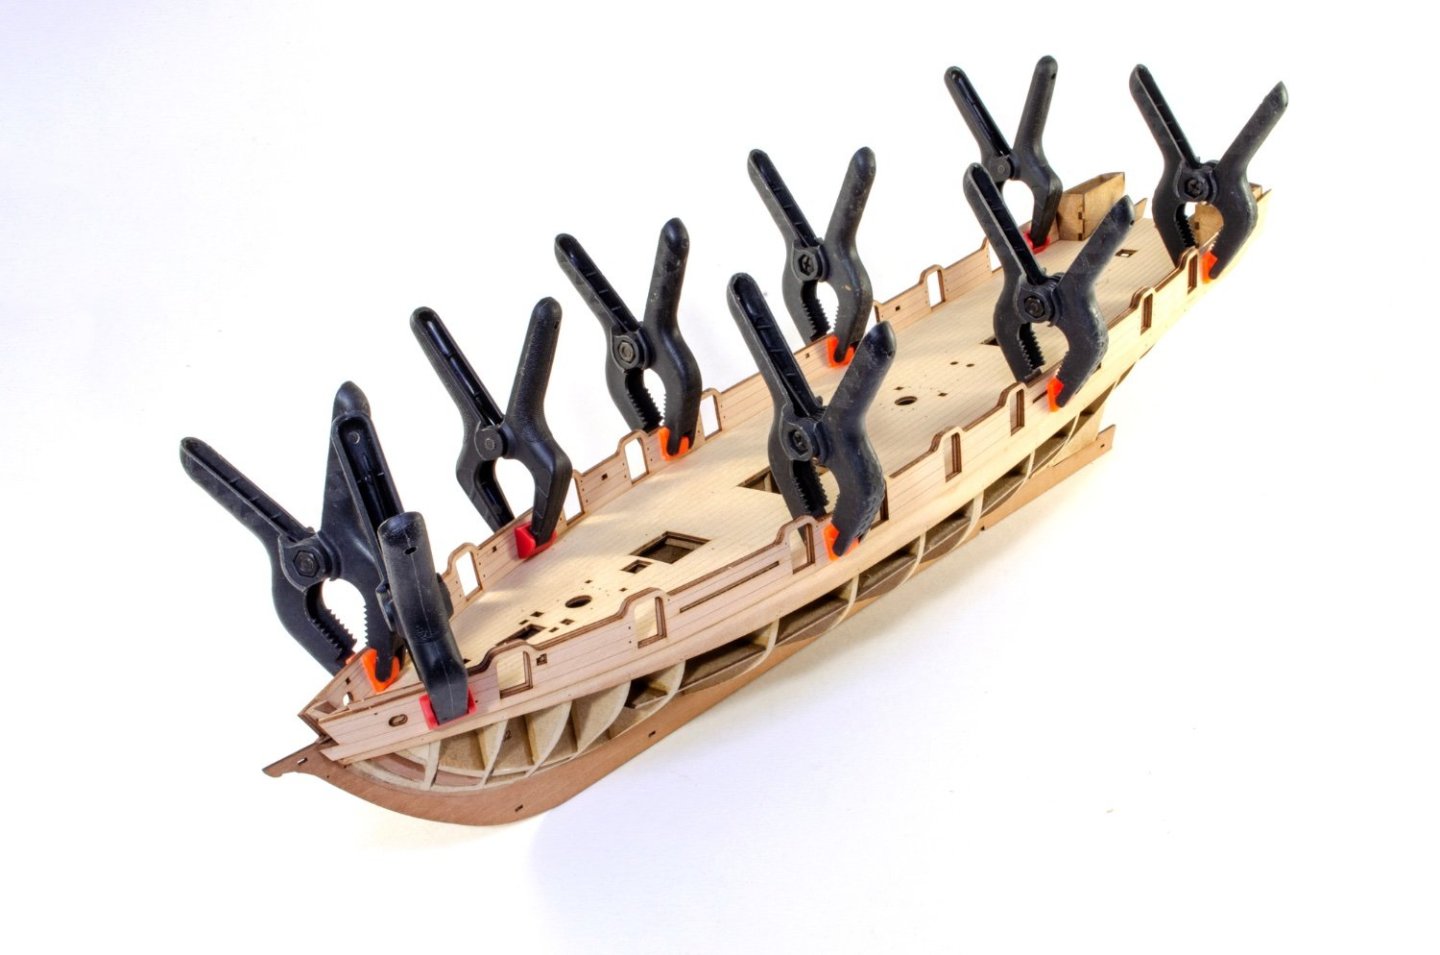
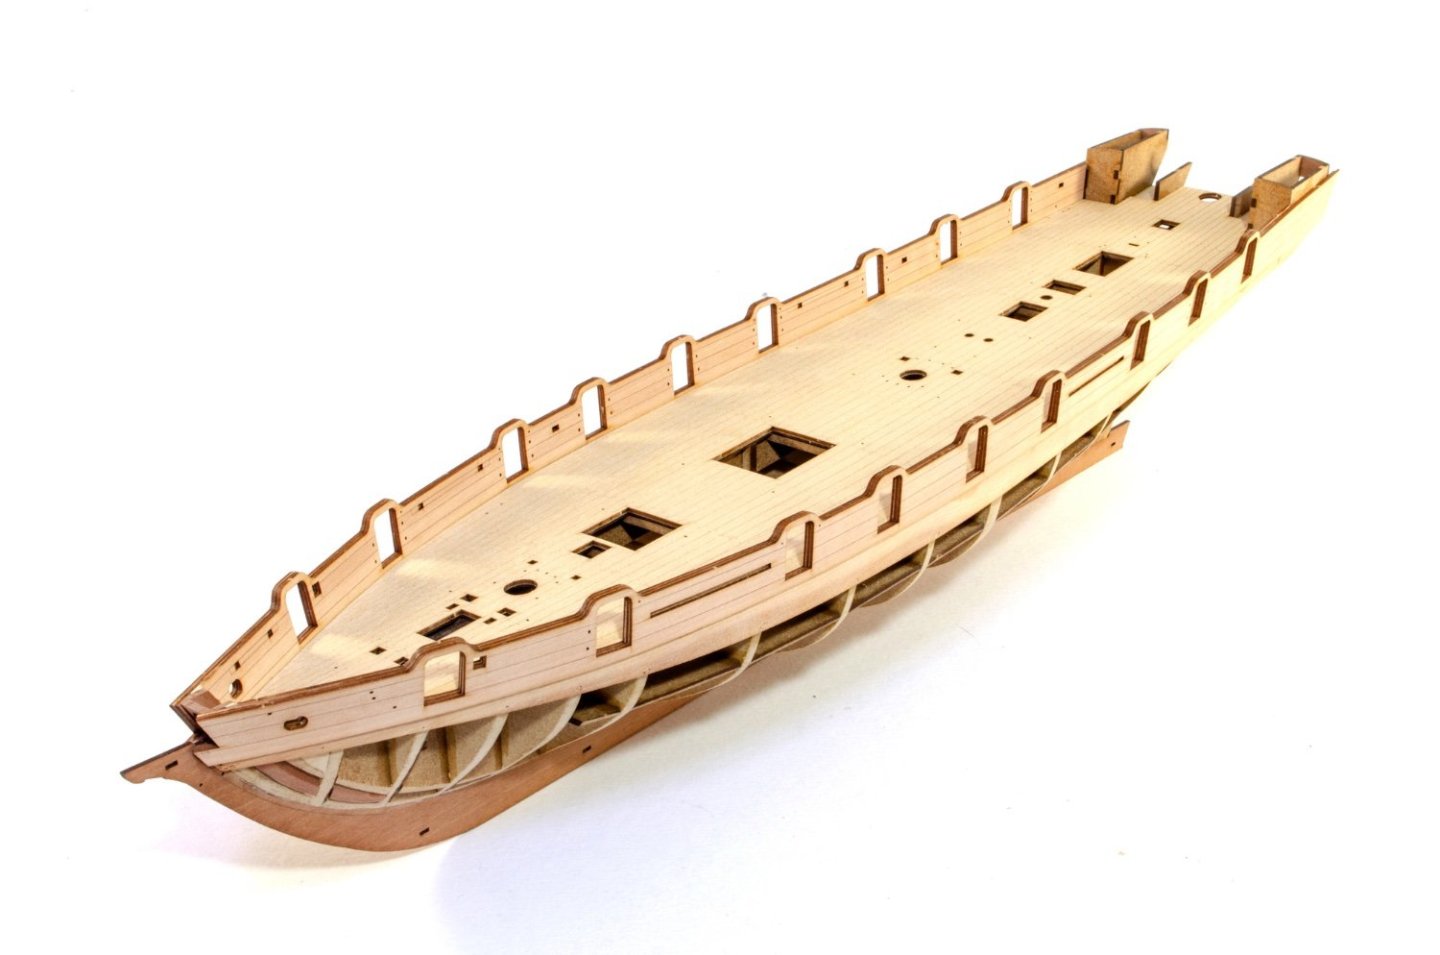
Weekend update time. I've done a bit of jumping around on Grecian over the last week as the engraved deck was modified and I've been waiting on some areas of the hull to dry. The bowsprit is now built, but I'll leave that to the next update. Some mast work has also been done. For the moment though, I'll show you where I am with the hull. On my last update, the hull was at this stage. I now had to add the bulwarks. These will form the inner 1mm core of the final bulwark. As with the other kits, these are engraved on the inner face so that you can align the lower engraved line to the deck level. No soaking is needed with these whatsoever. I did score and pin towards the rear where the bulkheads have a tighter curve, but the stuff is all very easy and I'll show what I did in detail for kit. These parts are pinned and clamped until dry, but with no glue between the bulwark and the bulkhead ear above deck level. Here is that same bulwark from the rear, with the scored and pinned area evident on the lower bulwark. Unusually for a kit like this, we don't yet do the planking. This is because we need to bolster those gunport arches. The outer bulwark is first dry fitted to the core bulwark and a pencil used to draw along the underside and the position where the channels will eventually slot in. This is simply so I know where to glue, and importantly, NOT to glue. I want to keep those channel slots free from glue clogging them up. Each outer bulwark is now glued in place. It's important to make sure they are adhered from top to bottom, but also vital that the tops of the gunport arches are properly glued. You can never have too many clamps! To ensure no error creeps in with the port positions between layers, the midship ports were first aligned and I words towards the stern and clamped, and then towards the bow and also clamped. If you get the midship ports properly aligned, you should find no error along the positioning of the others. My tip is simply a precaution for those who may tend to misplace a part slightly. Again, we are so used to removing the bulkhead ears after planking, but we are doing this early, to further strength those gunport arches. First of all, the ears are twisted off with some pliers... ...and then sanded flush with the deck. The laser-engraved lime deck is now ready to be fitted. The easiest way to do this is to mostly NOT glue it! On the prototype, the deck was simply glued down the centre and then the engraved inner bulwarks clamped into place on either side to hold it all down until the glue line set. Once dry, the inner bulwarks can be removed, allowing the deck to spring back up along the edges...but that's just fine. Those same inner bulwarks are now carefully glued into place, one at a time, making sure the port all line up properly and the tops of the bulwarks are at the same height. The deck edges will now be held firmly down. You'll note that the outer bulwark doesn't extend anywhere as deep as the mid core. This is to allow you to add first planking without damaging the outer engraved bulwark. That's all for now. Next update will show this all planked.


- 80 replies
-
- 31
-
-
-
- Grecian
- Vanguard Models
- (and 3 more)
-
I've never seen that method before, but glad it works!
-
The deck looks real nice. I do like that material. Nice clean job too.
- 443 replies
-
- 5
-
-
- Indefatigable
- Vanguard Models
- (and 1 more)
-
Kit review 1:25 Drakkar ‘Oseberg’ - Ships of Pavel Nikitin
James H replied to James H's topic in REVIEWS: Model kits
I imagine that's very likely. If in doubt, just drop Pavel an email and verify. It really looks a very sweet kit. -
Kit review 1:25 Drakkar ‘Oseberg’ - Ships of Pavel Nikitin
James H replied to James H's topic in REVIEWS: Model kits
It was apparently for the first few, but not sure how many that means. All new purchases will be fine. If in doubt, mail them with your serial number and see if yours is affected. -
Kit review 1:25 Drakkar ‘Oseberg’ - Ships of Pavel Nikitin
James H posted a topic in REVIEWS: Model kits
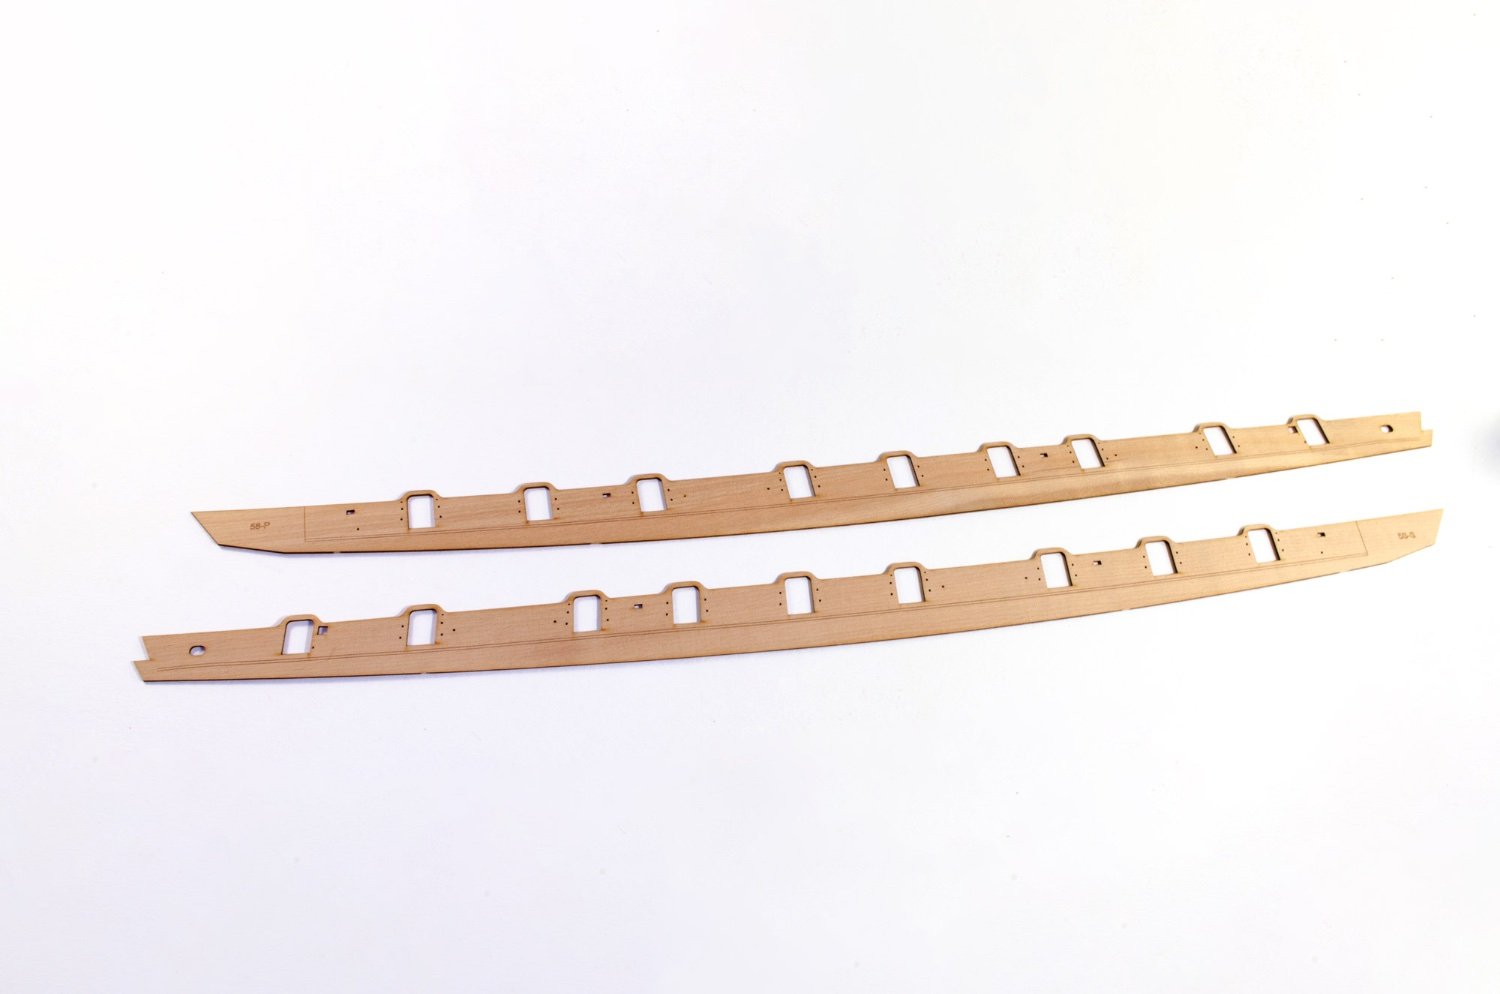
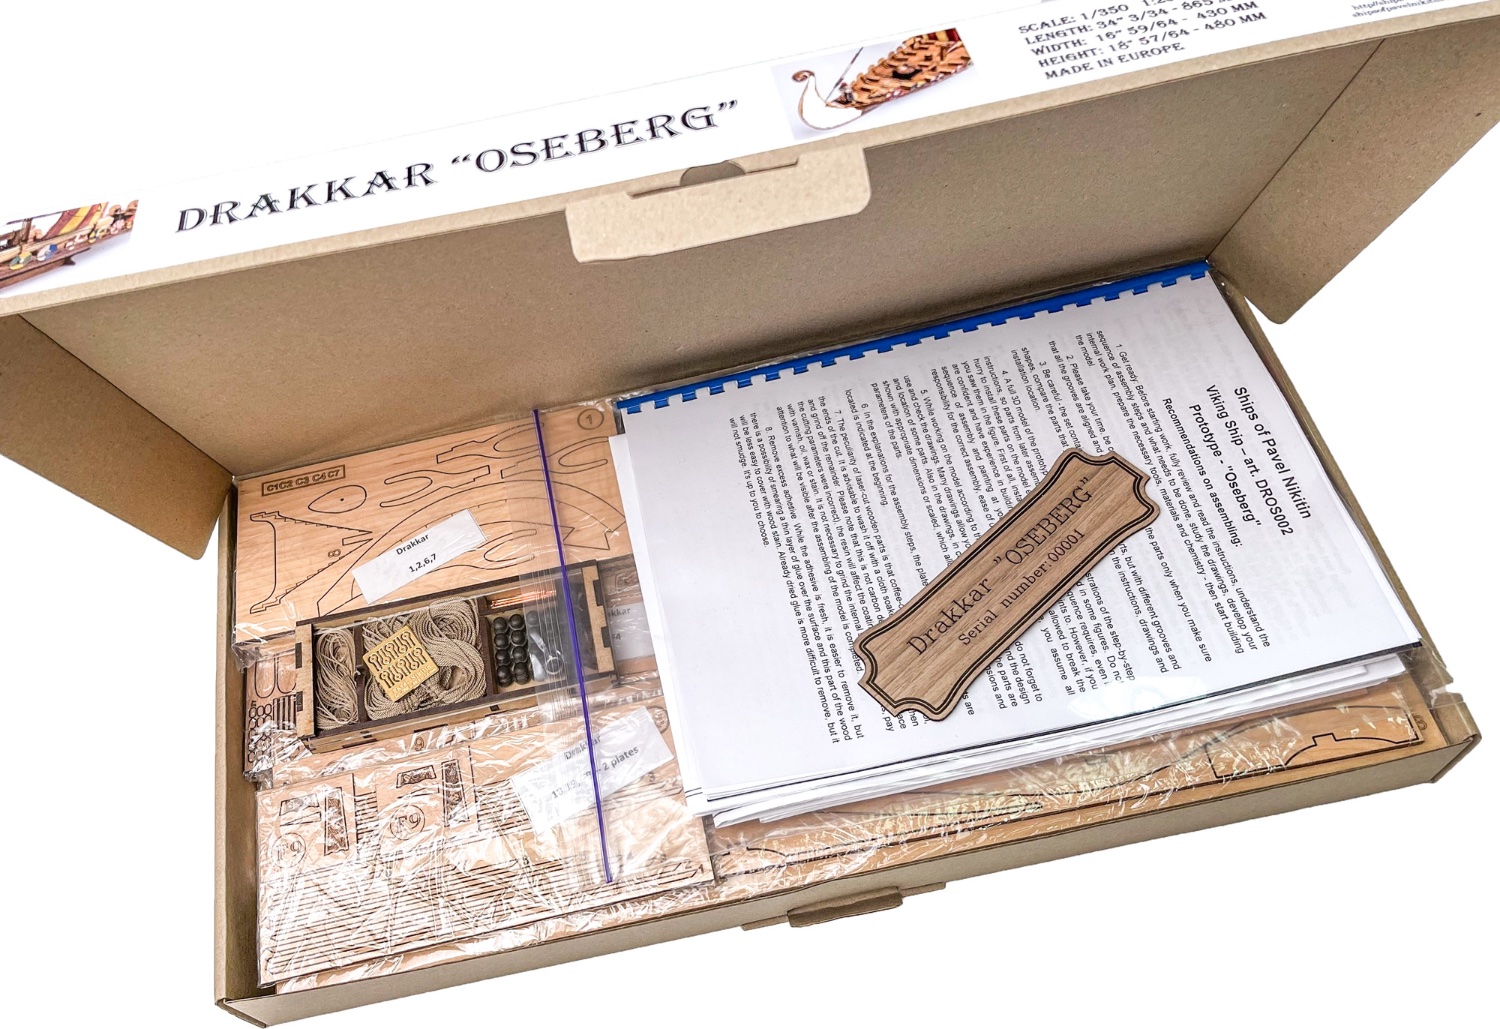
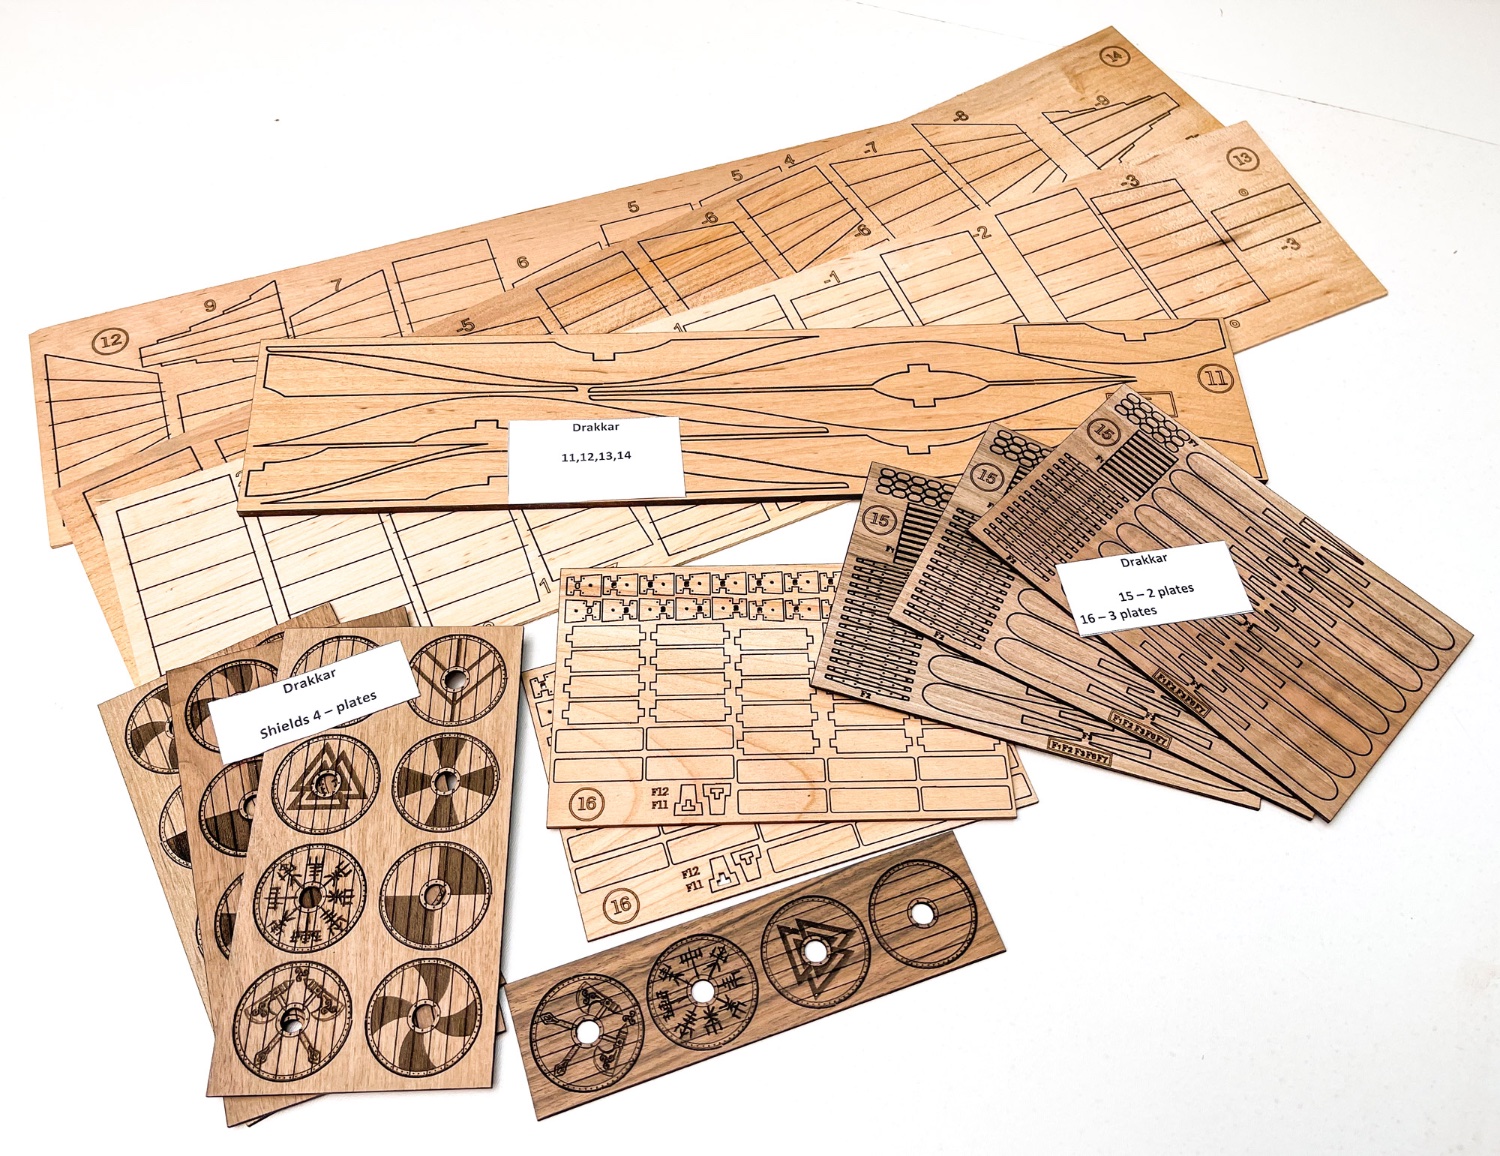
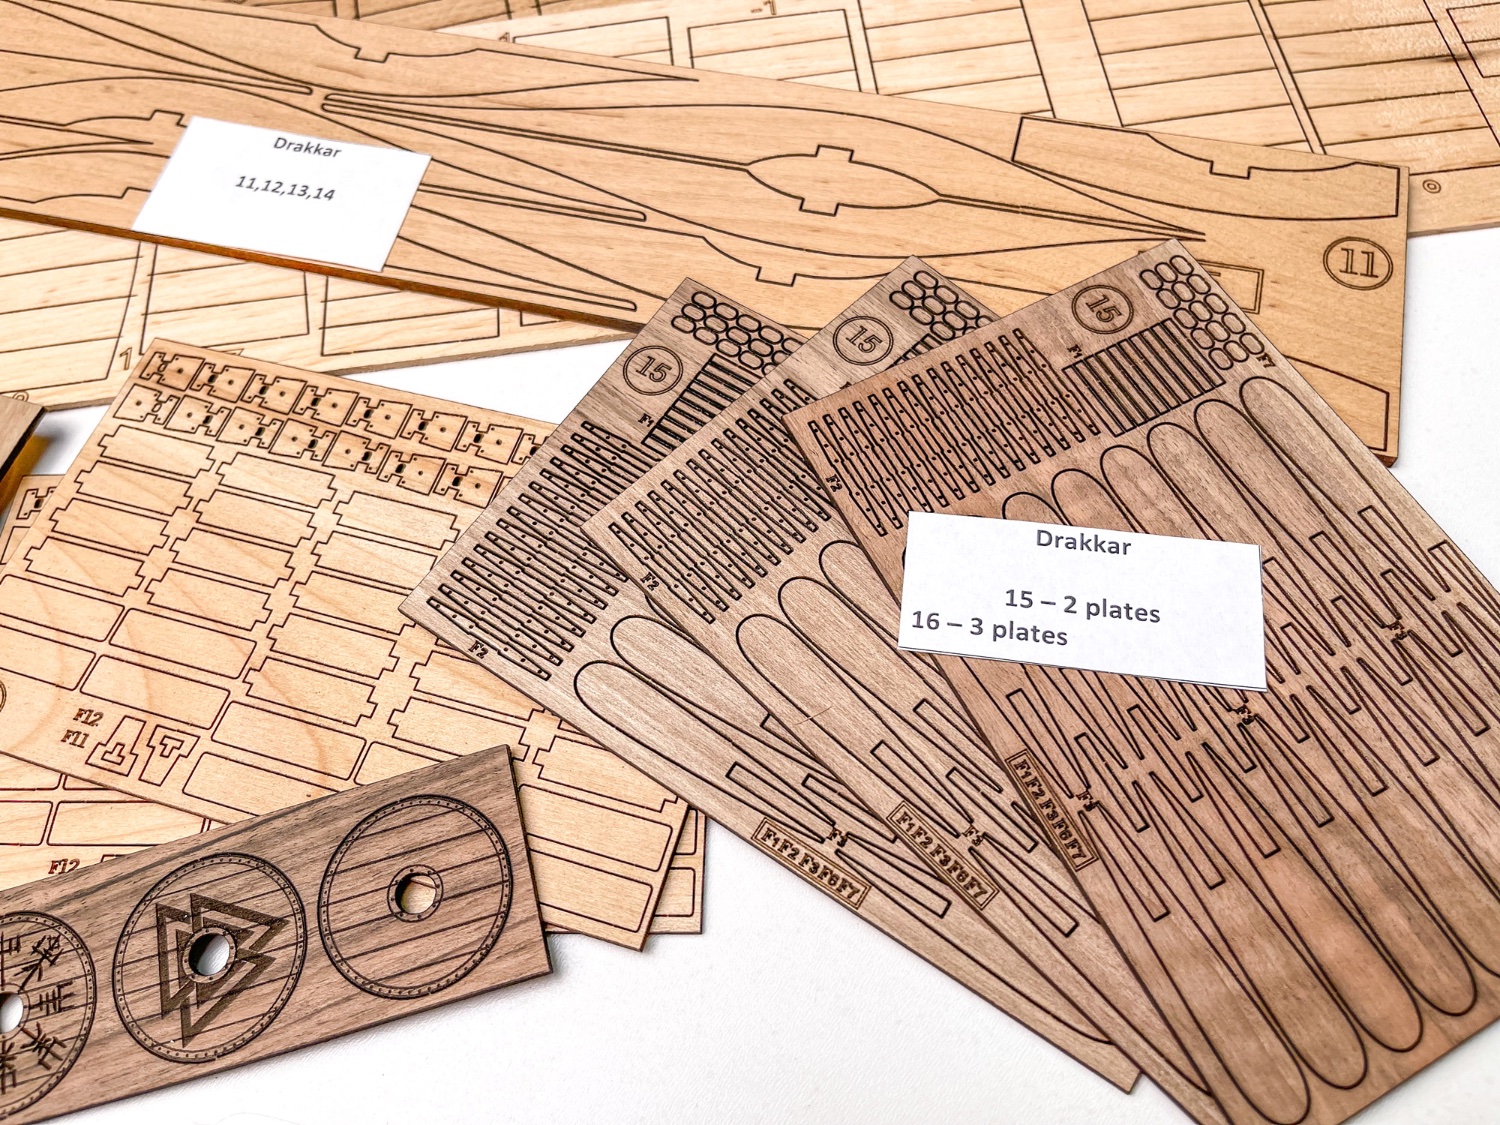
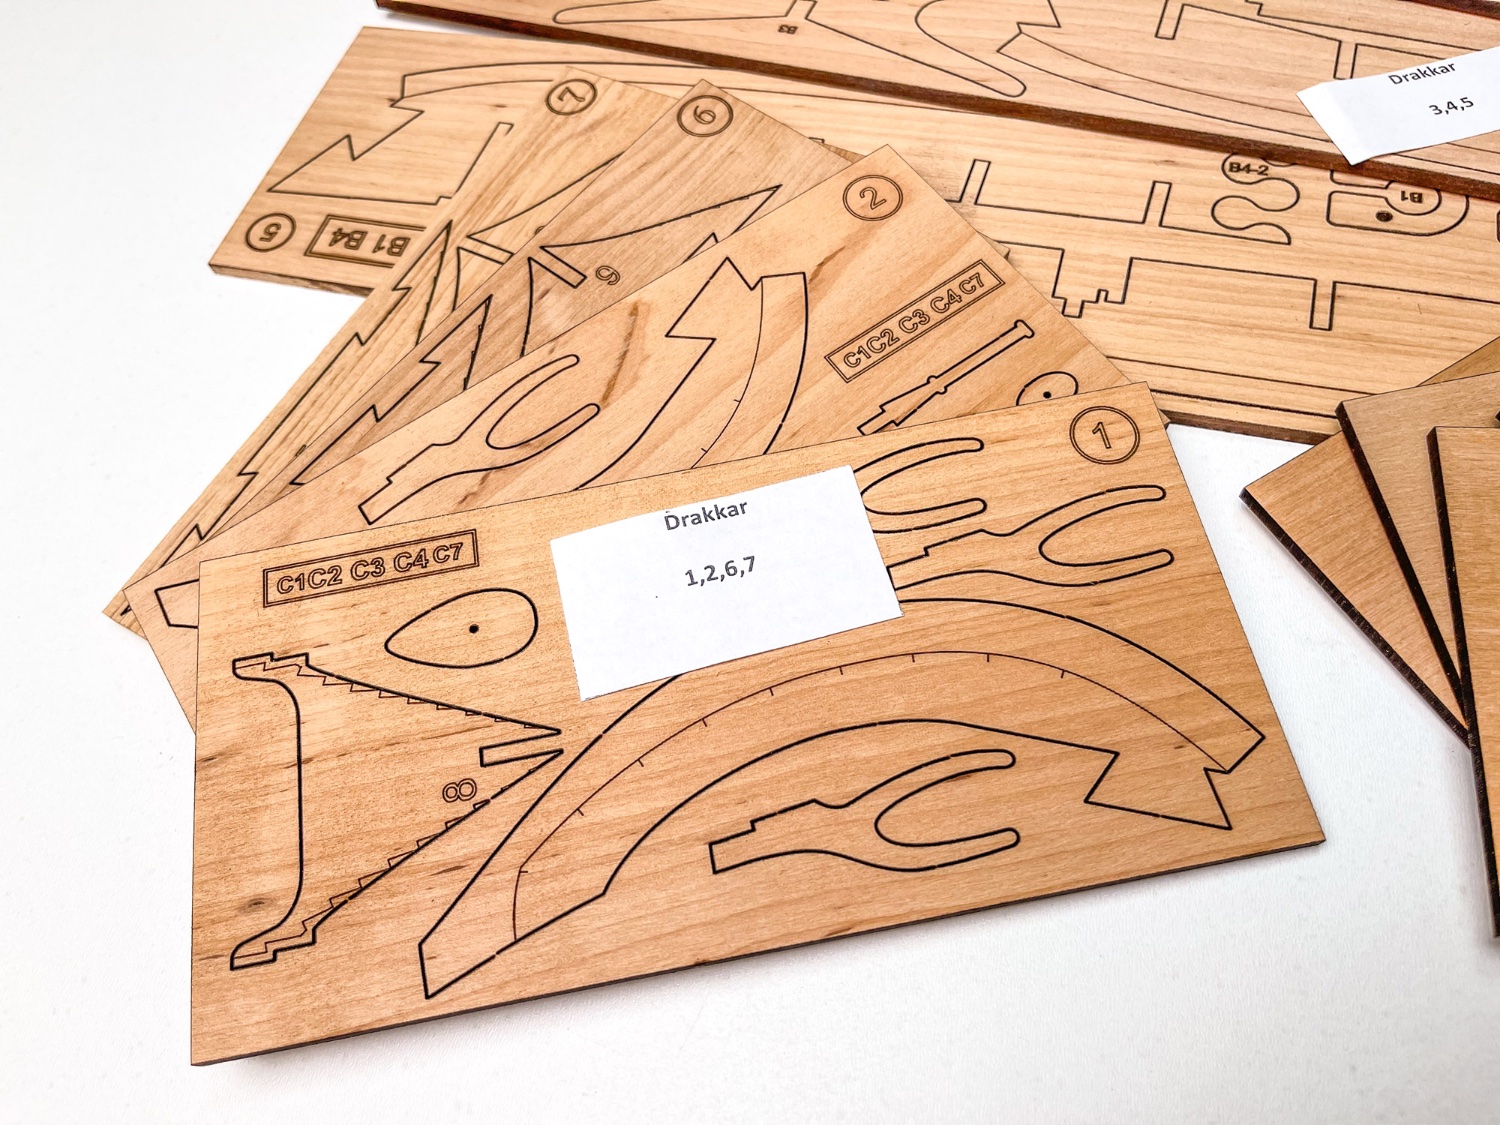
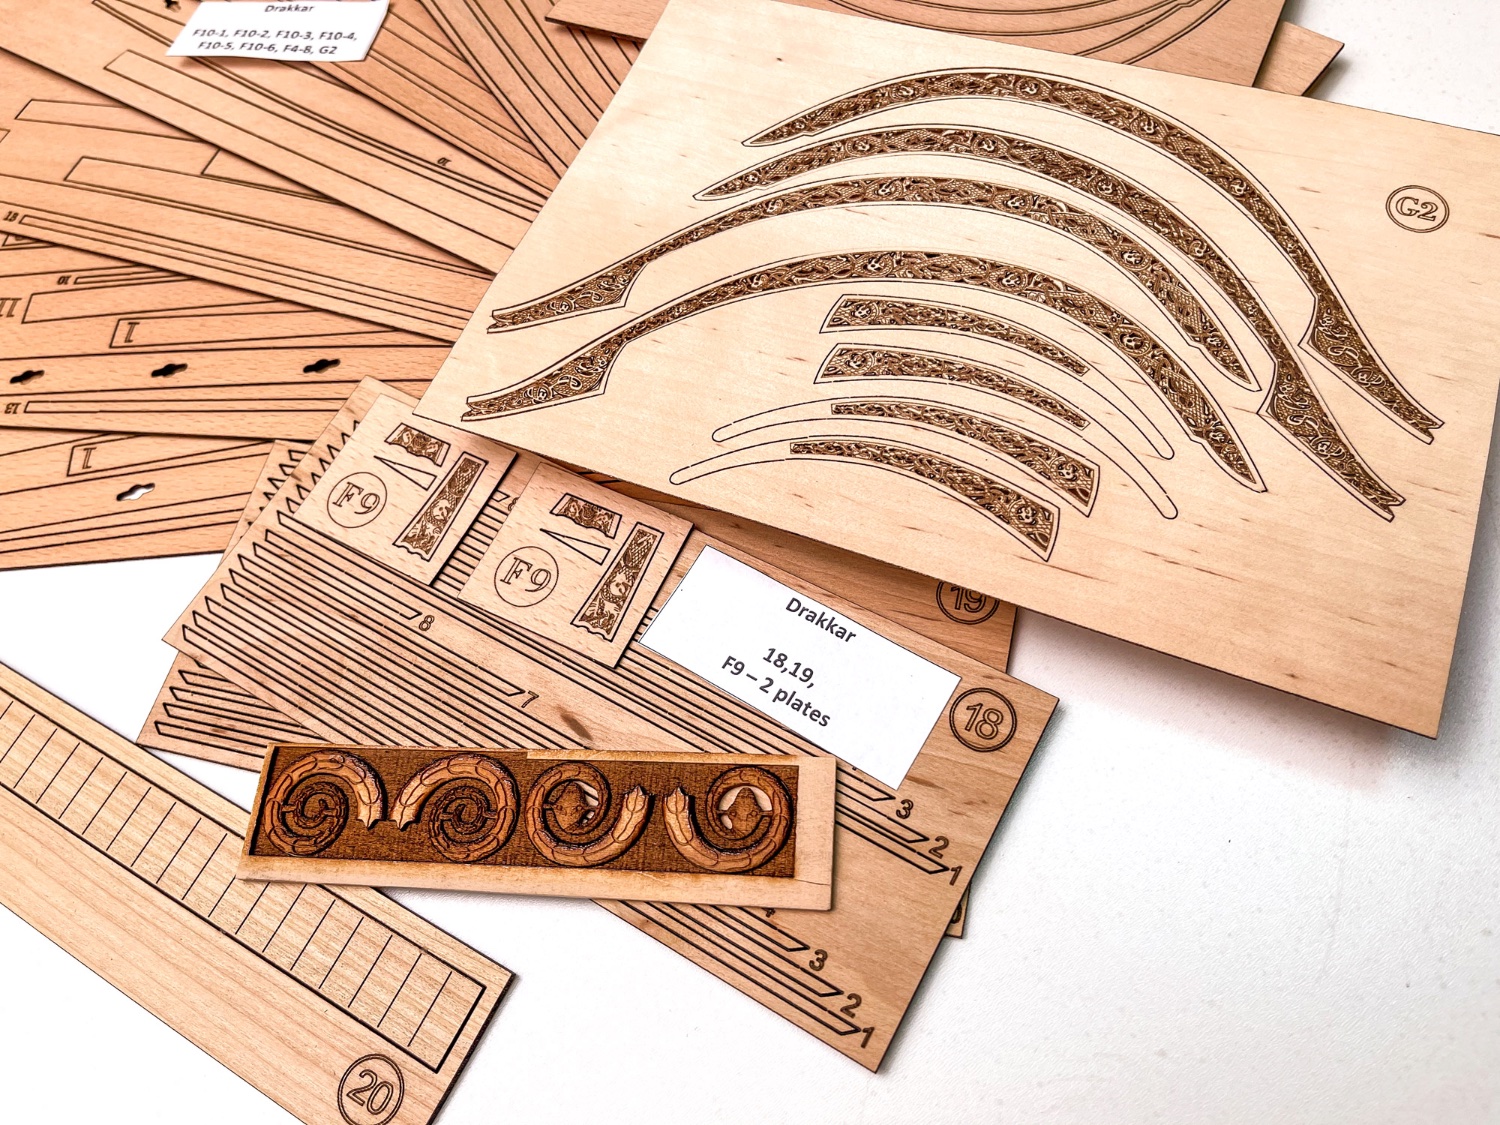
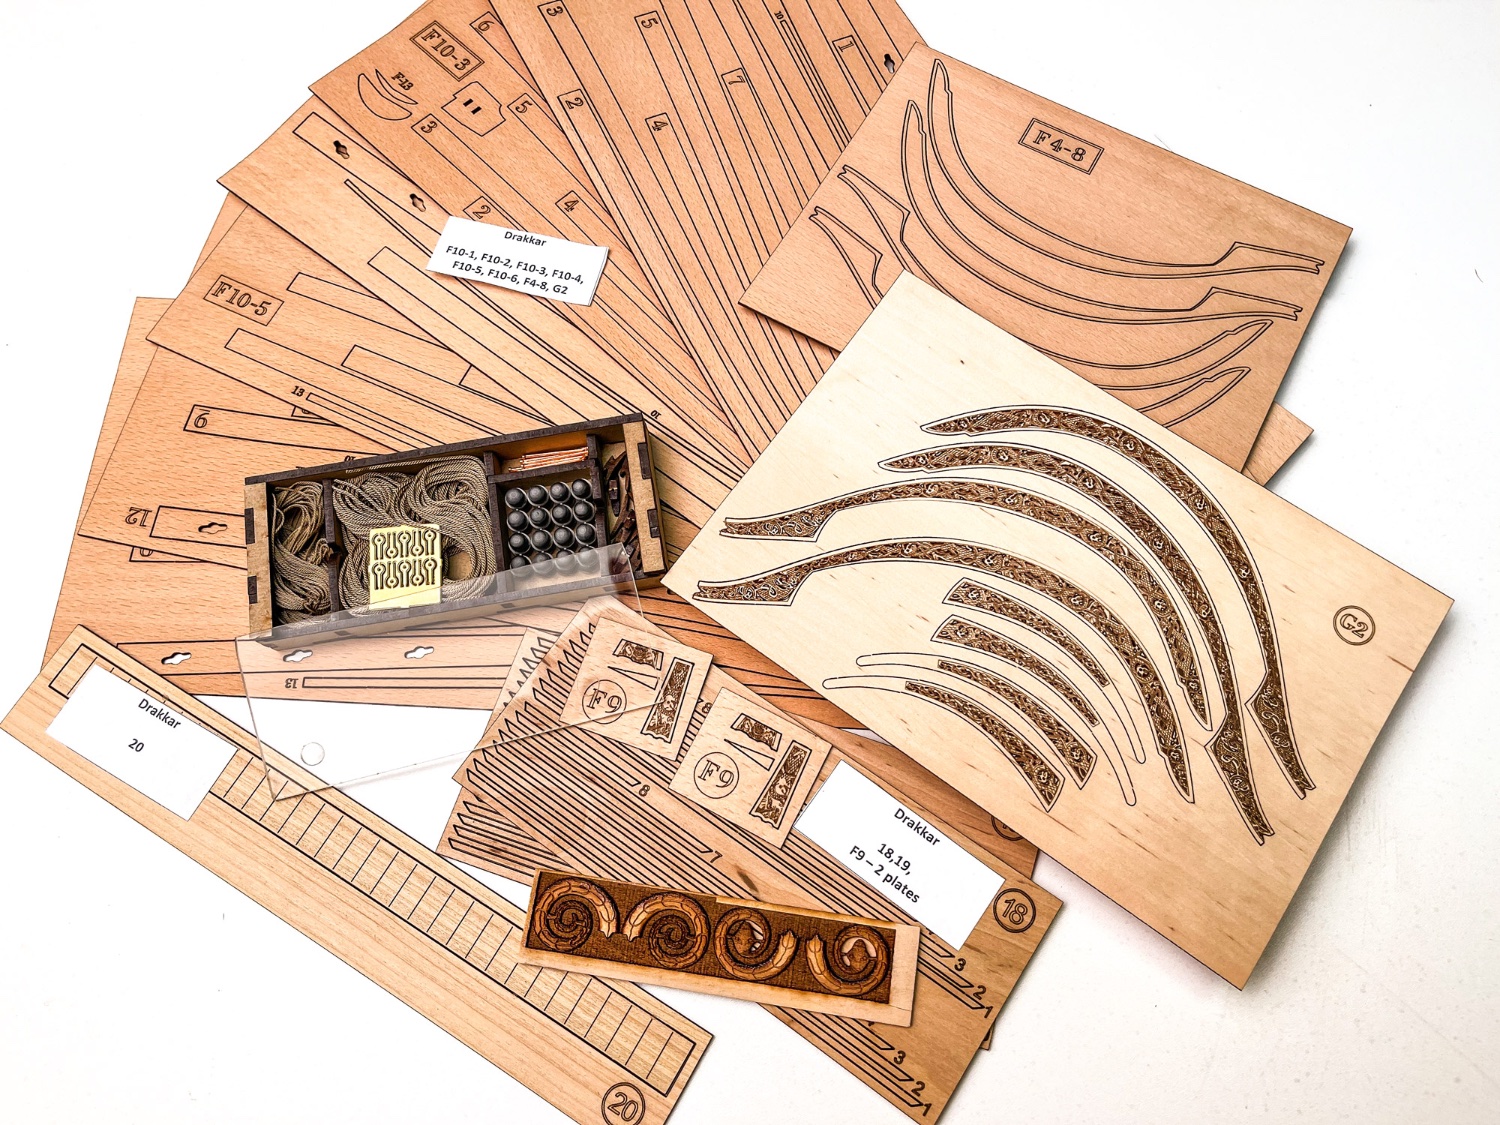
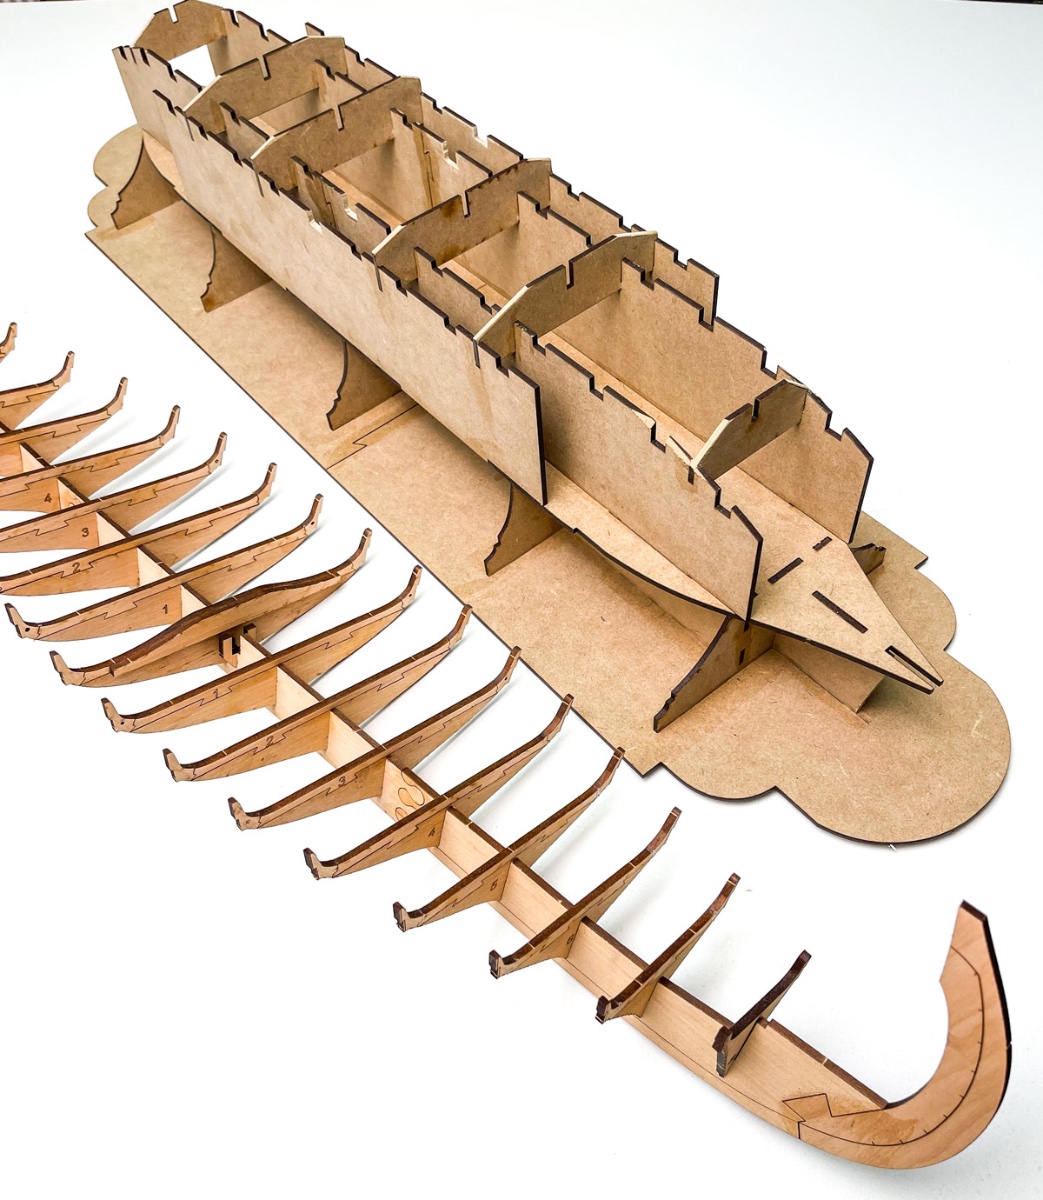
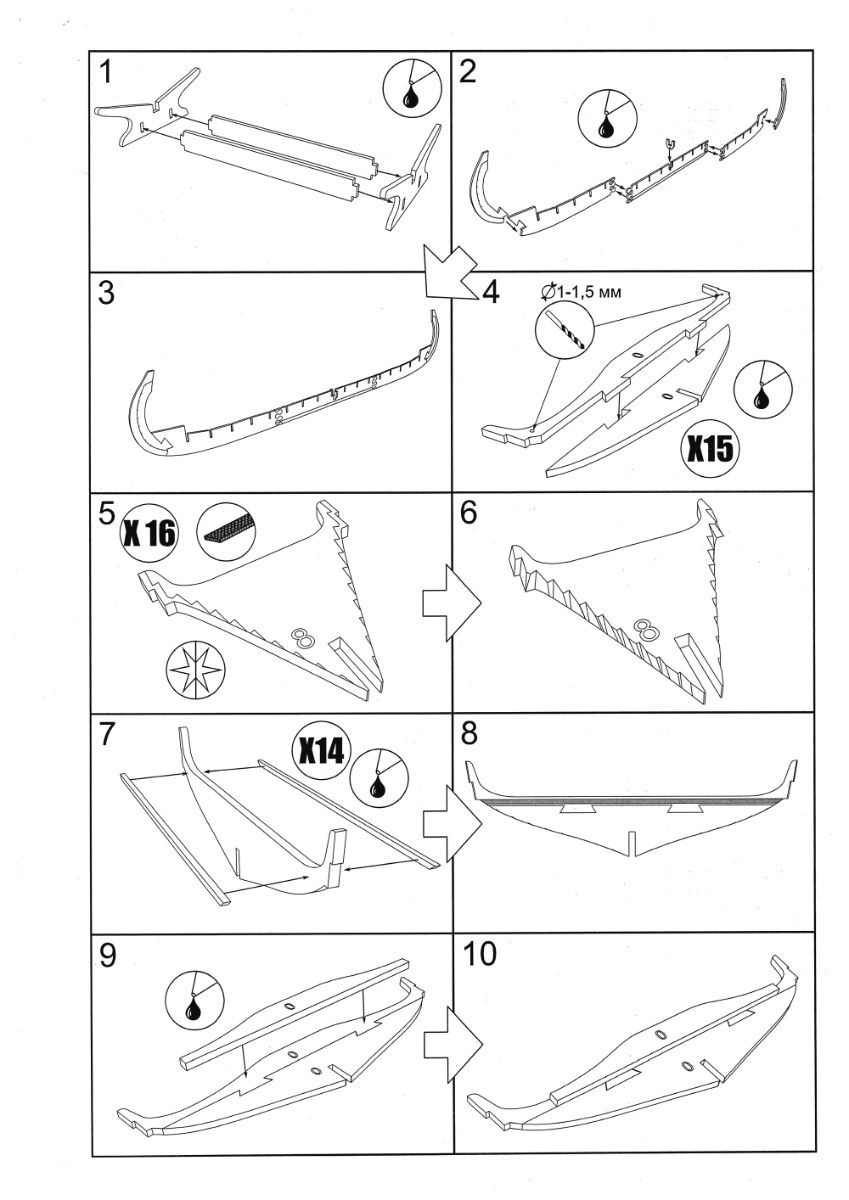
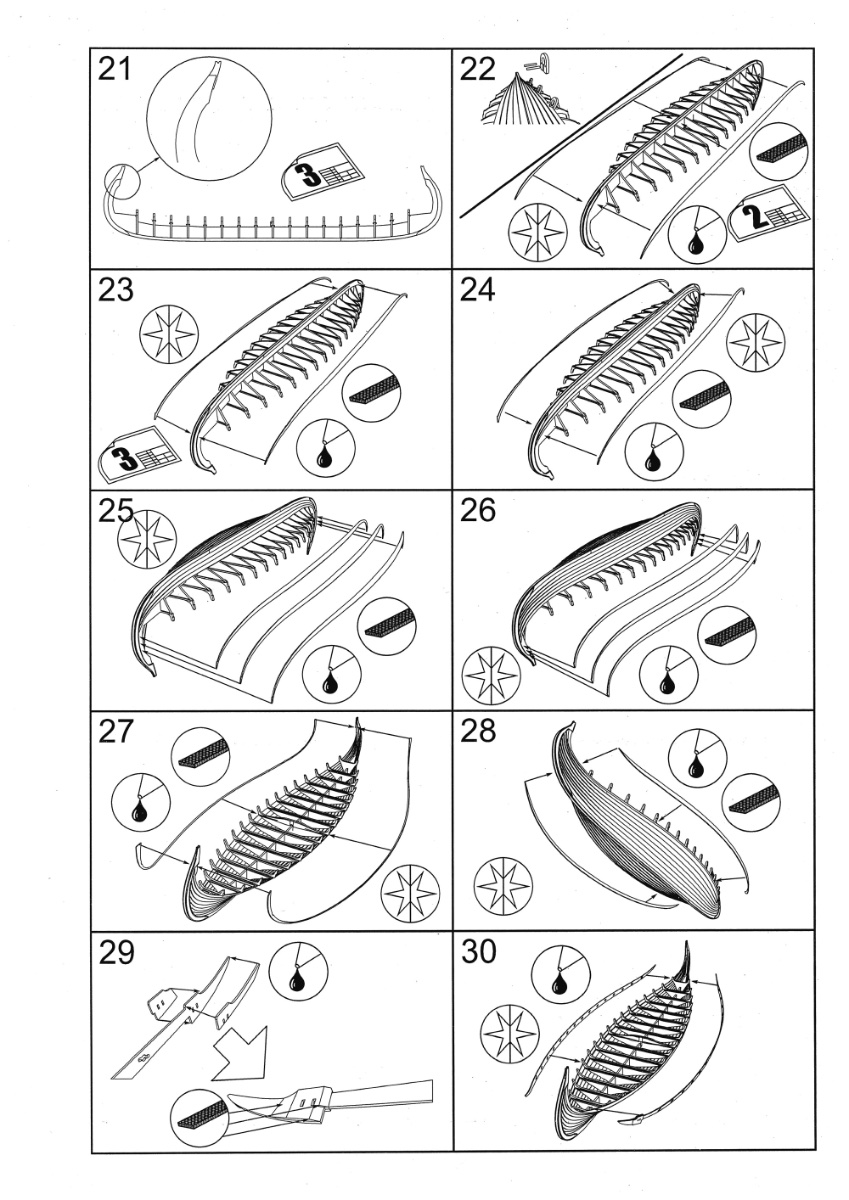
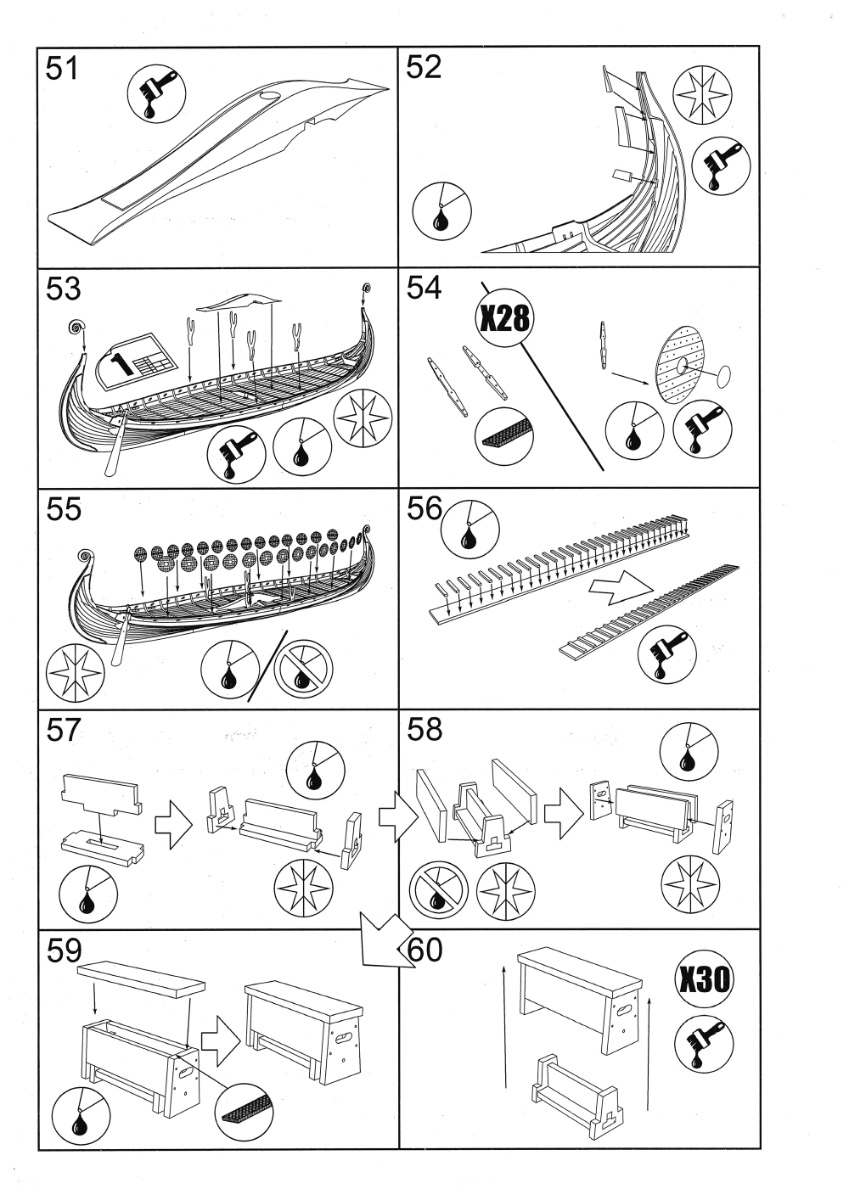
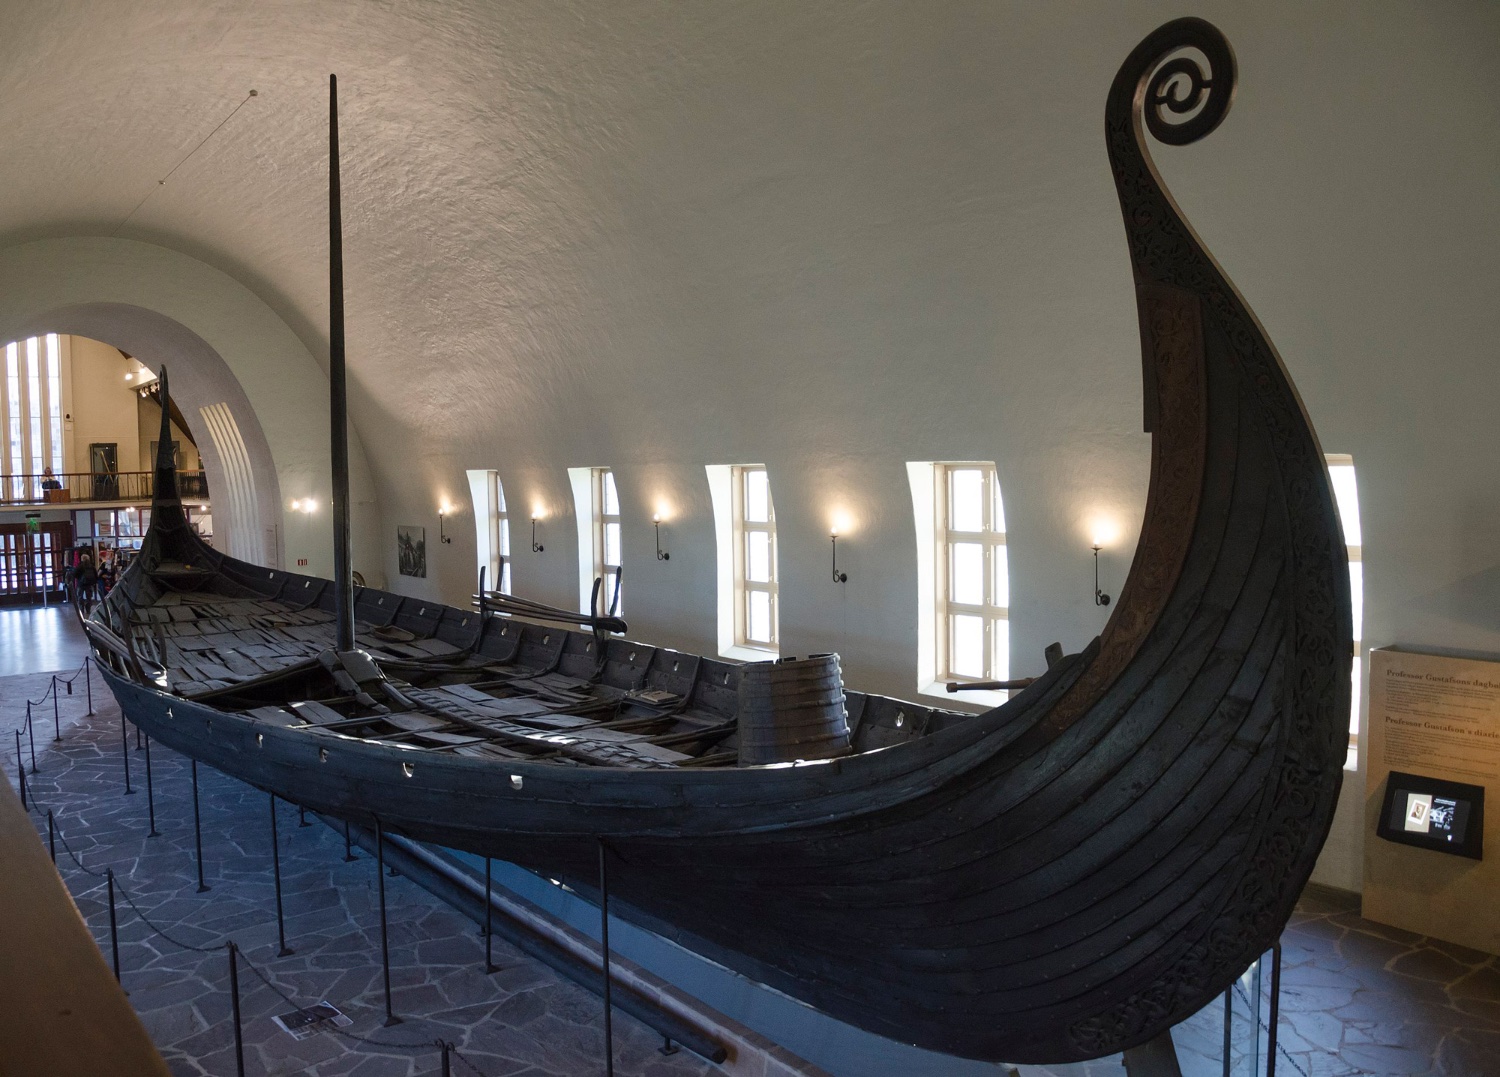
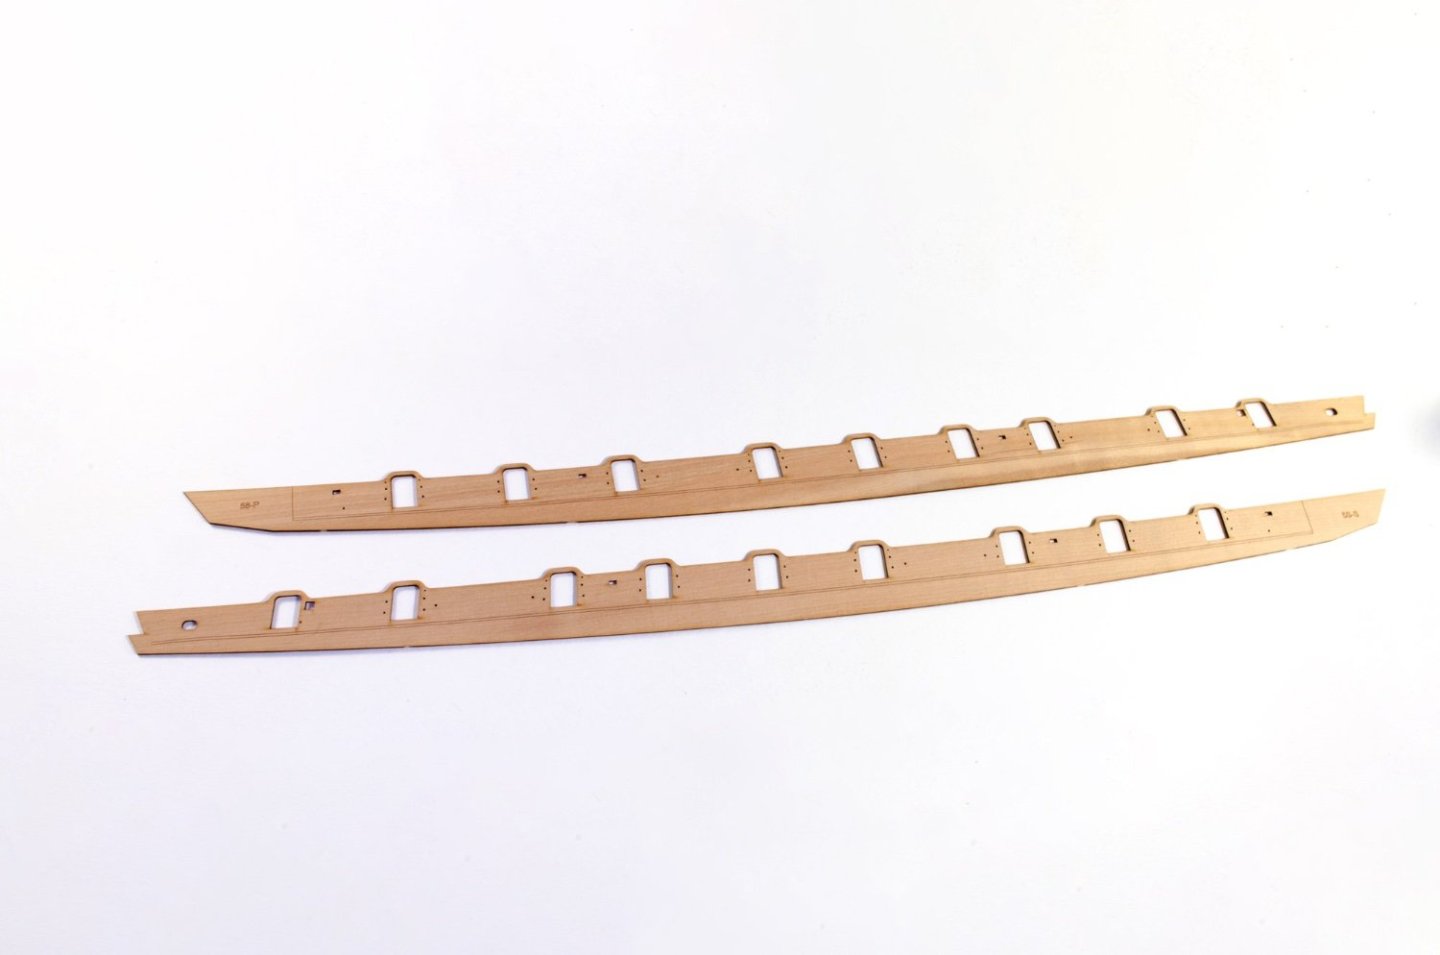
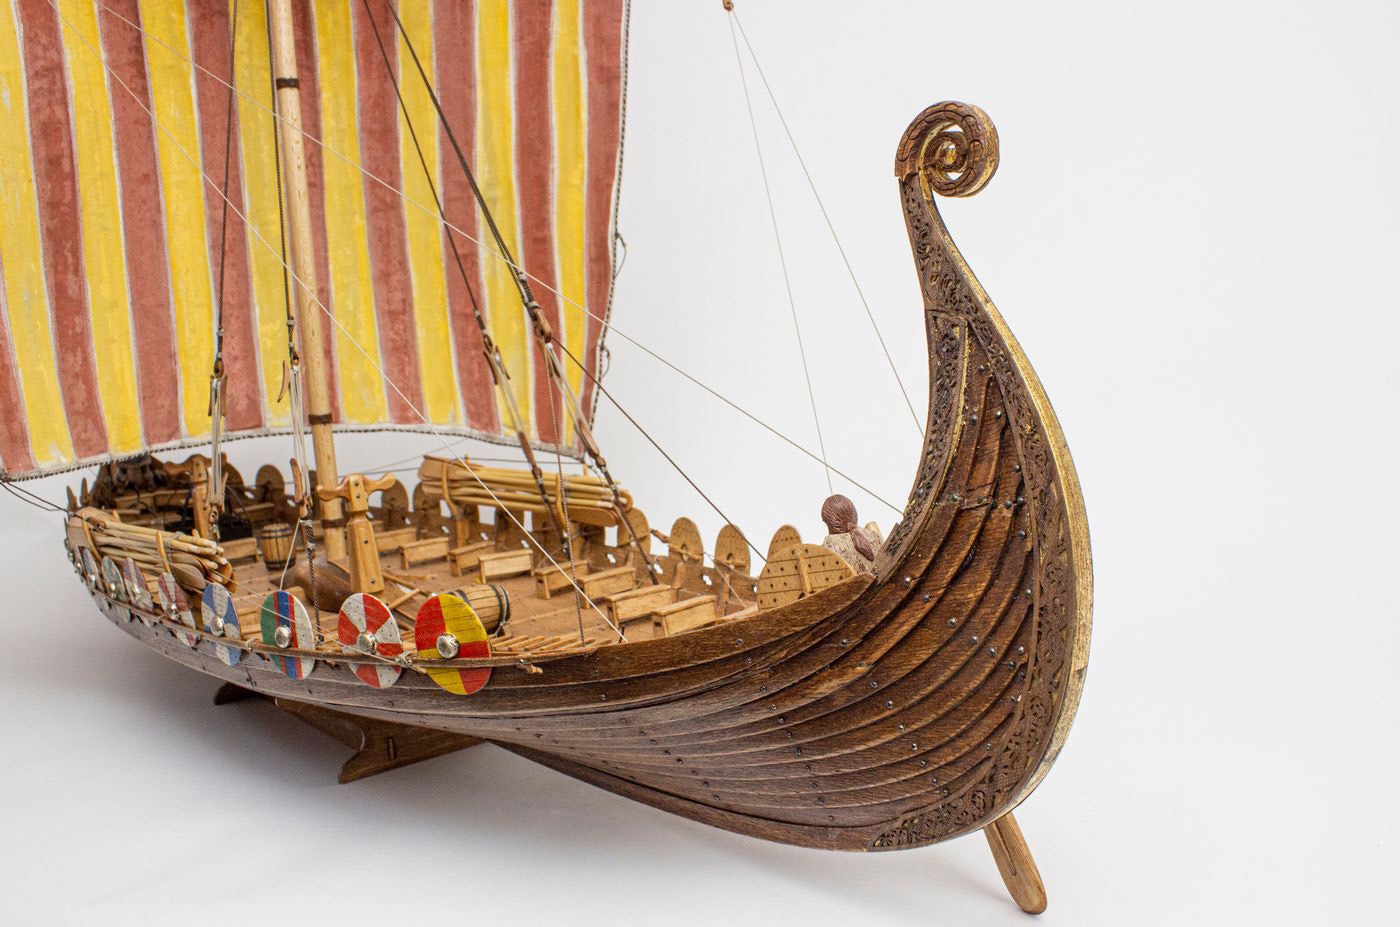
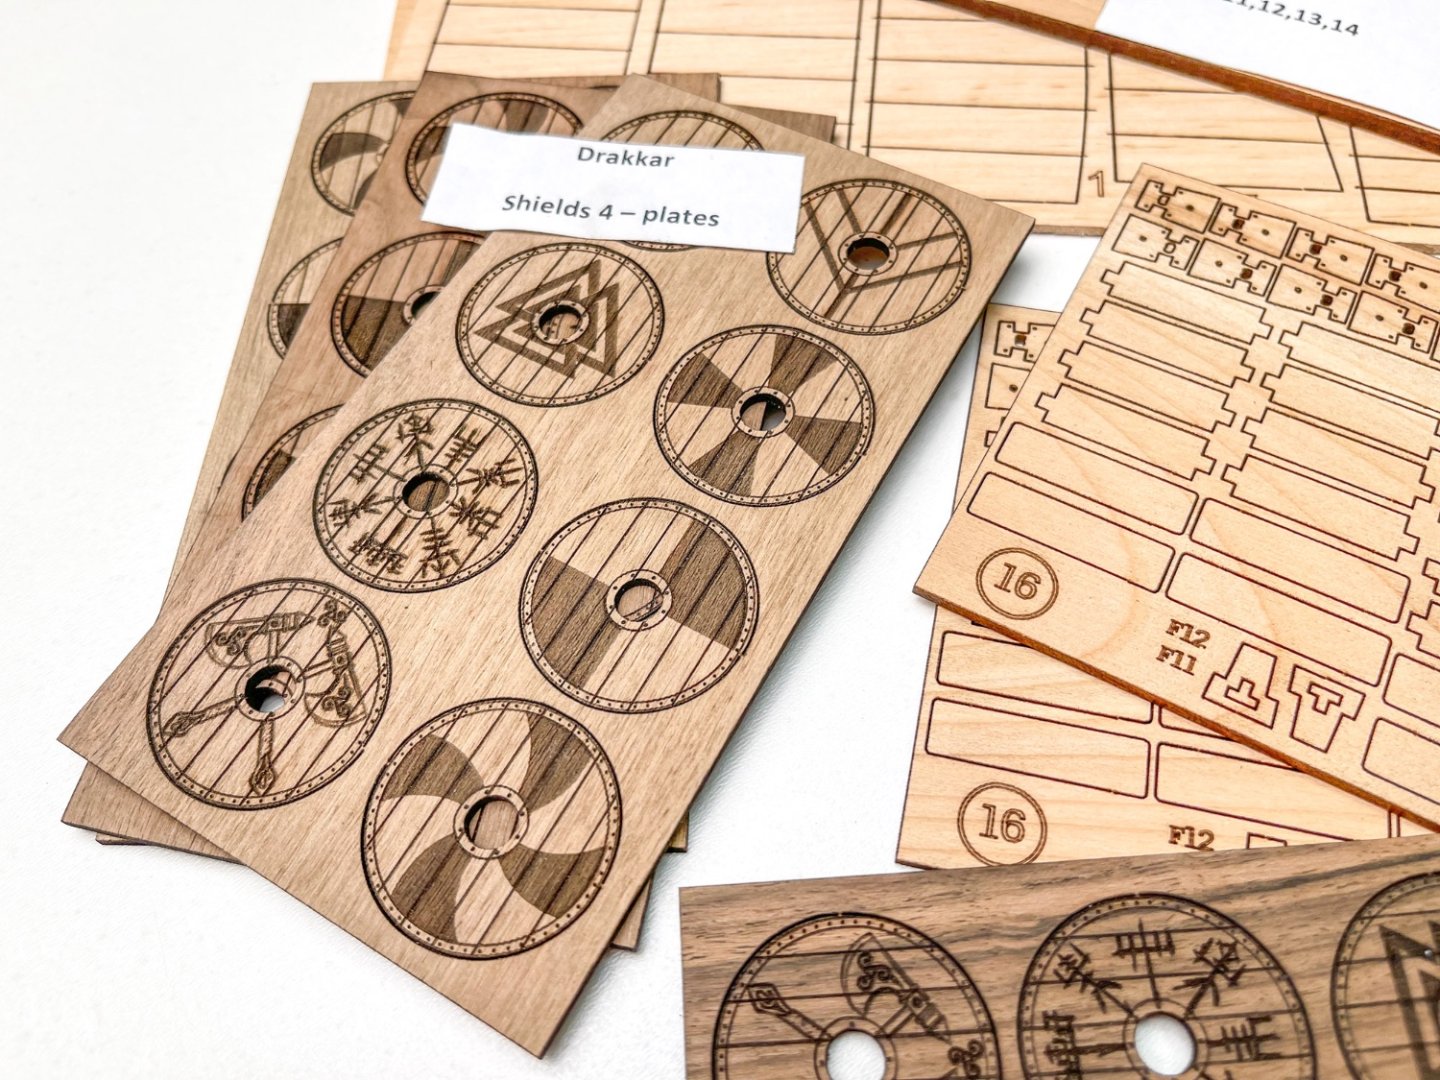
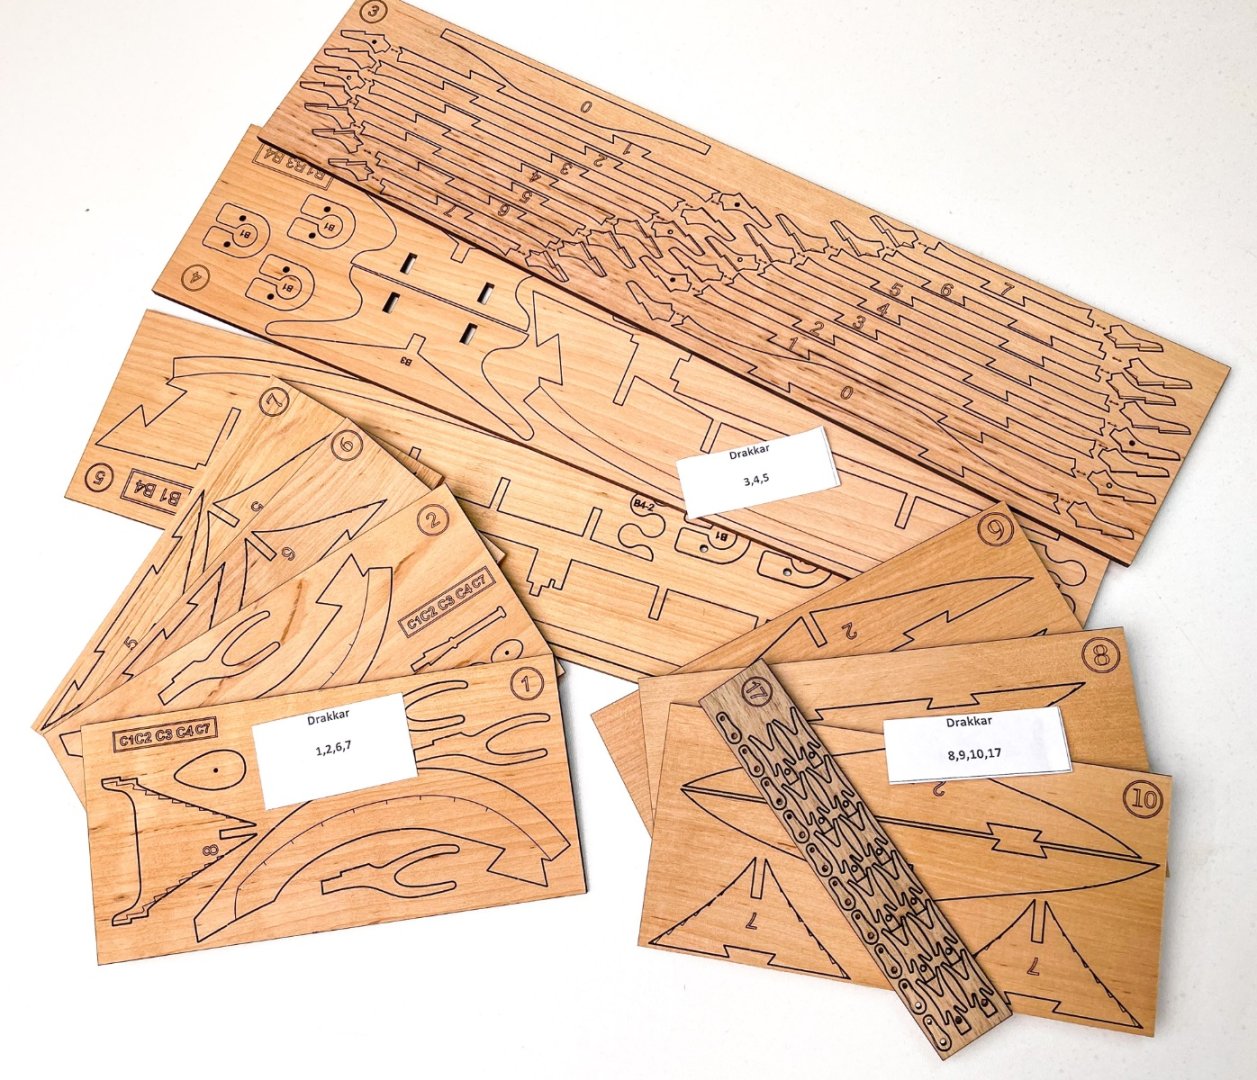
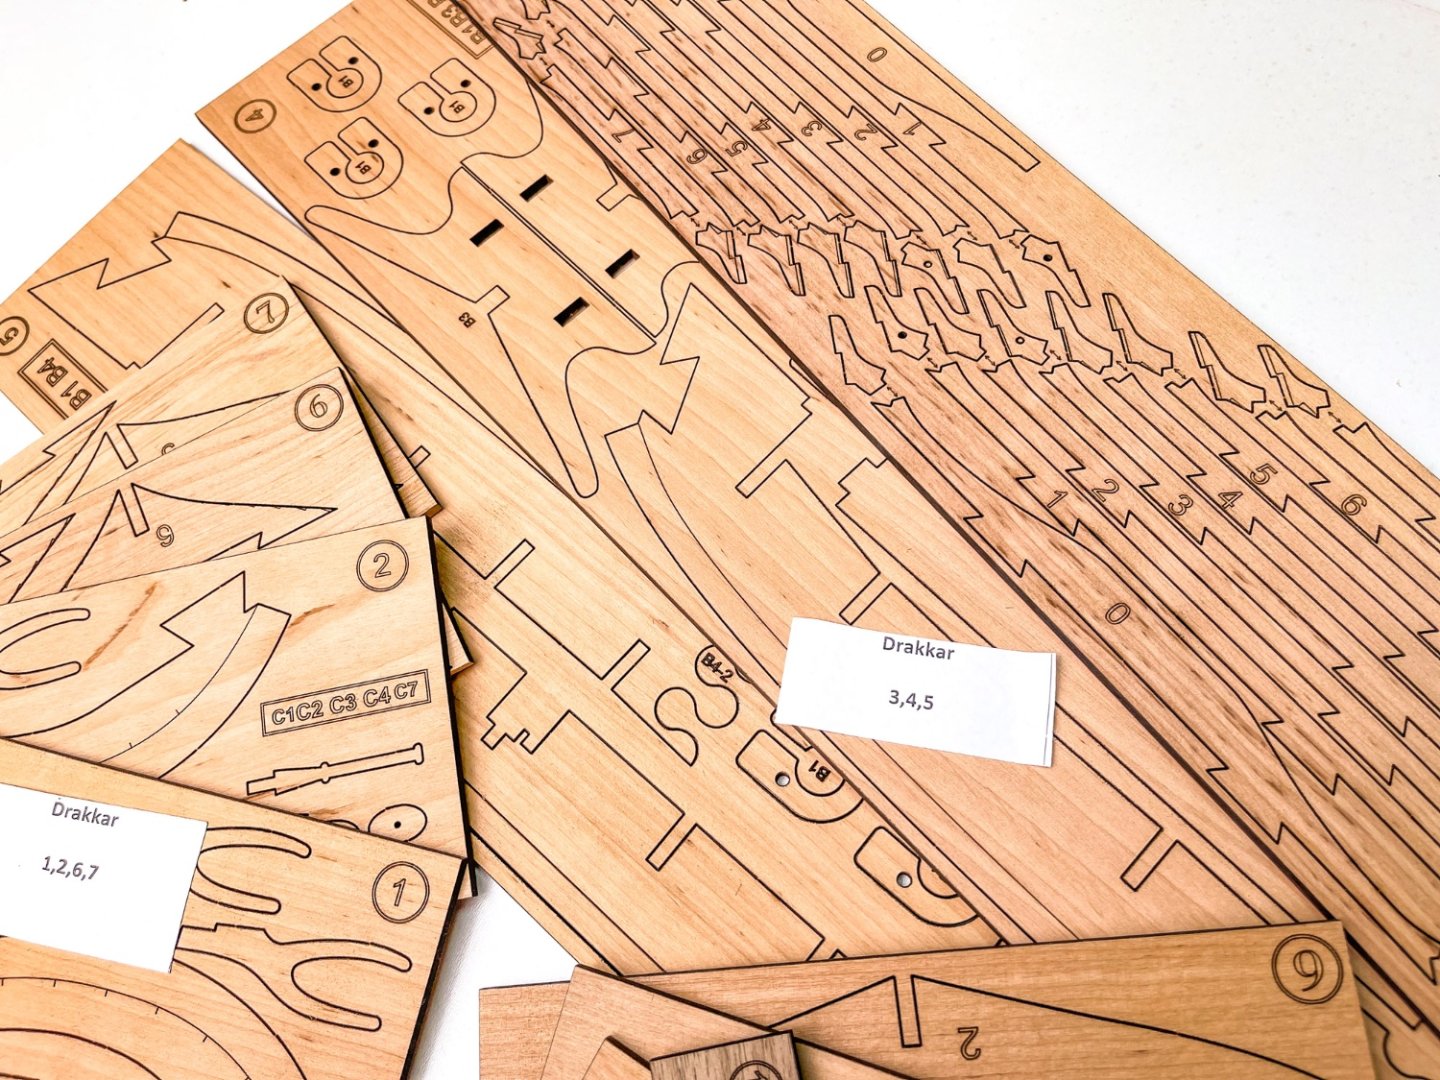
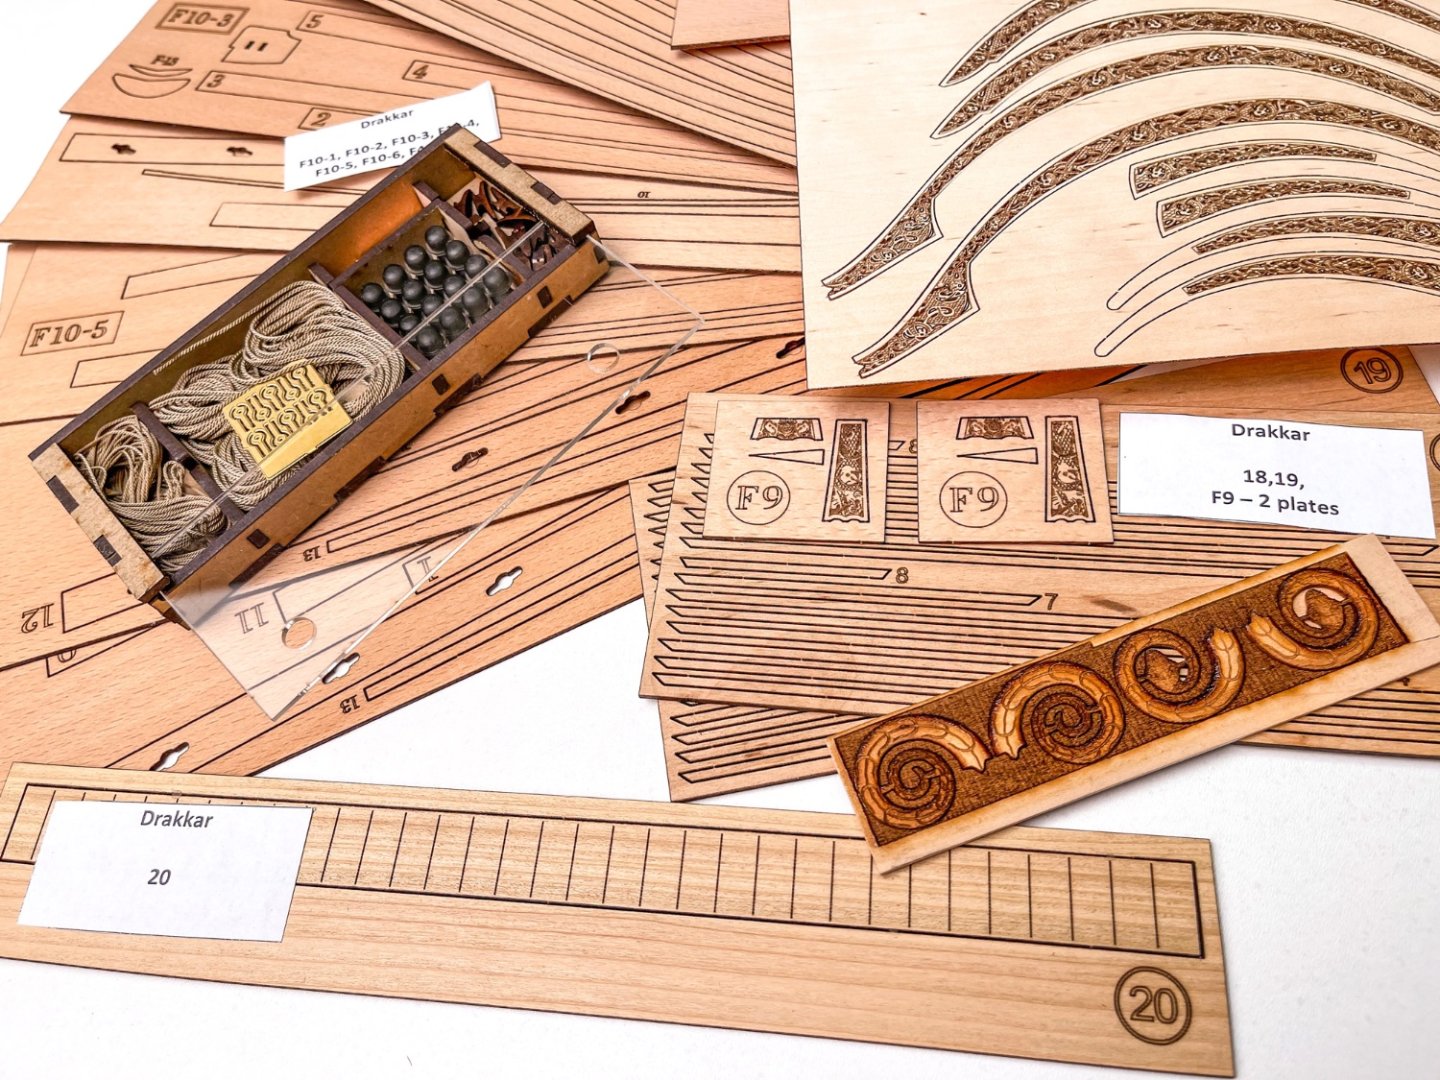
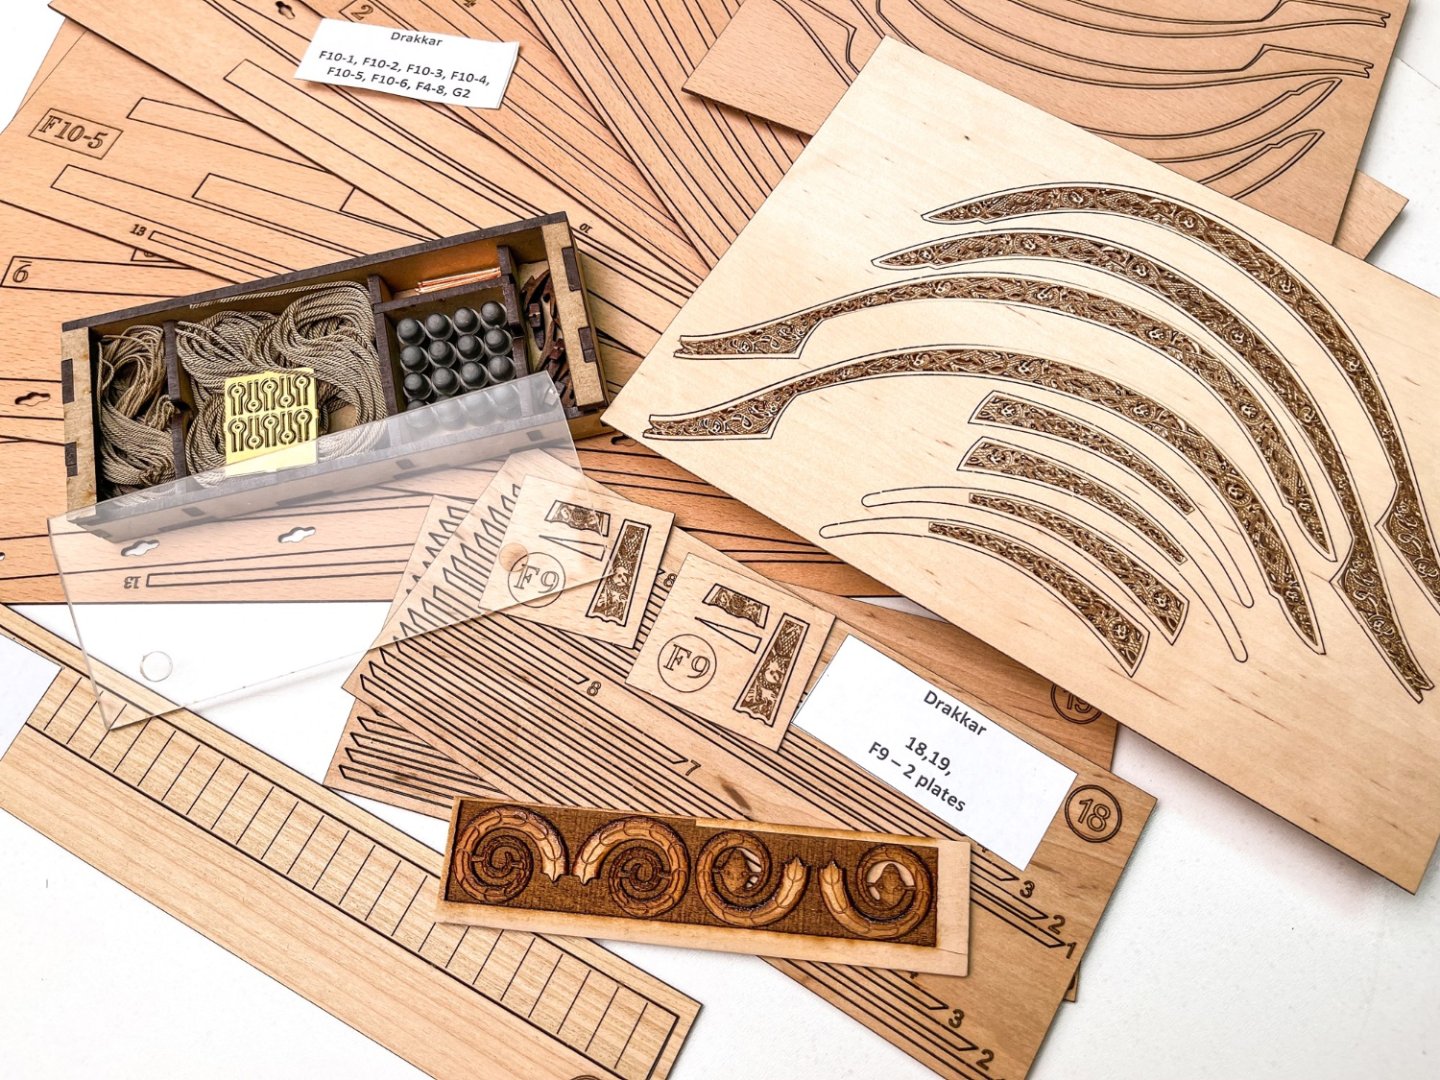
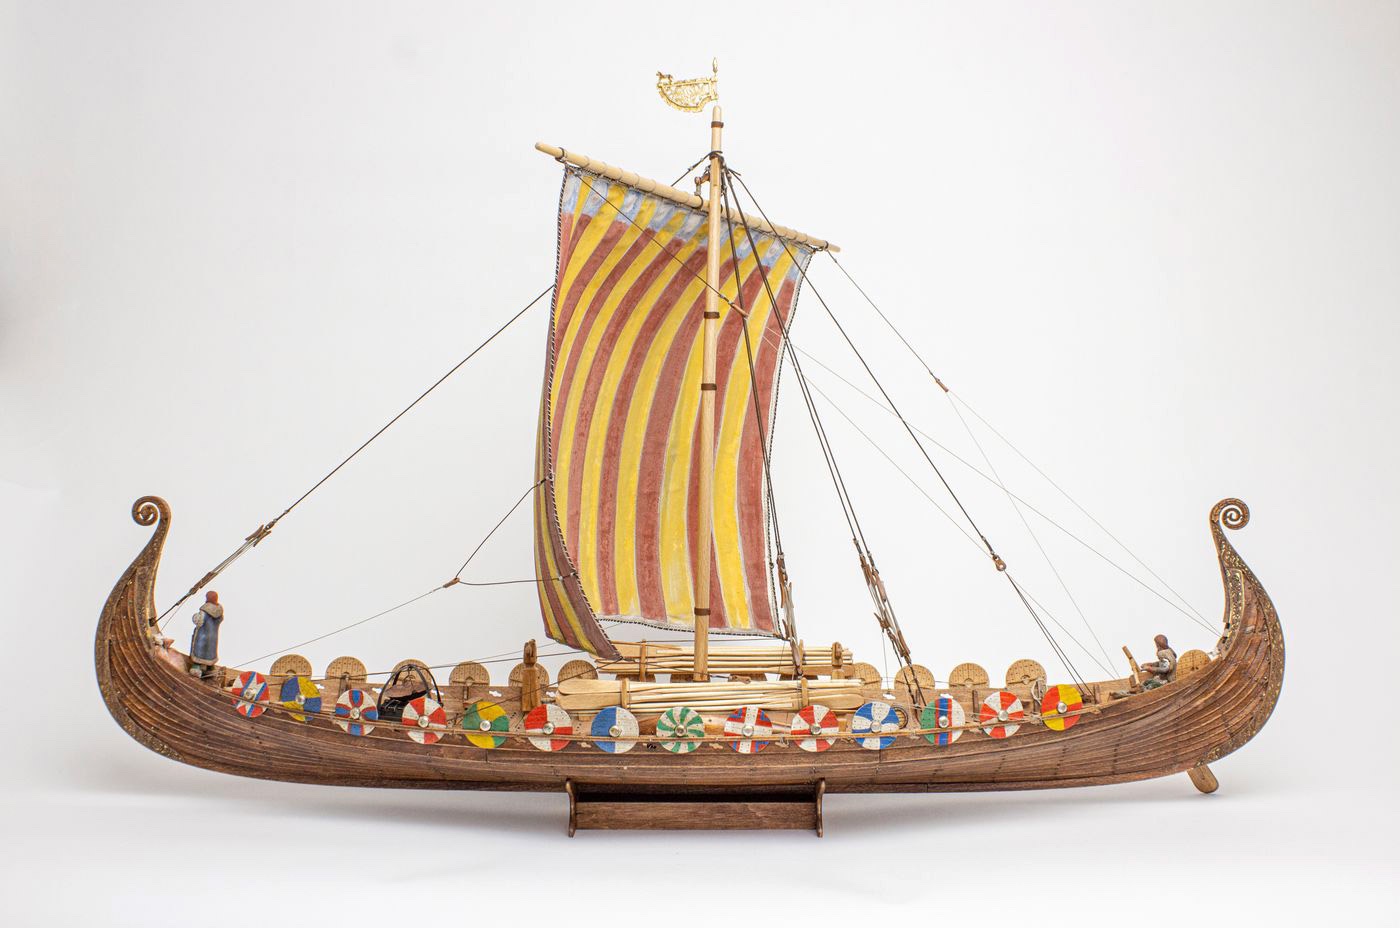
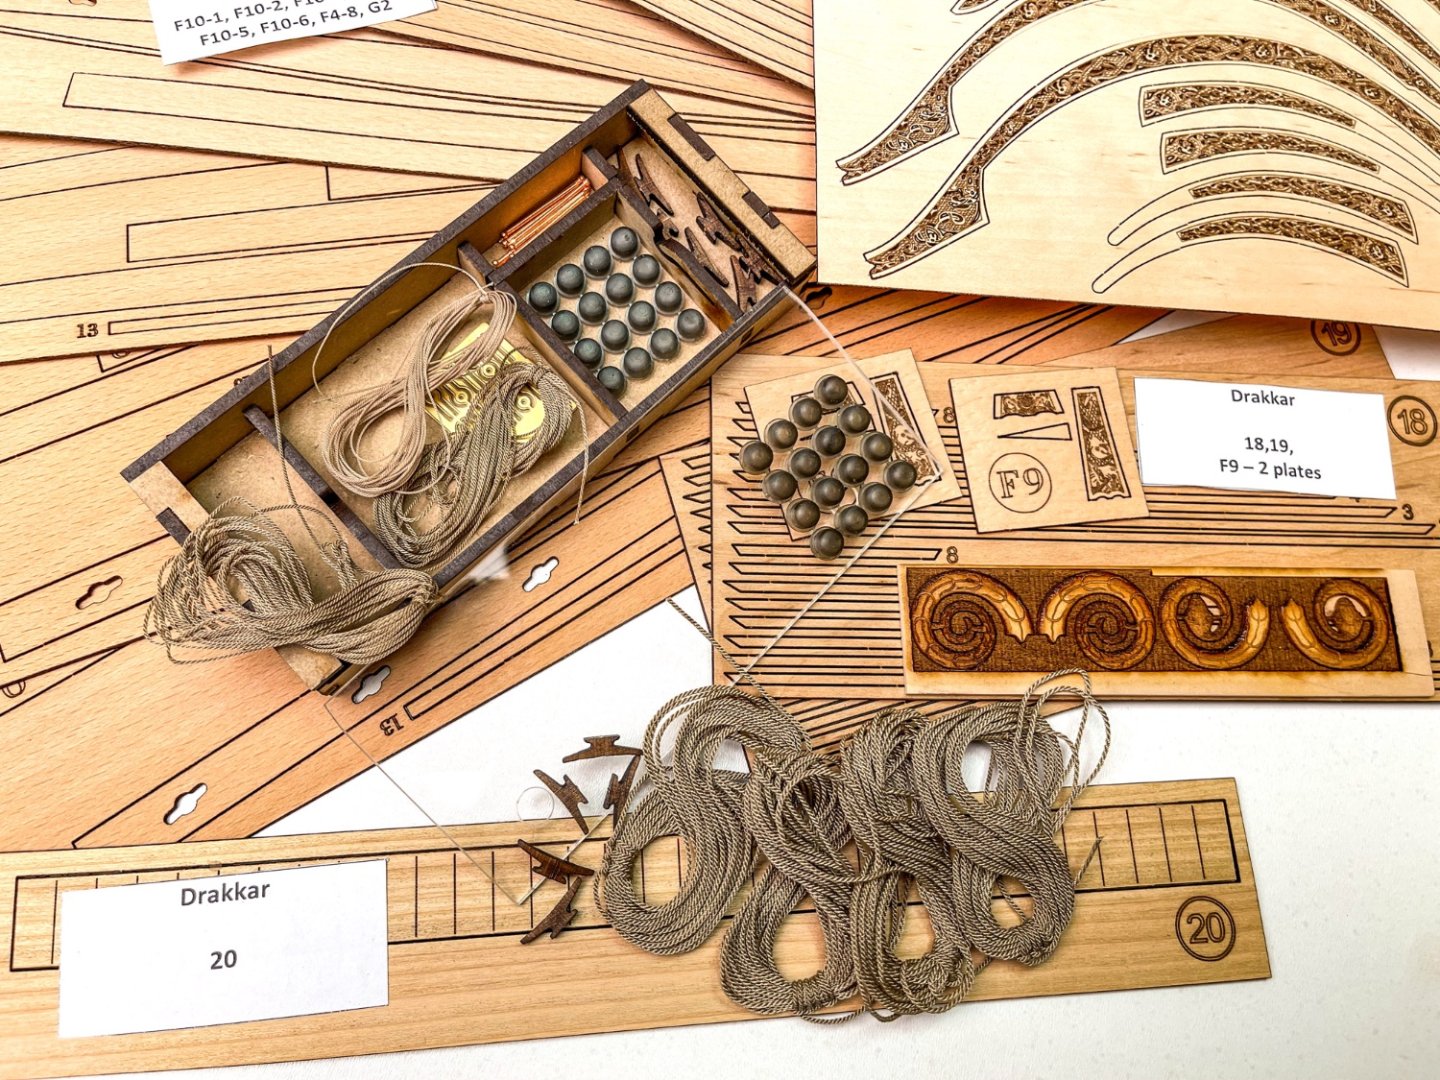
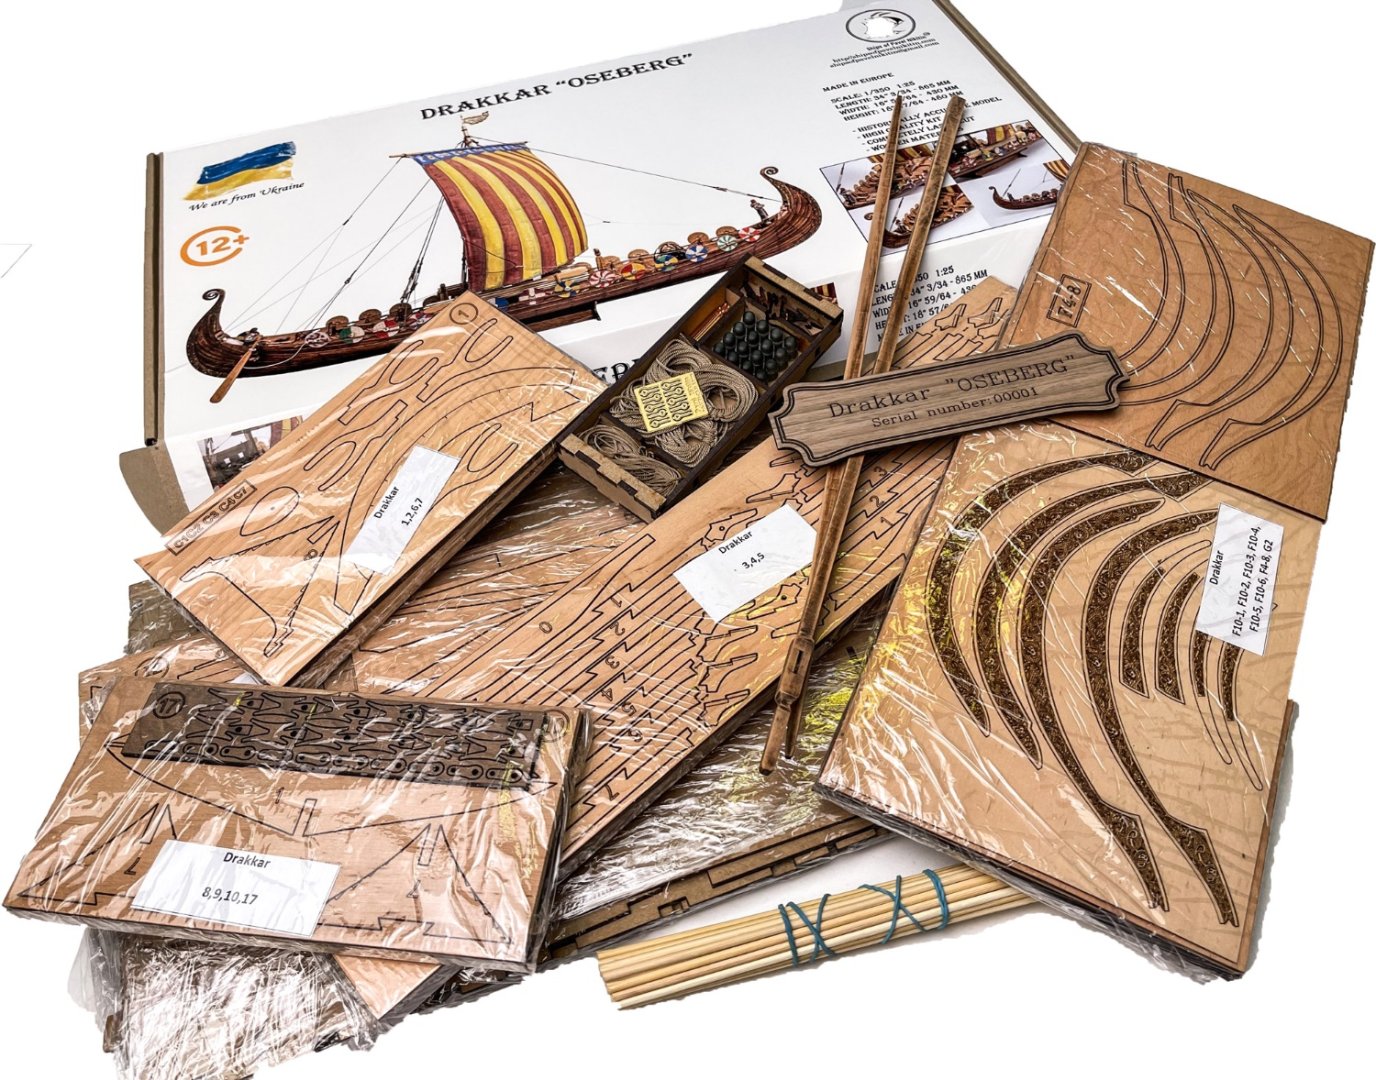
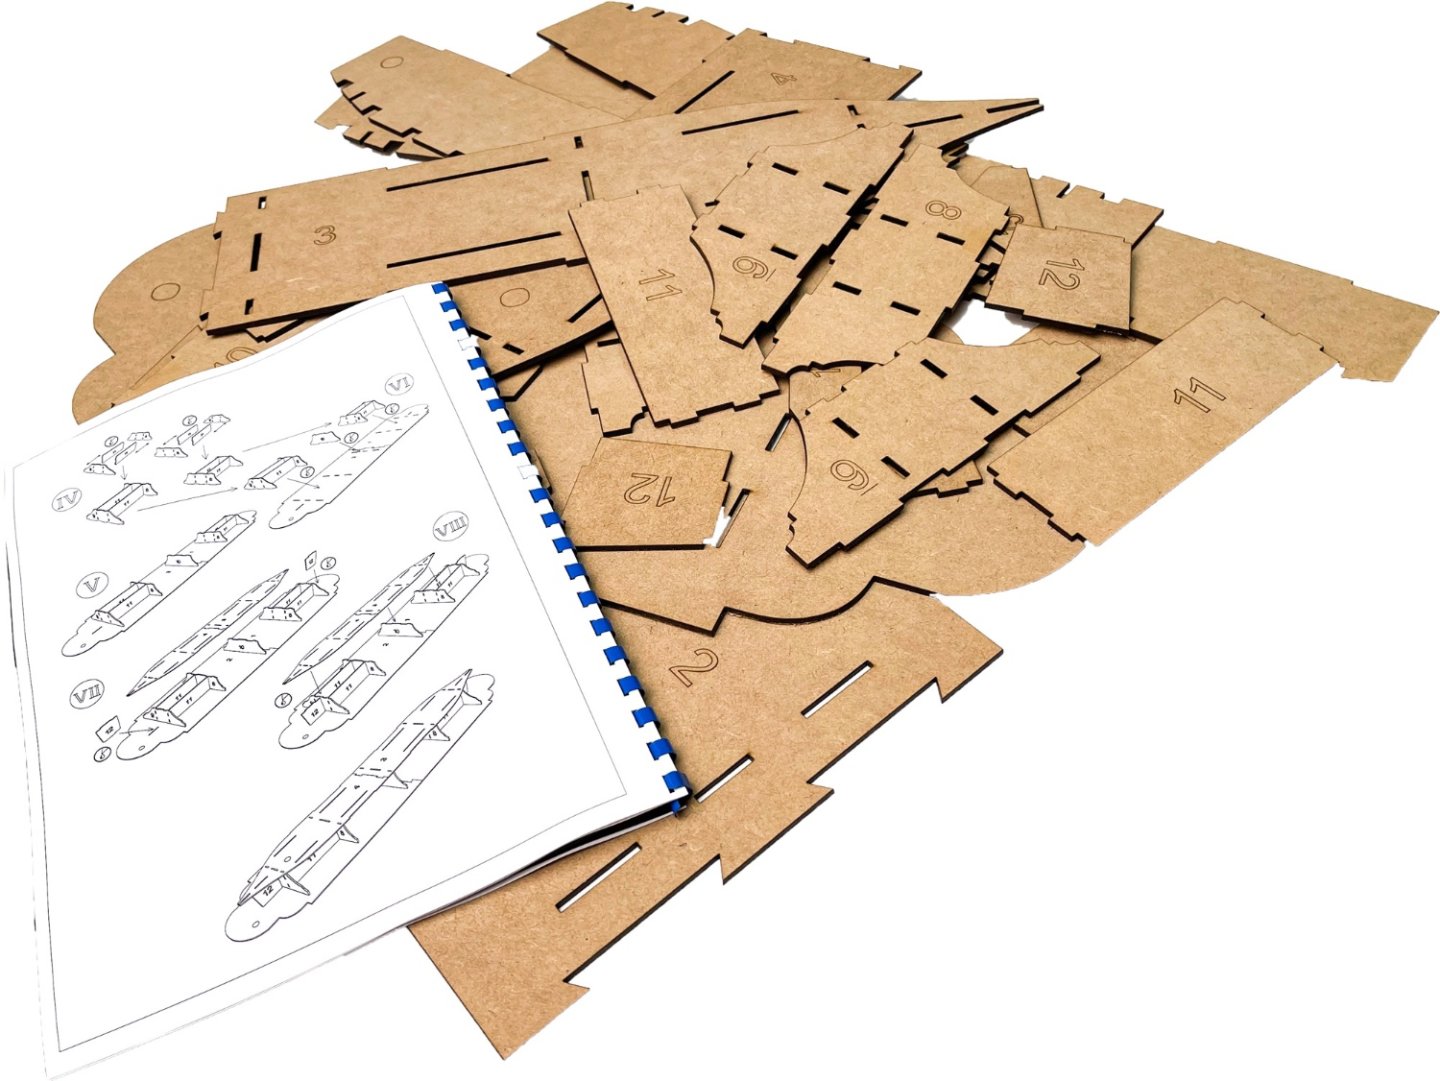
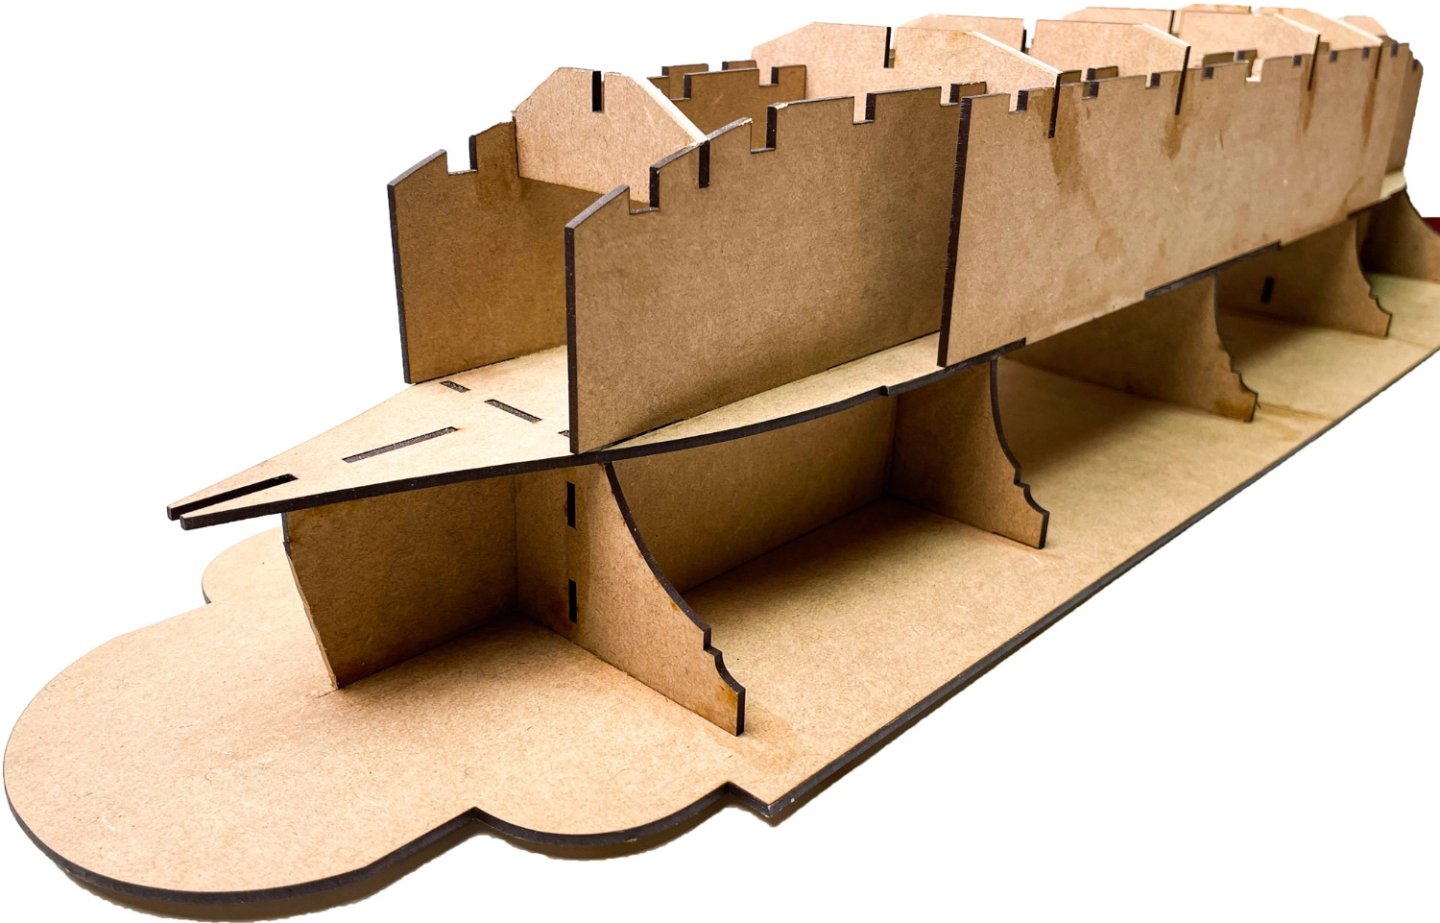
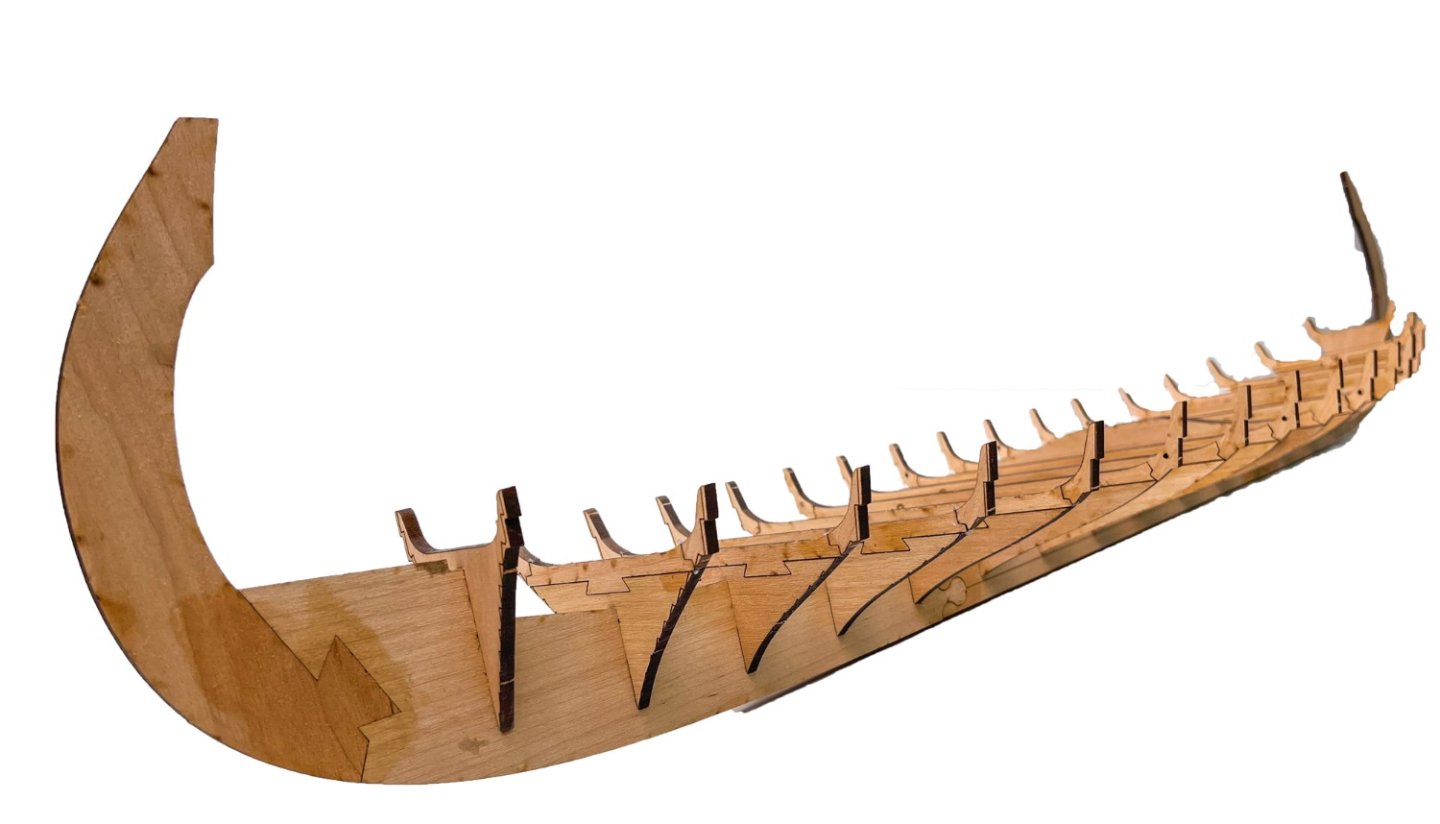
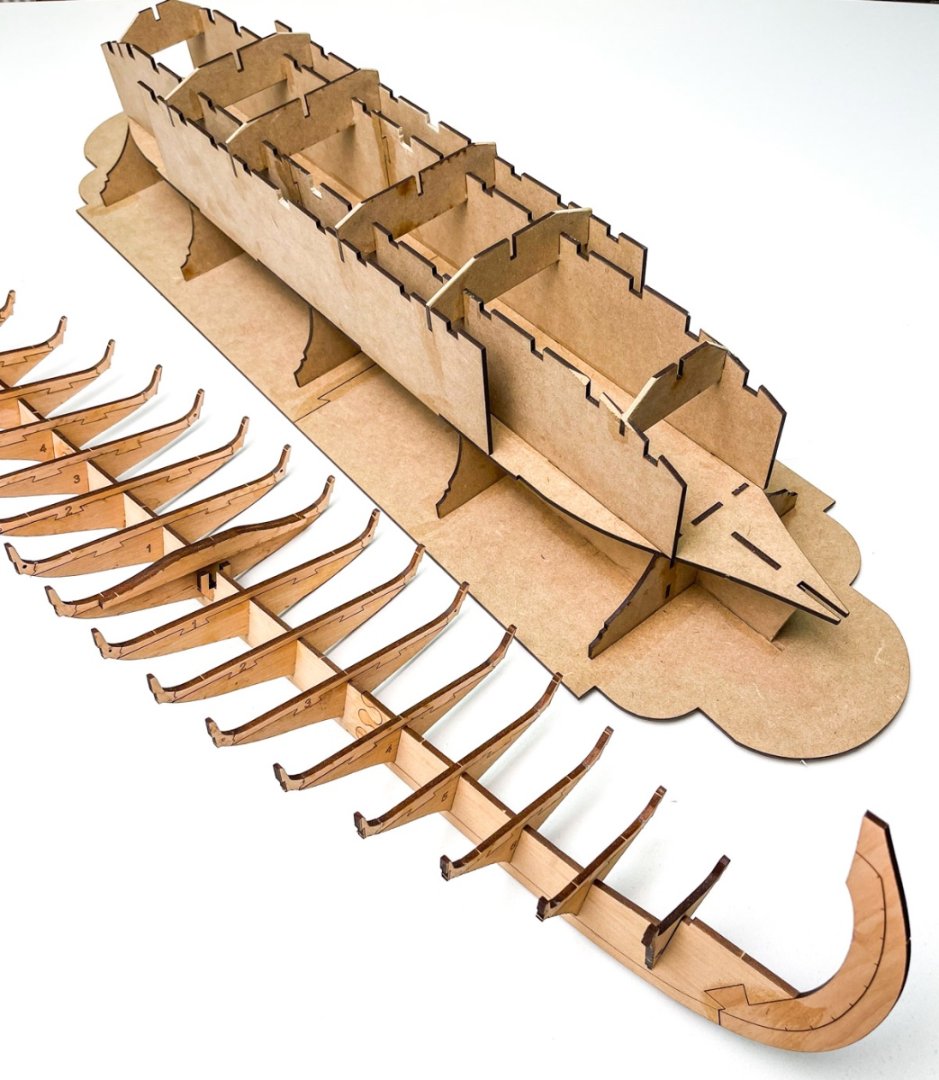
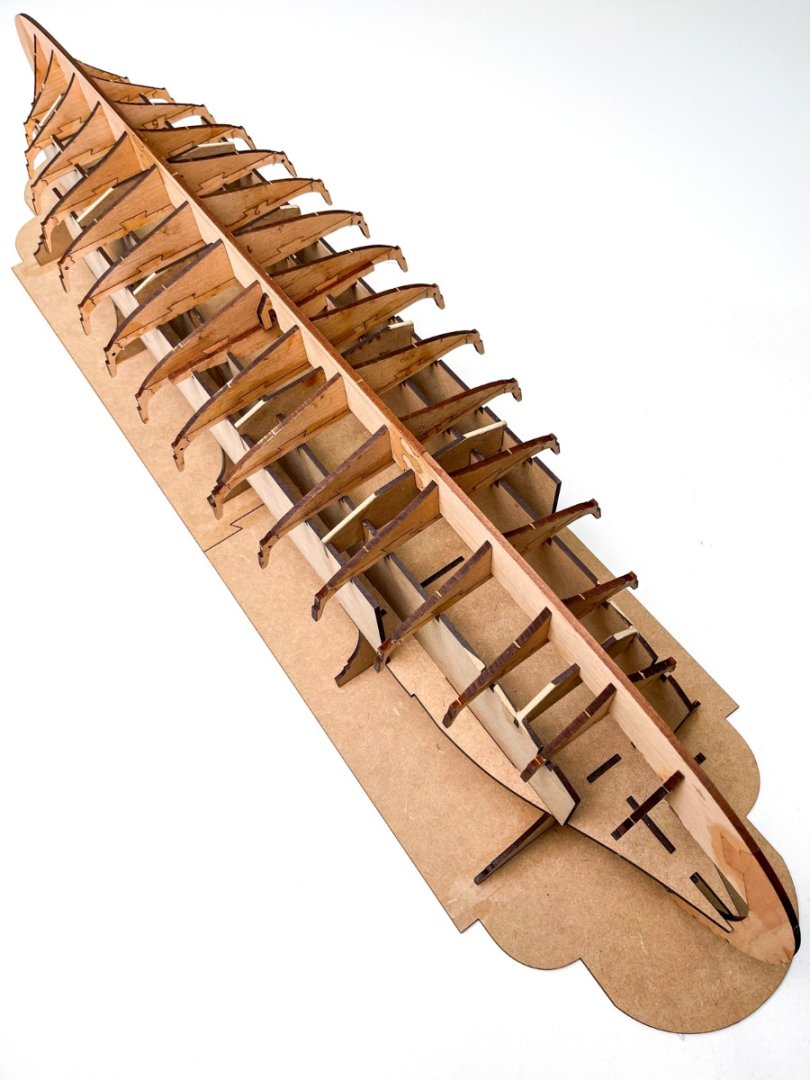
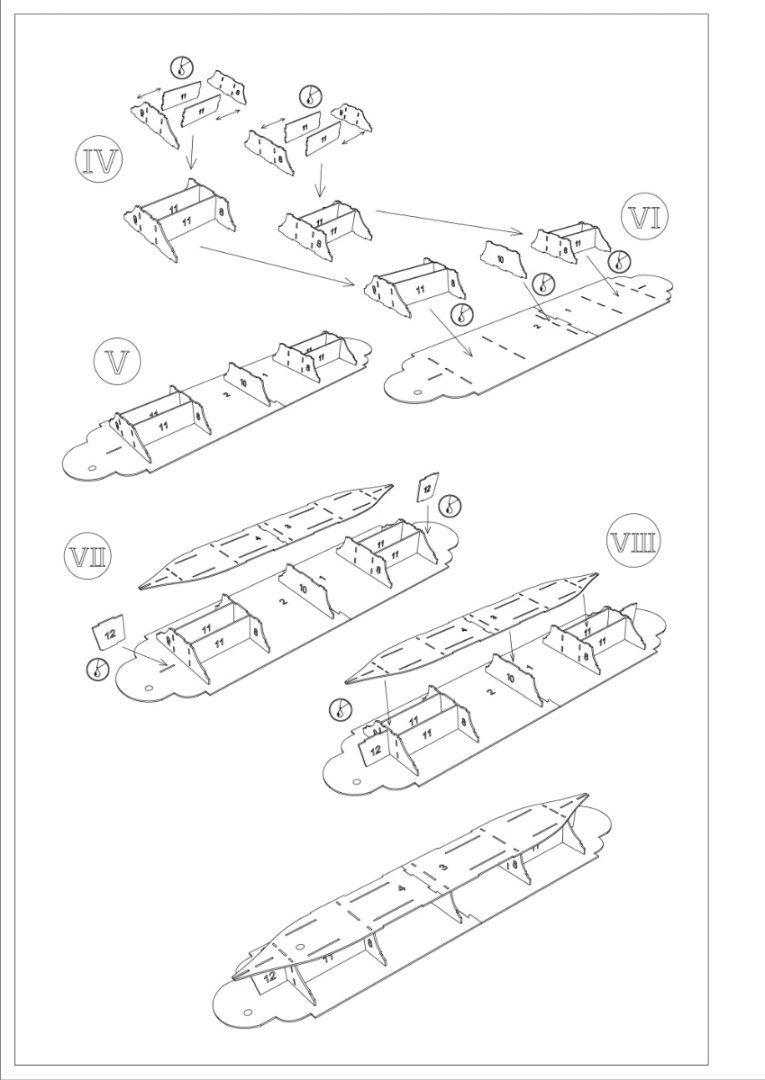
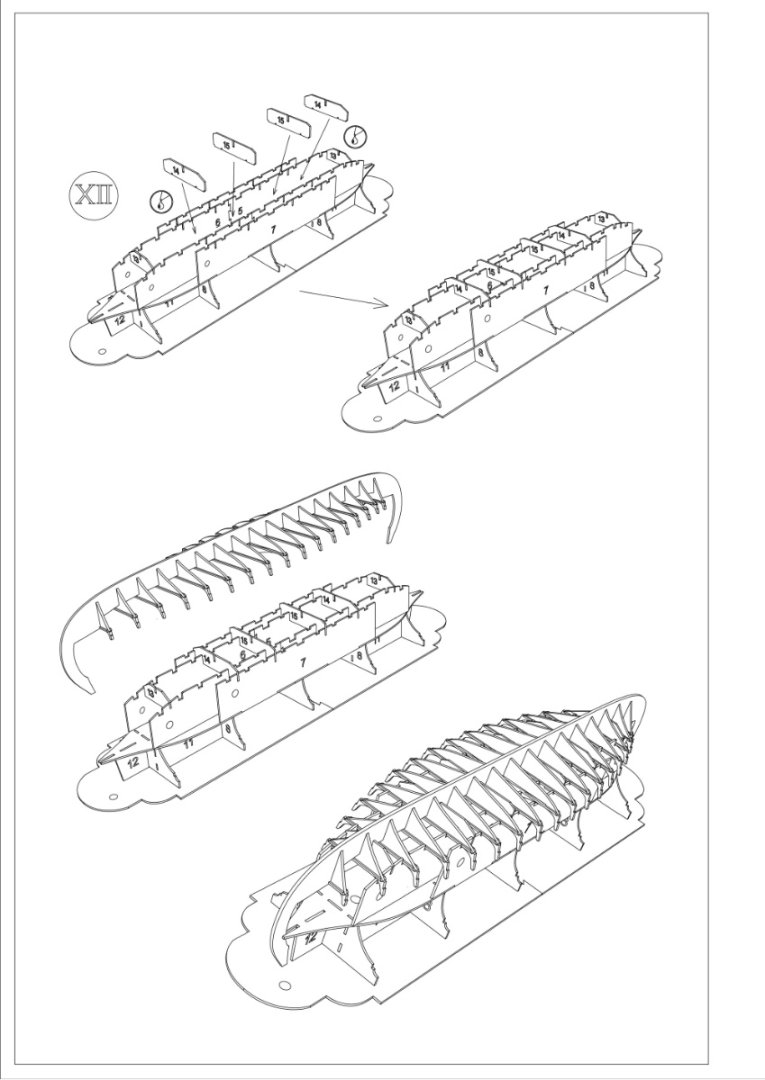
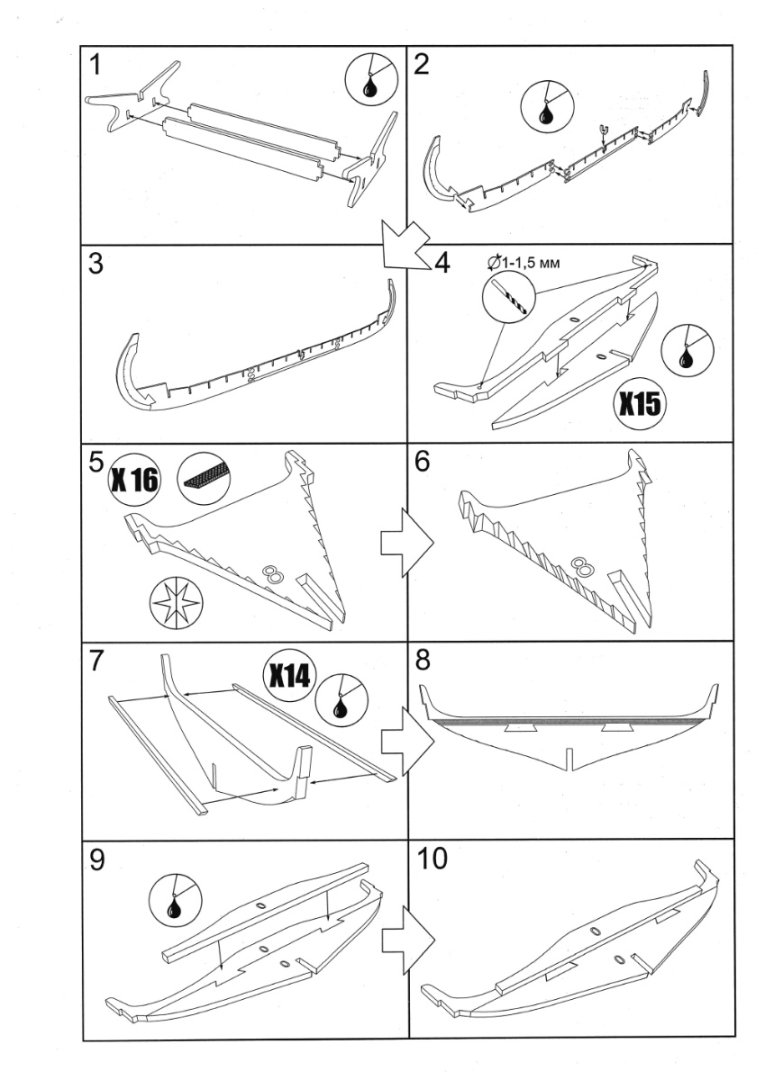
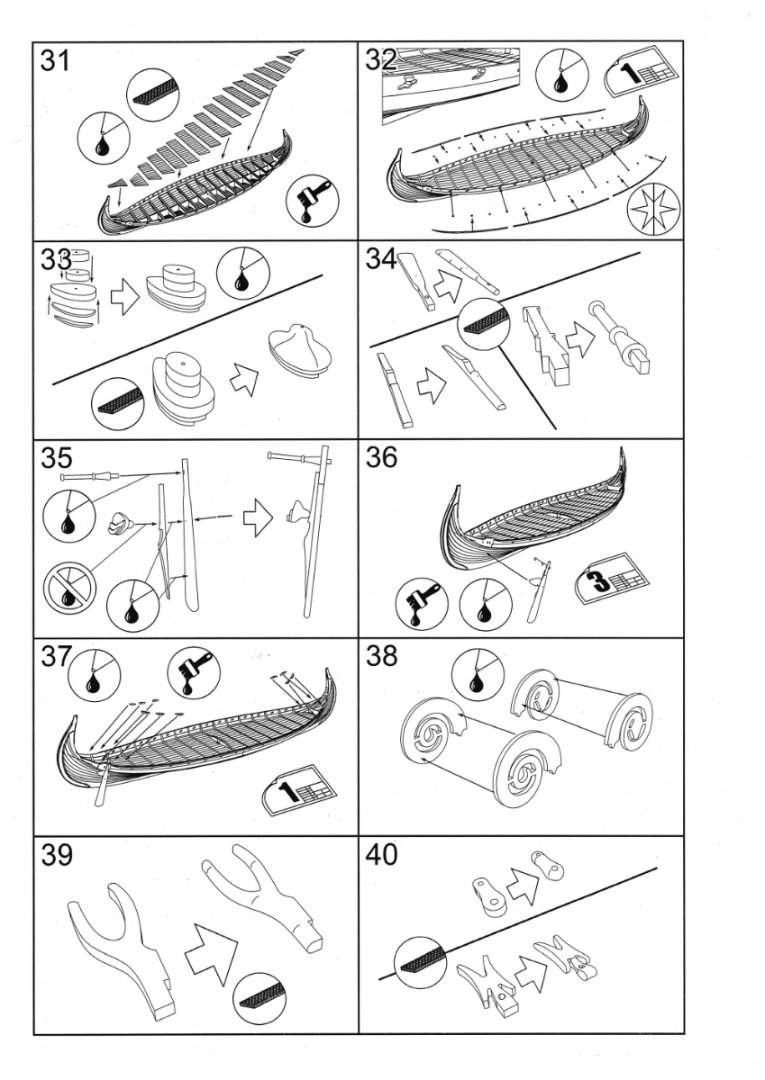
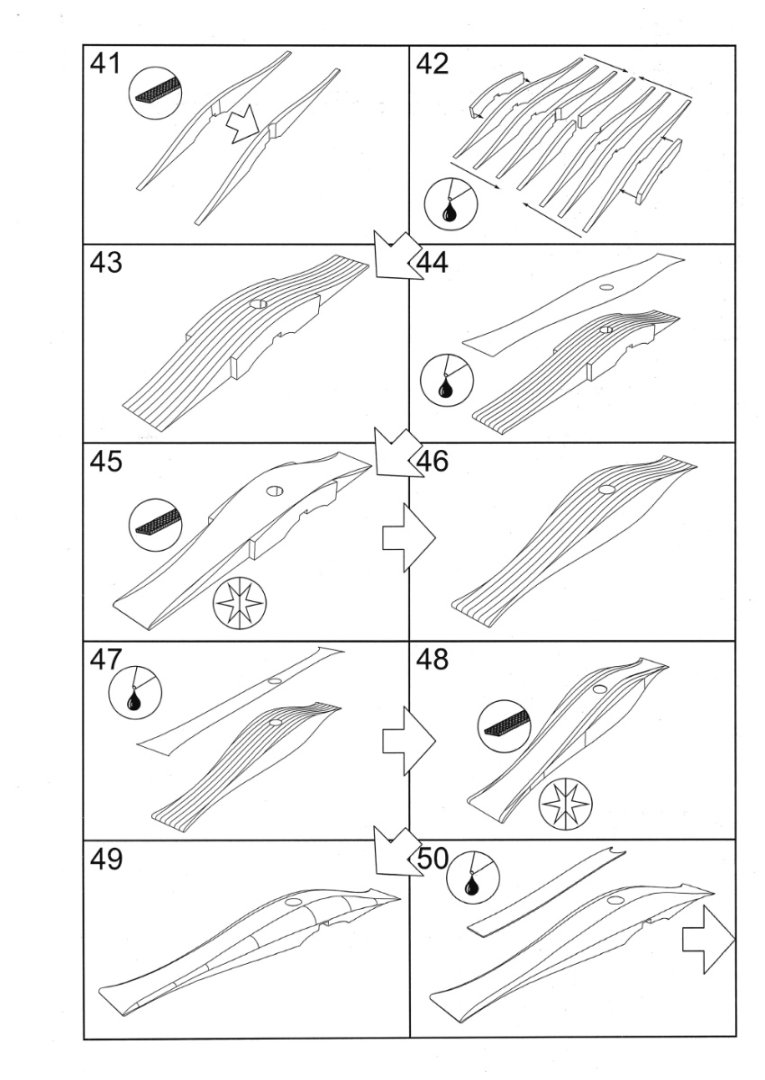
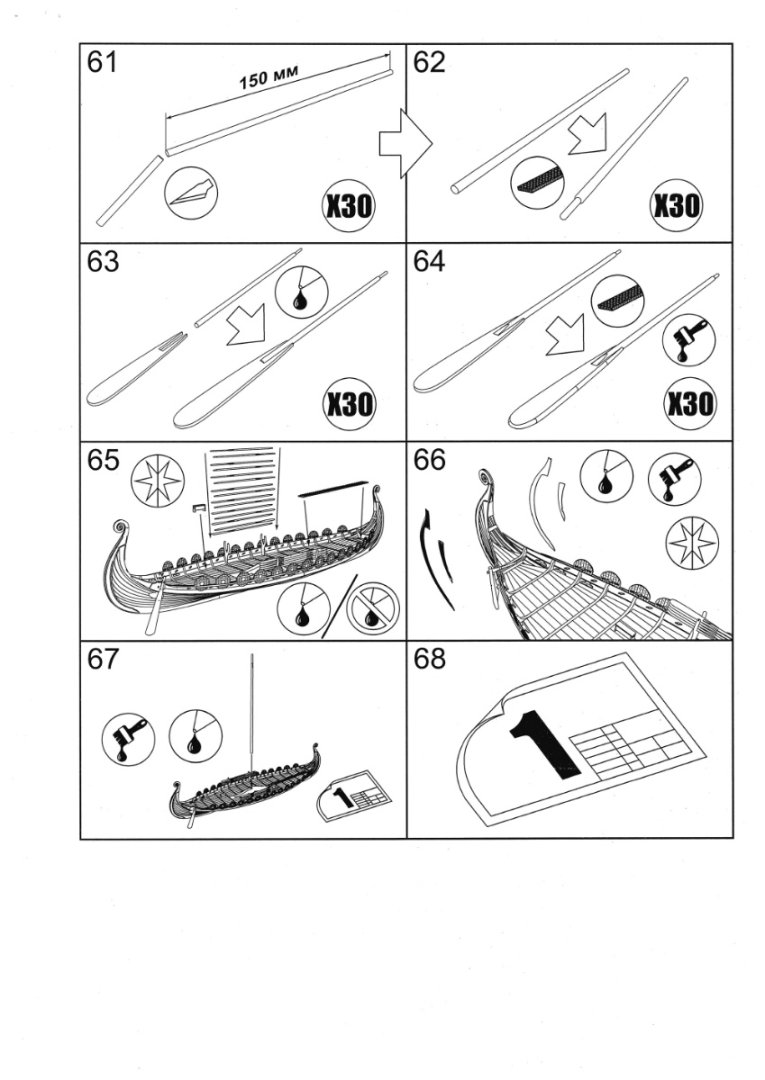
1:25 Drakkar ‘Oseberg’ Ships of Pavel Nikitin Catalogue # DROS002 Available direct for approximately £160 (7400 ₴) at time of writing History It is believed that the word “drakkar” originates from the Old Norse words “dreki” and “kar,” which mean “dragon” and “ship,” respectively. The warship acquired this name because the head of a dragon or another mythical creature (like Jormungandr) usually adorned the ship’s bow. The shape of the ship was also long and narrow, resembling a sea serpent. The Vikings constructed drakkars out of pine, oak, or ash wood. They used a special technique for splitting trees along the grain. They then watered the planks and held them above a fire to make them more flexible. The shipbuilders put the parts of the ship together with iron rivets and nails and bound them with cords and ropes. After that, they tarred the whole structure and caulked it by plugging holes and gaps and making the seams watertight. The sail was rectangular or square. It was made of sheep’s wool and covered with grease so that it didn’t get drenched. If there wasn’t a fair wind, the Vikings used oars – 20 to 35 pairs of them. In the Viking age, few ships could compete with a drakkar in terms of sheer speed, but drakkars were also very nimble. Thanks to the drakkar’s shallow draft, the Northmen could easily sail along rivers and fjords. They could land in places that were very difficult to access and attack their enemies unexpectedly. These warships were also barely visible between the waves because of their low sides. This helped the Vikings catch their enemies unawares, even in the open sea. Drakkars were created for more than just war, however. They were solid and capacious, so the Vikings sometimes used them for trade and to transport goods, but more often these ships were used for sailing long distances. How far did the Vikings travel? They reached the shores of Iceland, Greenland, and North America, to name but a few destinations. (Abridged from Vikings: War of Clans) The kit We’ve not exactly been awash with good kits of what we would call a typical Viking drakkar, or ‘longship’ as it’s more commonly known, despite the actual ancient translation. The Amati and Dusek are the kits which most come to mind. Pavel Nikitin’s new kit is also the largest in scale of this iconic vessel, weighing in at a whopping 1:25 scale! That equates to the following sizes: Length: 865mm Width: 430mm Height: 480mm Like the San Bartolome kit I recently looked at, the Drakkar is a second reworking, bringing a number of improvements over the original release, such as laser engraved ‘carved’ details on the bow and stern, including the ‘curls’ at each of those points. On other kits, this is where you would normally see such things as a dragon’s head, but this ship does not carry them, as per the actual recovered ship. I think in some respects, this was perhaps not as per a normal drakkar, but I could be wrong. The kit itself is packed into a slender but heavy corrugated box with a flap-opening lid depicting the finished model in all her glory, fitted with striped sail and 28 shields of varying décor. Inside the box, the various sheets are grouped into packages that are wrapped in cellophane, or ‘clingfilm’ as we know it in the UK. This keeps the sheets very tightly together. There are around 40 sheets of materials to build the drakkar. But that’s not all. Included with the ship is a very sturdy MDF jig which will most certainly aid those tasks that would otherwise be difficult, such as adding those clinker planks. As with other Pavel kits, this one also includes a homemade MDF and acrylic parts box, with the part numbers clearly engraved on the sliding lid. This box includes different sizes of high-quality rope in differing sizes (no fuzz!), 3d-printed boss heads for the many shields, cleats etc. The first task for the builder is to assemble the jig before then embarking on building the bulkheads. The bulkheads consist of a lower half into which a dovetailed upper half is fitted. The most outboard parts of each bulkhead are also separate parts. On the sheet, these are shown adjacent to their position on the uppers, with arrows depicting the location. This will add a little strength to the outer bulkheads, plus that change in grain direction at that point, will also help. There are also engravings on the completed bulkheads which denote where you need to pre-bevel the bulkheads prior to installation on the keel. The keel itself is a multipart assembly, with dovetail connection points. The bulkheads will be installed to the keel, inverted upon the building jig, and here is where the hull will sit until fully planked. A drakkar has a single mast and spar. These are provided as laser-cut/tapered parts that you will need to round off. Looking at the shape of these parts, then this is a welcome touch. Strips of dowel are also provided for the numerous oars. The paddles for these are pre-cut. For display purposes, a stand is also included, as is an engraved plate with a serial number. The kit is 00009. I am informed that the timber for this kit is a combination of walnut, cherry, alder, and beech. The instruction book is 28-page spiralbound A4 production with a protective plastic cover. The first part of the manual is text which relates to the numerous stages. Those stages are presented in drawing form in the second half of the manual. The drawings do appear to be nice and clear, and construction takes place over 68 stages. Inside the sleeve of the manual is a piece of laser-cut paper which contains three profiles which are designed to lay against the laminates that form the ‘fish’ or mast base. These are laid on at various stages and shaped to them. One plastic sleeve contains three nicely printed plan sheets which show the drakkar in various profiles, and in rig etc. The second wallet contains a single printed piece of material for the sail. You will obviously need to cut and stitch this yourself. The photos show this brightly painted, but I’d read that these were usually quite dark as protected with tar due to the expense of the sails back in days of yore. I do admit that the painted sail looks beautiful, and I’d probably go with that. The size of the sail is really quite an indicator at the size of this model in a large 1:25. Conclusion From both appearance and materials, this kit stands head and shoulders above other contemporary kits of Viking drakkar, by a very wide margin. Being based on the Oseberg remains, she also appears to be the most accurate of all of them too. The timbers used in the kit are stated as imitating those of the real vessel, which may have been the case, but the ships themselves were coated in tar and would’ve been quite dark. I suppose the final choice would be for the modeller. I would probably go for the tarred look. In all, I’m seriously impressed with this kit and Pavel’s determination to improve what already looked like the best kit available for this subject. All the small touches like the 3D shield bosses and the highly detailed laser carvings instead of the usual white metal fayre, really sets this apart. If you’ve ever had a thing about Viking ships or just want to build something a little different, then I really recommend this new release. *It was found that the kit had planks which were slightly too narrow to overlap properly. Pavel is now sending over replacement plank sets so I can eventually have a shot at building this lovely model kit. My sincere thanks to Pavel Nikitin for sending this kit out for review on MSW. To buy directly, click the link at the top of this article.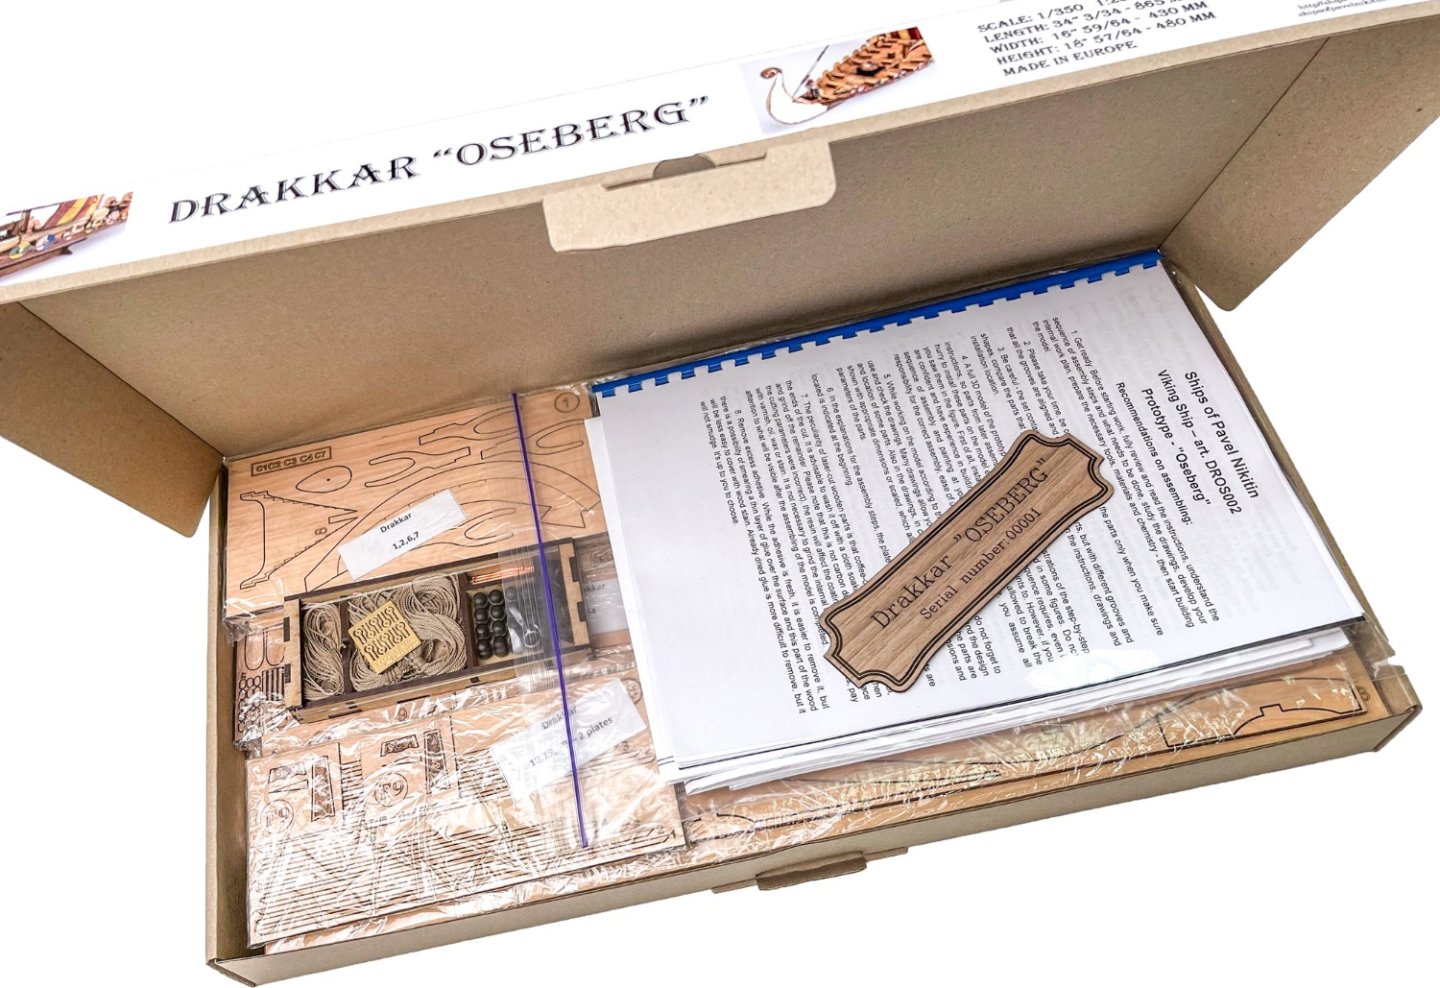


- 14 replies
-
- 23
-
-

-
-
The barrels are inserted at the very end and are easy to sit on the carts. I used CA gel.
- 488 replies
-
- 3
-
-
- Indefatigable
- Vanguard Models
- (and 1 more)
-
I know it looks odd before fairing, with all those port parts stuck out, but all looks correct to me.
- 587 replies
-
- 3
-
-
-
- Indefatigable
- Vanguard Models
- (and 1 more)
-
It’s only a case of removing a majority of the material and not in sanding to final shape. With a hull this size, that really pays off!
- 587 replies
-
- 4
-
-
-
- Indefatigable
- Vanguard Models
- (and 1 more)
-
That’s just the ply deck. The engravings are to help with placing the planking strips.
- 443 replies
-
- 5
-
-
- Indefatigable
- Vanguard Models
- (and 1 more)
-
Yes, those beams will just be discarded later. They do a nice job of keeping the bulwarks at the correct width during planking.
- 443 replies
-
- 7
-
-
- Indefatigable
- Vanguard Models
- (and 1 more)
-
You'd need an endoscope to see anything down there 😆
- 443 replies
-
- 7
-

-
-
- Indefatigable
- Vanguard Models
- (and 1 more)