thibaultron
-
Posts
2,938 -
Joined
-
Last visited
Content Type
Profiles
Forums
Gallery
Events
Everything posted by thibaultron
-

What should I avoid when creating *.stl files?
thibaultron replied to Jsk's topic in 3D-Printing and Laser-Cutting.
Lychee, at least, allows you to save any model back to an STL file. I put in the supports (both automatic and manual), then save the supported model to a STL file, for future use. -
I think a 1/48th scale of the Shallop would be great!
-
What should I avoid when creating *.stl files?
thibaultron replied to Jsk's topic in 3D-Printing and Laser-Cutting.
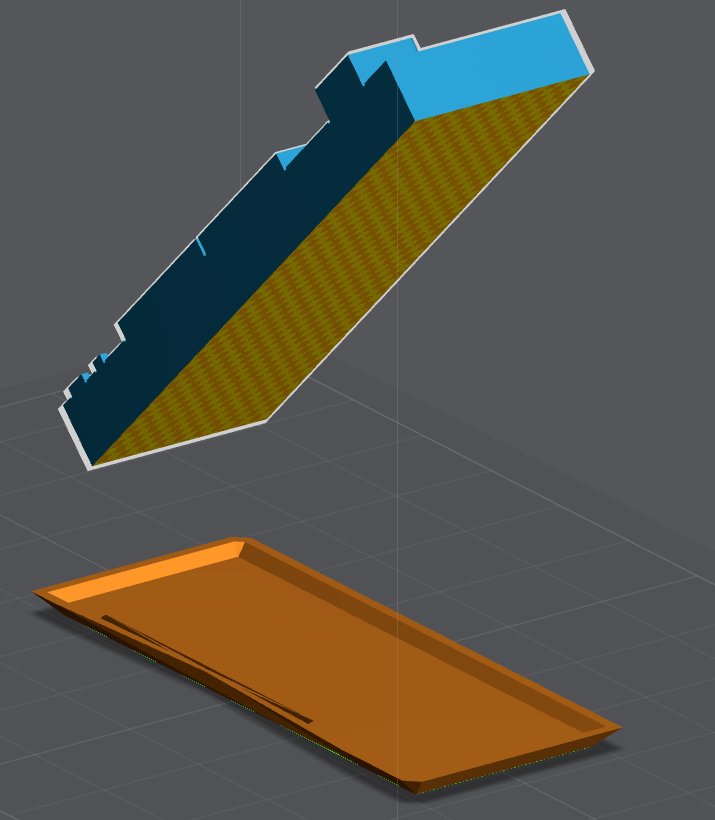
As the parts are so small. you might want to have a solid base with the parts then supported by sacrificial standoffs. This makes it easier to remove them without risking separating them from a larger support. I did this for two small step plates for a HO scale tender bunker I designed. The graphic below shows this with thin walls going from the base to the curved base (horizontal in this view) that the step is mounted to. One of the support walls is circled in red.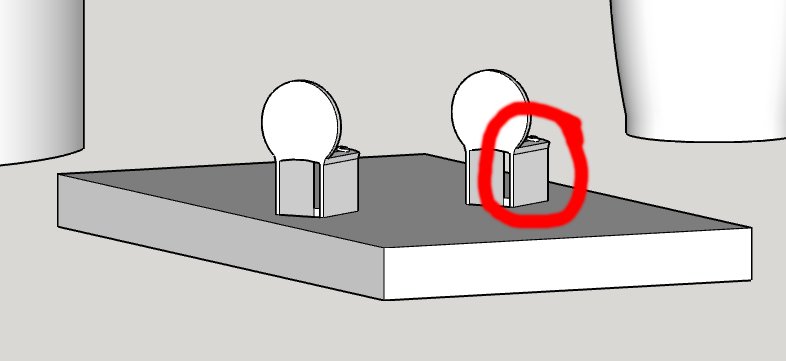
-
I have cats, case! I have an "in" for this preference, though. I have two large glass display cases I got free, one 5 feet long and 6 feet high, the other 6 feet long and the same height. I got these on a fluke of good luck. I also have a 5 foot long store counter cabinet that I bought when a thrift store was remodeling, another instance of being there at the right time!
-
What should I avoid when creating *.stl files?
thibaultron replied to Jsk's topic in 3D-Printing and Laser-Cutting.
That's a very small scale! The only thing I can think of is to print them vertically with the barrels farthest from the build plate, and the widest part toward the bottom. There is not enough of the smaller guns to tell me what they are supposed to look like. Also have him cut back on the cure time, long cure times can warp thin parts. Playing with the exposure times might help. -
What should I avoid when creating *.stl files?
thibaultron replied to Jsk's topic in 3D-Printing and Laser-Cutting.
Most of what I see seems to stem from a insufficient number of supports. Here is an example of one of my typical cannons with supports, in 1/24th scale. What scale are your prints in?
-
On Ebay, you can save a search, and they will send you an Email when the subject is listed. I wanted a certain model of a railroad station, that had a limited run. It took a couple of years but a kit was finally listed. I paid too much for it, but not an unreasonable amount.
-
The siding looks great, don';t hide it under paint! By the way say "Hi" to your neighbor for me!
-
Yes, thank you for all you do for us!
-
The STL files for the Brown Pattern Canons are available on the NRG web site.
-
The NRG has a collection of 3D STL files of various cannon types and sizes, that can be used for 3D printing.
-
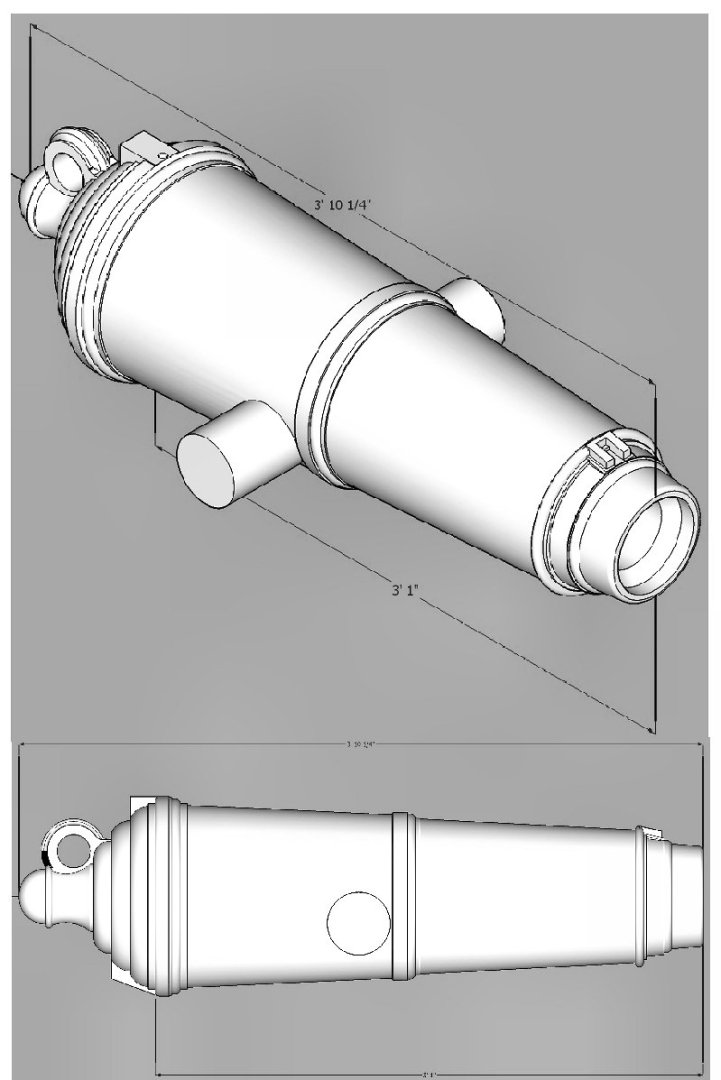
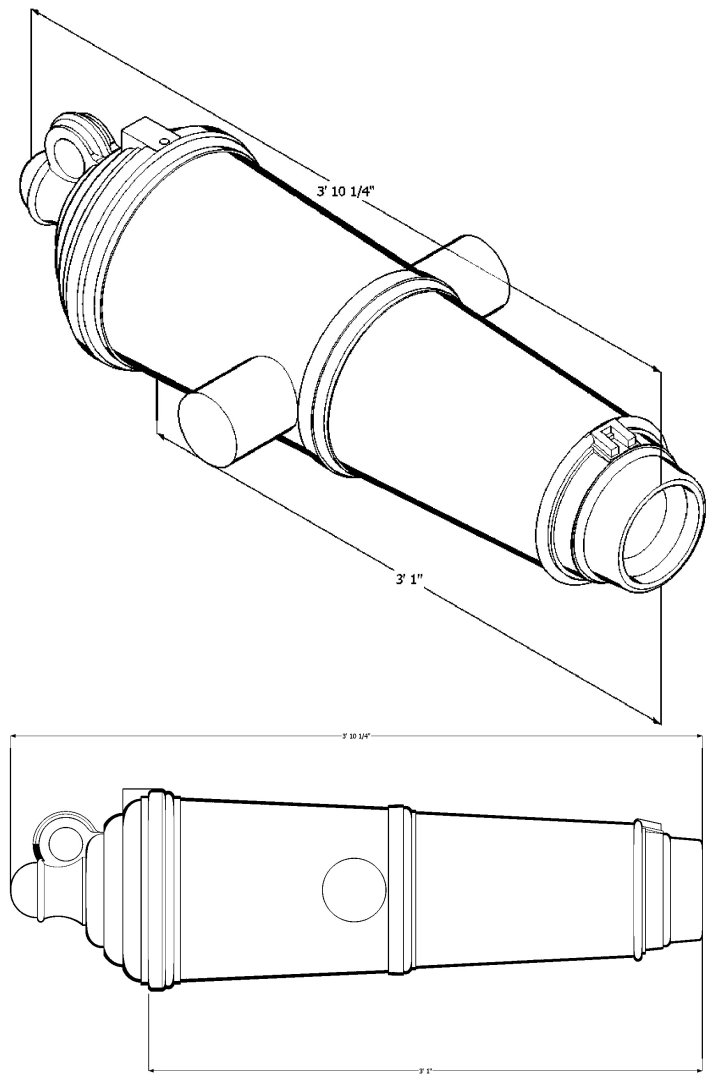
3D Printing Cannons in Resin
thibaultron replied to thibaultron's topic in 3D-Printing and Laser-Cutting.
Carronade Files Note: that they were Zipped using PeaZip, some other unzip programs give strange file extensions when used to unzipp the files. Carronade 1796-1815 Graphics.zip Carronade 1796-1815.zip Length Chart Of Full Sized and Scaled Cannons_002 with Carronades.xlsx -
3D Printing Cannons in Resin
thibaultron replied to thibaultron's topic in 3D-Printing and Laser-Cutting.
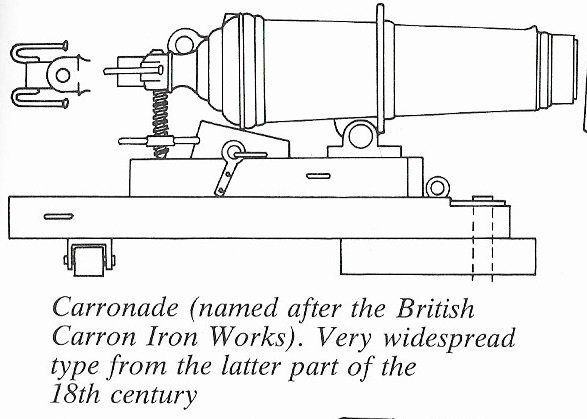
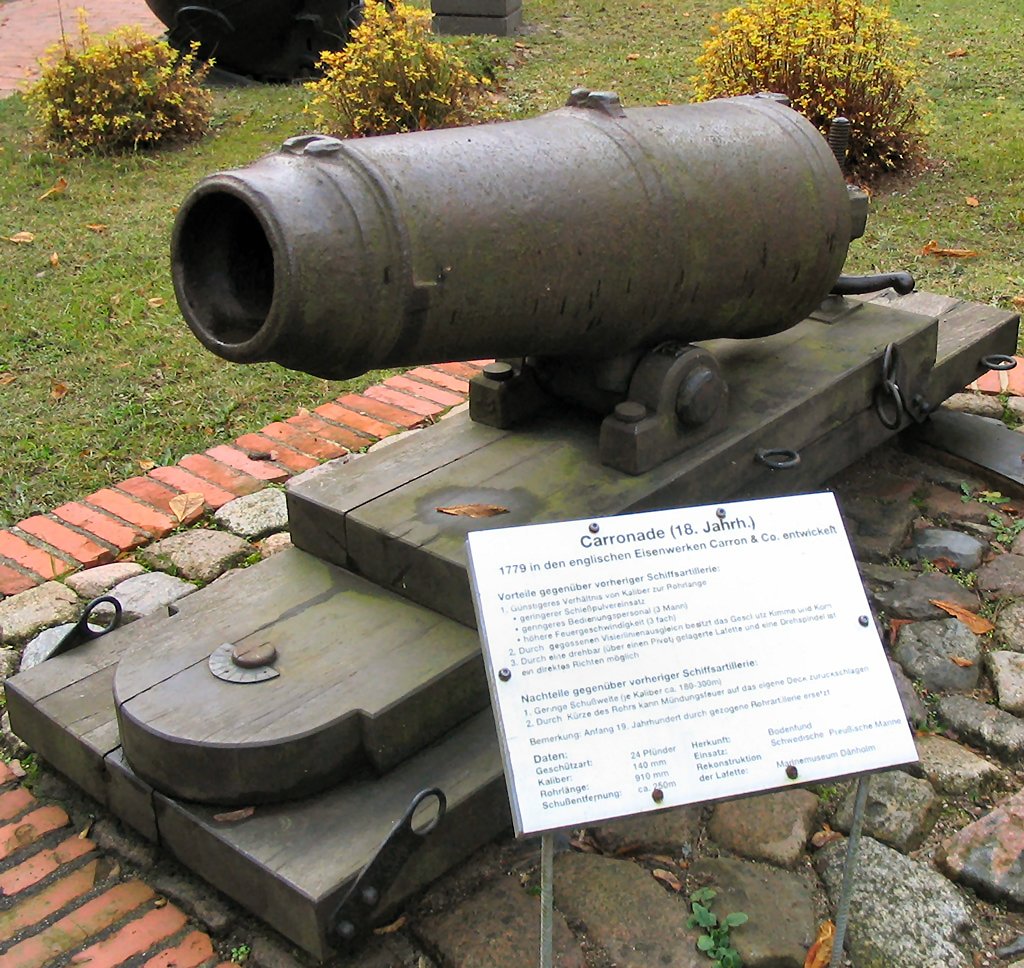
After I sent the files to the NRG, which they have added to the Resource section, I drew a set of Carronades. They have the files, but have not yet had a chance to add them. So, I'm adding them to the thread, in case someone needs them now. I'm also adding a new spreadsheet that has these added to the data. Here is a graphic of the 42 Pounder. The set includes 12, 18, 24, 32, and 42 Pounders. The STL files include a separate leveling screw. This allows you to adjust the cannon angle. The screws are over-long. They should be cut so a couple of inches sticks out when the cannon is horizontal on the carriage/slide. The screw top should be rounded. This graphic shows a drawing of a similar type, with the length of the screw depicted. Here is a photo of similar cannon. If you look at the right hand edge, you can just see the rounded top of the screw. The next posts will be the files.
-
https://splash247.com/maersk-vessel-takes-out-tall-ship-and-hits-museum-while-entering-fremantle/
- 1 reply
-
- 12
-

-

-
Thankfully, in the 4 years of drafting I took (3 in middle school, one in college), I never had to do any of the drawings in ink!
-
3D Printing Cannons in Resin
thibaultron replied to thibaultron's topic in 3D-Printing and Laser-Cutting.
After reading the NRG link, I see one error. This project would have never been possible without Allan Yedlinsky! He came up with the idea and supplied the original 2D drawings that were the basis of the final 3D drawings. He encouraged me, as the project continued, and acted as a sounding board and reference as I found additional historic details to add to and modify the details. This would never have been possible without his input, and help!- 131 replies
-
- 10
-
-
Squadron is being resurrected .......
thibaultron replied to yvesvidal's topic in Plastic model kits
https://squadron.com/ -
Yep, blew that one. I also forgot the lower rear boss. Sorry! I've fixed the drawing. Here are the corrected files. Cannonade 9 Pounder with Trunnions Full Size_002_1174_62mm.stl
-
Based on some upsetting past posts, this is a question. not a criticism. Is a sheet provided with the printed map and book pages, or copies we can download?
-
Yes, it can be done. To prove it I had to draw it, so here it is for everyone. Yes, I'm a terrible speller. Cannonade 9 Pounder with Trunnions Full Size_1174_62mm.stl
-
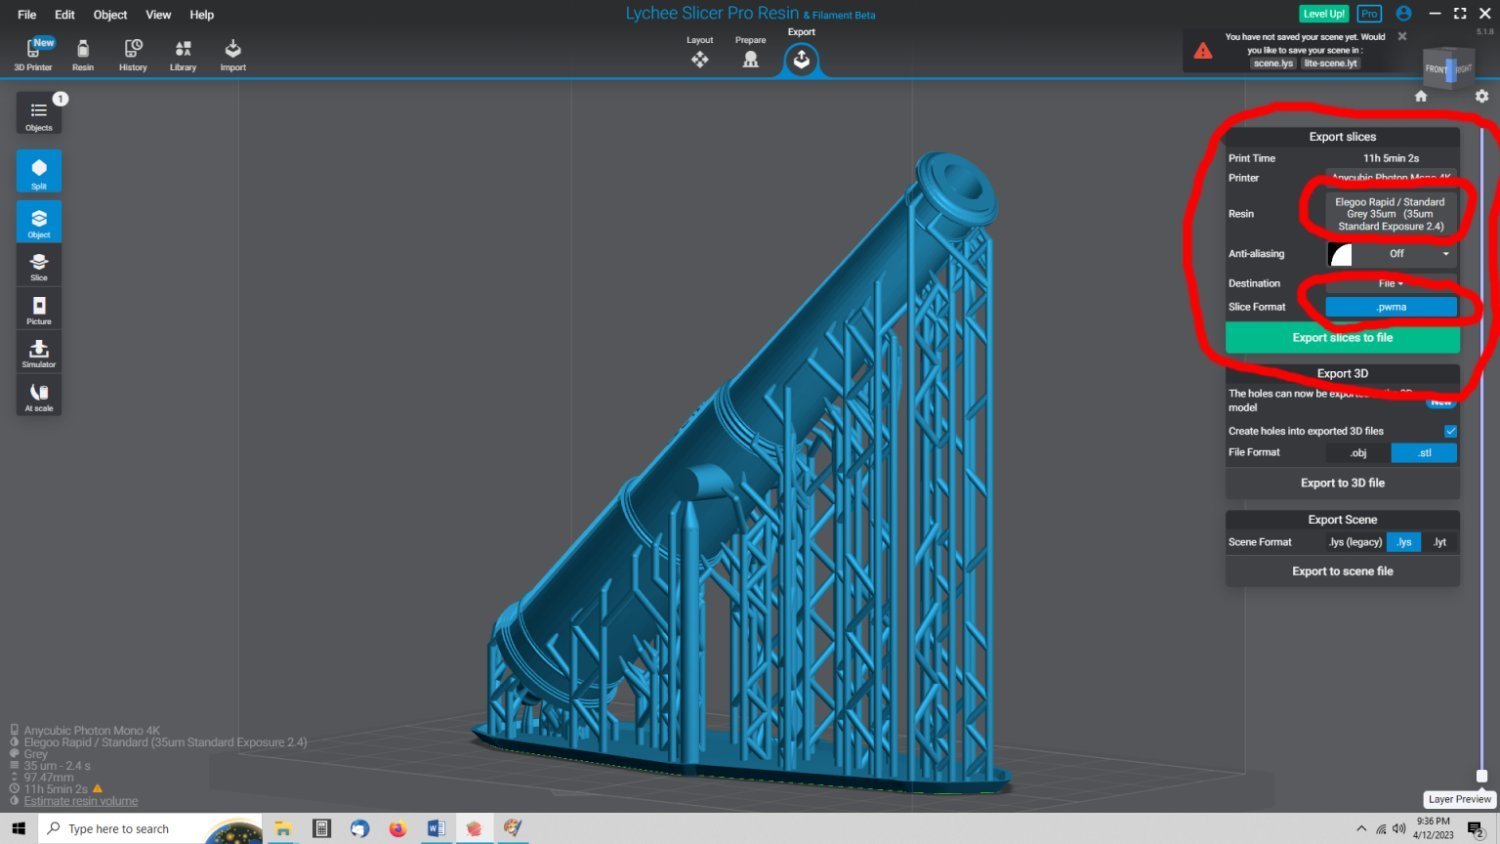
Chuck, if you are using LycheeSlicer, you might want to check out the "Raft" type base for the supports. The lip makes it easier to pry the parts off of the build plate.
-
3D Printing Cannons in Resin
thibaultron replied to thibaultron's topic in 3D-Printing and Laser-Cutting.
I've updated many of the files in this thread, since they were posted. The NRG is in the process of placing all the cannon STL files in a database, that will be available on their web site, so stay tuned.