HOLIDAY DONATION DRIVE - SUPPORT MSW - DO YOUR PART TO KEEP THIS GREAT FORUM GOING! (Only 13 donations so far - C'mon guys!)
×


Mark Pearse
-
Posts
820 -
Joined
-
Last visited
Content Type
Profiles
Forums
Gallery
Events
Everything posted by Mark Pearse
-
 The soapstone stands look beautiful. Would you be able to post a photo to show more detail? thanks
- 81 replies
-
- 2
-

-
- egyptian
- byblos ship
- (and 1 more)
-
Hi Keith That looks fantastic. The illusion of scale is getting better & better. Looking at the images, it occurred to me that another possibility for the mystery cleats is lashing points for the boom. A simple lashing to the boom stand would suffice in many cases - but in difficult conditions more would be needed to restrain it all as the boat lurched around. Aligning with the helm, lashings would interfere less with the most critical sight lines. Maybe.
-
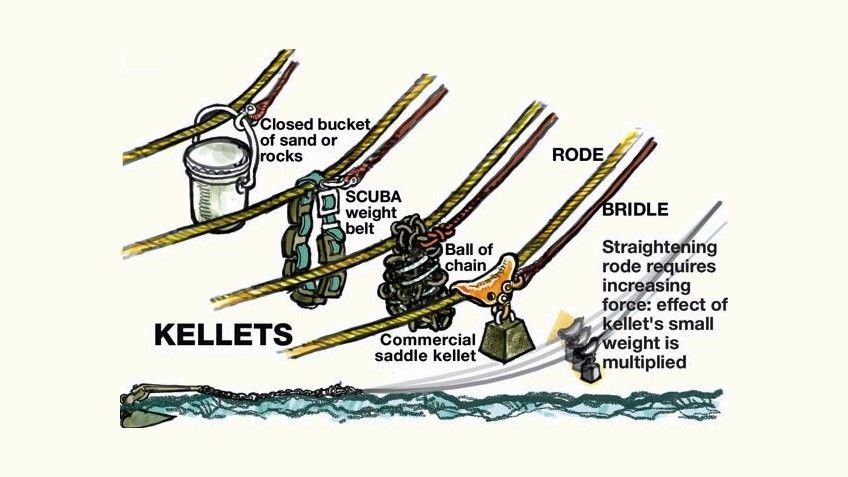
Hi George Very interesting subject, the rope truss is fantastic & very believable. On the mystery stone weights, one possible use is to assist the anchor. There's no doubt that a dead weight as an anchor is better than nothing, but a boat would pull slightly up - & with more wind a dead weight would tend to slide along the sea bed. If you use an anchor kellet, the pull on the anchor from the boat is horizontal with little "up" pull, & changes the anchor from being just a dead weight on a rope to the shape of the stone being a purposeful design. If you allow me to speculate: assuming the anchor is carefully lowered from the top rope to sit on the sea bed standing up, you then release that rope & the line to then hold the boat at anchor is now to the lower corner hole, then the pull on the anchor (if you use a kellet) is more horizontal, & the splayed face on the anchor would bite into the sand or mud instead of sliding. My guess is that the "top" rope on the anchor is for lowering & weighing only. I'll find an image online of a kellet & add it below. It's a simple but very effective anchoring tool. The mystery rocks could easily have had multiple uses, this is just one more possibility.
- 81 replies
-
- 8
-
-
- egyptian
- byblos ship
- (and 1 more)
-
Hi Vaddoc I don't have a lot of experience with topsails, but I don't think they need much adjustment - they tend to do what the mainsail does. I thought that they don't need much once set up. That's if you want to free up one of the cleats. On the jibs, are you thinking of putting blocks on the sail clews?
-
The blocks are really ingenious.The other aspect - which was clear from your sketch - is that the three lines will also help stabilise the block & keep it from twisting out of square, sheaves can jamb horribly if that happens.
-
Hi Vaddoc Good question, & I believe the expert opinion is that in a yacht there's a beam:length ratio that shouldn't be exceeded. However, the conventional wisdom isn't foolproof - our own yacht is 3m beam & 7.3m hull length, so very beamy - as a design almost 90 years old she is comparable sail performance to a modern cruising yacht of the same length, & in lighter winds we can usually convincingly beat comparable modern boats. The Karoo isn't a yacht as such, but I think some things do apply. A hull's 'righting moment' is key, it balances the wind power. The two simple ways of giving righting moment are ballast & positive buoyancy. Ballast is easy & we all understand that. Positive buoyancy is the resistance of a shape to being pushed into the water - so it "pushes back" when you try to tip the boat. A beamy boat has more than a narrow shape simply because it's wider. So ..... you can then get rid of some ballast & make the boat lighter - less weight, less wetted area etc. It's a balance, there is no one approach that is right or wrong, the best designers can do this remarkable balance...& they can still come up with a great looking boat.
-
She's really coming together. The area of the spreaders has a lot going on & is very neatly done.
-
Hi Keith Very interesting on the wire hardening. I wonder if the slots are because they use the tubes to double as vents for the black & grey water holding tanks.
-
Hi Carl Nice to hear from you. You are widely read on boats if you know this book. I'm guessing you're thinking of the 18 foot skiffs, & there is certainly some influence. The Karoo is like an 18' skiff with more boat & less sail. The skiffs had larger sail areas & 10 or 12 crew to keep it up & work it all - spinnaker poles had 3, 4 or 5 pieces each around 3.5m long. Their hulls are wider & shallower, but the lines are certainly similar. Cliff Gale did race the 18 foot skiffs, & his thinking in the Karoo design is influenced by them. Karoo would be manageable single-handed if it wasn't very windy, & raced with 3 or 4 crew. 18' skiff Brittania, 1920s - so same period as Karoo
-
Dick, A very interesting & enjoyable build to follow, & beautifully displayed in the photo above. Is that a reproduction of Durer on the left?
- 263 replies
-
- 3
-
-
- nave tonda
- round ship
- (and 2 more)
-
Great tool skills Keith. The balusters are very unusual, I've never seen anything like them, but I suppose that I know more about balusters in buildings than in yachts.
-
Hi John I don't think I'll do the cruising cabin - maybe if it was for my wall at home, but if it's for the sailing club I think it's better to leave it off.
-
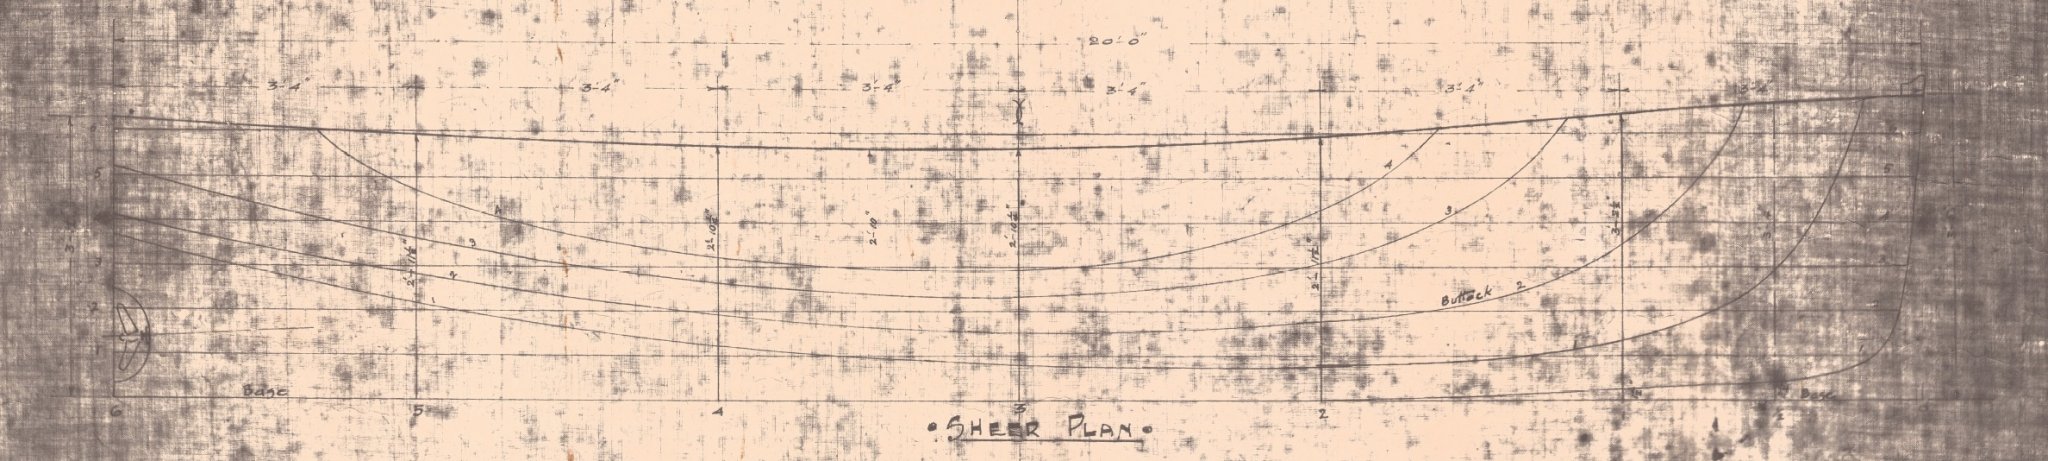
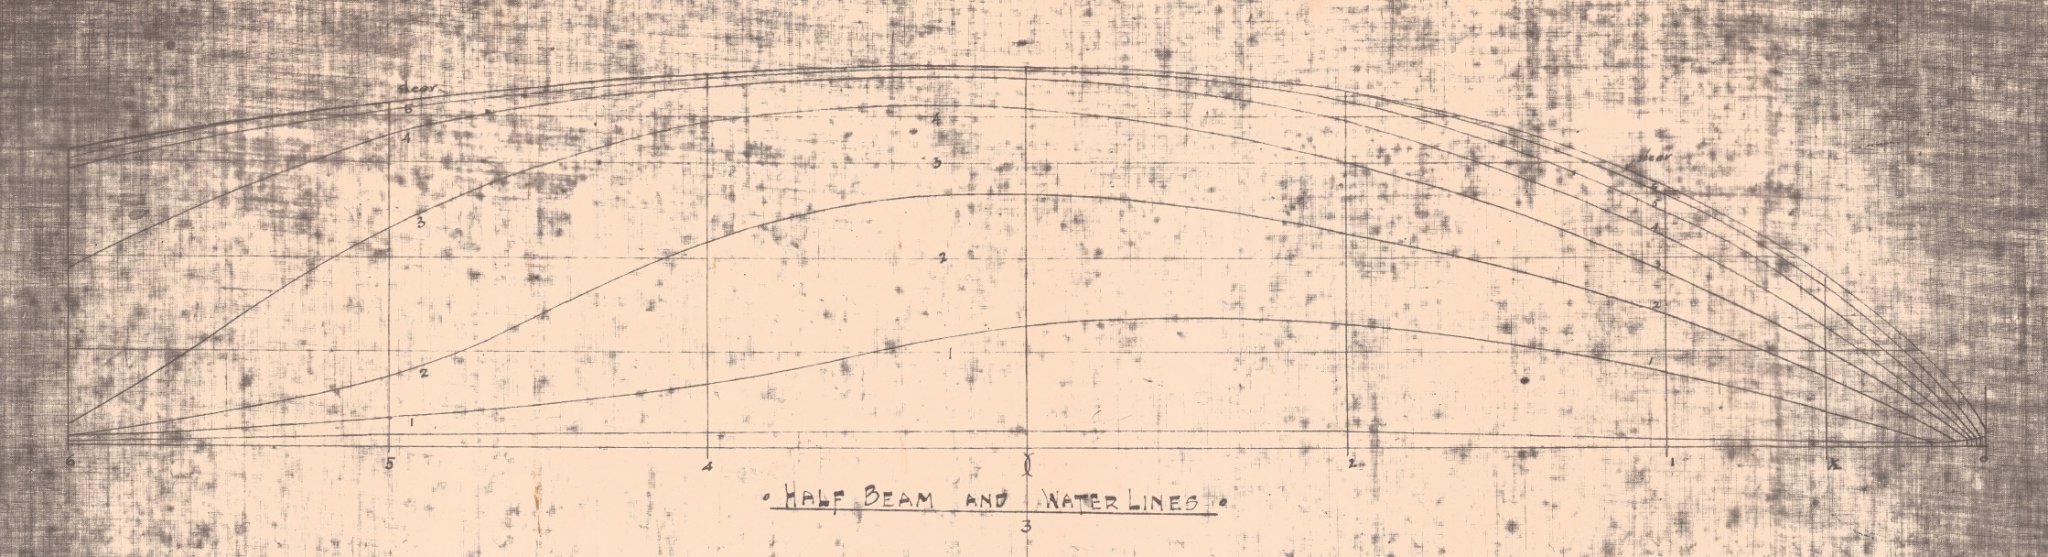
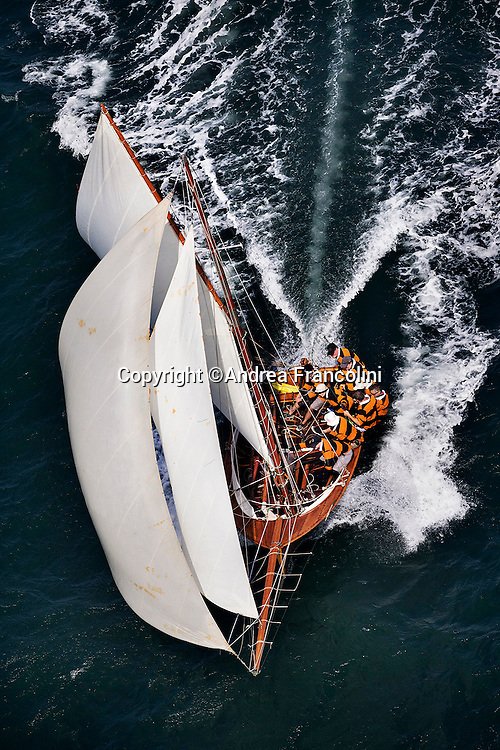
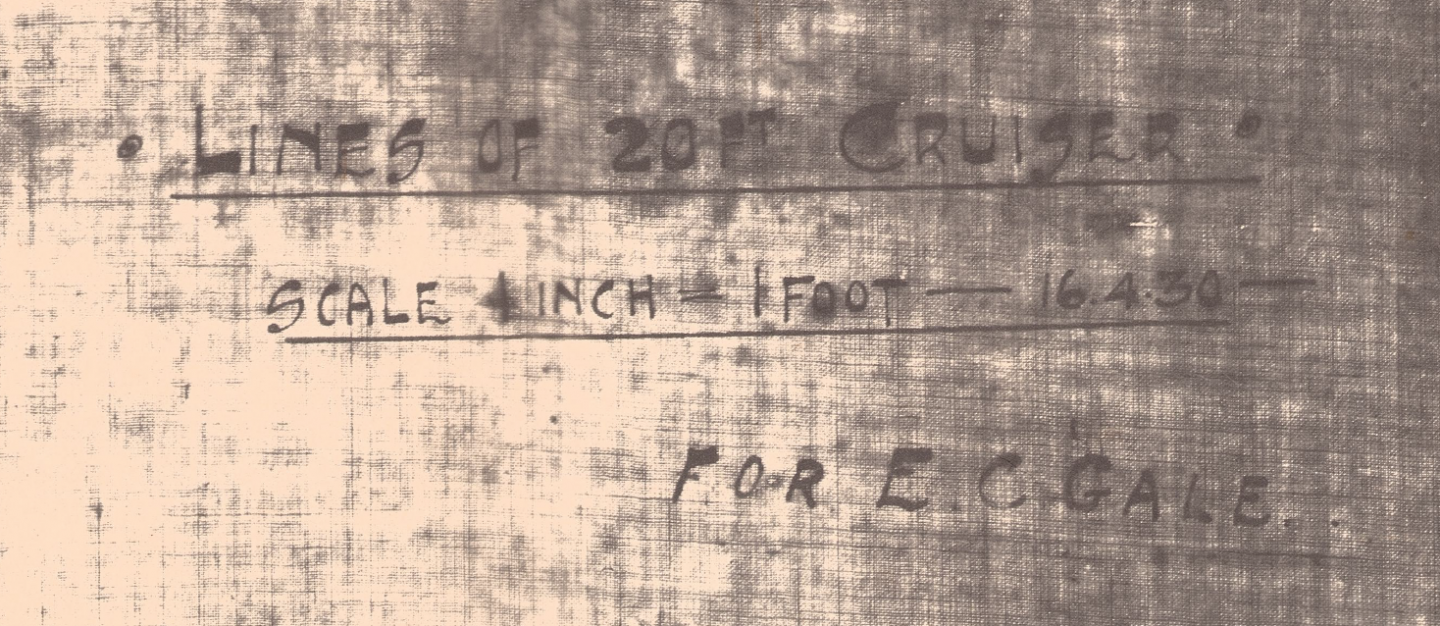
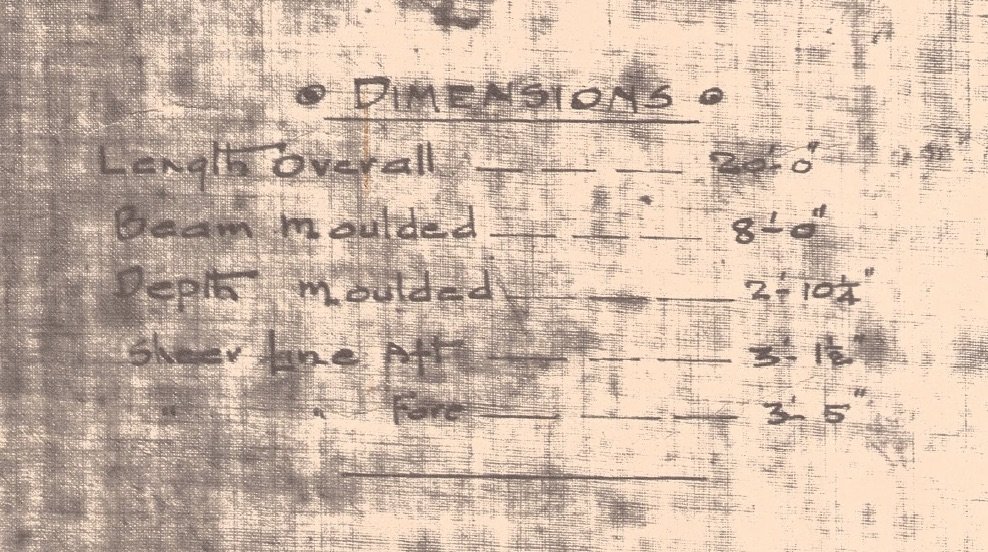
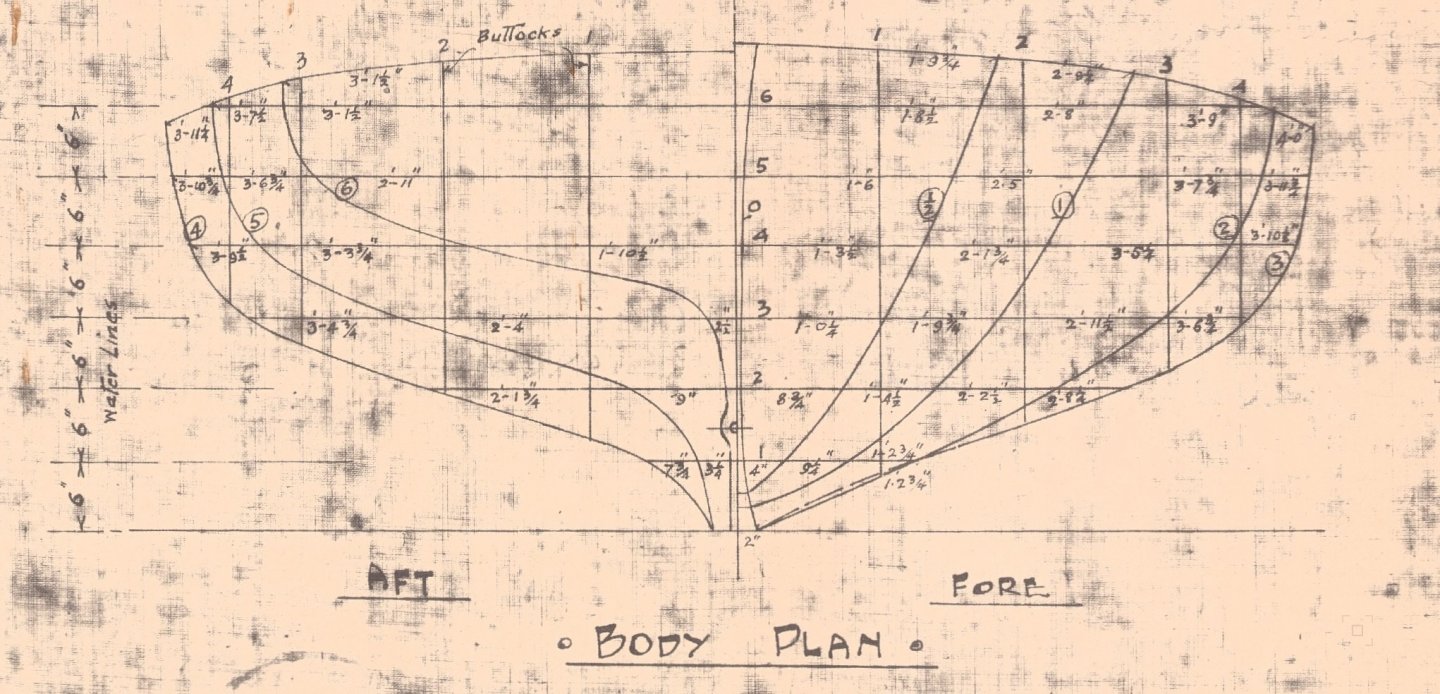
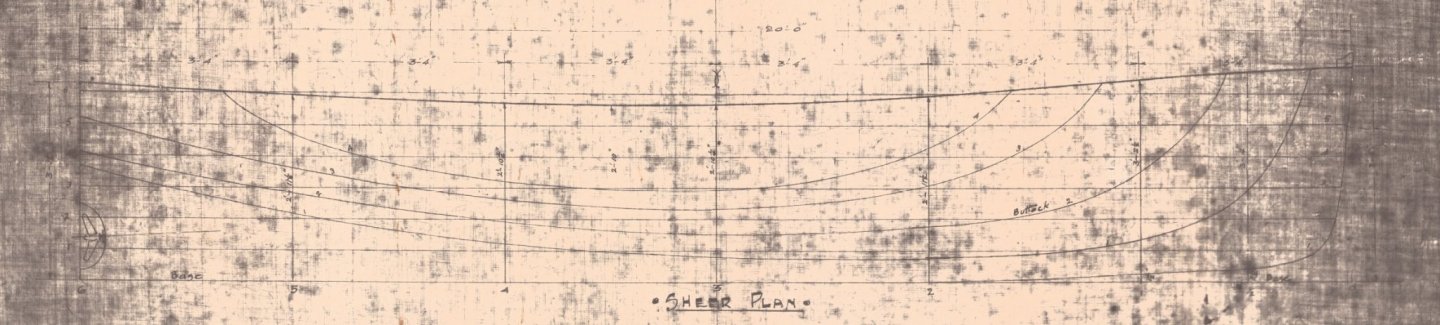
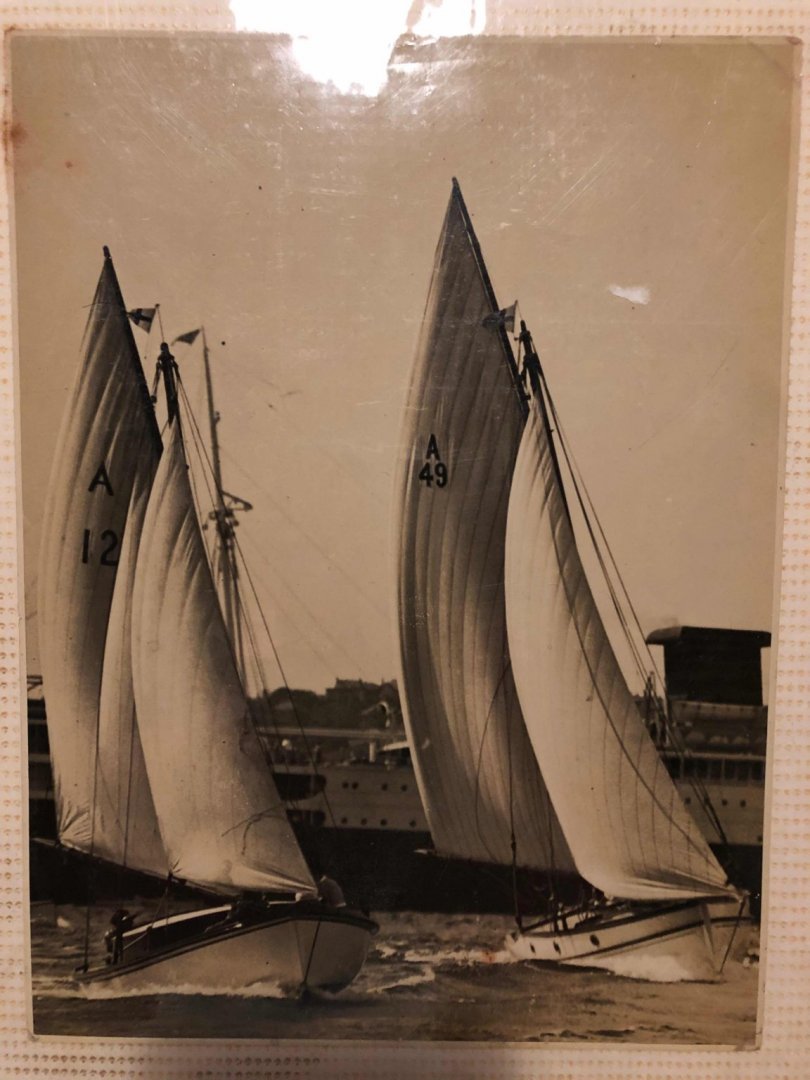
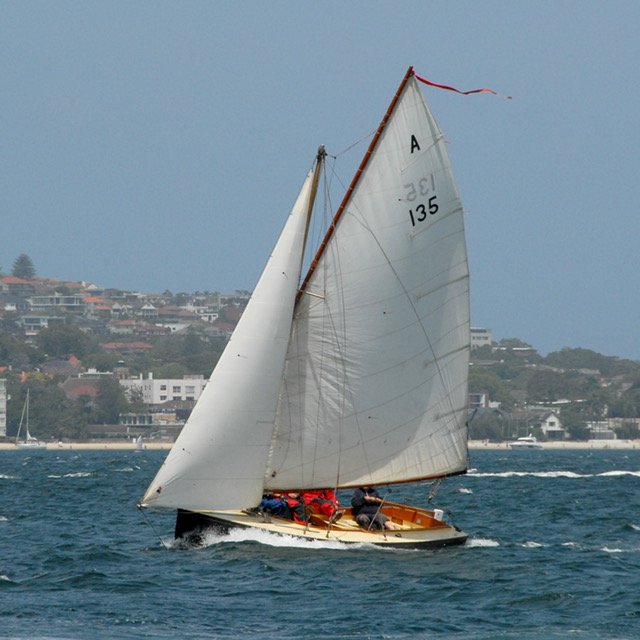
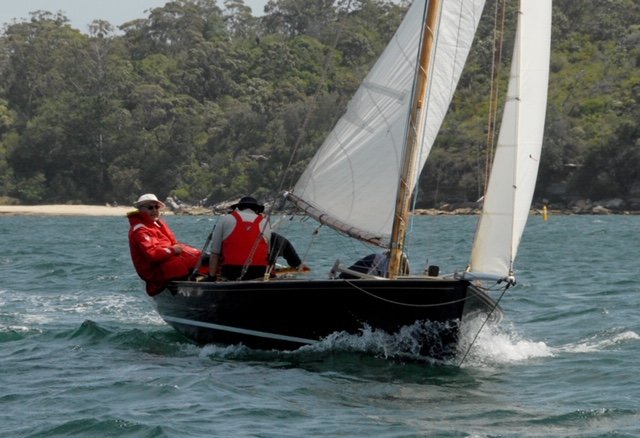
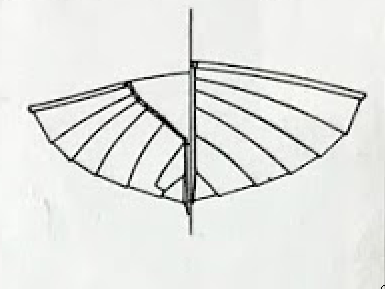
Hi everyone This is my second venture into model boat building. The first model was an unbuilt yacht design by a Sydney amateur yacht designer; this one is a much earlier design by the same man - E.C. "Cliff" Gale. Karoo was a 20' open sailing boat with a bowsprit & gaff sloop rig. Karoo was raced & was also a family boat. Incredibly they (Cliff & Mrs Gale, plus 3 strapping young sons) used to pack her full of gear for holidays & spend a week or two aboard on Pittwater, Broken Bay & the associated waterways Cowan Creek, Coal & Candle Creek etc. I'm doing a half model of the boat, as a gift for our sailing club model wall. The Karoo was a quick boat, I know because a copy was built about 20 years ago & despite her being given a fairly conservative sailing rig she is well able to keep up or beat with larger yachts. As with the last model the drawn information is not complete, but there are some photos of the original boat. And also I have one of the sons - Bill - who at 95 or so still has an astonishing memory when it comes to yachts. The drawing would have been done from a design half model, Cliff shaped the design in a bread & butter half model, layers dowelled together, & separated them to get the drawn lines. I plan to show some details beyond just the hull: gunwale & toe rail, lower section of the mast, bowsprit, rudder & tiller, centreboard. Coincidentally, it was 90 years plus 10 days ago this drawing was done: The lines show a shallow dishy hull with clean underwater lines; the shape is beamy & shallow. A 40% beam:length ratio is wide, but beamy is (or was) quite common in Sydney: Here, cantering under spinnaker at Pittwater, in the early 30s: This is the rebuilt version, she was slightly lengthened & made finer in the bow. Interestingly the owner's one comment is that she tends to bury the bow downwind under spinnaker. I'm guessing the original didn't do that, or as much, with more buoyancy in the bow. On the left, A12, with a removable cuddy cabin for cruising.


- 99 replies
-
- 11
-
-
HI Geert An enjoyable journey start to finish, and a lovely result. I like the timber used in the floor of the case, very nice tones. all the best, Mark
-
They will look amazing on the model. The figures also - & what's the story about the one with a red hat & looks to be sitting on his hands?
-
We used to make the glue by dissolving acrylic pieces in ethylene dichloride (I think that's it) until it was thick but could still go through a syringe (without a needle in it). You run the syringe along the joint & it soaks it up. If you get the thickness correct the glue will bridge gaps.
-
Hi Christian (Geert I hope you don't mind my butting in, but I have some experience in this). I have helped make a few large acrylic (plexiglass) cases. We found that 4.5mm could make a wider case than 6mm; 6 would would start to sag in middle before the 4.5 did.
-
15' Dinghy by Bedford - FINISHED - 1:1 scale
Mark Pearse replied to Bedford's topic in Non-ship/categorised builds
Hi Steve, I have a copy of the 'Fisher Skiff' - built in 1947 by an elderly Billy Fisher (the Putney one), who learned his shipwright craft in the 1880s & 90s. The original is thought to be close to Sydney waterman's skiffs of the 19C. She's dishier than Rosie, shallower & flatter - the drawings below show it well. I'm still wondering about a mirror: the benefits of enforced neck mobility aren't all bad. best wishes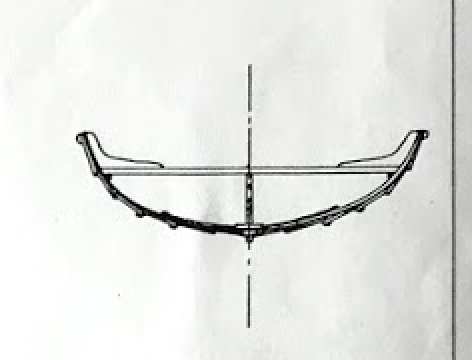
-
15' Dinghy by Bedford - FINISHED - 1:1 scale
Mark Pearse replied to Bedford's topic in Non-ship/categorised builds
Hi Steve That's very neat work. I've been rowing quite bit myself in the last couple of weeks, it being still permissible & fun. How high is the mirror compared to eye height? -
Another possibility for the cleats: They look to be several metres aft of where the main running backstays meet the deck. It's possibly connected with that tackle, & the loads would be sometimes be appropriately massive for that cleat. This is a racing yacht & these runners would be the main way of keeping the forestays from sagging away, many tons of load. Keeping that forestay up in strong breezes would be critical to windward performance, & history shows they weren't shy about racing in a breeze. Possibly they are only used in heavy conditions, & it's interesting to see that in the first two photos of this log, that there's a second backstay tackle in one photo that doesn't seem to be in the other - so they did change the running rigging to suit.
-
Agree with John, they are clearly meant to take some serious loads. Maybe see if anything aligns with the plate, could give a clue. If they seem to point outside the boat they might be to take some running rigging - maybe a block for the spinnaker brace...