usedtosail
-
Posts
2,421 -
Joined
-
Last visited
Content Type
Profiles
Forums
Gallery
Events
Everything posted by usedtosail
-
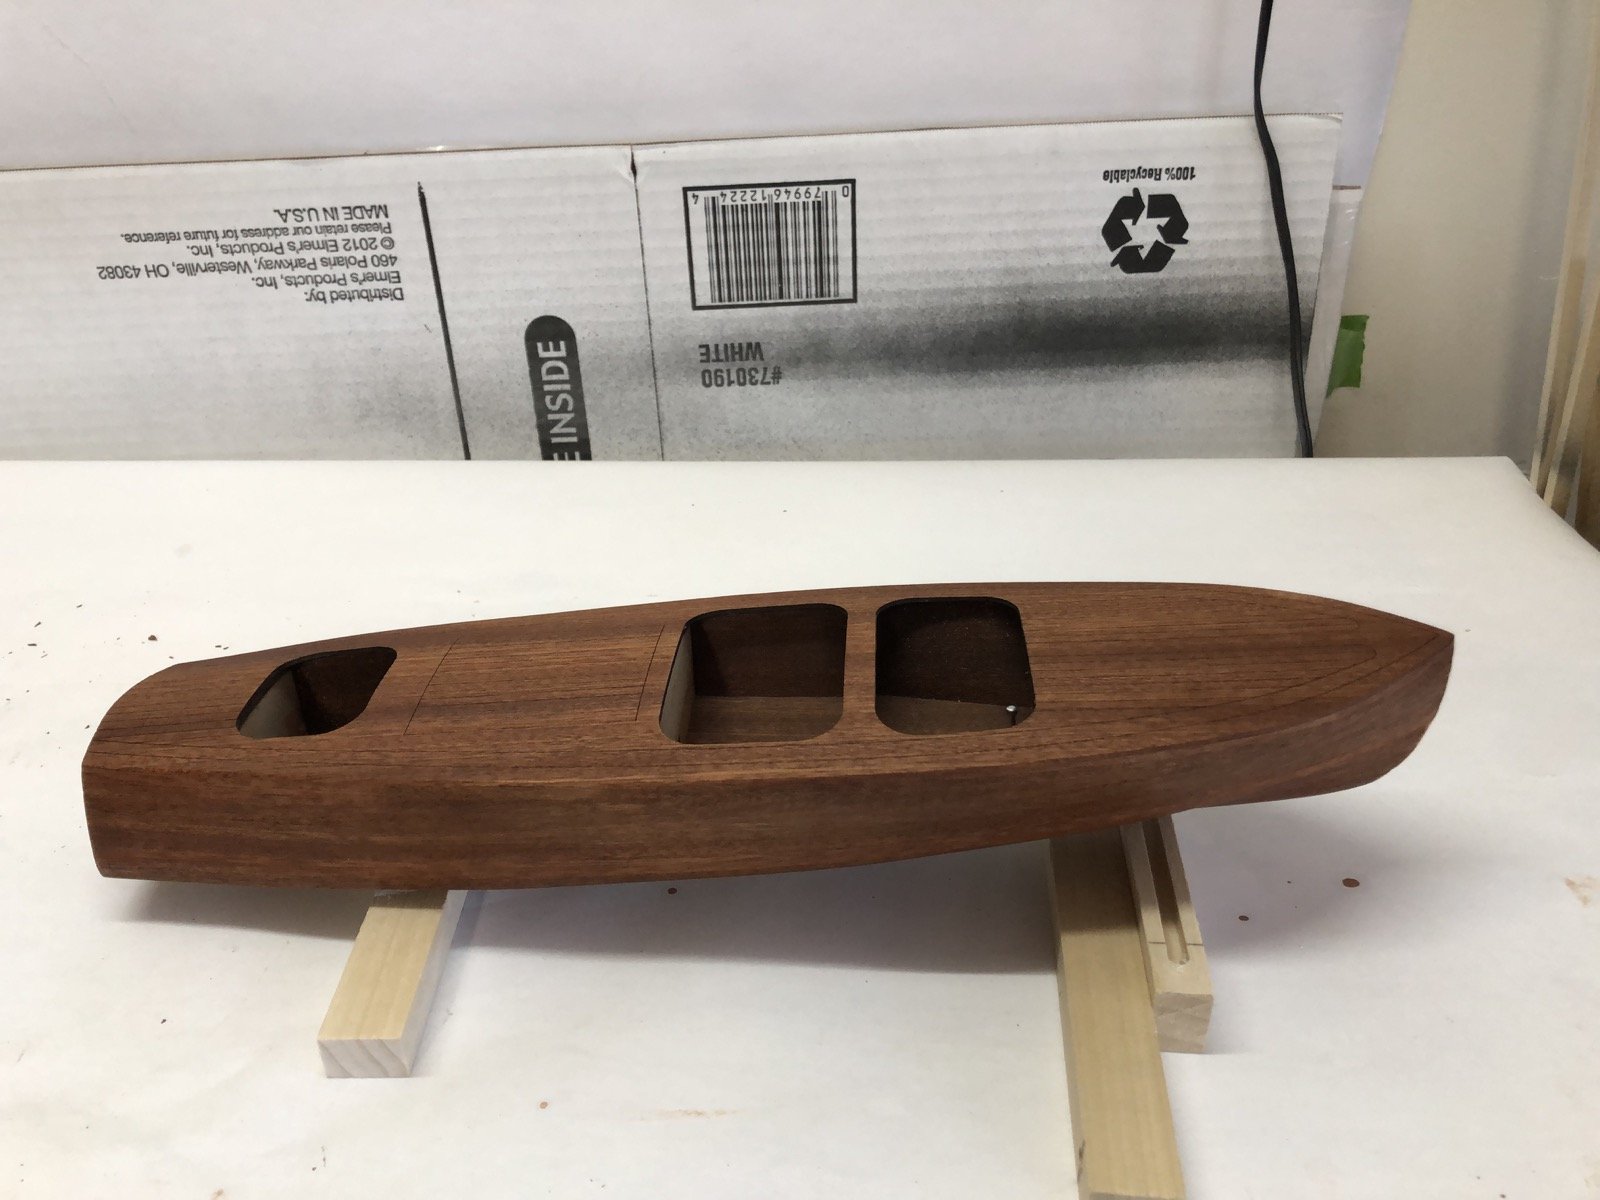
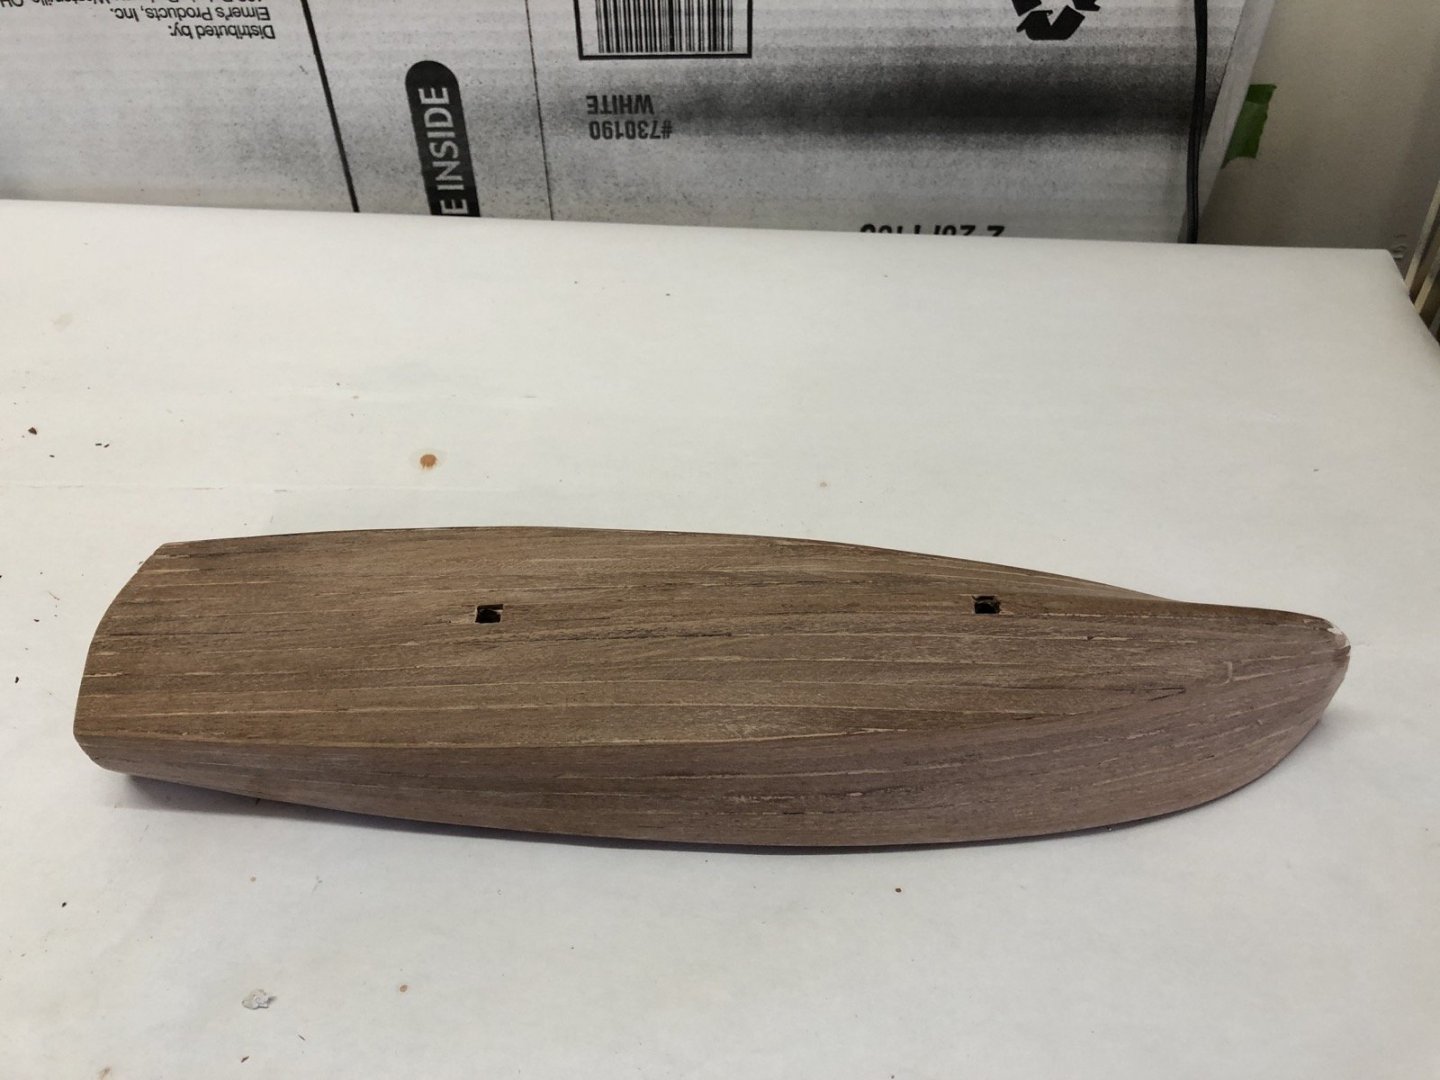
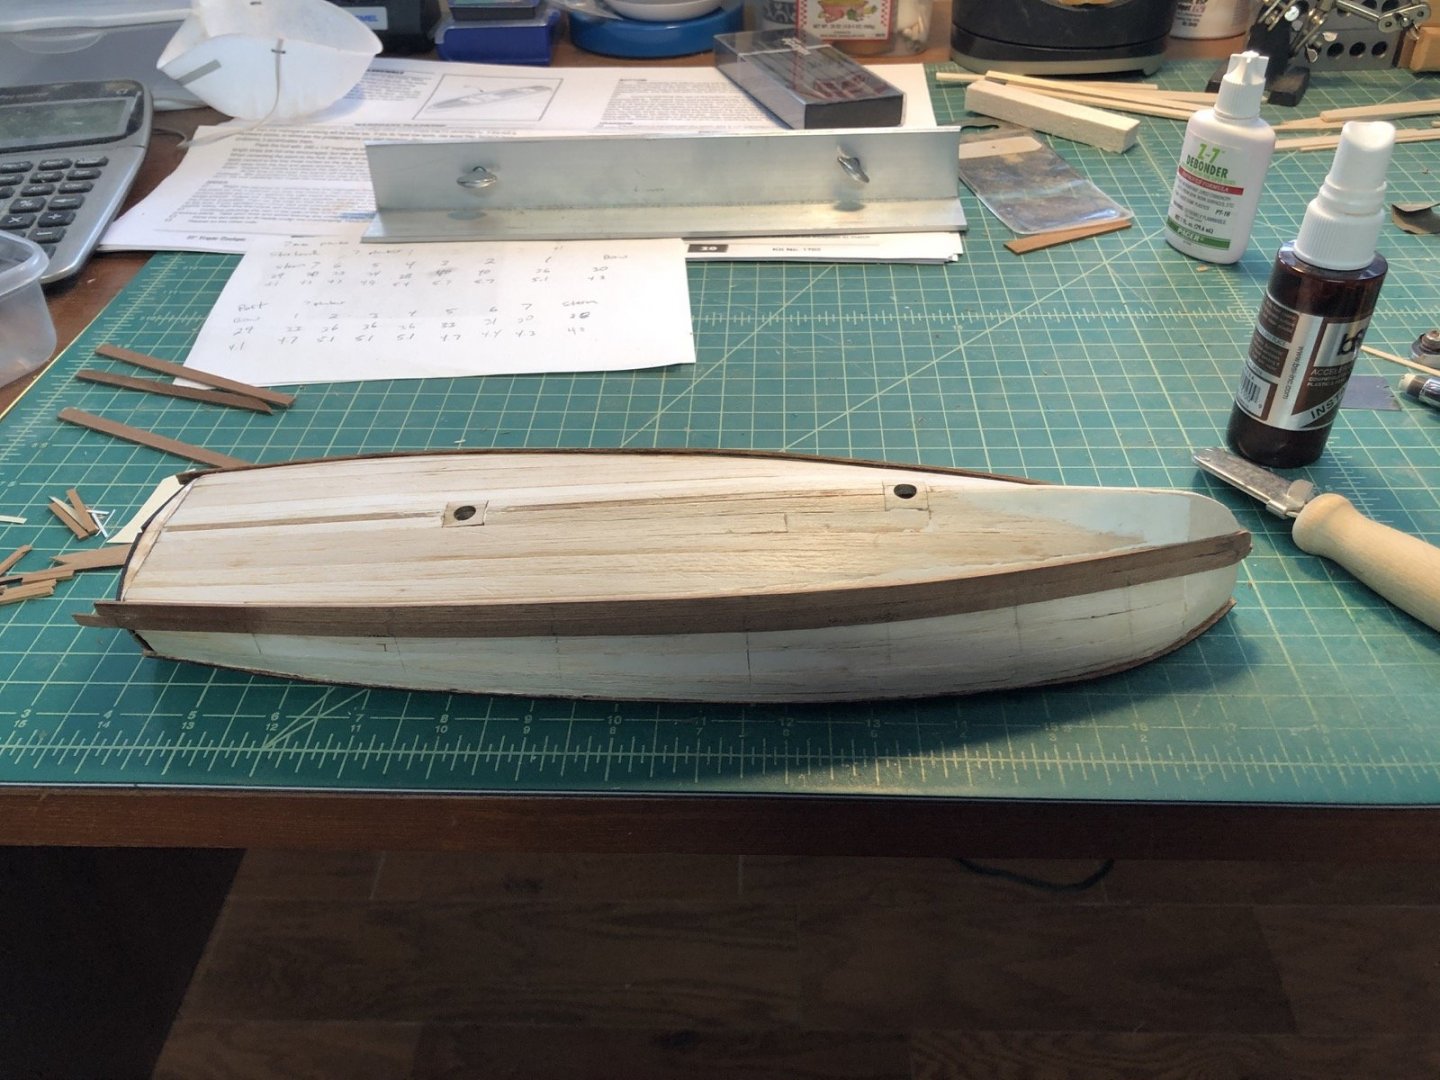
 Thanks Mike. I think I got the idea to use the Spaz products from your build log. I was very happy with the results. I hit a bit of a milestone today - the hull is finally filled and sanded after many weeks. I made a thinned solution of wood filler and added some mahogany stain to it, then used it to fill all the thin cracks and tiny holes in the hull. After a final sanding this is what the hull looked like. I then gave the hull a coat of mahogany stain, which evened out the colors really well. I am contemplating giving the hull a few coats of glossy polyurethane but I still have to glue a bunch of stuff to it, so I may wait. Seats are next to do. I am going to practice with some extra balsa to see if I can carve a realistic looking seat cushion. Stay healthy and happy.
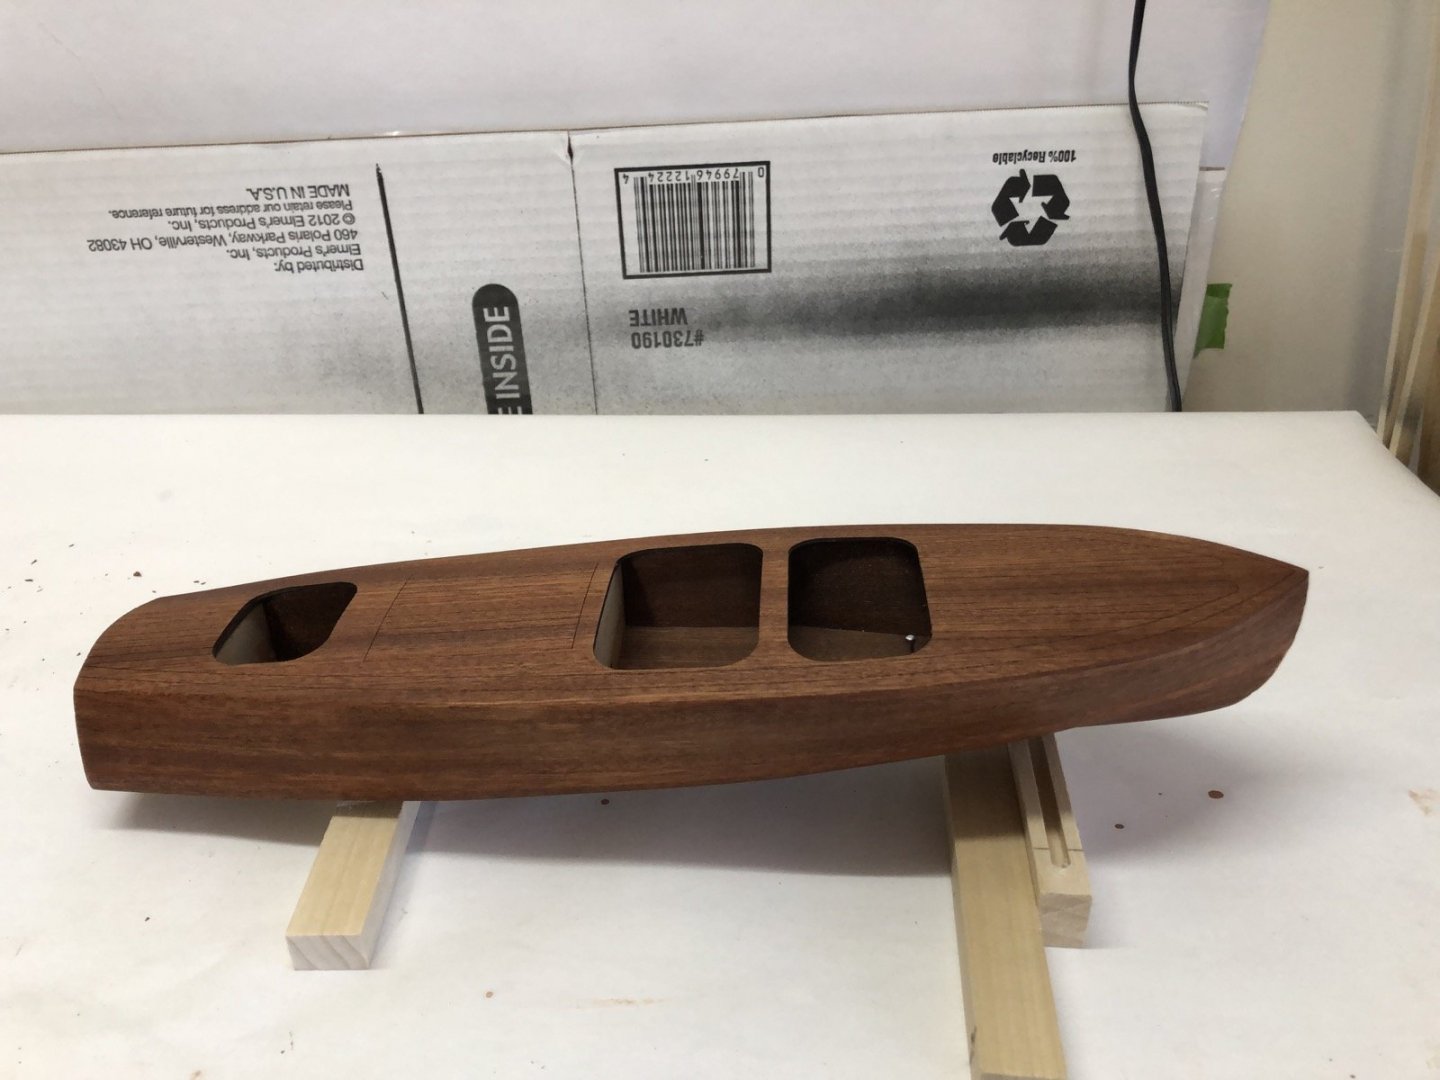

-
I am building the Dumas Chris Craft 1938 27' Triple Barrel Back, which is a scale of 1/24.
-
Jeff, I used tulle material for the netting on my Connie. You can get it in different colors at fabric stores like Joanne's. It is the stuff they use for wedding vails.
-
Nice work on the deck planking Mike. I was not successful in my attempt at that. Can I ask you what you used for the seat cushions. In the kit I am working on they provide plain balsa to use for them and I wanted to add some seam details so they look more realistic. Yours look great. Thanks.
-
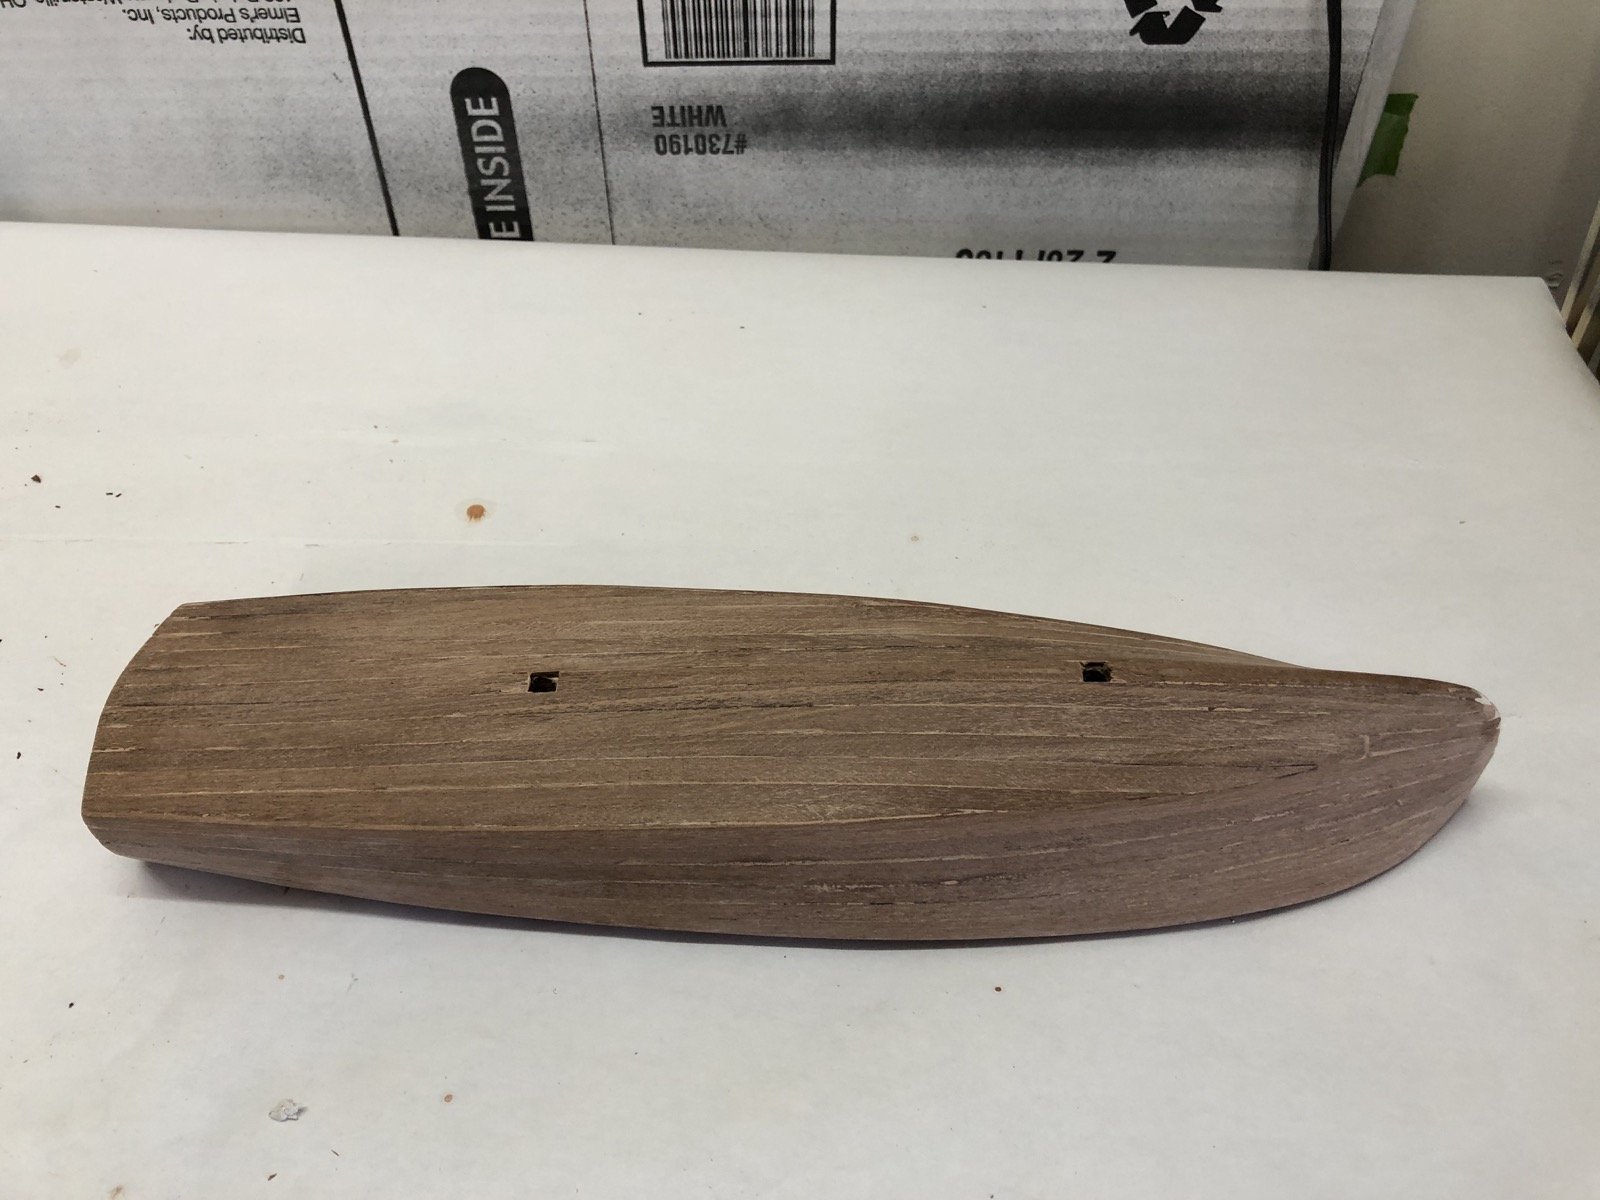
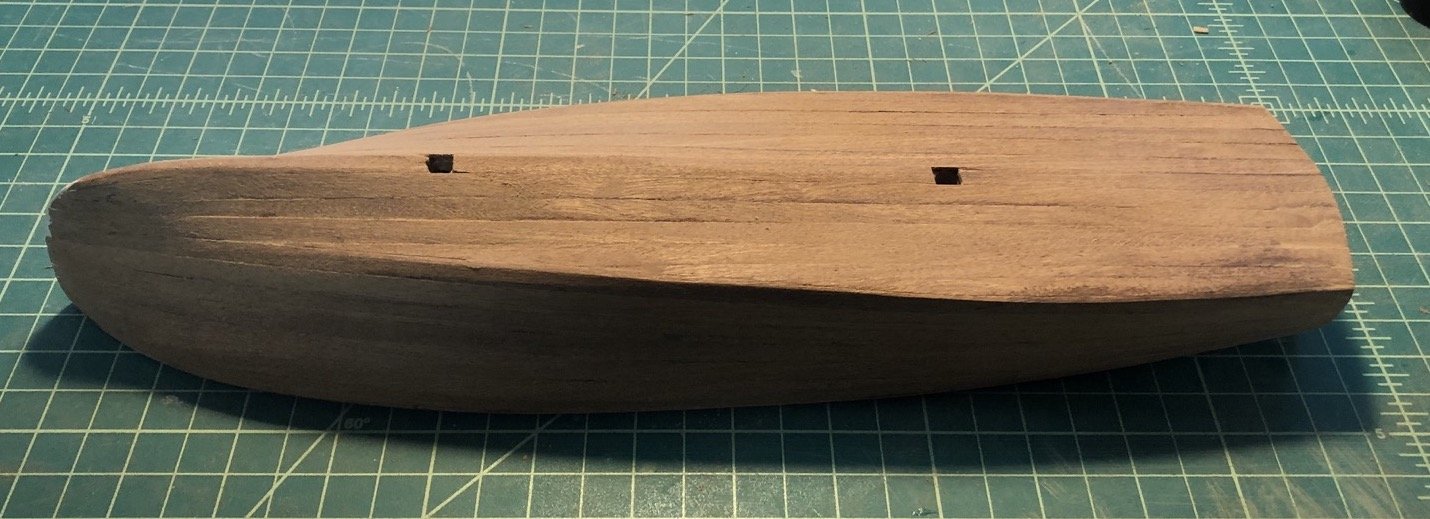
Just a quick update. I haven't had too much time to work on the model over the last month as we were away for part of that time and some other issues, but I am slowly getting back at it. I planked the transom and have given the whole hull a rough sanding. I am now filling in cracks and holes with saw dust and white glue and sanding the hull with medium grit paper. My goal is to get as smooth as surface as I can, which is difficult with the kit supplied mahogany but it is getting much better. I'll have pictures when it is closer to done.
-
The way I have added hooks to blocks like that is to put the strop around the block, put a seizing of only a few turns around the two ends, then put one of the ends through the hook and put another seizing where the first one was. I use very very thin line for the seizings so they don't look too big when they are done.
-
Byrnes Sliding Table -Input Requested
usedtosail replied to glbarlow's topic in Modeling tools and Workshop Equipment
The cross cut sled is one of the best accessories for the Byrnes saw, in my opinion. I also made one when I bought the saw a few years ago but the one from Byrnes is 100 times better. I highly recommend it. -
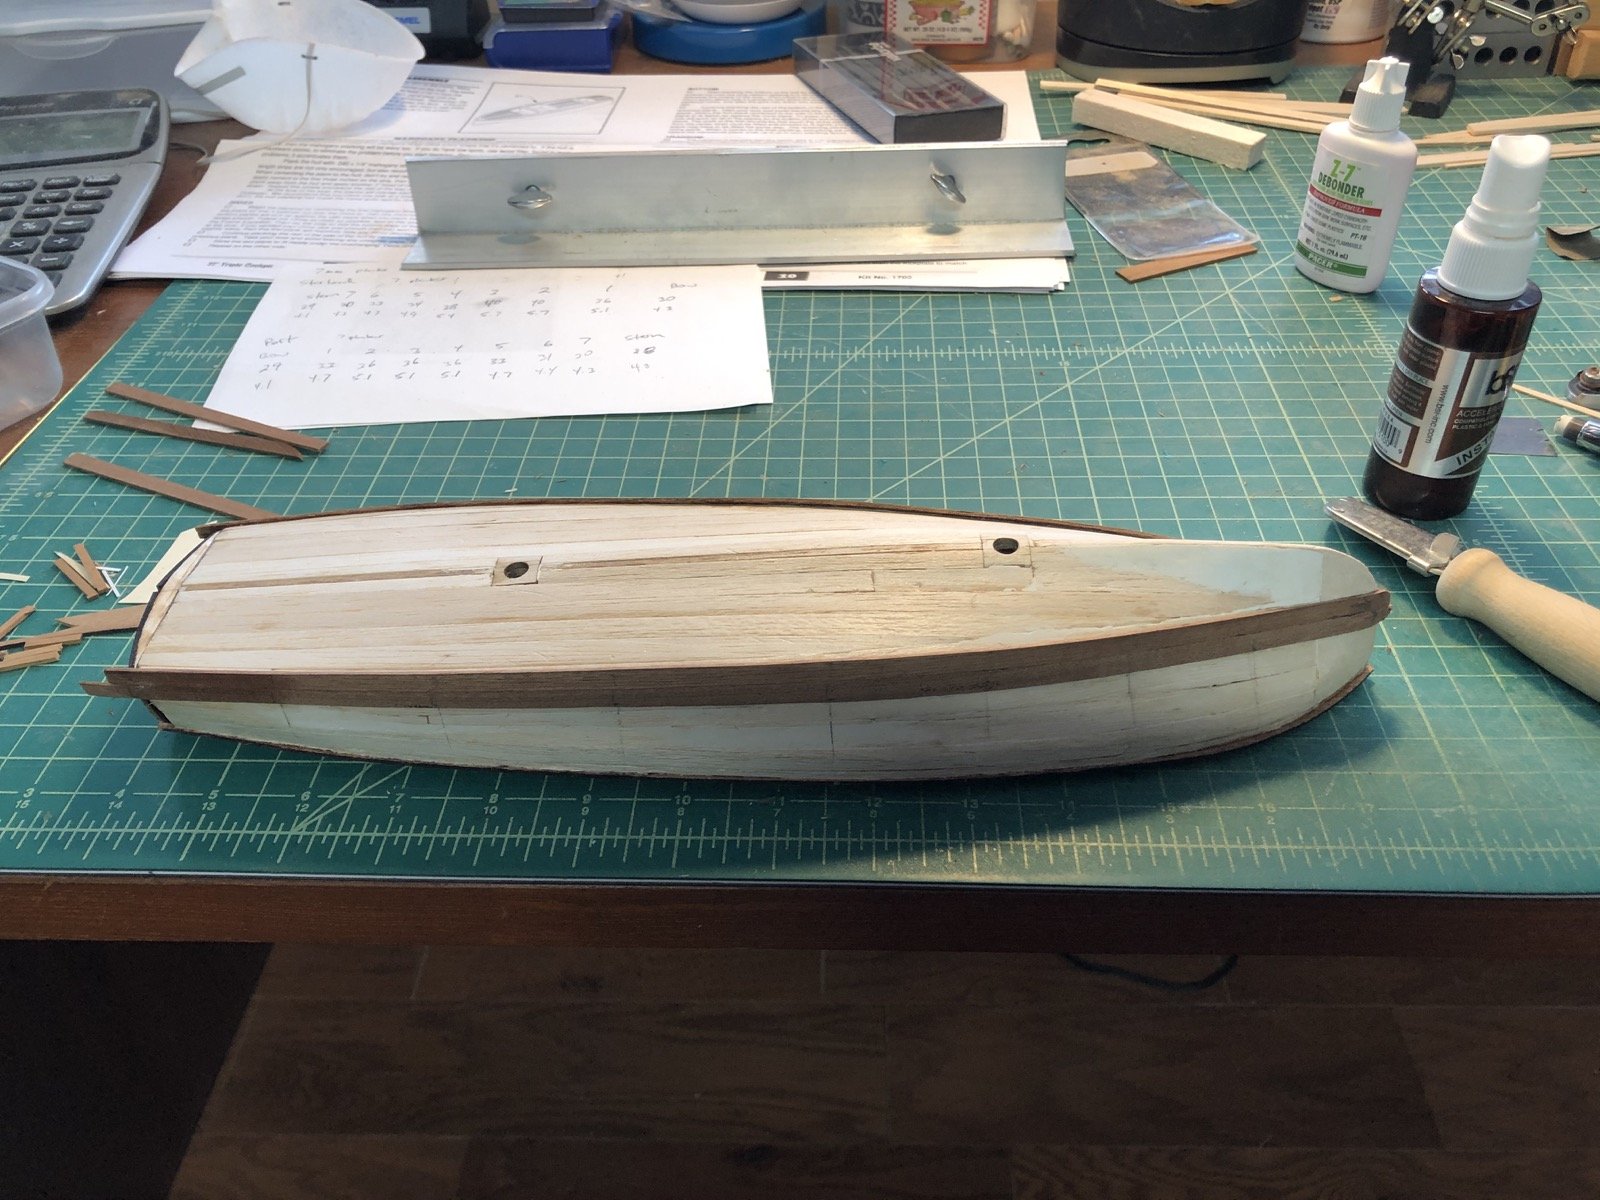
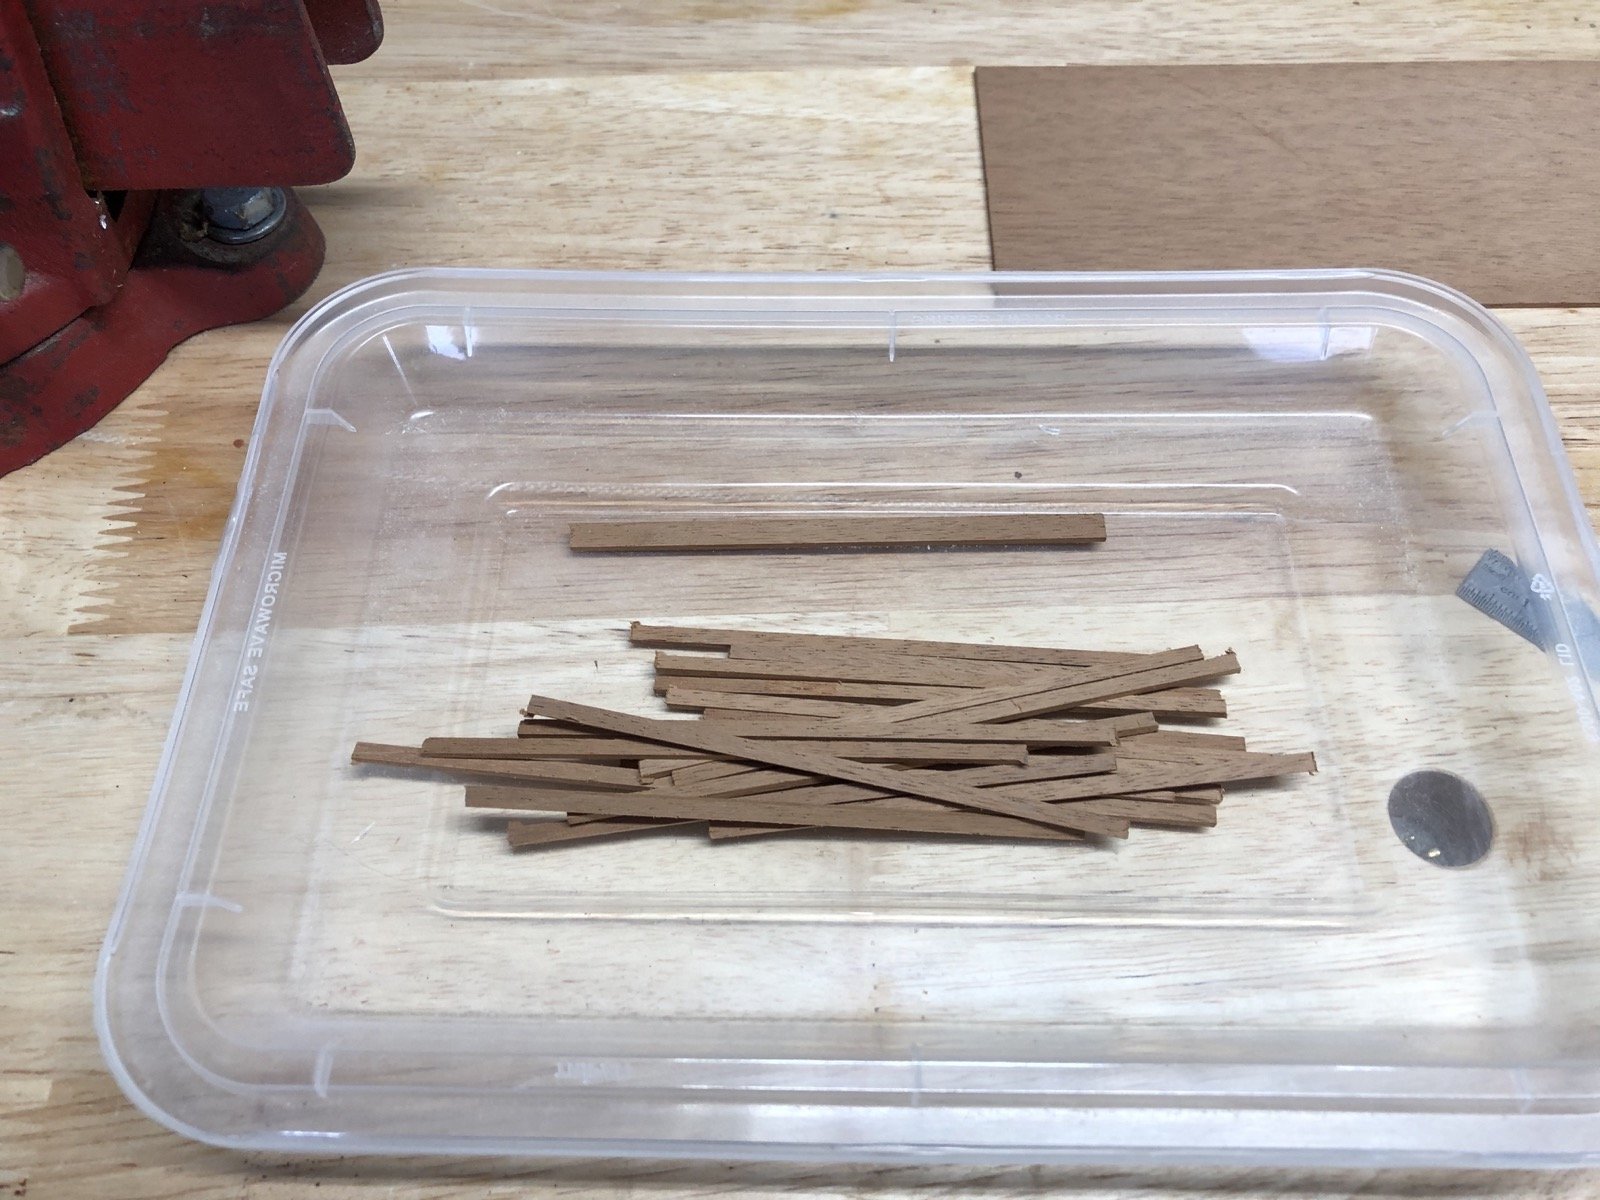
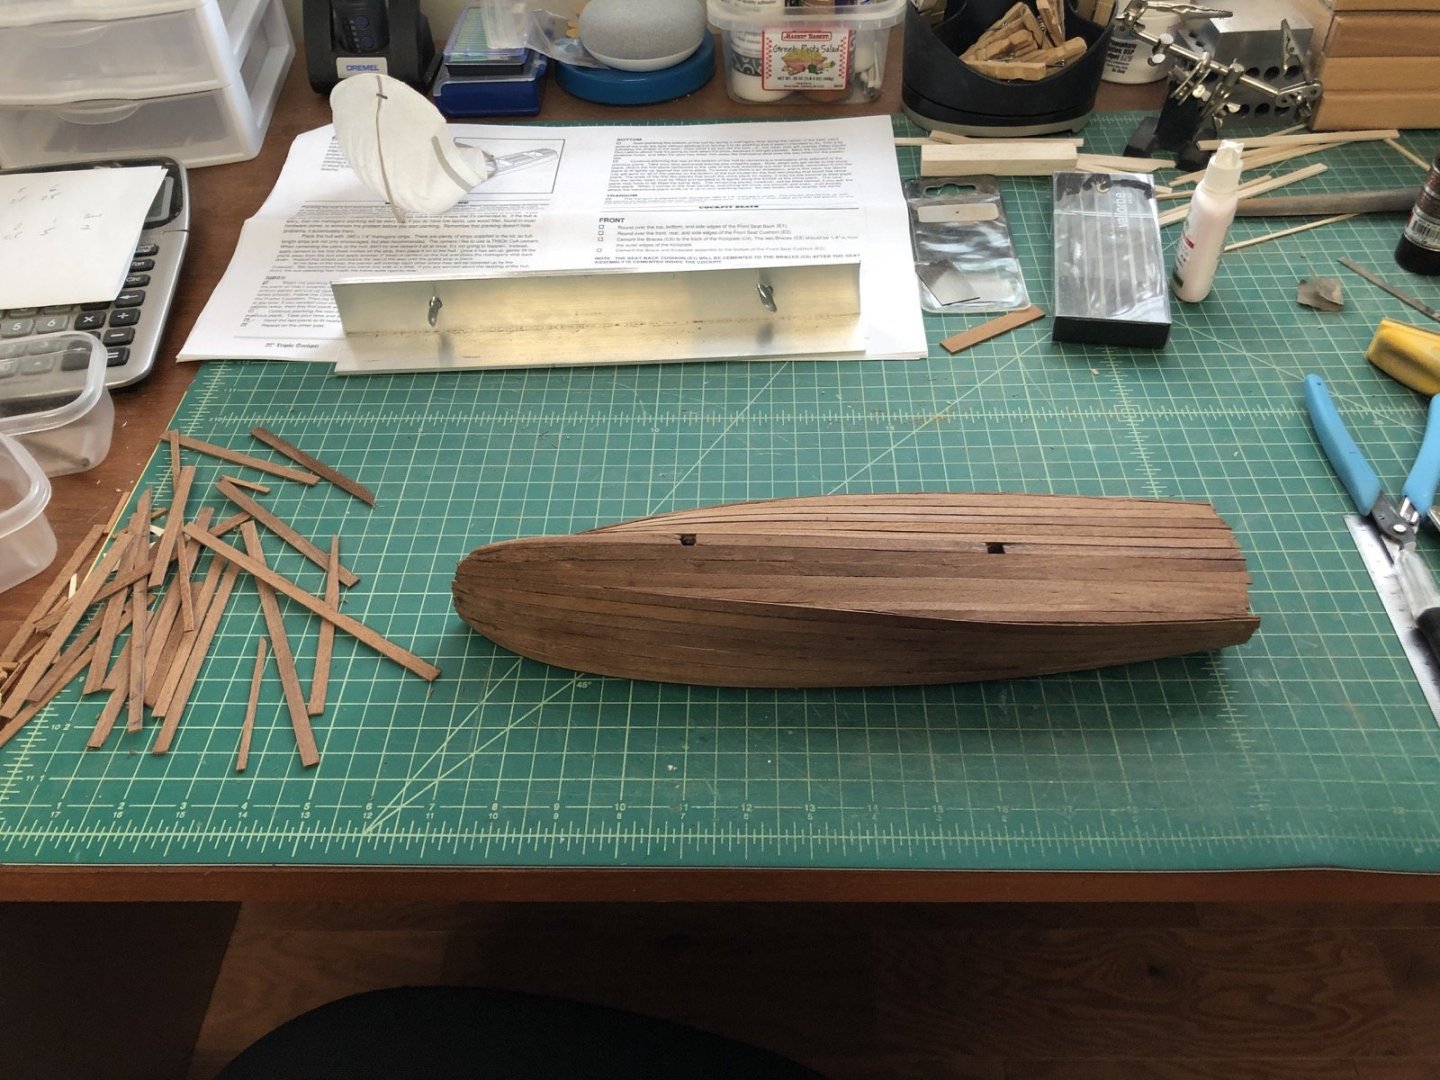
The bottom planking is now completed. I have not started sanding the bottom planks yet. I ended up with square openings around the holes for pedestals because the mahogany was splintering around the holes. The pedestals will cover these square holes so they won't be seen. Only the transom is left to plank. I am going to let the side and bottom planks extend past the ends of the transom planks so the ends will not show from the sides. I had just enough long planks for the sides and bottom. The pile of short planks is what is left which I will use to plank the transom.
-
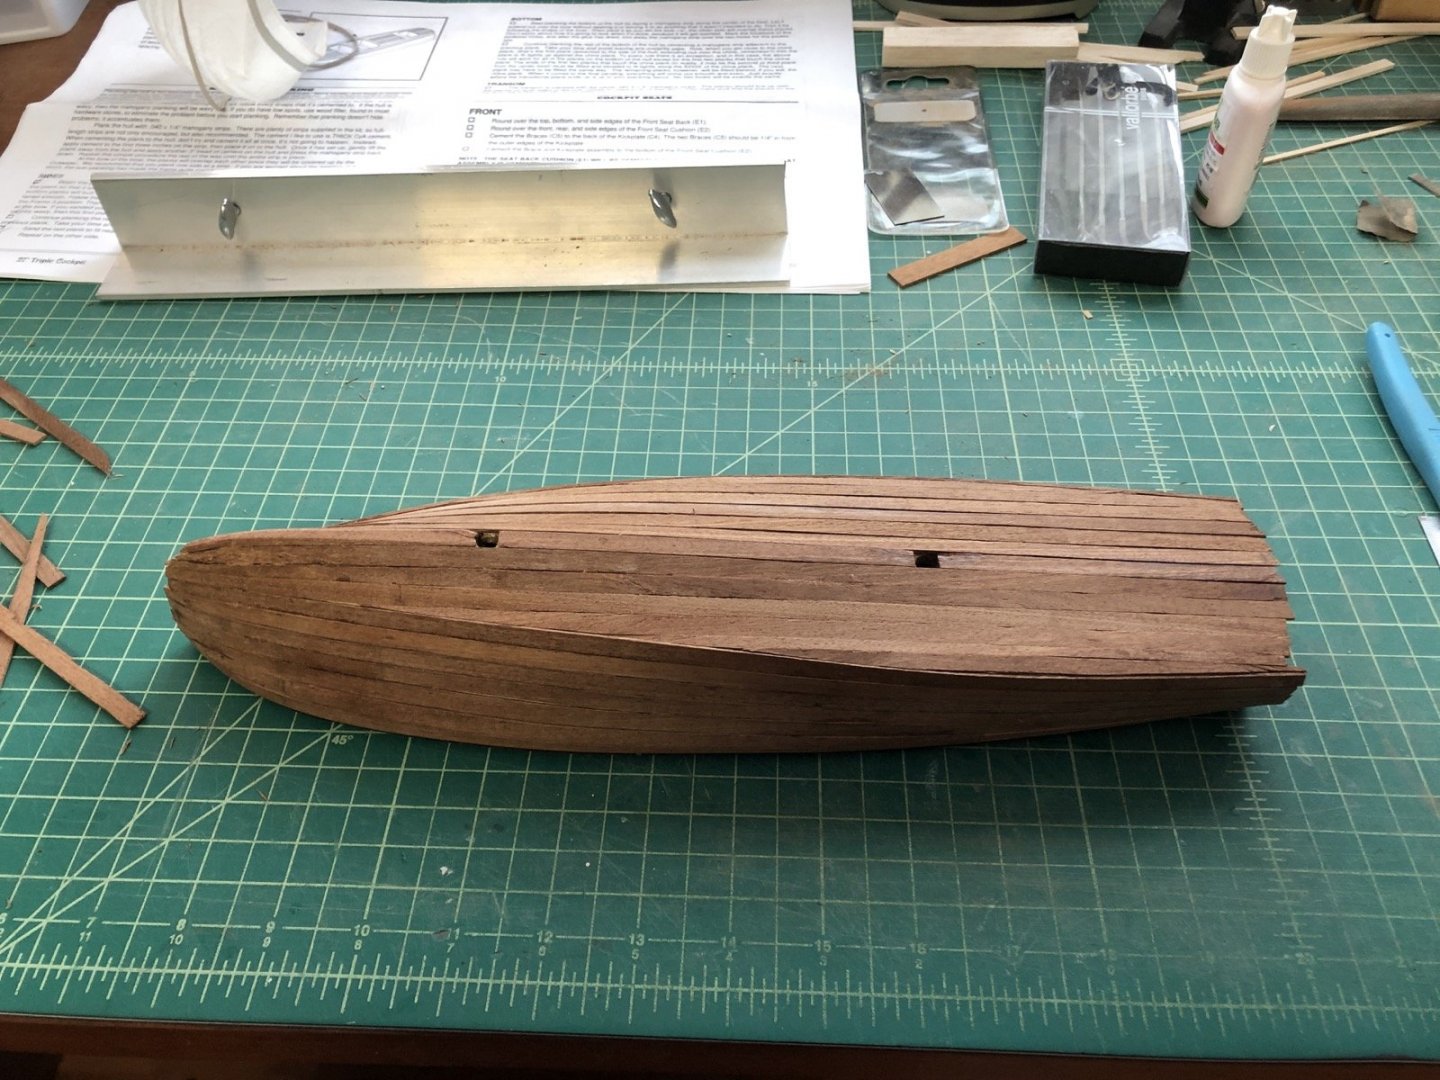
I finished planking the sides of the hull and have started planking the bottom. Here is the port side with a little sanding. Underneath, you can see the first of the bottom planks along the keel. Most of the bottom will be planked with full width planks, trimmed along the edges at the chine.
-
Count me in to follow along.
-
Straightening aftermarket rigging line
usedtosail replied to DonInAZ's topic in Masting, rigging and sails
Try running the waxed line over a light bulb that is on. This worked for me before I started making my own line. -
Nice job on those windows K. One idea for attaching the upper gun port lids is to cut small strips of brass or pieces of wire, bend them into a U shape, drill small holes into the edge of the port lid and the top of the gun port, then insert the brass strips into the gun port lids and the holes in the gun ports. I don't remember if the lids are thick enough for the holes though.
-
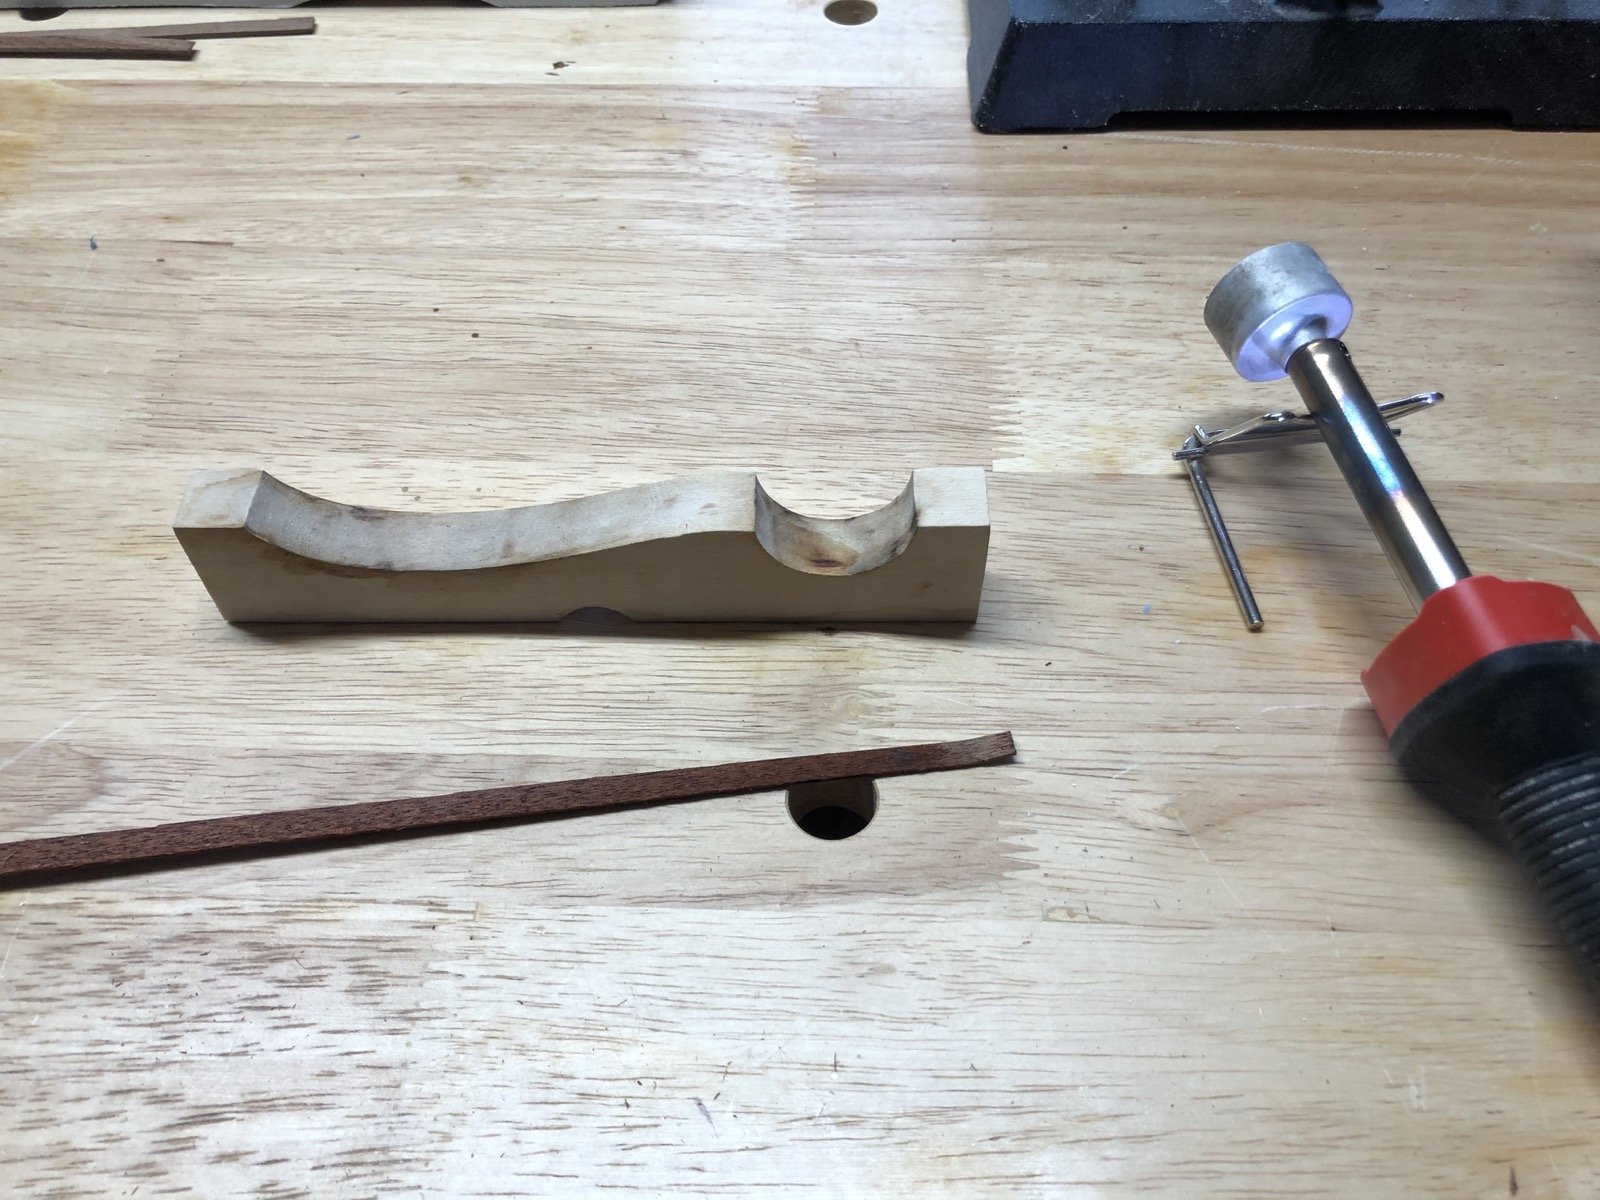
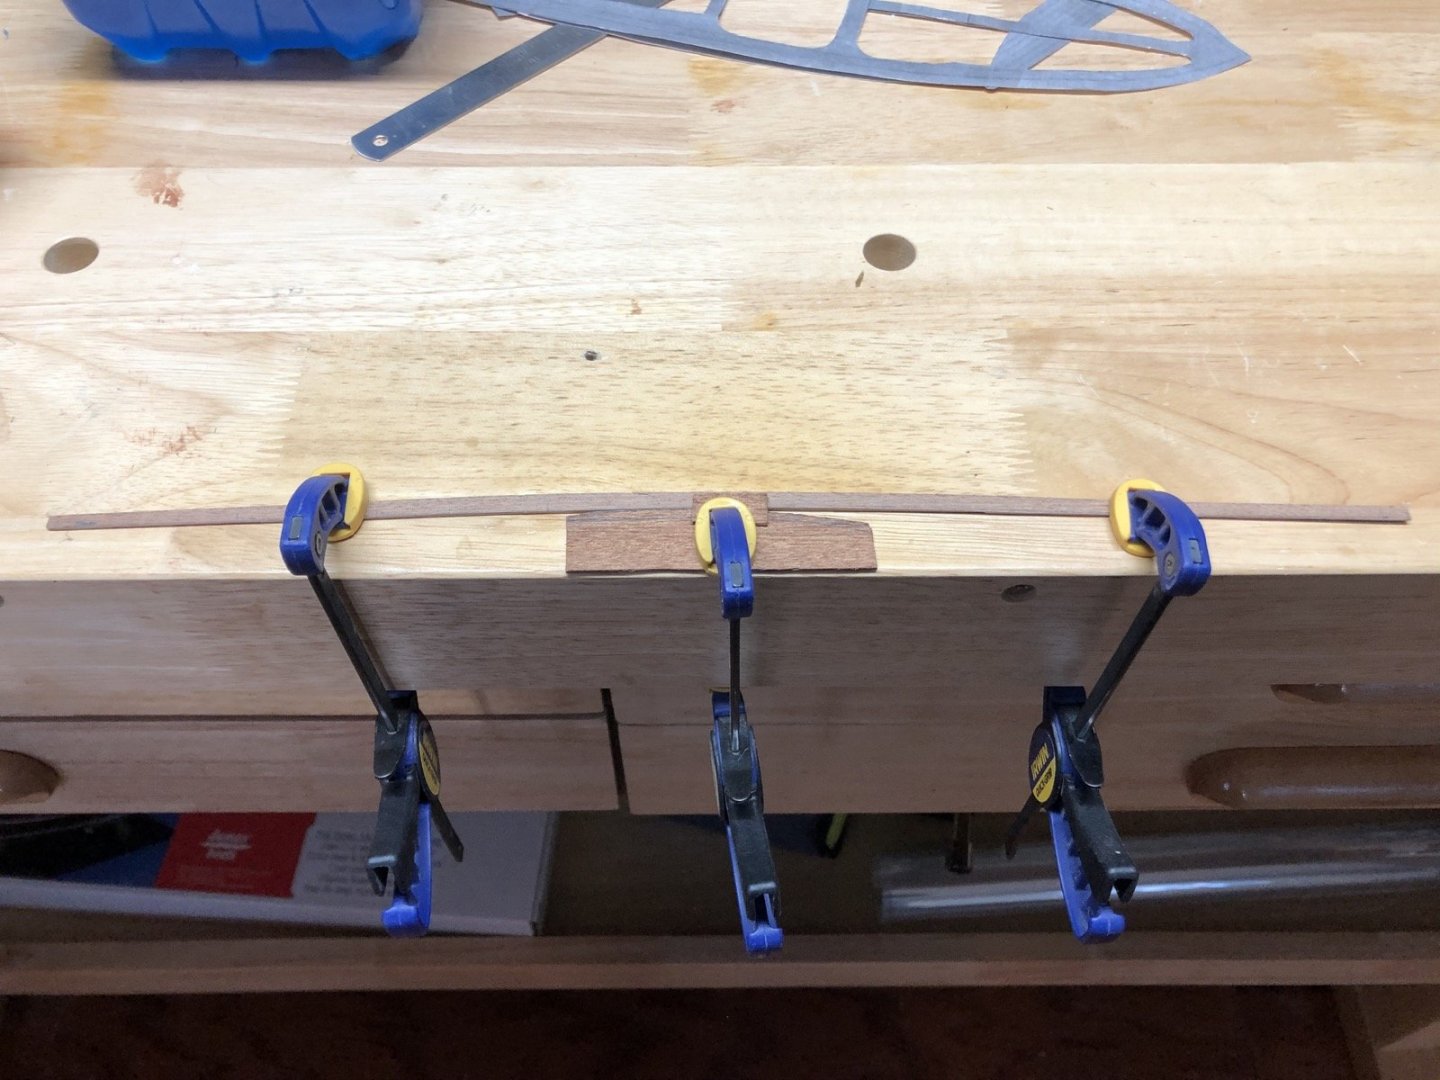
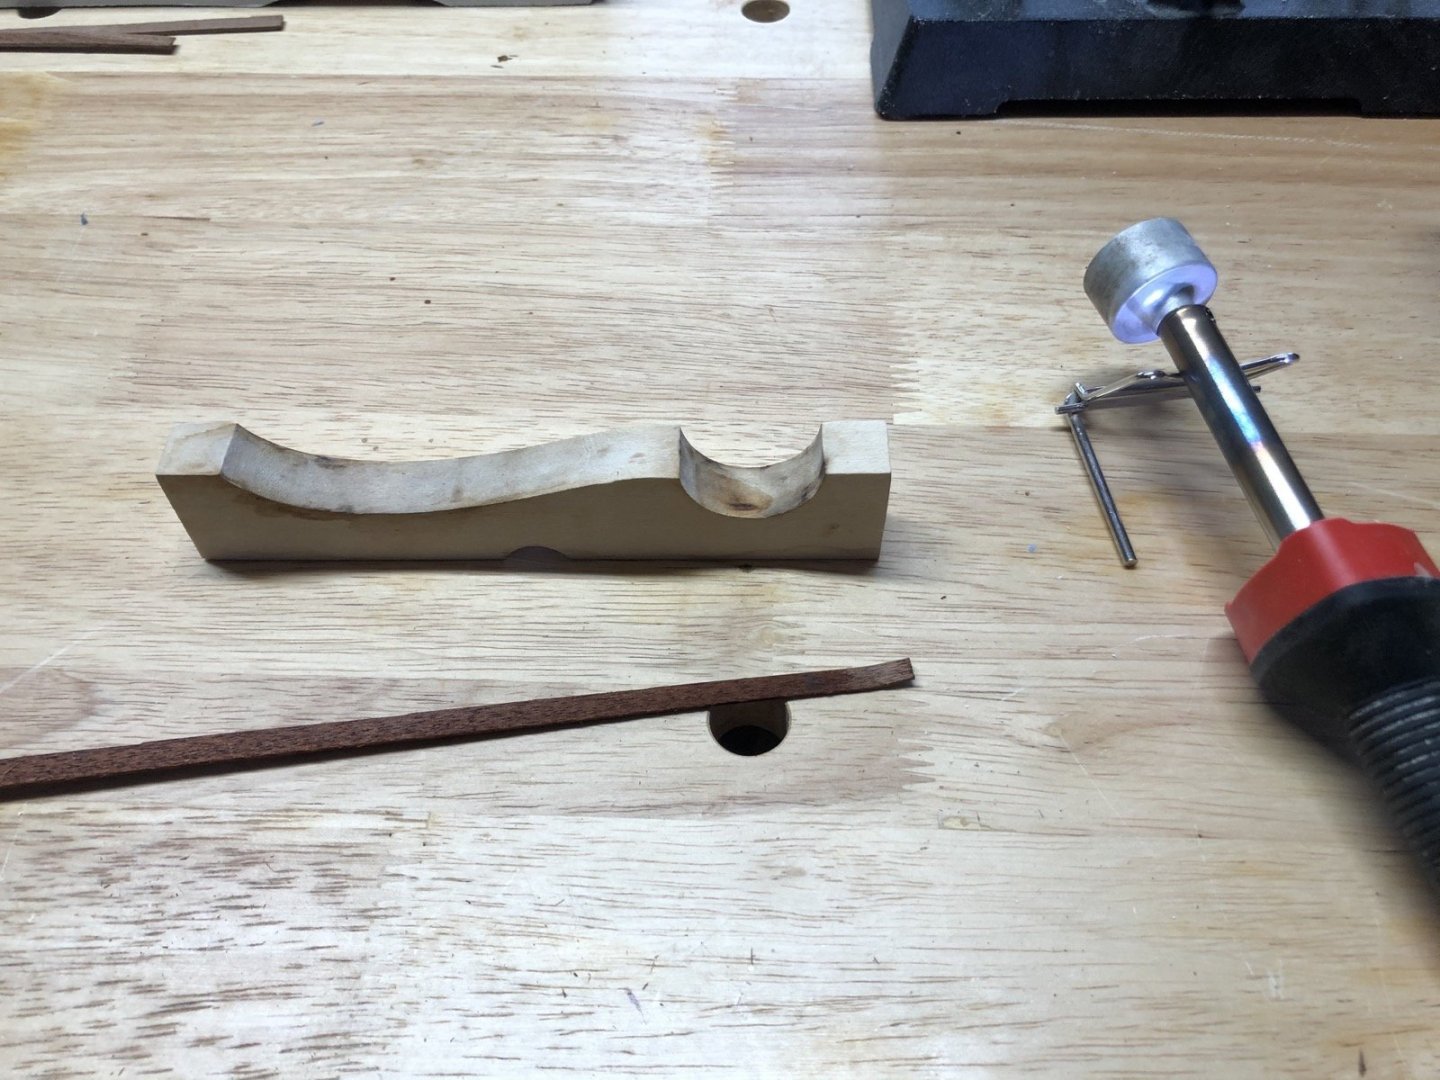
I have started the hull planking using the mahogany planks that came with the kit. The instructions say that there are plenty but by my calculation I have exactly enough if I don't screw any up, which I already have. Luckily I have mahogany sheets that I can use to cut more planks, which I will use on the bottom. I started my gluing a plank along each chine, leaving enough over the chine so that they will overlap the bottom planks. I am now planking up from those planks to the deck. After measuring off the hull I trim each plank to the width at the marked lines. I made a jig from two pieces of aluminum angle and some thumb screws for a previous build to hold the planks while I use a small plane to trim them. After the planks are trimmed I taper the cut side and curve the bow end with a plank bender to fit the curve at the bow. For the last few planks near the deck I also need to edge bend them slightly which I am using Chuck's method of clamping around a form and heating with a heat gun. So far so good but there are a few minor gaps that I will need to fill with wood glue and saw dust, mostly on the port side.


-
Can you sand off the laser char without affecting the other etched lines on the pre made deck? I am going through a similar dilemma on my Chris Craft build.
-
Looks good Jeff. Those are not easy parts to make.
-
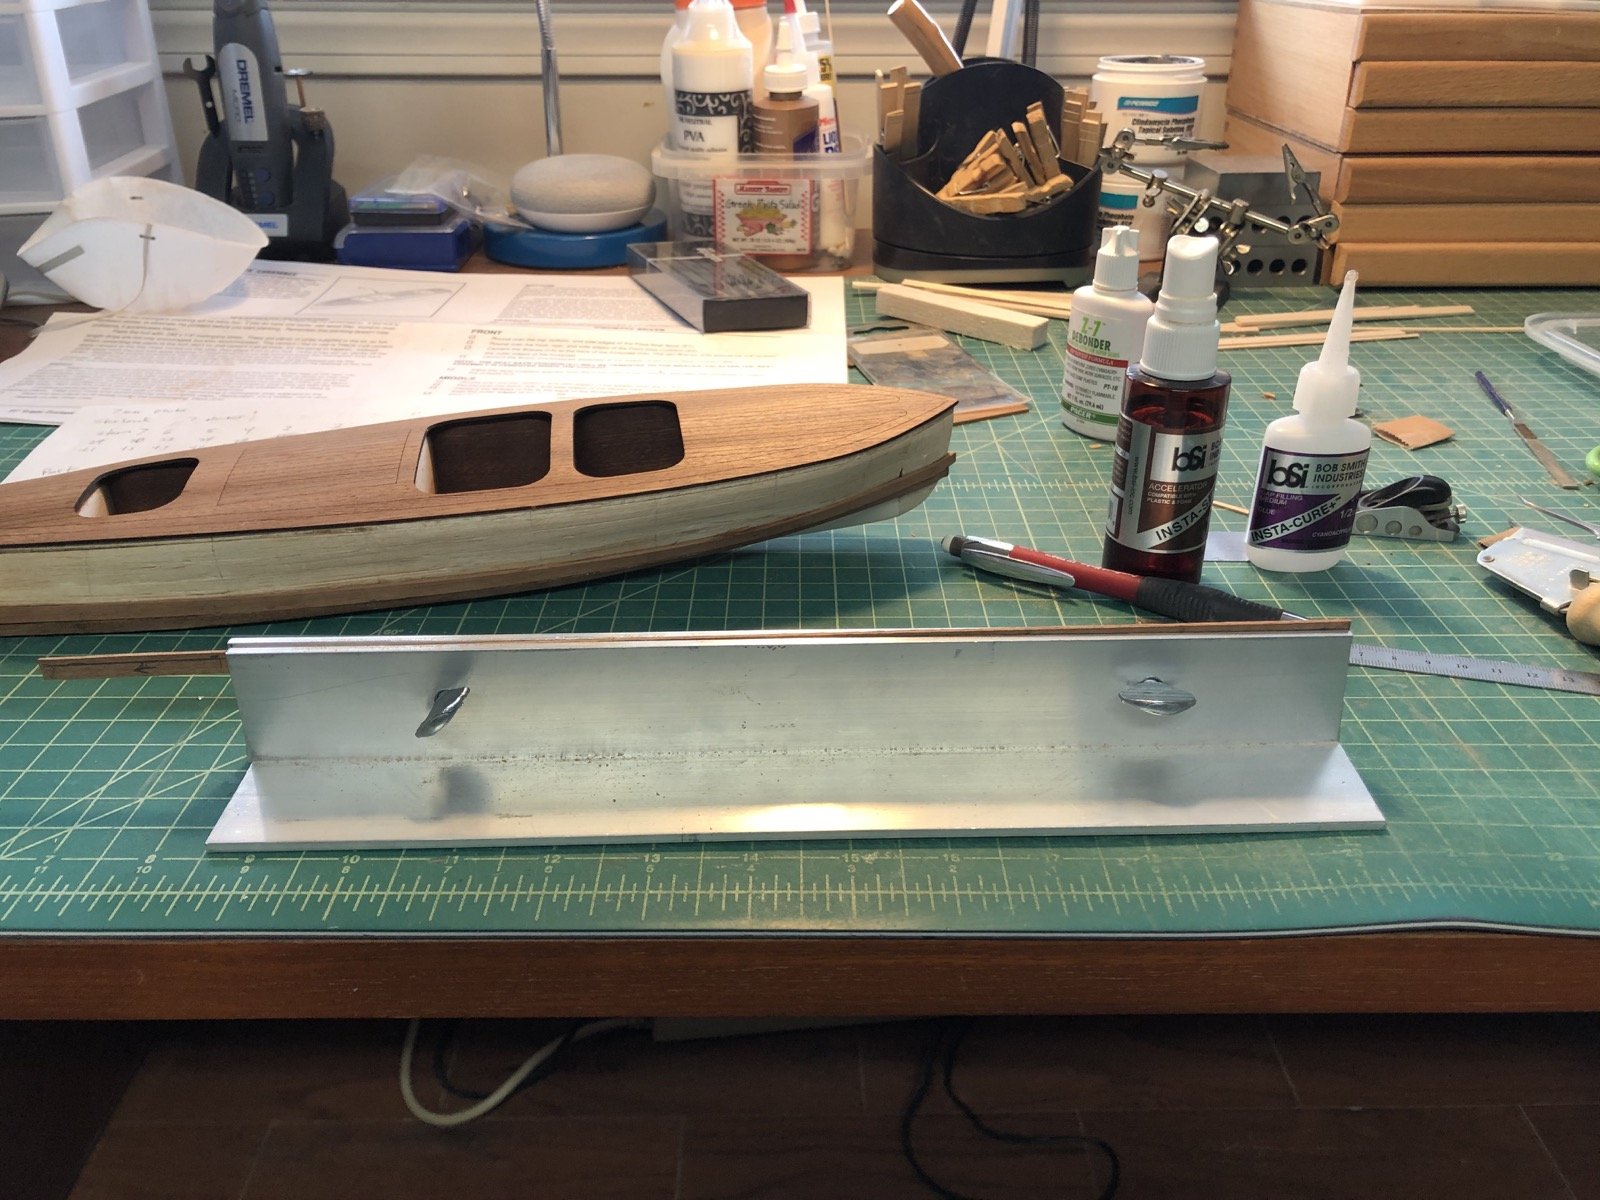
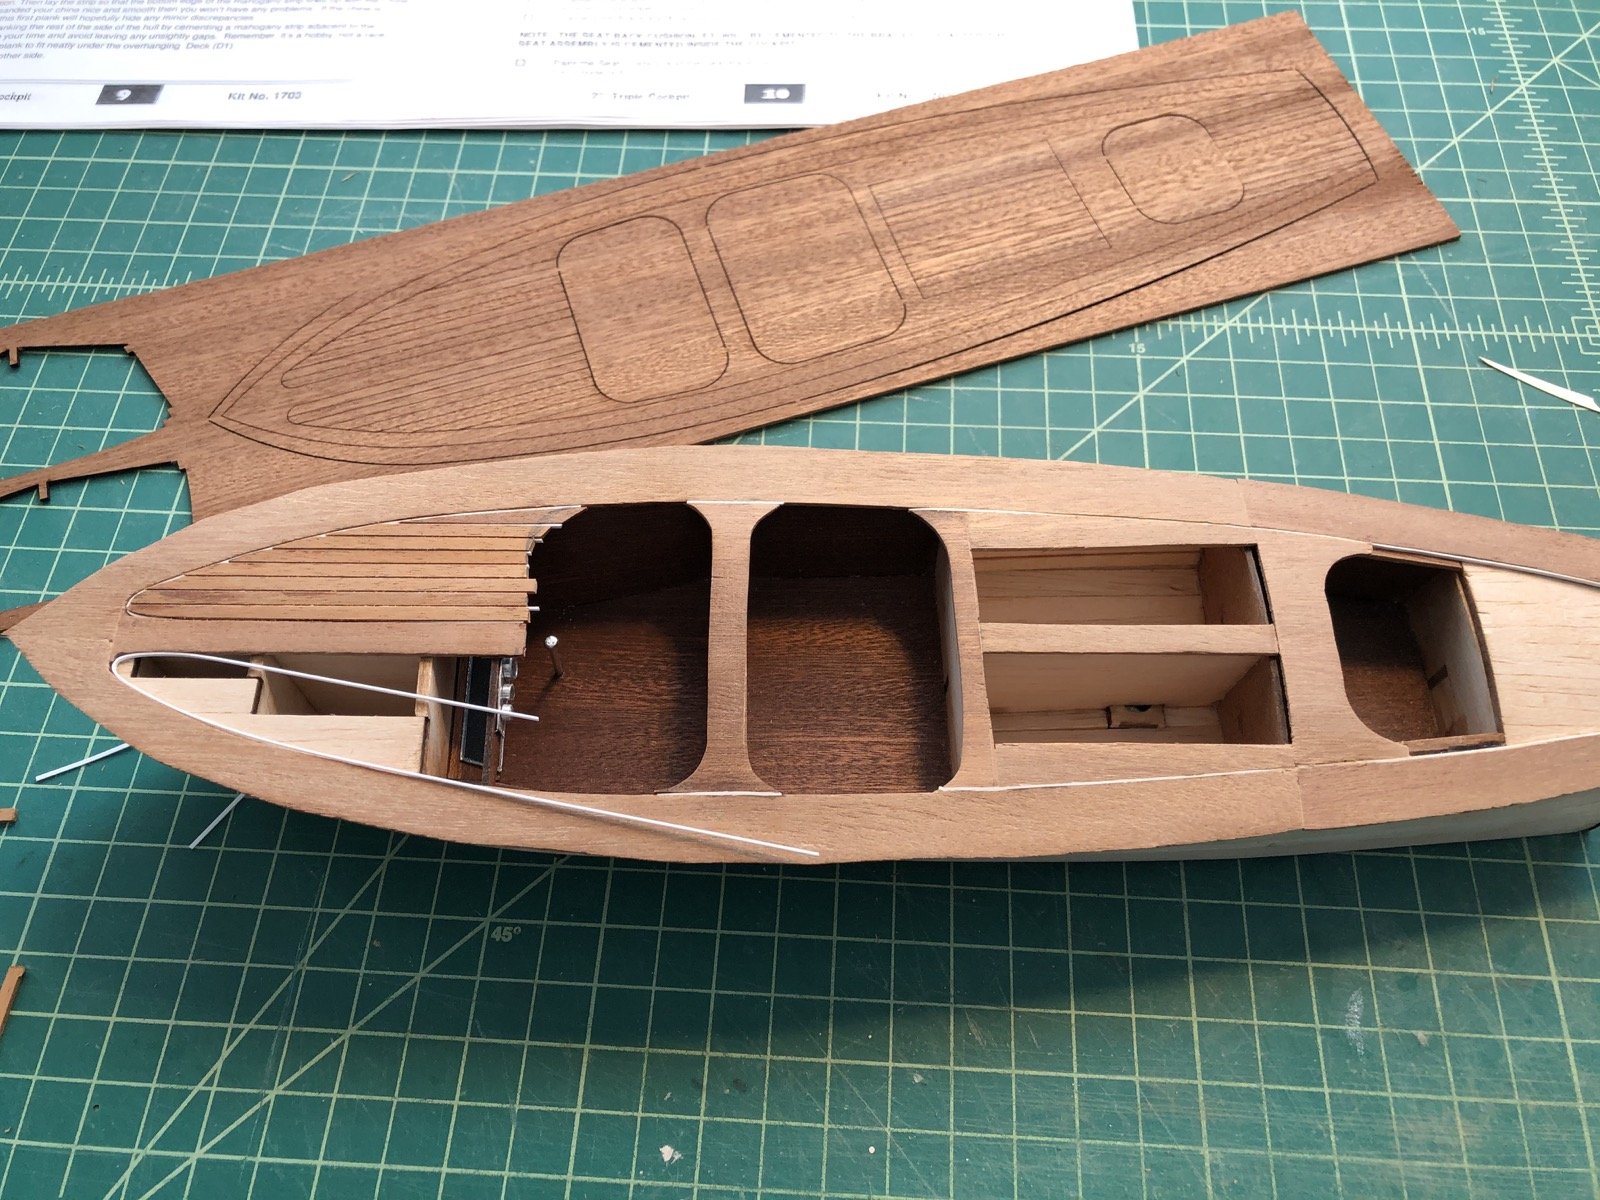
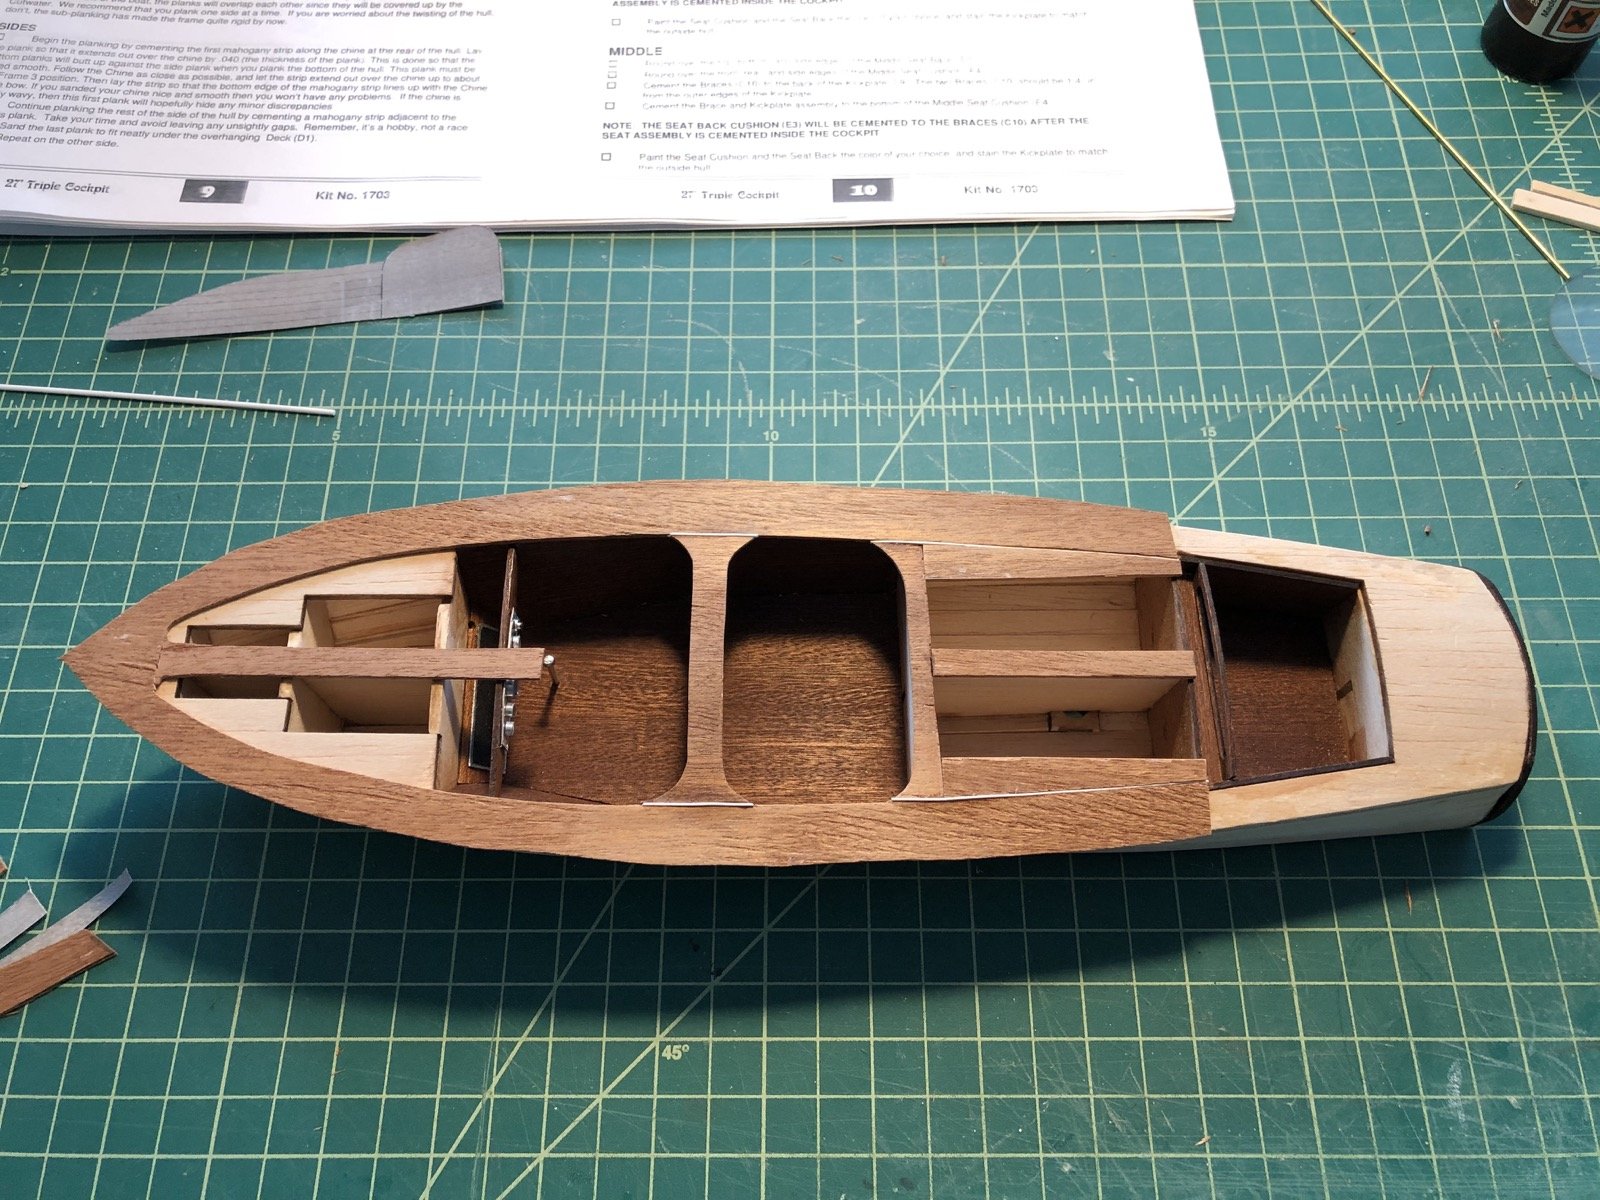
So I had a major set back today. After more sanding of the deck I was noticing that in some areas the sanding was introducing gaps and splinters in the joints. Also, there were some areas where there were deep gouges in the mahogany that when sanded out made the deck much too thin. So I made the decision to remove the planked decking and replace it with the kit supplied deck, which, except for the absence of the white caulking, looks pretty good. I am not happy that I had to remove the planked deck, but I am not unhappy with the kit suppled deck either. I used medium CA and rubber bands to hold the deck to the hull while the glue dried. The cockpit openings fit perfectly over the cockpits and the rest of the deck fit really well too. I had to trim some of the balsa under the deck so that the side planking fits underneath it, but only in a few areas. I used an X-Acto knife and flat scraper to trim the balsa. You can see in the above picture that even the supplied deck has some gouges along the port side. I do not want to try to sand these out because that will sand through the deck lines, so I am only going to give this a sanding with medium and fine sandpaper. I am coming to hate mahogany for modeling. The supplied mahogany planks for the hull were also pretty rough, so I ran all of them through the thickness sander to clean up one side. I only took off about .004" but they look much better on that side. The edges are also pretty bad so I need to clean those up as I fit the planks. I now need to measure off the sides and bottom so I know how the plank widths need to be tapered to fit.

-
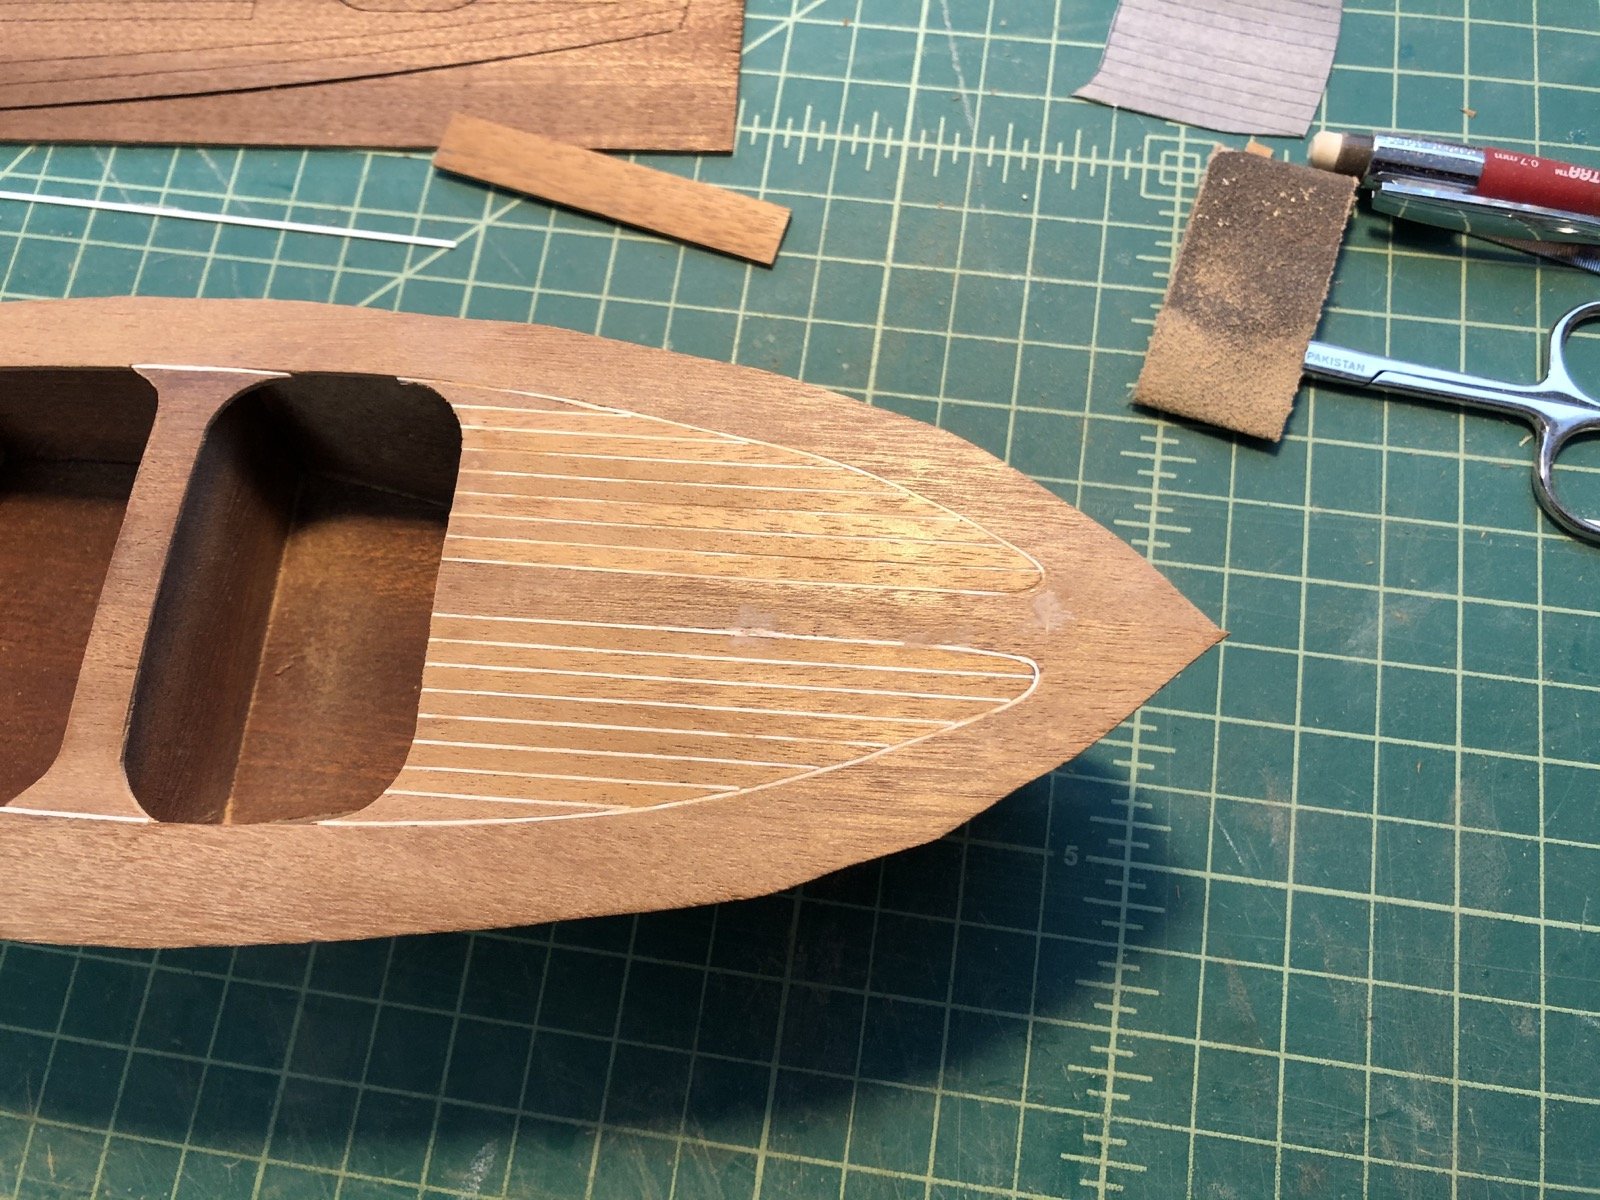
So here are some pictures of the sanding of the front deck. Here the starboard side is sanded down. And here is the deck with both sides sanded. This is still rough and needs to be leveled out but the caulking is now showing the way I want. This was done with a sanding disk in a Dremel tool but now I will finish it with a sanding block. Still a lot more to go but I know I can get there eventually. Remember the outside edges will get sanded to shape when I plank the sides of the hull.

-
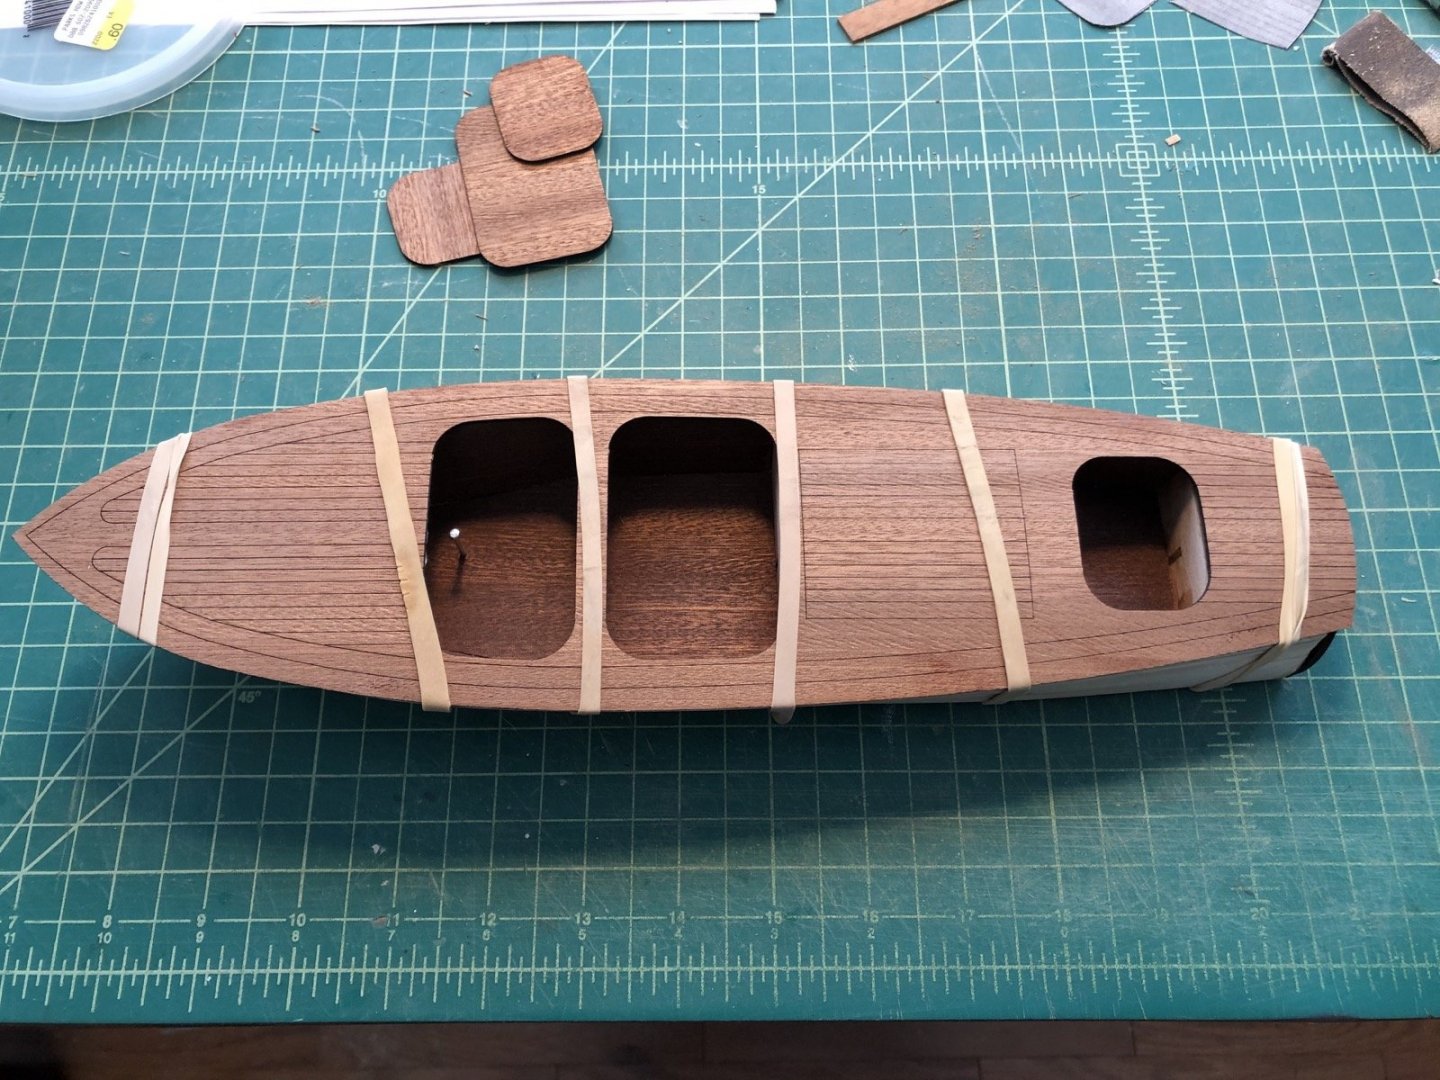
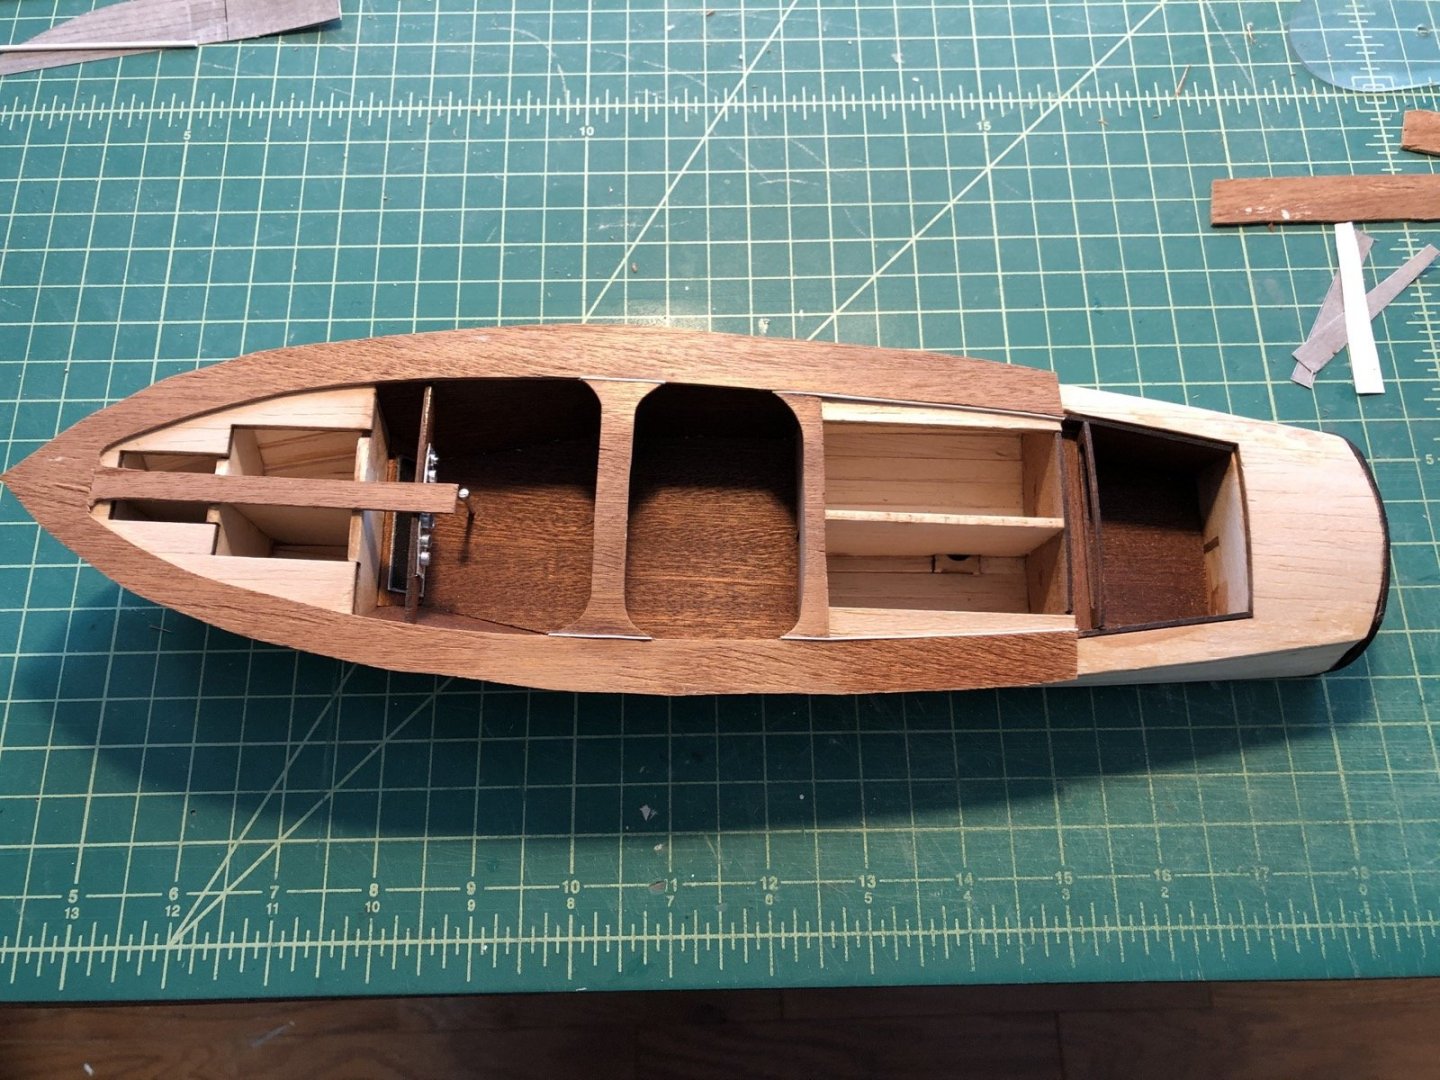
Yves, funny you should mention those round shapes. I was unsure how to trim those planks to make them, but I knew if I tried cutting or sawing them it would be a disaster. So i tried a sanding drum in a Dremel that was just about the right diameter. Also, because the planks protrude into the cockpit area, the ends are exposed so the bottoms of the planks must look good too. Well I tried it on the front cockpit and was really happy with the result. I still need to trim the planks at the aft cockpit but will use the same method. A lot more sanding is needed but it is nice to have all the planks in place. One thing I learned from this exercise is that I could have run the mahogany sheets through the thickness sander before I cut the pieces to get them thinner and with a better finish. They are very rough and need a lot of sanding now. On well, live and learn. I have half the front deck sanded and the caulking really stands out there now. I'll have pictures after I get more sanding done.
-
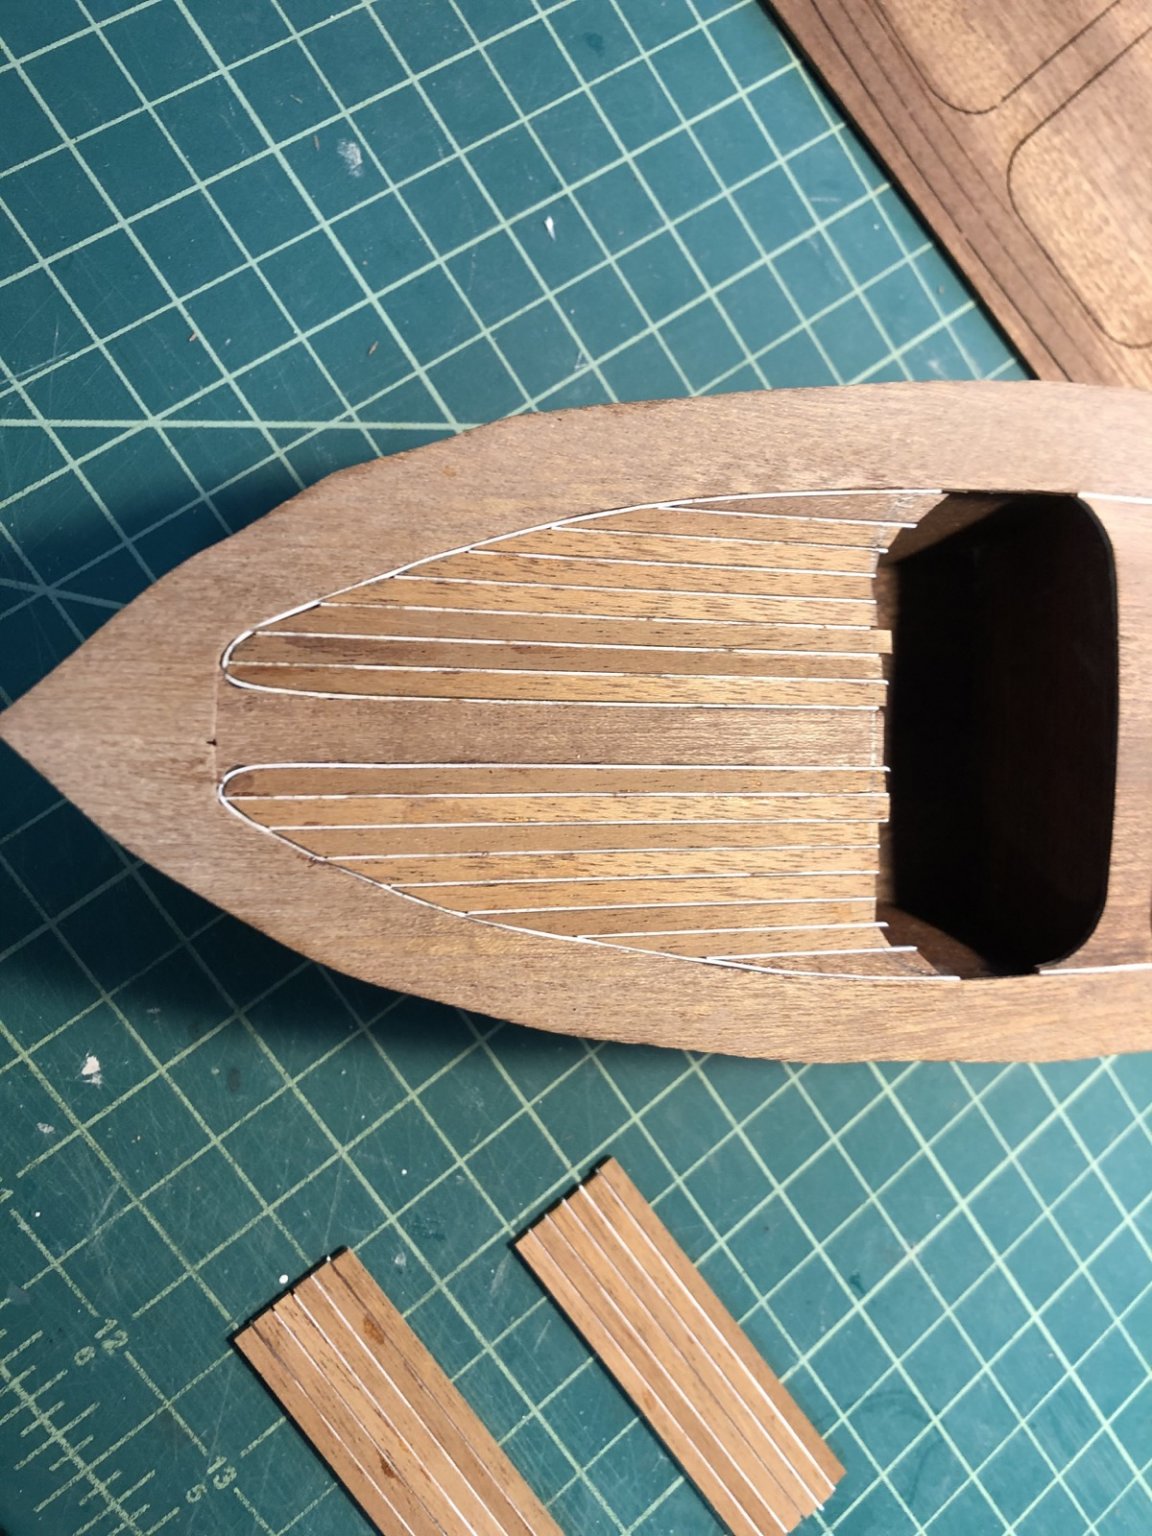
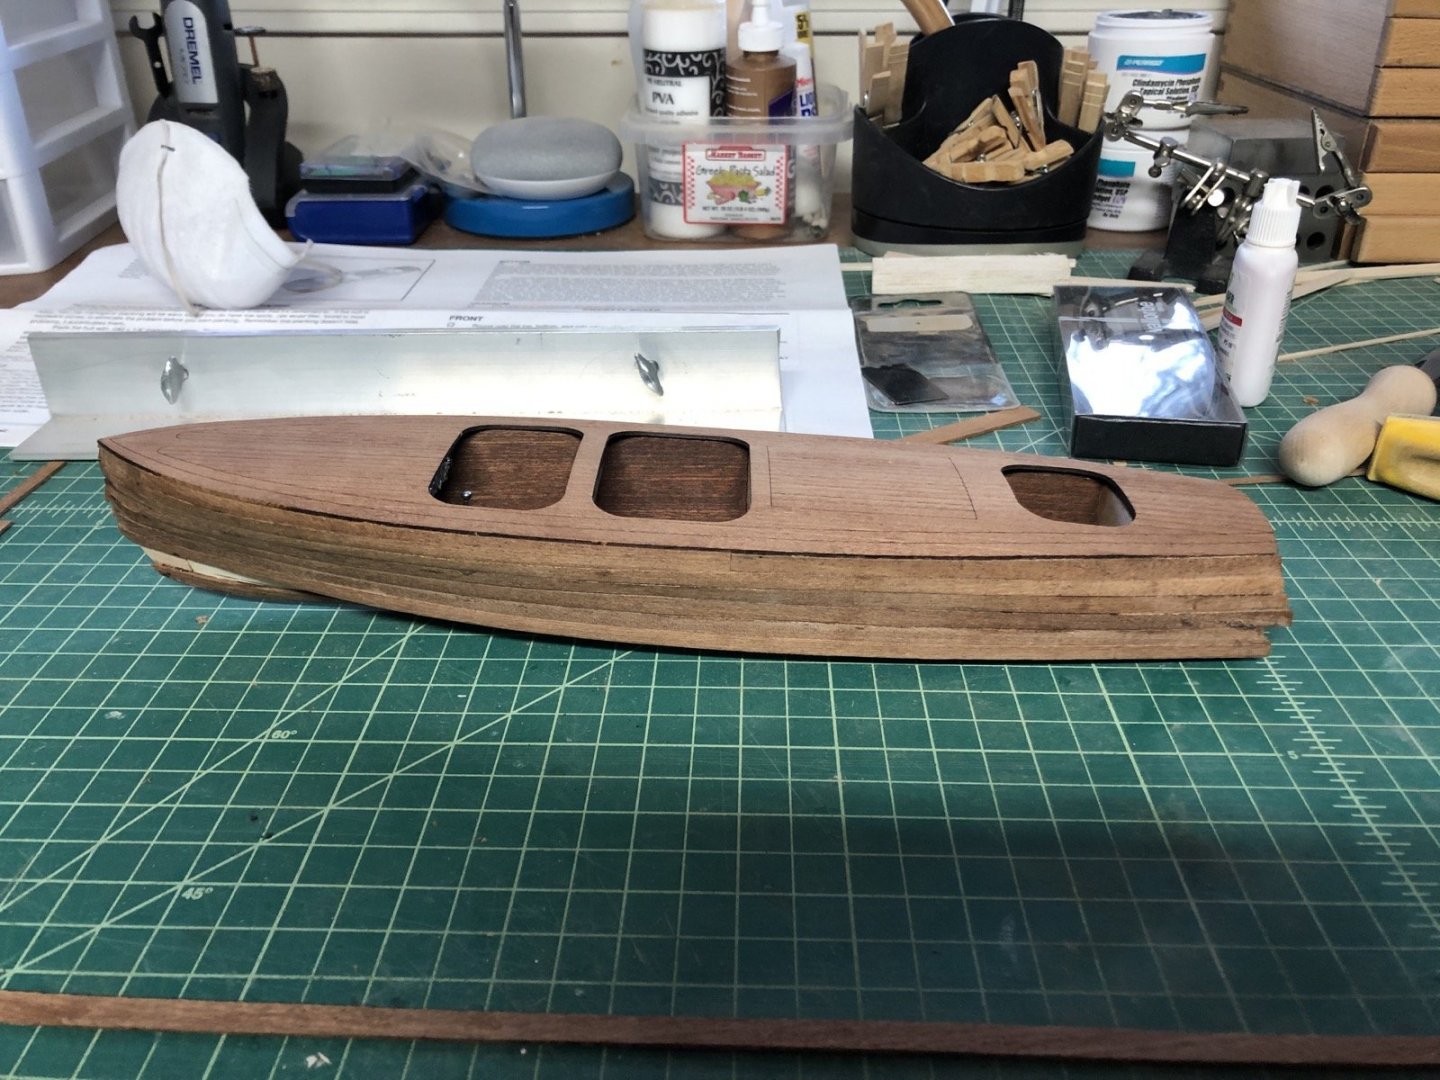
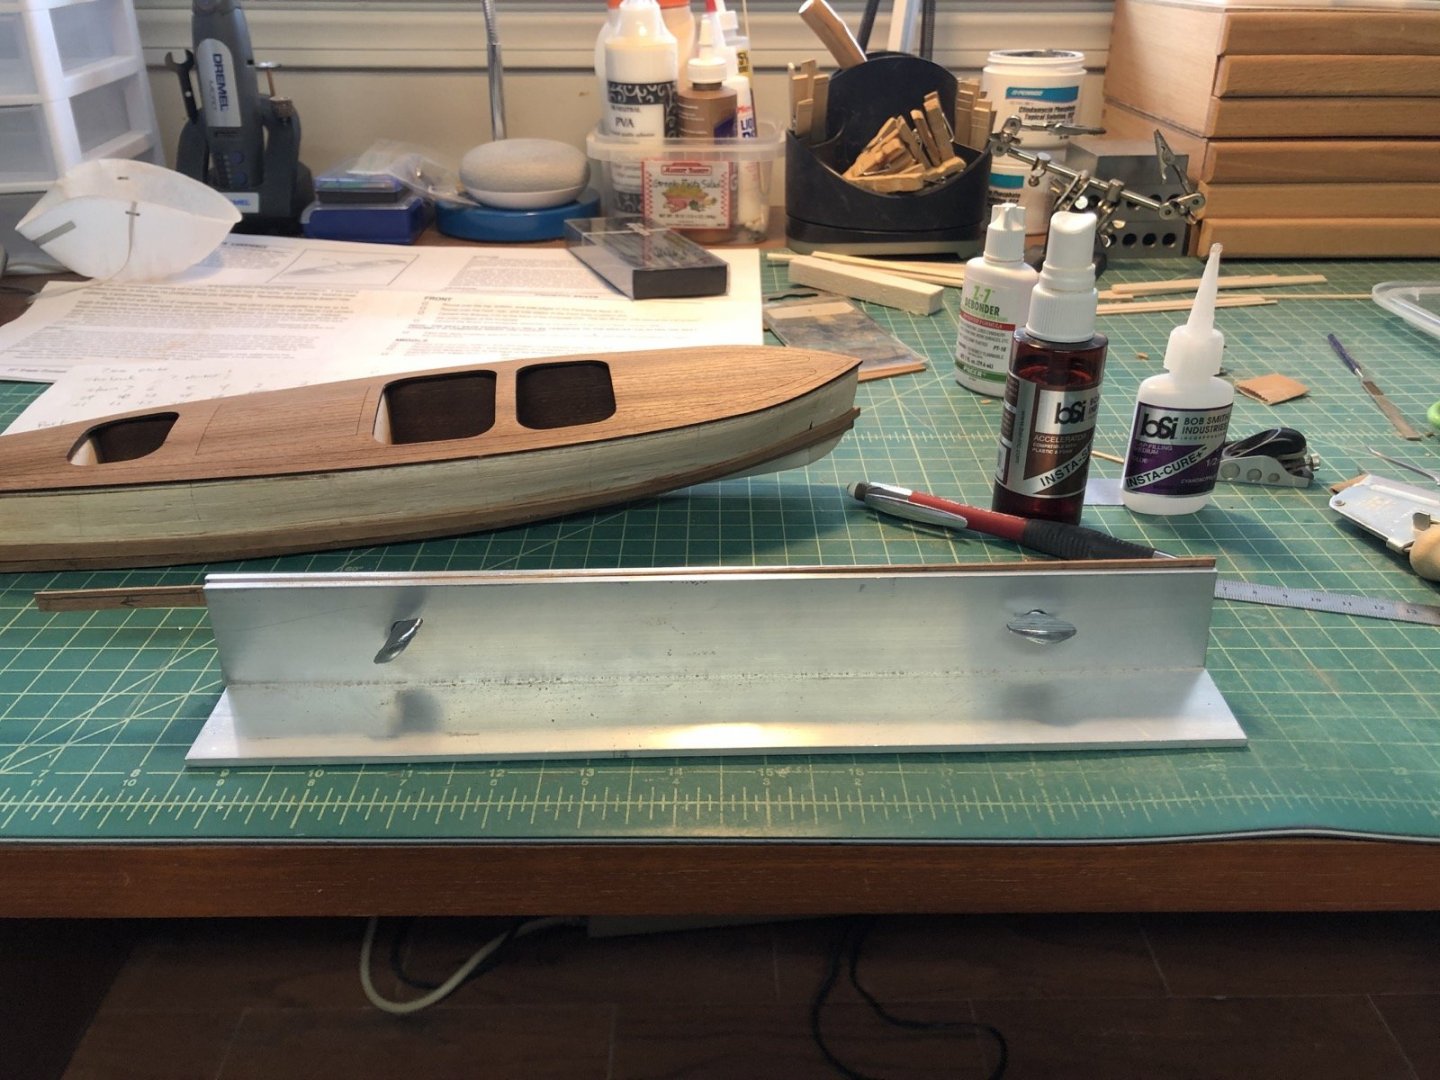
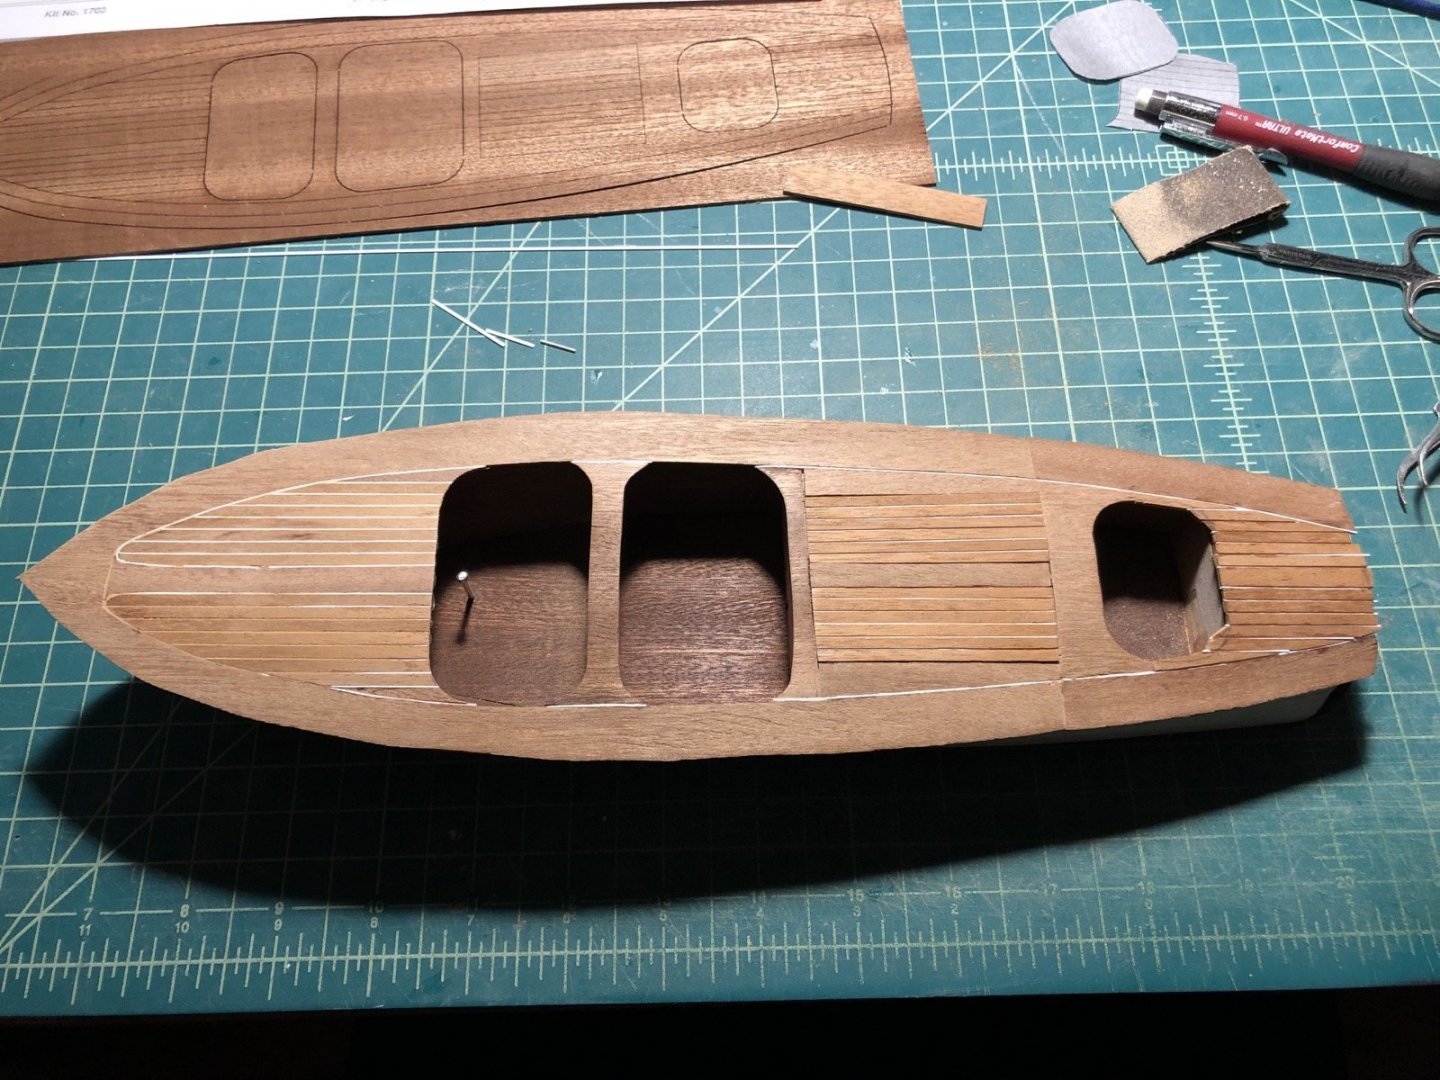
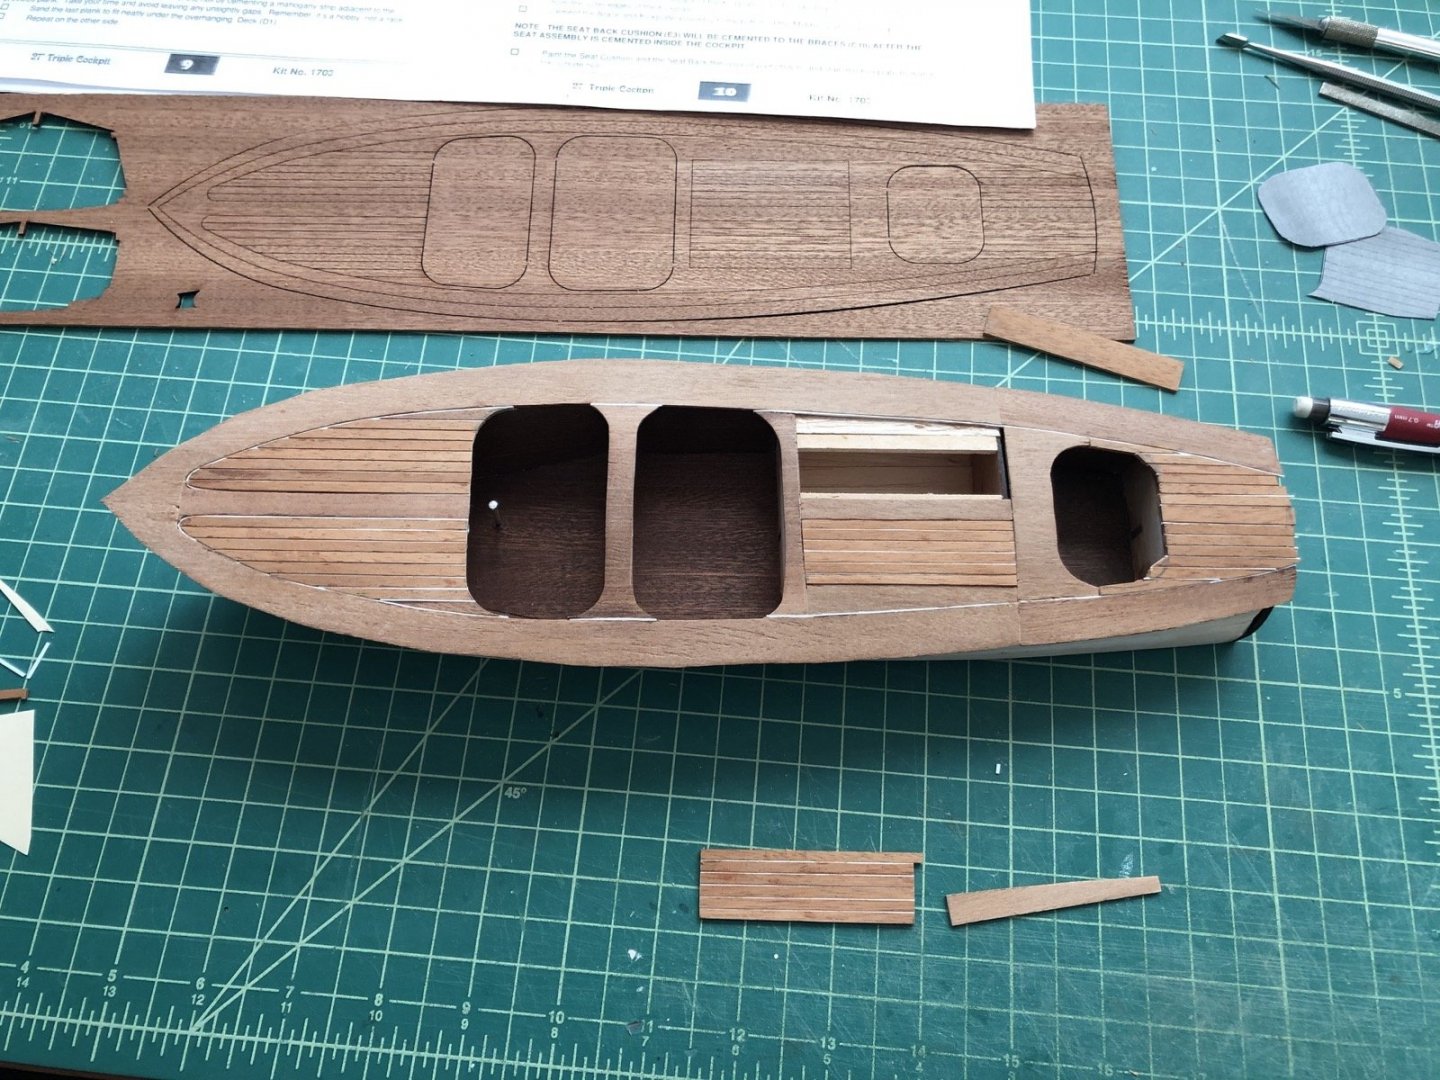
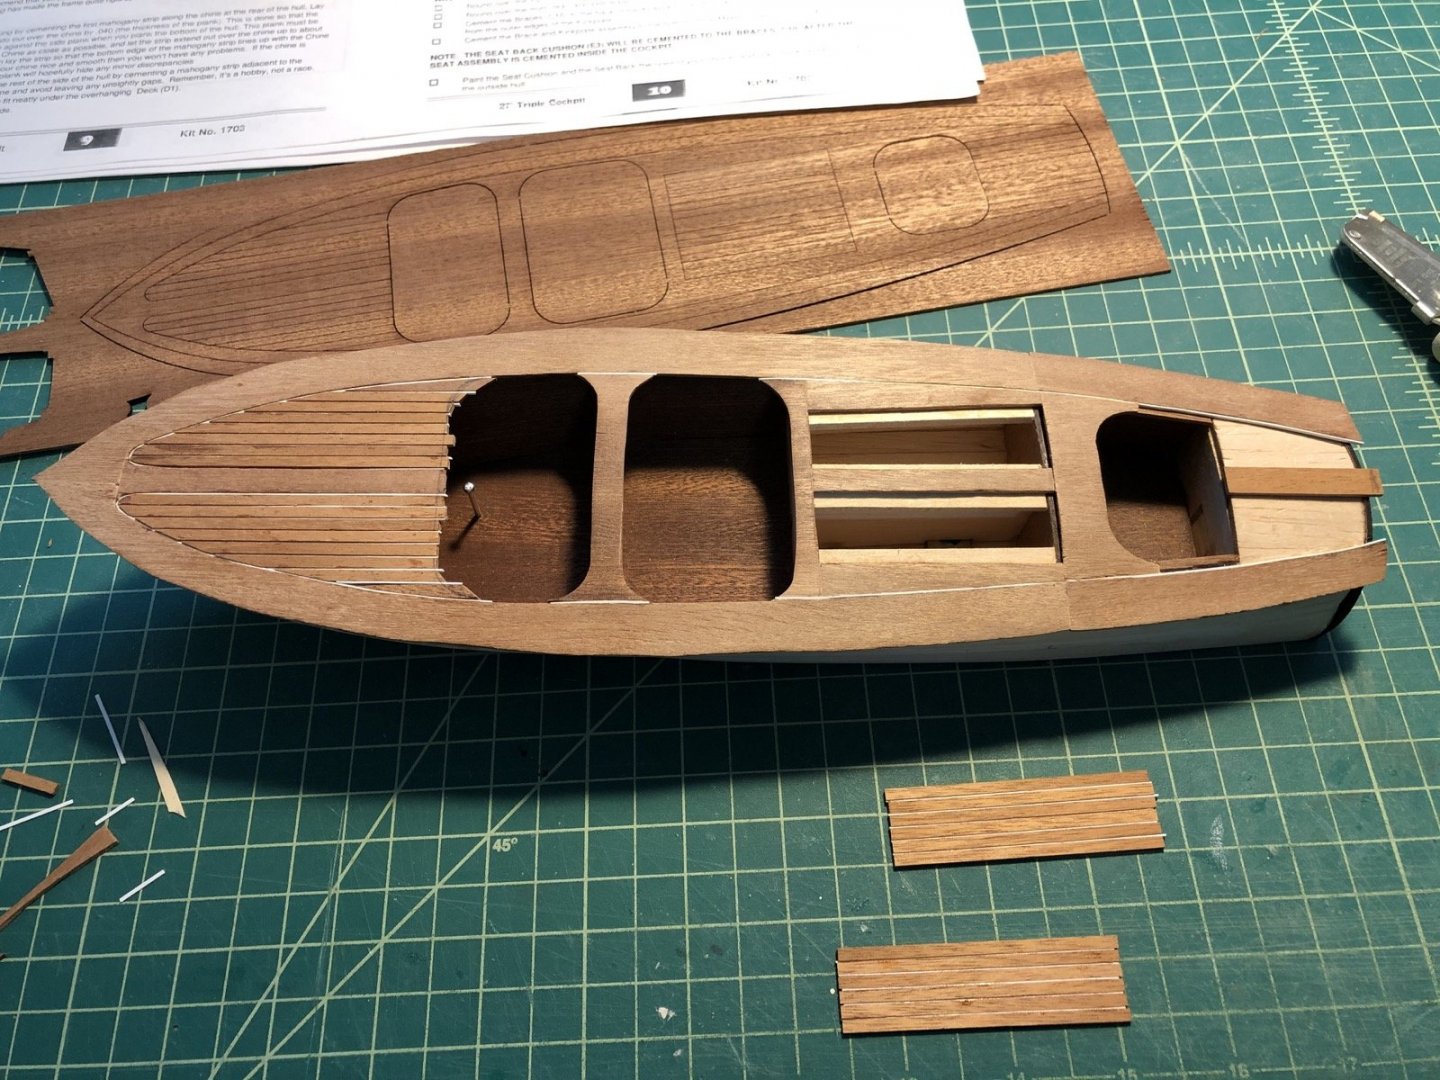
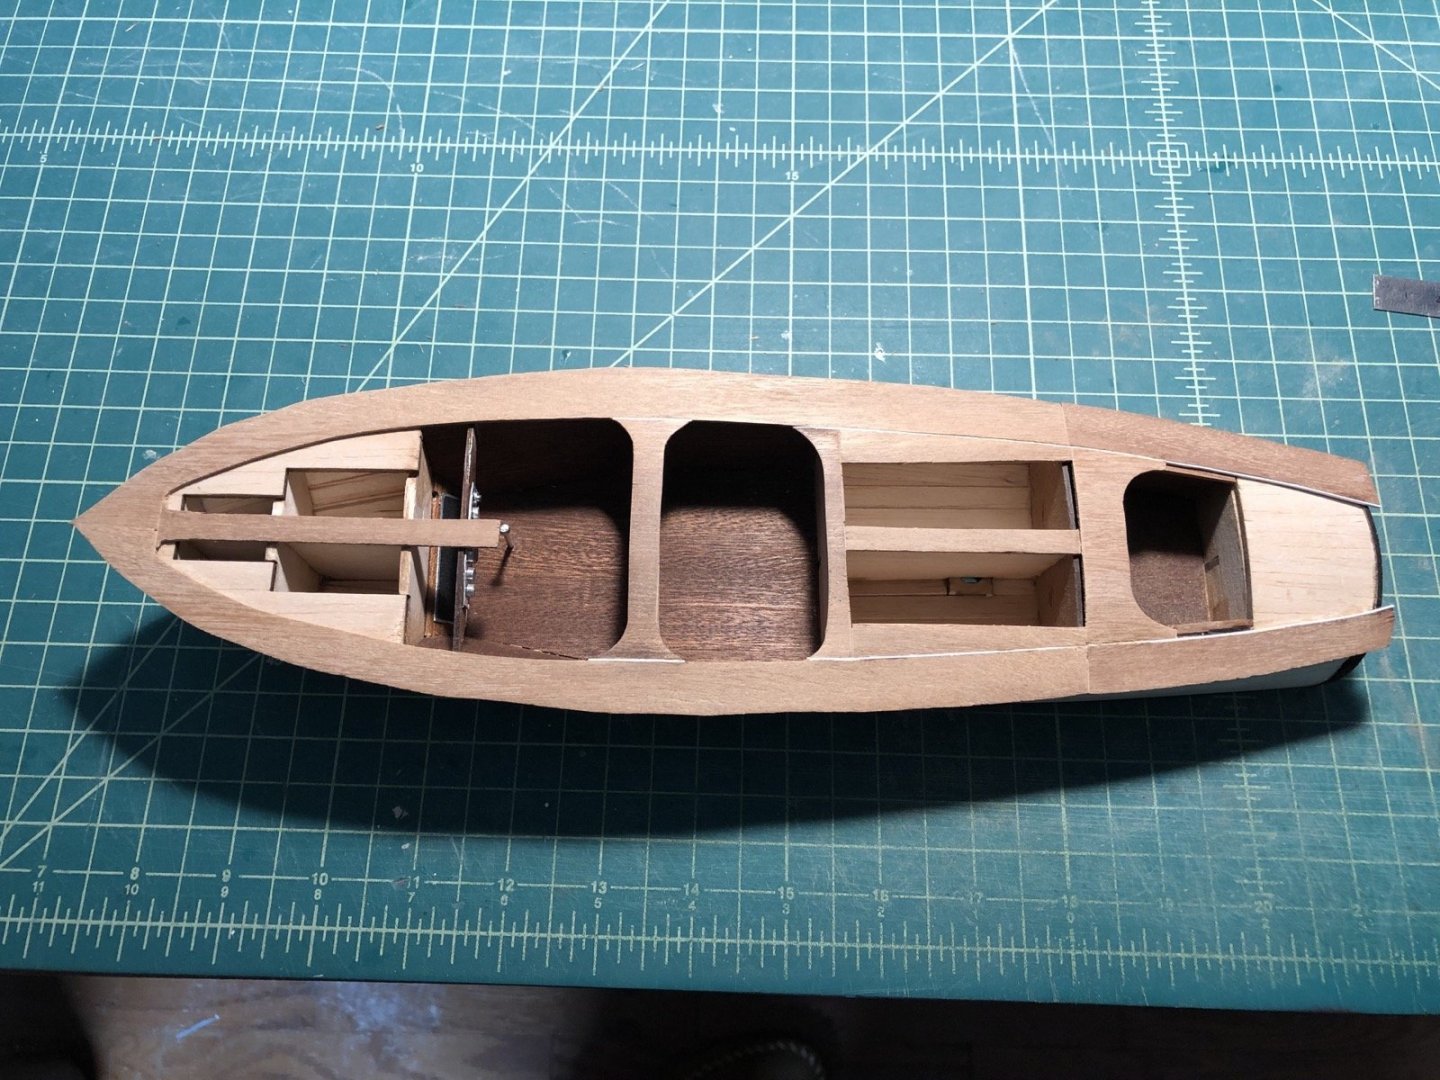
I planked the front deck with the 3mm mahogany planks I made and .015" wide styrene strips. I used medium CA to glue the styrene and mahogany together. I am going to use a sanding drum in the Dremel to shape the ends of the planks to the cockpit profile. I made the engine covers by gluing up the planks and styrene. I added supports in the openings to hold them up. I need to sand the covers to fit into the openings, then add the rest of the planks on the transom deck.


- 77 replies
-
- 10
-

-
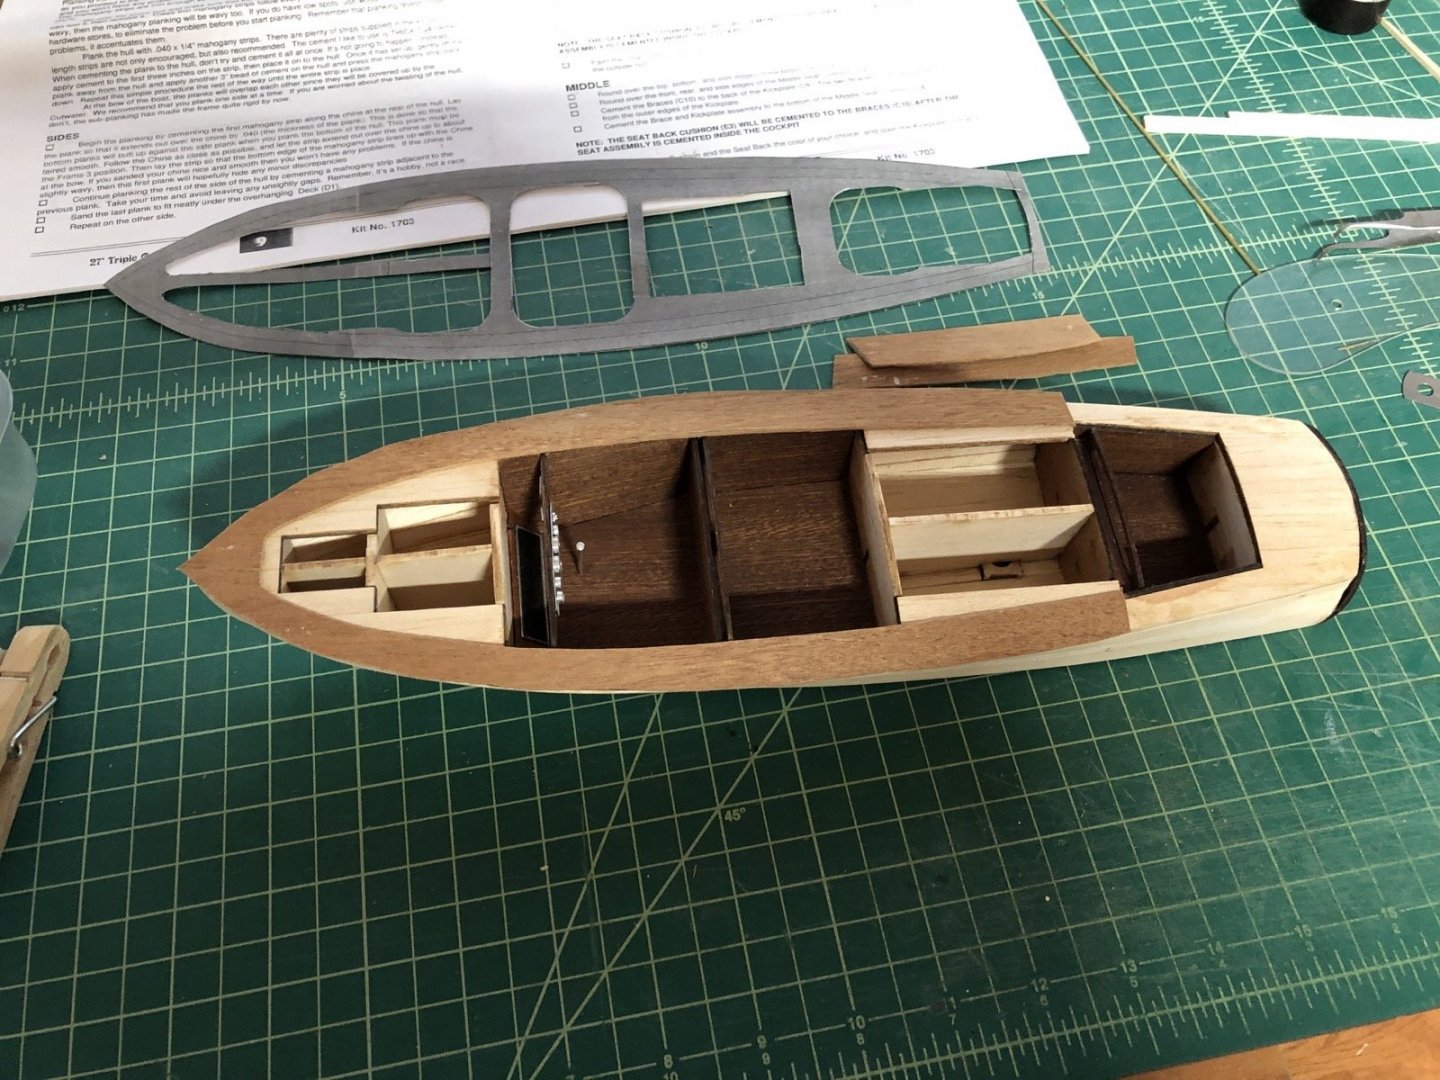
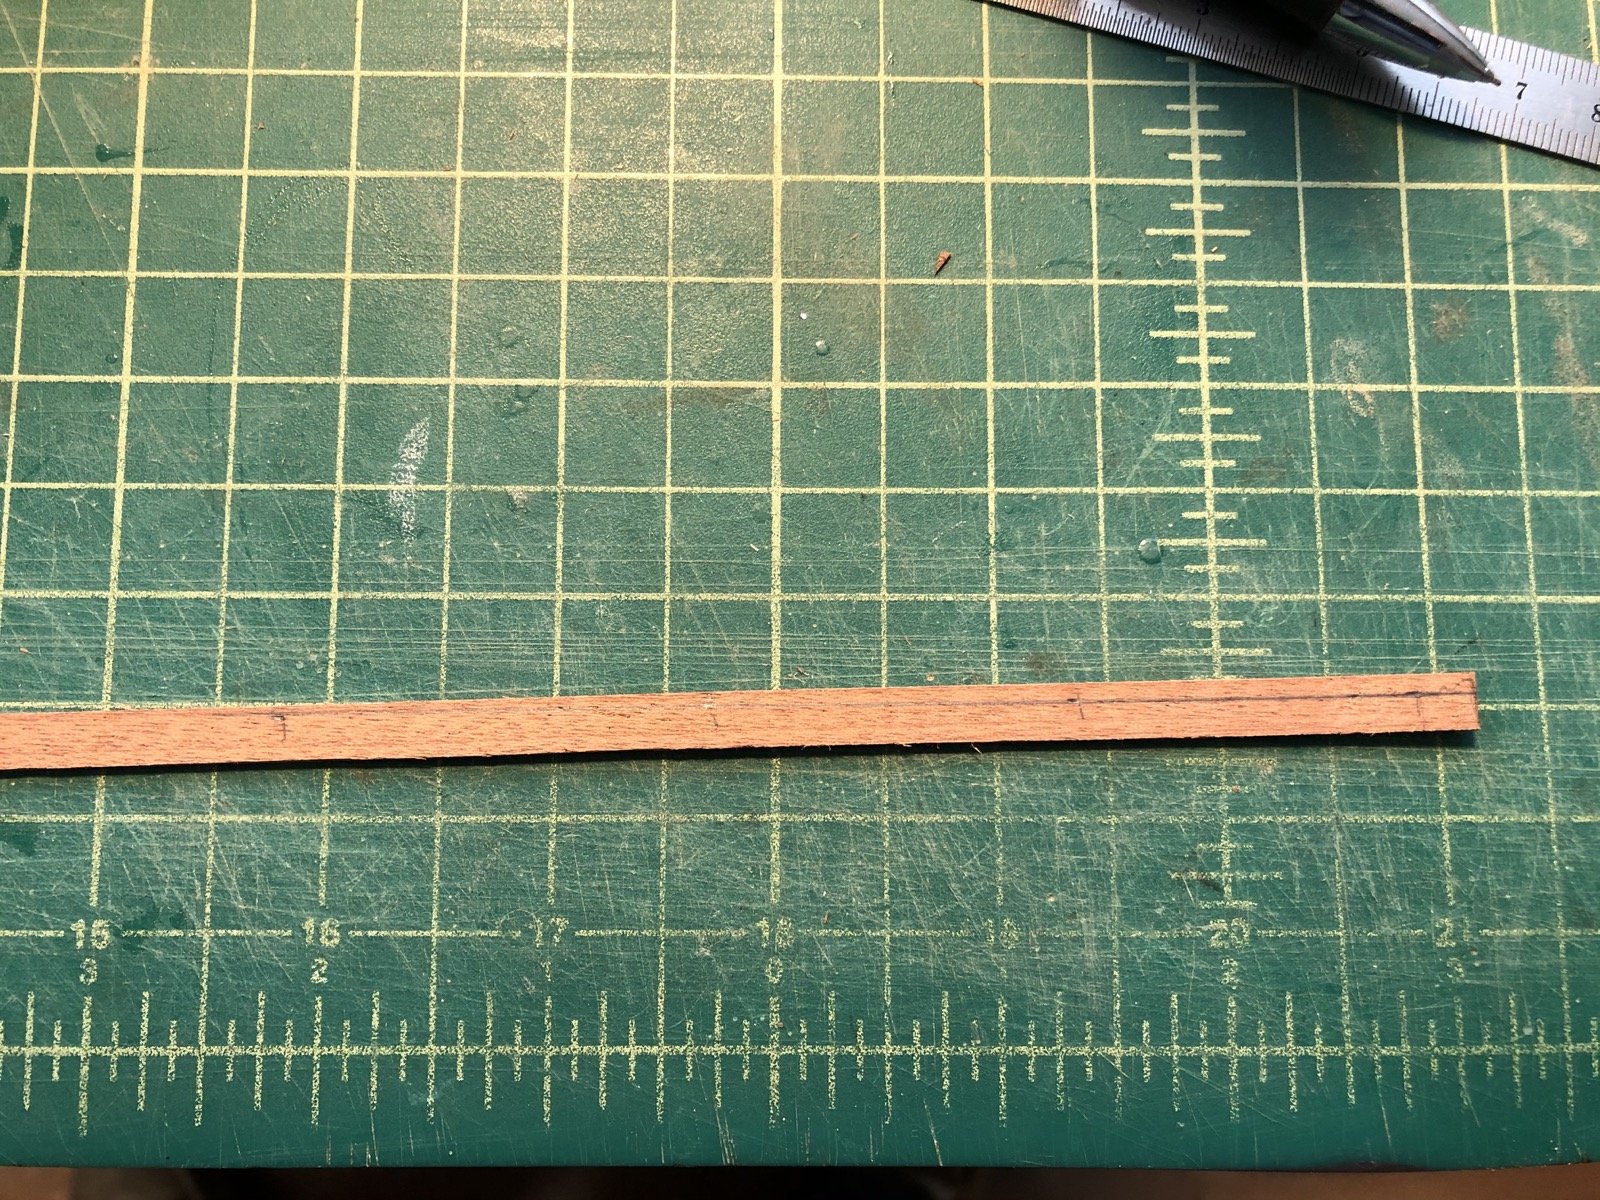
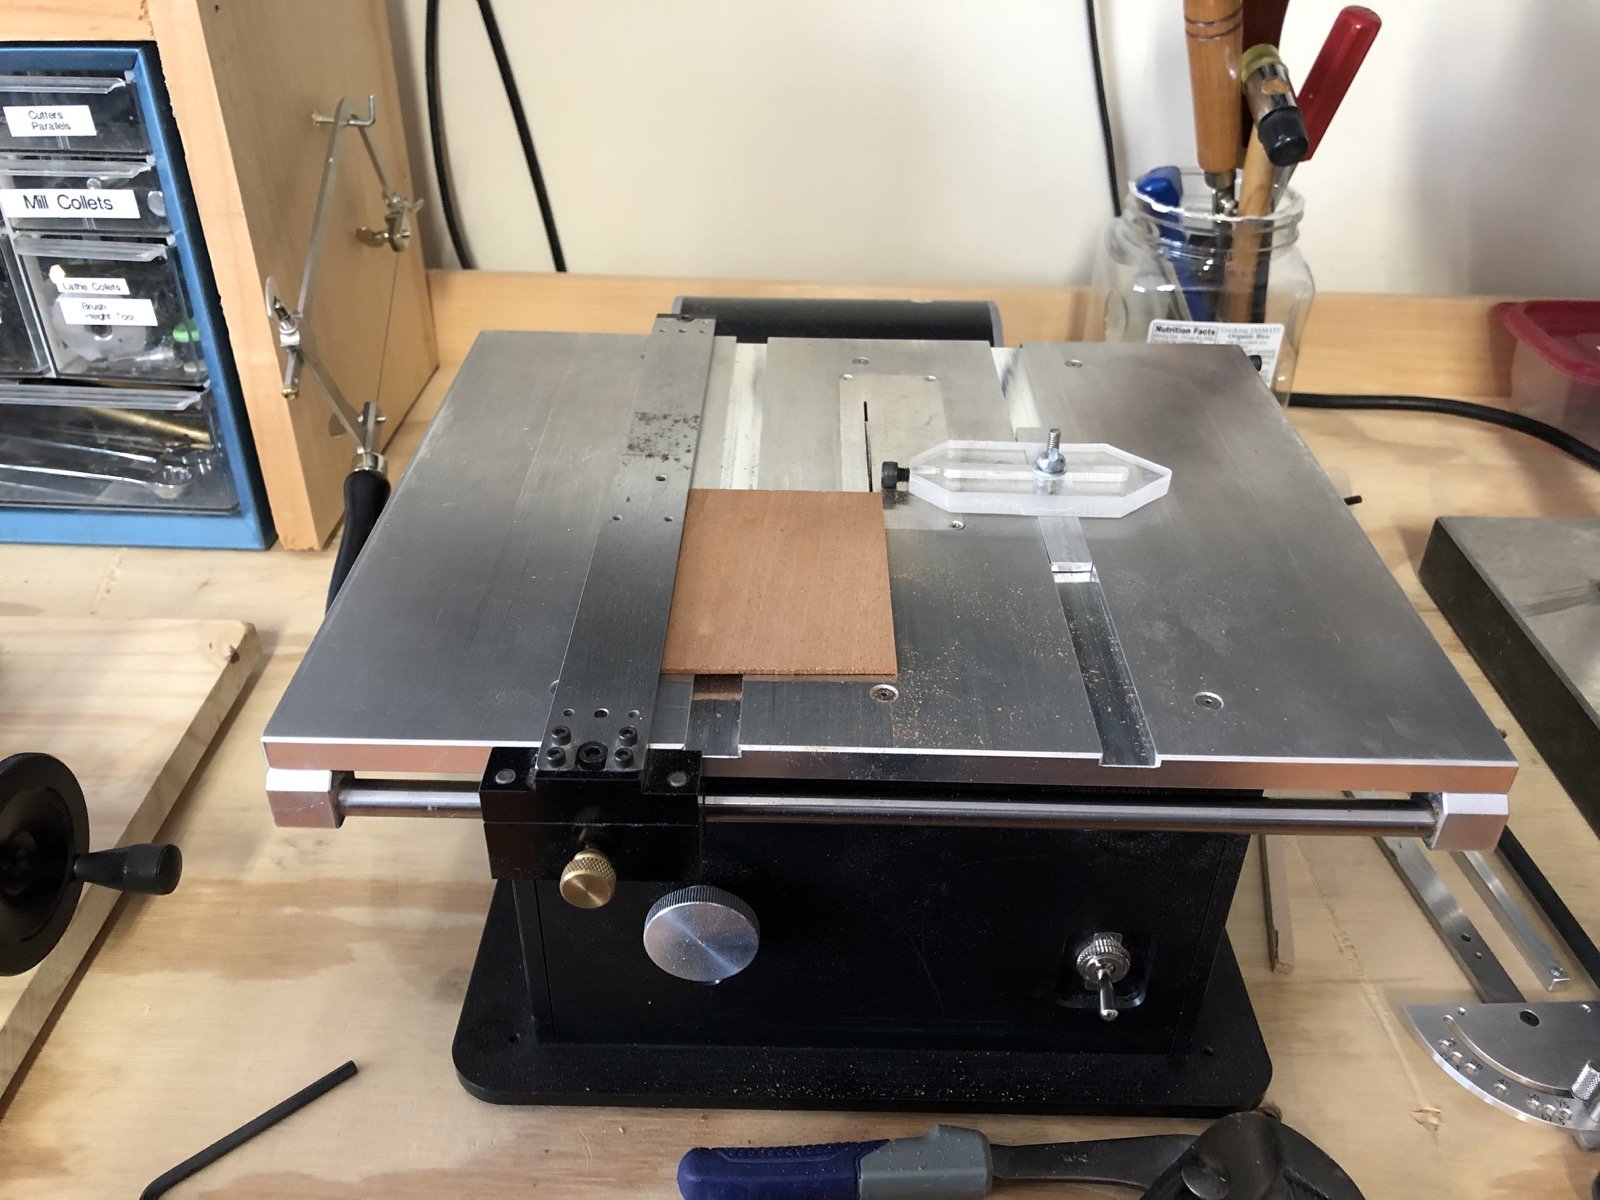
I finished adding the deck pieces that are not planks. I gave them a rough sanding to even them out and thin them down a bit, since I will be using thinner mahogany for the planks. I set up the Byrnes saw with a planking jig I made from plans that were in the NRJ a few issues back. I did add the cap screw so that I could make micro adjustments to the width once the jig is screwed down. I saw this on a jig Michael Mott made for the same purpose. It works really well to get the width just right. And here is the first batch of planks, all from that blank in the picture above. Planking can now begin.


-
I just found this log and want to say you are doing a great job. I have this model marked as a potential future build and after watching your work here I am more inclined to build it now.
-
I spent today making the various cockpit opening and engine cover pieces. I started at the bow and worked my way back. I still have to finish the piece that goes behind the aft cockpit. I was able to get better cuts on the jig saw without tearing out the undersides too much by placing the mahogany on some basswood sheet while cutting it. I also used some excess mahogany from the laser cut sheets for the cross pieces, which is better wood that what I had bought and cuts better. I also started adding the styrene strips between the side pieces I glued down yesterday and the pieces I cut today. I again left a lot of overlap on the outside edges which will be sanded down after the hull planking. I am hoping I can make that last piece in one piece but the aft parts of it are very thin so we shall see.


-
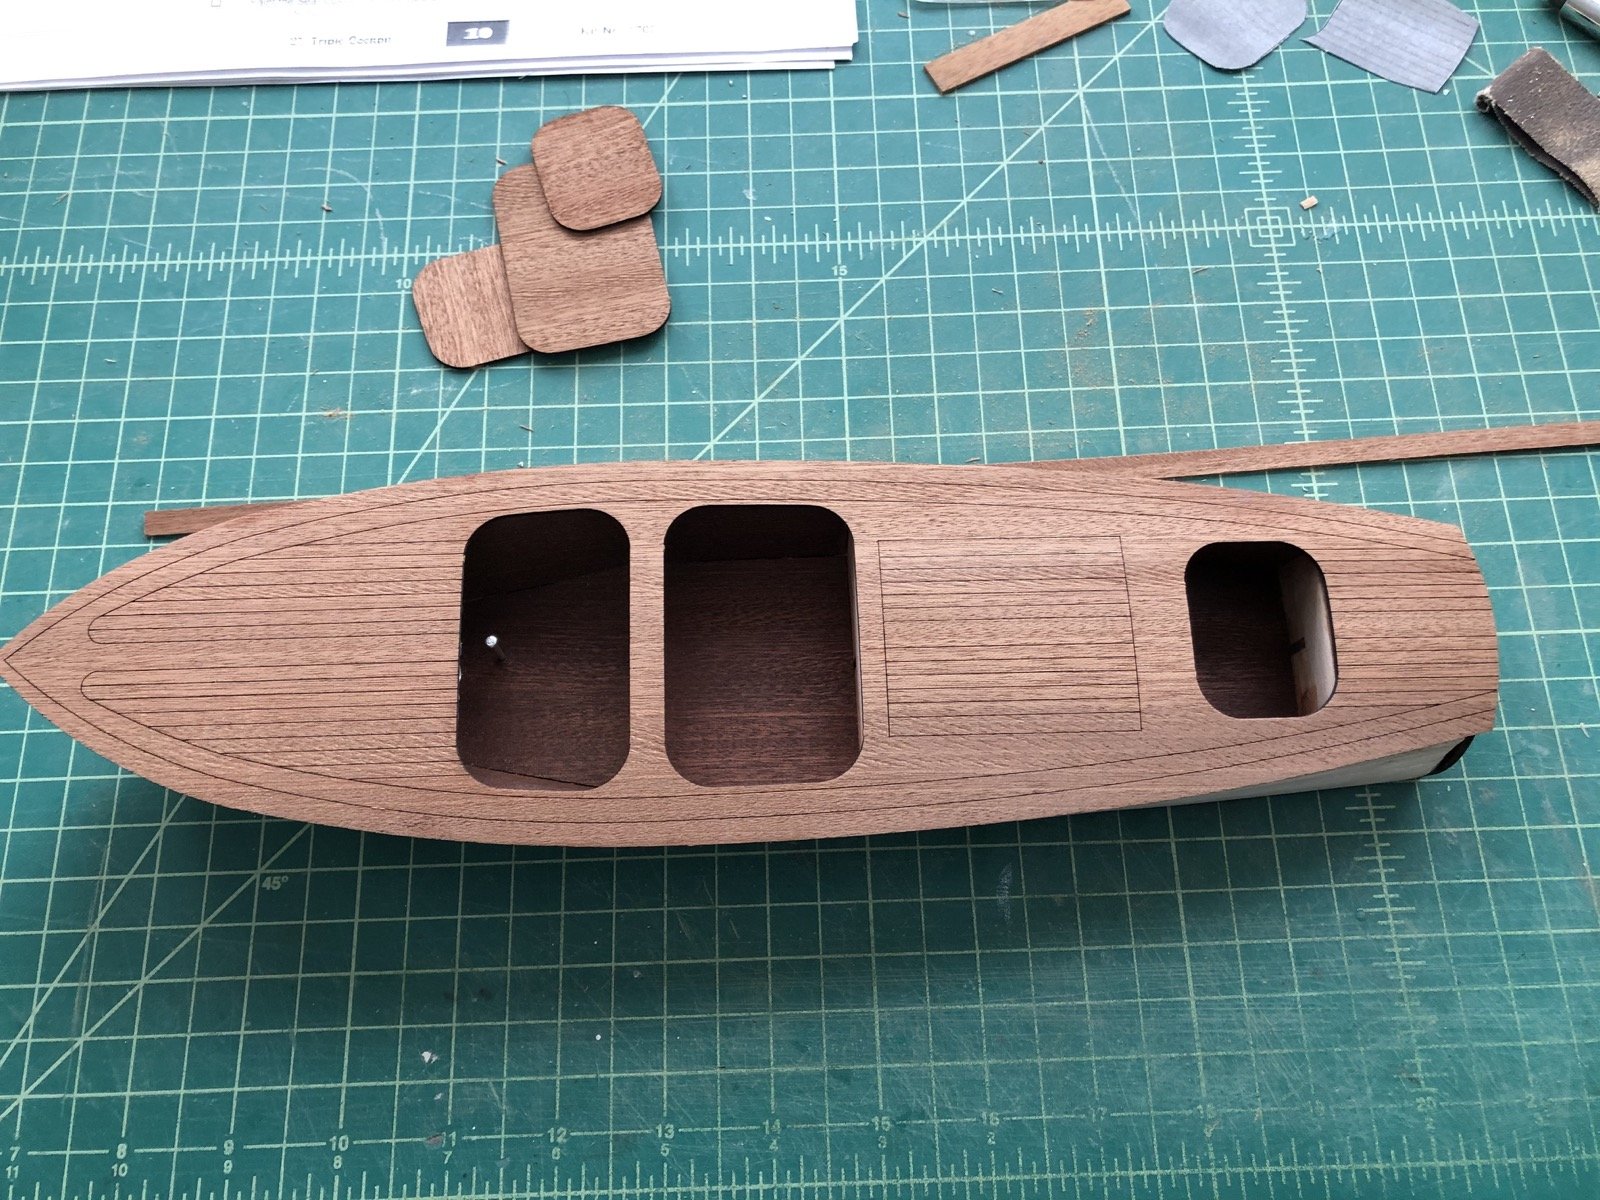
Well that was a spectacular failure. Let's just say the deck did not stay in one piece as I cut it out with the jig saw. Also the cuts on the underside were very rough. So on to plan B. I made templates of the two sides of the deck and cut those out with the good side up. I cut them just after the middle cockpit and will make templates for the aft sections later. I made sure the inside edges were sanded smooth because they would be hard to sand after they are glued down. I left the outside edges wider and rough because they will be sanded along with the hull planking later.