usedtosail
-
Posts
2,421 -
Joined
-
Last visited
Content Type
Profiles
Forums
Gallery
Events
Everything posted by usedtosail
-
 Very nice looking gun deck, K
 -
Steve, I found that I was able to straighten the deadeyes out when I added the sheer poles just above them. I used a piece of wood between the lashings and then lashed the sheer poles to the shrouds.
- 108 replies
-
- 3
-

-
- mamoli
- constitution
- (and 2 more)
-
Great start. I built this model a few years ago and loved it. I am looking forward to following along.
-
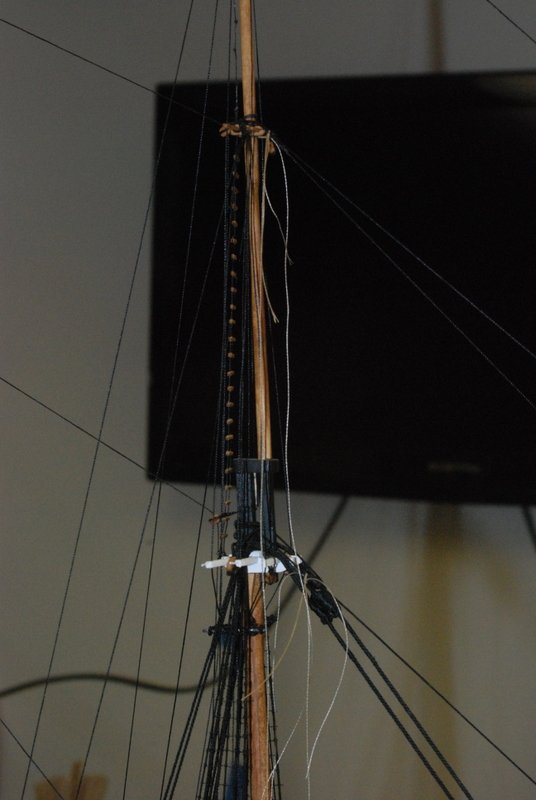
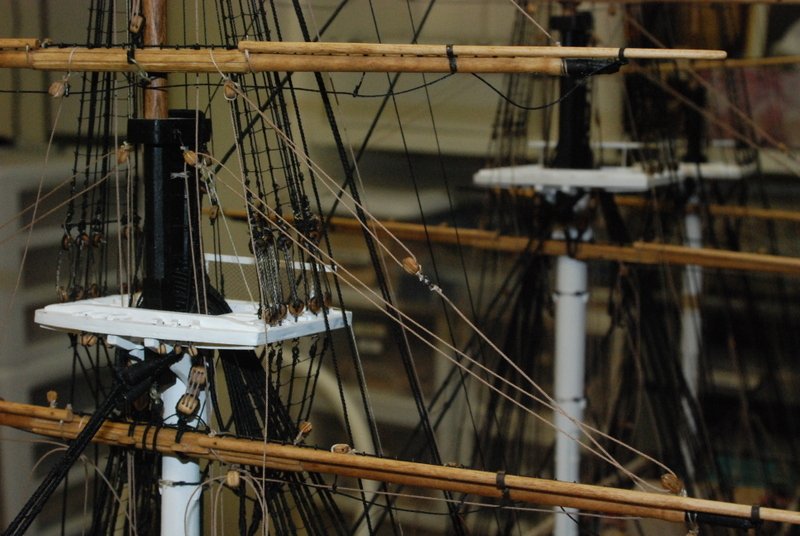
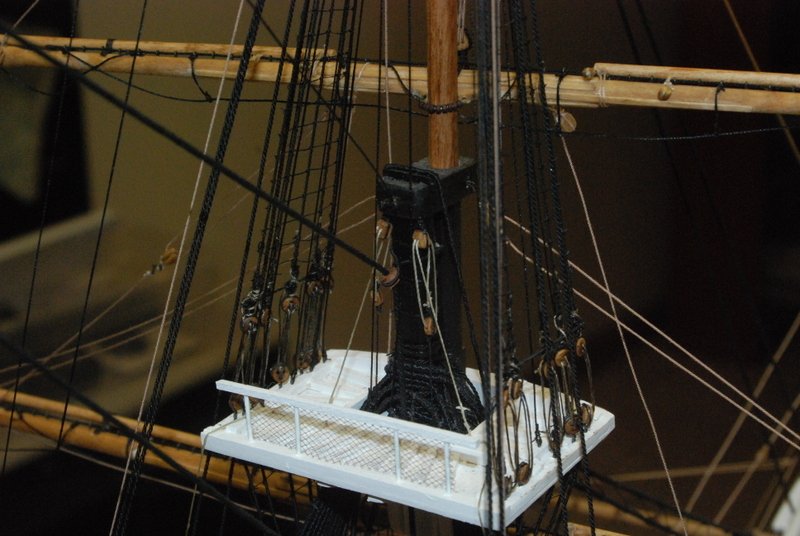
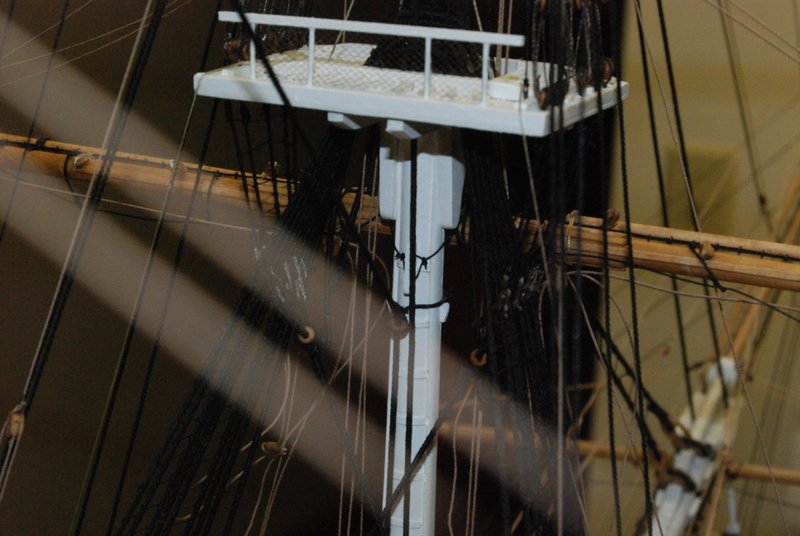
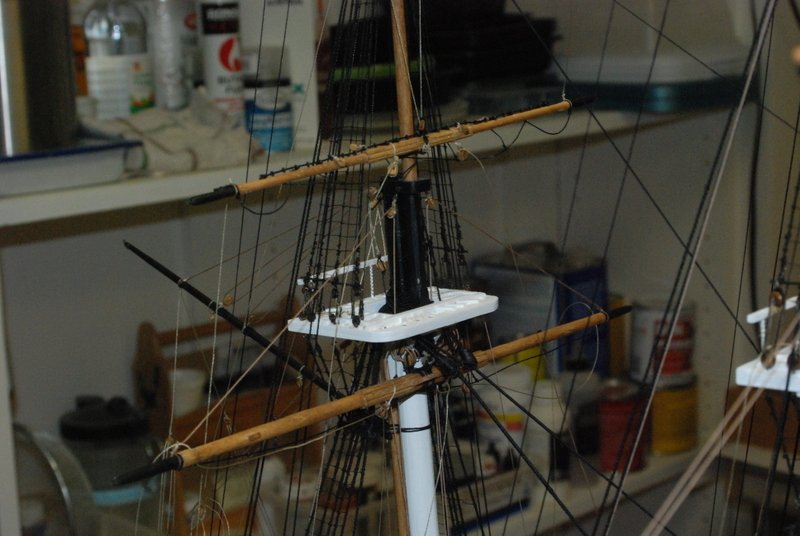
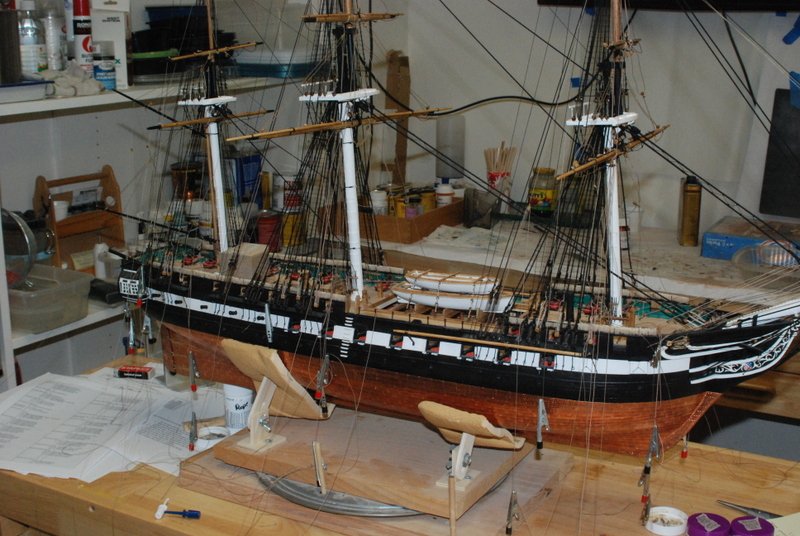
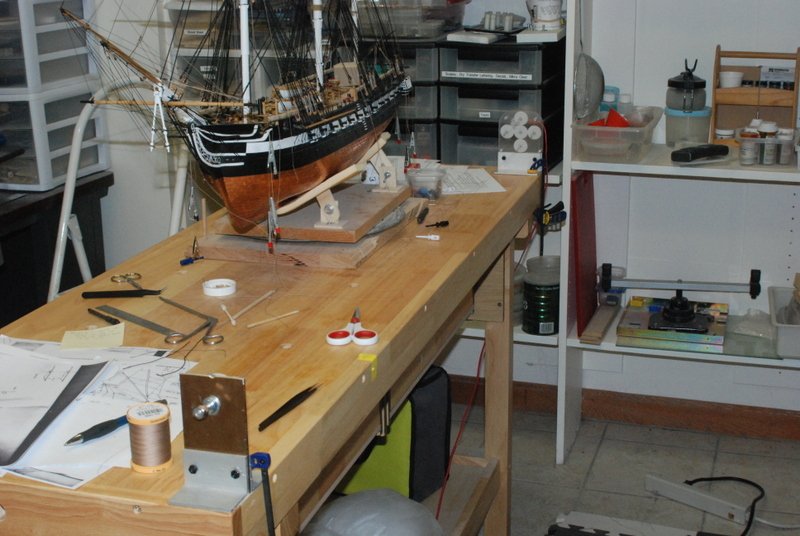
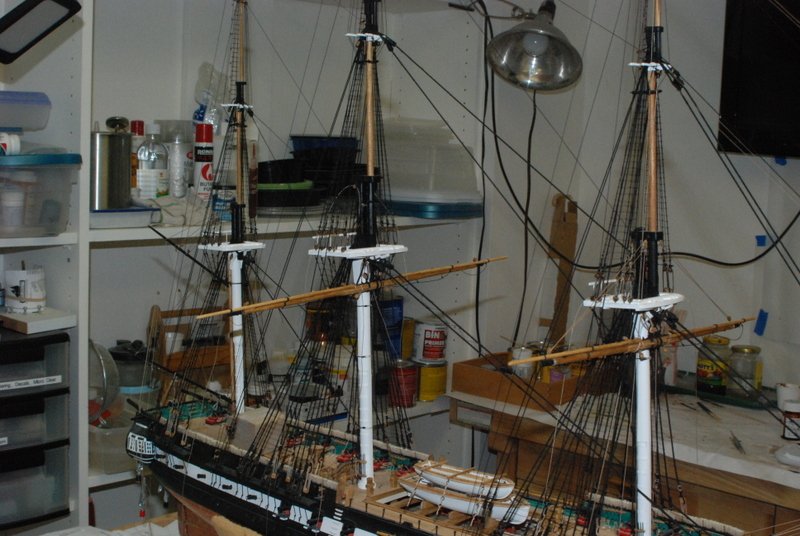
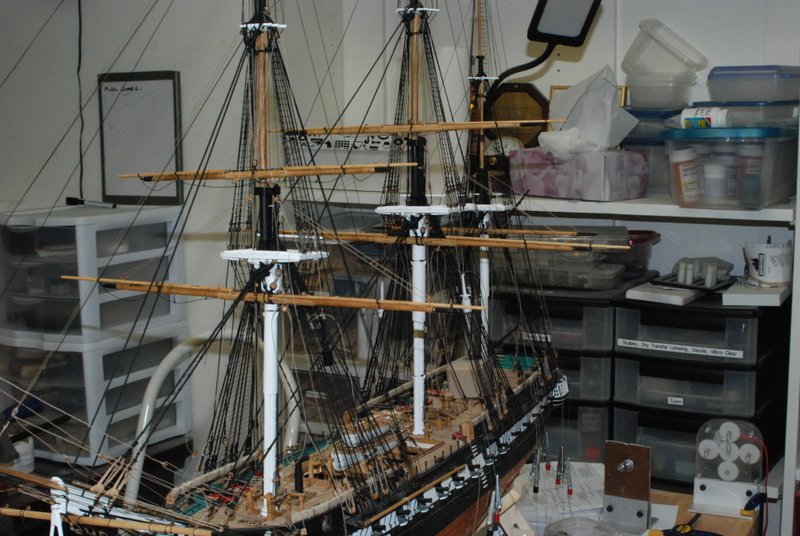
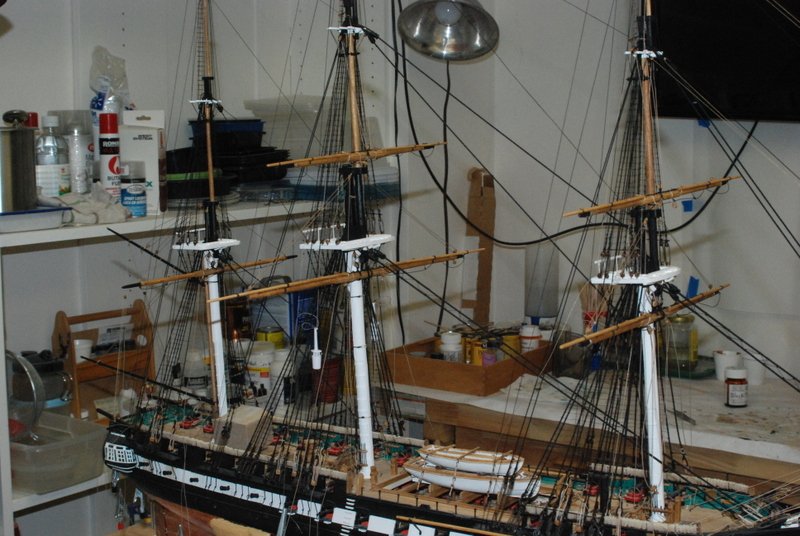
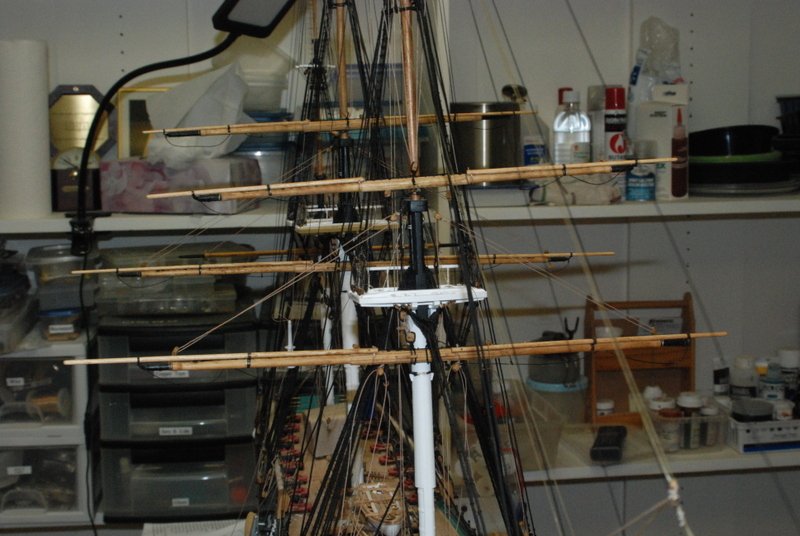
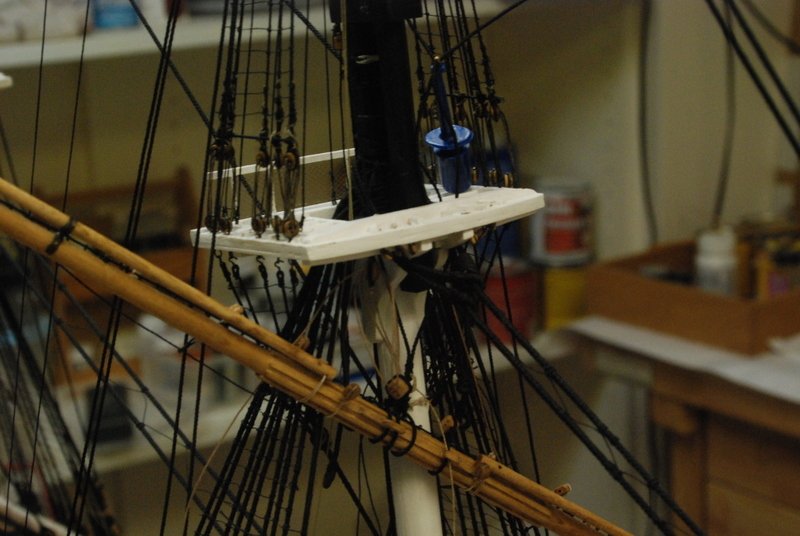
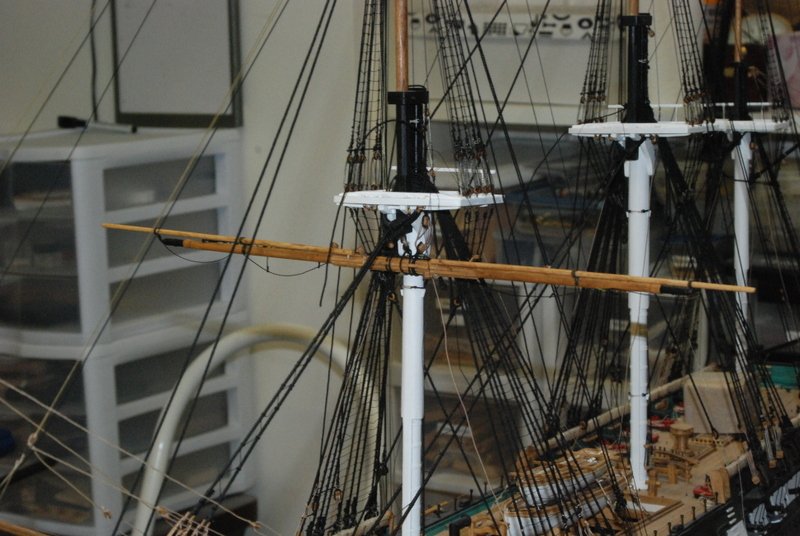
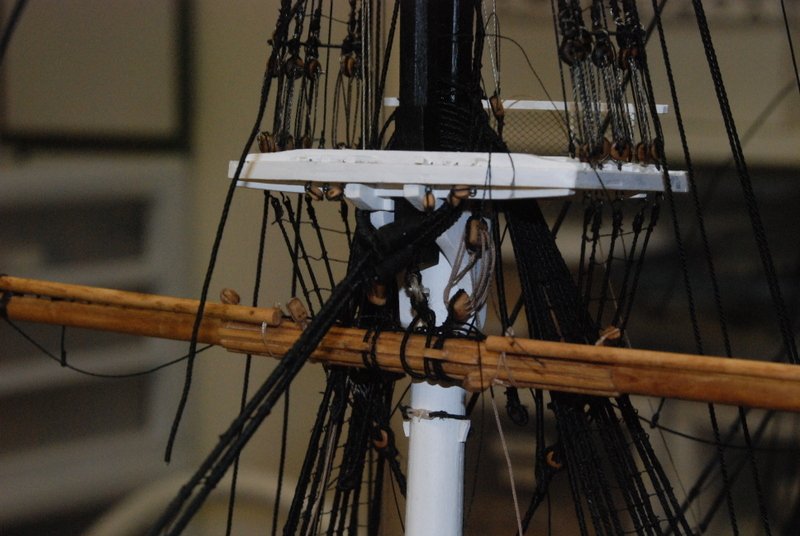
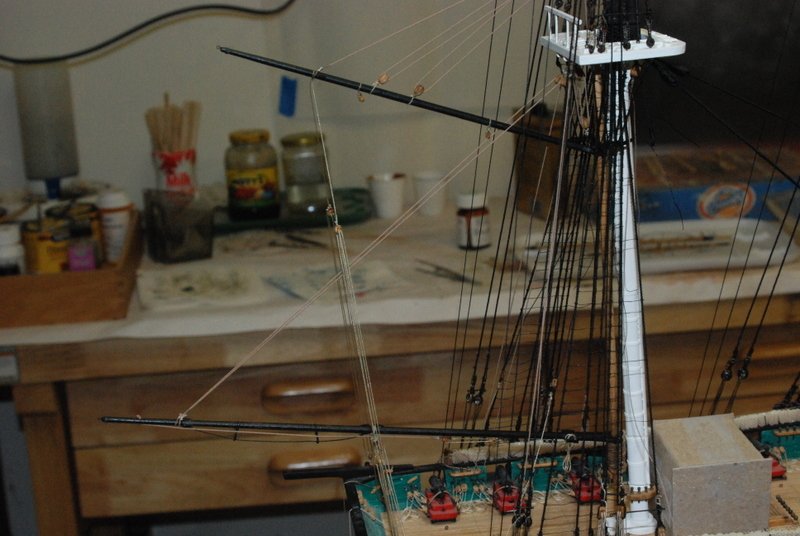
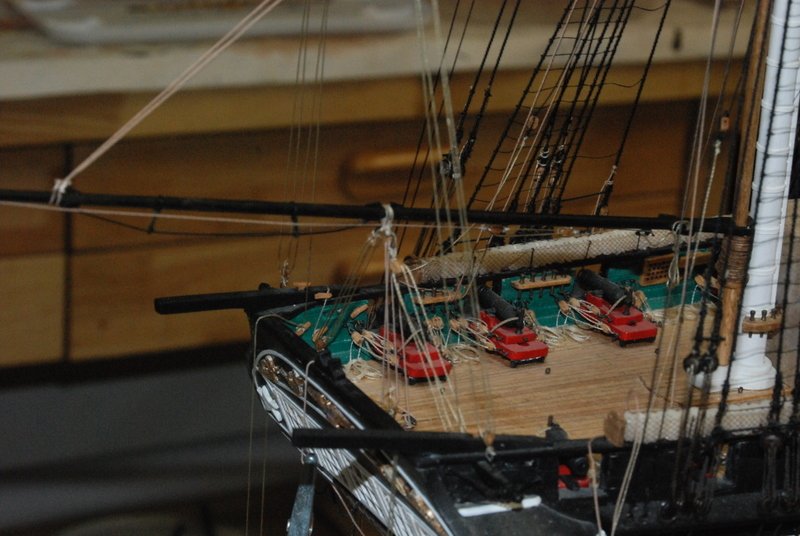
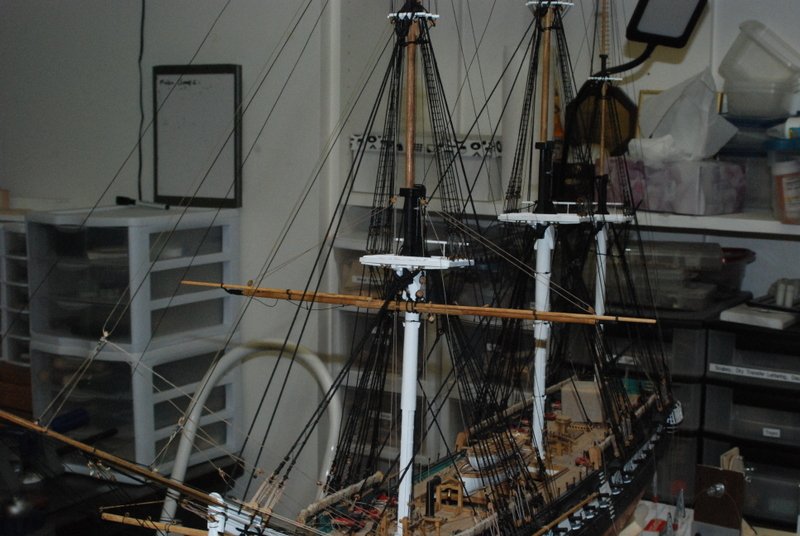
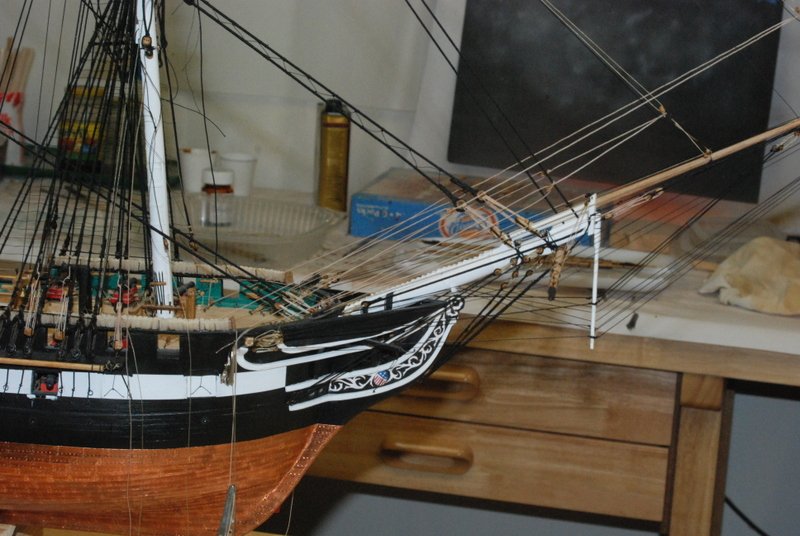
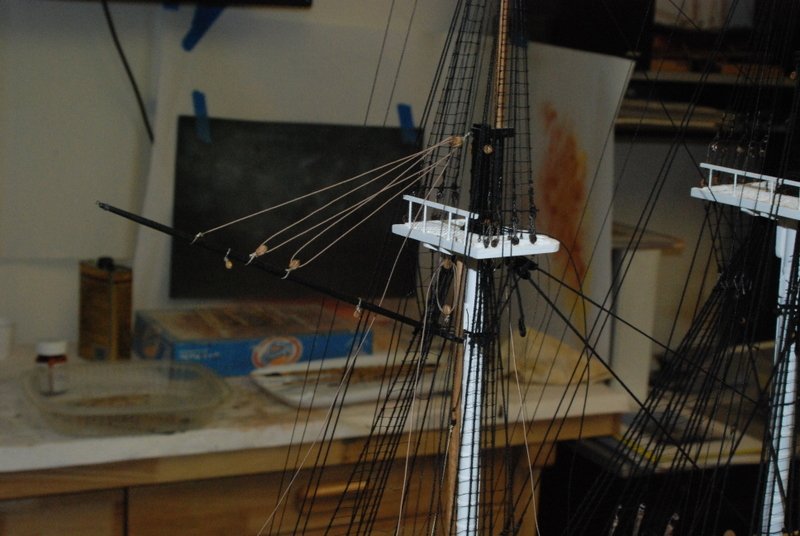
Work continues on the lower and topsail yard installation and rigging. I tried to take some more detailed shots this time to show some of the details as I have been adding them. The mizzen topsail yard was the latest to be added, with its simpler halyard arrangement than the fore and main topsail yards. I have these rigged with the tackles down to the fore and main channels. Most of the lines for these yards are now wrapped around a belaying pin or cleat, but nothing has been fixed yet so I can adjust them to all line up right. Here are some shots of the clew lines and sheets for the topsail yards. I used hooks on the sheets and hooked them into the hooks on the clew line blocks. I doubt they used hooks for the sheets on the real ship, but I wanted to have a secure connection, since I am using the sheets to put some downward pressure on the yards to counteract all of the up forces on these yards, like from the lifts. Here is a shot of one of the parrels, showing the beads that I used. These are brown seed beans, which are about 1.5mm. Here is a shot of the truss lines with their tackles on the fore top. The tackle lines are tied to cleats on the top. I found this very frustrating getting these lines secured to those cleats. I could wrap the lines around them fine, but getting the loops twisted to secure them was a bit challenging. I was able to get them all done correctly though, although I could have just wrapped and glued them in place. I like doing them the right way because I can easily undo them to adjust the tension on the lines, although getting them back around the cleats is no fun. Here is the other ends of the truss lines at the back of the fore mast. Getting these knots tied in the right place so the blocks on the other ends were in the right place was also fun, but it was doable after a few attempts. Here is the tackle line for one of the fore halyards. The blocks sit up pretty high in the air because I have these yards in the lower position, since they do not have sails. I am curious how they lowered these yards to the deck, as there does not seem to be enough line to get them all the way down without the lower block on the halyard hitting the block on the mast. I wonder if they lowered it part way with this line then tie on a different line to get to the deck? Here are the mizzen crossjack and topsail yards, still in the process of being rigged. And is an overall shot of the model so far.
- 1,354 replies
-
- 14
-
-
- constitution
- model shipways
- (and 1 more)
-
Thanks Dan. I have seen that method described before but never tried it. I'll have to give it a try. I would like to come to the joint meeting but have other plans that weekend that I can't get out of. Maybe next year.
- 1,354 replies
-
- 2
-
-
- constitution
- model shipways
- (and 1 more)
-
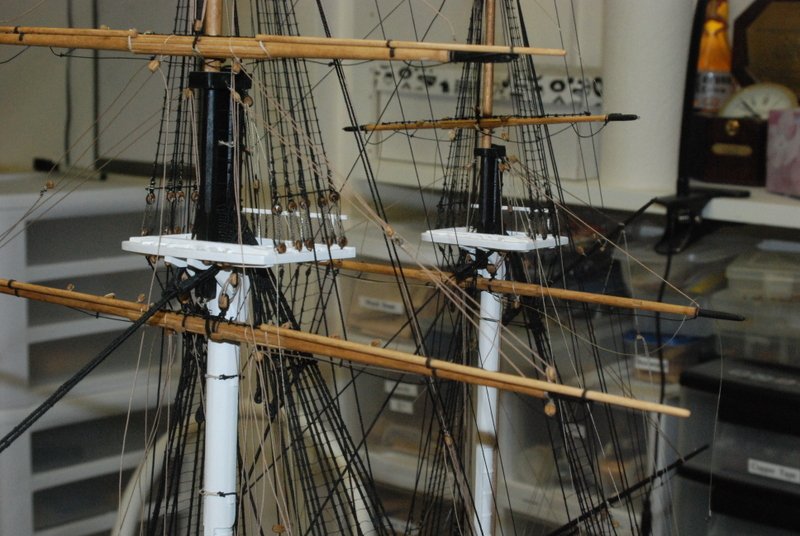
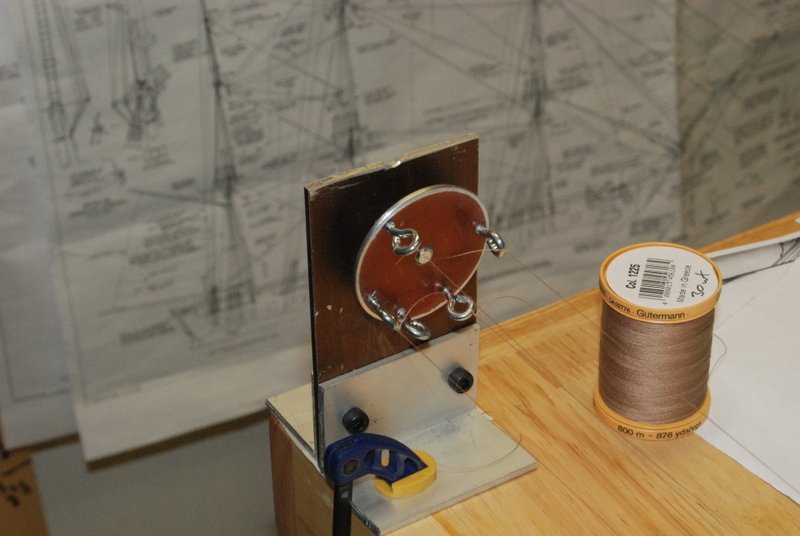
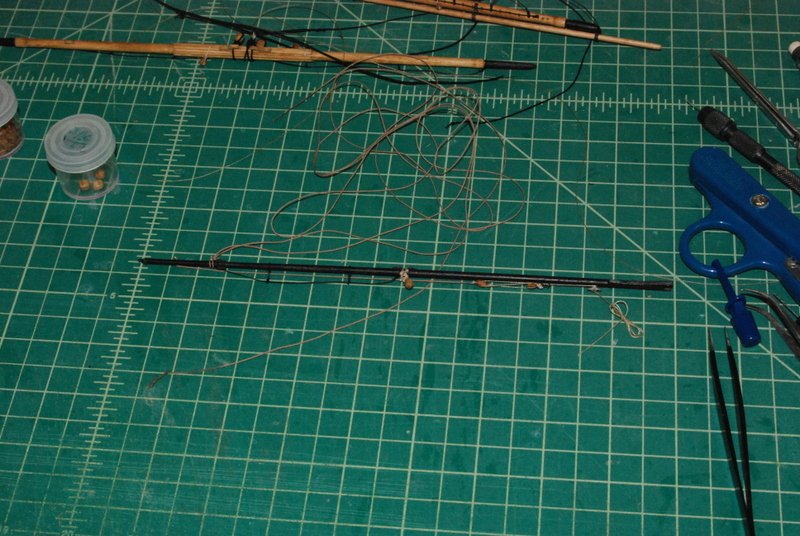
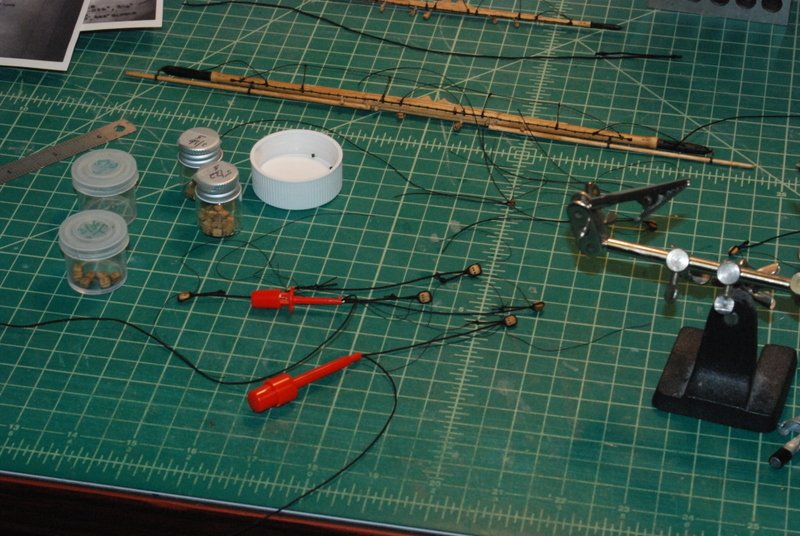
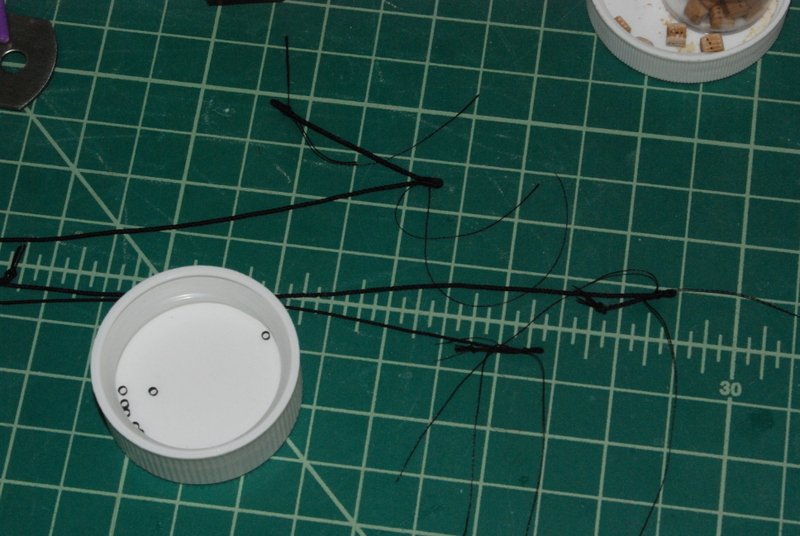
Thanks all. In between shoveling out of Nor'Easters, I have managed to get a fair amount of work on the Connie done. First though, fairly soon after my last post, I was using the wooden end of the rope walk to make 4 strand rope and it just came apart violently. So, I modified the aluminum end with more eyebolts so now I can use it for either 3 or 4 strand rope. Here it is in action making some 4 strand .020 inch diameter rope, using the thread shown above. I have the fore and main lower yards installed, with the lifts and clew lines threaded. I am holding off on the sheets and tacks until later. This picture shows them earlier without some of those lines. I have been having all kinds of problems with the mizzen lower yard, mostly with seizings coming undone as I thread various blocks. I have had to replace these in place which is a little difficult but so far not too bad. It just takes time waiting for the glue to dry on the new seizings. I currently have the triple blocks threaded and the port truss line done, and still have to redo the starboard side truss line when the block on the mast cap is dry. I have the lift lines on the yard too. I also have the fore and main topsail yards installed, with the halyard lines threaded through the block on the yard. These yards are tied onto the topmast using line between eyebolts on the parrel saddles. When I made the saddles I drilled the holes for the eyebolts but I didn't glue them in, so I now have added them to all the topsail, topGallant, and royal yards. The plans or instructions say nothing about parrels on these lines, but I used some small beads I had for them and will use them for all these yards. Last night I seized the double blocks to the ends of the halyard lines with tackle lines that will go down to another double block on the channels. I had not added the eyebolts for these blocks or the other halyard blocks to the channels so I had to drill the holes behind the backstays, which was a bit of a pain. All the eye bolts are there now. I have also added the lifts for these yards but have not threaded them through the sister blocks yet. I made the sister blocks some time ago and now I need to tie them to a shroud. This looks like it could be a little difficult too. Here are some shots from last night with the latest progress. Most lines are not permanently attached yet, so you can se that there is still some adjustment to the yards on so far to get them to line up. I really admire you guys that rigged the masts and yards together off the model. I would have no clue how to keep all those lines from becoming a big tangled mess. Even adding them one a time is getting a bit sporting. I have found that seizing lines onto the model hasn't been a big problem for me. Maybe I should say not yet anyway. Getting the lines onto belaying pins is the biggest problem so far. It takes a steady hand and lots of tries, with a fair amount of cursing in between, to get them on with a loop that holds the line in place. I haven't added any new rope coils yet either, and in fact the few coils I had on I took off because they were in the way. I will add them all later as I fill up each pin rack.

- 1,354 replies
-
- 7
-
-
- constitution
- model shipways
- (and 1 more)
-
From the Merrian Webster dictionary for point: one of the 32 equidistant spots of a compass card for indicating direction
-
Yes it does, Art. I can see a tiny light at the end of what has been a very long, but very gratifying, tunnel.
- 1,354 replies
-
- 3
-
-
- constitution
- model shipways
- (and 1 more)
-
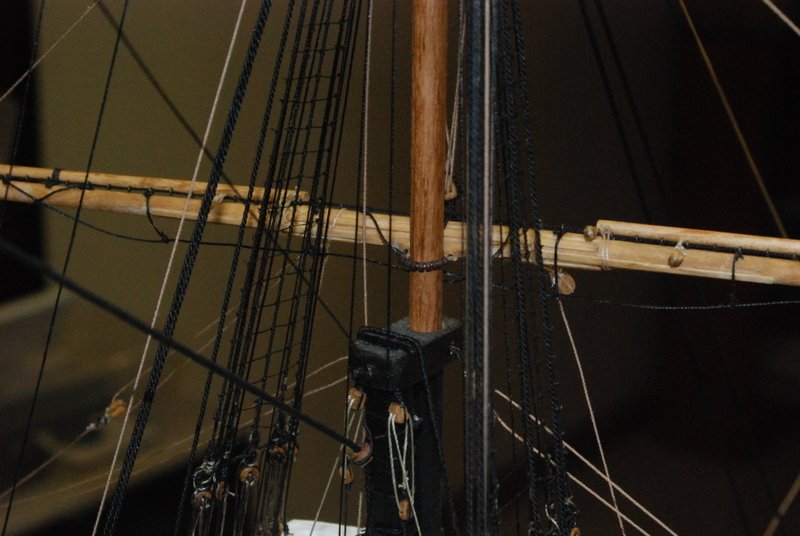
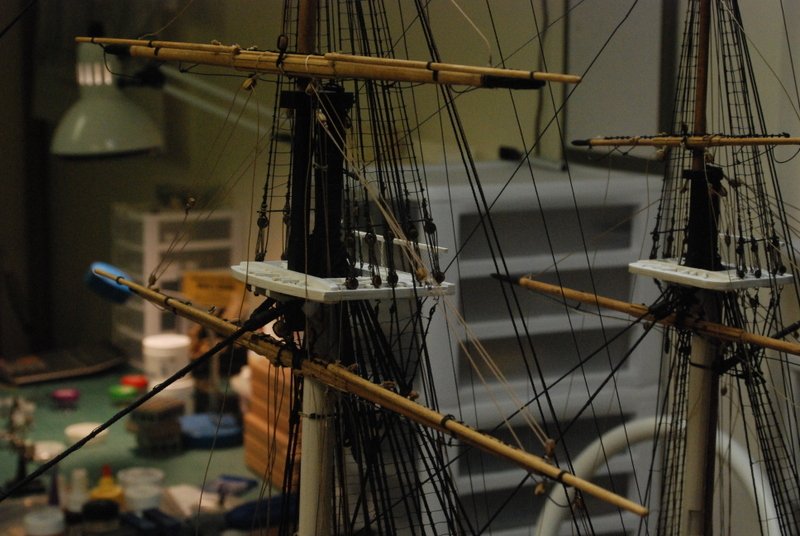
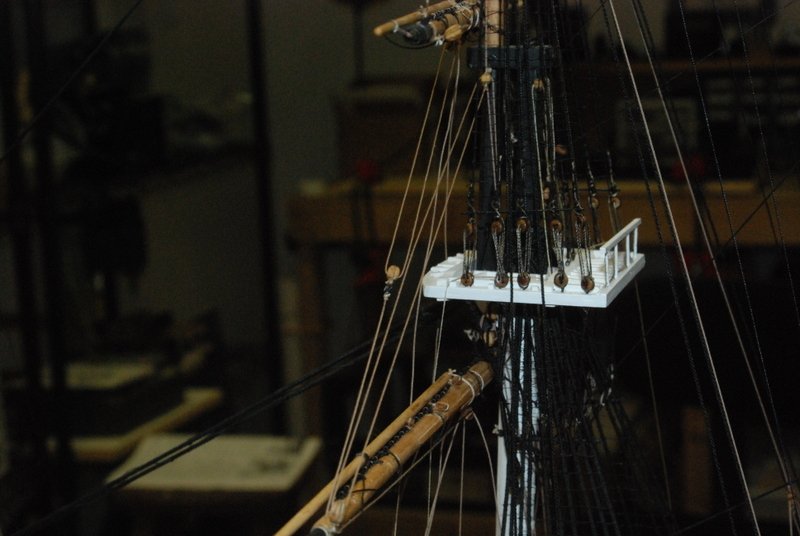
Thanks Al and Popeye, and the likes. Popeye, making these ships look good standing still is hard enough for me, I can't think about making them move to. I do have a nephew that is into RC, so he brings his toys to the lake. It is fun watching him motor them around. He is into fast model boats. I continue rigging the spars, with the first of the yards now up. I started with the fore lower yard. I had tied the lashing between the sling on the yard and the sling that goes around the mast, and luckily I left the excess lashing on. This proved valuable in that I used it to temporarily tie the yard to the mast while I fished the lashing line around the mast and put the loose end through the loop on the other end. At that point I put a clamp on the sling line and untied the temporary line, and the yard was attached to the mast. Then I threaded the truss lines up through the top and through the blocks on the mast cap. I also threaded the tackle lines through the triple blocks on the yard and the triple blocks hanging from the mast, which I had put on earlier and set their height. Once everything was "wired up", I adjusted all the lines to get the yard to hang correctly, although this has been an ongoing process since I took these pictures. I then added the lift lines, after having to seize the lift and brace blocks around the yard. I had made these with loops that I could slip onto the yard arms, but I forgot to do it before putting the studding sail booms on, so they couldn't slip on anymore. It was not hard to seize them in place, though. Here is how the yard is looking as of this morning. I did a few more adjustments of the footropes and stirrups after I hung the yard to get them to look better than they did. I will add the clewline next but leave it loose until I add the sheet and tack later. I have the main yard ready to install next. I have also installed the spanker boom and finished rigging it and the gaff. Lots of lines on them pulling in different directions, but after many adjustments I am pretty happy with how they came out. I am making the larger size ropes (above .015" diameter), so all of these lower spars use a lot of it. I have found that by using the same thread with either 3 or 4 separate threads, I can make two sizes of rope that fit the bill for all of these lines. I had made the aluminum three line fixture for the rope walk a few months ago, but luckily I kept the wooden version I had replaced with it. I added a fourth eyebolt to the wooden one, so now I have one for three strand and one for four strand ropes. We are in the midst of a terrific wind and rain storm that is supposed to last into tomorrow. I hope we don't get snow too. Great weekend to all.
- 1,354 replies
-
- 8
-
-
- constitution
- model shipways
- (and 1 more)
-
Thanks guys. Jonathan I have not thought much about how to transport the models, but I will document the process which should be in July or August. I am thinking of making a crate for the Constitution using the cradle that it is in now. Some of the other models I will transport in their cases, but those with cradles I will take out because in the past the cradles have proved to not provide enough support. I have been working on the running rigging at the bow, mostly the jib and flying jib lines - halyards, downhaul, tack, and sheets. They all meet at the block that would hold the top of the sail, and all are belayed at belaying pins. I have also been working on the spanker gaff and boom in the rear of the ship. I added the gaff using small beads for parrels, and rigged the peak and throat halyards. I haven't tied these to the belaying pins yet. I have also been getting the spanker boom ready to install. I added the lines for the topping lifts and the outhaul line with its associated tackle. I'll add the parrels and install it next. I have also added the sling and jeer lines to the three masts getting ready to mount the lower yards. I lashed the slings to the yards while they were still on the bench, so as soon as the lines with the triple blocks are all installed, these will be installed. Thanks for watching and have a good weekend.

- 1,354 replies
-
- 9
-
-
- constitution
- model shipways
- (and 1 more)
-
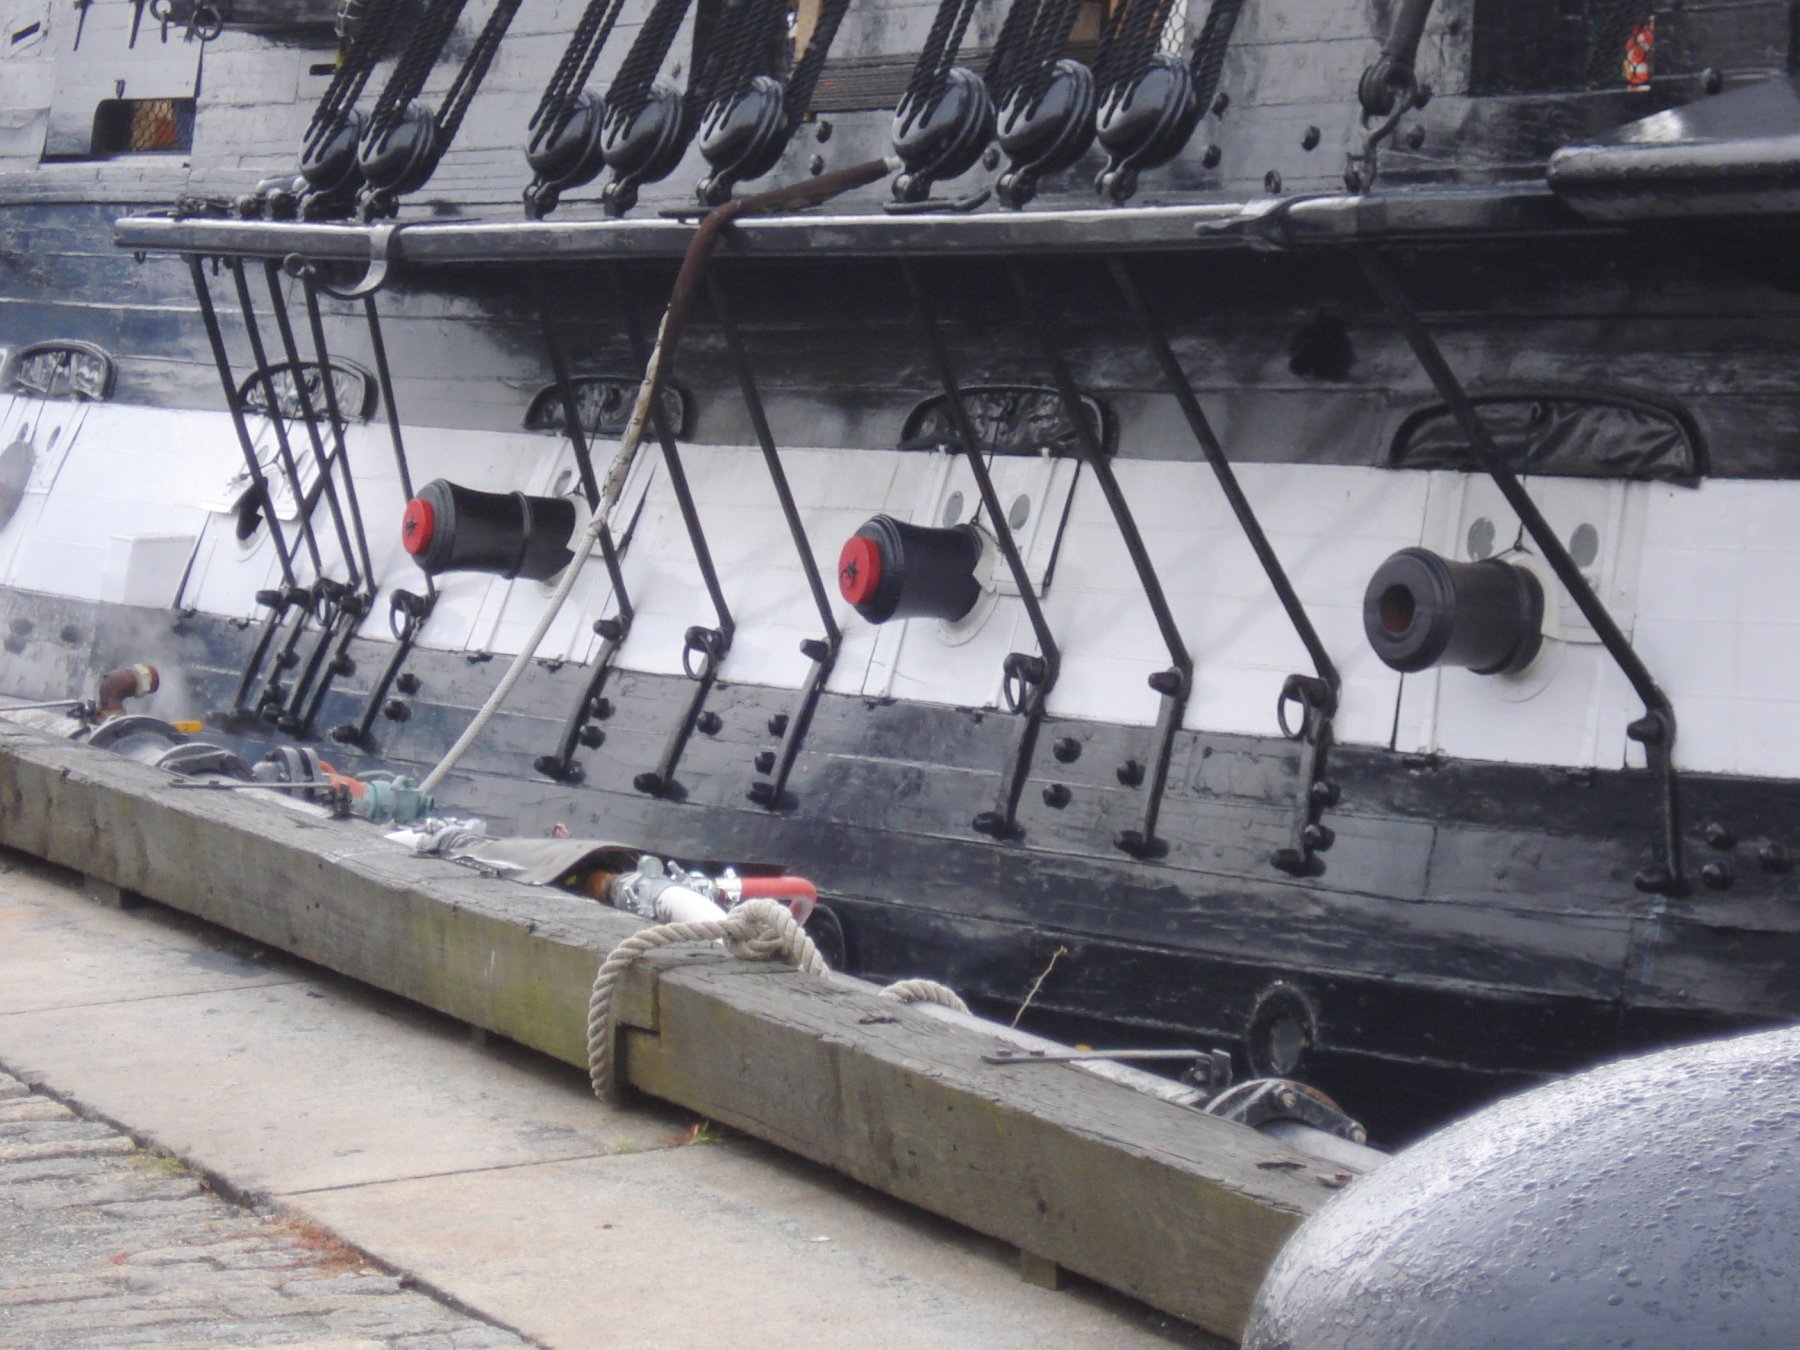
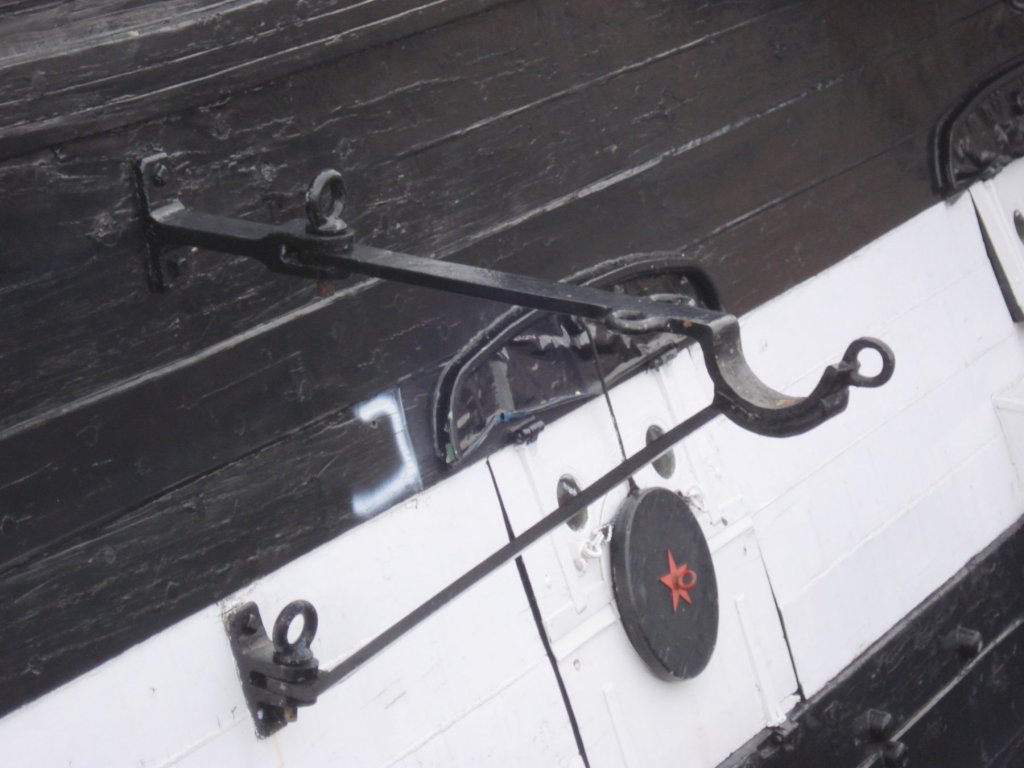
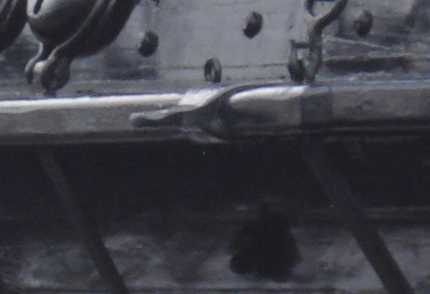
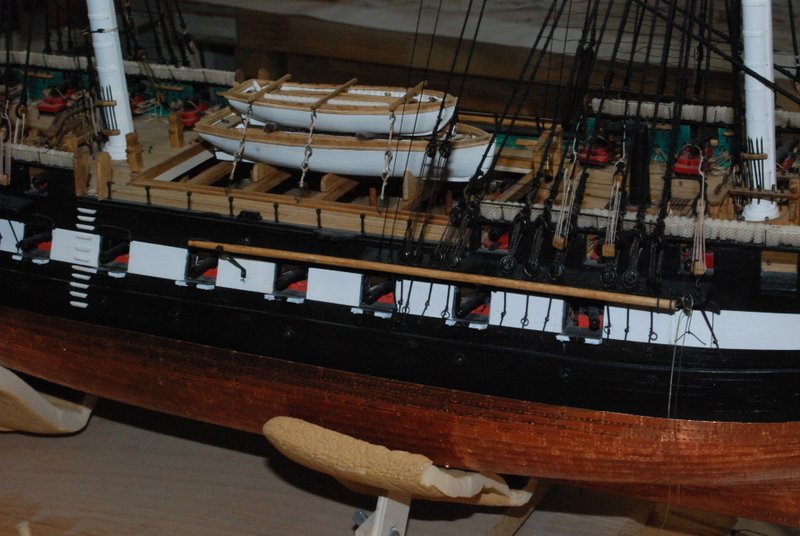
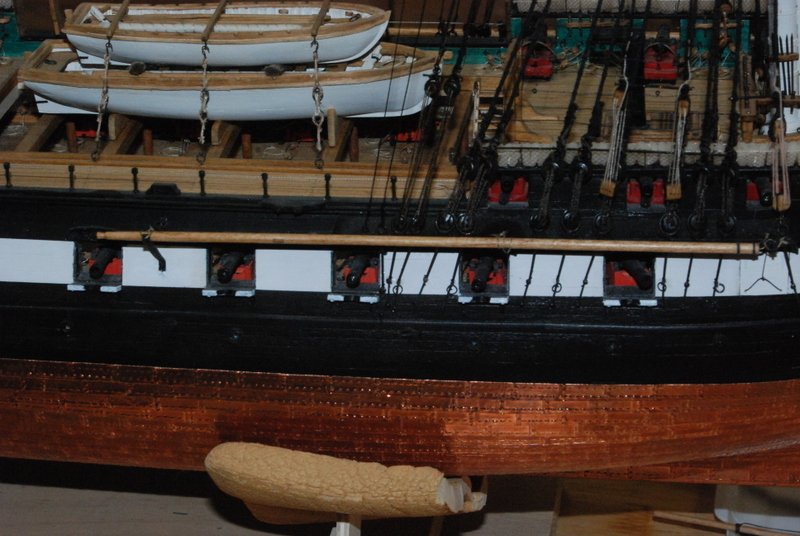
Thanks Jonathan. I certainly have learned a lot from other logs. I know your ship will come out beautifully. Here are the pictures of the fore studding sail brackets on the real ship. These pictures were taken in 2008. First the whole fore channel, then close ups of the three brackets, starting at the front. Now for some important information from my shipyard - I have fired all the sail makers. I can't believe what they wanted me to add to the model. I was not happy with the way the mizzen topsail was coming out, so I made the decision to not add any sails, either full or furled, to the model. I would rather not have any then have them detract from the rest of the build. Now I can get on with hanging the yards, and maybe finish this ship this year. Which leads to the other important news. The shipyard, along with the rest of the house, will be moving this summer. My wife is retiring at the end of this month and I will retire in July/August. We are putting the house up for sale in June and moving up to Newfound Lake in NH once the house sells. I have to figure out how to move the ship without damaging it, as well as the other ships I have built. Also, I will have to pack up the workshop and set up a new one there. I already know where it will be going, so I have started making plans for setting it up this Fall. I will be a bit busy getting our house here cleaned out and ready to sell, so that may impede some progress on the build over the next 6 months or so. Progress continues with getting all the blocks, strops and slings ready to hang the yards. I have also started rigging the halyards for the jib and flying jib, tying the ends to the stays.


- 1,354 replies
-
- 6
-
-
- constitution
- model shipways
- (and 1 more)
-
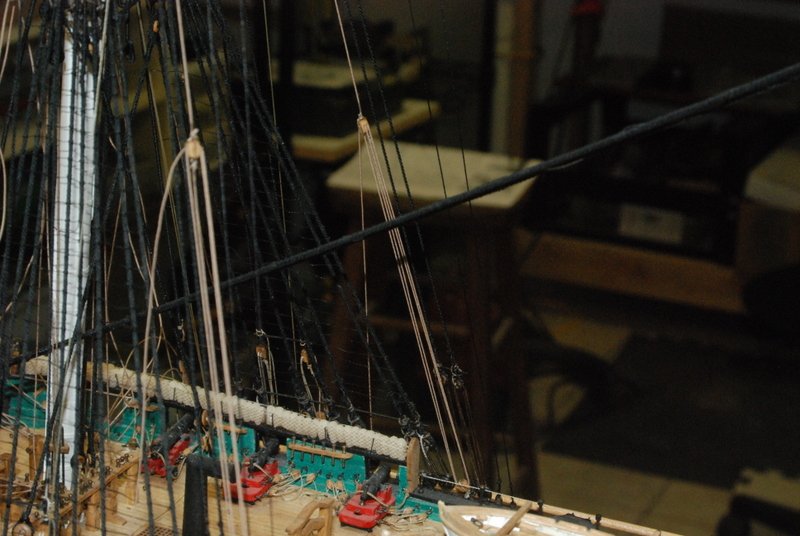
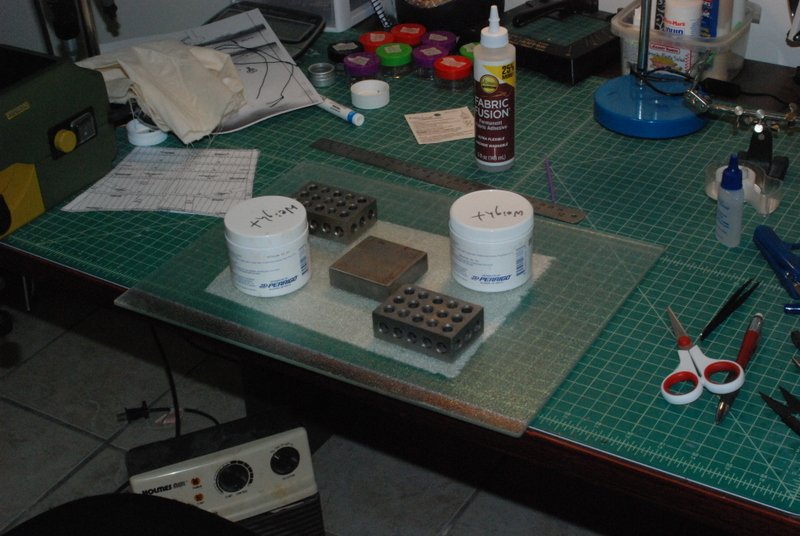
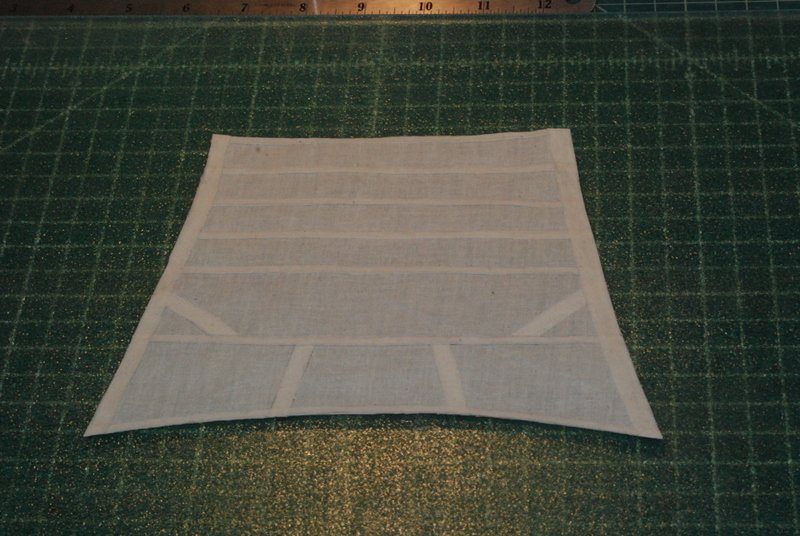
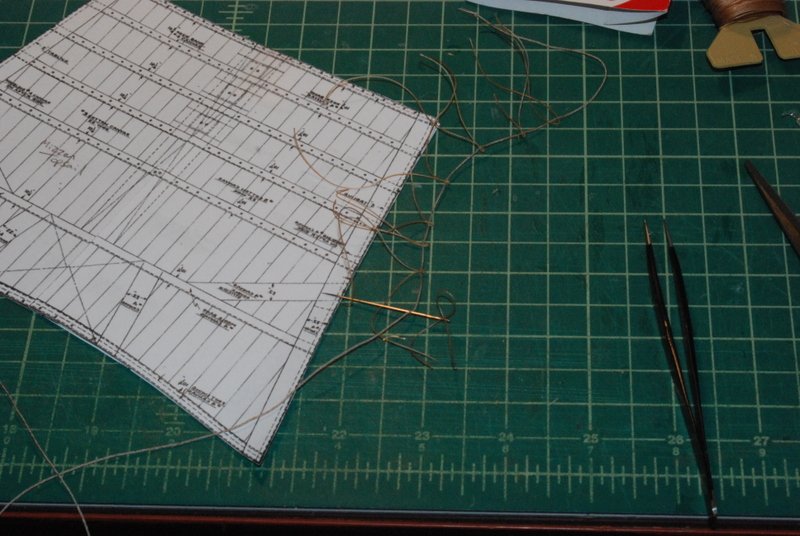
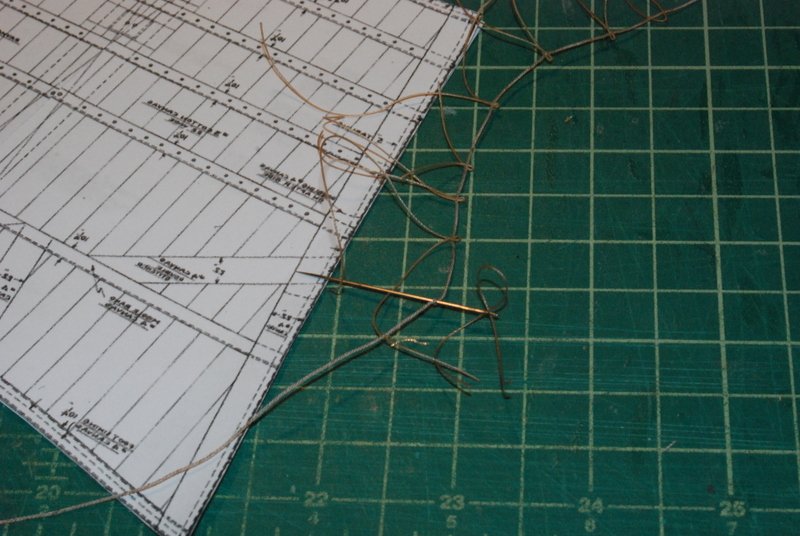
Well, that game didn't turn out like I wanted, but congrats to the Eagles. They played a heck of a game. And thanks for the likes, folks. I have been working on a few different things in parallel. First, I started to make the mizzen topsail. I figured I'd start with the smallest of the three topsails. I traced the pattern onto a piece of muslin, then cut out the reenforcement bands and glued them to the sail using fabric glue. I used a product called Fray Check on all the pieces before I glued them on. I put the sail under a piece of glass with some weights on it while the fabric glue dried. I then cut the sail out along the pattern lines and put more Fray Check along the edges. The bolt rope has a lot of loops in it for the various buntlines and leech lines. I am trying something that may or may not work for these. I am using a needle to put each loop into the bolt rope and then gluing them to the bolt rope. I am making the bolt rope as one piece, which I will then glue to the edge of the sail. I have the whole bolt rope done and will glue it on in sections starting tonight. We will see how this comes out. I did experiment with some scrap fabric and rope. I am using a liquid PSA which stays a bit tacky for this and it seems to hold the rope well to the sail. Once the glue dries on the loops, I trimmed the excess right up to the bolt rope, and I have had only one loop pull out. I also installed the lower fore studding sail boom brackets on the hull and fore channels. I used nails that I glued into the hull for the aft brackets, and eyebolts that I glued into the channel for the middle and fore brackets. I then lashed the booms to these brackets. [Sawdust Dave - here is a close up of the rigging for the boats that I just realized I had]. The plans are a bit unclear on what these brackets look like, but I had pictures of the ship that I took that show them very clearly. I can post those if folks are interested. I have also started to make the slings to hold the lower yards to the mast. I first made a bunch of small bullseyes from brass tubing to go into the loops. I then served a few lengths of line for the slings and started seizing loops into the them. I need to add furled sails to the lower yards before I install them, which I haven't started yet. Lot of stuff to do but it is getting there. Have a nice weekend folks.
- 1,354 replies
-
- 6
-
-
- constitution
- model shipways
- (and 1 more)
-
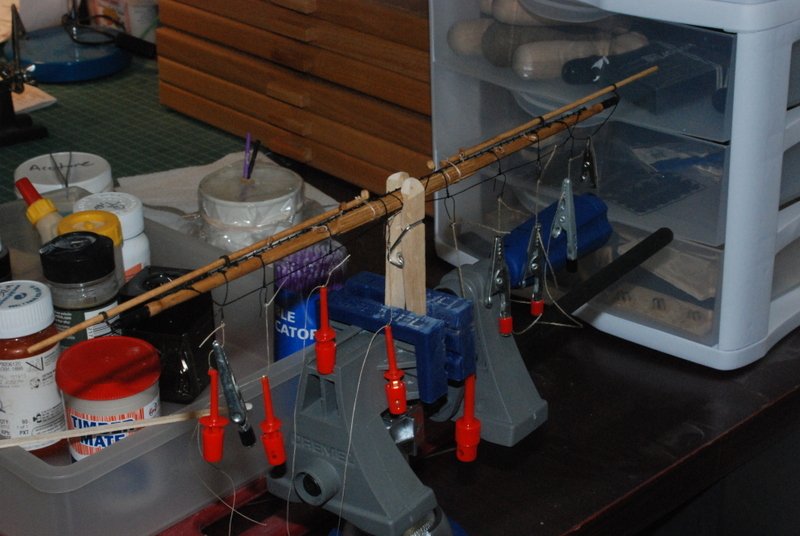
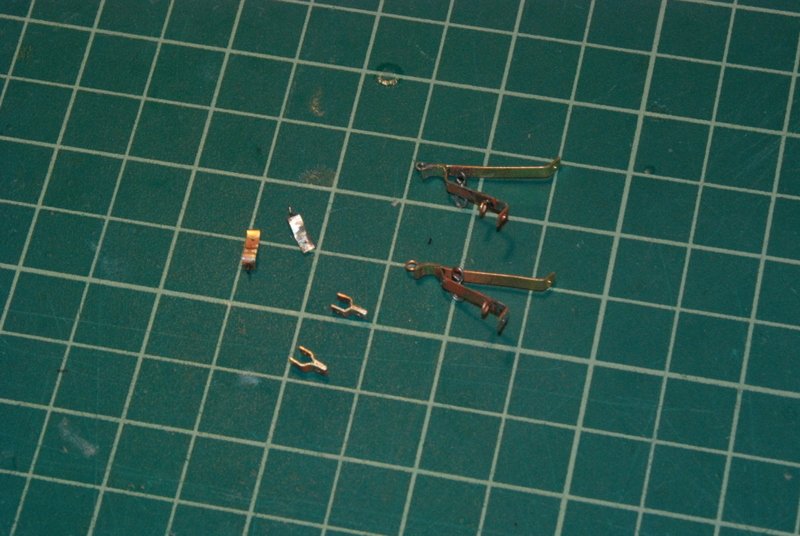
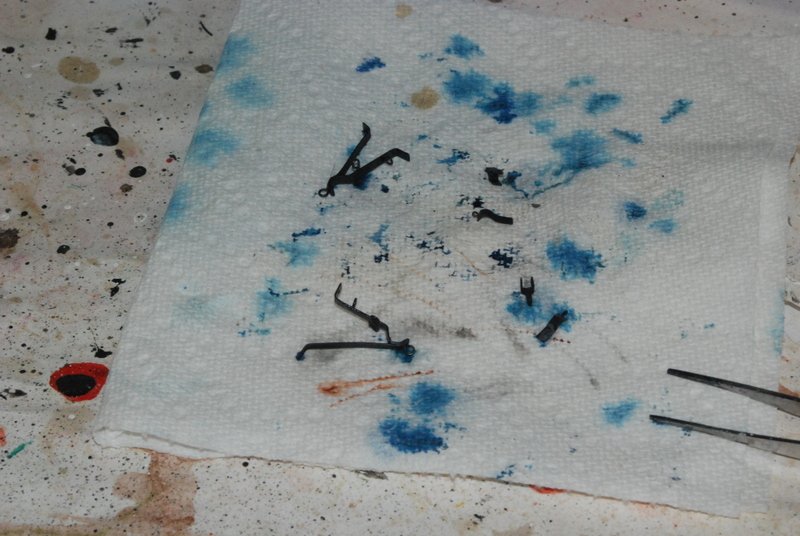
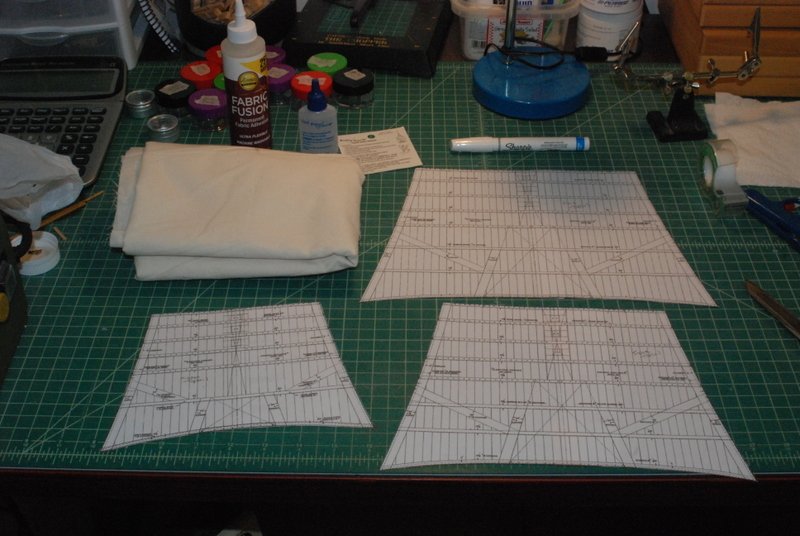
I have added all the stirrups, horses, and Flemish horses to the yards. The last action was to hang weights from the stirrups and coat them and the horses with diluted white glue to get them to hang right. This is what that looked like: Even after doing this some of the stirrups on the larger yards, because the lines was fairly thick, still did not hang down straight enough, so for those I put a very small drop of white glue on the back of the yards just under the stirrups and held them with clothes pins until the glue dried. This worked pretty well so they hung straighter. Next steps for the yards is to add the jeers, slings, and blocks to hold them up. I cut some slices of brass tubing and blackened them to use as bullseyes on the slings for the lower yards. I spent the last couple of days making the brackets that hold the fore lower studding sail booms to the fore channels. I made all of them from brass strip and two sizes of eyebolts. These is how they looked after soldering the eyebolts in place then cleaning up the excess solder with files: This morning I blackened these and here is how they looked coming out of the blackening solution: I will install these after they have a long time to dry, probably tomorrow. I like how the solder blackens along with the brass, so they look evenly colored. I have also started to make the three topsails that I will be installing. These will be the only full sails, the rest will be furled. I bought some unbleached muslin to use as the sail material. My plan is to cut out the full sail, then glue on strips for the various reenforcing strips on the sails, so I bought some fabric glue too. I made templates of the three sails from Constitution plans from the CD. These are shown as half plans, so I scanned them, flipped them and printed out both sides, then cut and taped the two halves together to make the whole sail templates. I am starting with the mizzen sail to see how that comes out. I am off to a neighborhood Super Bowl party later, to watch the Patriot's win their sixth title, so that's it for today. Go Pats!
- 1,354 replies
-
- 8
-
-
- constitution
- model shipways
- (and 1 more)
-
I wouldn't call it cheating - it is ingenious. Thanks.
- 682 replies
-
- 4
-
-
- halifax
- lumberyard
- (and 1 more)
-
Beautiful work on those yards, Bob. May I ask how you got such nice curves on the footropes? I am struggling with them on my current build now.
- 682 replies
-
- 4
-
-
- halifax
- lumberyard
- (and 1 more)
-
Nice work kmart on the gun port sills. If I may provide some guidance, those headers near the bow need to bow out in the middle so you have a nice curve of the planks there. Otherwise you will have a flat spot between the deadeyes. i can't tell from the third image above if there is enough curve on the header between the first and second gun bulkheads. Something I had to learn as I went.
-
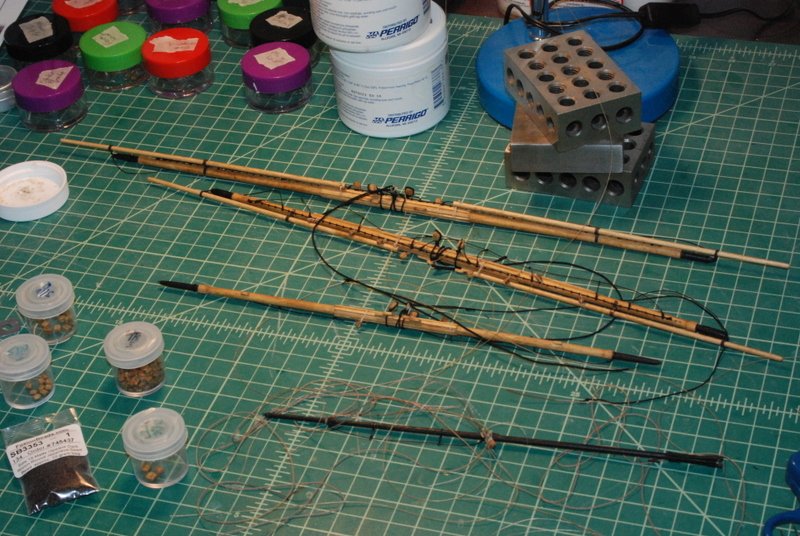
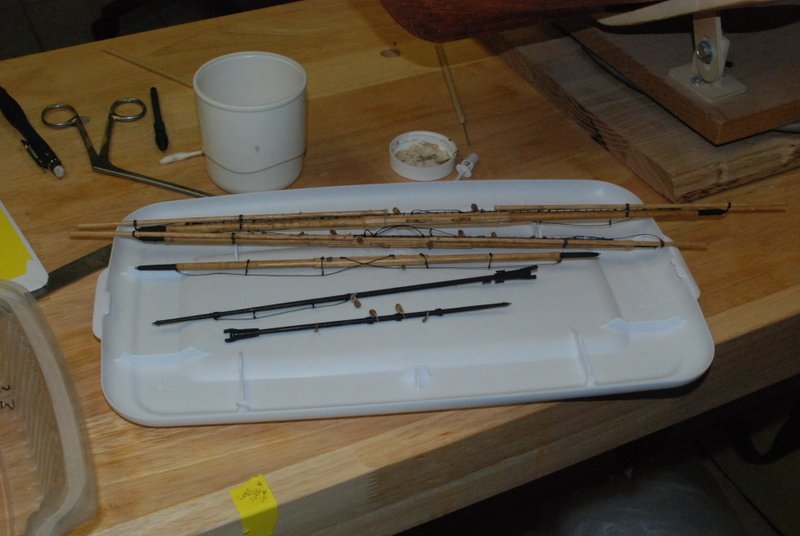
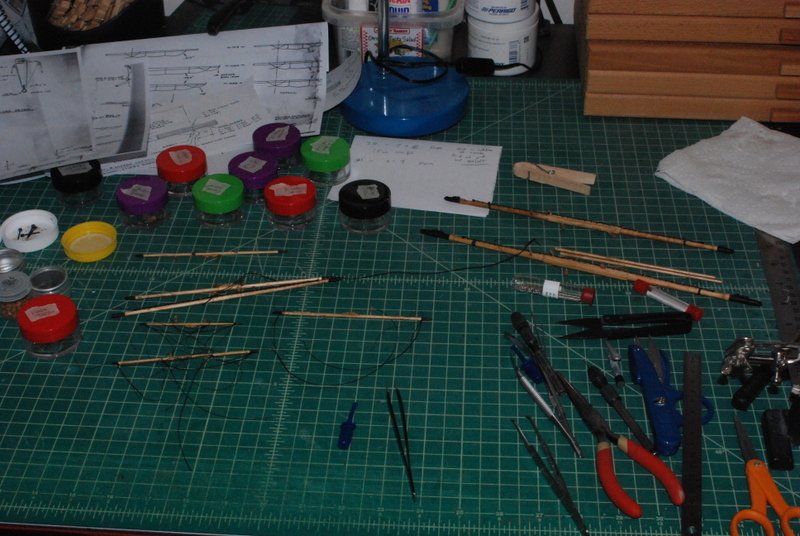
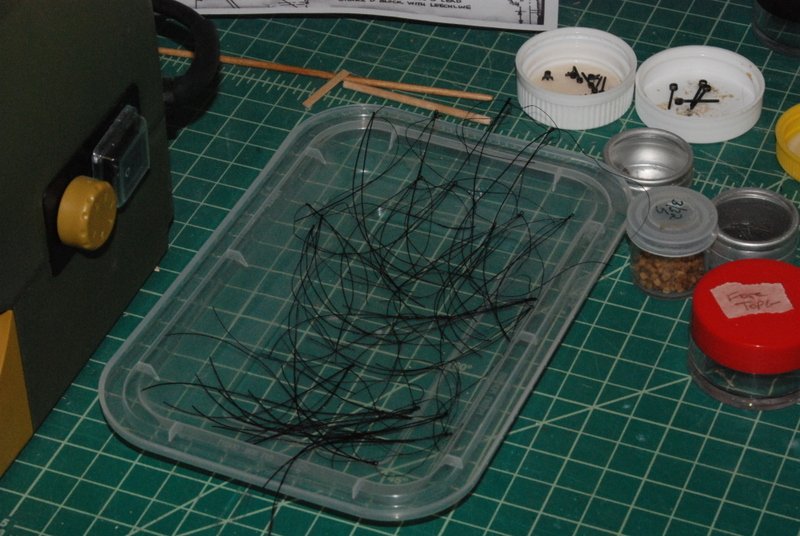
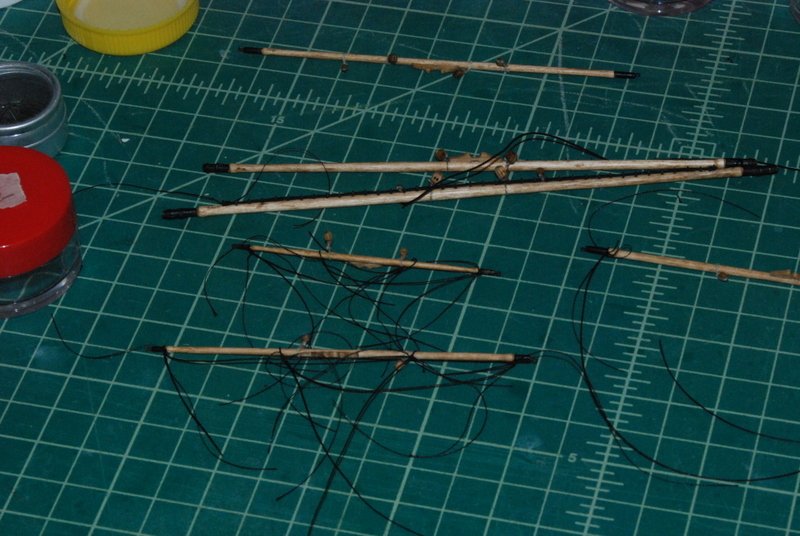
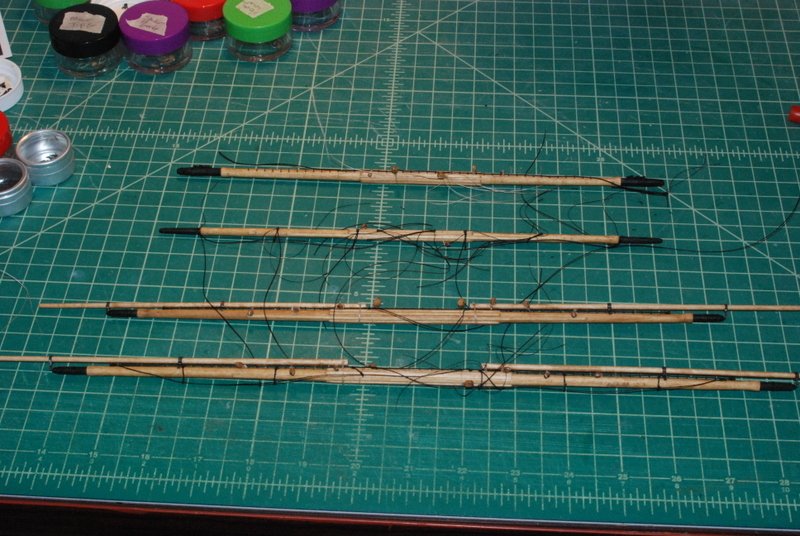
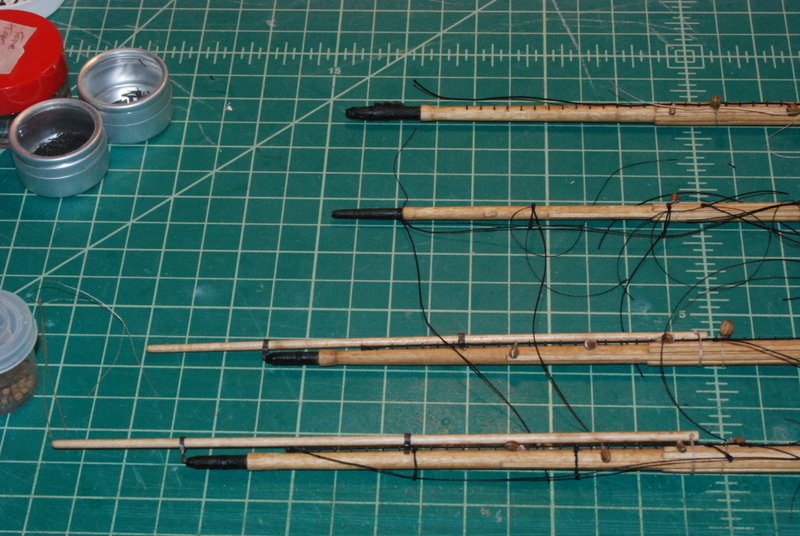
Time for a weekly update. First, thank you for the likes. I have been mostly working on getting the jack stay lines and studding sail booms onto the topsail and topG yards, and the horses and stirrups on the lower and royal yards. Here are the completed yards and spars so far: And here are the others in progress: I made up all of the stirrups I will need for the rest of the yards. These are a doubled piece of line that I put around a drill bit and add a seizing to make a small loop: I think there are 24 of these in this picture, with 3 different size lines. Here I am using them on the main royal yard. The mizzen lower yard doesn't have any stirrups, so that is the other small yard. The three topG yards are shown in progress in this image too. I am hoping to finish up these yards soon so I can move on.
- 1,354 replies
-
- 6
-
-
- constitution
- model shipways
- (and 1 more)
-
Had to laugh at all your medicine bottles. I also keep a good supply of them. One day my brother in laws were visiting and they saw them all and said it must take a lot of drugs to build these ships. They are not too far off, I think.
- 378 replies
-
- 6
-
-
- t78 norden
- billing boats
- (and 1 more)
-
Looking good, Popeye. More cold weather on the way, but not as bad as last week, eh?
- 378 replies
-
- 4
-
-
- t78 norden
- billing boats
- (and 1 more)
-
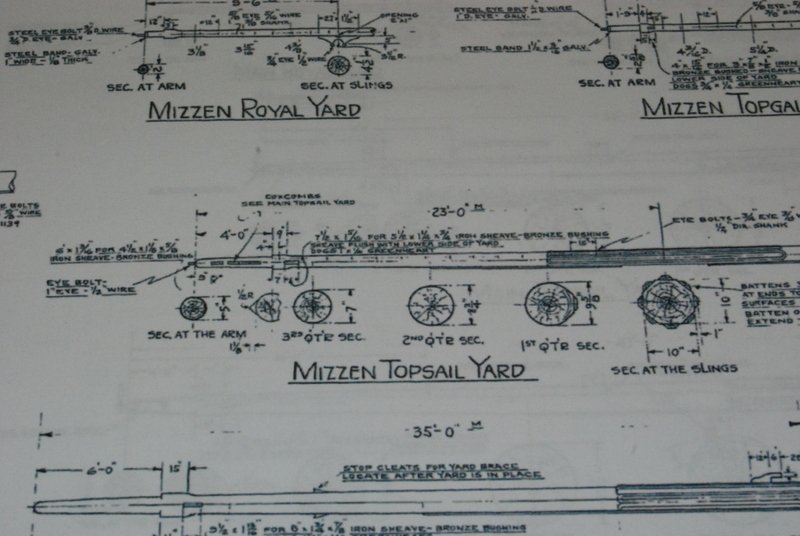
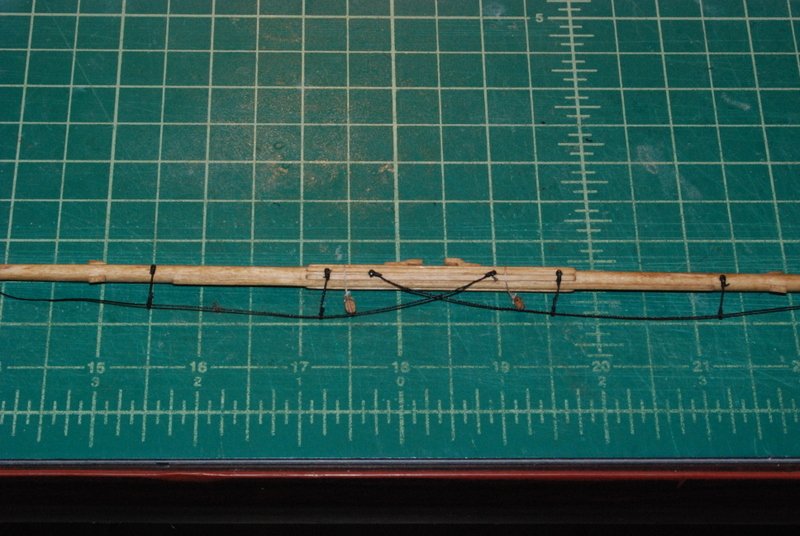
Thanks for the likes folks. More progress on the lower yards. I have successfully added the studding sail booms to the main and fore lower yards, after a little rework. I went to slip one of the fore studding sail booms into the inner bracket to use it to align the outer bracket, but it had a double bend in it like an S shape, which it did not have when I stained it. So, I had to make and finish a new one, which took a few days. It is all installed now. I took a bit of a short cut on the outer brackets, which on the real ship are two straight pieces that meet at a 90 degree angle. For mine, I just bent a single piece into a 90 degree angle. I have also been adding the horses and stirrups to these yards, and have started adding the jack stay to the main topsail yard. The mizzen lower yard, or crossjack yard, does not have a jack stay since it does not carry a sail. For the yards with jack stays, the stirrups are tied to the eyebolts and hang down the back of the yard. For the crossjack yard, I first made the stirrups as loops around the yard, but I didn't like how they hung down. So, I went a different route here by adding small nails to the back of the yard, leaving the heads above the yard slightly so I could tie the stirrups to the nails. I then pushed the nails further into the yard. Here is how it came out. I still need to shape the stirrups so they curve around the yard so the horses are hanging down, not straight back. A little white glue and some clothes pins should take care of that. Speaking of jack stays, the MS plans specifically say to only put jack stays on the fore and main lower and topsail yards. Since I plan to put a sail on the three topsail yards, I was wondering how to attach the mizzen topsail to that yard, which I figured would be to just loop lines around the yard to hold the sail. But, I have the plans from the 1929 restoration, which clearly show jack stays on all the yards except the crossjack yard. So, I am going to add a jackstay to the mizzen topsail yard and possibly the topgallant yard too. I am not putting jack stays on any of the royal yards as the eyebolts I have would look way too big. I will have furled sails on the topG yards and maybe the royal yards too, which would cover them anyway. I will have jackstays on the fore and main topG yards. Keep this in mind future Connie builders that the plans may be misleading here. I have also started planning for making the topsails and the furled sails. I have sail plans from the restoration that I have pulled each sail out from and scaled them to model scale, so I can make paper templates for each sail. This will be done in parallel with finishing the yards. Have a great weekend all.
- 1,354 replies
-
- 6
-
-
- constitution
- model shipways
- (and 1 more)
-
It was pretty cold last week - hovering around 0 most of the week. Up to 40 degrees today, though.
- 742 replies
-
- 3
-
-
- constitution
- frigate
- (and 1 more)
-
Damn, why didn't I think of that Dave. I did use a small scroll saw and it was real pain taking the blade in and out for each layer.
- 742 replies
-
- 3
-
-
- constitution
- frigate
- (and 1 more)