usedtosail
-
Posts
2,423 -
Joined
-
Last visited
Content Type
Profiles
Forums
Gallery
Events
Everything posted by usedtosail
-
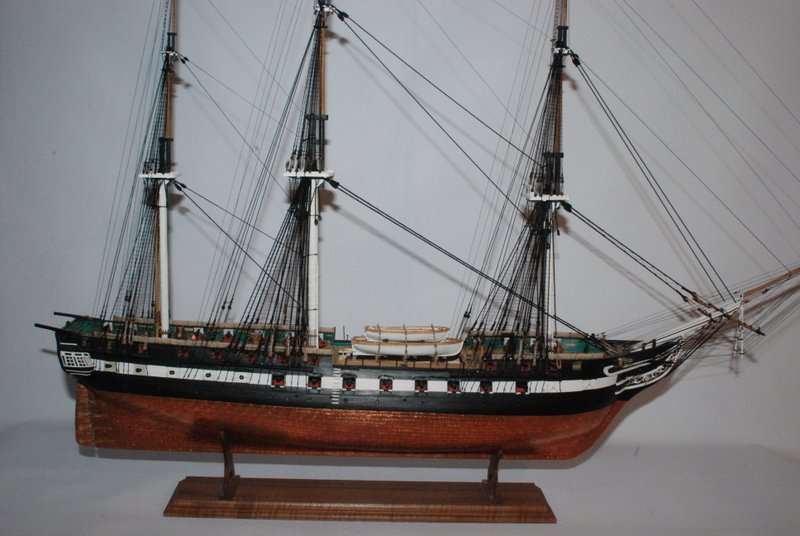
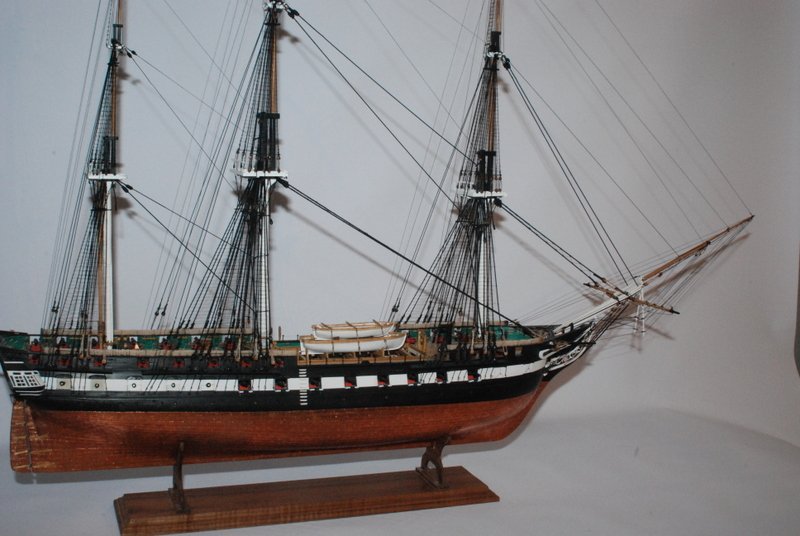
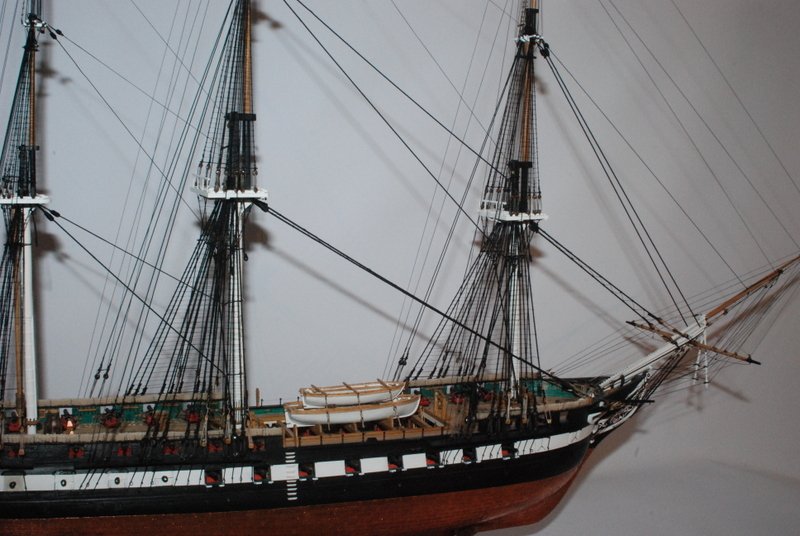
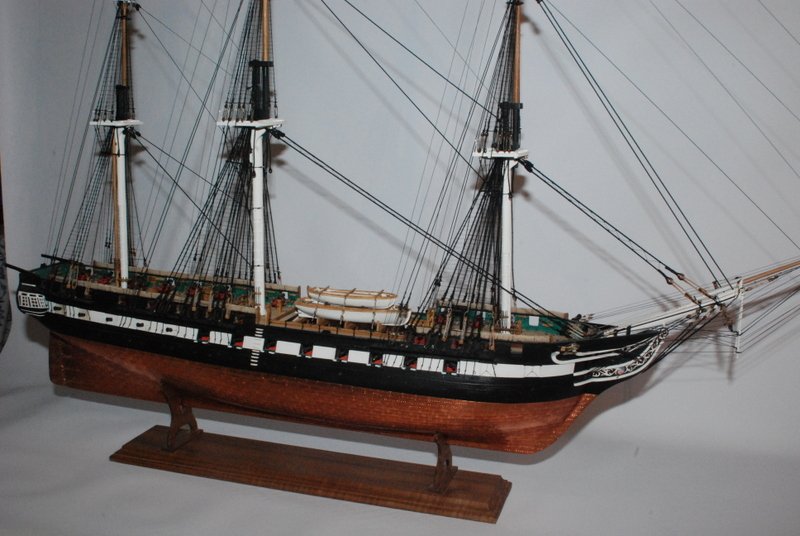
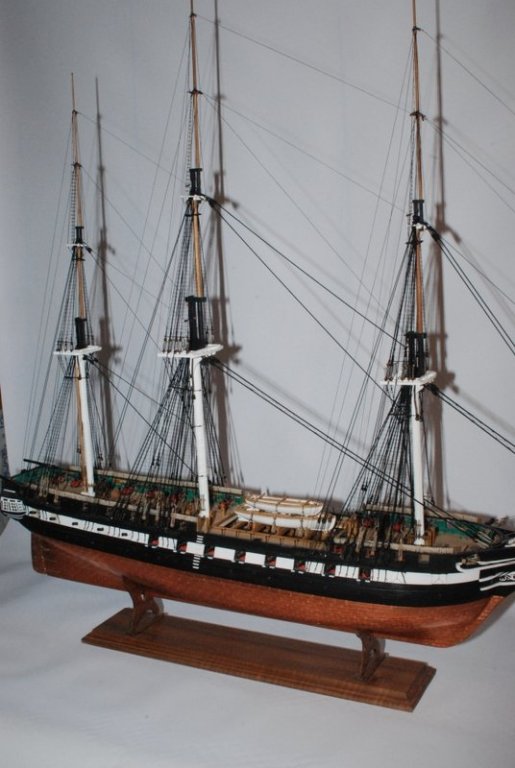
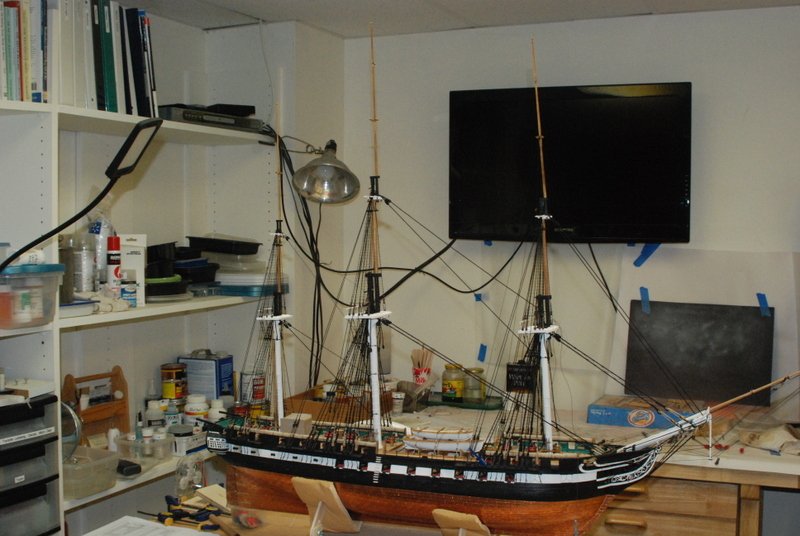
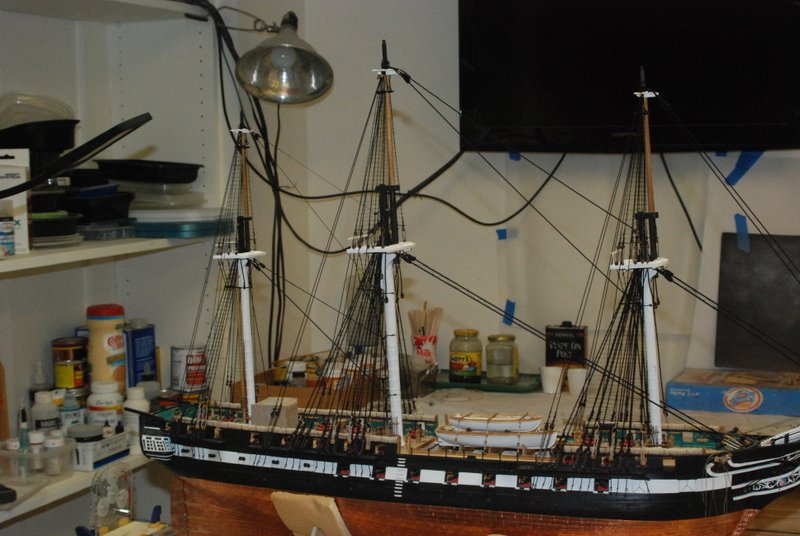
 Thanks Popeye and Ken. And now after almost 4 years of work, I have come to a major milestone - the standing rigging is completed! In honor if this event, I set up the back drop and put the Connie on the stand I made for her, and took some glamour shots. It was nice being home for Thanksgiving so I had tome to do this. Enjoy.
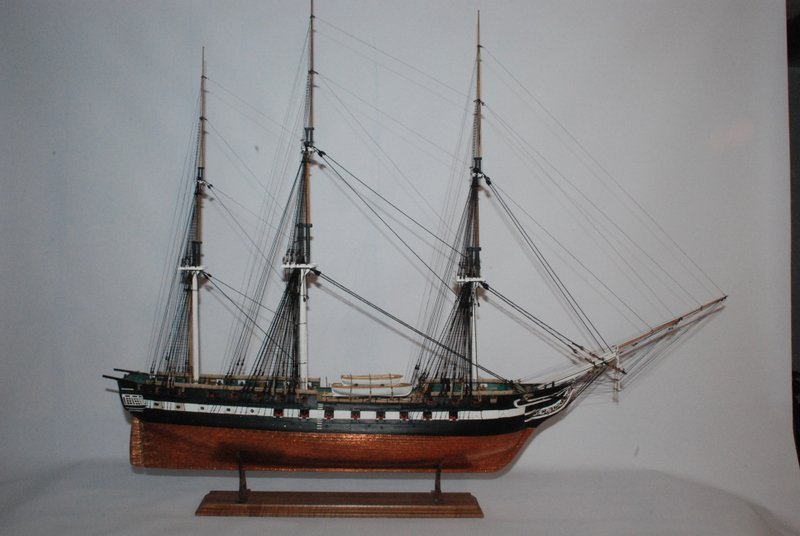

- 1,354 replies
-
- 15
-

-
- constitution
- model shipways
- (and 1 more)
-
Thanks Al, and for those who hit the like button. The ladder is a bit out of scale, but I could not work with wood that was less than 1/32" square. I am pleased with the result.
- 1,354 replies
-
- 3
-
-
- constitution
- model shipways
- (and 1 more)
-
Ropewalk
usedtosail replied to Worldway's topic in Rope Making/Ropewalks's Rope Materials and parts resources
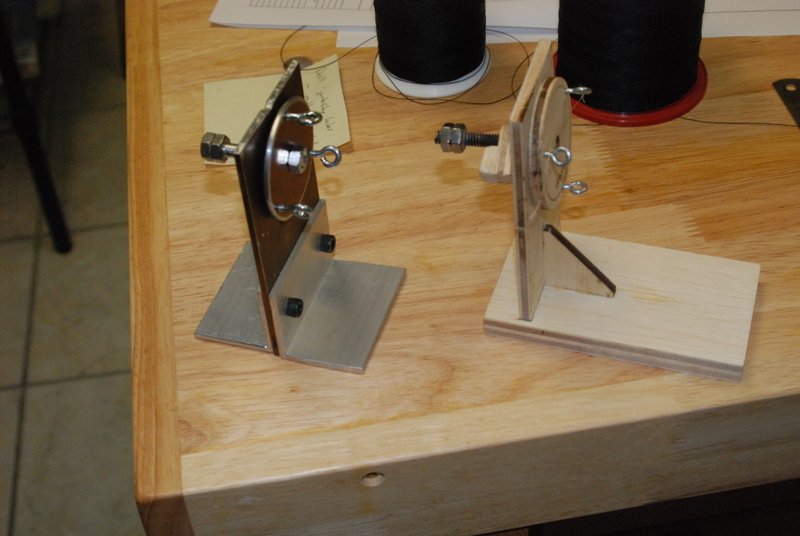
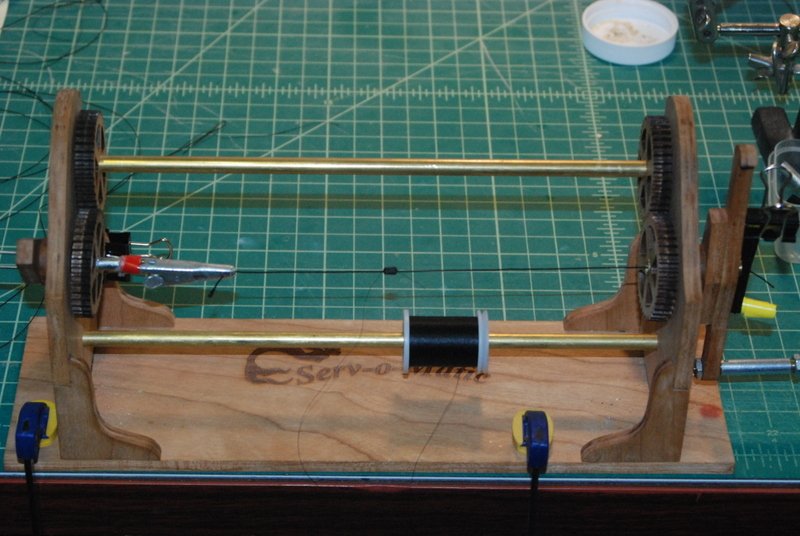
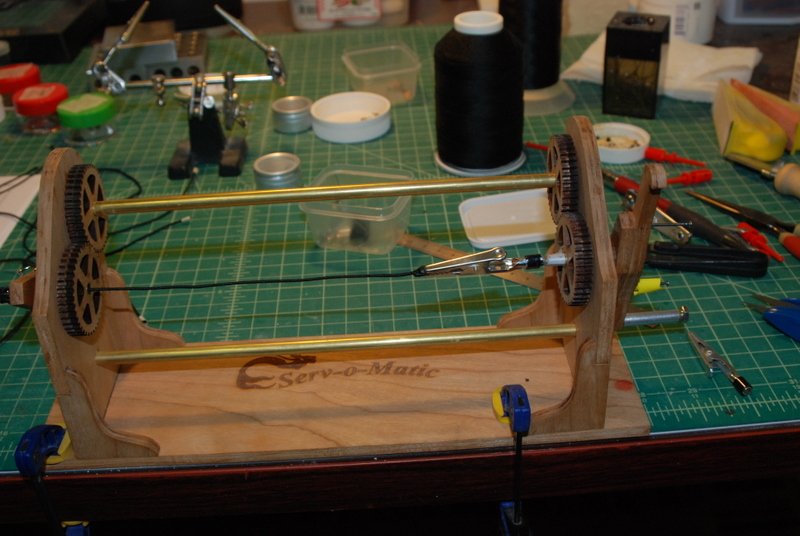
Hi Derek. I think you will be happy with the ME offering. I wanted to show you my set up, which is a combination of the Dormanoff vertical ropewalk and the ME horizontal rope walk. For the head end, I replaced the ME version with the Dormanoff. I was using clamps to hold it vertical, but this weekend I sandwiched it between to aluminum angle irons, which is much sturdier and easier to clamp to the bench. For the tail end, I was using a modified version of the ME tail end, as shown on the right in this picture. The handle broke off at some point, so I jammed a cut off bolt into the end hole and threaded on a couple of nuts, so I can drive it with a nut driver in an electric hand drill. Because I can turn it so fast with the drill, I wanted something a little better, so I built the next generation back end over the weekend, shown on the left, mostly from some sheet aluminum I had. I cut the disk and threaded in the eye bolts. I also pressed a ball bearing into a hole in the vertical sheet, and turned a shaft that is threaded on both ends. The disk is threaded onto the shaft with a nut to hold it in place, and two nuts are threaded on the other end for the nut driver. Have fun with your rope making. When assembling the ME rope walk, put the head end together carefully so it turns easily. That was the biggest problem I had with mine.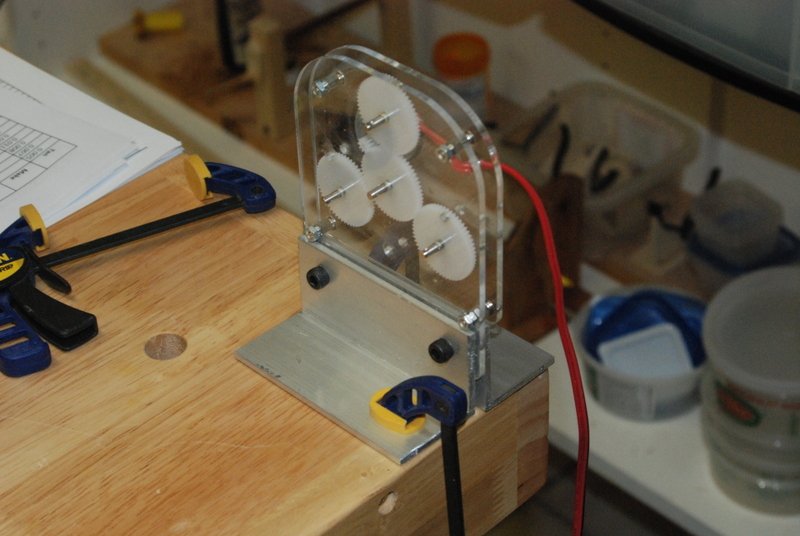
-
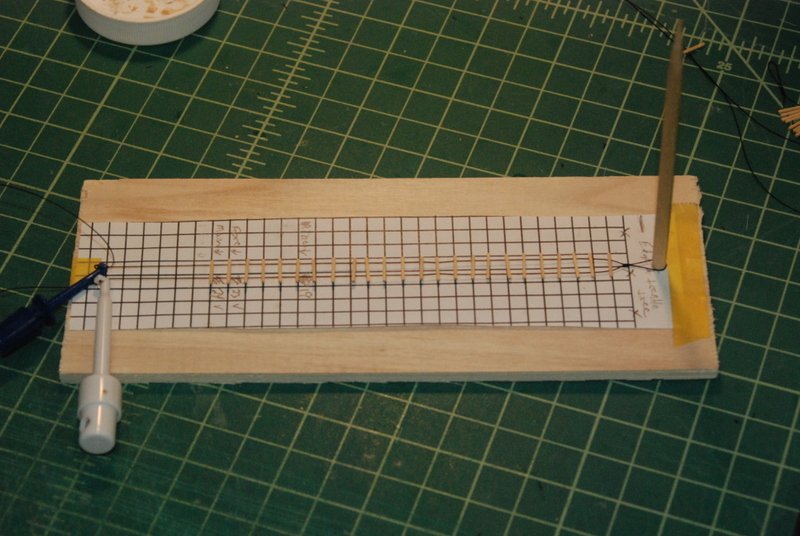
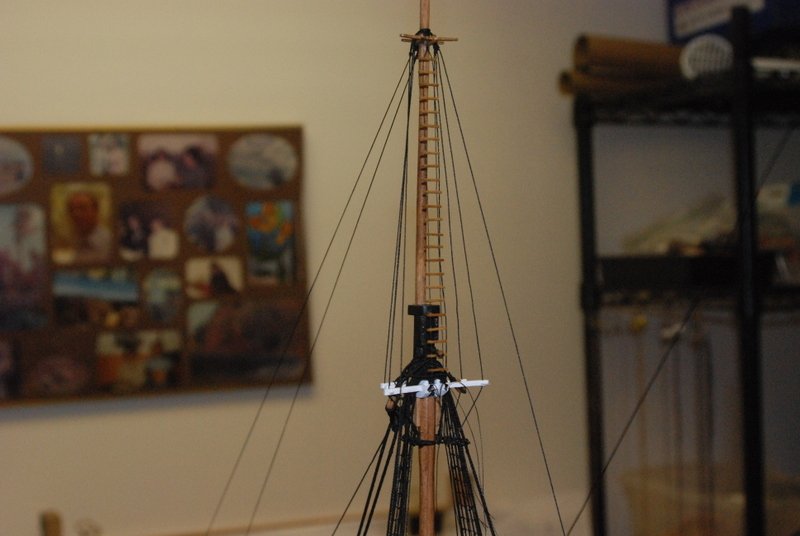
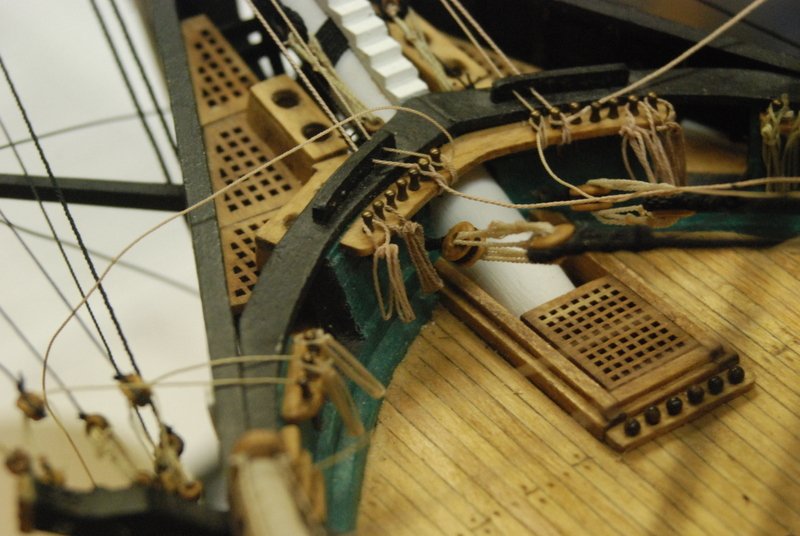
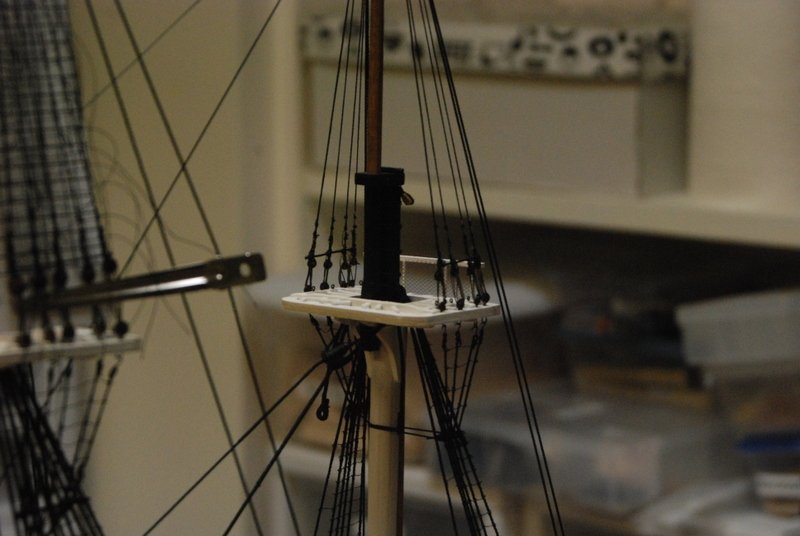
Thanks again Al, Popeye, and GMO2. Welcome Hal. I made up the three ladders over the weekend using the jig shown here. Along with the post to hold the loop at the top of the ladder, there are two eye bolts that the ladder lines are threaded through and the lines clamped. I could have also tied the lines around the eye bolts, but the clamps made it easier to get the ladder off the jig. I was going to put plastic over the graph paper, so the glue would not stick the ladder to the jig, but the ladder was held just off the surface so no glue got to the graph paper. The jig worked really well to align the rungs and hold them while the glue dried. I stained the rungs with oak stain and hung the ladder on the fore topG mast. If you look closely at the above picture, you will see a block sticking through the rungs near the bottom of the ladder. The main topG stay was formerly in that block, so I had to remove it, put the ladder in place, then replace the stay. No big deal, but I should have known the order and held off on the stay. It is back in place now, but I took the picture before I added it back, and before I trimmed the loose ends of the ladder lines. I kept those lines really long, which helped when I had to seize them to the eyebolts at the back of the trestle trees. I threaded the line through the eye bolt, then left it very loose, which meant that I could put the seizings on well a way from the mast, then slide them into place while tightening the lines, and fix them when the ladder was at the proper tension. I have to stain the other two ladders and add them to the main and mizzen masts. I can also now start on the fore royal shrouds, back stays, and stay.
- 1,354 replies
-
- 7
-
-
- constitution
- model shipways
- (and 1 more)
-
No rush getting the Swan plans to me. It will be a long time before I can think about starting. Thanks also for the materials list. What length should the 3" sheets be - 24", 36", something else? Thanks.
-
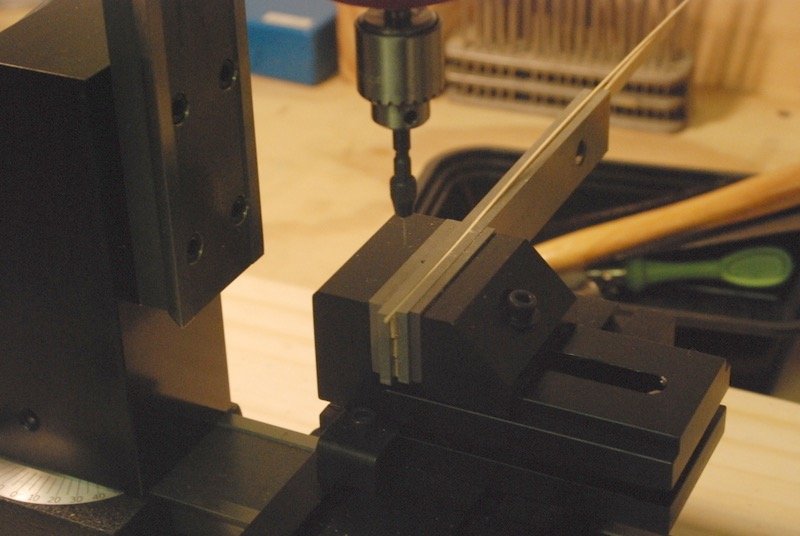
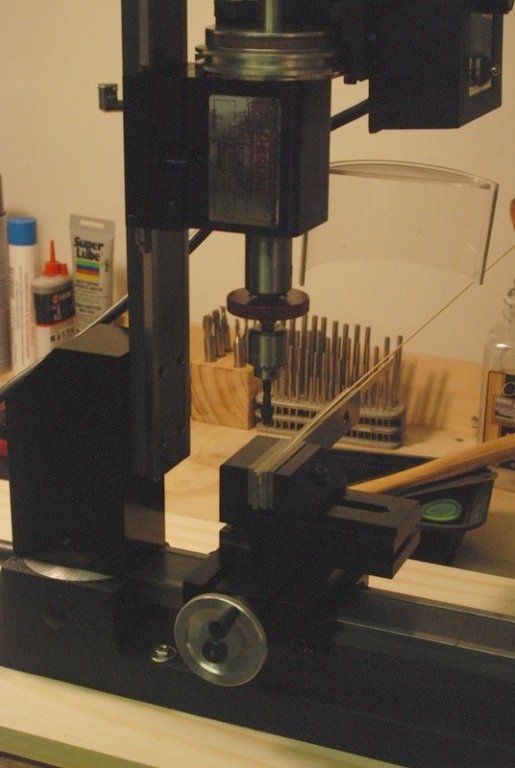
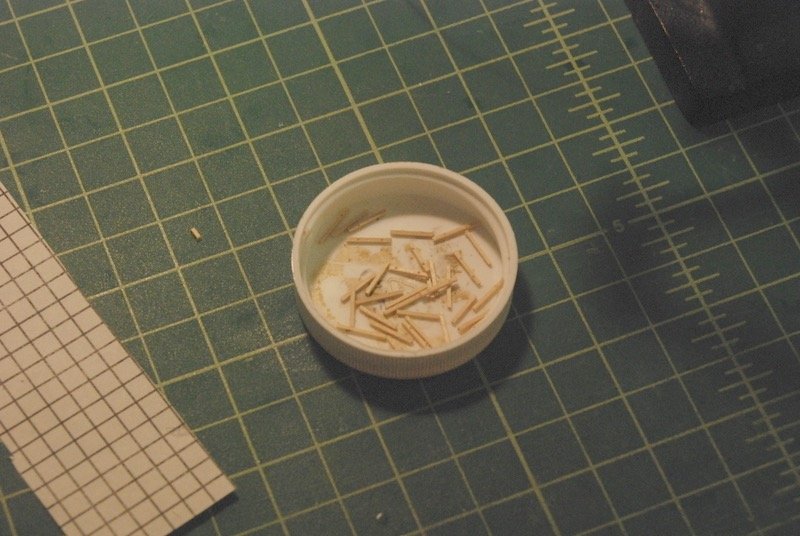
Thanks so much, Al, Popeye, Dave, GMO, and kmart, plus the likes. GMO2, I like your plan to model the 1927 restoration version. I agree that it is a great historical event for this great ship. I will look forward to following your build, as I am to other builds that are in progress or about to be started. I finished up the mizzen topG shrouds, back stays and stay. I found that if I tensioned the stay first, then the back stays, then the shrouds, they look better than tensioning the shrouds first. I did it in this order on the main topG mast, but not the fore topG mast. Not enough of a difference though to redo them, though. I promised to take pictures of the rope coil jig I use, but have not made any new rope coils yet. Here are some pictures of the latest ones I made, along side some older ones that I don't think are as good. The older ones are the two on the left in both pictures. The others are all the newer ones. I think the main difference is that the newer ones hang better. The other difference is that the newer ones are made from cotton rope while the older ones are nylon rope. I plan to use mostly cotton rope for the running rigging. I am now working on the three Jacob's ladders that hang on the topG masts to the topmast trestle trees. I was going to make these by gluing wood strips to the line, but decided to try drilling holes in the strips and threading them through the line, which to me seems more secure. I set up the mill with the sensitive drilling attachment and used some parallels with 1/32" wood strips between them to make a jig for holding the 1/32" square basswood for the rungs. There is a slot at the top of the vise that these strips fit into. I first tried drilling through multiple strips, but after the first two, the drill bit wandered enough that the holes were coming through the sides of the rungs. I then drilled each strip individually. I used a #77 drill bit, which left enough "meat" on the sides of the holes, but makes stringing the rungs onto the line a bit difficult. I have to keep dipping the end of the lines into thin CA to harden them after adding a few rungs, as the ends want to fray. Because the vise is not actually holding the strips down, I used tweezers to hold the strip as I drilled each hole, especially when removing the drill bit from the hole. After drilling the holes for 4 rungs, I removed the strip and cut the rungs off. With this process I was able to make about 20 rungs in 30 minutes. I need about 70 rungs for the three ladders. I also used a small drill bit holder so I could center the tiny drill bit in the sensitive drilling attachment more easily. Here is the mill set up: Here is the first batch of rungs and the start of assembling them. I did not trim the rungs to length until after they are strung on the lines, then I slide the rungs together and trim the ends with a scalpel. I am currently putting a jig together with a piece of graph paper that will secure the lines while I glue the rungs in place. Look for that in a future post.

- 1,354 replies
-
- 7
-
-
- constitution
- model shipways
- (and 1 more)
-
Just sent you a paypal payment for swan plans and masting plans. I tried to send a PM but it didn't go through. Thank you for your great support towards this hobby and good luck in your future plans.
-
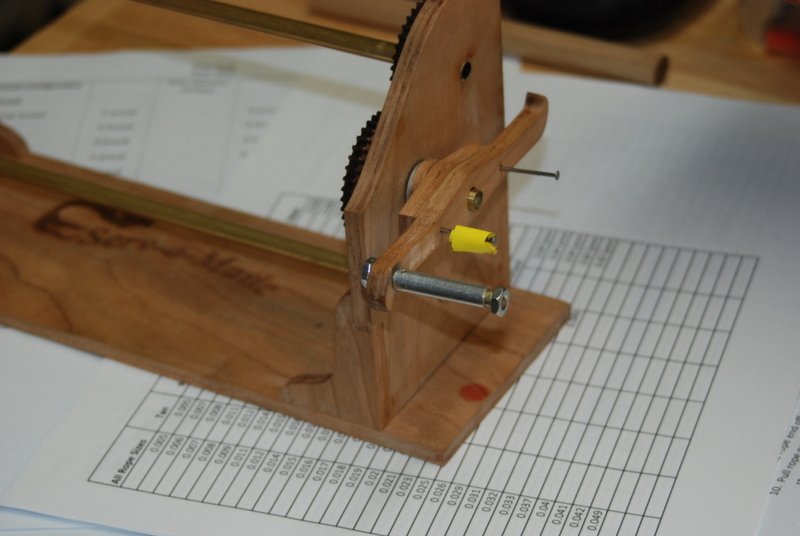
Could you drill those holes while the assembly is still on the lathe, before you part off the wheels? This was one of the most rewarding parts to make for me. Have fun with it.
- 742 replies
-
- 6
-
-
- constitution
- frigate
- (and 1 more)
-
Thanks Ed. Yes, I guess a clove hitch is really two half hitches. I just never thought of it like that because when I use them for ratlines it seems more complicated for some reason. I used to do seizings with half hitches but now I use more of a wrapping with a loop at the top that I take the end through. I like this type because it will slide before being fixed, which in some cases is not always a good thing, but in others is very useful. Keep up the great work and especially the books, which are some of my favorite reads.
- 3,618 replies
-
- 3
-
-
- young america
- clipper
- (and 1 more)
-
Great work as usual Ed. One question - you mention you are using clove hitches for the seizings. By what you show, it looks like those are half hitches, unless you are making each successive loop in opposite directions?
- 3,618 replies
-
- 2
-
-
- young america
- clipper
- (and 1 more)
-
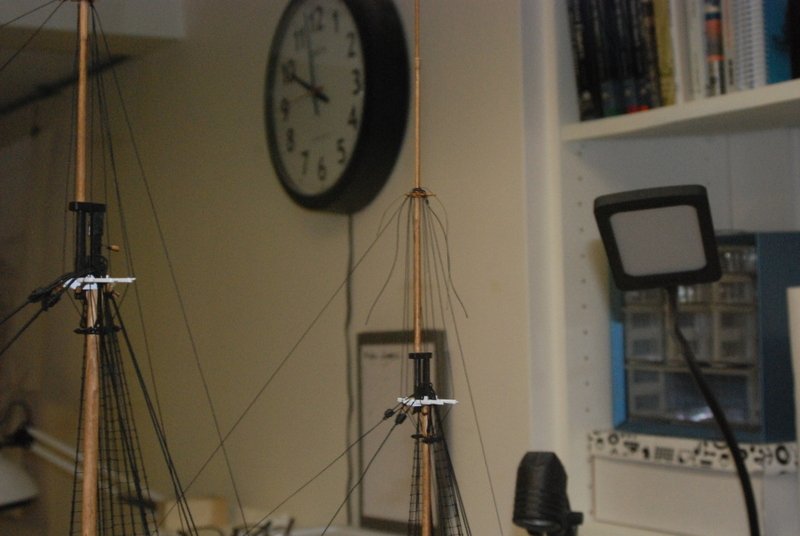
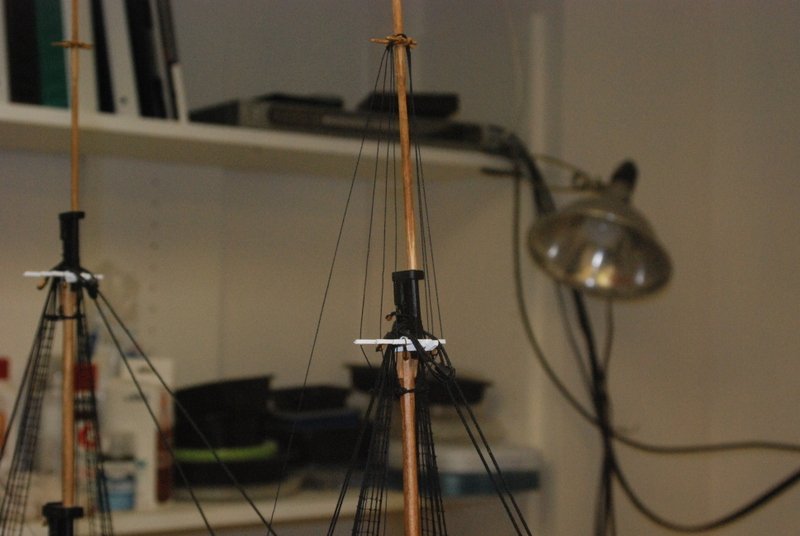
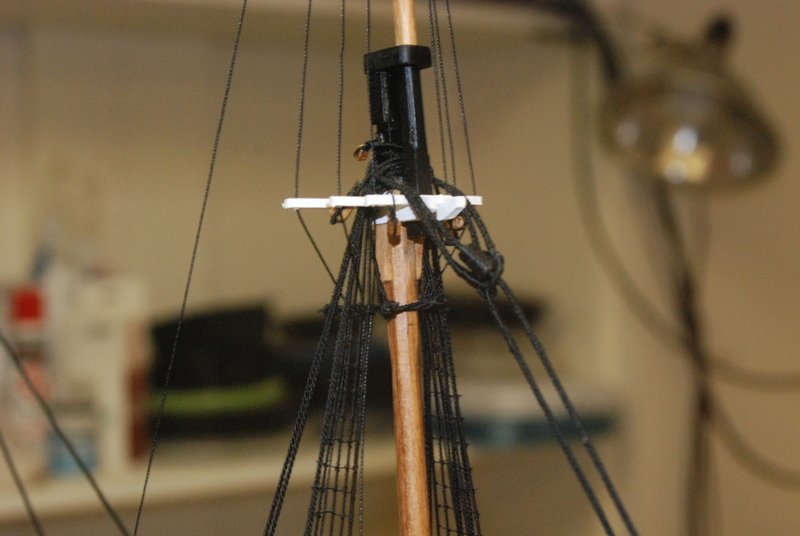
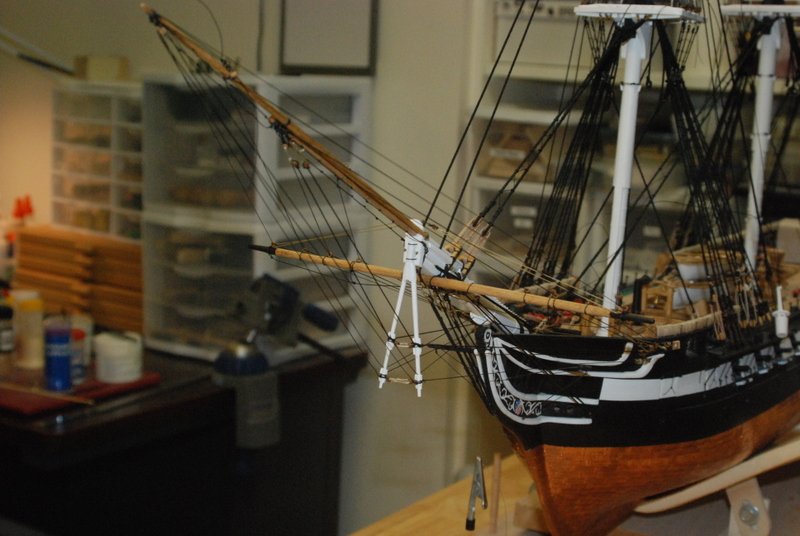
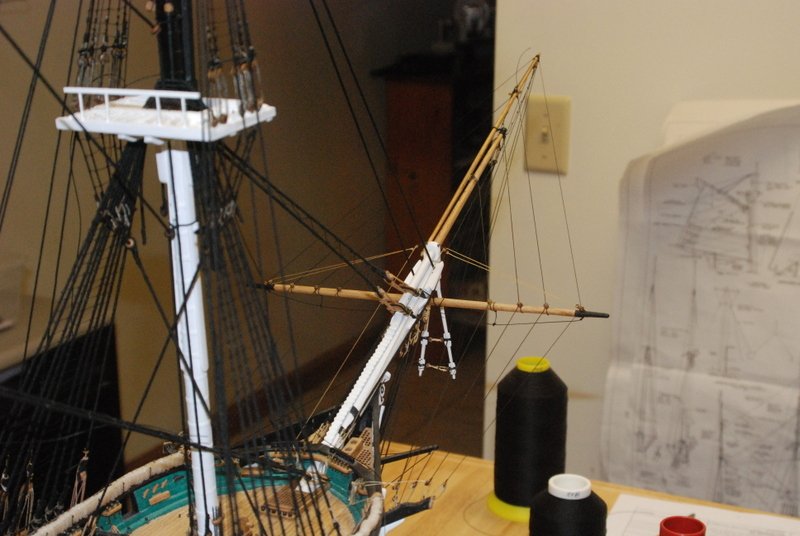
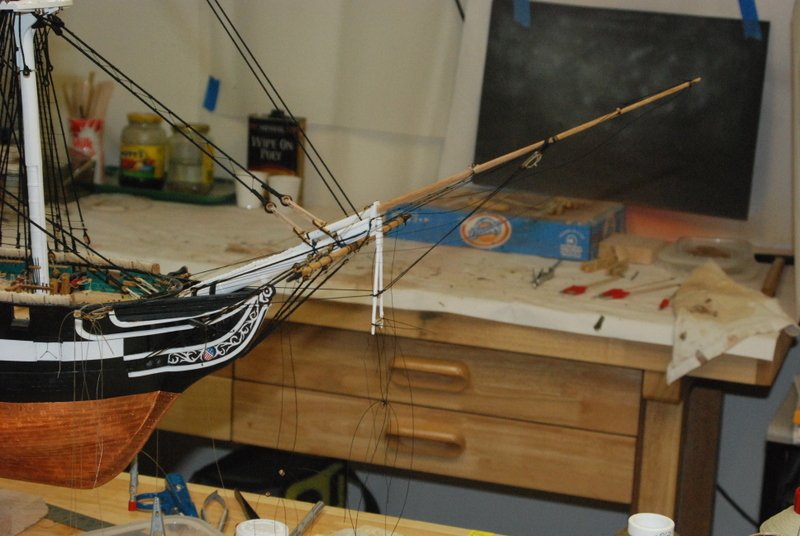
Thanks popeye, and you folks who hit the like button. I finished up the flying jibboom rigging that was started in the last pictures - the outer traveling and fixed guys, and the outer martingale stays and back ropes. In order to tension these, I added a temporary line to the flying jib boom traveler to hold it from sliding back. This will be removed later when the flying jib boom stay is added, which will pull the traveler forward. I added the top gallant masts to all of the topmasts. These are a little harder to keep in line, and I have to keep checking them every time I add a new line. I added the topG trestle and crosstrees, which I had made earlier. I left the rear crosstrees off these when I made them because of the shoulder on the topG masts where the royal masts start (they are all one piece). There would be no way to slide the trestle trees over that shoulder, so I slipped the trestle trees on the mast at the topG shoulder and glued the rear crosstrees in place afterwards. This worked really well. I have not glued these to the masts, as I think the rigging will hold them in place. We will see. If I need to I think I can get some glue up under them. Once the topG masts were added, I glued the cheek blocks to the topmasts. I had also added blocks on loops for some of the stays, and I cut small chokes to hold the loops in place, which I glued on and painted black in place. I started the top gallant (topG) rigging with the fore topG shrouds. It was interesting having to thread these through the tiny bullseyes on the topmast shroud staves. I had to stand on a step stool to get high enough to look down on the bullseyes to thread them, but it turned out easier than I thought it would. From the bullseyes, they go down to the eyebolts on the fore top. I threaded each one through an eyebolt, then kept it loose while I added a seizing, slid the seizing down to the eyebolt while putting tension on the loose end of the shroud, then fixing the seizing at the eyebolt. This technique worked pretty well, although getting the tension right between shrouds proved more difficult than the lower shrouds. After the shrouds, I added the topG backstays, but did not tension them yet. I then added the jib stay, which required another mouse. I made this one the same way as the others, although it is smaller. I used very thin fly tying line to serve the stay and over the mouse. The jib stay goes through the traveller on the jib boom, then through the sheave in the end of the jib boom, and ends in a double block. There is a single block that is hooked to the bow sprit cap, and the tackle line runs to the bow pin rail. I hooked all that up this morning but did not get a picture. I also added the outer jib stay, which goes through the dolphin striker to an eye bolt at the bow, and flying jib stay, which goes through the traveler on the flying jib boom, but have not finished the outhaul for it yet. I have also been playing around with different techniques for making rope coils to go onto the belaying pins. In the past I have always bent the whole coil around a 90 degree edge and hung the whole thing on the pin. Since then, I have seen examples of ropes with one loop that goes over the pin and the rest hangs straight down from the loop. This is what I am trying to get to. I will show the jig I use and how I am doing it in a future post. Thanks for your interest.
- 1,354 replies
-
- 8
-
-
- constitution
- model shipways
- (and 1 more)
-
I think your plan sounds good. Having all real guns on the gun deck is a great goal and will really add to the details. I agree those fake barrels are lousy, which is why I closed the gun lids on them. By tunnels, I think you mean trunnels or treenails. Yes, I think you can simulate them by drilling holes in the planks and using wood filler to fill them, which is how I did mine anyway. The difference for your plan would be to line up the cut planks off the model, mark, drill and fill your treenails, then install the planks. Rigging the guns between the bulkheads might prove to be a bit challenging, but you could probably fake some of the rigging for the guns that will only show through the gun ports.
-
Ropewalk
usedtosail replied to Worldway's topic in Rope Making/Ropewalks's Rope Materials and parts resources
Well, here is my journey into the world of rope walks. I started with the basic Model Expo ropewalk, which actually worked pretty well. It was tough getting the wooden gears to mesh nicely so after a while the end with all the gears became unusable. I then bought a Domenoff vertical rope walk. This worked OK, but I had problems not having enough height getting a length of rope as long as I needed, and I wanted more control over the tension of the finished rope, which was very dependent on the amount of weight used. So, I mounted the Domenoff horizontally, essentially replacing the end of the ME rope walk that broke. I still use the other end of the ME rope walk, which I modified so I can turn it with a power drill. I can vary the tension by holding the moving end with one hand and the drill in the other, keeping the tension as tight as I like while the threads are pre-tensioning and while the threads are wrapping into the rope. I also added a foot switch to control the Domenoff end, so I can stand at the other end to keep tension on the threads. I am very happy with most of the rope I can make this set up, except for very large ropes which I have not yet perfected. I buy from Chuck for those large sizes (.035" and up). I have also recently purchased a used Byrnes rope walk, which I have been experimenting with. So far, I have not been able to reproduce the rope with the same quality as I can with the Domanoff/Model Expo hybrid. If anyone is interested in the Byrnes rope walk, make me an offer. I really don't need it. -
Run a few battens along the outsides of the bulkheads. If they are fairly lined up you should be OK. I had some that need quite a bit of shimming on the outside to fair to their neighbors. I don't know if ME fixed anything, but they might have. As Captain Steve says, I cut off the spar deck supports where I place the gun deck and filed down the new bulkhead tops 1/8" so I had room for 1/16" solid underlayment and 1/16" planking for the gun deck.
-
Thanks for the compliment, Kmart. I hope my log helps all of the next round of Connie builders. And you all will help the next round, etc. etc., as the previous builders helped me. It is a long journey for sure. I am getting close to 4 years on this build. But it is so rewarding. And you are off to a great start. And one more thing - if you haven't already, check out XKens build log of his Connie. A wealth of information is there.
-
Kmart, well to the connie club. I look forward to following along with your build. Don't hesitate to ask questions, but it has been a few years since I was at these steps. Tom - go for it, and please start a build log when you do. i'll follow along with yours too.
-
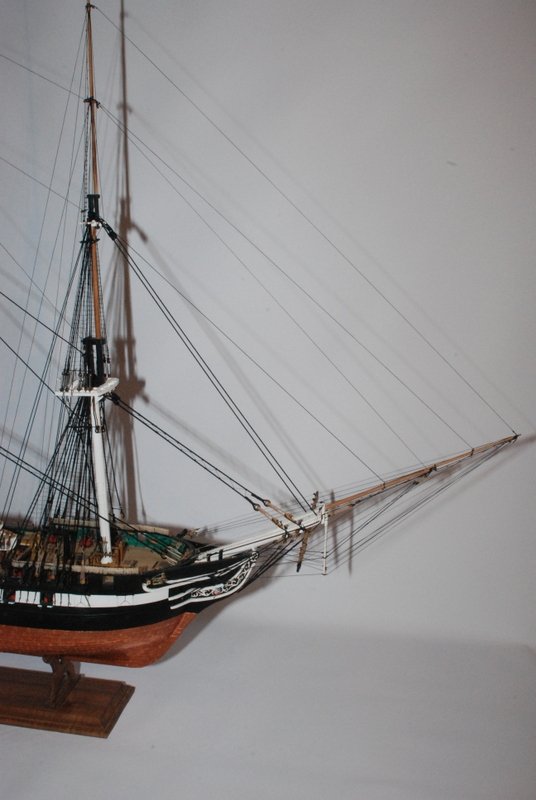
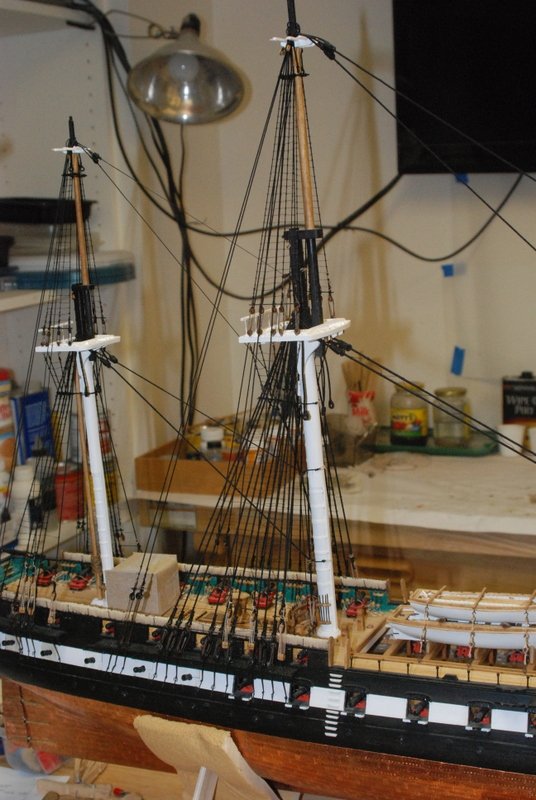
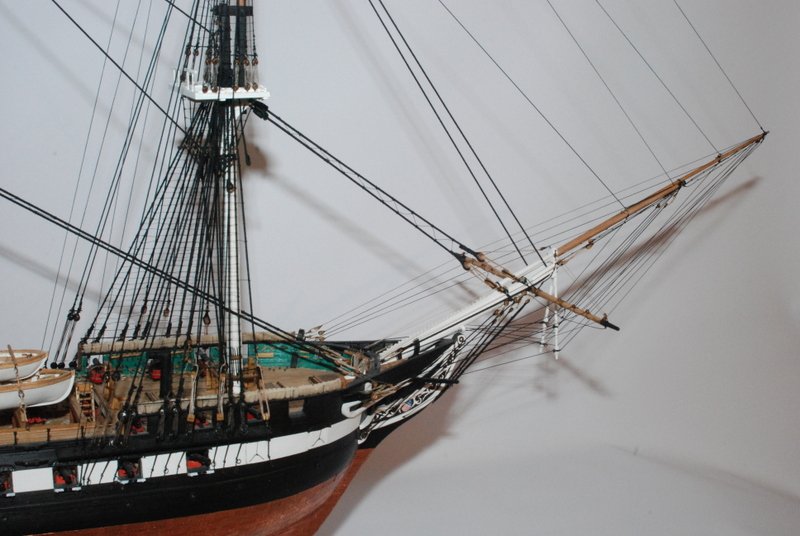
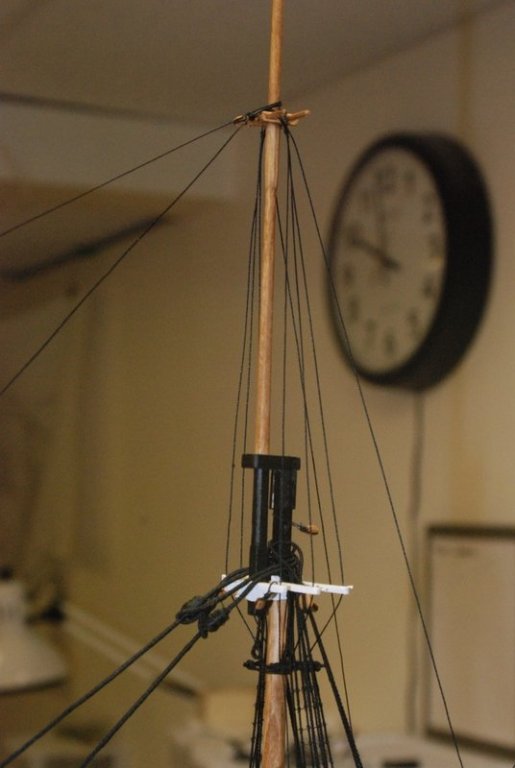
So the work on the topmast standing rigging is completed. All of the ratlines have been added to the topmast shrouds, and the breast stays have been redone to start at the topmast top. I apologize for the pictures, now and in the future, as the cluttered background makes it hard to see details. I do have a backdrop I can use but it in another room and I don't want to keep moving the model in and out. I was going to stop and take some good pictures after the topmast rigging was done. but I ended up just continuing on with the flying jibboom rigging. Here are pictures of the in progress and completed topmast standing rigging. And here you can see the start of the jibboom standing rigging, specifically the outer traveling and fixed guys, and outer martingale stays. I attached the flying jibboom to the bowsprit cap by drilling a hole through the boom into the cap, then gluing it in place with a piece of wire in the holes. This seems to have made a nice secure attachment, and I then placed a U shaped piece of wire over the flying jibboom as more of a decoration than an actual support. The metal bracket in the middle I glued to the end of the jibboom, so there is a good attachment at that end too. I wanted this to be well attached in case I bump it later.


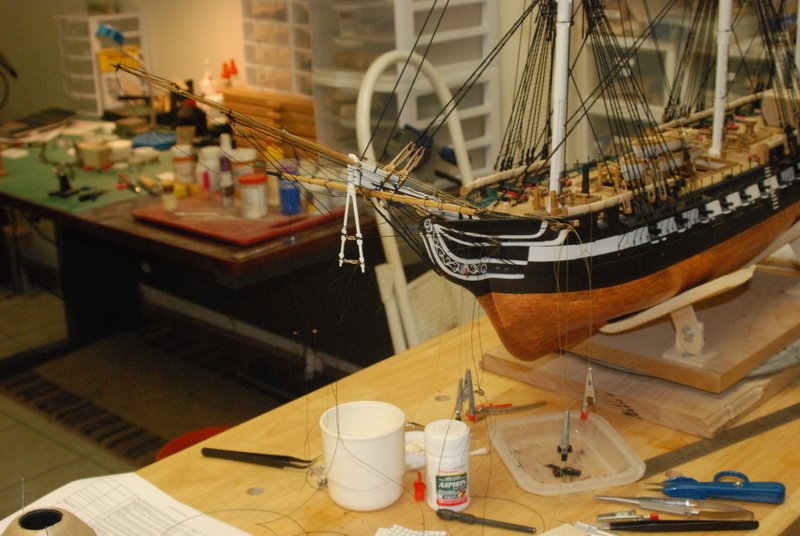
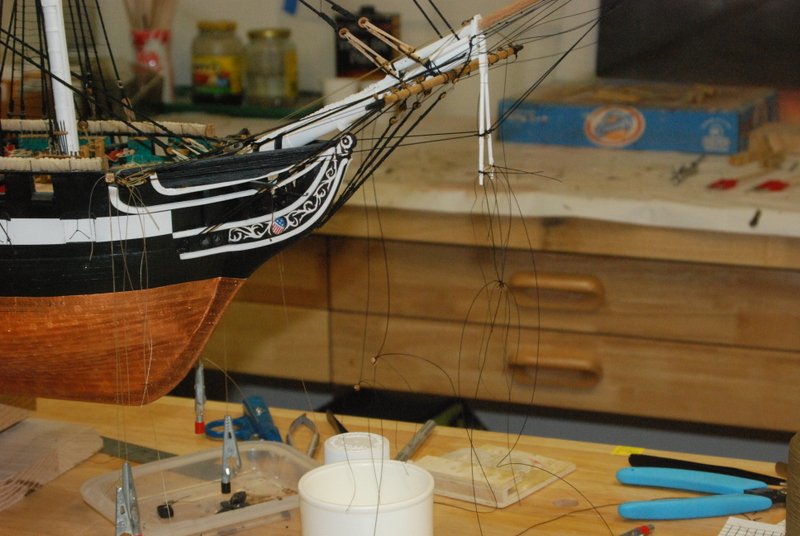
- 1,354 replies
-
- 9
-
-
- constitution
- model shipways
- (and 1 more)
-
Yep, I made the same attachment, using another brass tube with a tight fit into the tube on the serving machine. The other mod I did was add a handle to the crank:
- 11 replies
-
- 7
-
-
- block seizing serving
- serv-o-matic
- (and 1 more)
-
Coming along nicely Maturin.
-
I like the comb jig to hold your grating pieces. They look great (or should I say grate).
- 1,135 replies
-
- 2
-
-
- model shipways
- syren
- (and 2 more)
-
Thanks Gary. I completely got those wrong. I have the breast backstays on, but have them coming from the lower mast heads, not the topmast heads. I will have to take them off and redo them, but that is not a problem as I have had to redo many things as I have gone along. I have the AOS book but haven't been using it as I don't think it is very accurate, but in this case it is. The MS plans don't show the breast backstays in relation to the other standing rigging, but the picture of the breast backstay on the plan shows the loop at the top and does say to go around the topmast head.
- 1,354 replies
-
- 1
-
-
- constitution
- model shipways
- (and 1 more)