Supplies of the Ship Modeler's Handbook are running out. Get your copy NOW before they are gone! Click on photo to order.
×


popeye2sea
-
Posts
1,916 -
Joined
-
Last visited
Content Type
Profiles
Forums
Gallery
Events
Everything posted by popeye2sea
-

jibboom guy pendant - standing or running rigging?
popeye2sea replied to GaryKap's topic in Masting, rigging and sails
Think of the Jib boom as a mast put over on an angle. The bob stays are the equivalent of a back stay, and the guys are the equivalent of the shrouds. The lead through thimbles on the spritsail yard gives the required spread angle to hold the jib from side to side and the tackles have the same function as dead eyes and lanyards for a shroud. -
Thanks John. Merry Christmas and Happy New Year to you and yours also. May it be healthy and prosperous.
-
You may want to try faking the rope down on the deck, which is probably the way a working line was laid out for running anyway. It consists of laying the rope down in long figure eights so that the half turns at the ends overlap. Since the turns at each end are in opposite directions there are no kinks put into the rope and it will run free. BTW the round coil is called a flemish coil http://www.youtube.com/watch?v=wUBHtbWLmxo
-
The shroud has three seizings clapped on. The first is a throat or cross seizing put on where the end of the shroud crosses behind the standing part (when looking from the outside of the ship). On this seizing the turns of the seizing are vertical. Then the end of the shroud is brought up beside the standing part and two additional round seizings are put on the first is called a middle seizing and the second is called an end seizing. The end of the shroud is whipped and cut off just above the end seizing. You will end up with a small gap above and below the throat seizing due to the diameter of the rope. For right hand laid rope the shroud passes around the dead eye counter-clockwise. For left hand laid rope the shroud passes around the dead eye clockwise. The laniard starts from the hole in the upper deadeye furthest from the end of the shroud.
-
Steels, Elements and Practices of Rigging and Seamanship has a detailed description of how made masts are constructed
-
So, now your a bricklayer too? Fantastic work. It really amazes me how many skills we learn and employ in miniature in order to build these models.
- 2,250 replies
-
- 1
-

-
- model shipways
- Charles W Morgan
- (and 1 more)
-
My general principle with the rigging is to try and do all of it without resorting to glue. That means rigging as close as possible to the real thing: whippings, seizings, ends tucked into or under strands, etc. That mouse will never come apart, it's woven together. The ends of the serving lines are pushed through the strands of the stay with a needle. Tension on the stay will just hold it tighter.
- 196 replies
-
- 1
-
-
- plastic
- soleil royal
- (and 2 more)
-
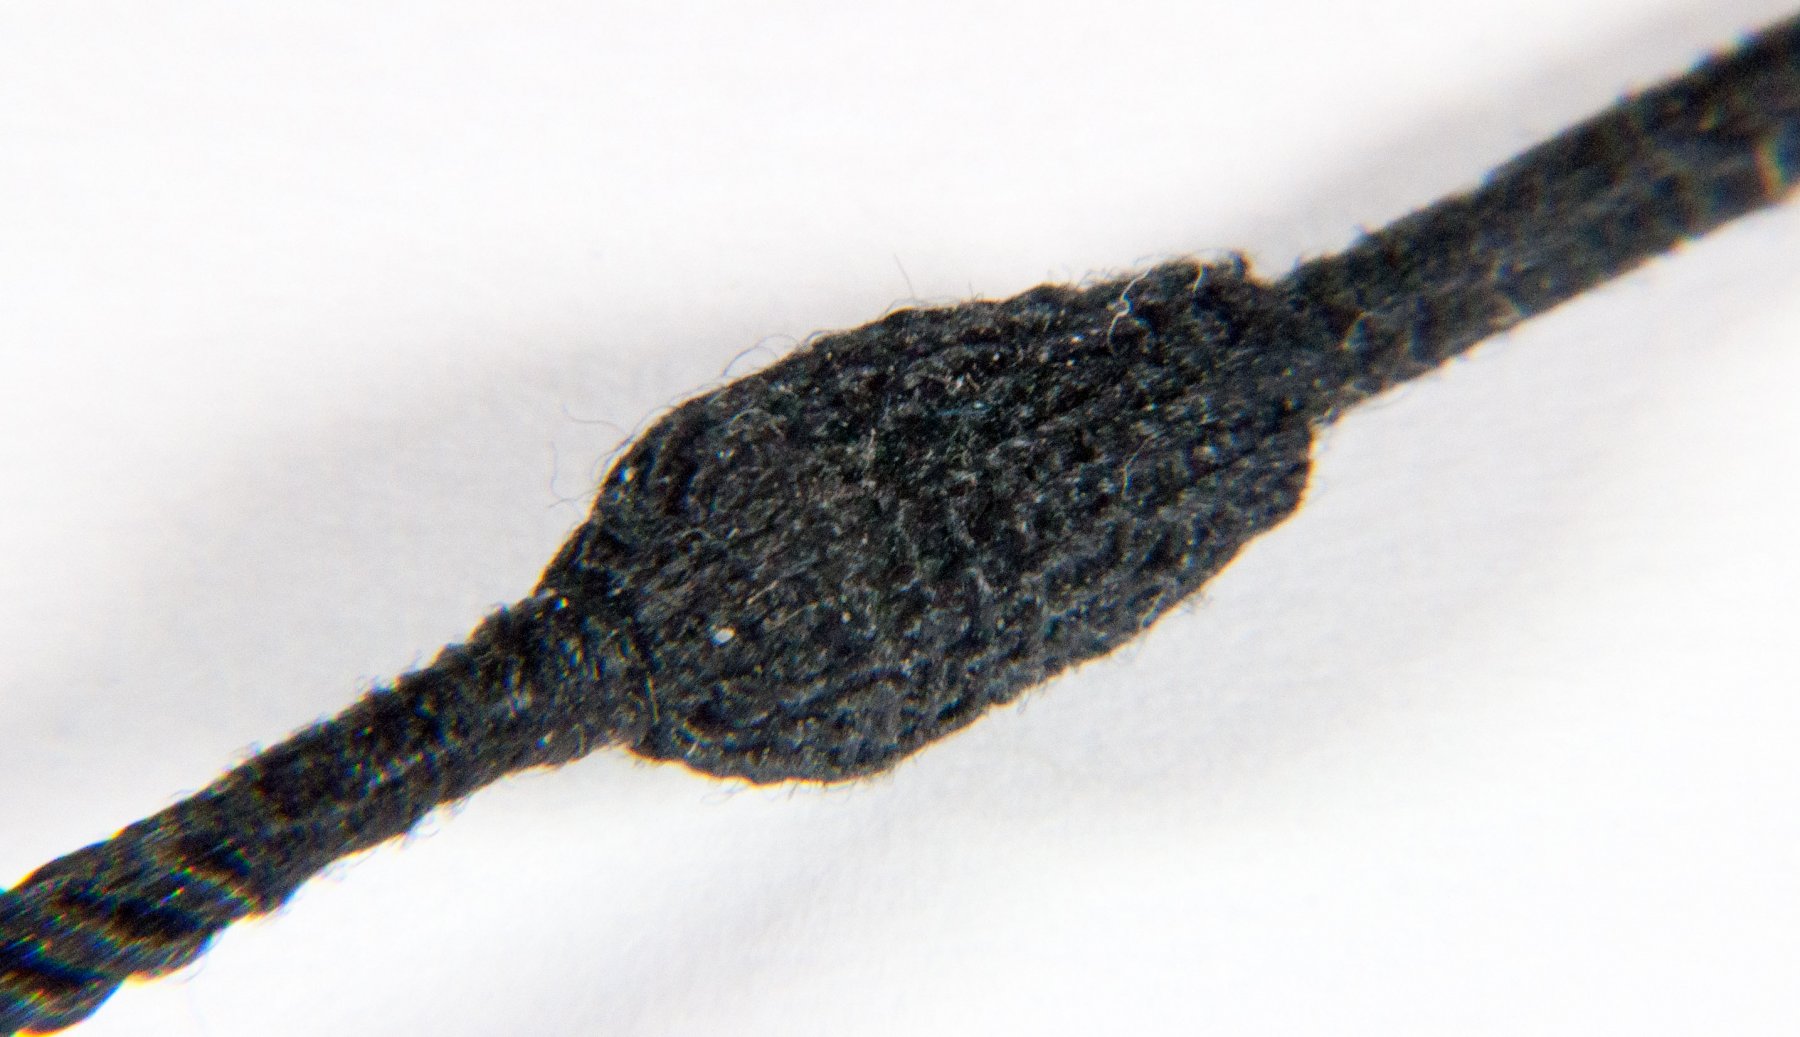
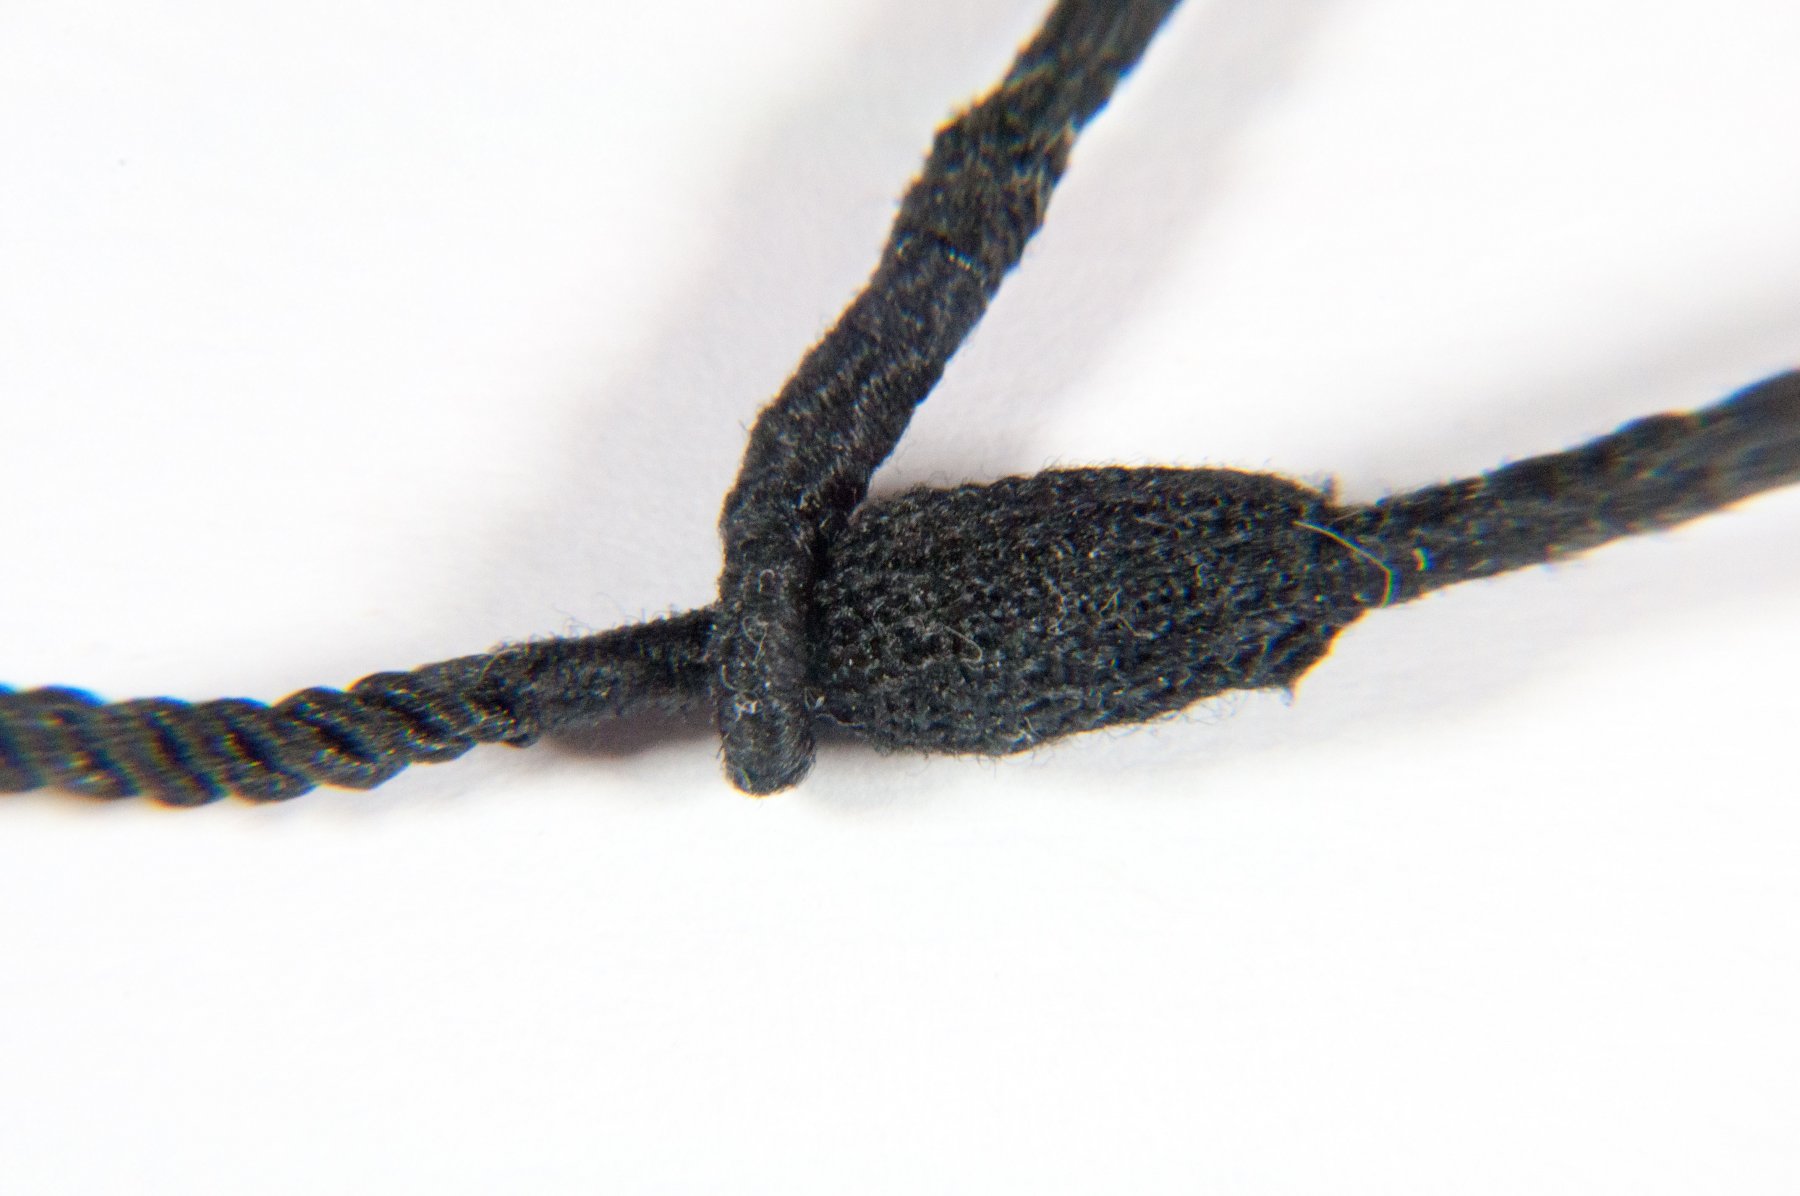
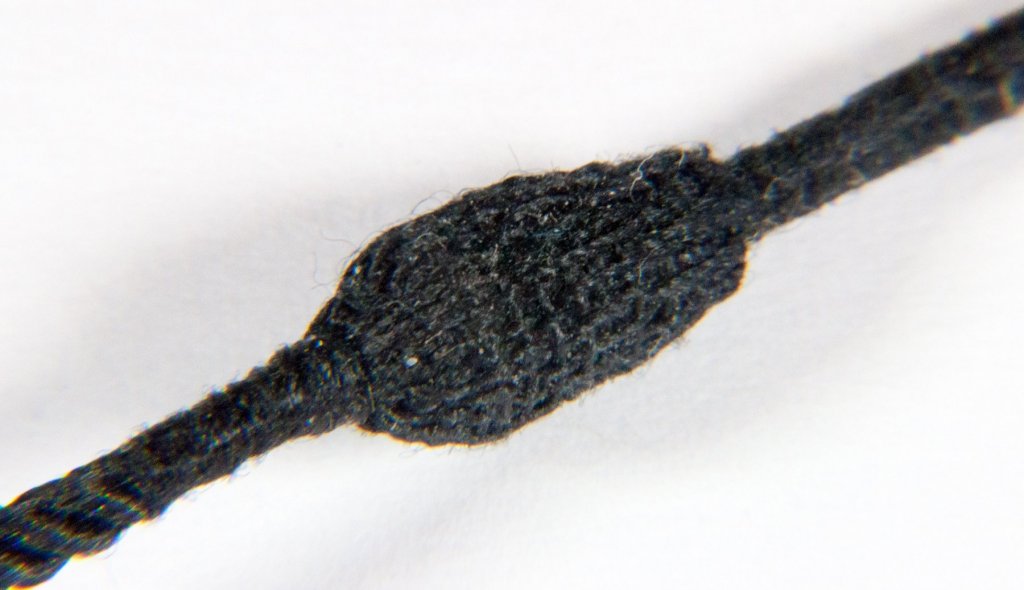
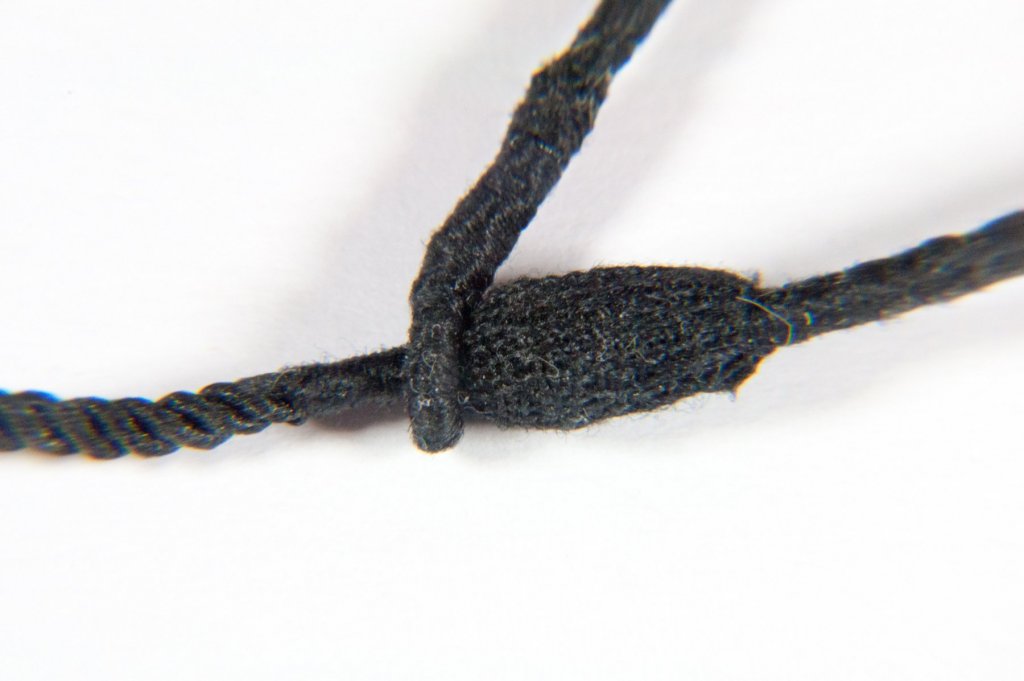
Hello all, I got tired of making bolts for my cannon carriages so I decided to put the riggers to work starting to prepare the rigging. Decided to start with the main stay: Here is a summary of the process The line I am using is Morope. An eye is turned in on the end with a circumference just large enough for the stay to pass through. Morope is tricky to unlay for splicing because it is nylon. When cut it will just fall apart I separated the strands with a toothpick and touched a drop of CA to each before cutting so that the strands would not unravel. The eye was then serviced with sewing thread with the serving continued over the splice. The stay was then wormed for one third of its length from the eye. I did not bother with parcelling. The mouse was then raised on the stay to it's proper shape and size with sewing thread then pointed over to finish. The mouse is several hours worth of work with the needle and thread I hope you enjoy
- 196 replies
-
- 8
-
-
- plastic
- soleil royal
- (and 2 more)
-
John, I think Evergreen Scale Models sells styrene sheet stock that is made to look like brick.
-
How about some holy stones and prayer books and tubs for water to wash and scrub the decks.
-
Should all spars be aligned in the same direction?
popeye2sea replied to Modeler12's topic in Masting, rigging and sails
Not sure what the proper answer here is but my gut feel is that no one would really justifiy spending the time and energy bracing round yards that did not have their sails set. -
Your skill with woodworking really comes through. Great work. The hatches are fantastic.
-
Dan, we use a leather similar in fashion to a sailmakers palm with a broad flat piece over the thumb.
-
The decking under the main hatch looks great, however be advised, under the main hatch on the spar deck is a corresponding hatch on the gun deck and further below a hatch on the berth deck in order to get cargo into the main hold and orlop.
-
Position of yards with furled sails.
popeye2sea replied to Ulises Victoria's topic in Masting, rigging and sails
In addition to what has been said above, the sails were set by sheeting home the clews to the lower yard and then hoisting the yards up to their full height. The reverse was done to furl the sails. -
Although I have fired a cannon several times I can not say with certainty how much of a blast would come out of the touch hole. The powder charges we use are much smaller than a full combat load. And to be honest, my position on the gun is either worm/loader or sponge/rammer, so I am usually at the muzzle of the gun when it goes off and not really paying any attention to the touch hole. My impression is that there is a plume of smoke but not much else. Also much of that plume is from the powder in the pan and touch hole.
-
Well, right now mine are either in an old cookie tin or on my work bench, so anything will help.
-
Barehook, I really like the look of that storage box.
-
Seizing or whipping a line. Here is how I have done it.
popeye2sea replied to Modeler12's topic in Masting, rigging and sails
The tackle is the system of ropes running through the blocks, i.e.: a block and tackle Two blocks made up together in one strop is called a sister block. In fact, an example of two unequal sheaves in the same shell was a fiddle or violin block. -
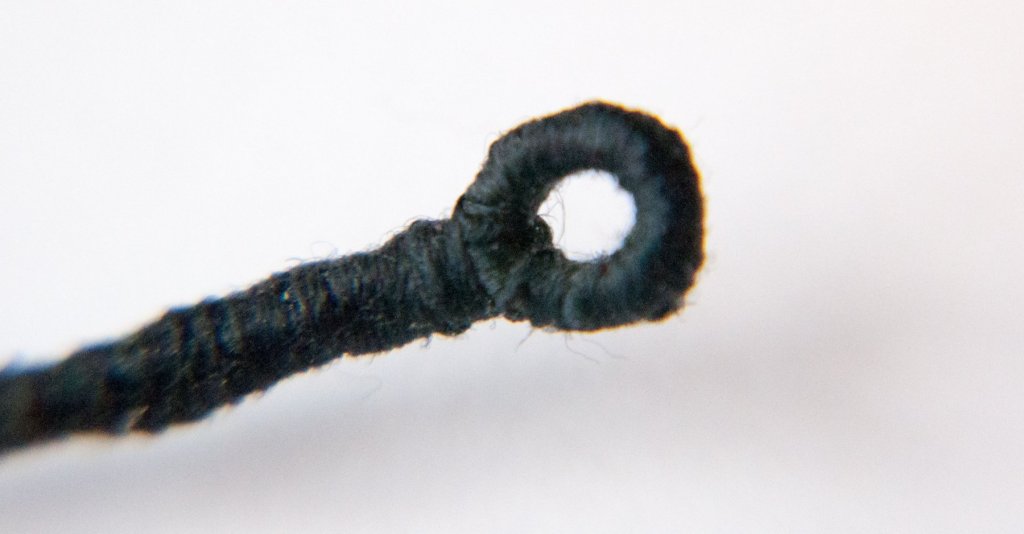
I bought a set of round nose ultra fine pliers from a company online called Micro-Tools (part # PLR-491-10). I then ground one tip down to 1 mm, which is just over 1/32 inch. The grinding down was really just an increased taper and I tried to preserve the mating surface of the plier jaws. The best way to form the loop is to grasp the wire between the jaws of the pliers in your right hand, the jaw that you are going to loop around (smaller jaw) away from you and the wire gripped so that it is at the very end. You do not want to able to feel the wire above the plier tip. You also want to make sure the the wire is perpendicular to the pliers or you will get an oval. Using the thumb of your left hand bend the wire around the small jaw of the pliers. Your thumb should be right up to the pliers and it is more of a pushing the wire around the jaw. You will need to turn the pliers in your right hand by turning your wrist without losing your grip on the wire. You may reach a point where you can not bend any further comfortably without losing your grip. You can adjust the the grip of the pliers so that the point at which they are gripping is further back along the loop by just turning the jaw slightly in the loop. This will allow you to finish closing the loop. Be careful not to move the wire up or down the jaws while doing this or you will get two different diameter bends in the loop. Once the loop is made shift your grip on the wire by spinning the pliers in the loop until you are now gripping the straight section opposite the end of the loop. Bend the wire slightly in the opposite direction until you get the shaft of the eyebolt pointed in the right direction. I use the same pliers for making rings for ring bolts and hooks for blocks. The hooks are made with five separate bends in the wire, but the principles are the same. It is important that you keep the wire perpendicular or your bends are going to be out of plane and at odd angles. Remember that you are not bending the wire with the pliers so much as you are bending the wire around the jaw. You will have a lot more control over how the bends look if you are doing all the bending with your hand and not the pliers. Regards,
-
The worm that we use on our working 1812 era cannon is made from cast iron and the head looks like a spring. The arms really do not scratch the bore of the cannon at all. The pitch of the helix is smaller than you have depicted. The 'arms' make more that 2 complete revolutions. The sponge and rammer are on opposite ends of another pole. In addition to unloading the gun the worm is used as part of the regular gun drill. Here is the drill we use. It was standard during the war of 1812 1. "Search your piece" The worm is inserted down the barrel and given several turns to snag any unburned wadding or cartridge left over from the last shot 2. "Sponge your piece" The wet sponge is run down the barrel to extinguish any burning embers 3. "Search your piece" 4. "Sponge your piece" 5. "Advance cartridge" The cartridge is brought to the loader 6. "Load cartridge" The cartridge is inserted into the barrel and rammed home 7. "Load with shot" The round shot (or other shot) is inserted into the barrel a wadding is inserted after and the shot rammed home 8. "Prick and prime" The gunner inserts the prick down the touch hole to pierce the cartridge bag and then fills the touch hole with powder. A lead apron is the placed over the touch hole to protect the powder. The gunner then sights the gun and the crew uses handspikes to train and elevate the weapon. 9. "Make ready" The gunner blows in the linstock to make sure it is burning well. The apron is removed from the touch hole. 10. "Fire" The gunner touchs the linstock to the touch hole.
-
The rigging plan of my Soleil Royal (1669) has blocks on the shrouds used as fairleads for some of the upper rigging. I am not sure if this is a correct usage for this time period. My thought is that there should be wooden fairleads seized to the shrouds. Does anyone have some information regarding which is more correct for the late 17th century?
-
Thanks all, Joe, a thousand more? Woo Hoo....think of all the builds I could finish by then Dan, Thanks for the tip. A lot less work for me. Time to start ripping out all the ringbolts in the deck and filling holes Regards,
-
How did some of the rigging terms get started? References??
popeye2sea replied to Modeler12's topic in Nautical/Naval History
halyard (n.) "rope for hoisting sails," 1610s, from Middle English halier "a halyard" (late 14c.), also "a carrier, porter" (late 13c. in surnames), from halen "to haul" (see hale (v.)). Spelling influenced by yard"long beam that supports a sail. Rat Line Middle English radelyng First Known Use: 15th century Bunt (line) 1. a : the middle part of a square sail b : the part of a furled sail gathered up in a bunch at the center of the yard 2: the bagging part of a fishing net Origin of BUNTperhaps from Low German, bundle, from Middle Low German; akin to Old English byndel bundleFirst Known Use: circa 1582 Leech (line) 1. : either vertical edge of a square sail 2 : the after edge of a fore-and-aft sail Variants of LEECH leech also leach Origin of LEECHMiddle English leche; akin to Middle Low German līk boltropeFirst Known Use: 15th century -
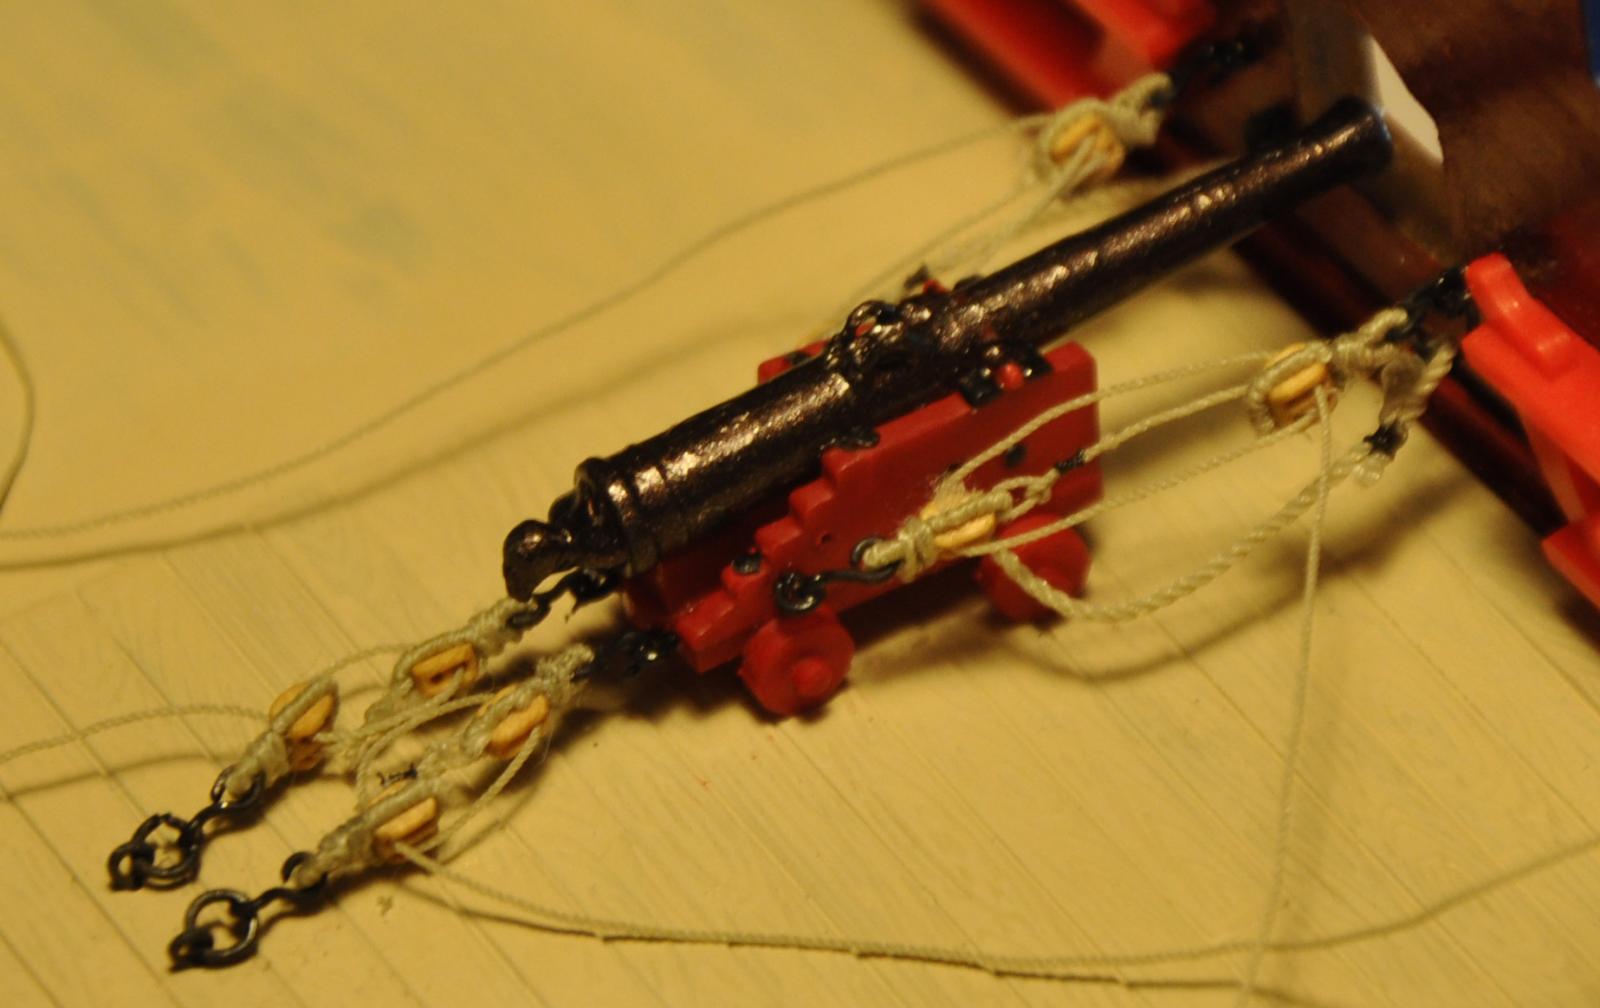
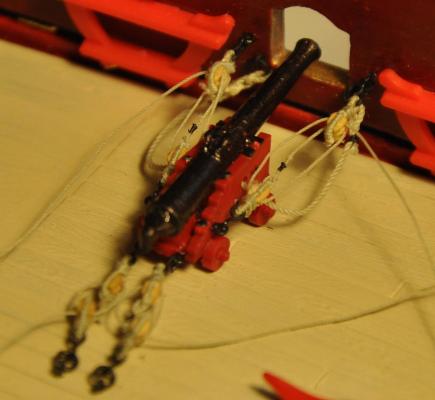
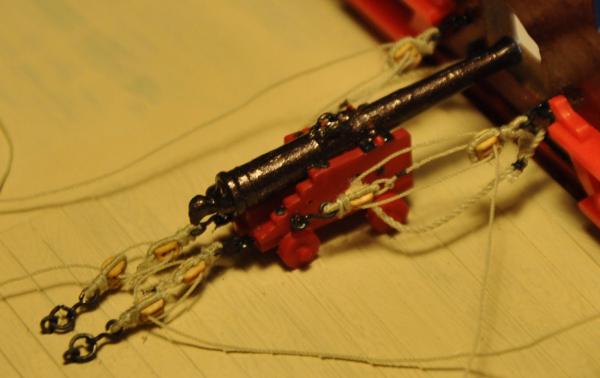
Thank you all for the birthday wishes. The build was a big hit at the Shipwright Guild meeting. I got some good tips on soldering techniques for the upcoming deadeyes and chainplates project. The cannon rigging continues....a long and tedious project. But, it is progress none the less. Of course it is taking longer because I keep refining my methods as I go along. The first cannon in place is a test piece. Here are some pics of it as it is today. I may still change some things. I think I will make the breeching thicker. Thanks for looking in. Regards,
- 196 replies
-
- 6
-
-
- plastic
- soleil royal
- (and 2 more)