popeye2sea
-
Posts
1,935 -
Joined
-
Last visited
Content Type
Profiles
Forums
Gallery
Events
Everything posted by popeye2sea
-

Constitution. Mystery rigging in top
popeye2sea replied to JerseyCity Frankie's topic in Masting, rigging and sails
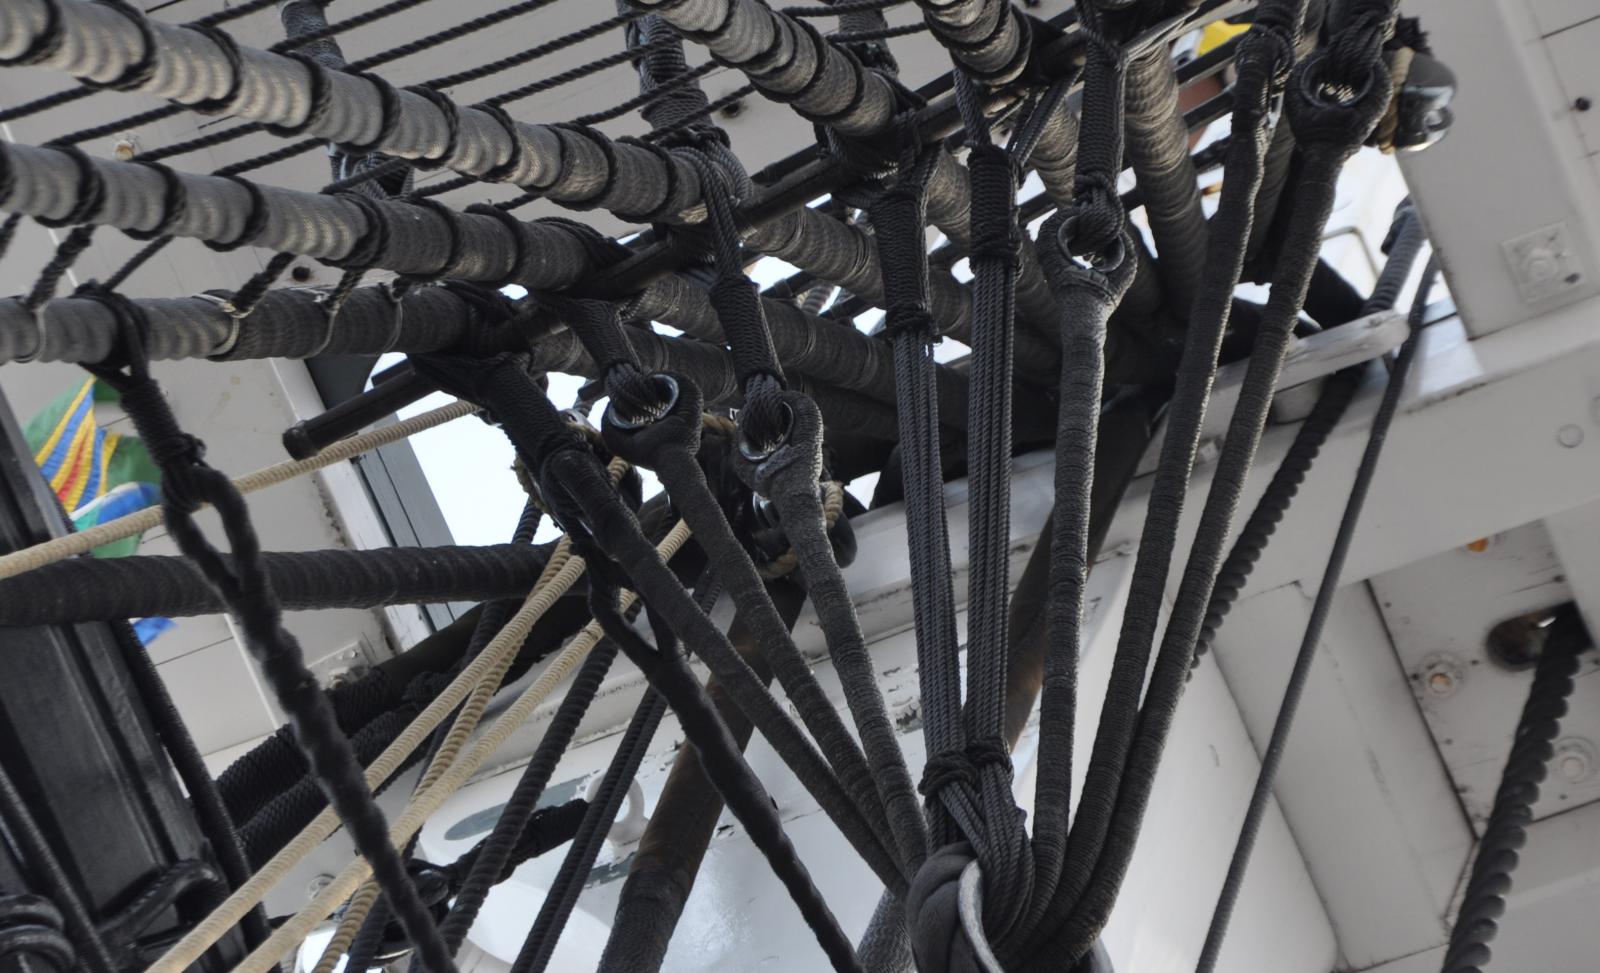
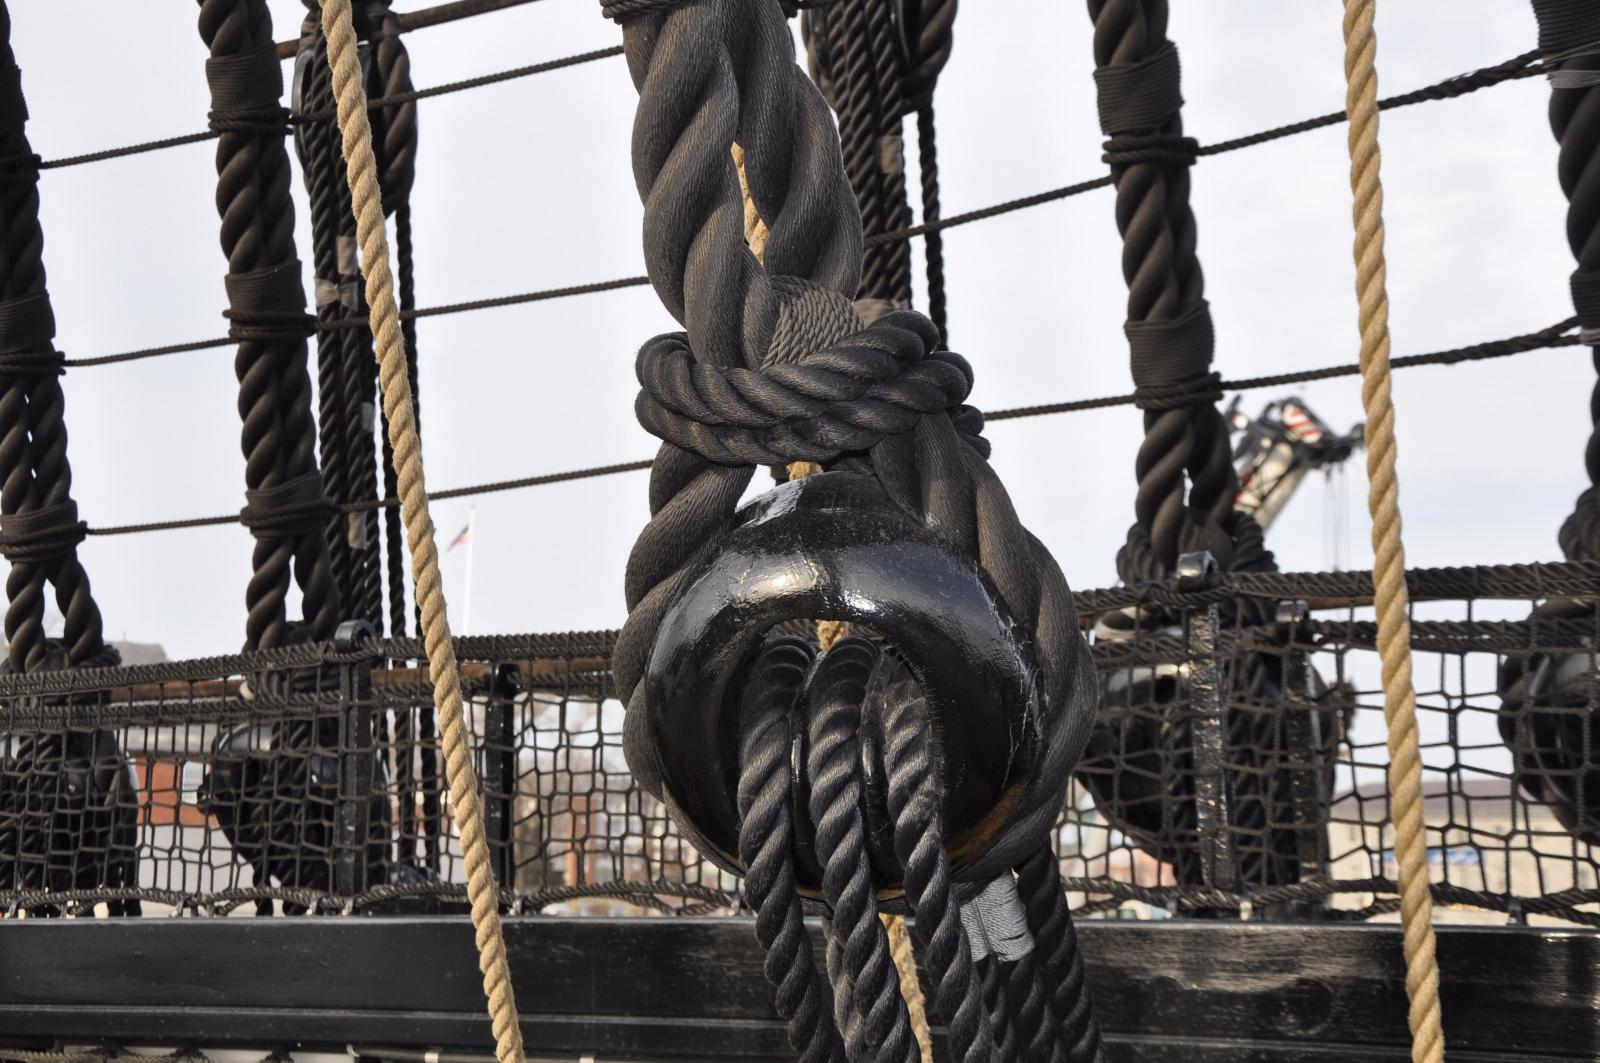
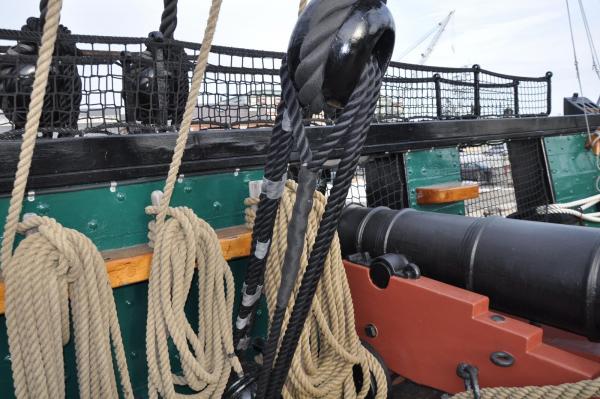
Went by the ship today and took a couple of photos. Those are truss tackles for the lower yards. From top to bottom in the photo: 1: Truss tackle 2. Truss pendant 3. Truss tackle fall (belays on deck aft of mast) I could not get aboard to check exactly where this belays. BTW: The signal flags NAPJ are the ships call sign. A unique radio signal identifier for all vessels and/or broadcast stations. All US Naval vessels call signs start with N. Civilian radio stations west of the Mississippi start with K and those east of the Mississippi start with W. US Army and Air Force start with A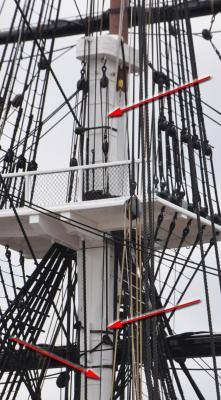
-
Constitution. Mystery rigging in top
popeye2sea replied to JerseyCity Frankie's topic in Masting, rigging and sails
Going to be there again soon. Will investigate and take pictures. -
Constitution. Mystery rigging in top
popeye2sea replied to JerseyCity Frankie's topic in Masting, rigging and sails
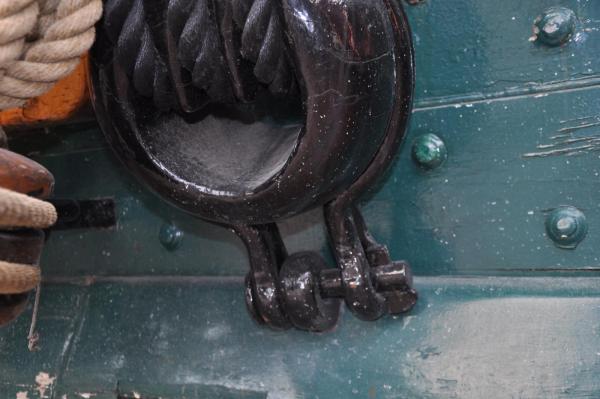
They look like they might be truss tackles. The pendant clearly goes through the lubbers hole. But, I can not tell if the tackle belays in the top. -
Has anyone got any information on older vessels of halyard buckets being used to coil and hold the long lengths of halyard that you end up with when the yards are hoisted?
-
A spar is a pole. It is a collective term for every pole on the ship. Vertical spars are called masts. Spars that cross masts and extend to both sides are called yards. Spars that extend to one side only are called booms or gaffs. You will often find that the same object used differently on a ship will get different names depending on it's usage.
-
Once you get the basics of seizing a strop around the block the rest is just variations on the same theme. For the becket at the bottom of the block you can do two things. 1. Make the strop longer and create another eye just like the one at the top or 2. make a small grommet (a circle of rope like the picture of the strop above) looped through the bottom of the strop. The standing part of your tackle fall will the be attached to this grommet with a becket bend. For the attachment to a boom or spar, again there were different ways to accomplish this depending on the particular location and type of block. One way is to strop the block is with two long eyes that would just about meet around the boom. The two eyes would then be lashed together to hold the block securely against the boom. The other method is to strop the block with any eye and a tail. The tail is passed around the boom through the eye and the seized to itself. The idea behind seizing blocks to a spar in this way is that it allows the block to be removed without cutting the strop. All you would have to do is cut a seizing. Re-stropping blocks all the time would be a pain in the ****. Blocks were normally fitted with their strops off the ship in the ship yards were the proper tension could be applied to the seizings.
-
There are many, many lines not currently rigged on Constitution, since she never sets most of her sails. The ship currently only has the 3 top sails, a fore topmast stay sail, and a spanker. She also does not have any yard, mast, or stay tackles. It's pretty much just the standing rigging.
-
how to paint like this?
popeye2sea replied to luesey's topic in Painting, finishing and weathering products and techniques
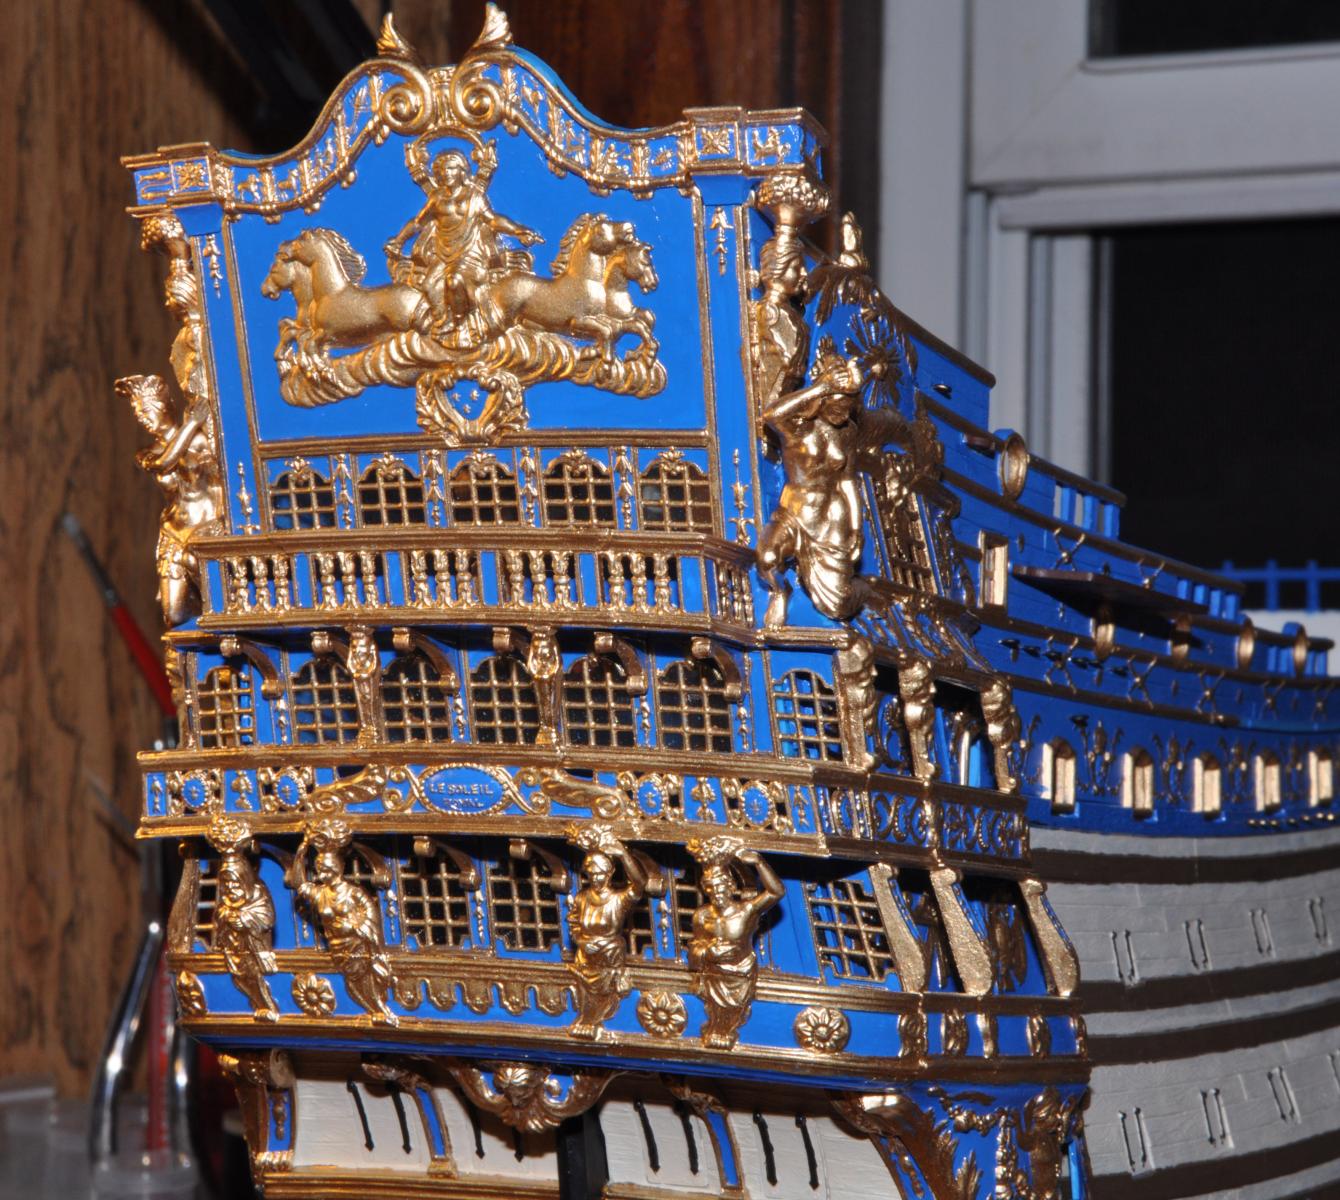
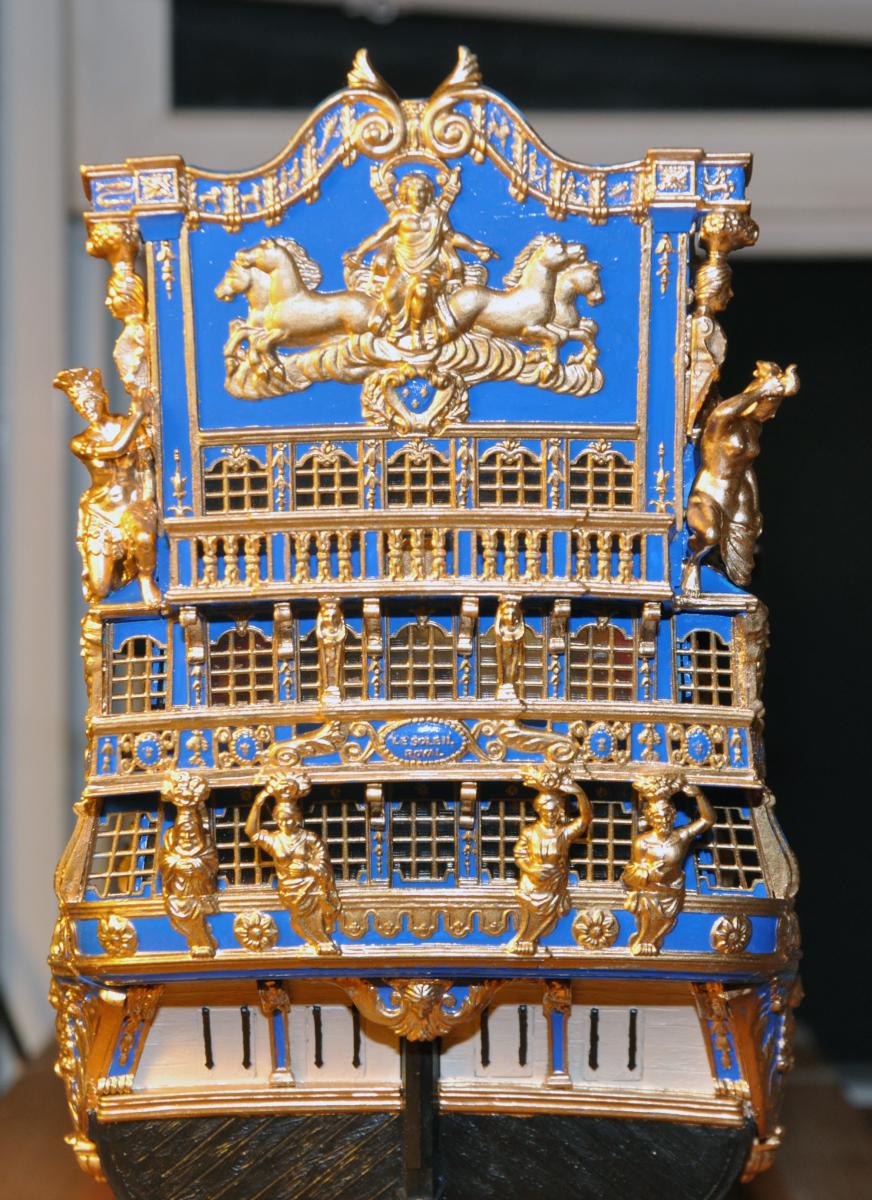
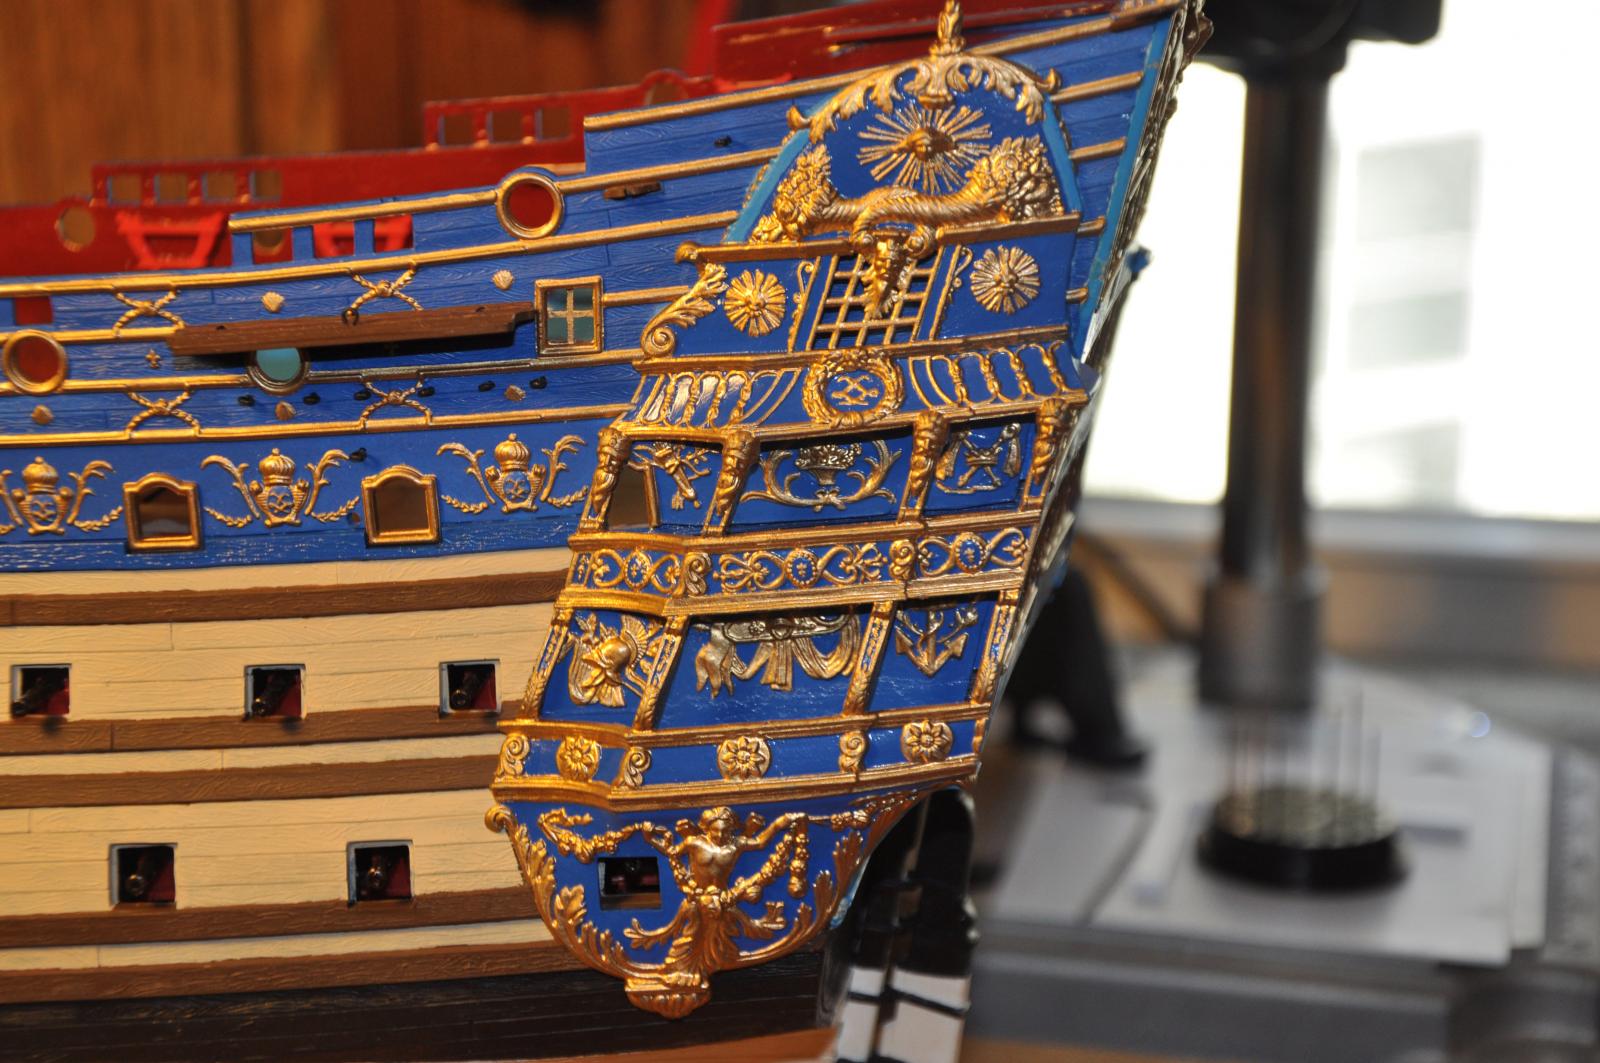
For my Soleil Royal I used good quality brushes. Generally liners and pointers in sizes of 5/0 and 10/0. I seemed to have the best results by painting the outside edges of the figures first and then filling in the rest. All of the paintwork was done under magnification. Only enough paint was loaded on the brush to allow for a couple of strokes. When using any metallic color paint you must stir the paint often as the pigments settle very fast and you will find the color getting very dull as you apply it to the surface if you do not stir frequently.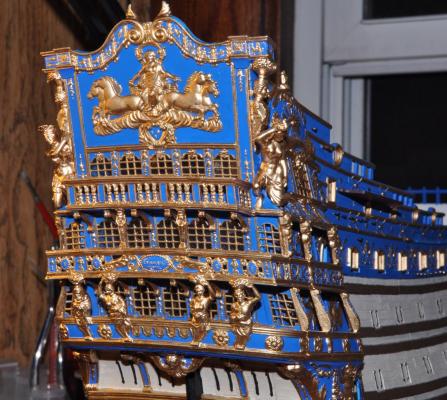

-
You can look up copies of the International Code of Signals (HO 102 or Pub. 102 as it is sometimes called) on the web. But that is just the international code. The Allied Signal Code is a classified document developed for use by the military. The ship could fly signals from either. I could tell you some of the signals from the code.....but then I'd have to kill you.
-
I have been toying with the idea of building my model so that the entire rig is operable, i.e be able to set or furl sails, or brace yards as desired. Not sure that I can accomplish this or even if it is feasible, but I have always wanted to make the attempt. We shall see.
-
I am Considering a Plastic Build and Need Advice
popeye2sea replied to BANYAN's topic in Plastic model kits
And what is wrong with a plastic kit? -
I posted these somewhere else, but I do not know where. I thought these would illustrate the construction of the bentnik shrouds pretty well.


- 732 replies
-
- 6
-

-
- constitution
- model shipways
- (and 1 more)
-
THE BLACKEN-IT TRIALS
popeye2sea replied to Erebus and Terror's topic in Metal Work, Soldering and Metal Fittings
I use blacken-it for steel and the recommended concentration is 1 part blacken-it to 9 parts water. I prepare the steel by immersion in muriatic acid diluted in water 1:10, then rinse in de-ionized water. I have had good results with it. -
You can still get chunks of wood from the Constitution that are about the size you mentioned for $5.50 from the Constitution Museum. PM me if you need some.
-
Colouring mono-filament line for seizing line on blocks
popeye2sea replied to tkay11's topic in Masting, rigging and sails
Tom, thanks. I have been using monofilament line for the same reason as Tony for seizing small lines. Separating the strands of the thread is a great idea. So obvious, yet I never thought in that direction. Henry -
painting the "Undersides"
popeye2sea replied to geoff's topic in Painting, finishing and weathering products and techniques
The material was called "white stuff" and I believe it's makeup varied from place to place but could be made from tallow, pine tar or resins, sulfer compounds and fish or whale oil. -
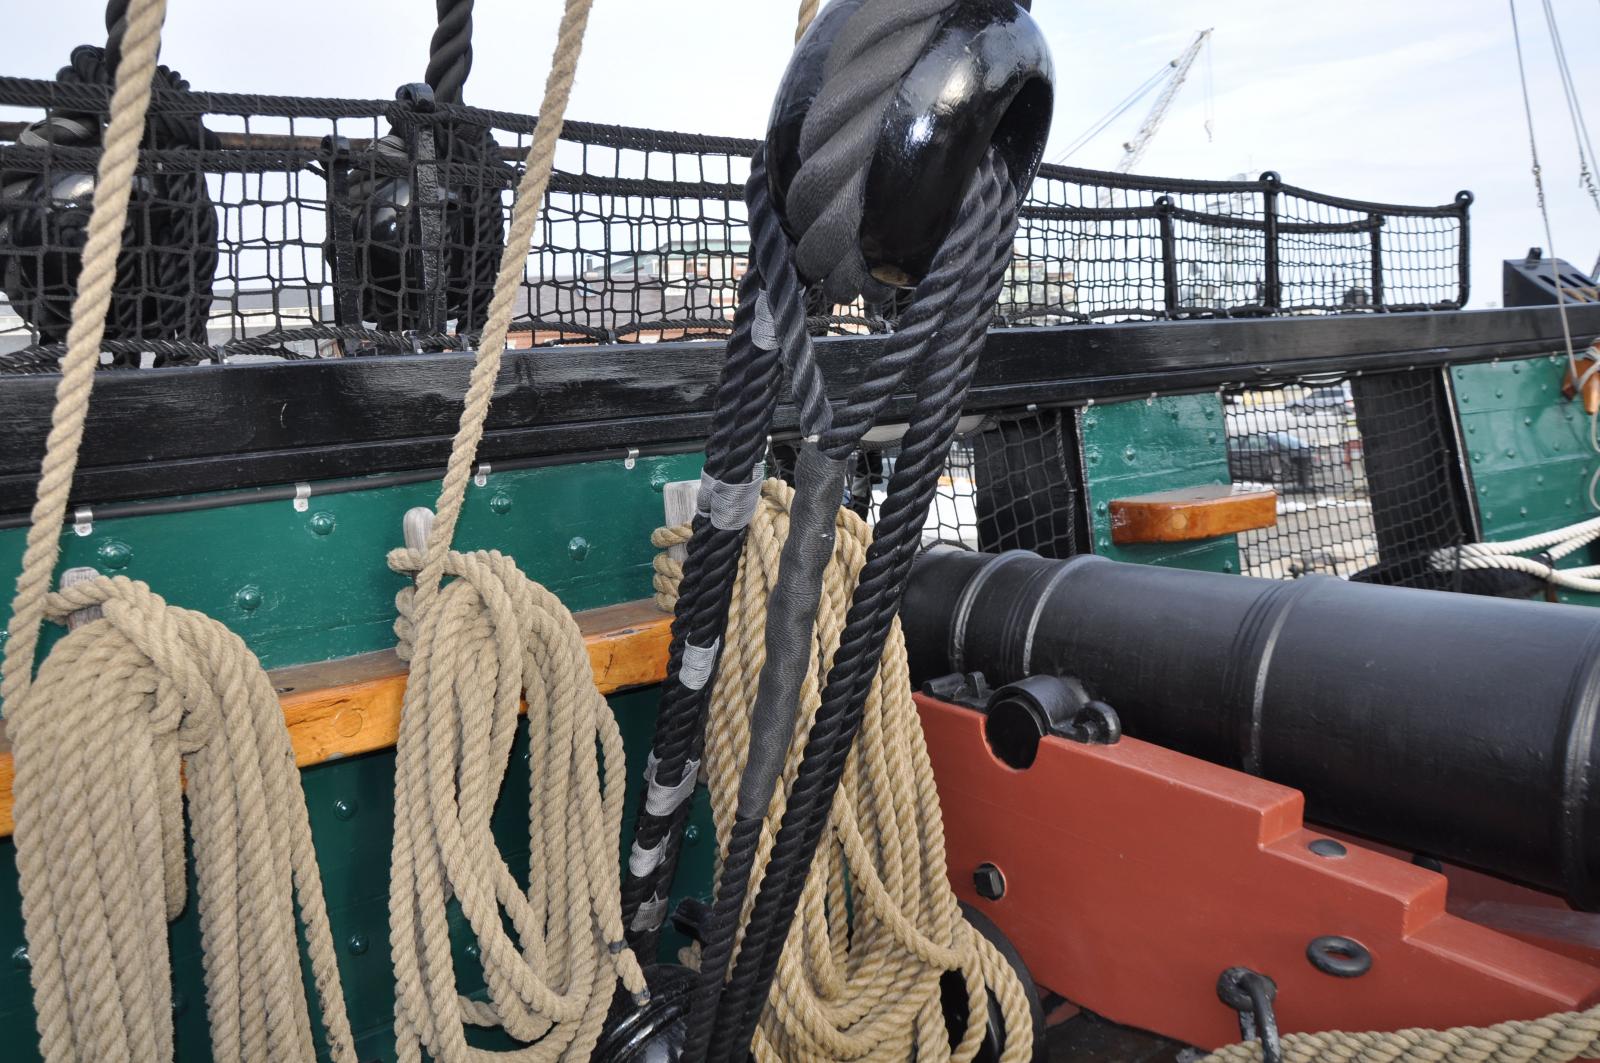
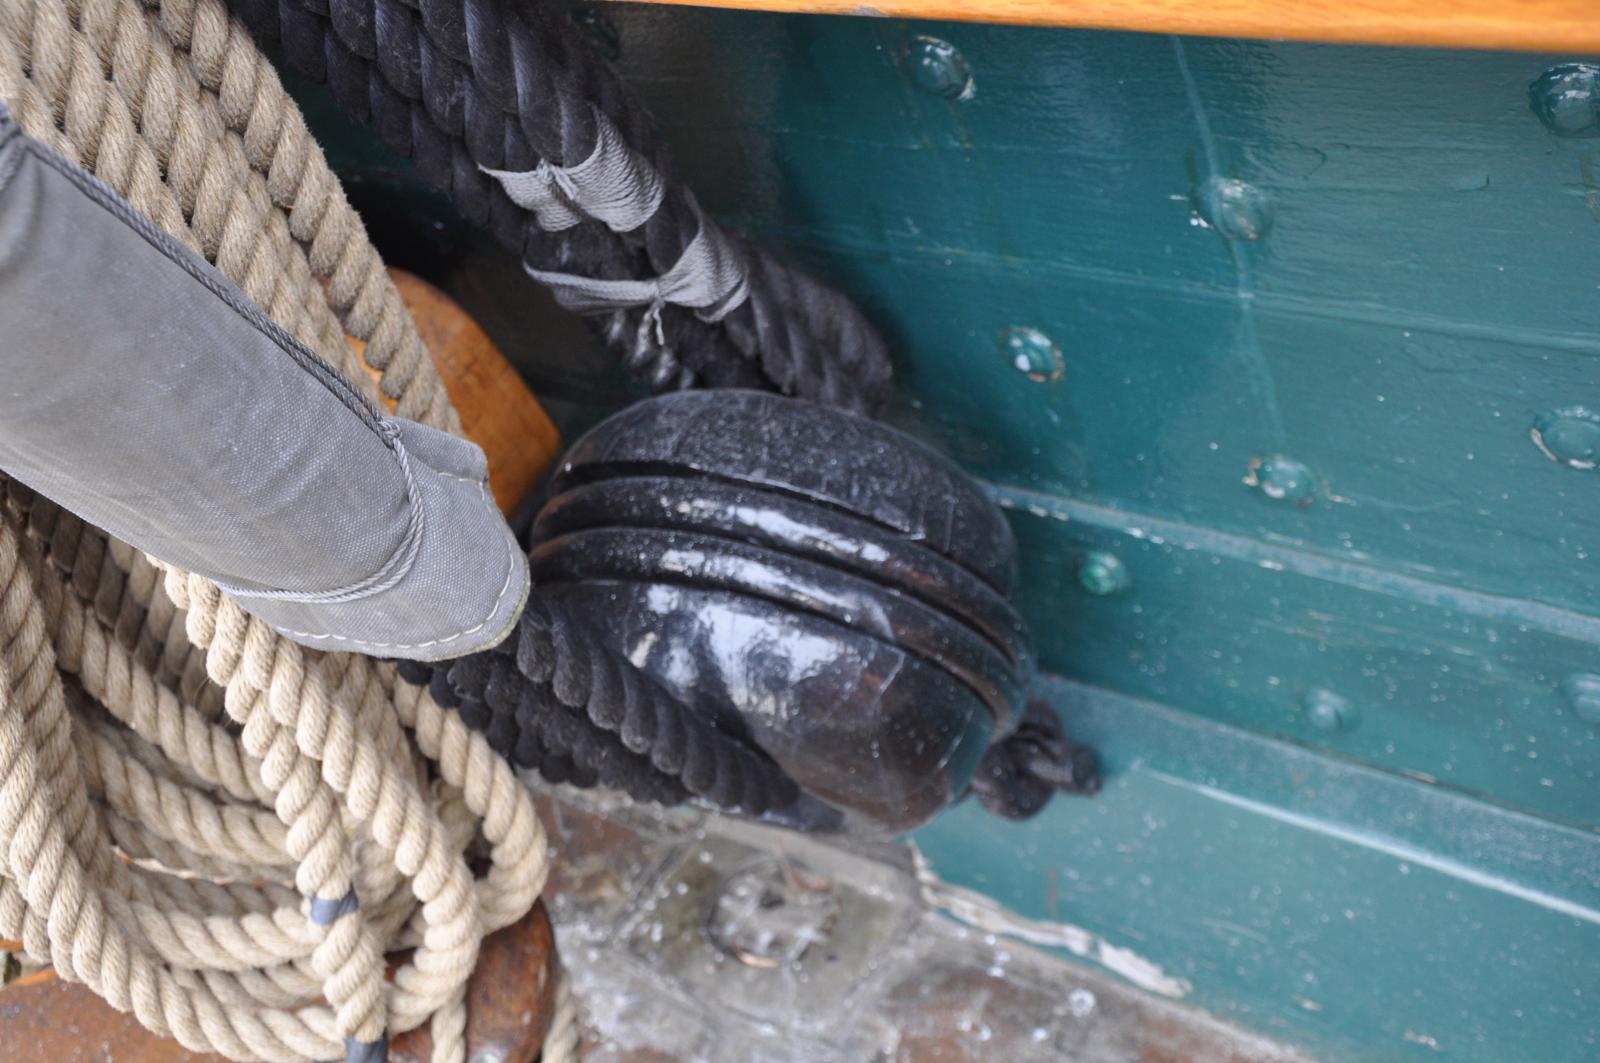
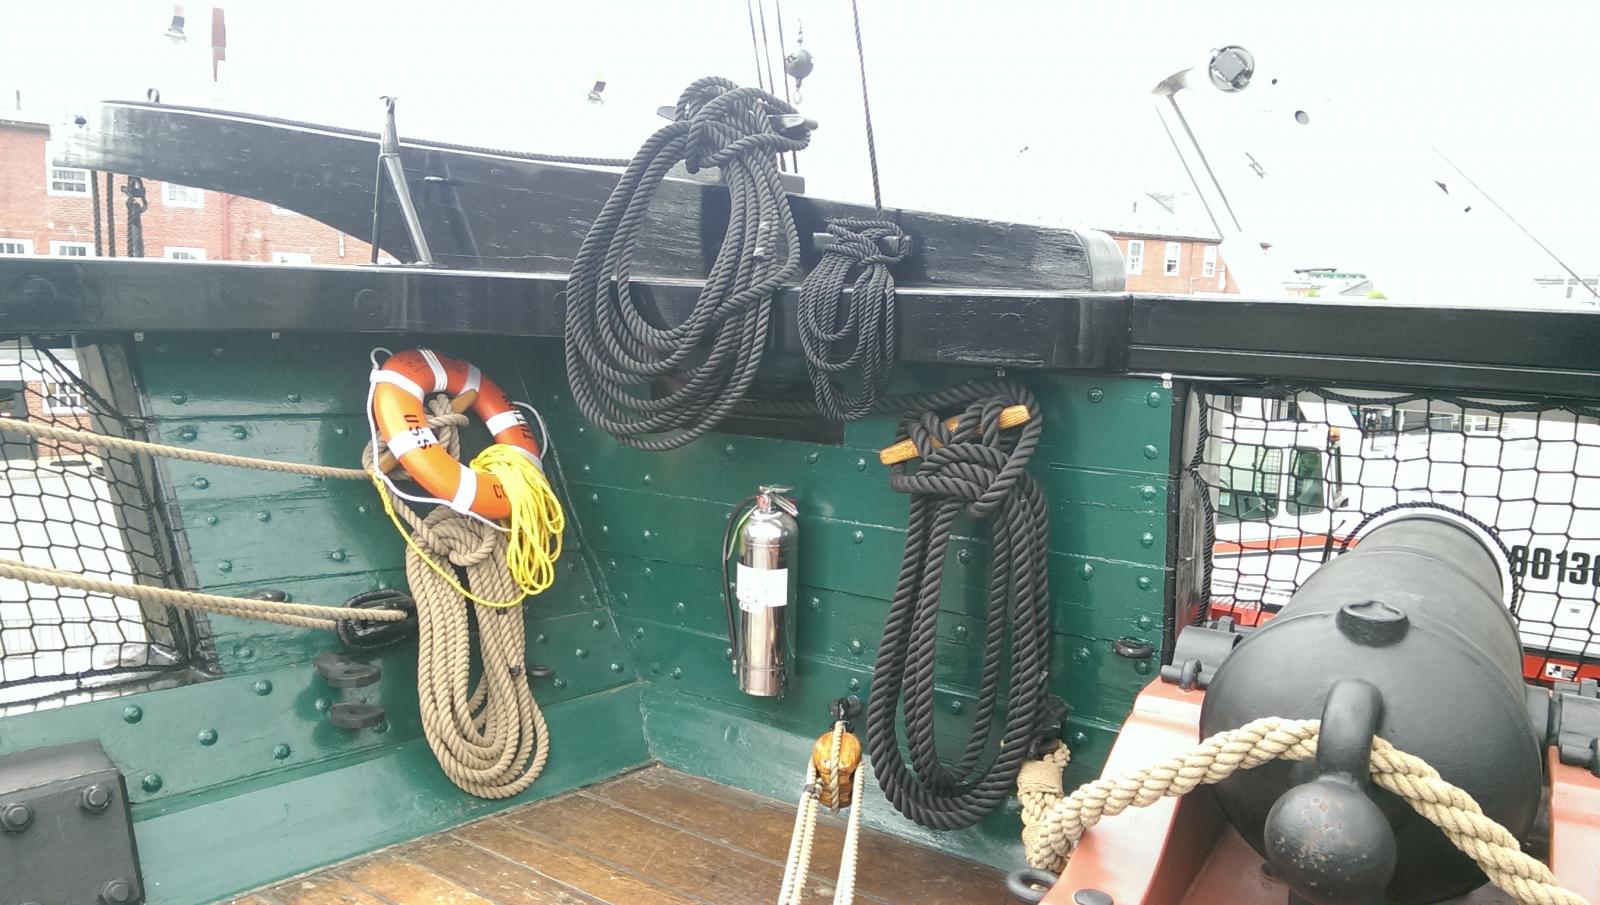
Here is what I found aboard the ship today. There are no lines that come inboard on the gun deck. In the picture below you can see the sheave in the spar deck bulwark for the main sheet. It belays on the large horizontal cleat next to it. The next picture is where the main brace comes in. Its sheave is right aft by the transom, close up under the cap rail. (Of course, the fire extinguisher and life preserver are not original equipment ) When the bulwark in the waist was higher the fore sail sheet and main tack came in through sheaves there. Now that this section of bulwark has been removed I do not know where these lines come inboard. It depends on whether your version has the high bulwarks in the waist If the waist is open my guess would be to take the fore sheet aft to a sheave and cleat just aft of the break and the main tack inboard to a cleat just forward of the break. Again, I am not sure if the tack required a sheave. The fore tack did not seem to have one


- 601 replies
-
- 3
-
-
- constitution
- revell
- (and 1 more)
-
I see what you have there for the rigging of the main and fore sheets and tacks, but I am still not convinced that these lines come inboard on the gun deck on the actual ship. I will take another look next time I am aboard in the next few days.
- 601 replies
-
- 1
-
-
- constitution
- revell
- (and 1 more)
-
Setting flags - which way does the wind blow?
popeye2sea replied to rodgerdodger's topic in Masting, rigging and sails
I always thought that the whole point of bracing the yards up sharp was to bring the windward edge of the sail closer to the wind. So the apparent wind direction will usually be closer to the line that the yard makes across the ship, hence that is the direction that the flags should point. I also think that while underway some combination of flags are always flown, whether it be the national ensign, admiral or other commanders distinguishing mark, or signal flags. Perhaps if the ship is underway, not in company with other ships then there might not be a flag displayed. -
I would have to check my set of plans for the Connie, but I don't remember anything belaying on the gun deck. Does the main sail sheet run through a sheeve in the side? Perhaps the main brace? I think that those are on the the spar deck level also. Not sure what you mean by a halyard clew line. The halyard and the clew are two different lines.
- 601 replies
-
- 1
-
-
- constitution
- revell
- (and 1 more)
-
Removing paint
popeye2sea replied to Don Quixote's topic in Painting, finishing and weathering products and techniques
It also helps if you scrape out of a corner and not into the corner. You'll get cleaner removal. -
The ironic thing is that nothing that Joshua Humphries designed into the ships was very unique. All of the concepts he used were found in other ships. The beauty of his design was combining them into one ship. He was very forward thinking. He knew that the country could never afford to build enough ships to go toe to toe with any European navy.
-
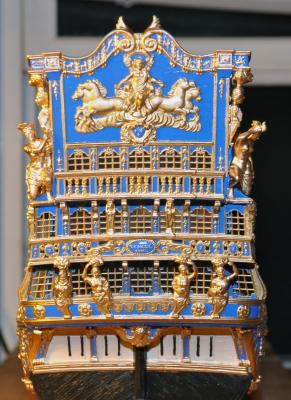
I think there is some influence there from the general styles in art and architecture of the period. The older pieces being more highly decorated.
-
Beautiful work Sherry
-
Deck beam Scarphs?
popeye2sea replied to NMBROOK's topic in Building, Framing, Planking and plating a ships hull and deck
Would not the position of posts be determined somewhat by the placement of various furniture and gear (i.e. pumps, capstans, etc.) about the decks.