HOLIDAY DONATION DRIVE - SUPPORT MSW - DO YOUR PART TO KEEP THIS GREAT FORUM GOING! (Only 24 donations so far out of 49,000 members - C'mon guys!)
×


fnkershner
-
Posts
1,595 -
Joined
-
Last visited
Content Type
Profiles
Forums
Gallery
Events
Everything posted by fnkershner
-
Psst Sors - He did make it himself. he just posted pictures of the step by step. By the way Augie Nice job!
- 2,191 replies
-
- 1
-

-
- confederacy
- Model Shipways
- (and 1 more)
-
Bob - I would do the epoxy idea except for a couple of issues - 1 is that I would have to cut into the false deck. by itself not a big deal but then you come to the real concern - How do I get past the bulkheads? I don't relish cutting into those. I think Blackie has the right approach. If I carefully use wood glue and his putty...? So this log will go dark for a couple of weeks while I try these things and do a little enjoying the summer.
- 80 replies
-
- 1
-
-
- Americas Cup
- Endeavour
- (and 1 more)
-
Dave - What paint did you use? I have been trying to decide on what shade of blue I will use. Looks real clean.
-
Blackie - That's a great Idea. How thick is the layer once it is sprayed on? I will go try to find some. Is it something that is carried in an auto parts store?
- 80 replies
-
- 1
-
-
- Americas Cup
- Endeavour
- (and 1 more)
-
Jim Byrnes Model Machines
fnkershner replied to Mahuna's topic in Modeling tools and Workshop Equipment
Gee Jim why didn't I think of that. Thanks for the info. -
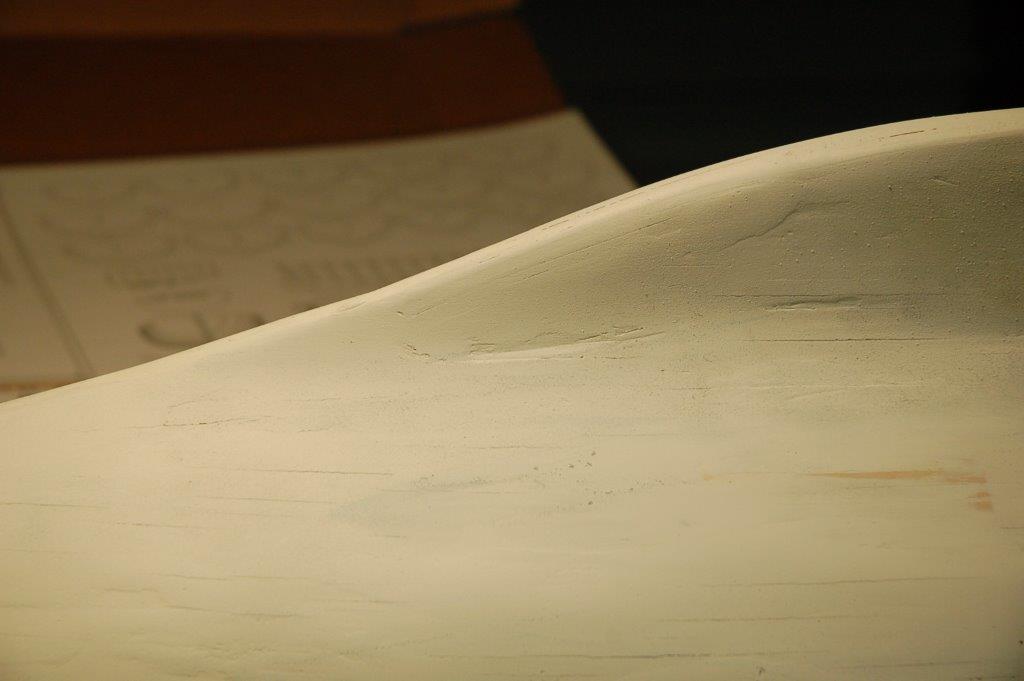
Did I mention that primer shows every flaw! :angry:
- 80 replies
-
- 2
-
-
- Americas Cup
- Endeavour
- (and 1 more)
-
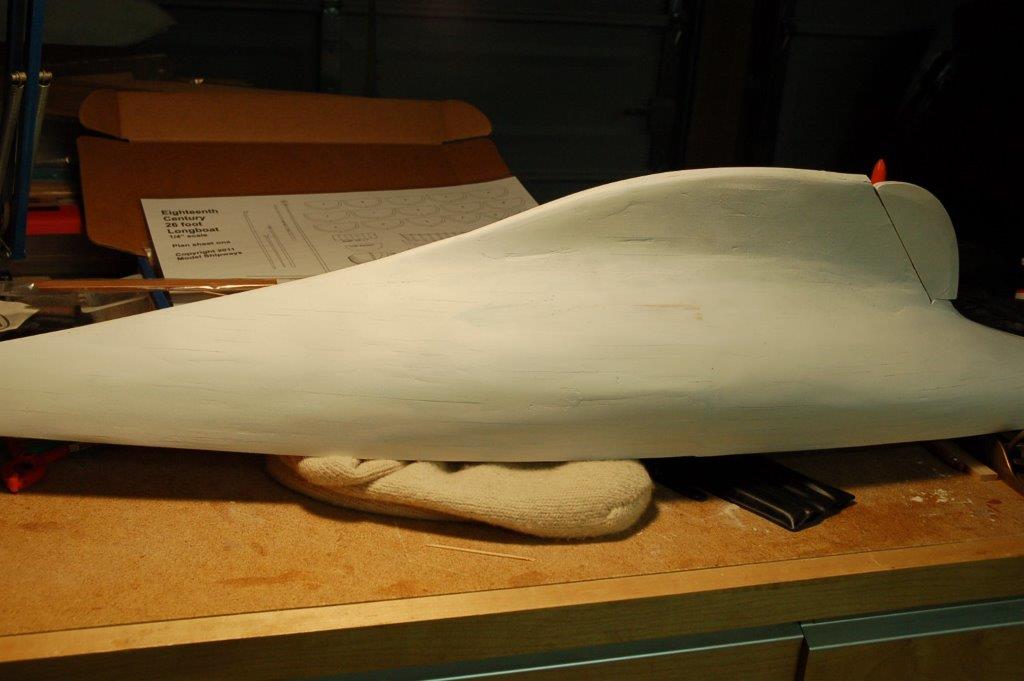
Ok, back to the log progress. First let me explain the steps up to this point and also ask for advice. As mentioned before in this log I decided that I was going to paint the hull so decided not to bother with the 2nd layer of planking. I may regret this decision as you may see. Step 1. Complete the planking Step 2. Use approx. 3 1/2 tubes of putty to cover the planking. Step 3. SANDING (lots of sanding) Ugh Step 4. Discover that at this scale there is a bigger distance between bulkheads so the planks flex more, and a lack of edge gluing can create cracks. Step 5. Another 1 1/2 tubes filling cracks etc. I found this not very useful. even with the putty covering the cracks the underlying wood would flex. Step 6. Carefully fill cracks with wood glue. This appears to work better that the putty. Step 7. More Sanding. I started with 120, moved thru 220 grit and finally 320 grit. Also as I found more cracks filled them with glue and sanded. Step 8. Spray paint 2 coats with primer. Step 9. OMG look as all the cracks! So unless someone has some knowledge I guess I am back to filling and sanding. Then repainting. so here are the pictures -


- 80 replies
-
- 3
-
-
- Americas Cup
- Endeavour
- (and 1 more)
-
Ok, It is definitely time for an update to this build log. First off a picture. Dr. Per made a house call! PS Peter this is definitely not your ship yard. Mine is a bit more lived in.
- 80 replies
-
- 4
-
-
- Americas Cup
- Endeavour
- (and 1 more)
-
I like you hammocks. can I see a picture of the other side where the loops are tied together. they look very much like mine. Although mine were easier since they were a different scale. What did you do to the edges of the cloth to keep it from fraying?
-
Jim Byrnes Model Machines
fnkershner replied to Mahuna's topic in Modeling tools and Workshop Equipment
I agree with Per. I have sanded 3" wide sheets, but it doesn't quite work. -
Jim Byrnes Model Machines
fnkershner replied to Mahuna's topic in Modeling tools and Workshop Equipment
Chuck S - I am now the proud owner of all of Jim's machines. At one point I wasn't sure I had a use for the Thickness Sander. Now I wonder what that was like. I use it quite a lot. Cabrapente - The thickness sander has an adjustment wheel that is very easy to use. It is marked off in tick marks and I don't know if these marks are separated in English or metric distances. When I am using the tool. All I do is insert the wood piece I am sanding and adjust the wheel until the wood is snug. I then pass the wood thru the sander. Then I tighten the adjustment by a couple of tick marks and pass the wood again. I then use my micrometer to measure the thickness. If I don't have the desired thickness I tighten and pass it thru again. It is pretty straight forward. -
Richard - Right now I can't find it. but there is quite a discussion on the subject of rolling and tying the hammock. Lots of good info. All I can tell you for now is that it was tied with a marlinspike hitch. This consisted of 7 loops around the roll from one continuous length of rope. I have some pictures I will try to post for you. (as soon as I find them)
- 227 replies
-
- 1
-
-
- syren
- model shipways
- (and 1 more)
-
Pete have you seen the stern Lanterns that Chuck designed? I think you will find the very nice.
-
Ahem, Well if it will help you and Jeff do business. I would be willing to be the transshipment location. I.e. you order from me and I order from him. Slight shipping cost should be the only issue.
-
Pops, You may want to consider getting some additional wood for your Bounty Launch. I knew someone who built it with the wood supplied and he broke quit a bit of it trying to soak and bend.
-
Pete - How are ship's curves different from draftsman's French curves? and if there is a significant difference where can I find a set?
-
Pete - if I understand the photos, you cut the planks for 1 sheet instead of edge bending. Is this correct?
-
Thank you Pete.
-
Pete - I love those scuppers. You may be able to answer a question for me. On many kits they have a plank that follows the inside of the bulwarks. it is often called the waterway. But it is thicker than the deck planking. to me this makes not sense. the water will not reach the scuppers if they are above deck heights. Unless there is lots of water. So is there really a water way plank? and is it really larger than the deck planking?
-
Dave I think he has you confused with me. Yes there is a retractable keel on my build but I decided to plank it over. I like the lines better this way.
-
Wow! nice banister.
-
You are correct. but I have decided to modify this a bit. From the experience I had with another build I am going to paint first then plank the deck. There are a couple reasons for this. First, I don't have to mask or worry about paint on the deck planking. And 2nd I like the look of a dark wood rub rail. So I am going to make my own bow and stern pieces and lay the same wood along both sides after I paint. I may also use the darker wood for the king plank. Then plank the deck as usual. I think the contrast of the blue and the dark wood should look nice. I am currently looking at swiss pear for this.
-
Yes that is exactly what I wanted. Thank you! I think I will add filler as suggested. I believe you are mentioning the stern post. One of the things I have learned from kits designed by Chuck is how to hide the ends of my planking in the Rabbit or the stern post. This discussion will be invaluable when I get there.
-
Thanks Chuck that is just what I needed. I knew it was out there somewhere I just couldn't find the pictures. Mike - The 2nd question is do you have a shot looking from behind directly at the stern. By the way I don't believe you work. your speed of response is amazing.