HOLIDAY DONATION DRIVE - SUPPORT MSW - DO YOUR PART TO KEEP THIS GREAT FORUM GOING! (89 donations so far out of 49,000 members - C'mon guys!)
×
.JPG.ca33079f5815b861e67b9c2cccd37982.JPG)

Blue Ensign
-
Posts
4,566 -
Joined
-
Last visited
Content Type
Profiles
Forums
Gallery
Events
Everything posted by Blue Ensign
-
 A beautiful build of Cheerful, well done Erik.👏 B.E.
 -
Cheers Daniel, the sleeve system works well in this situation.👍 @ Dave, - You're right of course but I had glued the bulwark fittings before I decided to rig the Breeching lines. Originally I had intended to leave them unrigged as with Sphinx and Indy. Navy Board style. Fitting the rings was in itself a tedious business and I had no desire to try and remove them at this stage. Jigs are an excellent way to reduce the pain of gun rigging. As used on the Cutter Alert. - also used to rig the side tackles. As used on the Cutter Cheerful. On the model rigging is penance for my change of mind. 🫤 Cheers, Maurice. (B.E.)
.thumb.JPG.d43701b79ba5e34376ef8474bc5bc823.jpg.2a90738ce8a010ffea1dd7f56feb98f6.jpg)


- 332 replies
-
- 14
-

-
- Harpy
- Vanguard Models
- (and 1 more)
-
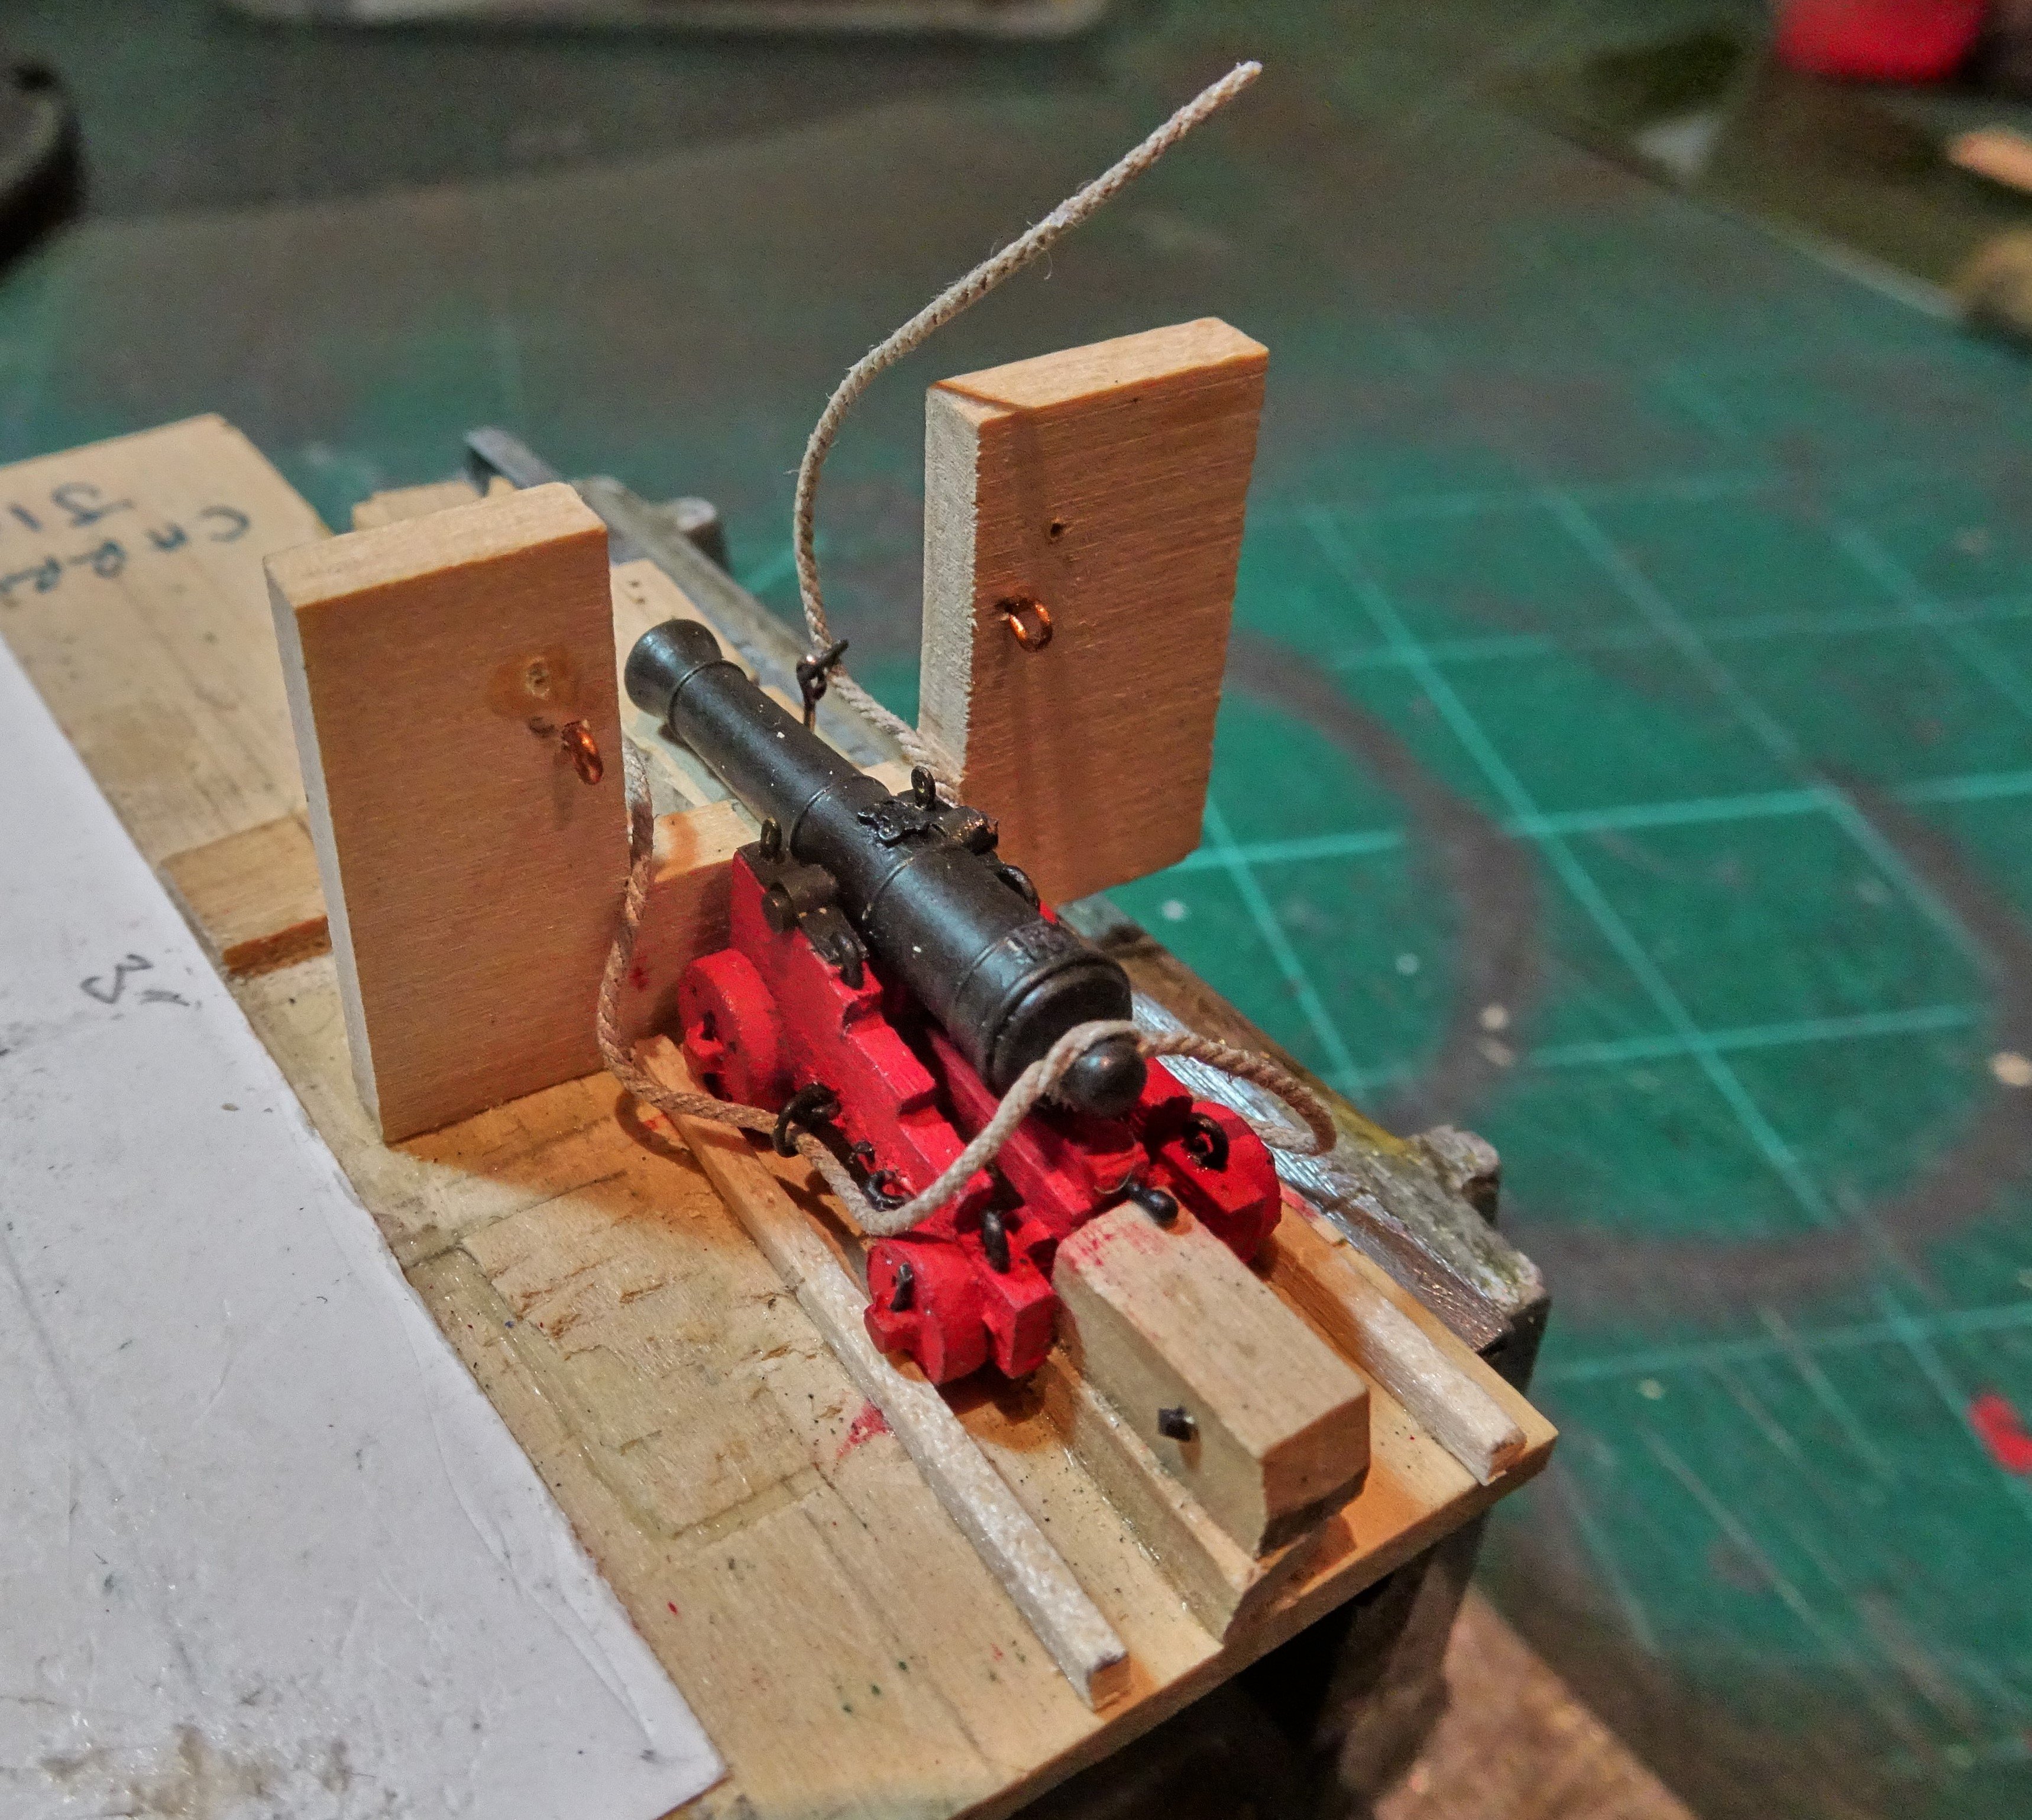
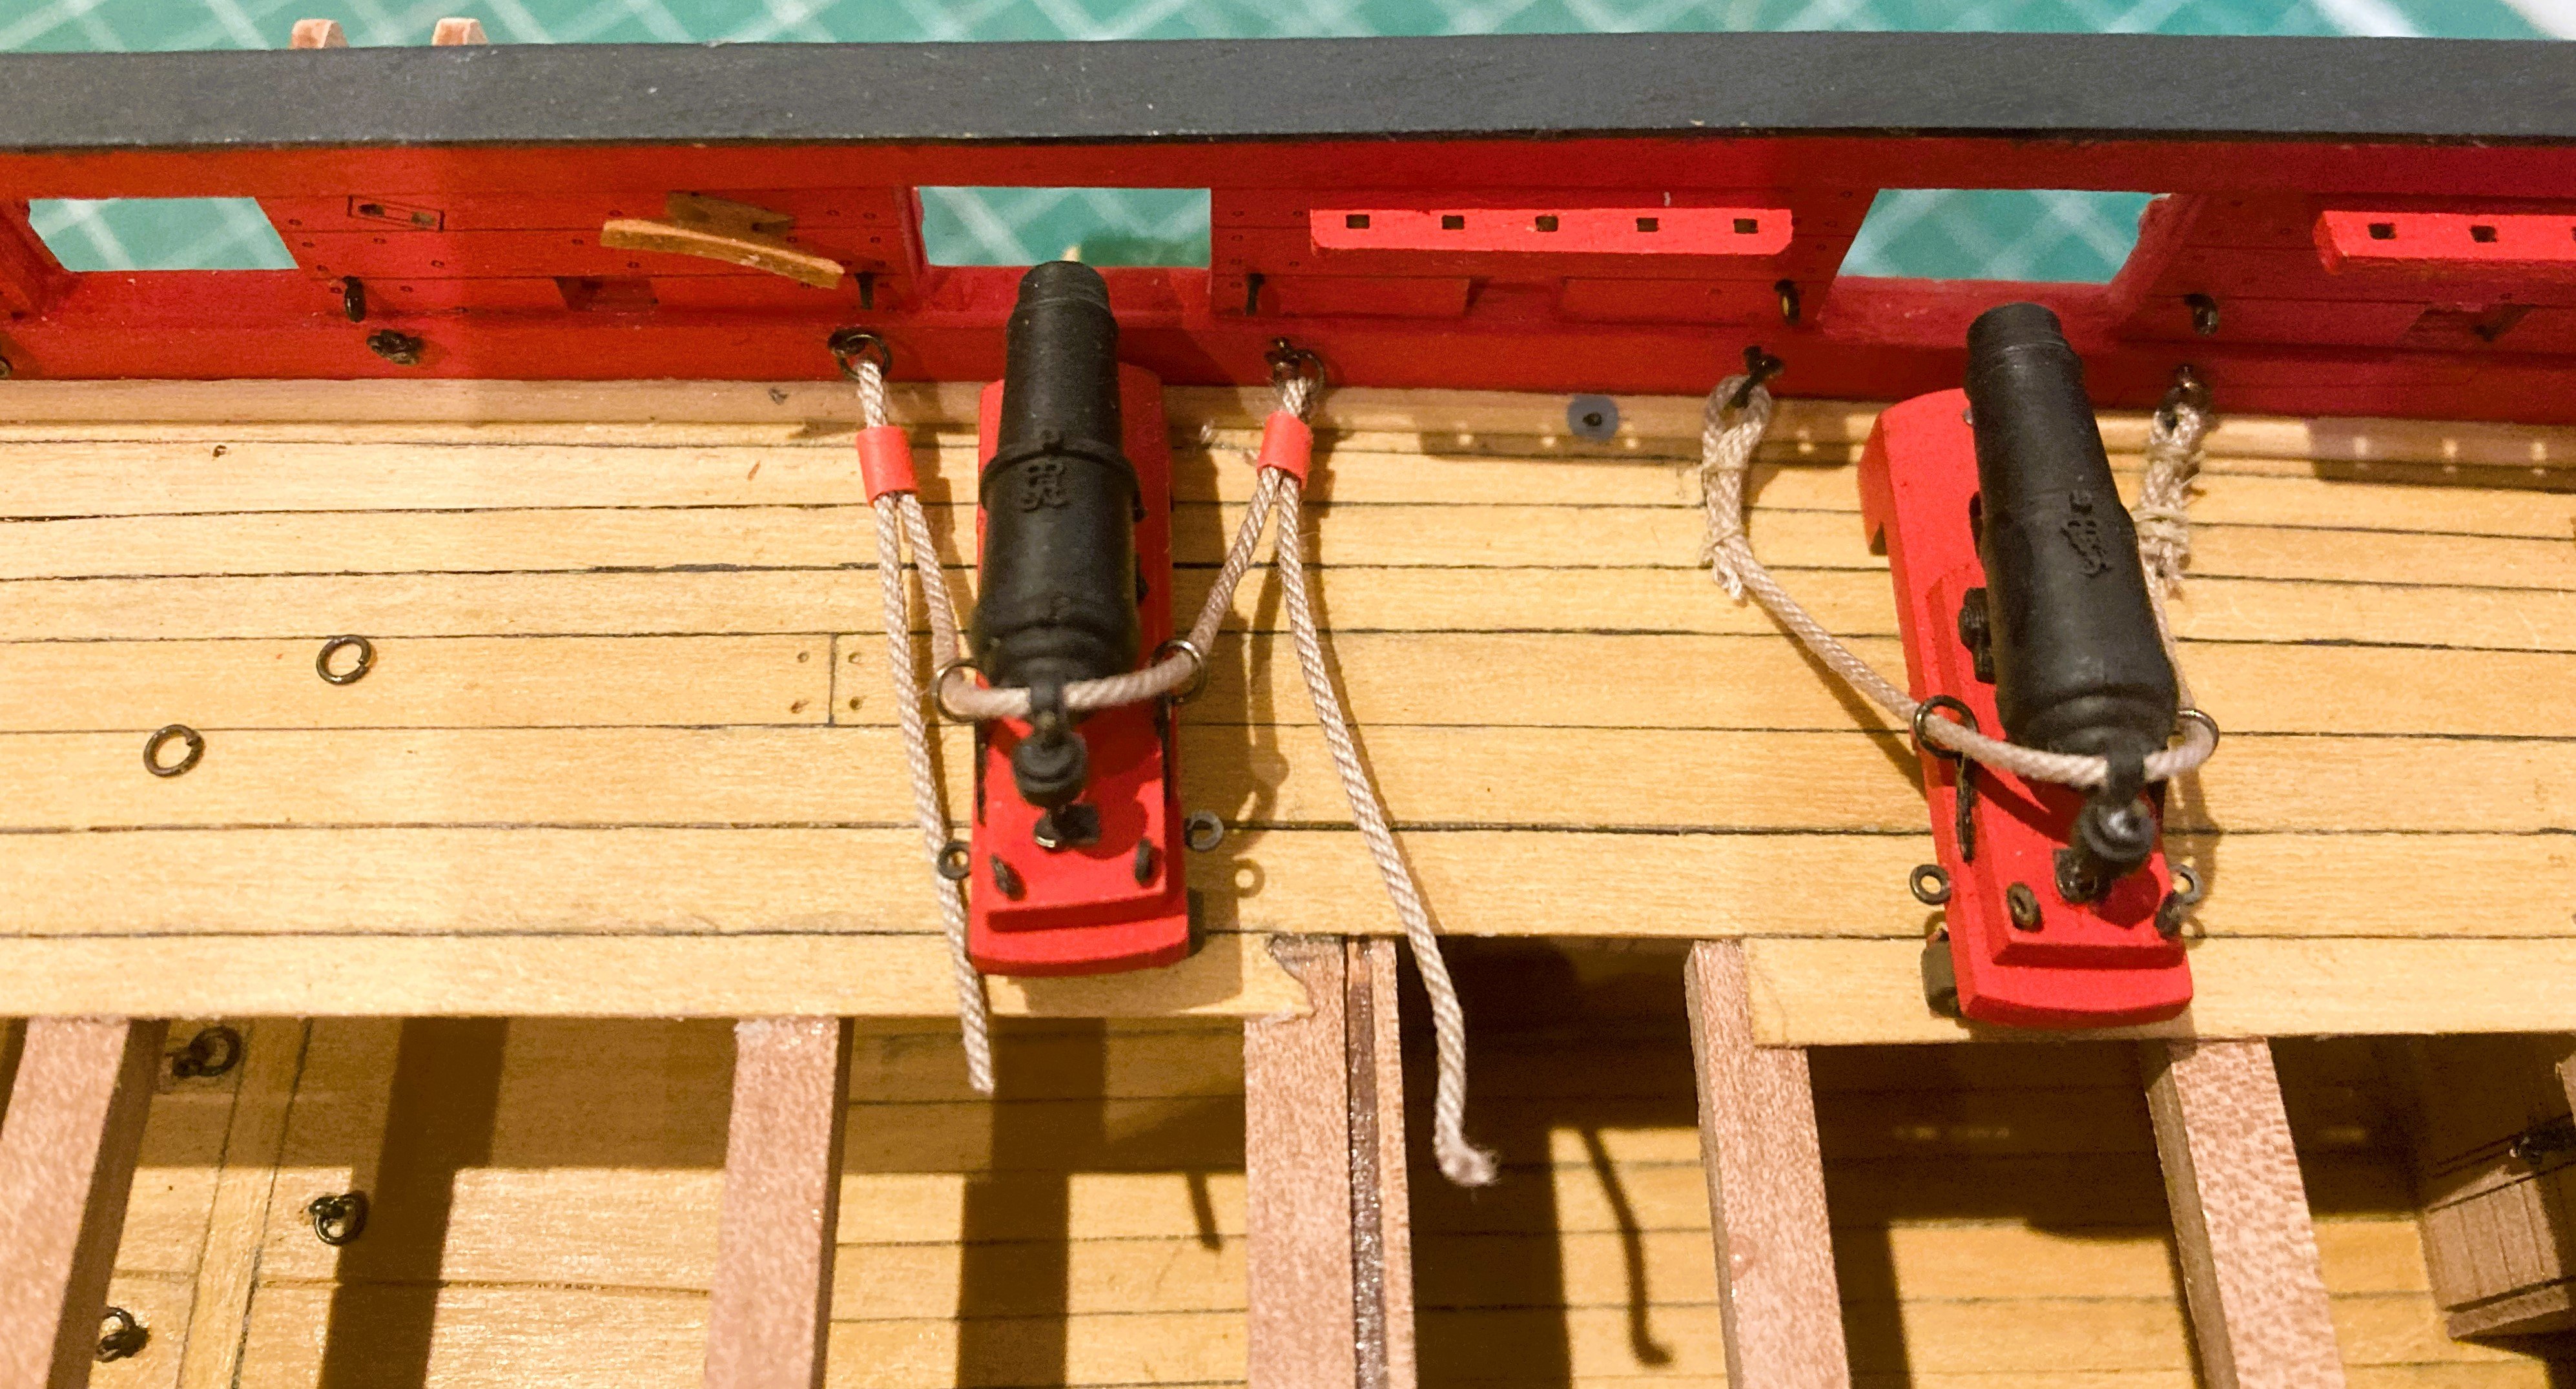
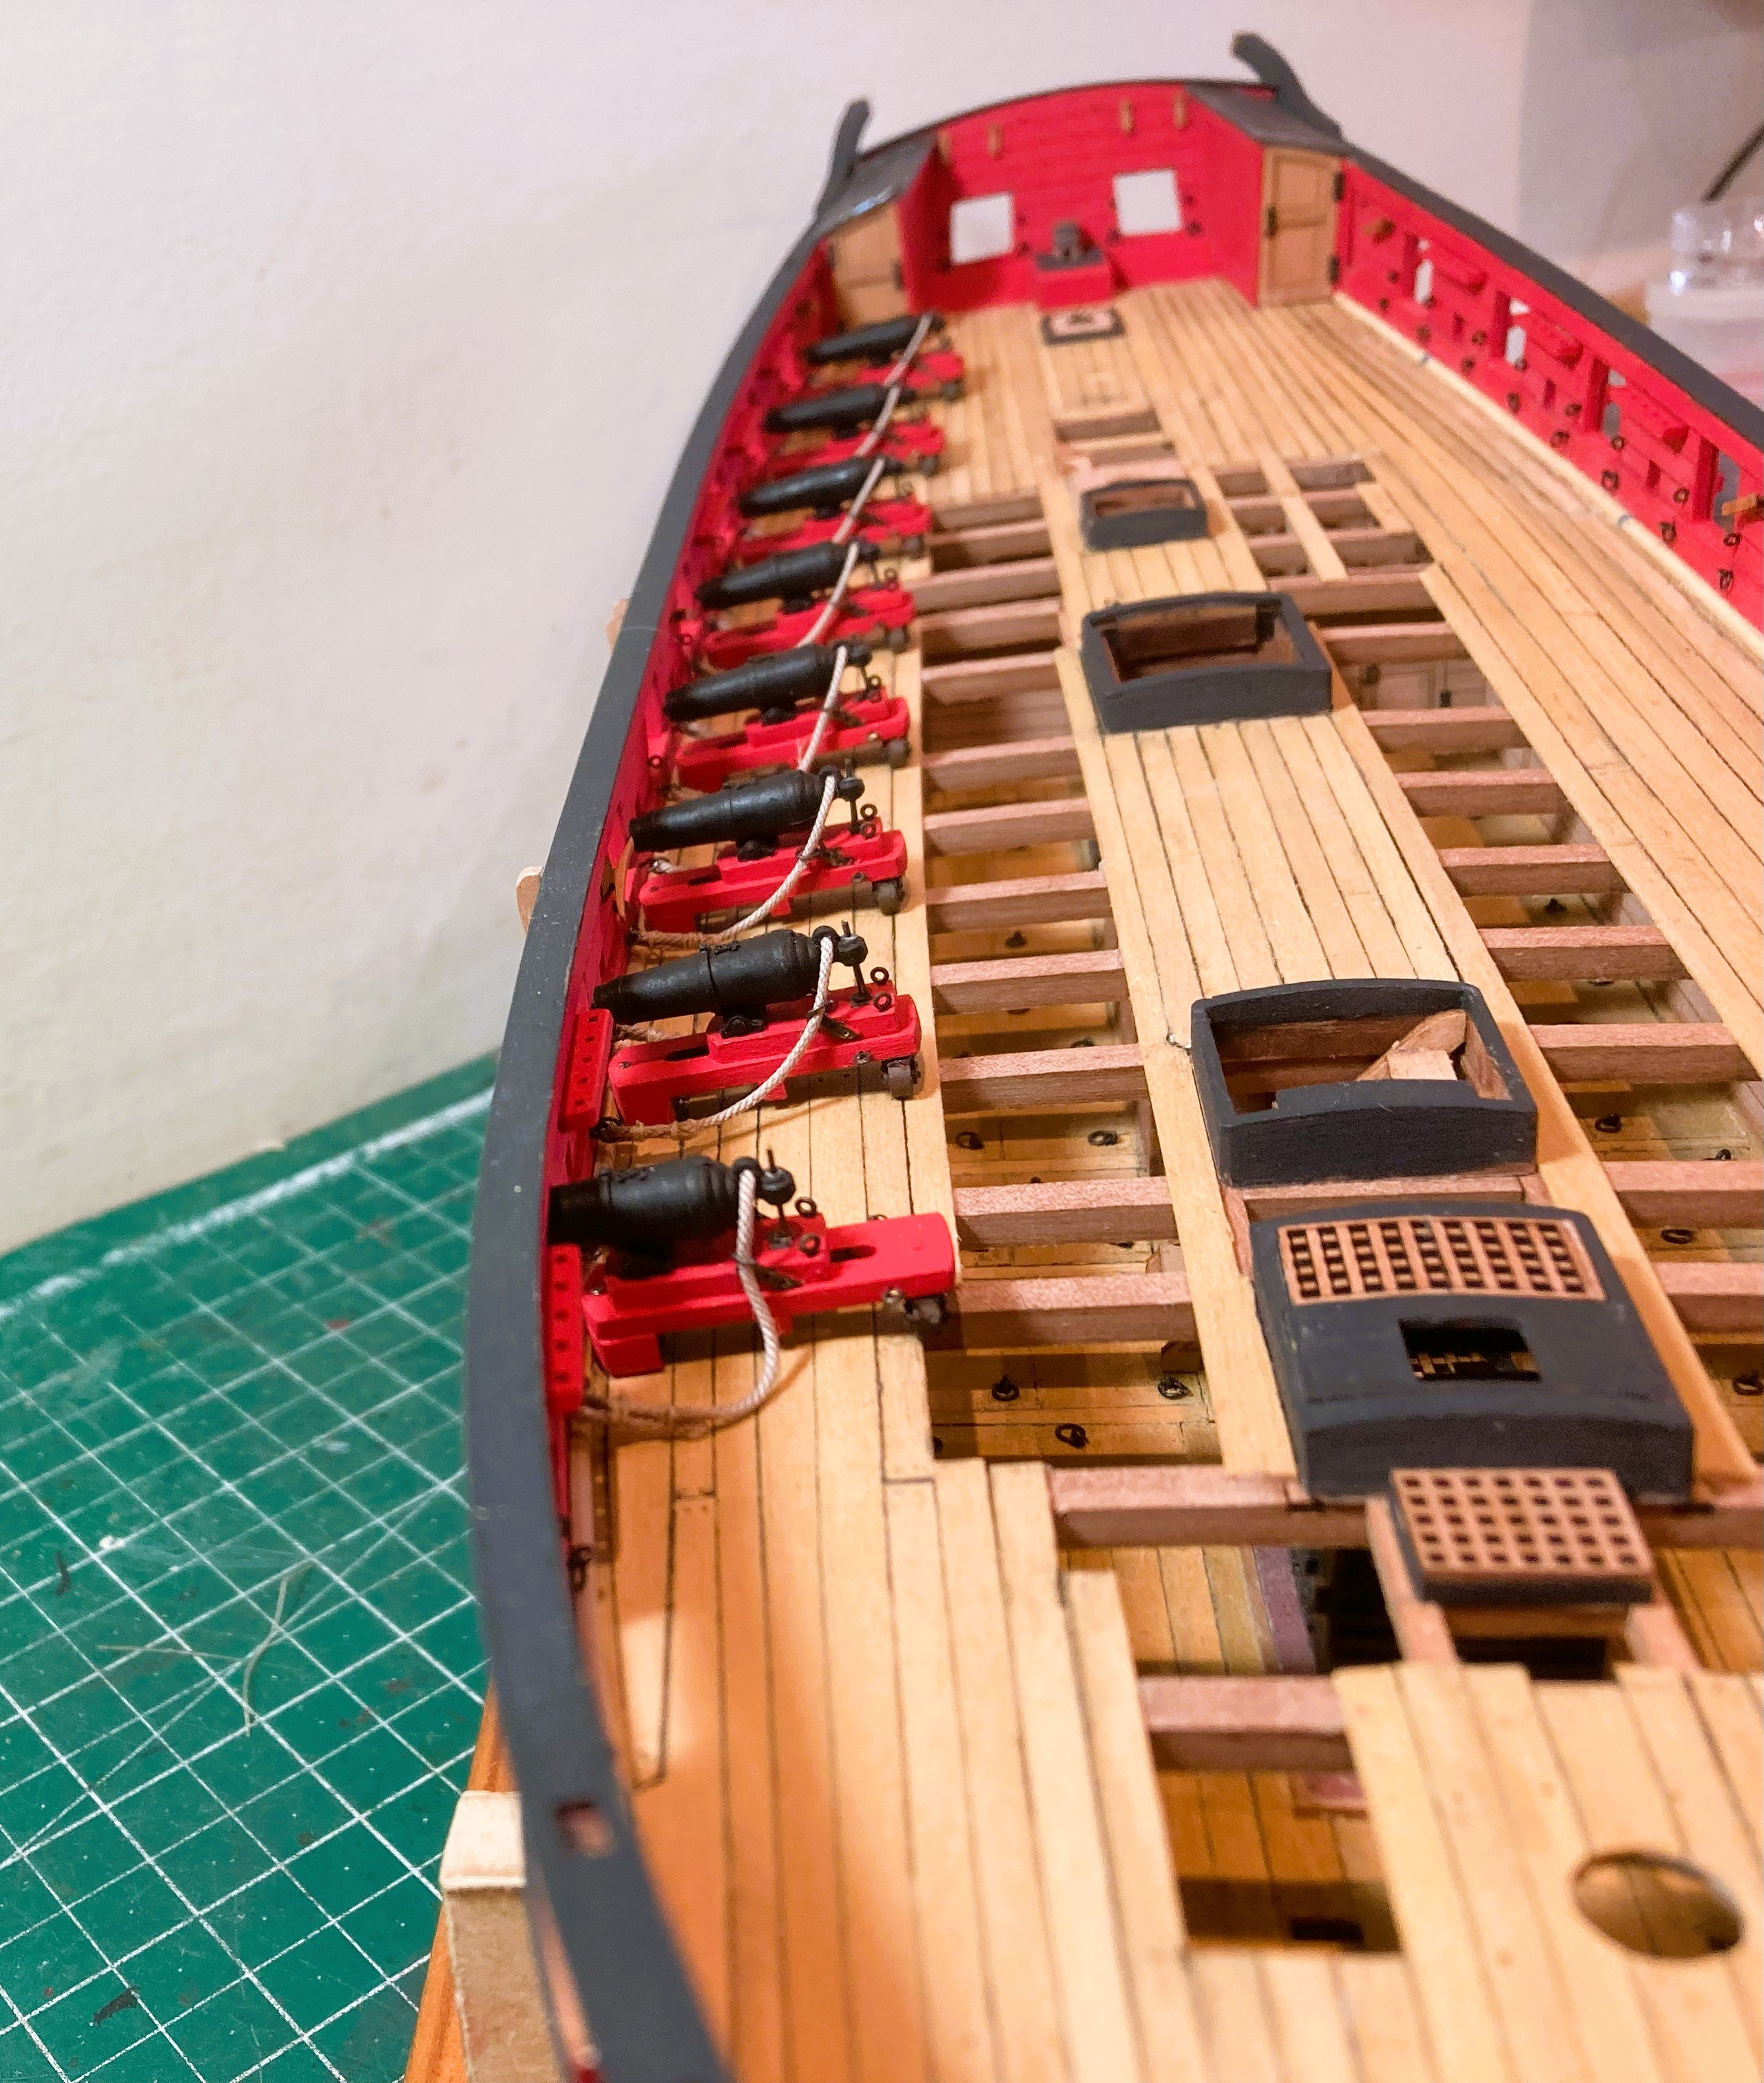
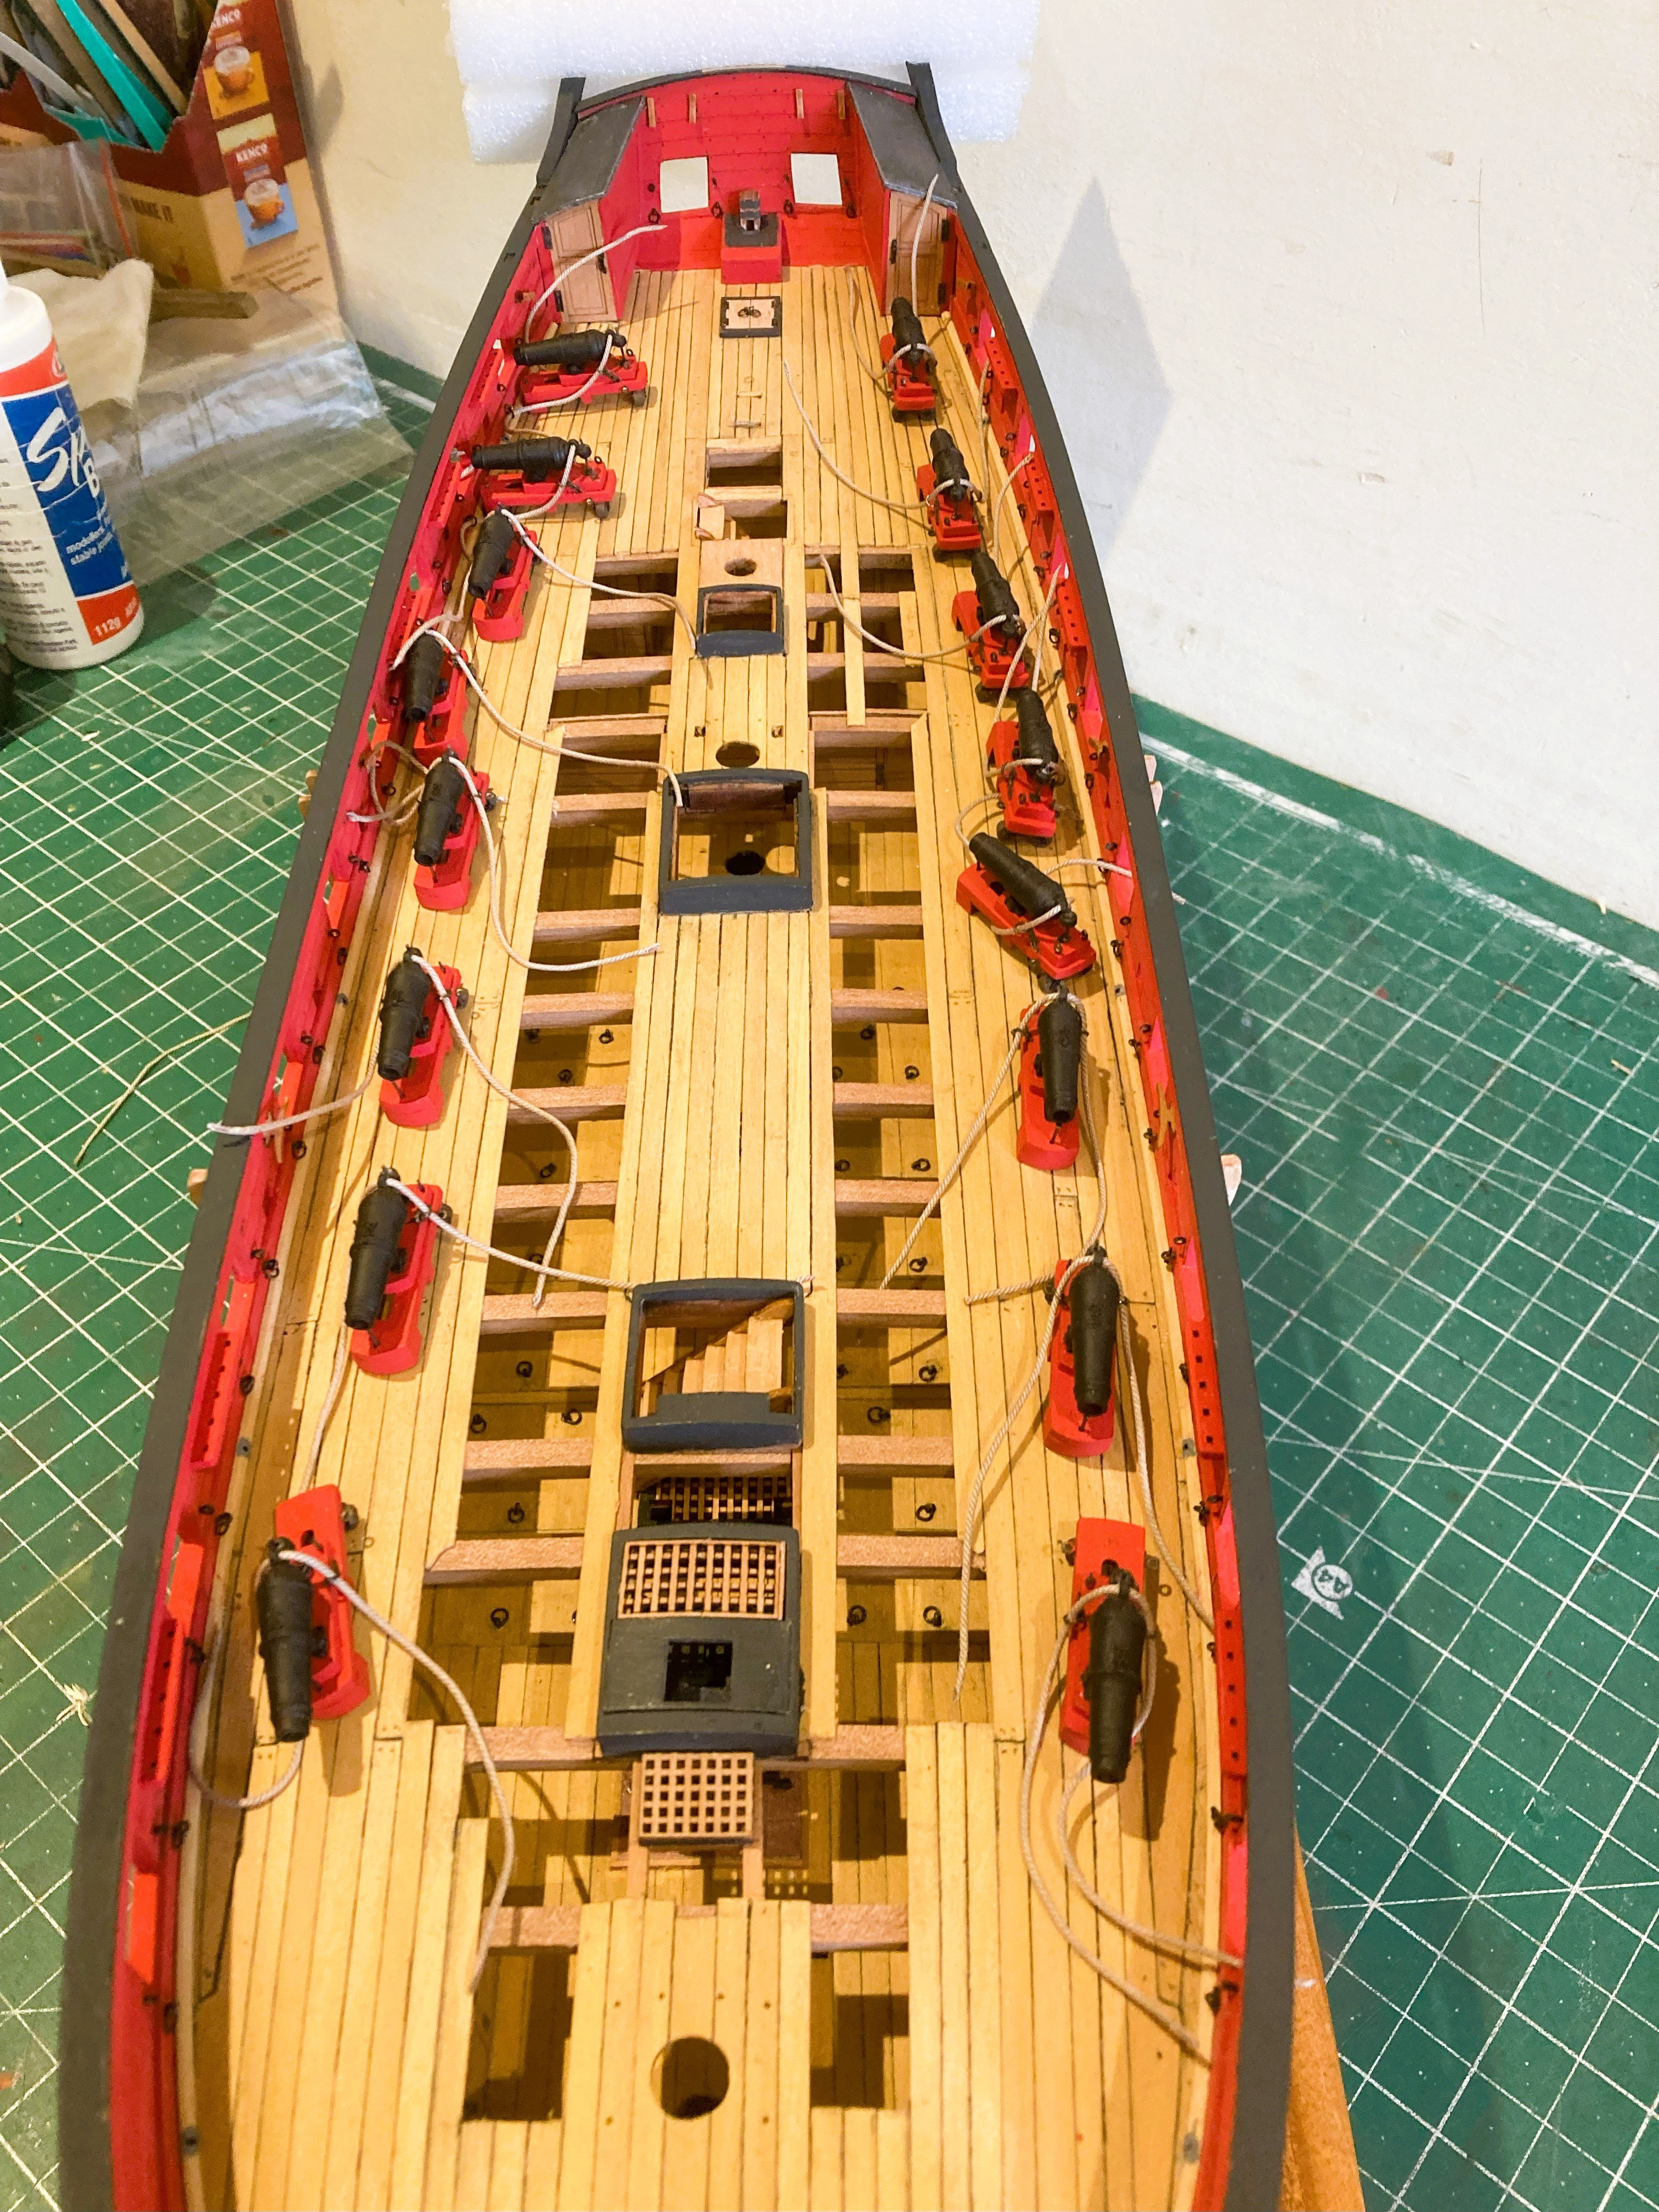
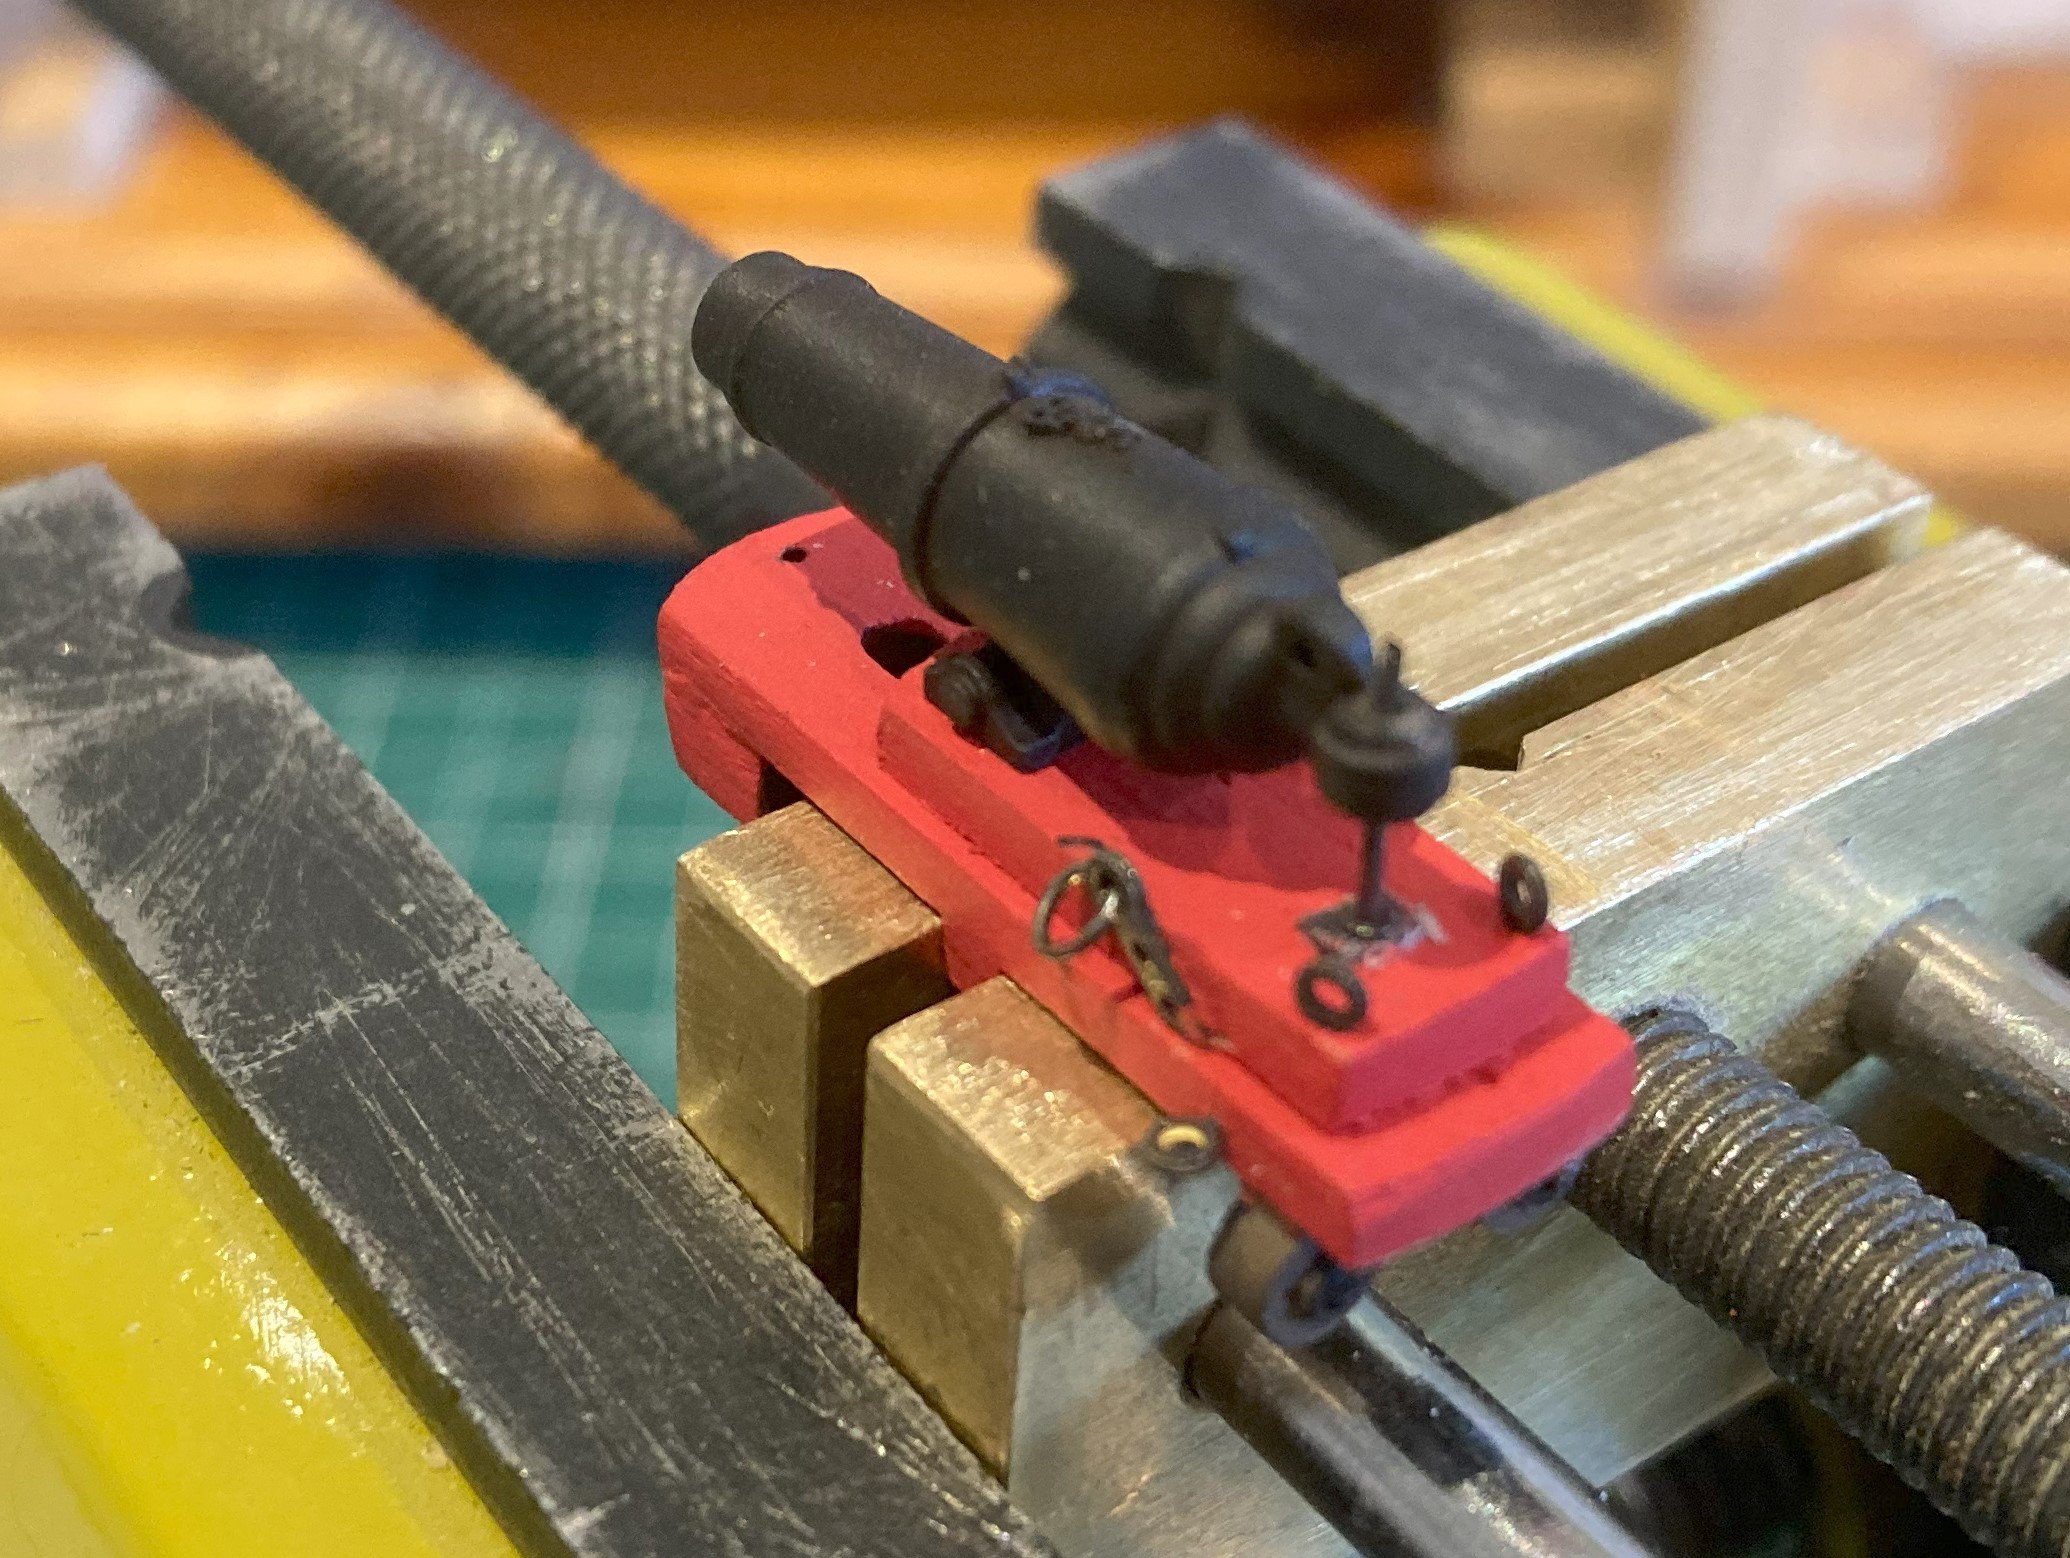
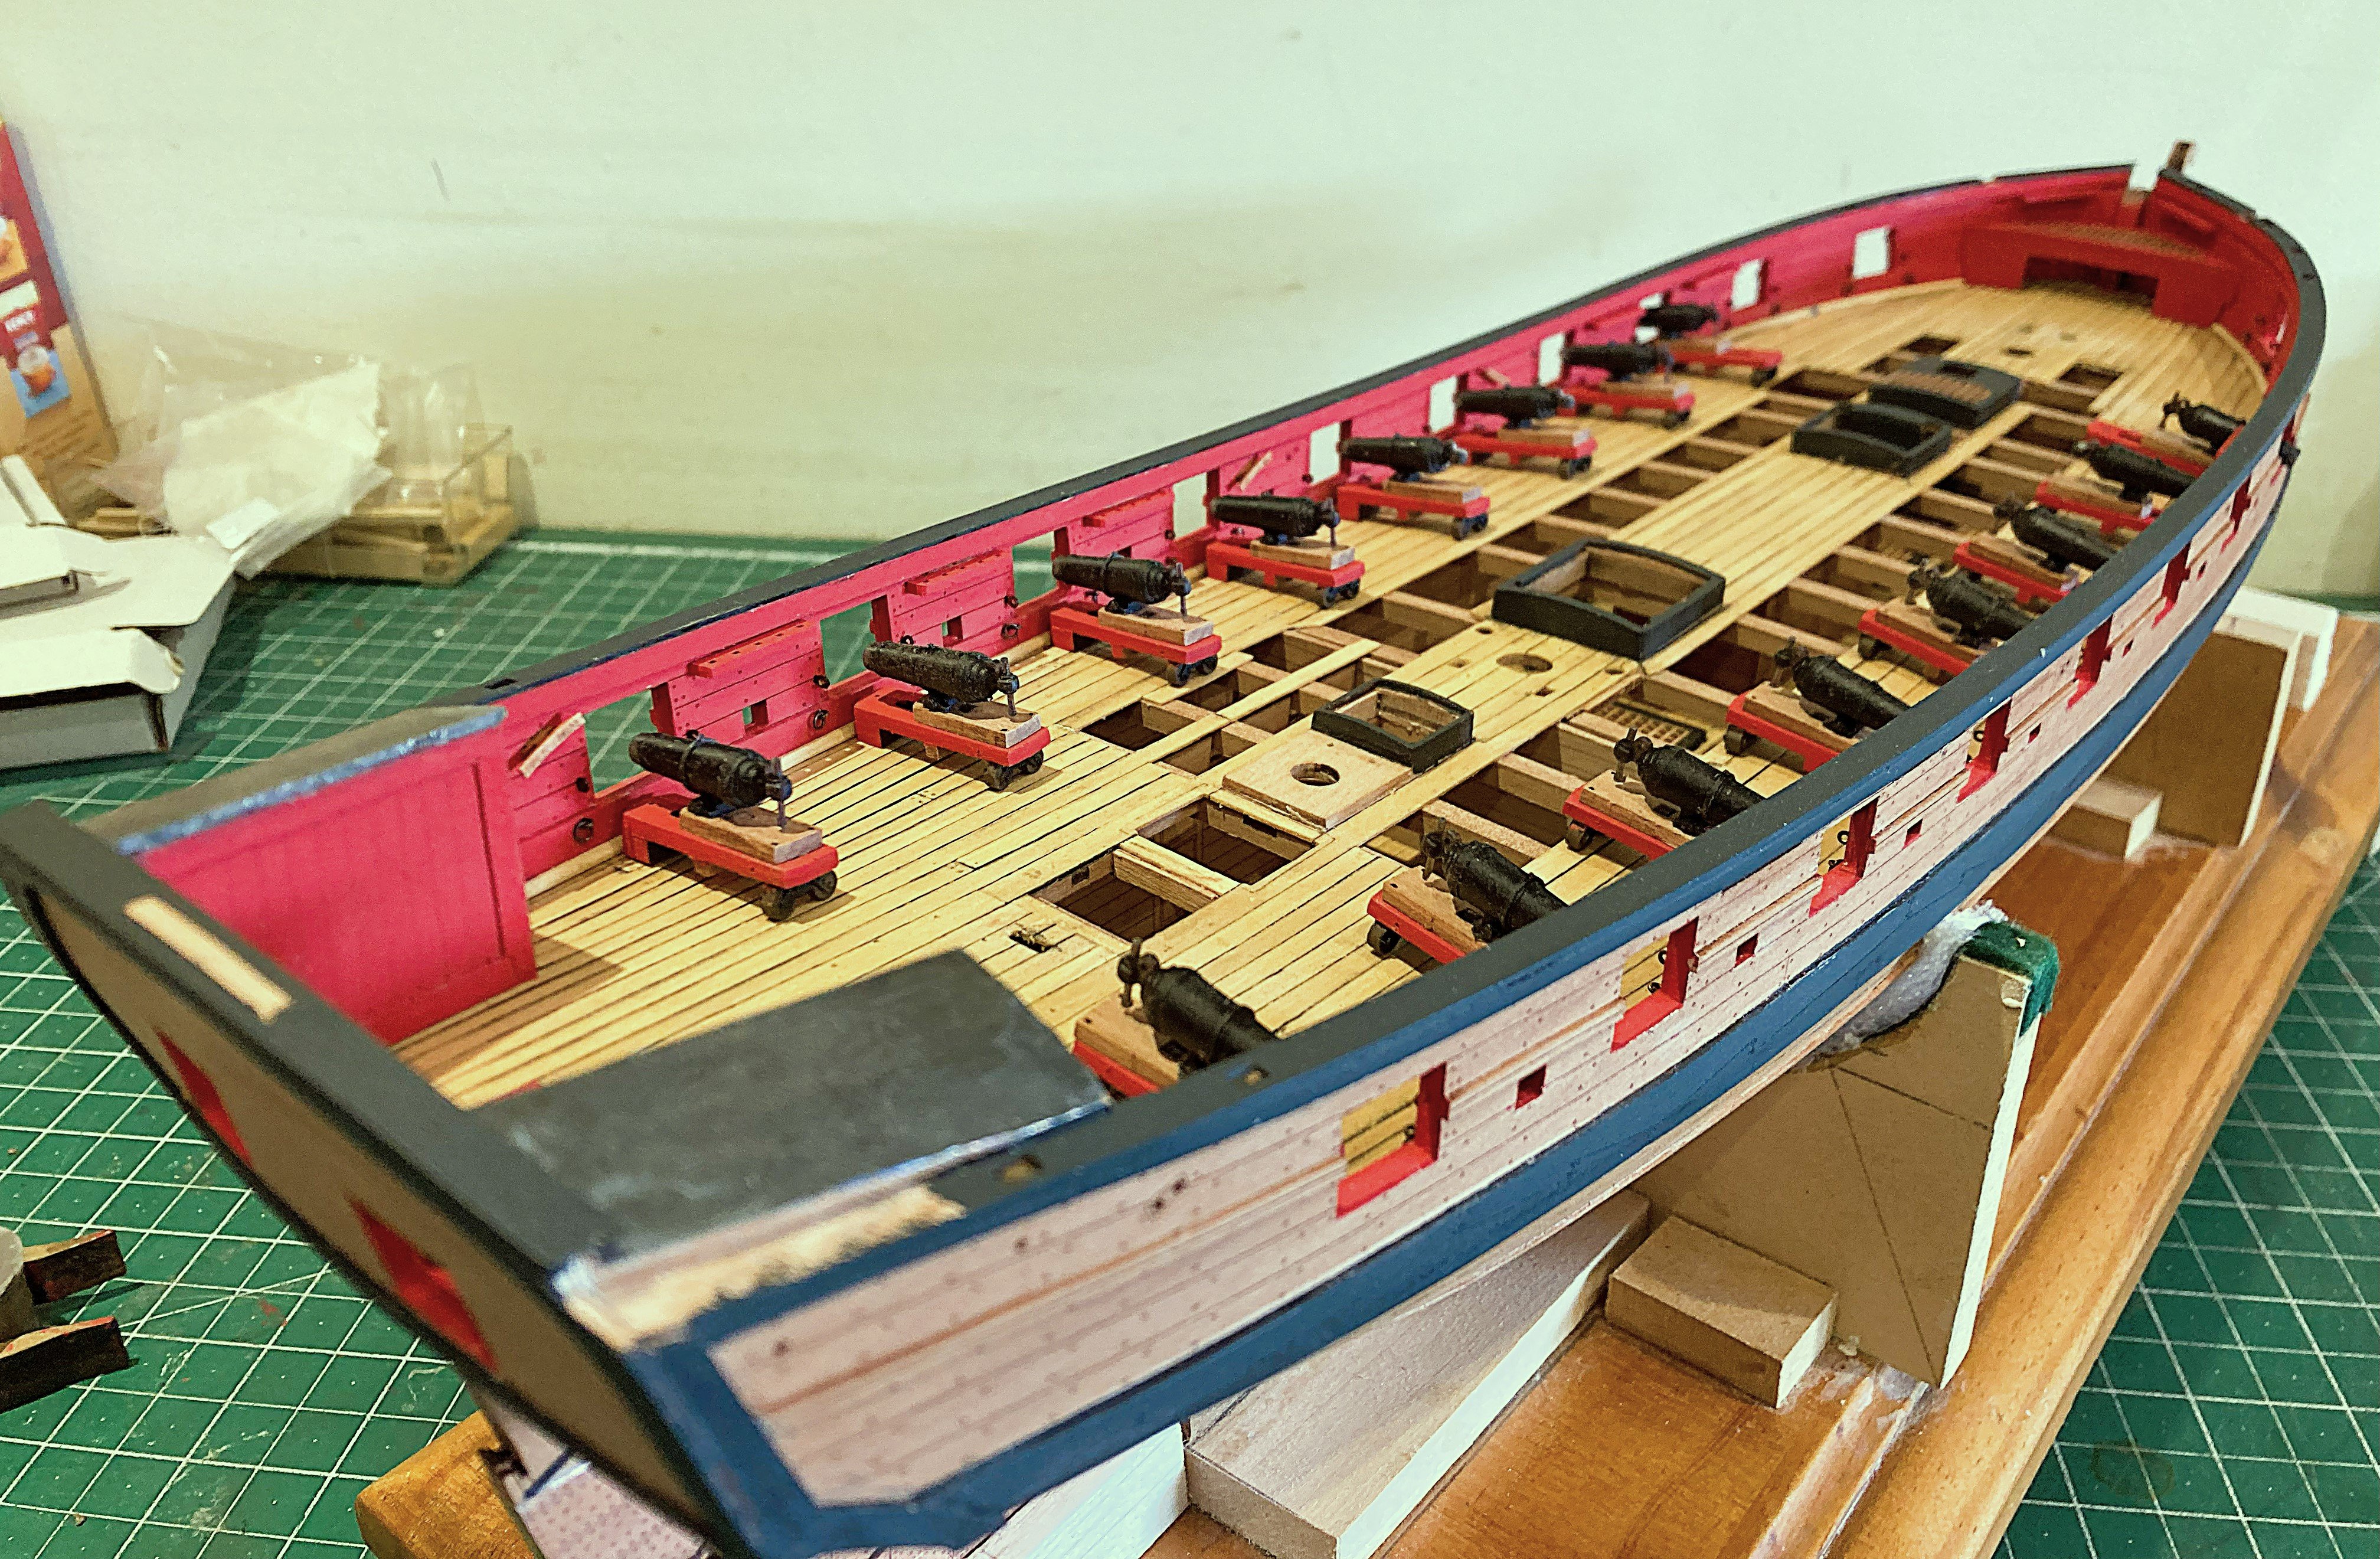
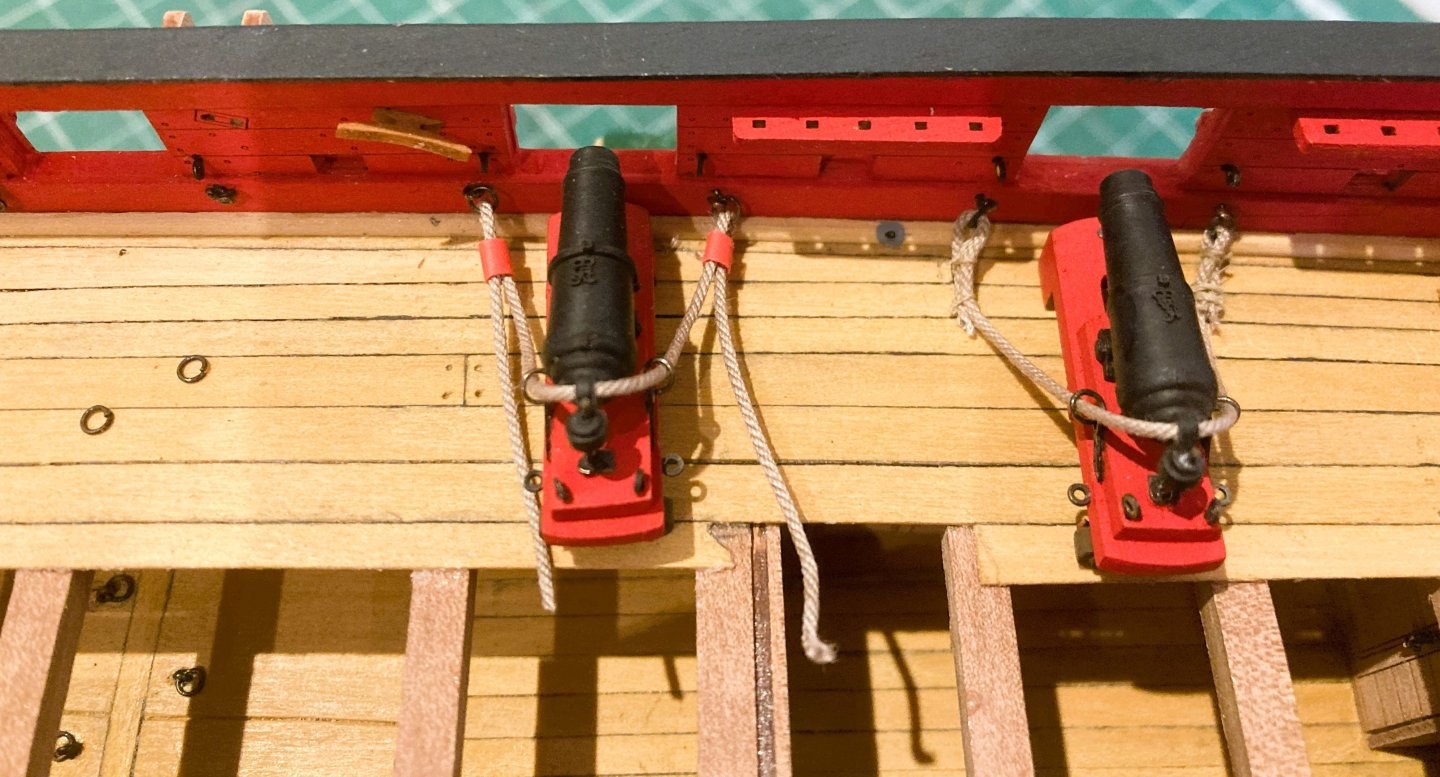
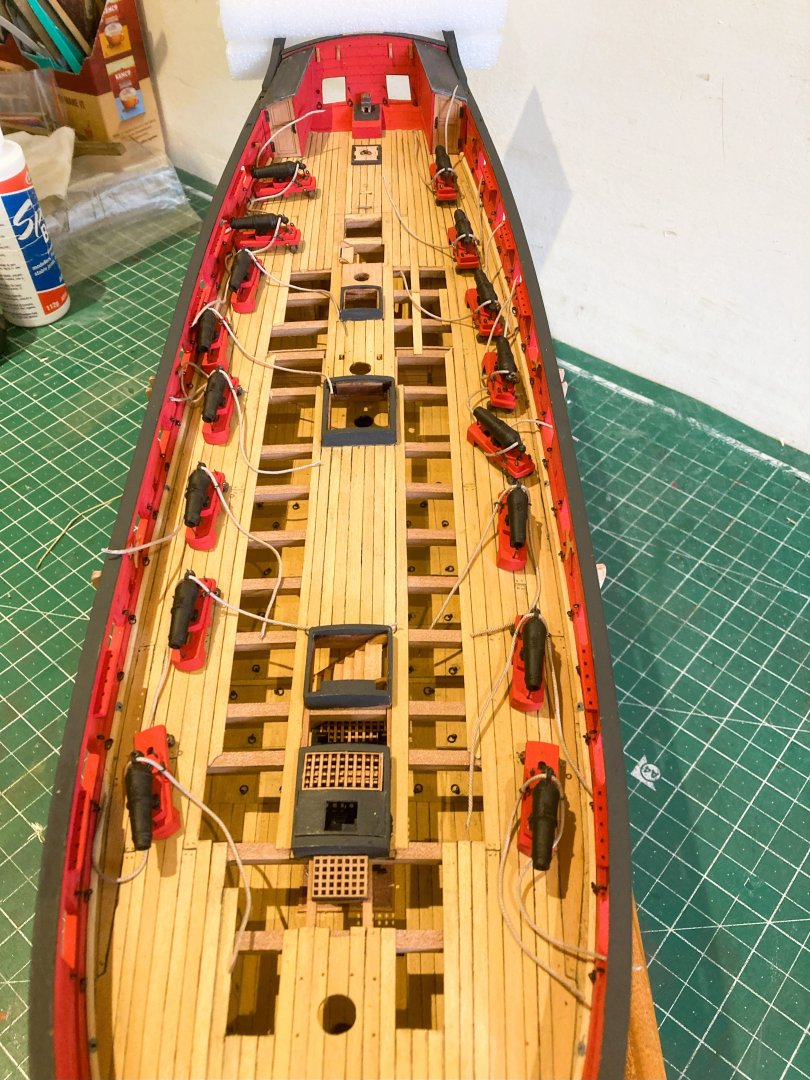
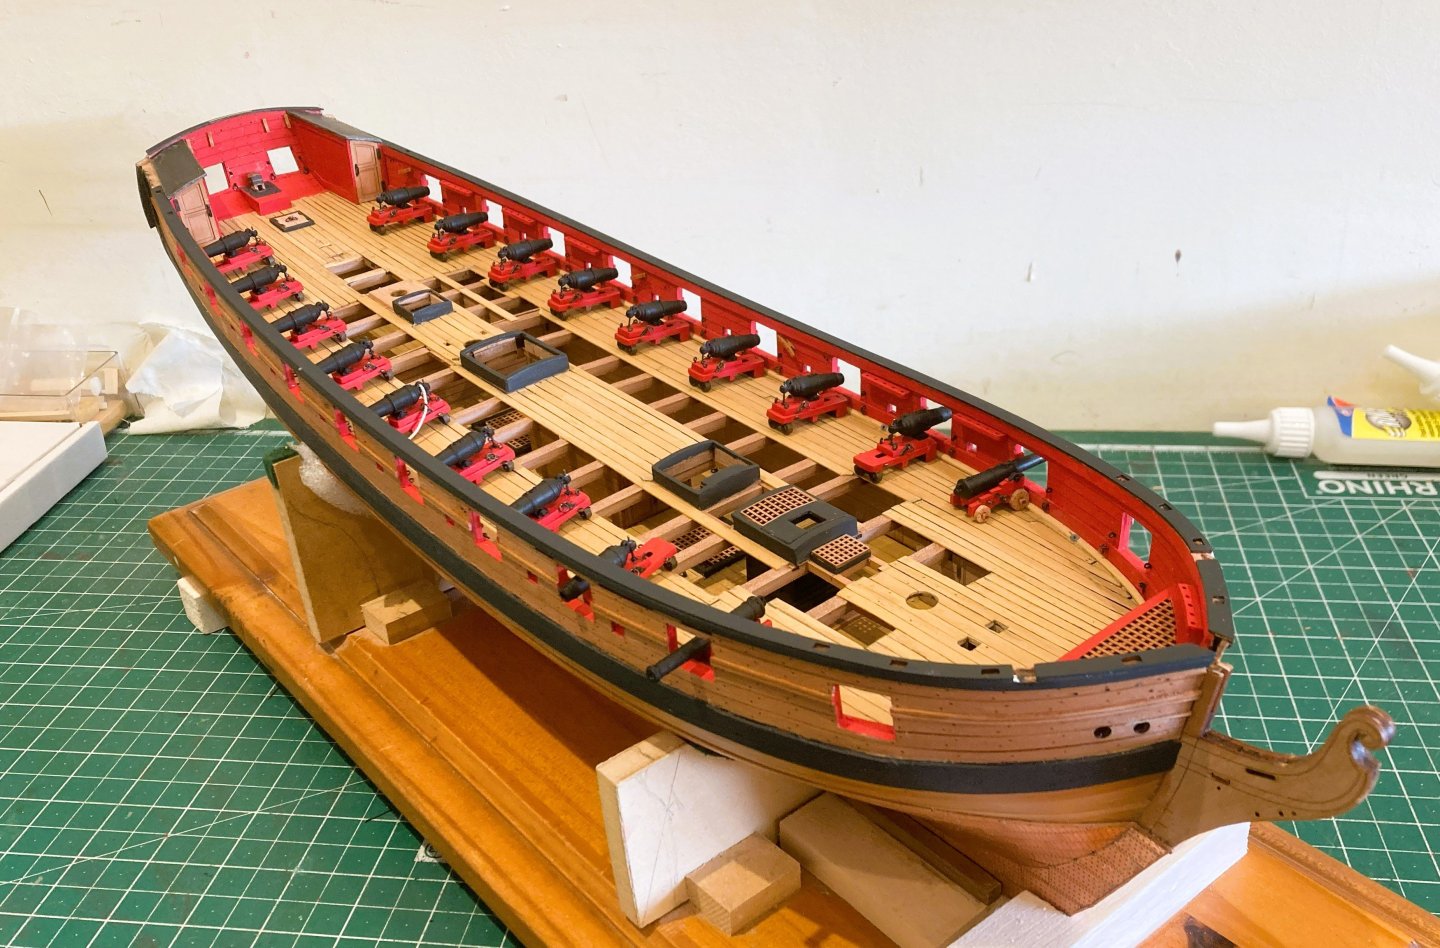
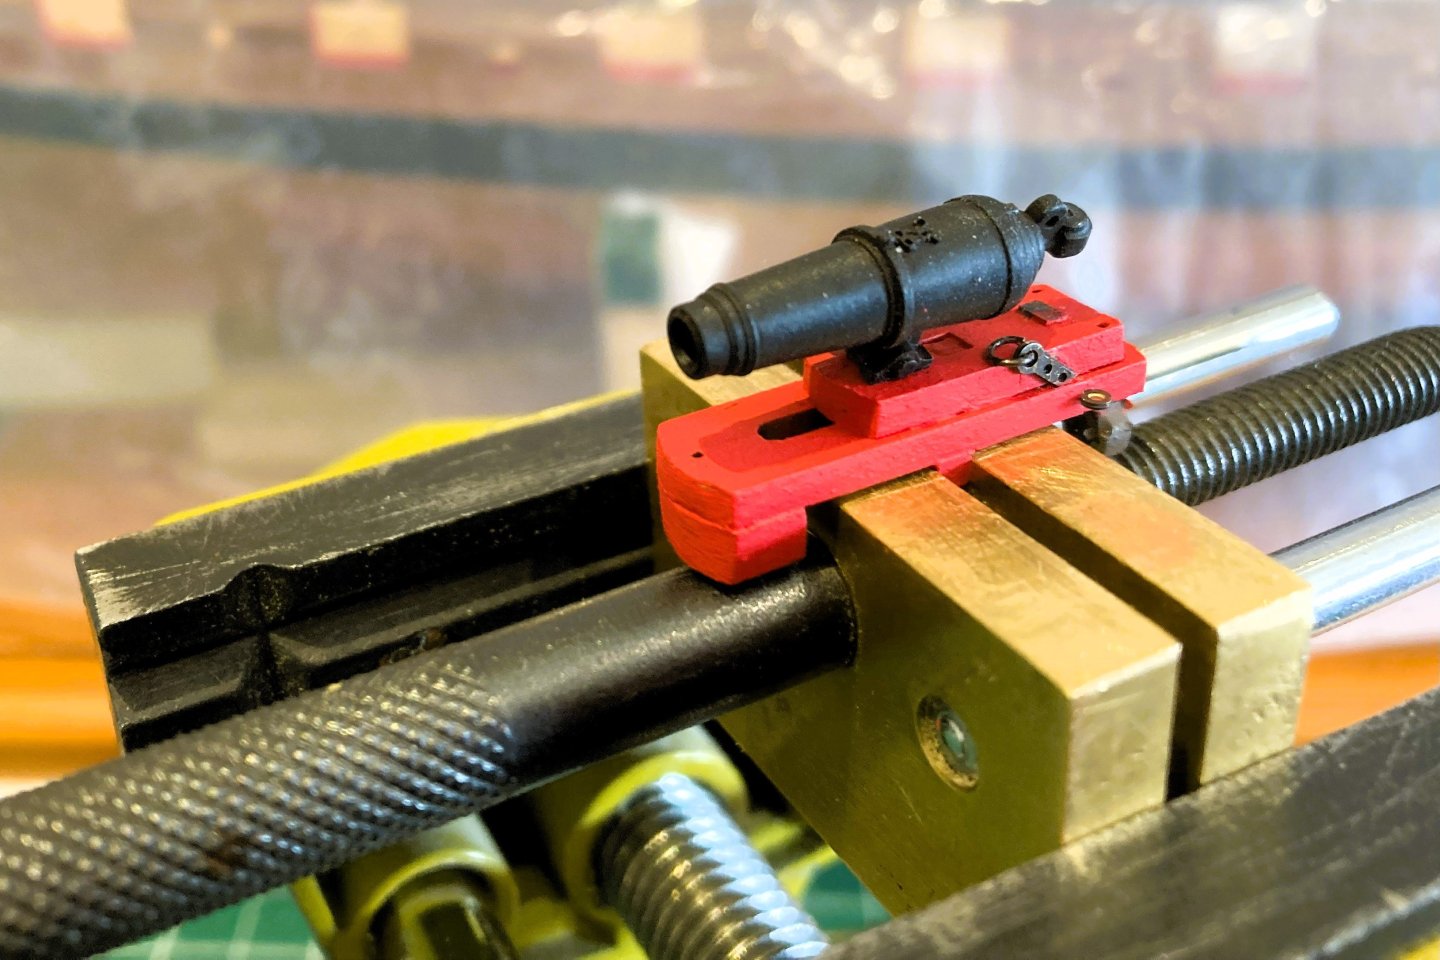
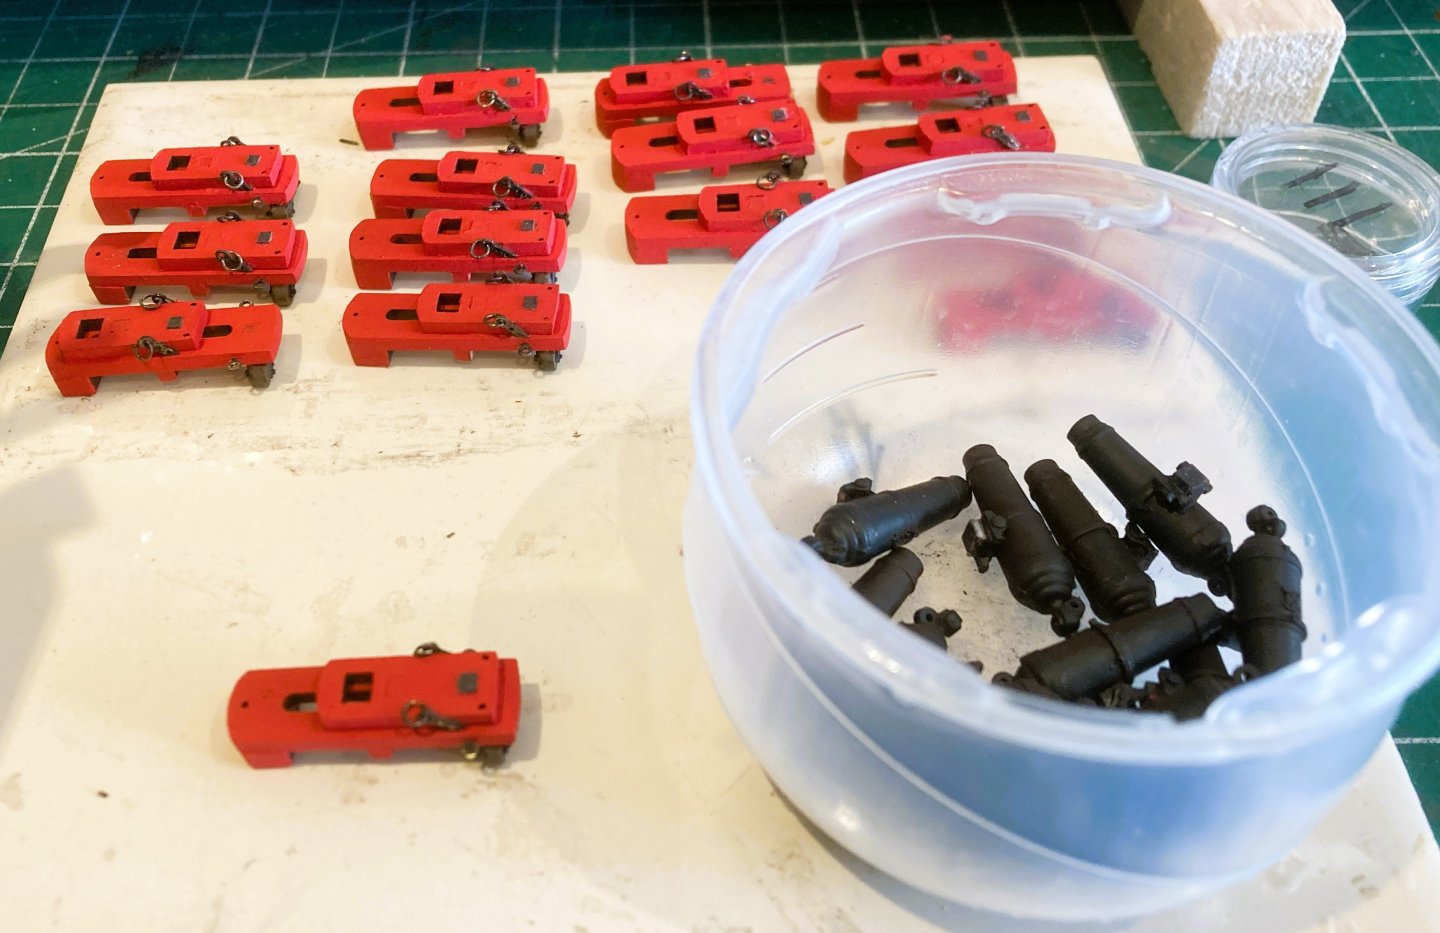
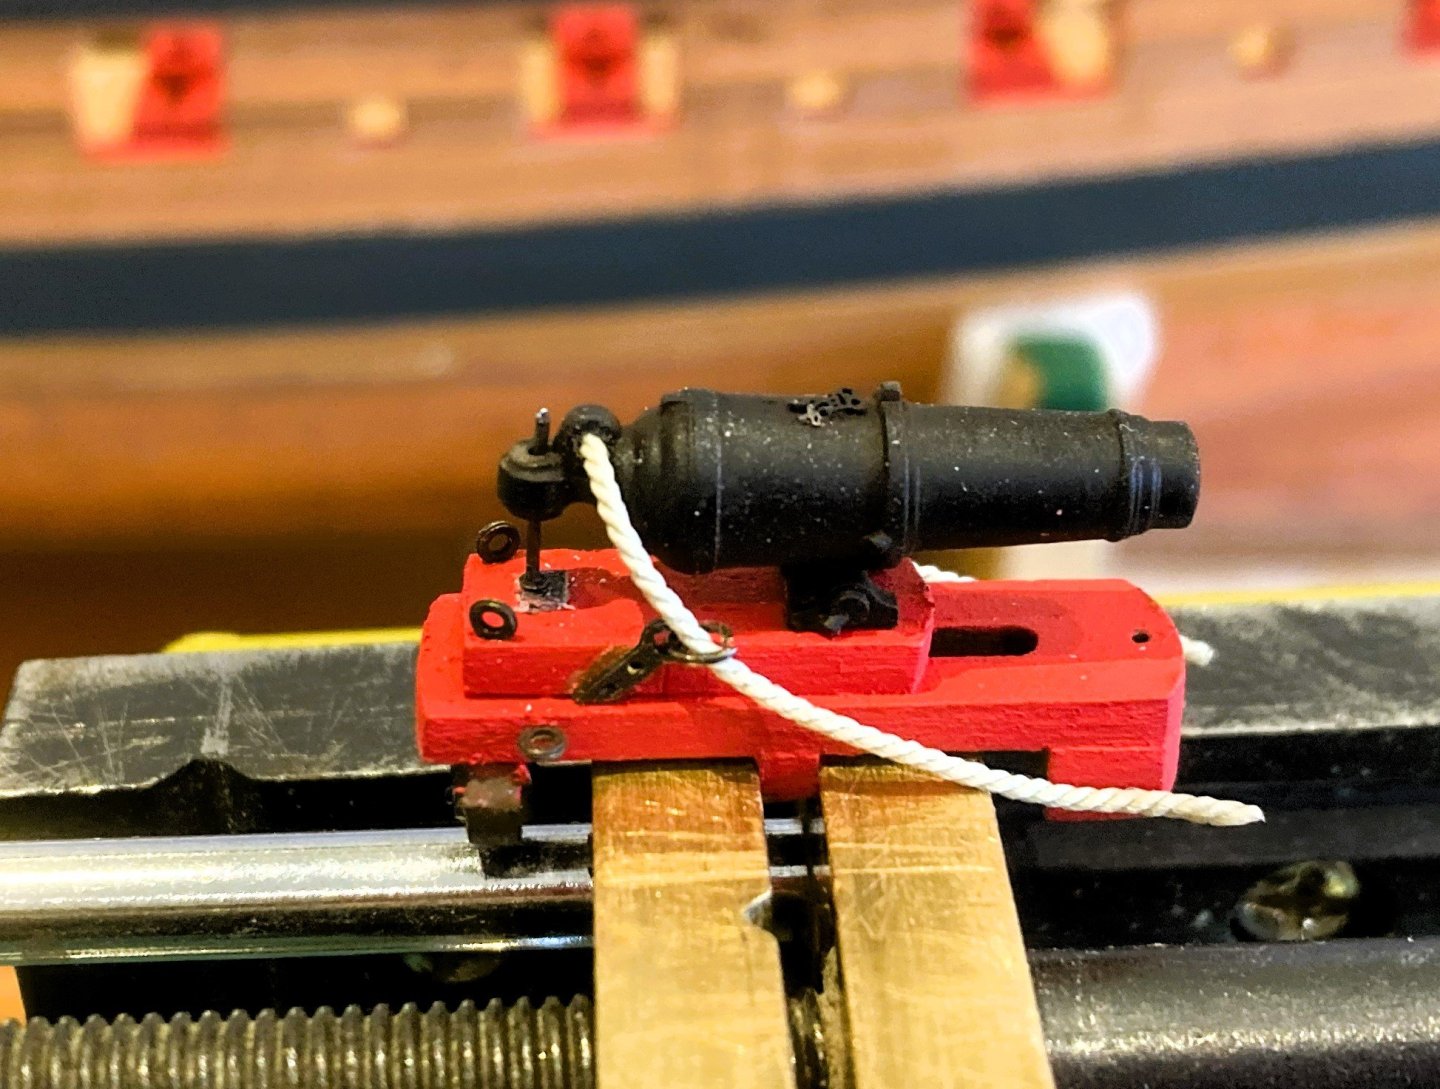
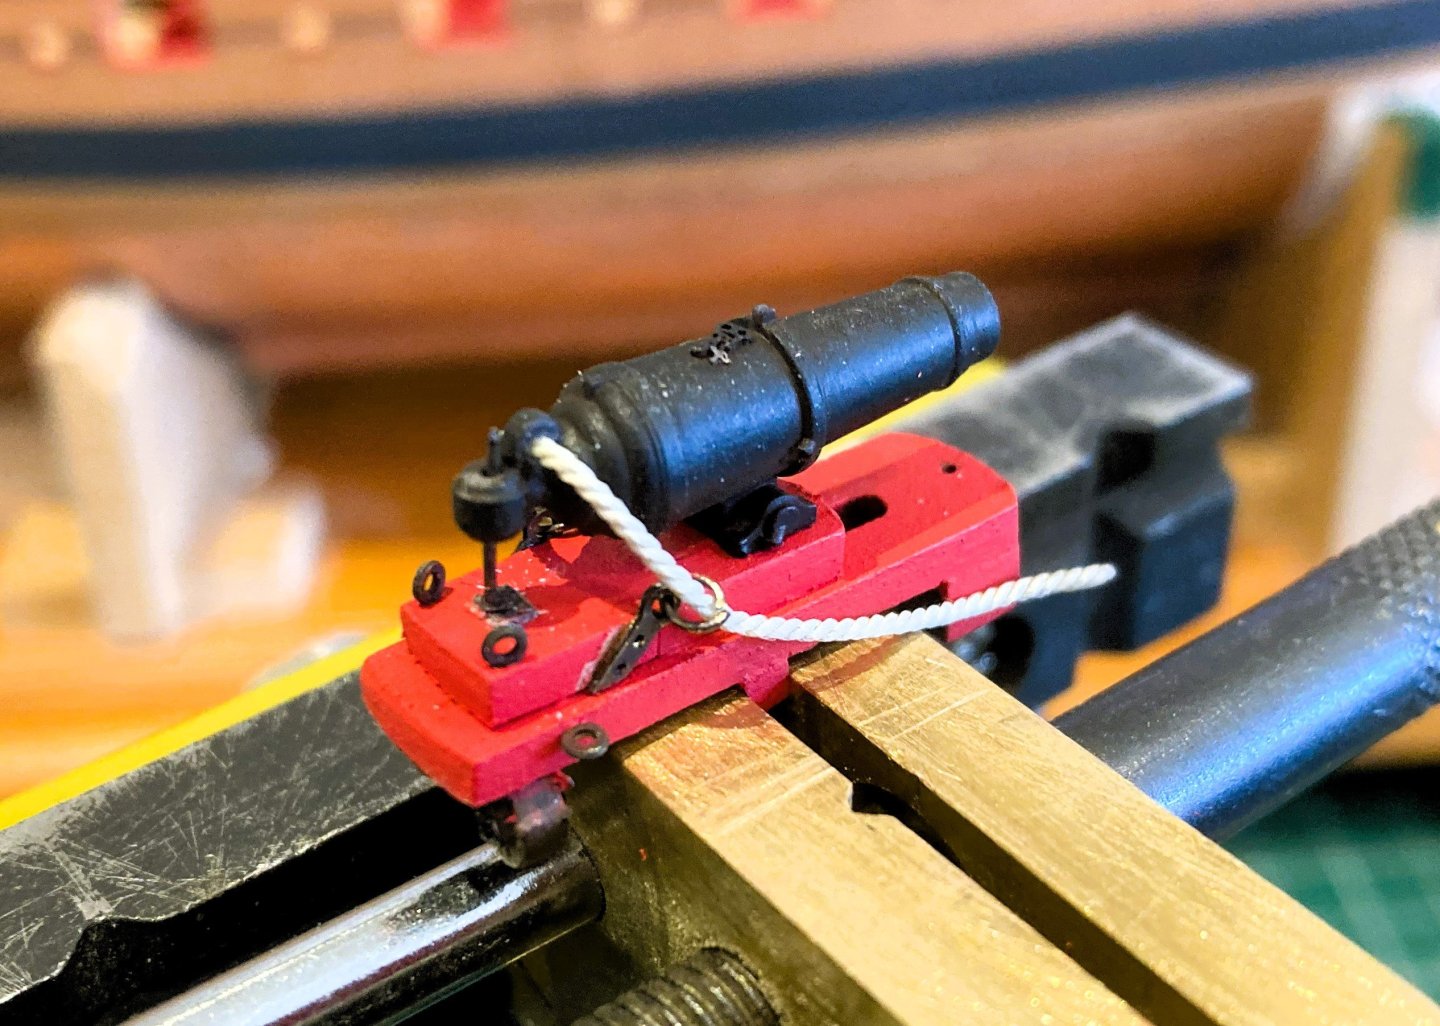
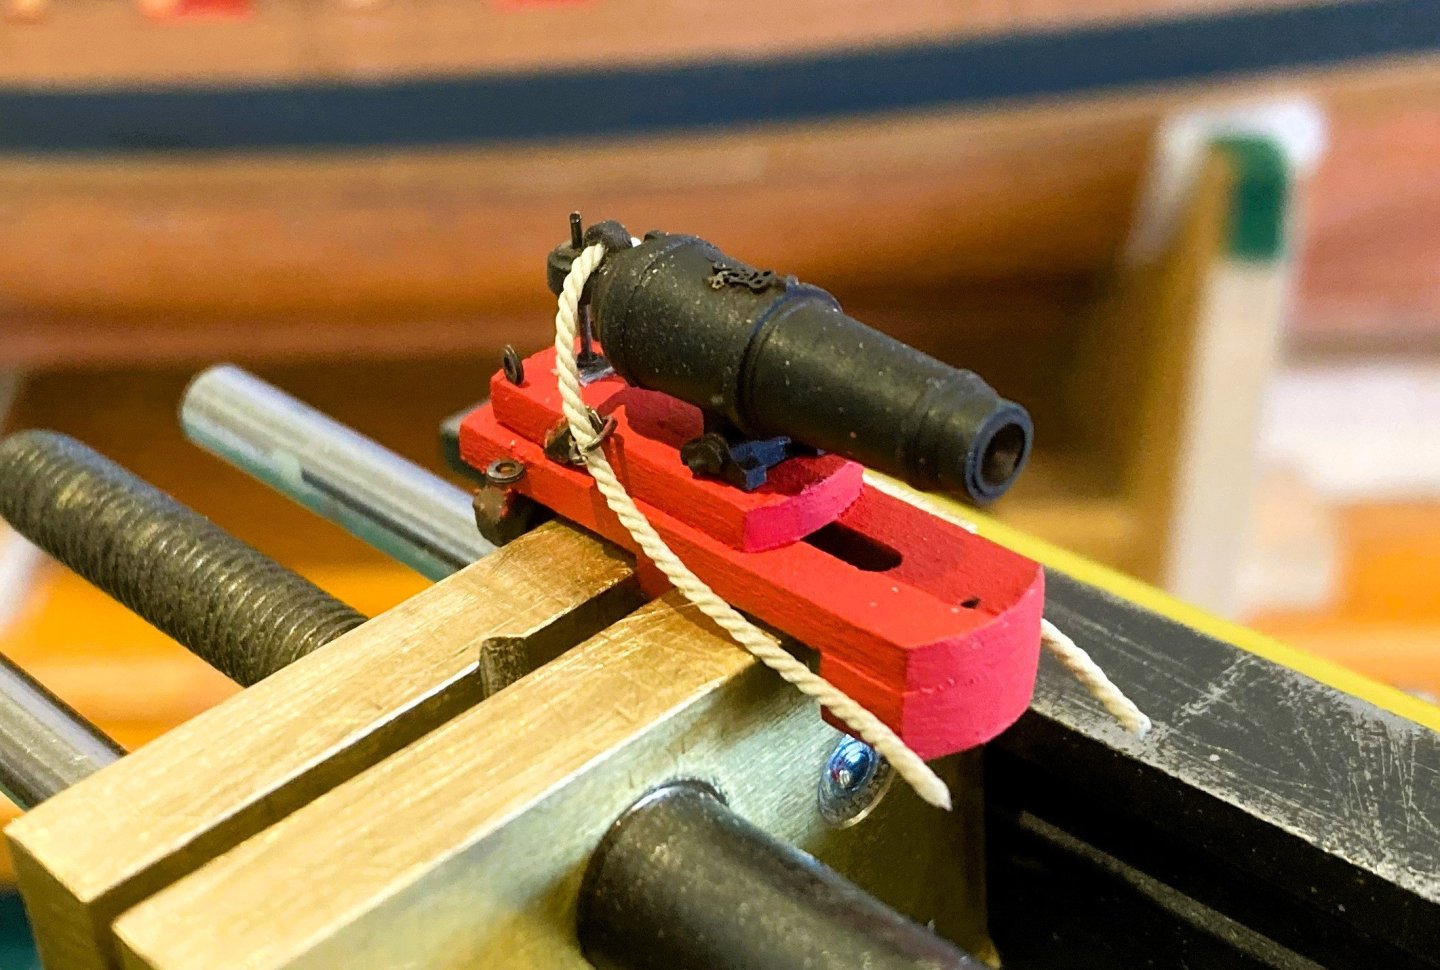
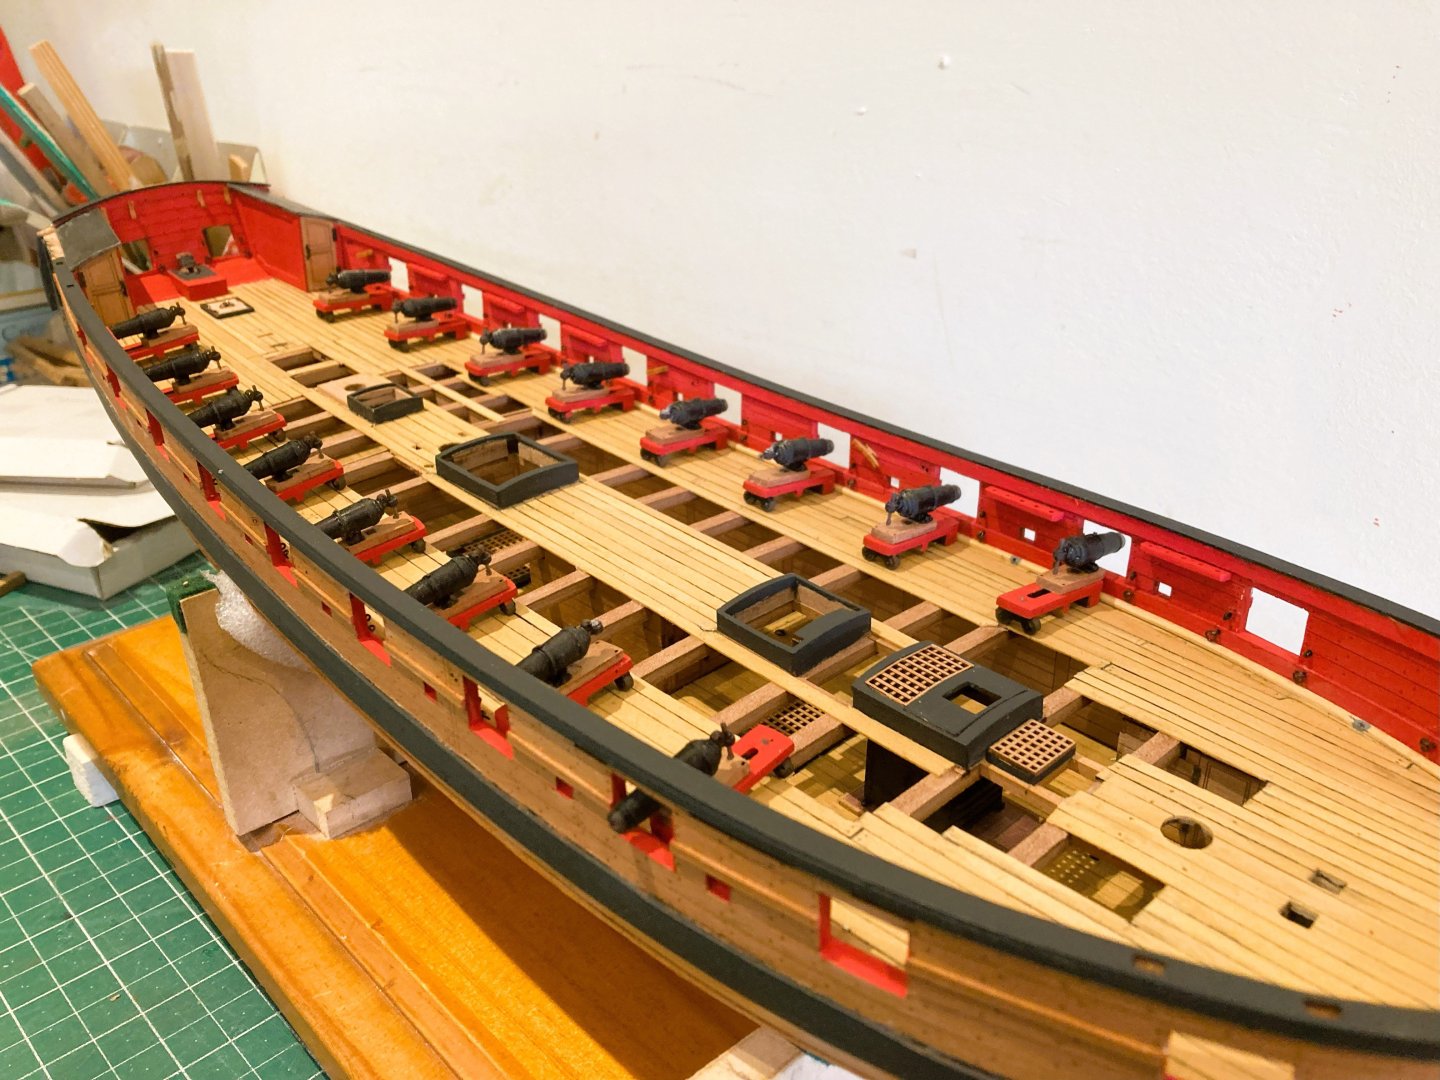
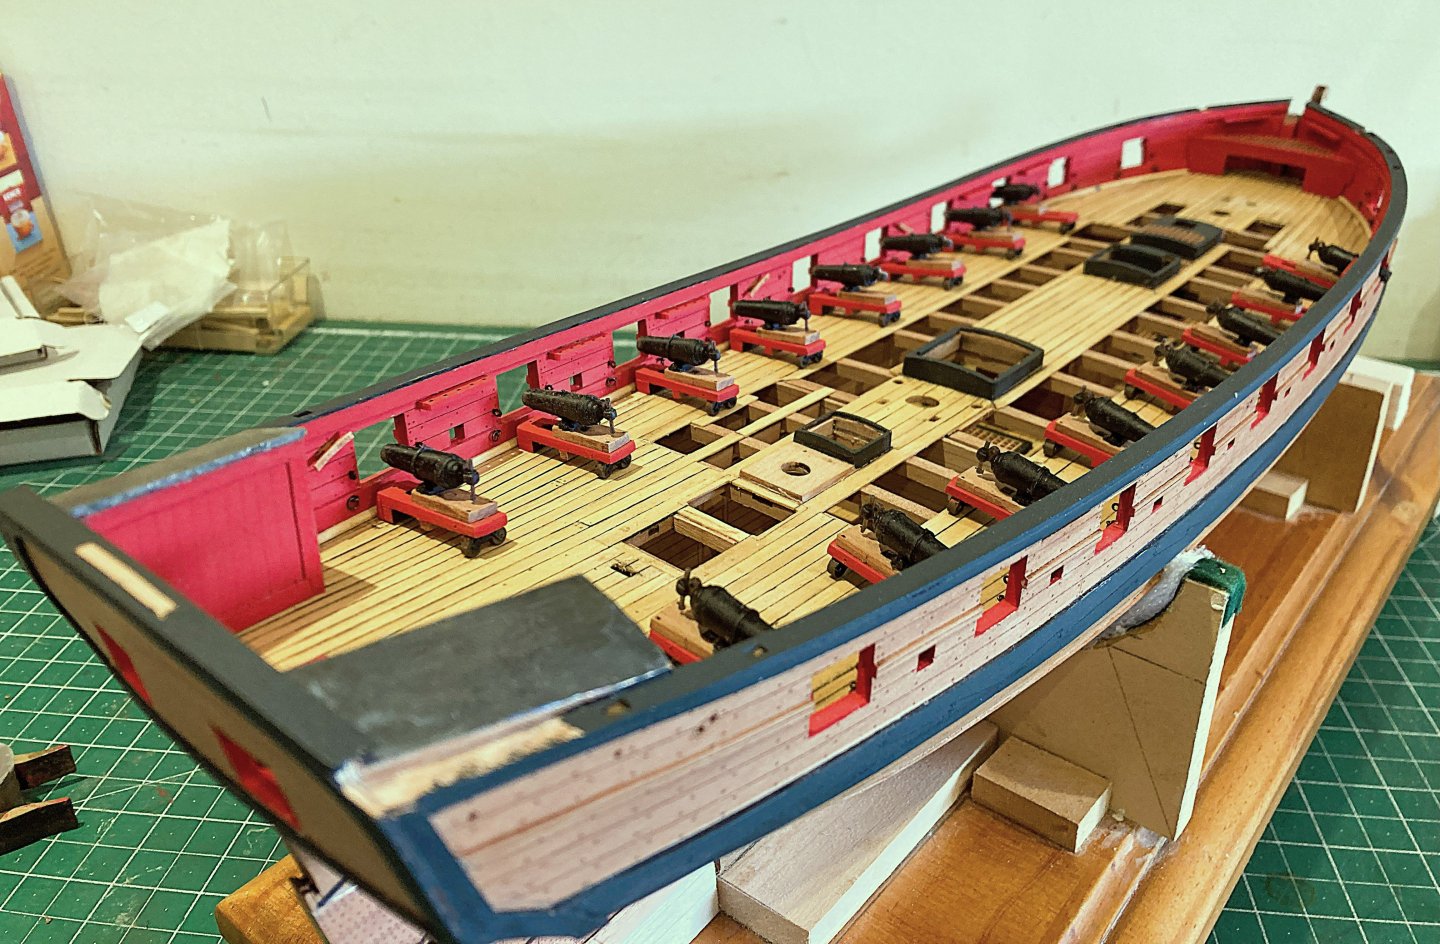
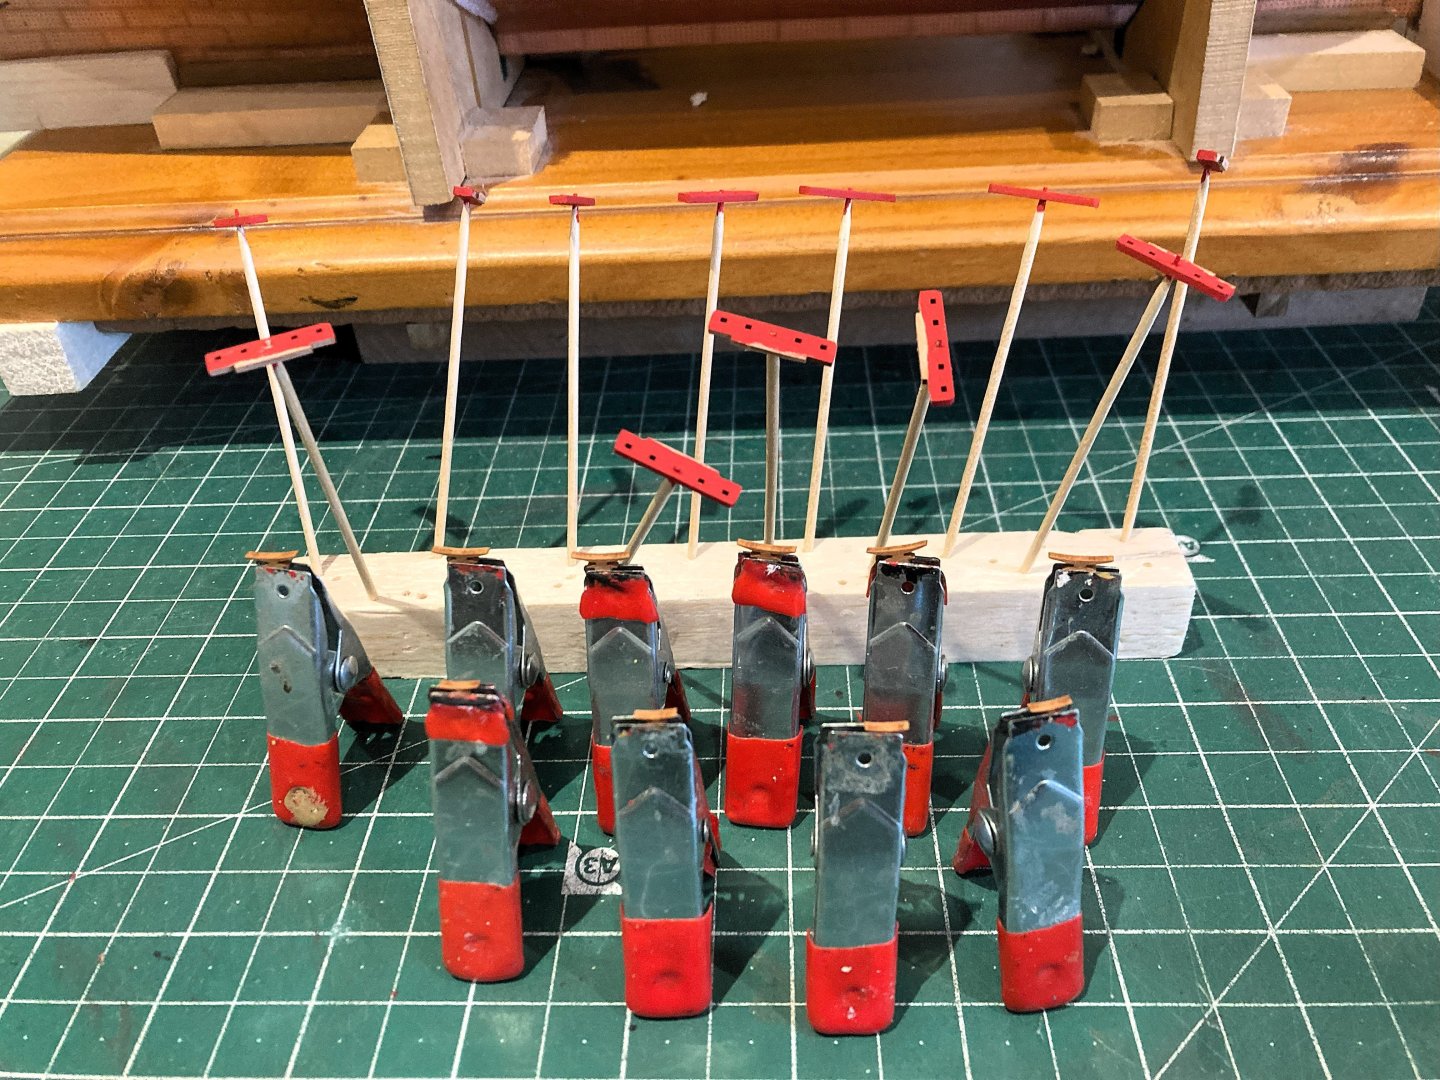
Post 66 Installing the guns. I start at the stern on the Starboard side, I am not then working over previously fitted guns. With the Port side guns the opposite applies. Given that I will be rigging the guns insitu rather than on an off-model jig I needed to work out the best approach. I will have to use a slightly simplified method of seizing the breechings given the scale and the size of the line. One of the main issues is folding the line once it has passed thro’ the bulwark ring, in order to seize it. 3927a I used small sections of heat shrink tubing as sleeves to hold the return of the line whilst I seized it, initially close to the bulwark ring, and with a second seizing a little below it. I use 0.1mm ø line for the purpose. 3938a The seizings are painted with diluted pva to secure before trimming. 3932a This is a tricky exercise to do not least because of the strain on back and arms, I found sitting at my desk rather than working on my taller work bench worked best for me, but I still needed a short break after each fitting. 3937a 3934a 3935a I made the decision to add the breechings after I had fitted the bulwark fittings, but it would be better to rig them on a jig off- model. This would allow a more authentic seizing of the lines, and would be far easier on the body. I would certainly have used a jig were I intending to add the tackles, which on Harpy I am not. Two days work to fit the starboard guns, onto the Port side. That’s my Easter weekend sorted. B.E. 19/04/2025


- 332 replies
-
- 25
-
-
- Harpy
- Vanguard Models
- (and 1 more)
-
She's looking great David. Some very nice detailing, and I particularly like your Rudder coat, tricky little beggars to make. Well done. B.E.
- 114 replies
-
- 1
-

-
- Vanguard Models
- Speedy
- (and 1 more)
-
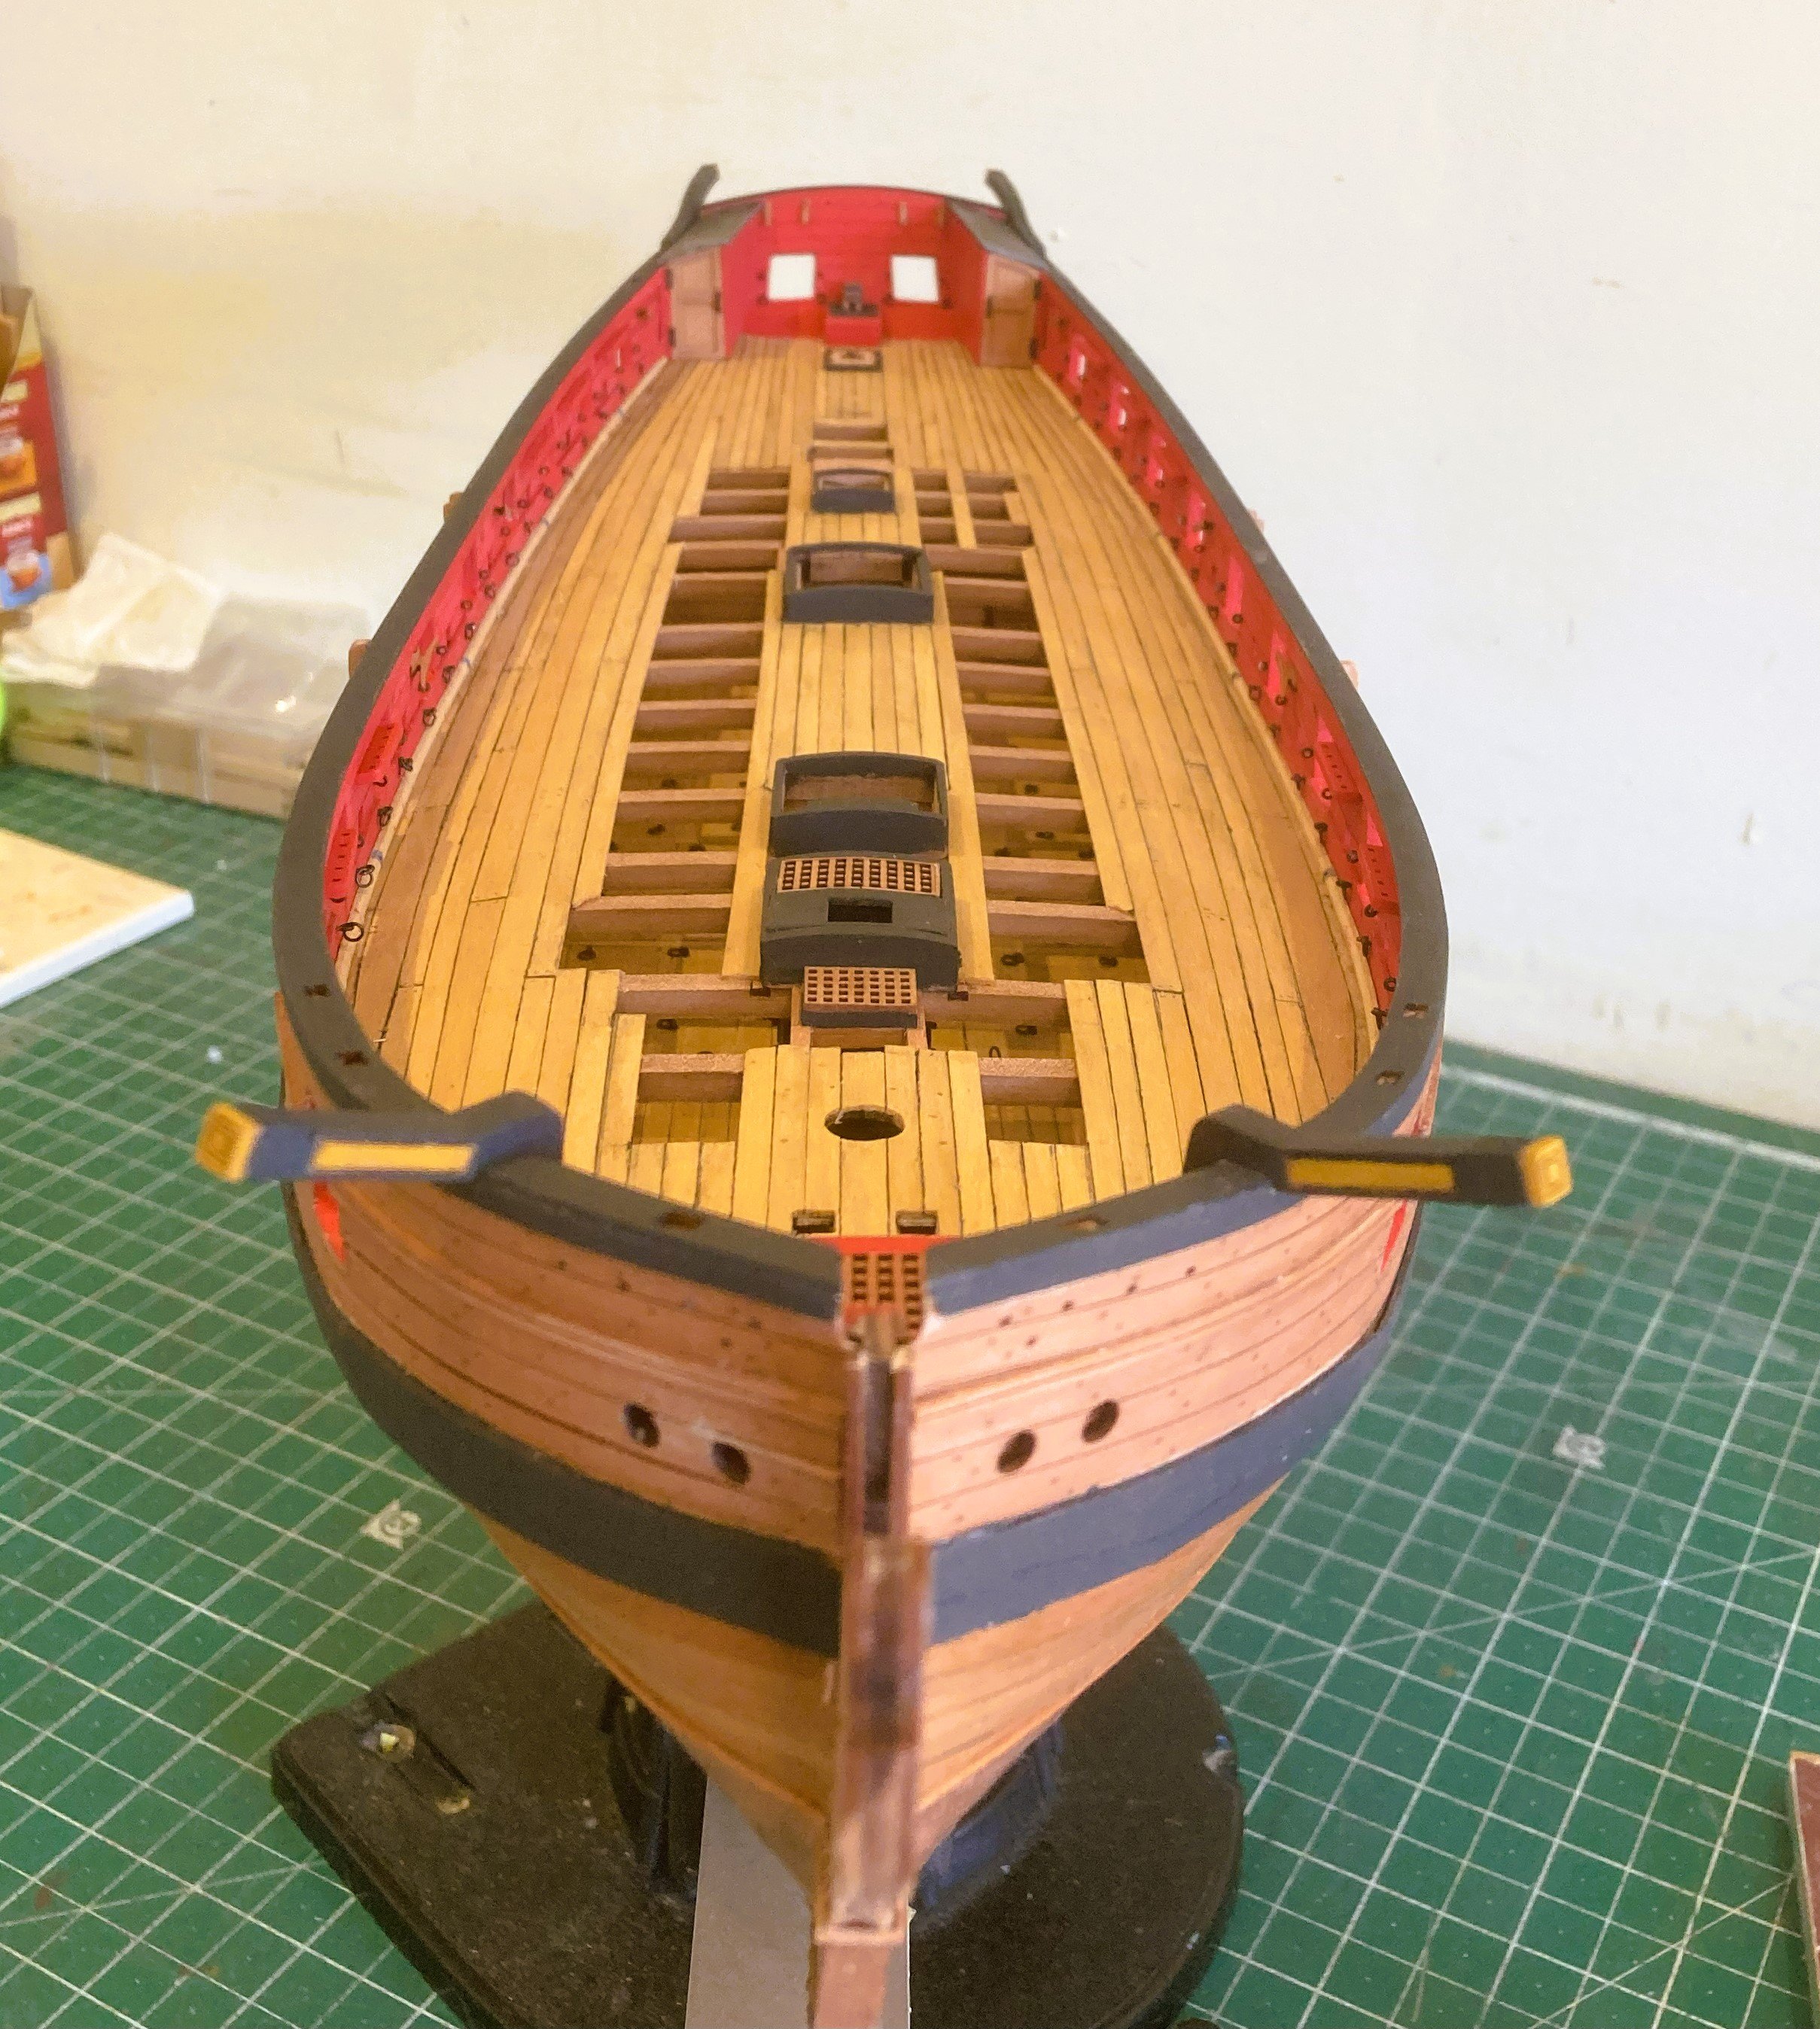
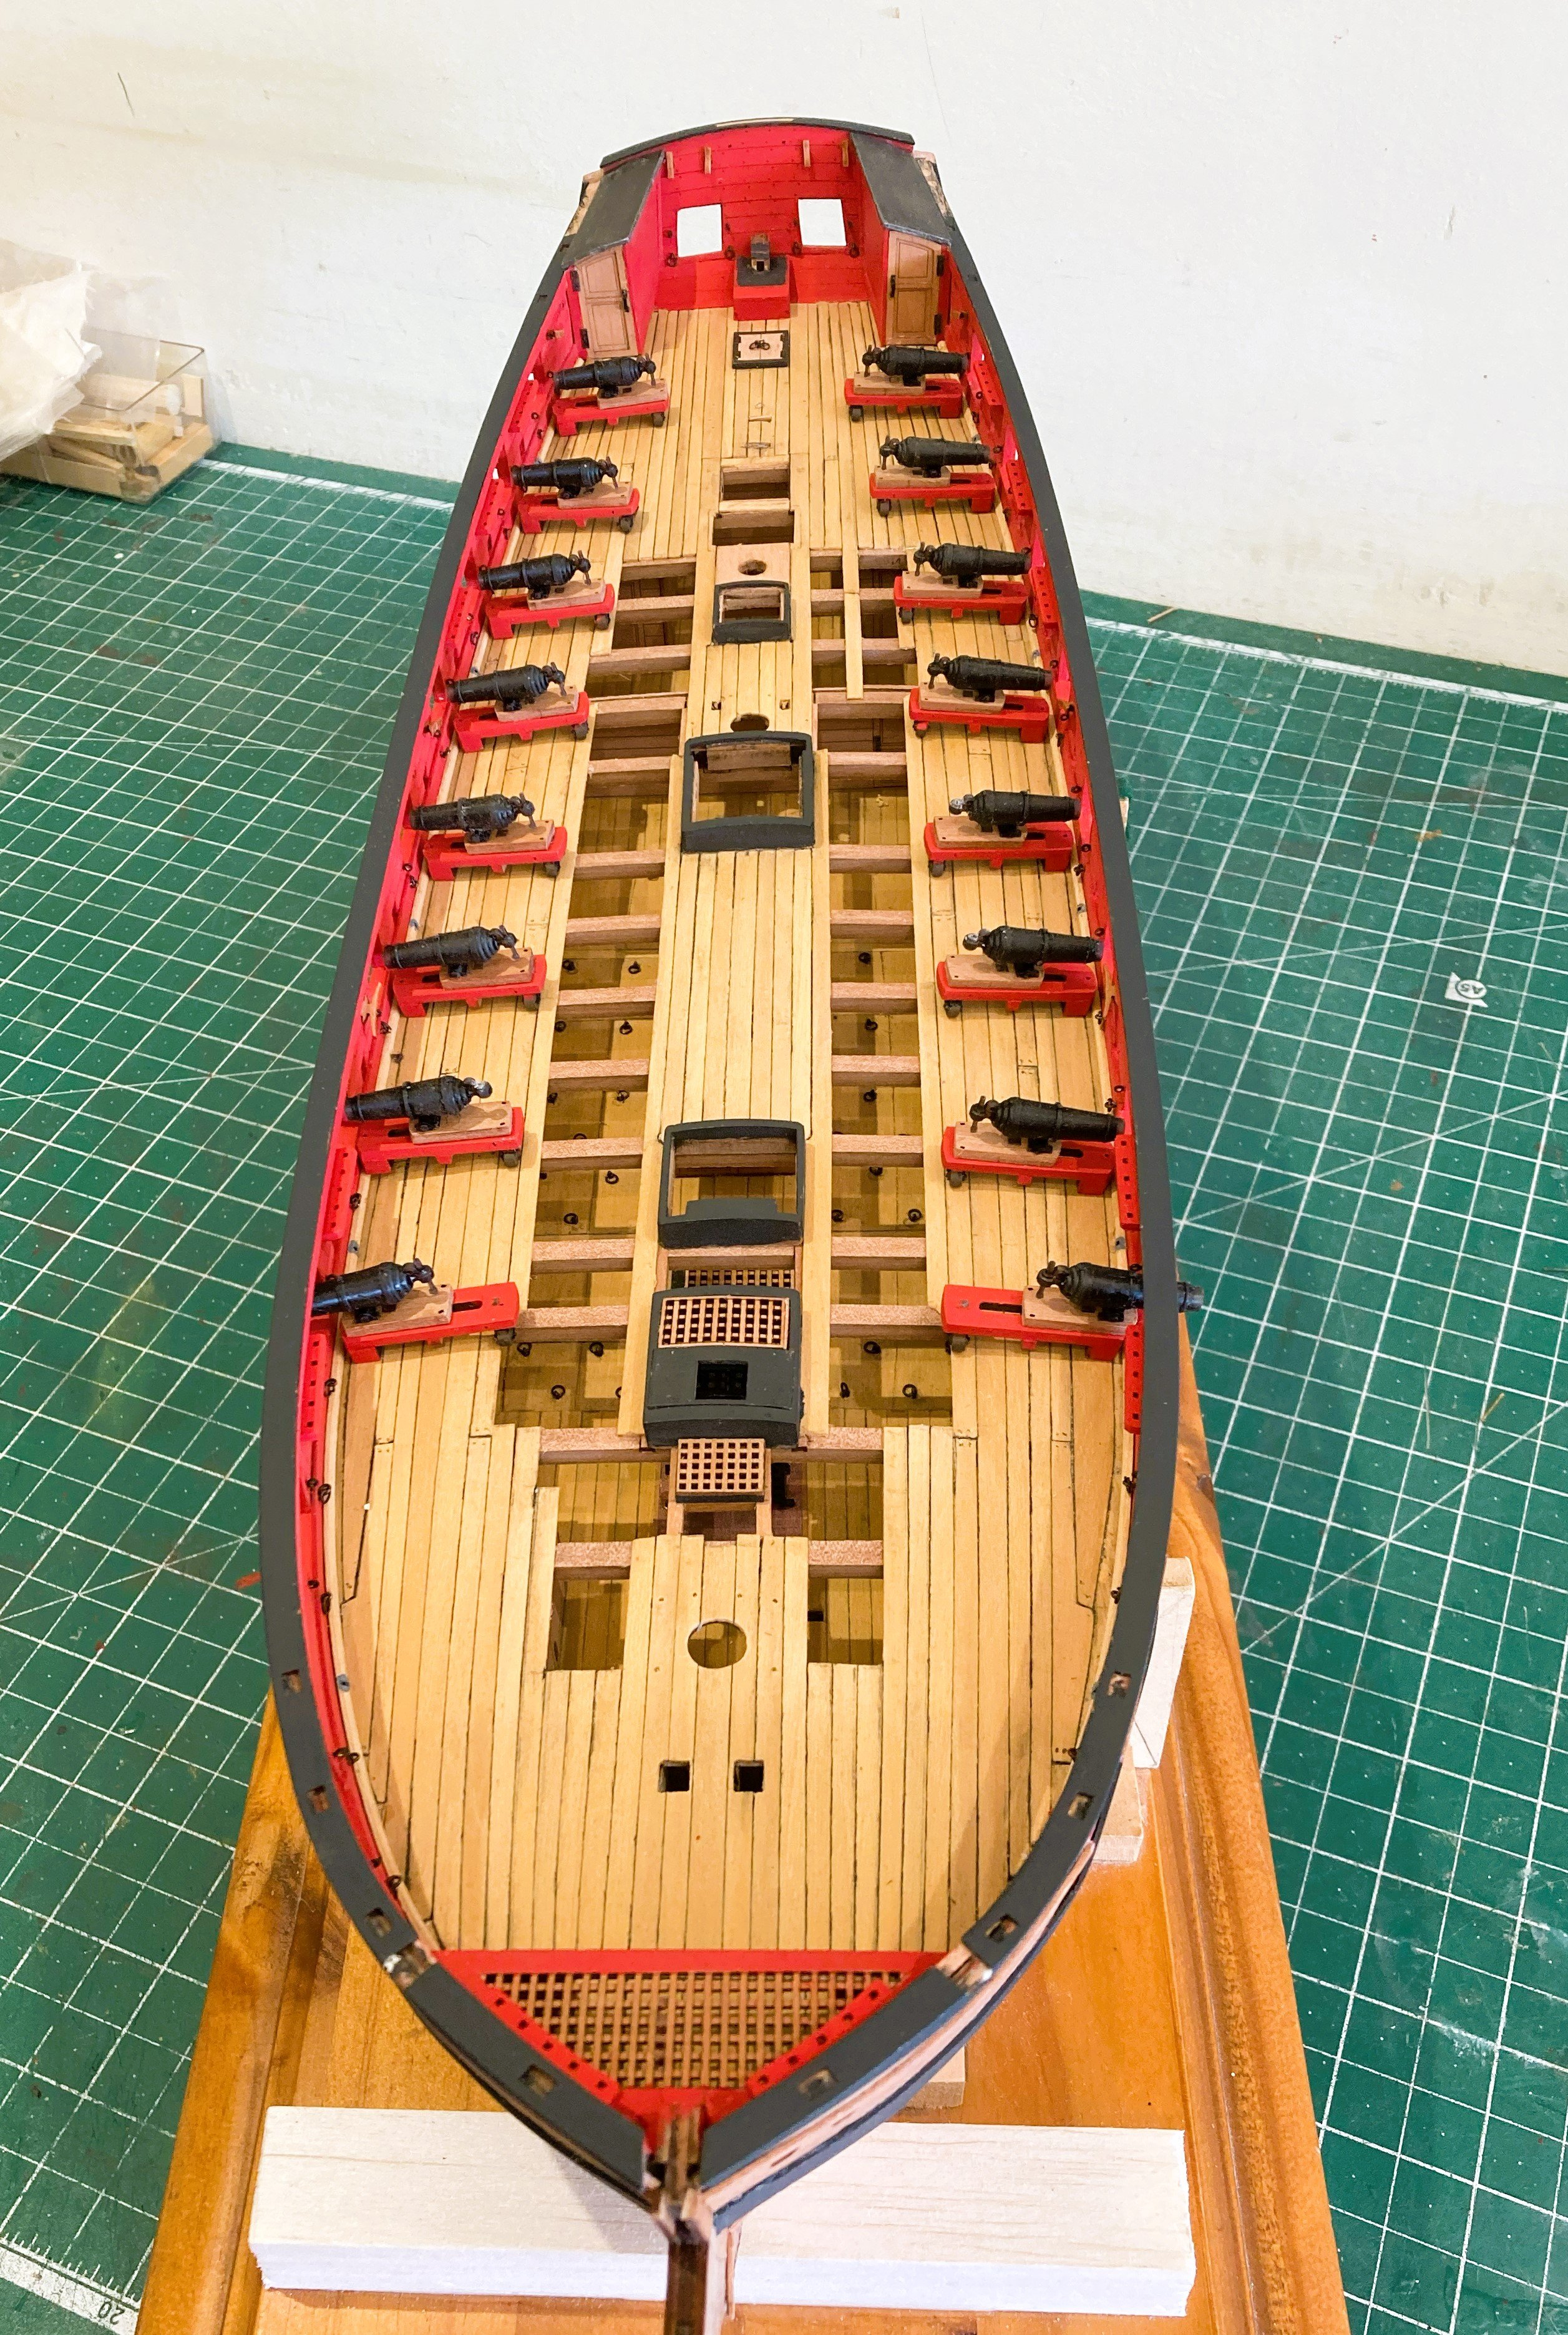
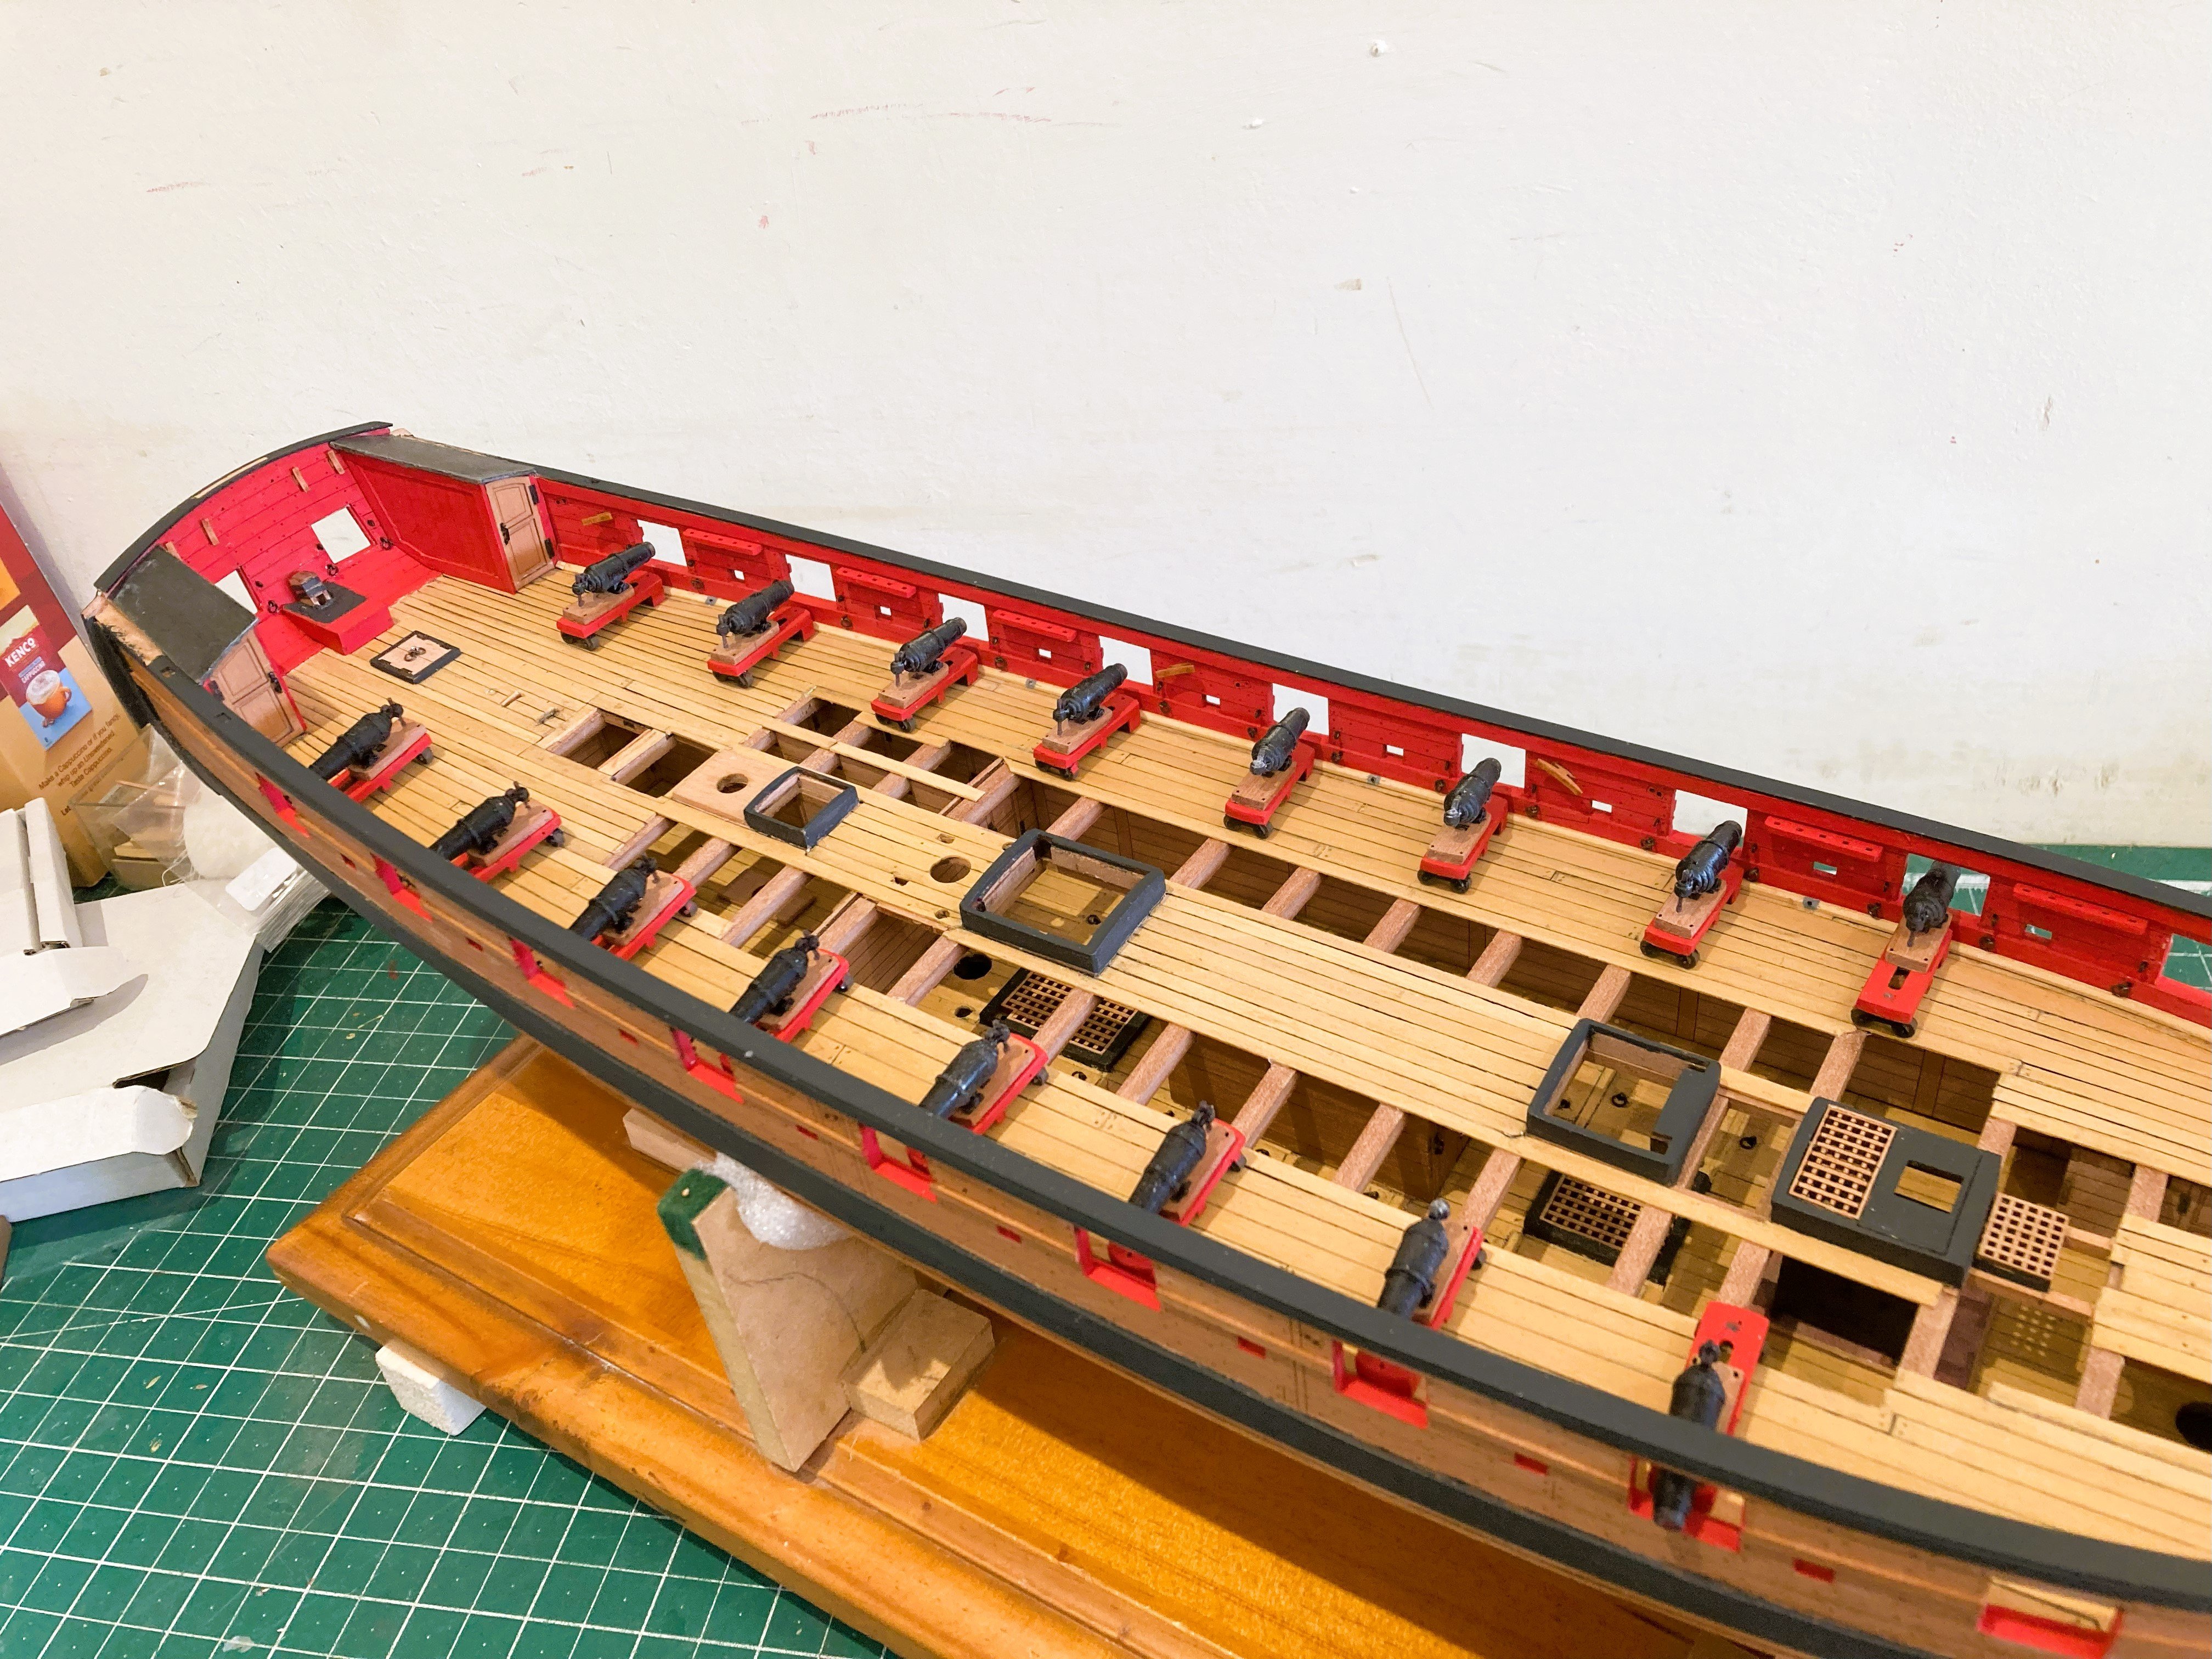
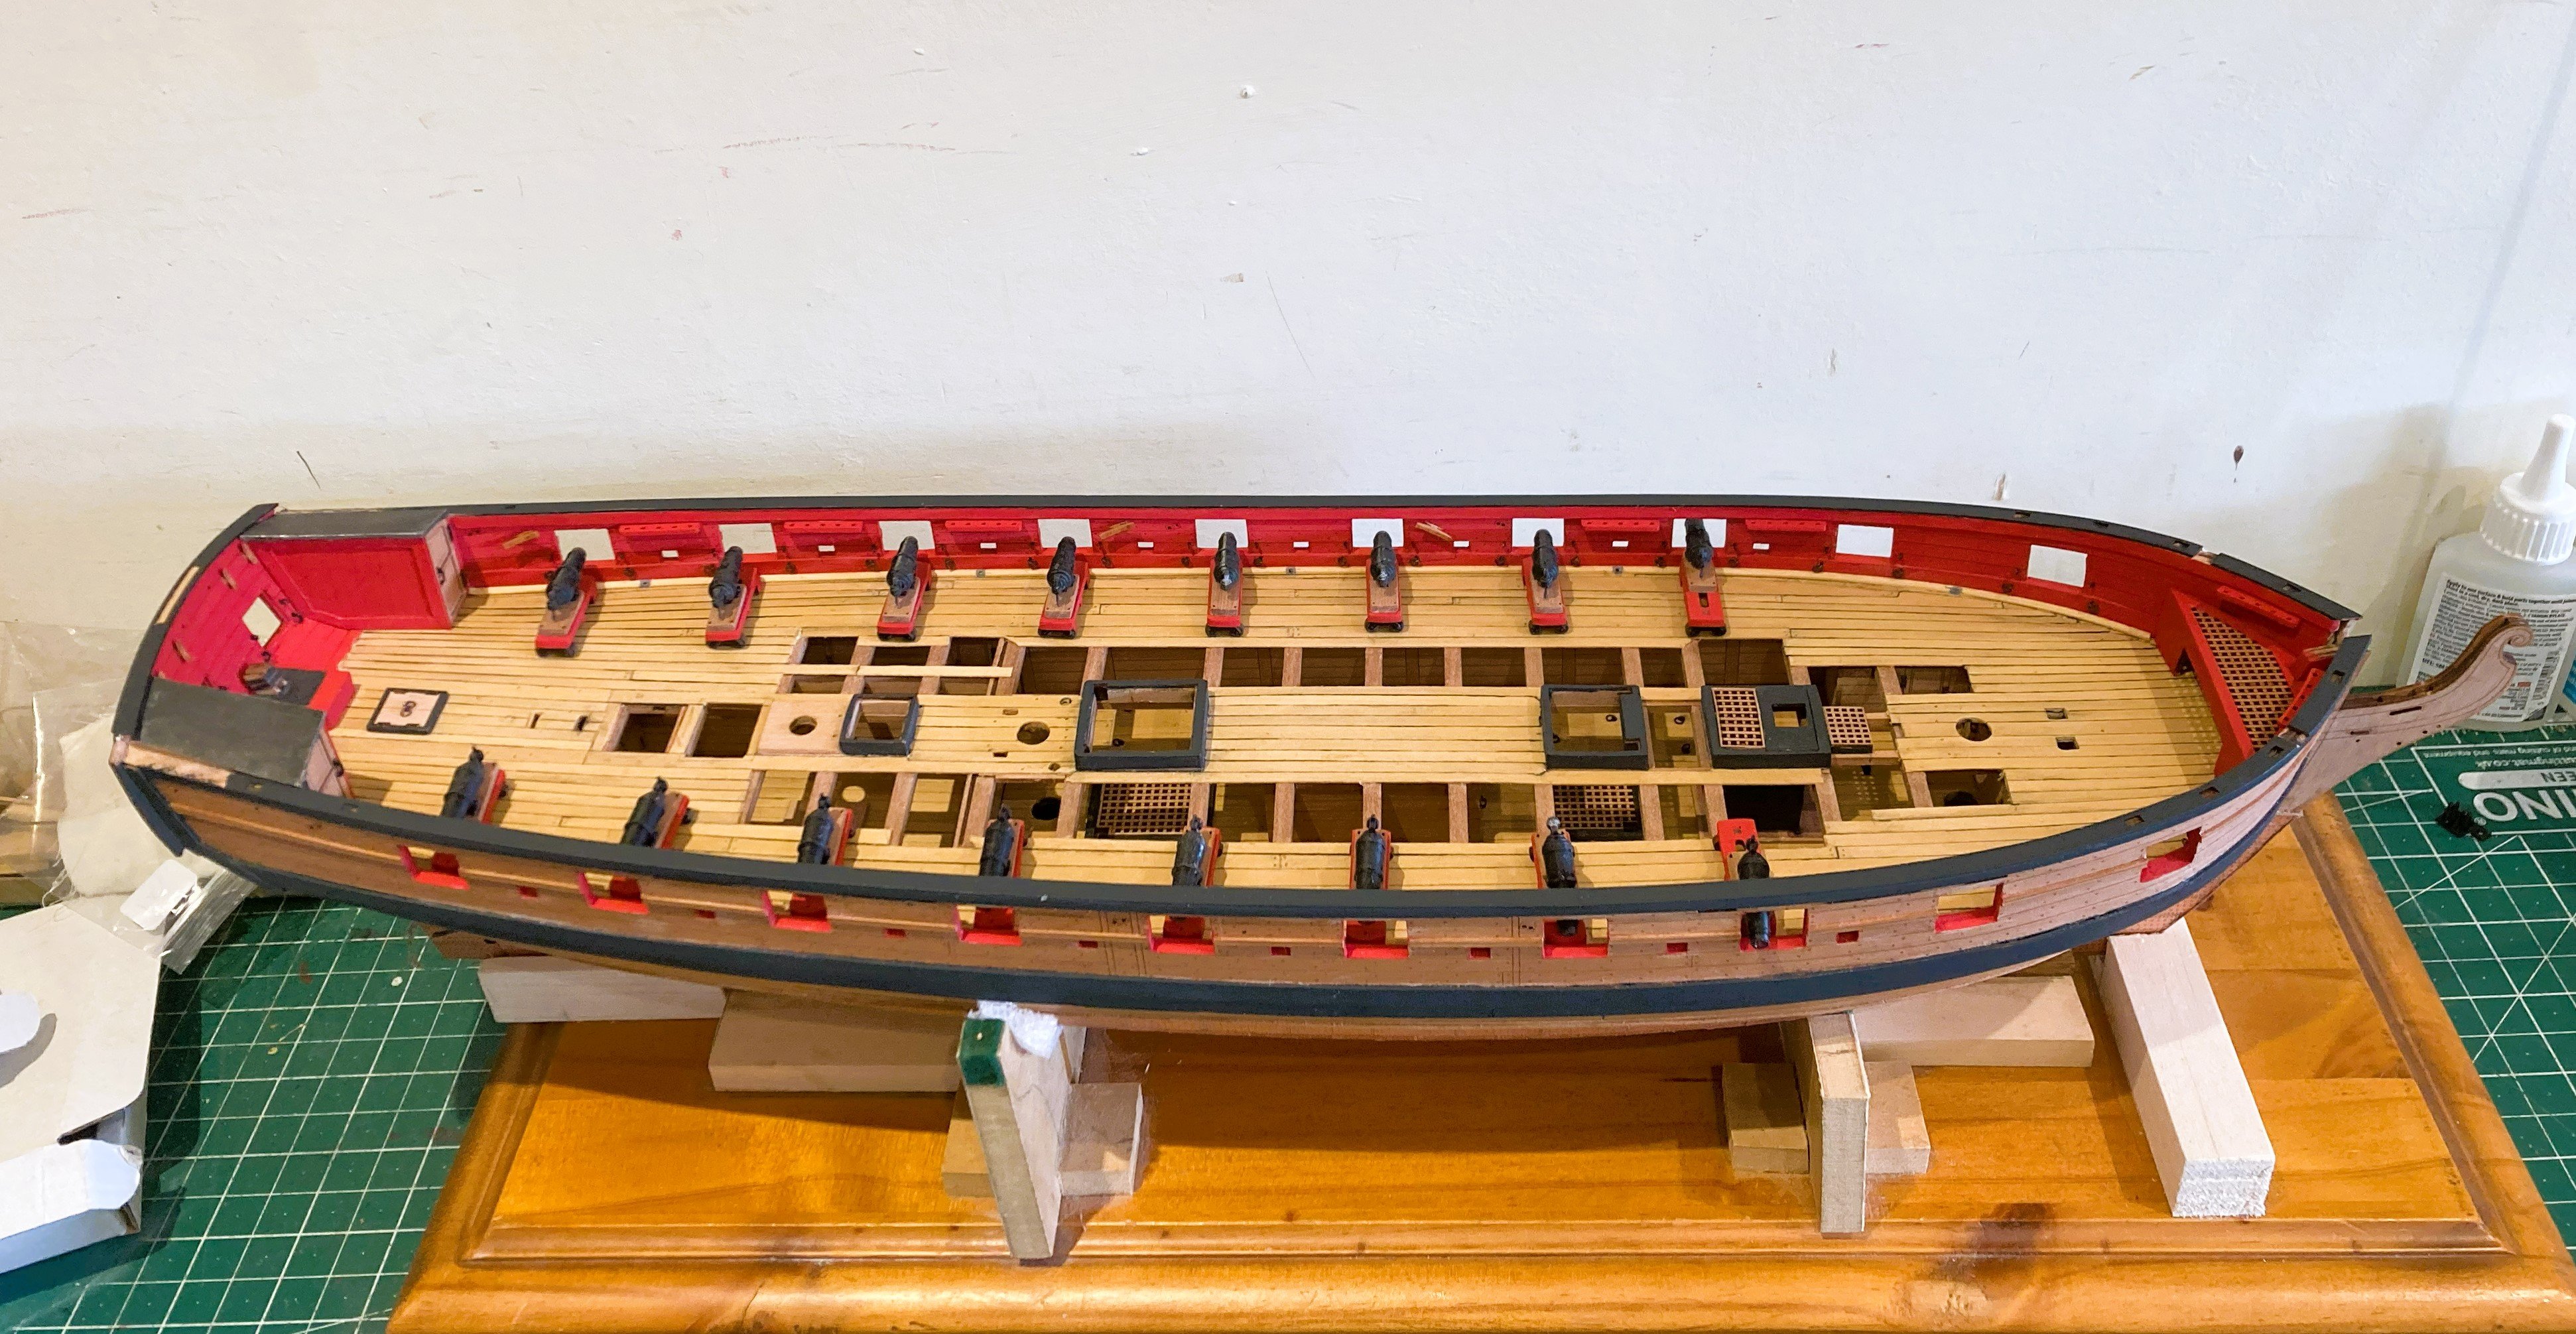
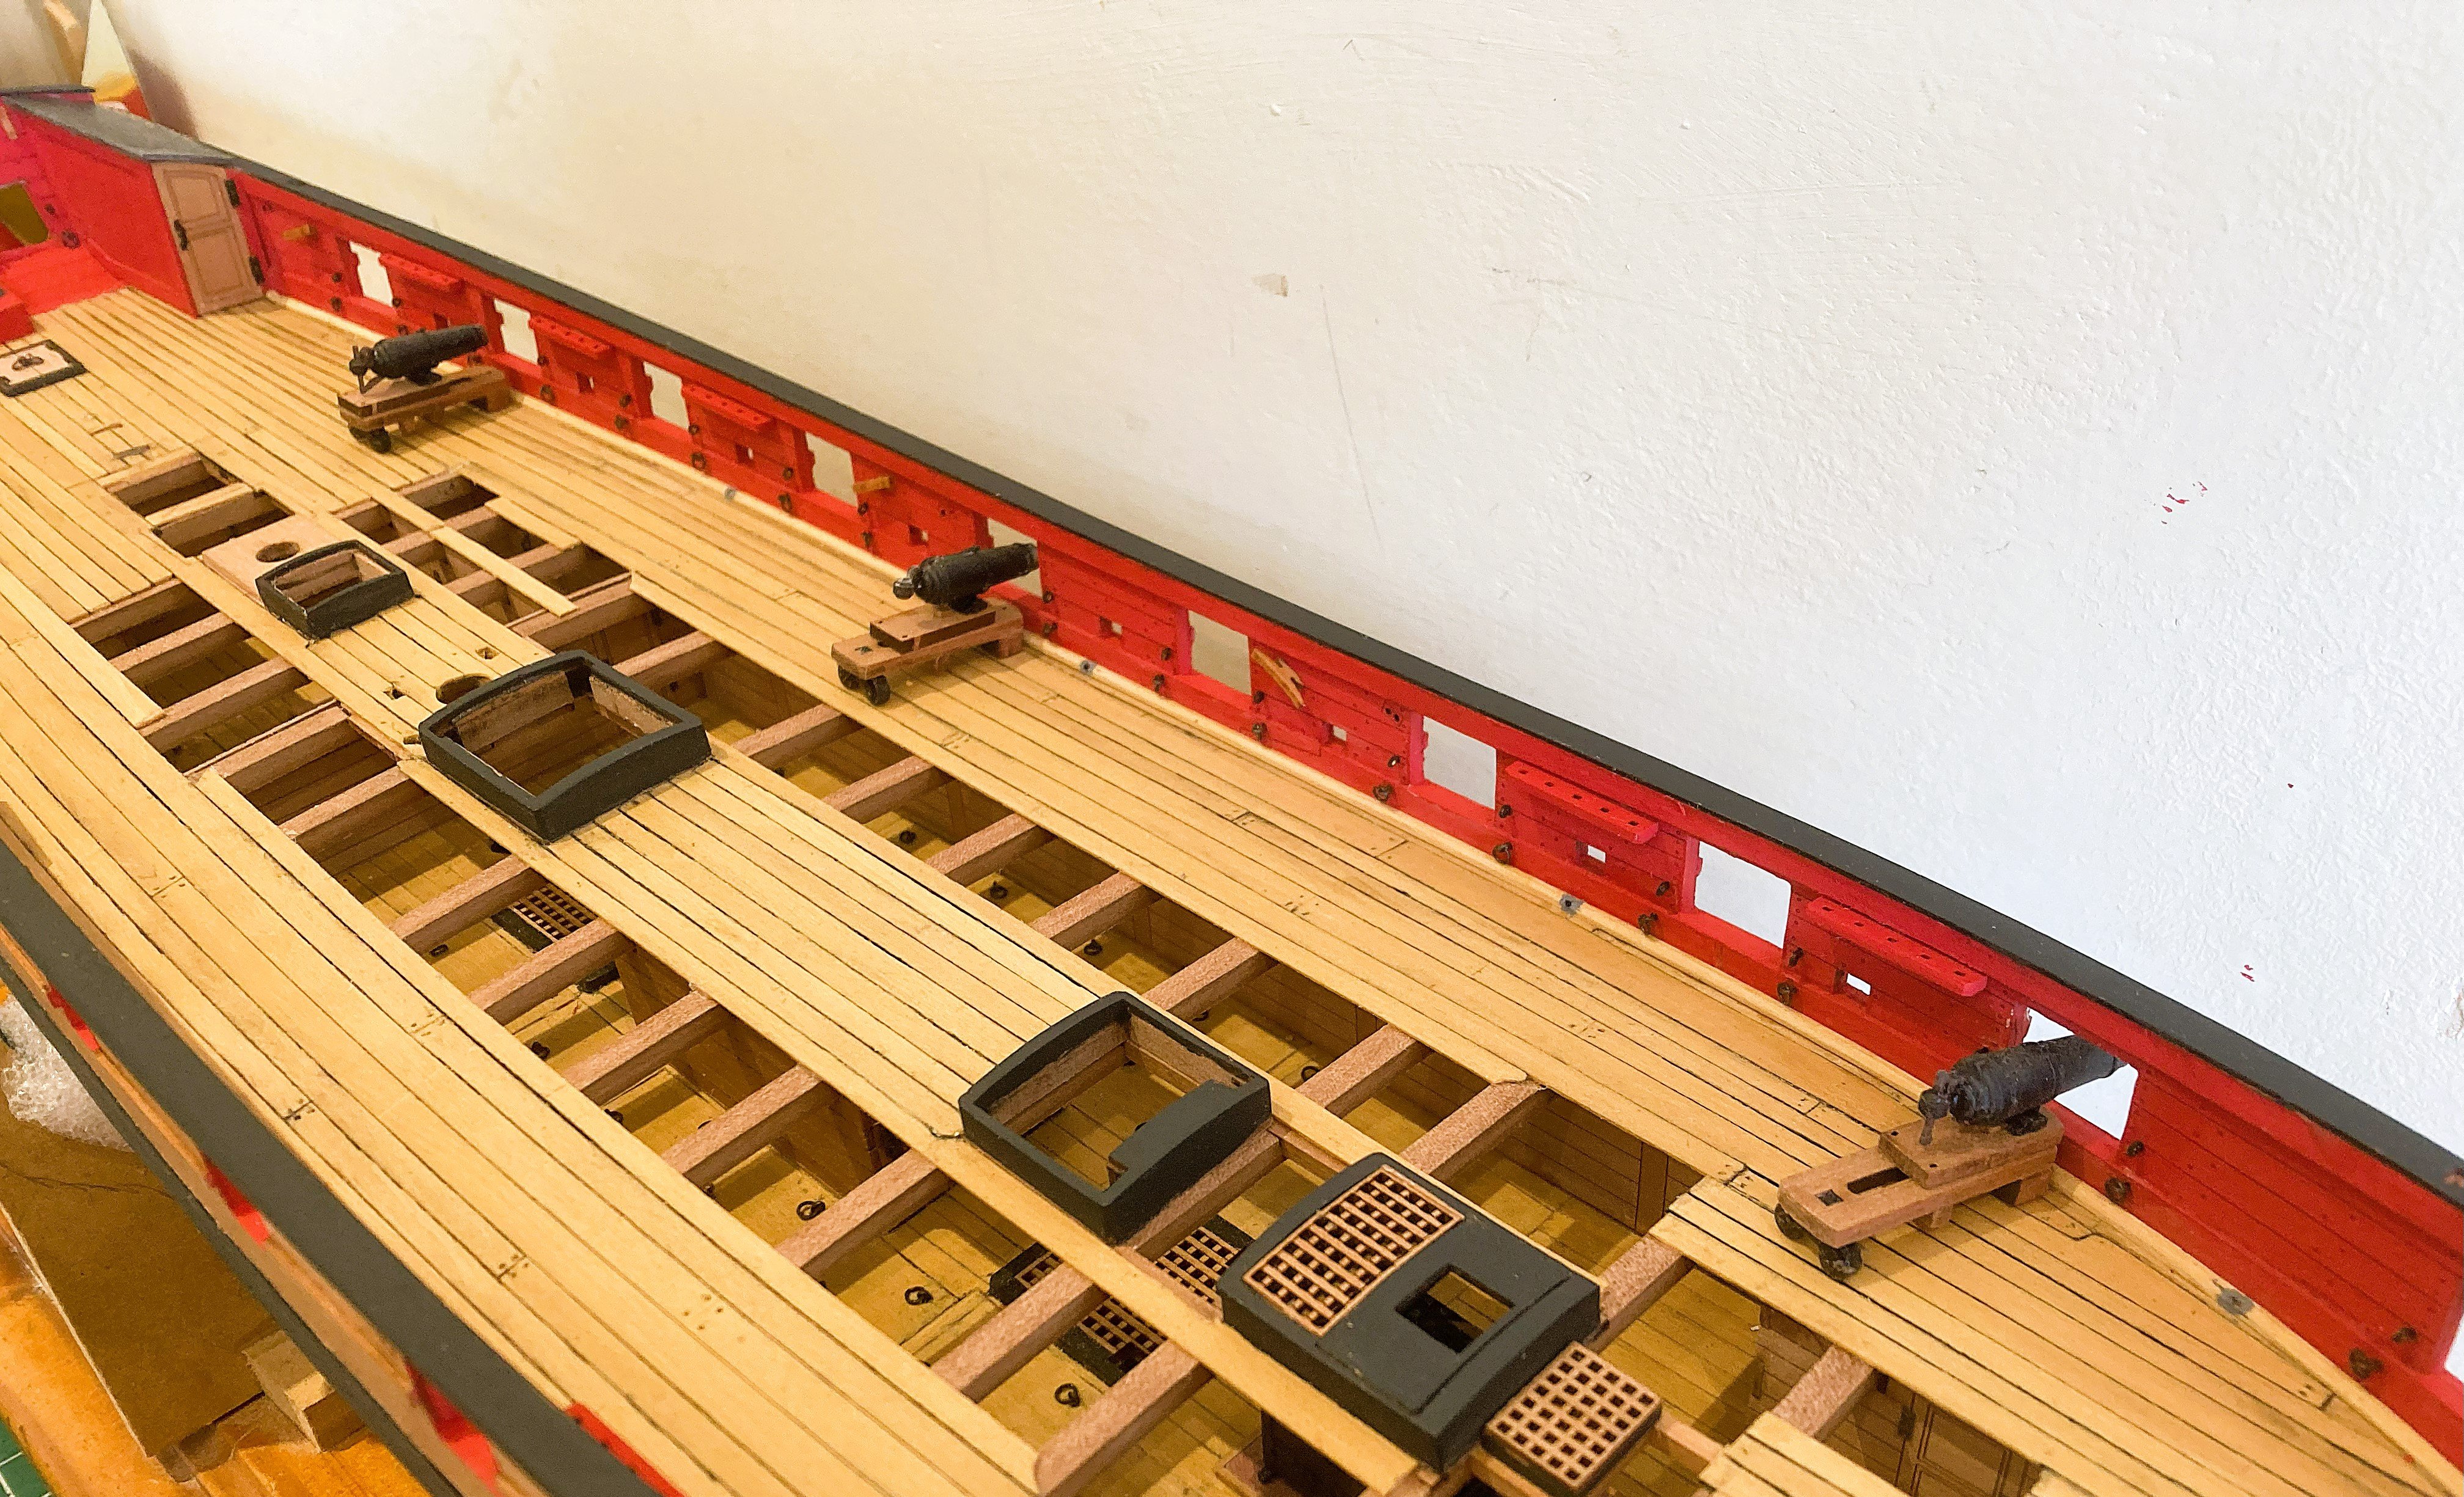
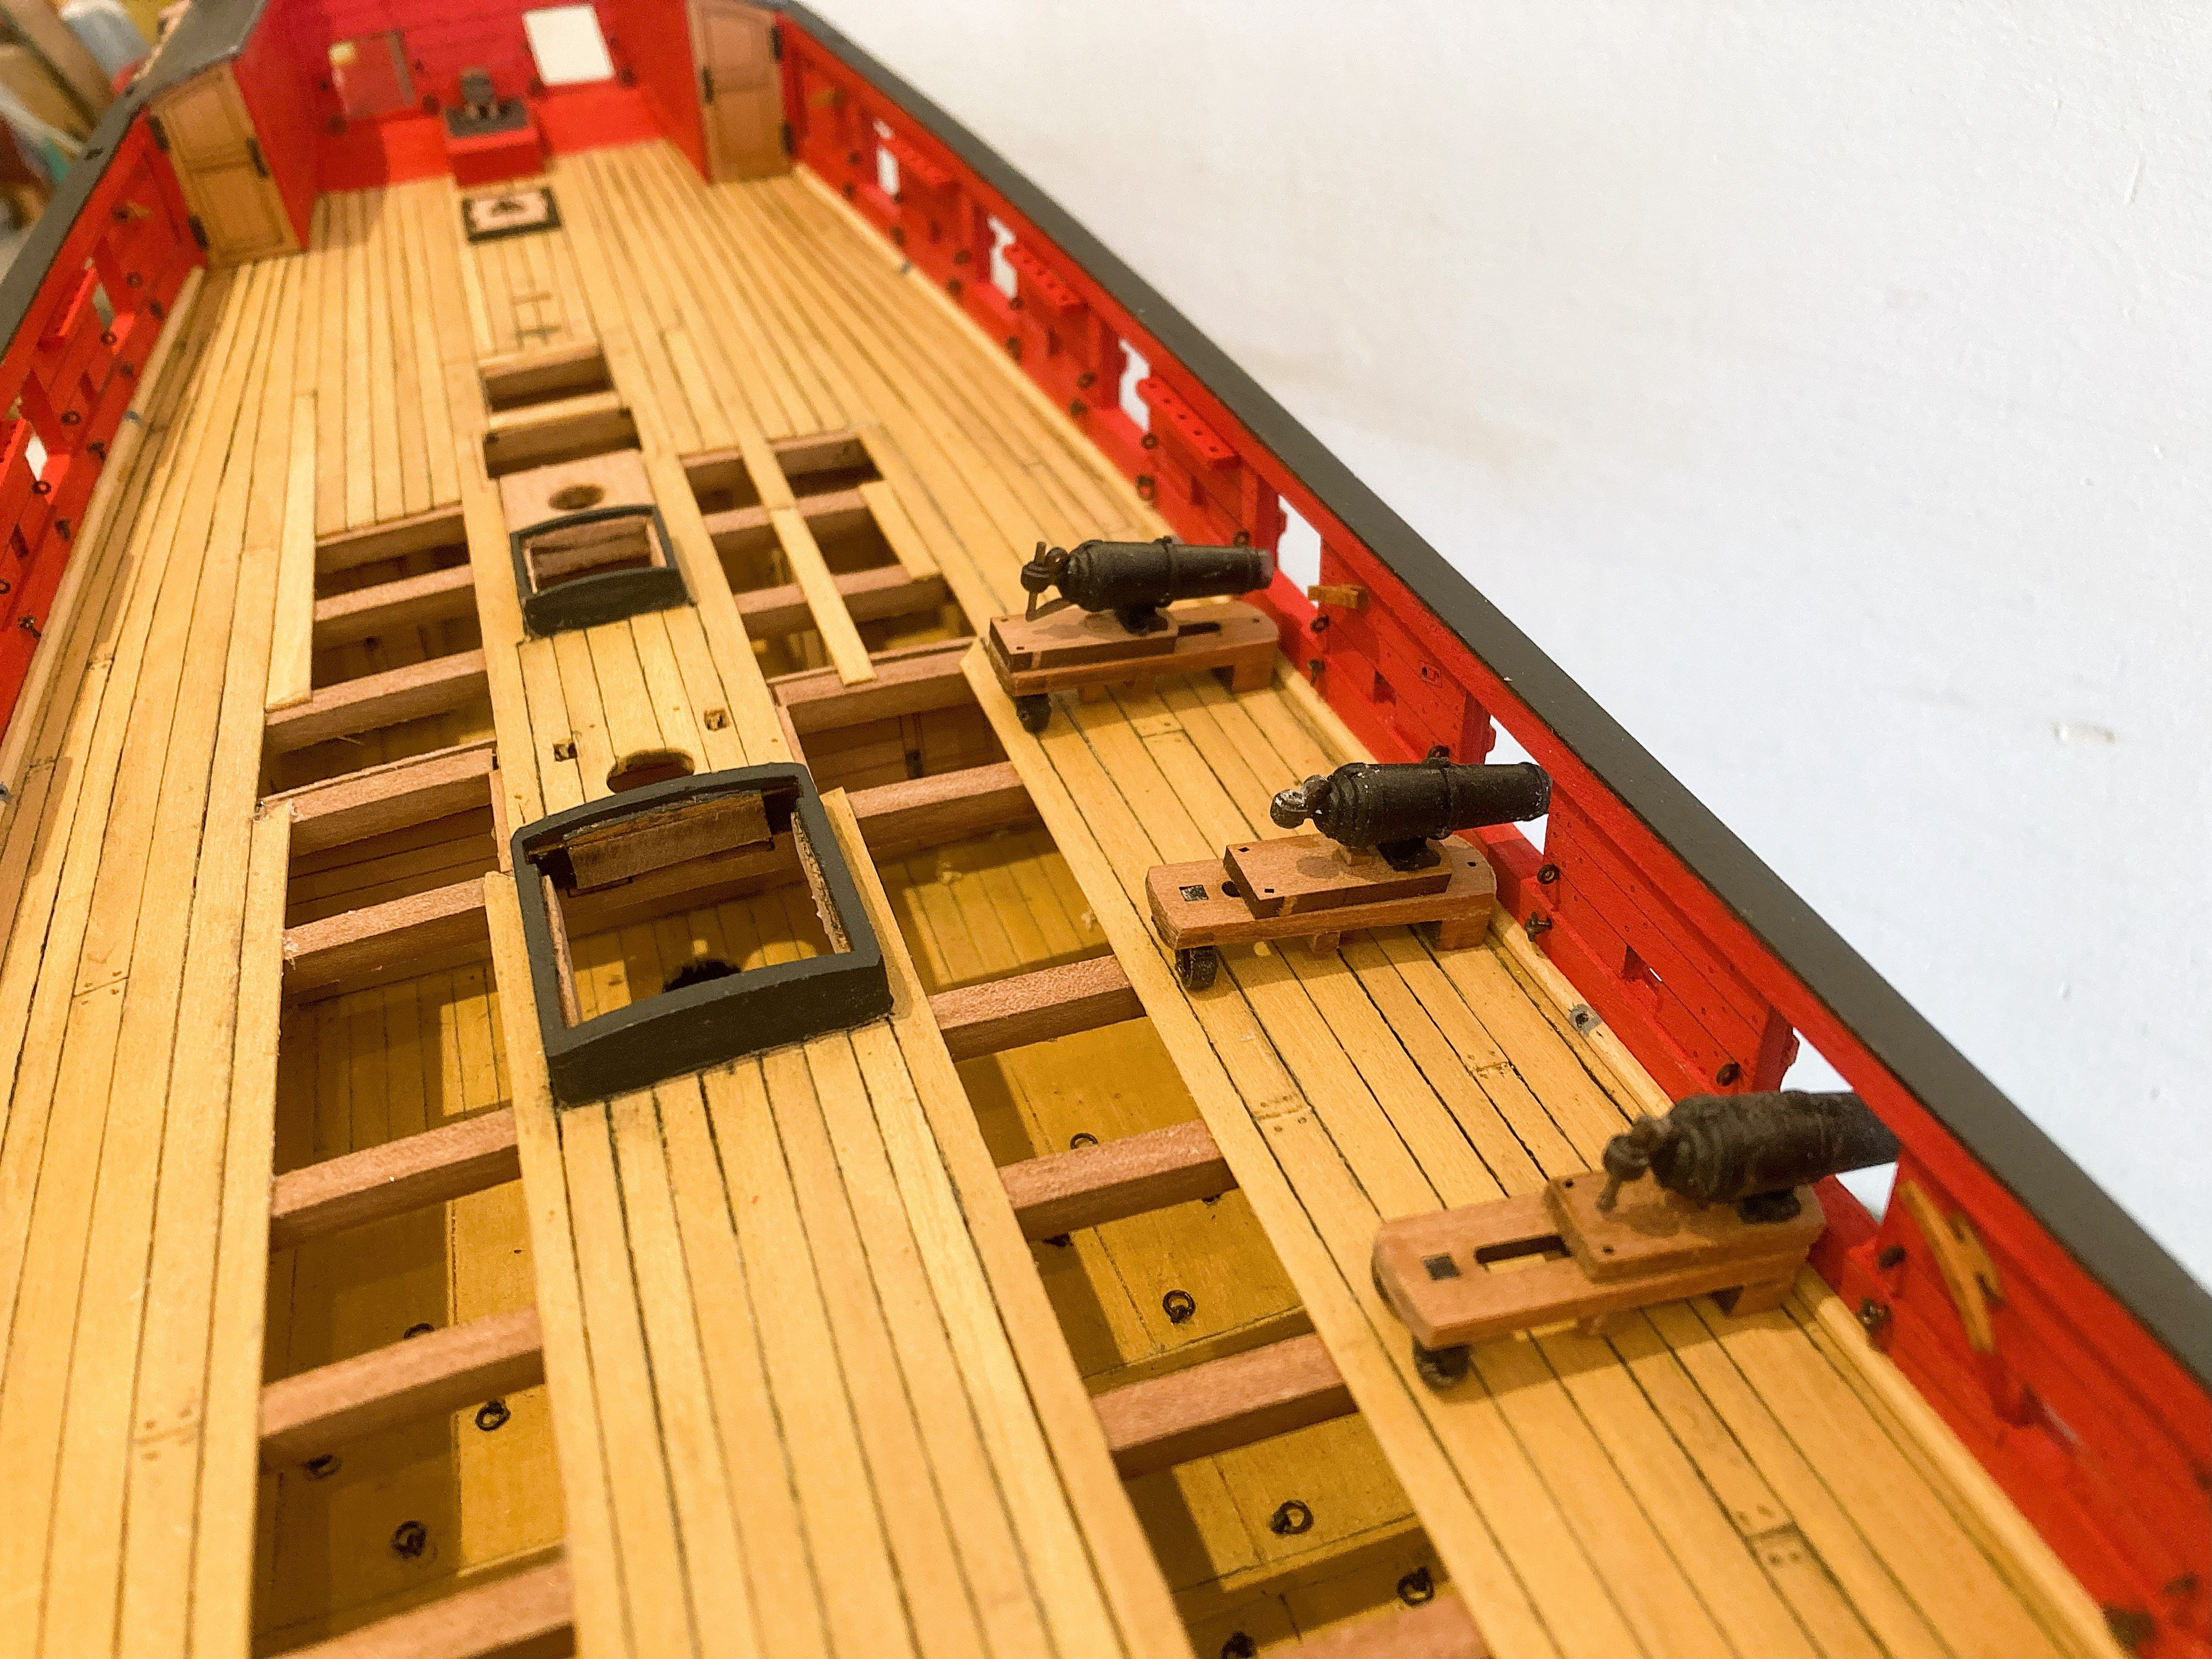
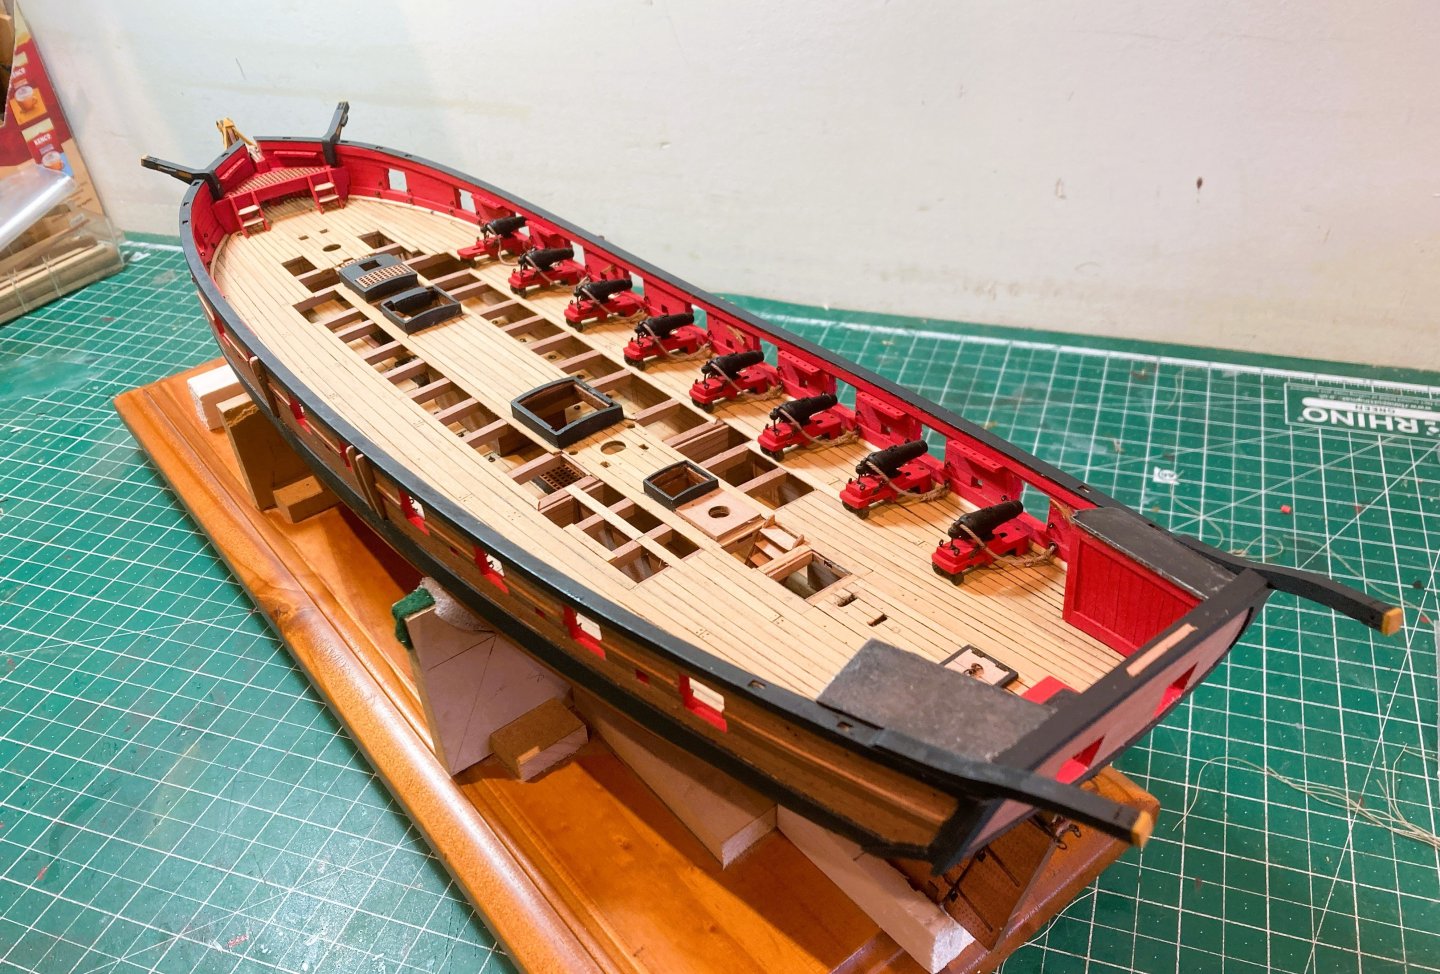
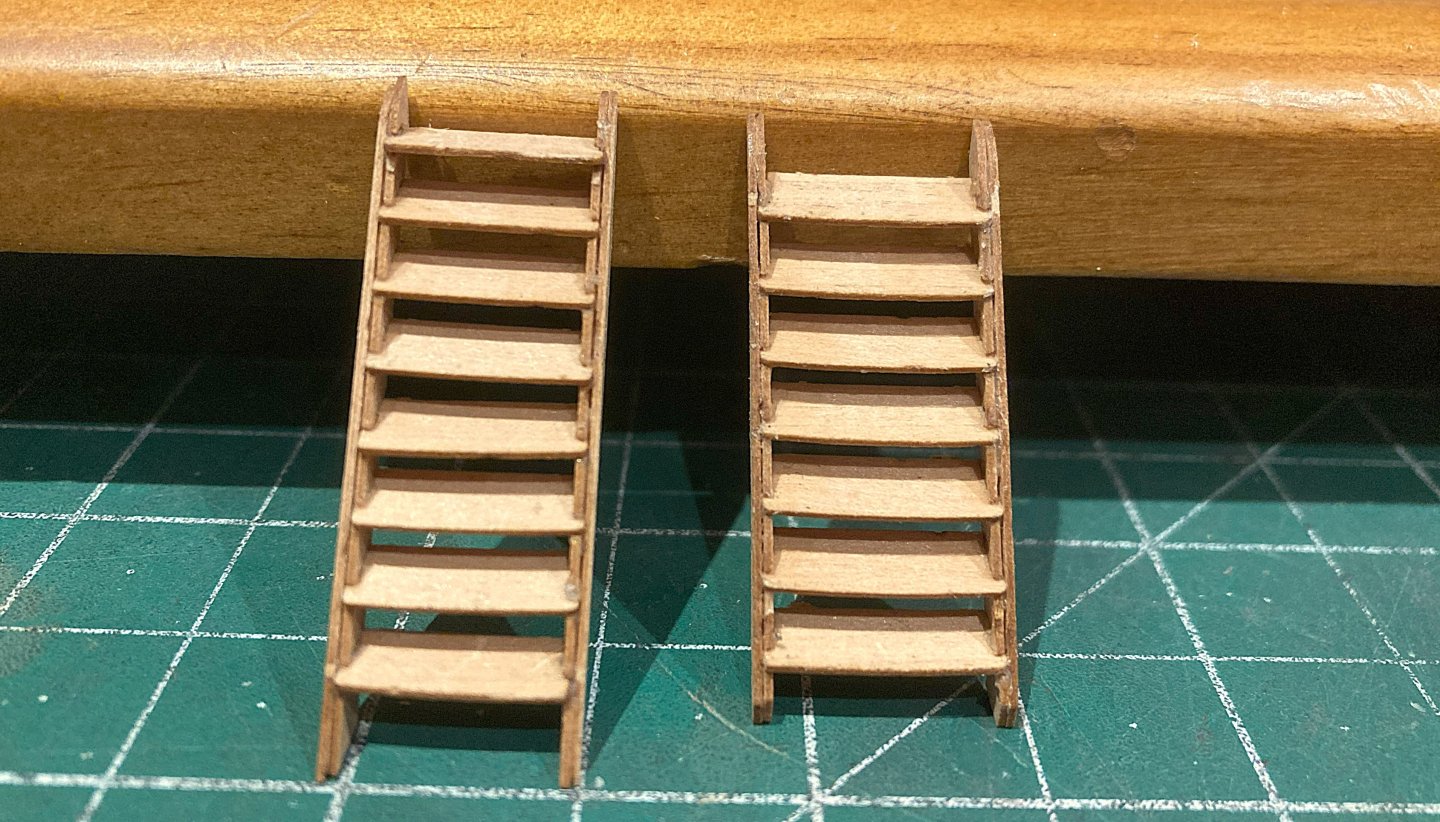
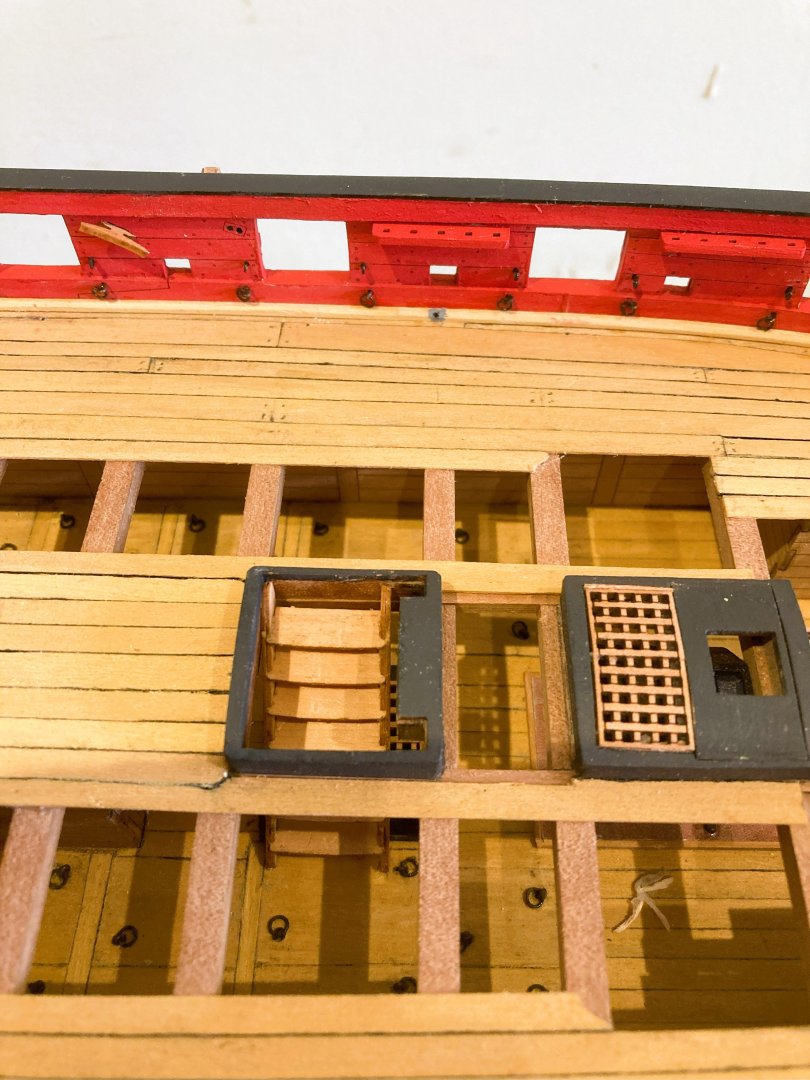
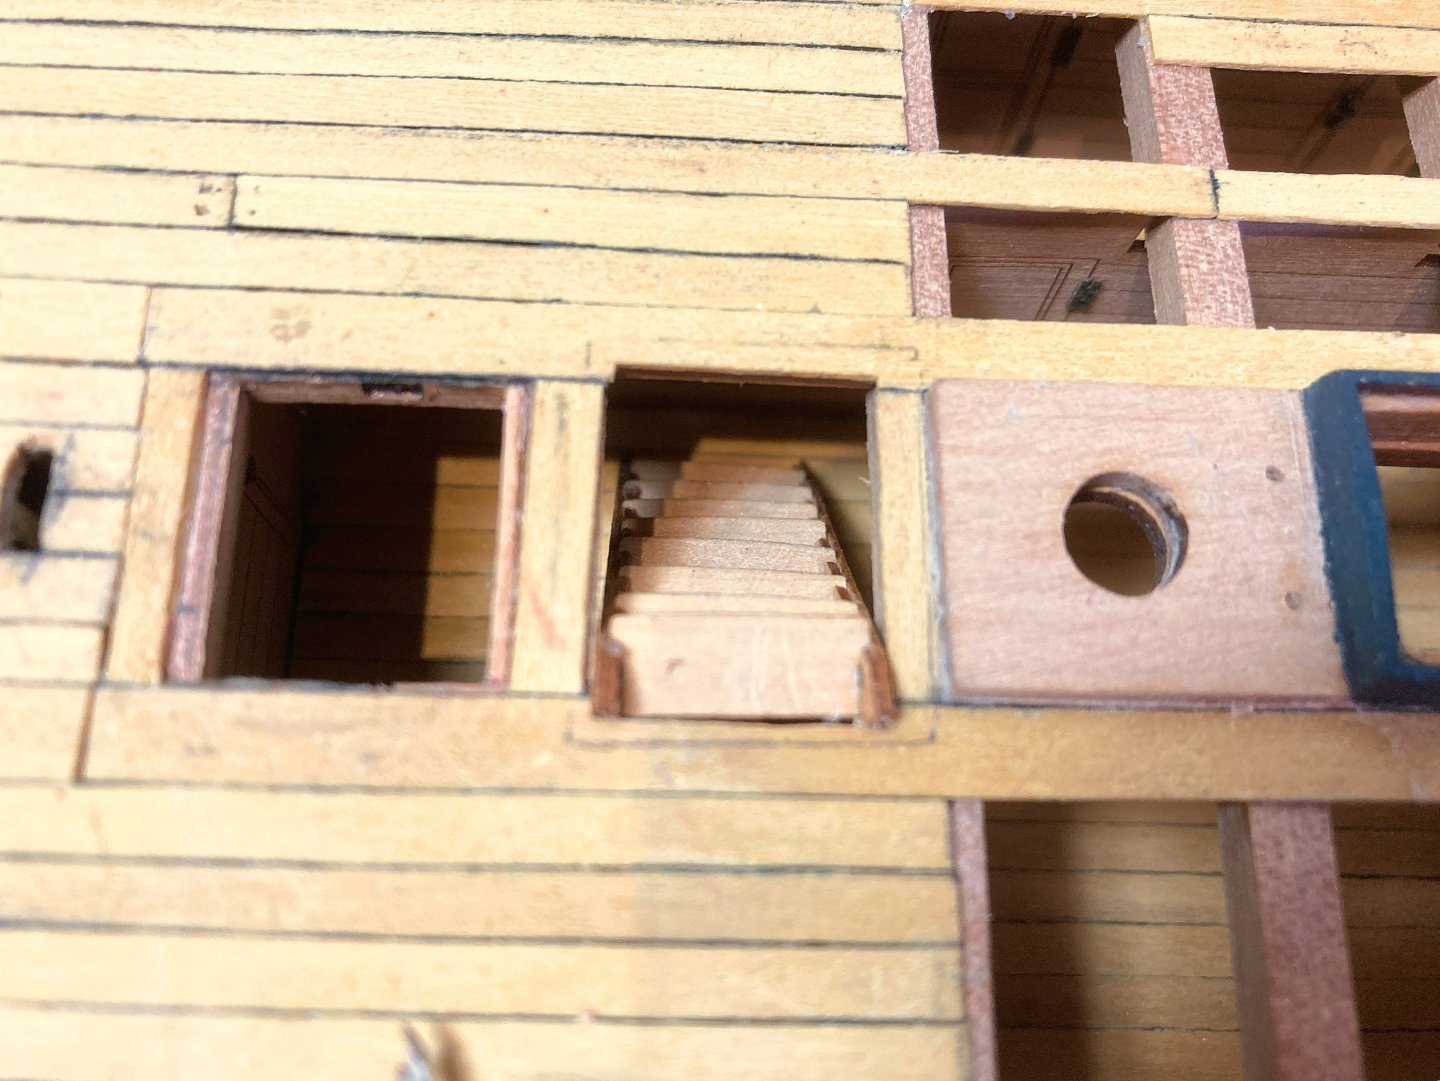
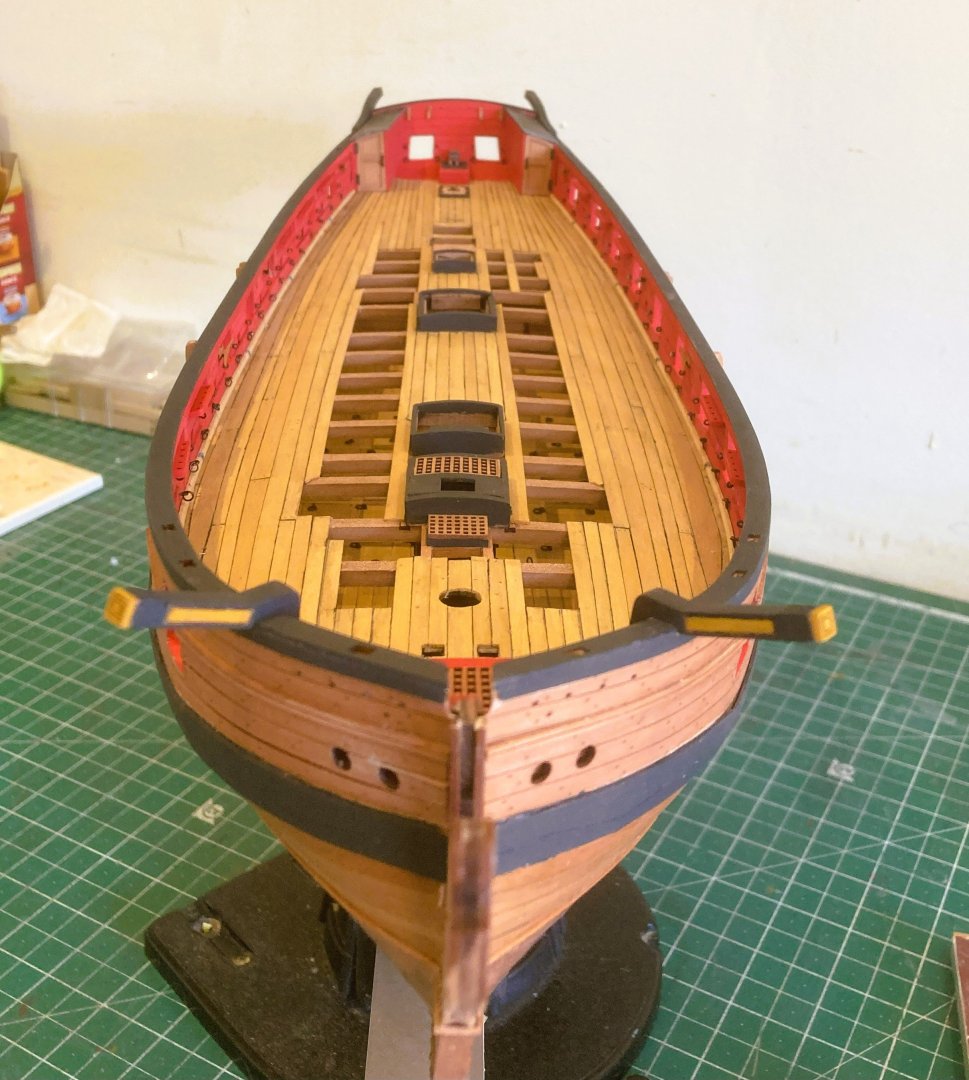
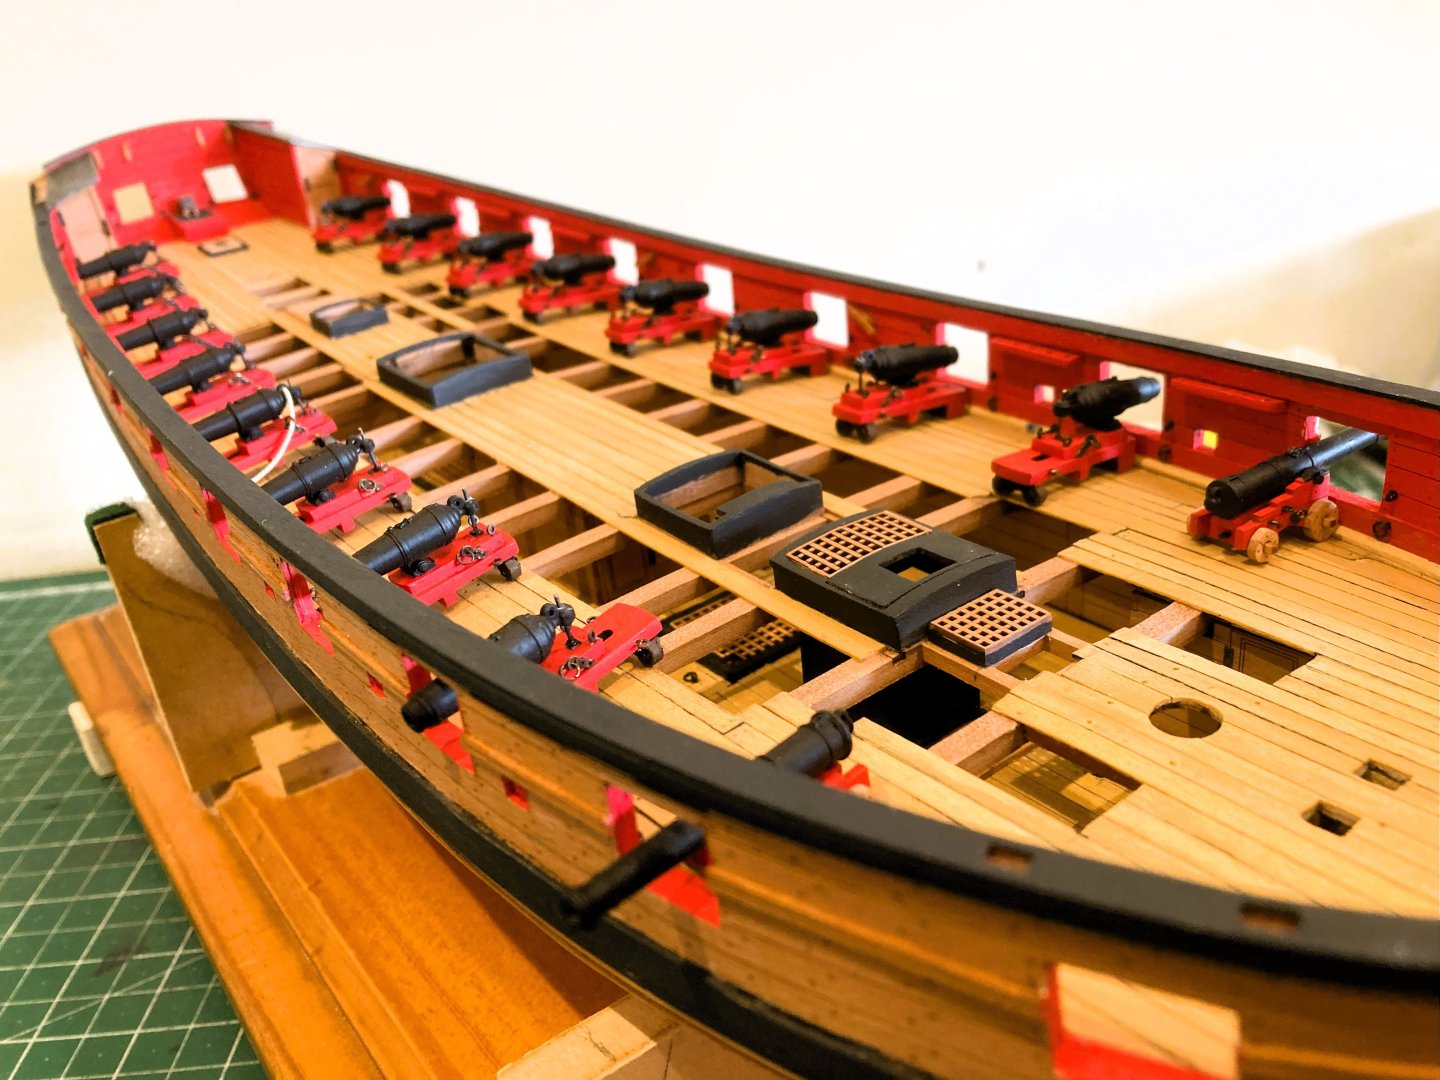
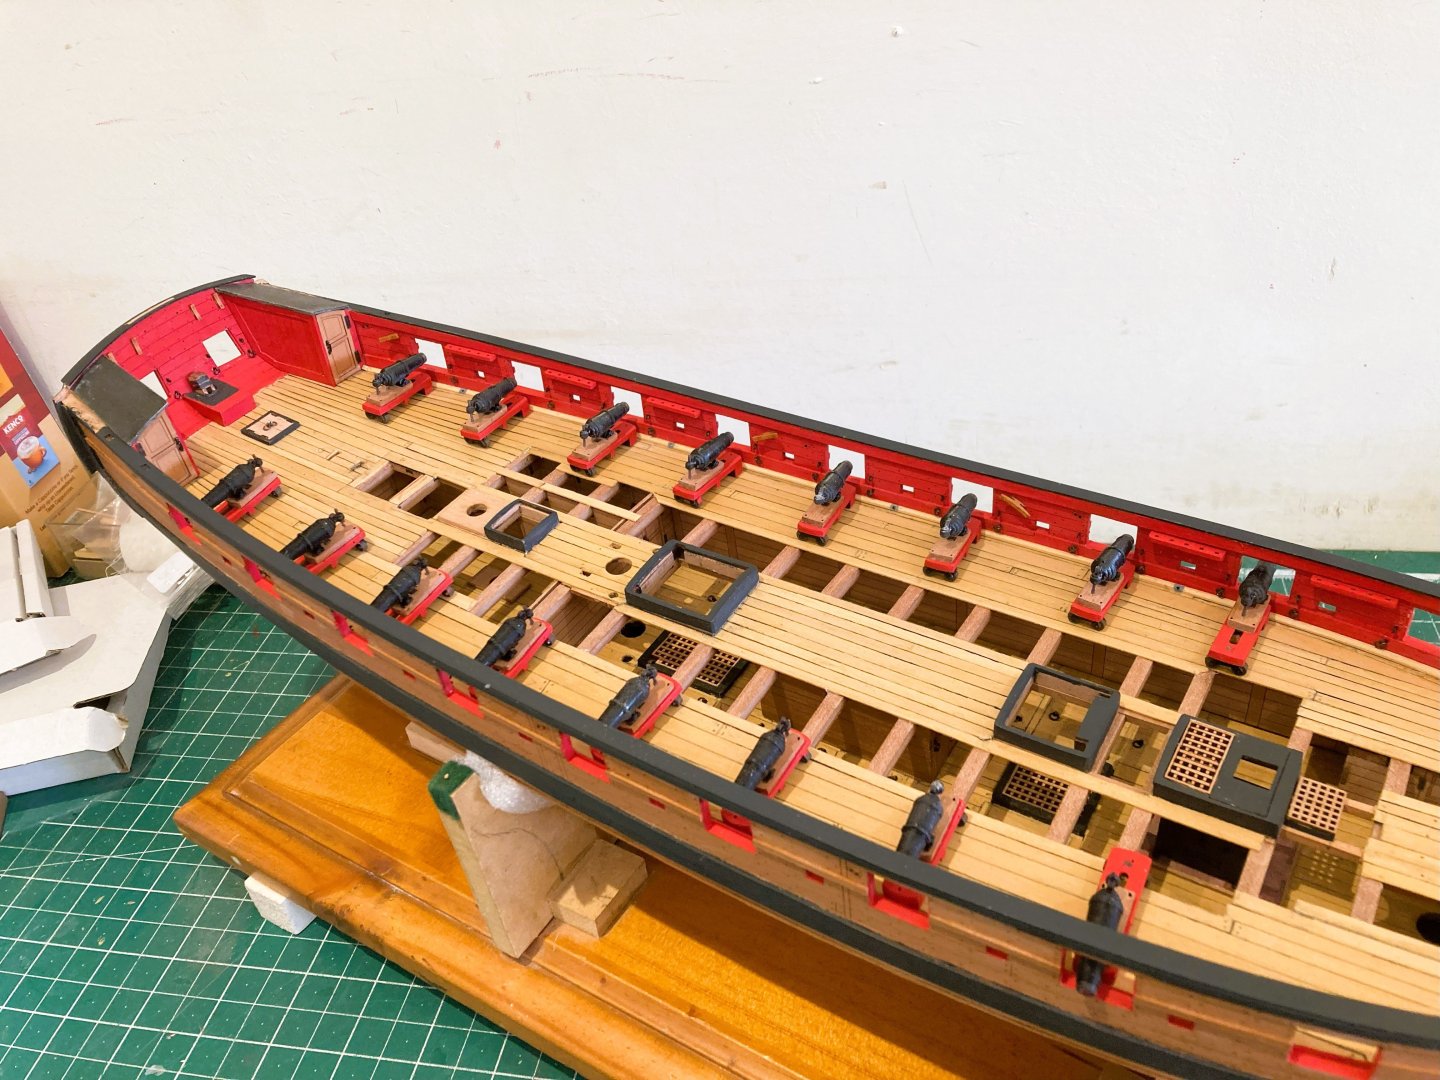
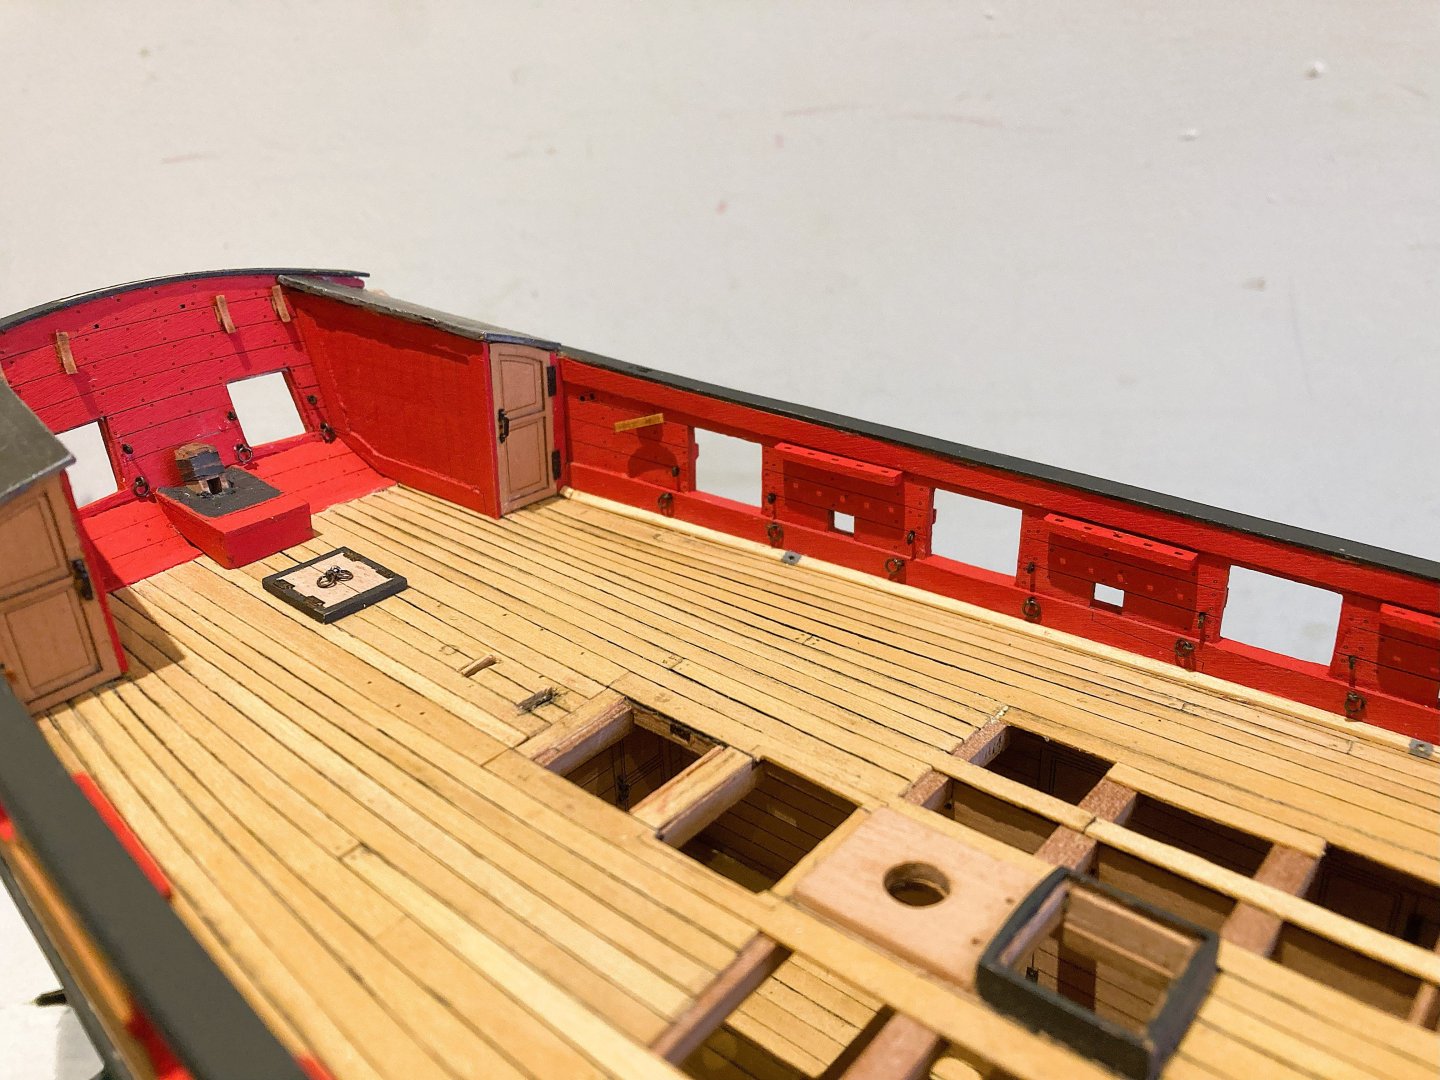
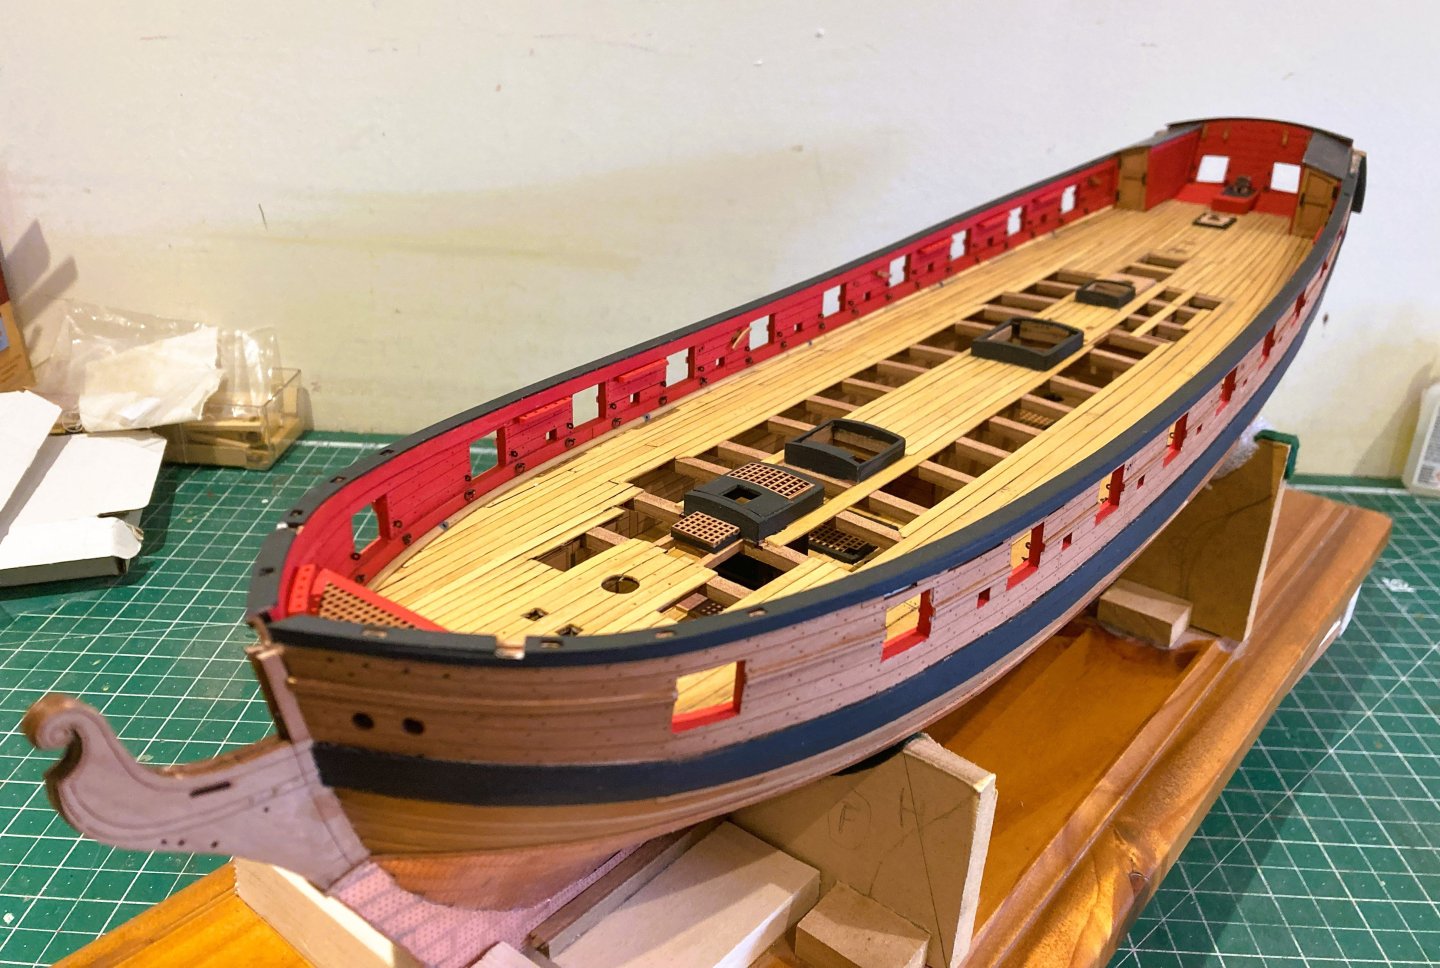
Post 65 Fitting out the deck cont’d. I begin with the ‘tween deck ladders, best completed at this stage. 3905a Pesky little constructions, nicely formed, but fiddly to handle. 3910a The fore ladder in place, notches perfectly over the Lower deck Fore hatch coaming. 3922a The aft ladder sits above the deck level, the stiles butt against the lip of the Companionway cover. There are two small steps to the Bow platform. They are easily identifiable but note that the parts are numbered 74,75,76, and 77,not as given in the Manual. Those relate to the inboard bulwark ladders. 3918a 3915a Fitting these at this point will not interfere with other work on the deck. The individual centre-line deck fittings have mostly been completed and only require gluing into place on the deck. I considered it would be better to first fit the guns given the fiddly nature of rigging the Breechings, and the less incumbrances the better. 3920a 0.88mm ø Syren rigging line is used for the breechings, with a length of 130mm to allow for securing at the bulwarks. The actual line length given for a 32 pounder carronade is 20 ft or 95mm at scale. The next stage will be seating the guns and seizing the breechings to the bulwarks. 3909a 3908a A tedious exercise I suspect, so I may be some time. B.E. 17/04/2025


- 332 replies
-
- 25
-
-
- Harpy
- Vanguard Models
- (and 1 more)
-
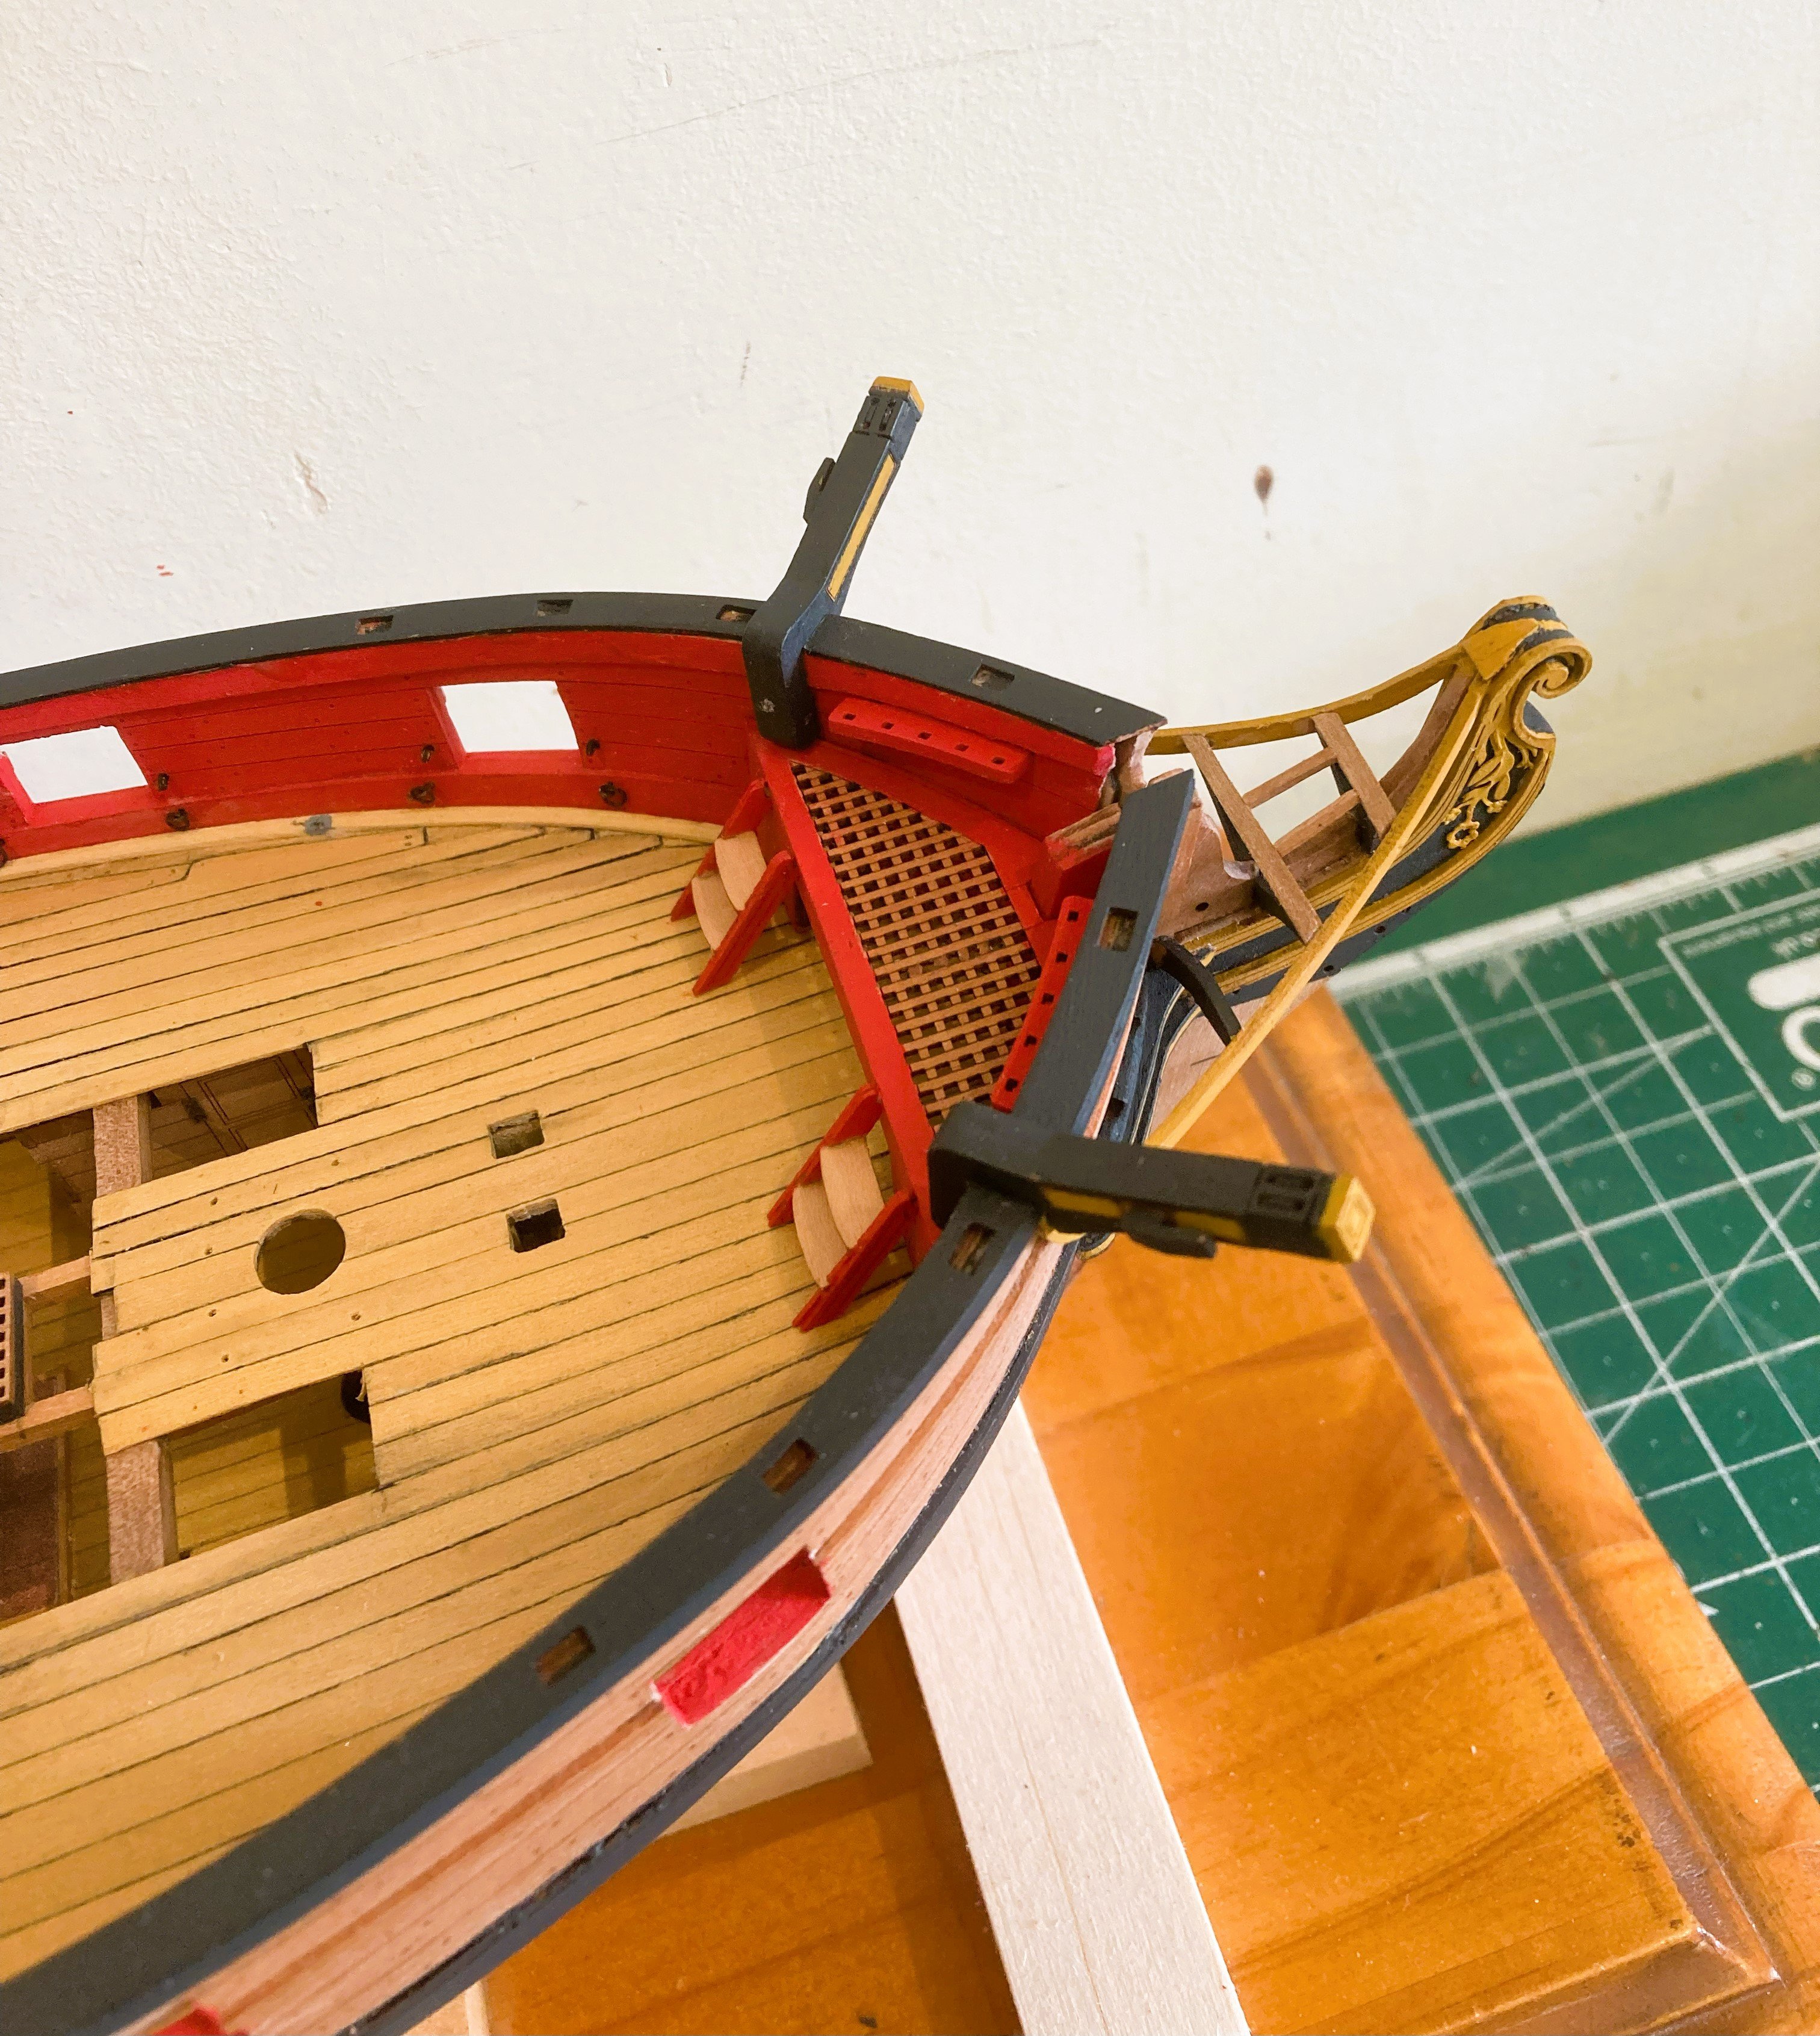
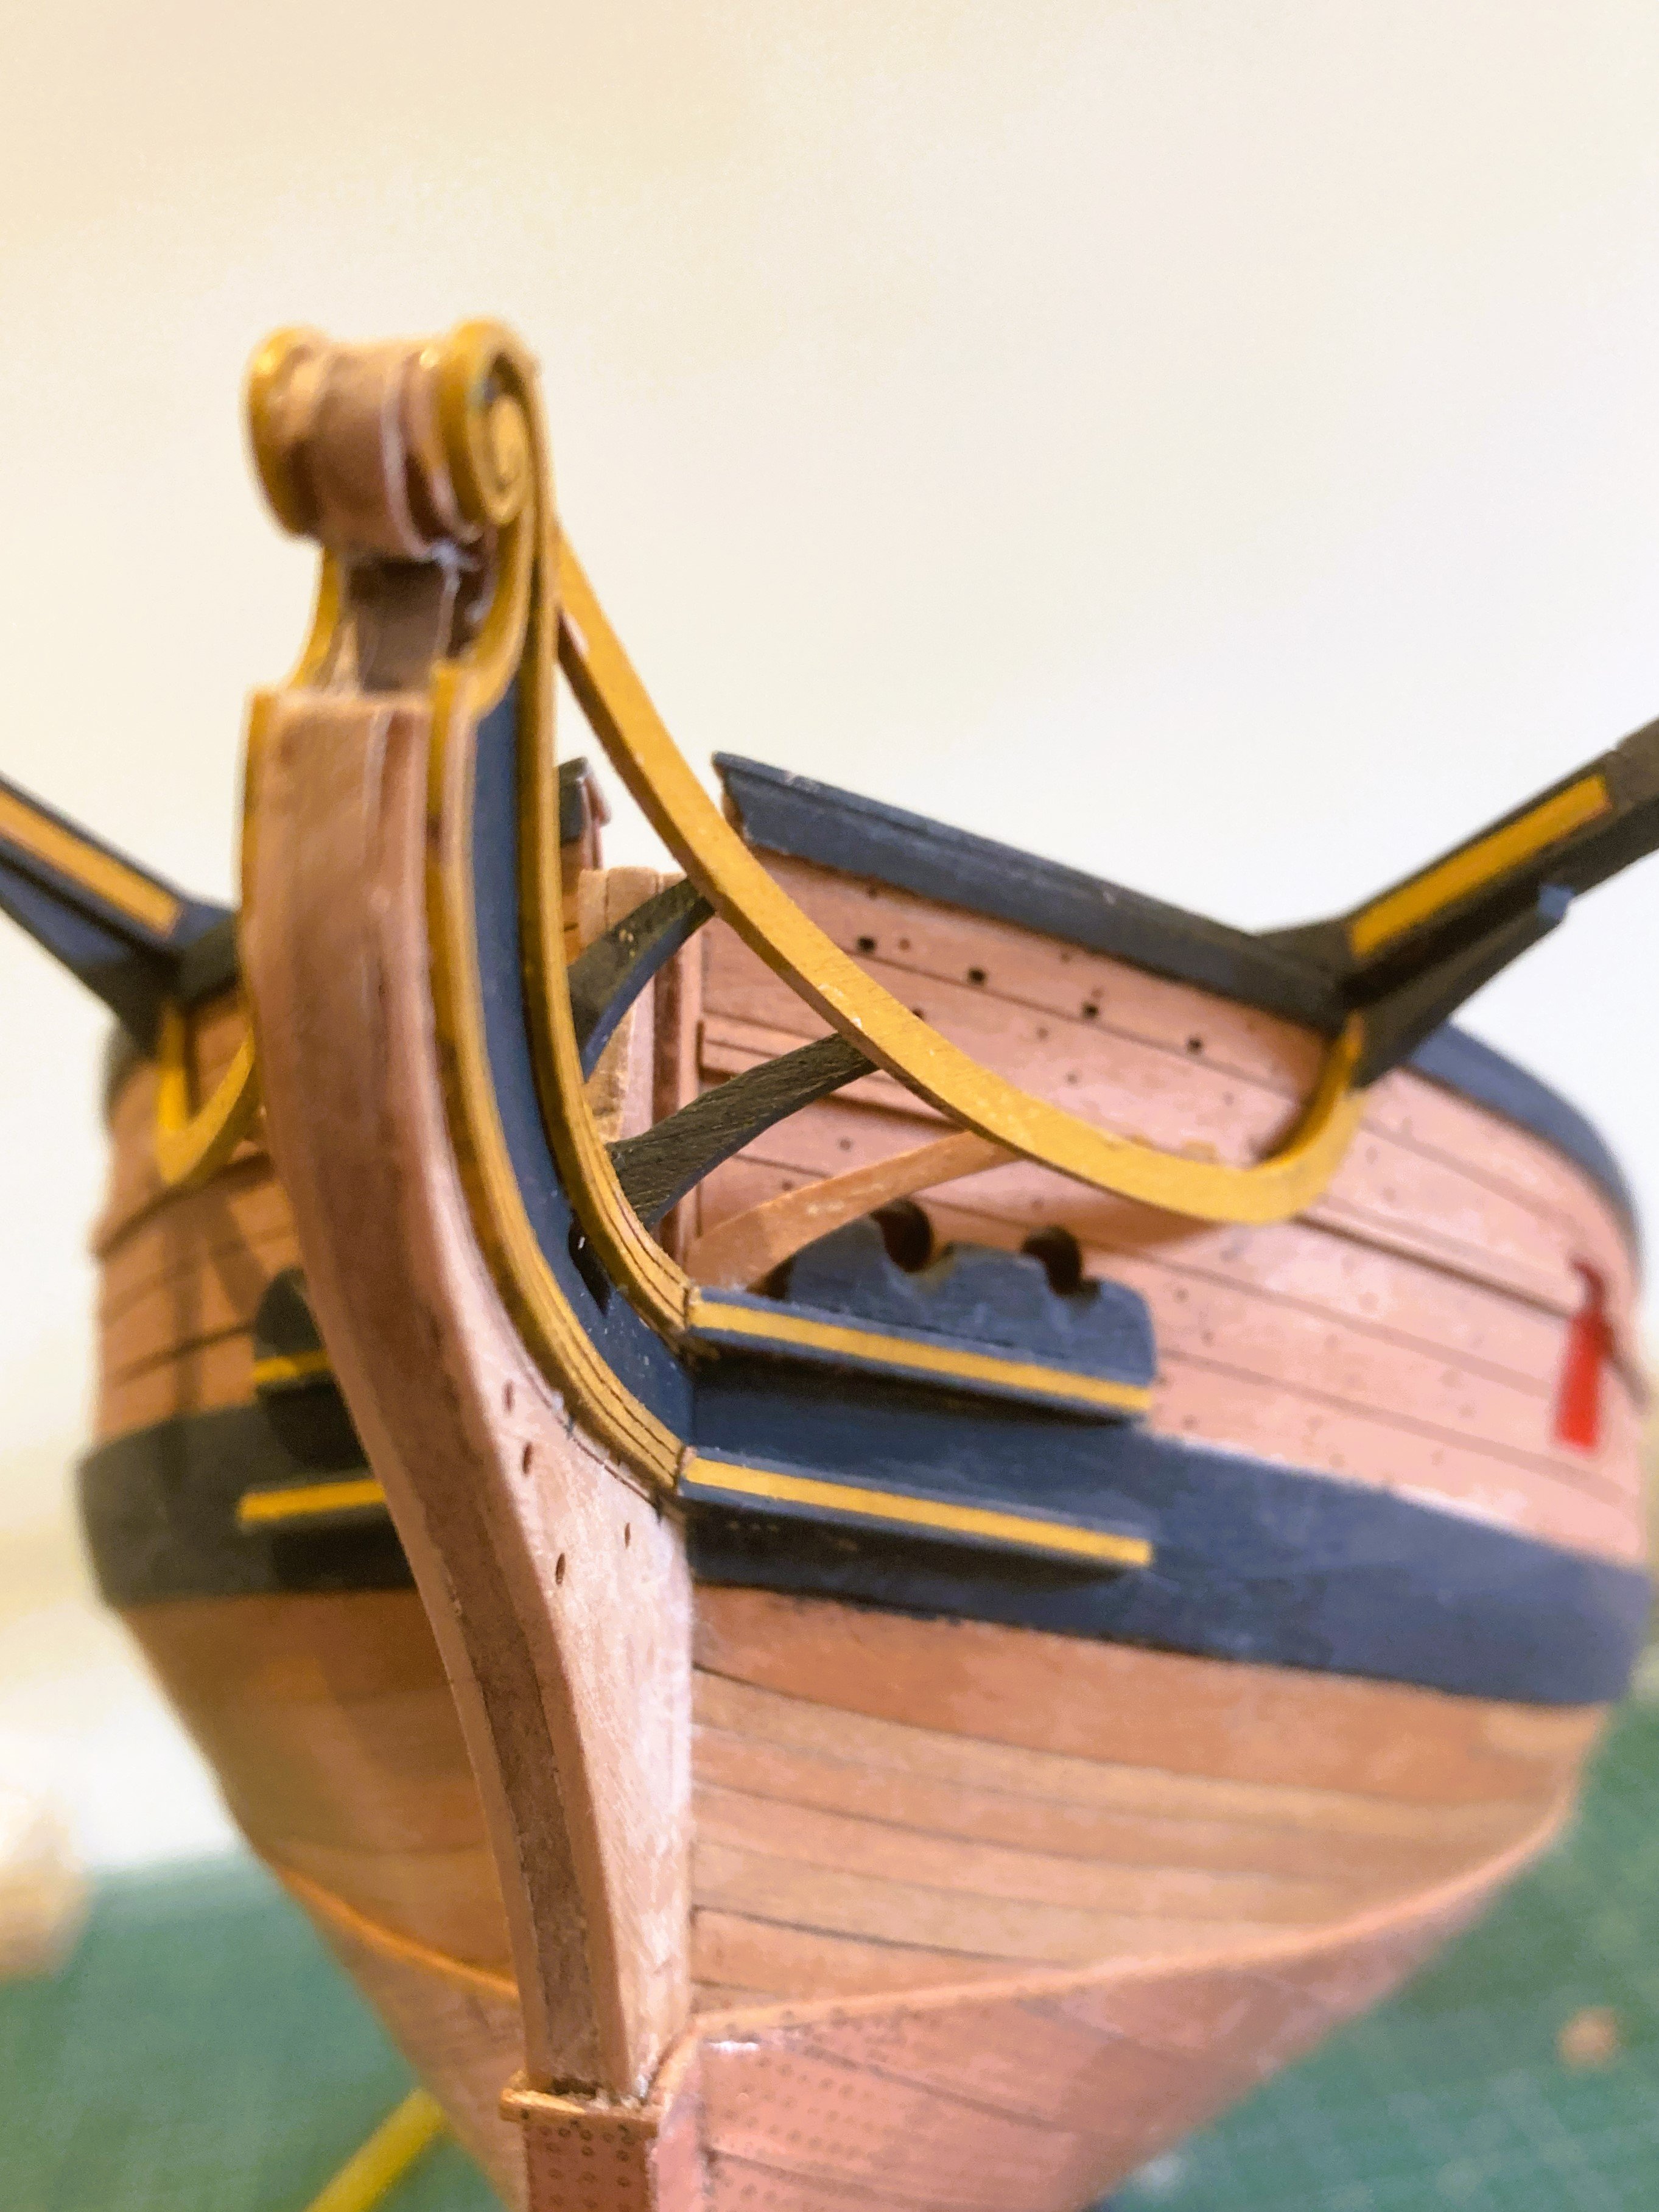
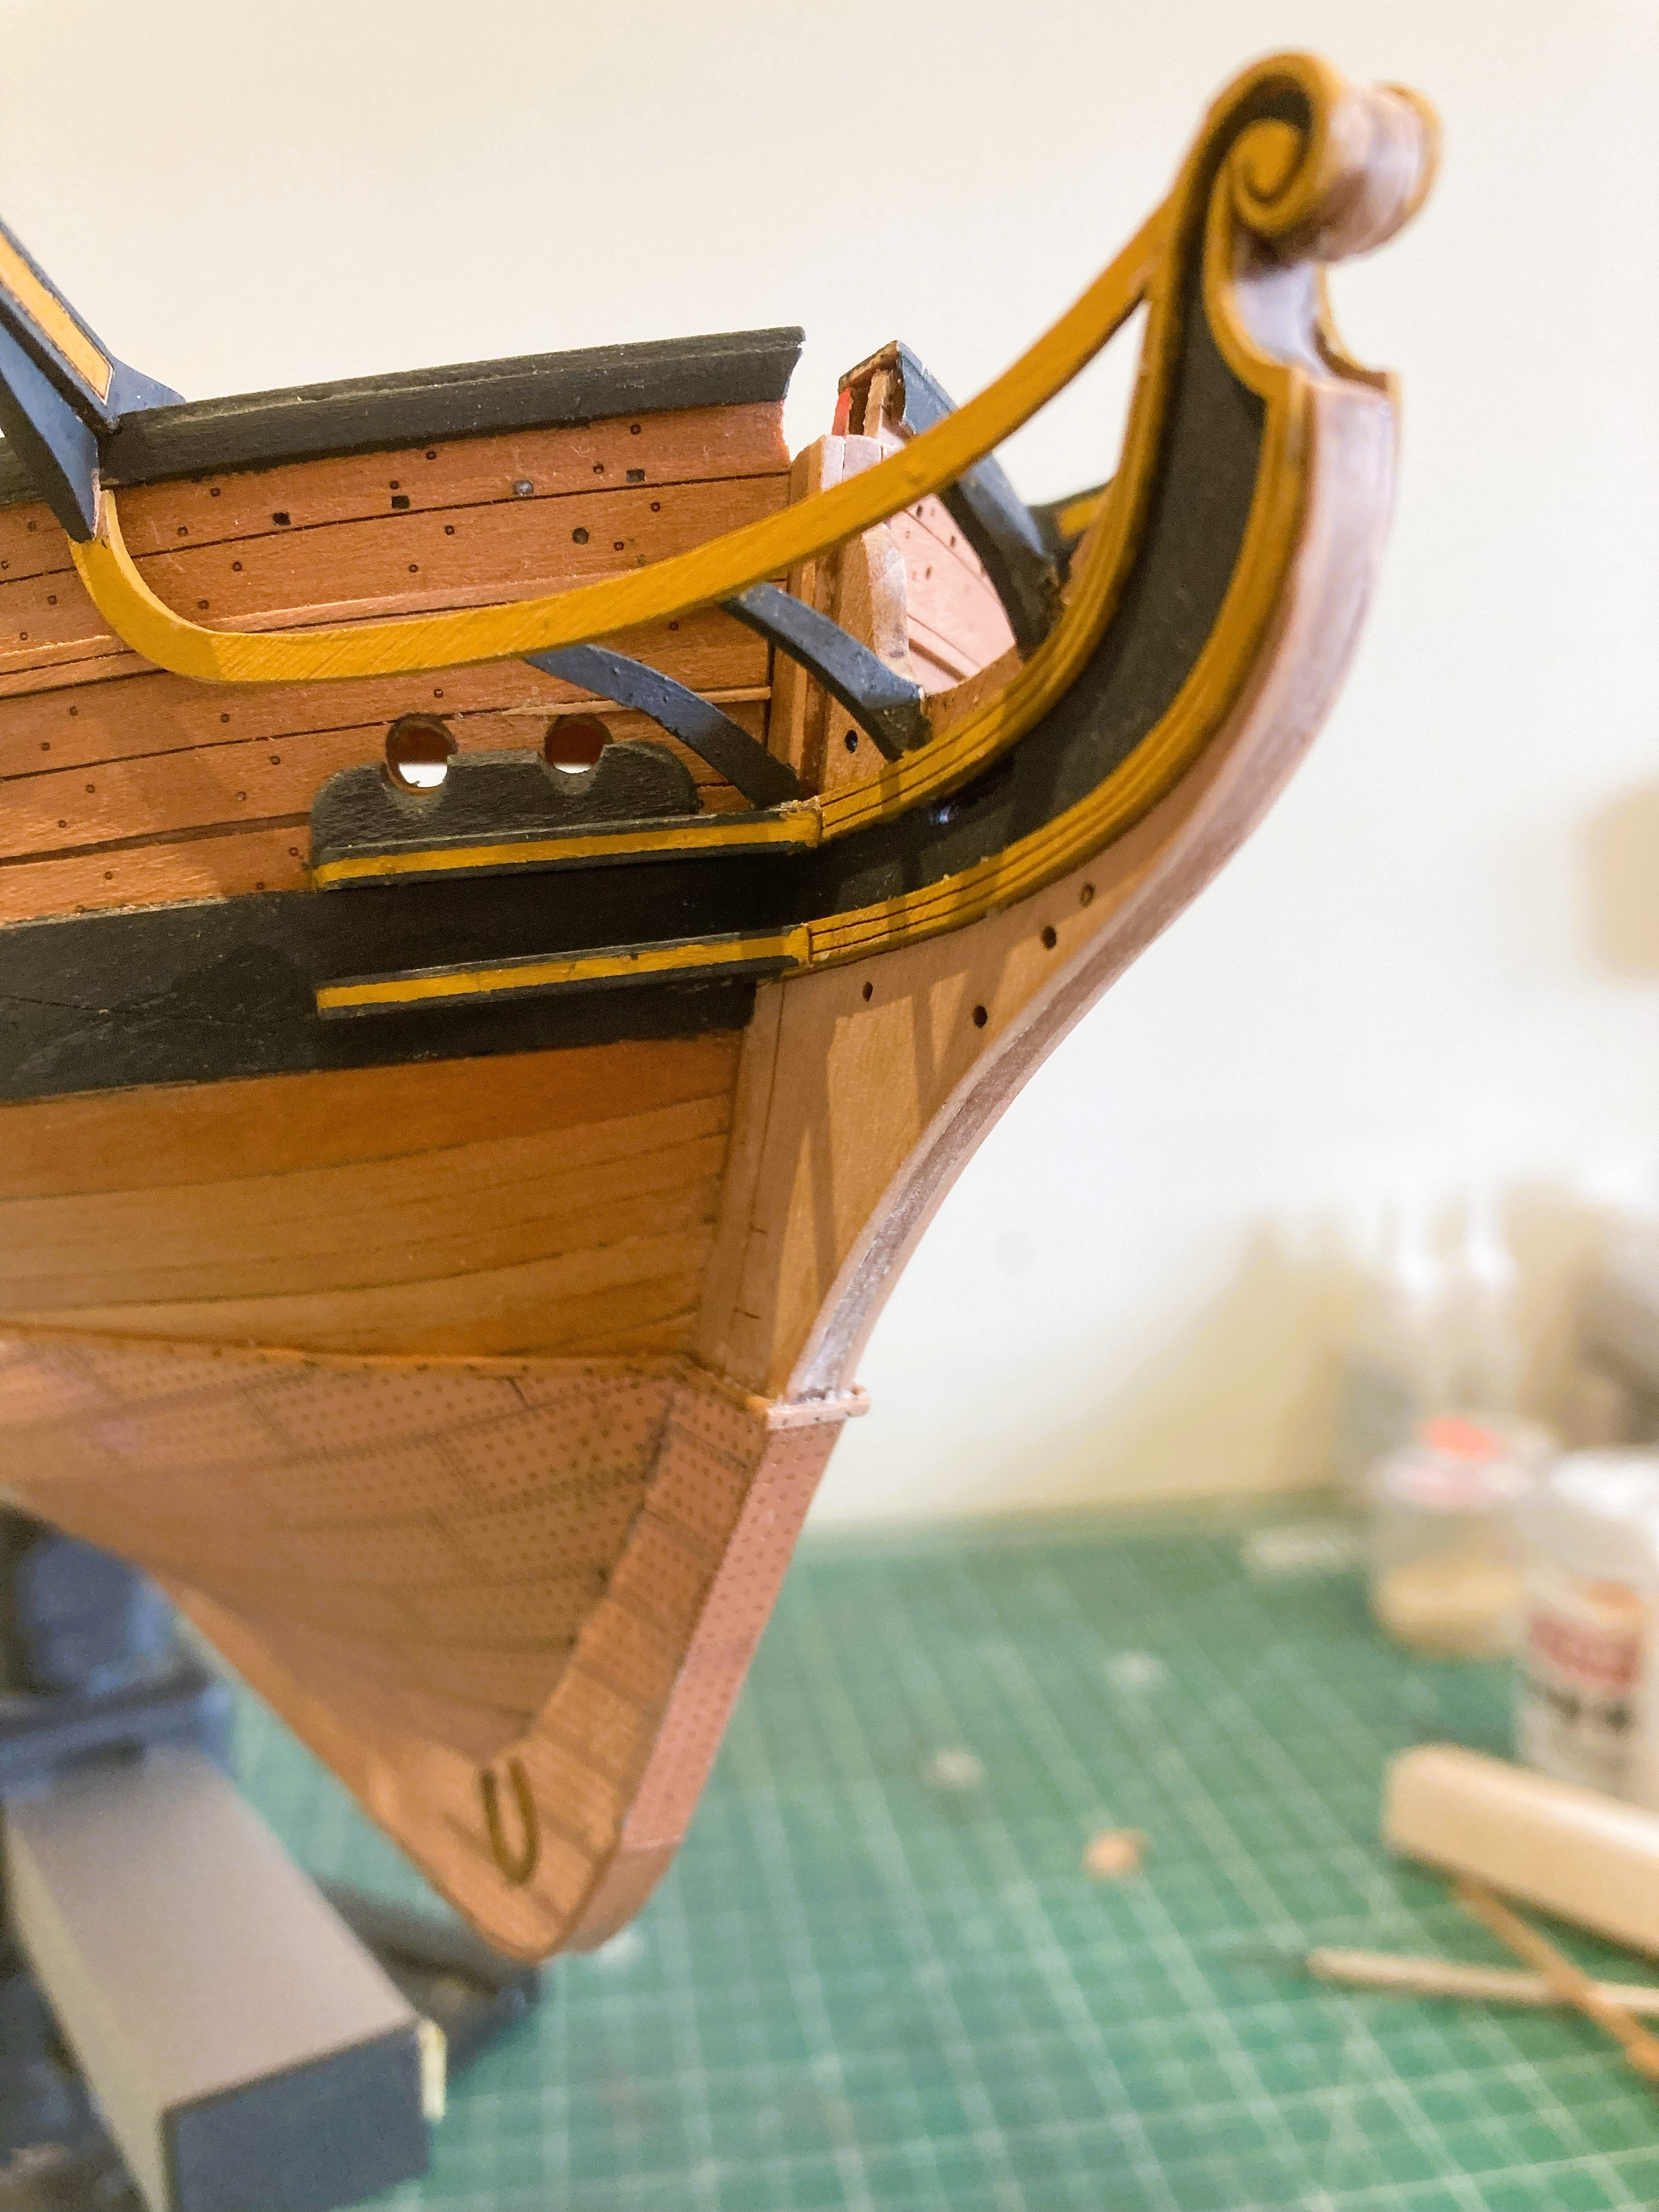
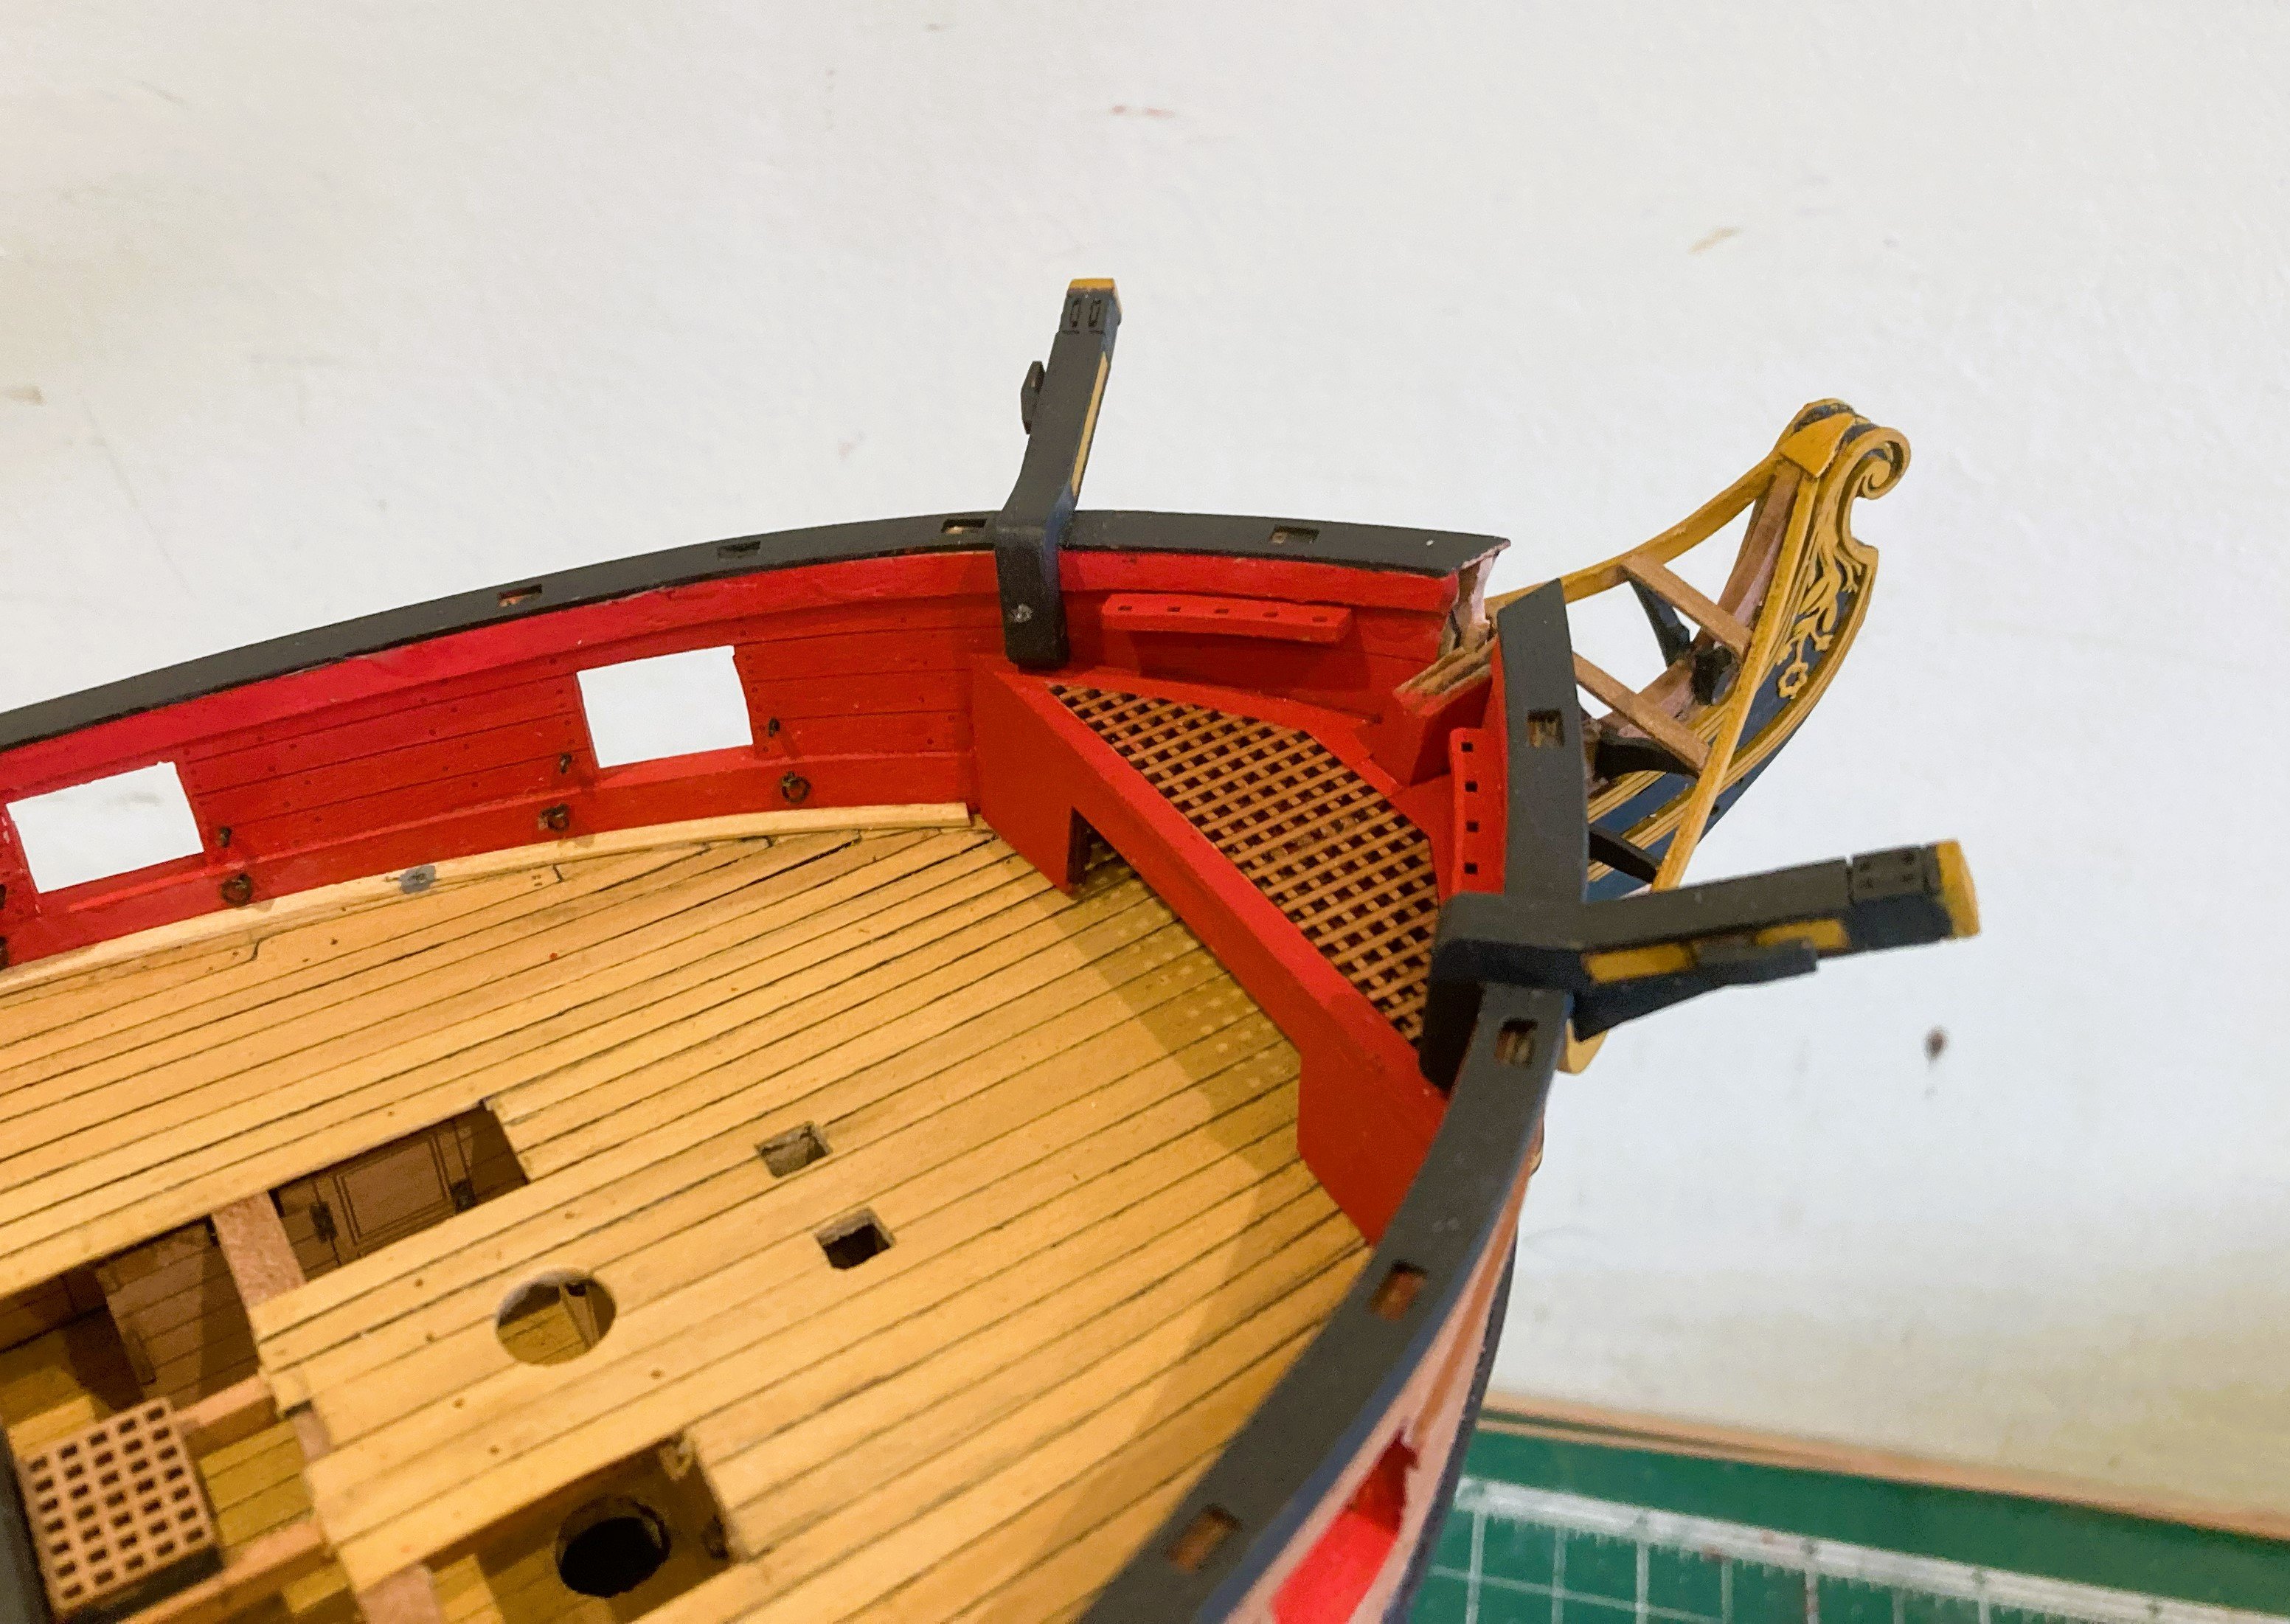
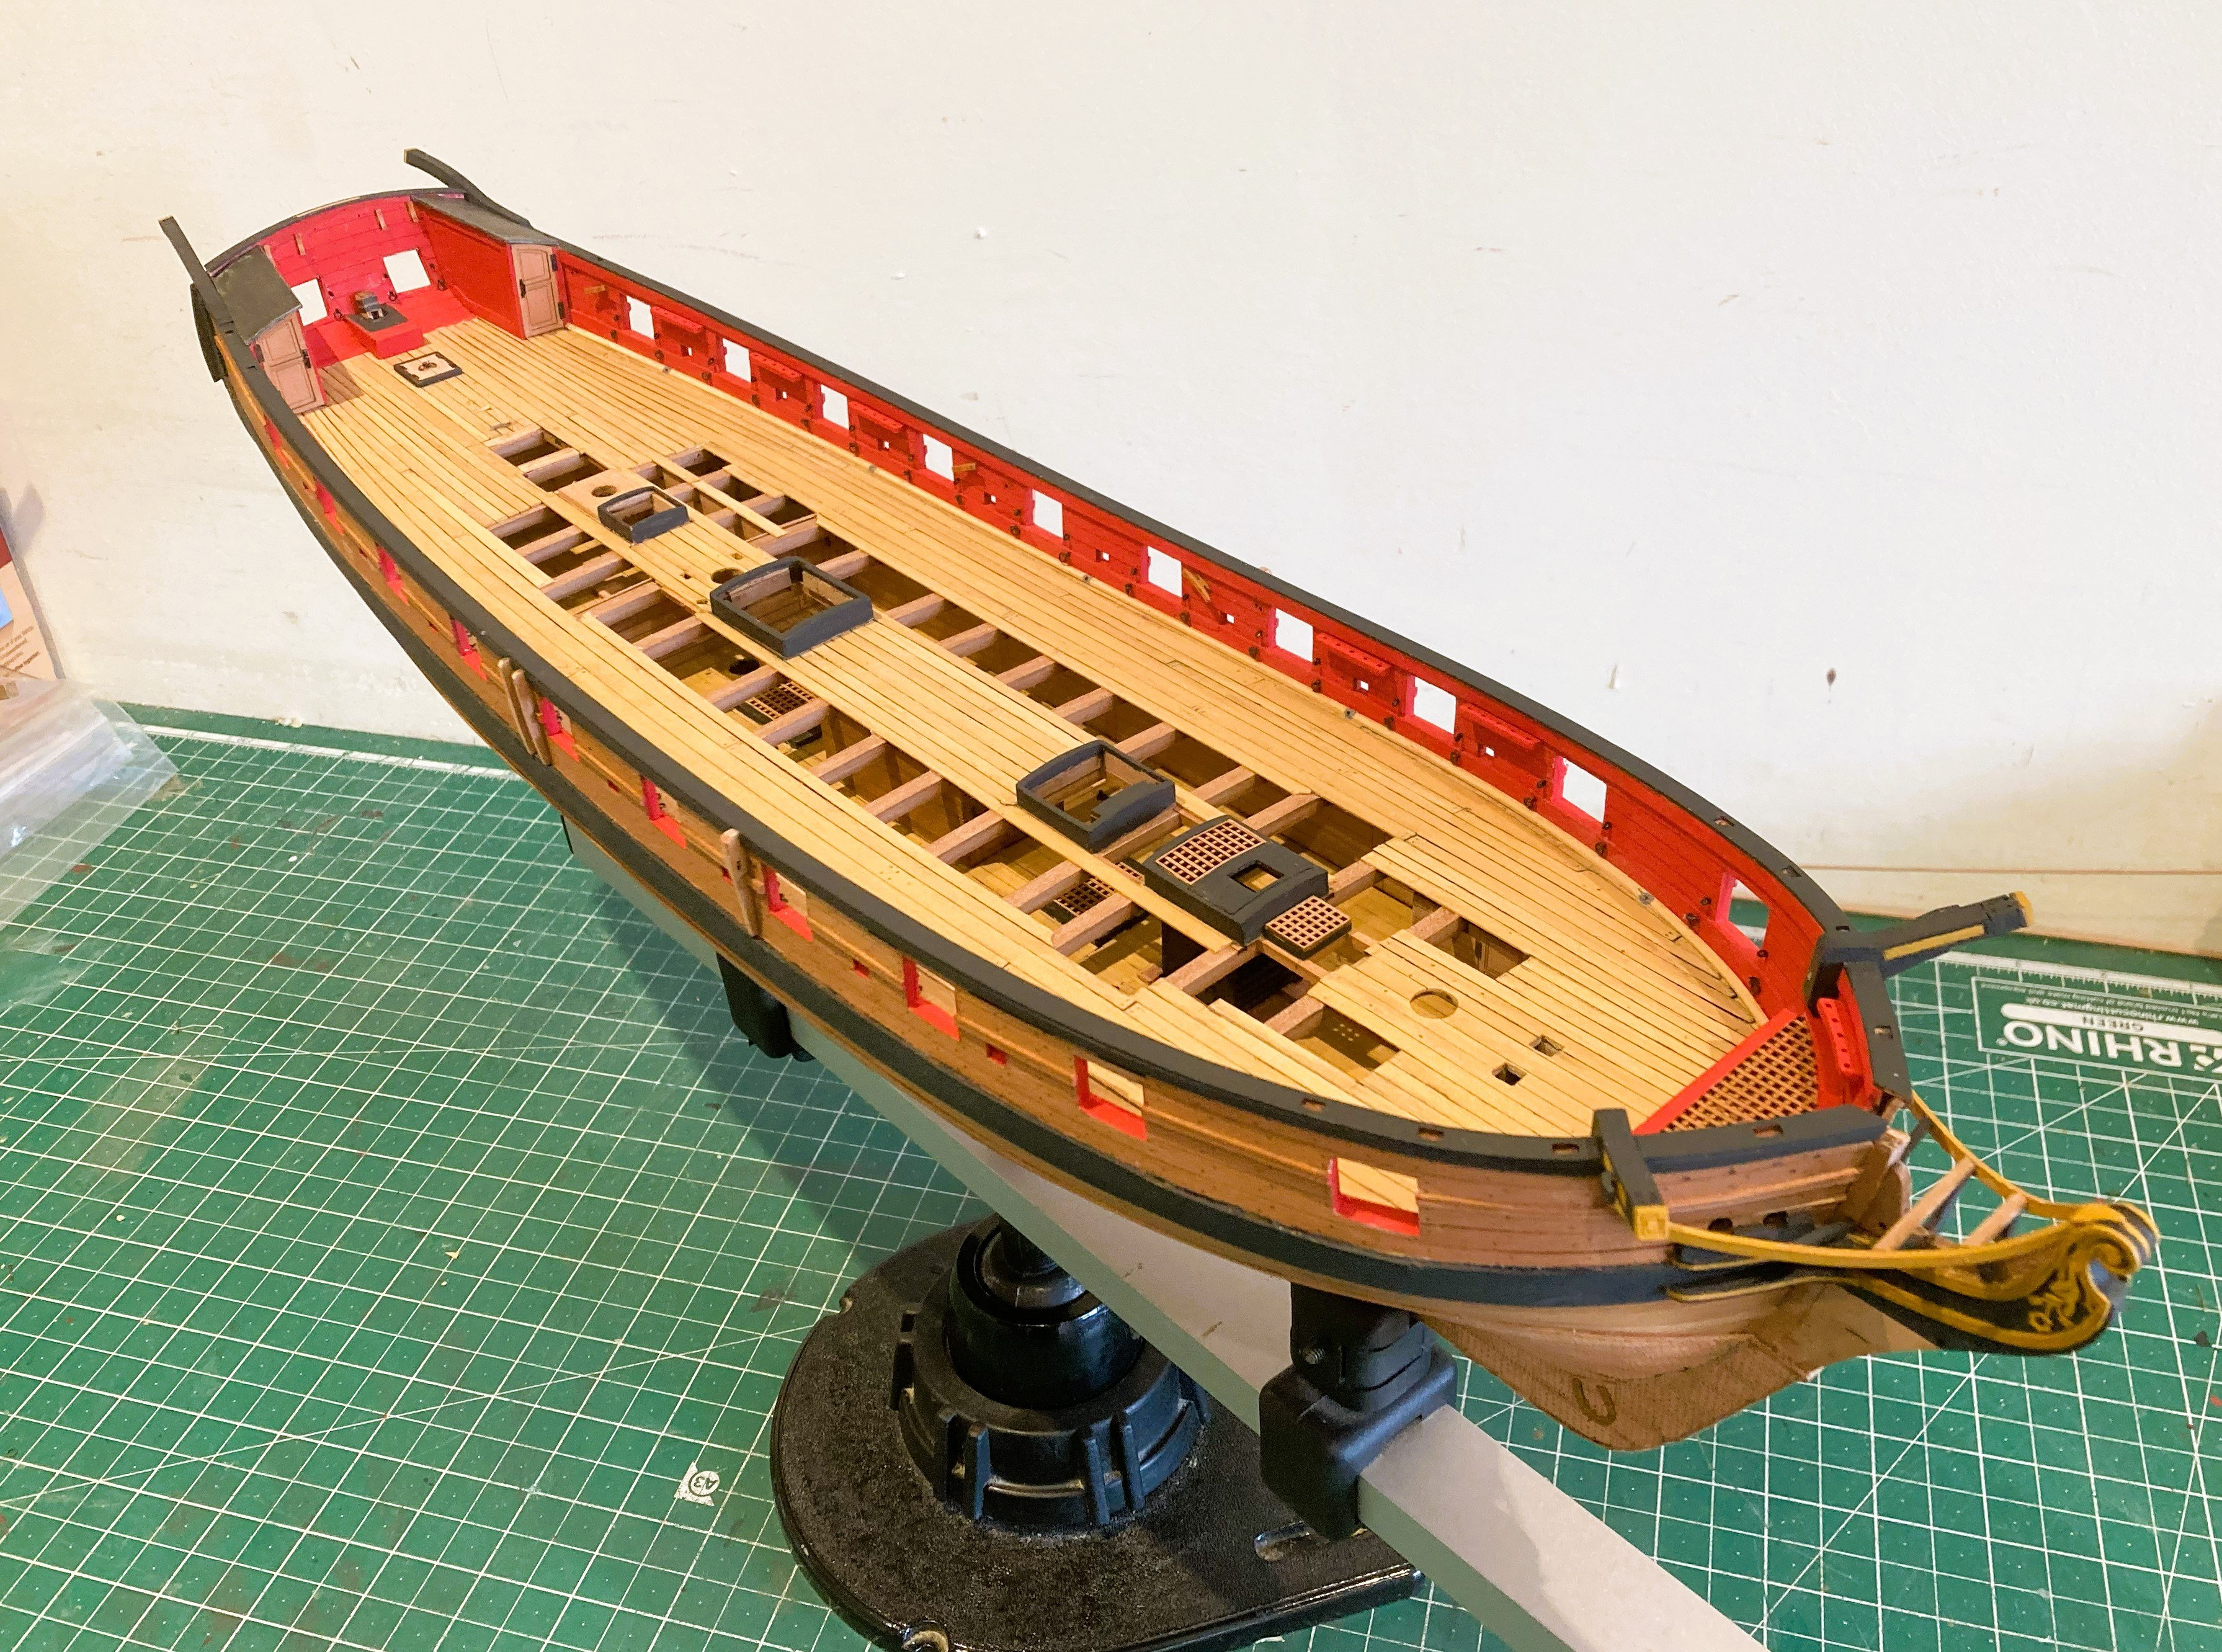
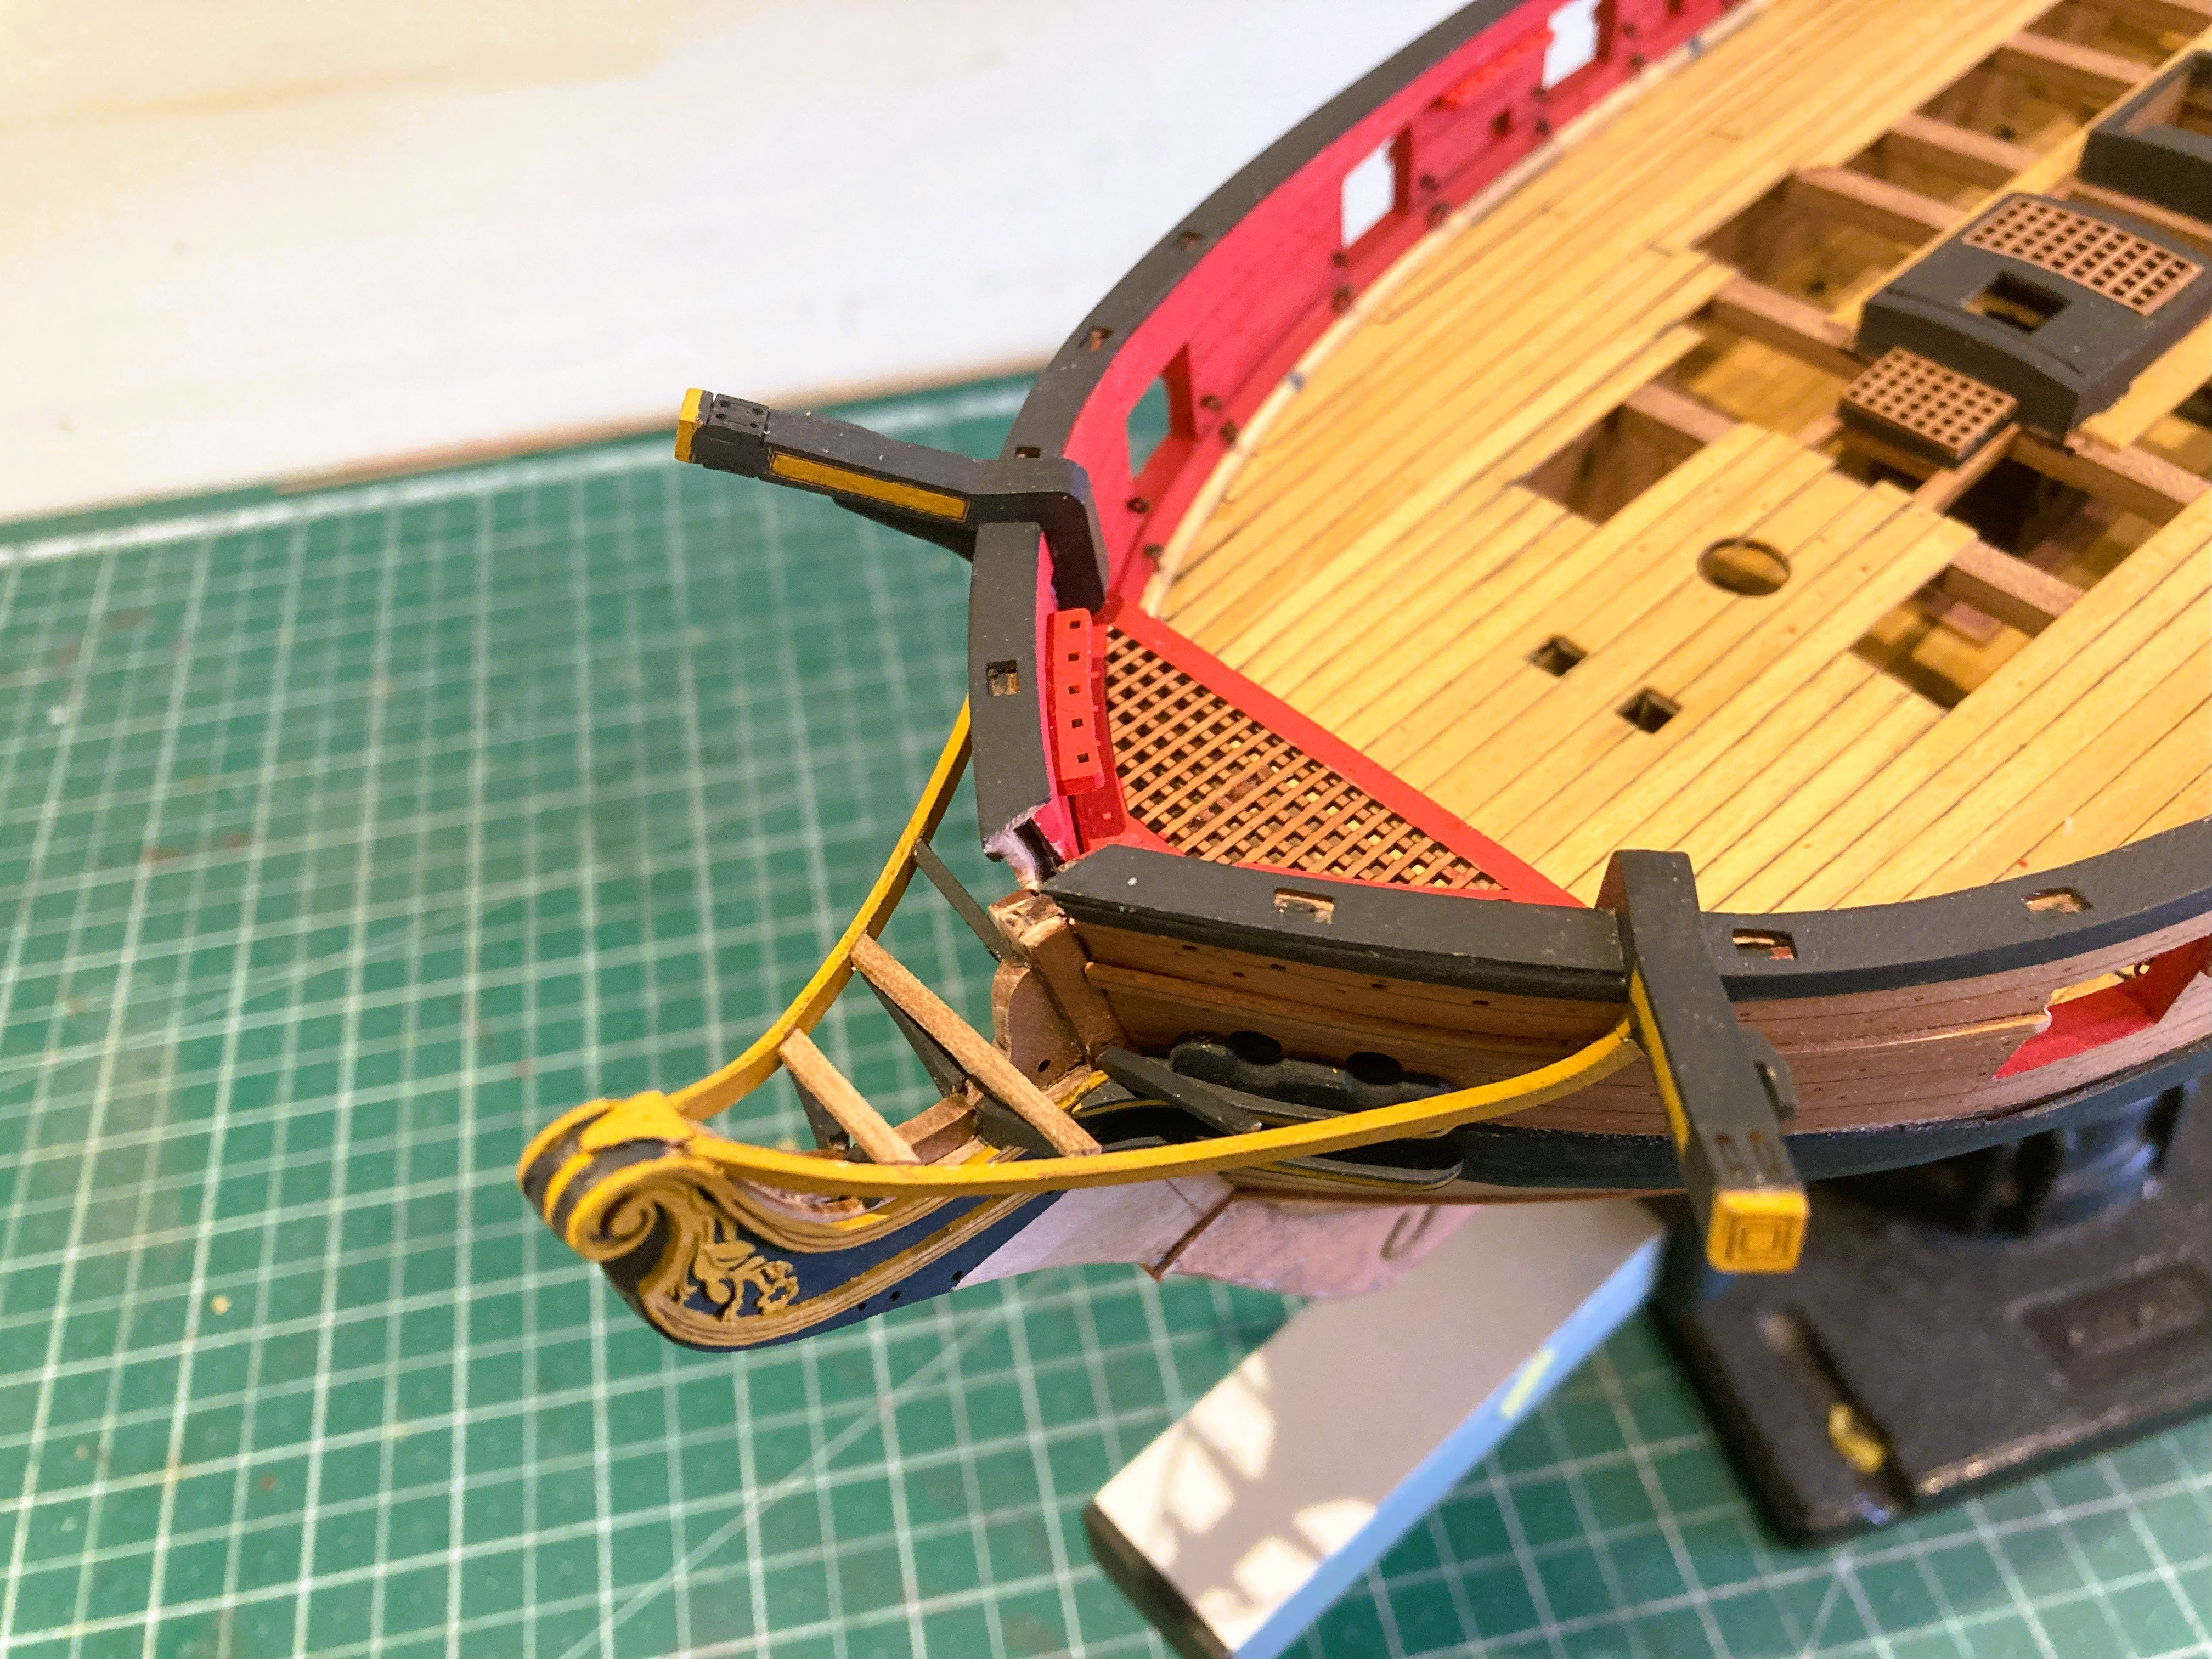
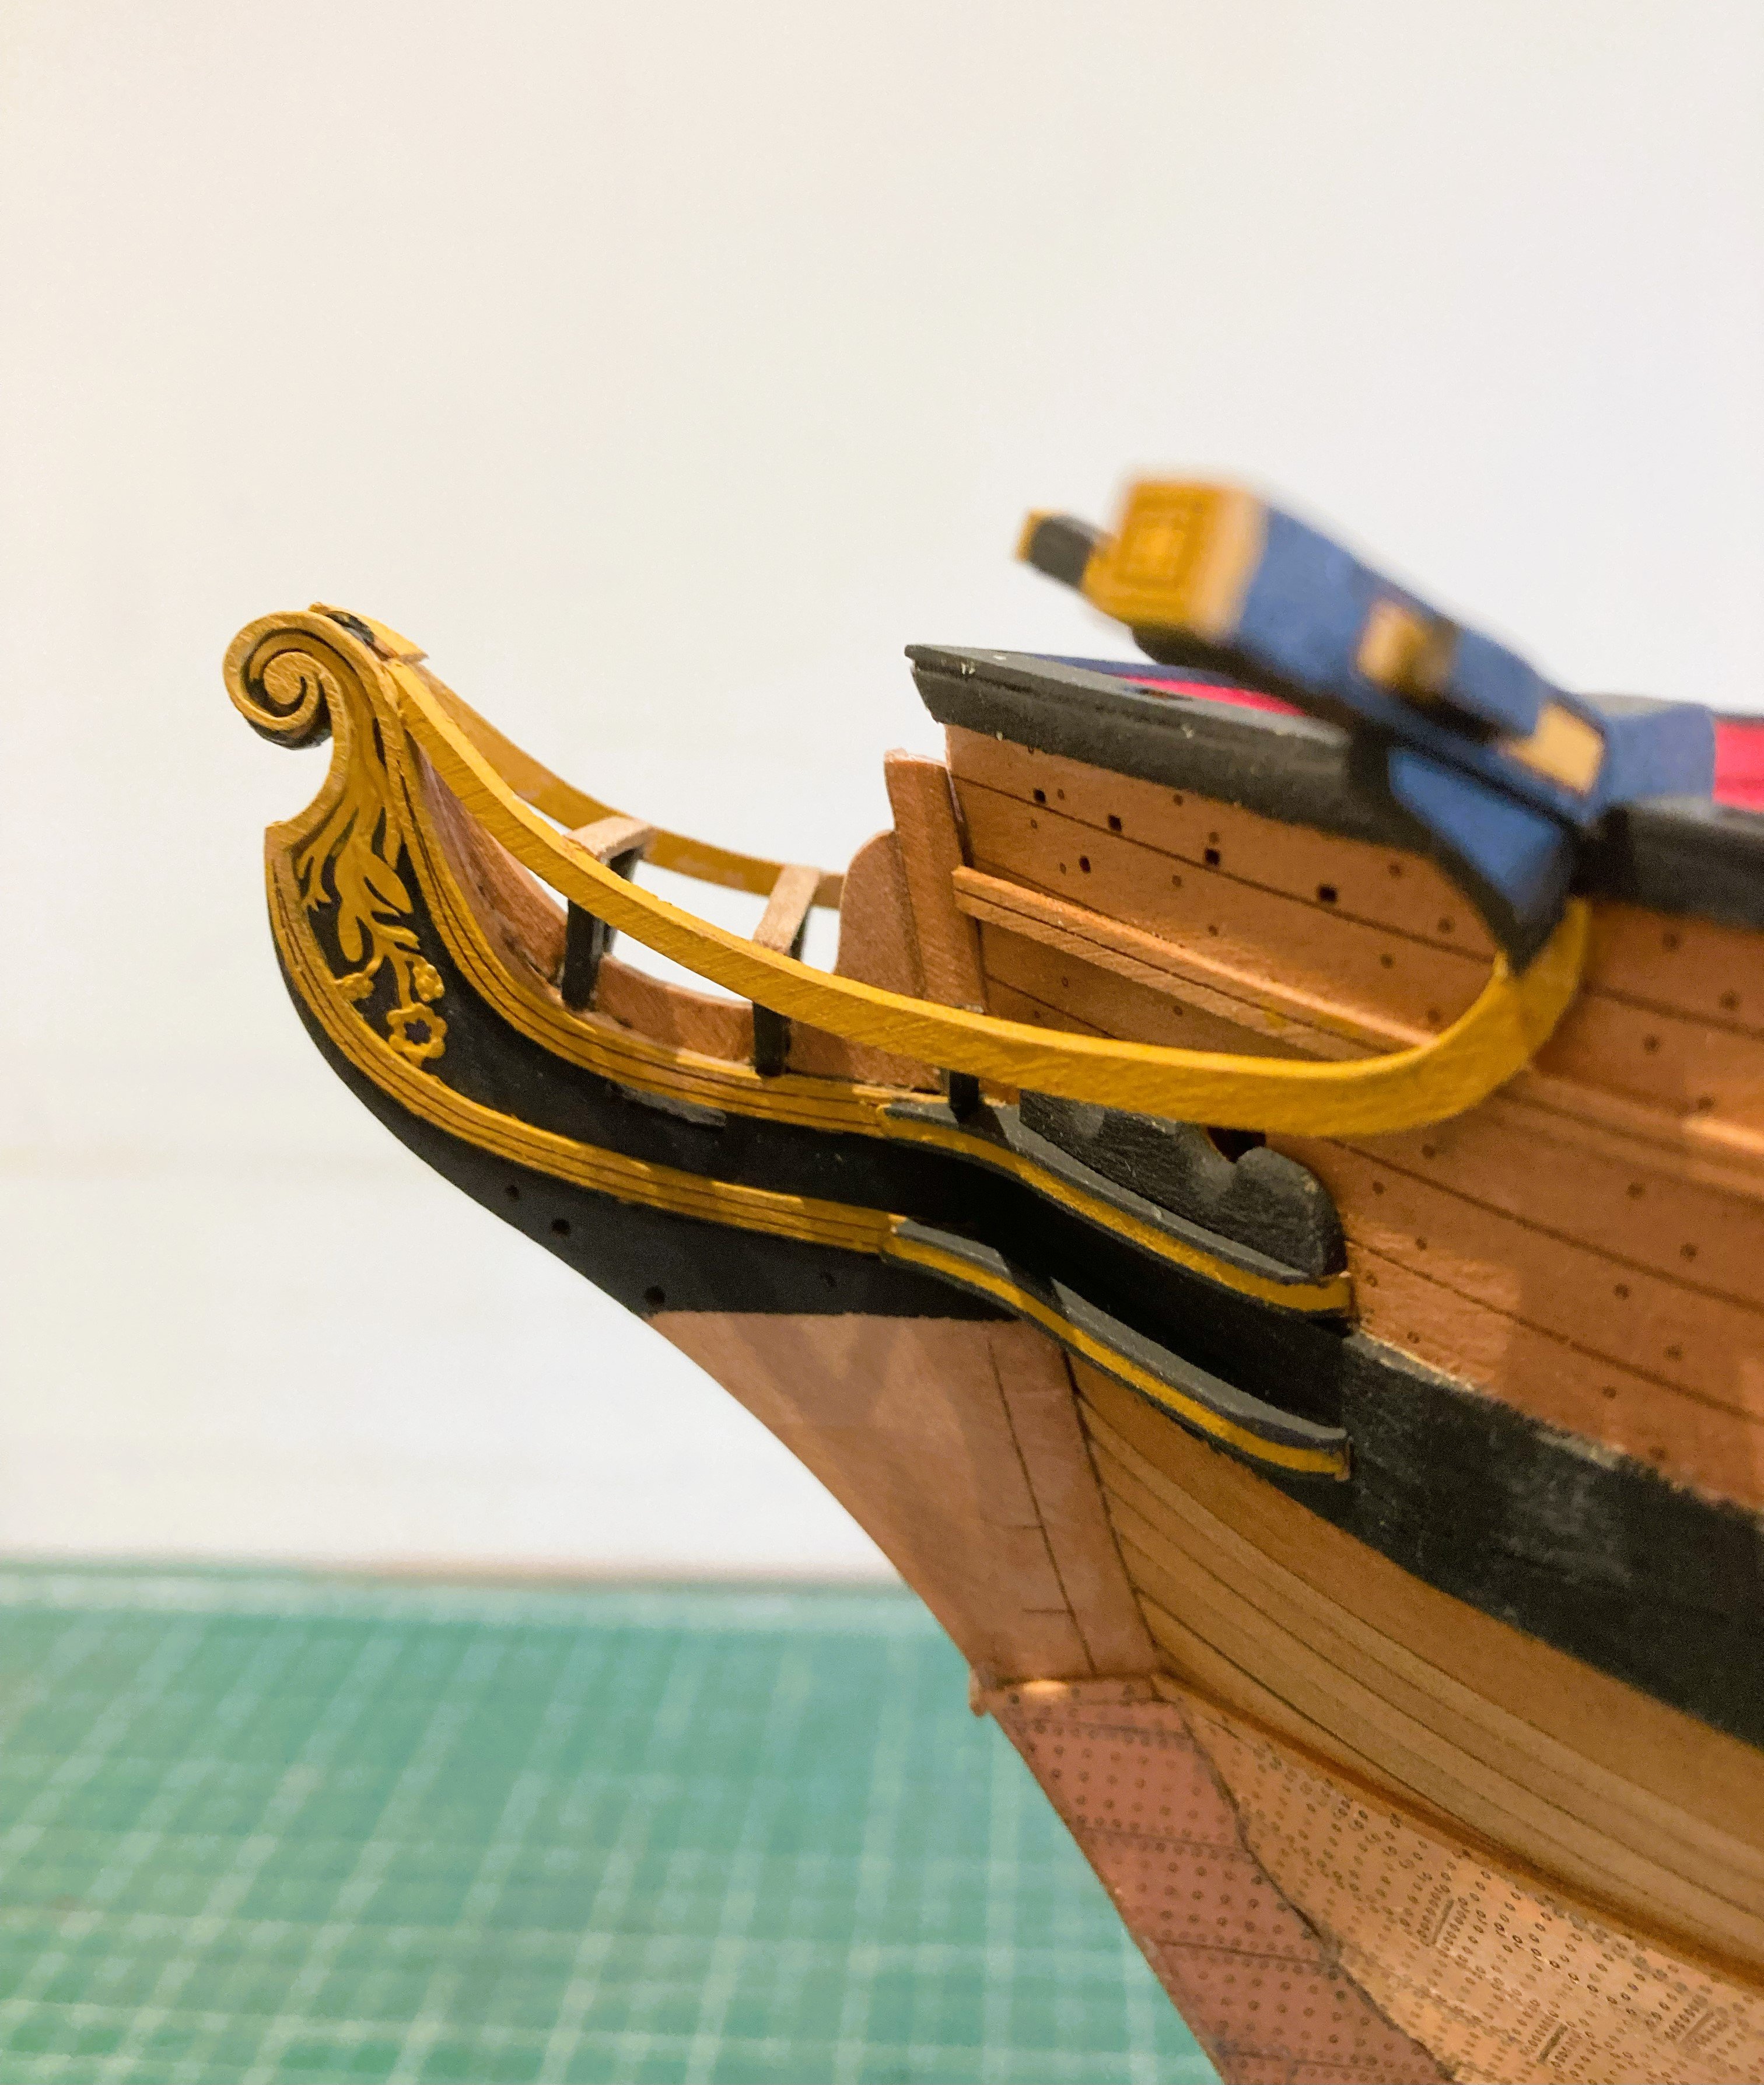
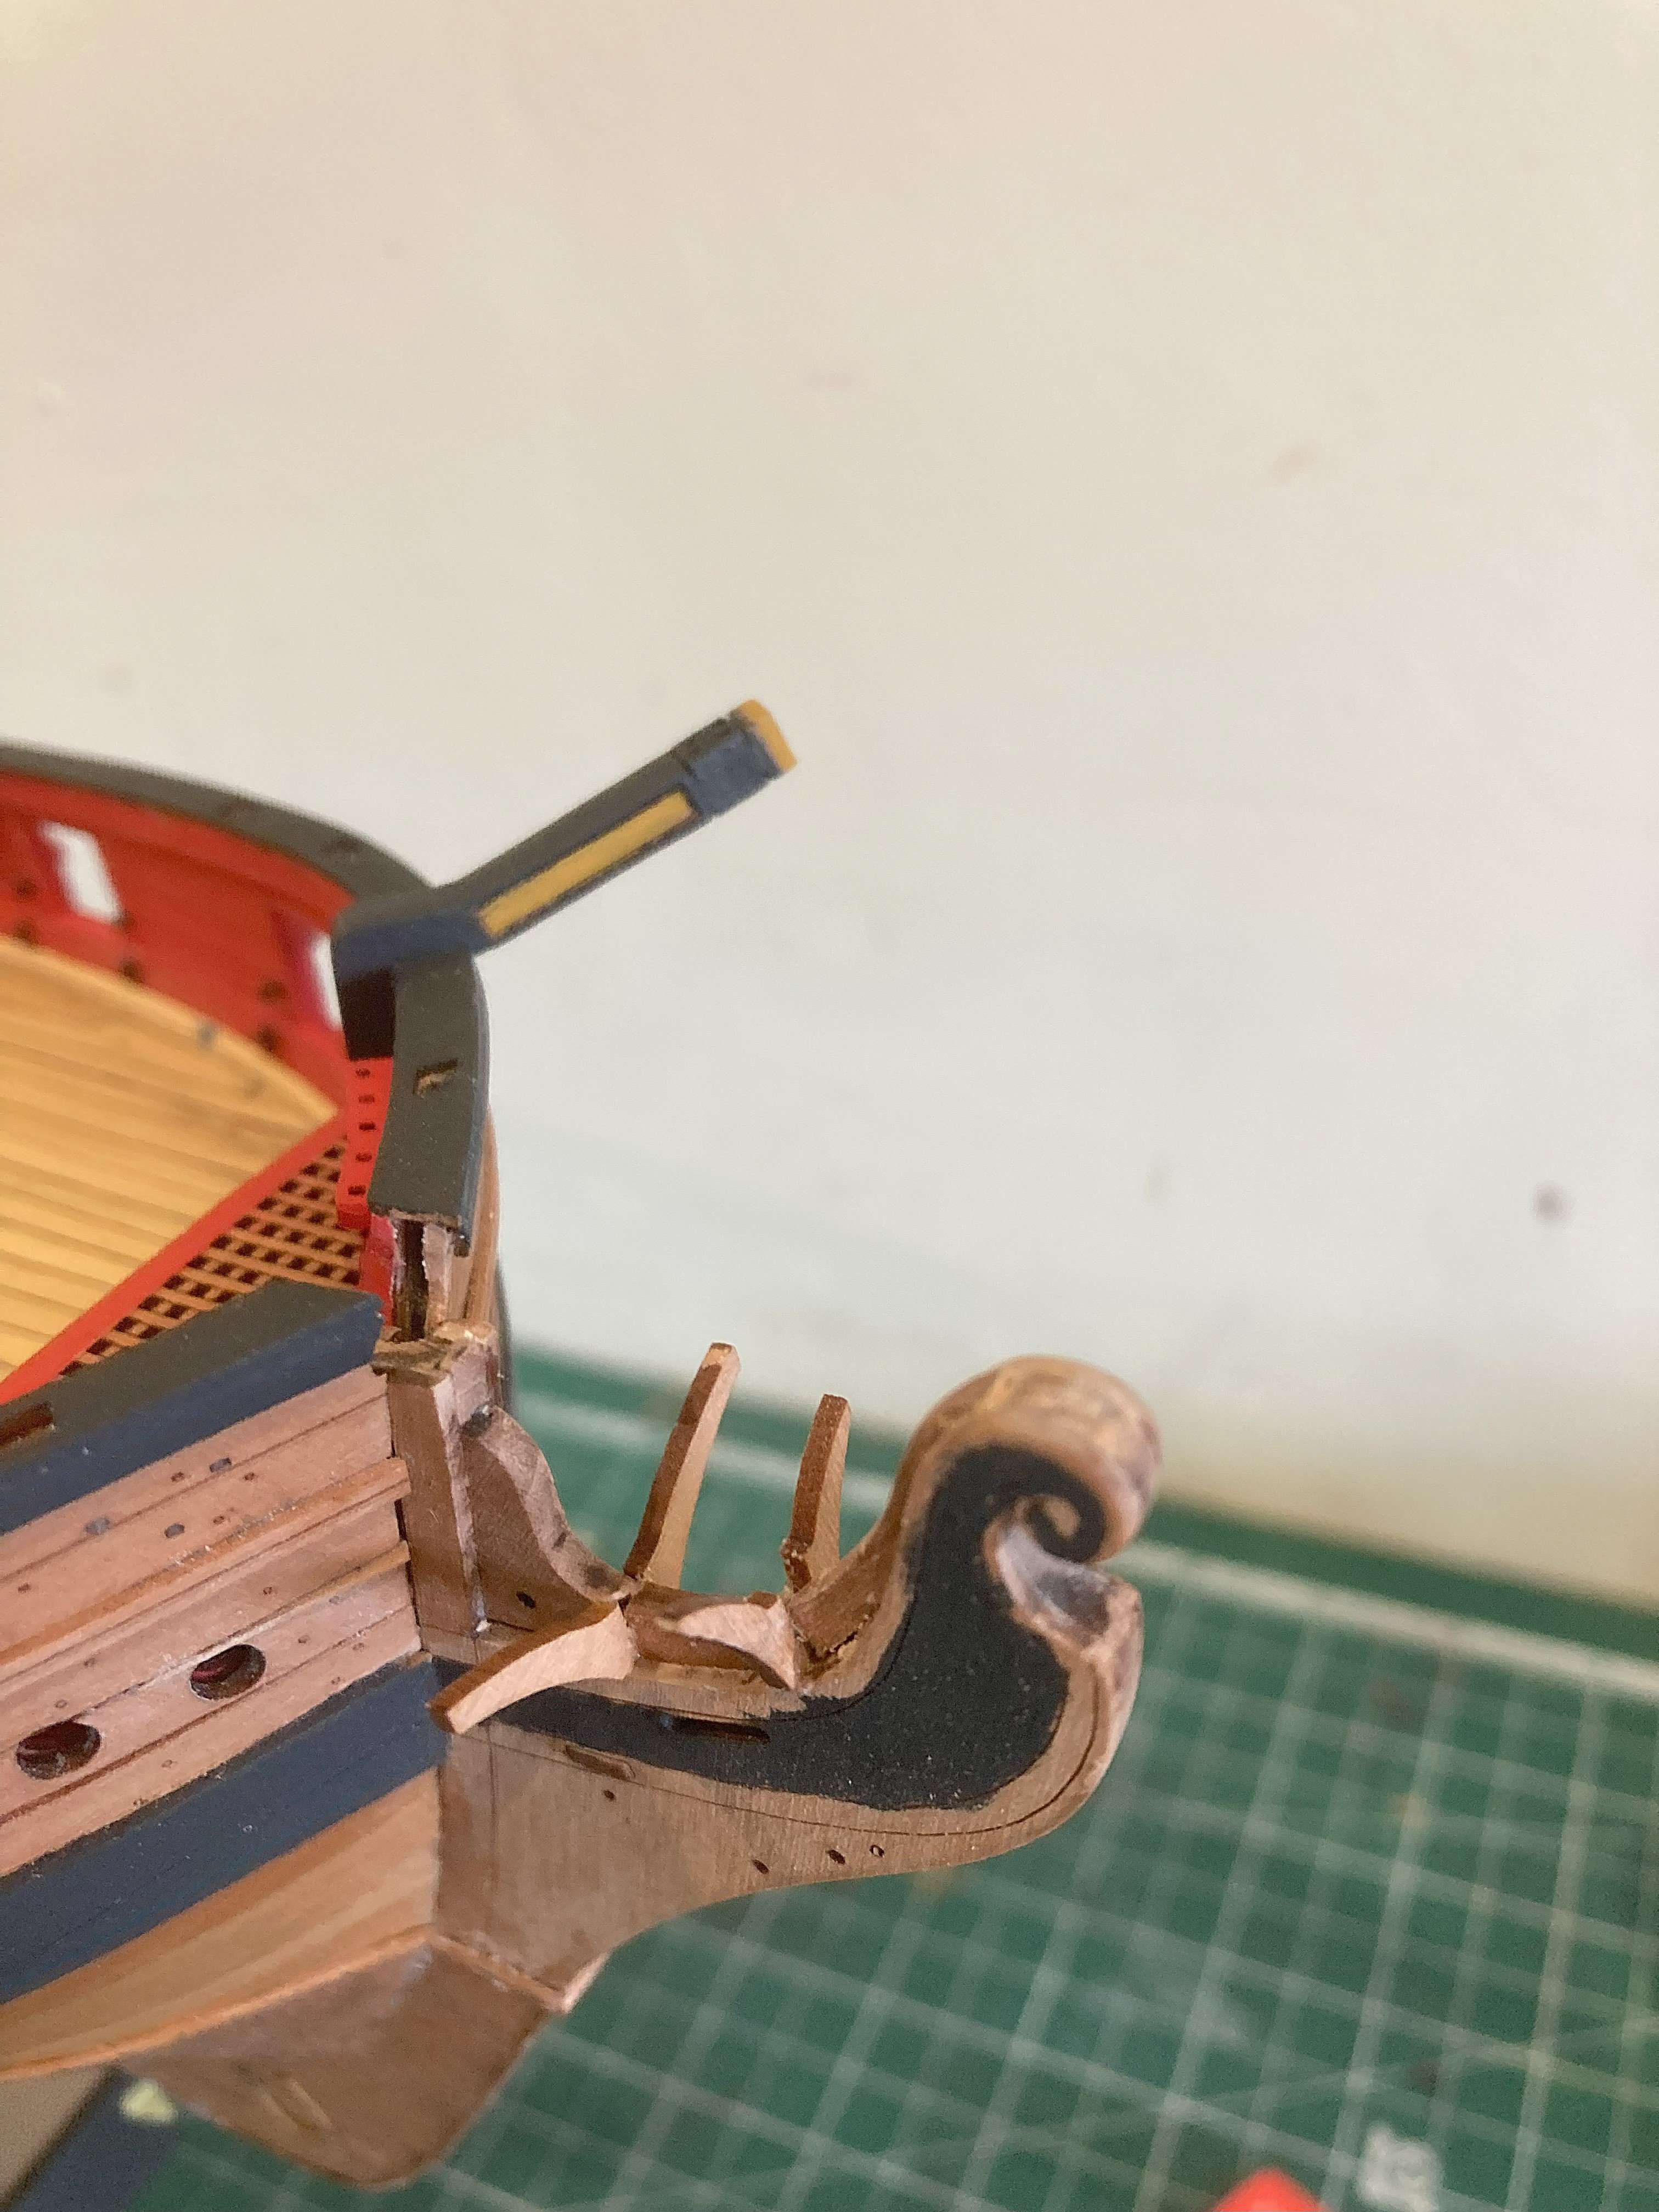
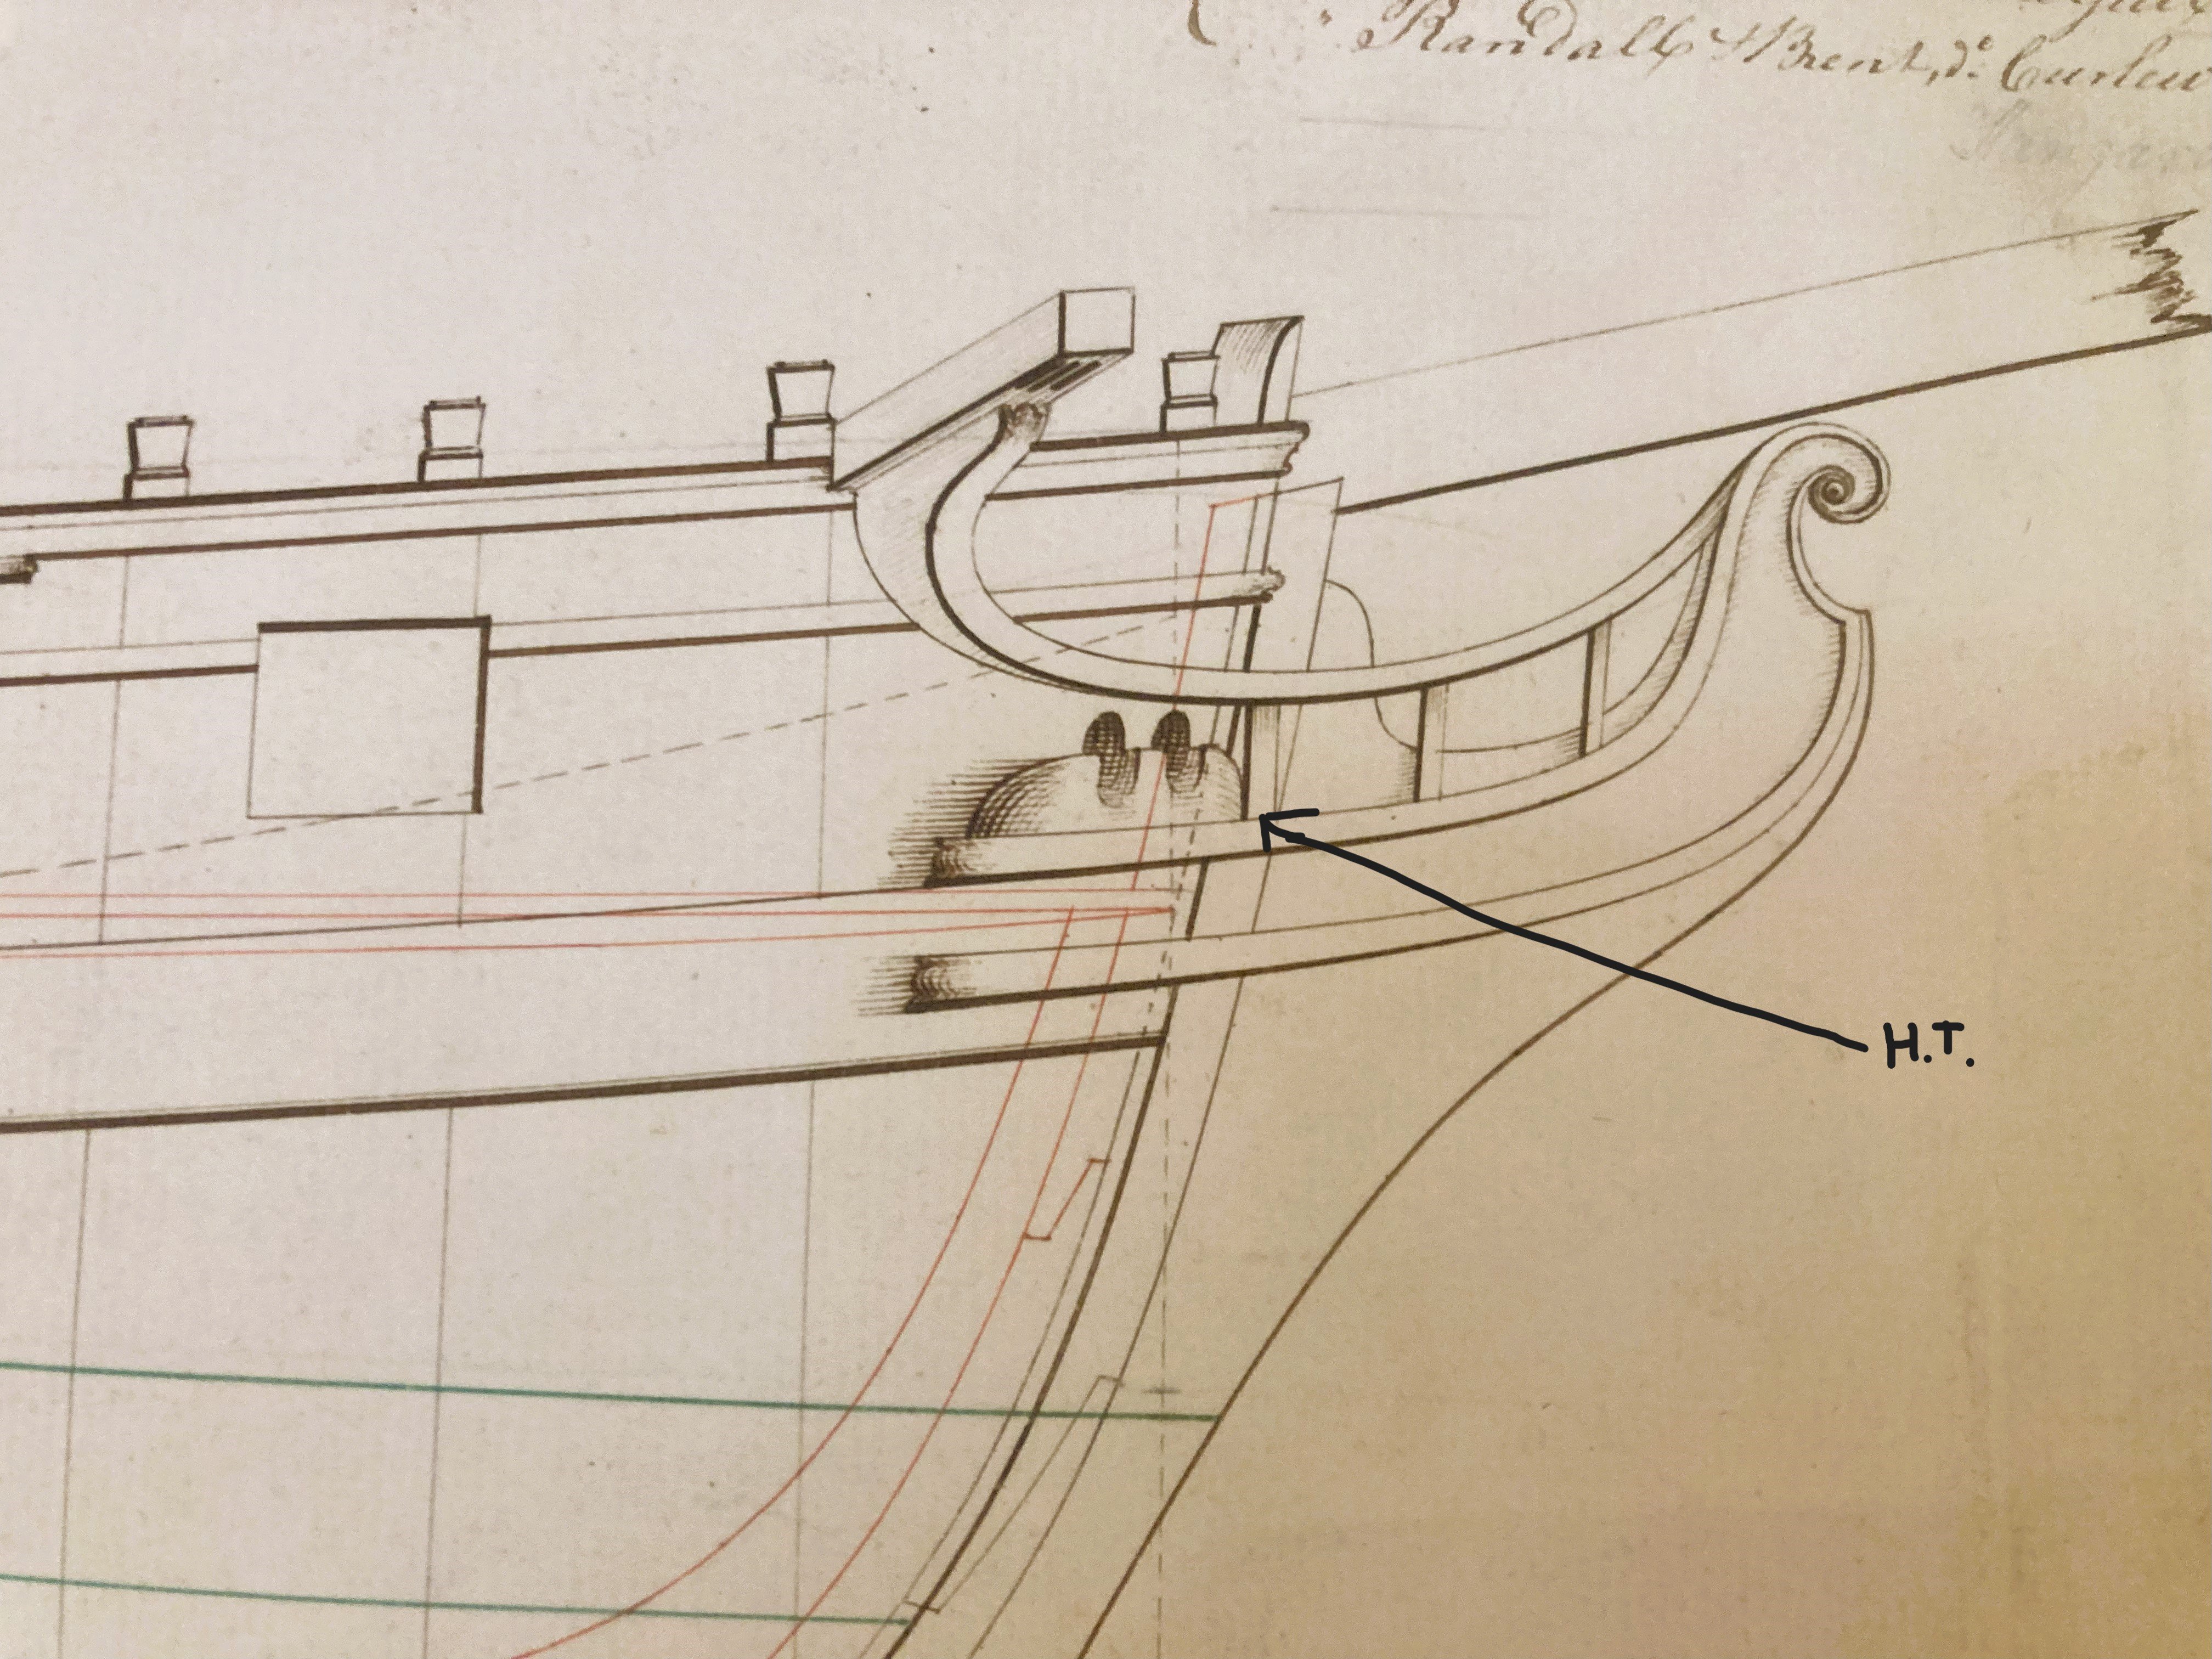
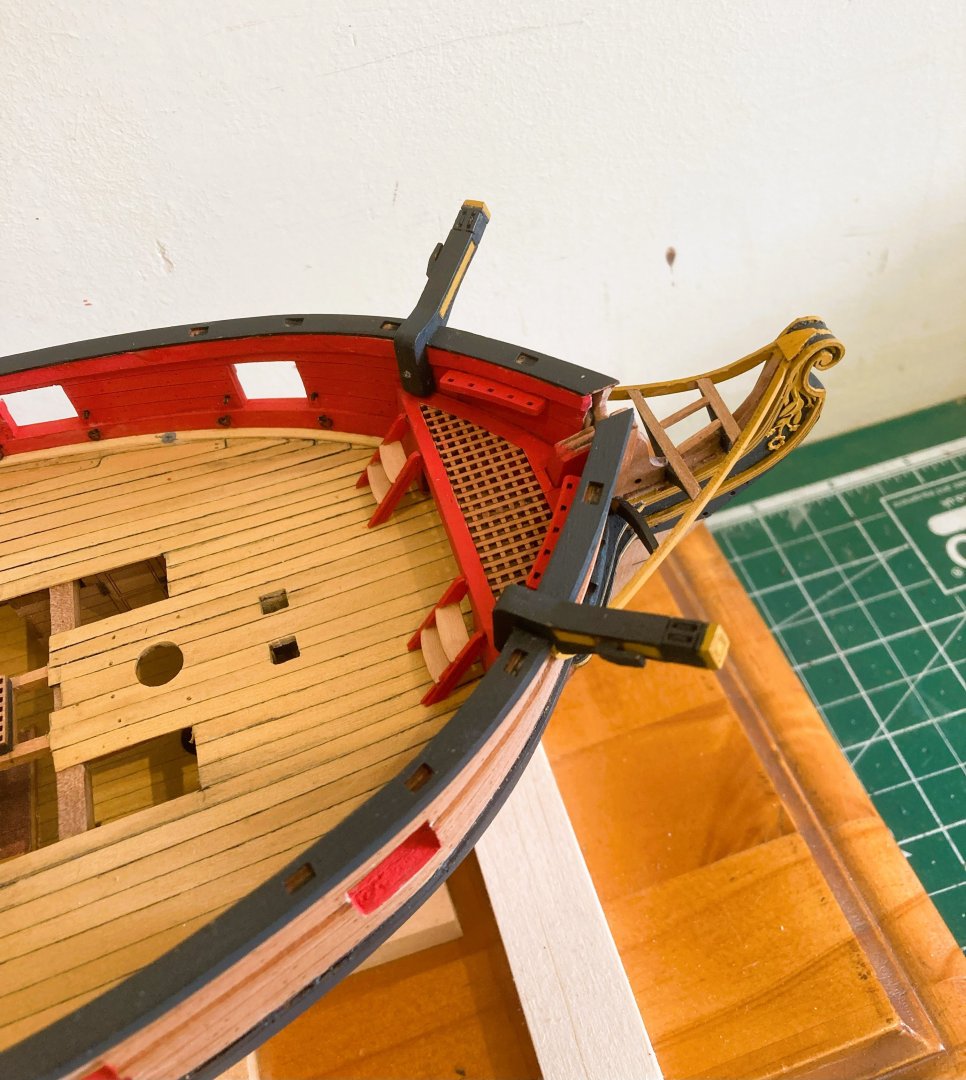
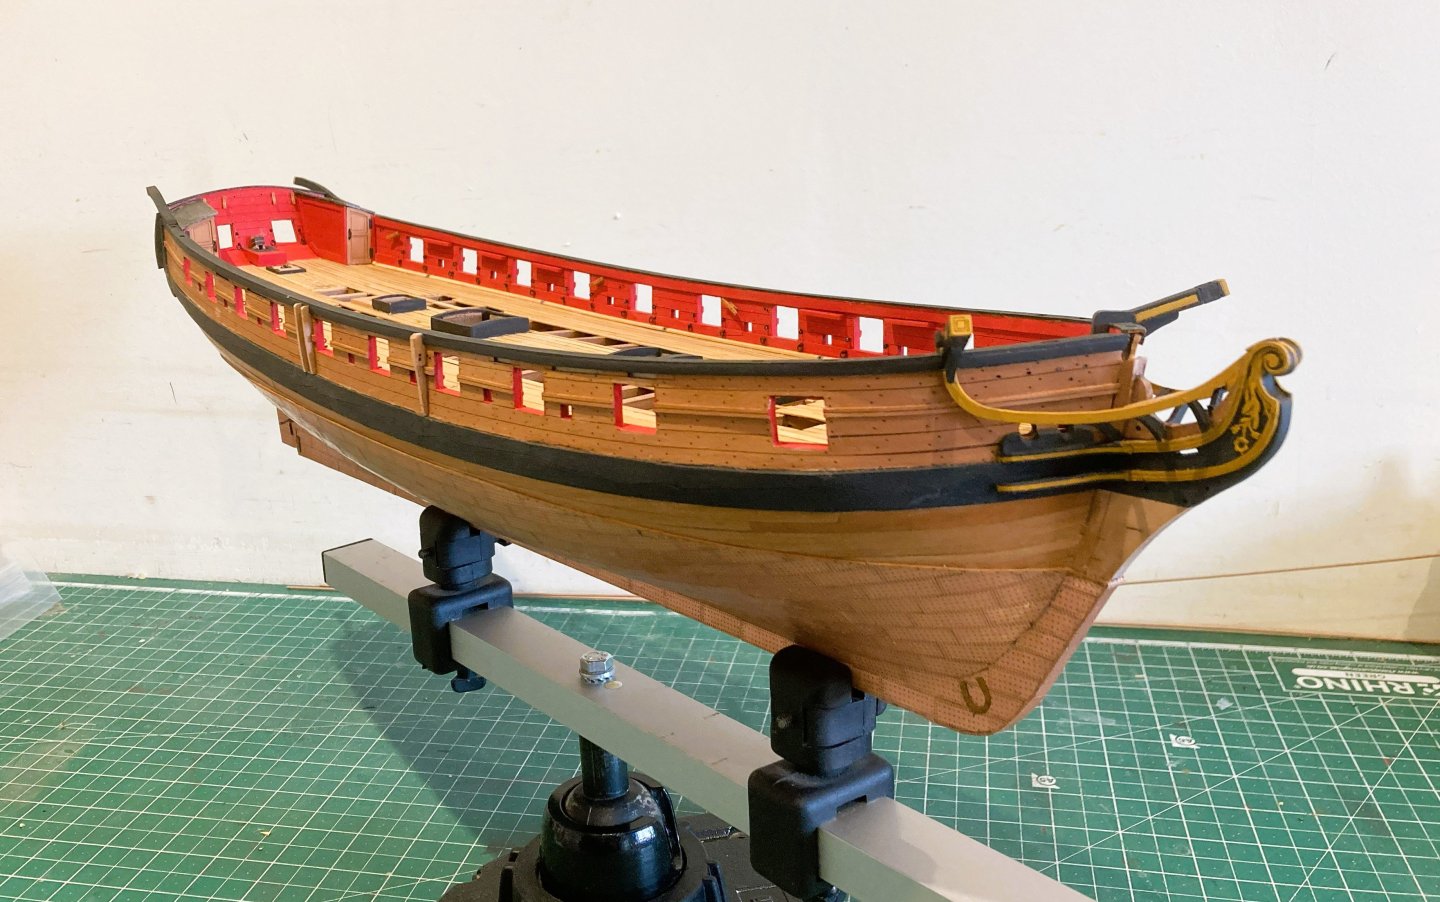
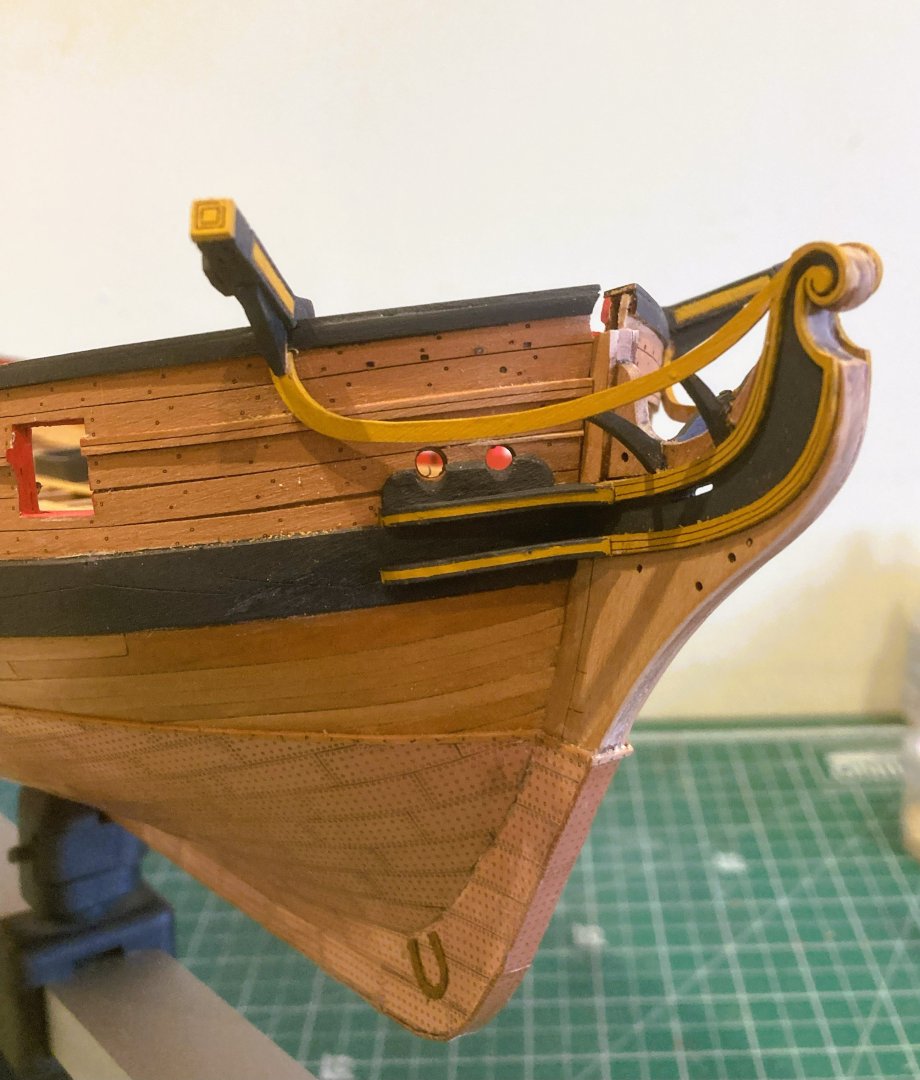
Cheers Ronald and Mark, and thanks to all following along, much appreciated. Post 64 Headworks cont’d Additional Timber heads 3848b I decided to have a punt at creating the aftmost timberhead as shown on the Adm plan above. 3864a I used the spare kit part as a template for the basic shape, traced onto some spare 1.5mm fret, and cut out on the jigsaw. 3869a 3875a 3878a I suspect that some detail is missing from the head works, but unfortunately there doesn’t seem to be an Adm. plan of this area. 3880a I don’t know whether it is a kit simplification, or based on other sources, but I have doubts that the space between the Head timbers and rails would simply be a void. At the very least I would expect there to be Head beams running between the Head timbers, linked by Carlings in the fore/aft direction. 3887a I decided to add these and the saddle, but leave out any further enhancement. I’ll fit the carlings later, once I’ve checked that they don’t foul the Gammoning. 3897a Would there have been gratings, and seats of ease for the crew? Harpy did carry quite a large crew (121), and I presume the ‘Necessary’ at the stern was for the use of Officers.🤔 The final part is to add the decorative scroll work. 3901a This is primed with Metal Prep 4k before painting with ochre brown. 3883a 3891a 3893a 3886a The hull is complete now, but I think Harpy has raised more questions in my mind than Sphinx and Indy taken together, all great fun, and I’m enjoying this build far more than I imagined I would. ……..Back to the deck fittings. B.E. 15/04/2025


- 332 replies
-
- 31
-
-
- Harpy
- Vanguard Models
- (and 1 more)
-
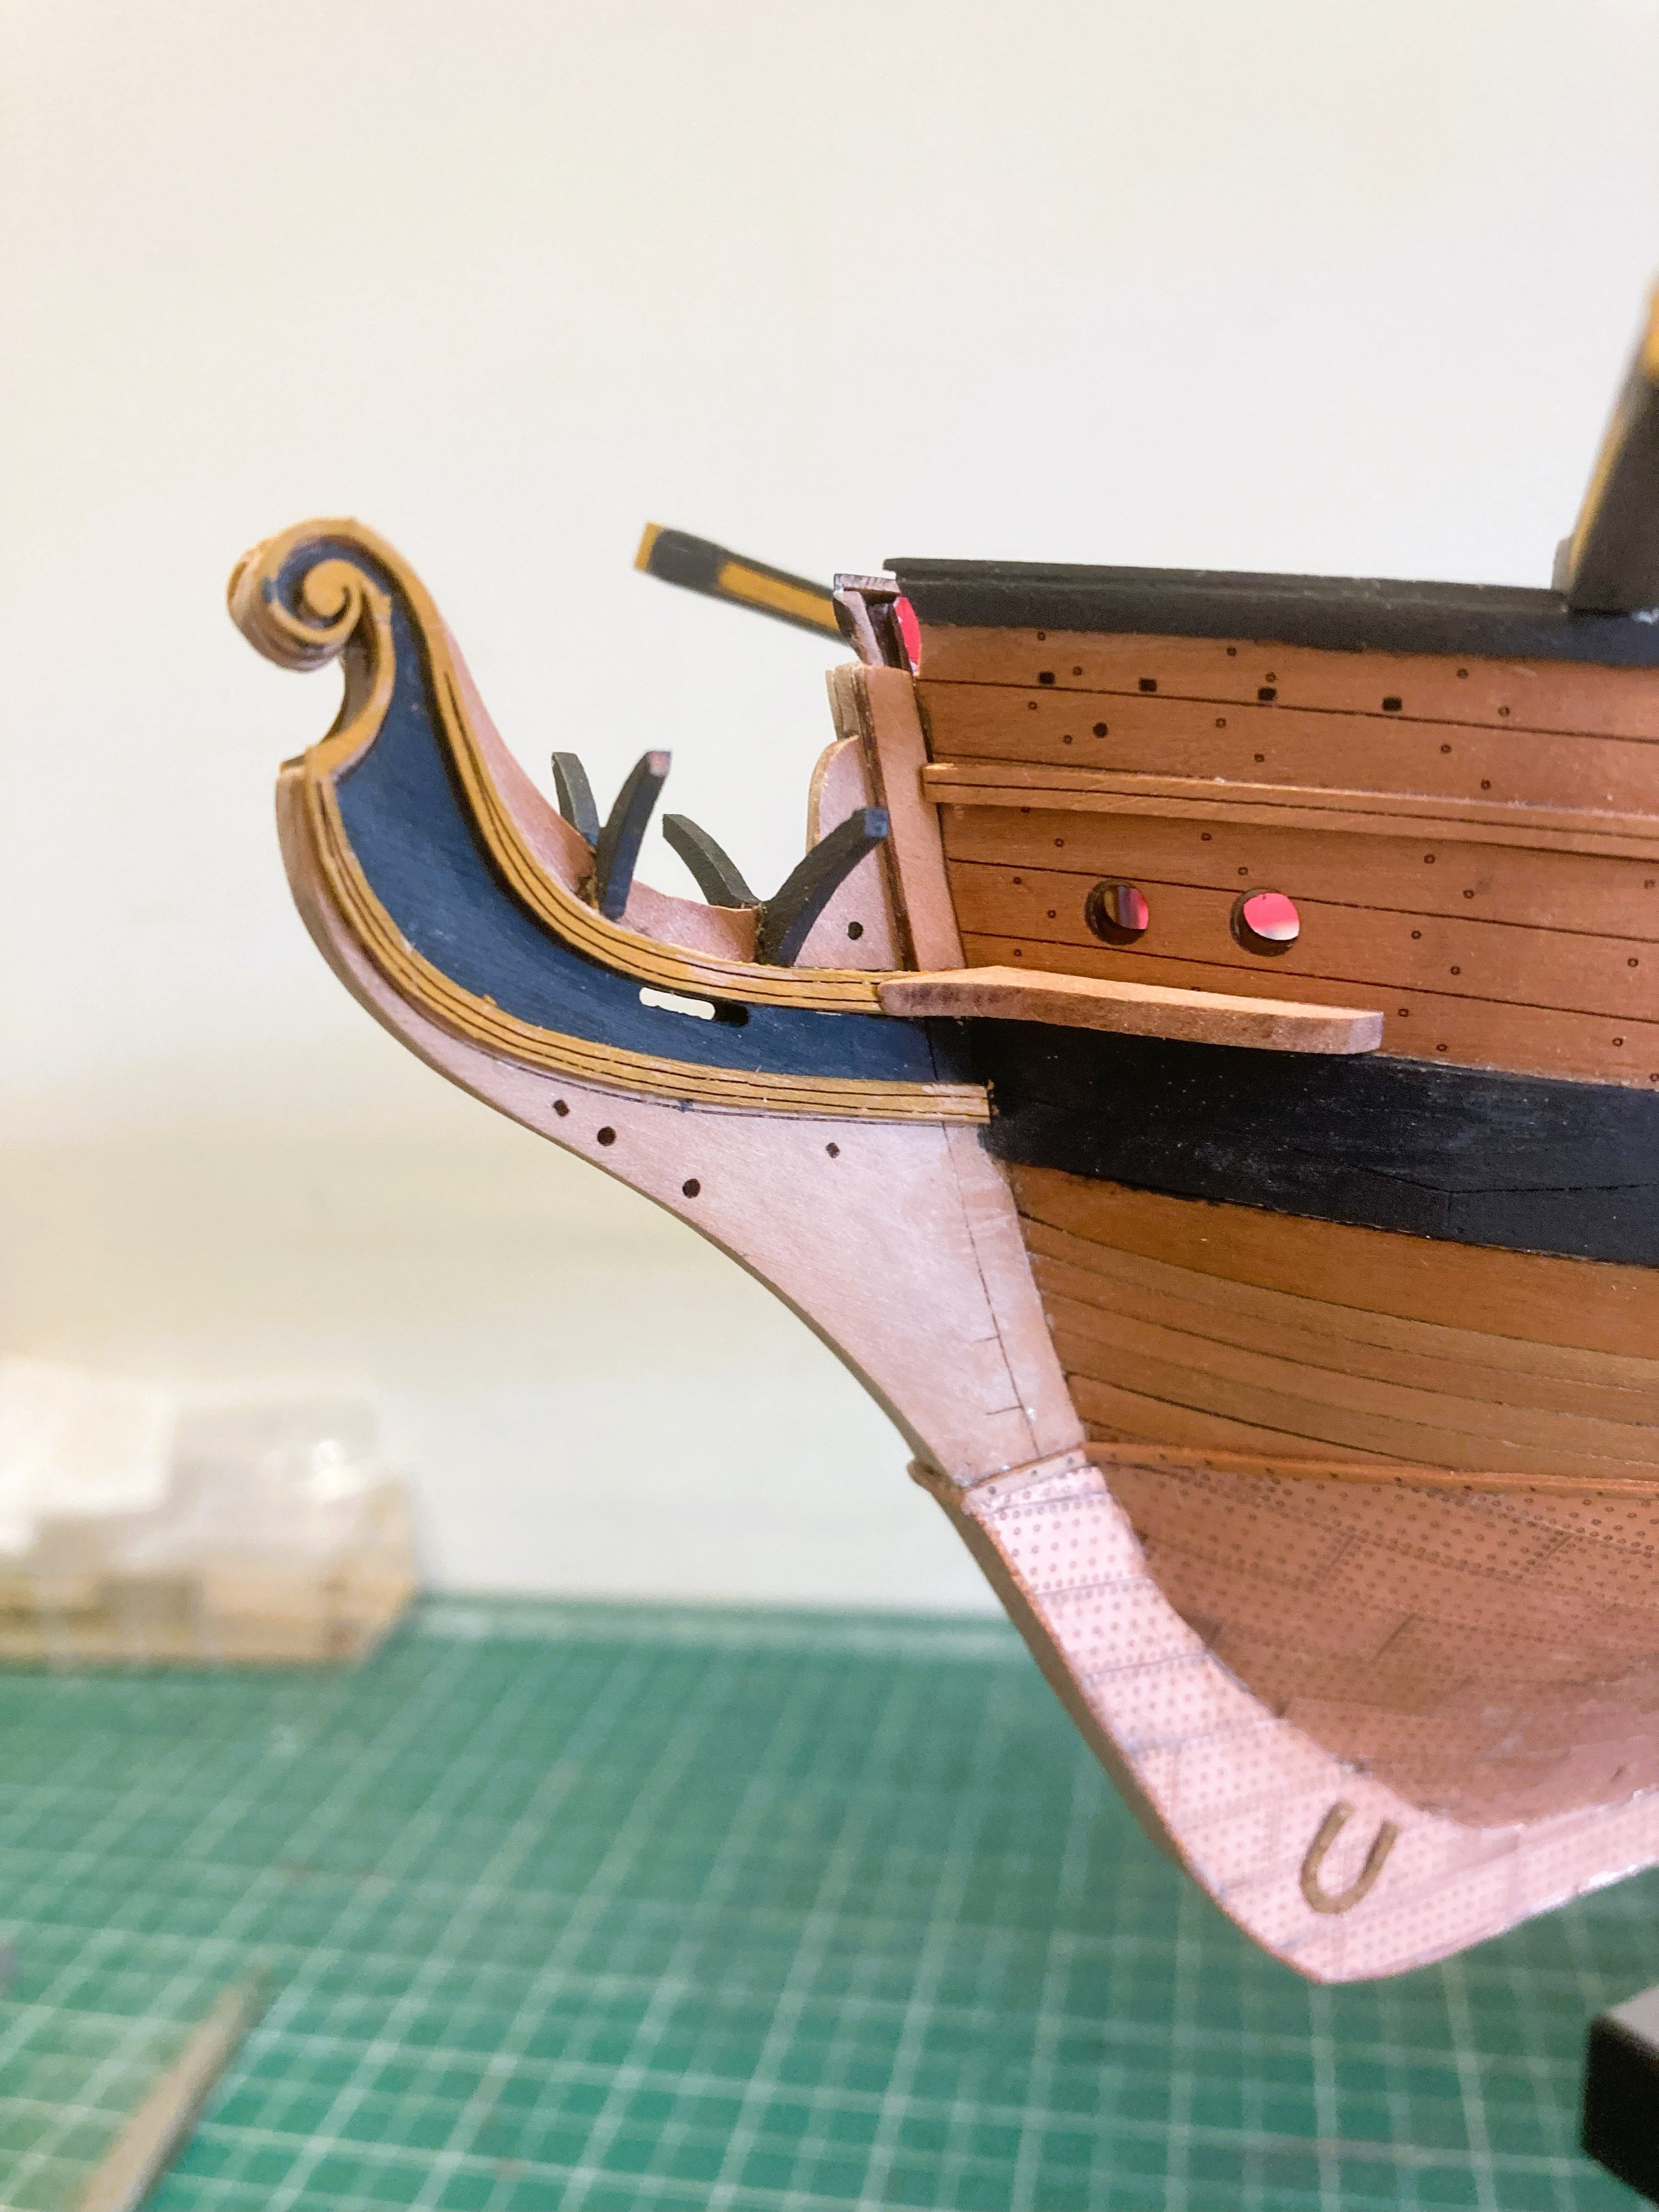
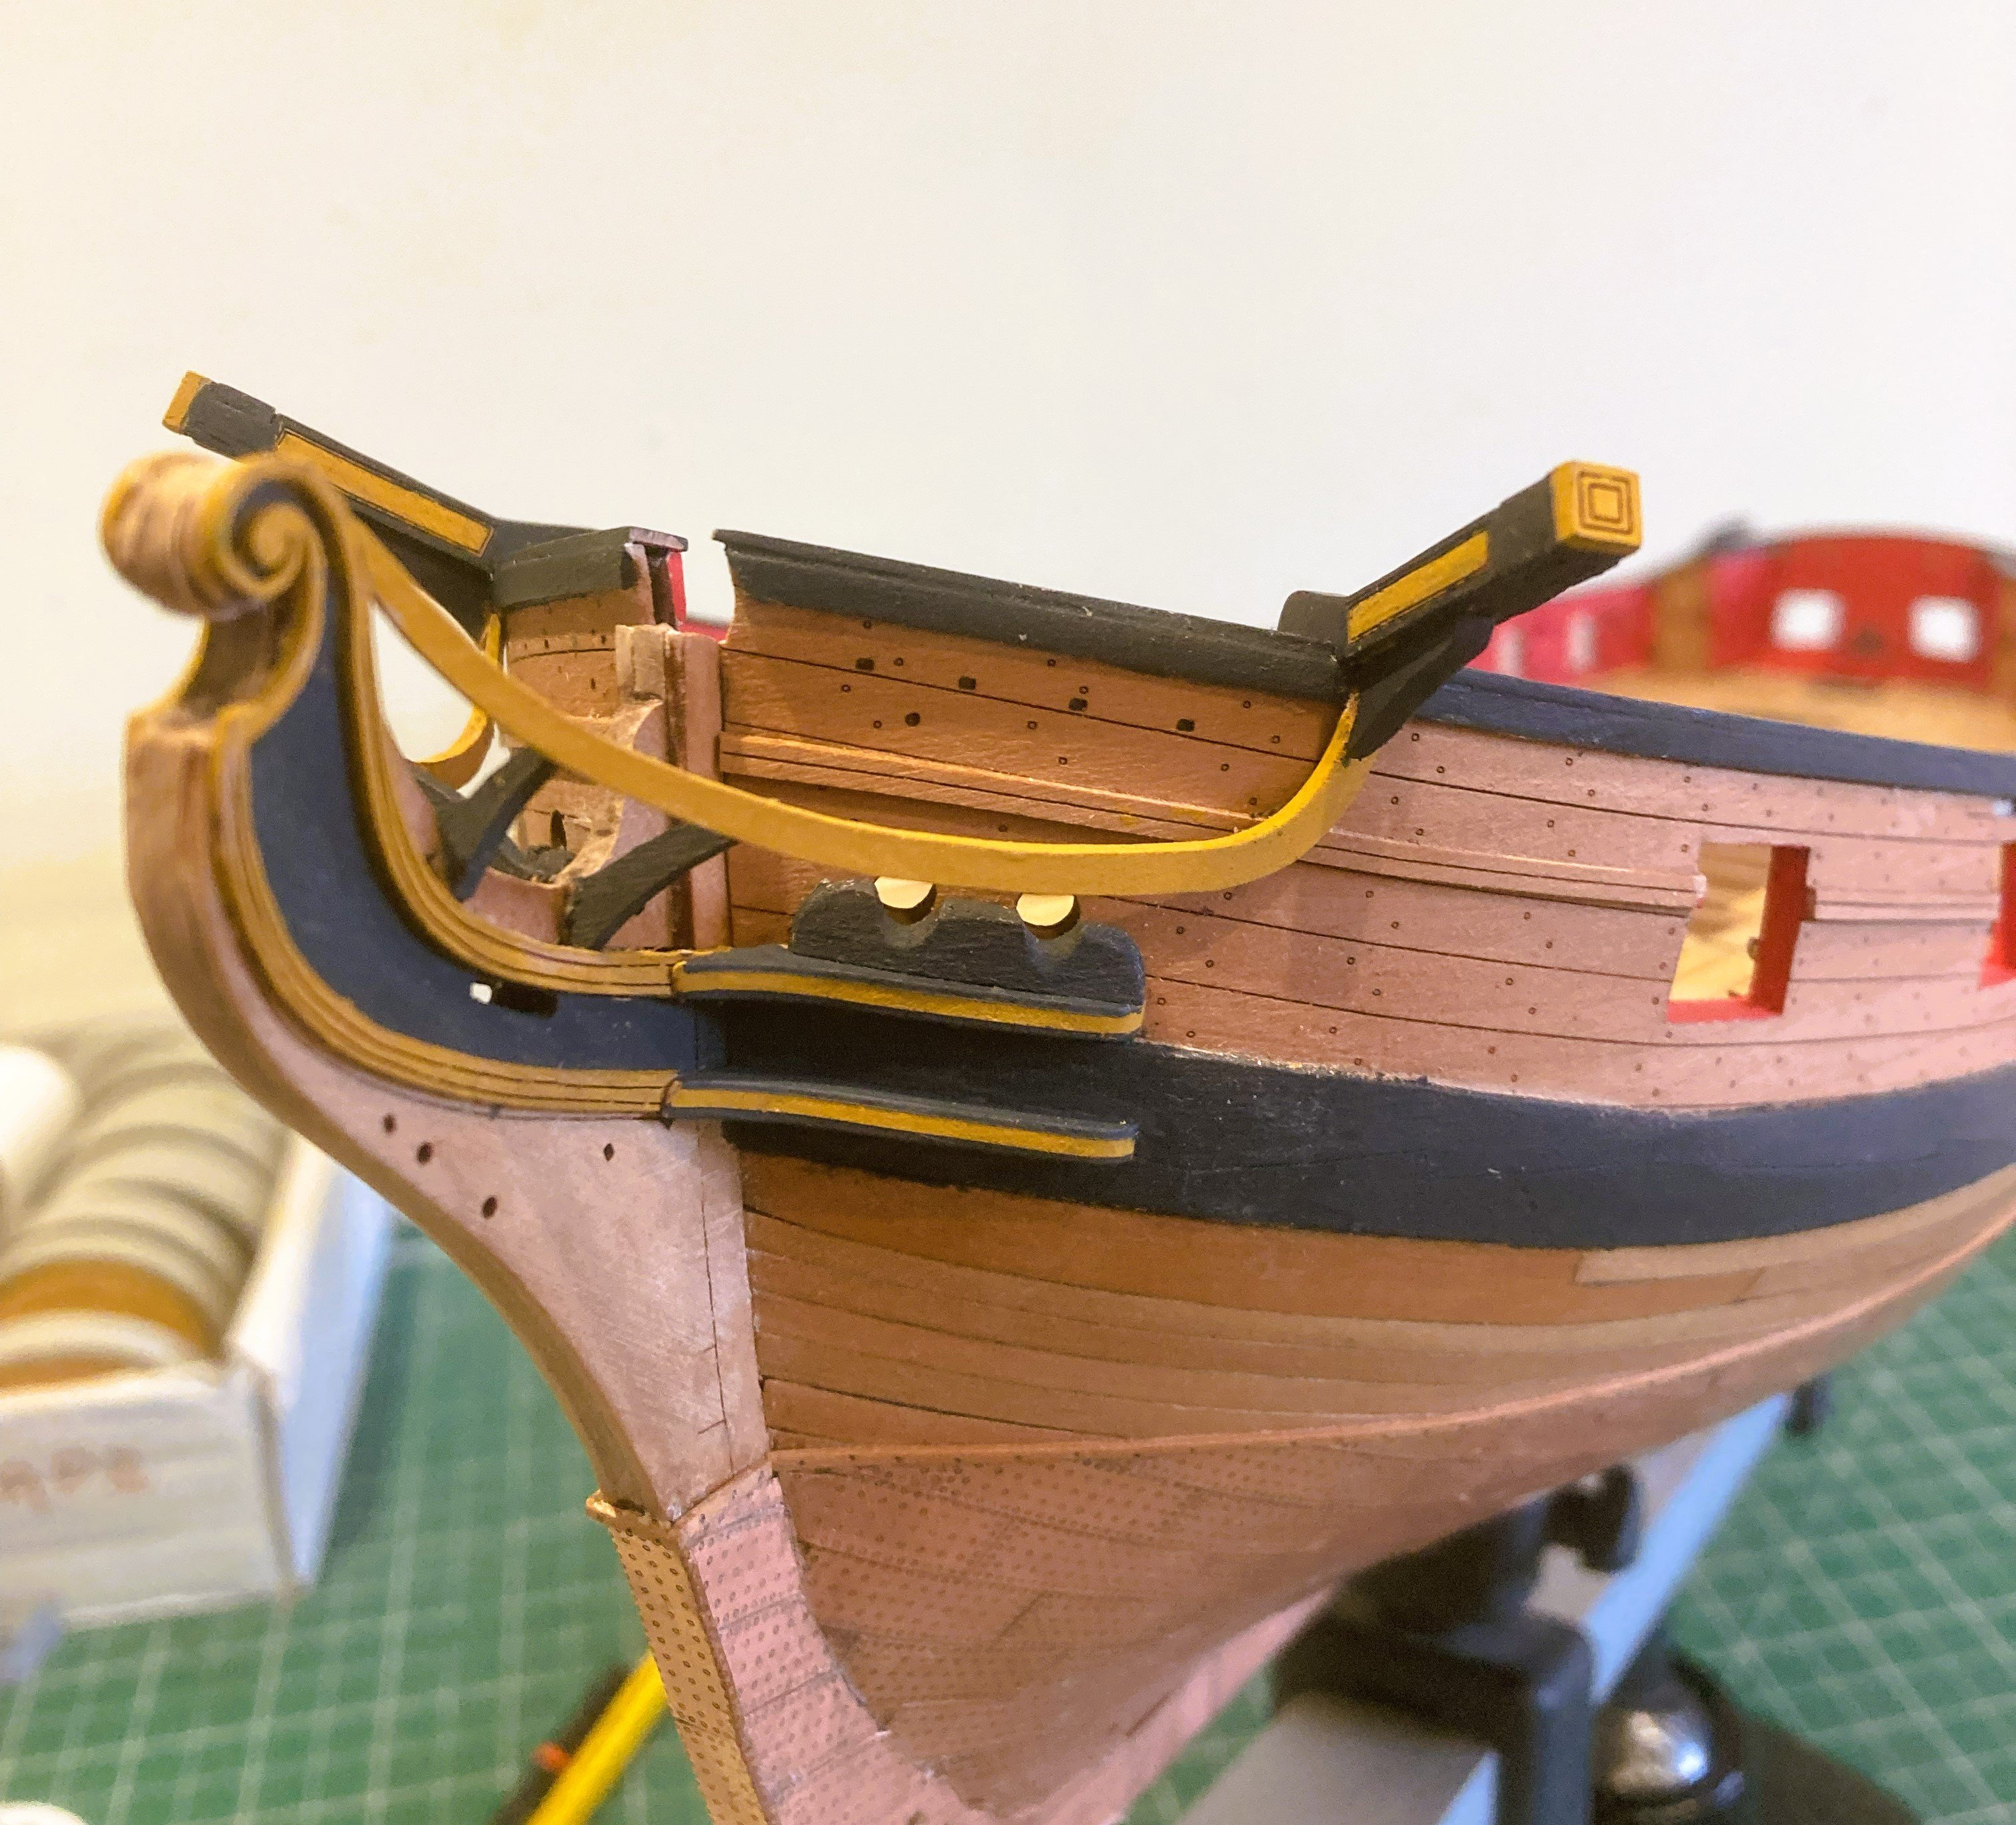
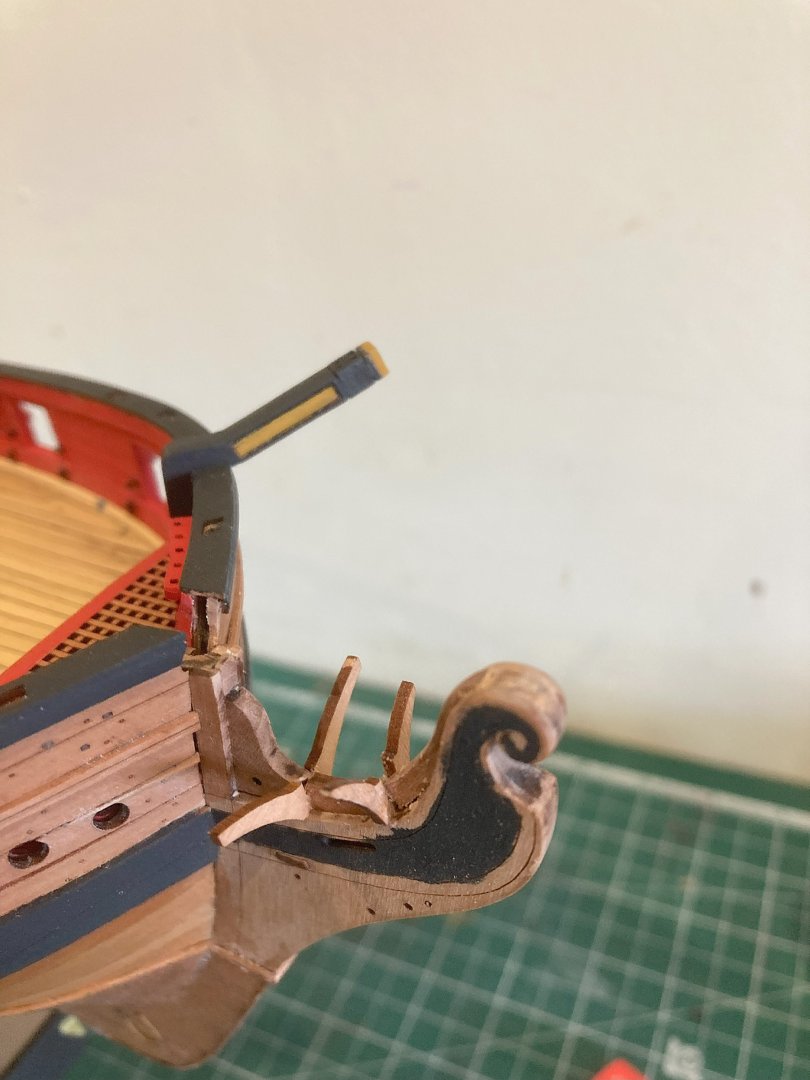
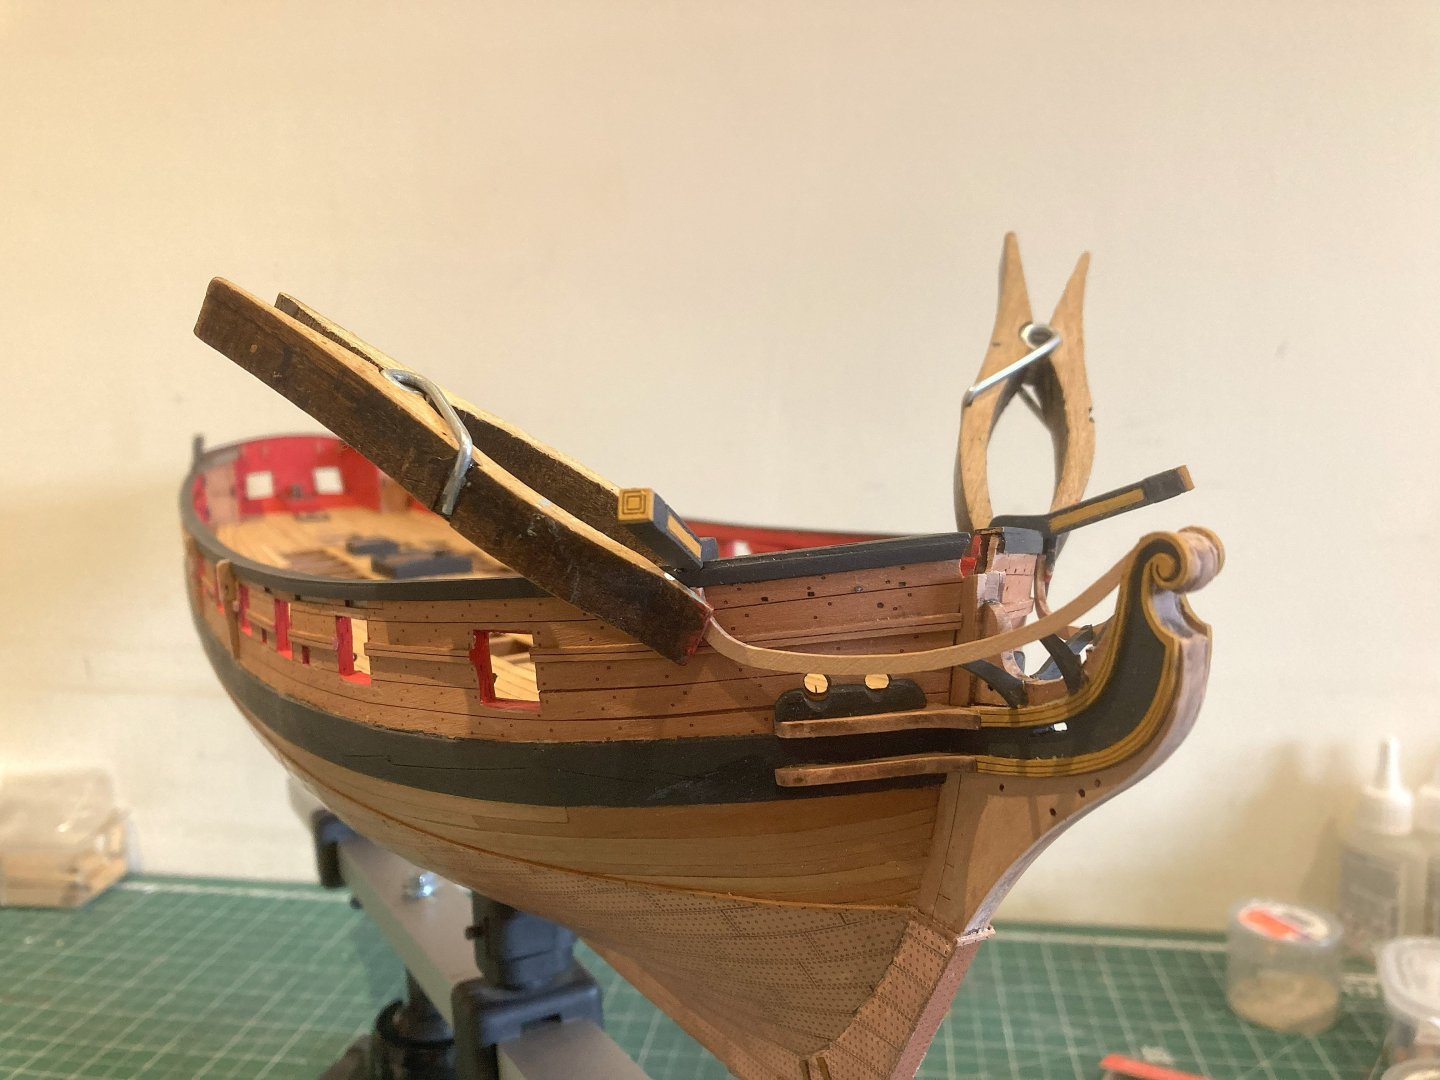
Post 63 The Head works. This is a critical area in the modelling of ships of this type, so, the first thing that happens is the part that represents the gammoning knee/ extension piece breaks into three pieces. ... and I thought I had soft hands🫤 3840a These were reconstructed on the model before moving on. There are two head timbers and the smaller forward one also broke into two parts. Fortunately there are spares for the head timbers. 3848b I noted during working this area that the Adm. Plan shows a third head timber close by the stem? I’ll have a look once the Main rails are fitted how feasible it would be to install a third set. 3842a Great care is necessary handling the Hair brackets and I didn’t attempt to remove the char from the edges. They were pre-painted using Vallejo Ochre Brown before fitting. 3846a The upper and lower cheeks are nicely formed and required very little adjustment to fit. I fitted the upper one first which sits atop the wale, to act as a guide for fitting the lower. The Hawse Bolsters require reducing in depth by around 2mm, and are improved by rounding the edges and chamfering the grooves over which the cables would run to reduce wear. I also induced a slight round to match the curve of the bow area. The Main Rails 3847a I usually find holding the rails in place for dry fitting a bit tricky, but not so bad with Harpy. Pleased to note that the rails sit against the head timbers without manipulation, so I think using pva on the hull and cyano on the head timbers will work. I was a little confused about the positioning of the Main rail where it meets the cathead. The manual and the prototype photos show it ending beneath the Sheer rail; Plan 5 suggests it runs over the rail against the underside of the Cathead. There are examples of both approaches on builds ahead of me at this point. 3860a I opted for the lower position which makes it flush with the Sheer rail, but importantly it still met the head timbers correctly. Cathead support Bracket. This fits over the Main Rail beneath the Cathead. 3856a The brackets do require some tweaking for best fit and it improves the aesthetics to simply shape a slight curve on the outer sides of the bracket. 3852a 3861a Not quite done with the headworks yet….. B.E. 14/04/2025


- 332 replies
-
- 24
-
-
- Harpy
- Vanguard Models
- (and 1 more)
-
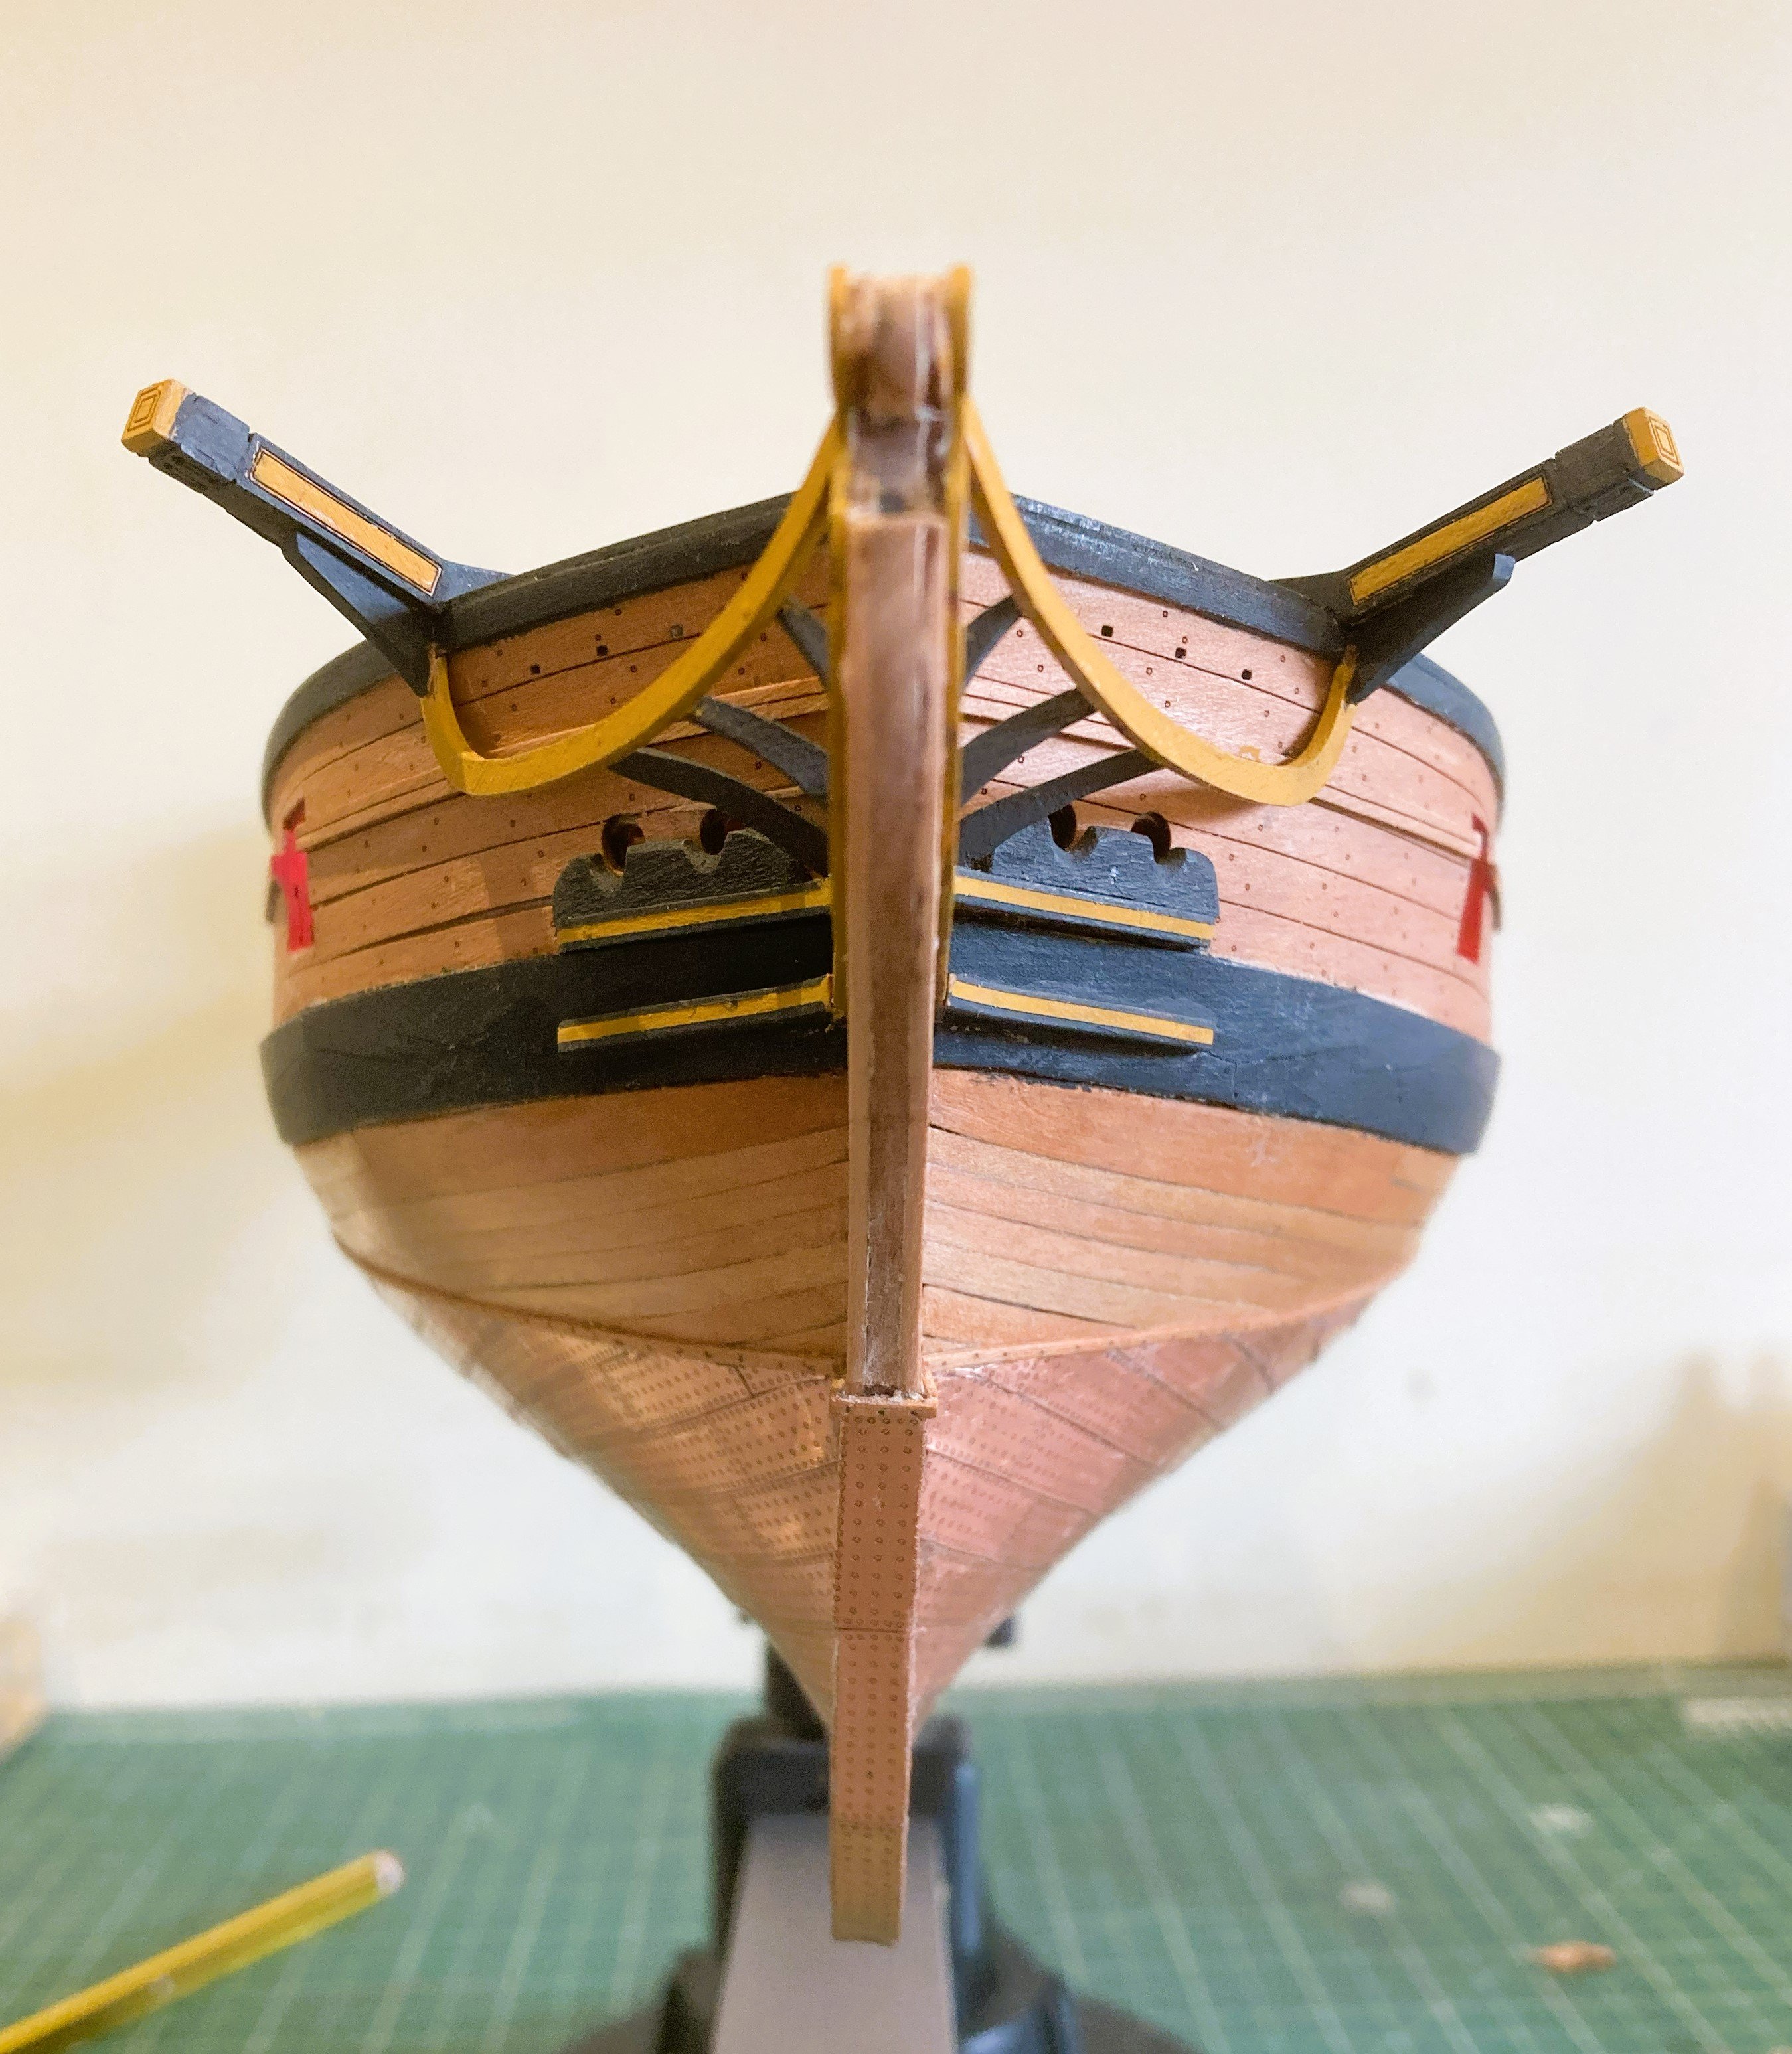
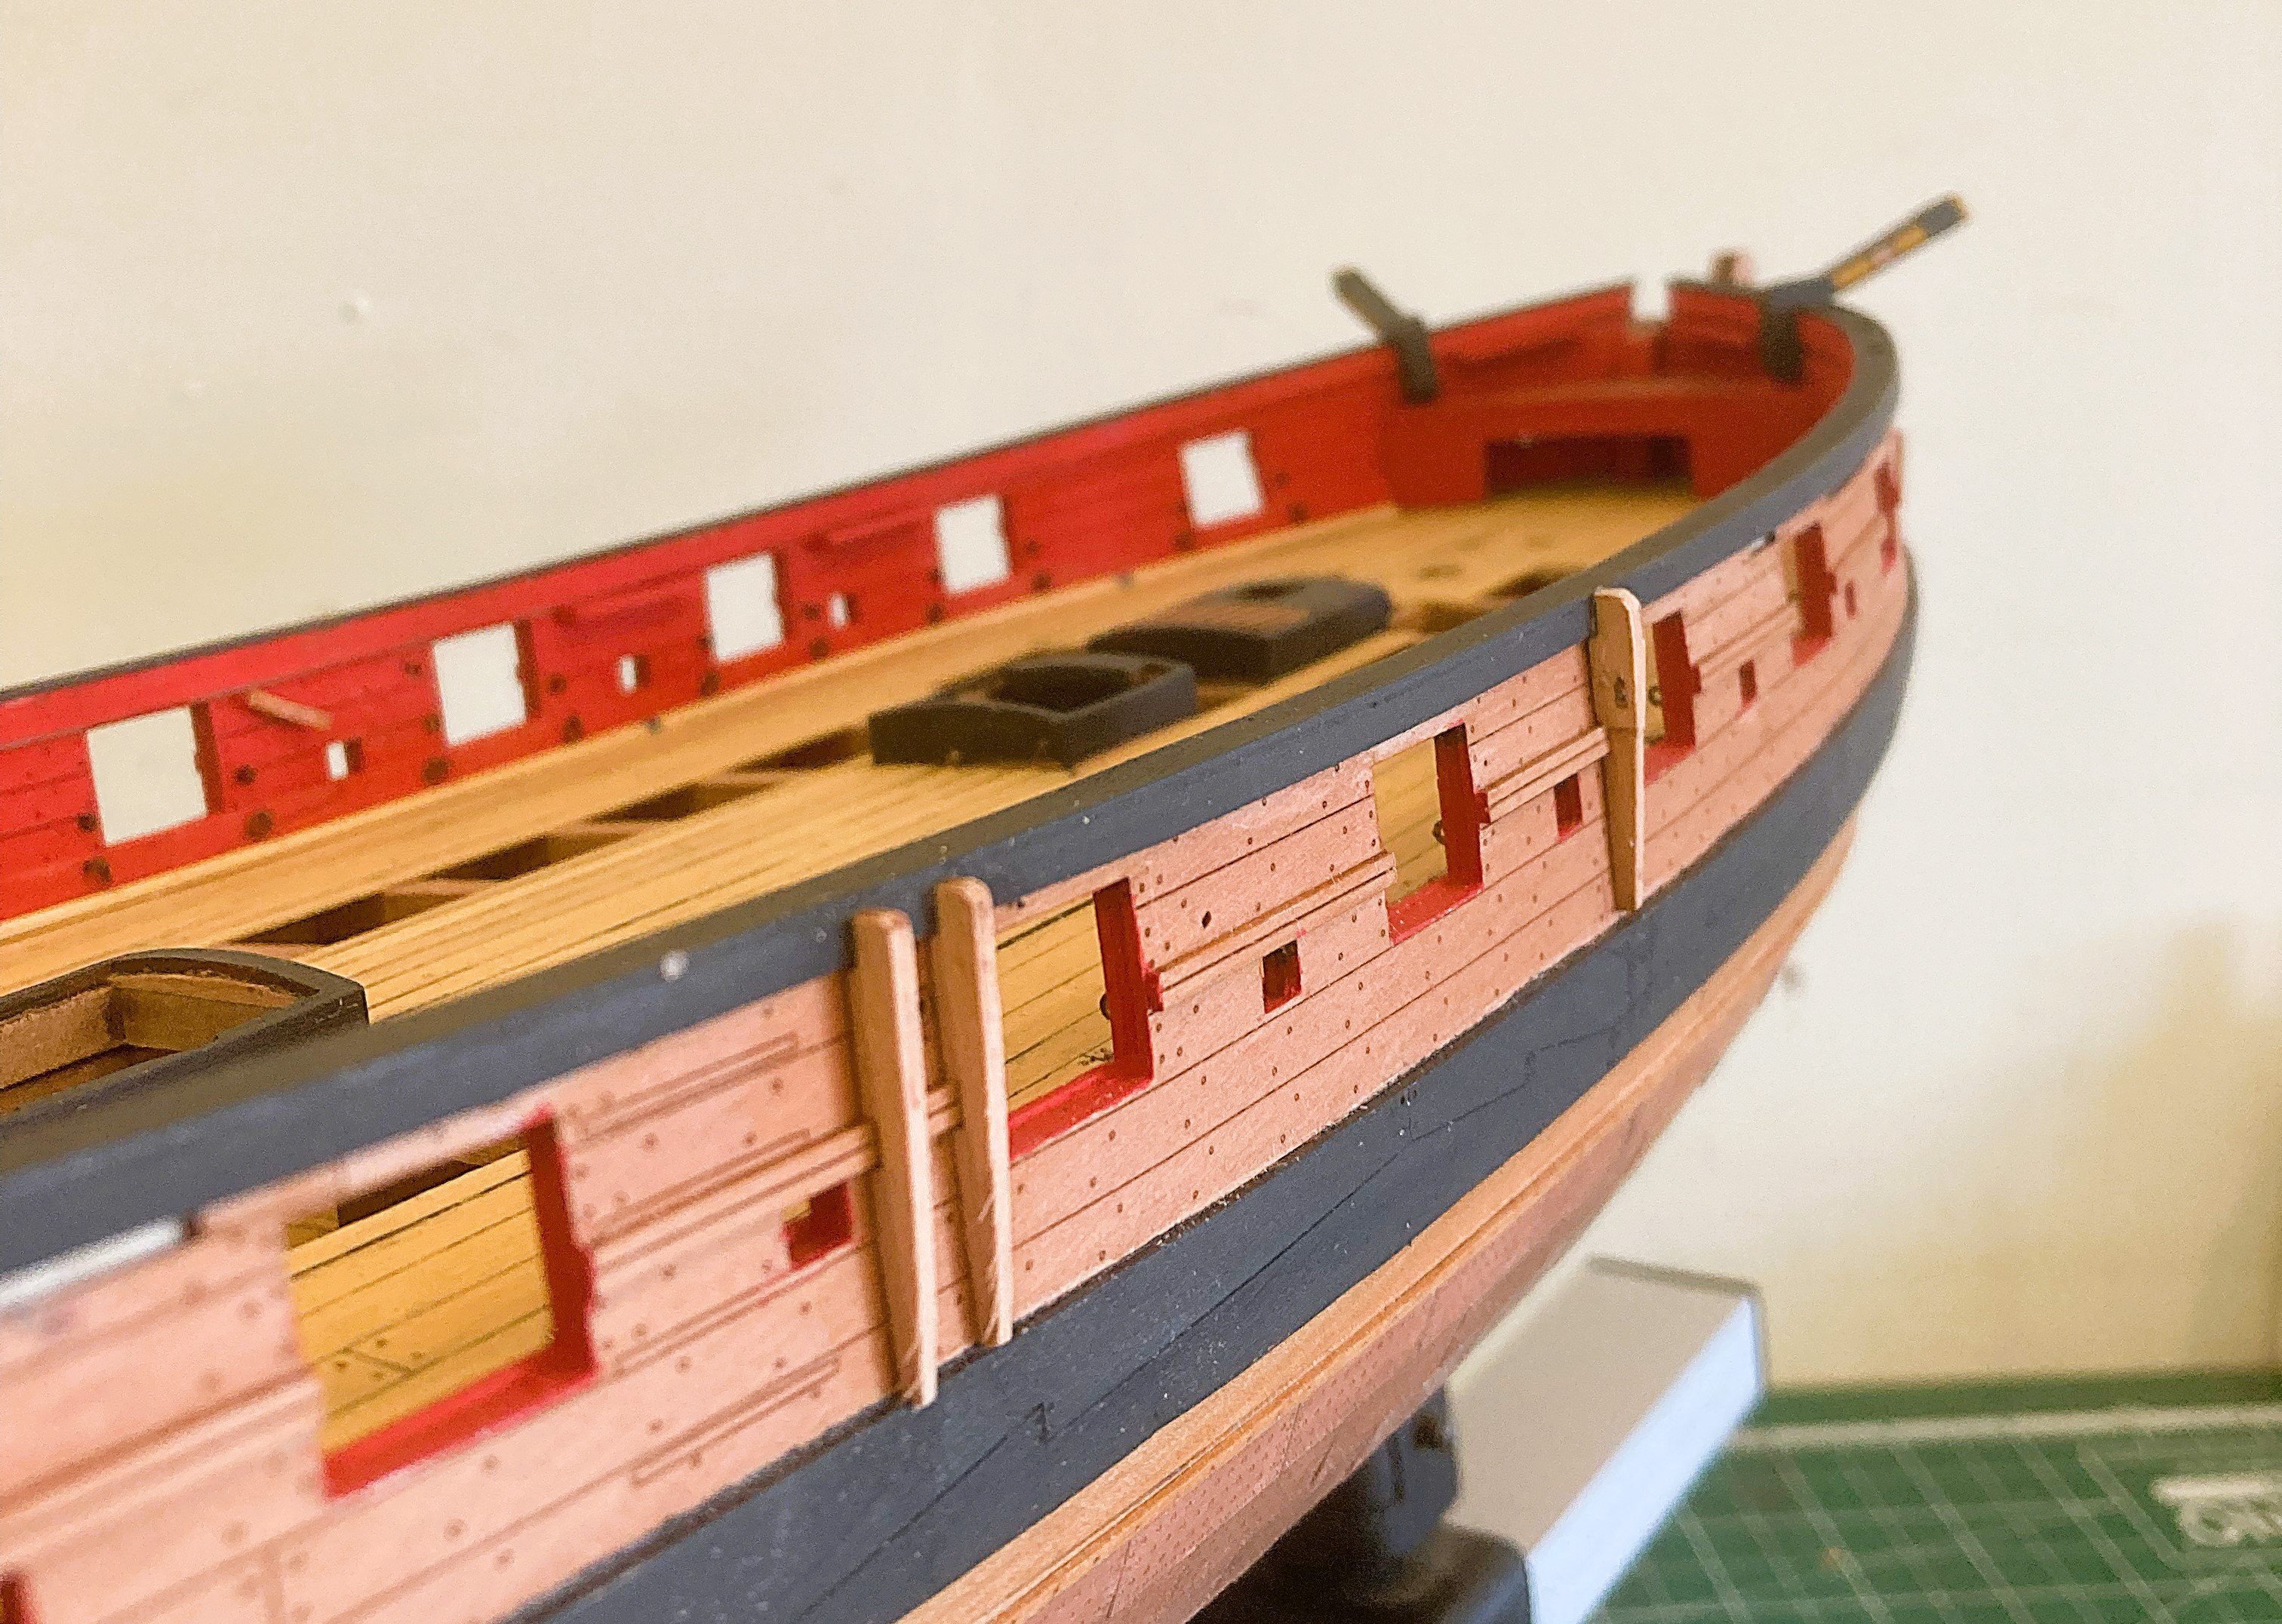
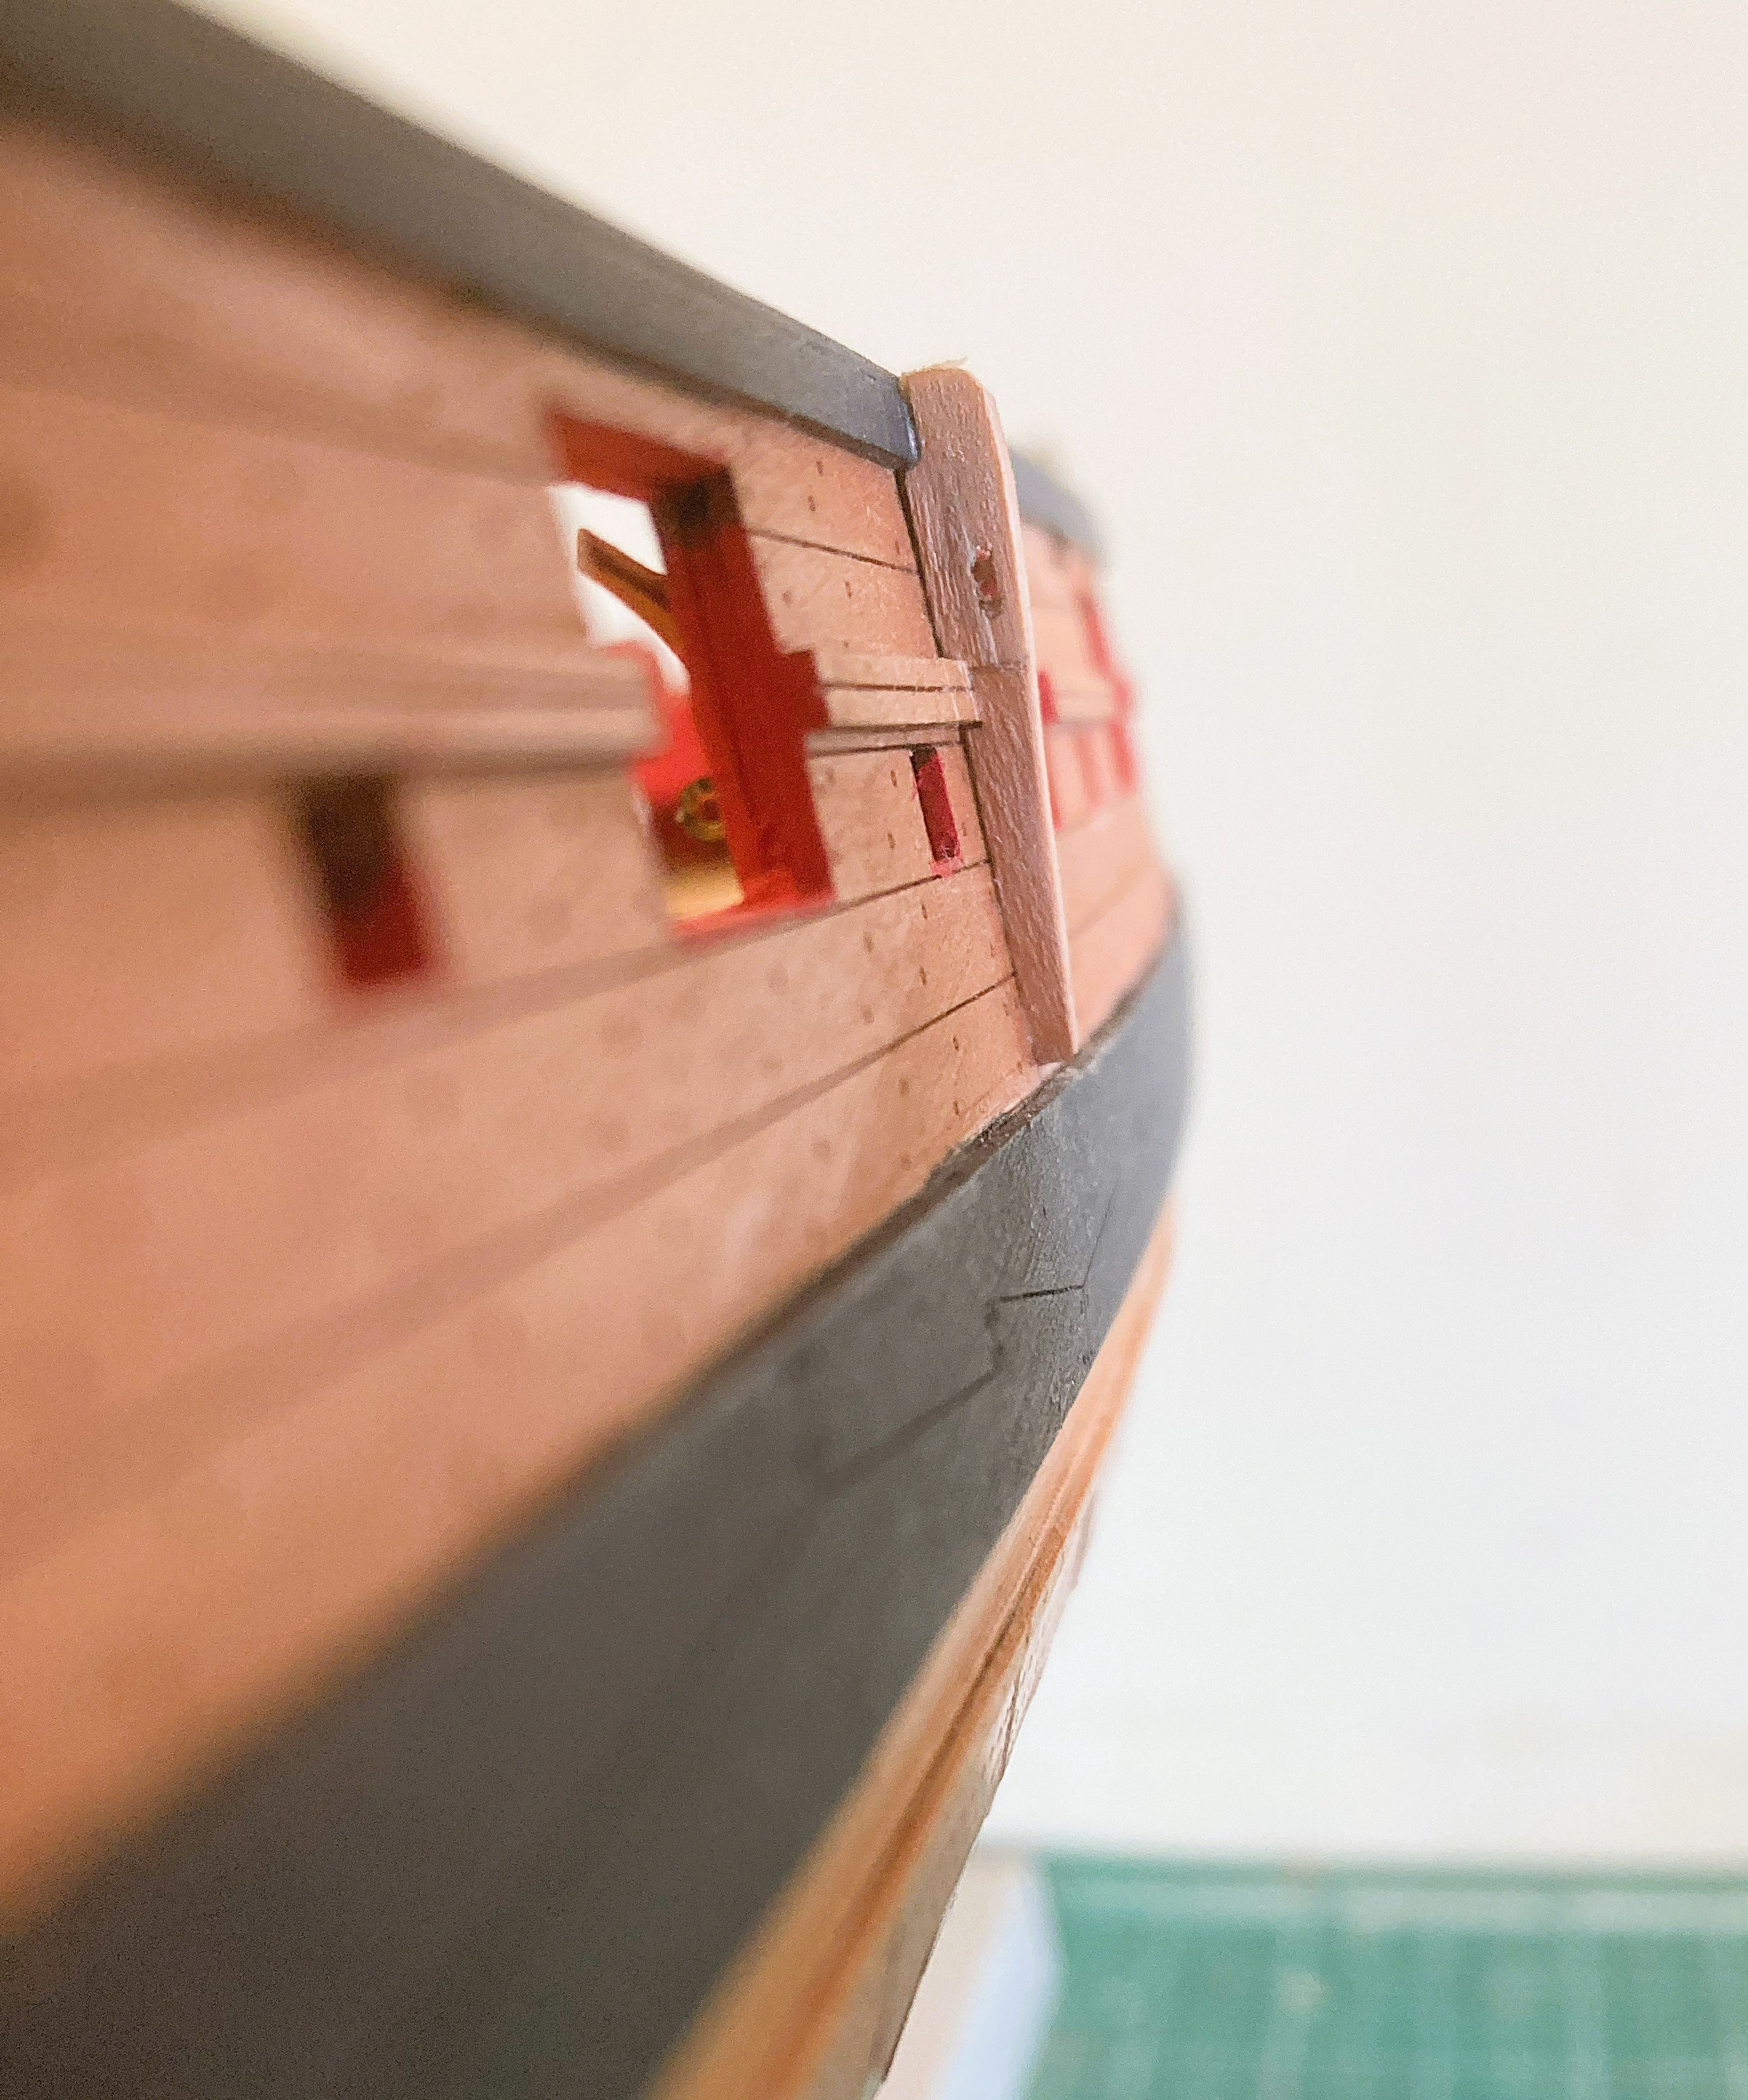
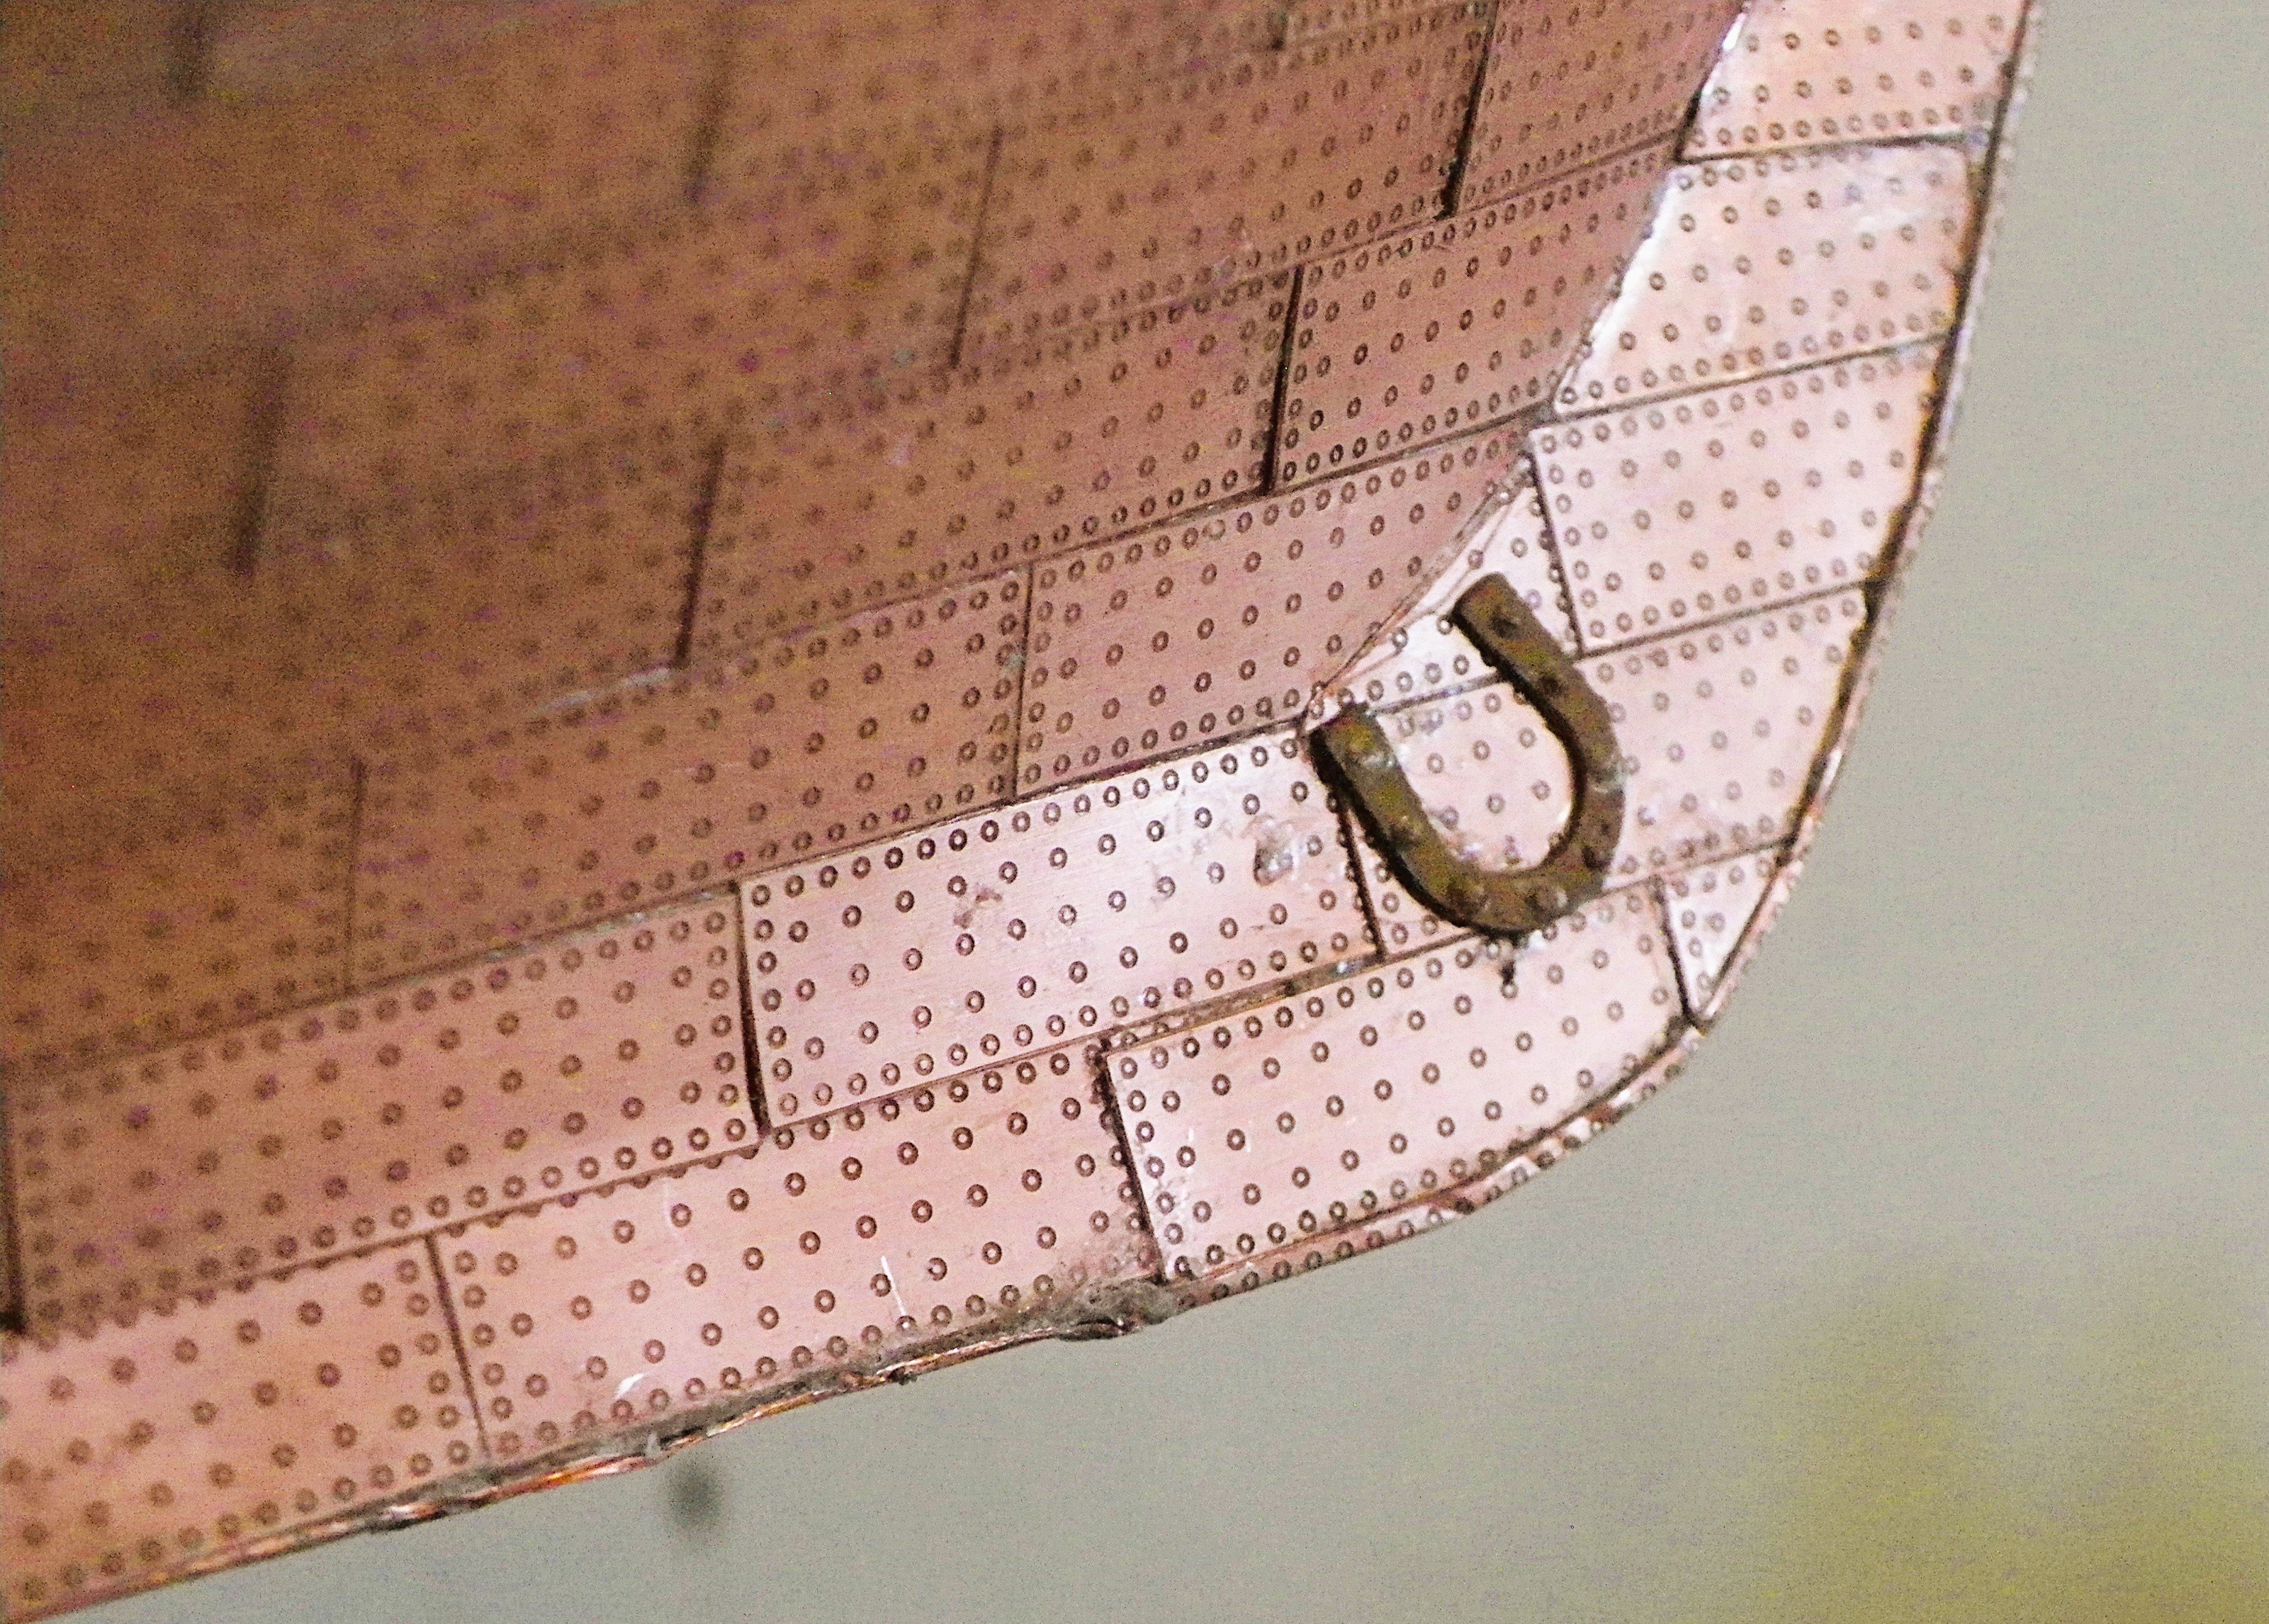
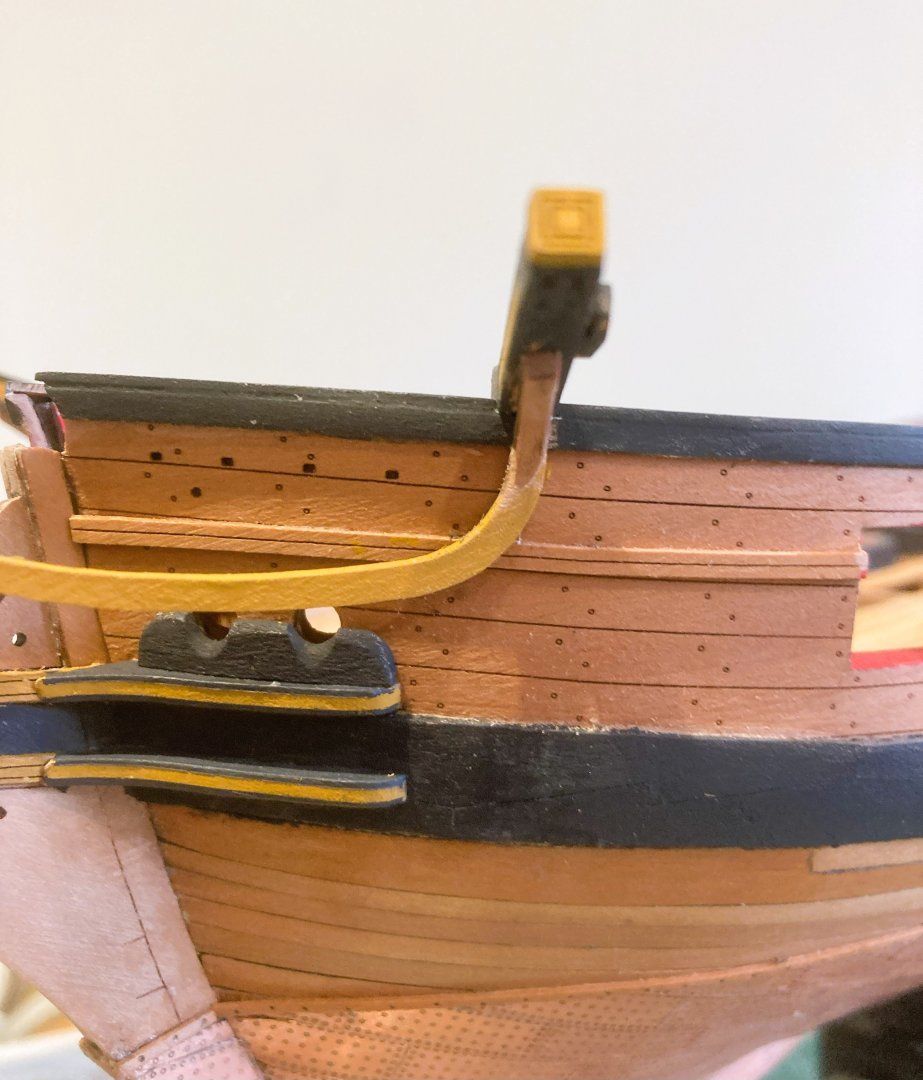
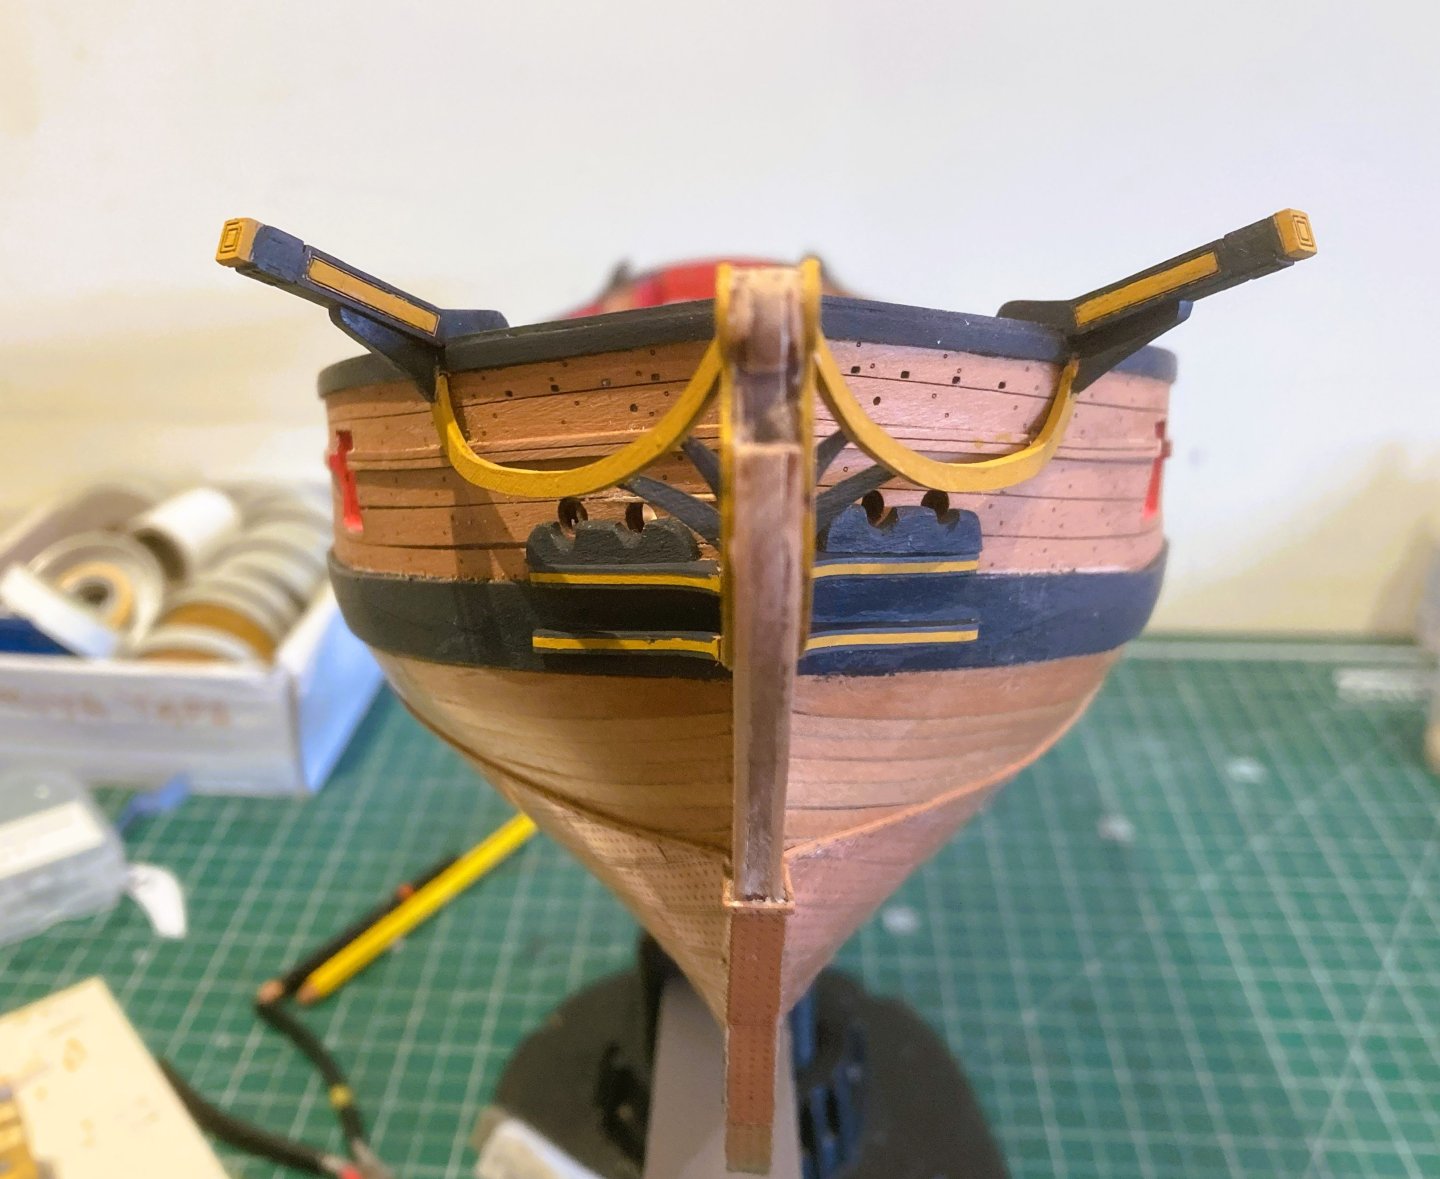
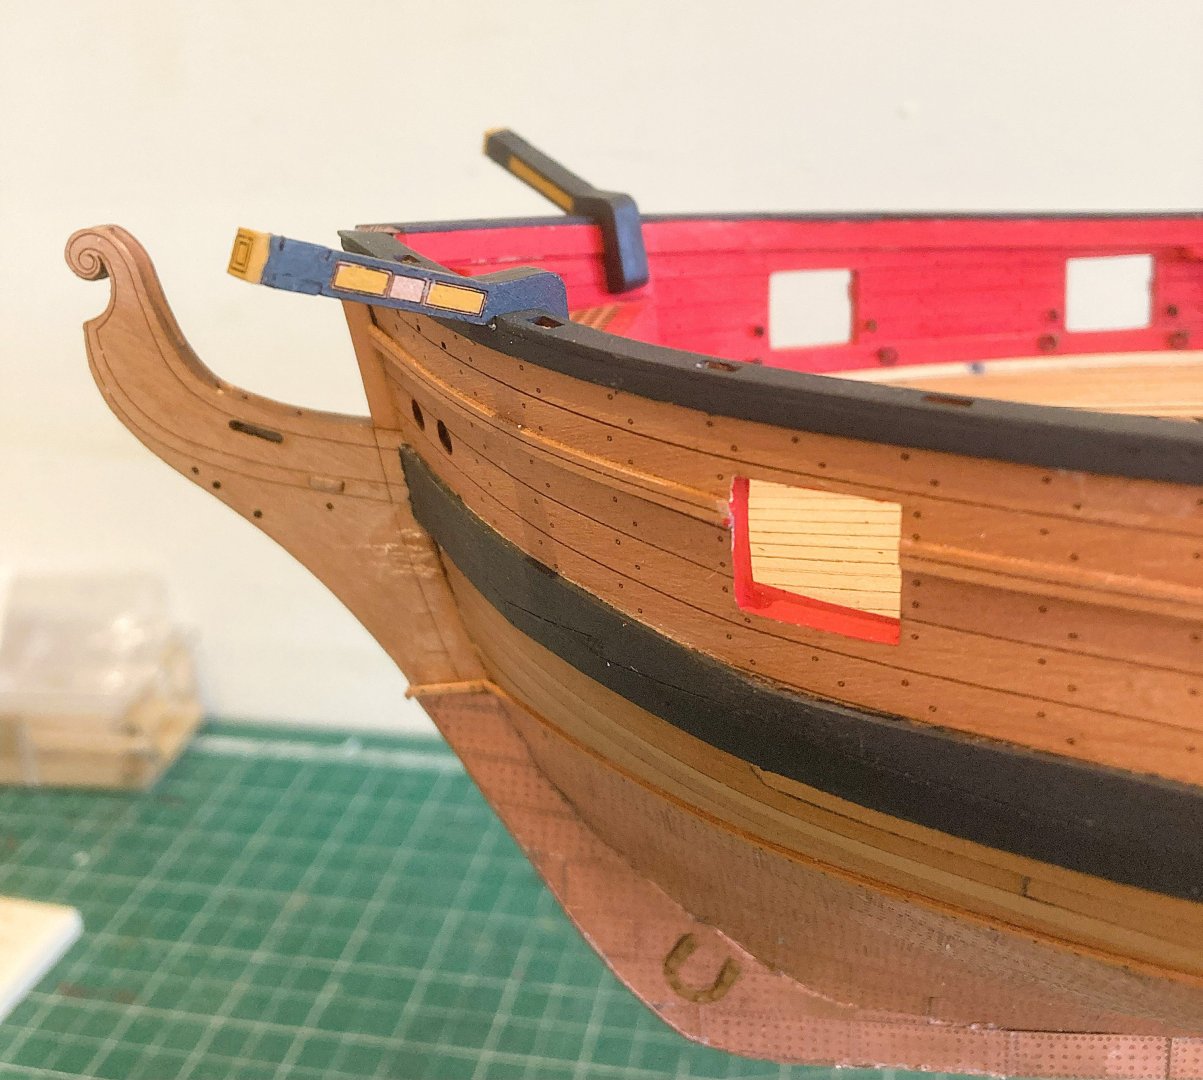
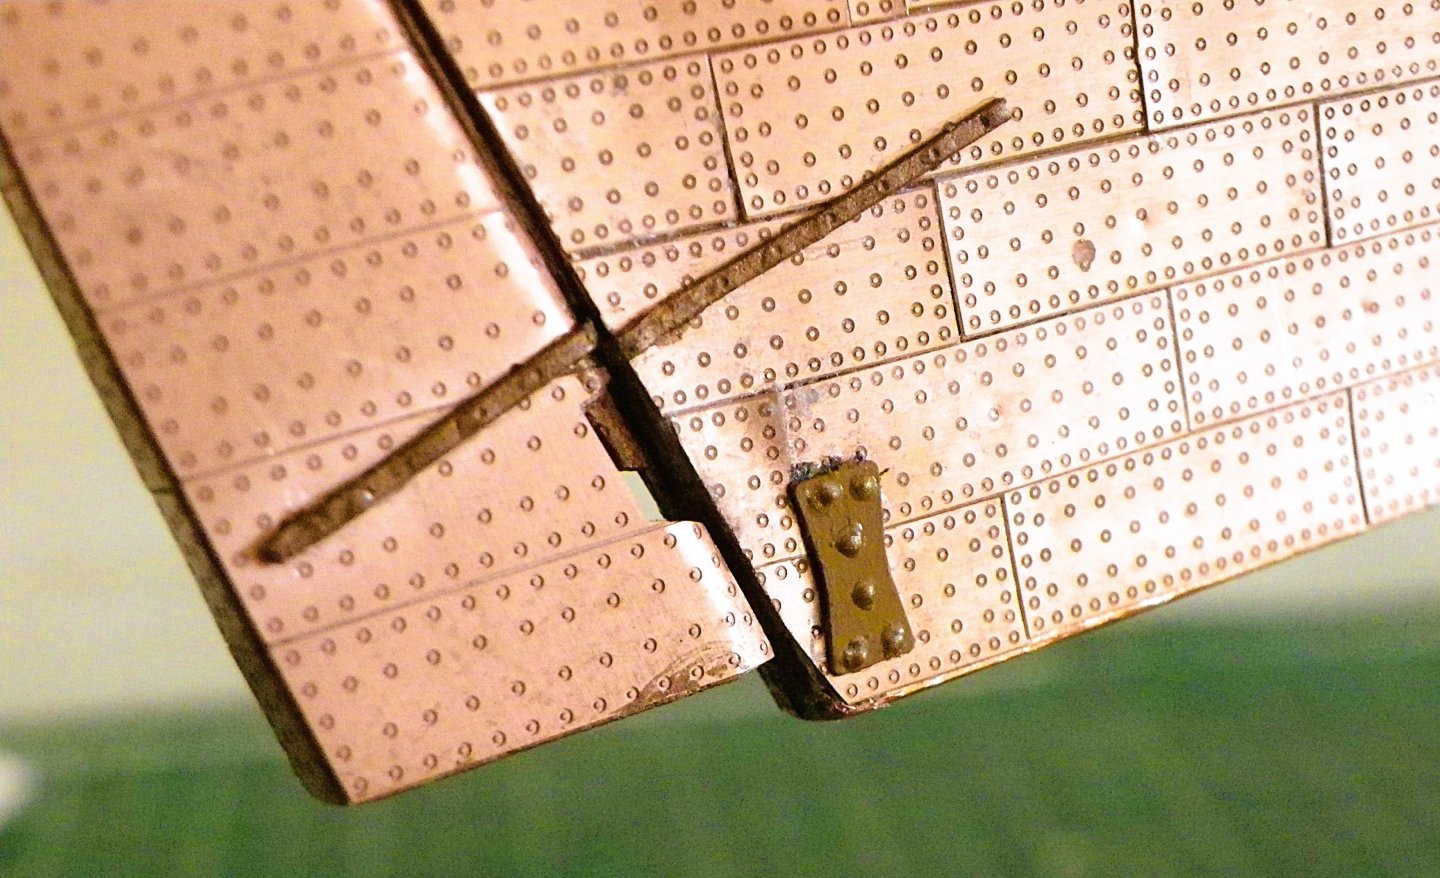
Post 62 Hull fittings I begin by adding the Horseshoe and fish plates. These are brass etch but are ideal for production in laser board as demonstrated by Chuck’s Syren versions. For Harpy I used the kit pe versions. 0952 I initially blackened them and then painted using the same mix as I used for the rudder hinges and straps. 0951 Attached with cyano using a template for position. Bolt heads represented by pva. I also attached the spectacle plate. The plate is usually attached to the rudder around the waterline level just below the lower hance. 0941 This is how it is shown on Plan 4 sitting just above the Pintle strap. 0942 On the prototype model and Plan10 it is positioned just below the second (upper) hance. A case of you pays your money, you takes your choice. 0947 I opted to place as per Plan 4, it looked more authentic to my eye. I hope I have inverted the hull for the last time now so I move onto fitting the Catheads and Stern Davits. 3821a 3823a 3819a 3820a I drilled thro’ the sheaves before fitting, and pinned the aft end of the Davits. I next added the Fenders and Chesstrees to the hull. 3817a A little taper was applied to the Fenders as per the Adm. Plan. 3832a As produced by the Laser machine the Chesstrees look a little blocky and unfinished. A little shaping reduces that obvious kit part look. 3829a I’ll sort the side steps out later, for now I’m moving onto the Headworks. B.E. 11/04/2025


- 332 replies
-
- 25
-
-
- Harpy
- Vanguard Models
- (and 1 more)
-
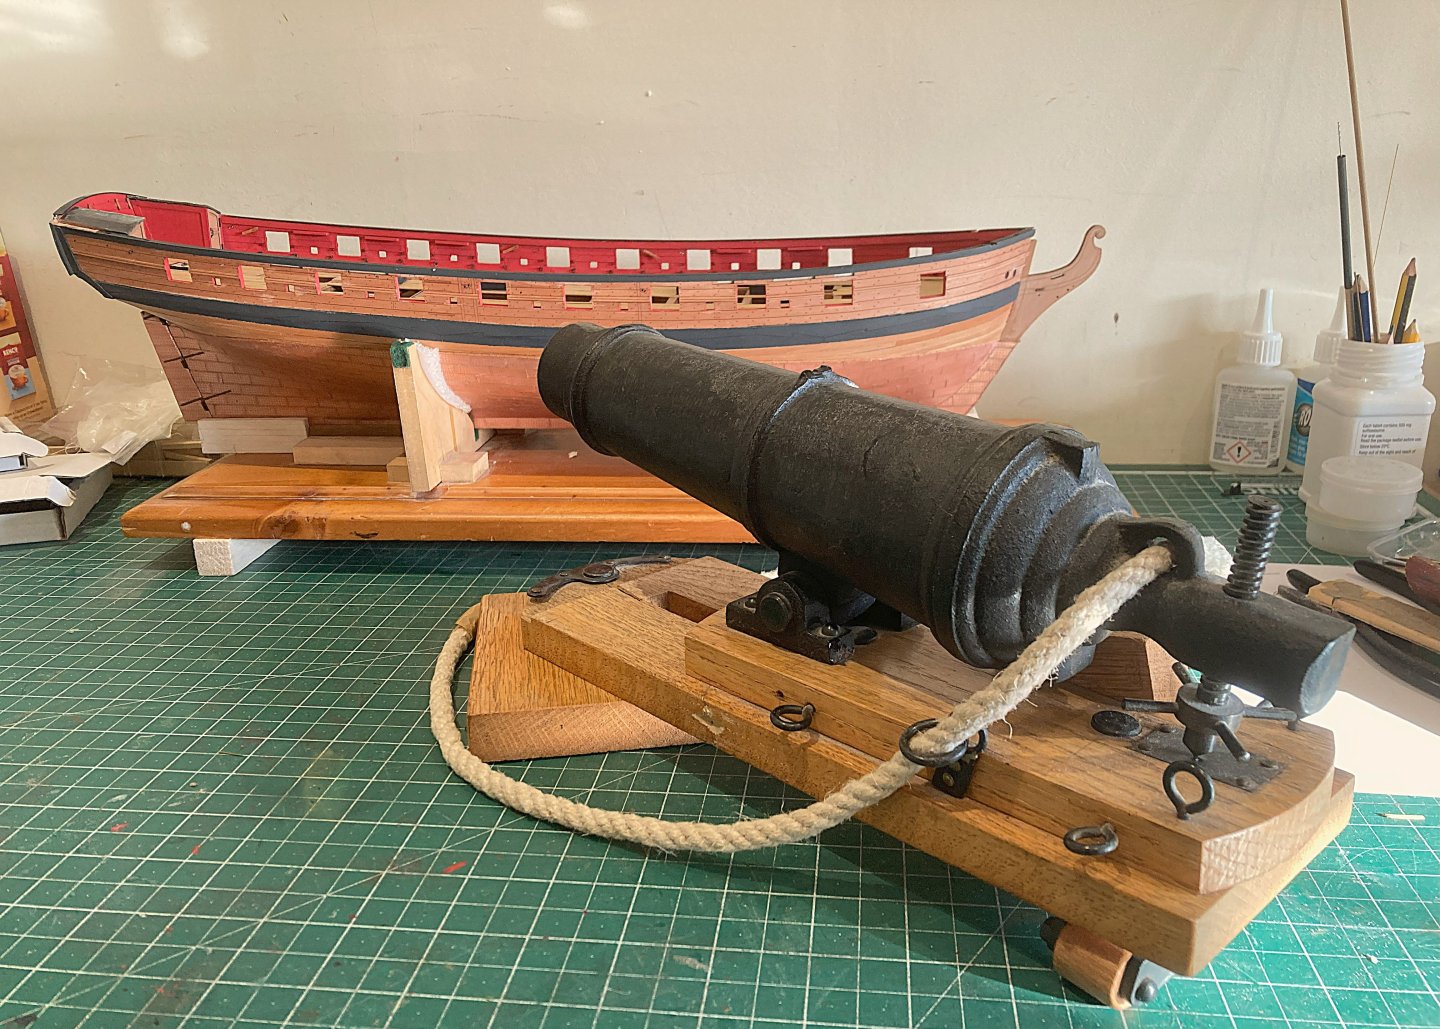
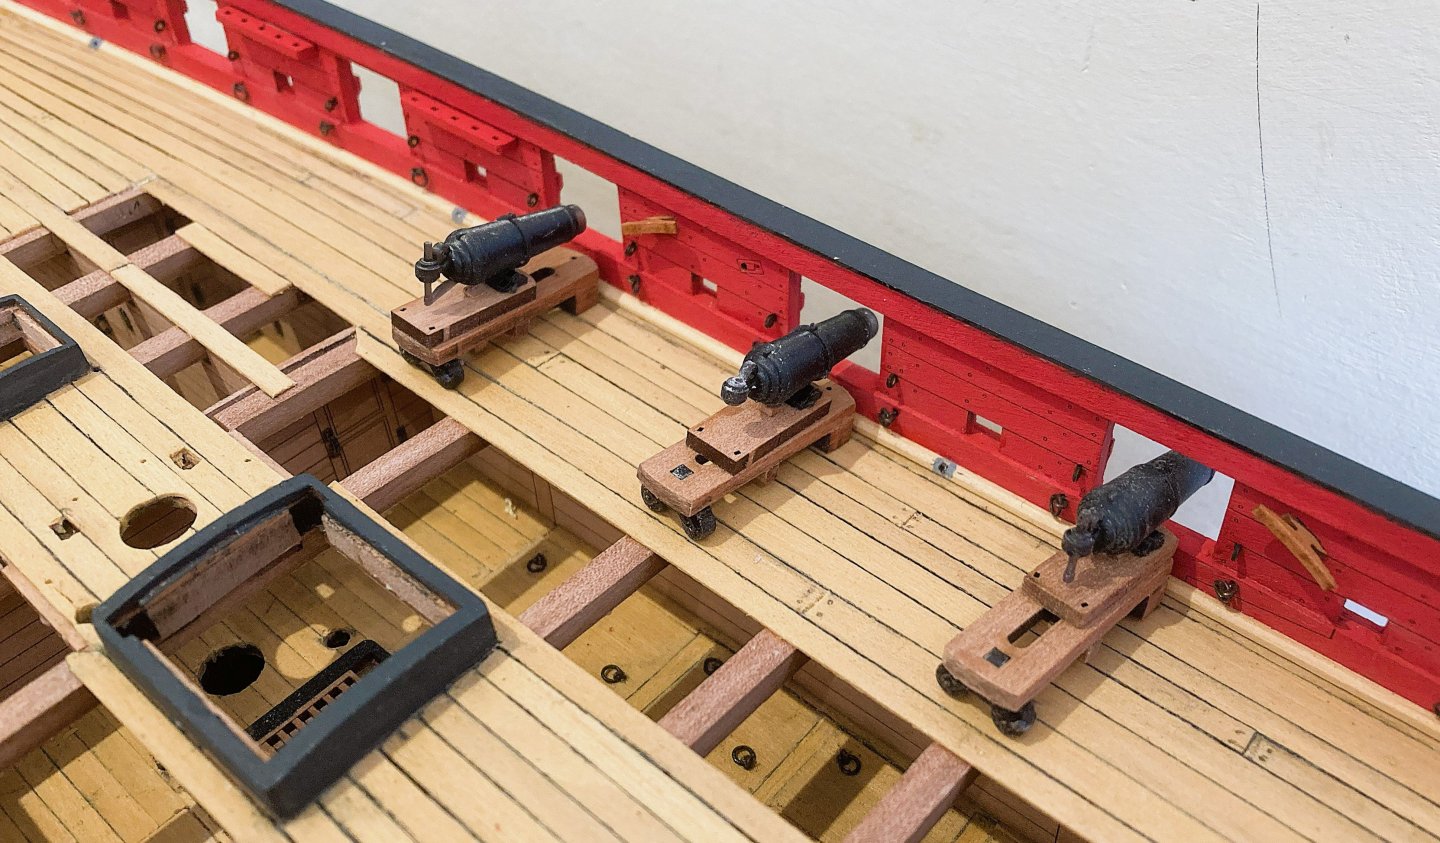
Post 61 Carronades completion. I seem to have spent forever messing around with the Carronades, but they are an important feature on the model. I tried various methods to represent the turning bars on the elevation screws, but nothing looked right, or was overscale. 3251 I did manage it on the 42 pounders on Indy,(above) but they are slightly bigger, it makes all the difference. 3790a The carronade slides are simply secured with pins through the deck, they are a reasonably tight fit, and for me glue is not necessary. Bow chasers. There are two six pounder long guns provided in the kit. They are of the current Vanguard design with integral cap squares. This does mean that the guns have to be fitted at the same time as the carriage assembly but it does save all that faffing around separately fitting Capsquares. I quite like them. Manual photo. There is a little oddness about the indicated placing of part 227 (sections 389 -392 of the manual) described as a quoin. It makes more sense to me representing the stool bed, which more properly ends short of the bracket ends. Not a major issue, just re-position the piece when fitting. Quoins, wedge shaped blocks used to raise the elevation of long guns, sit atop the stool bed. 3792a Quoins are not supplied with the kit but they are easily made. 3795a 3796a 3800 The barrels do contain some sort of indistinct Monogram in a cartouche, but I preferred to use Syren Laser board versions, as with the Carronades. I used the provided eyelets for the tackle Loops but I added separate ring bolts for the breechings. 3786a The Guns will now be removed to continue work on the hull. It is a comforting thought that the tedious element of gun assembly has been completed. B.E. 09/04/2025


- 332 replies
-
- 30
-

-
-
- Harpy
- Vanguard Models
- (and 1 more)
-
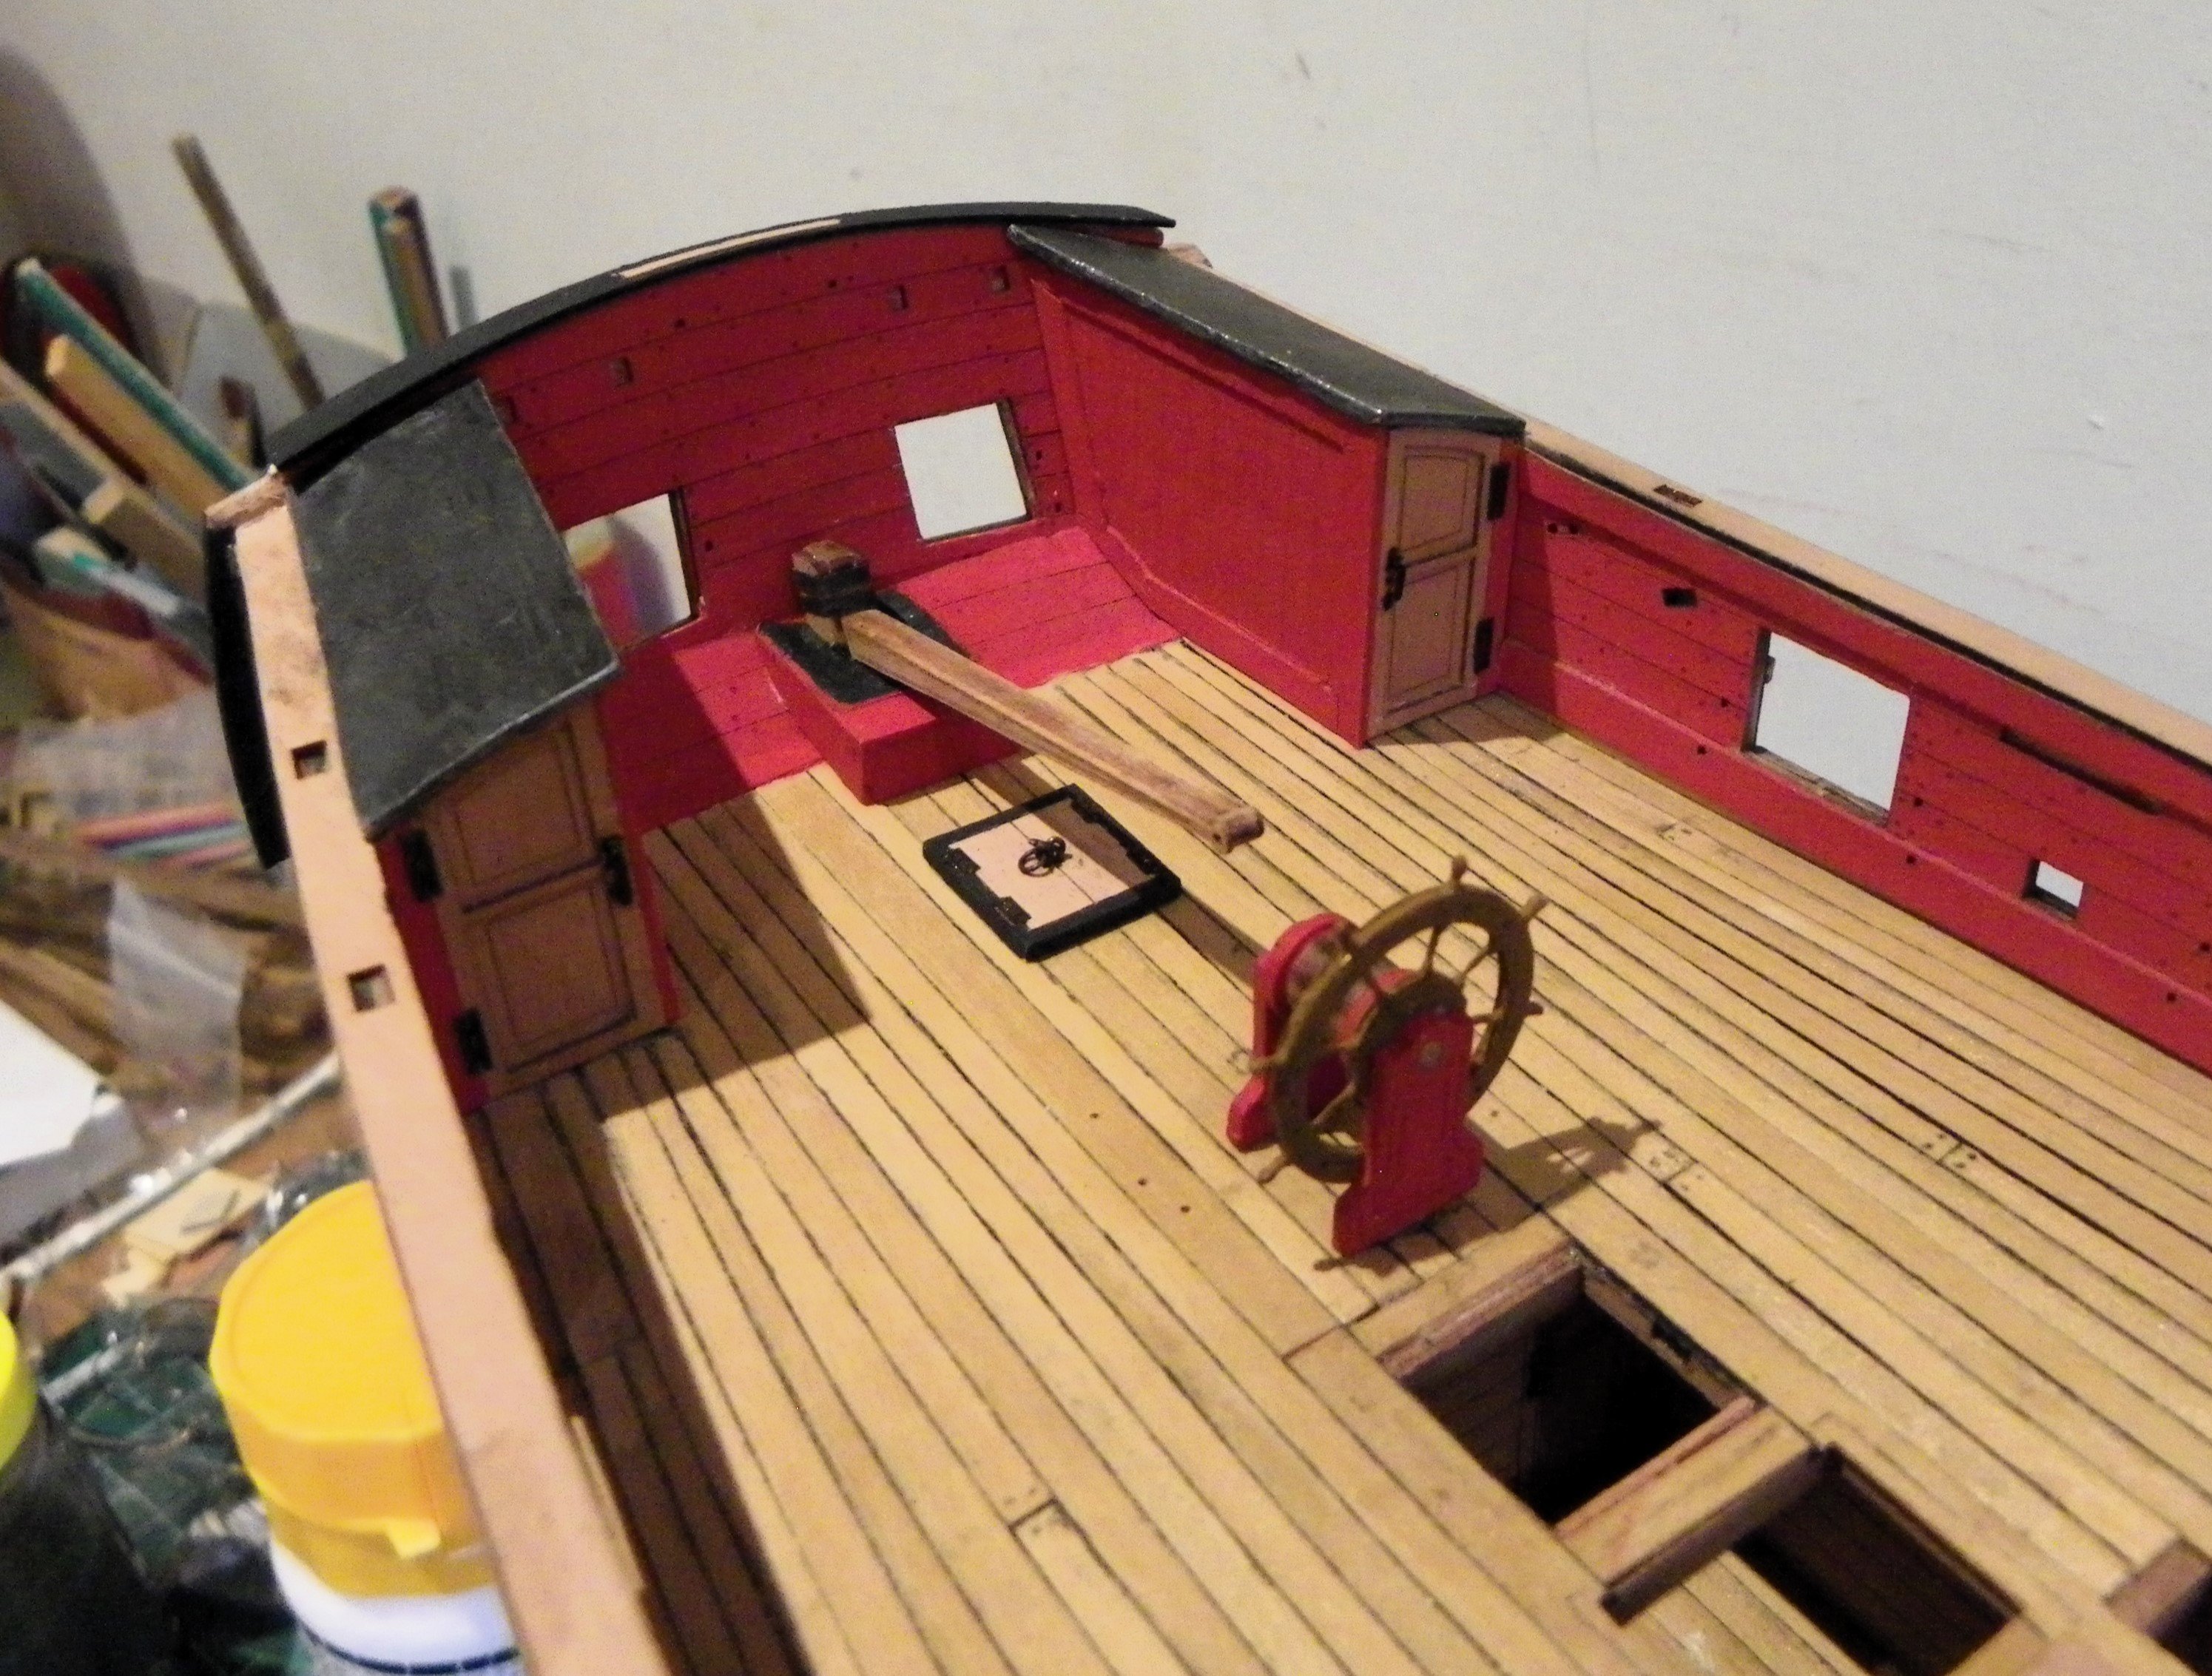
Check the orientation of the Skylight, and Wheel, Glenn. B.E.
- 241 replies
-
- 3
-
-
-
- Vanguarrd Models
- Harpy
- (and 1 more)
-
A fine looking Sphinx, very well done👏 B.E.
-
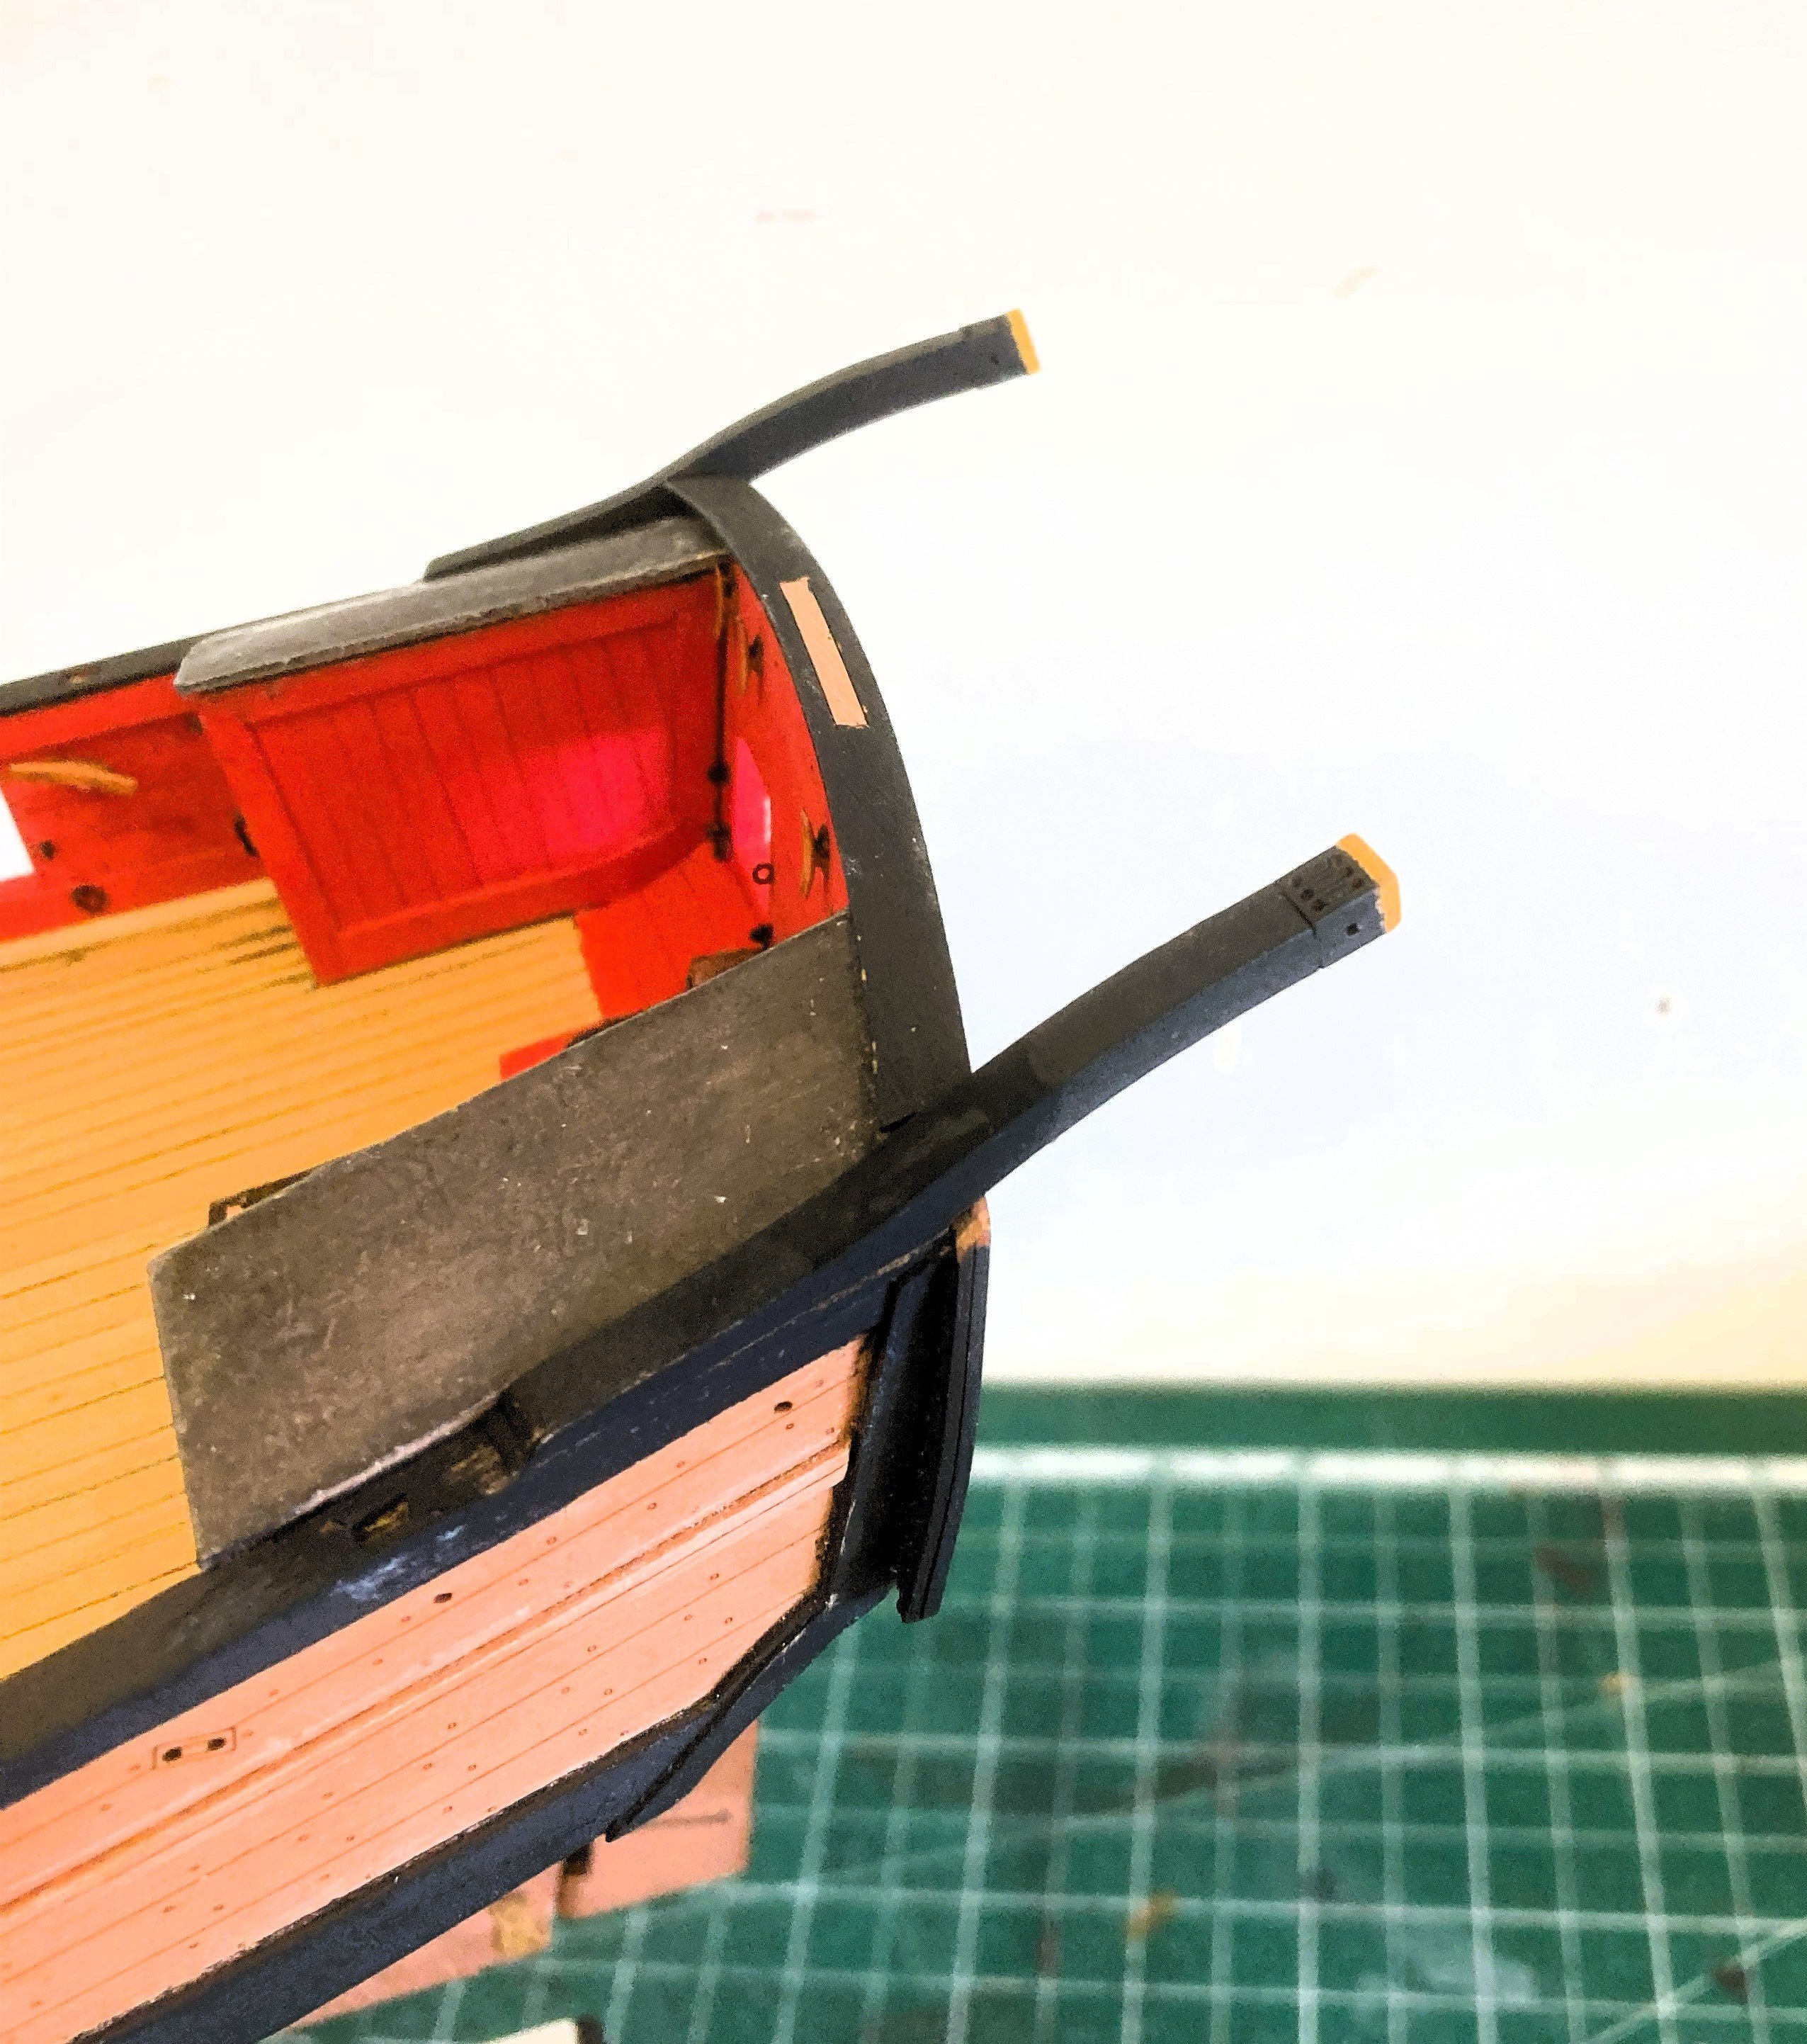
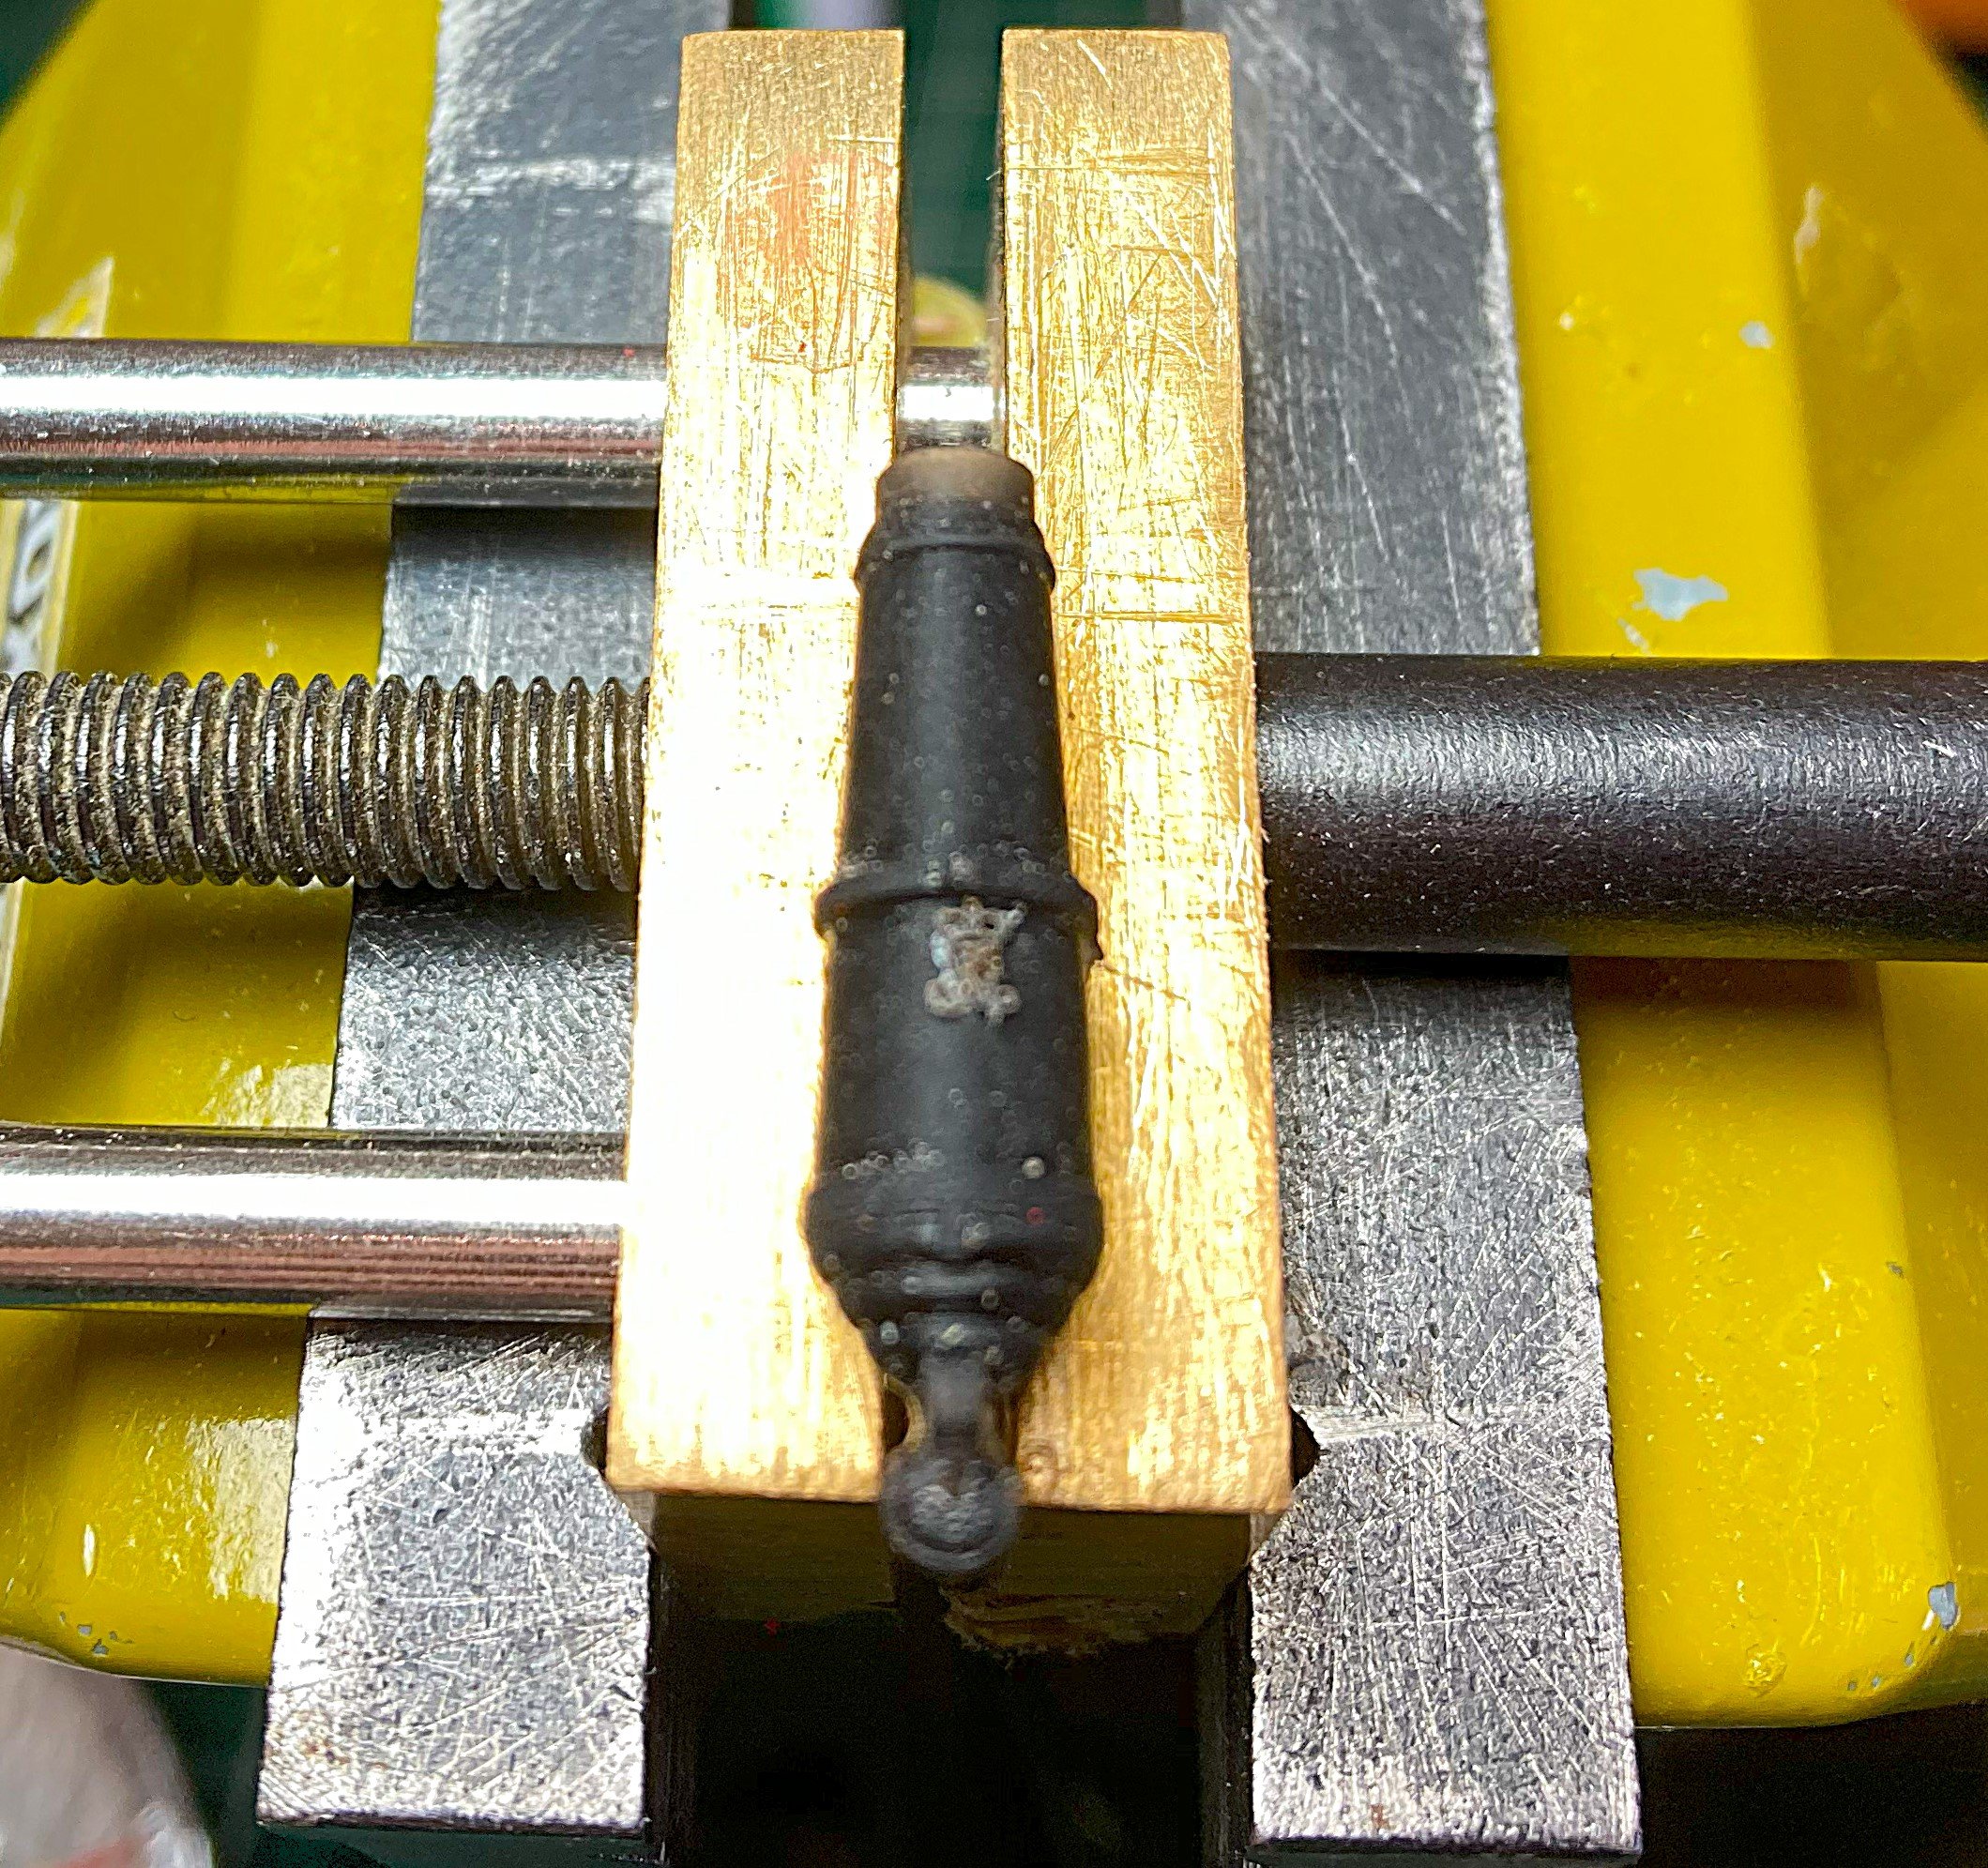
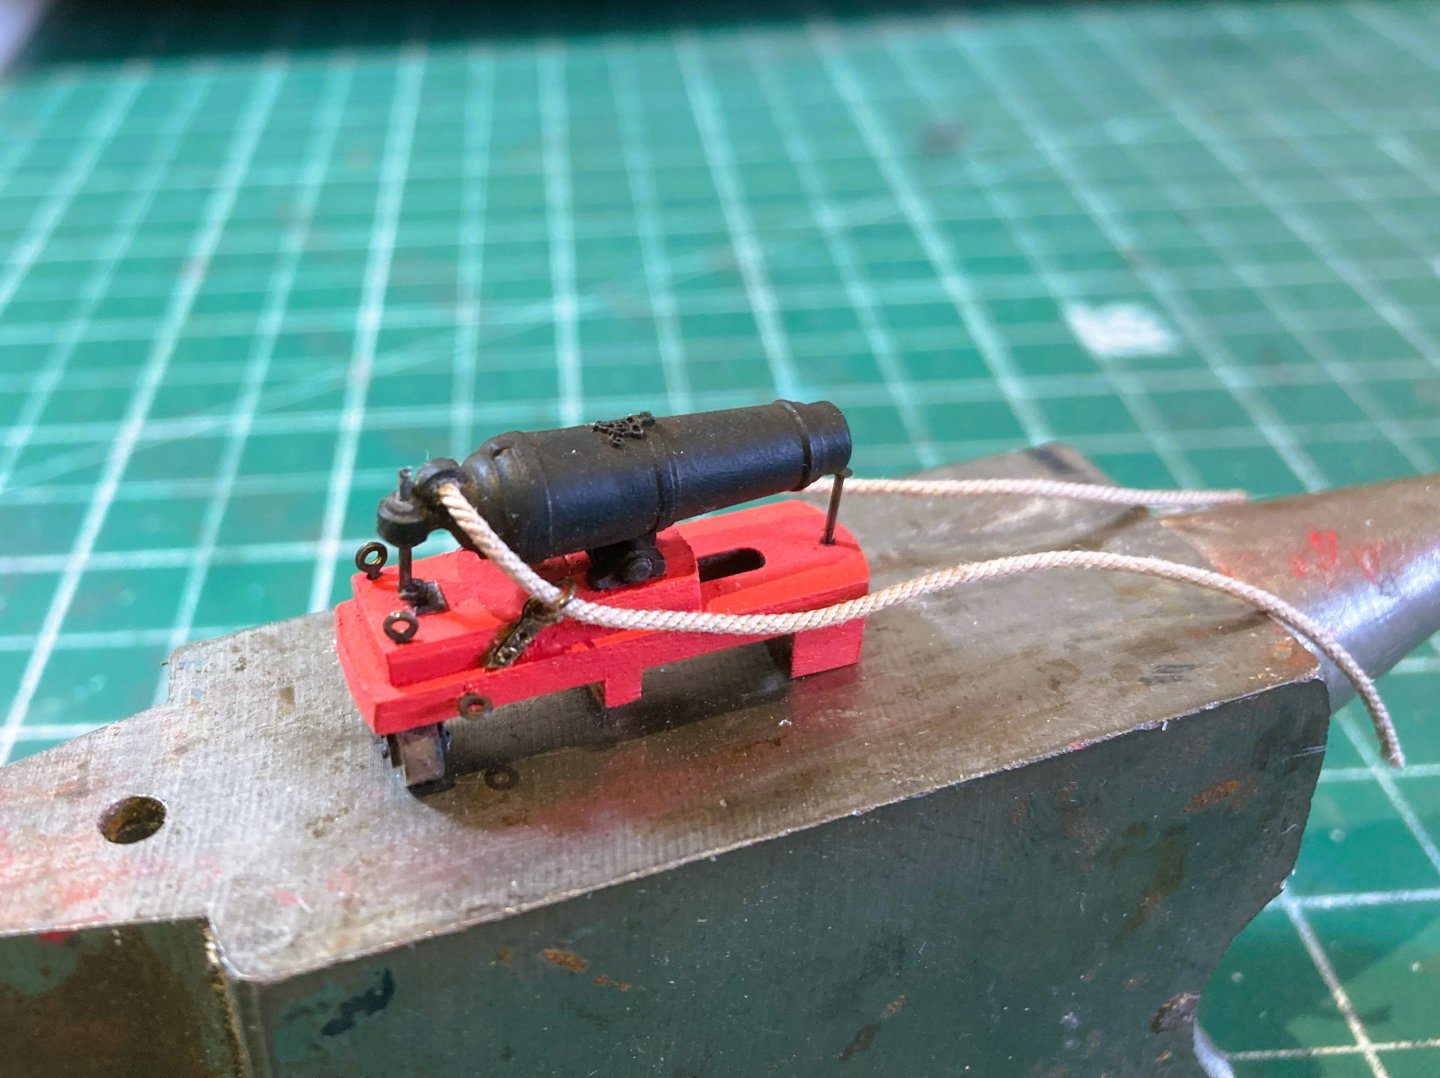
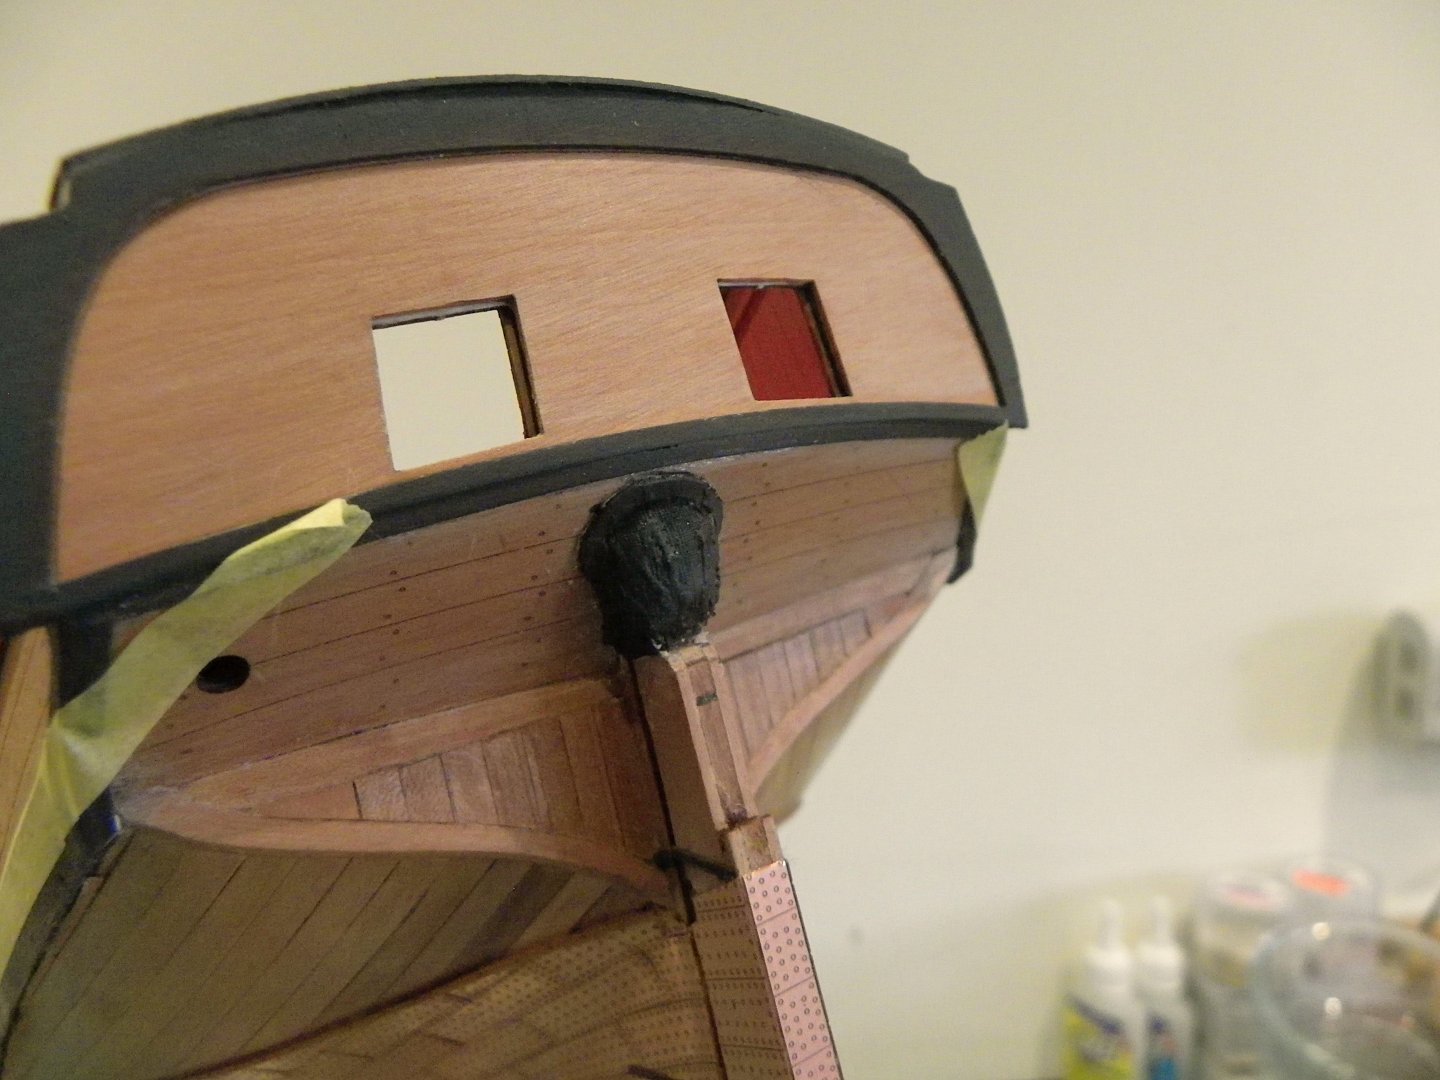
Post 61 Carronades (Part 3) 3692a As with Indy I added Syren Monograms which were applied before priming and painting. They were then treated with dark brown weathering powder after painting. 3755a When it comes to the ironwork placement on the carronade base, my go to references is the AotS books The Frigate Diana which also carried 32 pounders and was contemporary with Harpy. In accordance with the 1:24 scale drawings I have placed the bracket for the Breeching ring angled forwards on the carriage. 3758a I added a ‘metal’ plate beneath the elevation screw. 3756a The pe elements require blackening before use This part of the assembly is by far the most fiddly and tiresome of the assembly process. Several of the brackets pinged off into the ether during fitting, lost forever, but fortunately there are a few spares. There is also a lot of re-touching of paintwork. 3765a I replaced the kit breeching rings with Amati 2mm rings. I decided to replace the elevation screws with blackened pins, I will look to add the turn handles if I can find the right makings. I have decided with Harpy that I will add at least the breeching ropes. It is not clear from the kit blurb the actual line sizes, but my sources indicate lines of 8” circ equating to 1mm ø at scale. However, true scale is not everything with scale models. 1mm line looks far too heavy with the provided carronades, and there is also the issue of damaging the breeching ring in drilling it out to suit. 3769a 3773a I found that 0.8mm line ( in this case polyester line) gave a look I was happy with. For the side tackles 2” circ lines are indicated for the side tackles. these equate to 0.25mm ø line. With side tackle lines I have found that a smaller line is often a better fit and more visually appealing. 3771a Still a way to go before I’m happy with the guns, but meanwhile… More random thoughts about Harpy Those two large stern ports, what is their purpose? They are rigged for guns, but the absence of carronade slide fixings looks problematical. Apart from that the barrels wouldn’t extend beyond the counter. 3674a Moving the the 12 pounder bow chasers aft is a possibility but clearance of the counter issues would still apply. This design as seen on other vessels has always puzzled me, why not fit port lids to keep out some of the weather in a following sea? Onwards.. B.E 06/04/2025


- 332 replies
-
- 24
-
-
- Harpy
- Vanguard Models
- (and 1 more)
-
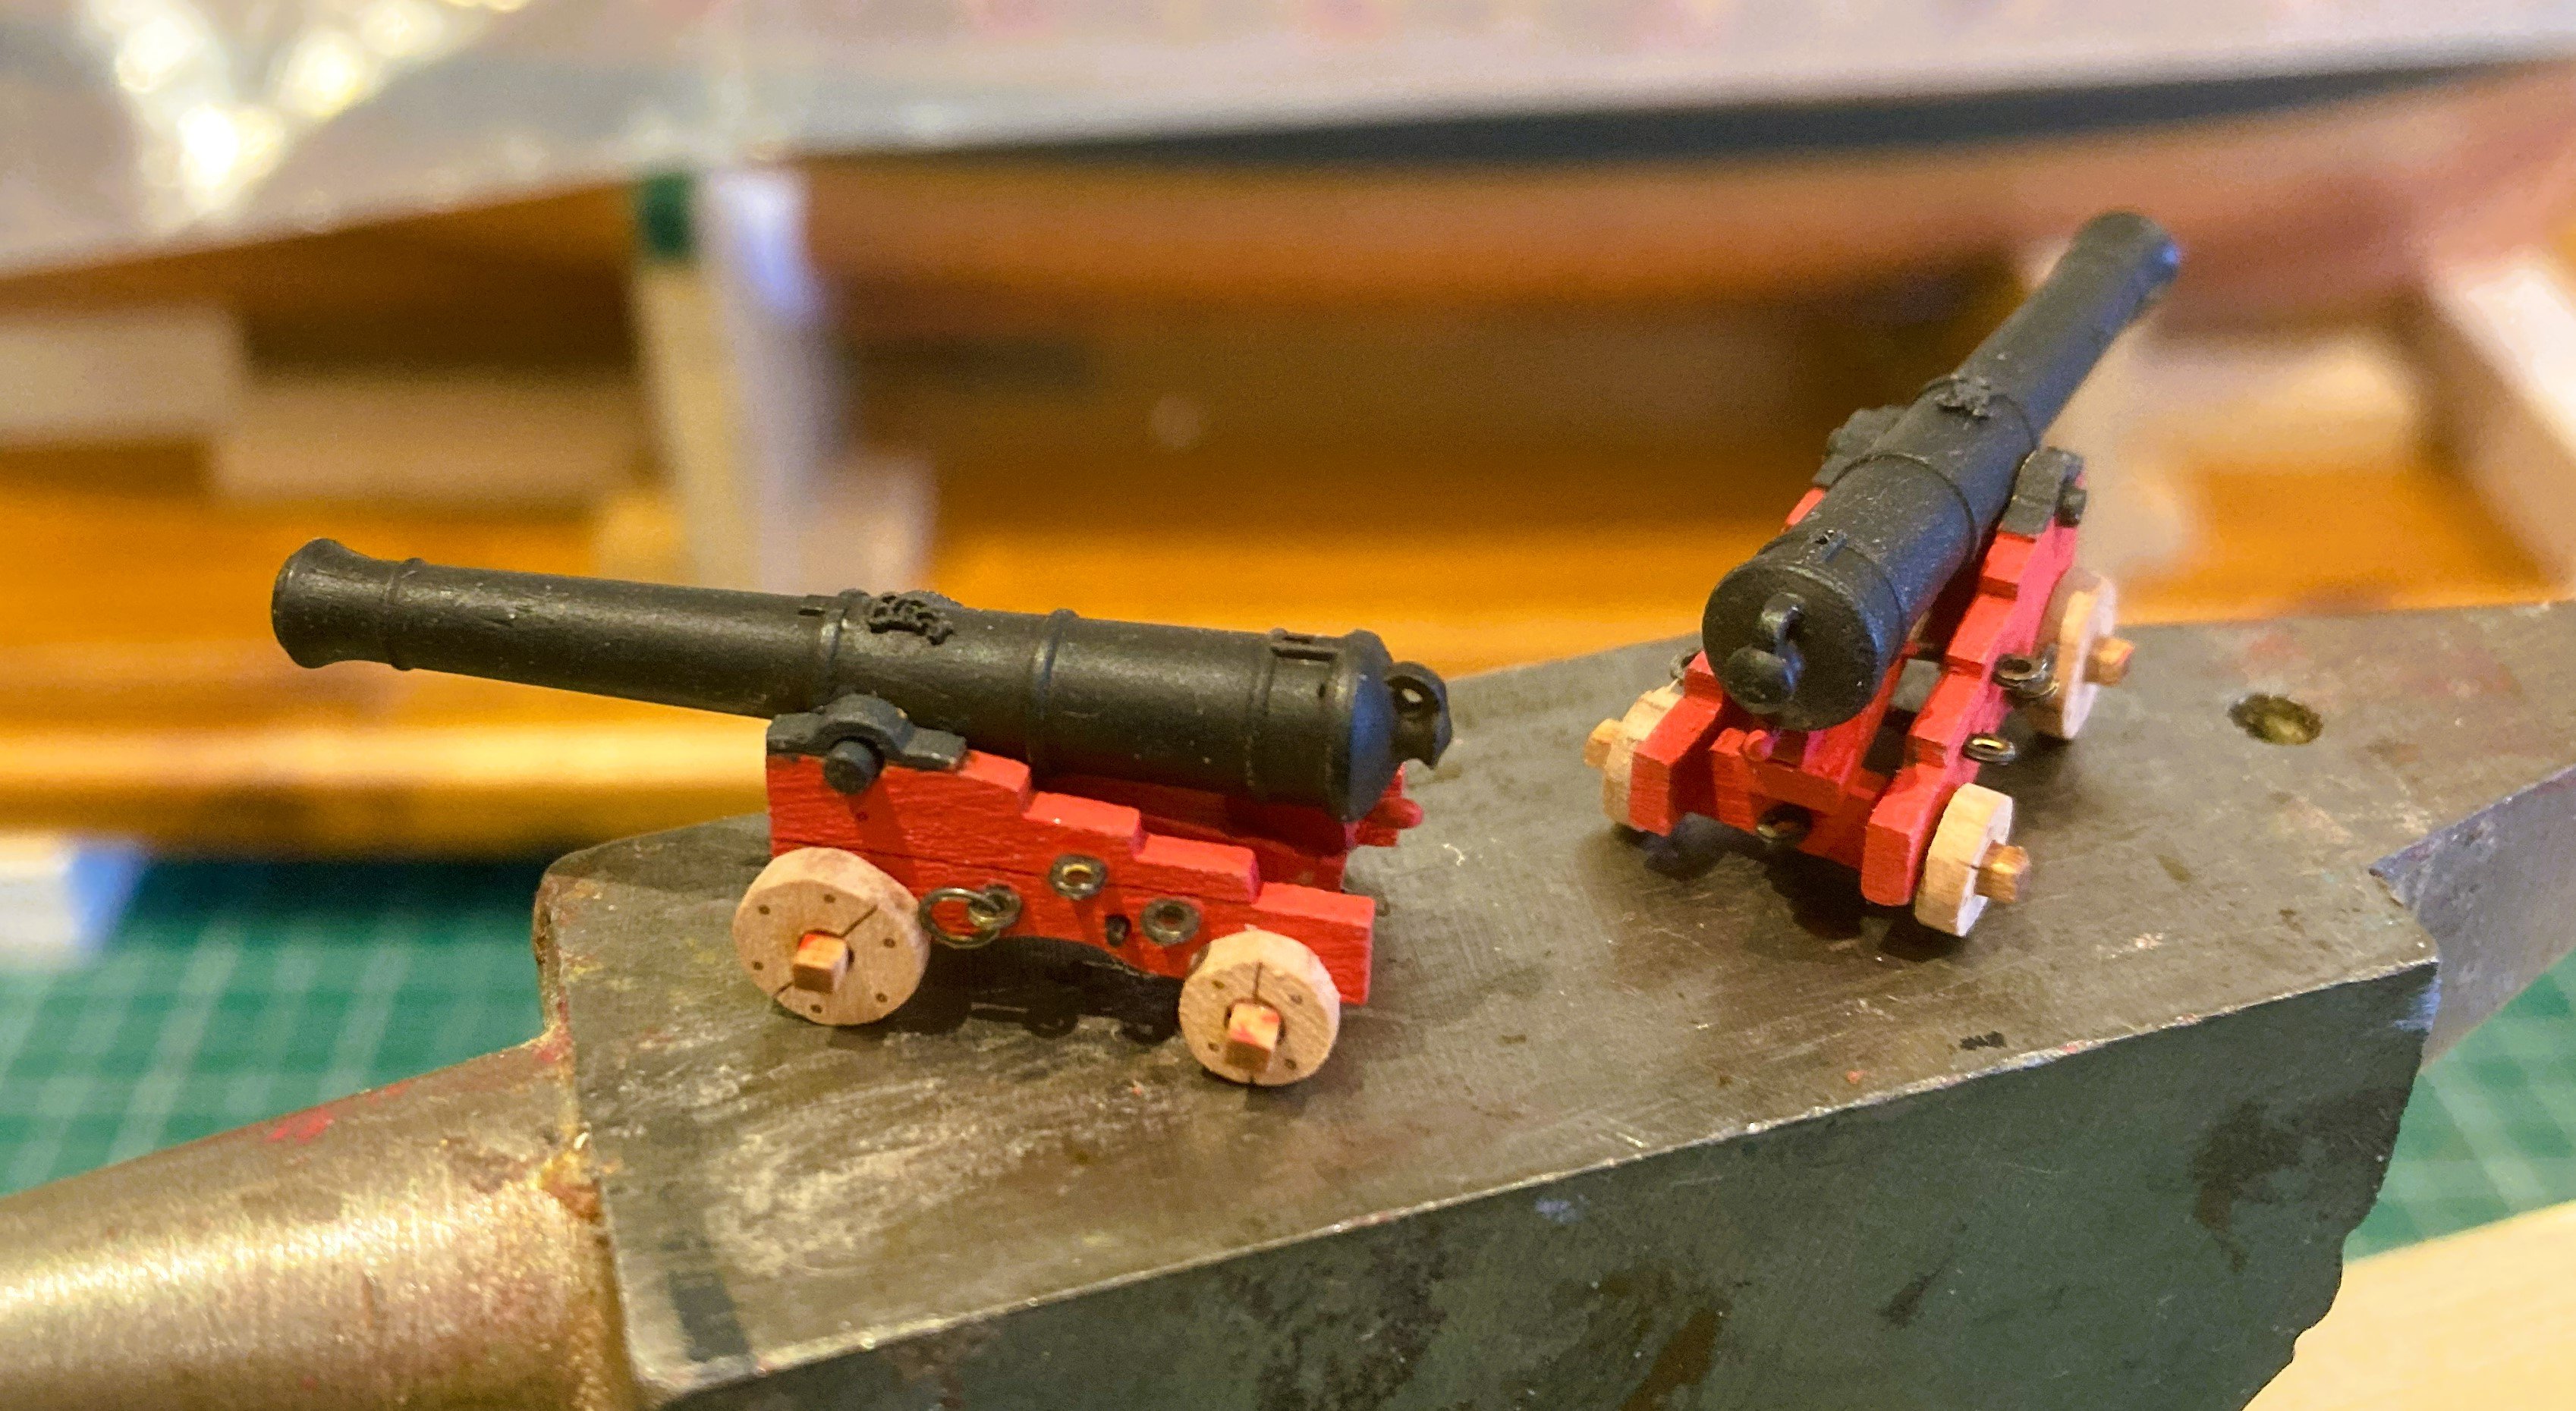
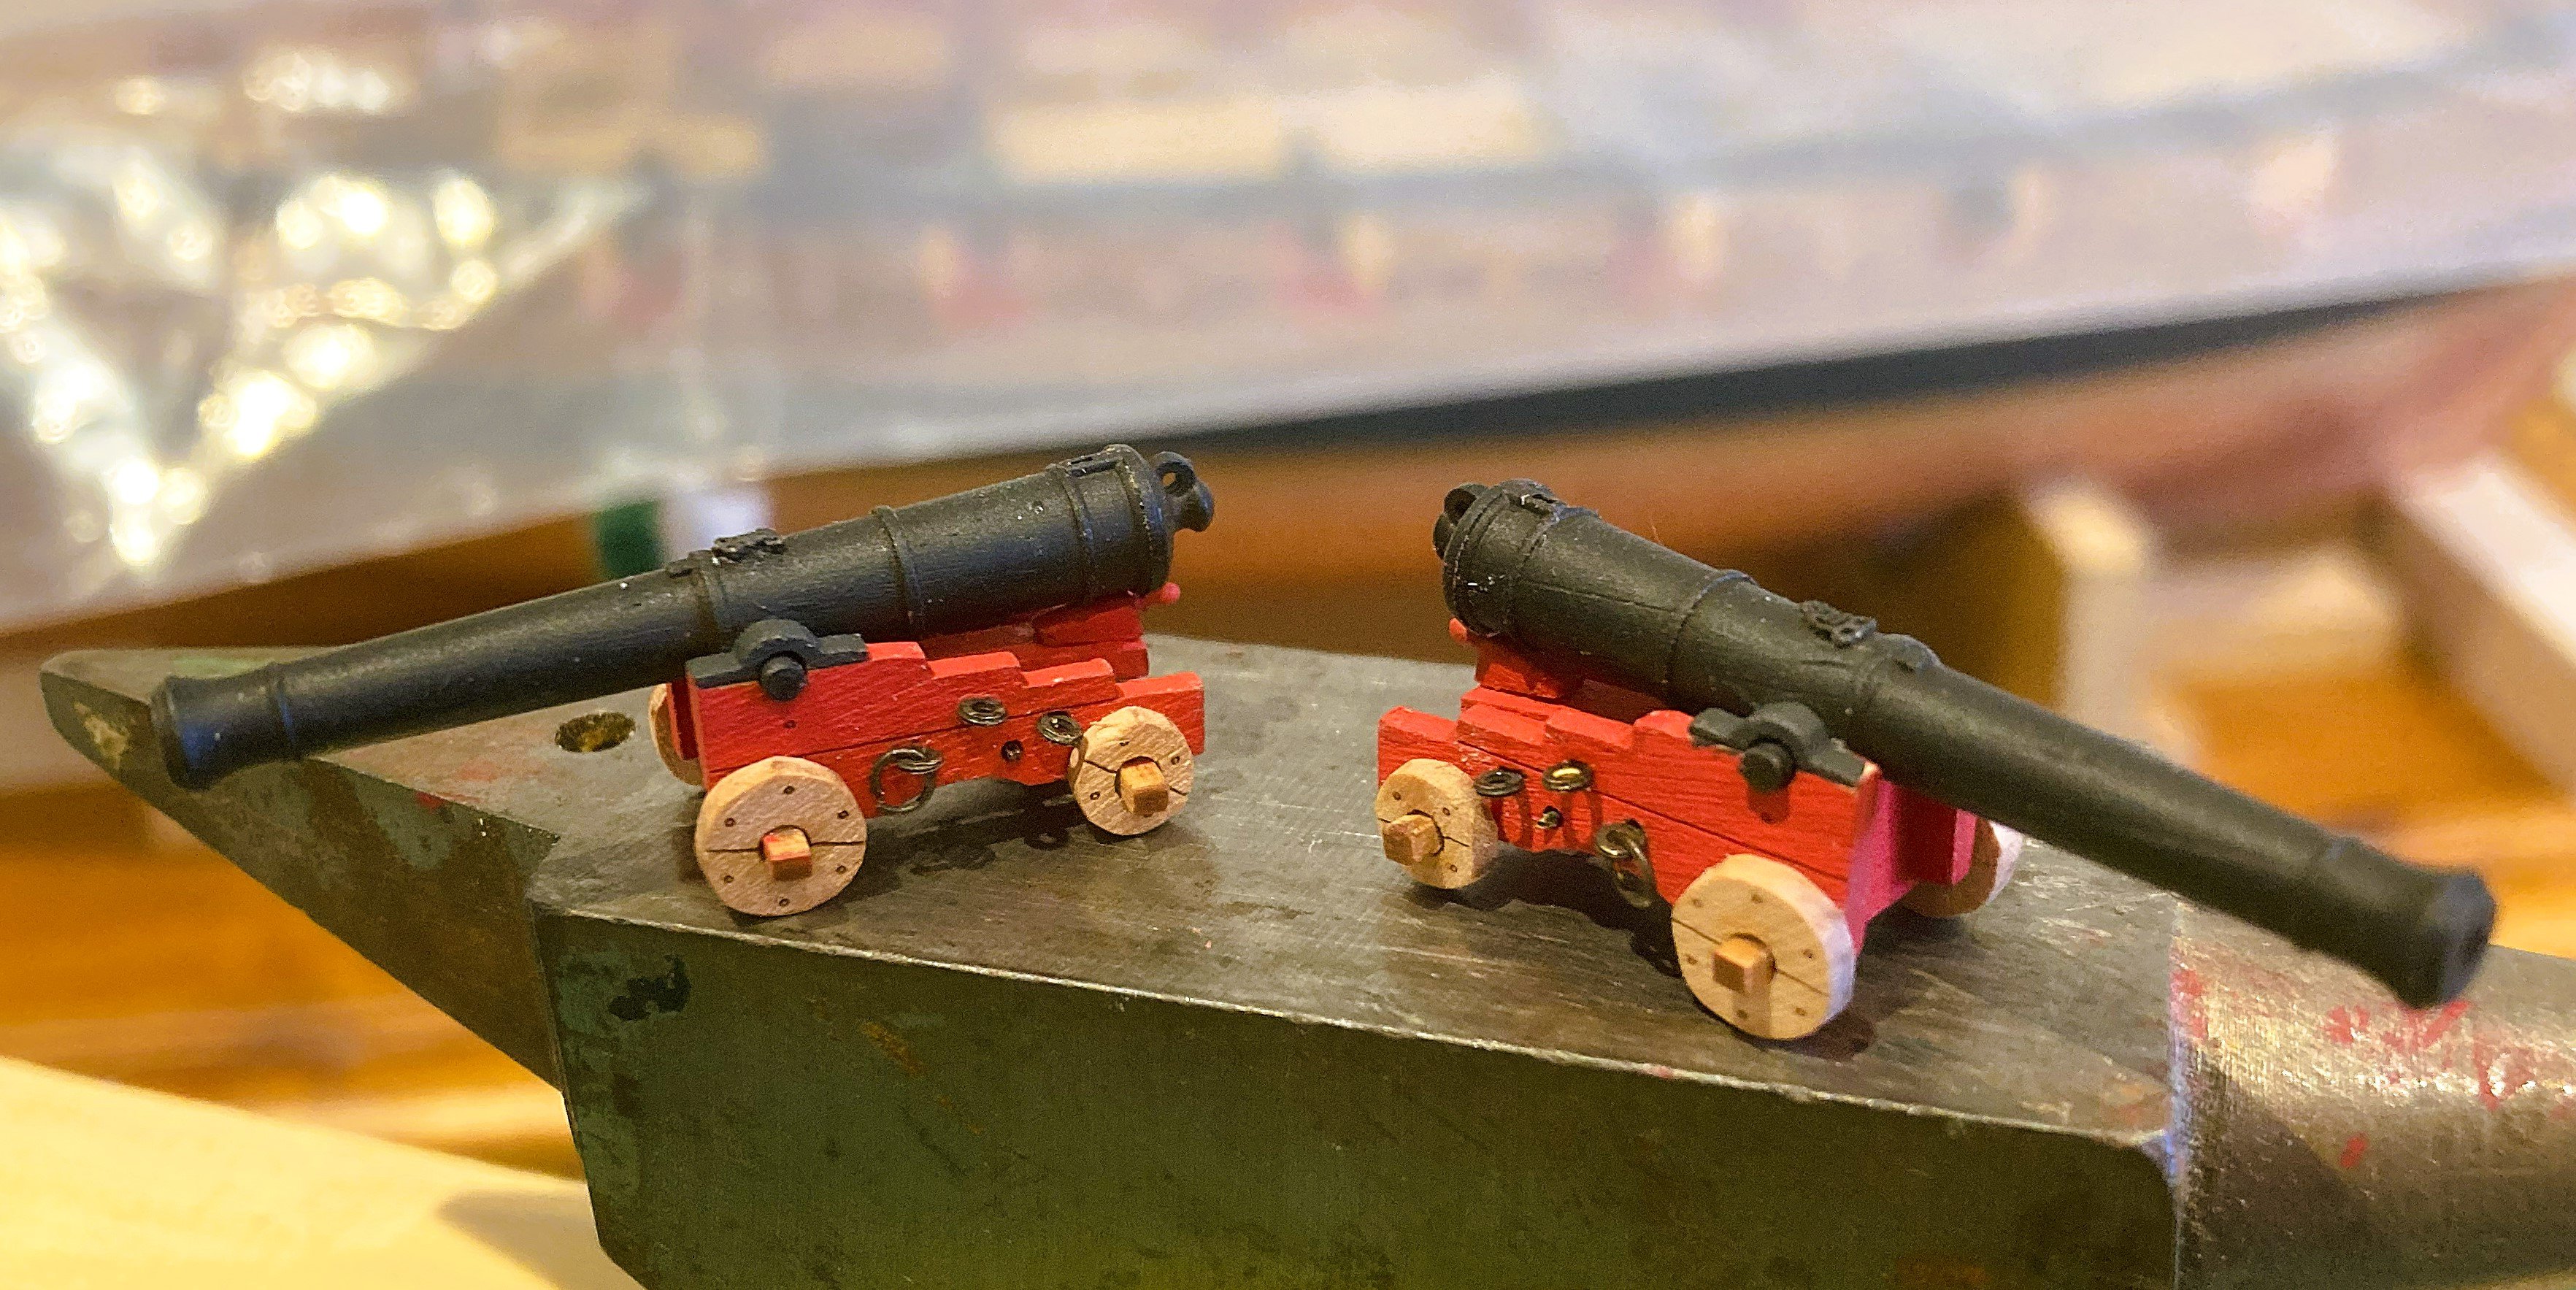
Thanks Mark and Jo, always good to have affirming thoughts.👍 Post 60 Carronades Part 2 For the past three days I have been playing around with the guns. There are 16 multi-part units to assemble and each one is a time consuming mini project. The Pearwood bases initially need a good cleaning up, Vallejo Red paint does not easily cover char. Base modification. I have looked at modifying the slide and carriage so that the carriage actually slides. It would basically involve using a longer bar thro’ the carriage, removing the support bracket from beneath the slide, and adding brackets to the carriage bar beneath the slide, avoiding gluing the slide and carriage together. On reflection I decided it wasn’t worth my effort so I just glued the carriage behind the slide bracket to give the run-in position. 3678a I kept two carronades in the run-out position to demonstrate the use of the slide. 3679a 3680a 3683a Before gluing the carriage to the slides I had one last check . 3684a Content with my choice. 3669a Ahoy Harpy – I think you’re goin’ to need some bigger carronades. Taking a few days off now to enjoy the Welsh Marches, and one of my other interests - Castles. B.E. 29/03/2025


- 332 replies
-
- 24
-
-
- Harpy
- Vanguard Models
- (and 1 more)
-
A nice improvement Chris, to add to your list of scale modifications.👍 The fore most kit bulkheads always present difficulties when you like to model the Manger. Cheers, B.E.
-
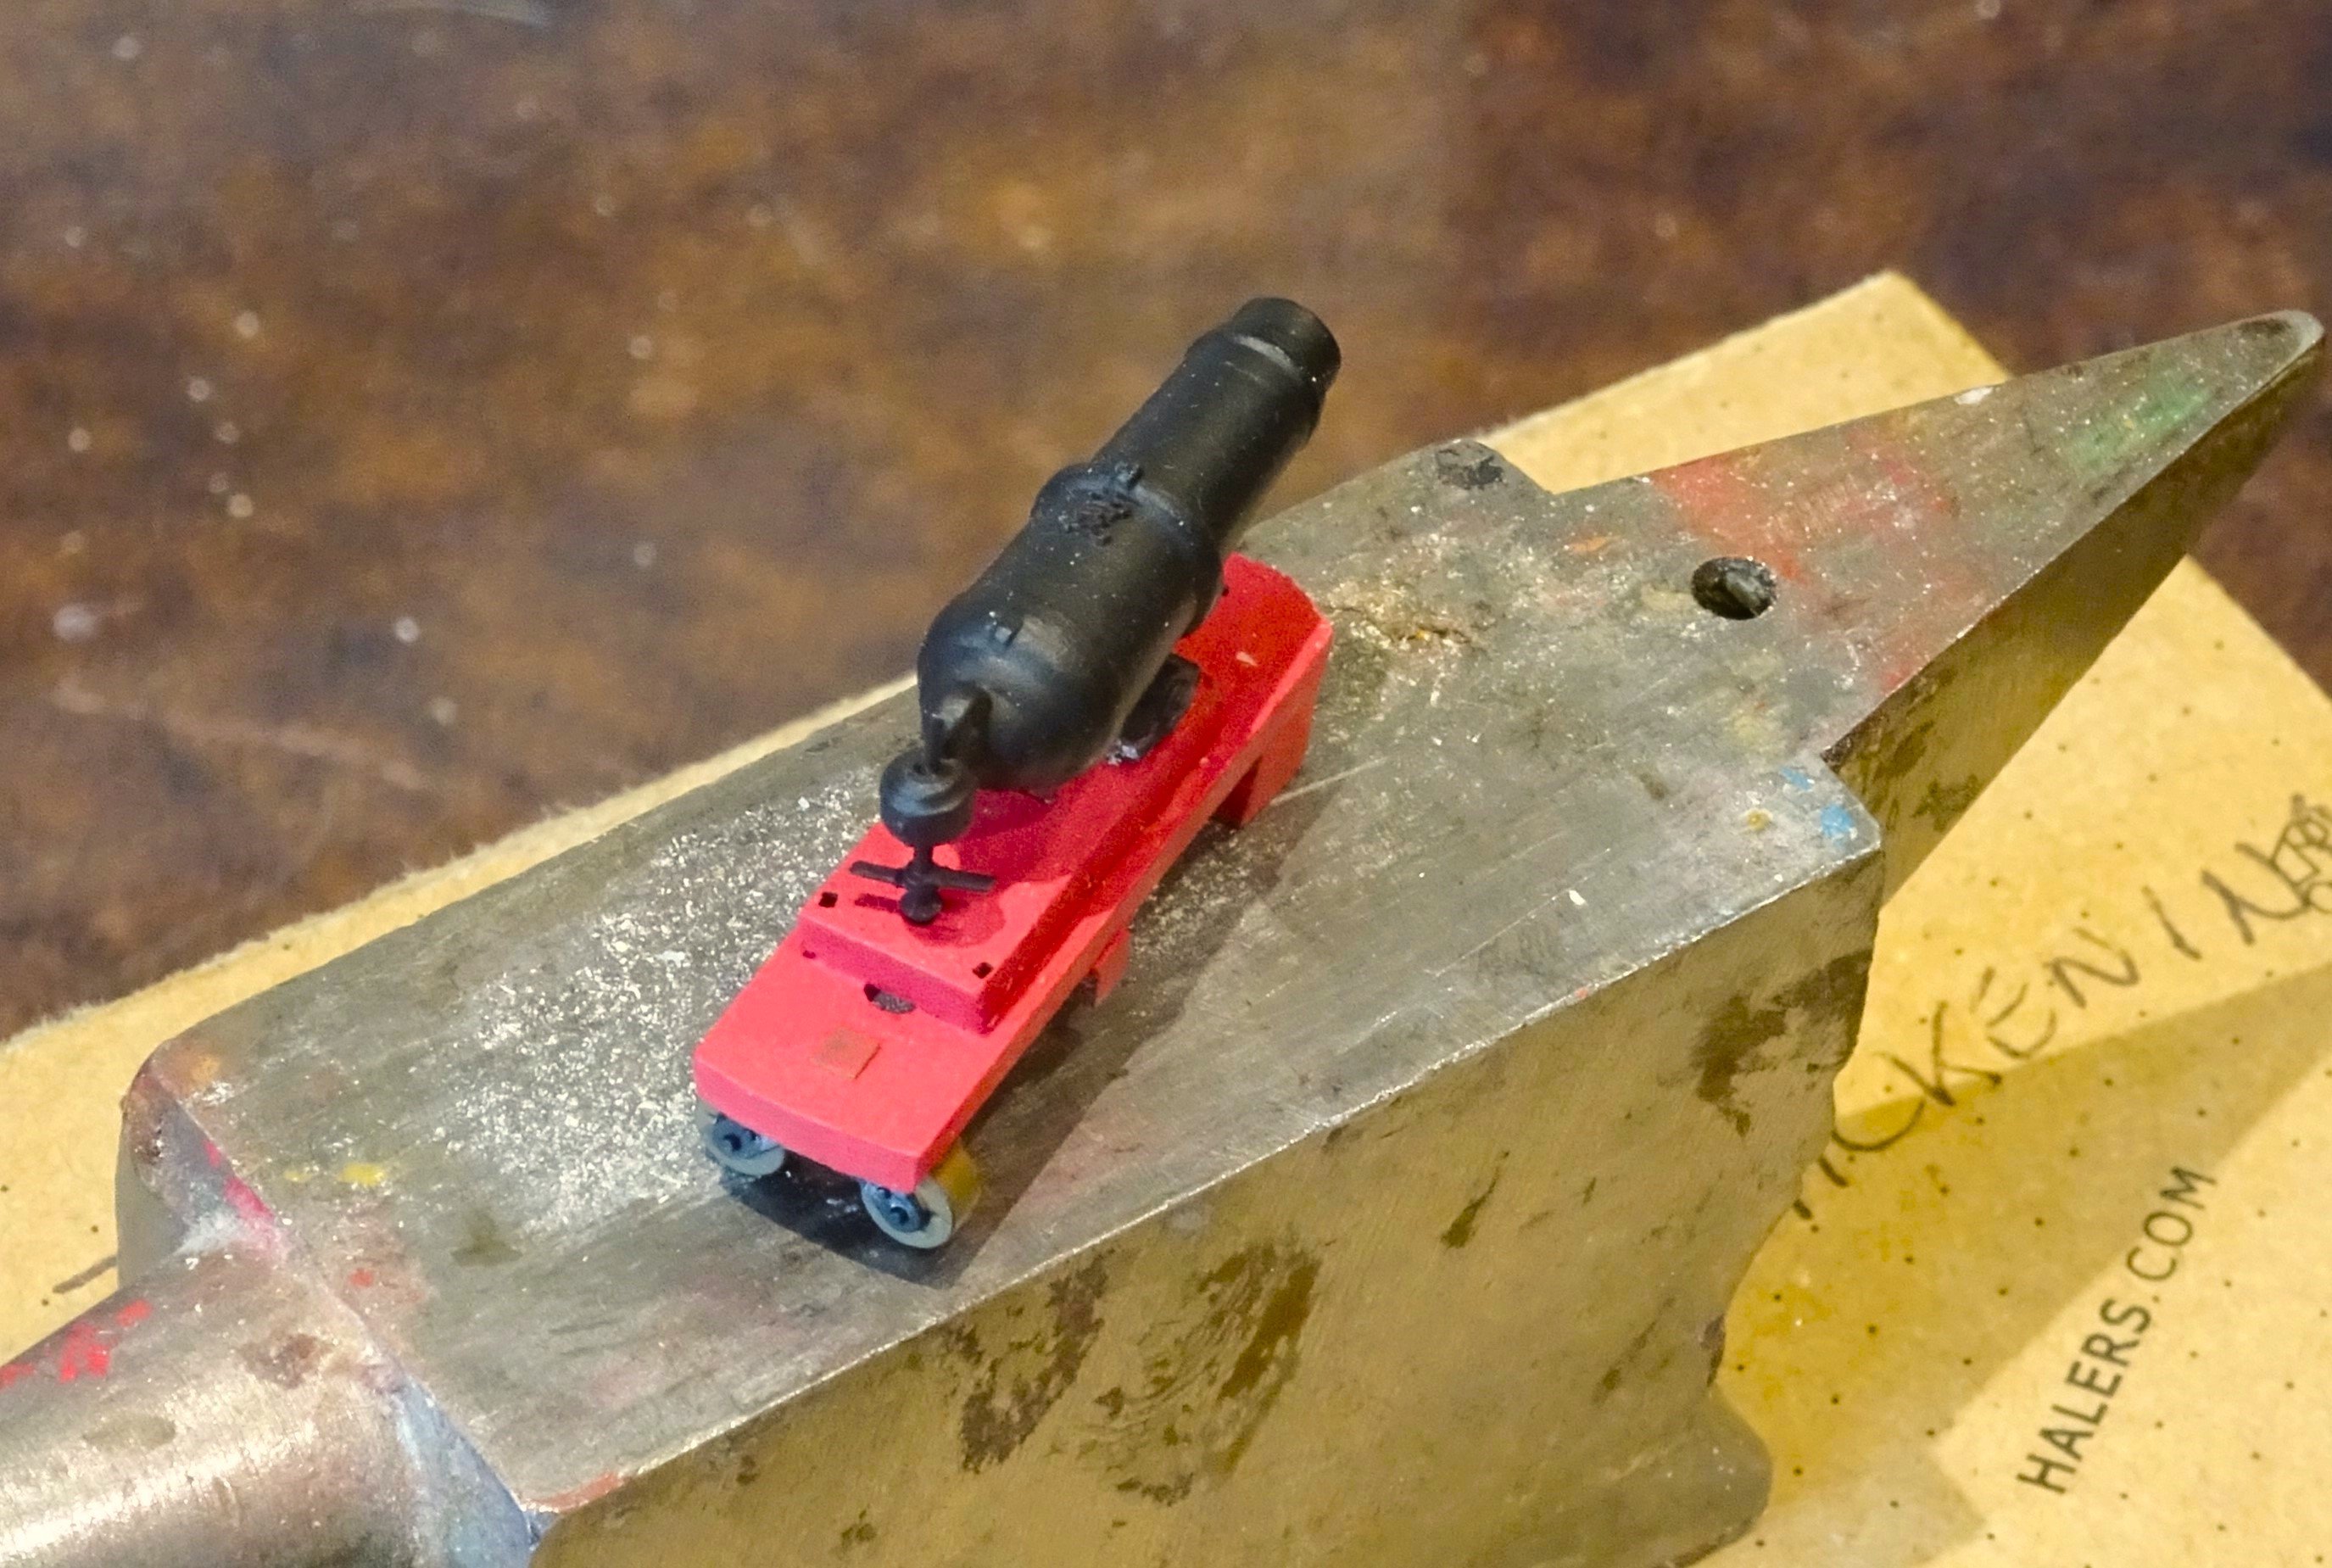
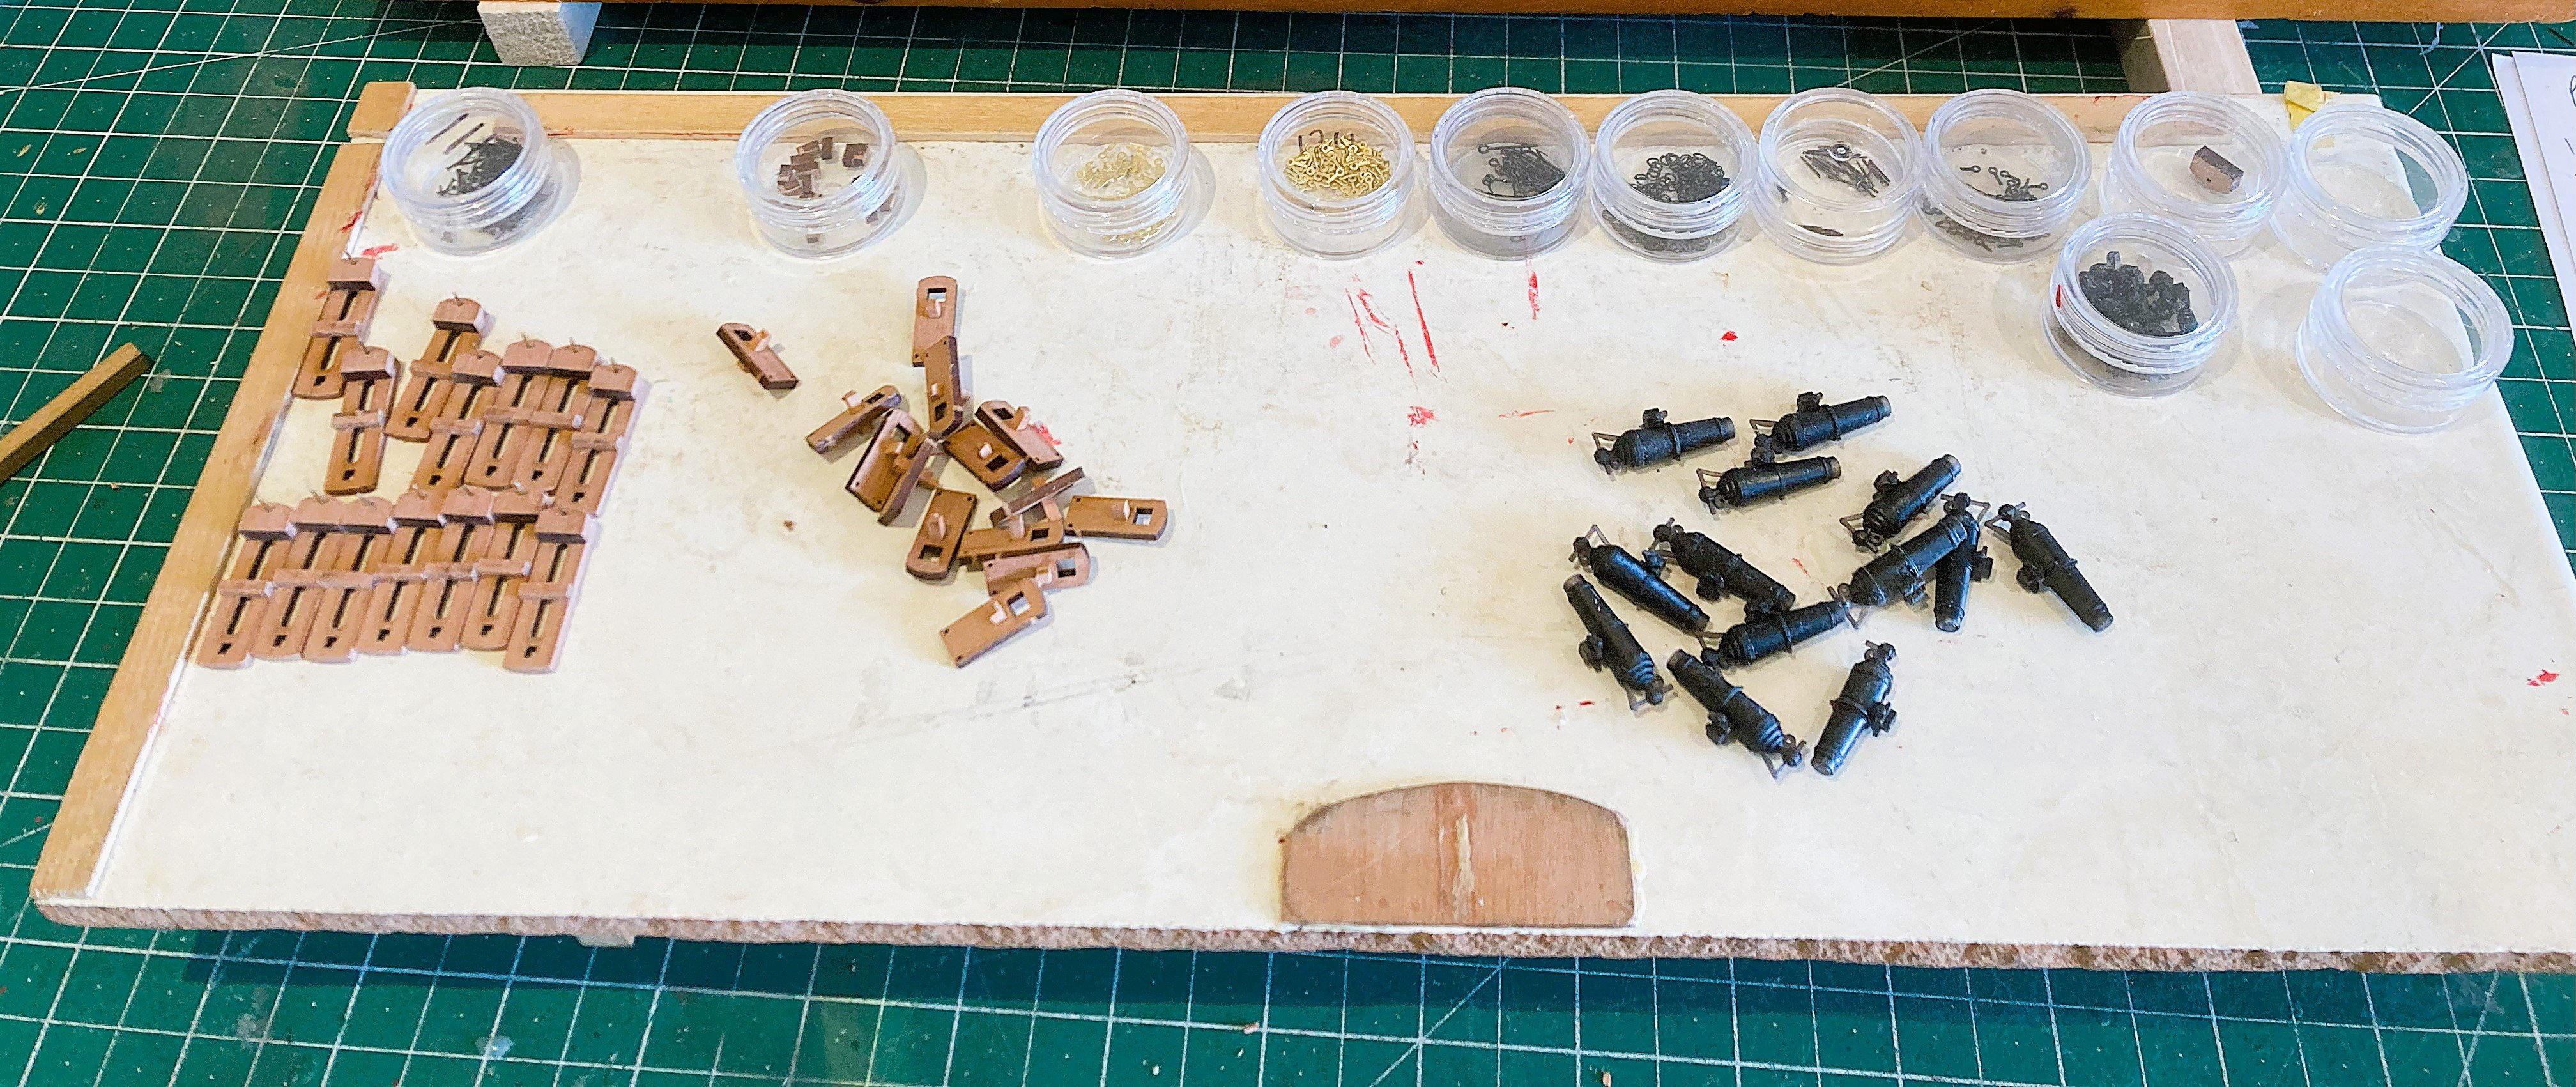
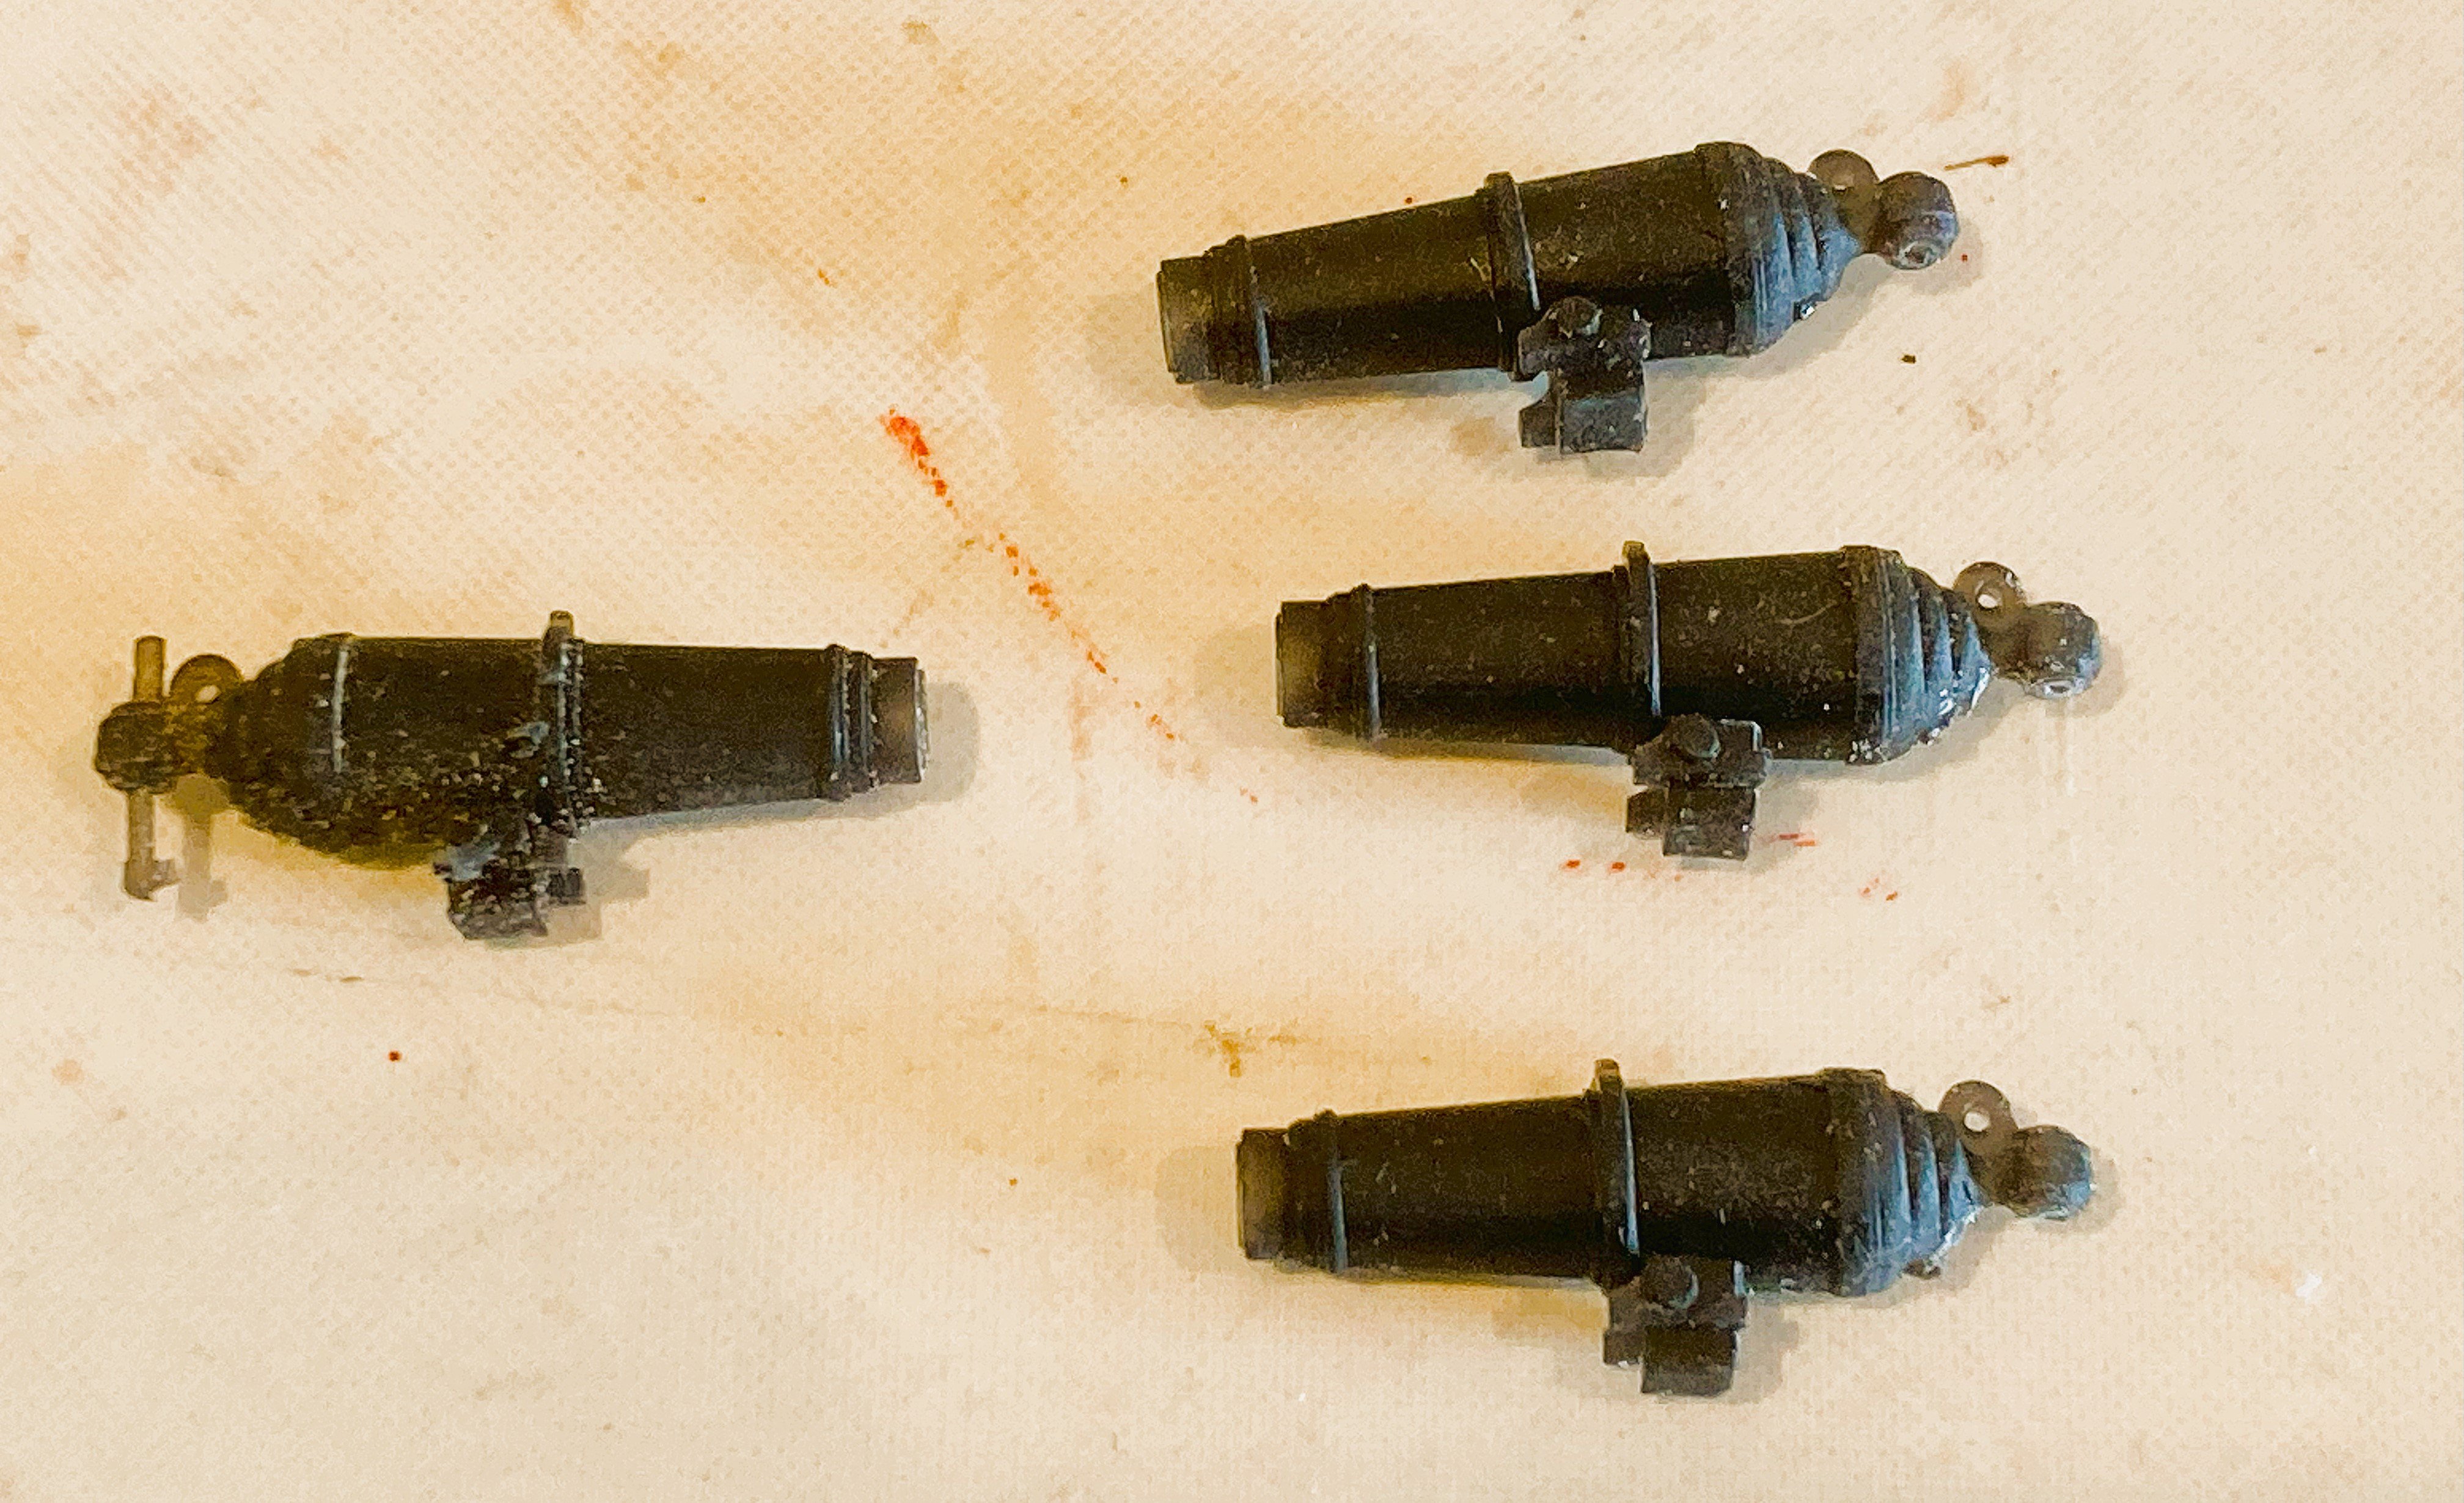
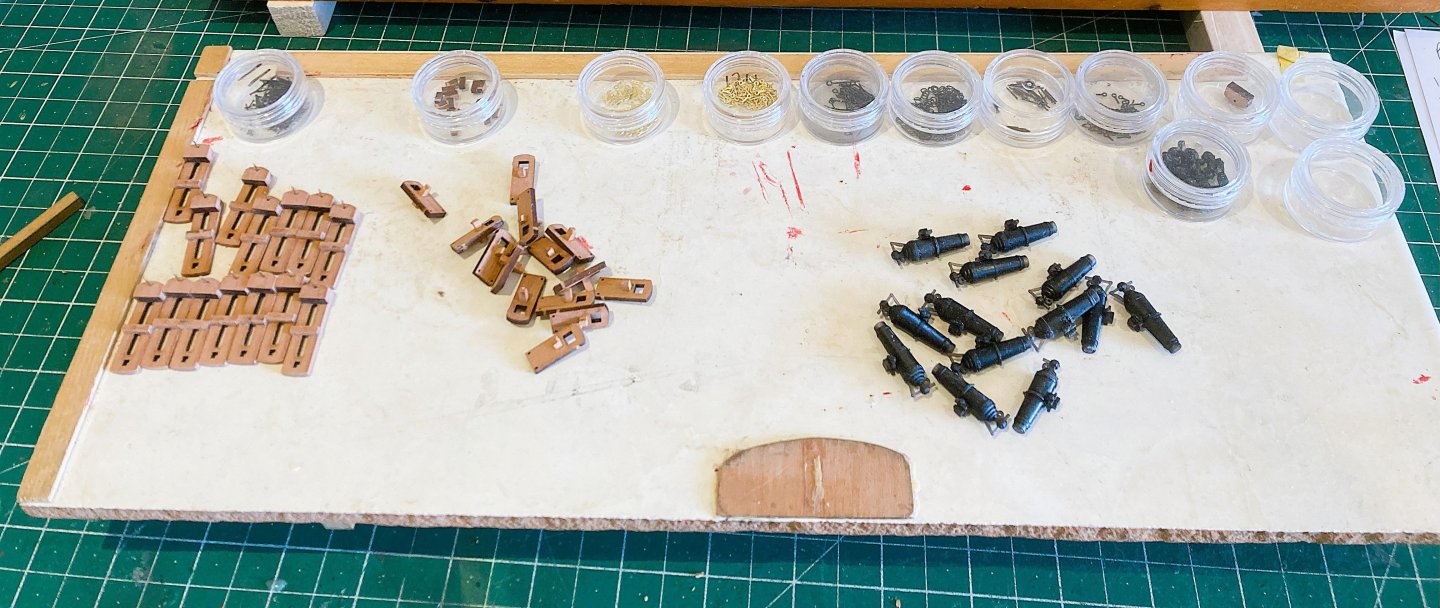
Post 59 Carronades Harpy carried a complement of (16) 32 pounder carronades. 3661a I like to set up a sort of production line for carronade assembly, all the constituent parts in separate containers. Before I get to that part I need to decide what position I prefer the carronades to be set. 3664a There are three options, run-out, inboard (run-in), and mid-way. 3665a 3662a 0070 I quite like the Run-in position which I think I will use for most of the guns, with a couple of examples of the other settings. I am thinking I could modify the slides to allow movement of the carriages. 3667a At this early stage I have noticed that the elevating screws are subject to breaking when removing the supporting fret. I had three break but they are easily drilled and fitted with a blackened pin. I used a No11 scalpel blade for the cutting and found that cutting the elevation screw first worked best for me. B.E. 26/03/2025


- 332 replies
-
- 23
-
-
- Harpy
- Vanguard Models
- (and 1 more)
-
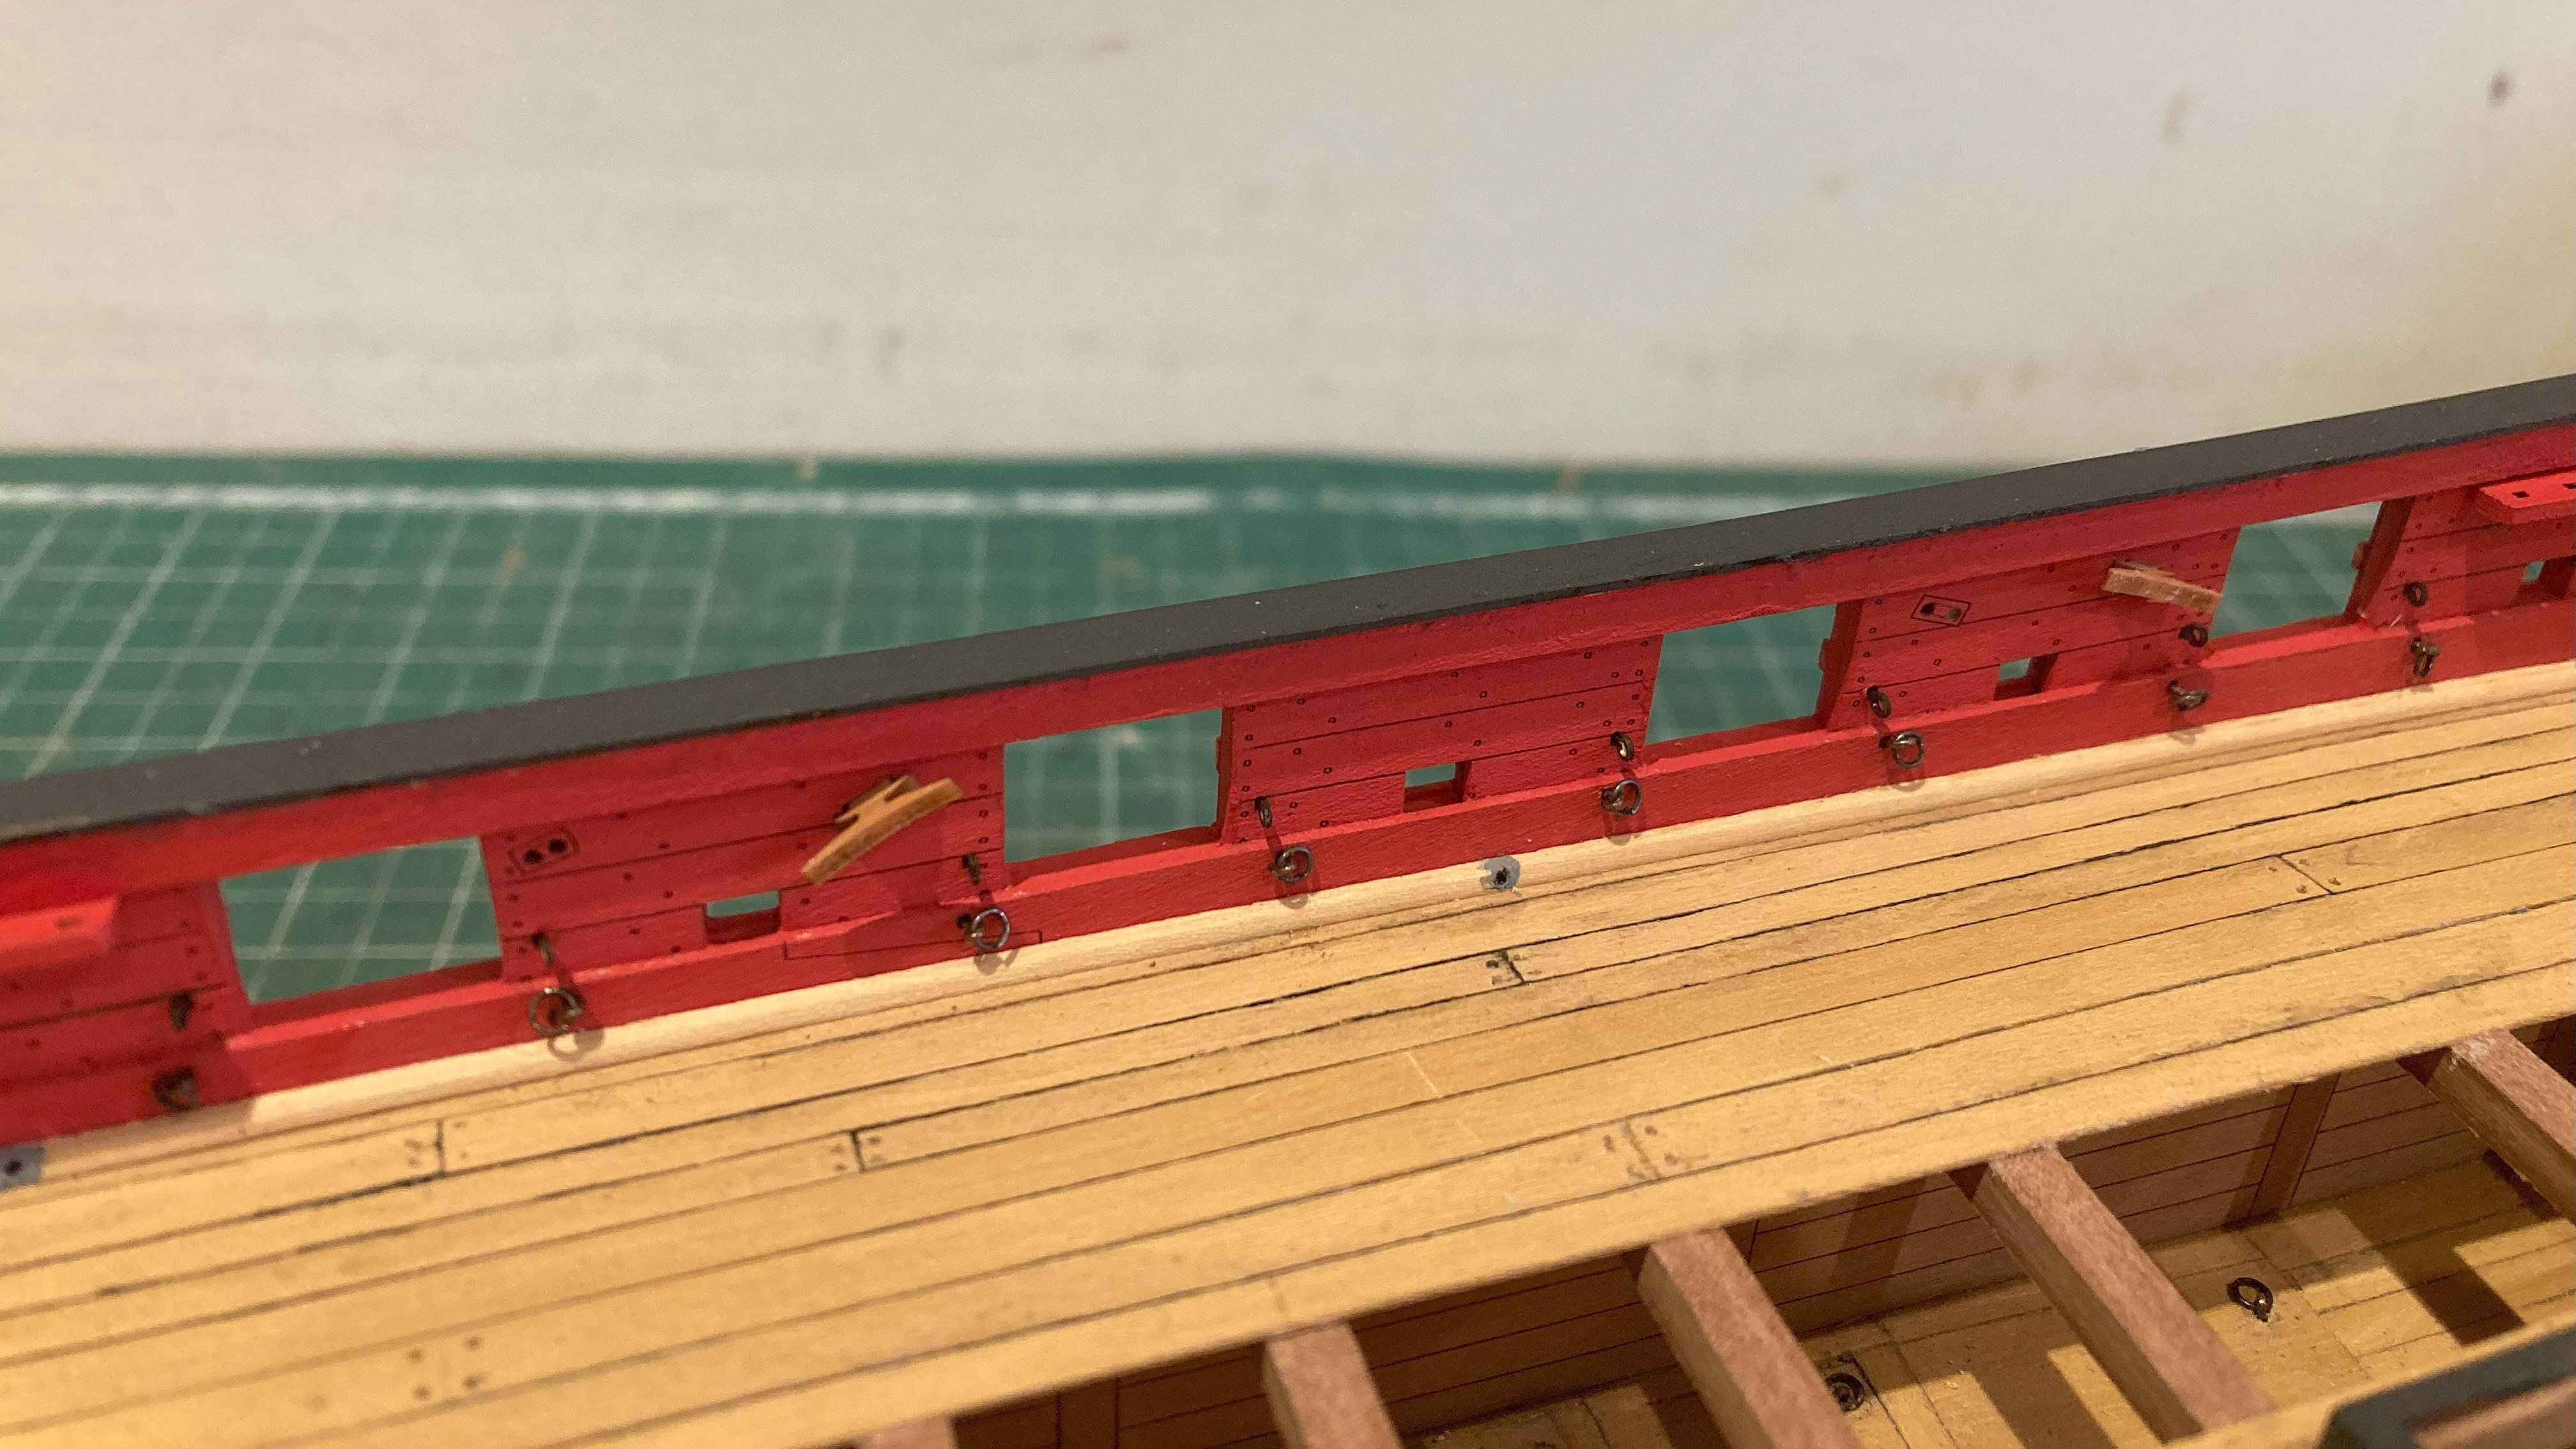
Thanks Ron, my old Pentax doesn't seem to be responding to adjustments so I've ditched it in favour of the i-phone which gives a more representative colour match. @ Rusty - Thanks for looking in Rusty, hope things are good with you. Post 58 Rings and things A stage I can’t put off any further, the bulwark fixings for the gun tackles. Some 88 pieces are required to equip the gunports, all to be chemically blackened. 044 Etched eyes are provided for both side tackles and breeching, altho’ the breechings should really be ring bolts, something I have modified on every build I have done. Adds to the work but the look for me is so much better. 041 I used the kit provided eyes for the tackle fixings, and Amati fine eyebolts and 2mm brass rings for the breeching ring bolts. 3643a Along with the ironwork there are pin racks and cleats to fit. 3653a As a contrast I decided to leave the cleats as varnished plain wood. 3648a 3657a 3655a 3658a Sucks up a lot of time attending to the detail, but she’s starting to look more shipshape now. Been working close to four months on this build, more time than I initially imagined to reach this stage given the amount of pre-cut laser parts. The next stage is likely to be even more time consuming, so Harpy is providing a lot of entertainment for the money. B.E. 25/03/2025.


- 332 replies
-
- 26
-
-
- Harpy
- Vanguard Models
- (and 1 more)
-
The only thing I did perhaps differently to you Glenn was to clean the back of the plates set with fine wire wool and wipe over with isopropanol. I can't understand other than that why they are not sticking.🤔 B.E.
- 241 replies
-
- 1
-
-
- Vanguarrd Models
- Harpy
- (and 1 more)
-
Looking good Walter, and that's a good clean line you have achieved at the waterline. Not sure about being 'calming and relaxing' but you do get into a sort of rhythm with this task, much as you do with ratlines. I'm still glad I progressed both sides together so I wasn't faced with having to do it all over again.🫤 B.E.
-
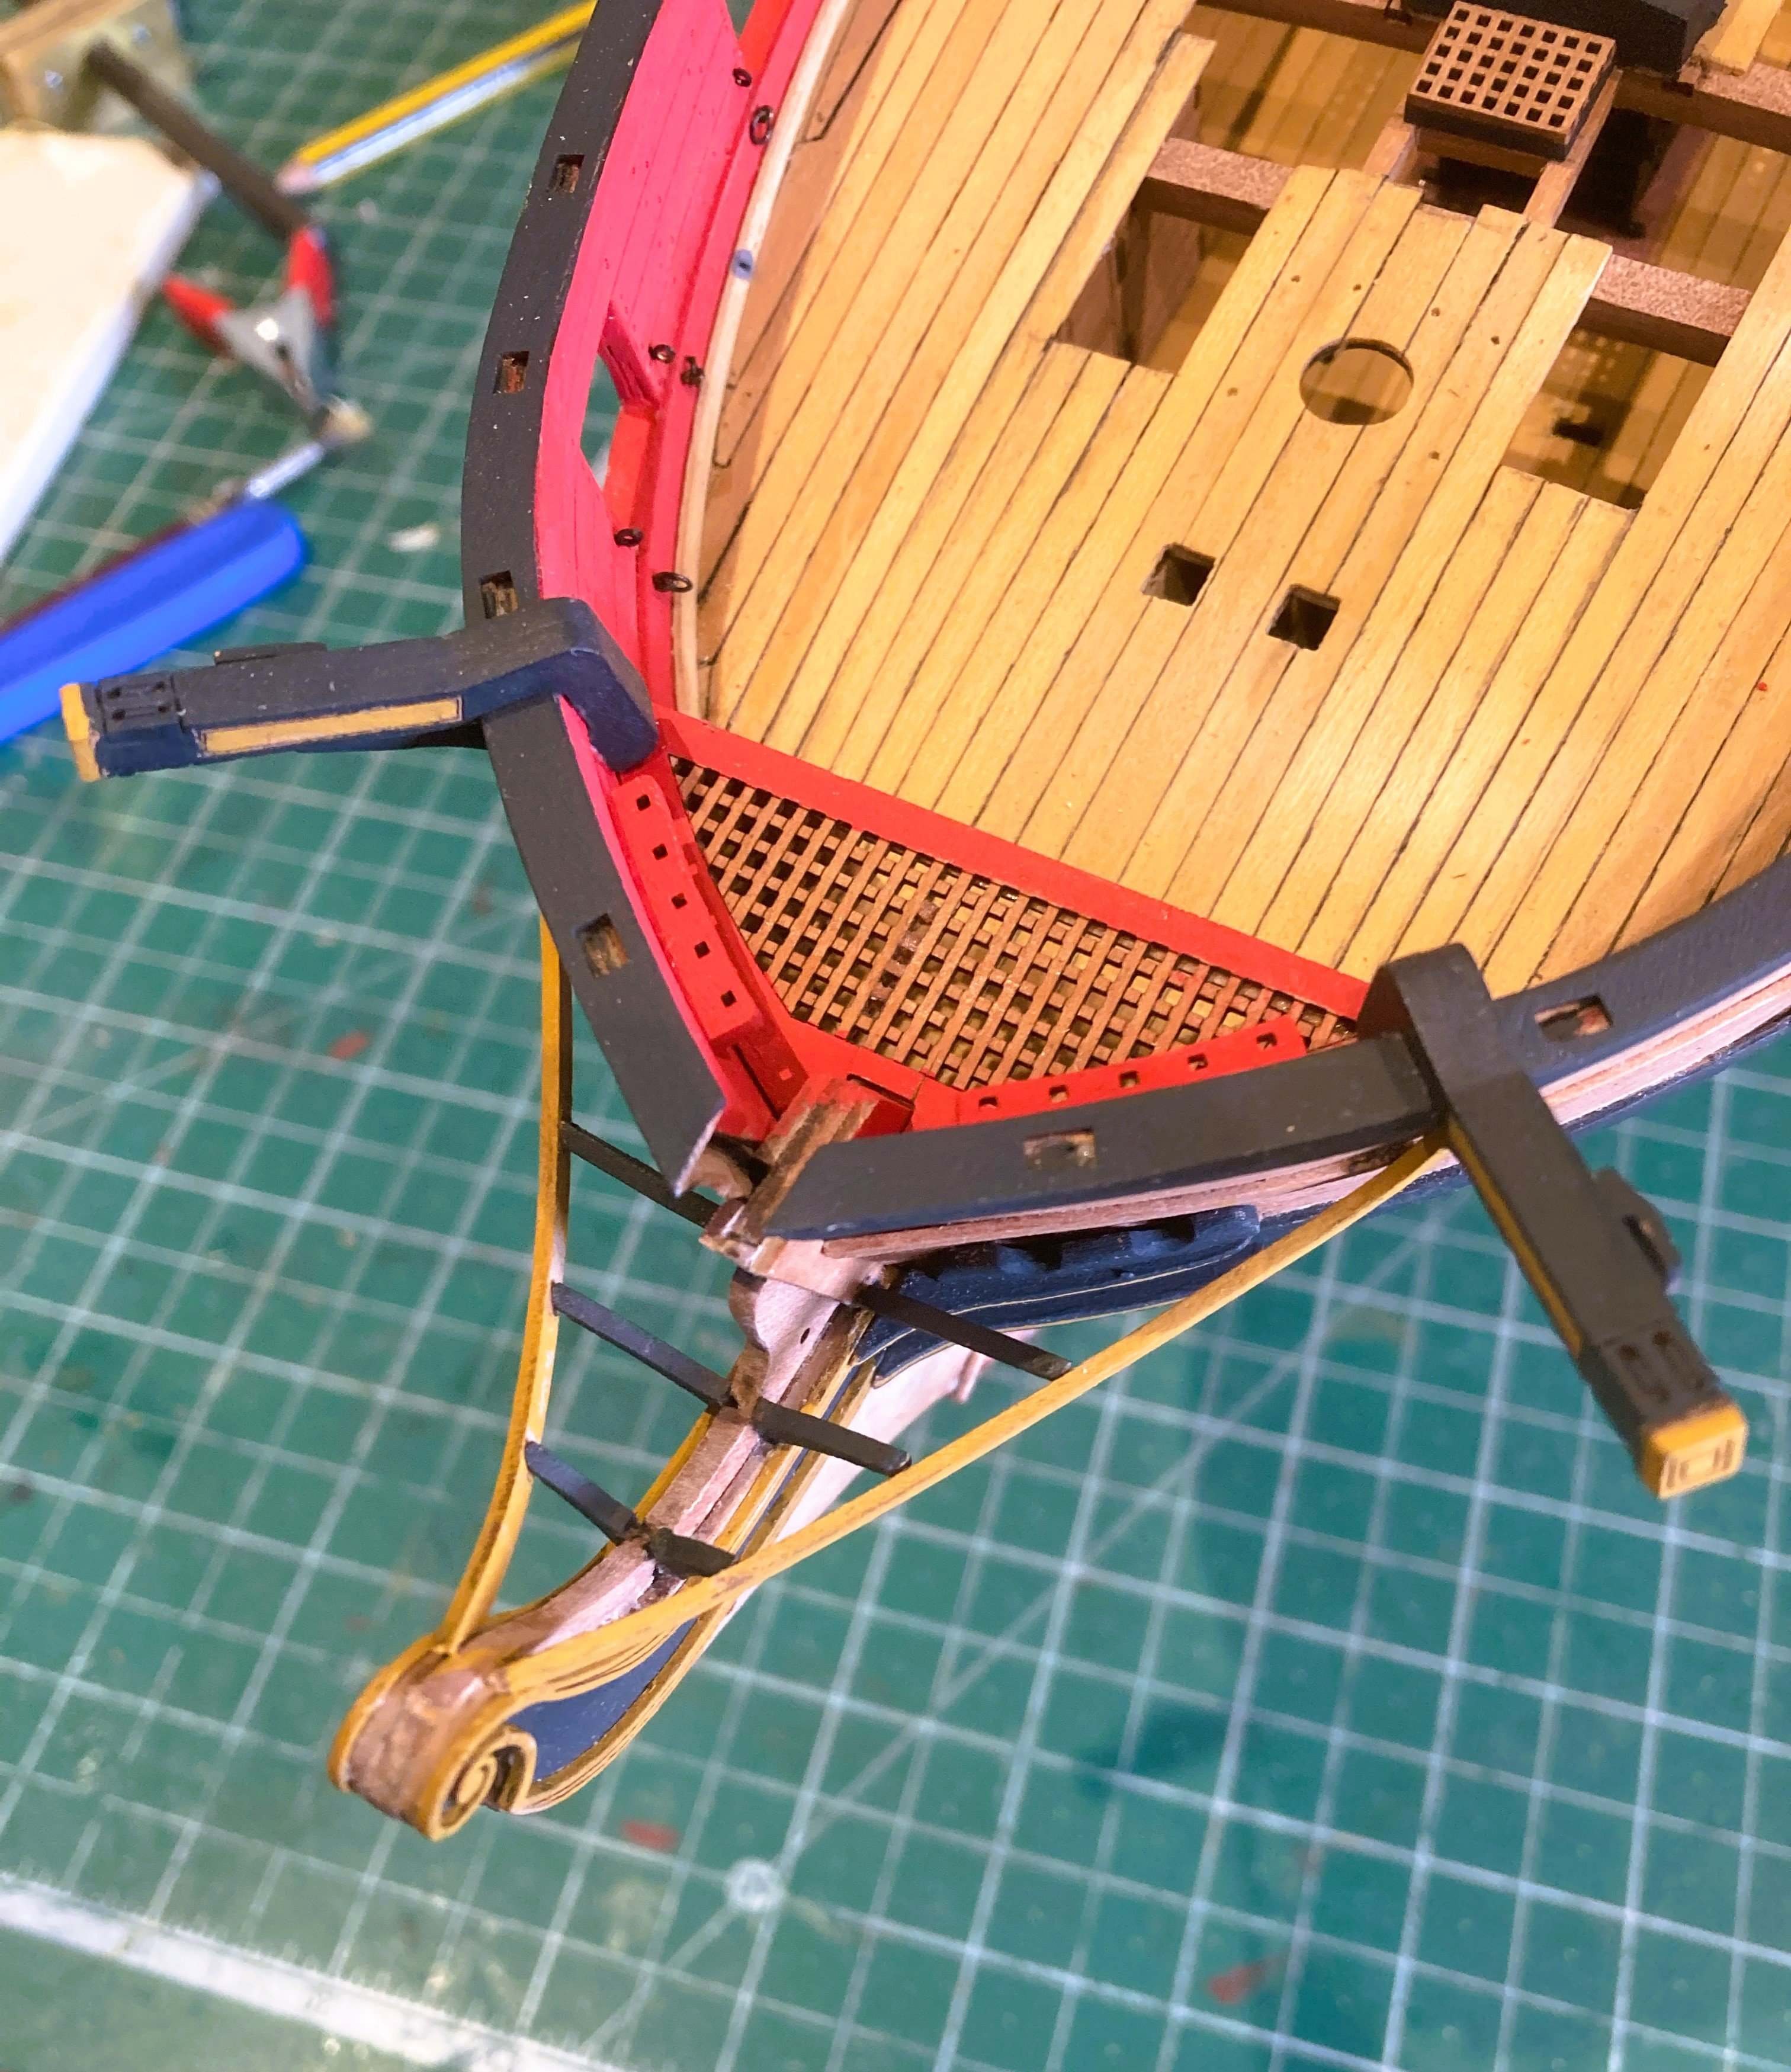
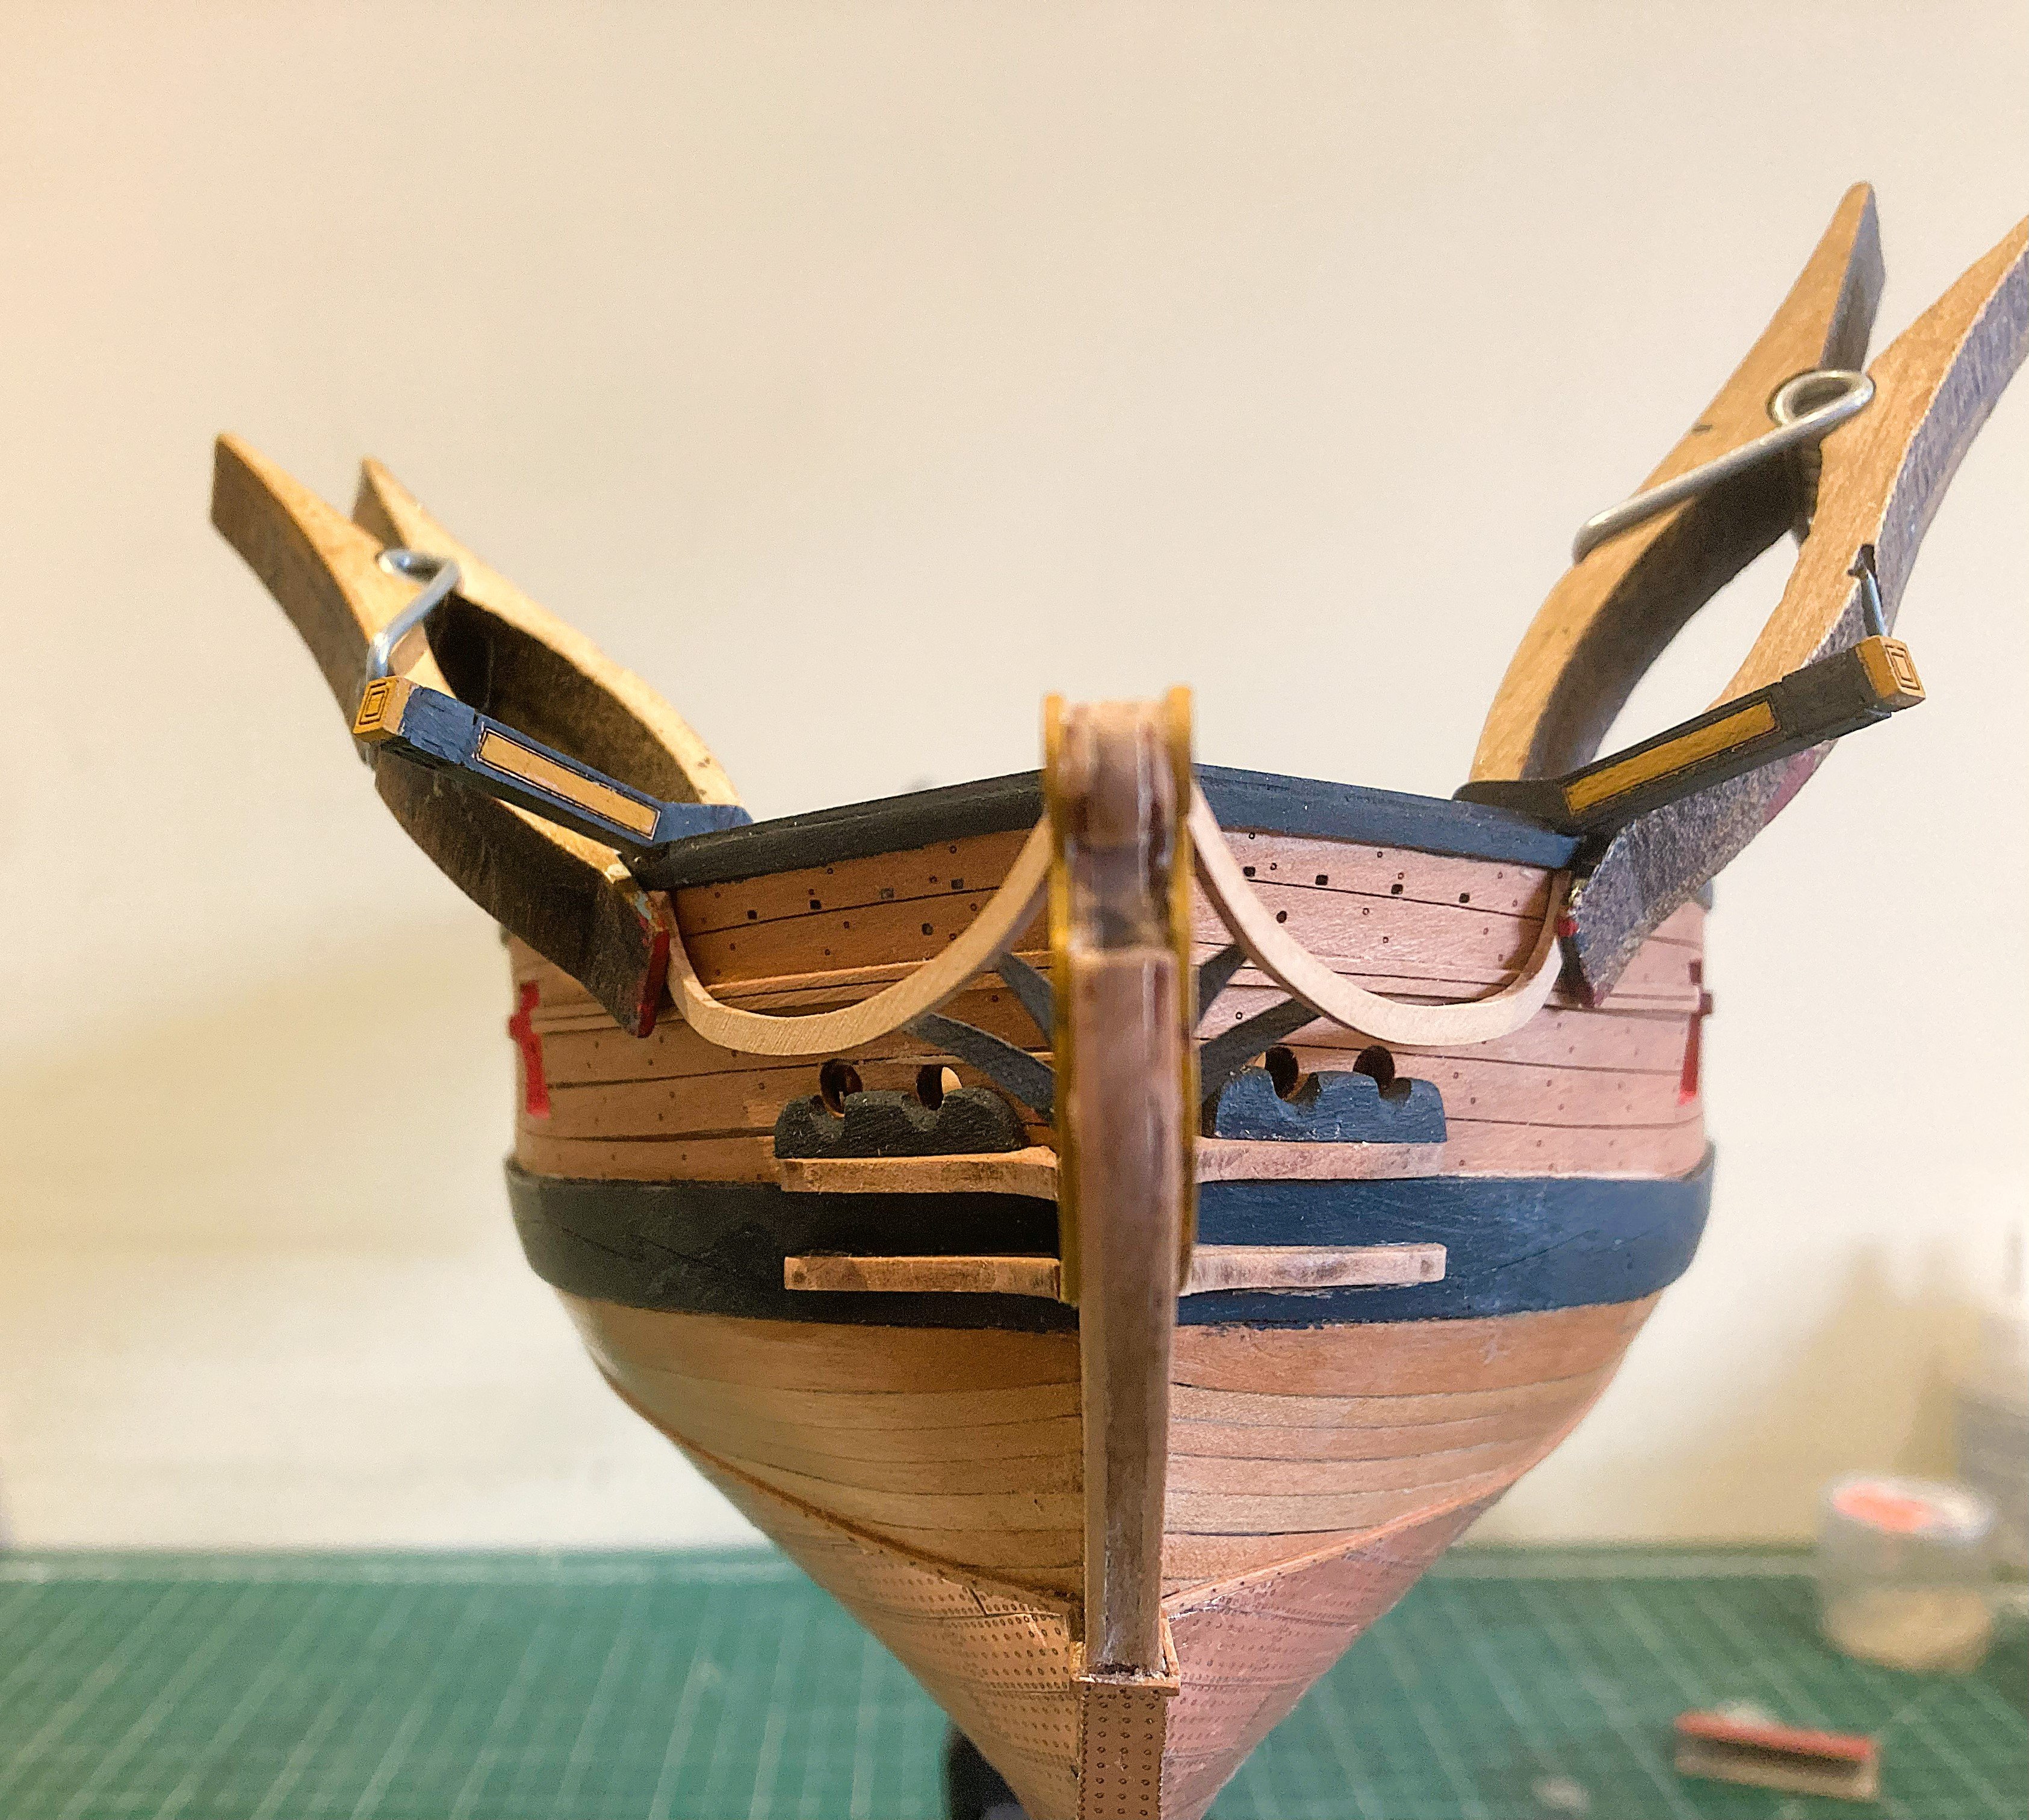
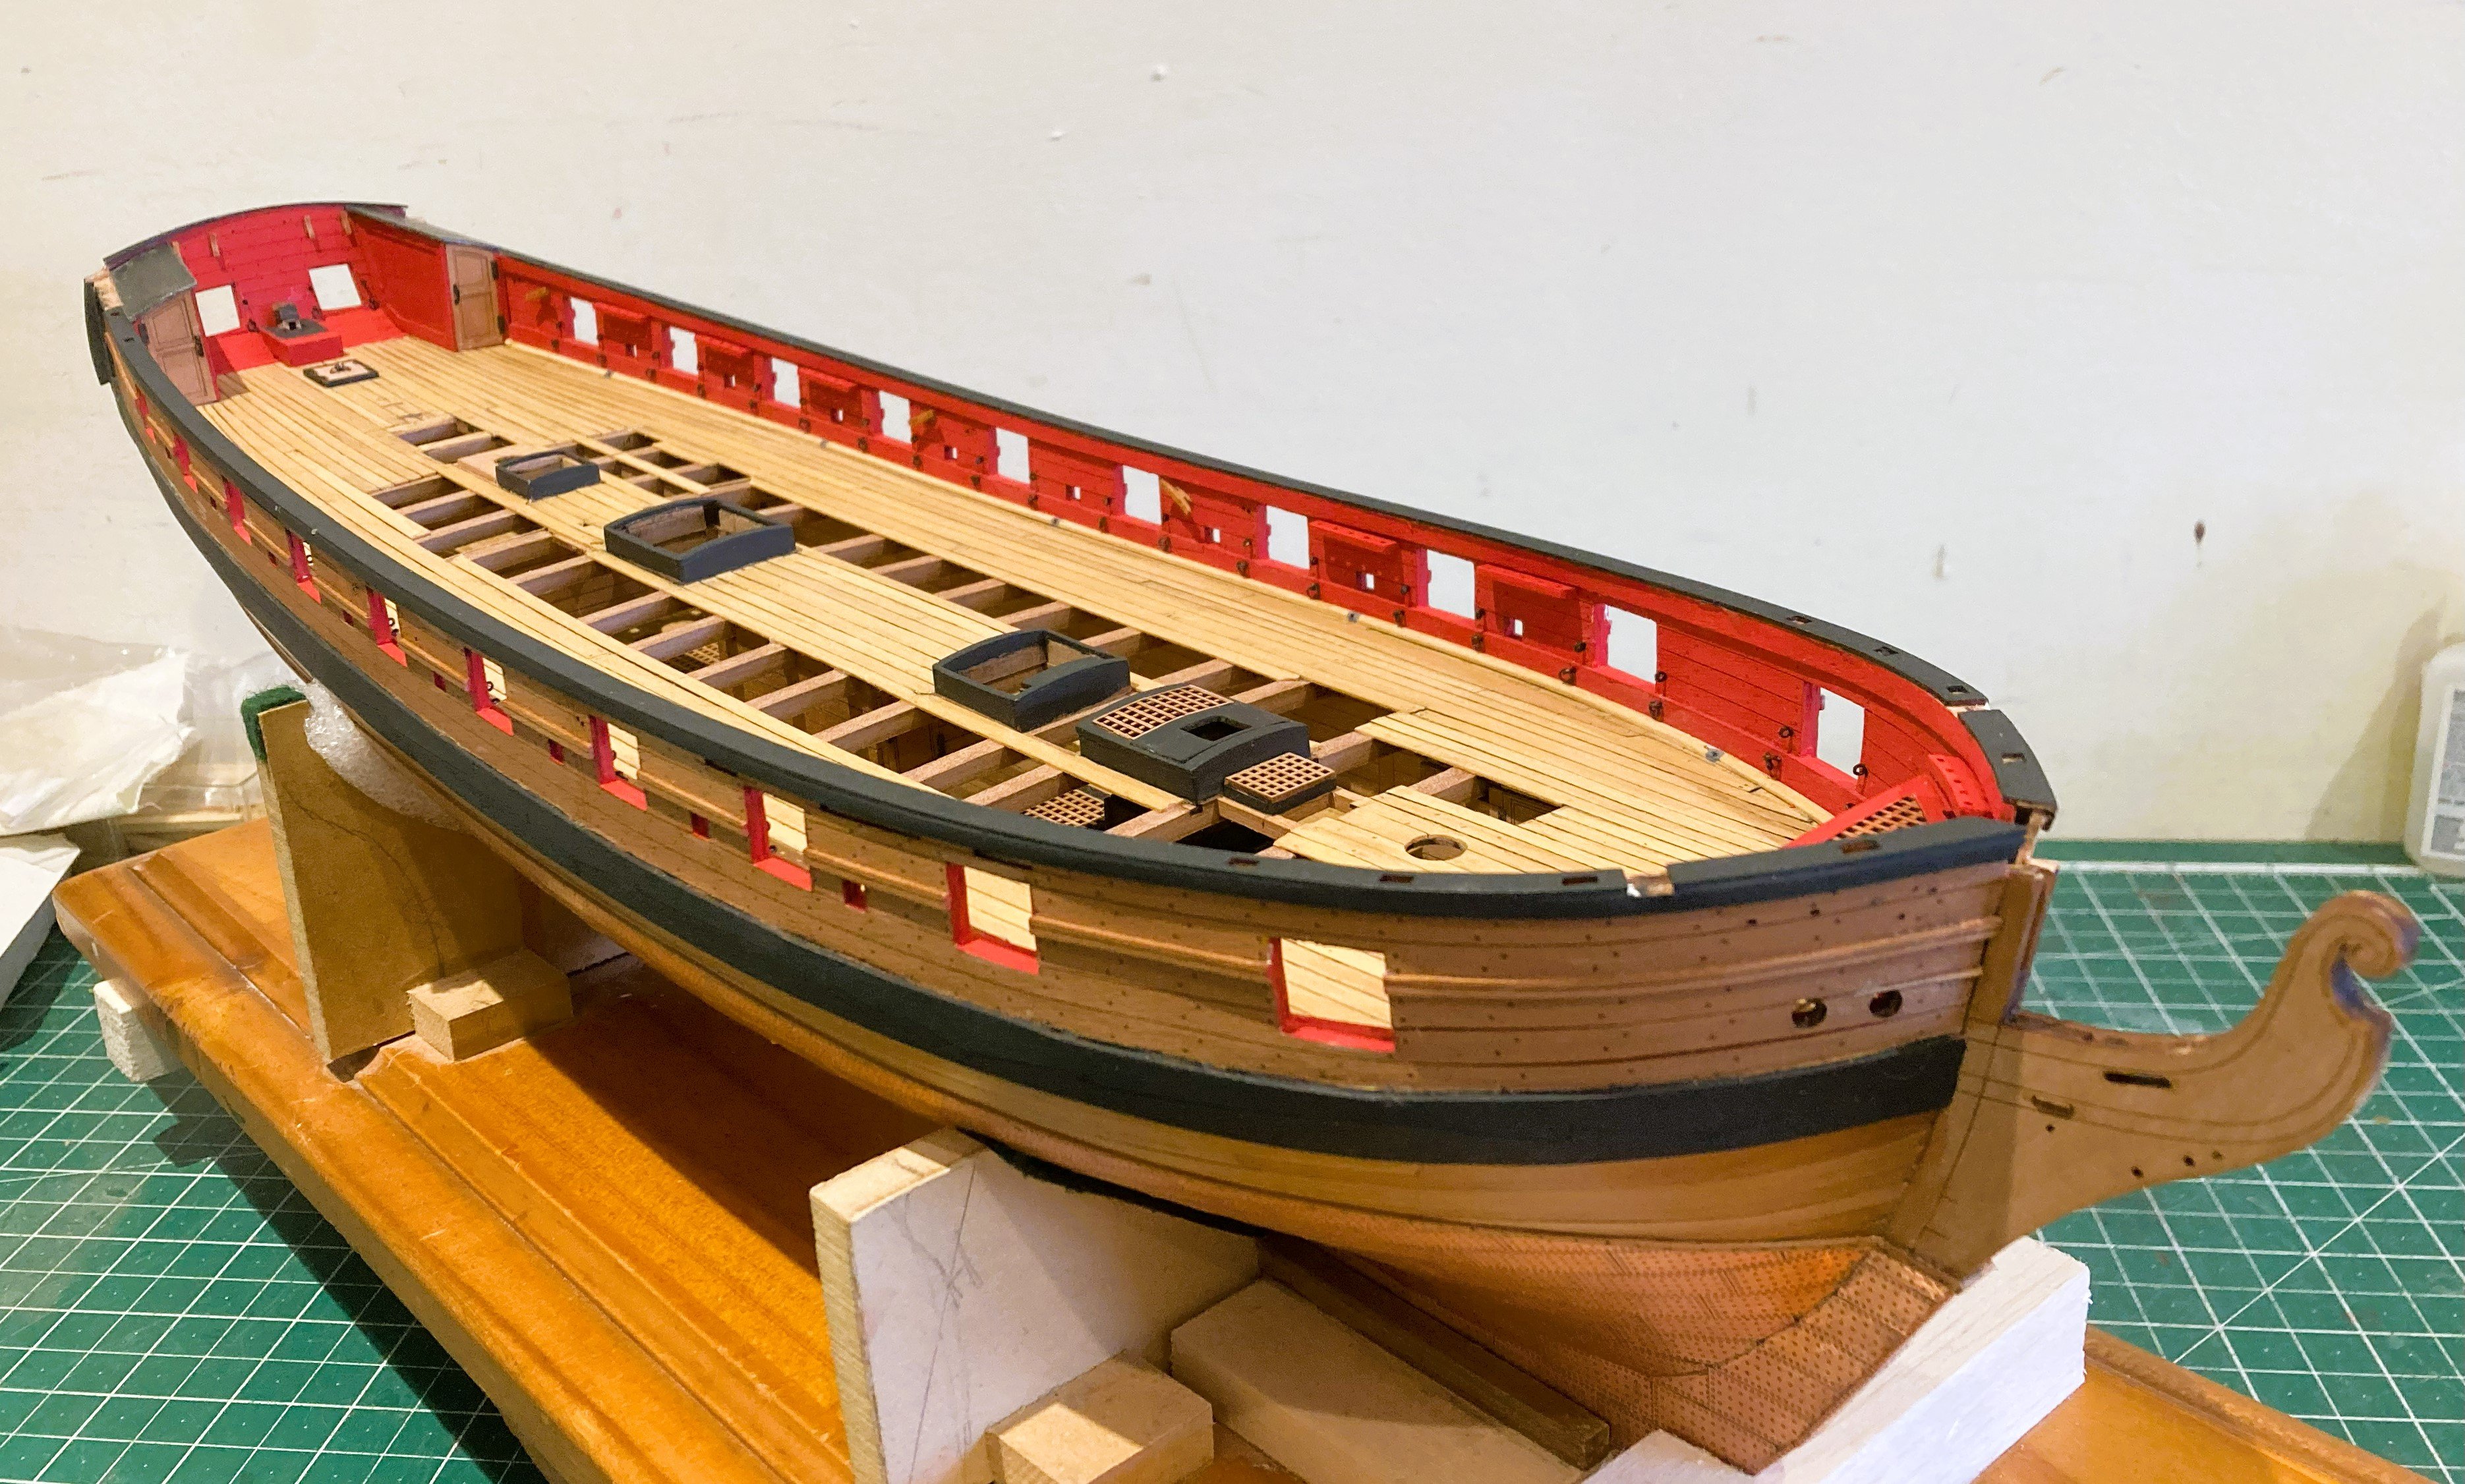
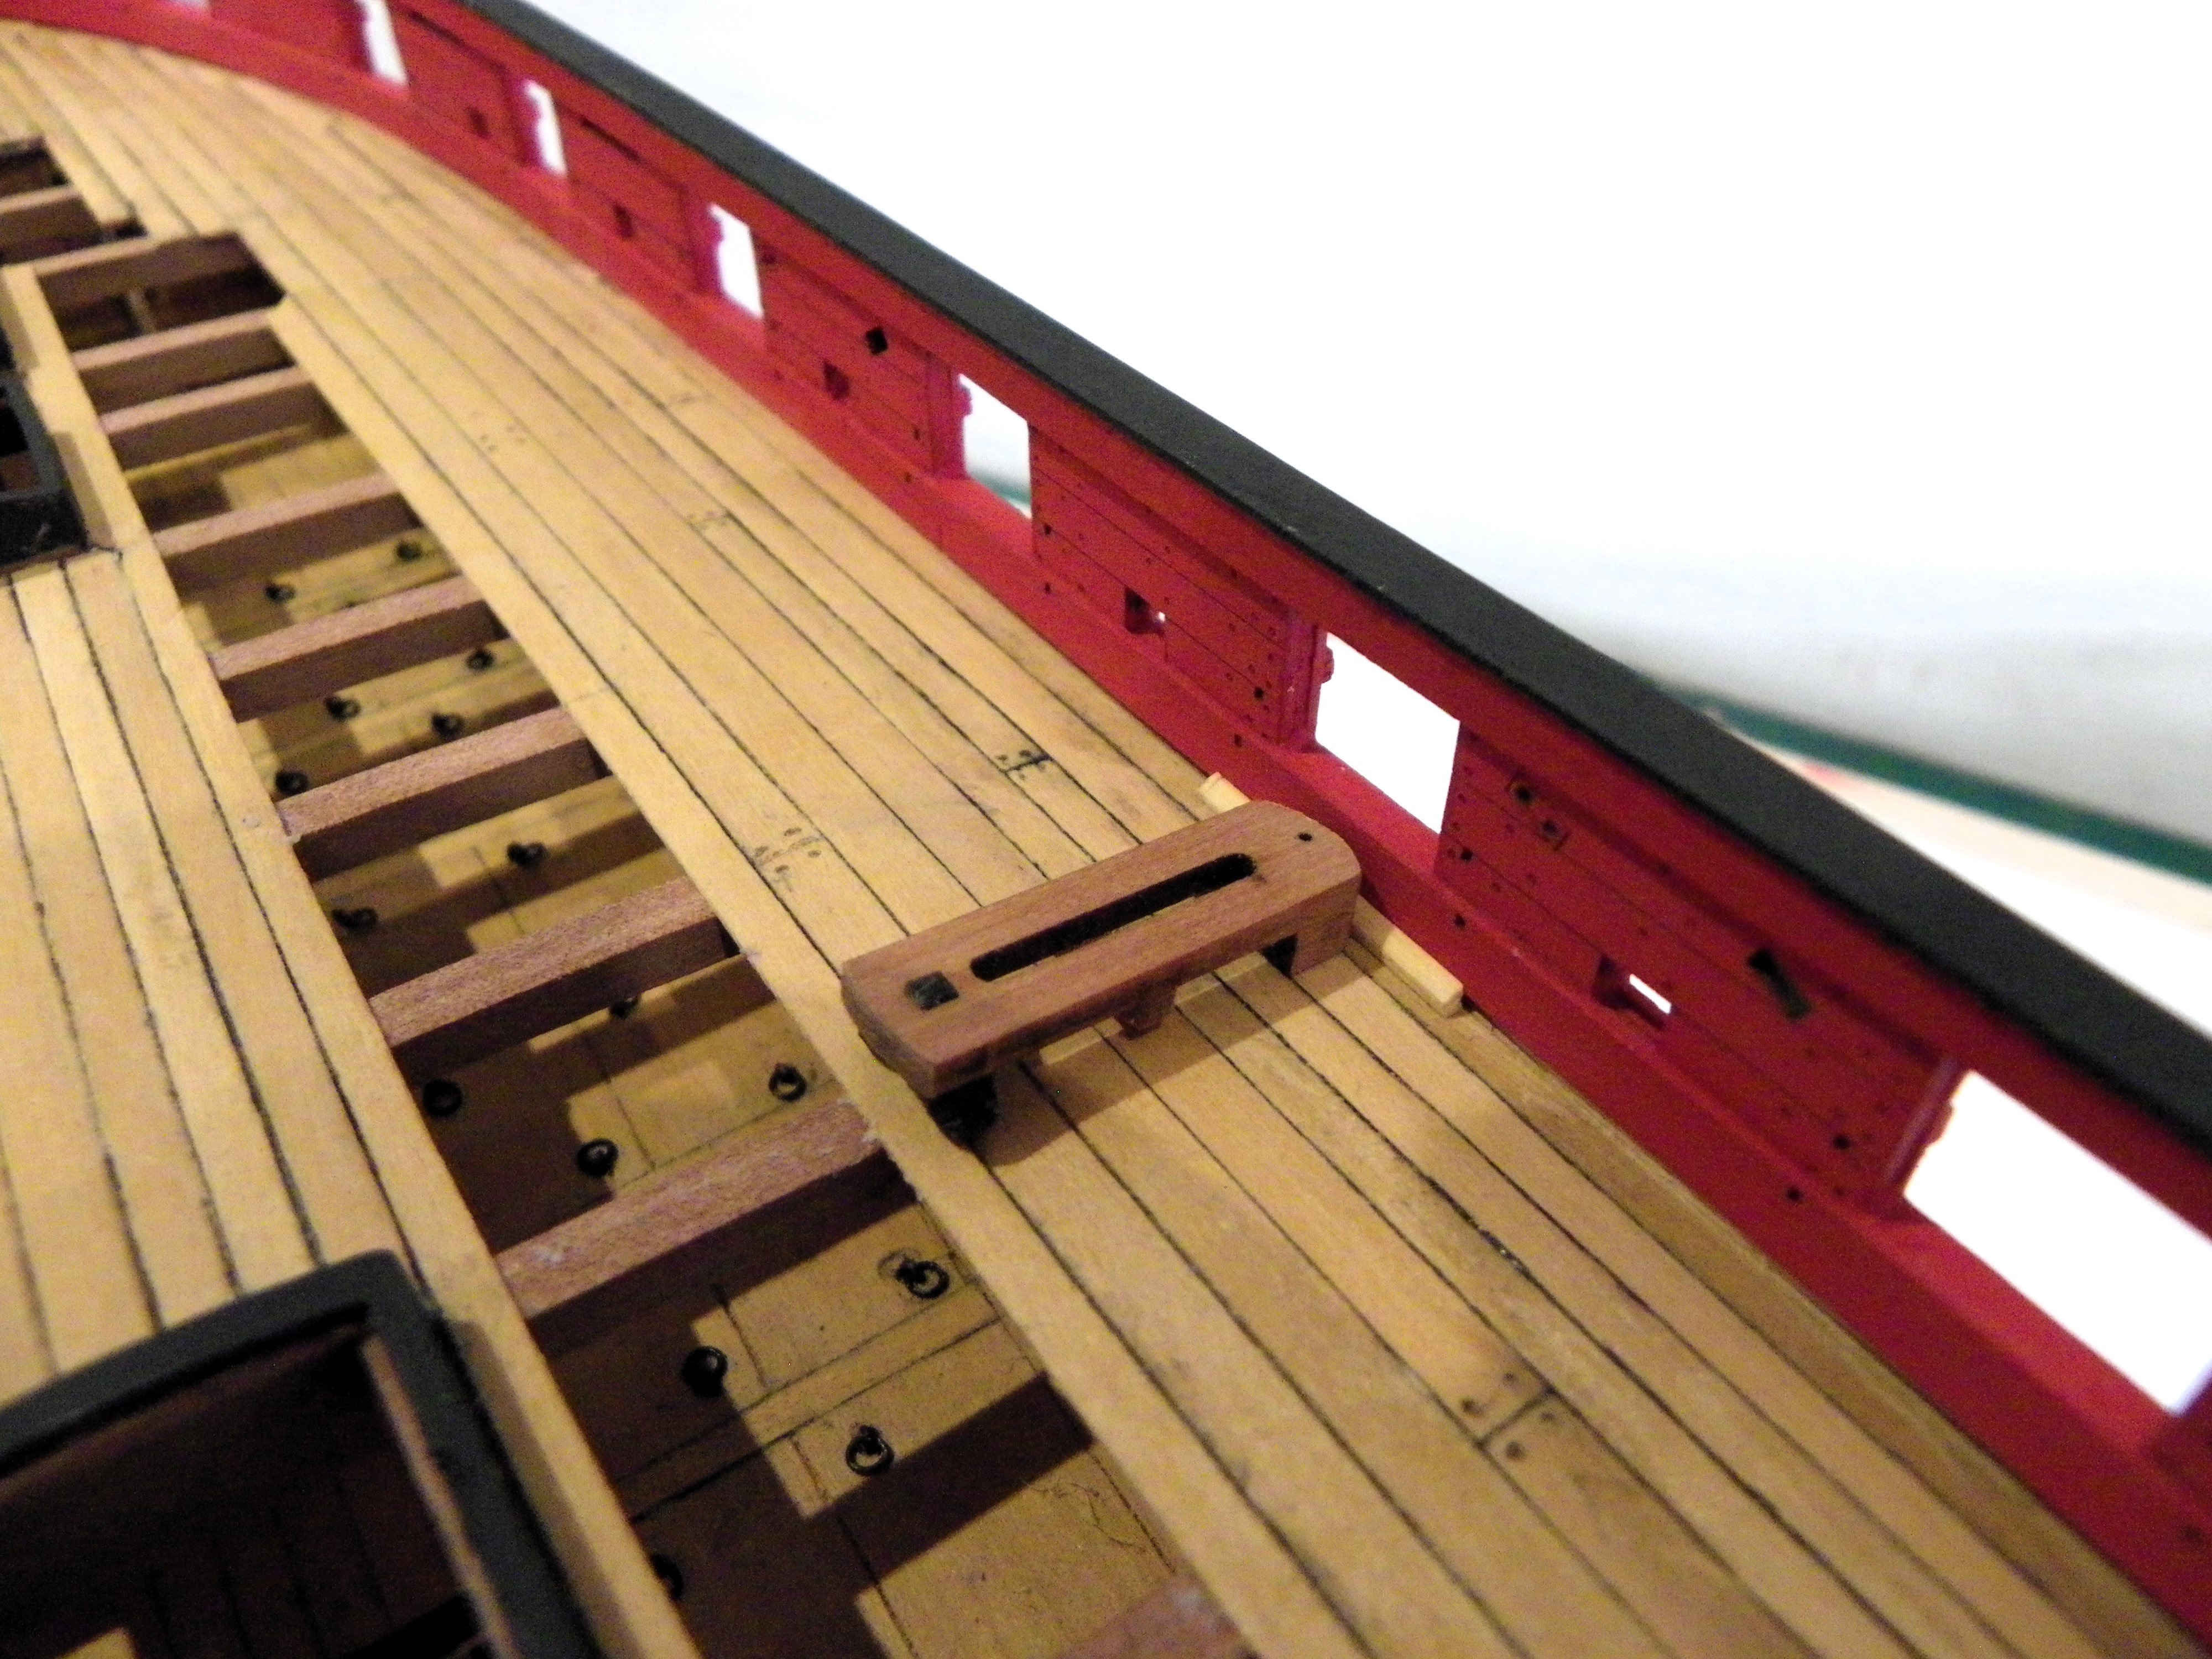
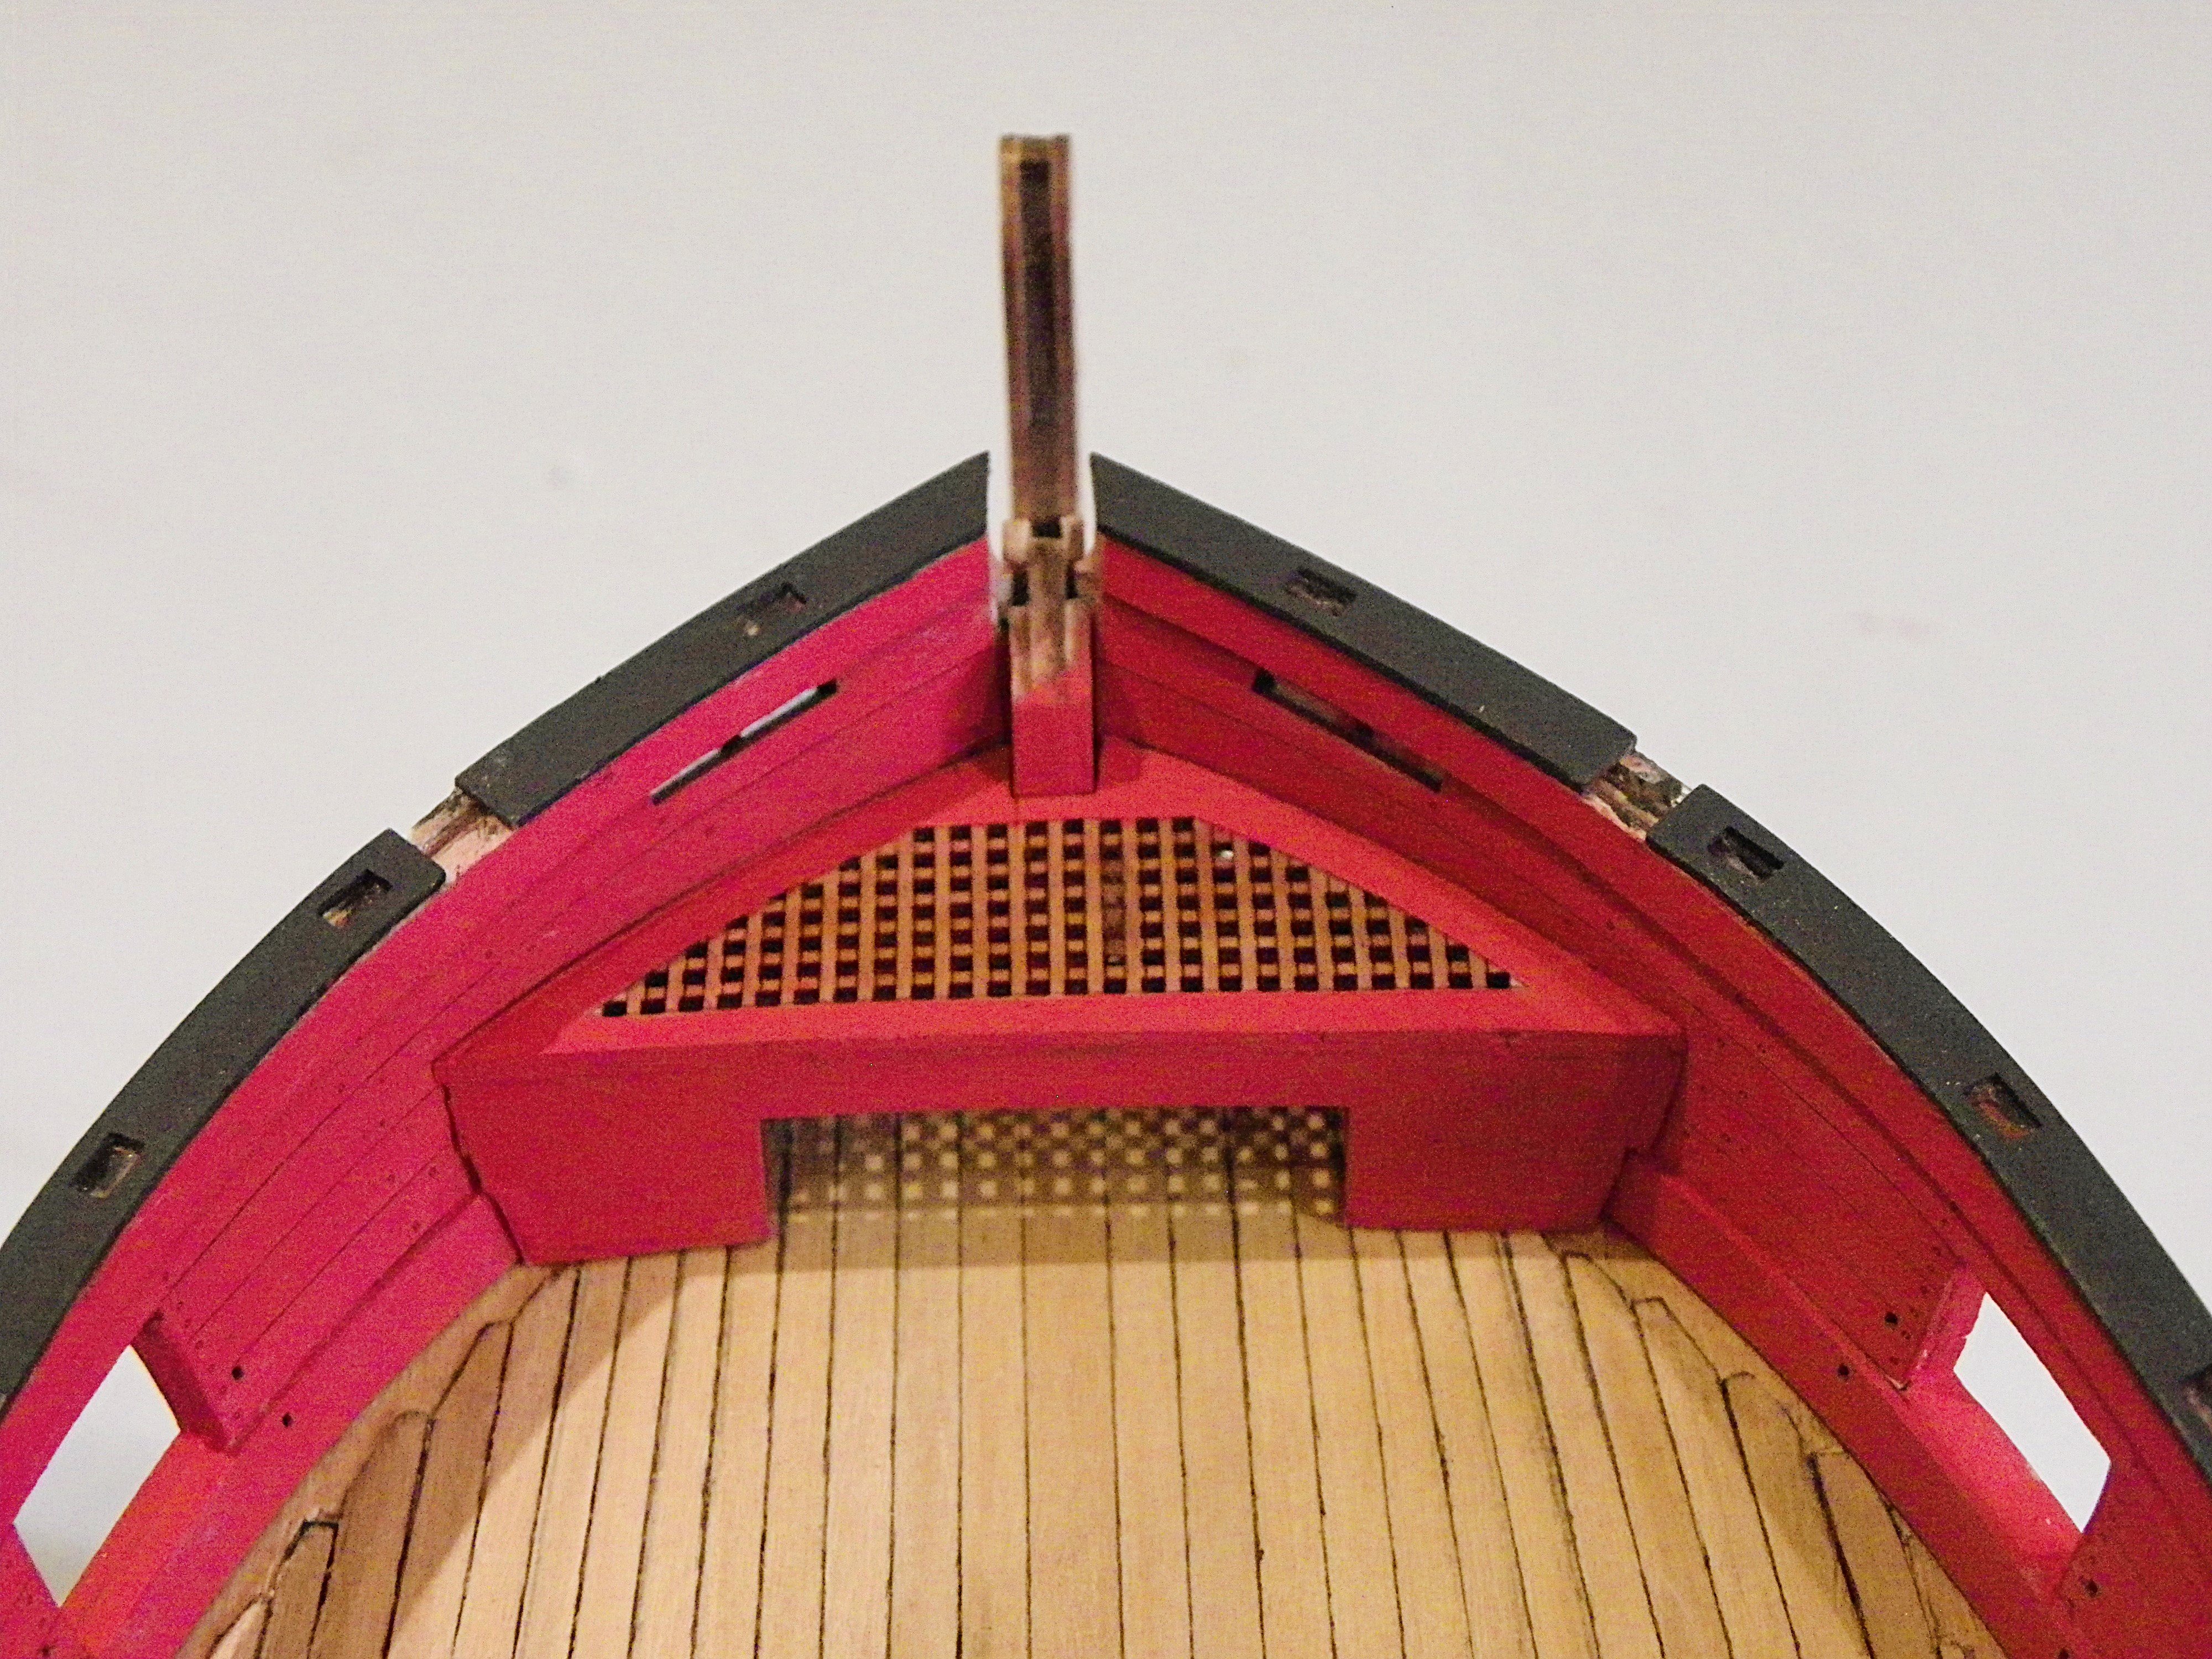
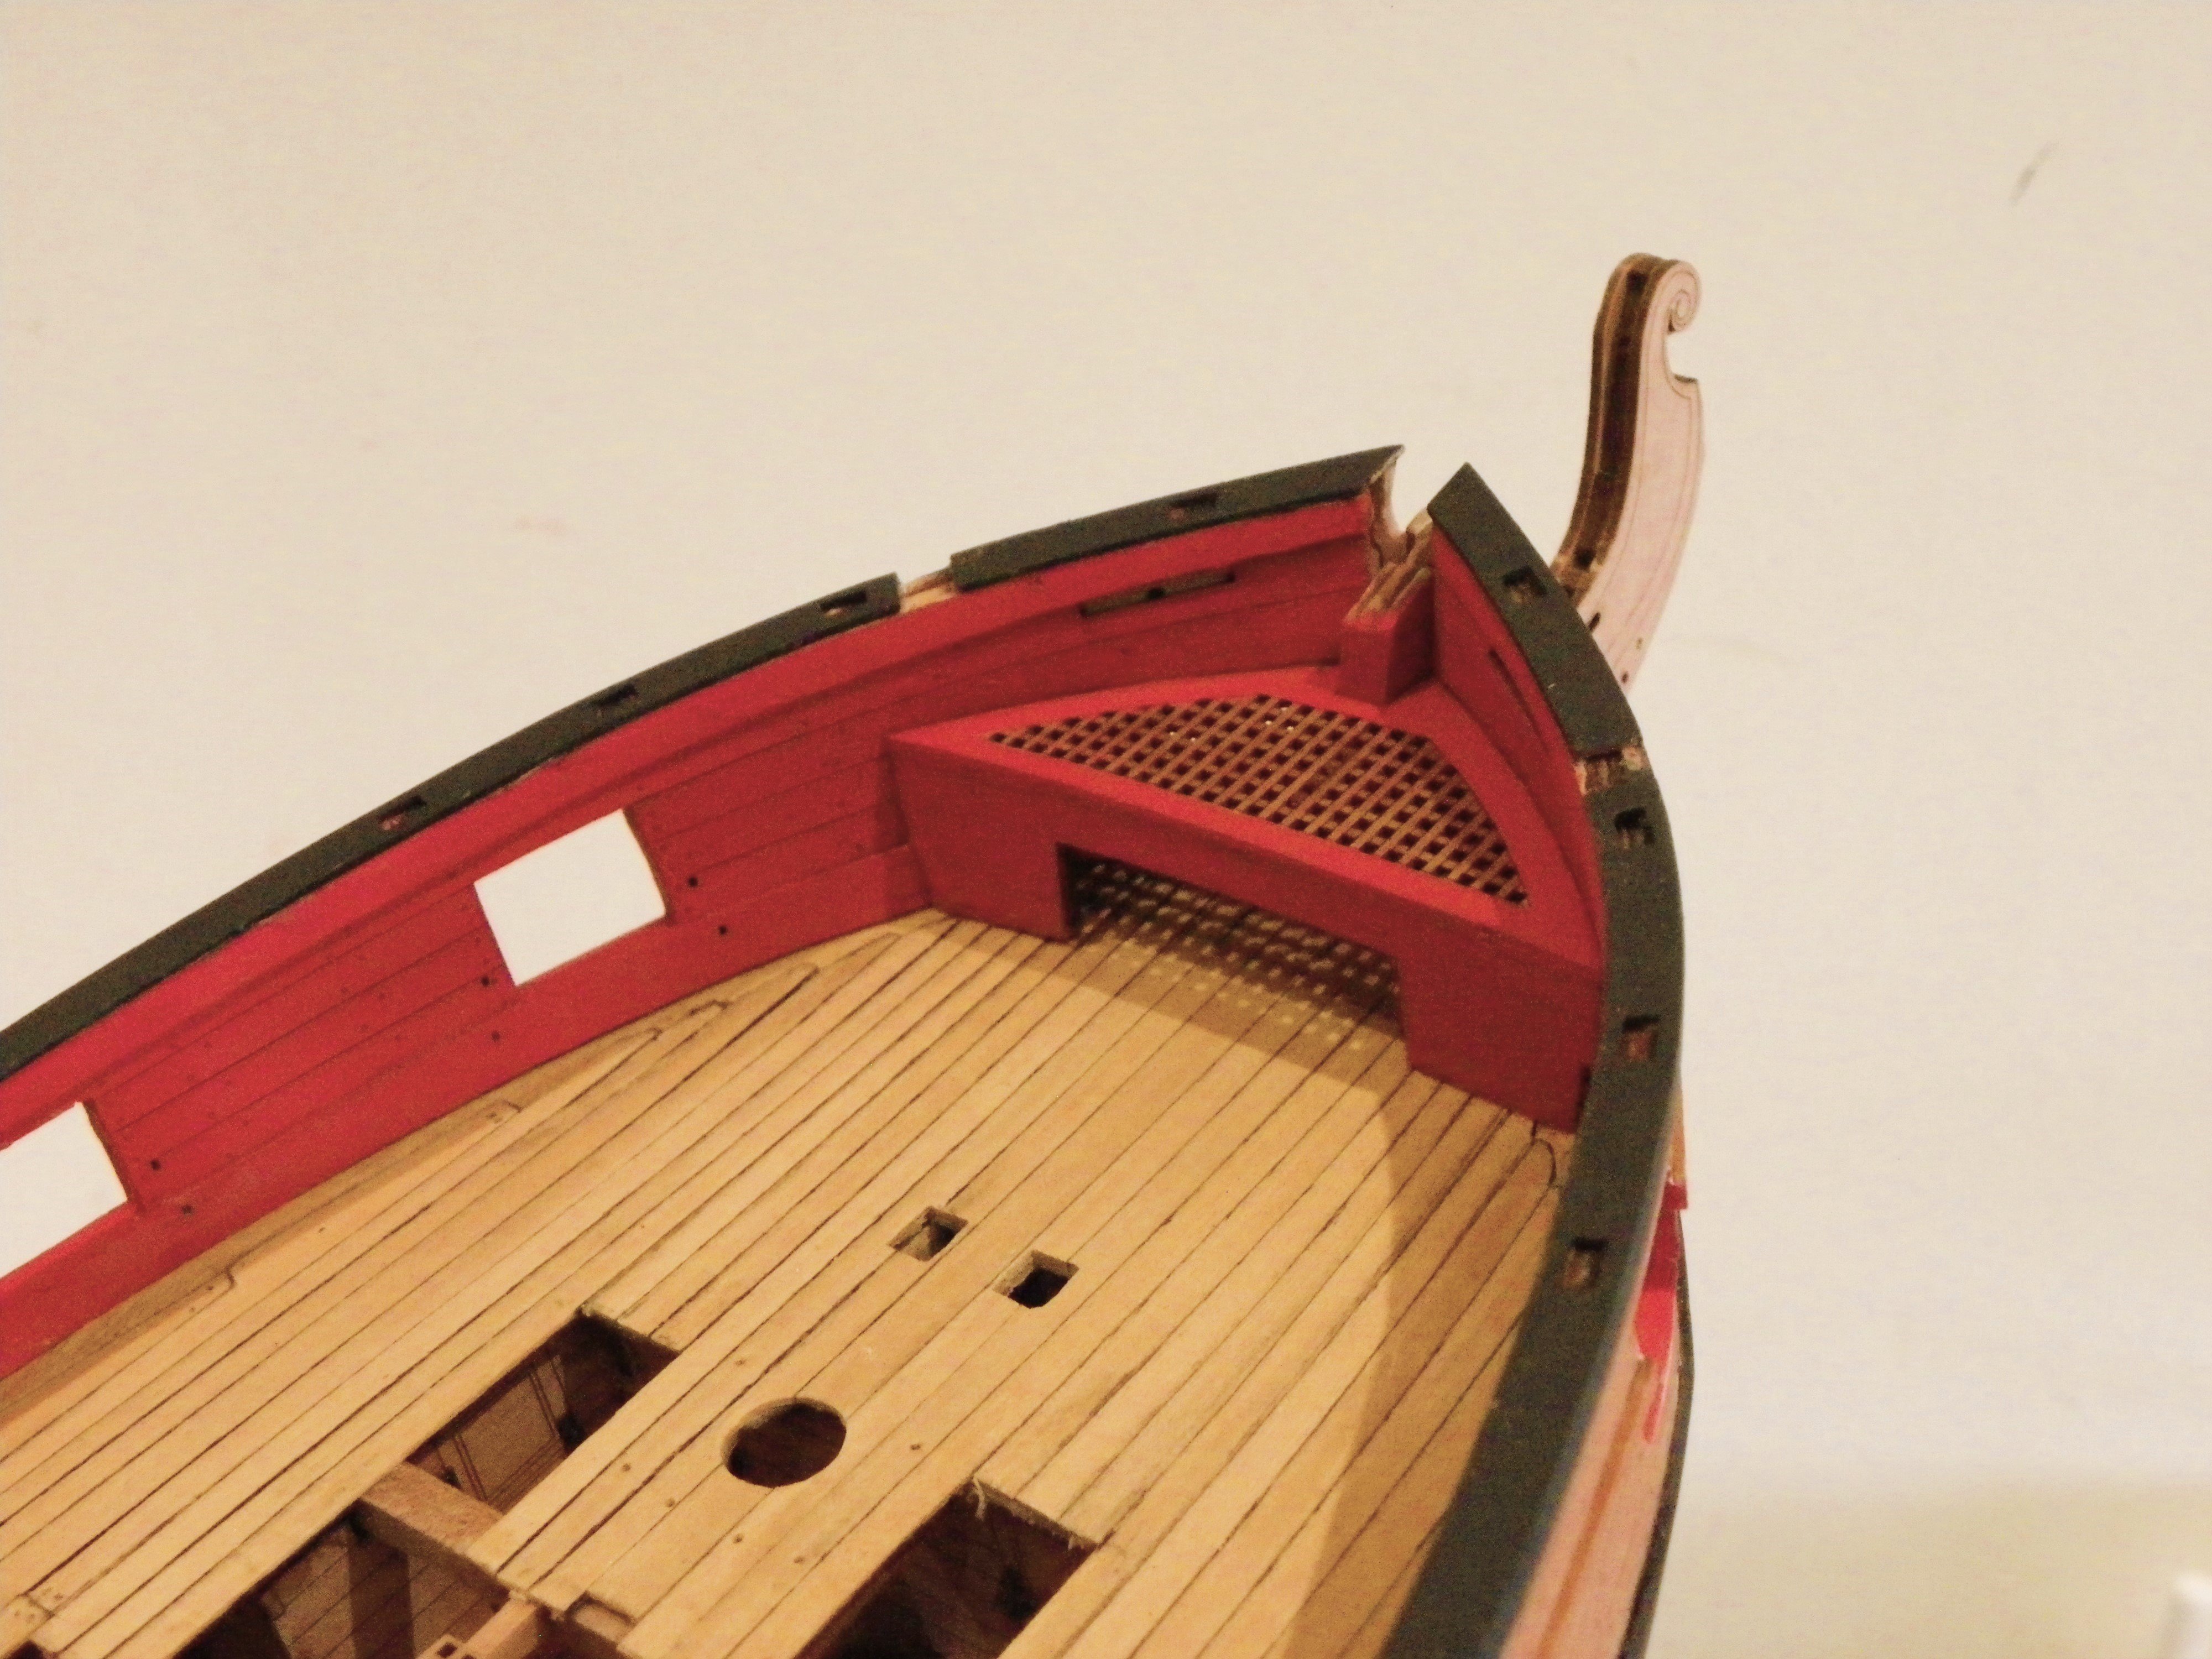
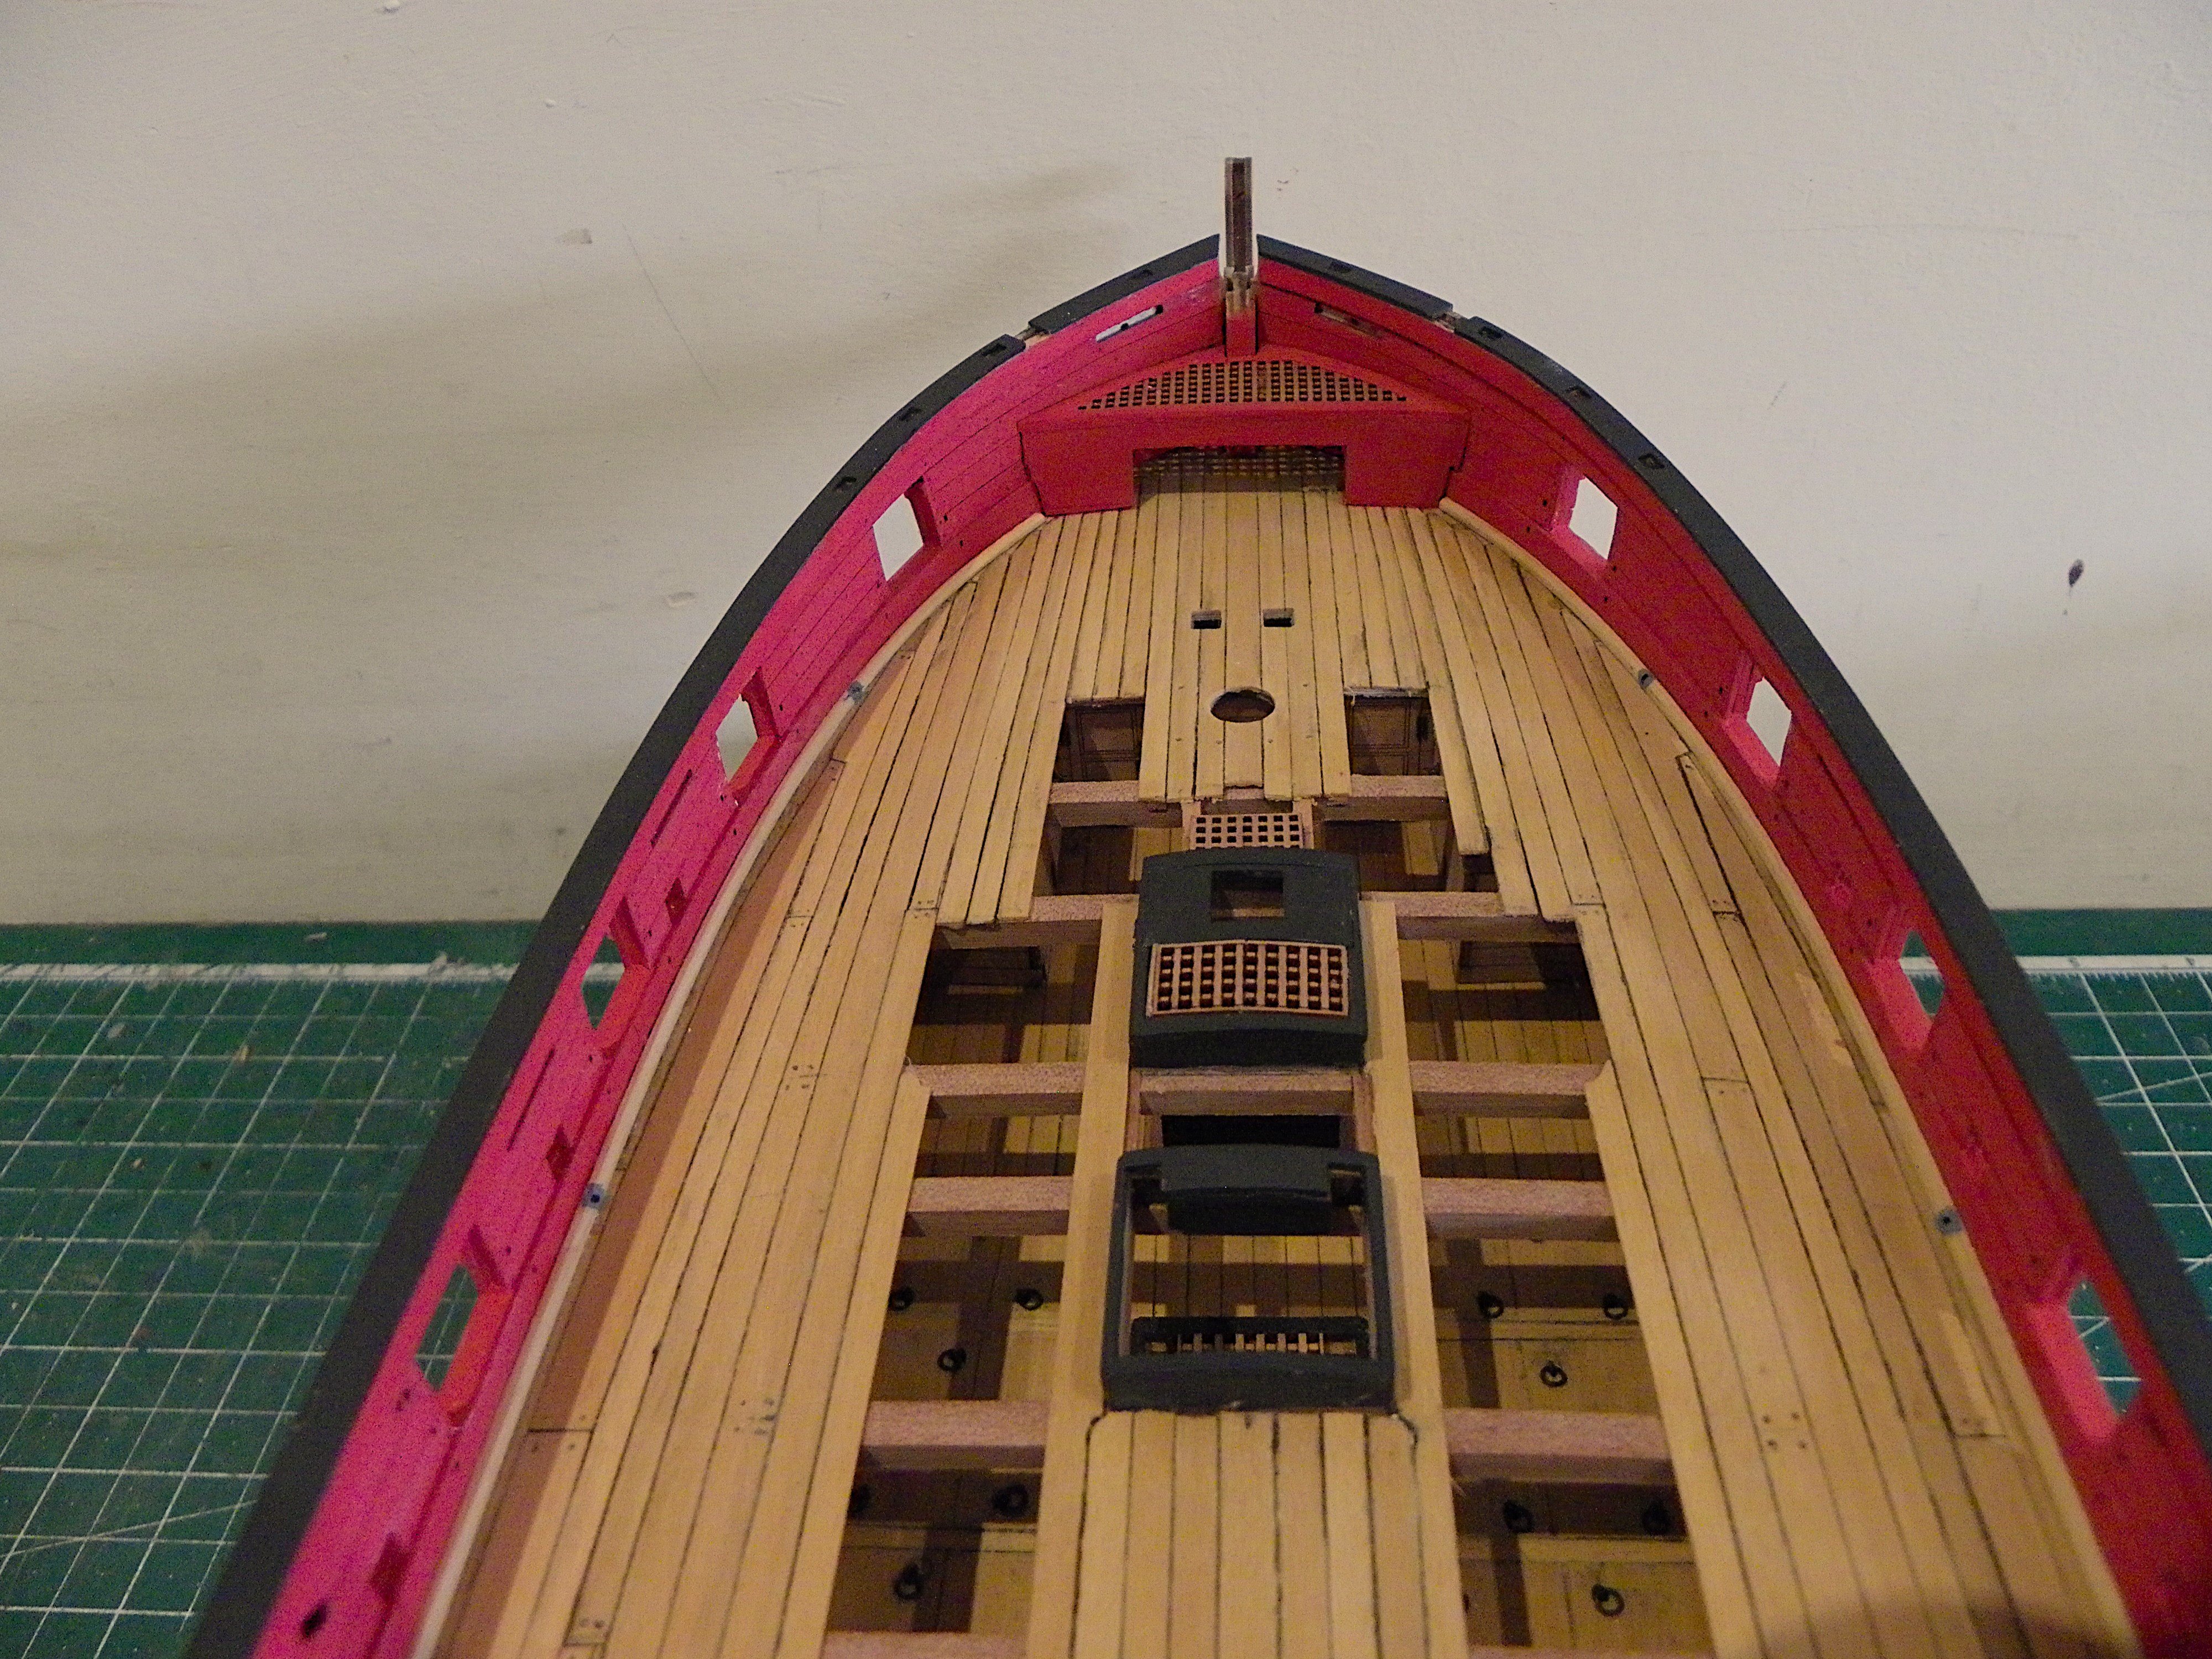
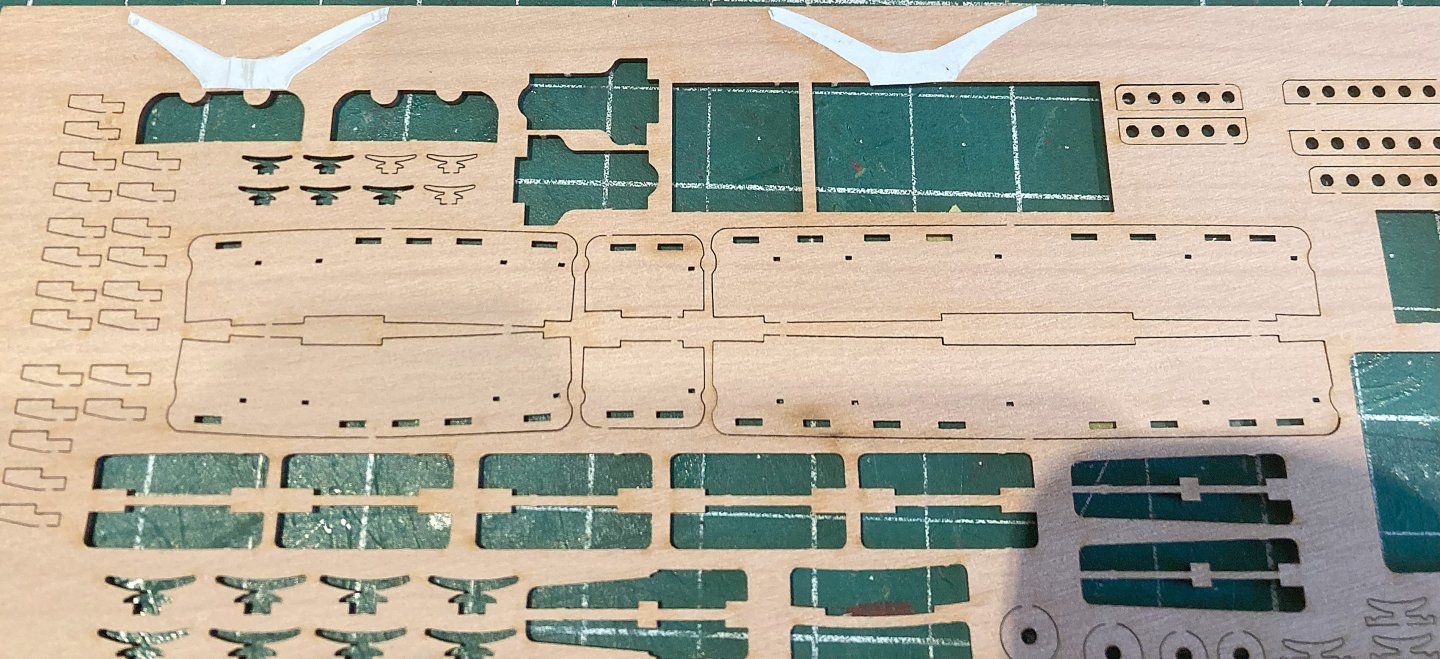
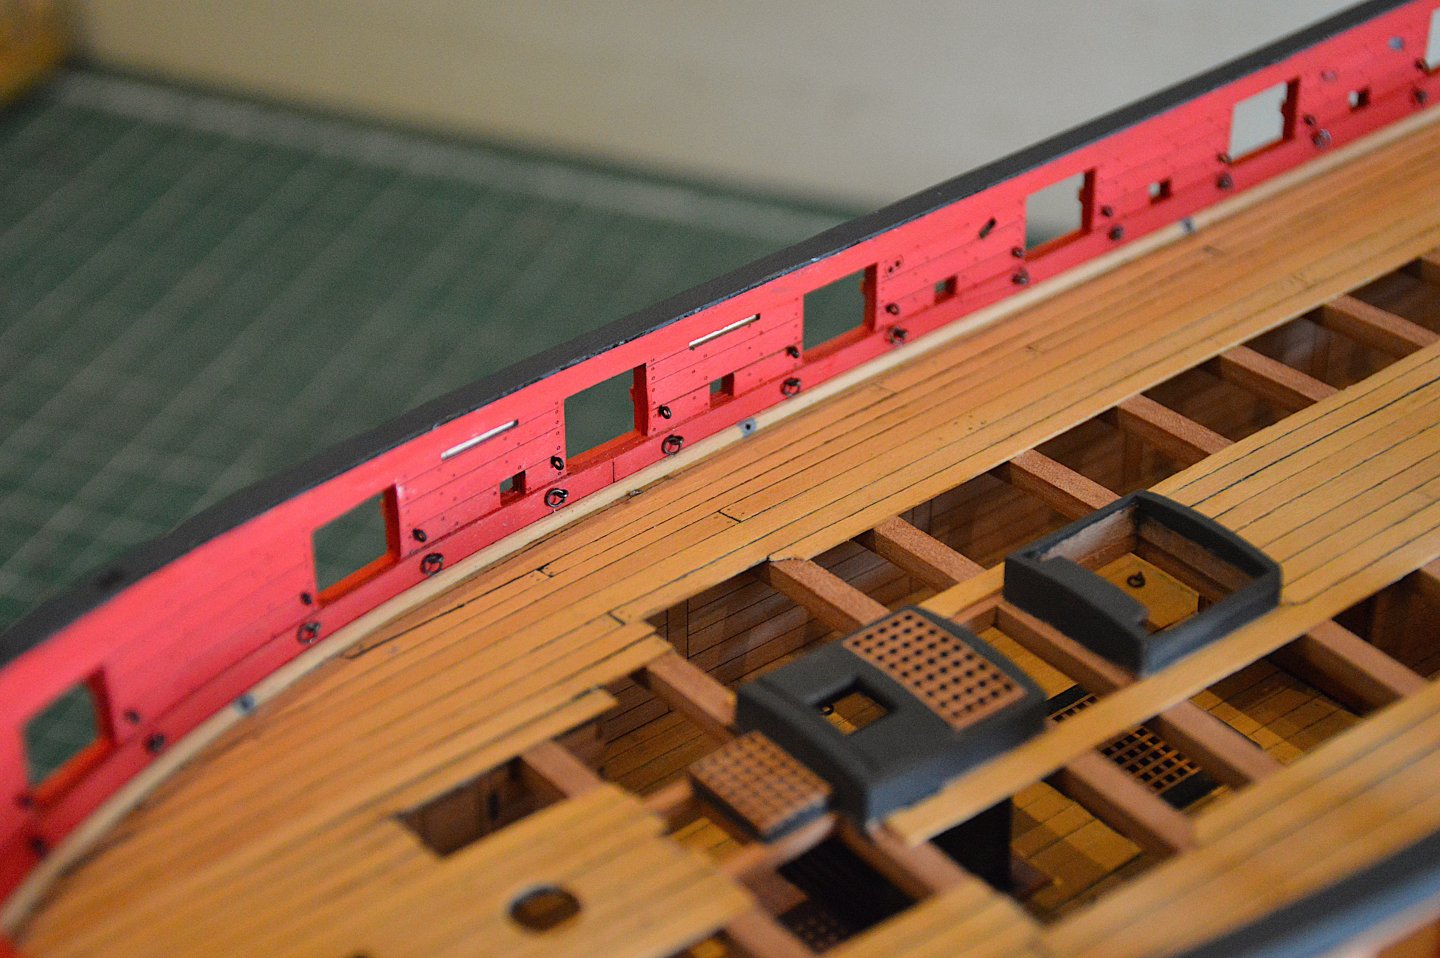
Post 57 Fittings (Part 4) There is a neat Fore platform at the bow of Harpy complete with gratings and access steps. Cut from 0.8mm pear the base frame is a delicate piece, mine had broken into three pieces before I even cut it from the fret. I took the pre-caution of tracing all the pieces onto card to create a template to check the fit before messing with the actual pieces. 0903 I seemed to have a lot of trouble with this seemingly simple addition. Apart from needing some tweaking to get a good close fit to the bow timbers, several of the grating sections fell out which presents a tricky repair job as the grating is integral to the piece. I did manage it after some time having cannibalised a scrap grating piece. 0901 The four replaced sections are just to the right of the stem. Waterway These are not represented by kit parts but would fit beneath the spirketting if worked up from scratch. I do usually represent these on models using a small quadrant piece glued against the spirketting, and pierced with the scuppers. I use 1.5mm Boxwood square stock for the purpose, shaved down using a scalpel blade to form the quadrant. 0898 As I suspected, even a waterway of 1.5mm impacted on the limited deck space to support the carronades, making it necessary to add additional deck sections to avoid the rear trucks looking as if they were about to drop off the edge. 0906 Five scuppers are placed along the hull and because of the scale the lead flanges are represented by paint. 0913 Don’t quite know why my old Pentax Bridge camera is showing a lurid pink/purple shade to the ochre paintwork on some photos, but suffice to say it is not representative of the true effect. Onwards, B.E. 22/03/2025


- 332 replies
-
- 21
-
-
- Harpy
- Vanguard Models
- (and 1 more)
-
it's Vallejo Black/grey, makes for a better scale effect I think. For the same reason I tend to use lesser whites - White/grey and Ivory rather than pure white. B.E.
- 332 replies
-
- 3
-
-
- Harpy
- Vanguard Models
- (and 1 more)
-
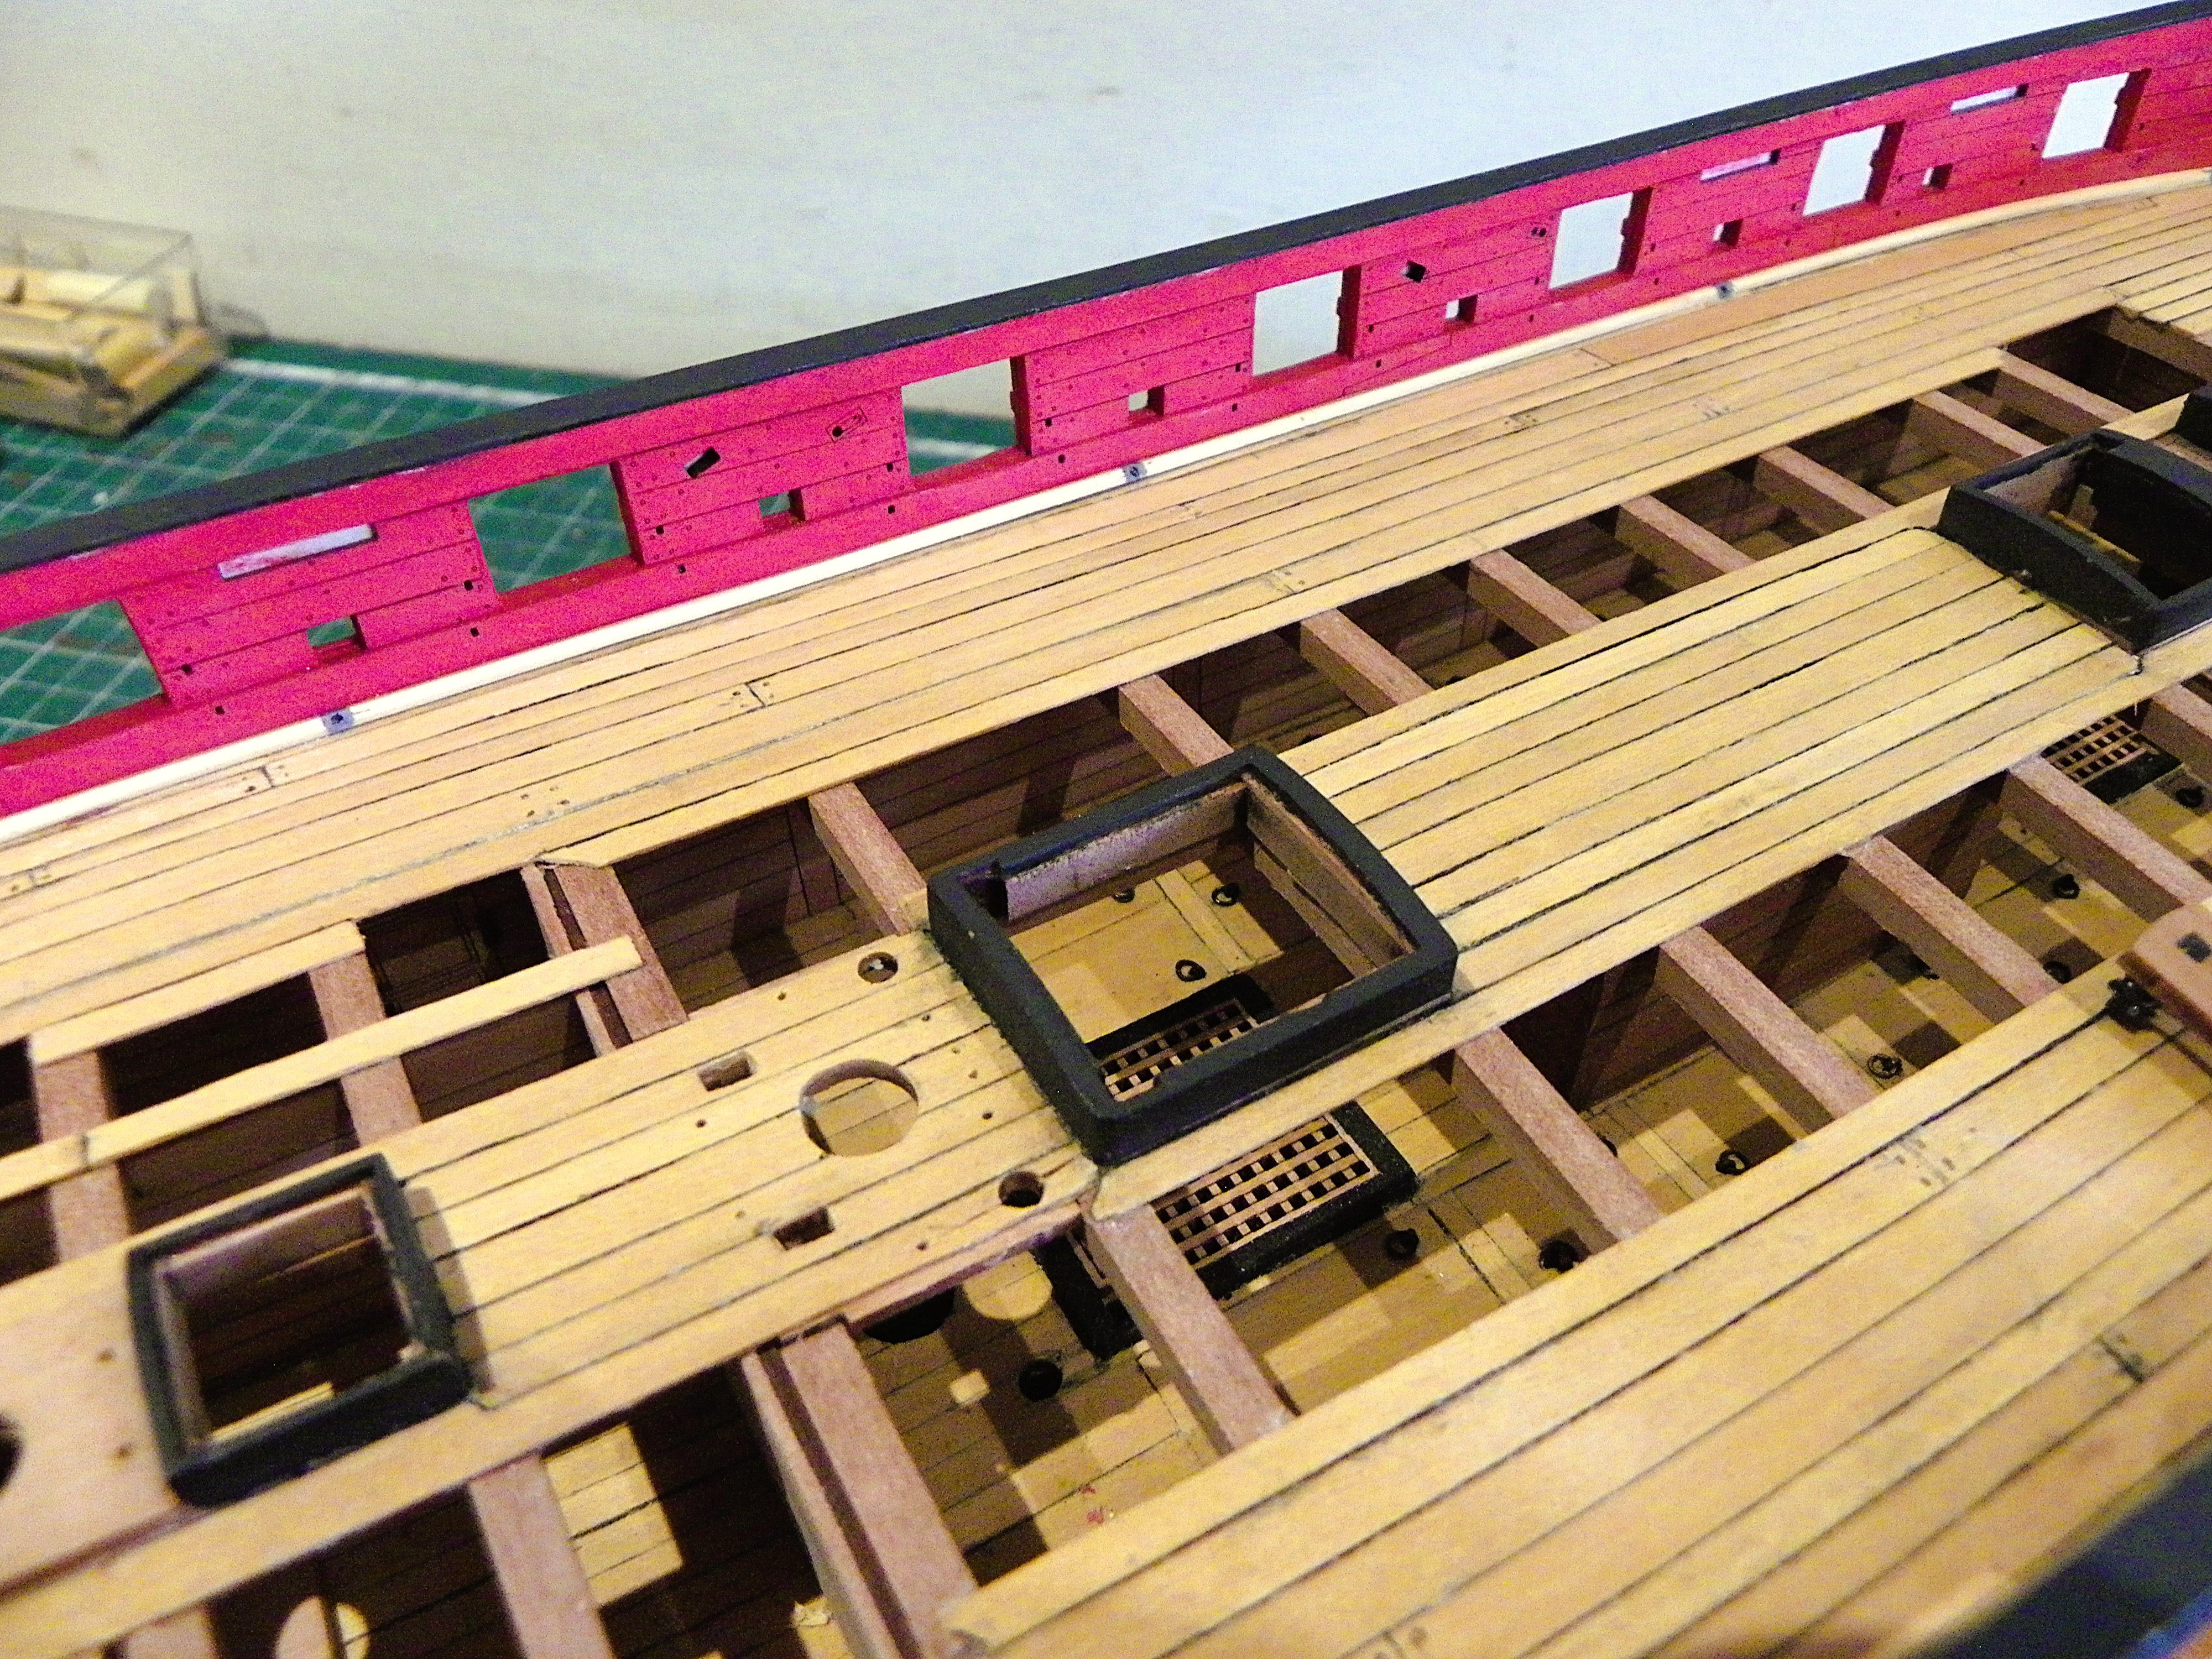
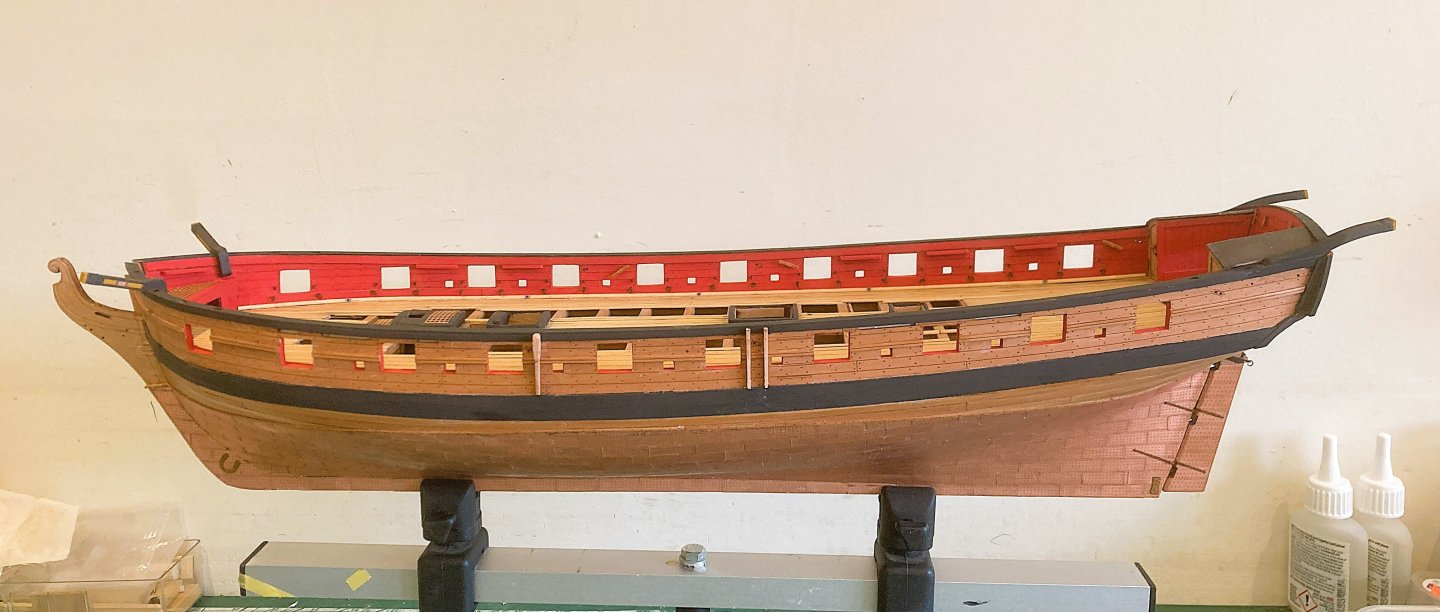
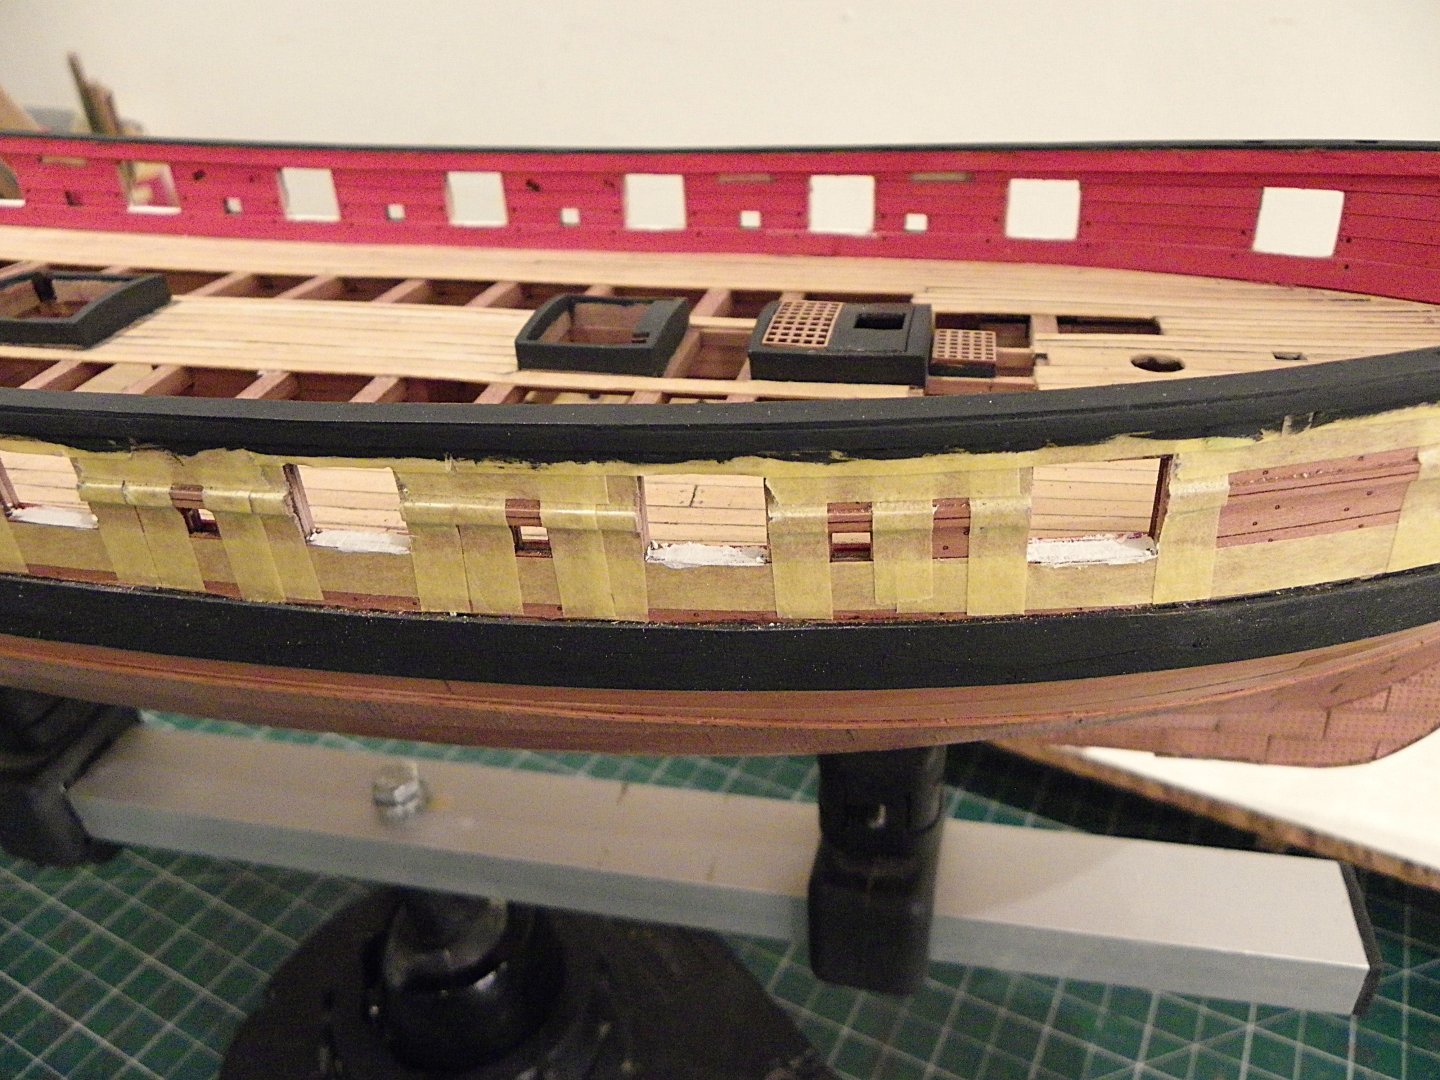
Post 56 A general clean-up session A time consuming exercise of sanding, masking, varnishing, painting, and re-painting of the exterior hull. The wale is re-painted and further coats of W-O-P applied to the Topsides. 0084 Once dry, the tedious task of cleaning up and painting the insides of the Gunports and sweep ports beckons. To line or not to line, at least the Gunport cills, my main concern here is to avoid seeing the layered effect of the three sections that make up the bulwark. On my build there were in places a slight difference in height between the outer cill level and the inner spirketting level at the gunport. To file them completely flush would result in the spirketting dipping down across the gunports, not a good look, but the effect would be largely be covered by the Carronades. 0885 I used a very fine filler to smooth across the cill line, before painting. A case of fill and sand until the desired effect is achieved. 0027 0896 0033 03595a 03596a 03599a I’m pleased that this aspect of the build has been completed, but as always touch-ins will be required and ongoing right up to completion. Looking better now to my eye, but I’m thinking about lightening the Topsides colour to reflect a more traditional ochre look. I will have a play around with various finishes on spare Pearwood. B.E. 19/03/2025


- 332 replies
-
- 20
-
-
- Harpy
- Vanguard Models
- (and 1 more)
-
Good luck with the plating Walter. There are a couple there that look a little suspect, but remember that they ping off quite easily with the point of a scalpel blade. Any you feel less than happy with are best removed and replaced, there should be plenty of spares to allow for this. Try and get them as close as possible to the adjacent plates and cover any gaps. Keep you eye on the top line, you may find it necessary to slightly overlap in certain places to maintain the line, but if it starts to run off the effect will be magnified strake upon strake. B.E.
-
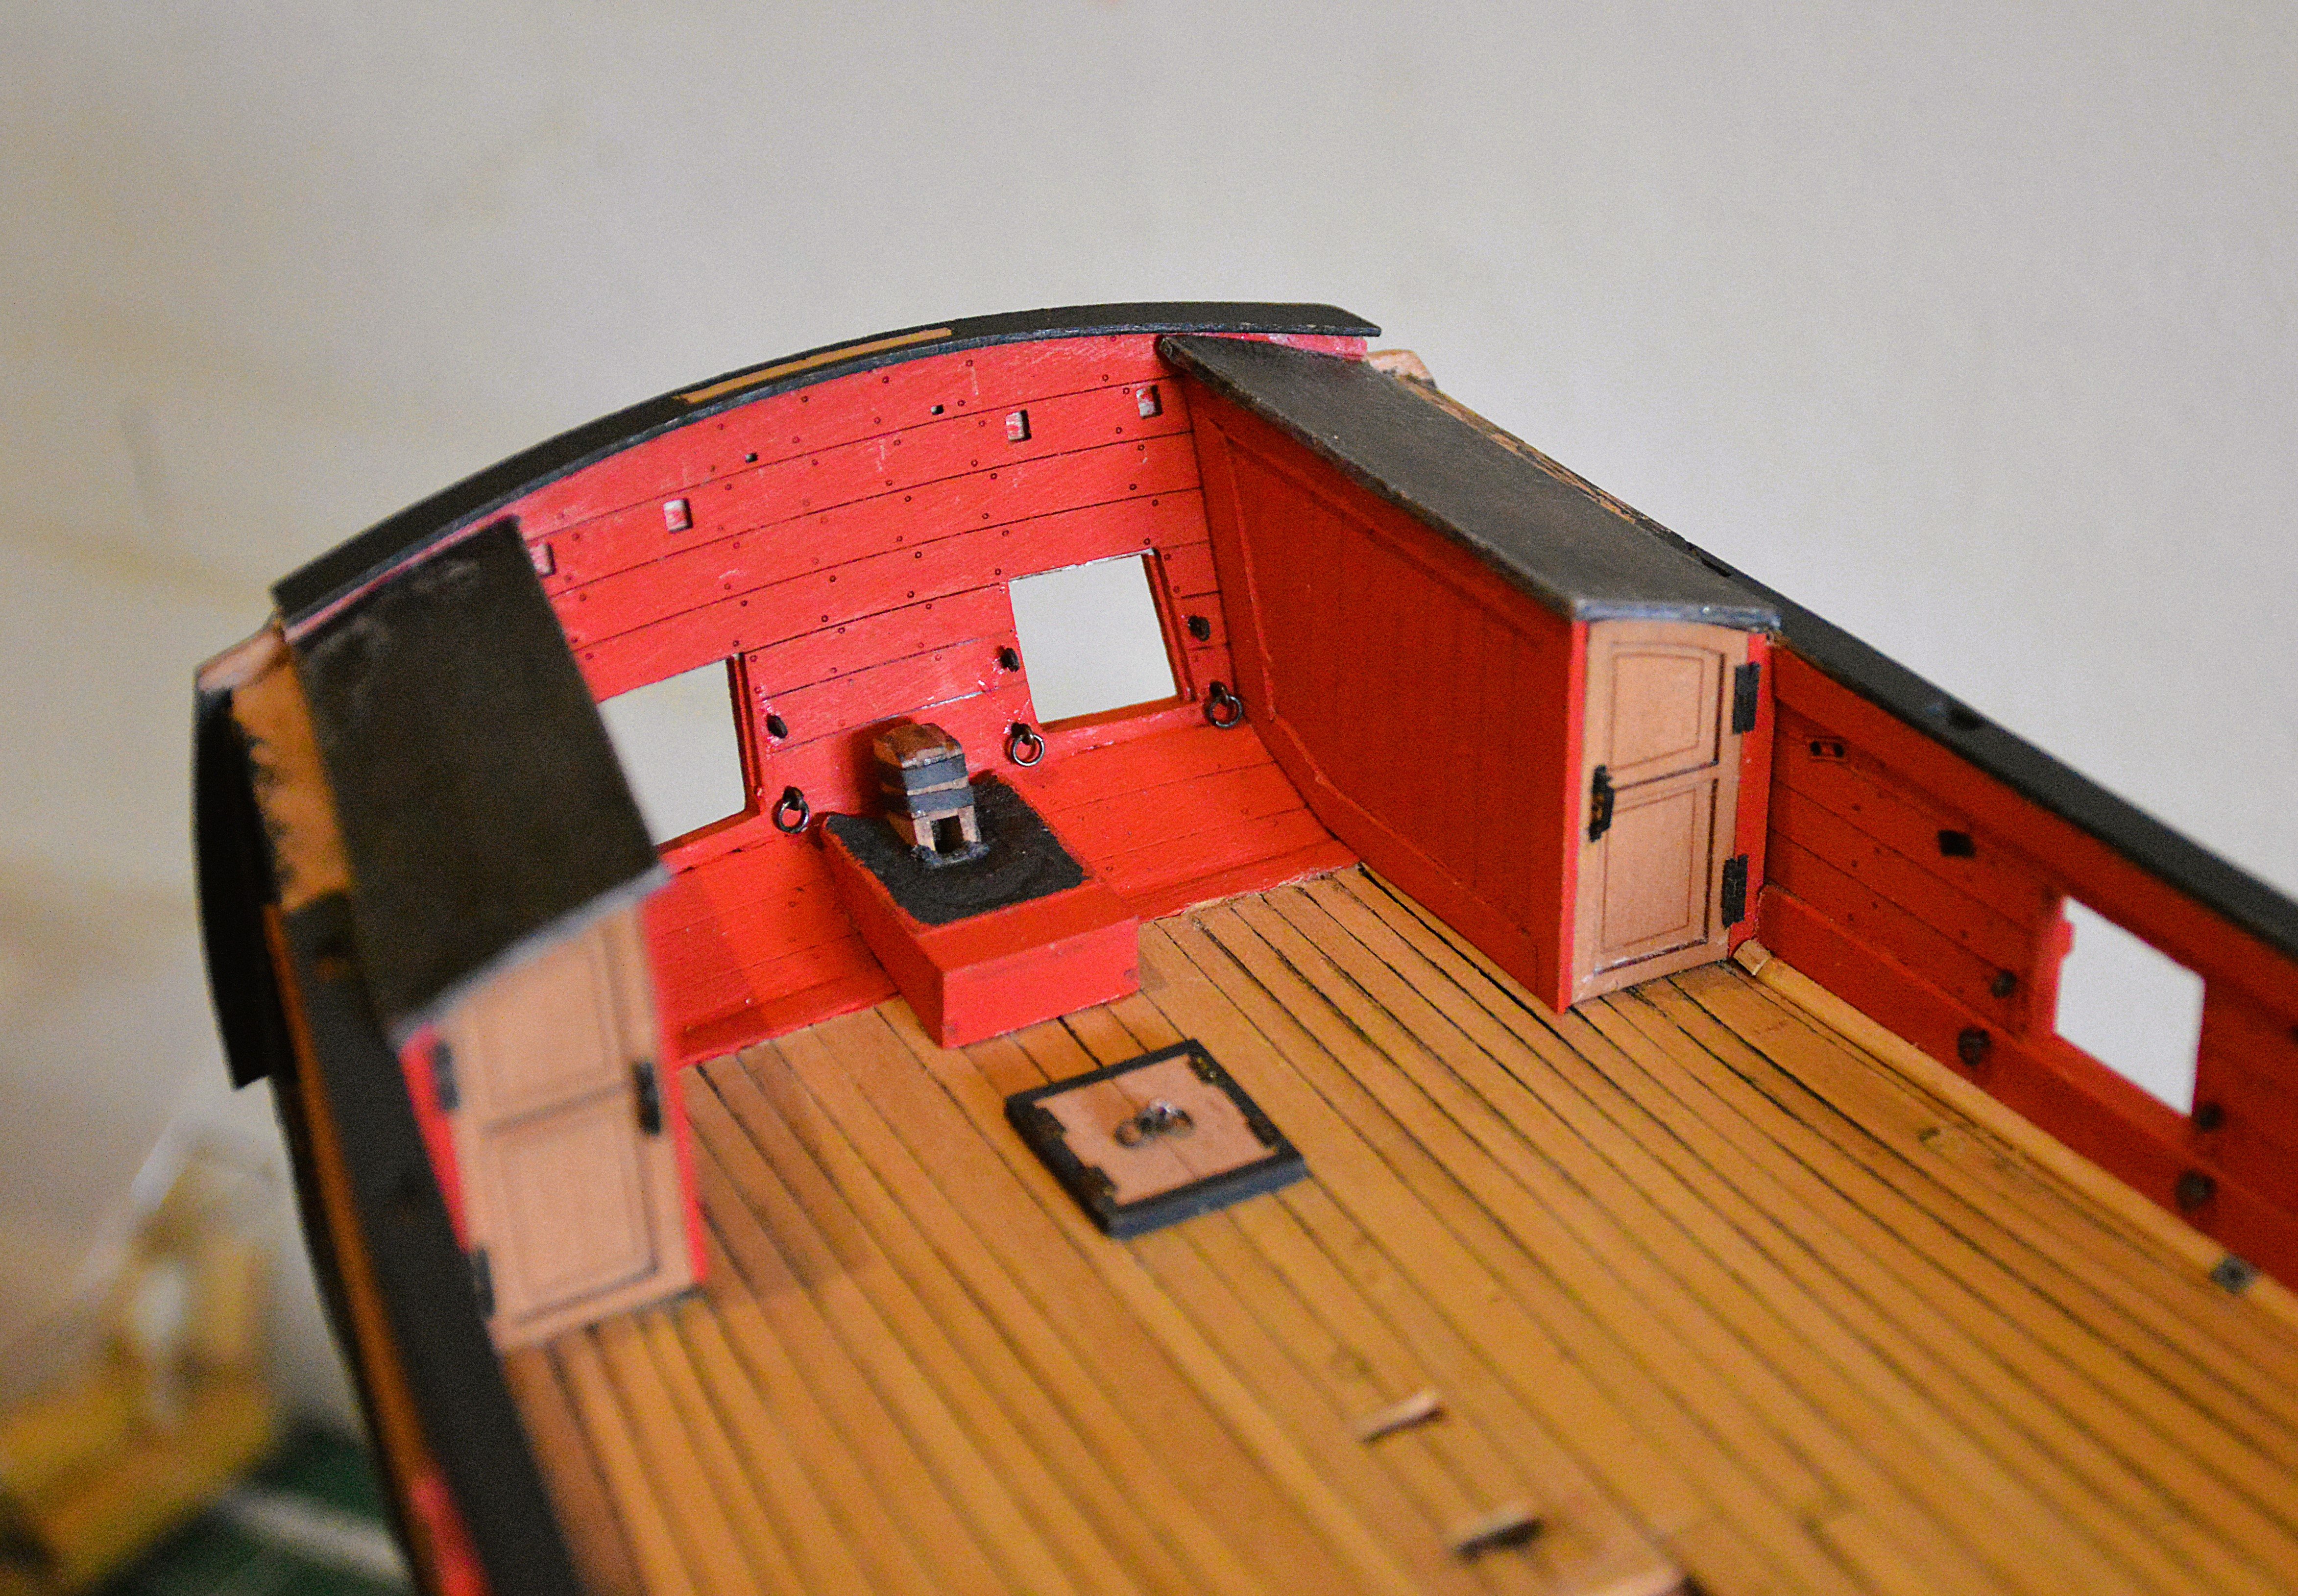
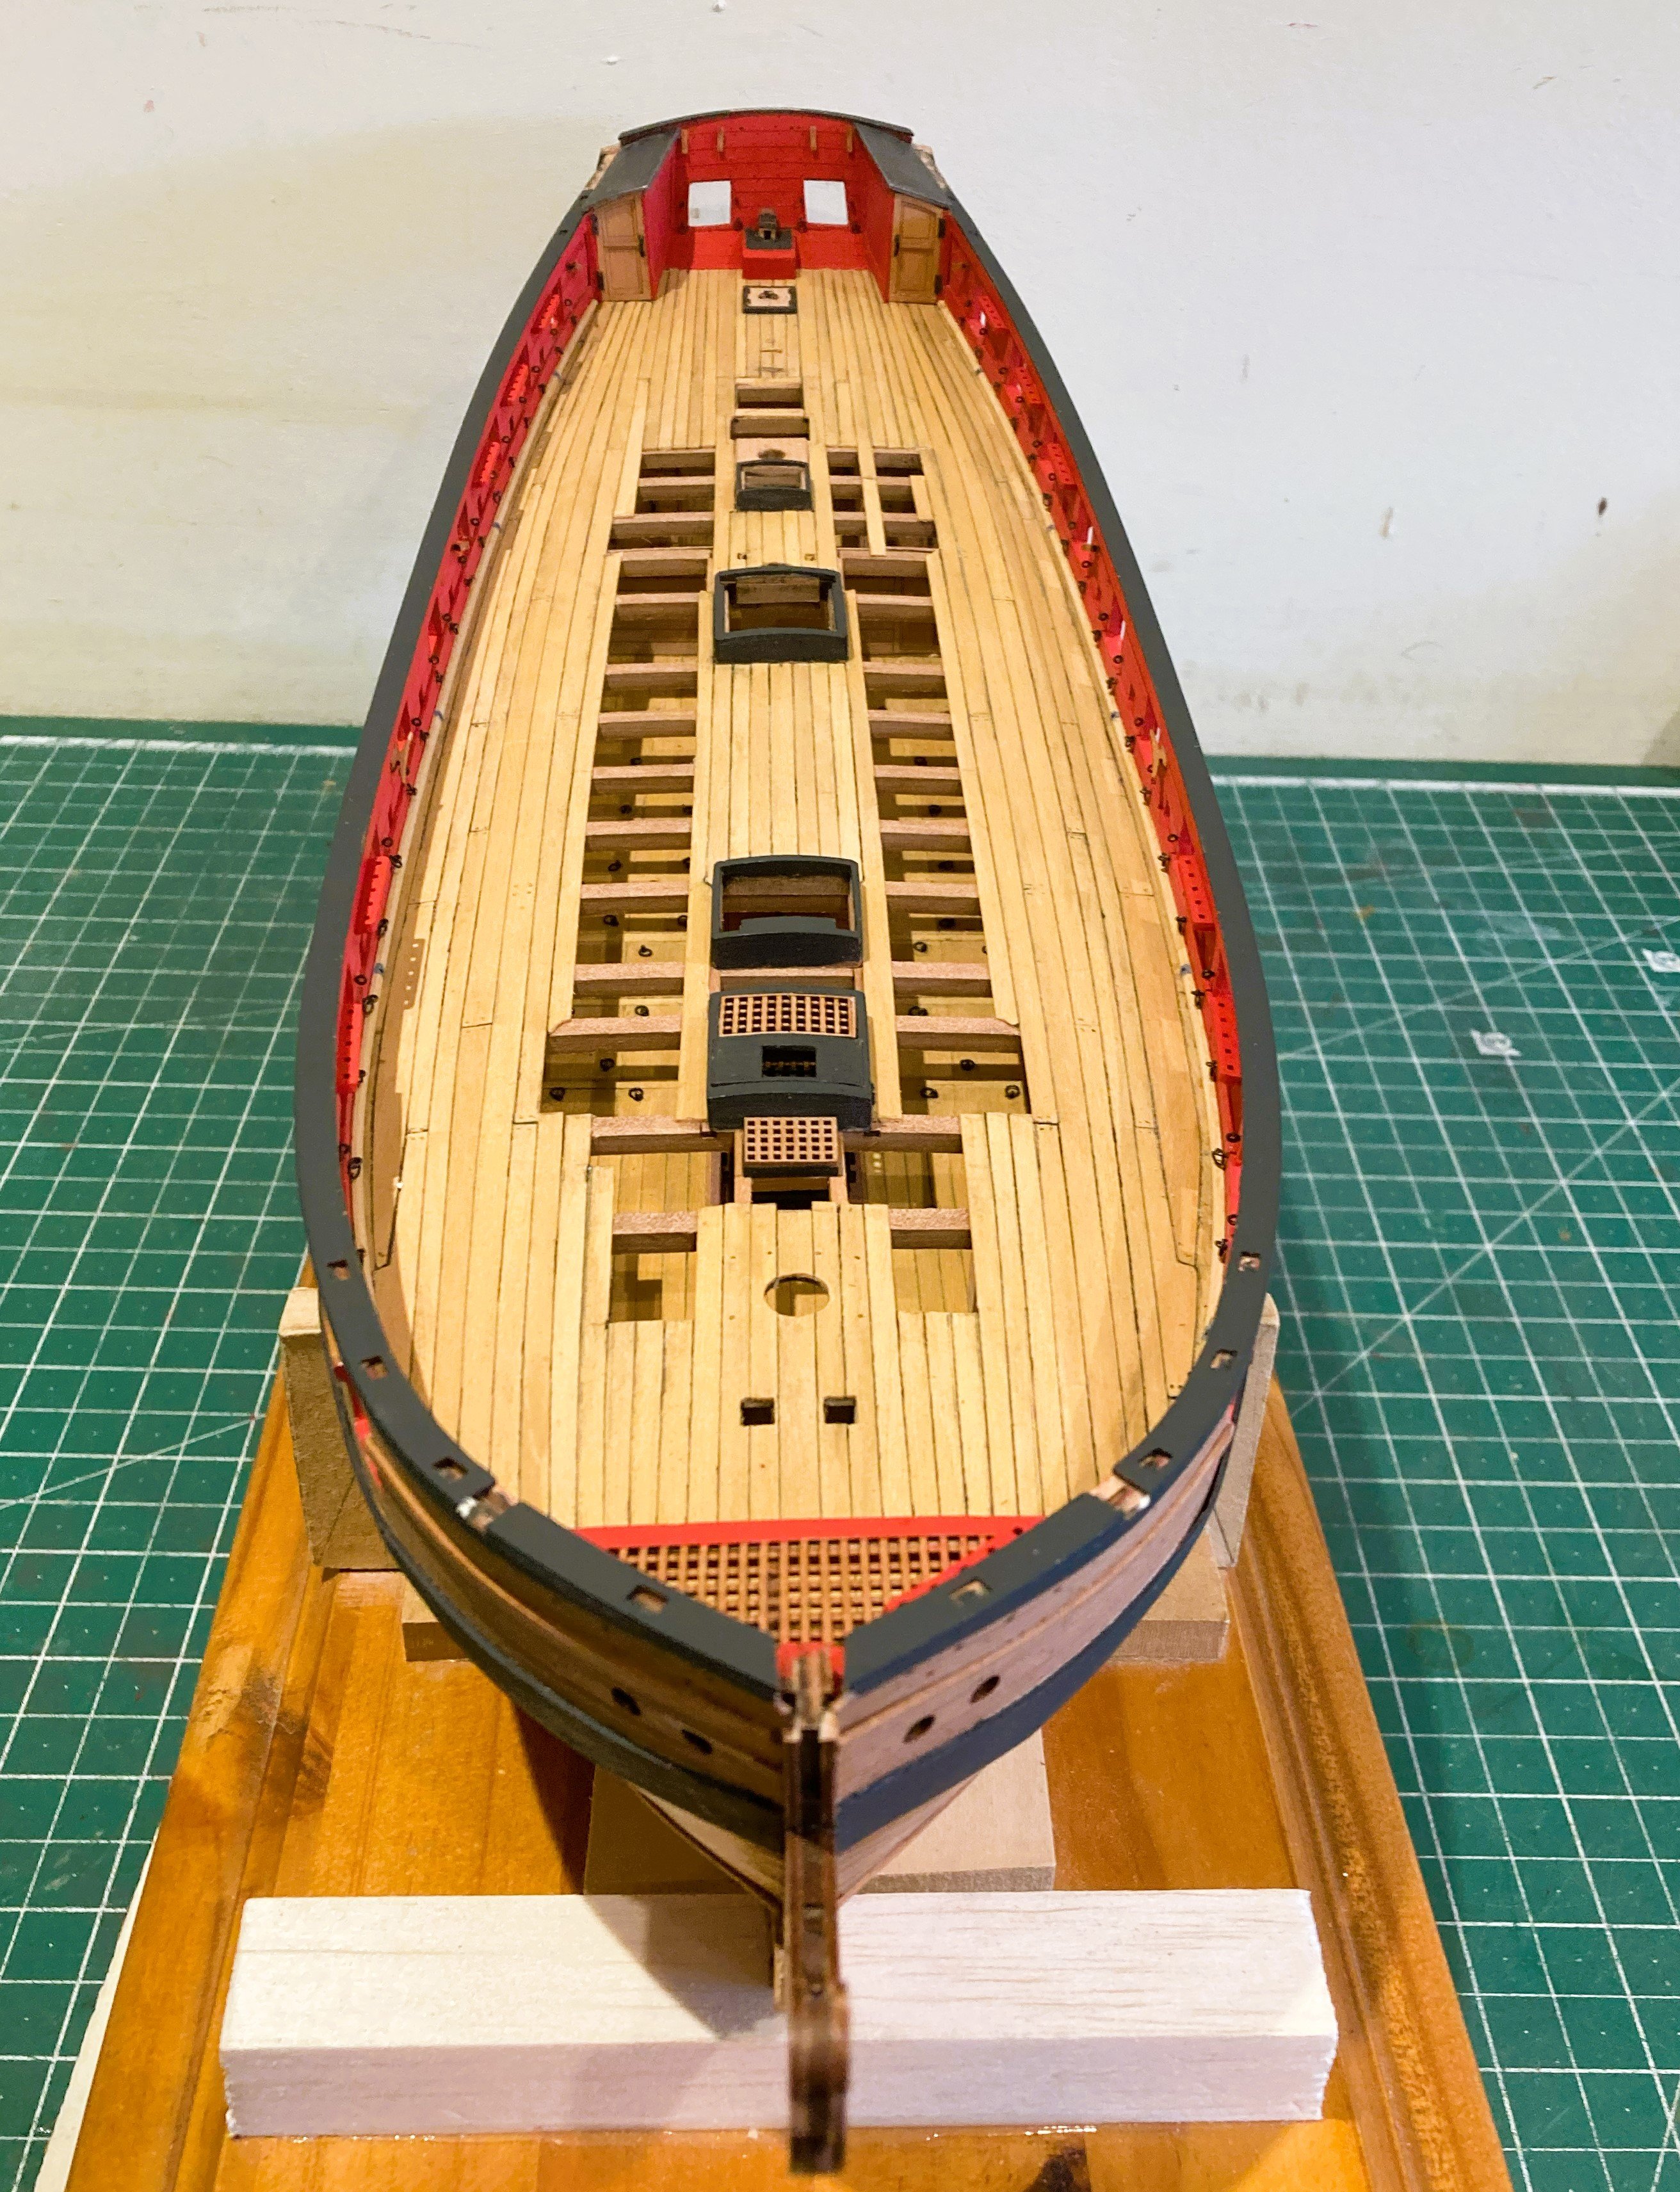
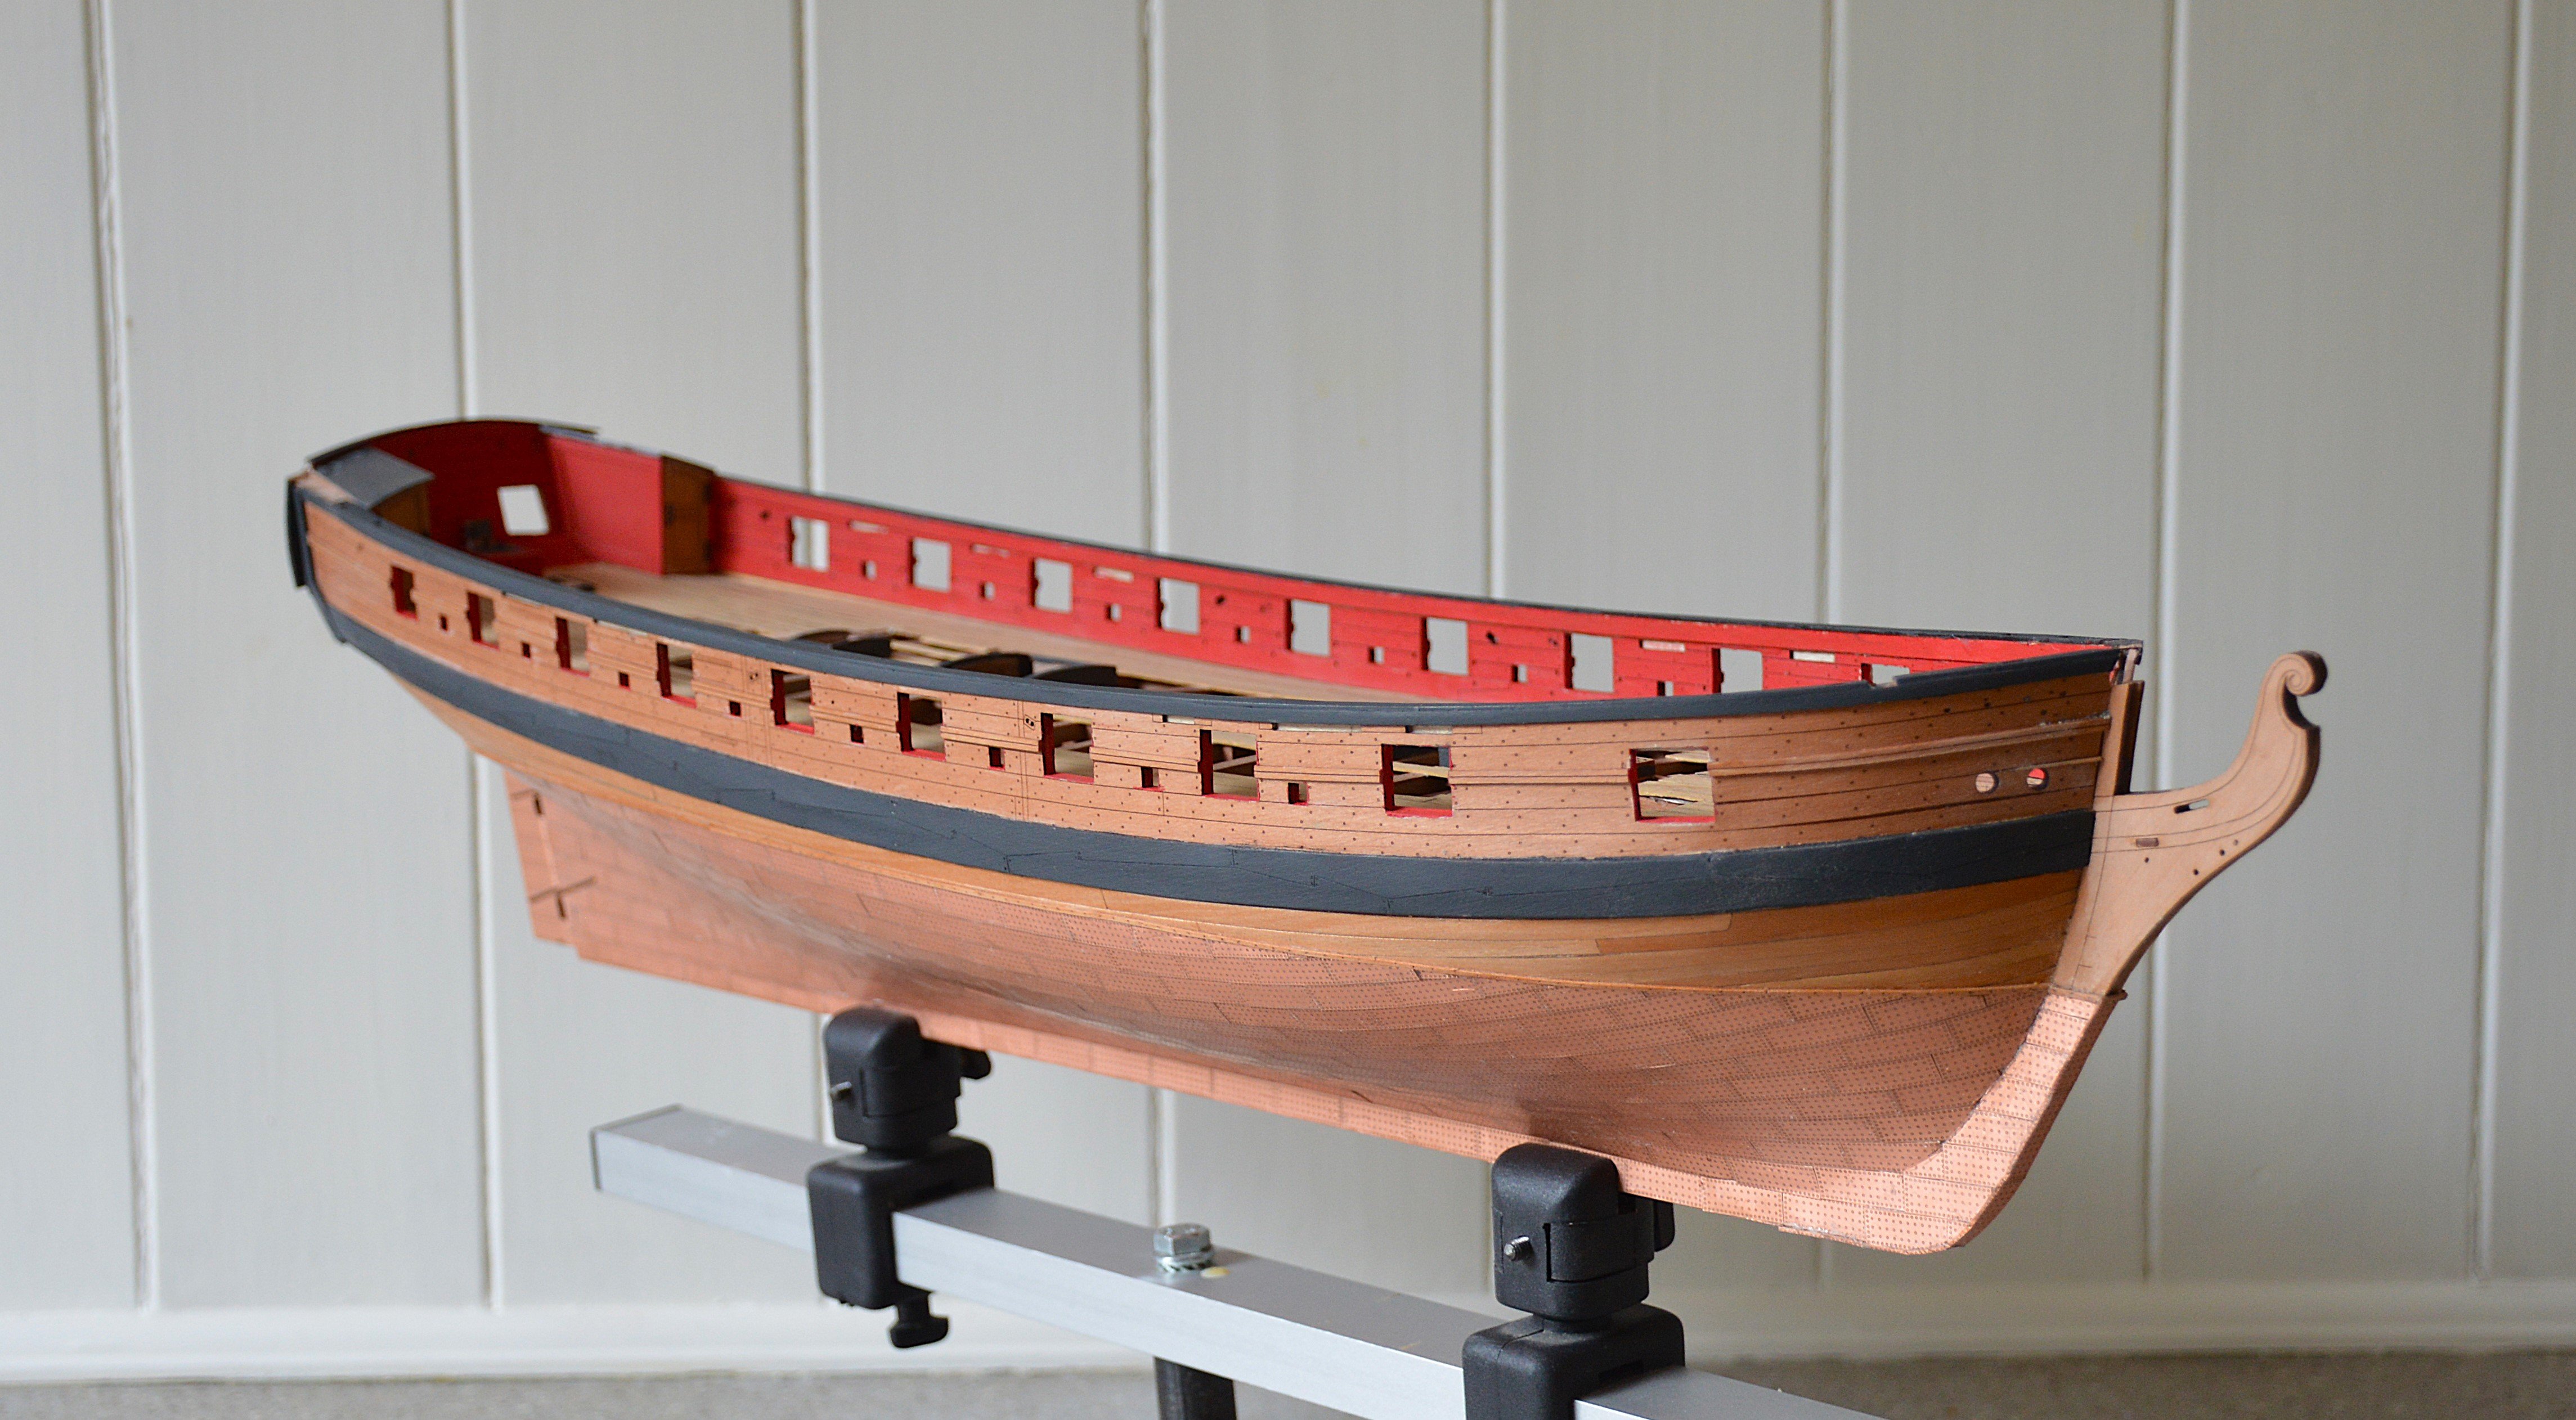
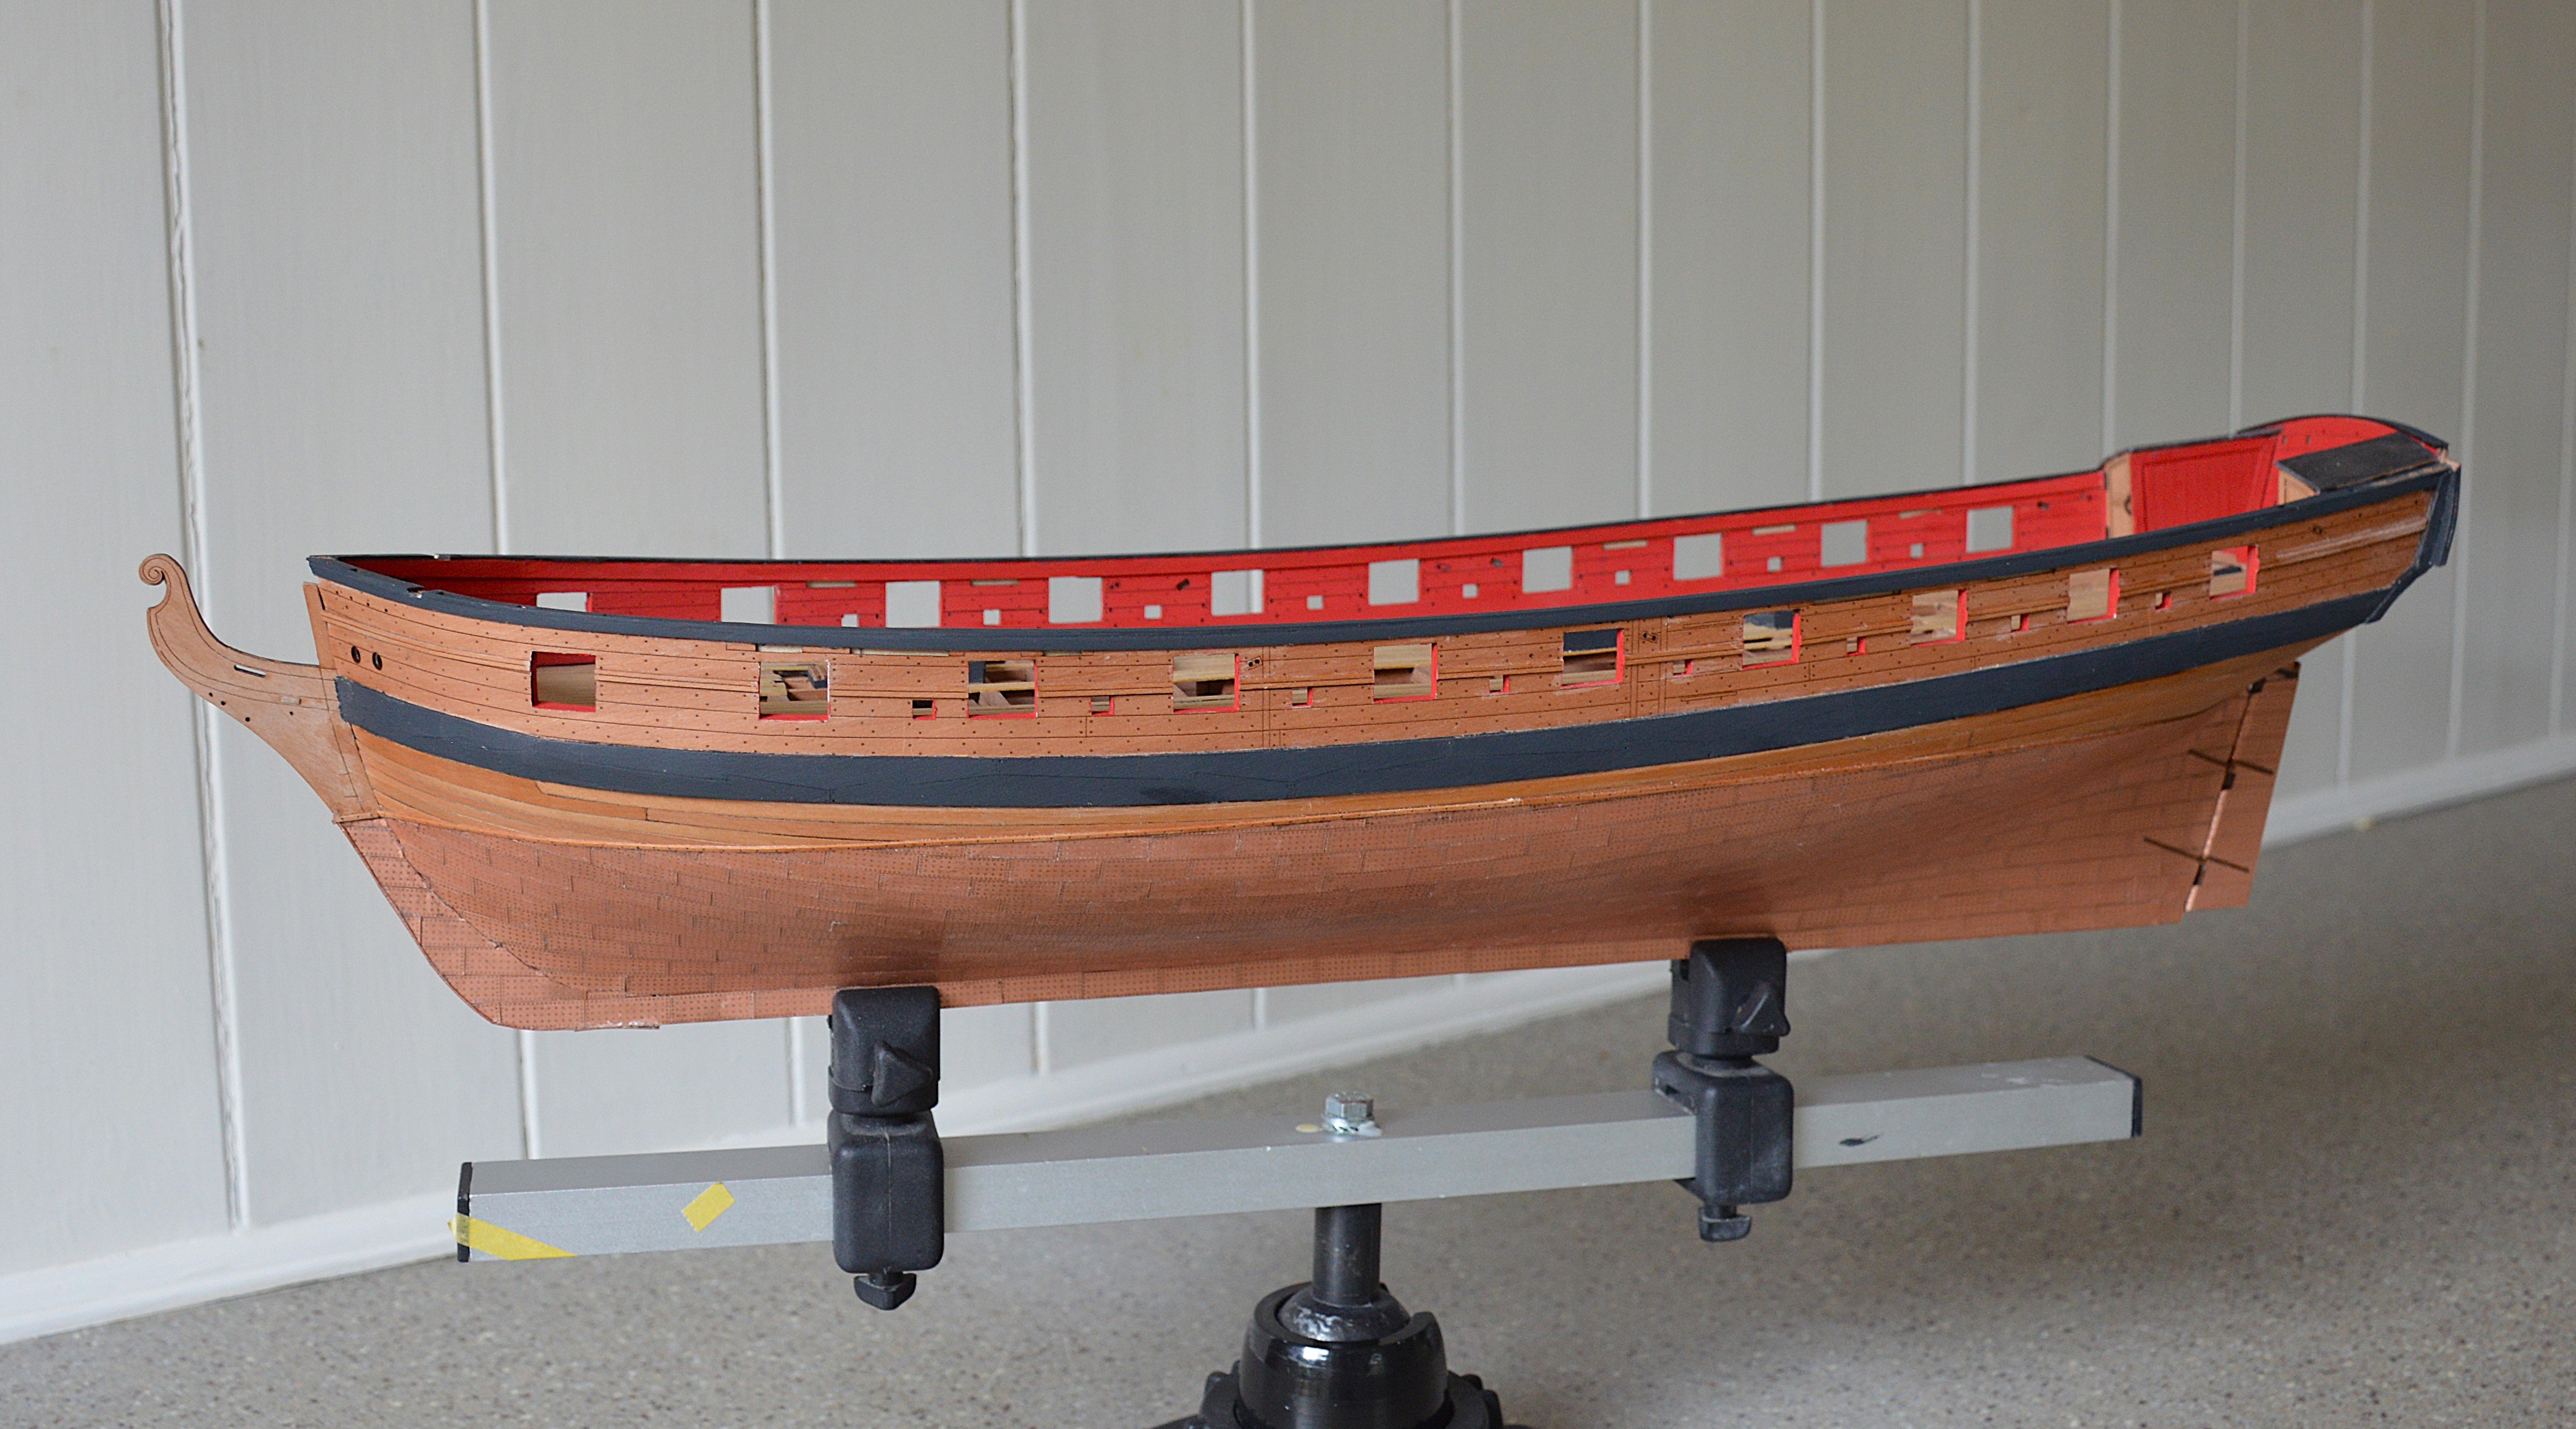
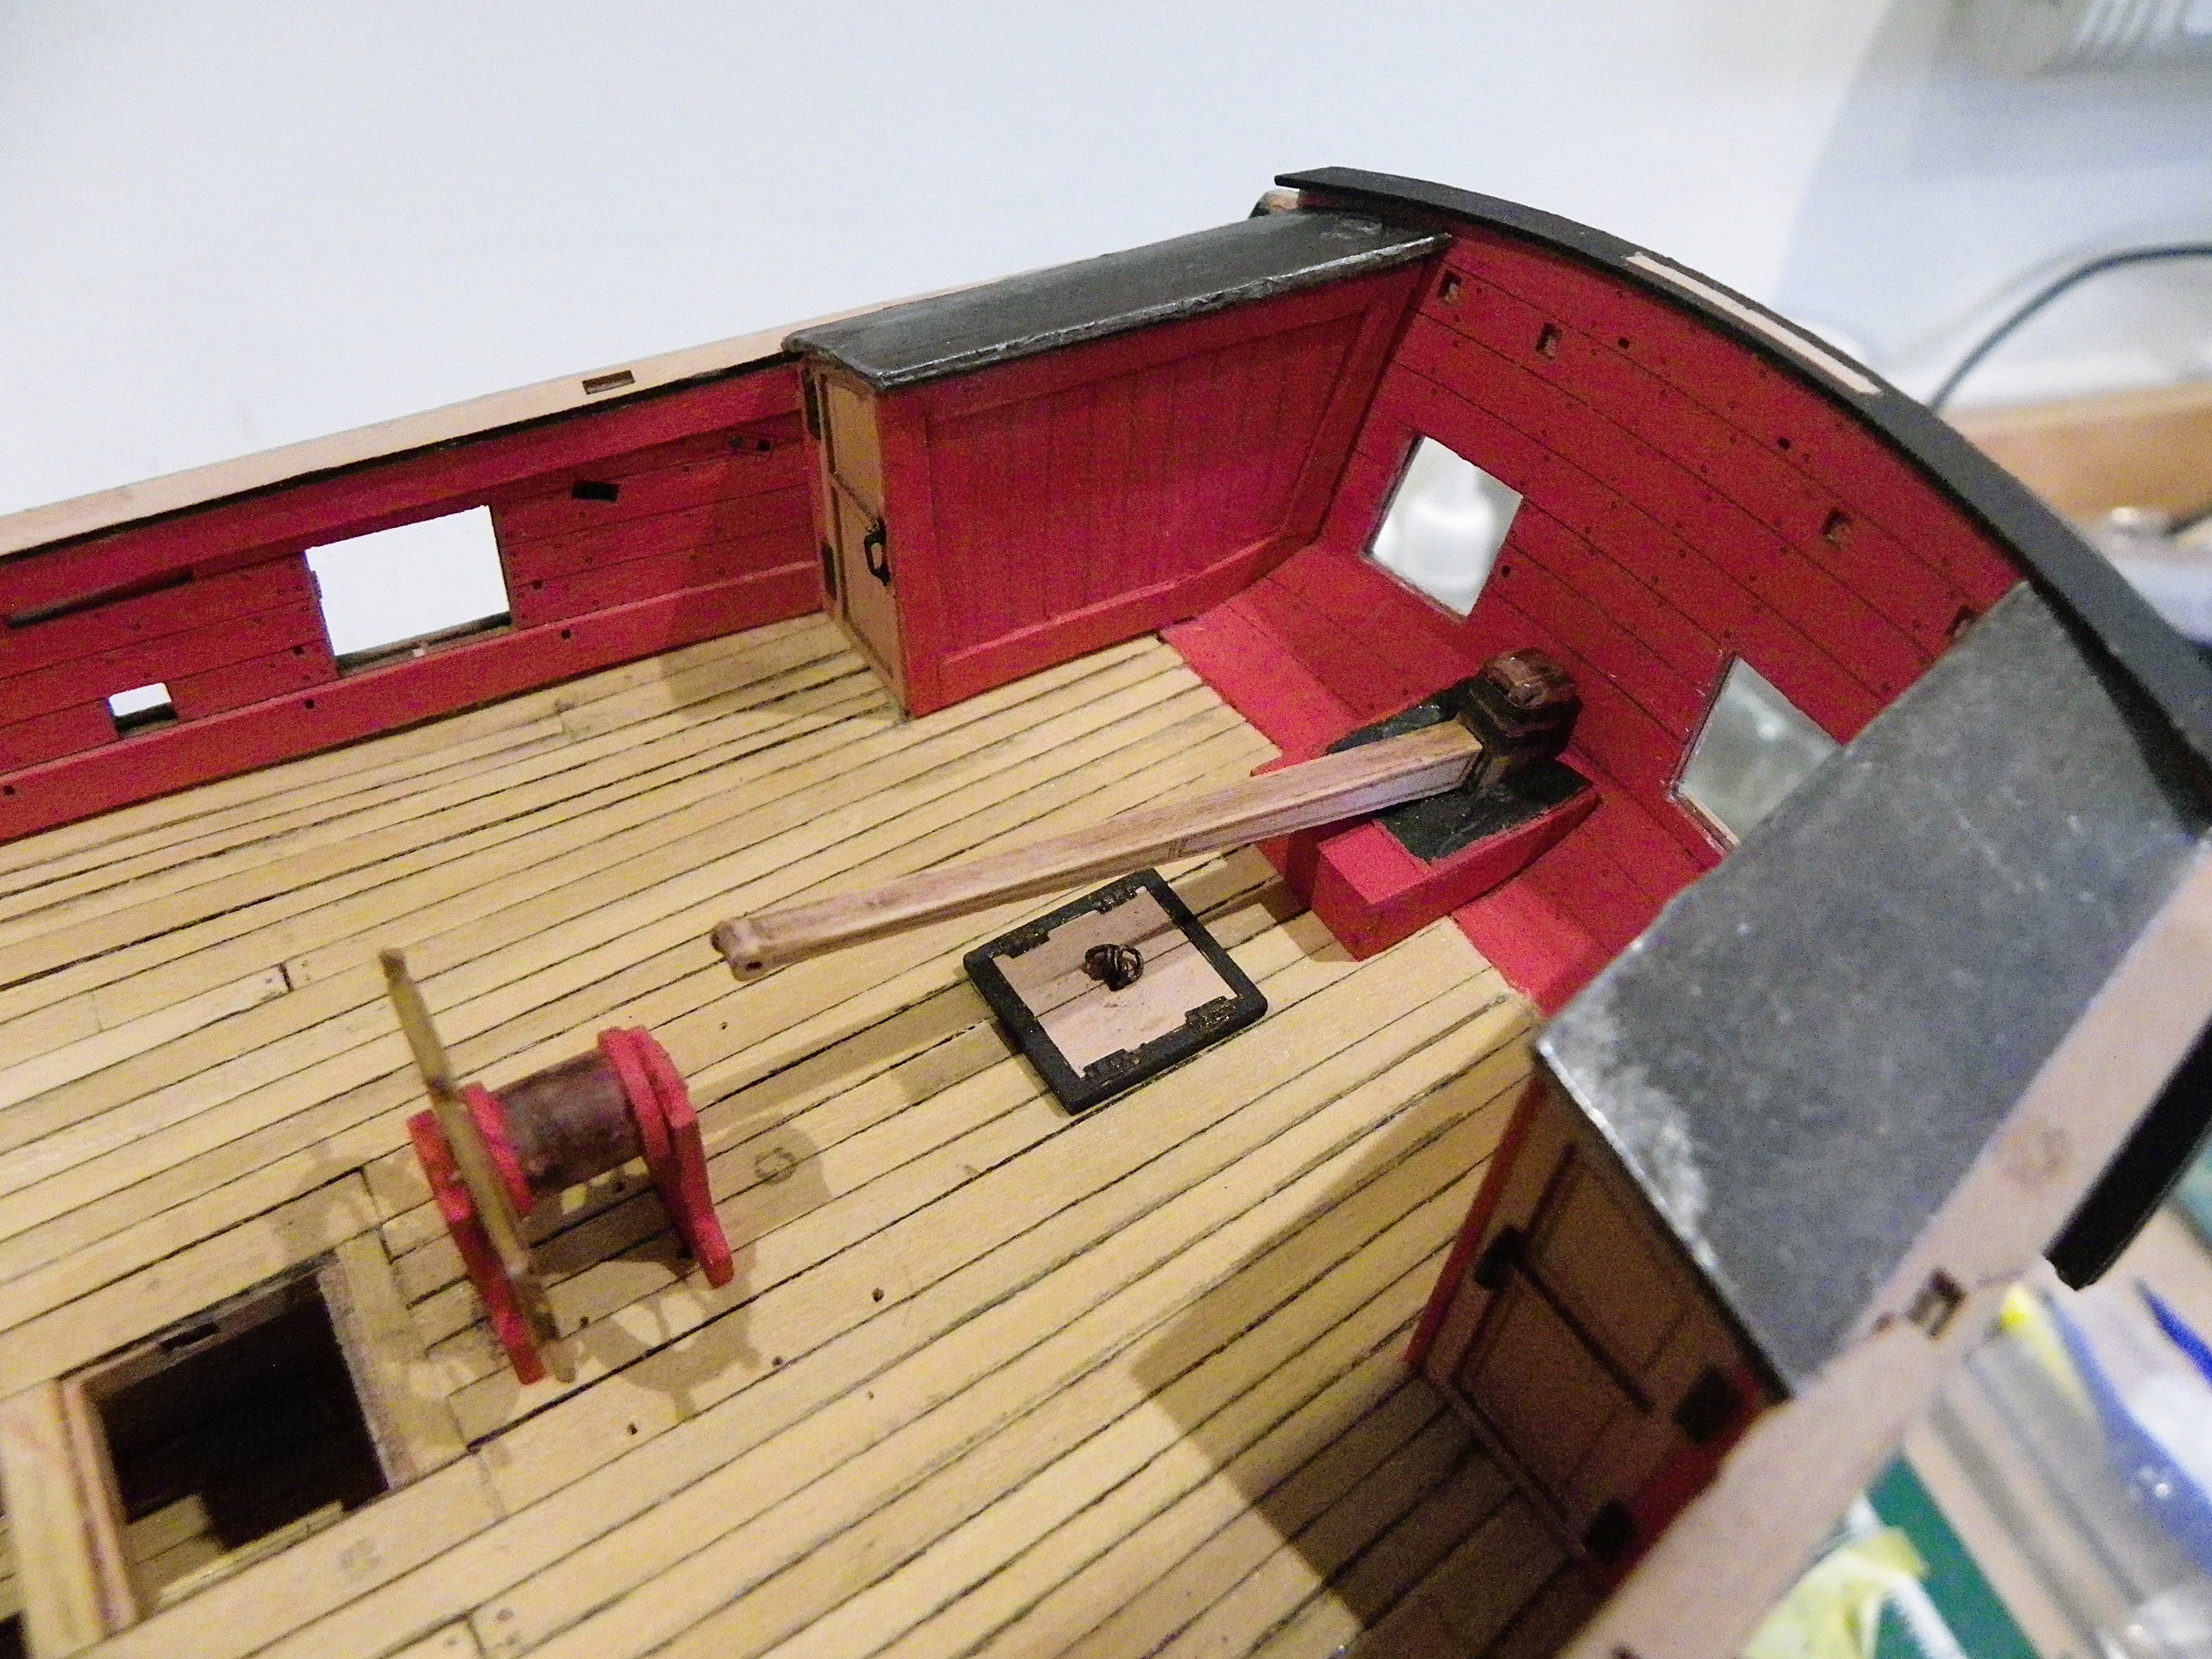
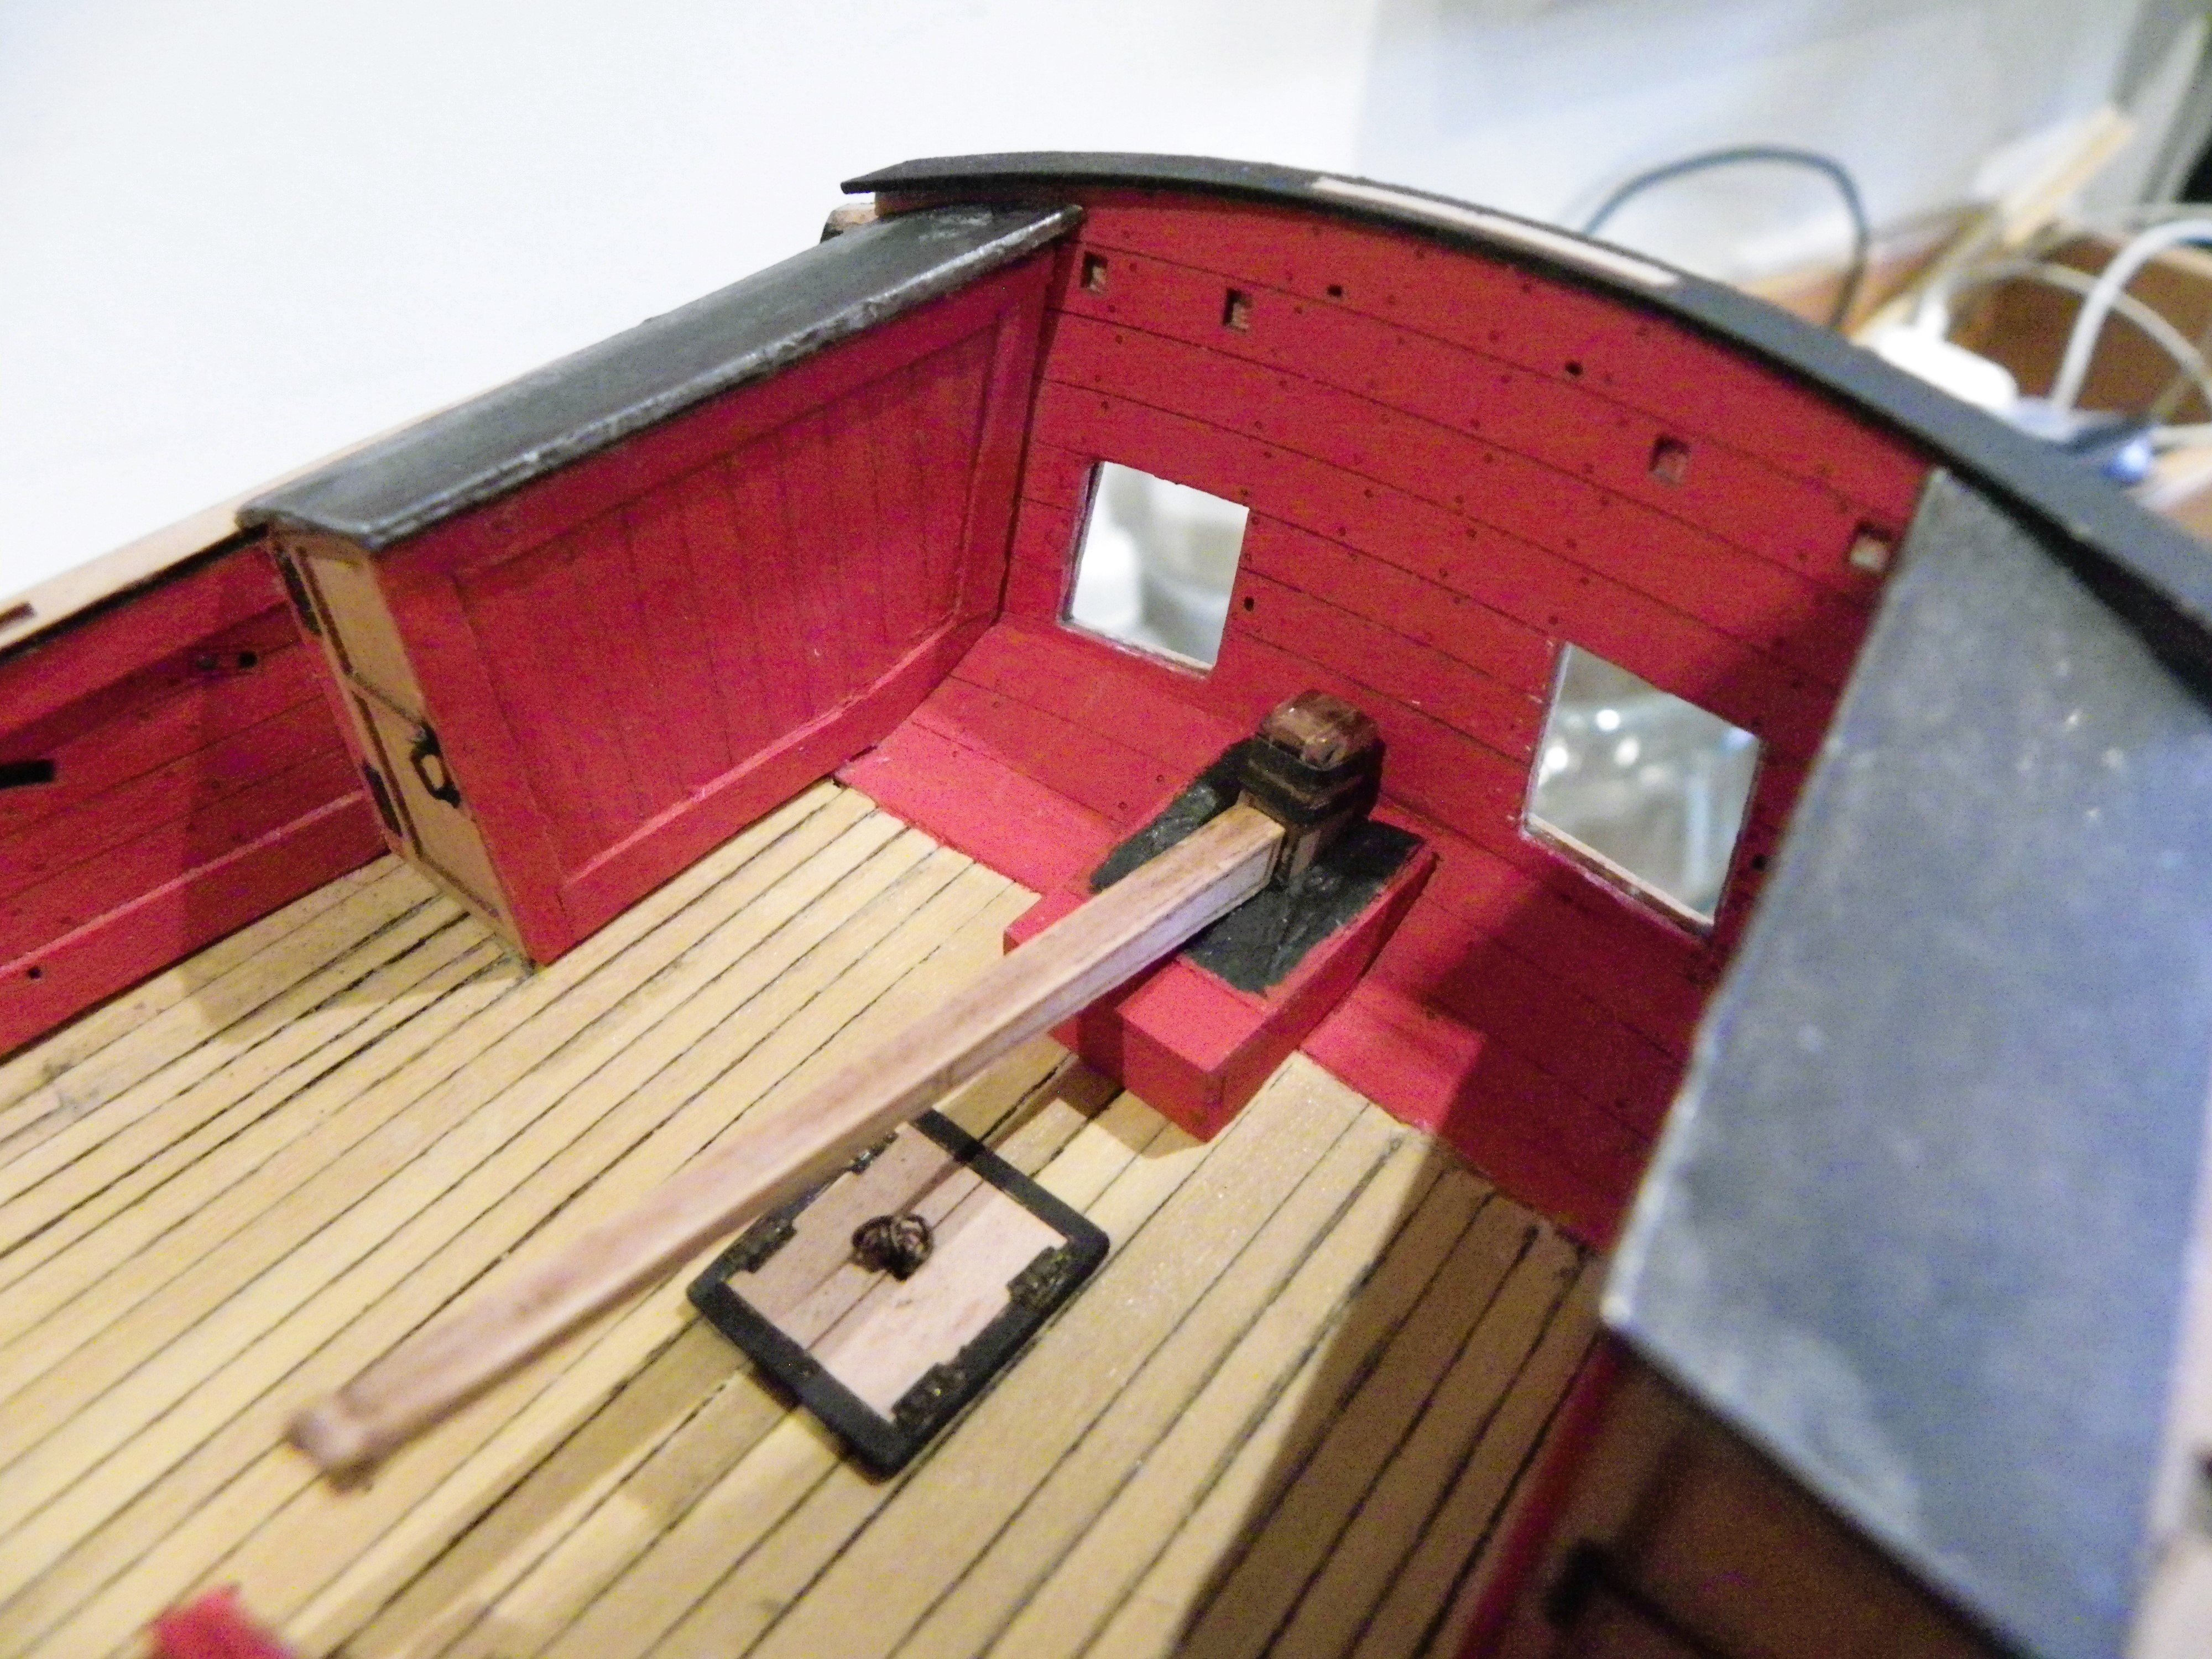
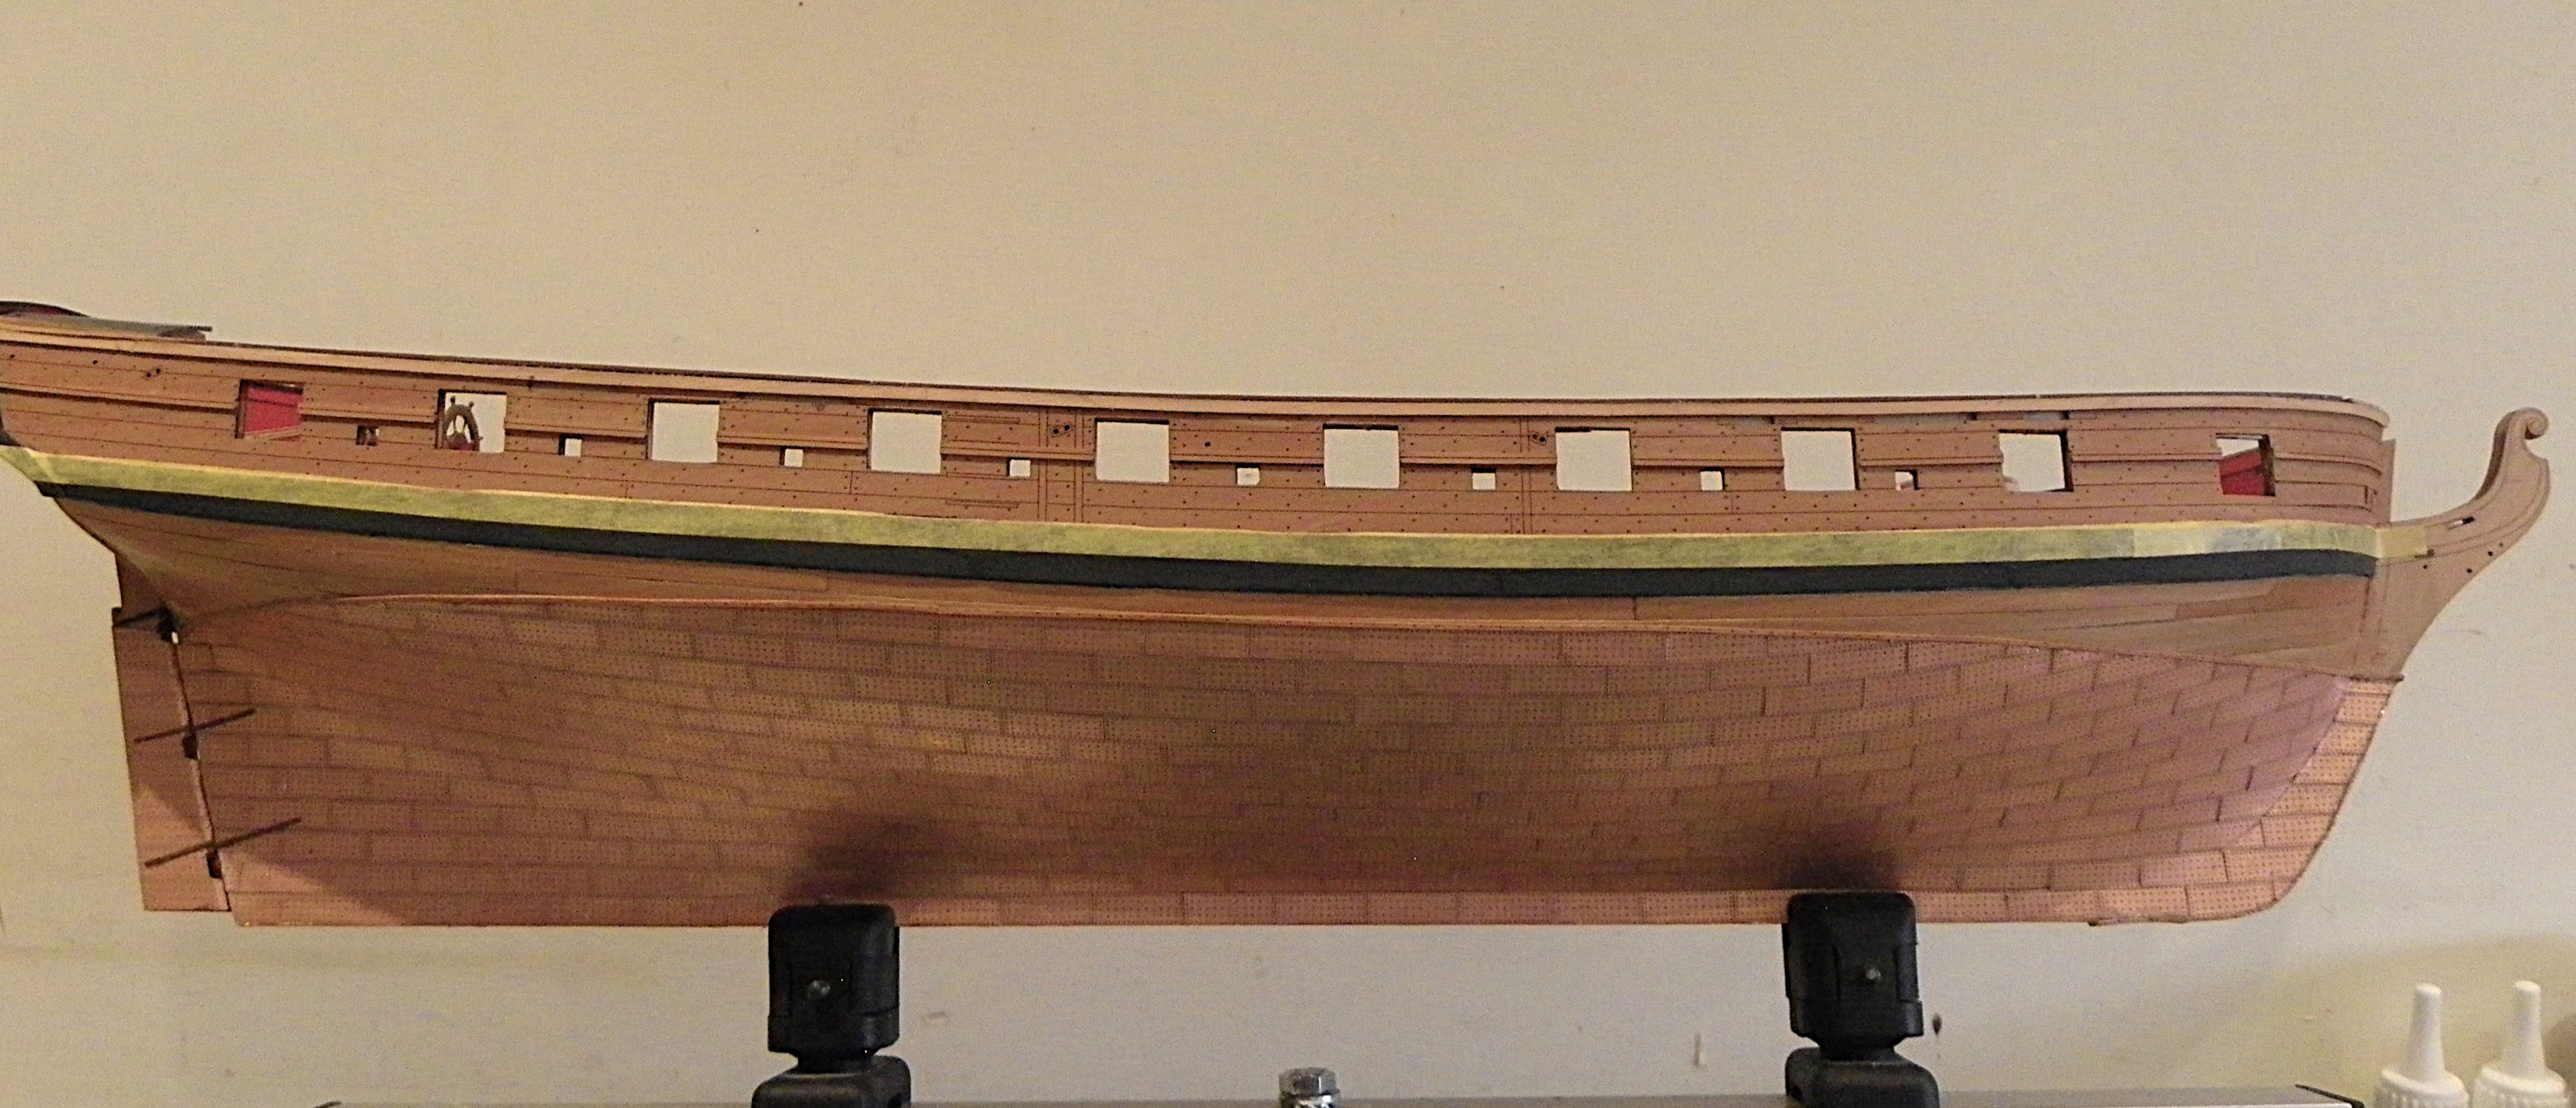
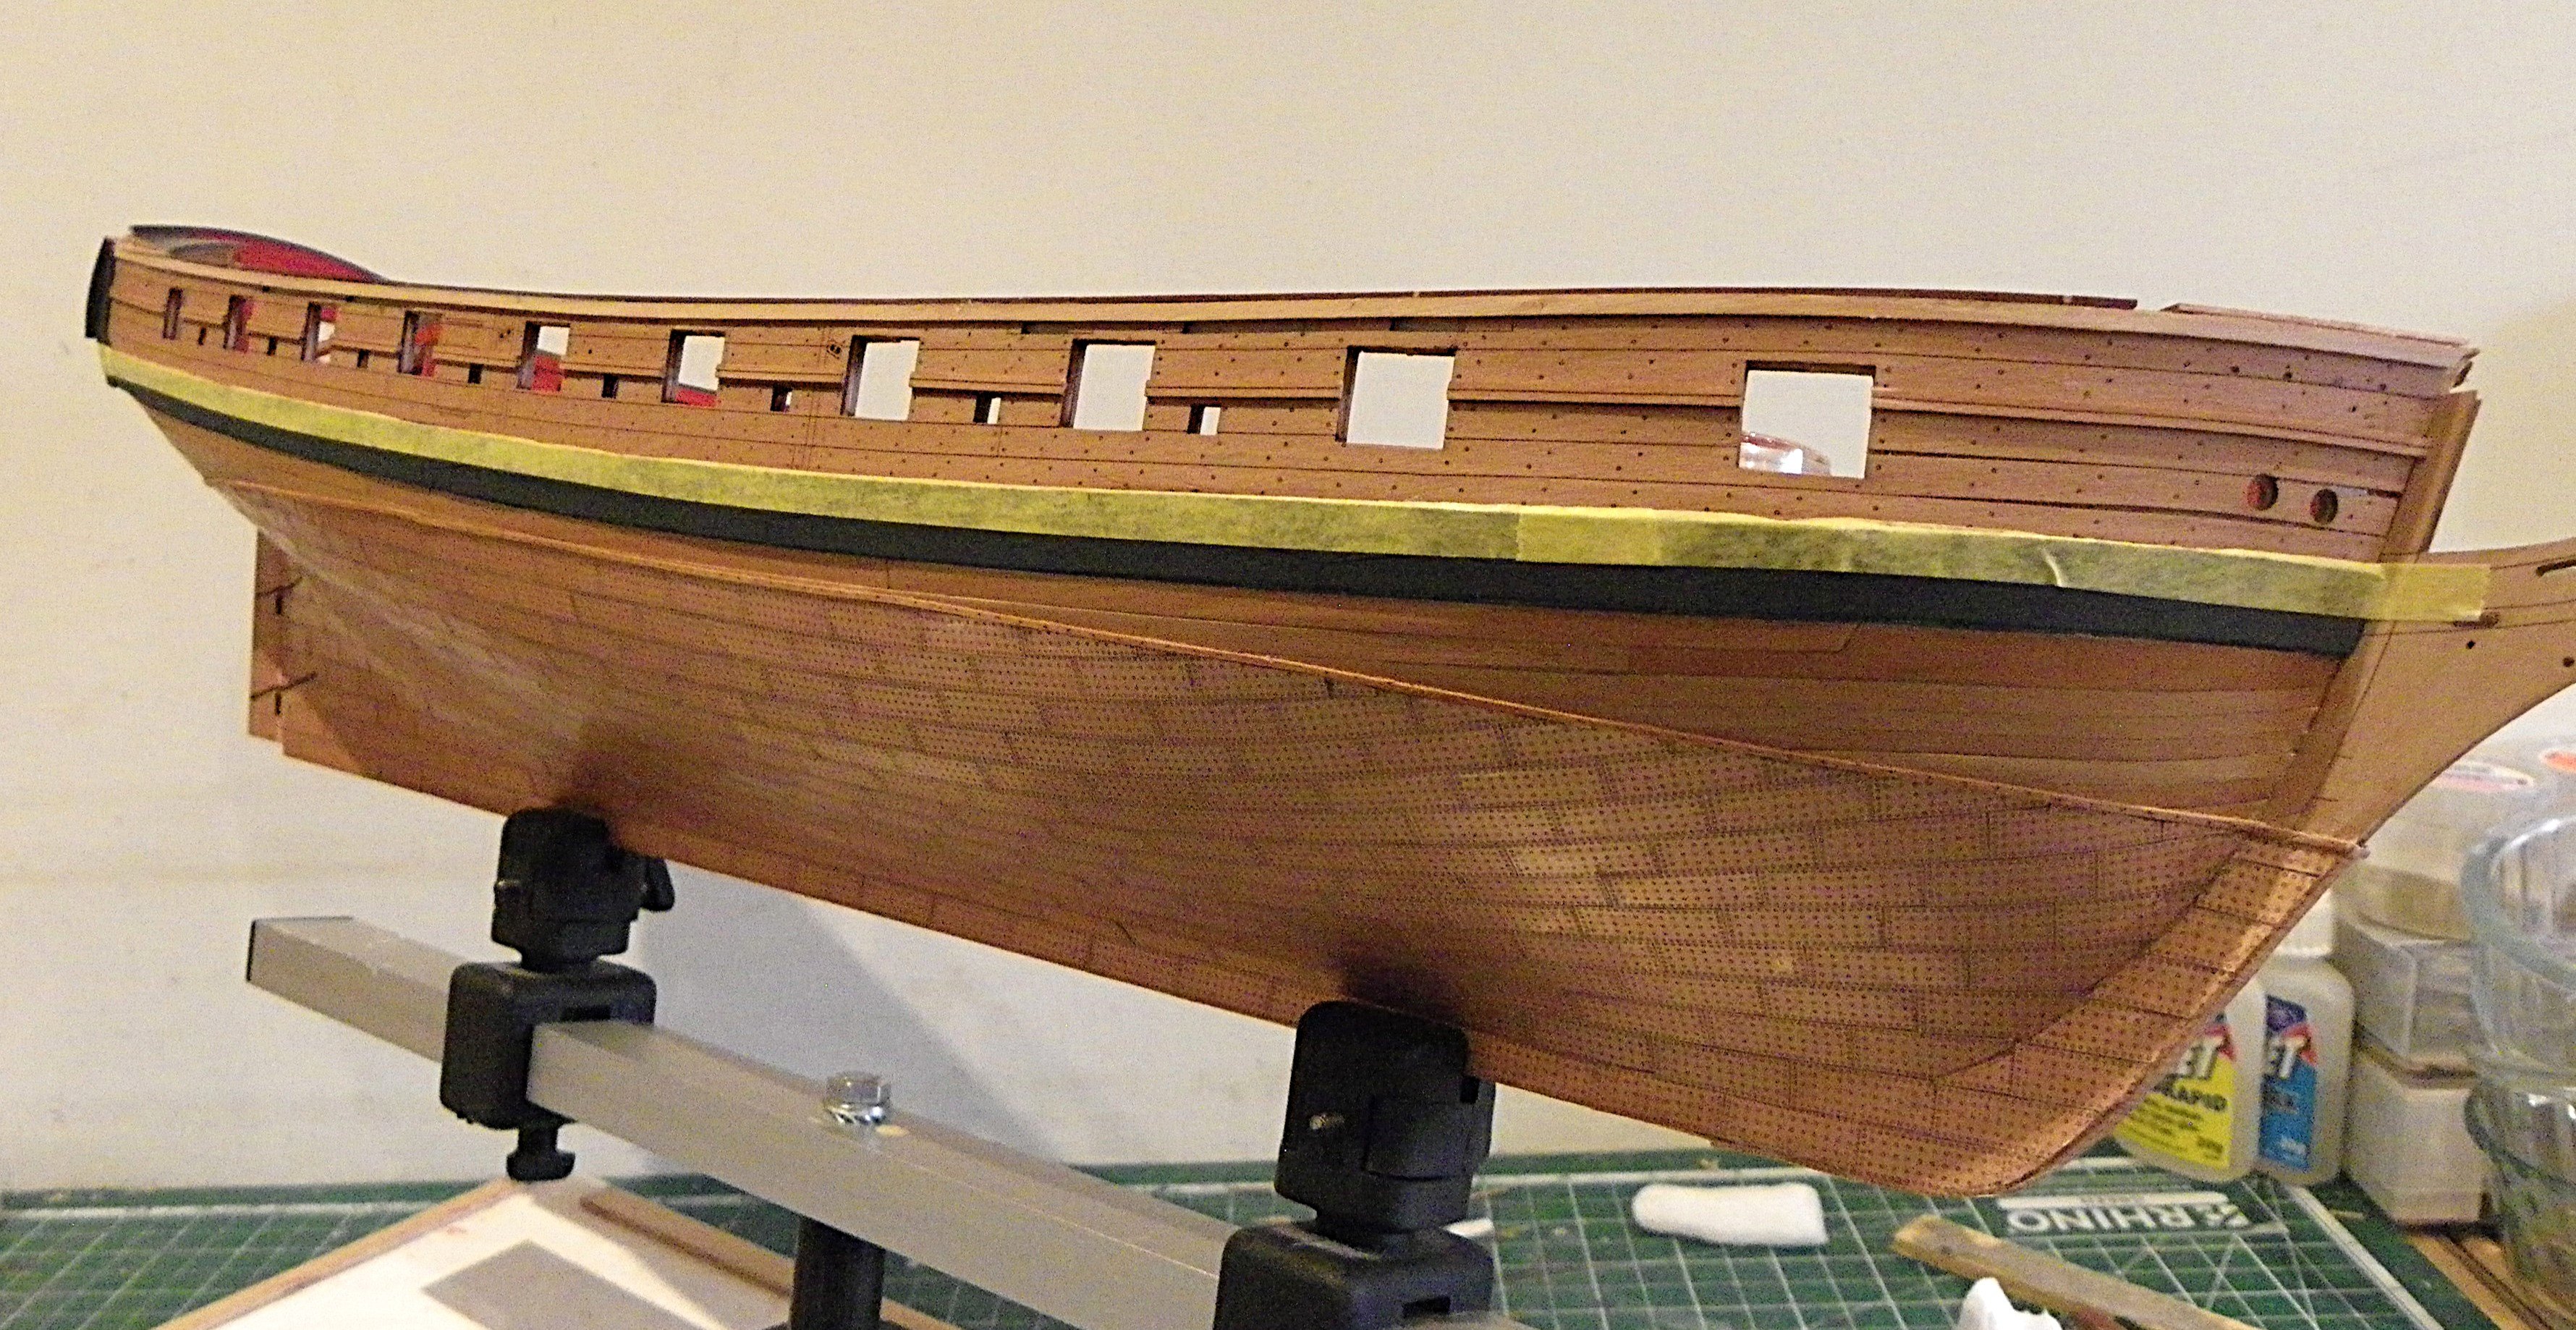
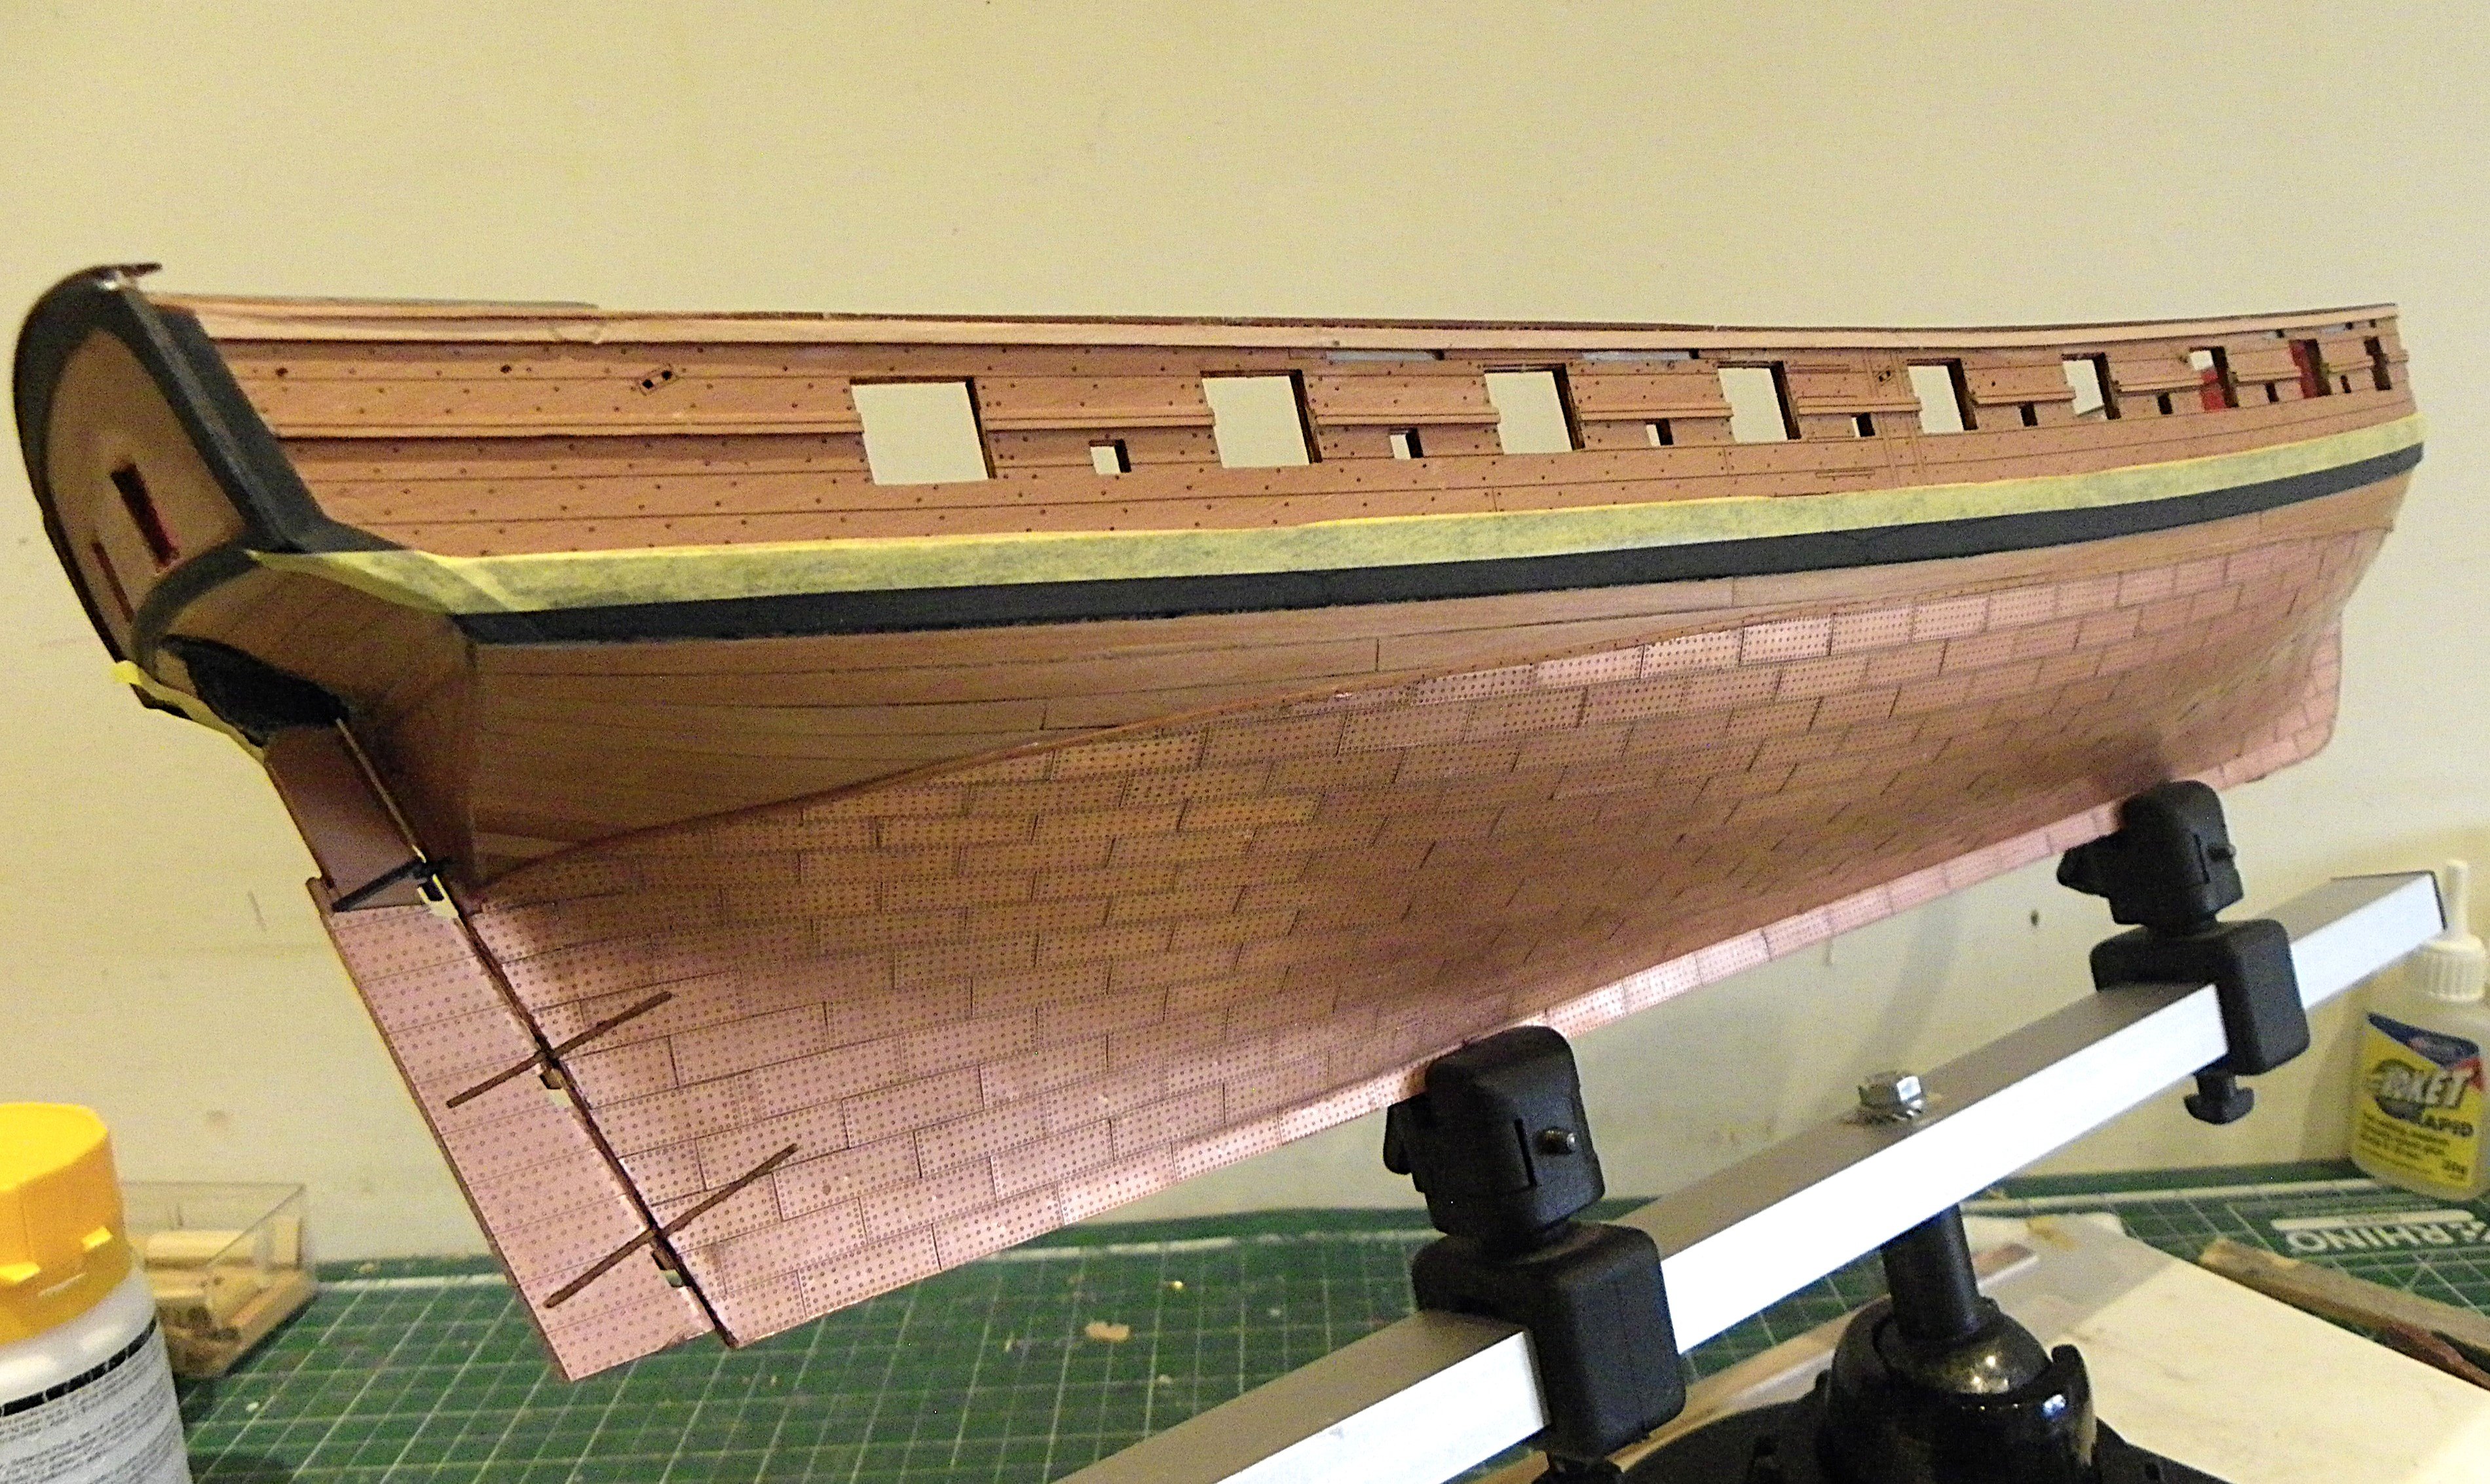
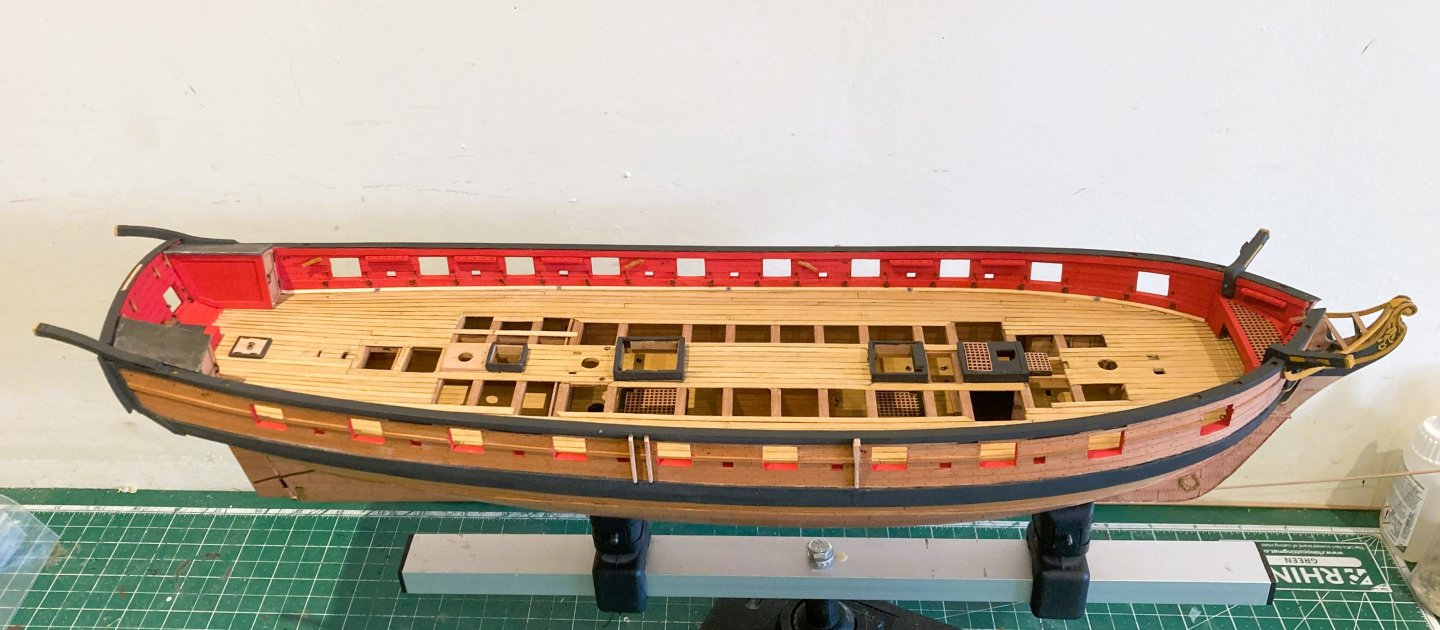
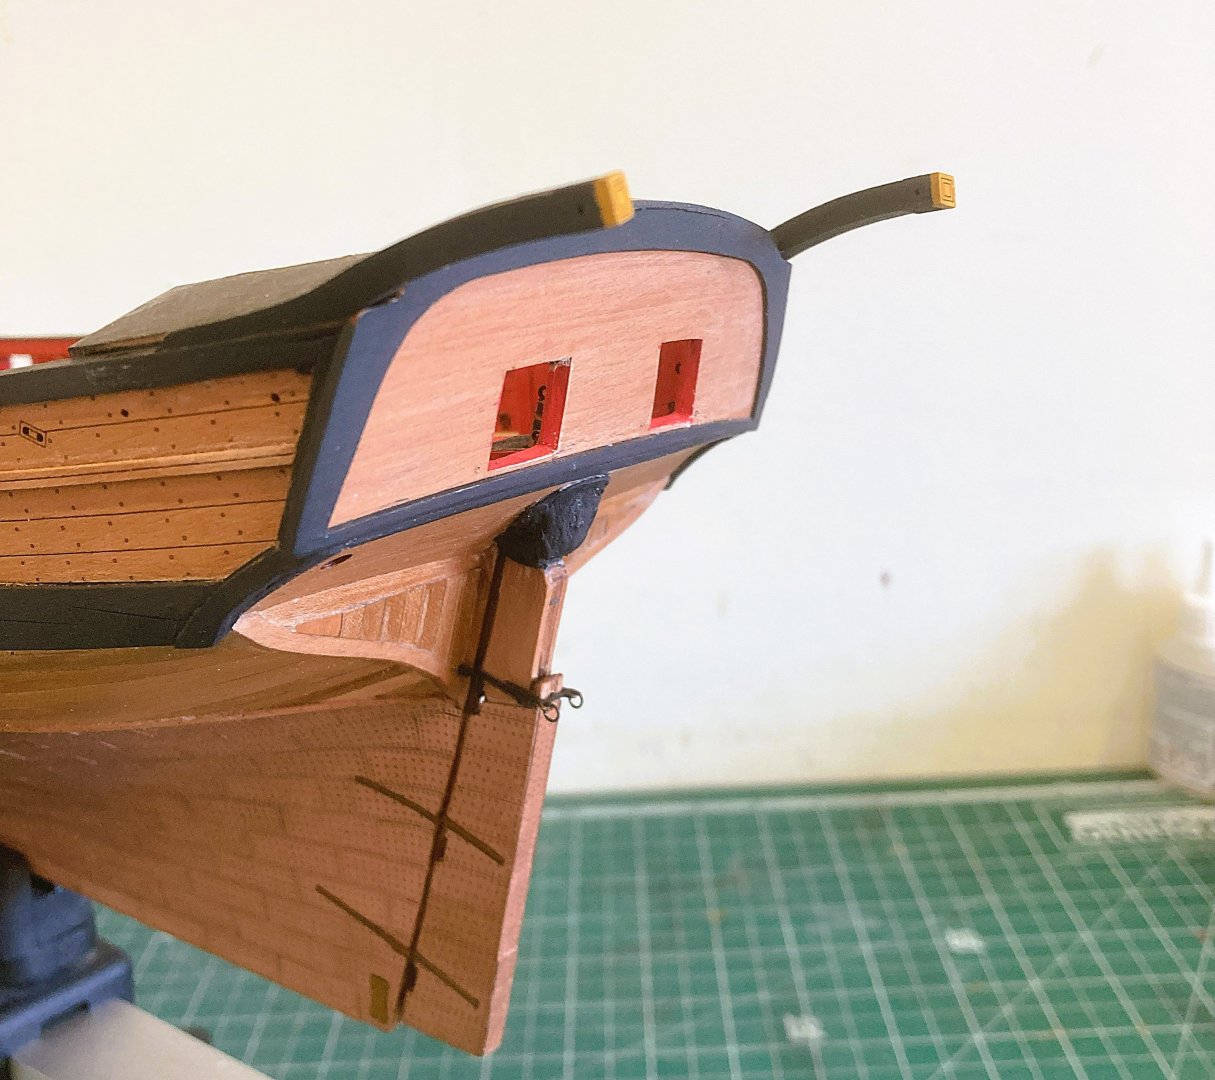
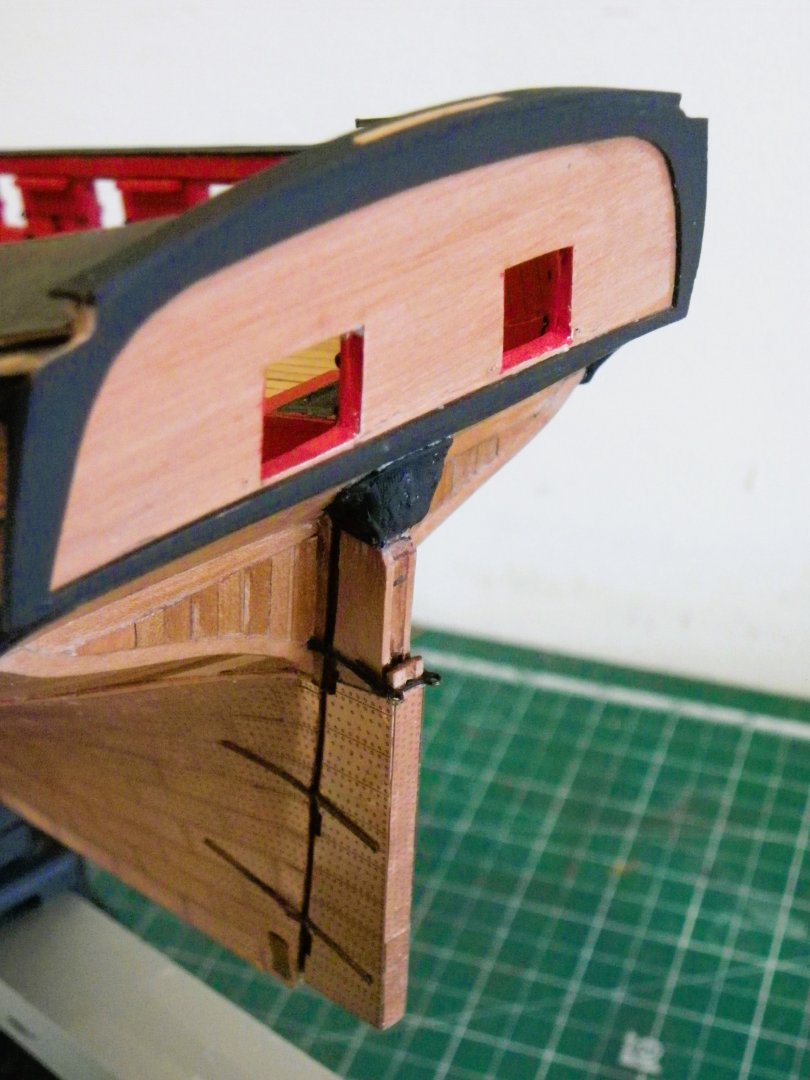
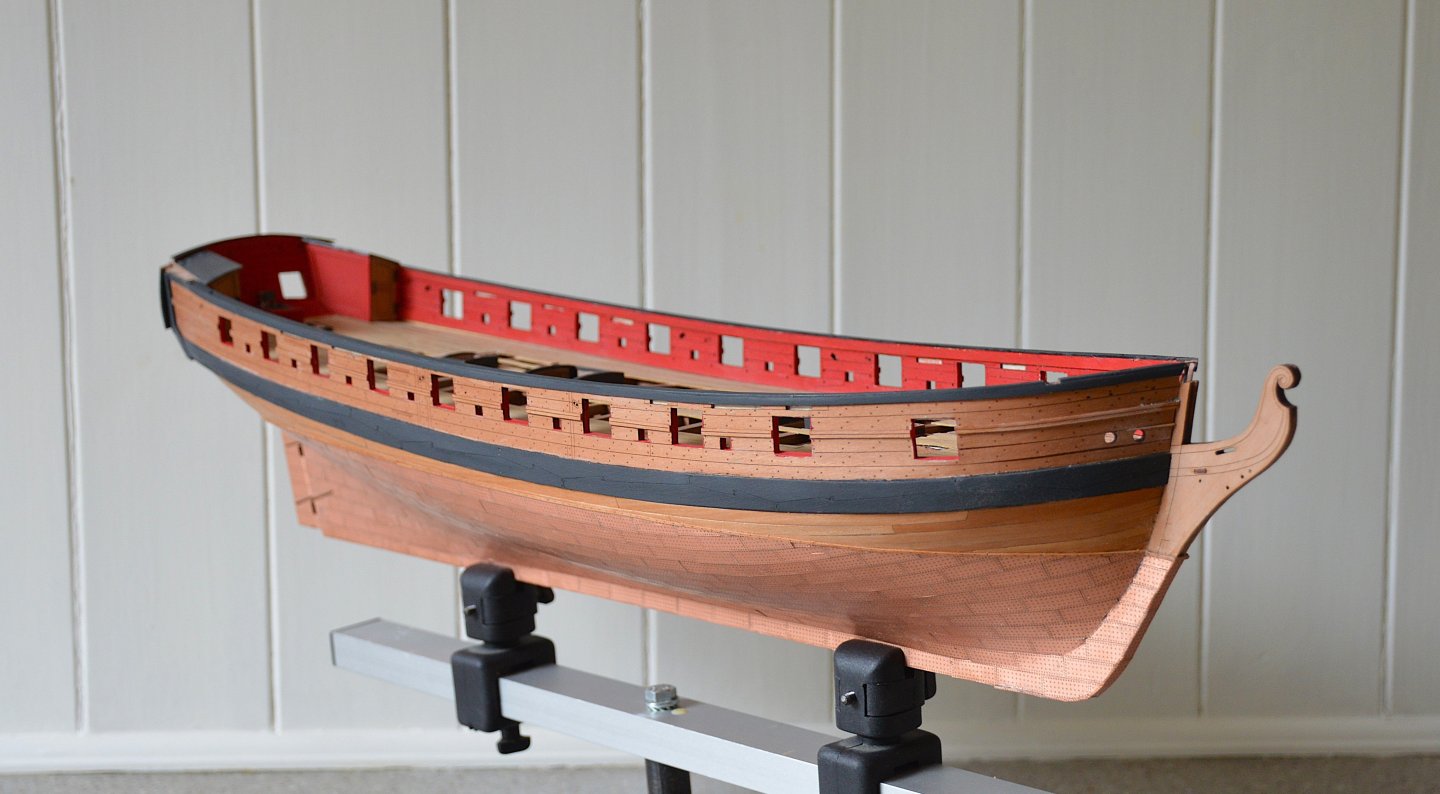
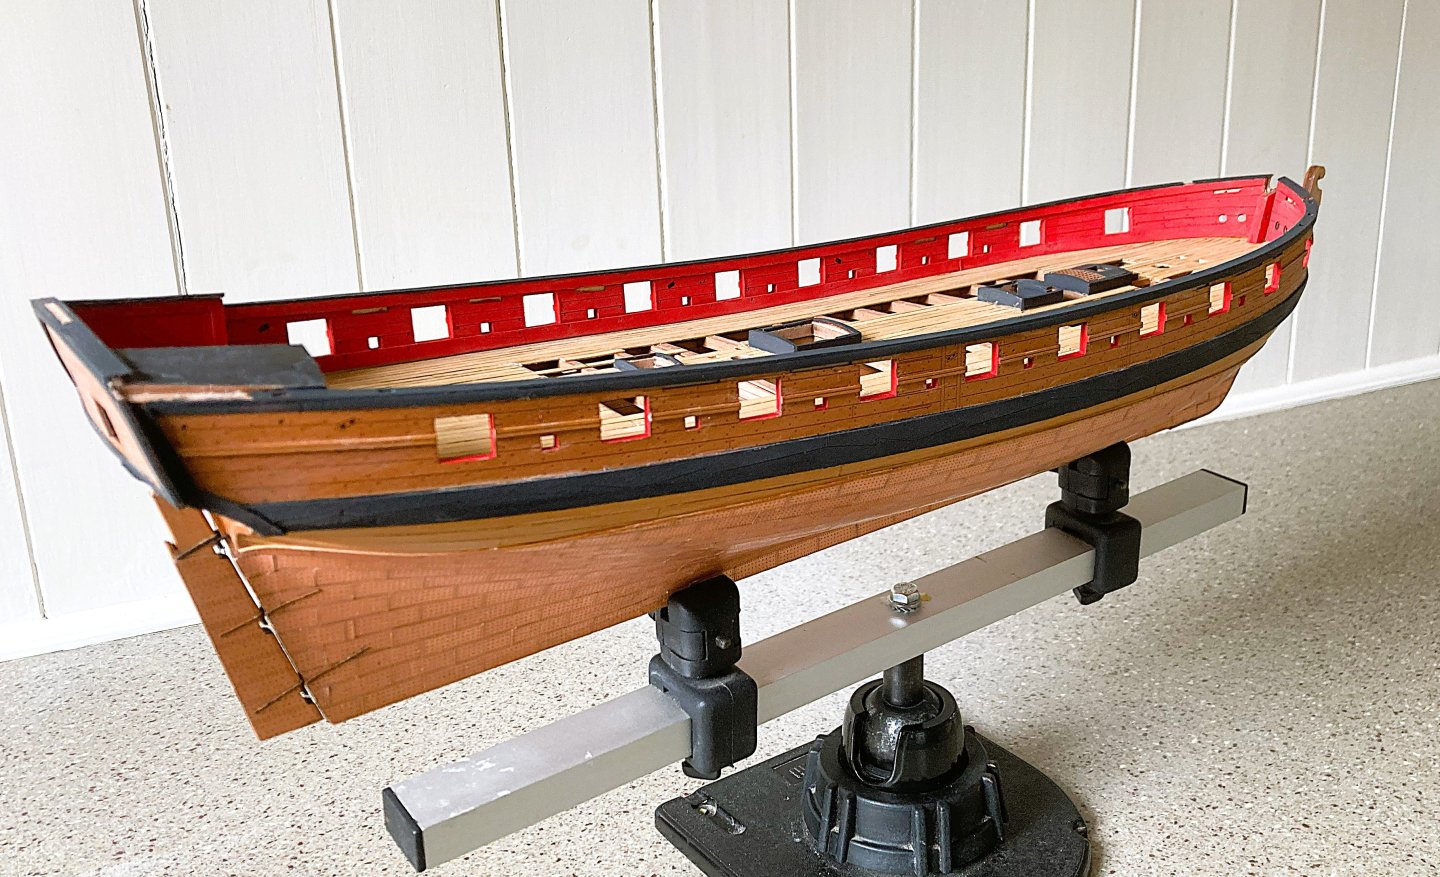
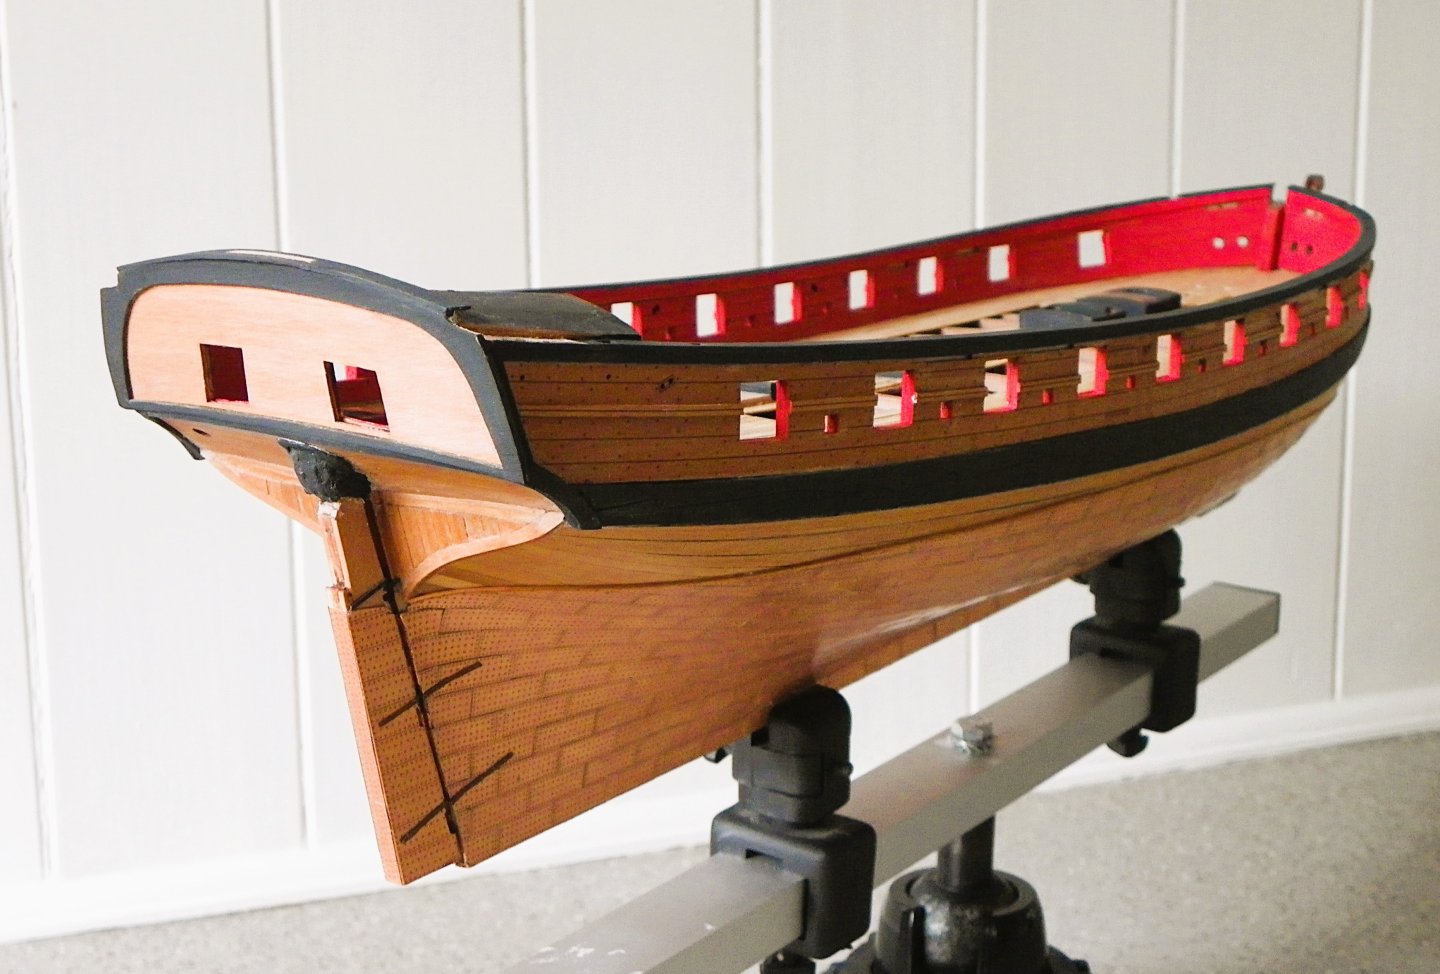
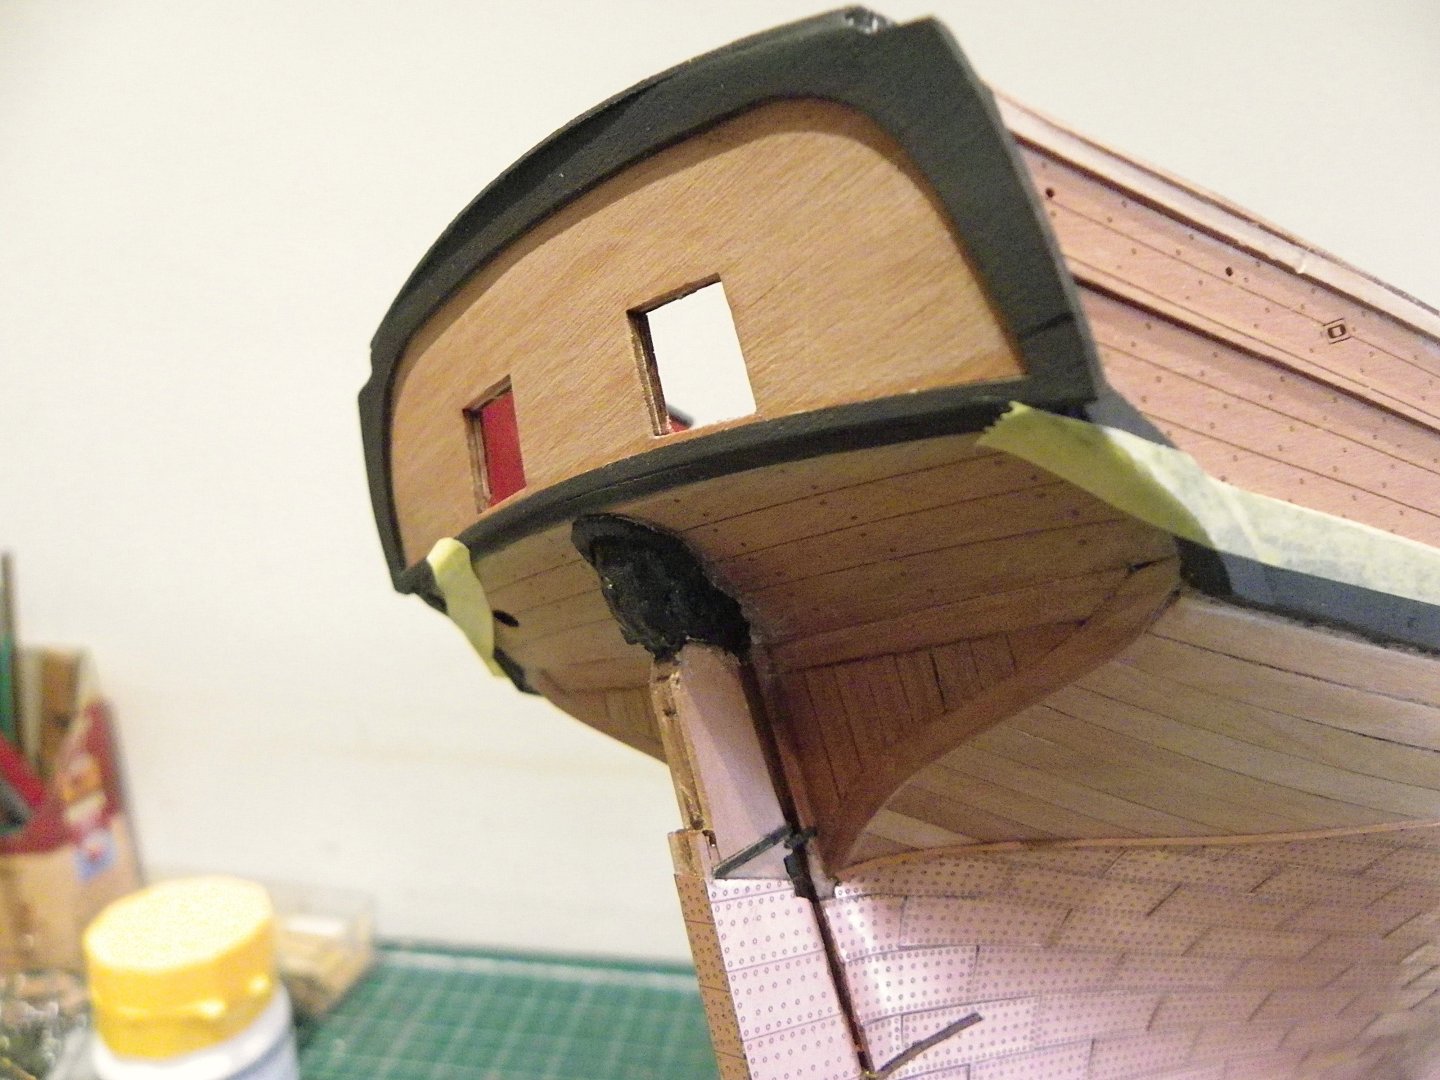
Post 55 The hull is inverted to re-check the plates, a couple were replaced where they had been marked. Once the deck fittings are in place inverting the hull becomes more difficult. 0876 The plates remain as supplied, apart from cleaning with acetone they have not further been cleaned up. On balance I prefer the look as is, rather than either scrubbed bright, or patinated. 0877 0878 I don’t know what surface coating was originally given to the plates to give that sea scoured pinkish look, or whether it will eventually patinate over time. Protective coats I had it in mind to fit a Rudder coat and an inverted hull gives the best position to attend to the job. 0857 I last fitted a Rudder coat on my Cutter Alert build and I think Harpy really needs one too. That gaping hole leading directly thro’ the deck would obviously need sealing. Rudder coats are a tricky item to make and I detailed my approach on the Alert build. There is a fair bit of trial and error involved here. 0866 Once the coat has been fitted there is still the opportunity to tweak it. Here I’ve added strips of modelling paste to increase the impression of looseness and small folds in the ‘canvas’ material. 0869 0868 Maybe a little more tweaking, but that can be done with the hull upright. With the hull the right way up there is still work to do. There is a sort of helm housing included as part of the kit, but it leaves the area around the rudder head open thro’ to the rudder head opening in the lower counter. There is something of sorts shown on the Adm. plans but the detail is quite vague. 0874 Chris has had a punt of what it may look like and I’ve had a punt further by adding a Helmcoat. These are common fittings around the rudder head on open decks, where the rudder is cut thro' the counter. 0881 I did find that I had to sand down the bottom of the helm box a little to allow free movement of the tiller. 0875 For the coat I simply used microporous tape which gives a good impression of tarred canvas. B.E. 17/03/2025


- 332 replies
-
- 24
-
-
- Harpy
- Vanguard Models
- (and 1 more)
-
Thanks James, saved me the trouble of composing an answer. B.E.
- 332 replies
-
- 2
-
-
- Harpy
- Vanguard Models
- (and 1 more)