HOLIDAY DONATION DRIVE - SUPPORT MSW - DO YOUR PART TO KEEP THIS GREAT FORUM GOING! (Only 51 donations so far out of 49,000 members - C'mon guys!)
×
.JPG.ca33079f5815b861e67b9c2cccd37982.JPG)

Blue Ensign
-
Posts
4,564 -
Joined
-
Last visited
Content Type
Profiles
Forums
Gallery
Events
Everything posted by Blue Ensign
-
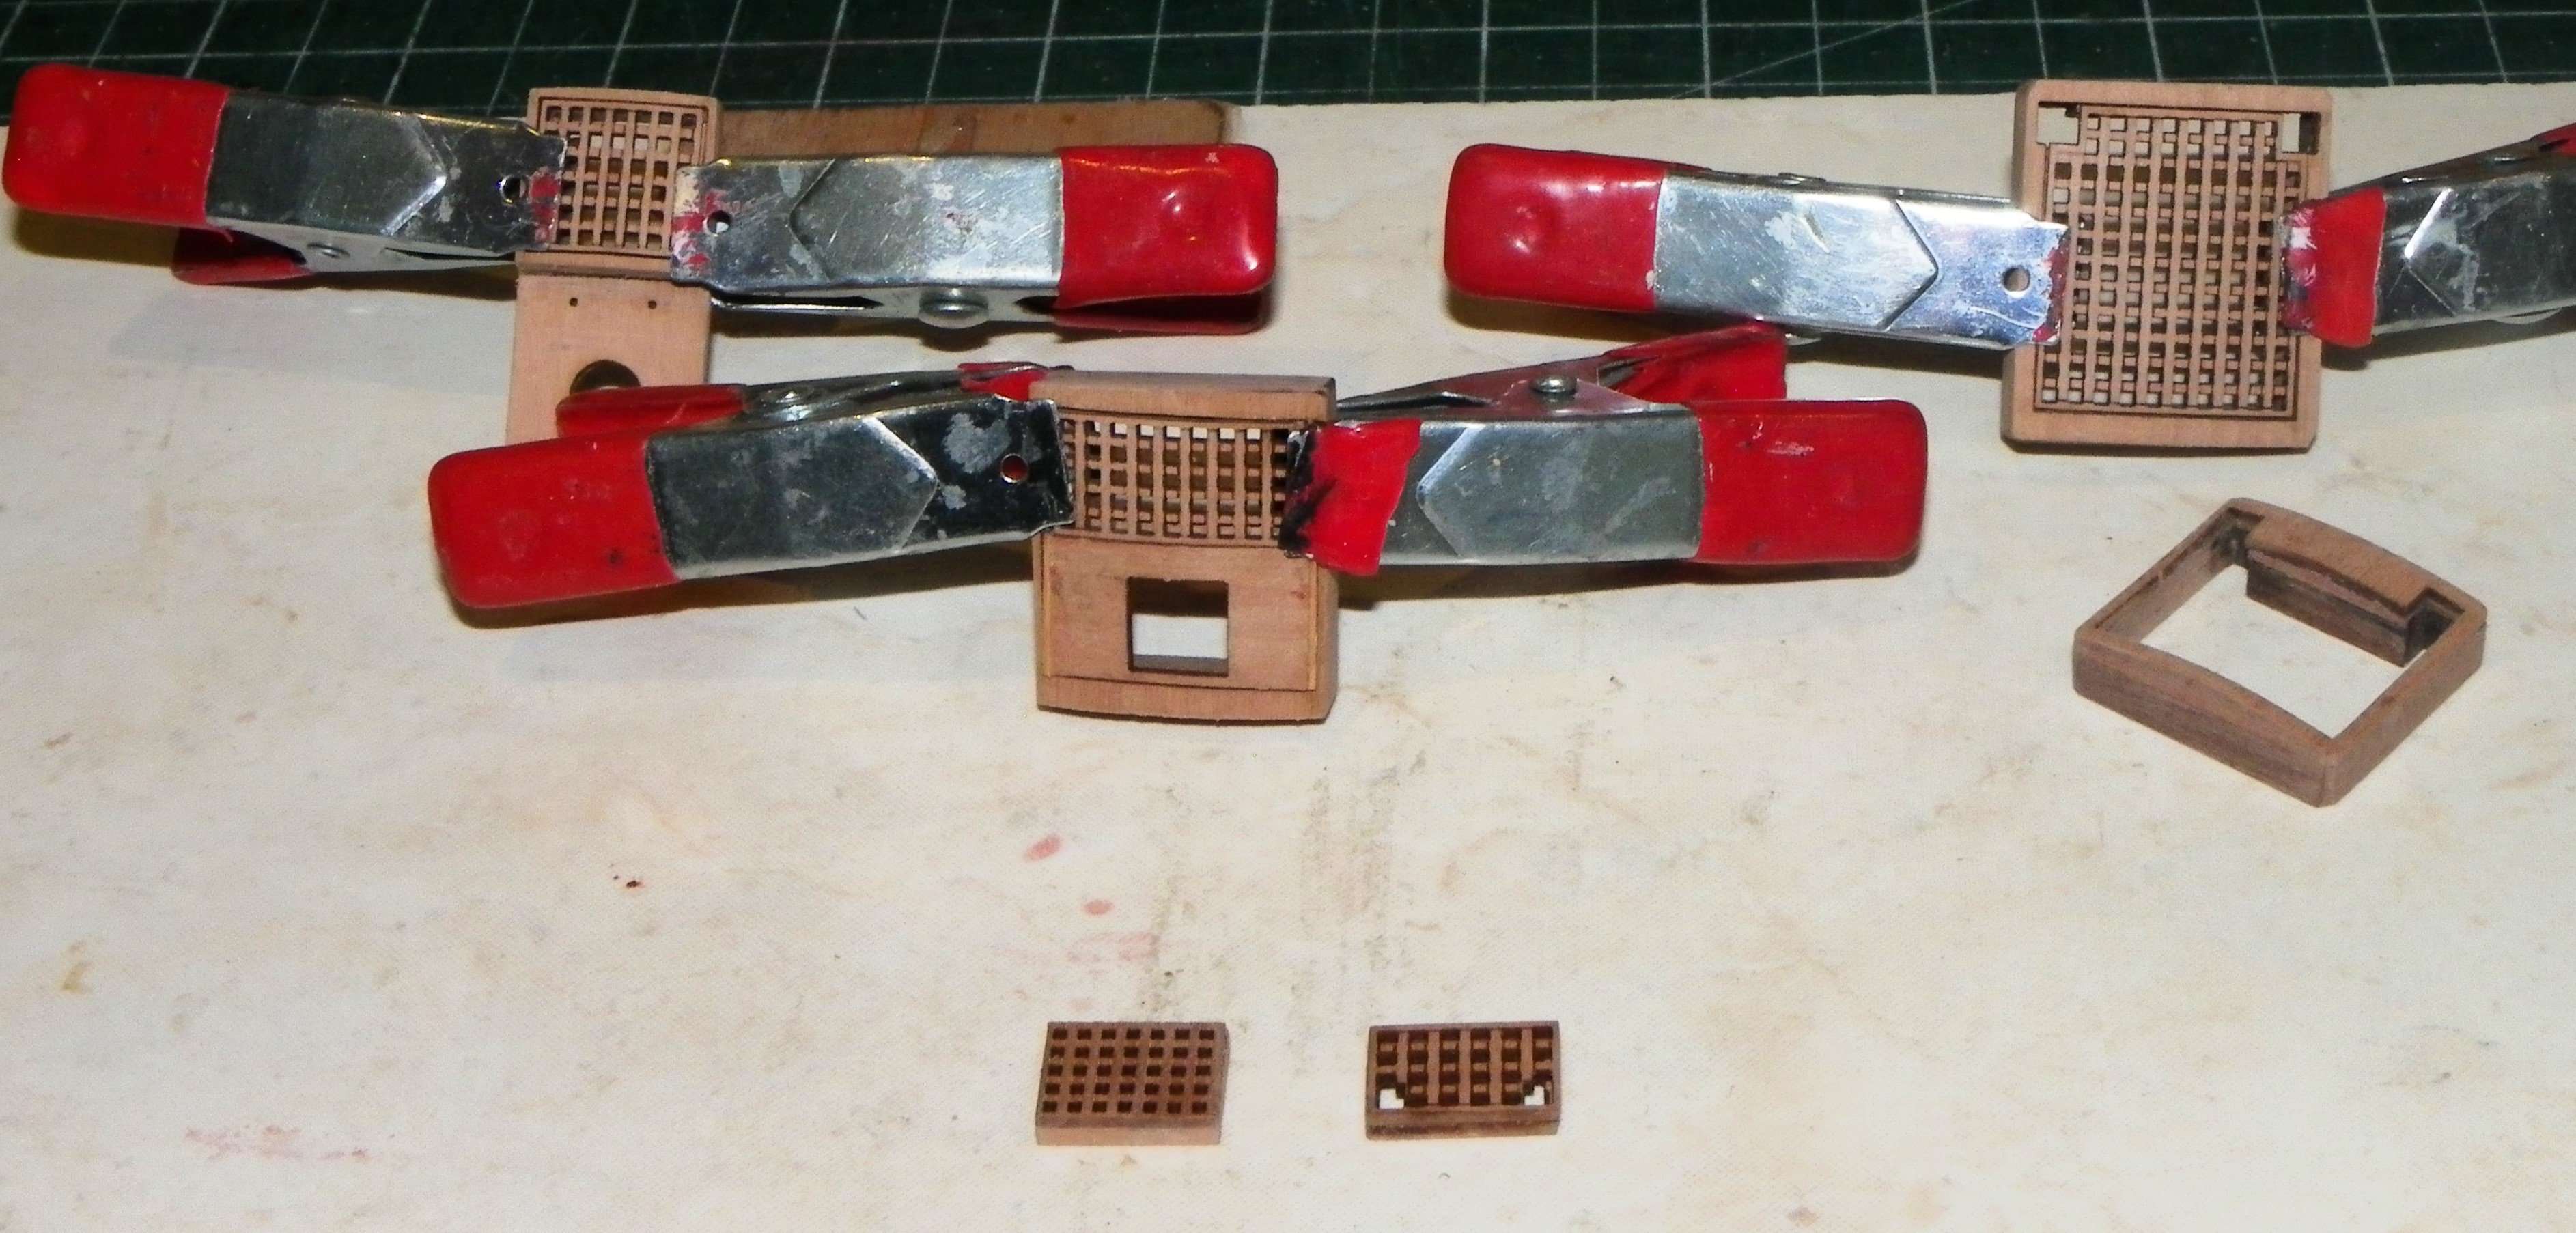
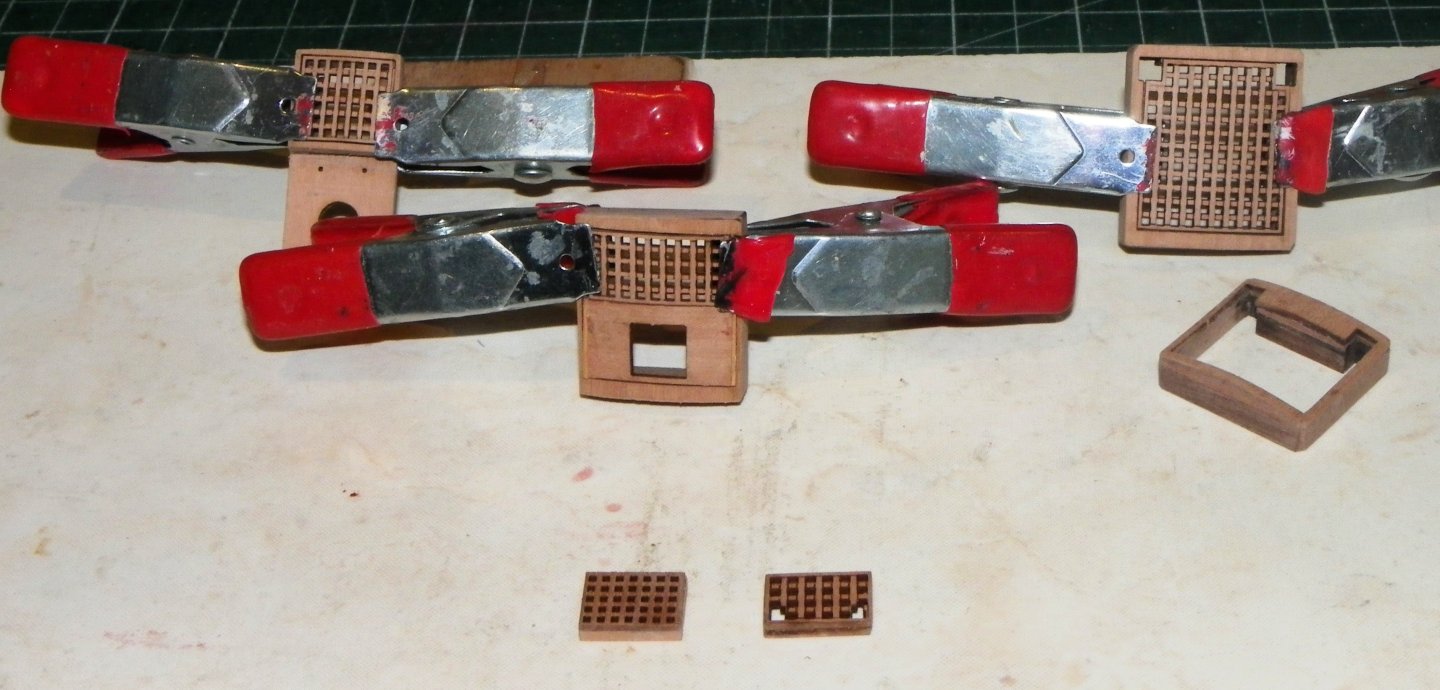
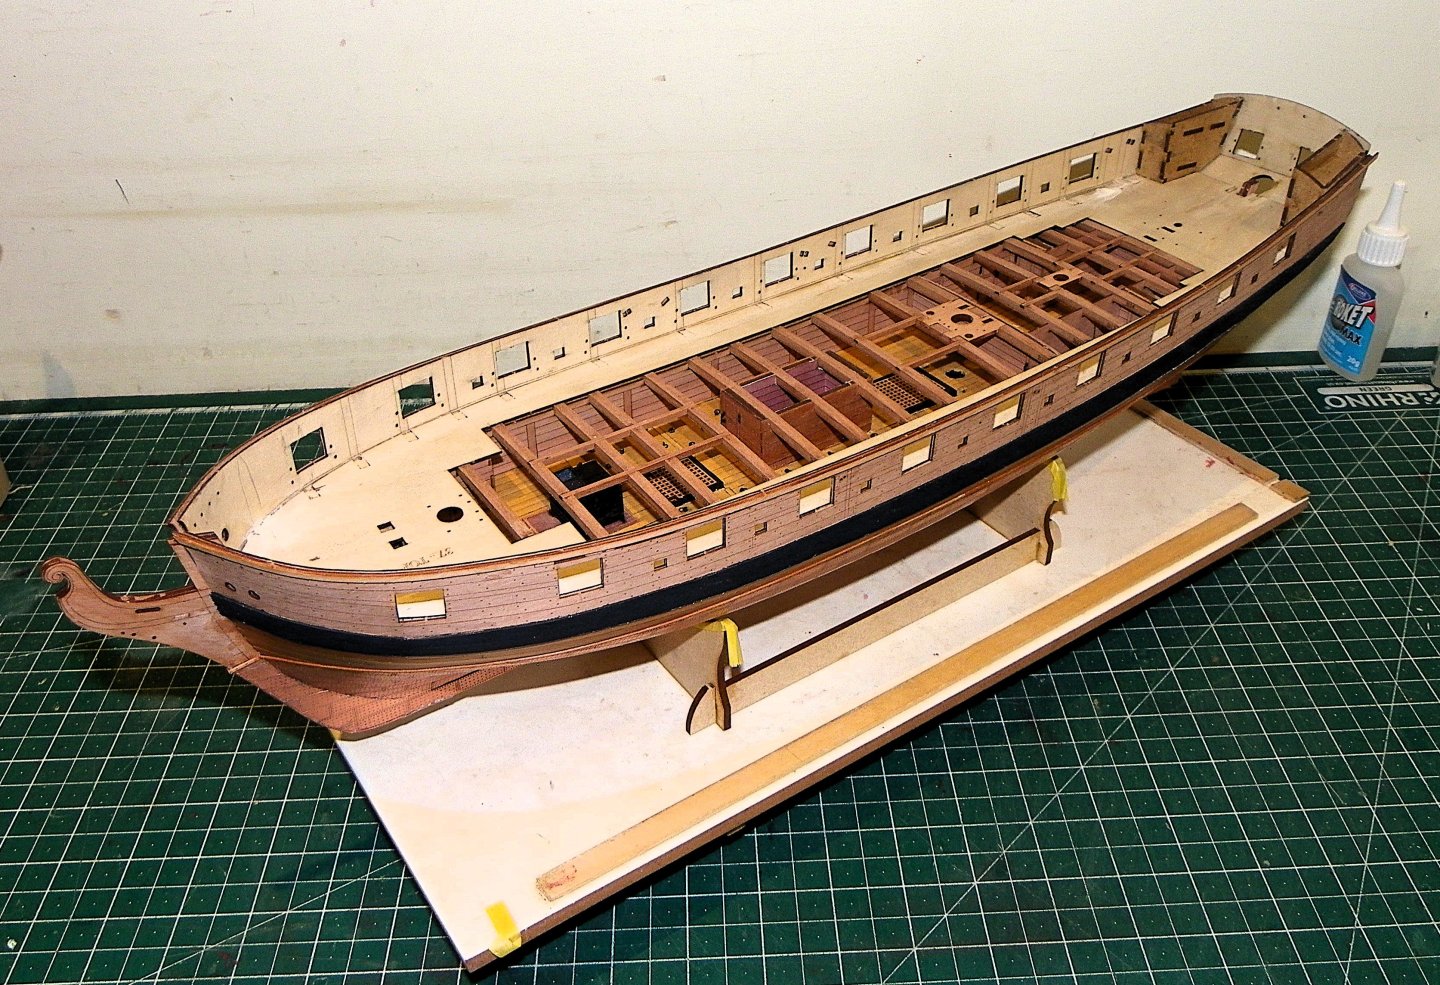
 Post 40 Prelude to planking. 0449 I have spent a morning cleaning up just these five fittings. The Char proved very stubborn. 0446 I do intend to paint the coamings Black, but I prefer to keep the insides bright, which proved to be the most difficult to clean. The gratings will be given the w-o-p treatment. 0443 I decided I couldn’t live with the kit small steam grating set-up (on the right) so I re-made one more to my liking. 0459 Looking a lot better now. 0452 I can now proceed to planking. 0460 I think my assistant is telling me it’s time for (his) lunch. B.E 20/02/2025

- 332 replies
-
- 19
-

-
- Harpy
- Vanguard Models
- (and 1 more)
-
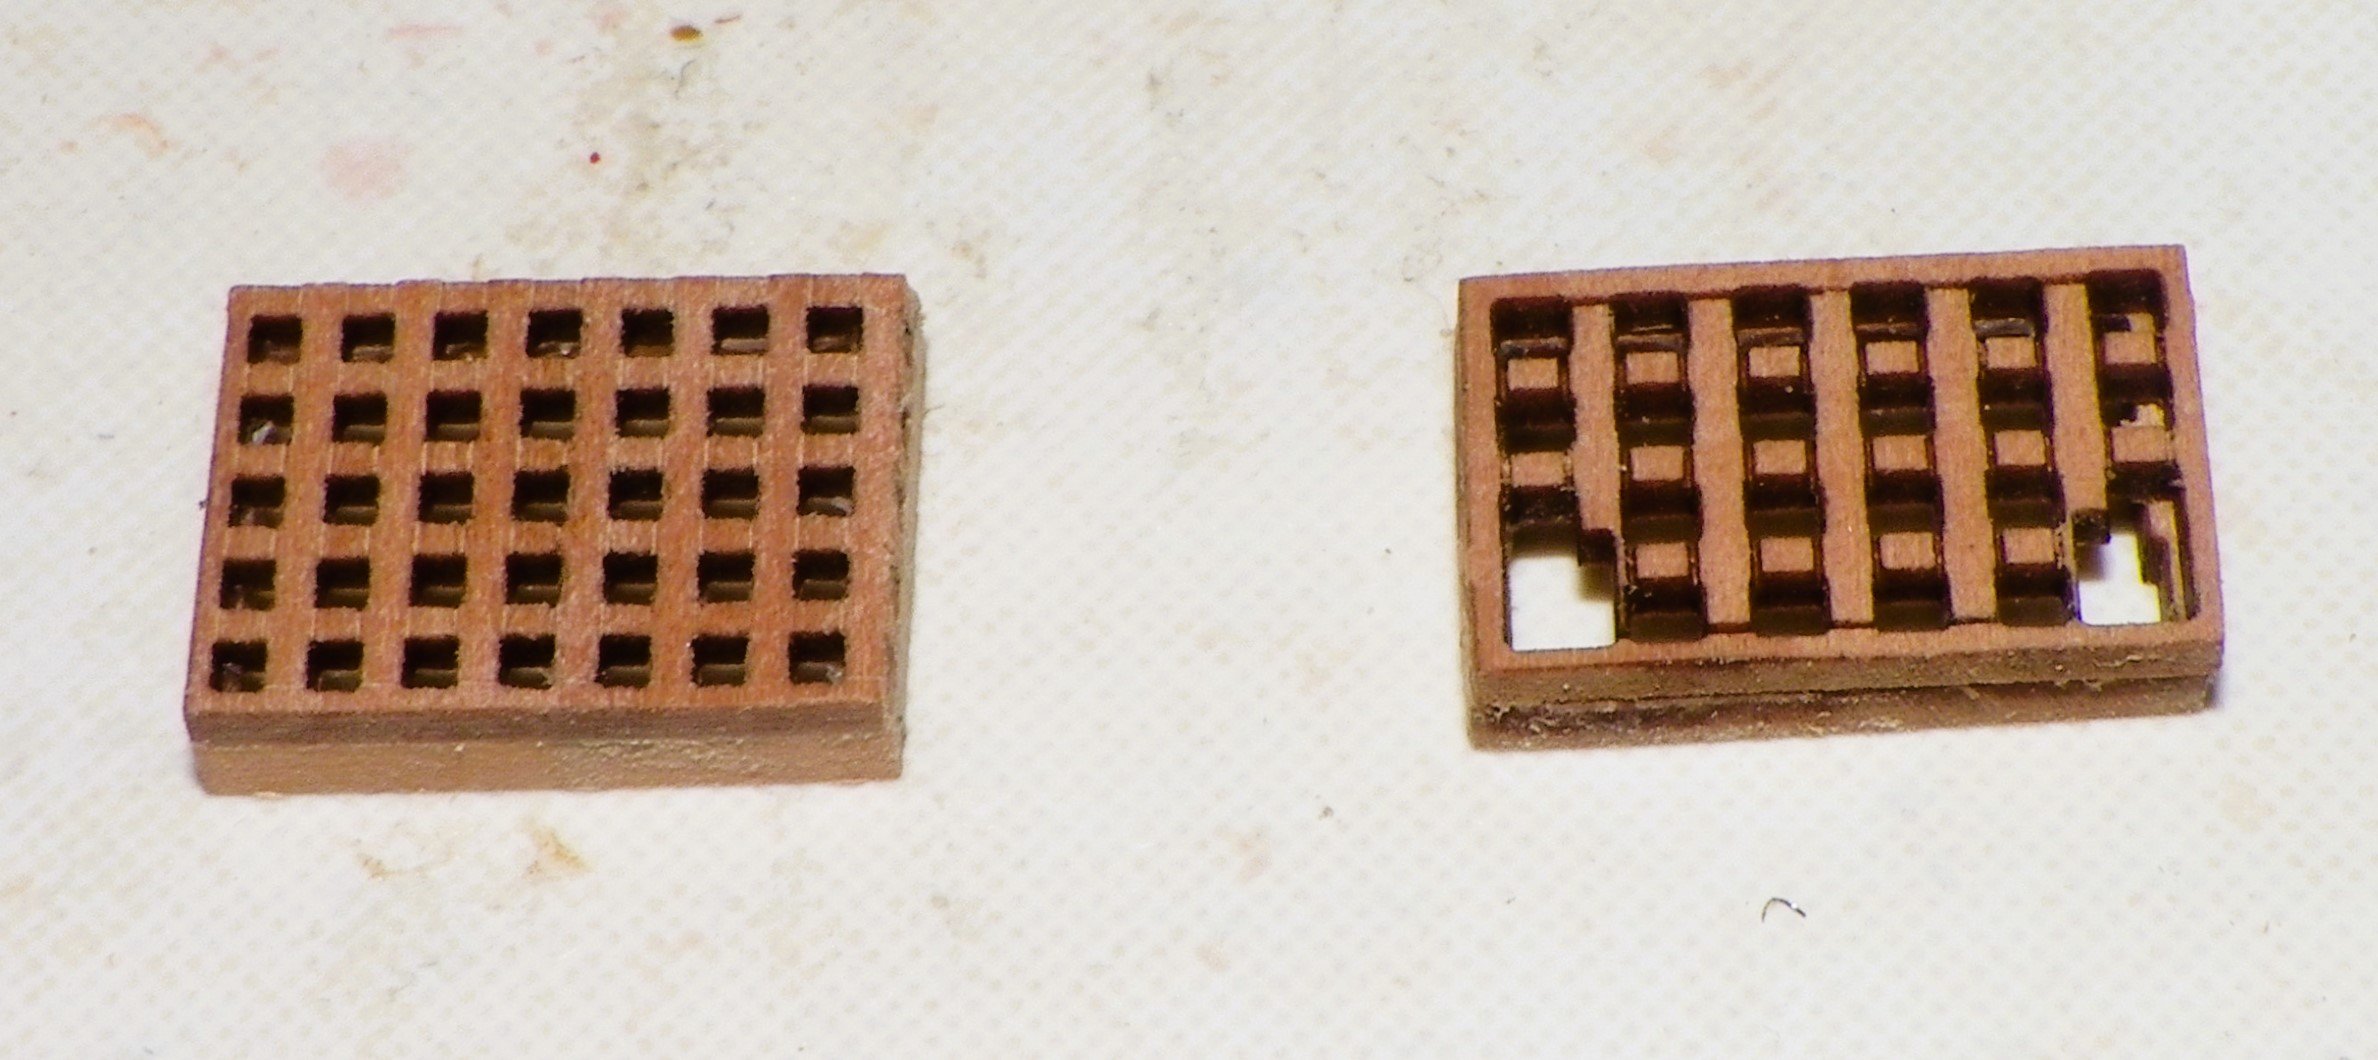
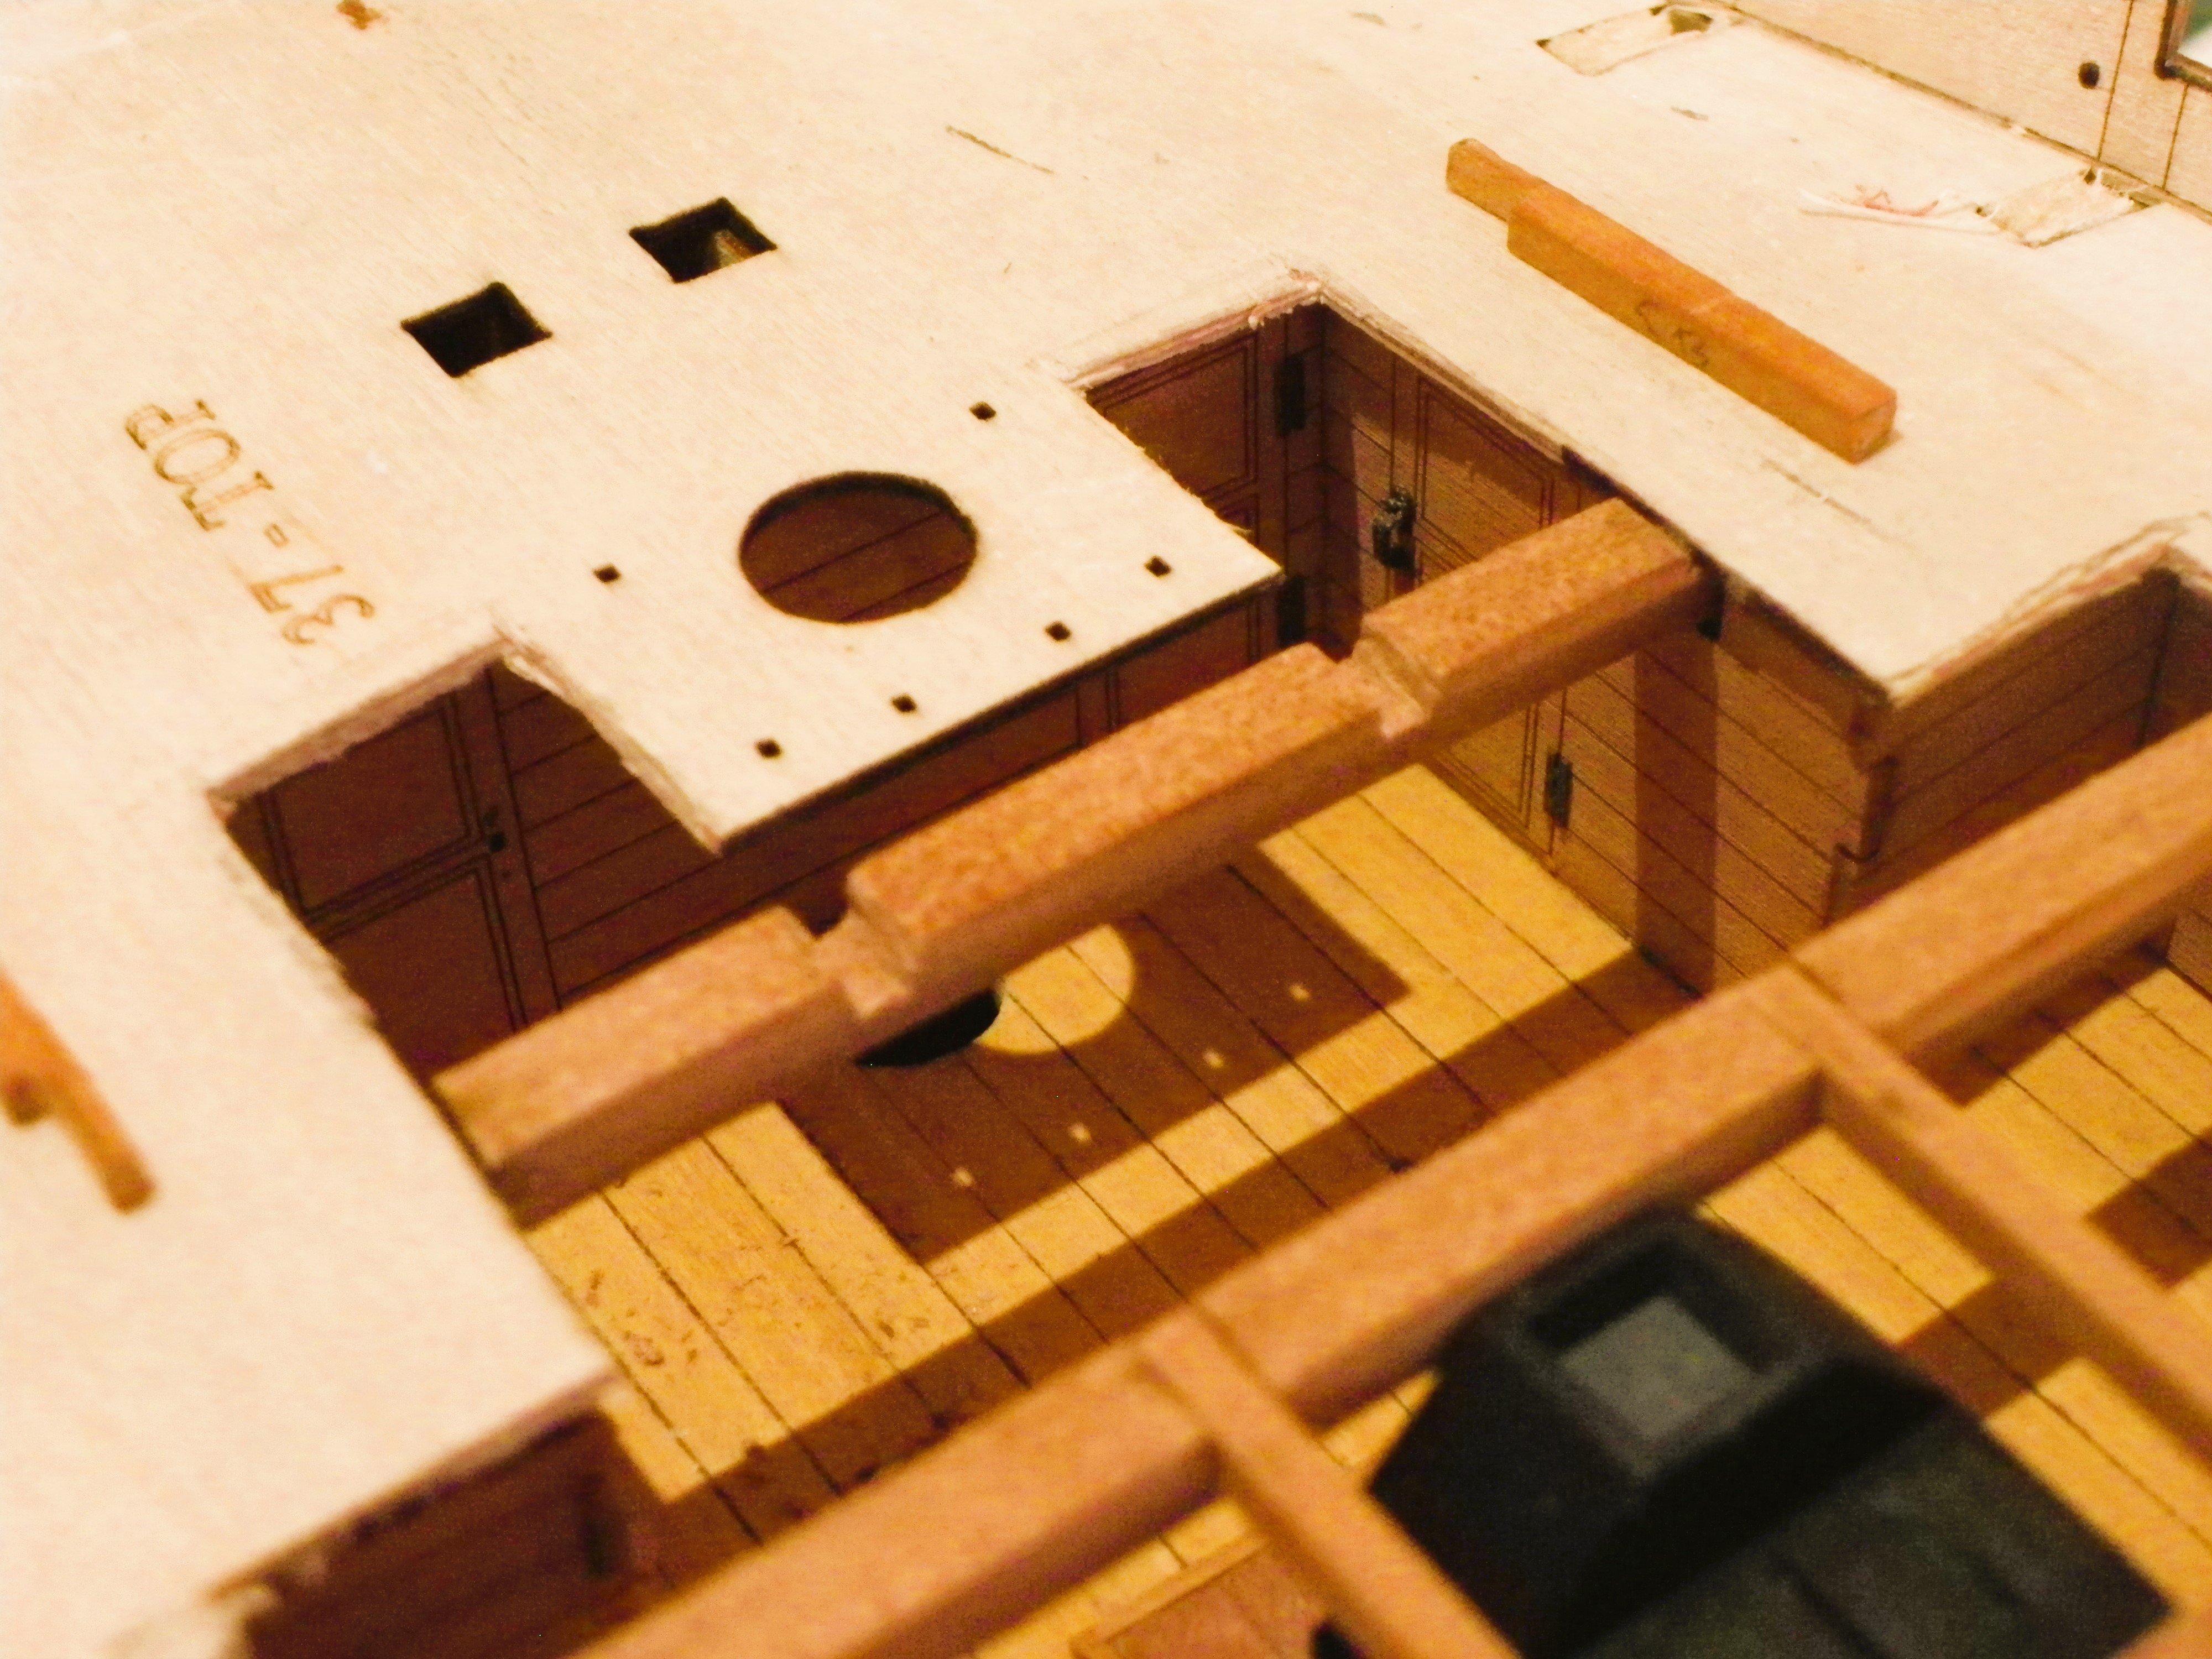
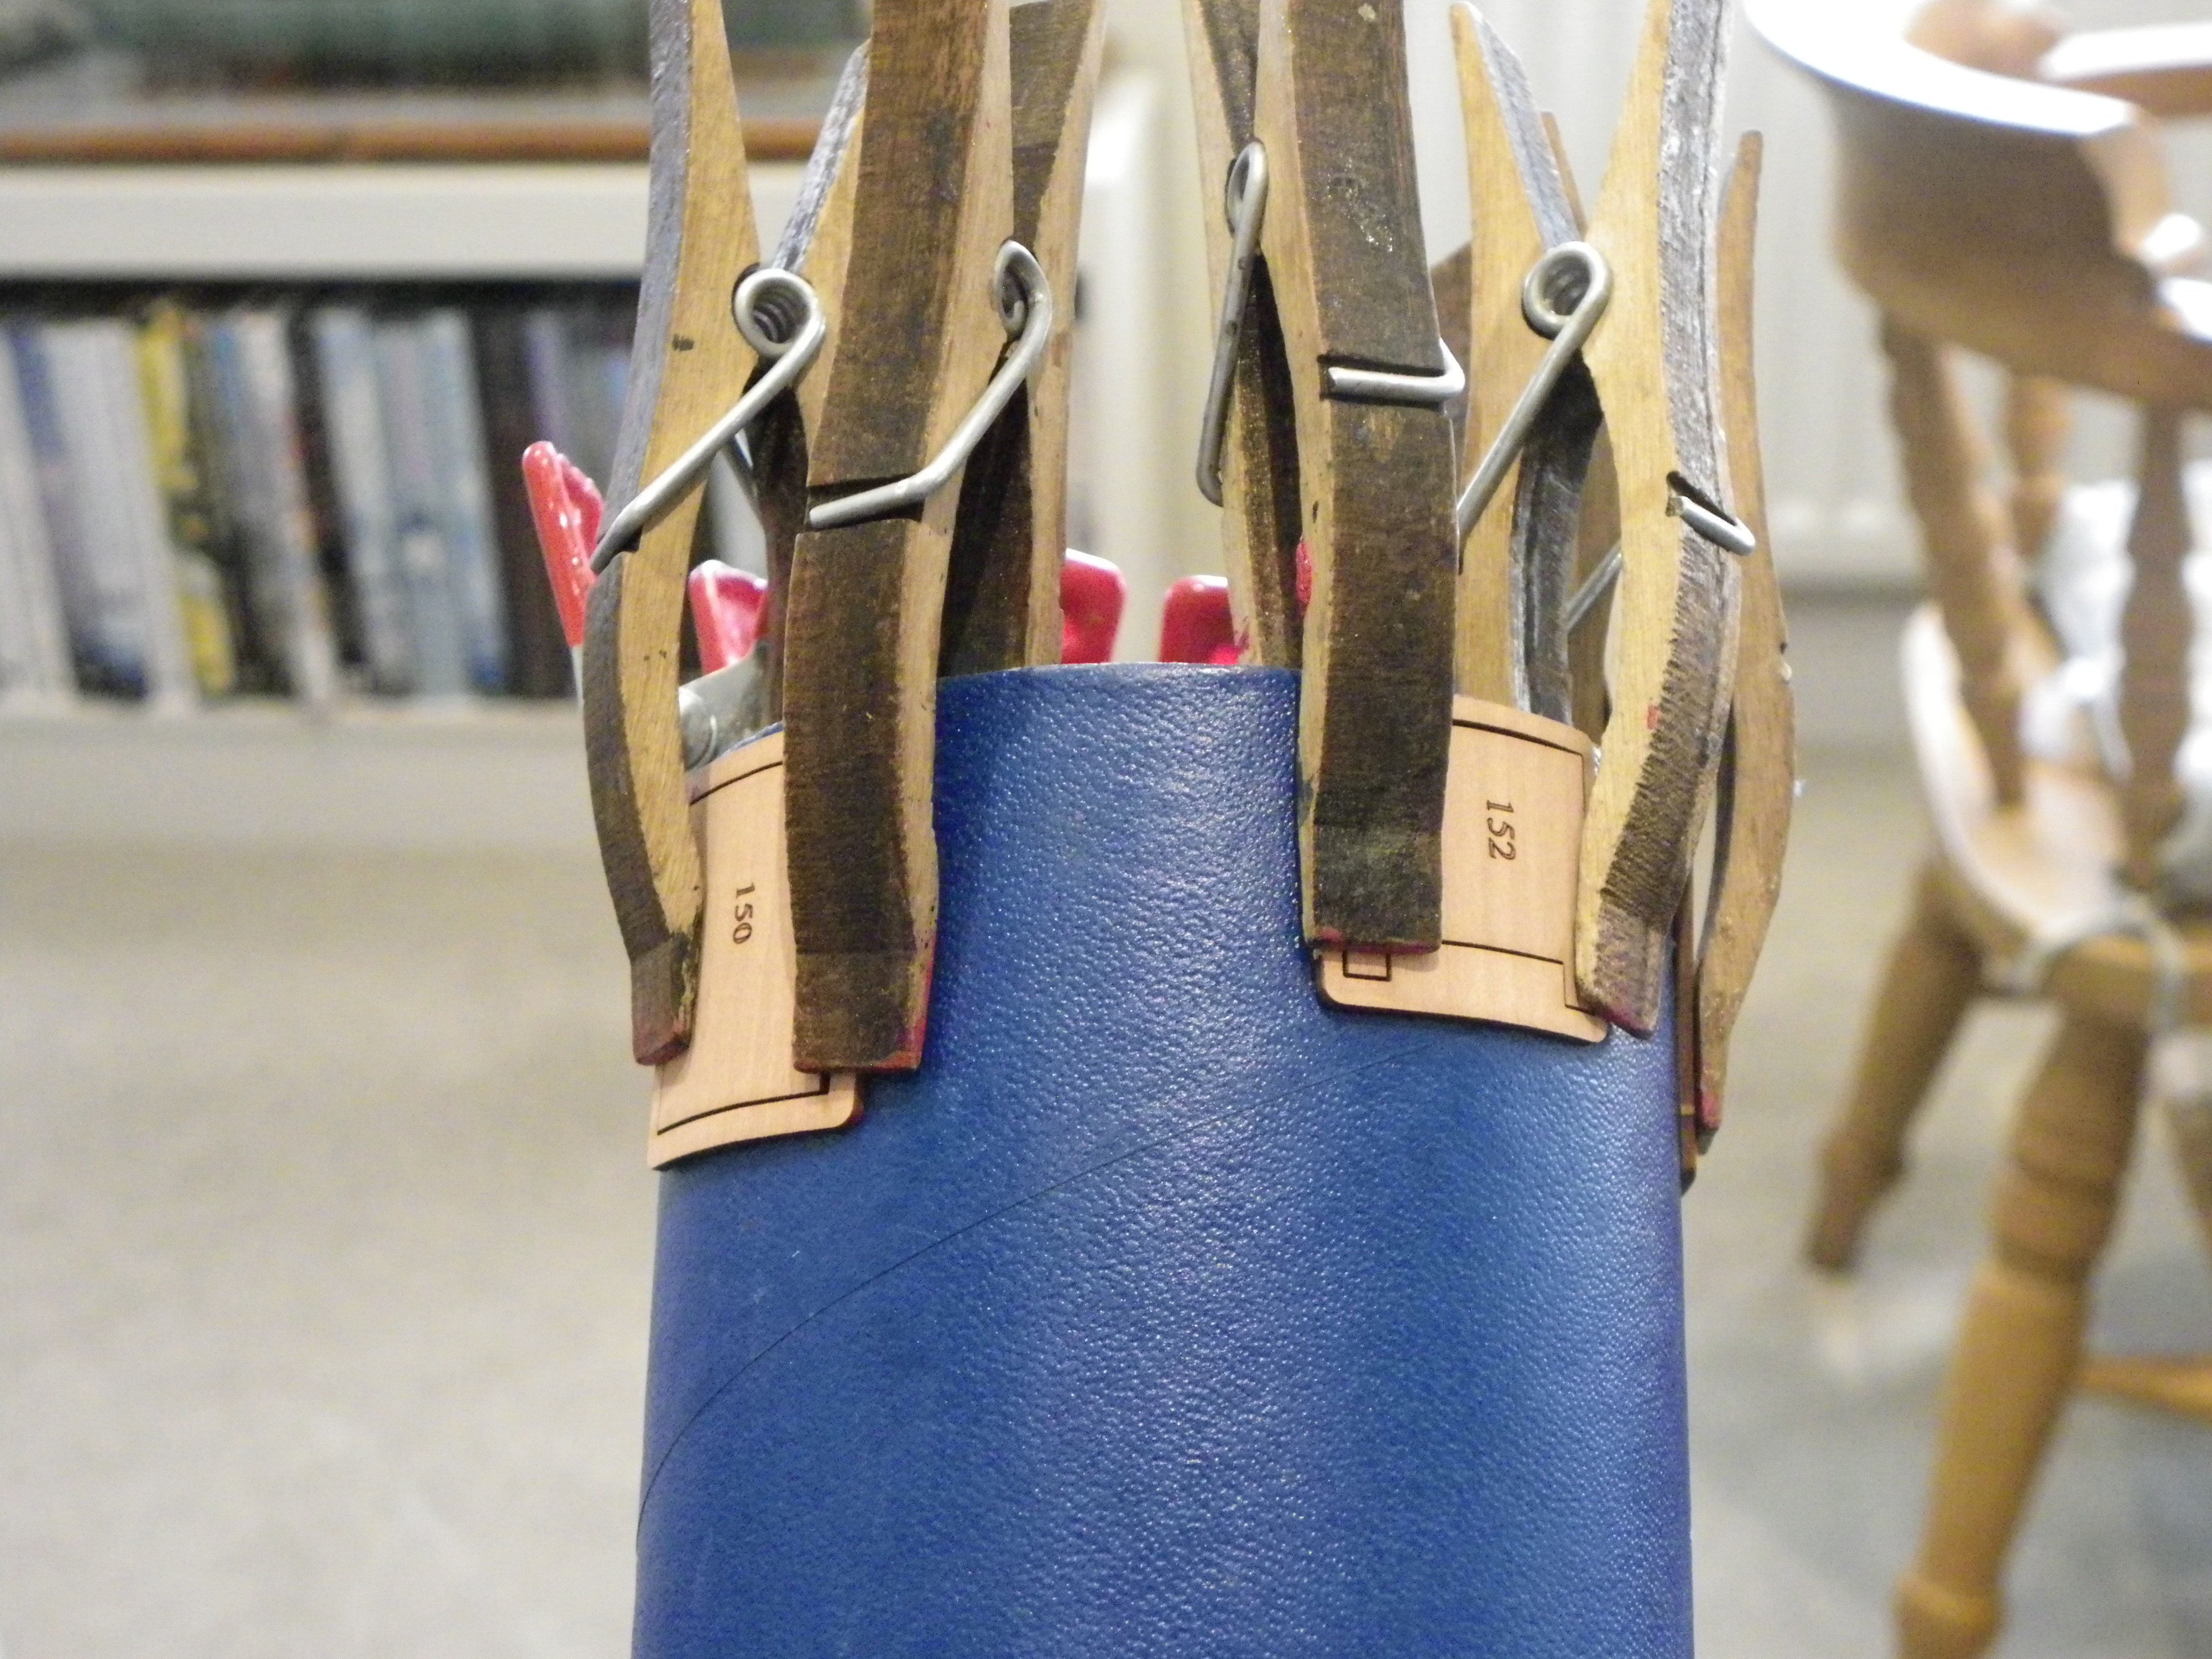
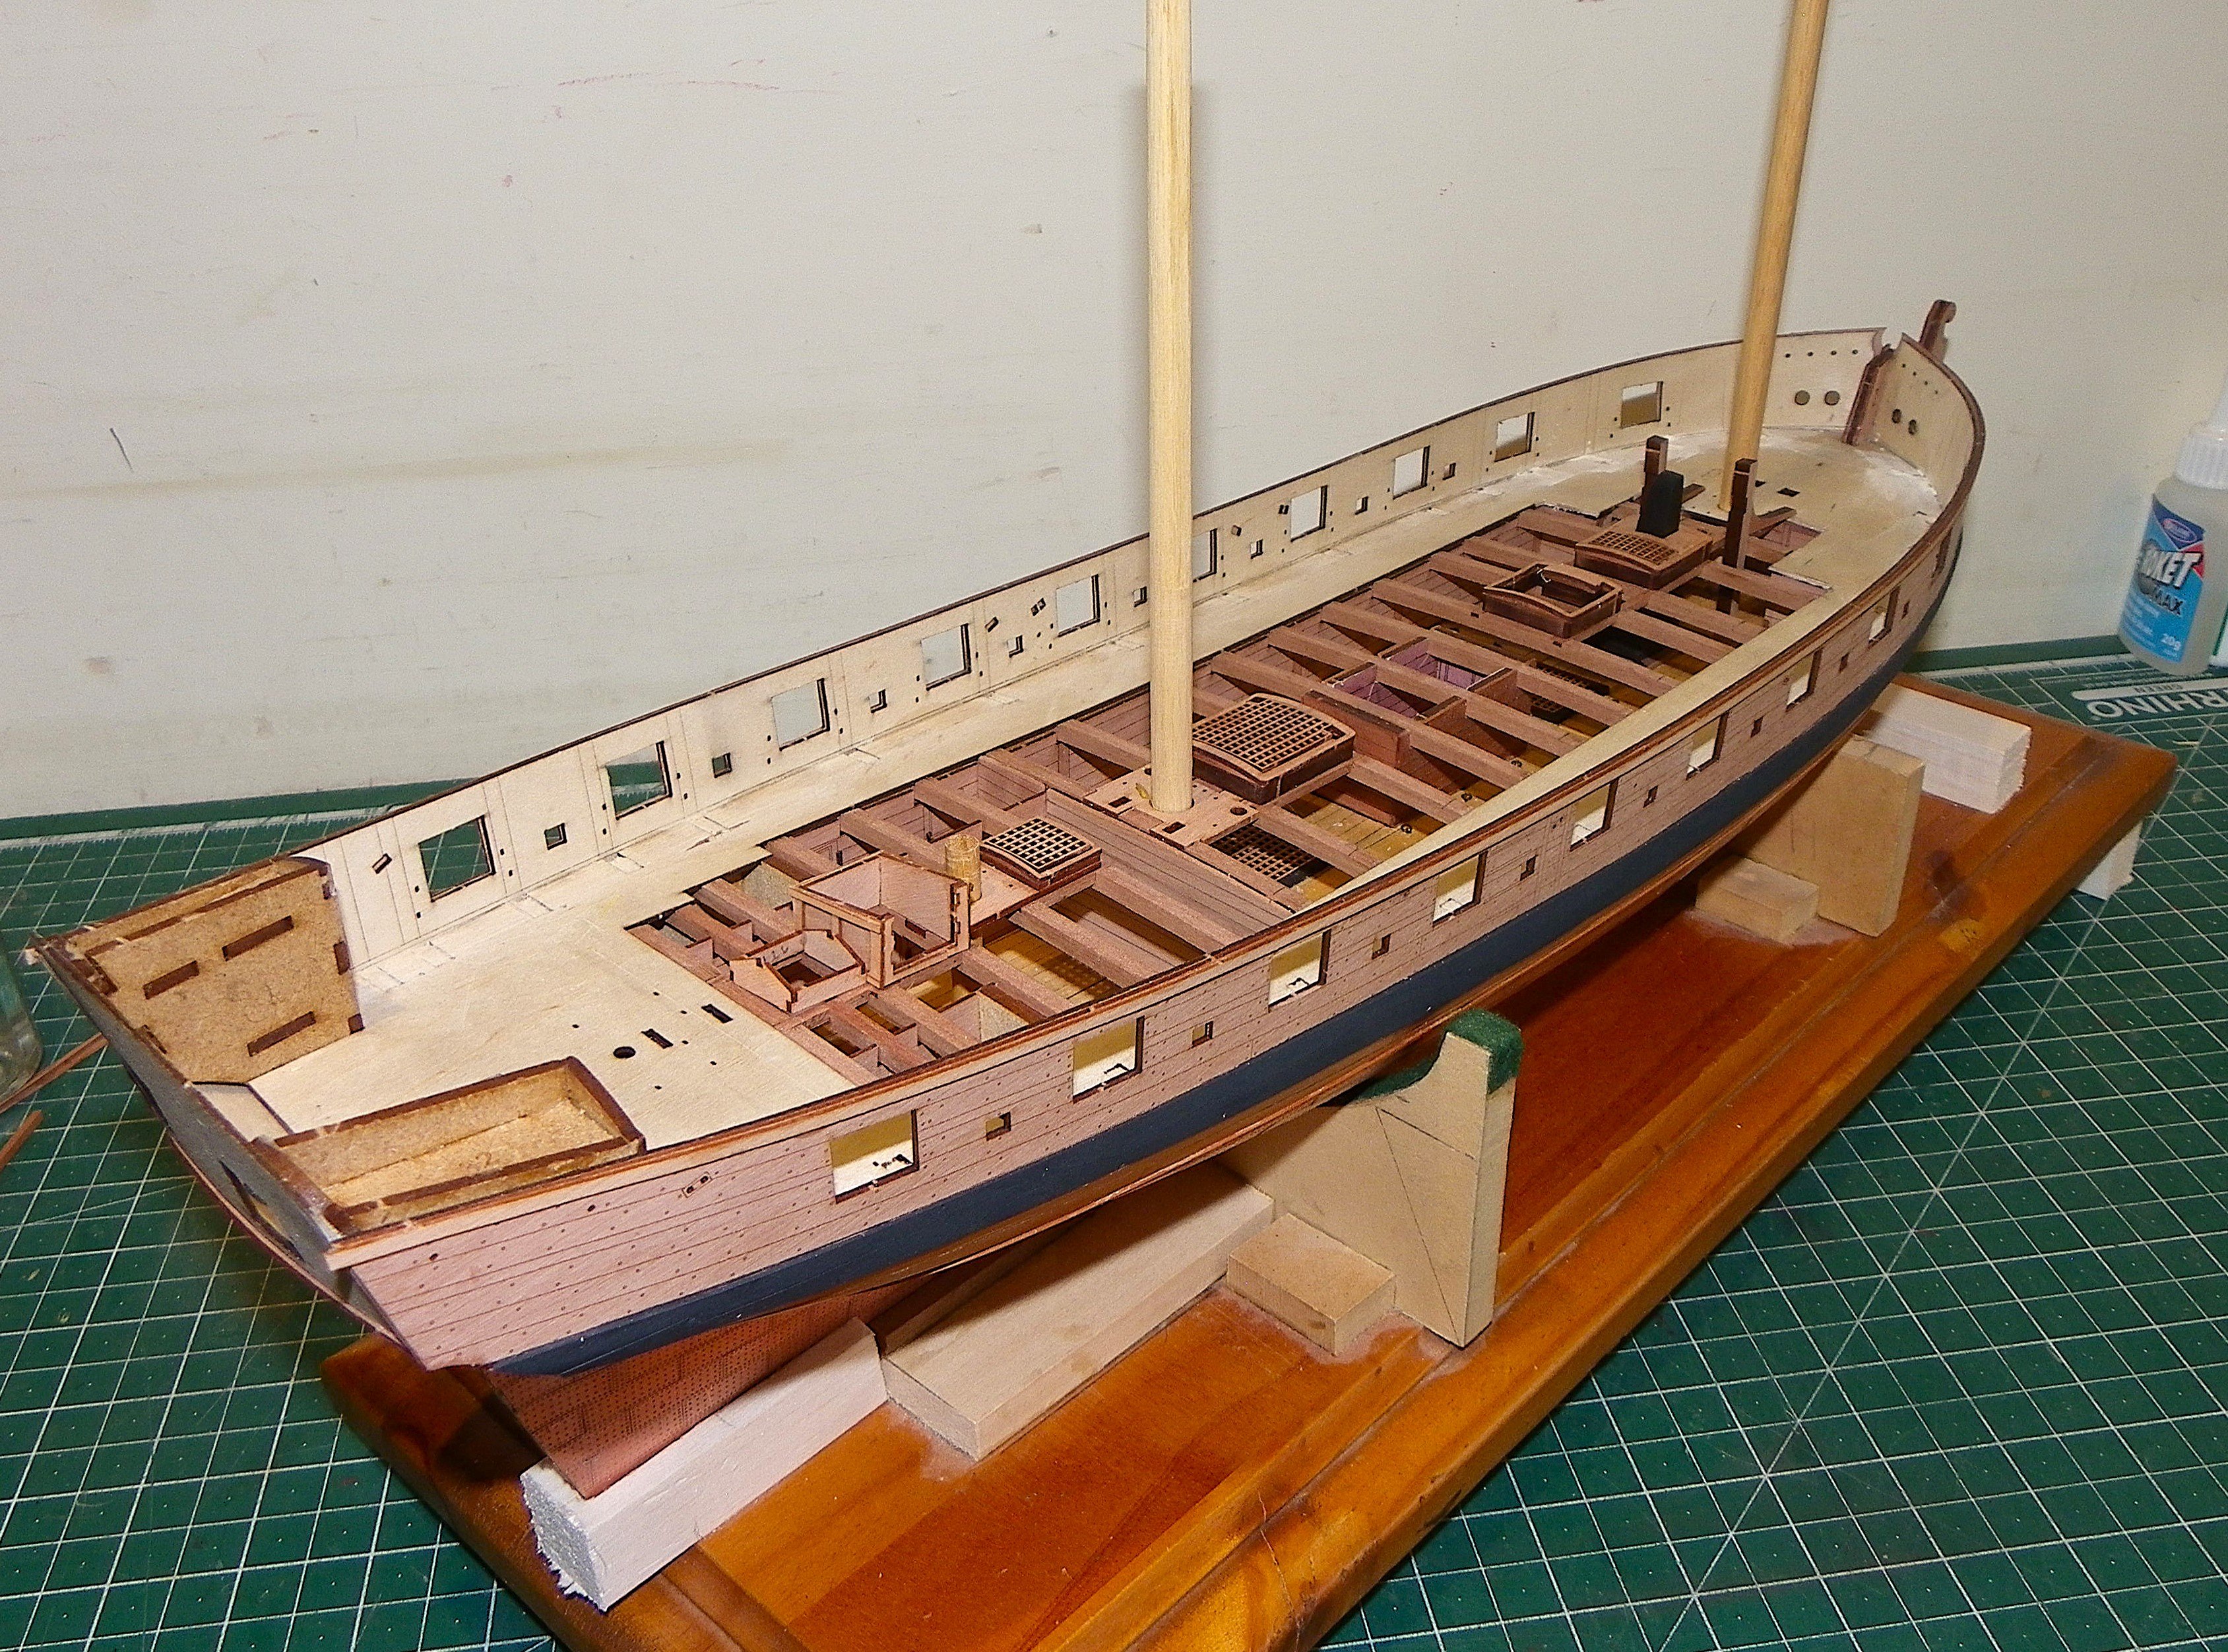
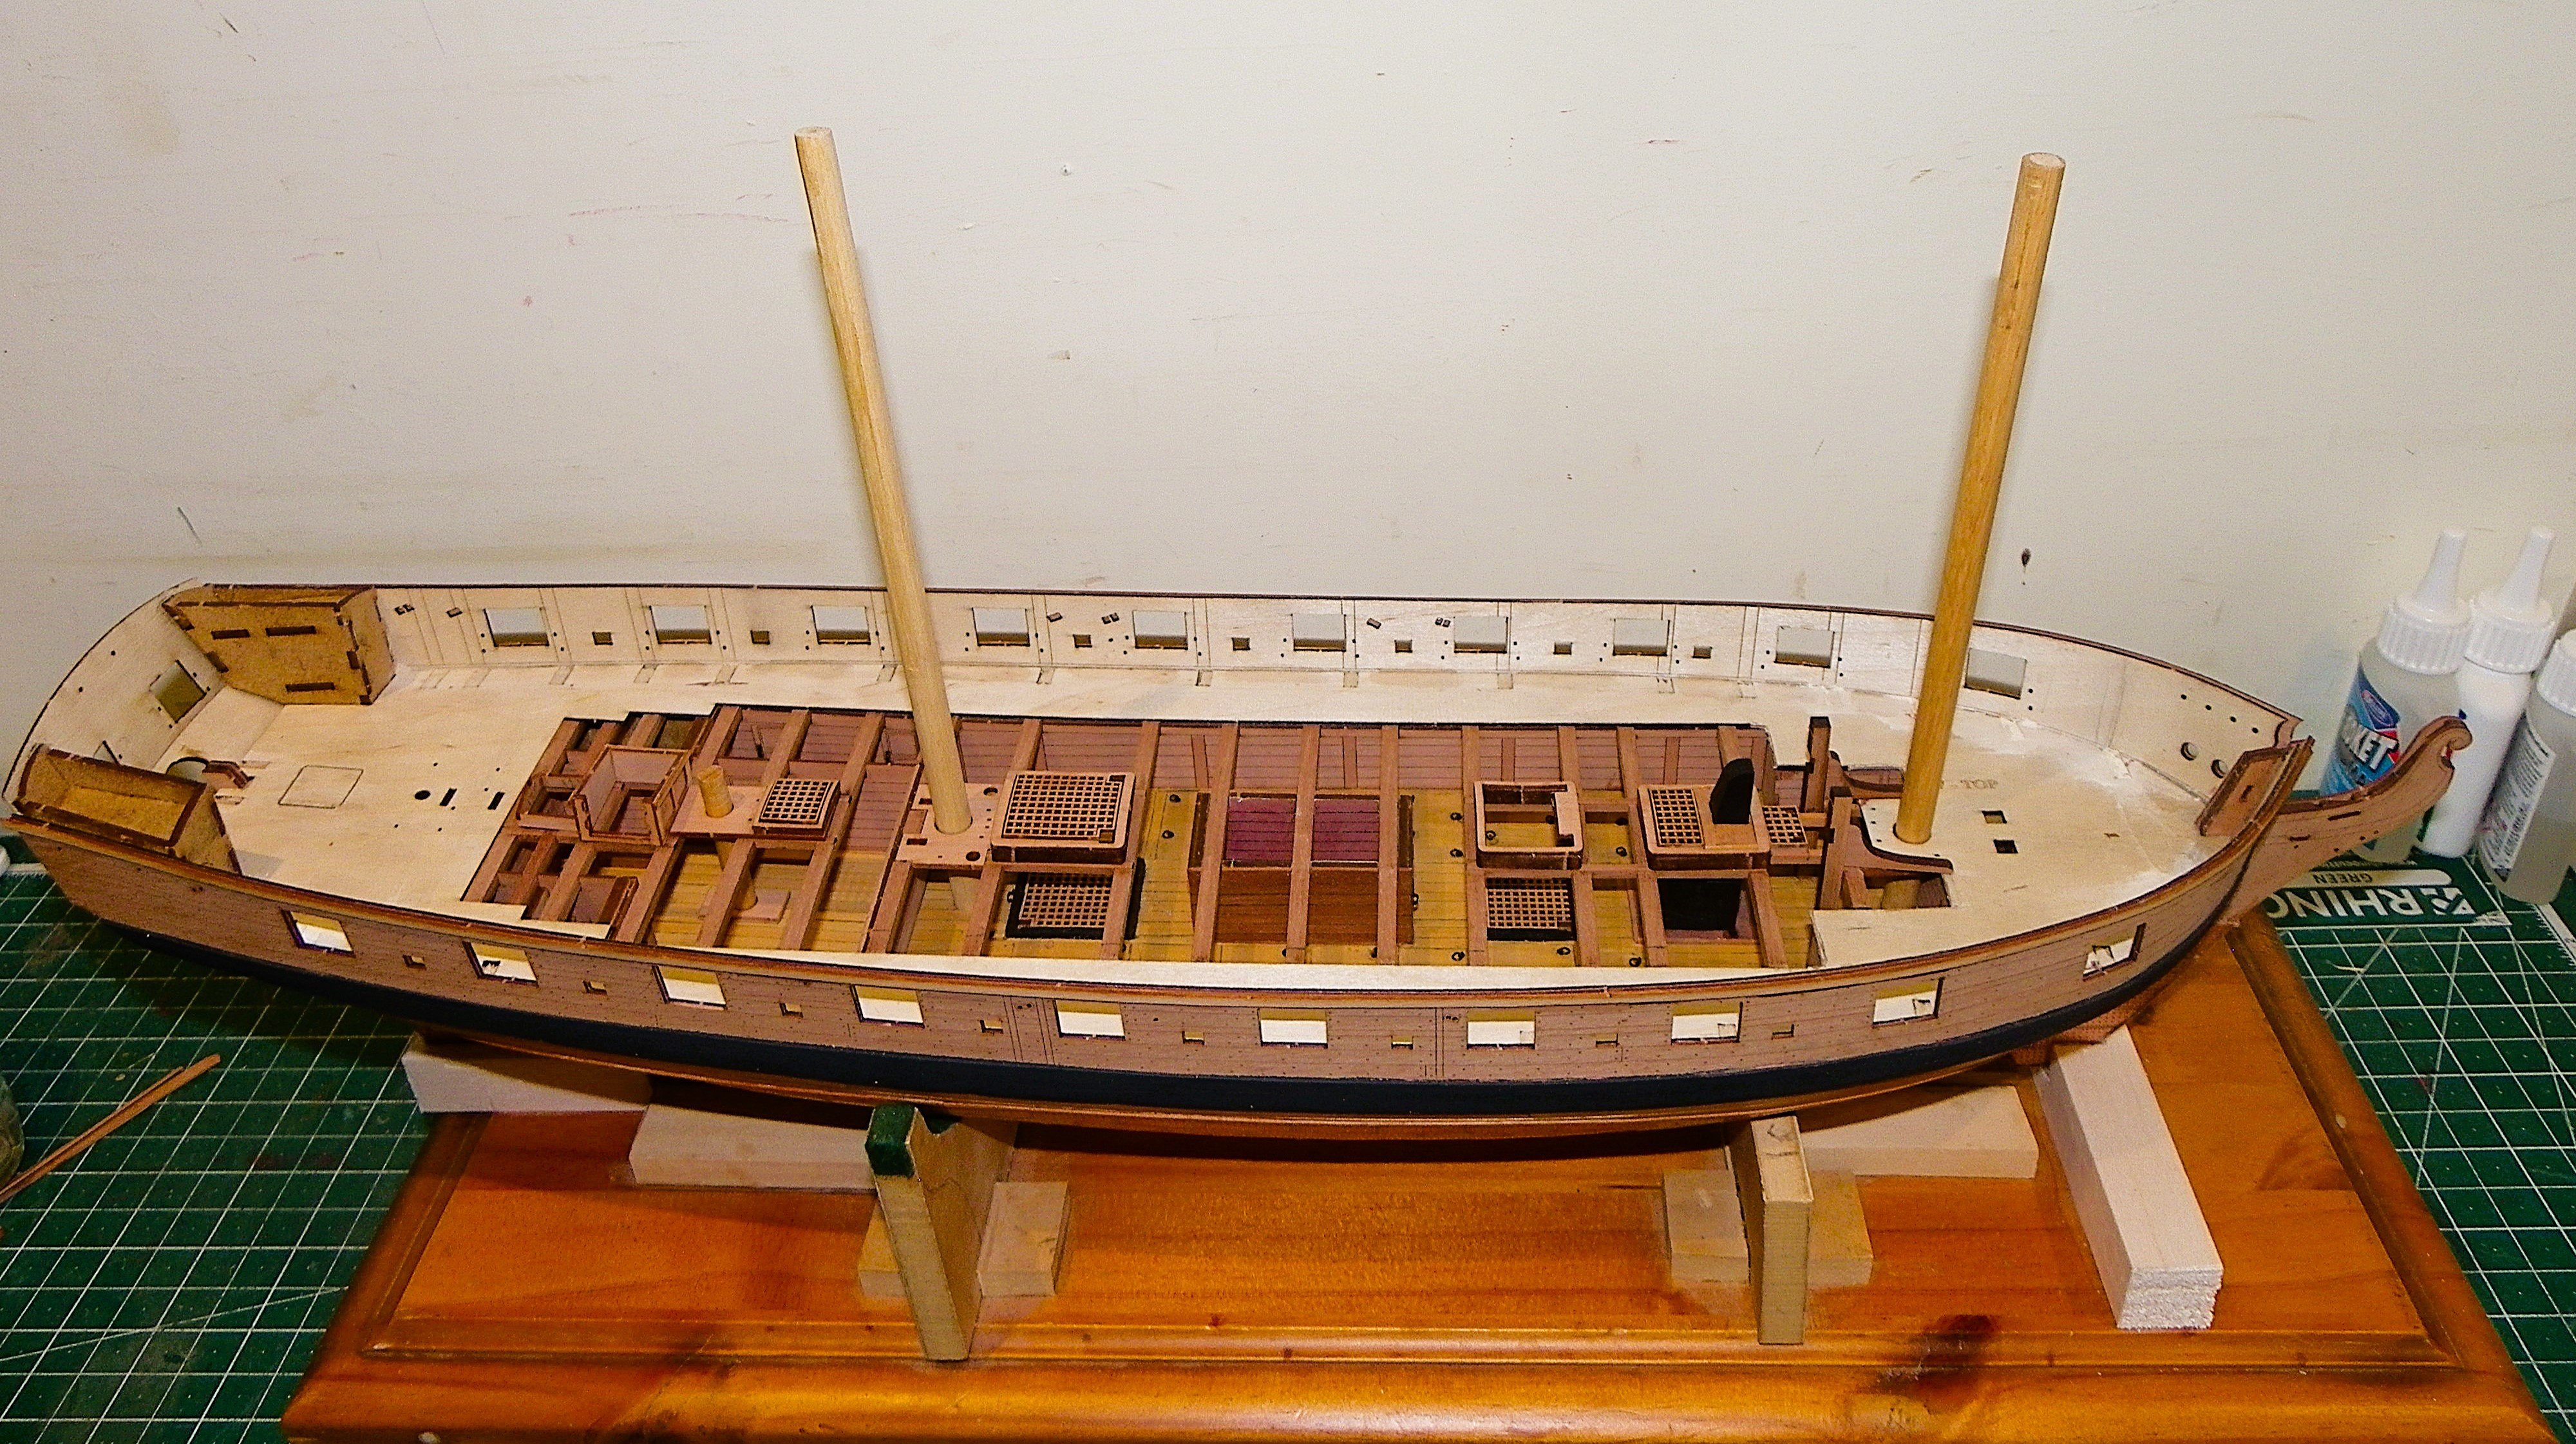
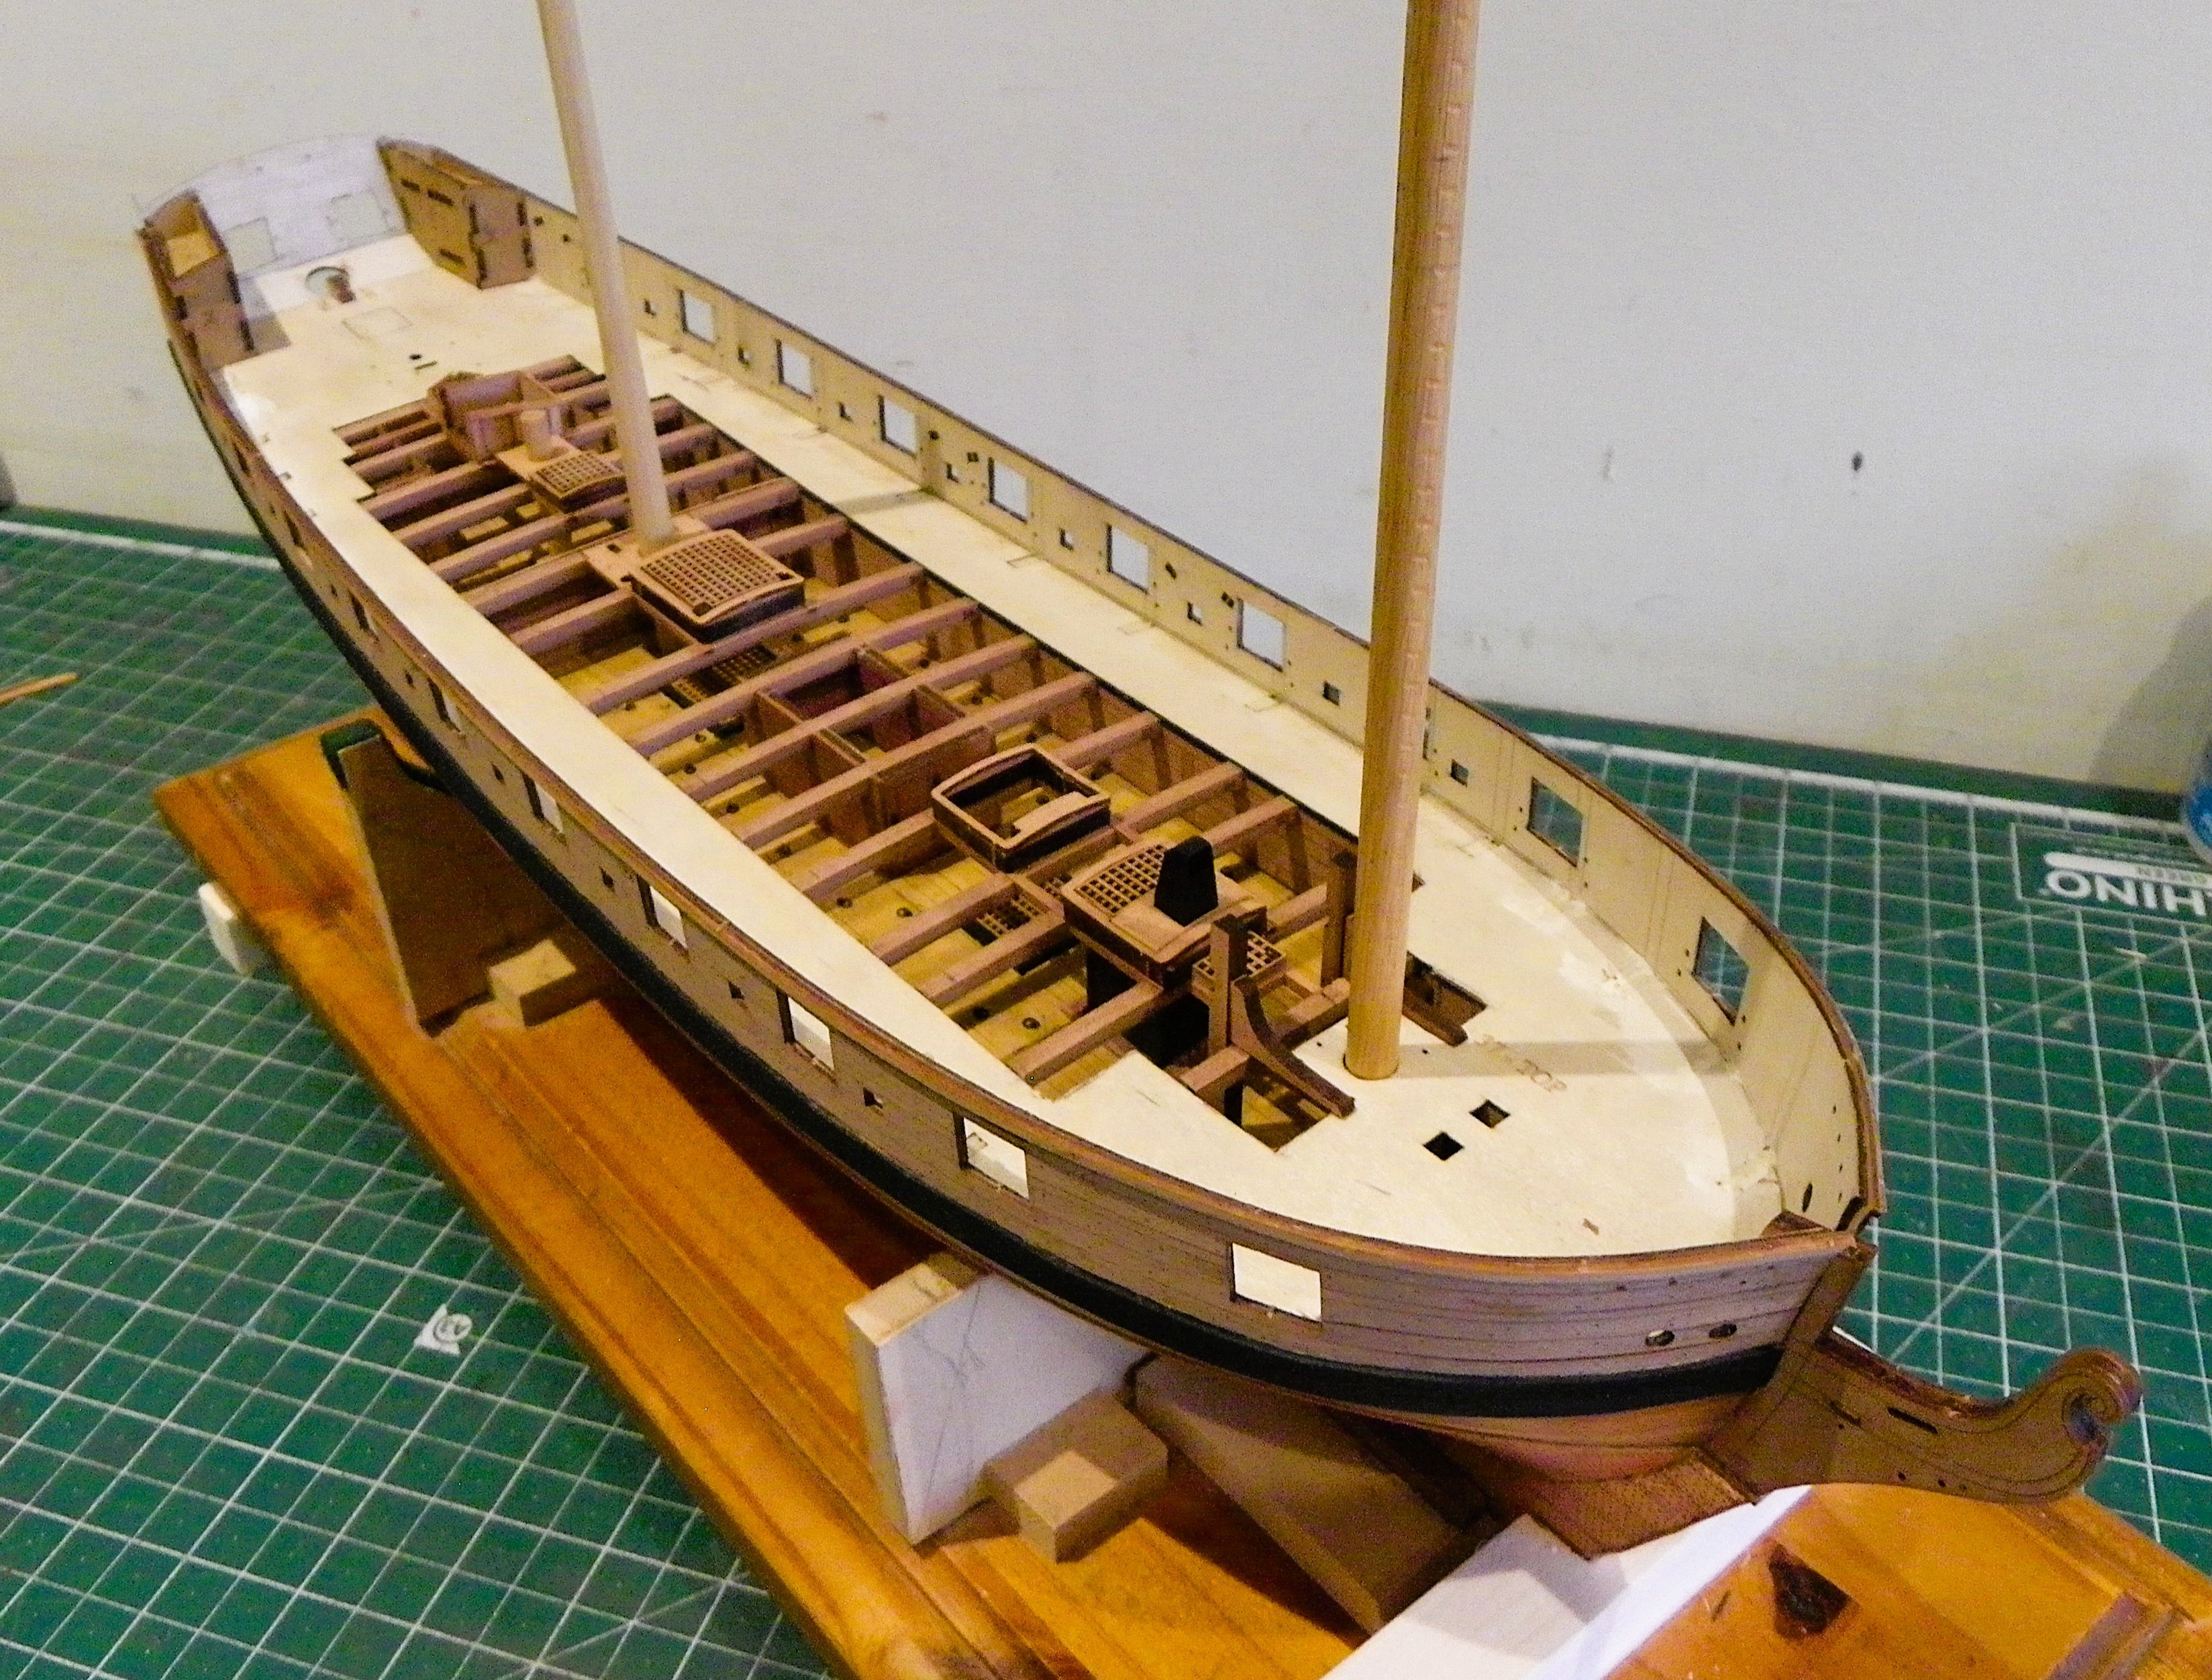
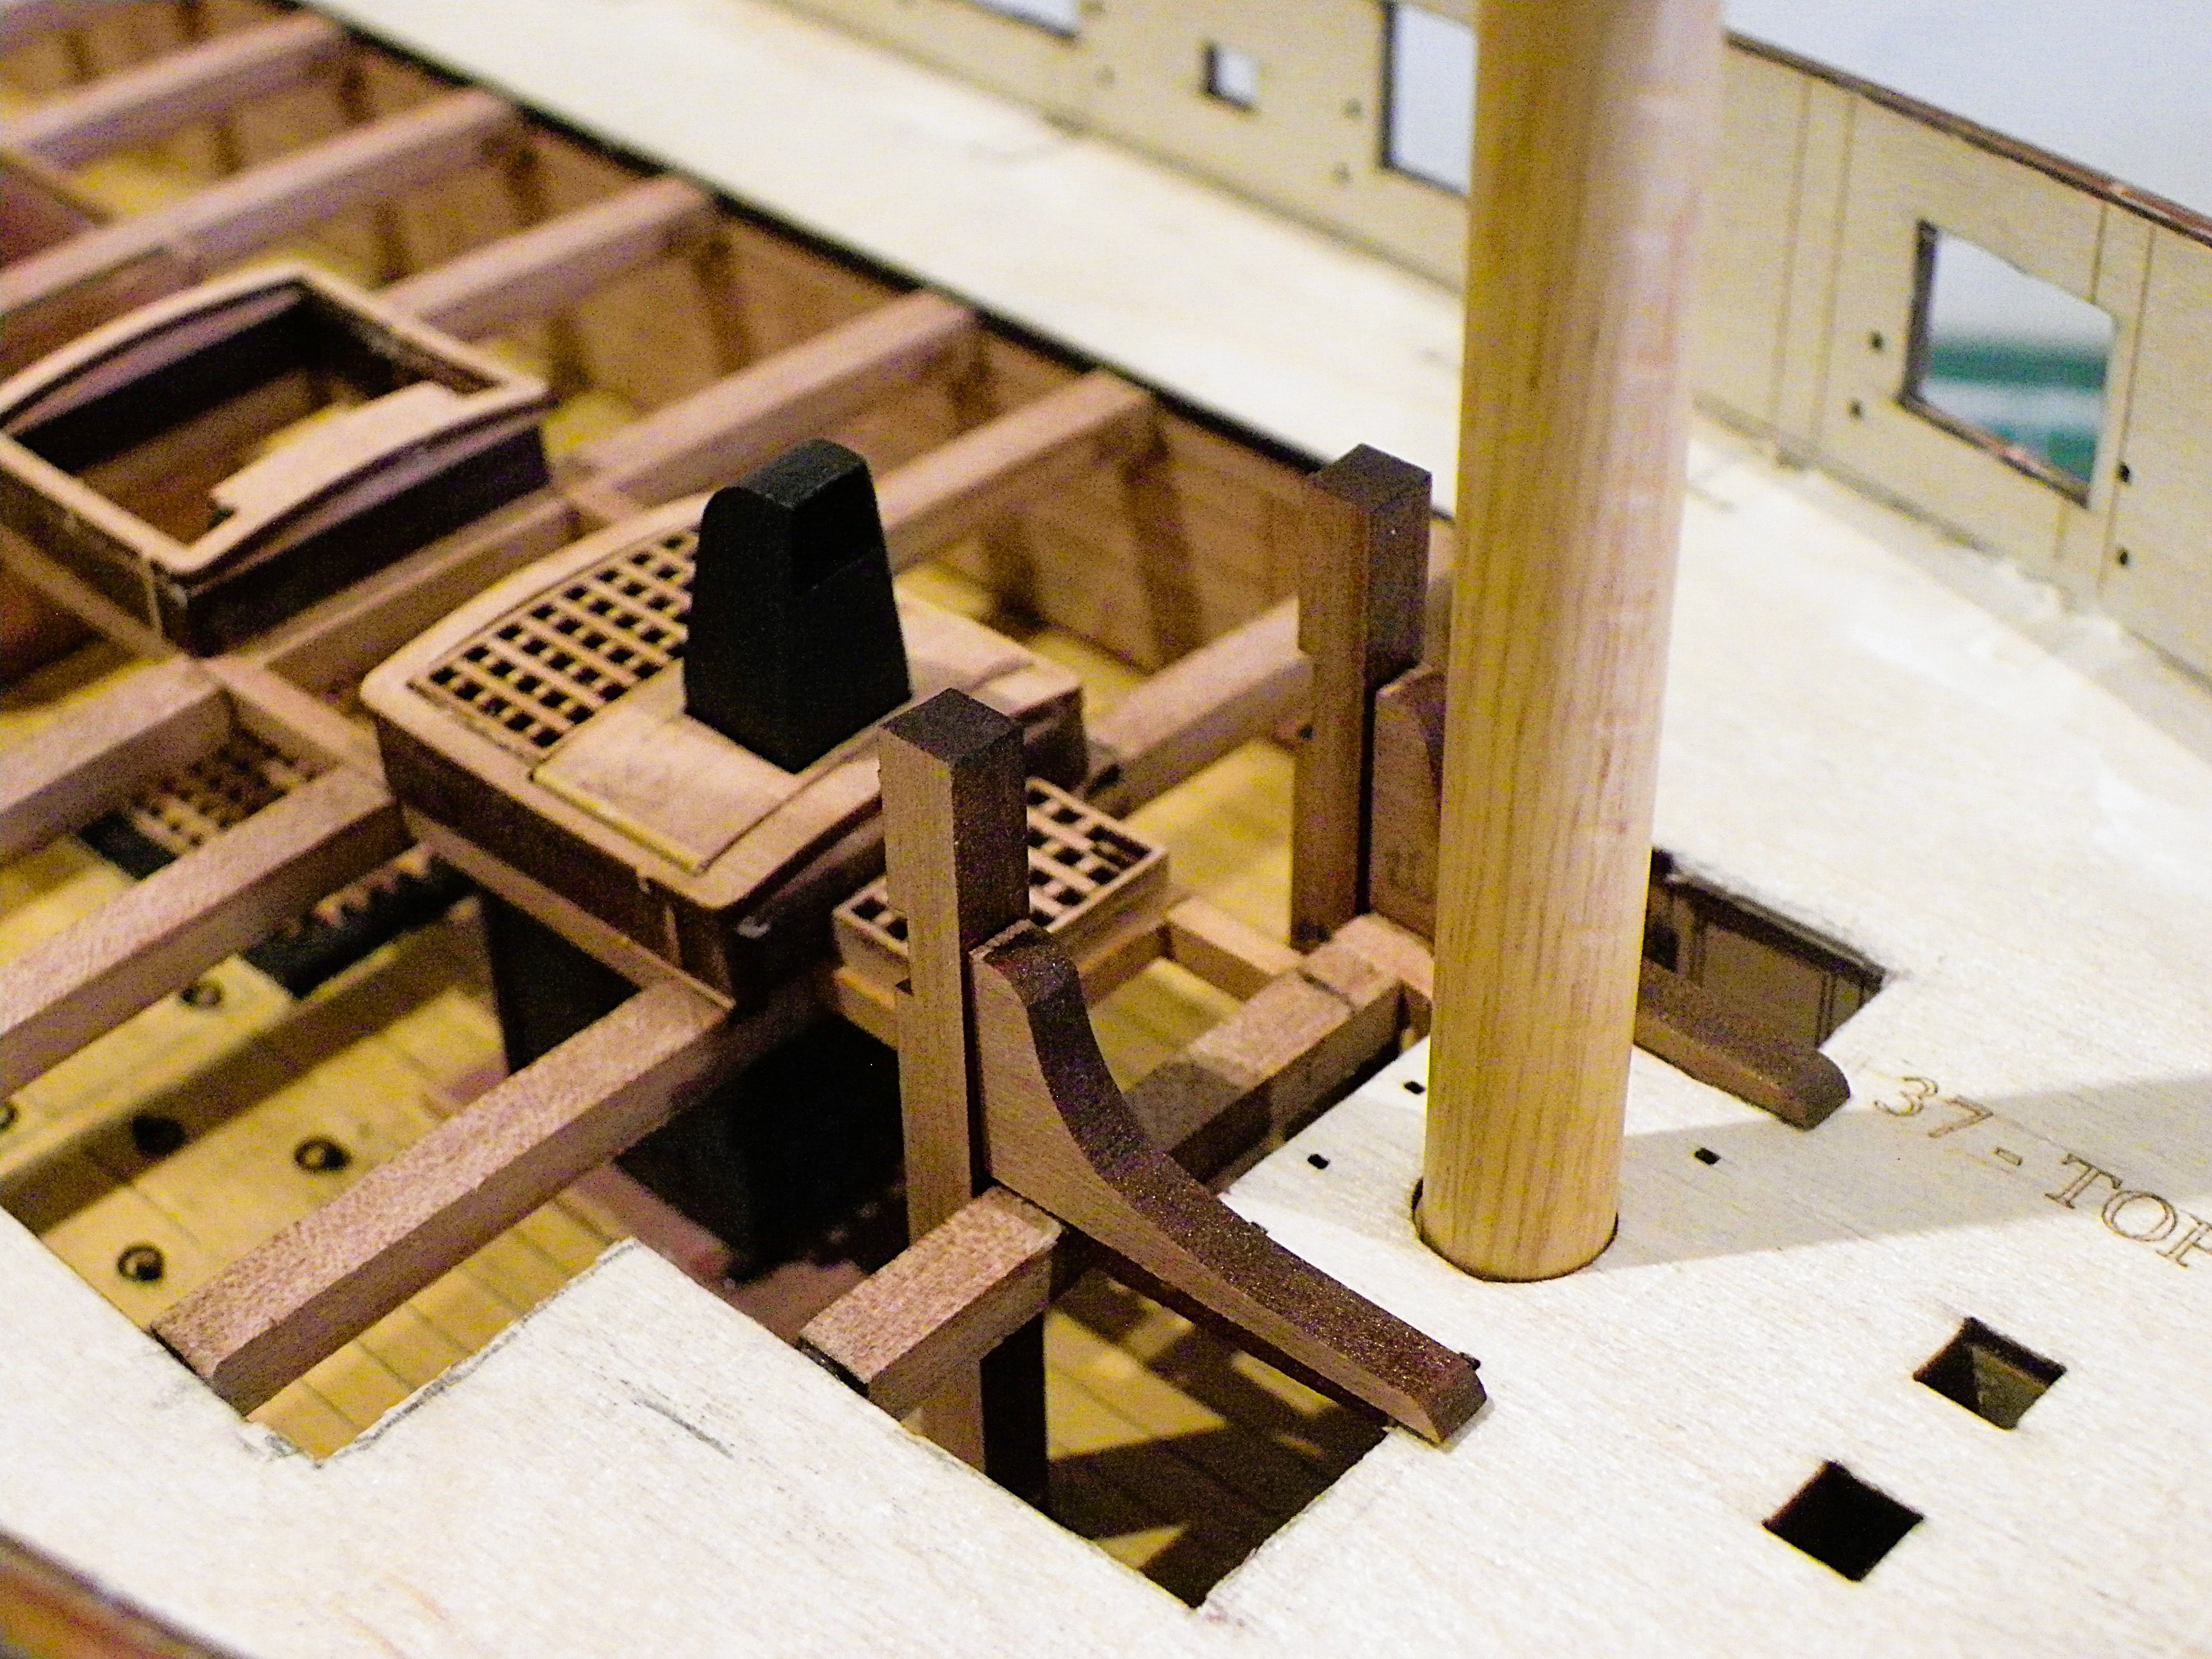
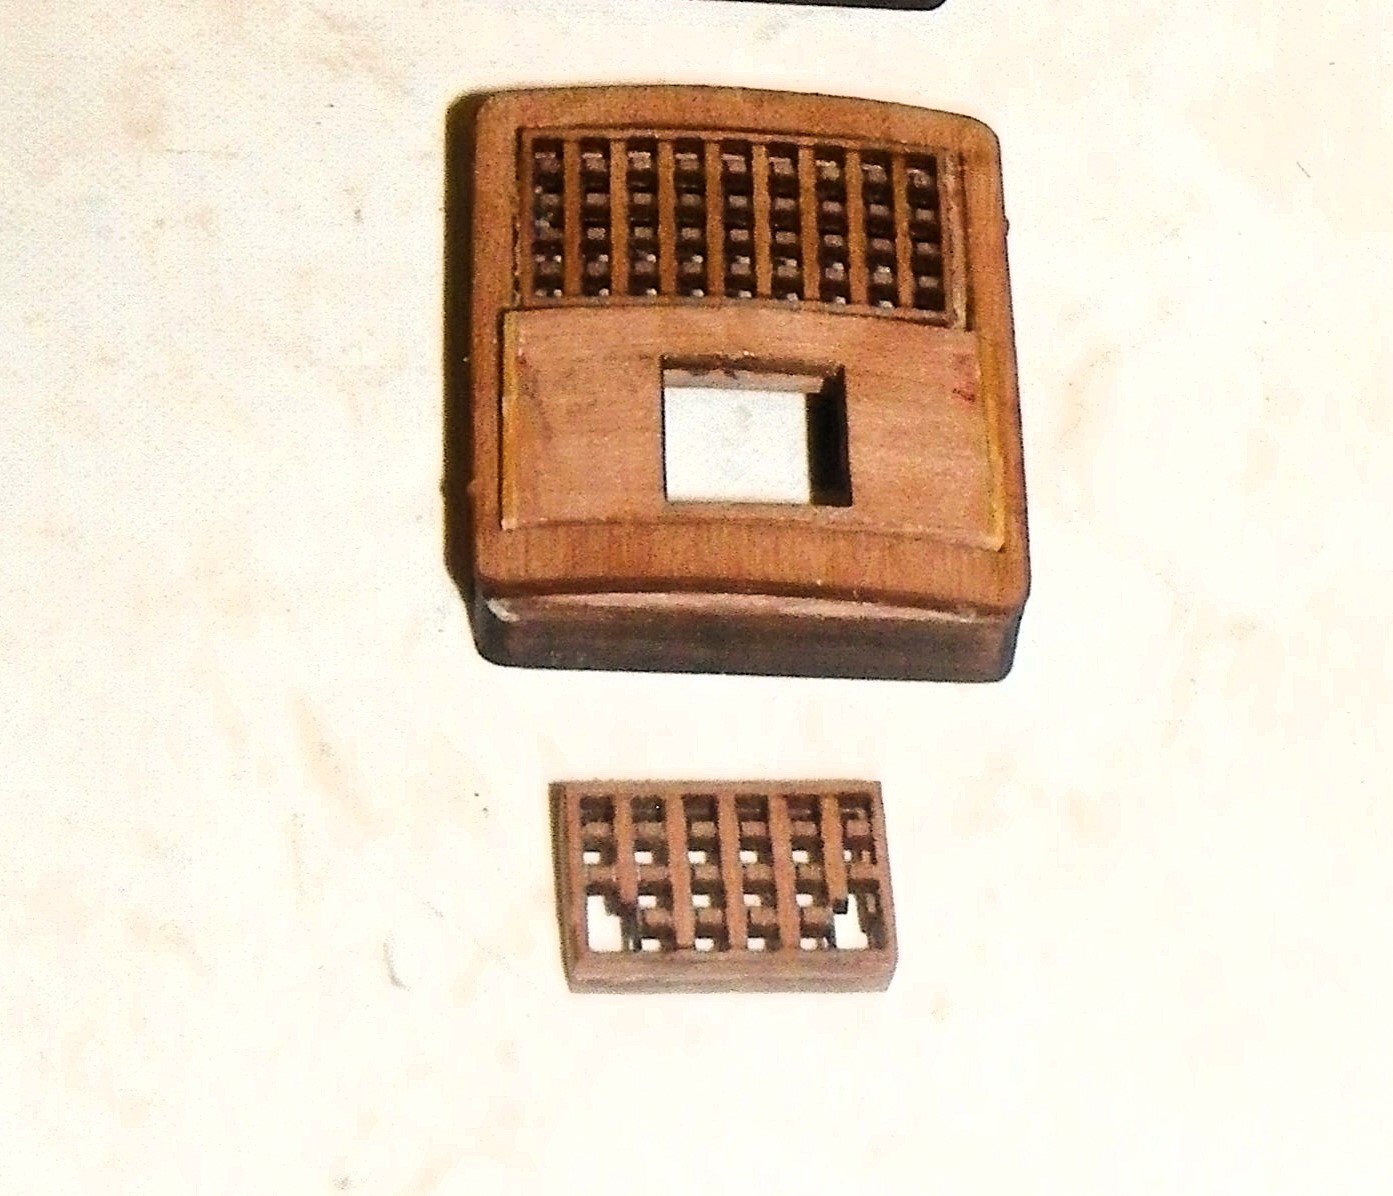
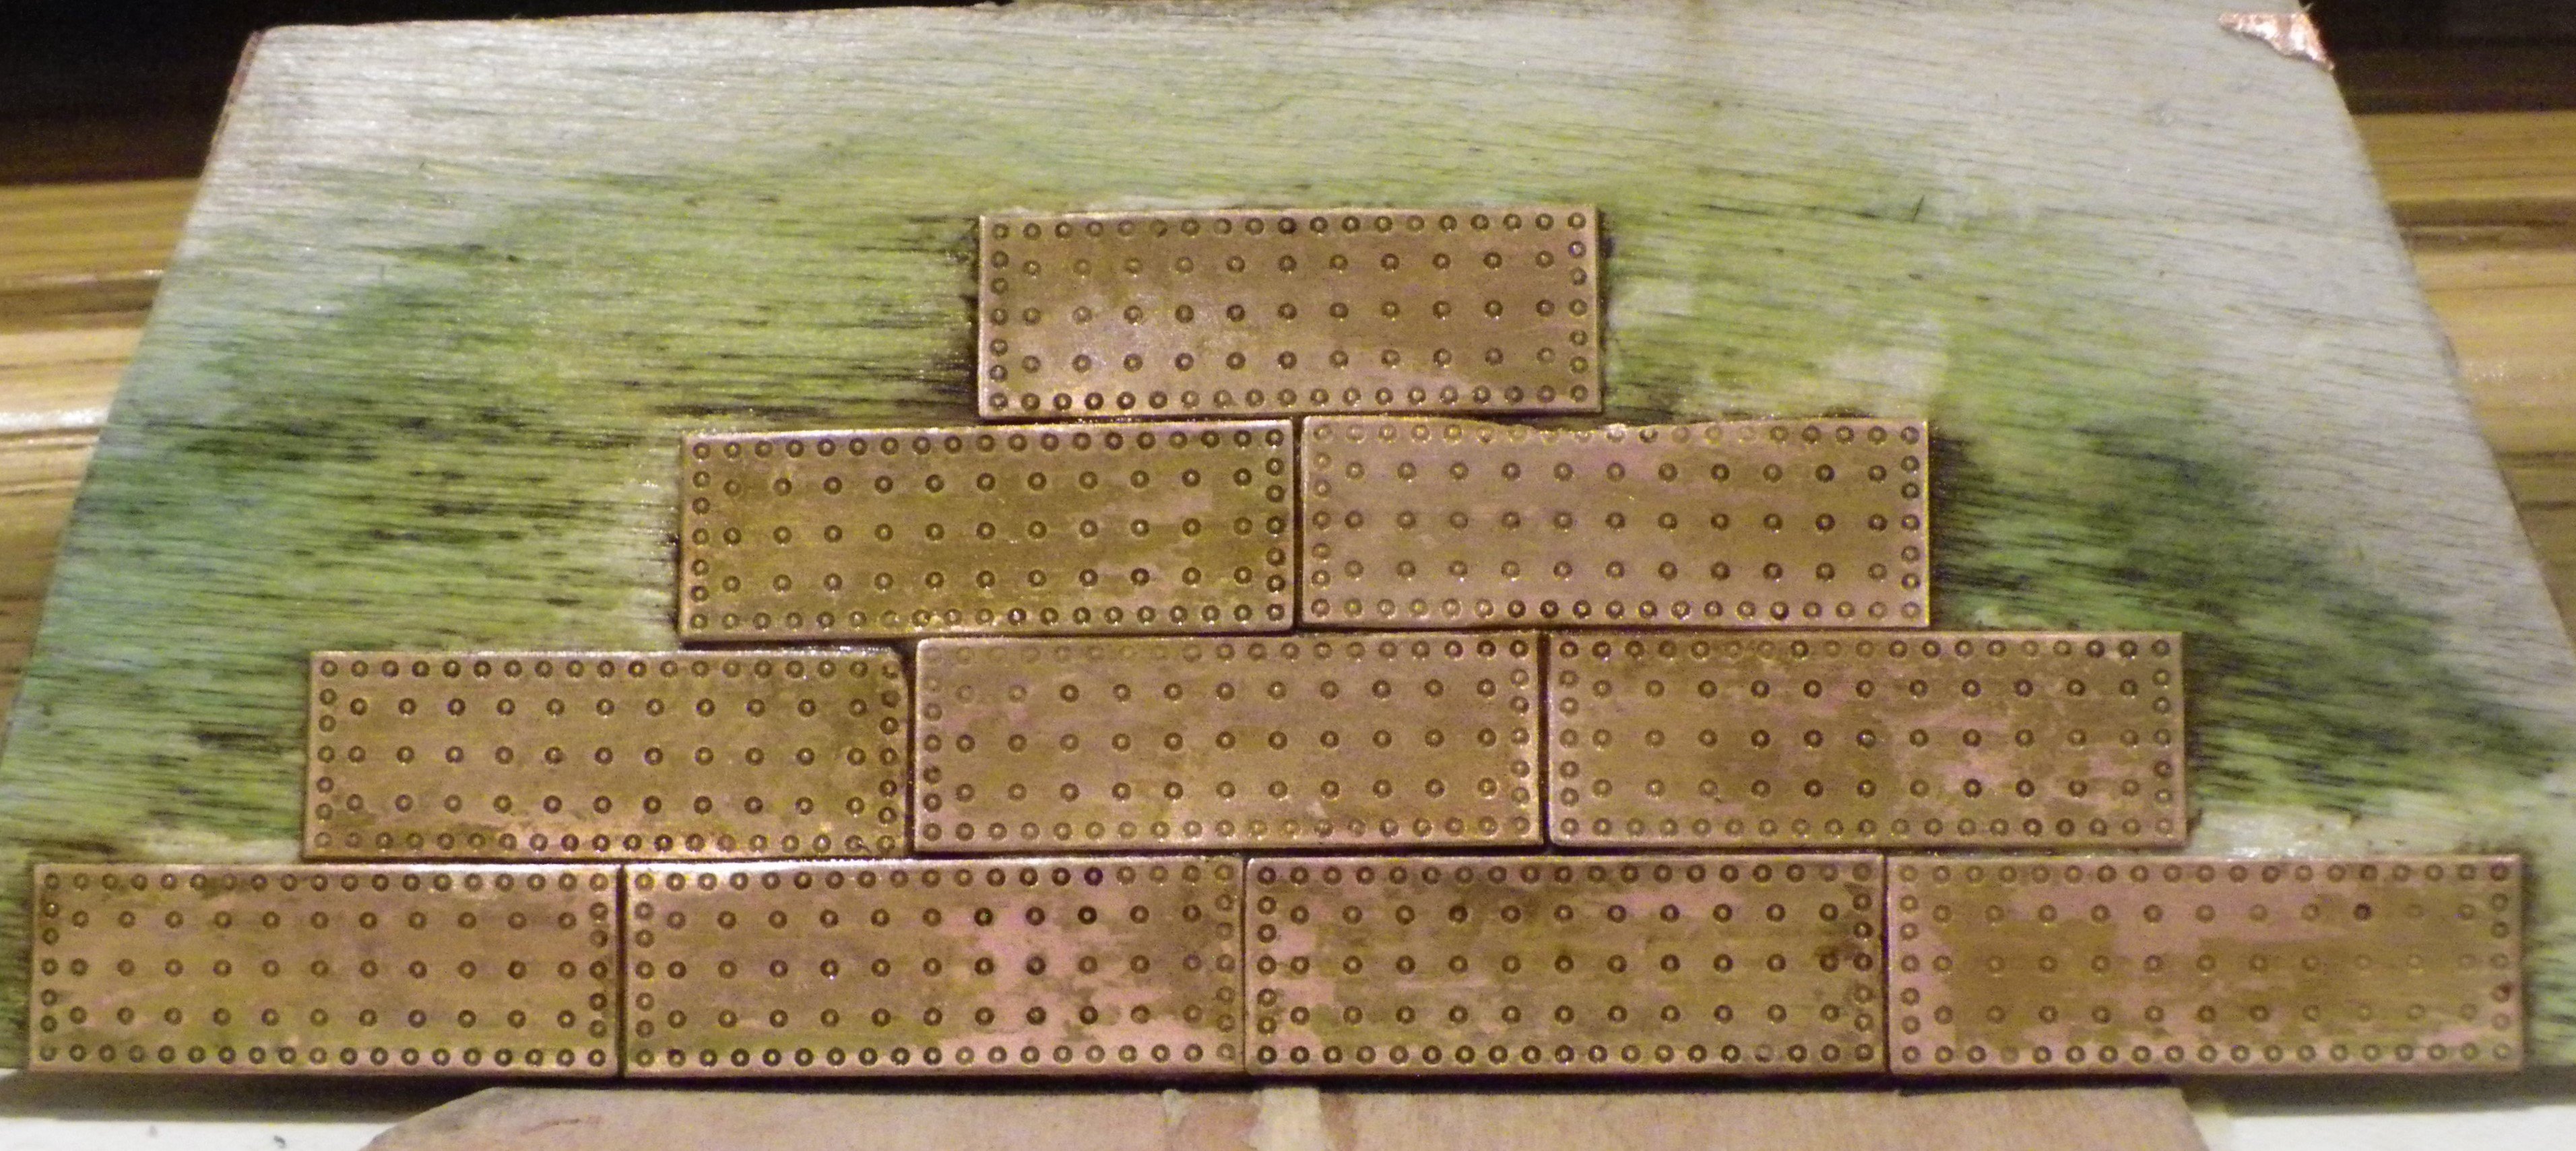
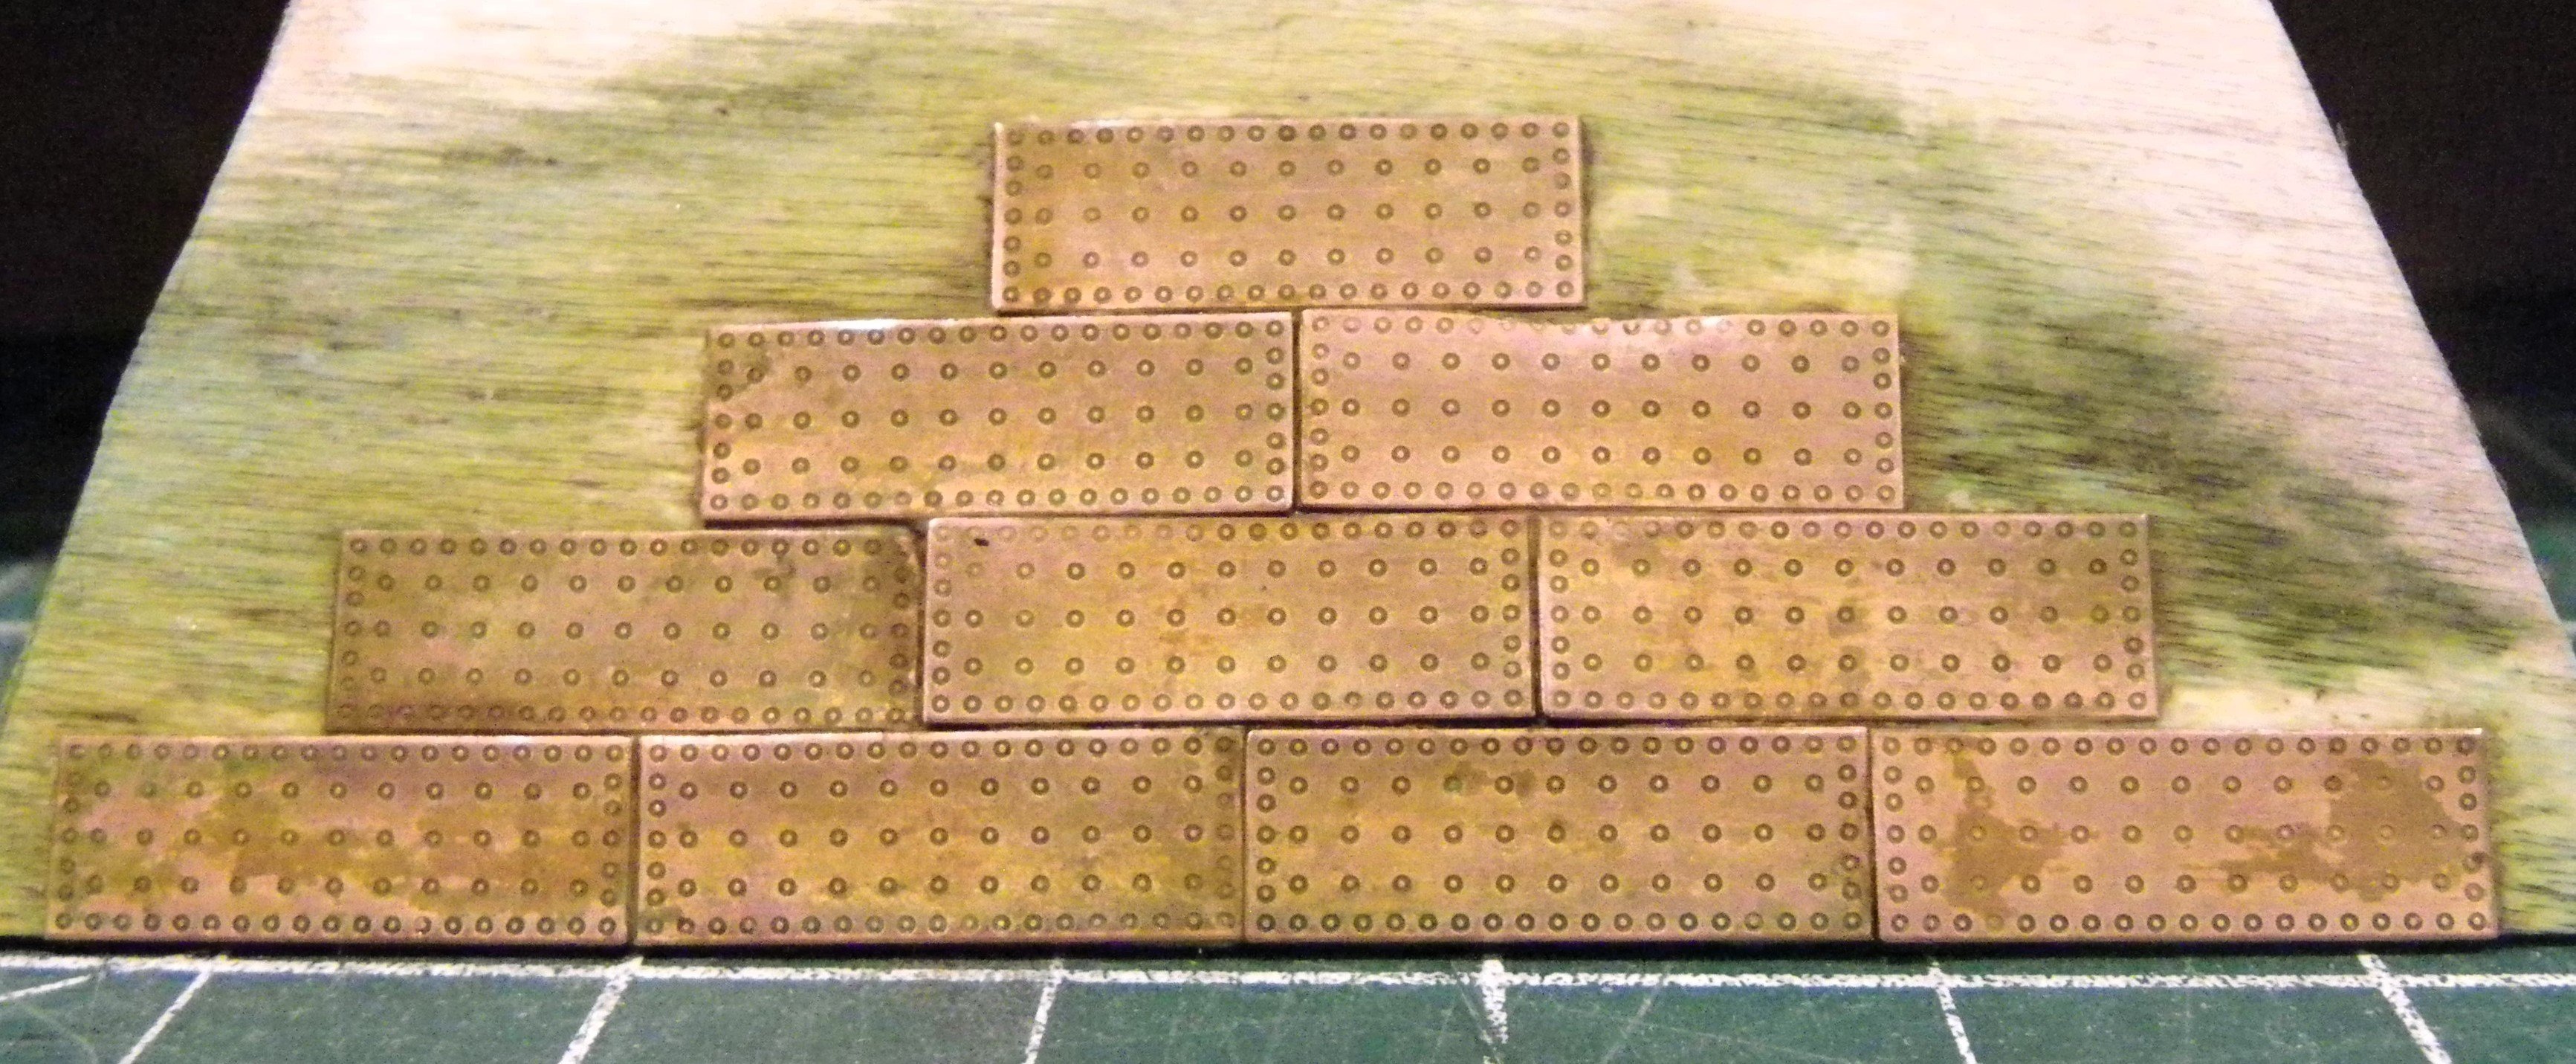
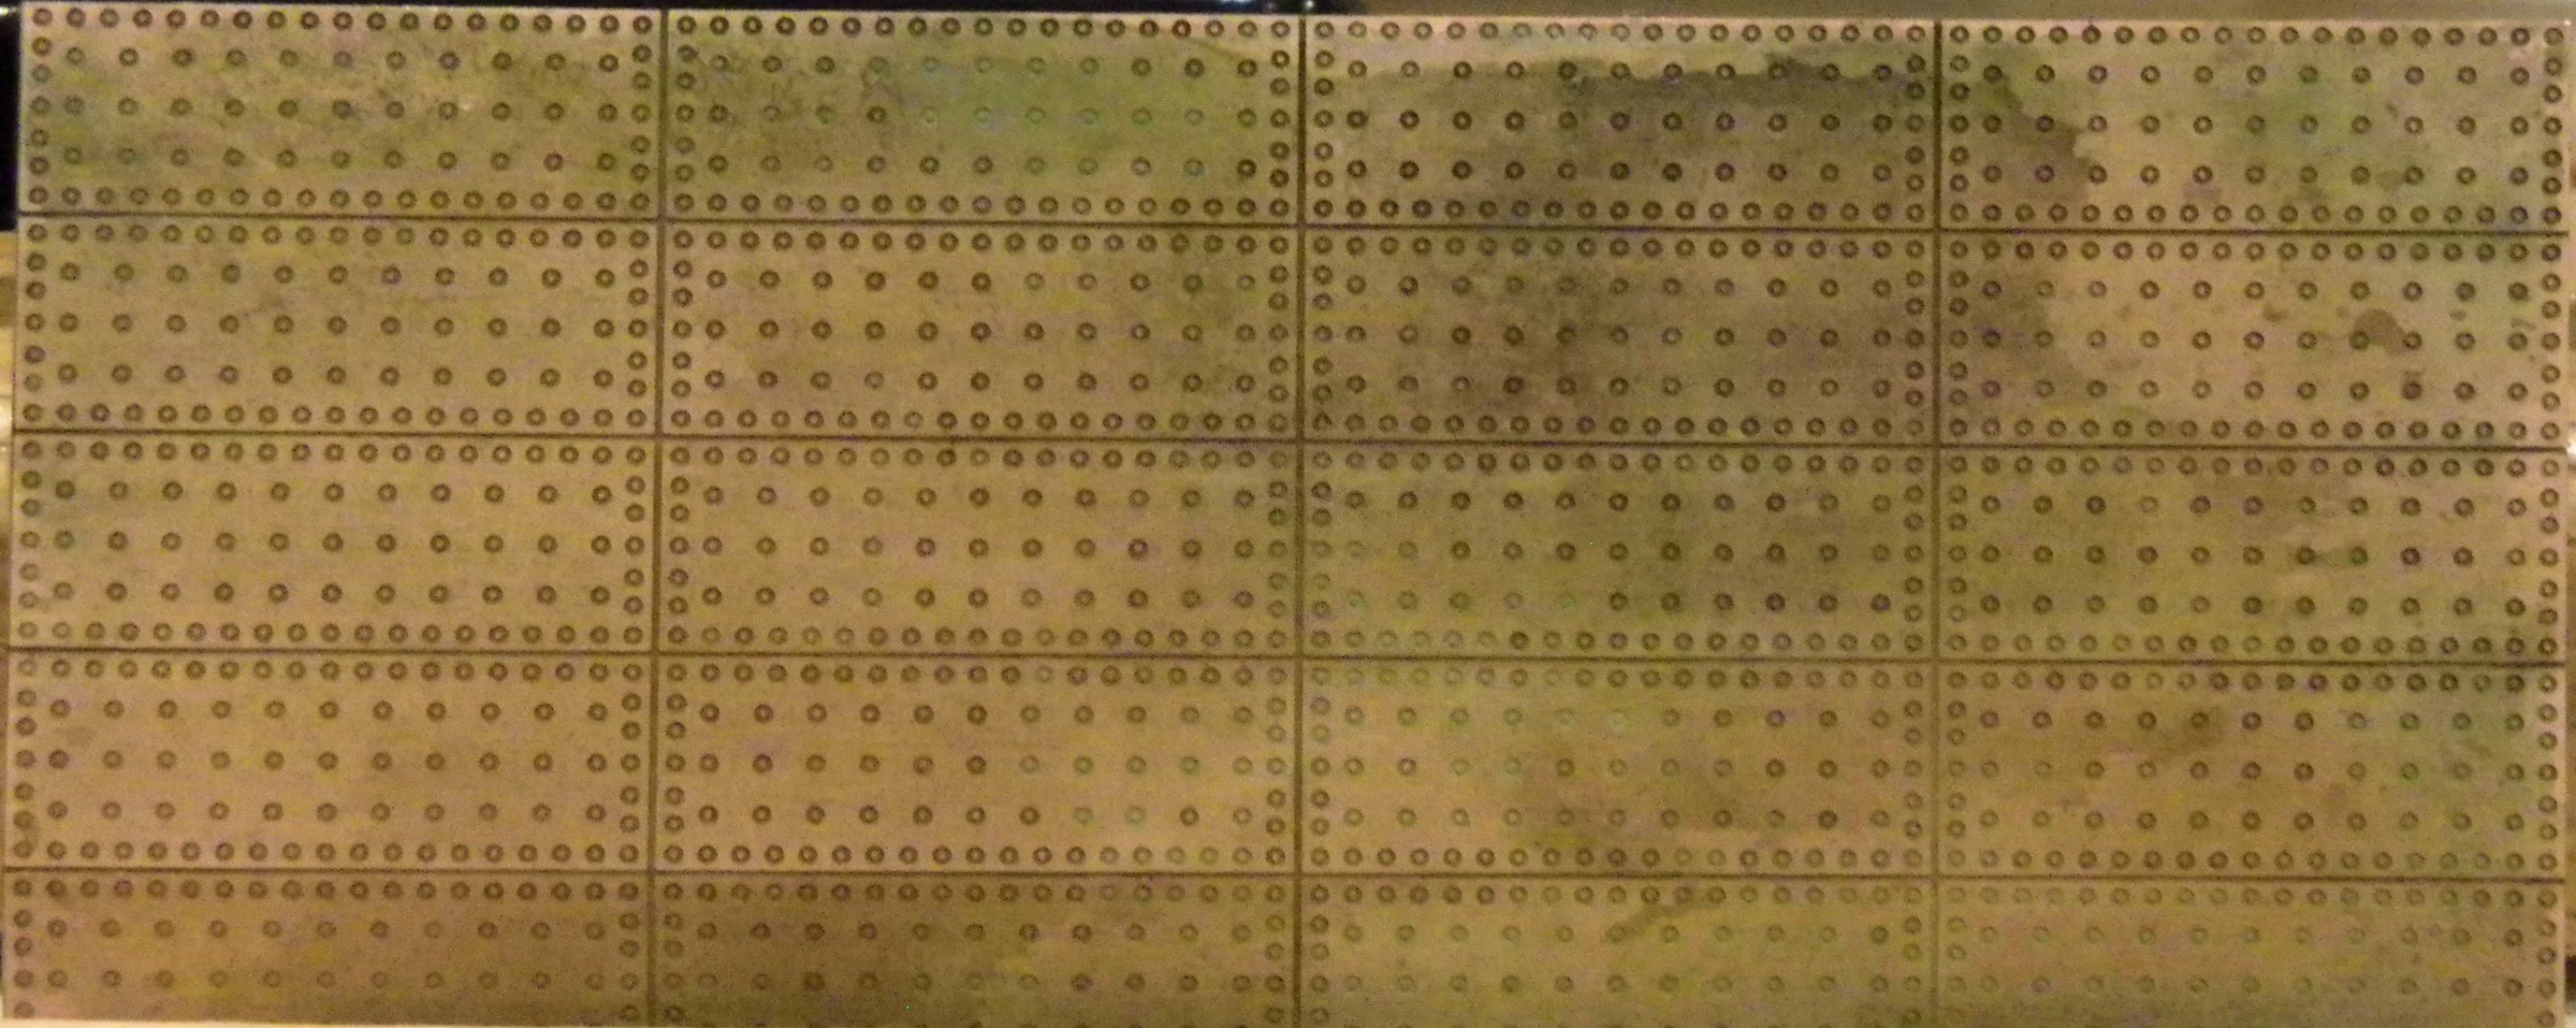
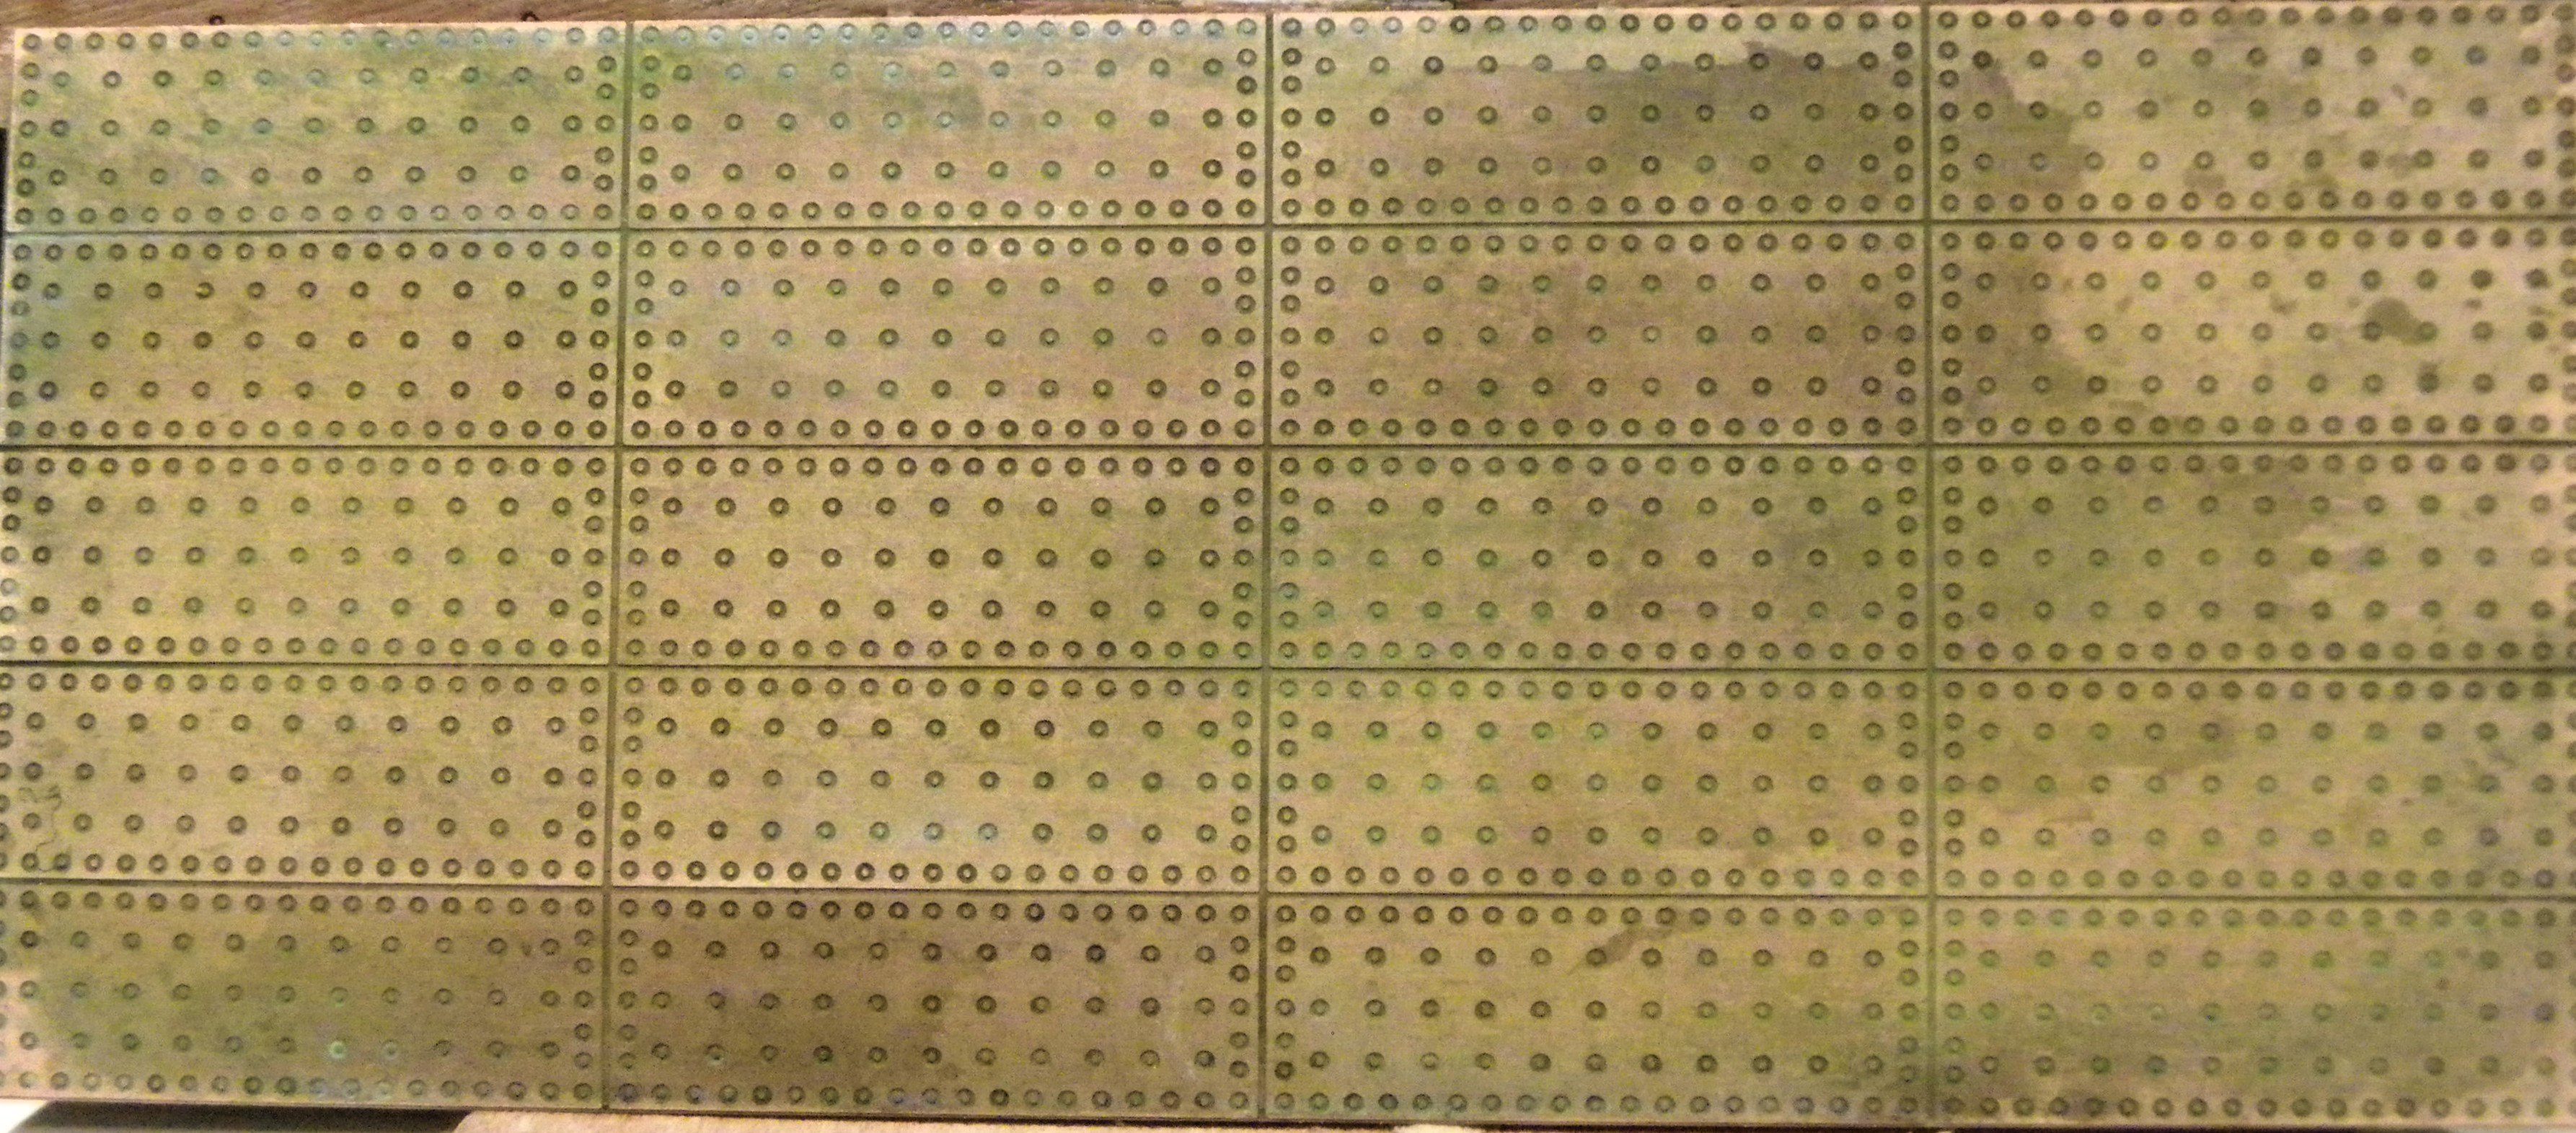
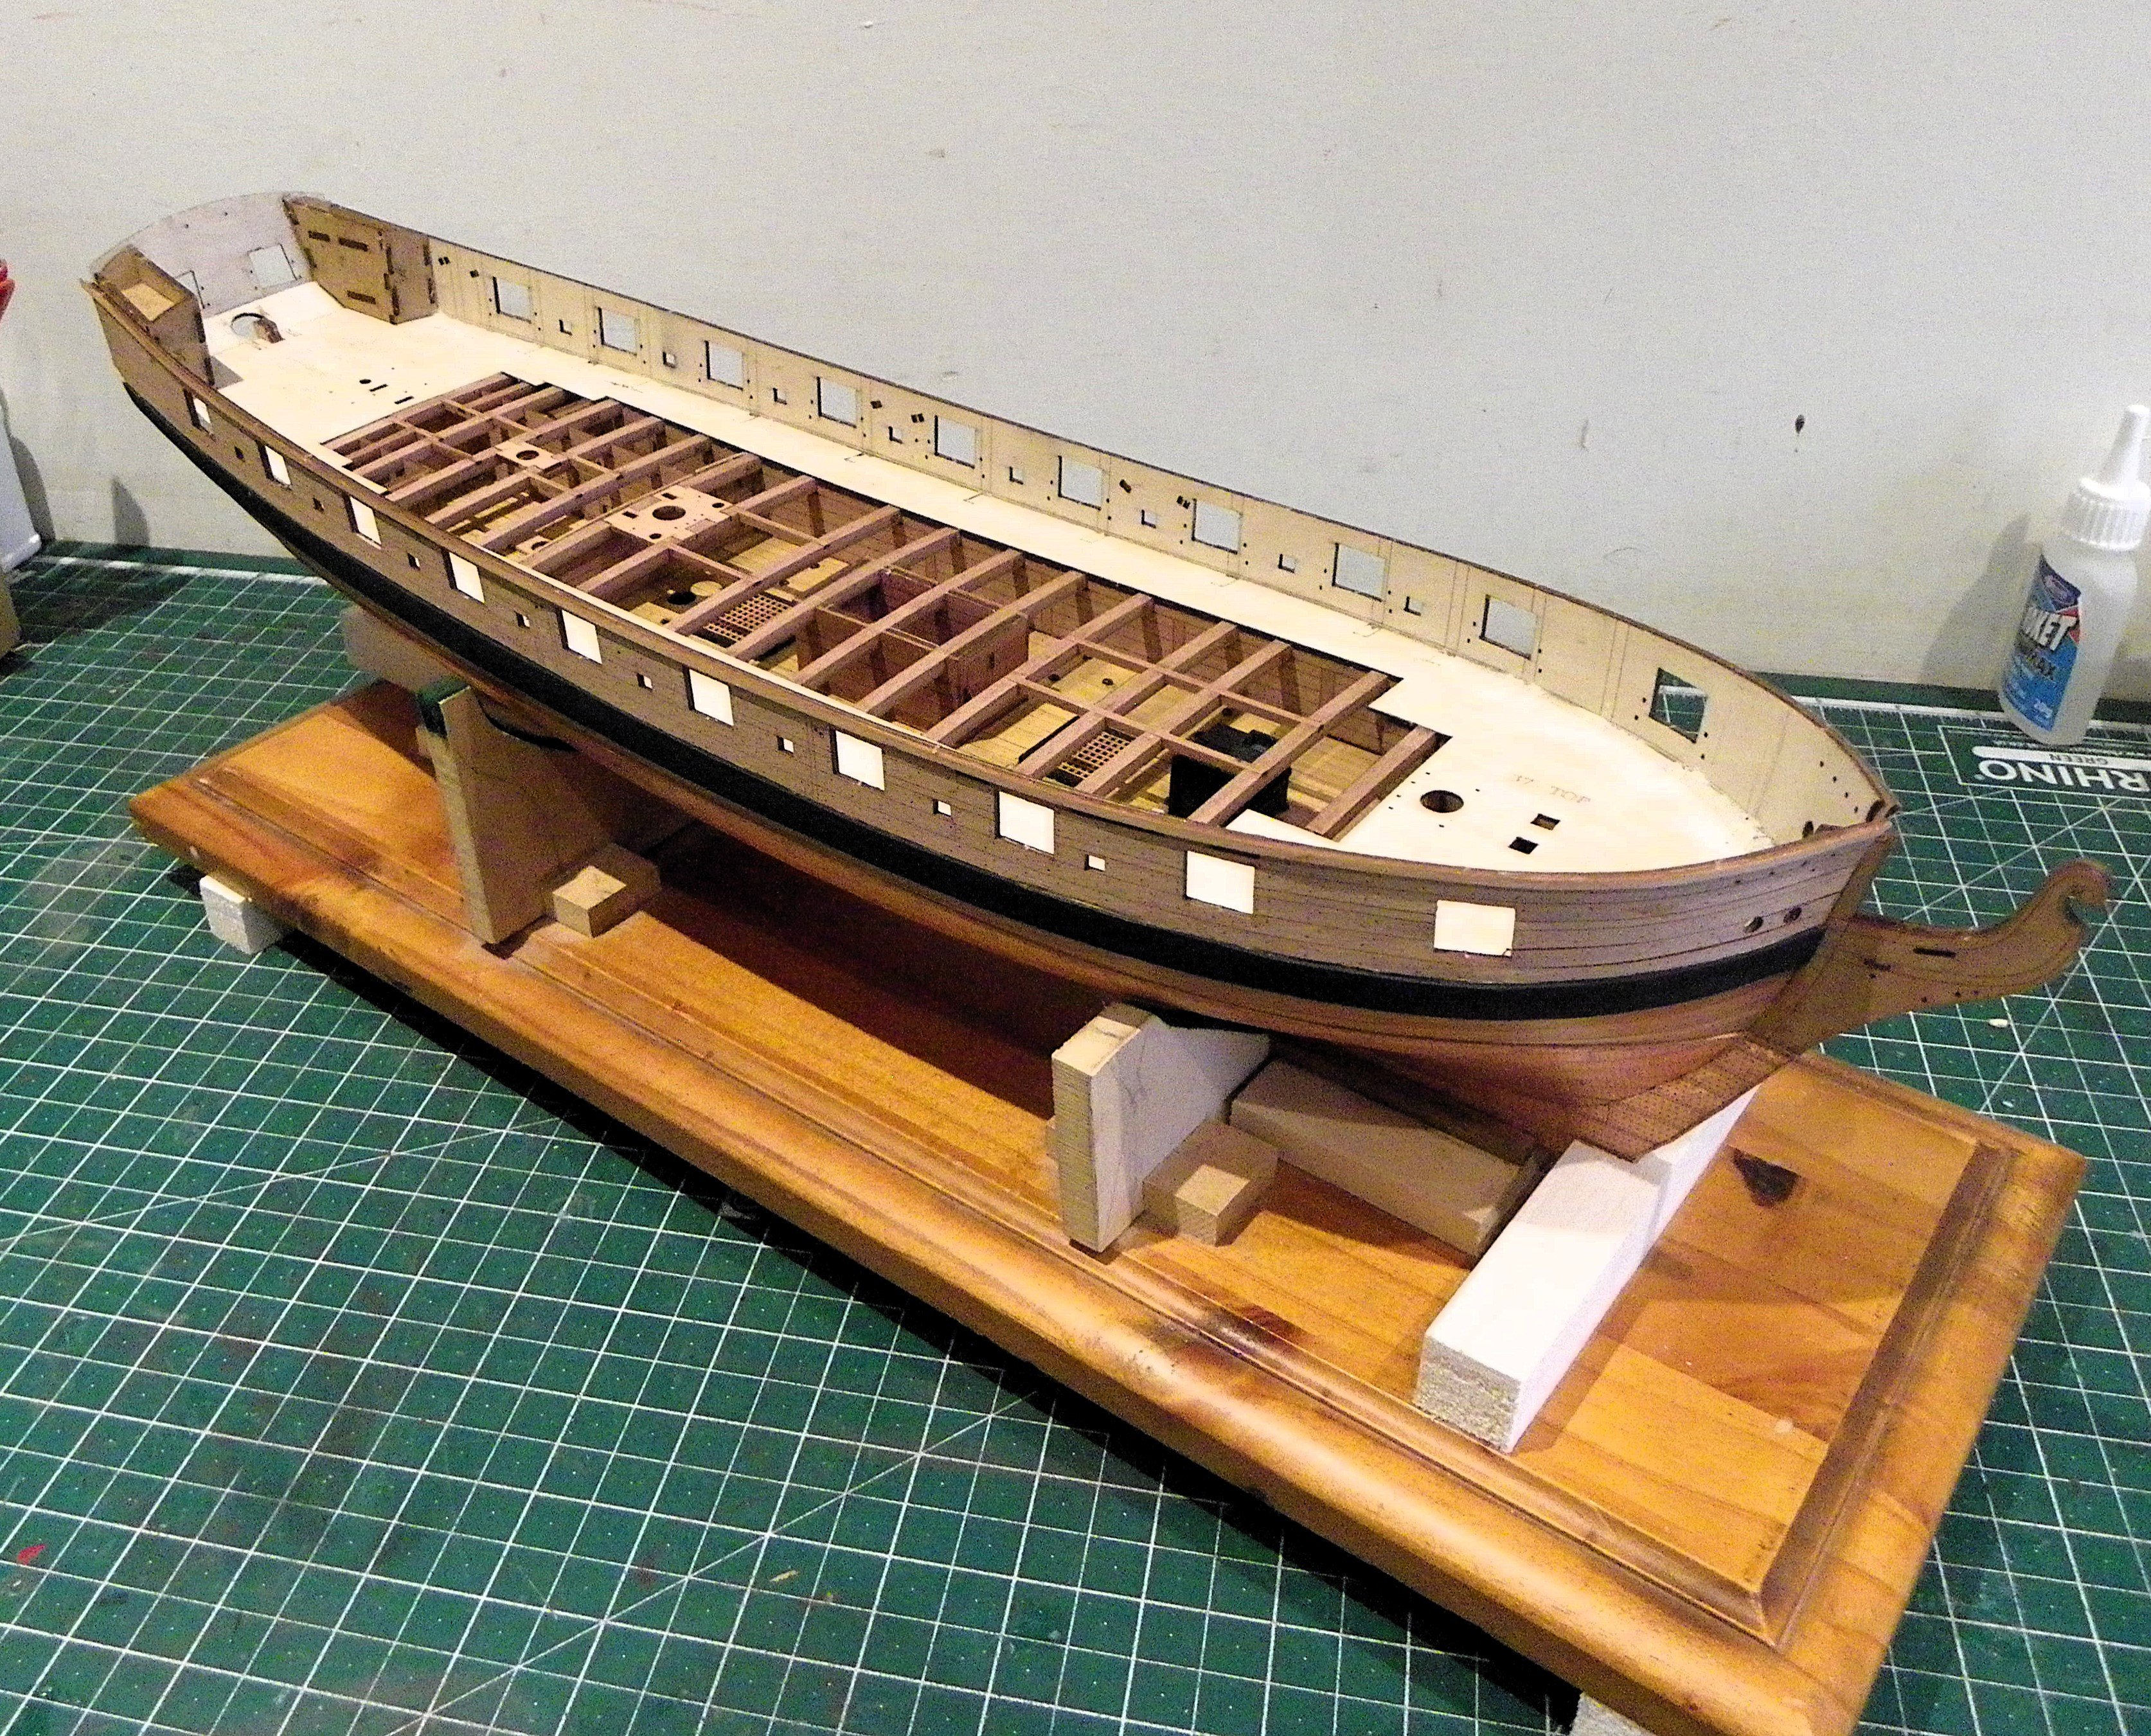
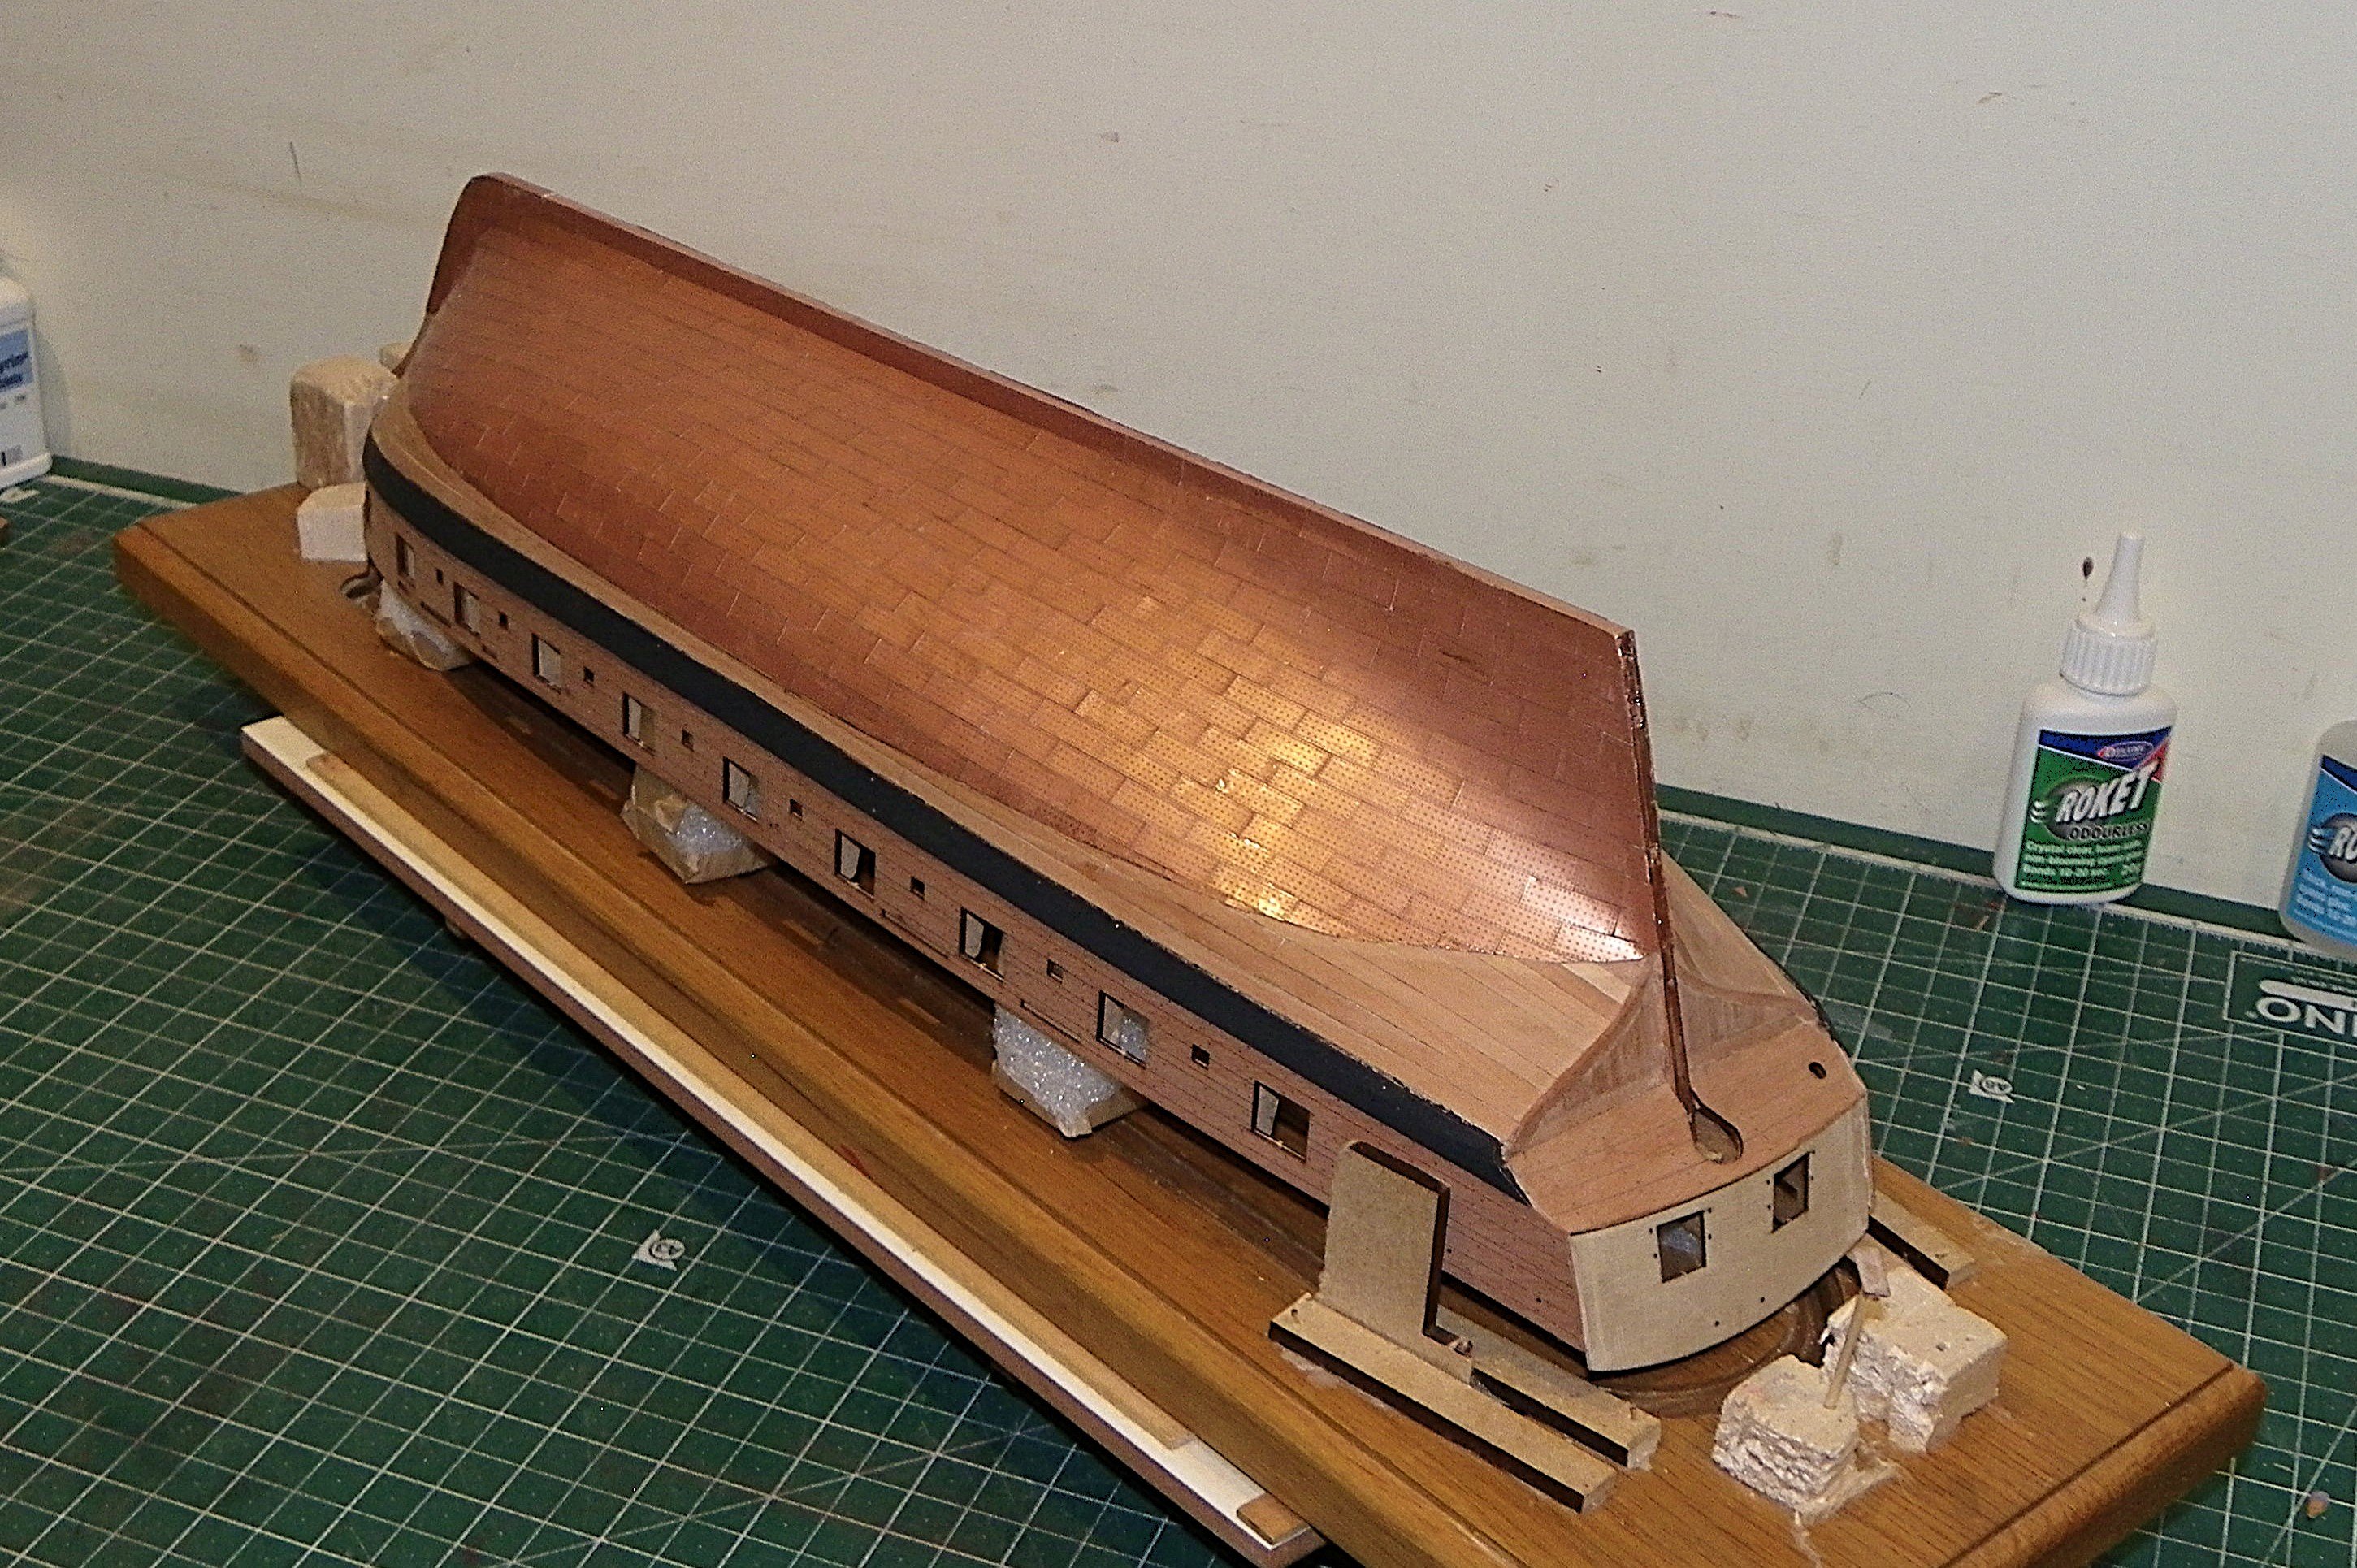
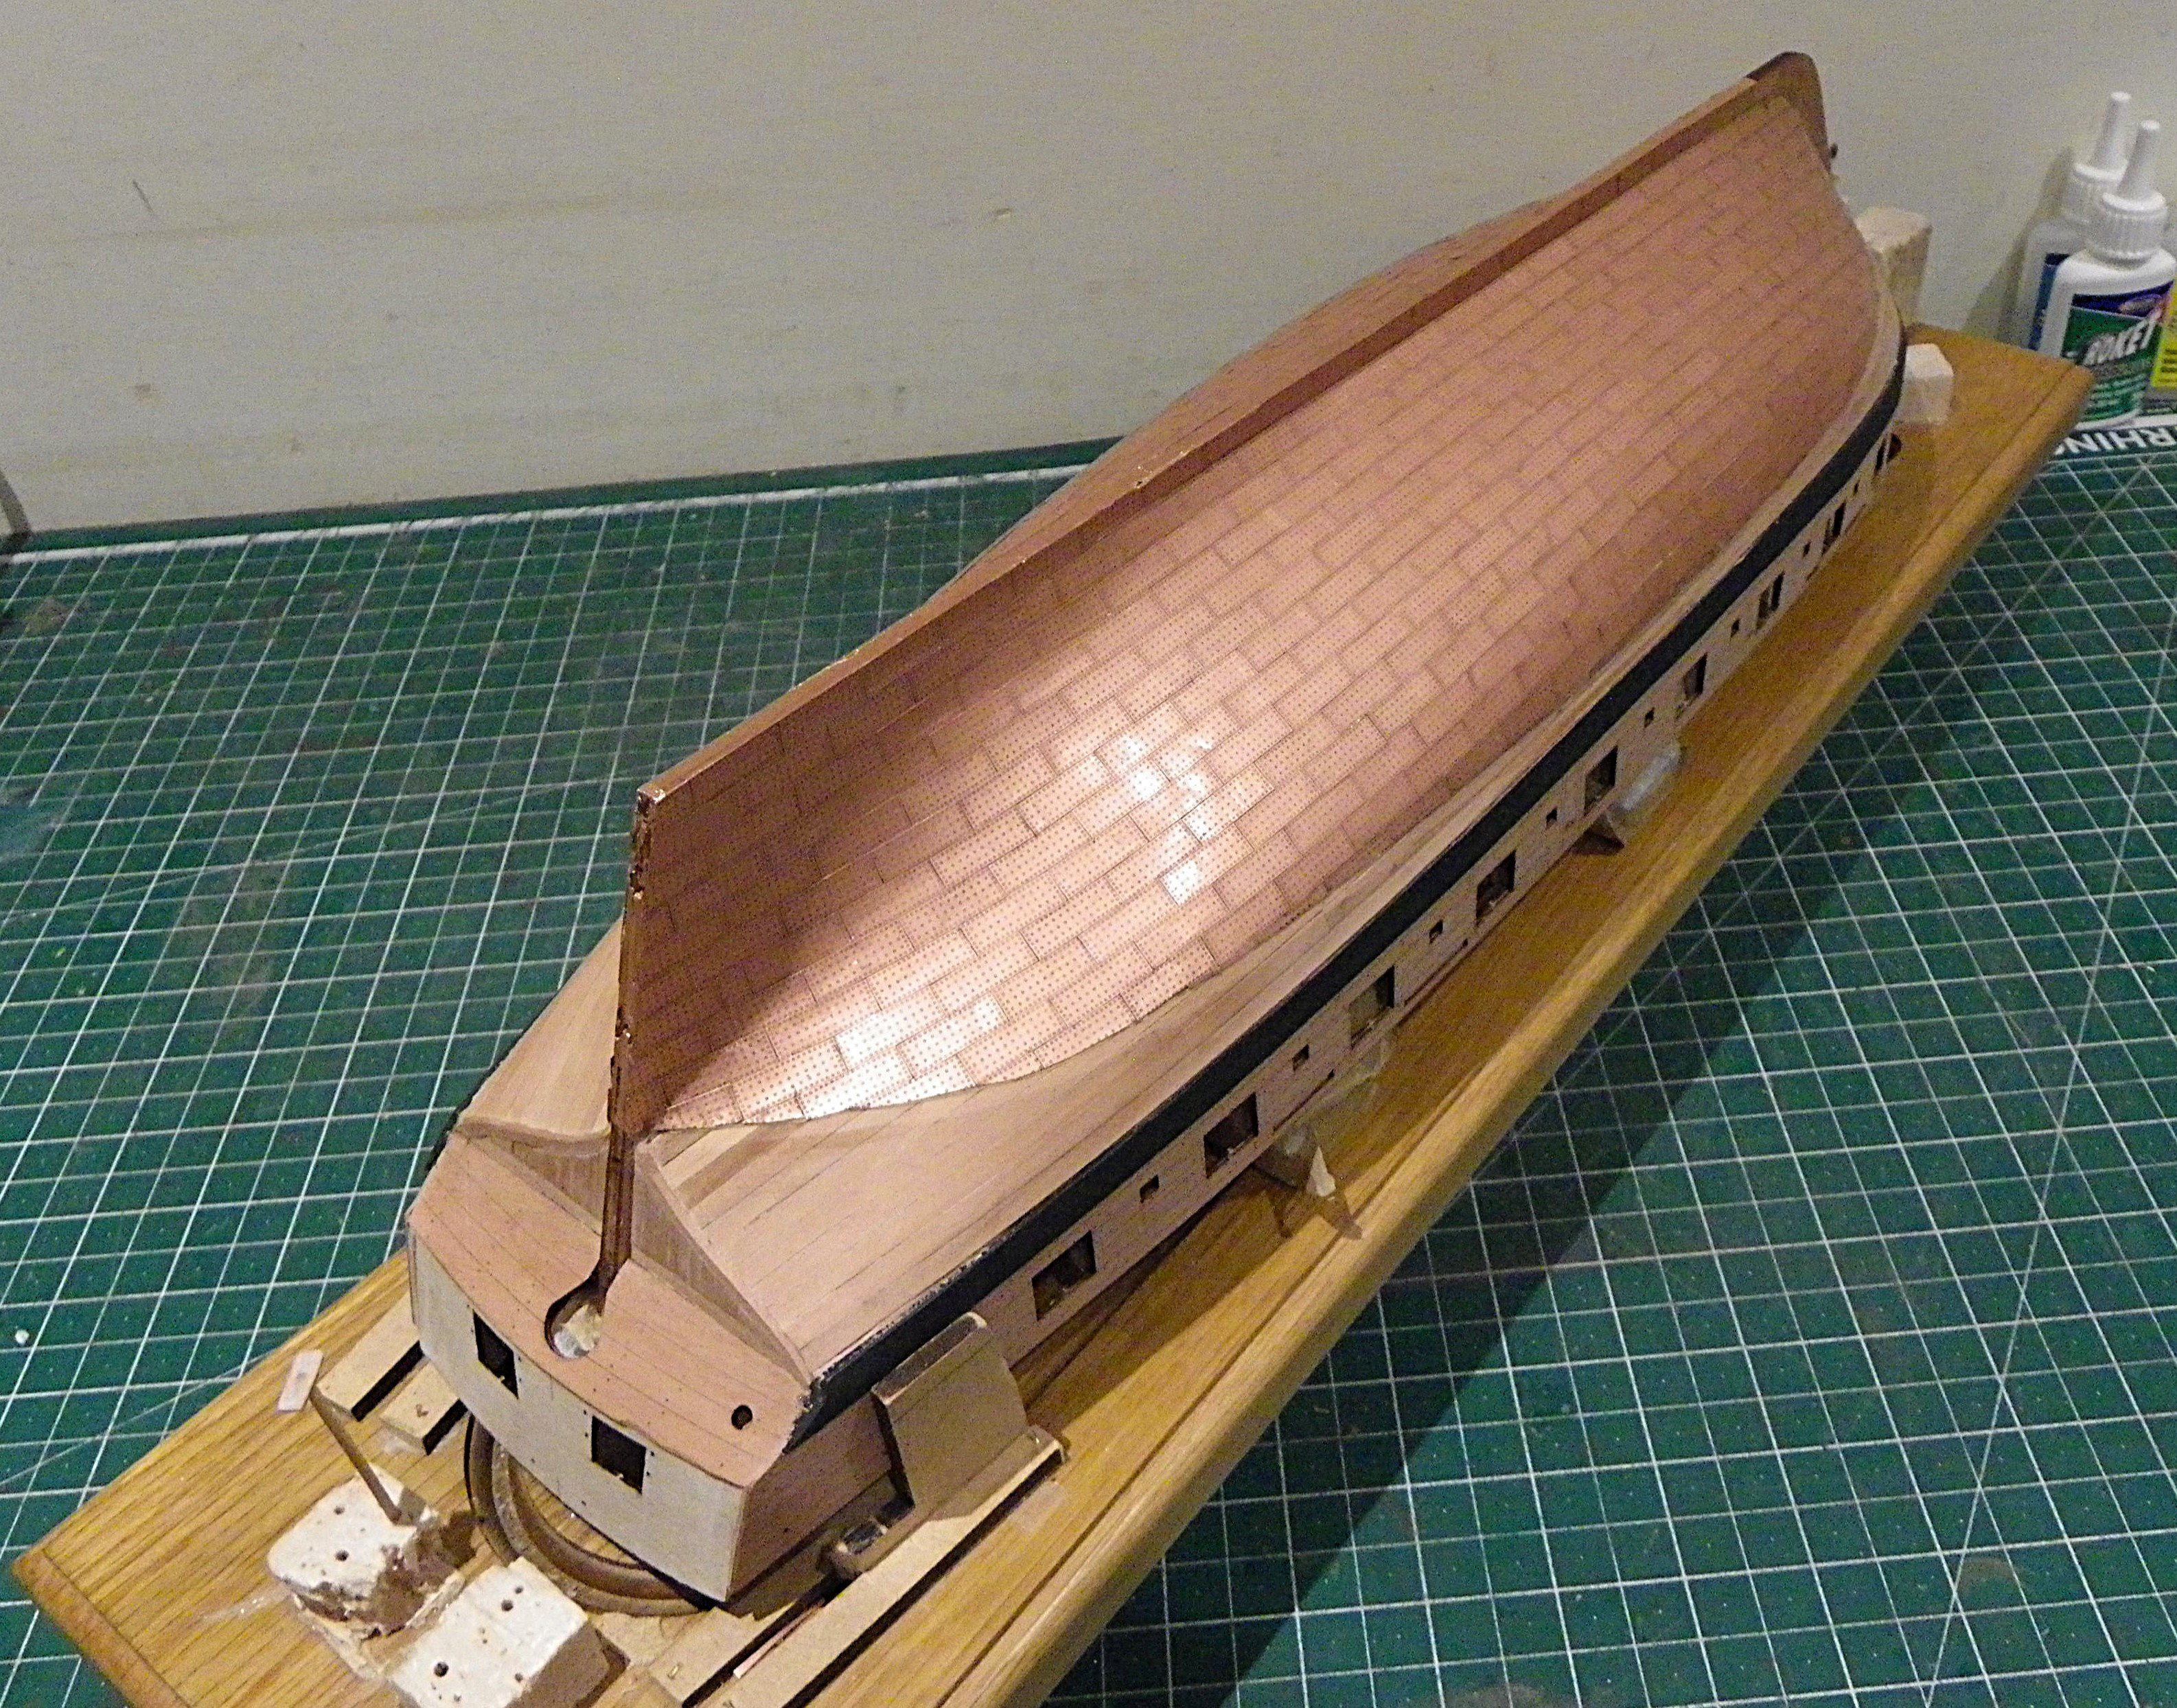
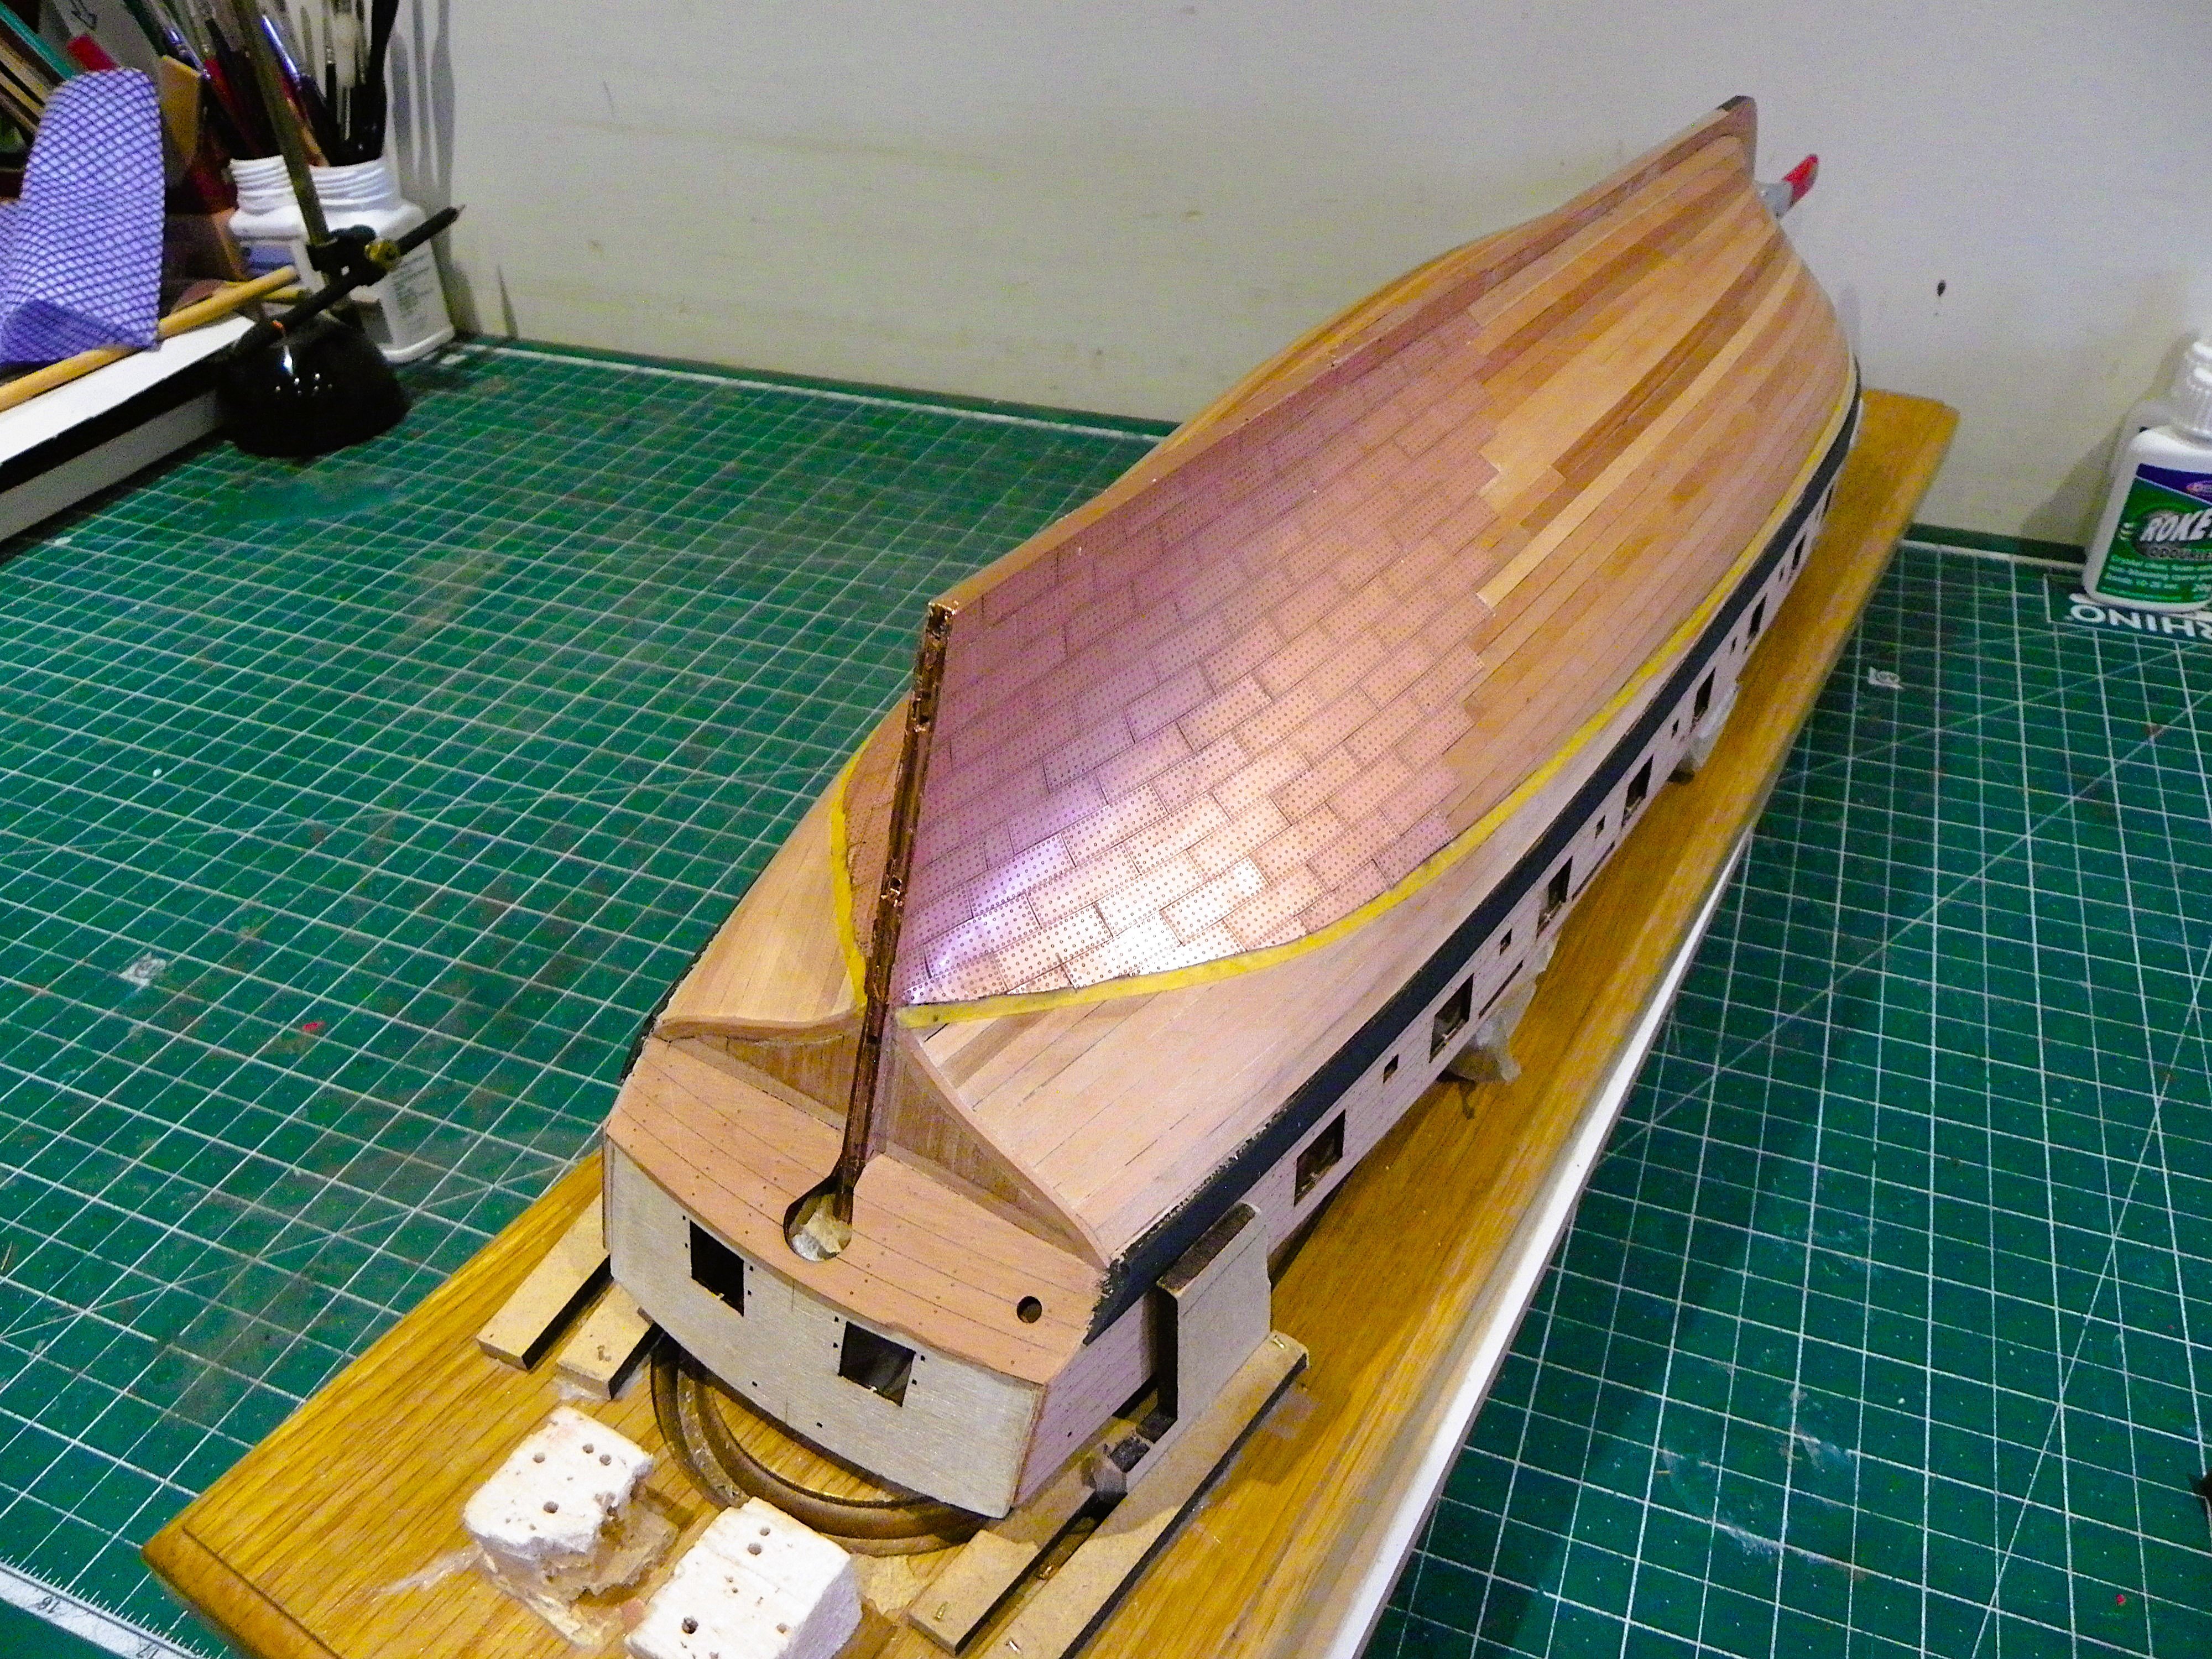
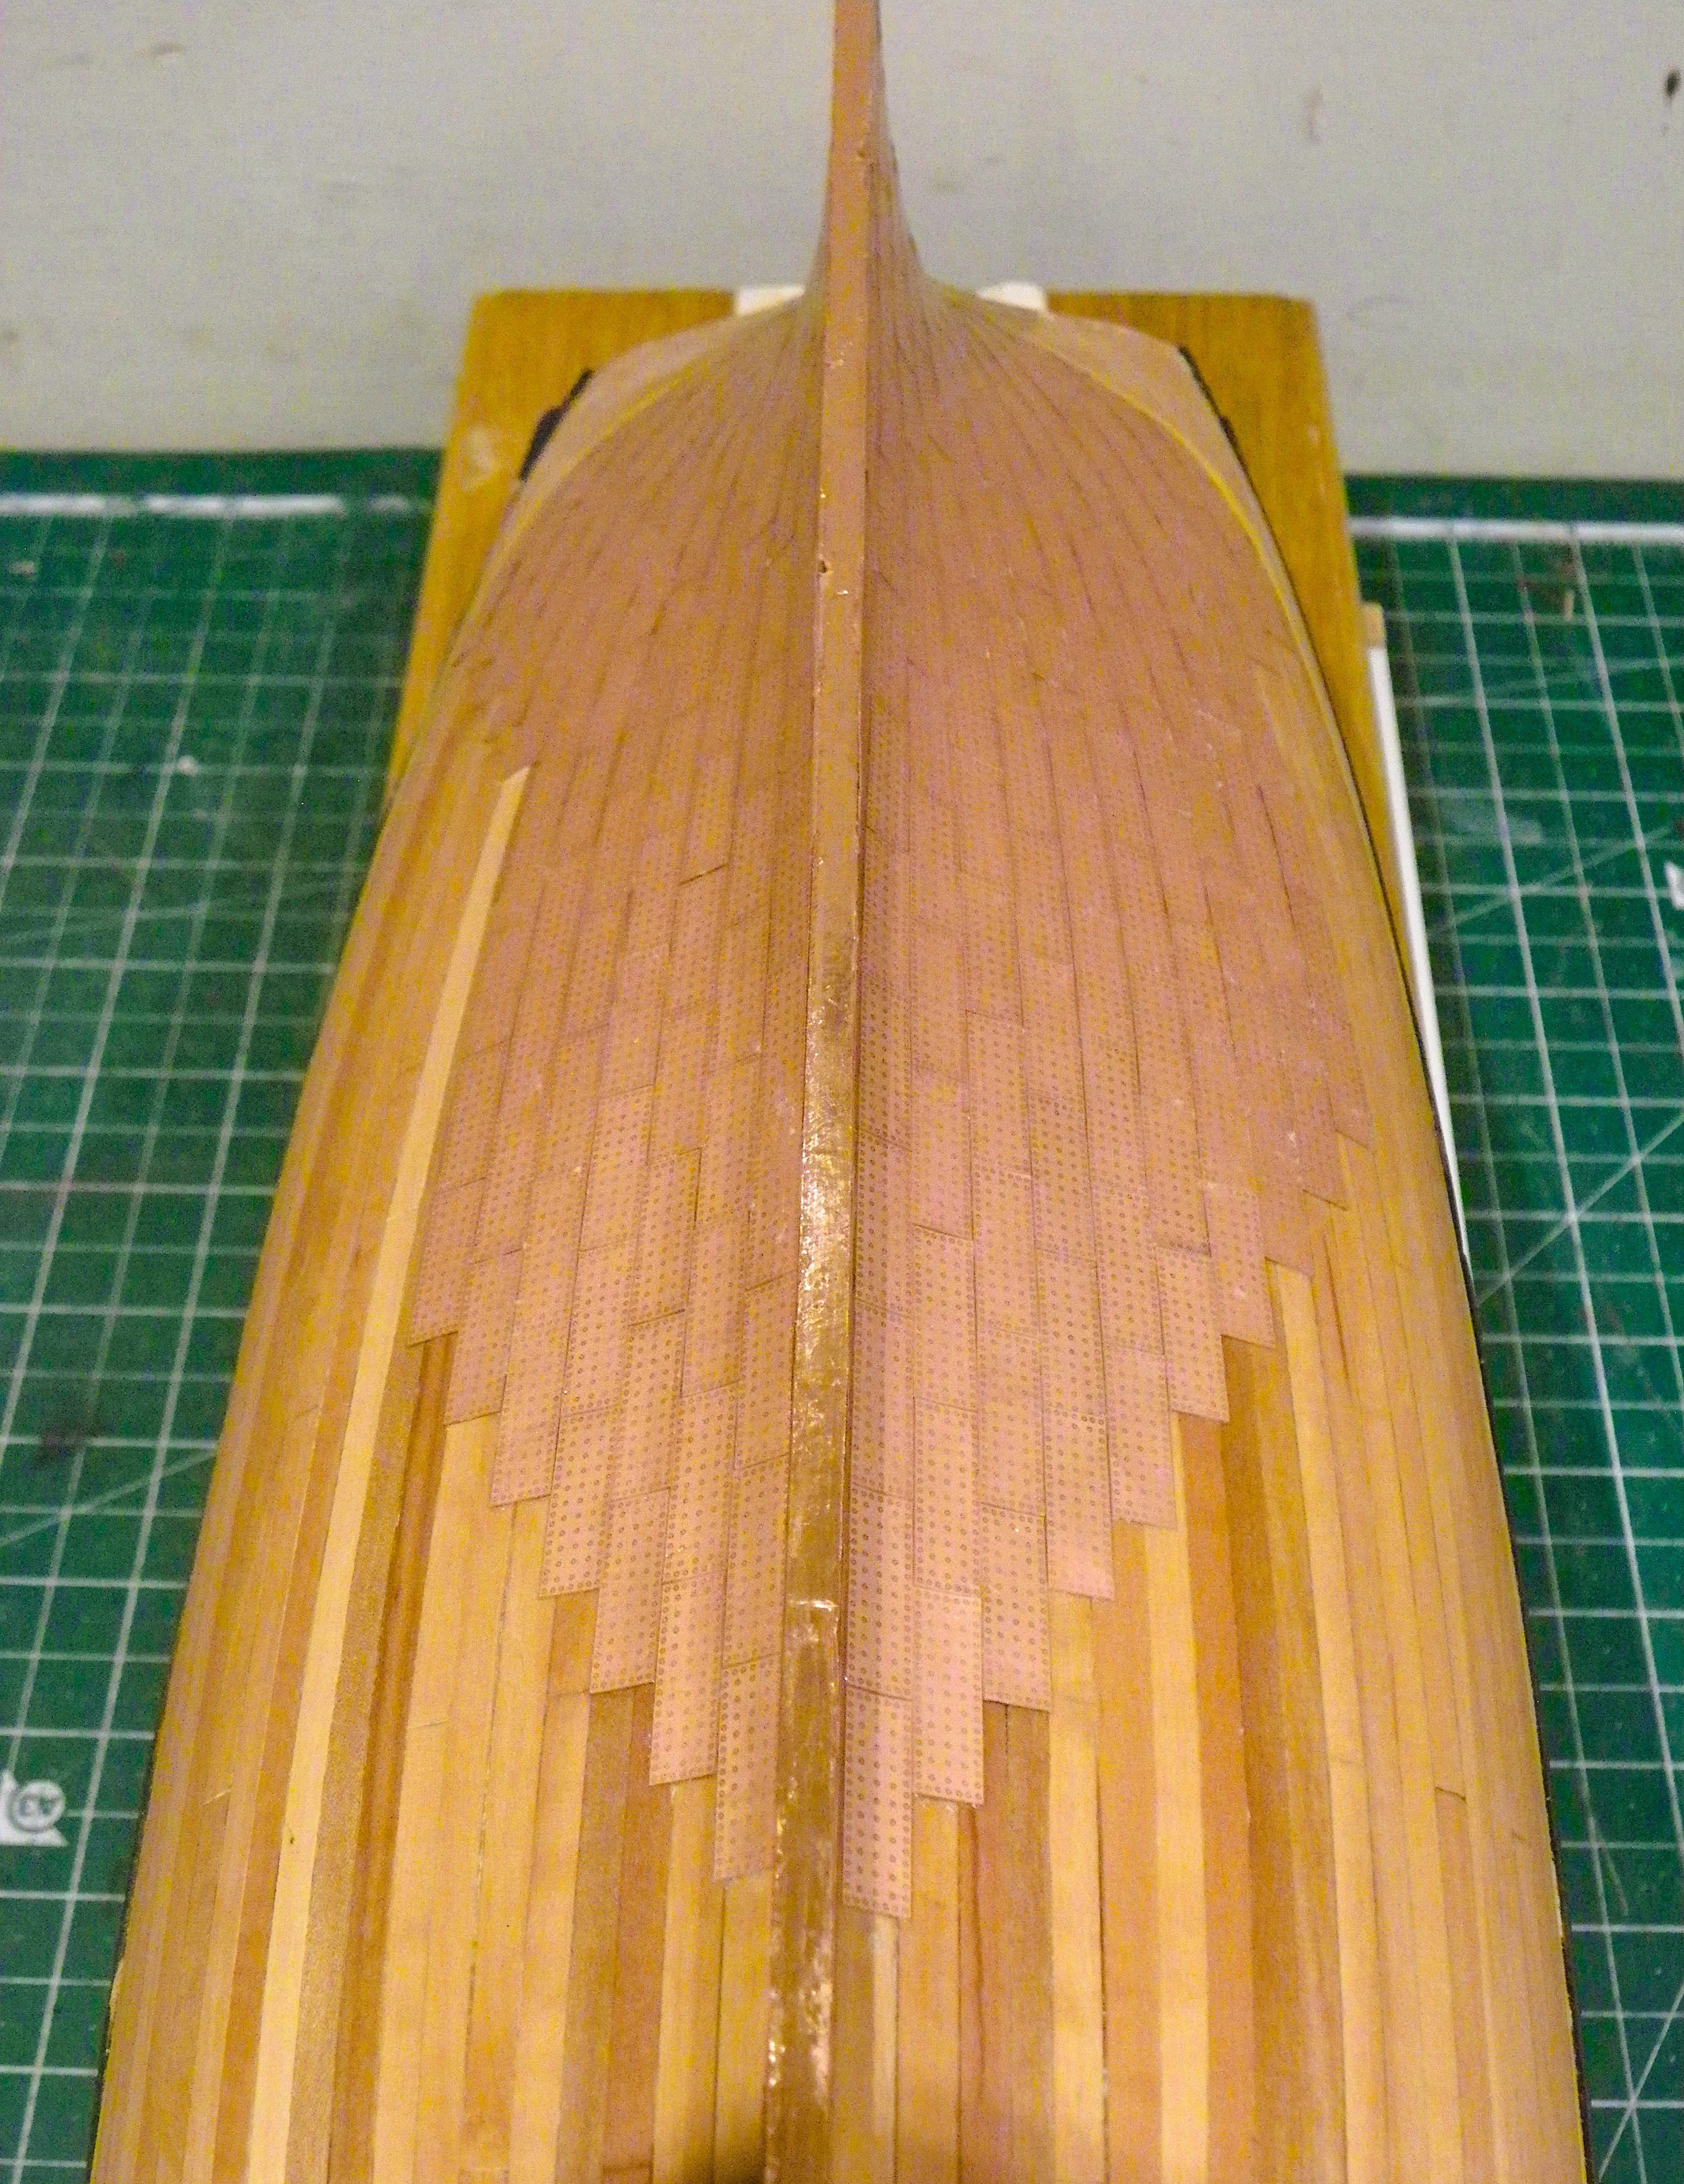
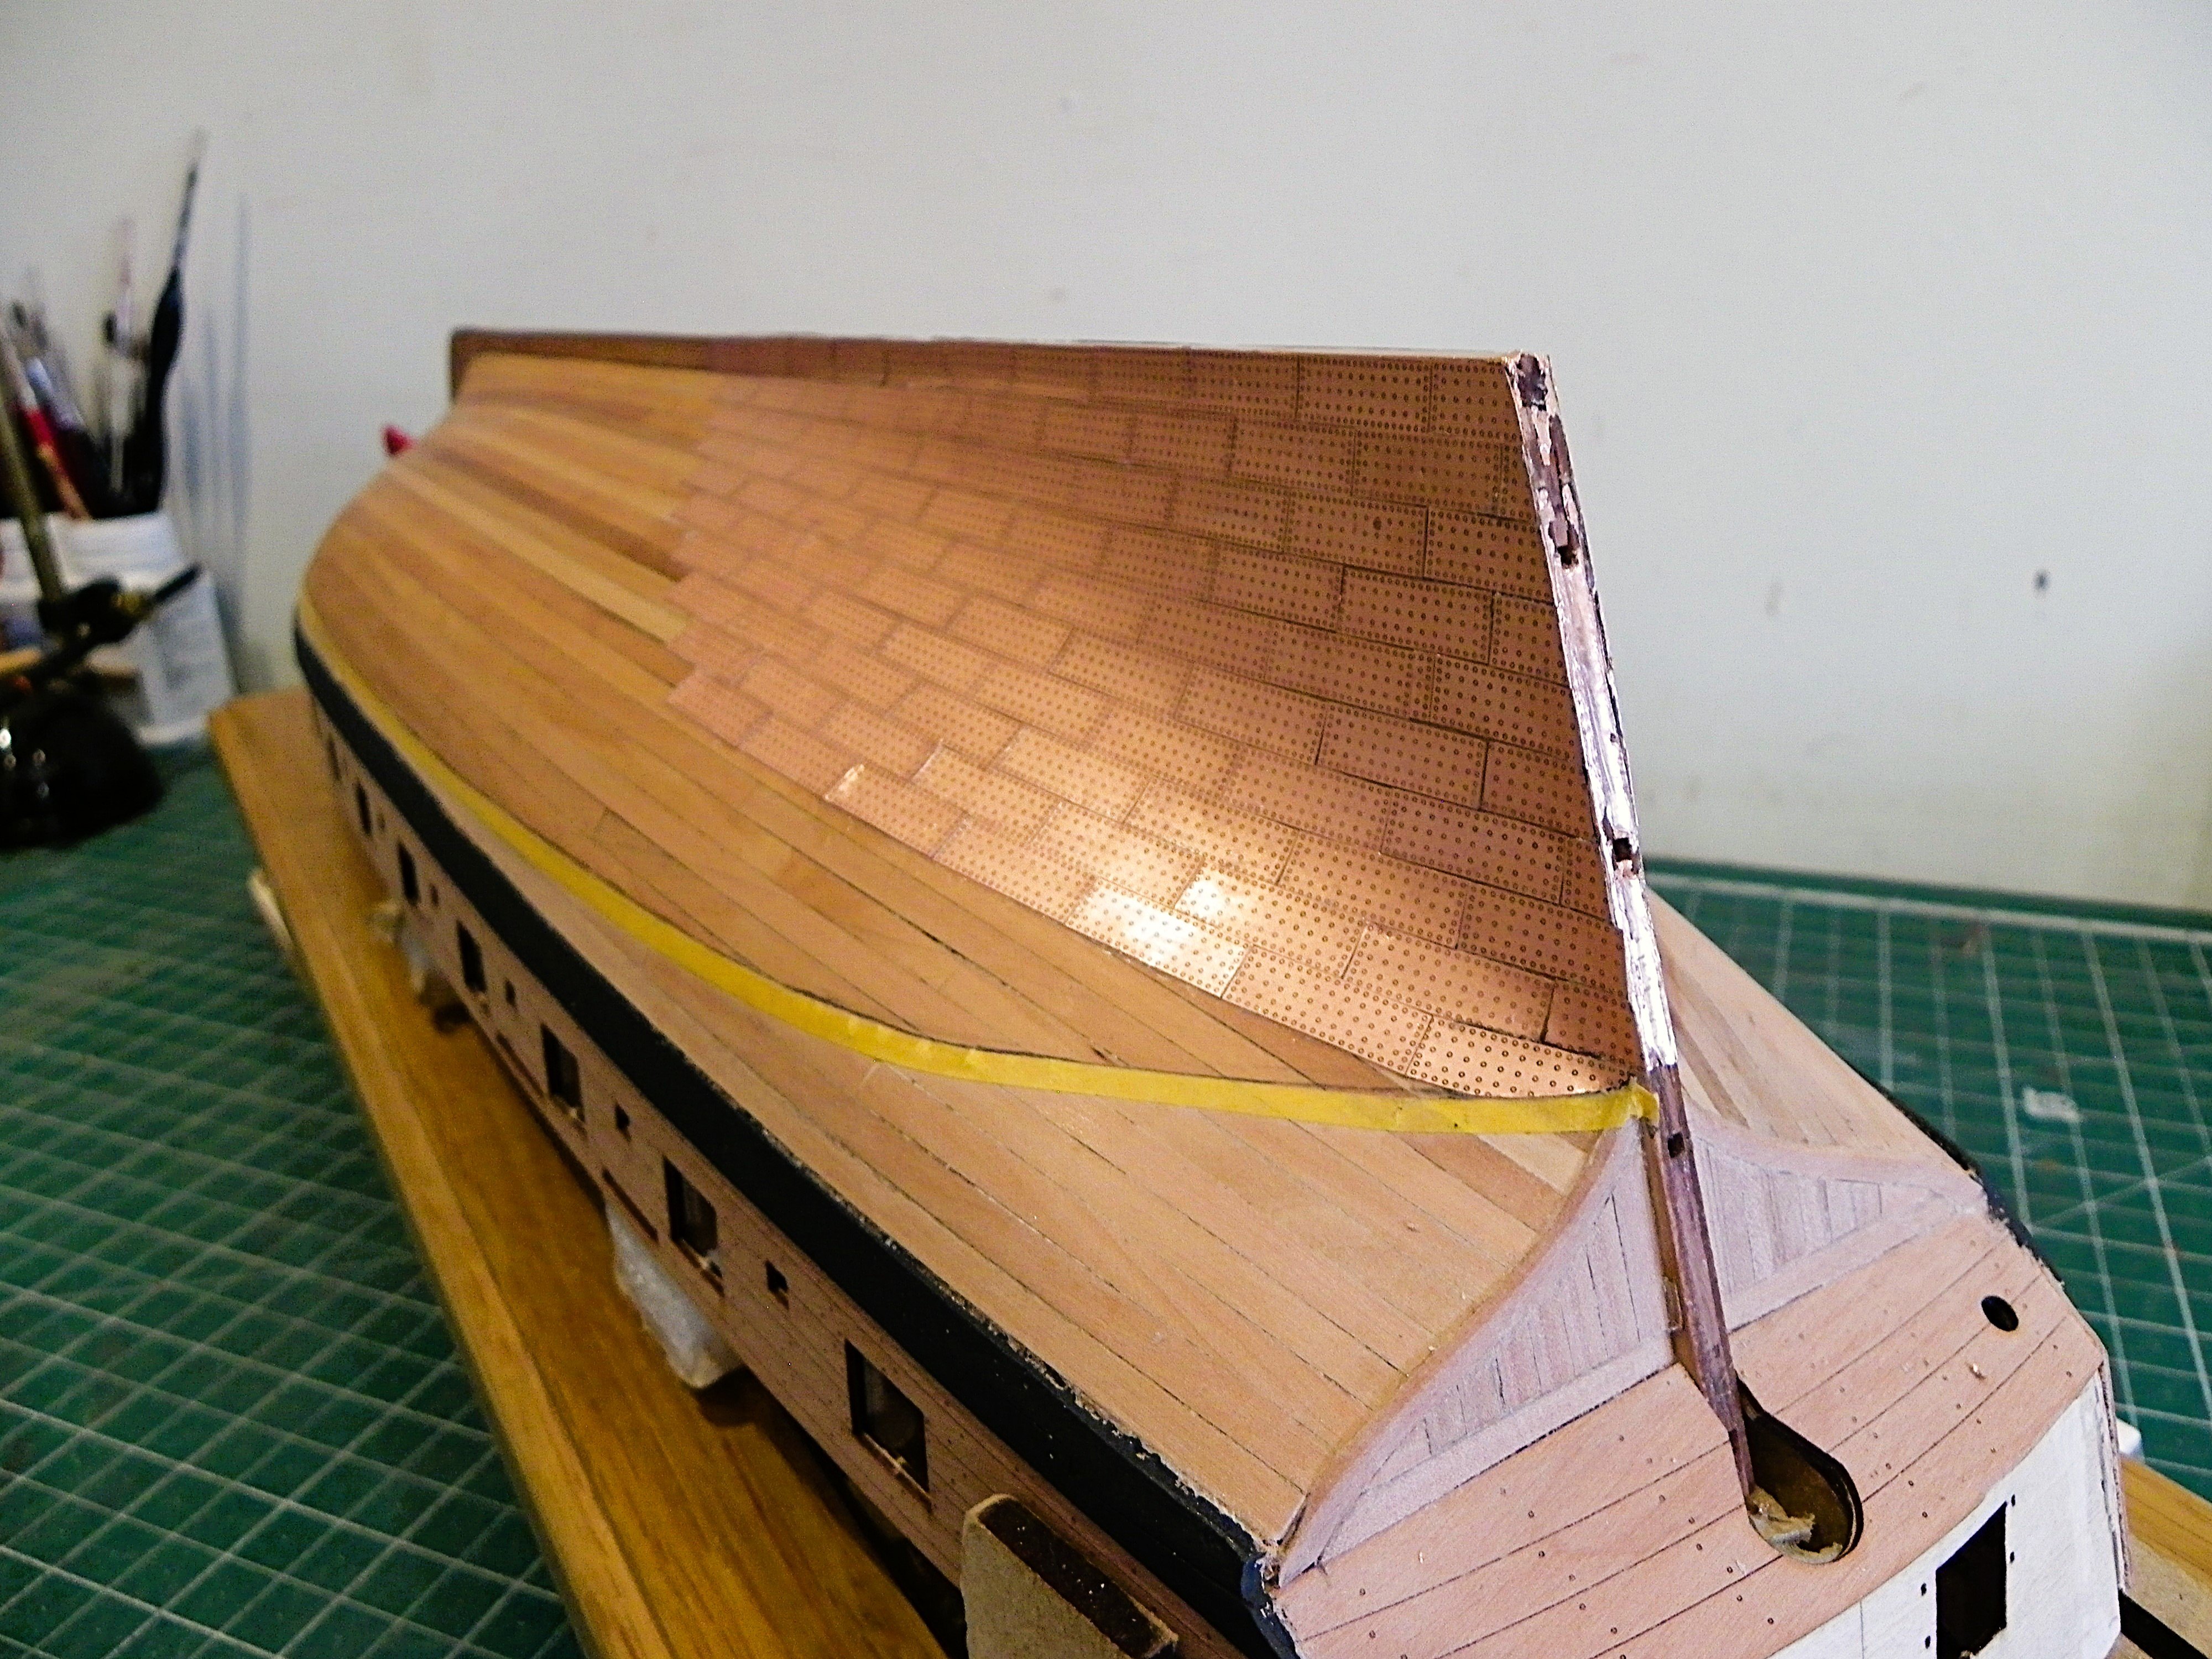
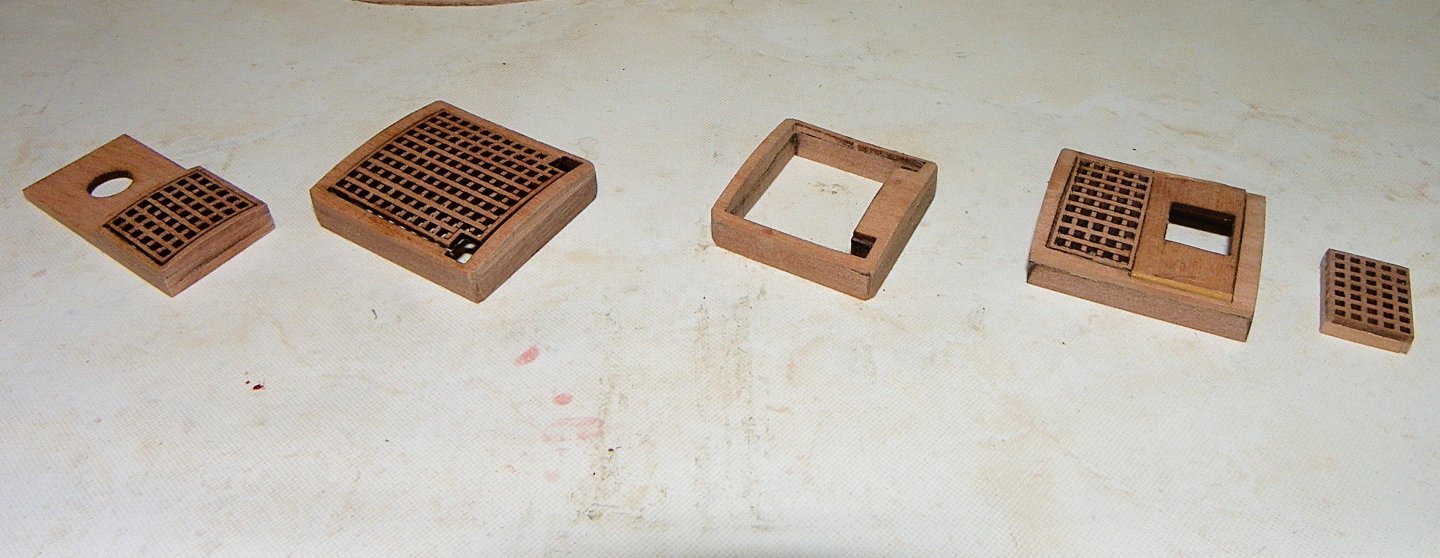
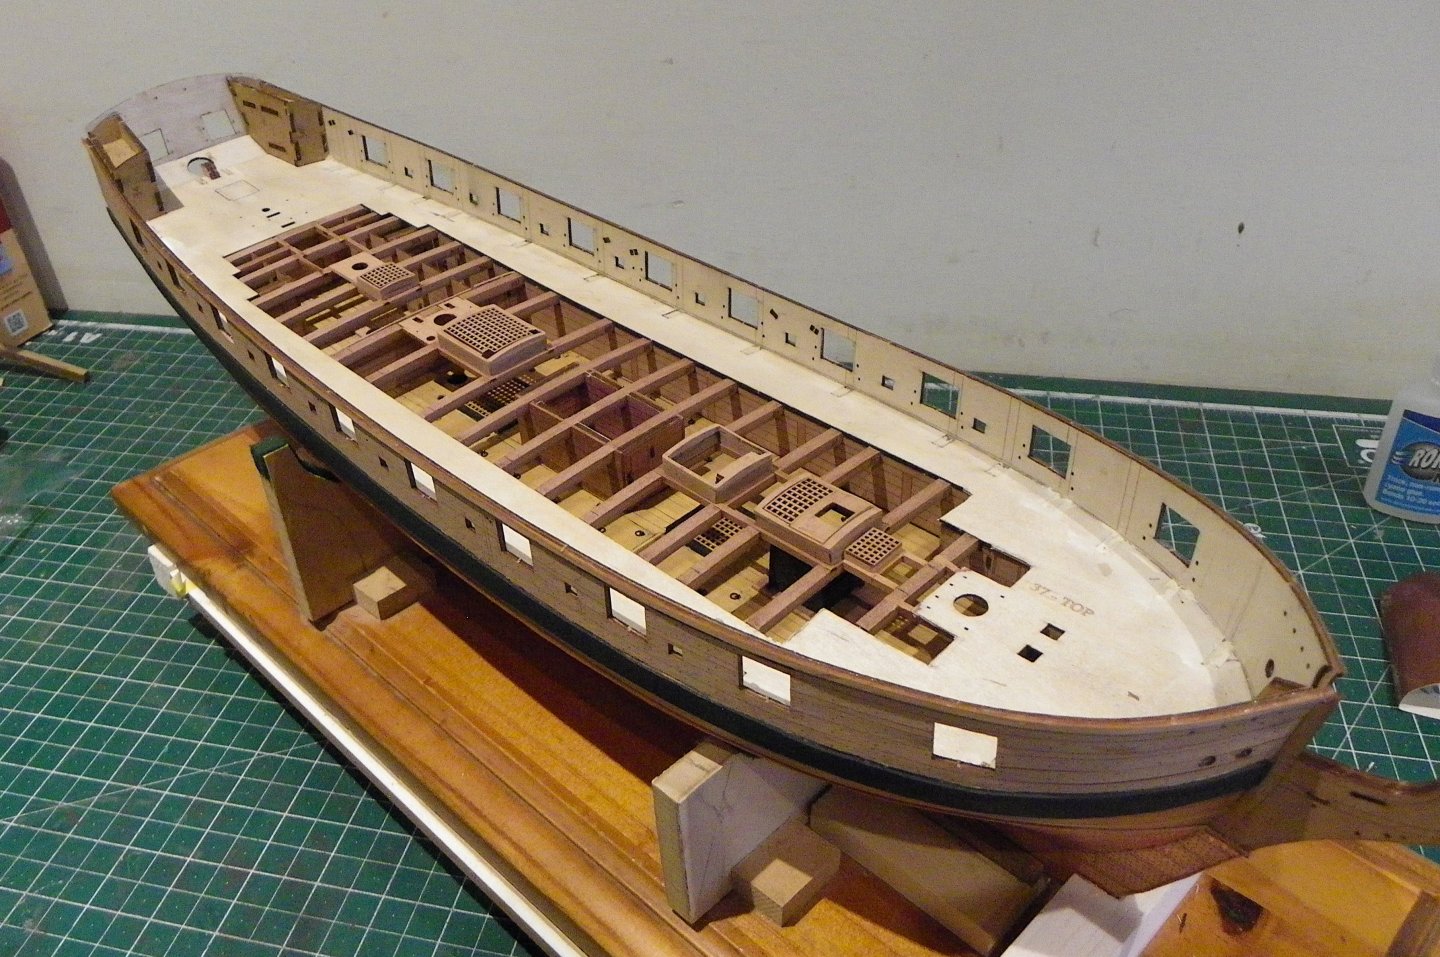
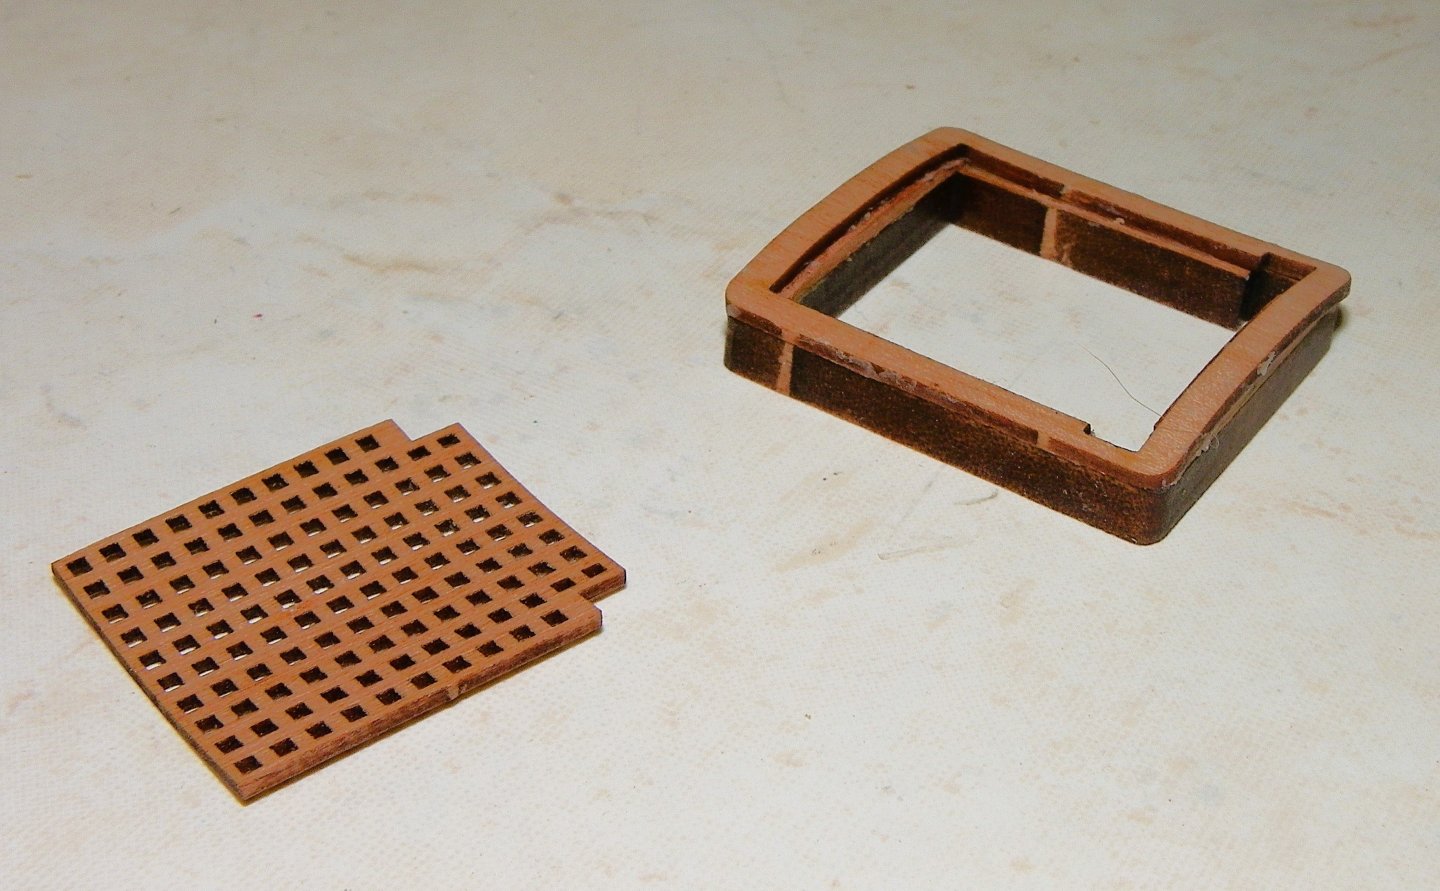
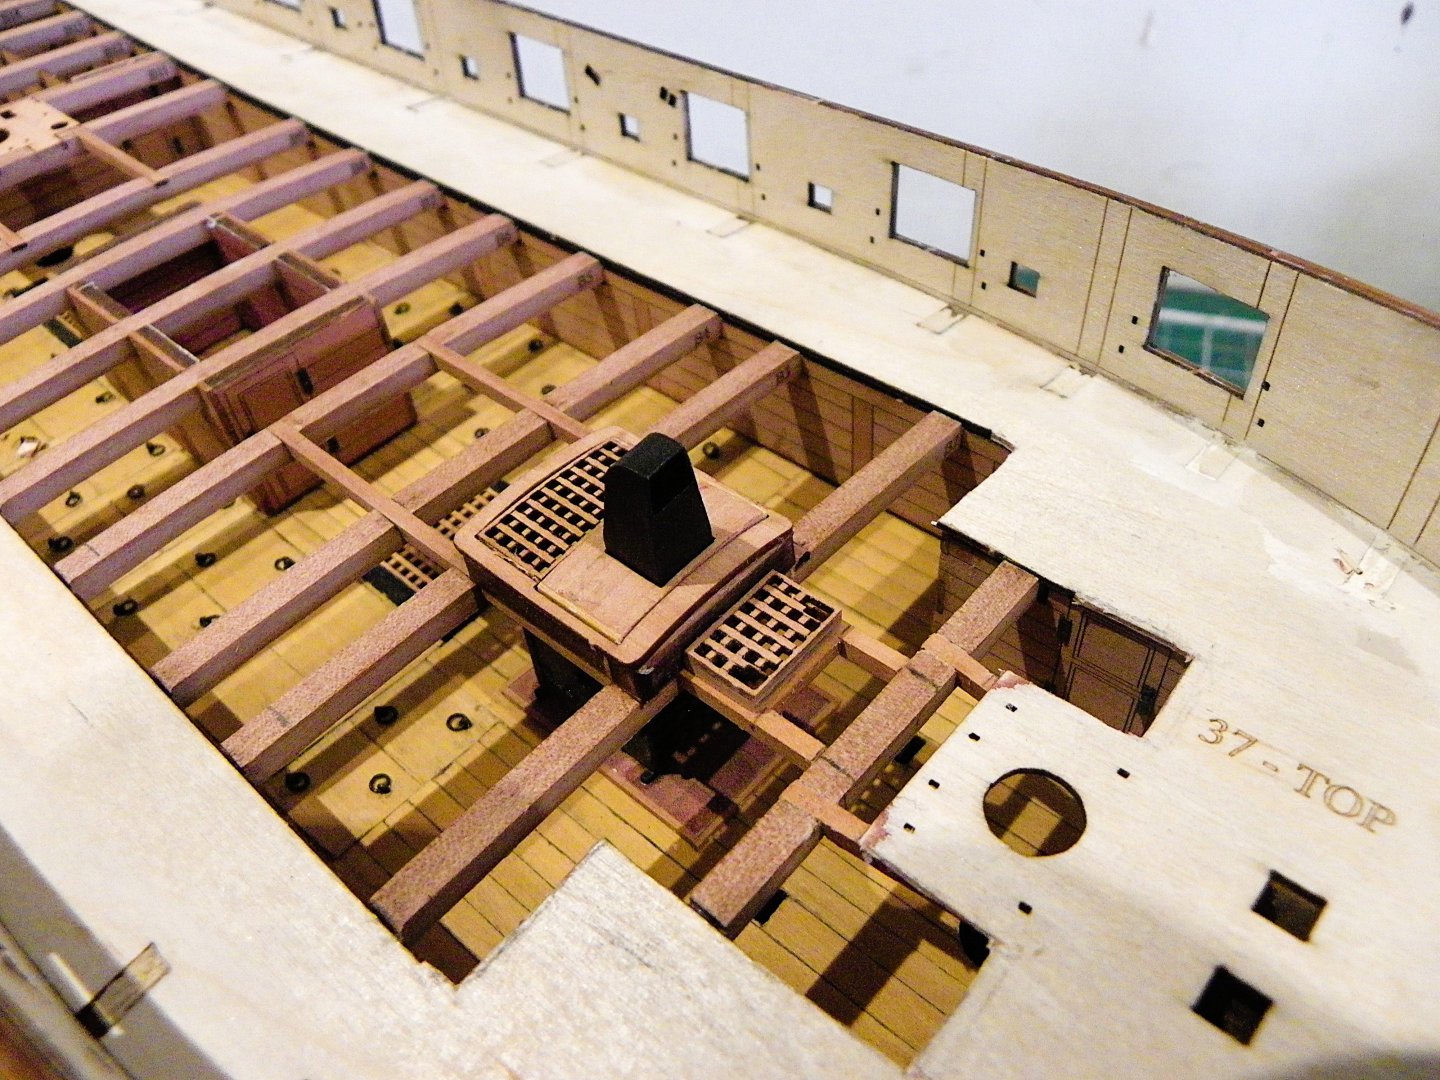
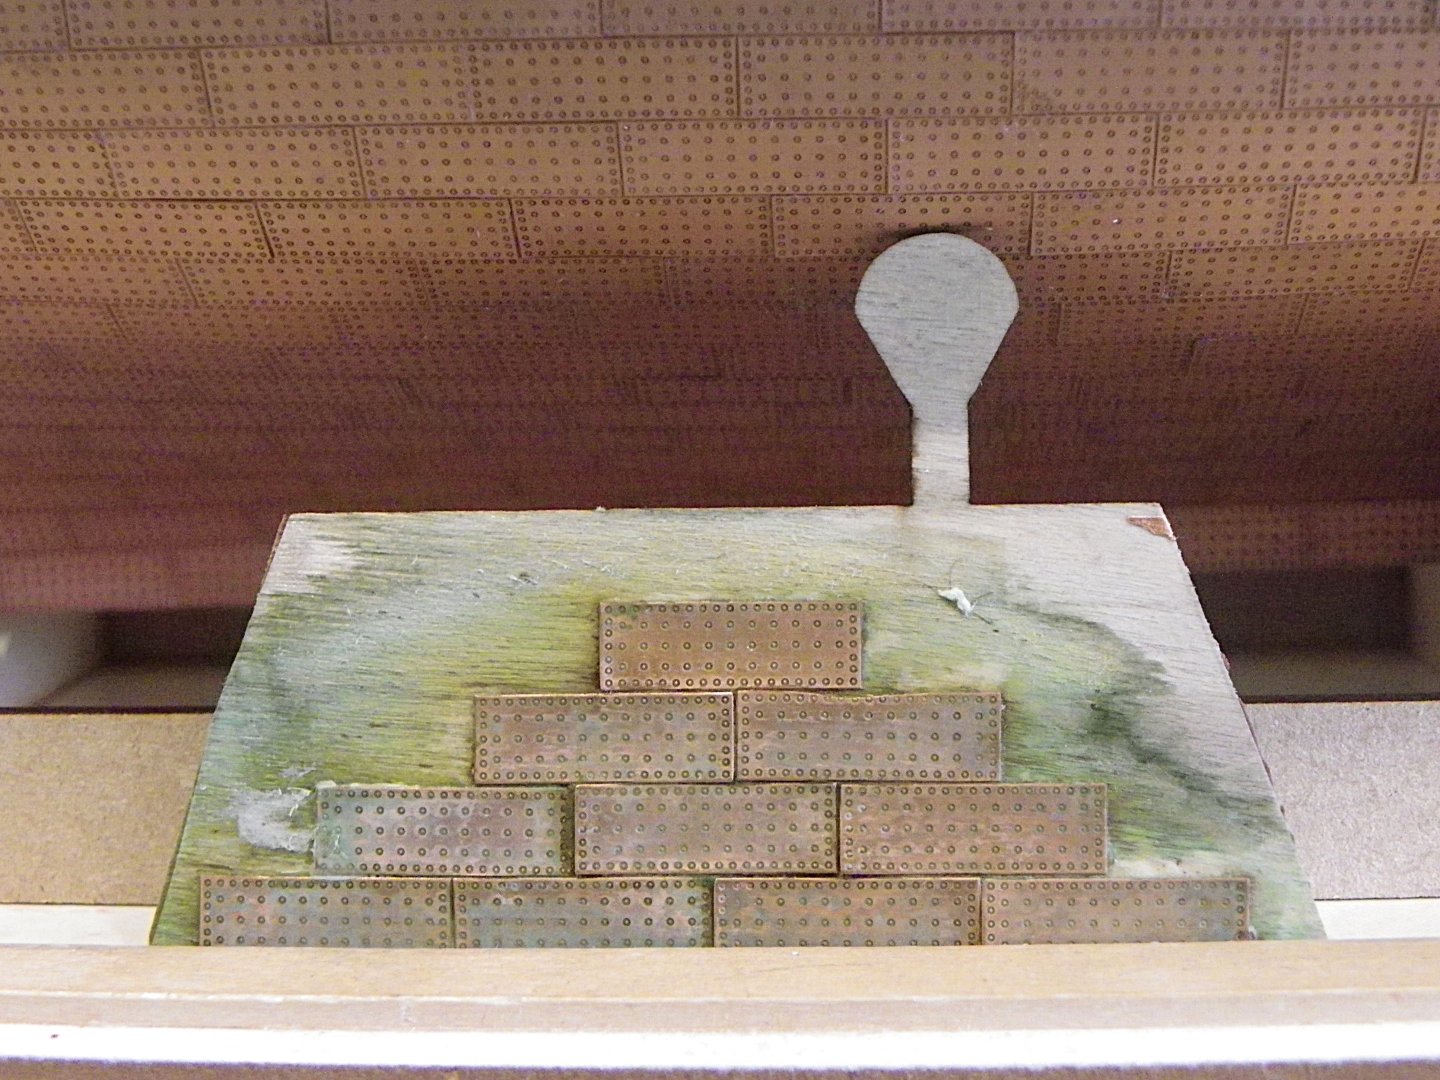
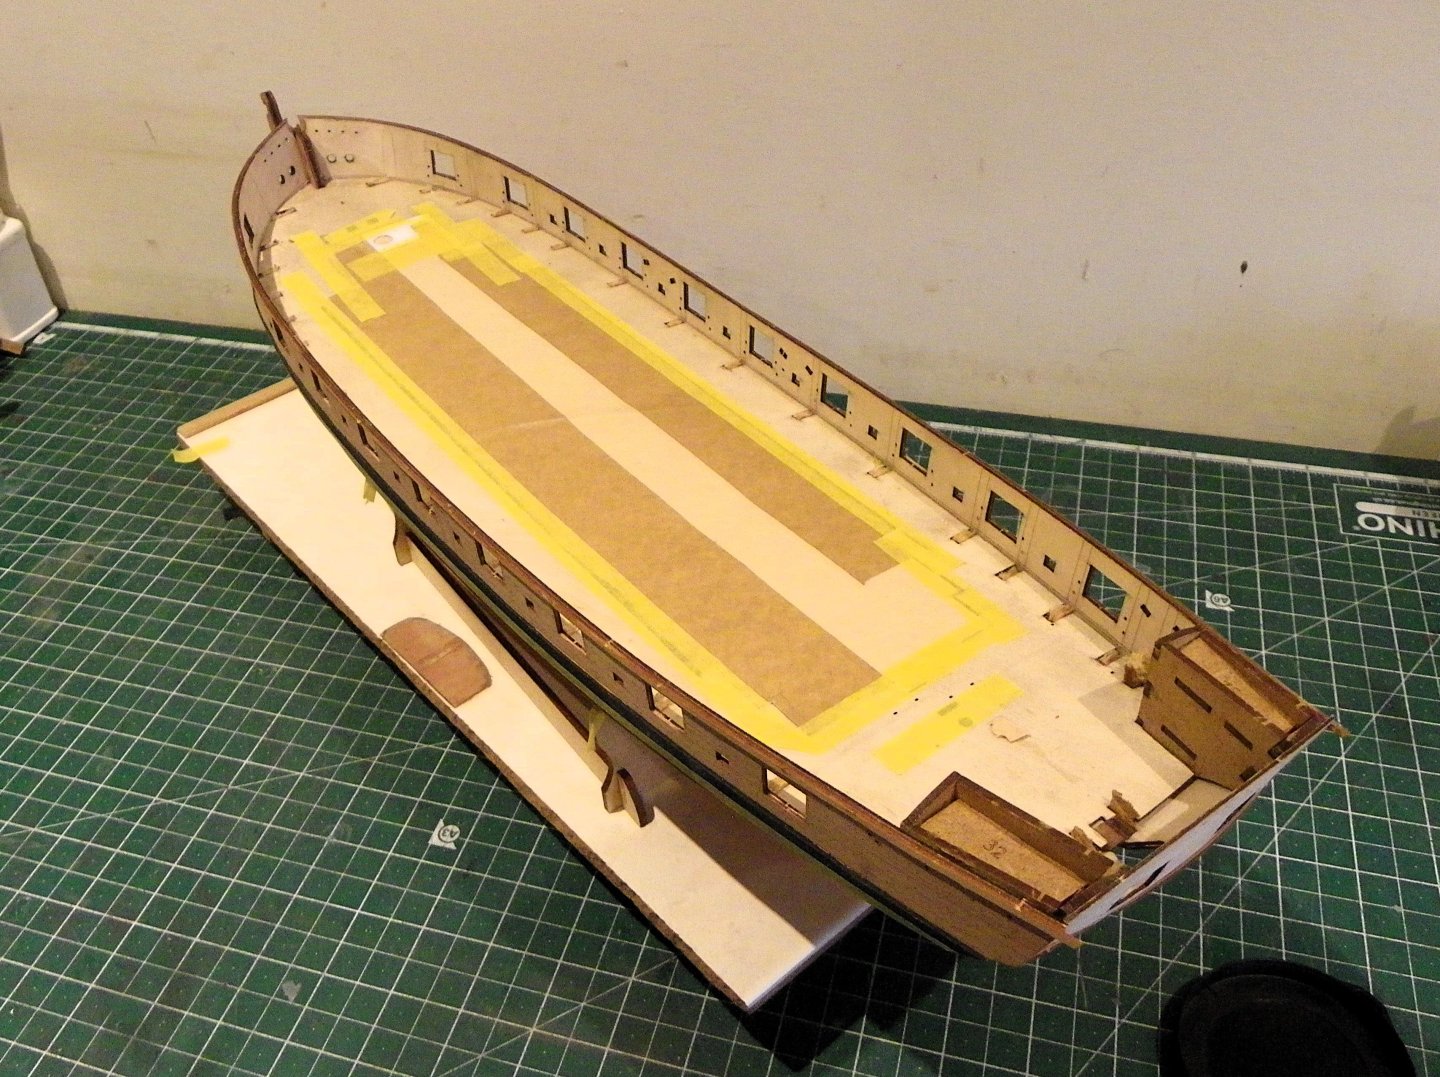
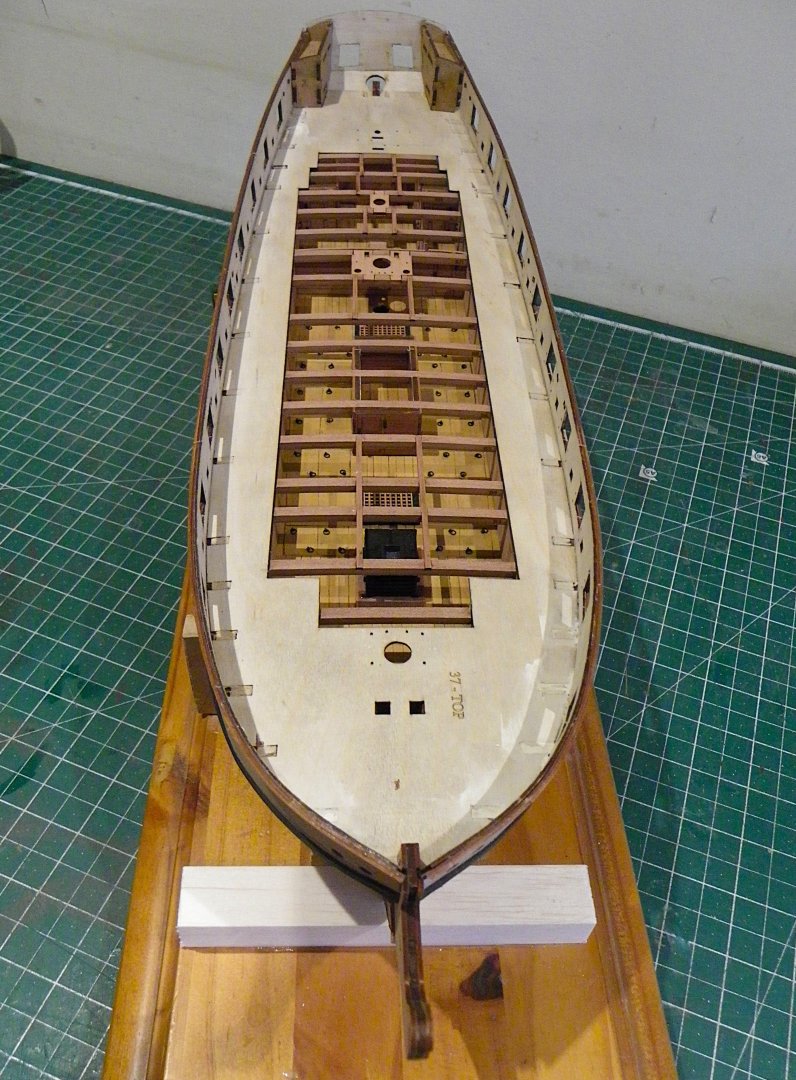
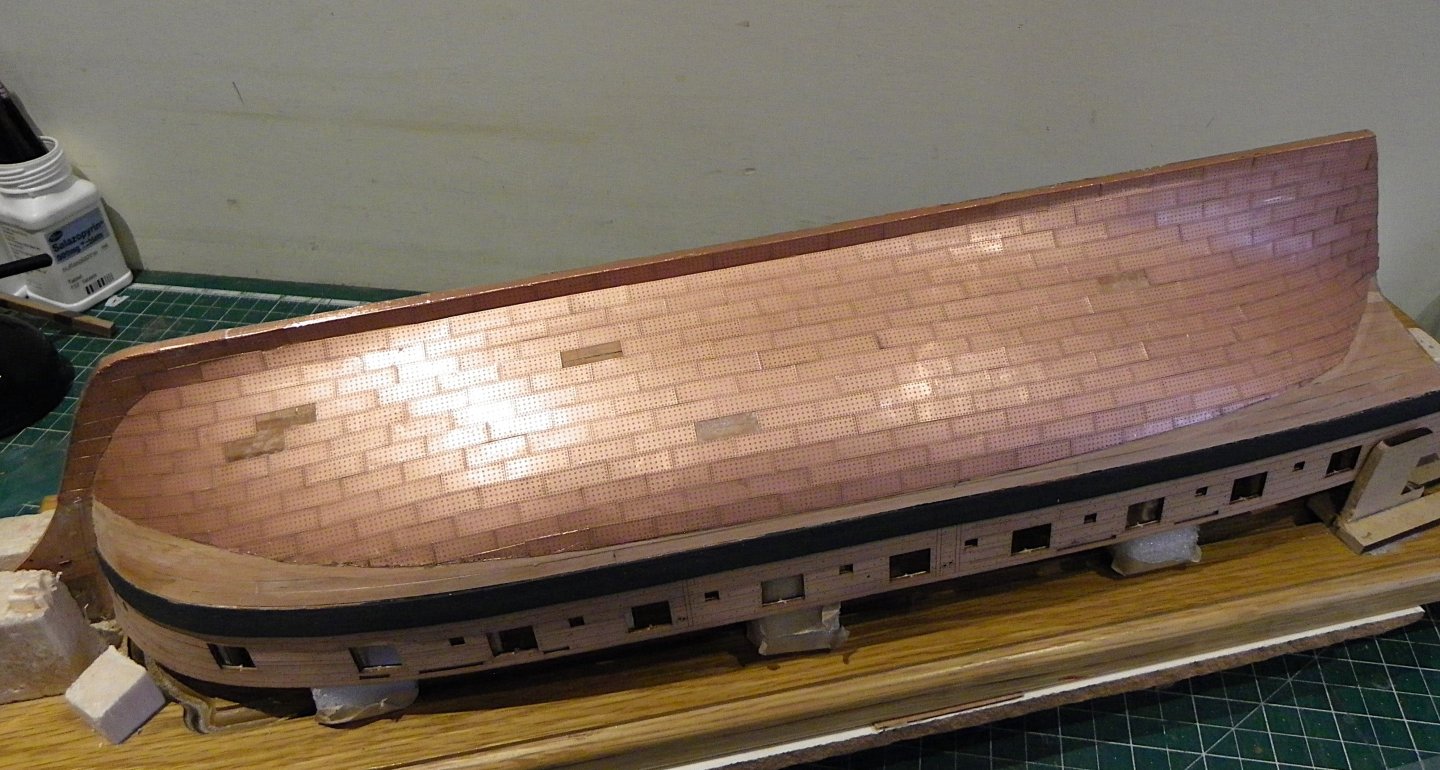
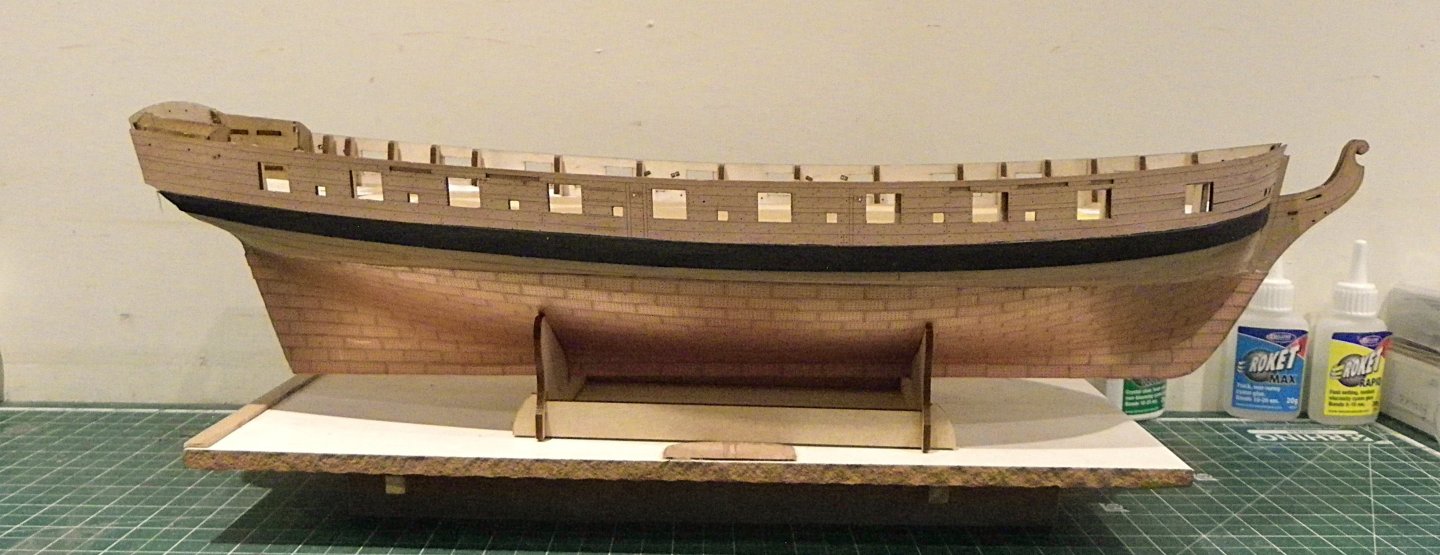
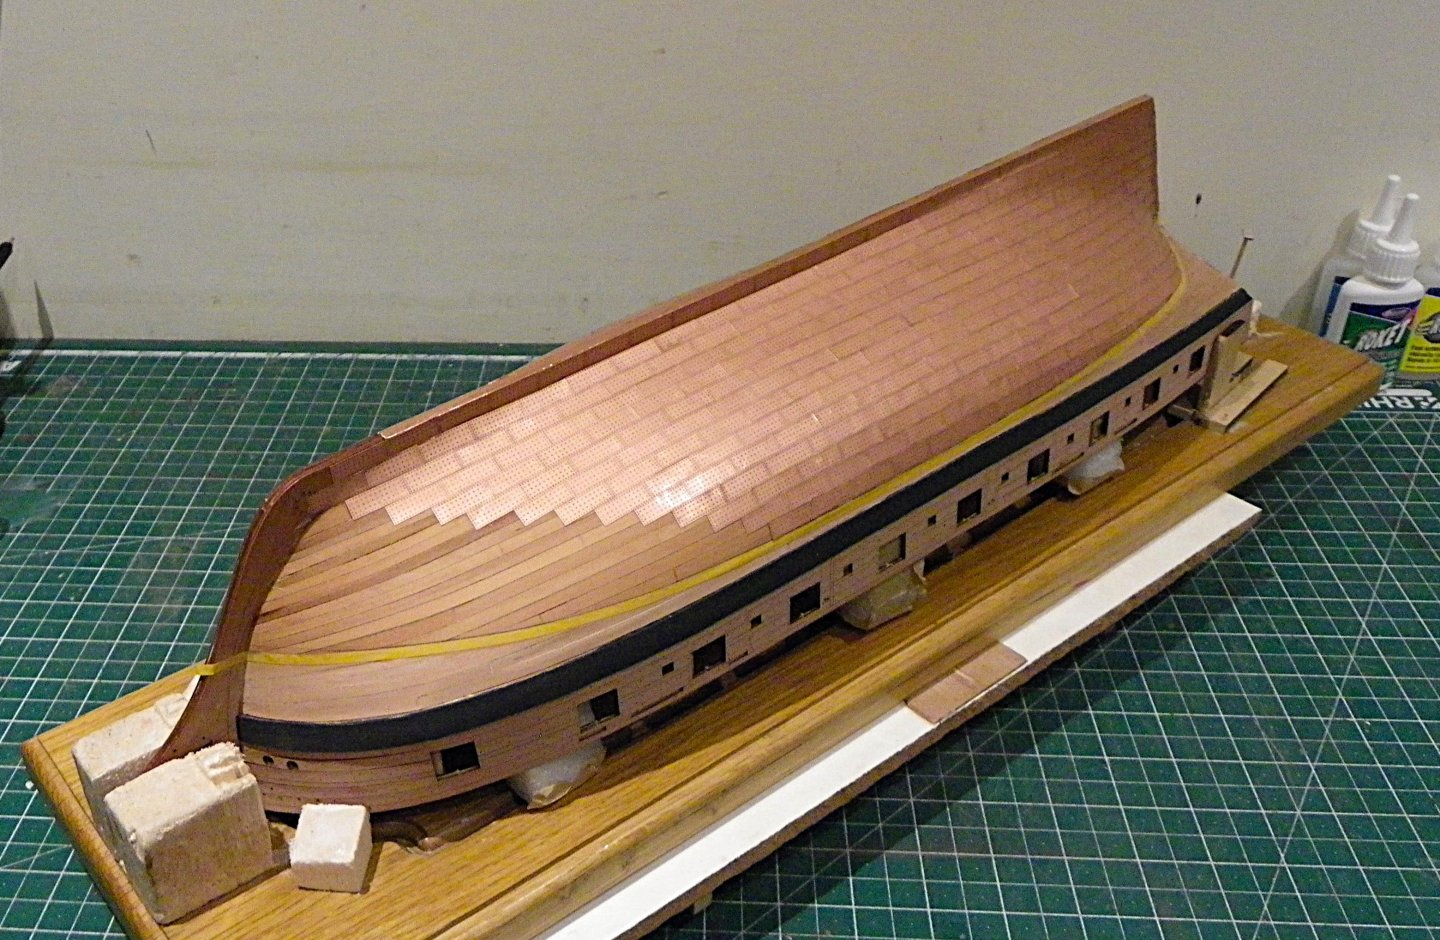
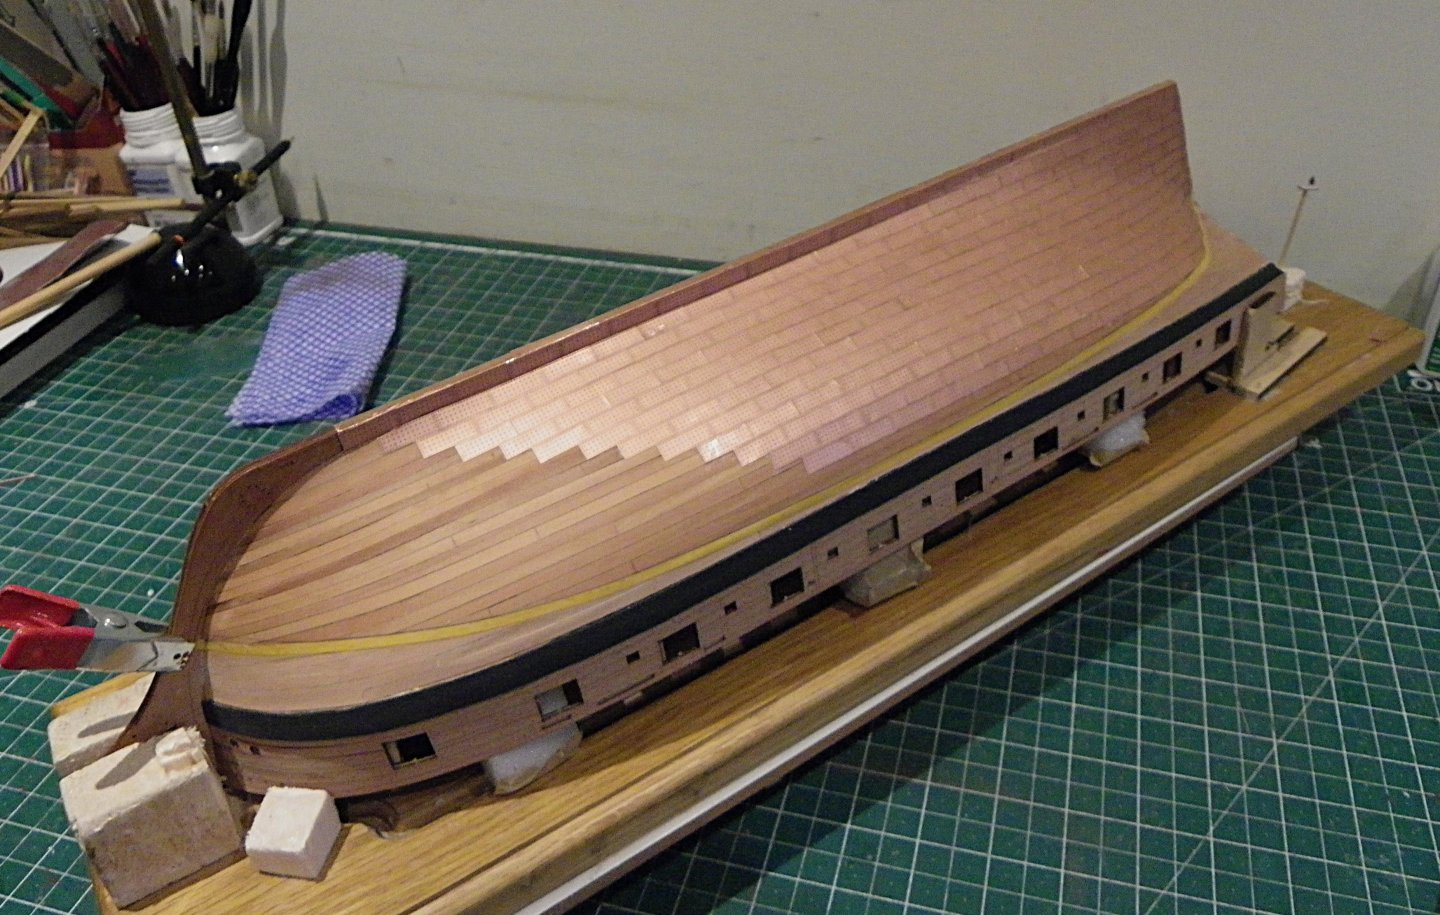
That's a cracking shot of your 64, Ron, and the copper colour is spot on for what I'm after. Love the small details - lead sheathing on the stem and Tompions in the Hawse holes. 👍 Post 39 Thinking about the deck As with Indy and Sphinx I want to leave as much of the lower deck open to view as is practical. The ply sub-deck gives the basic shape to be over-planked but the area will be increased sufficiently to house the carronades. 0384 At the bow around the Fore-Mast I have cut away an area to show more detail of the forward cabins. This necessitates adding carlings to the deck beam behind the mast to support the mast partners. Retro fitting carlings is a little tricky. The centre line of the boat will be planked where necessary between the various fittings. Hatchways and Companionways will be fitted before planking. Chris has designed these to fit within the etched deck cut-outs, directly on the beams, so I don’t need to make adjustments to the height of the coamings etc. The first job is to make up and fit the grating sets. Quite time consuming the assembly and fettlin’ of these items, there is a lot of heavy char to be removed. It pays to take time, they will be prominent features of the Upper deck. 0435 For the first time on a build, I have not had to add a round-up to the head ledges of the coamings, Chris has included this feature in the parts.👍 0393 Veneers wettened and clamped around a suitable former, in my case a plan tube, are used to cover the coamings/ head ledges. The instruction suggest leaving them for 36 hours before use, but I blast them with the hair dryer and leave overnight. I perceive on the gratings a sort of ribbed effect I have not noticed on previous builds. They benefit from a light sanding to reduce this. 0402 The Instructions suggest that rounding the gratings isn’t necessary; I found it of benefit, and I applied the hairdryer treatment but without dampening the grates. 0404 Main Hatch 0432 The only issue I had with assembly was with the Fore grating and stove chimney cover. I had to add side pieces to get a good fit. All these fittings are in their raw state at present. When going off-piste with the decking it is advisable to check out all the fittings to ensure sufficient deck planking is in place. 0423 0424 Here the riding bitts and standards are dry fitted. I will need to support the standards with decking. 0412 Additional carlings were required to support the small steam grating above the stove grate, which otherwise just sits on the etched deck. 0414 Not sure what the small cut-outs on this grating are for? They almost look like a fault. 0417 0419 0420 All the char will now be removed and the centre line fittings glued into place. B.E. 19/02/2025


- 332 replies
-
- 21
-
-
- Harpy
- Vanguard Models
- (and 1 more)
-
Thank you Mark, TJM, and Alan. @ TJM - I was hoping to avoid the nasty stuff like Ammonia and Copper sulphate, and even the option of hard boiled eggs would require a large bag to to hold the hull, and a fair bit of puff to inflate it. @ Mark - I'm in no hurry to follow this up. @ Alan - I have kept the test samples exposed to air pinned to my plan board, I will leave them to mature. 0394 You can see the current state compared to the virgin plates for the Rudder. B.E.

- 332 replies
-
- 8
-
-
- Harpy
- Vanguard Models
- (and 1 more)
-
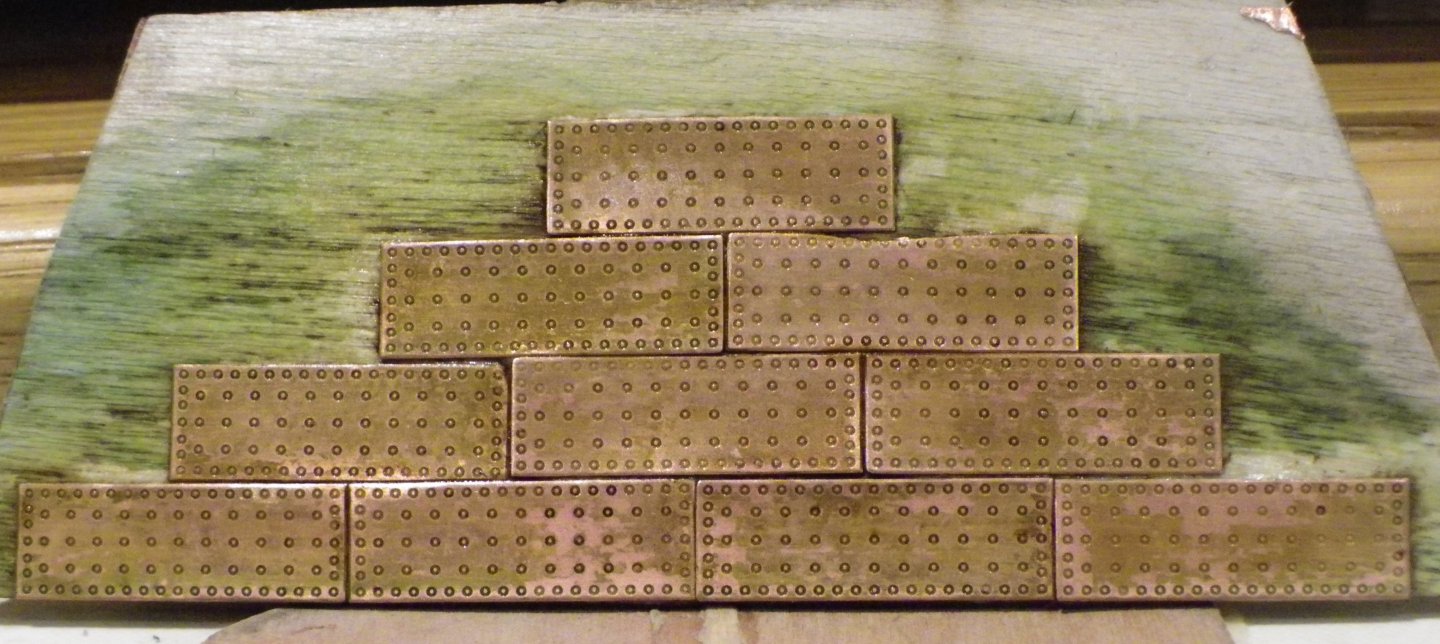
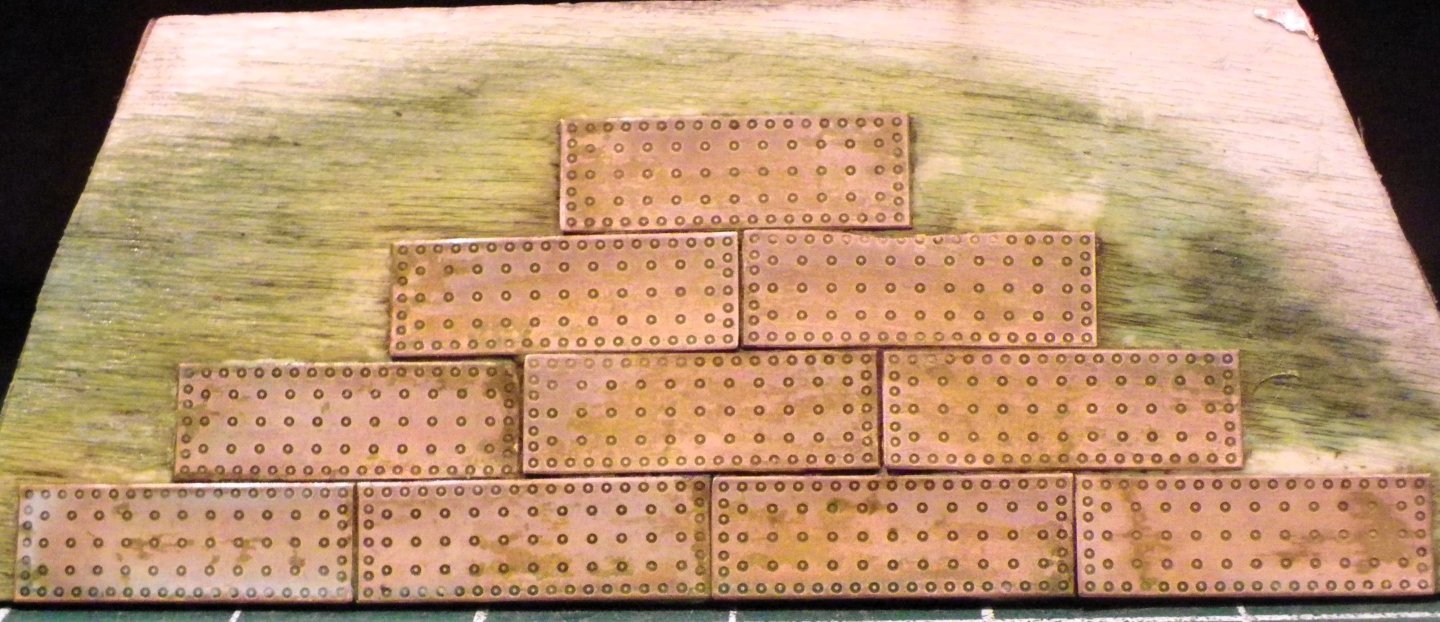
Hi John, I was spoilt really by the beautifully matched Pear wood I obtained from Hobbymill E.U. that I used on my Sphinx and Indy builds. I thought I would get away with it on Harpy as there was to be only a few strakes on view. I dare say I will grow to love it.🫤 Cheers, B.E. Post 38 Thinking about Patina. During the plating I had also been playing around with patina. I set up a test sample of plates. Day 1 0204 These were scoured using fine steel wool, followed by cleaning with acid dip and Isopropanol. Having long been a fan of the copper finish achieved by Alistair (Aliluke) on his ‘Fly’ build. I next tried his ‘natural’ approach. Unusual maybe, but the chemical is widely available, free, and instantly on tap. 0278 0279 My own supply had no instant effect, but after several applications over several hours this is the result. 0284 Washed with clean water, and a comparison with the old penny look I am after. A way to go yet, I think. 0286 A further application and left overnight. 0287 Again, washed with clean water. If I was looking for a weathered effect maybe, but not what I’m after. Day 2 Fresh supplies and several more applications. 0288 Result after overnight. 0289 I am also applying the urine method to a sample of plates as supplied, without any cleaning beyond a wipe with isopropanol. Day 3 0349 More fresh supplies, and several applications later, and result overnight. Not a great deal of difference. 0353 Neither with the other sample. Day 4 0382 Not much changed, and I’m not impressed with the look. I prefer the look on the model as is rather than either the rather dirty looking treated plates, or a bright and shiny look that would result from the wire wool treatment. Movin’ on… B.E. 18/02/2025


- 332 replies
-
- 17
-
-
- Harpy
- Vanguard Models
- (and 1 more)
-
Nice work on those Drop planks Richard.👍 B.E.
-
Thank you Frank, and you're welcome. My Pegasus build was on the stocks for 7 years which makes your build now in its 15th year. The standard of fittings now available are so much better, look up Vanguard Models, run by the original designer of the Amati Pegasus kit, Chris Watton. Regards, B.E.
-
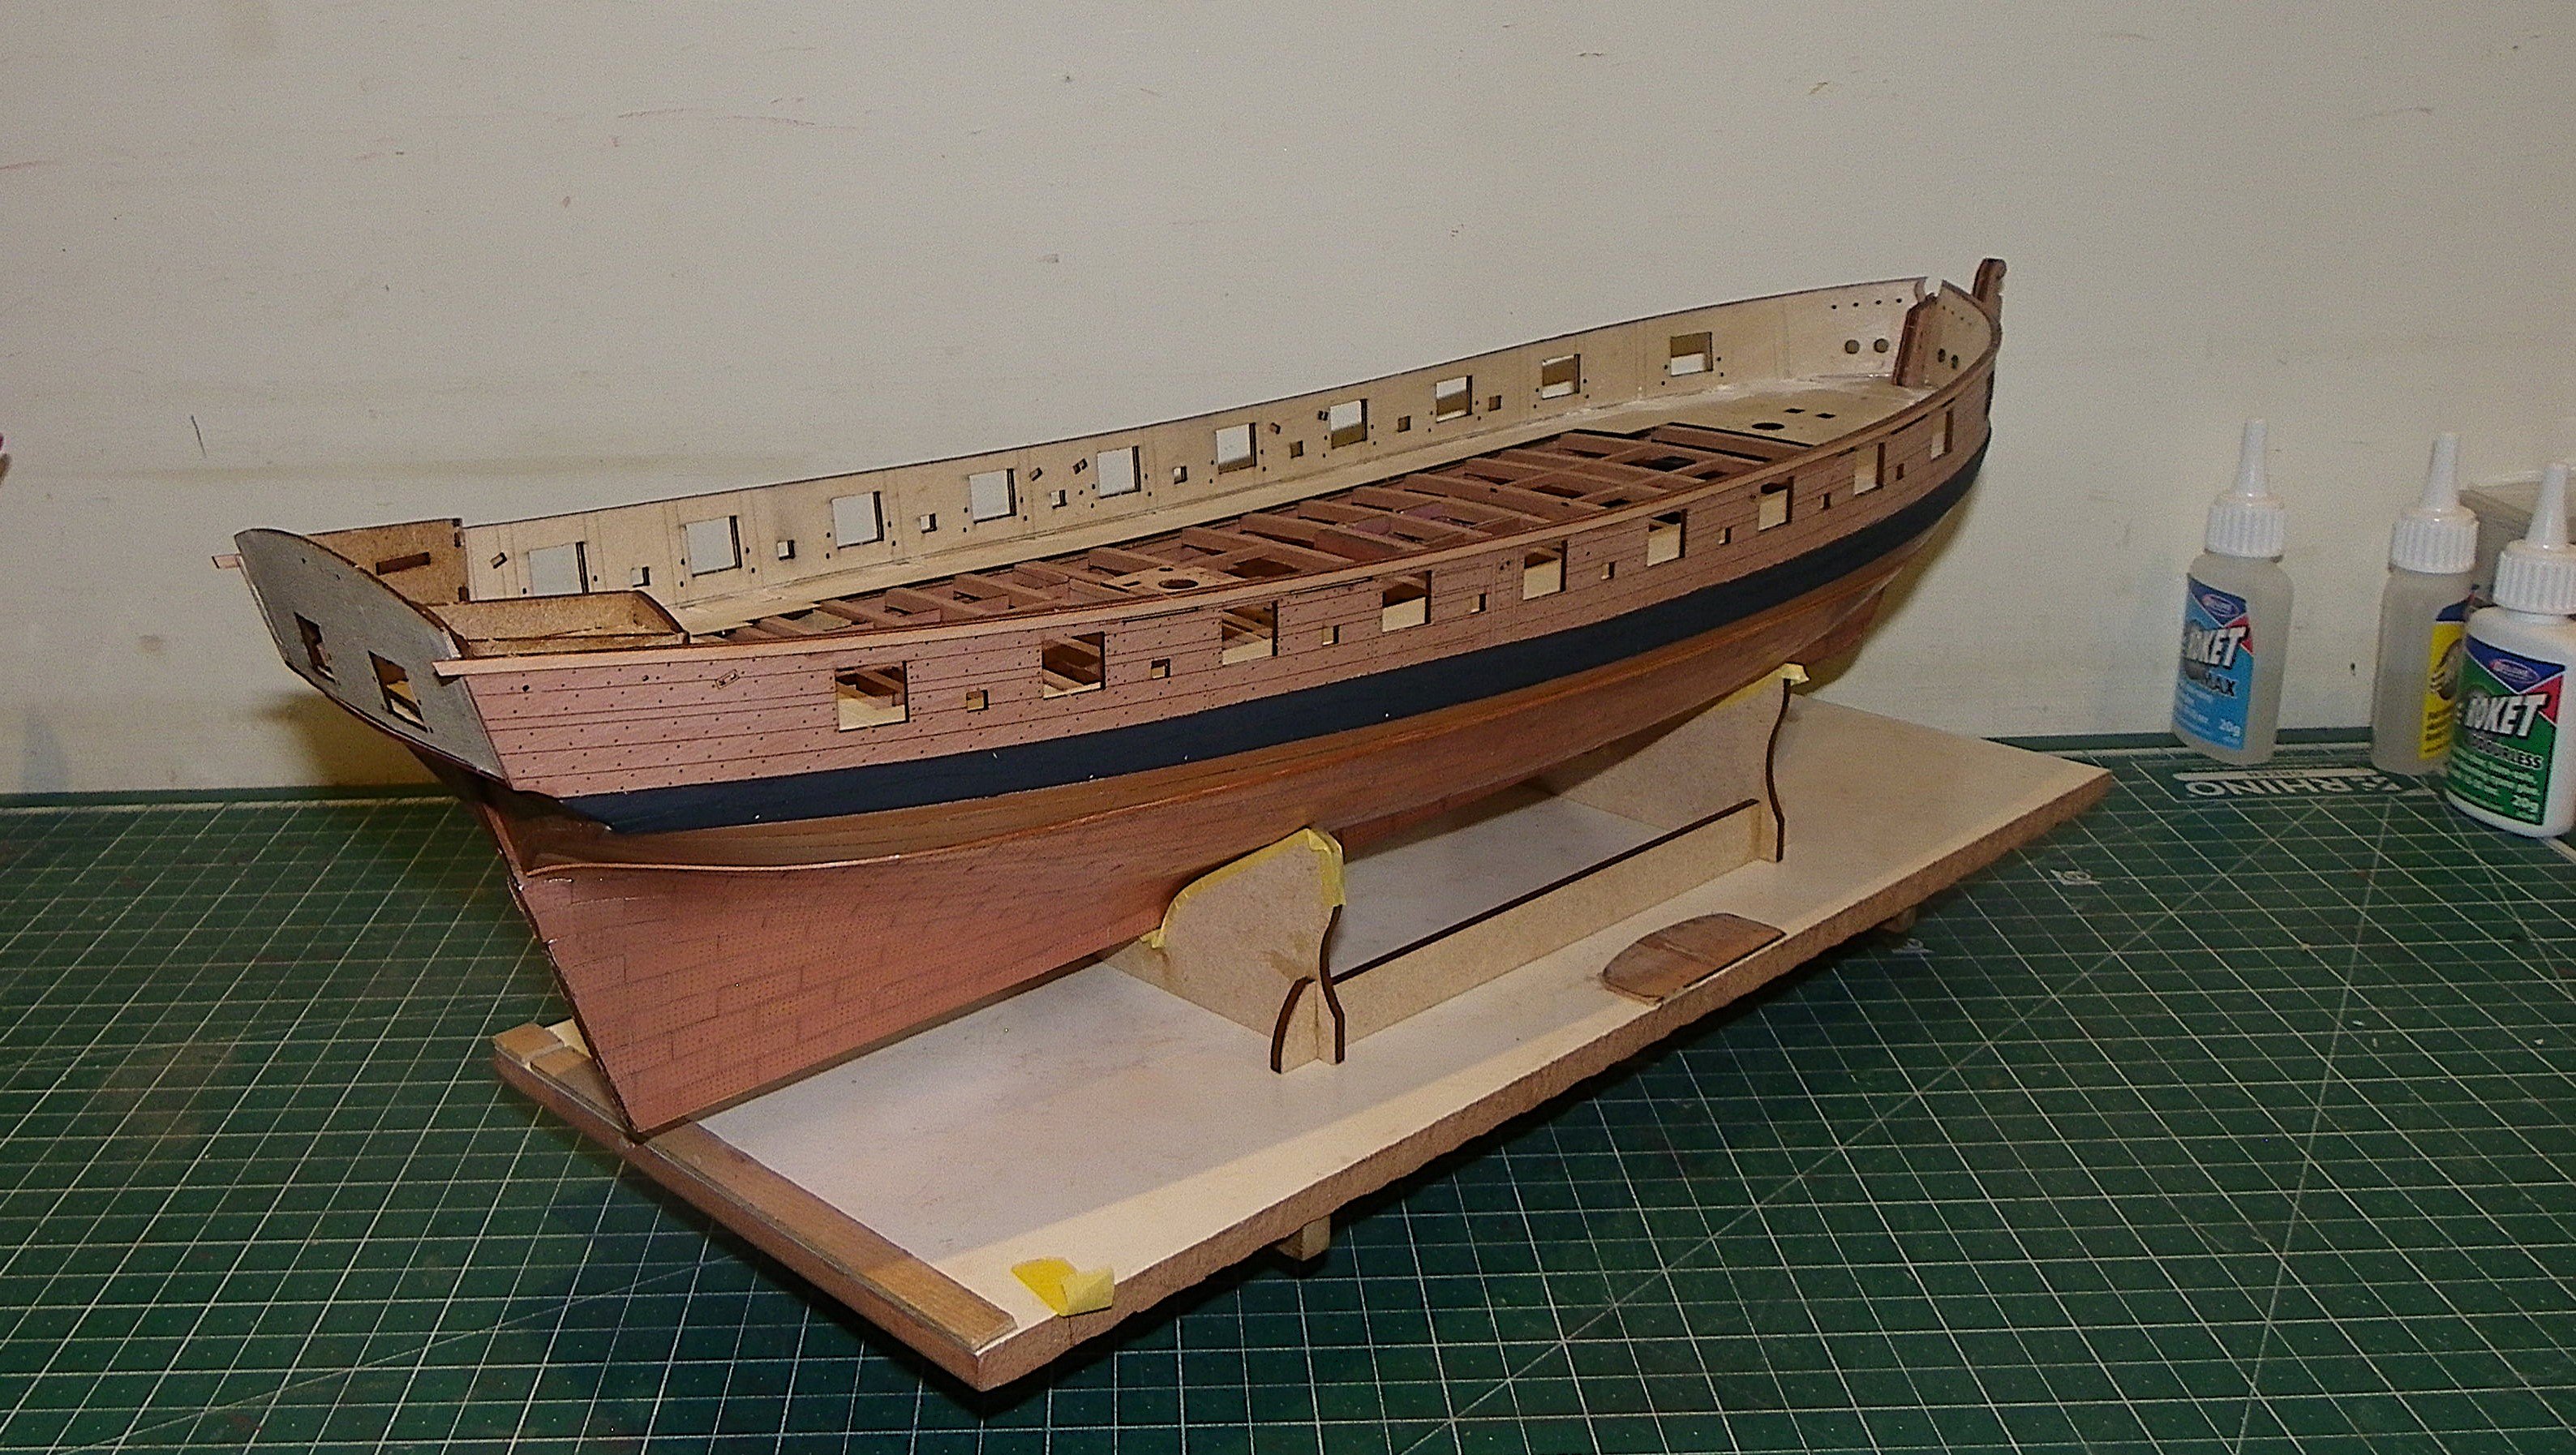
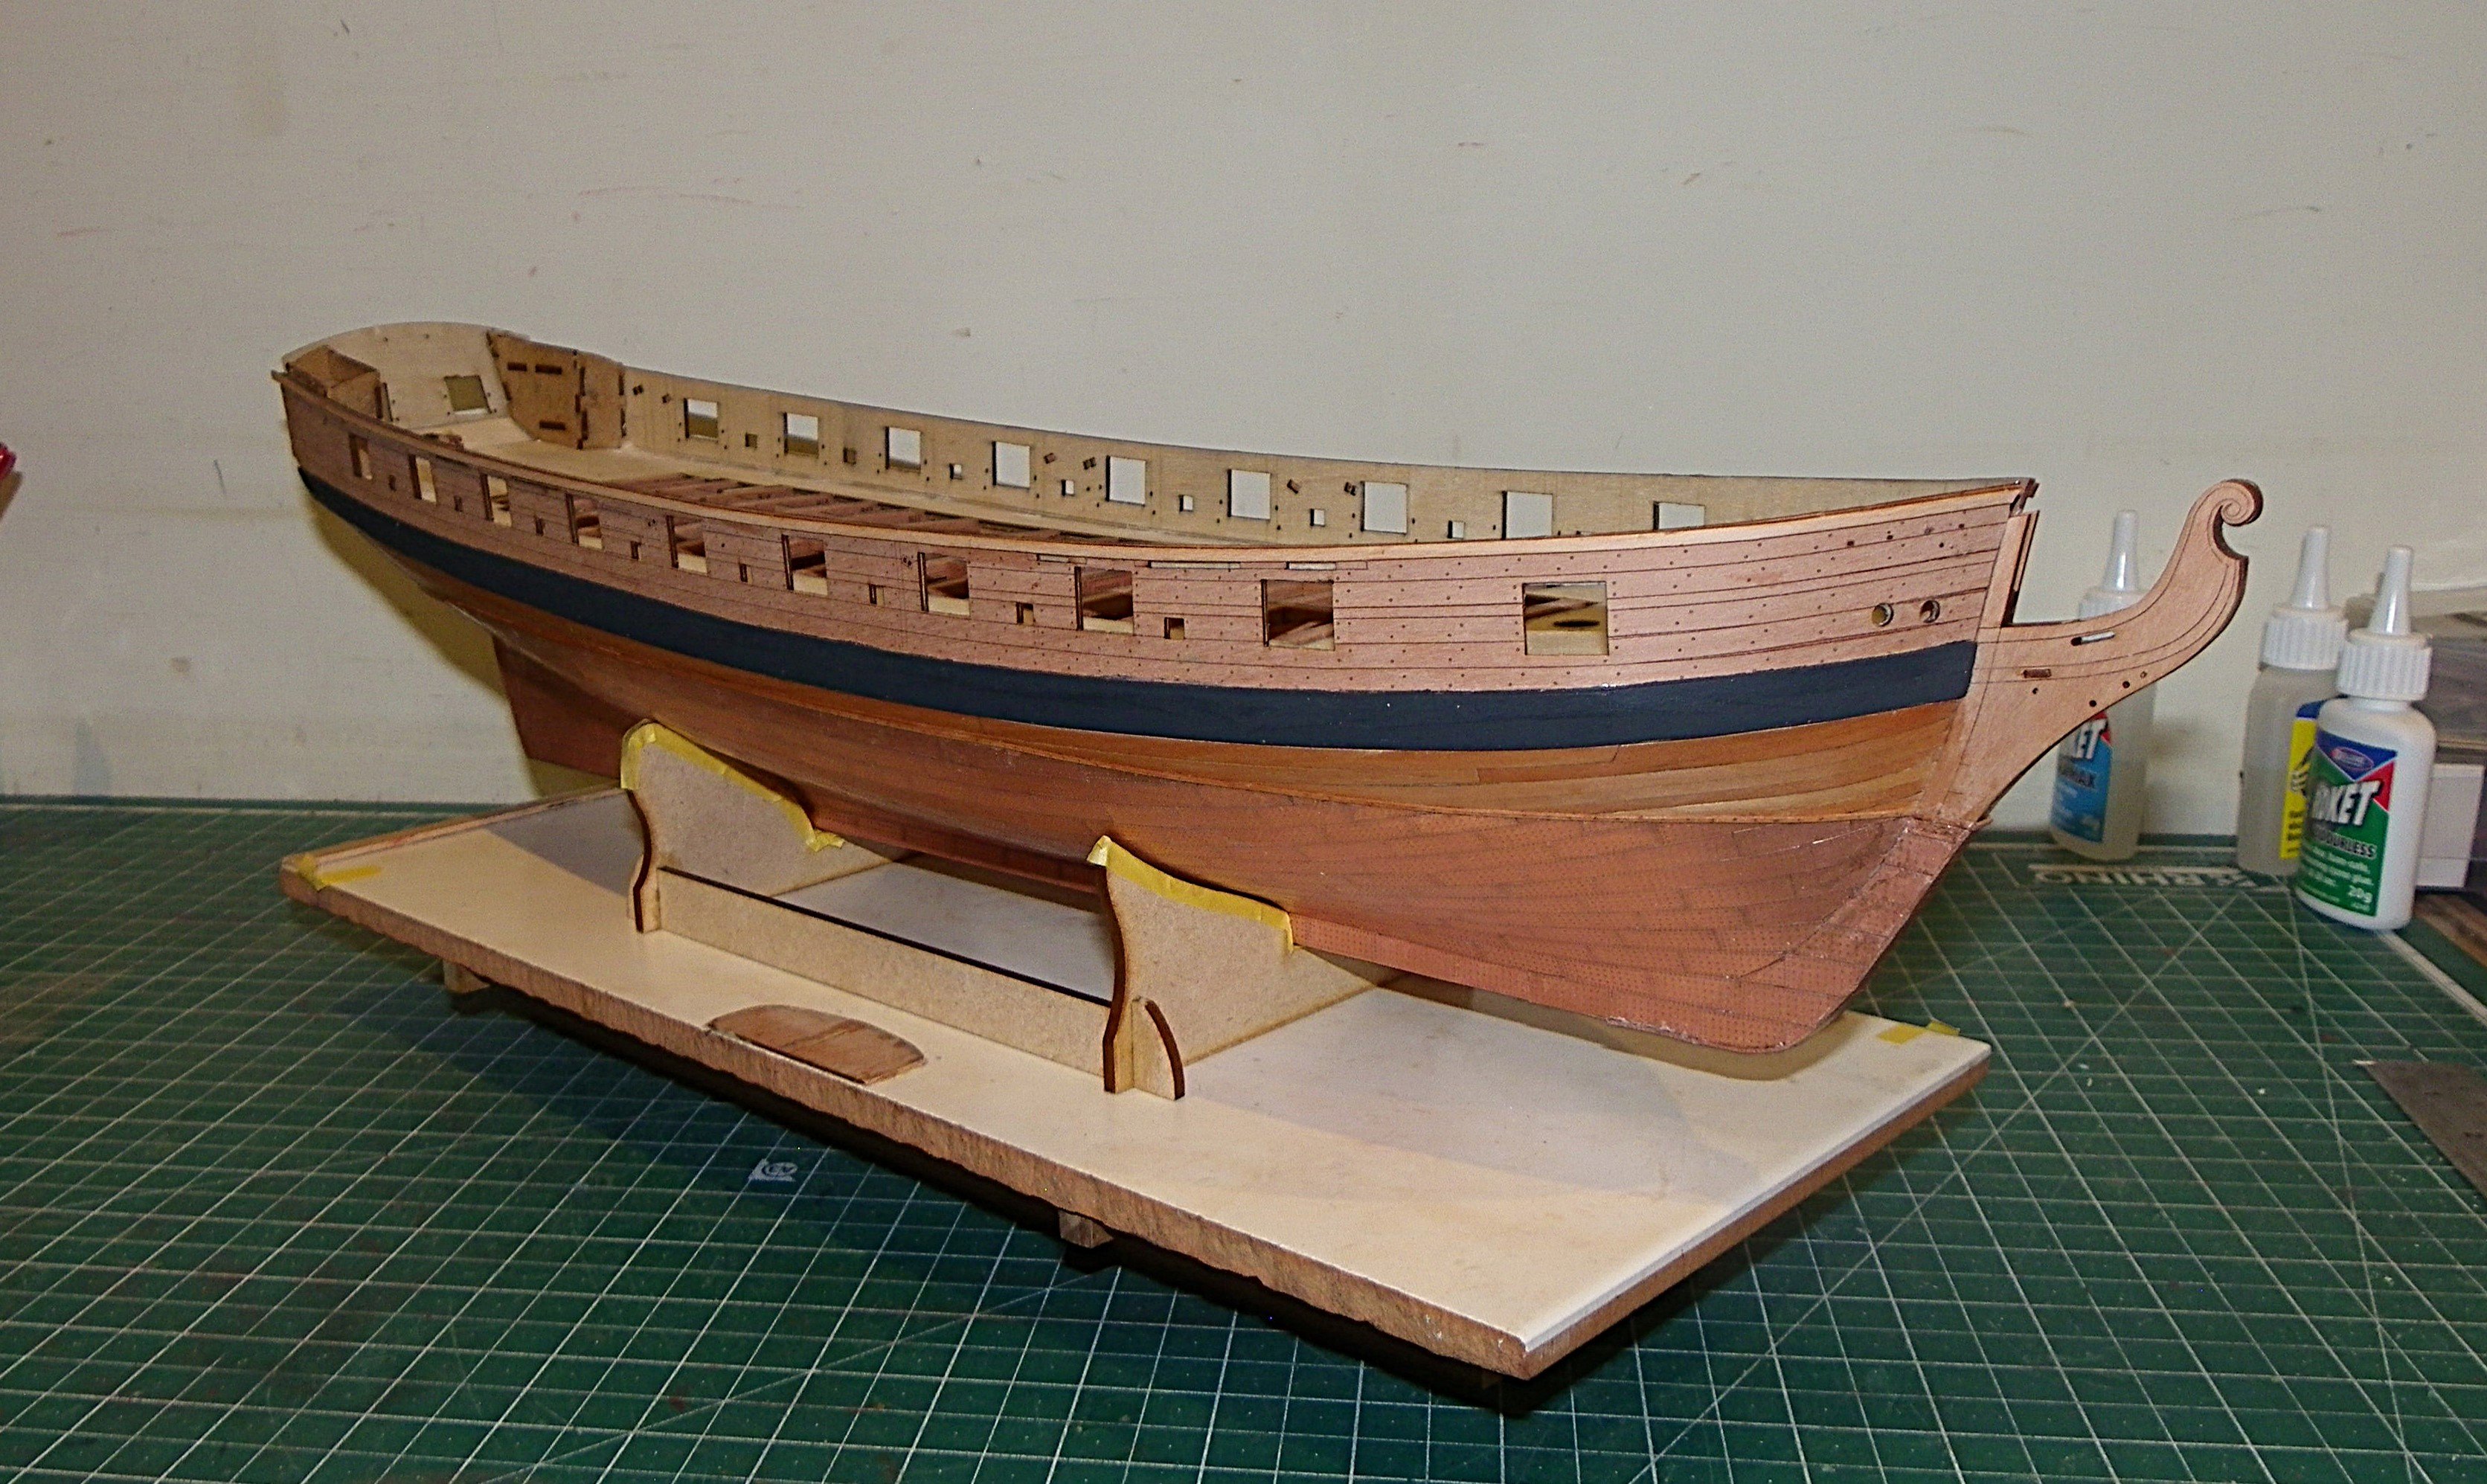
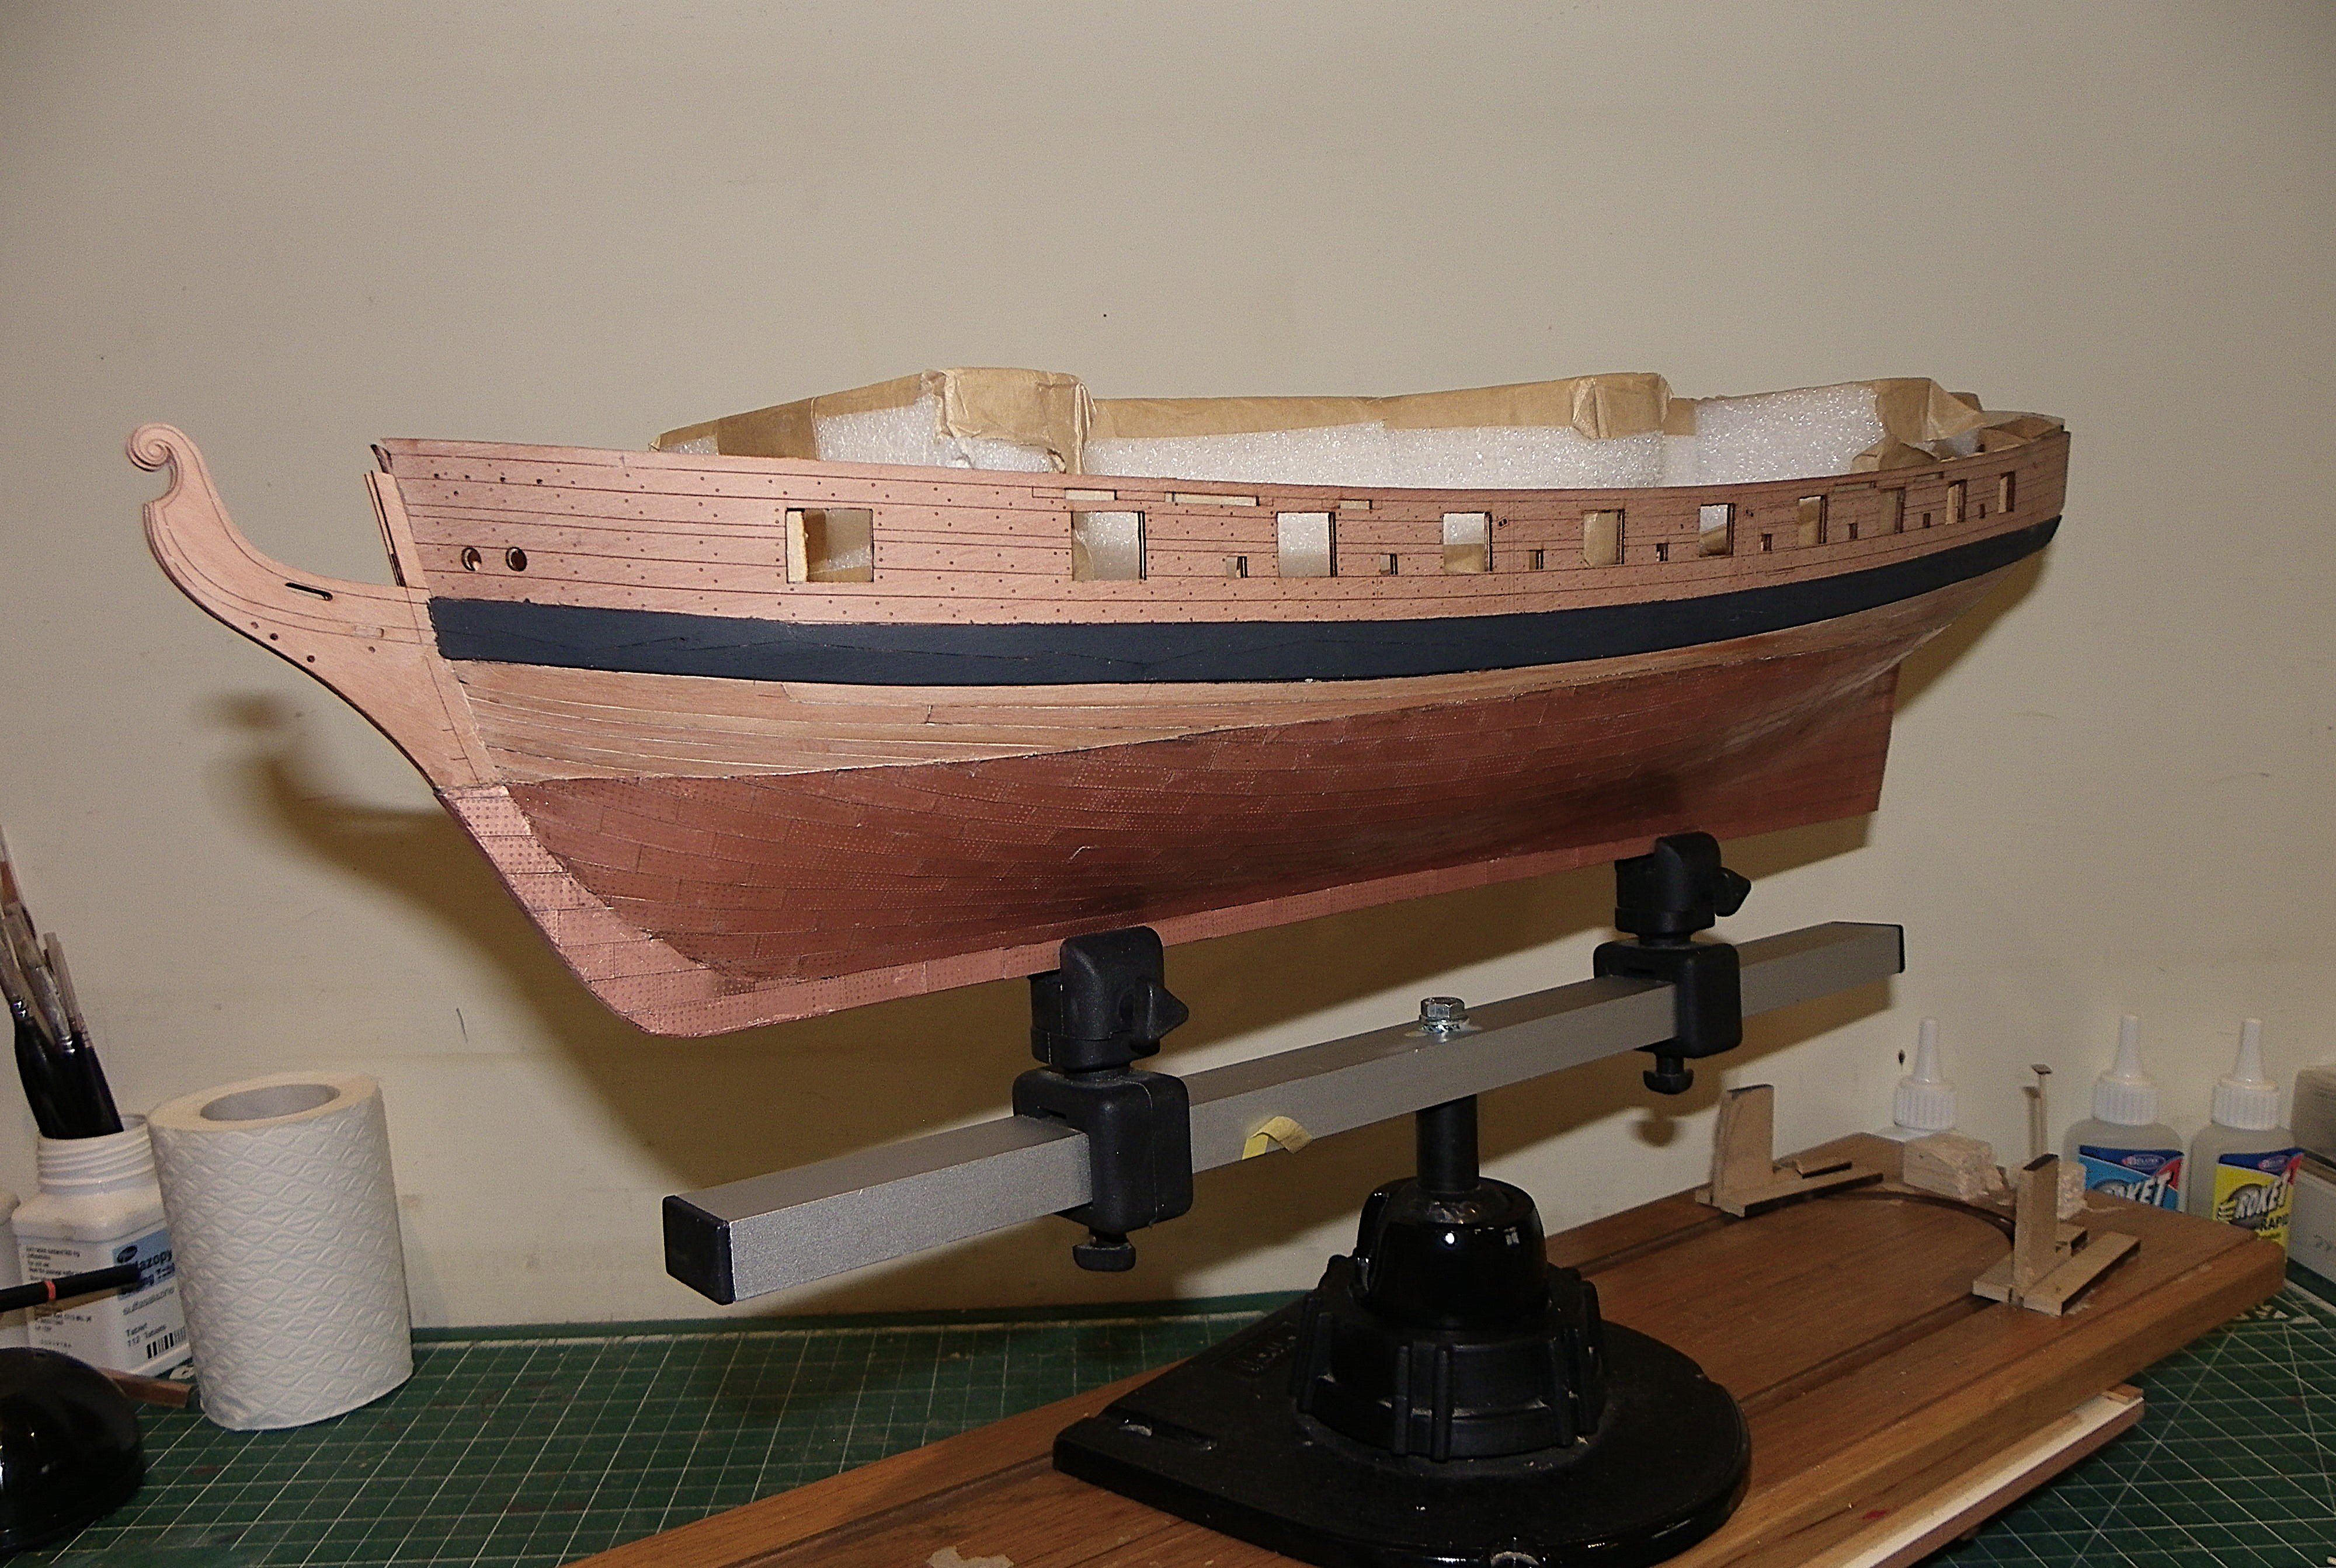
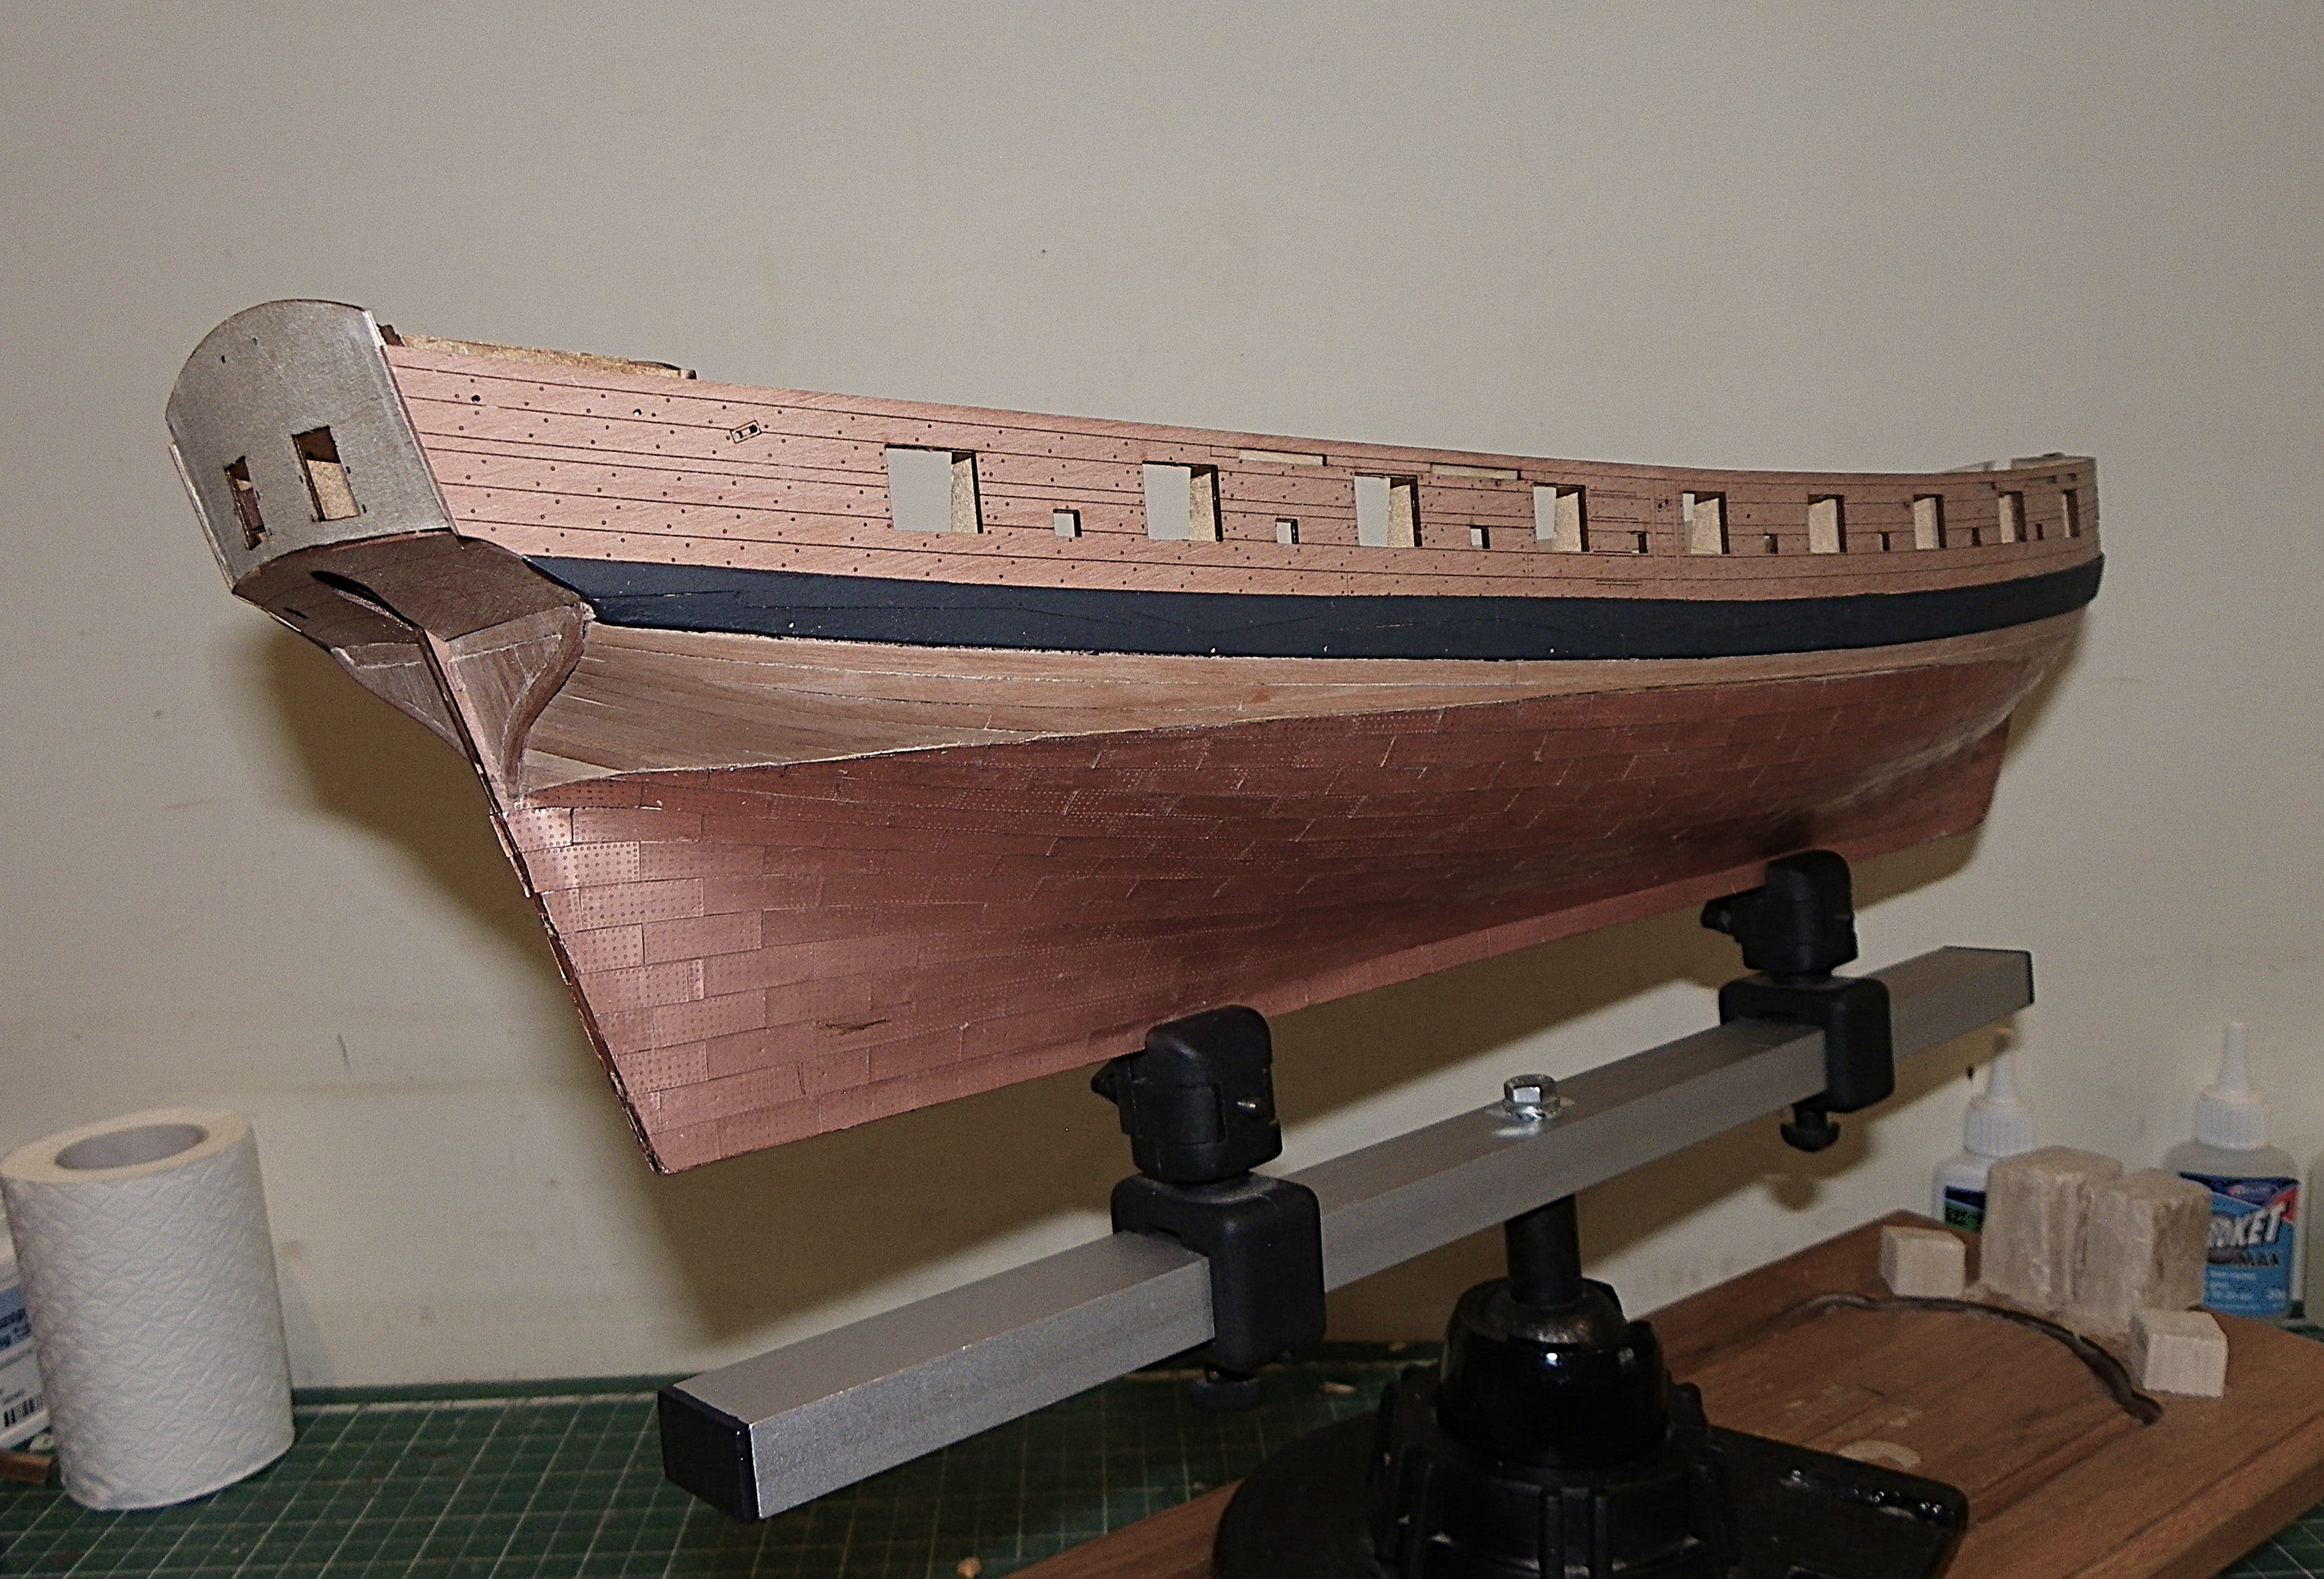
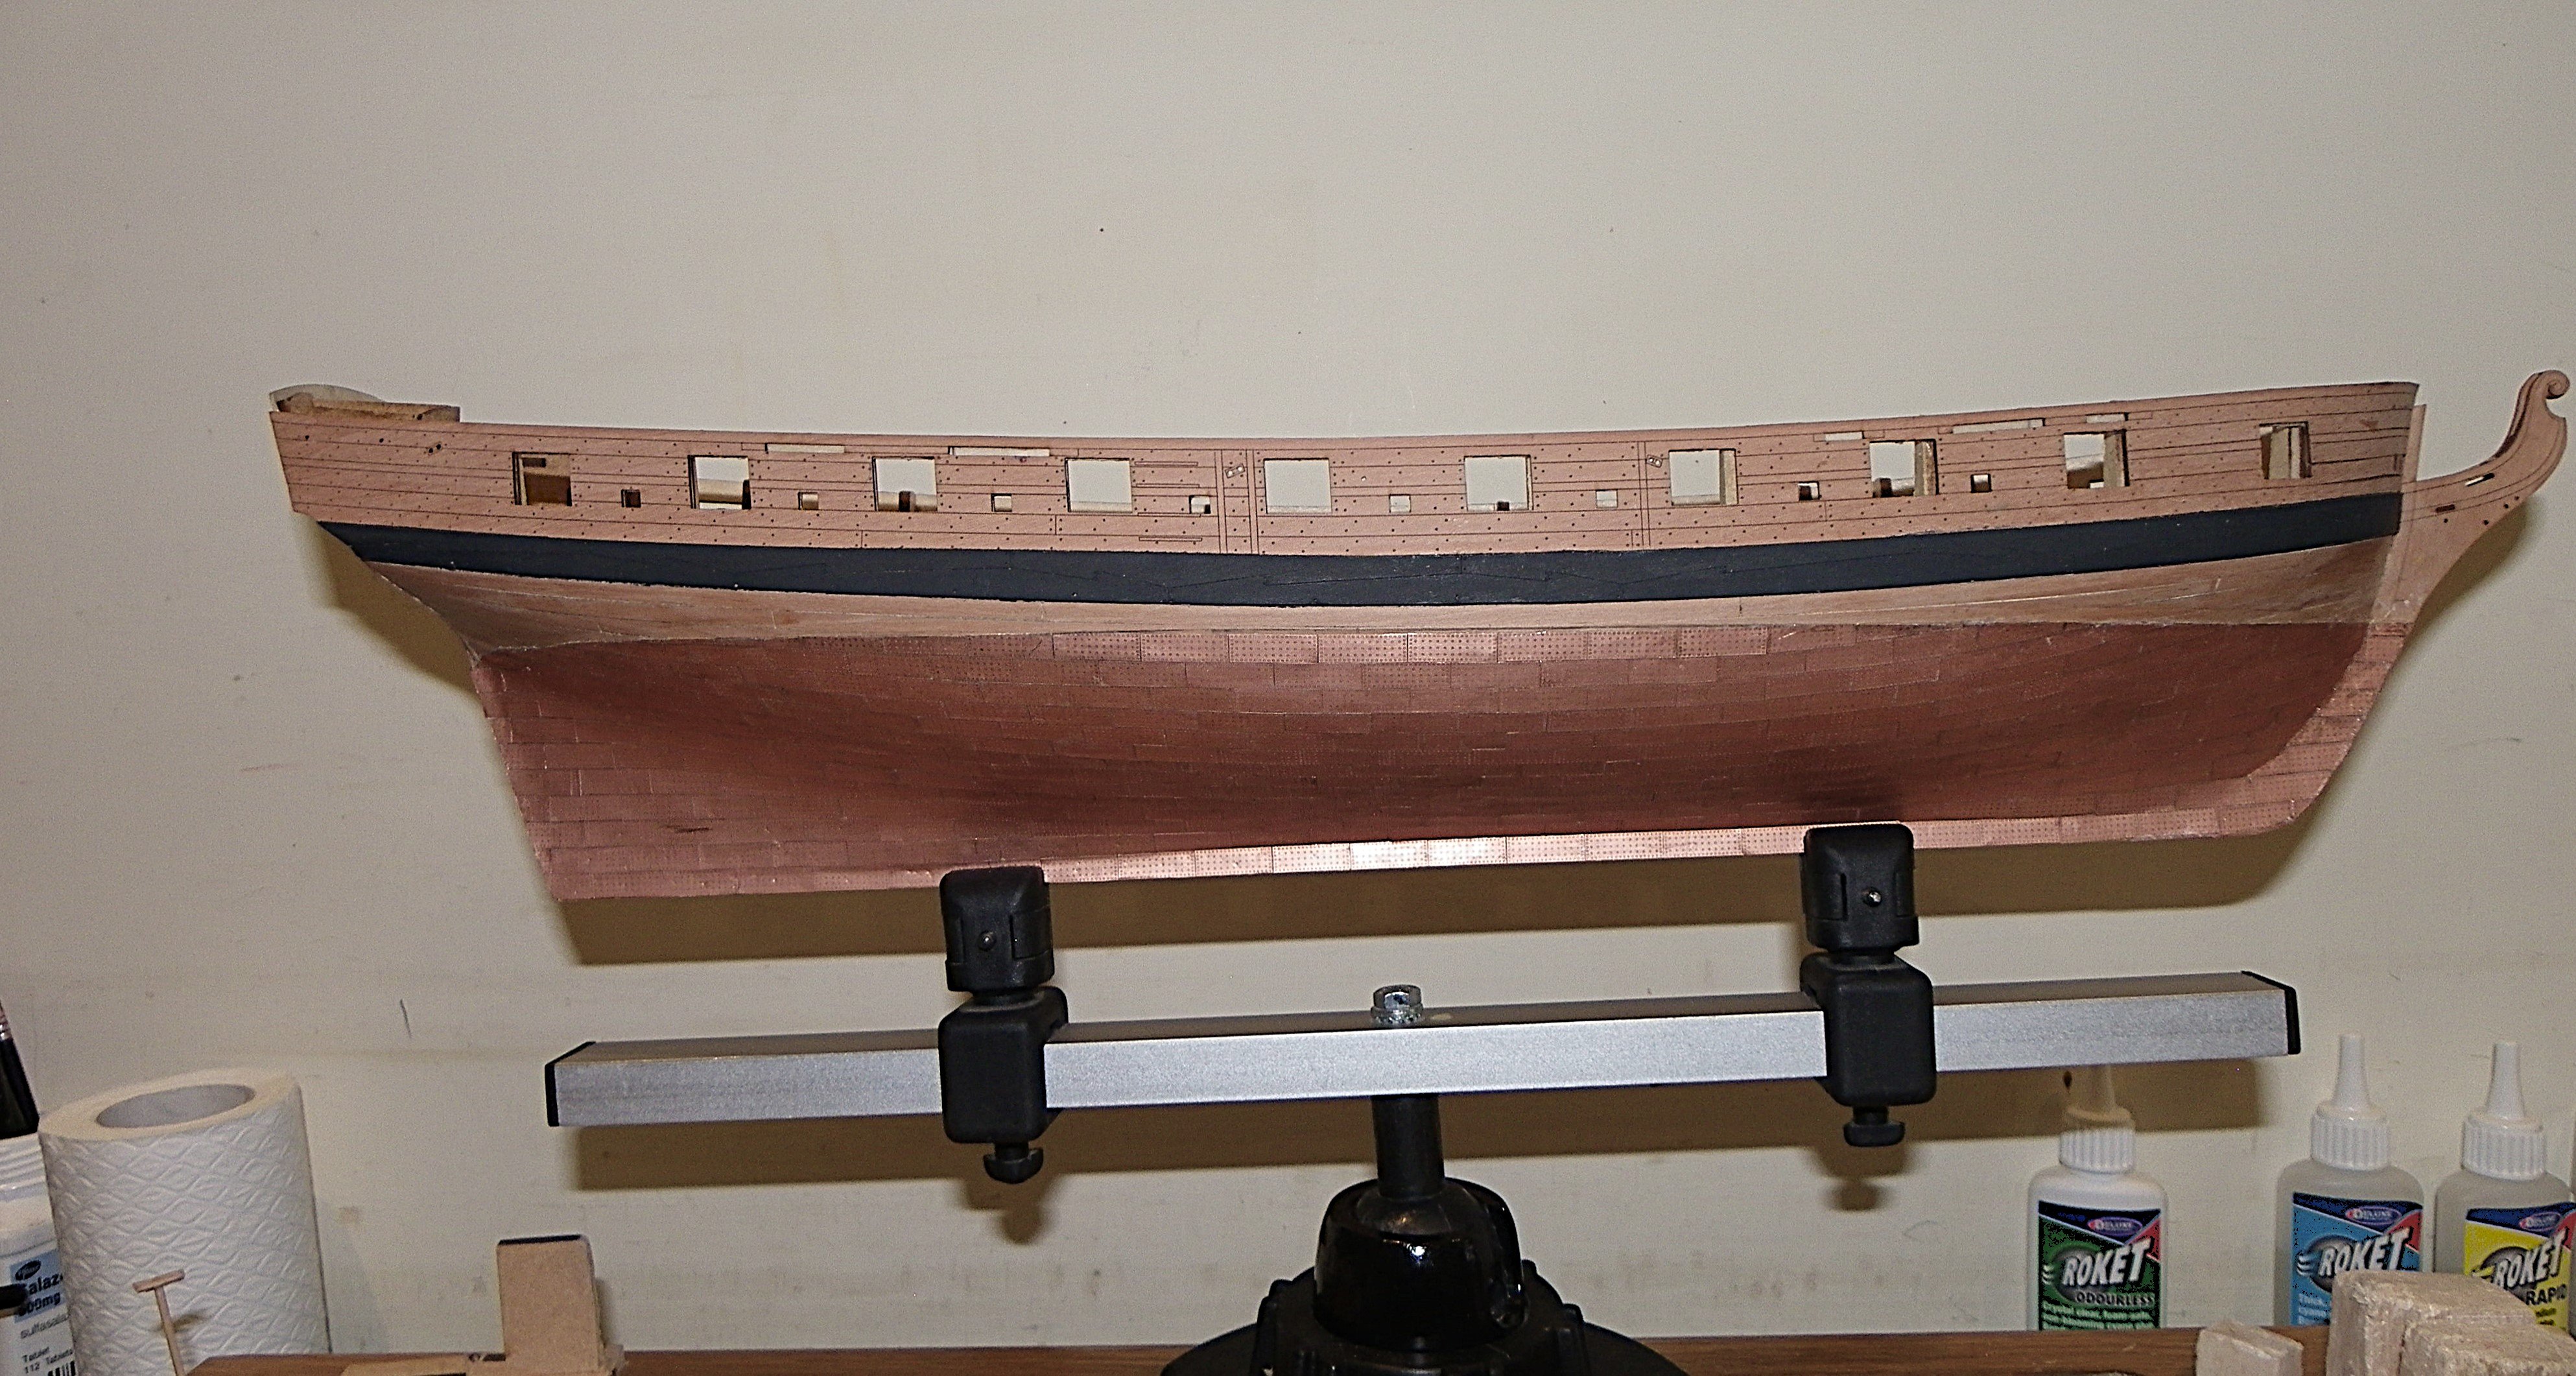
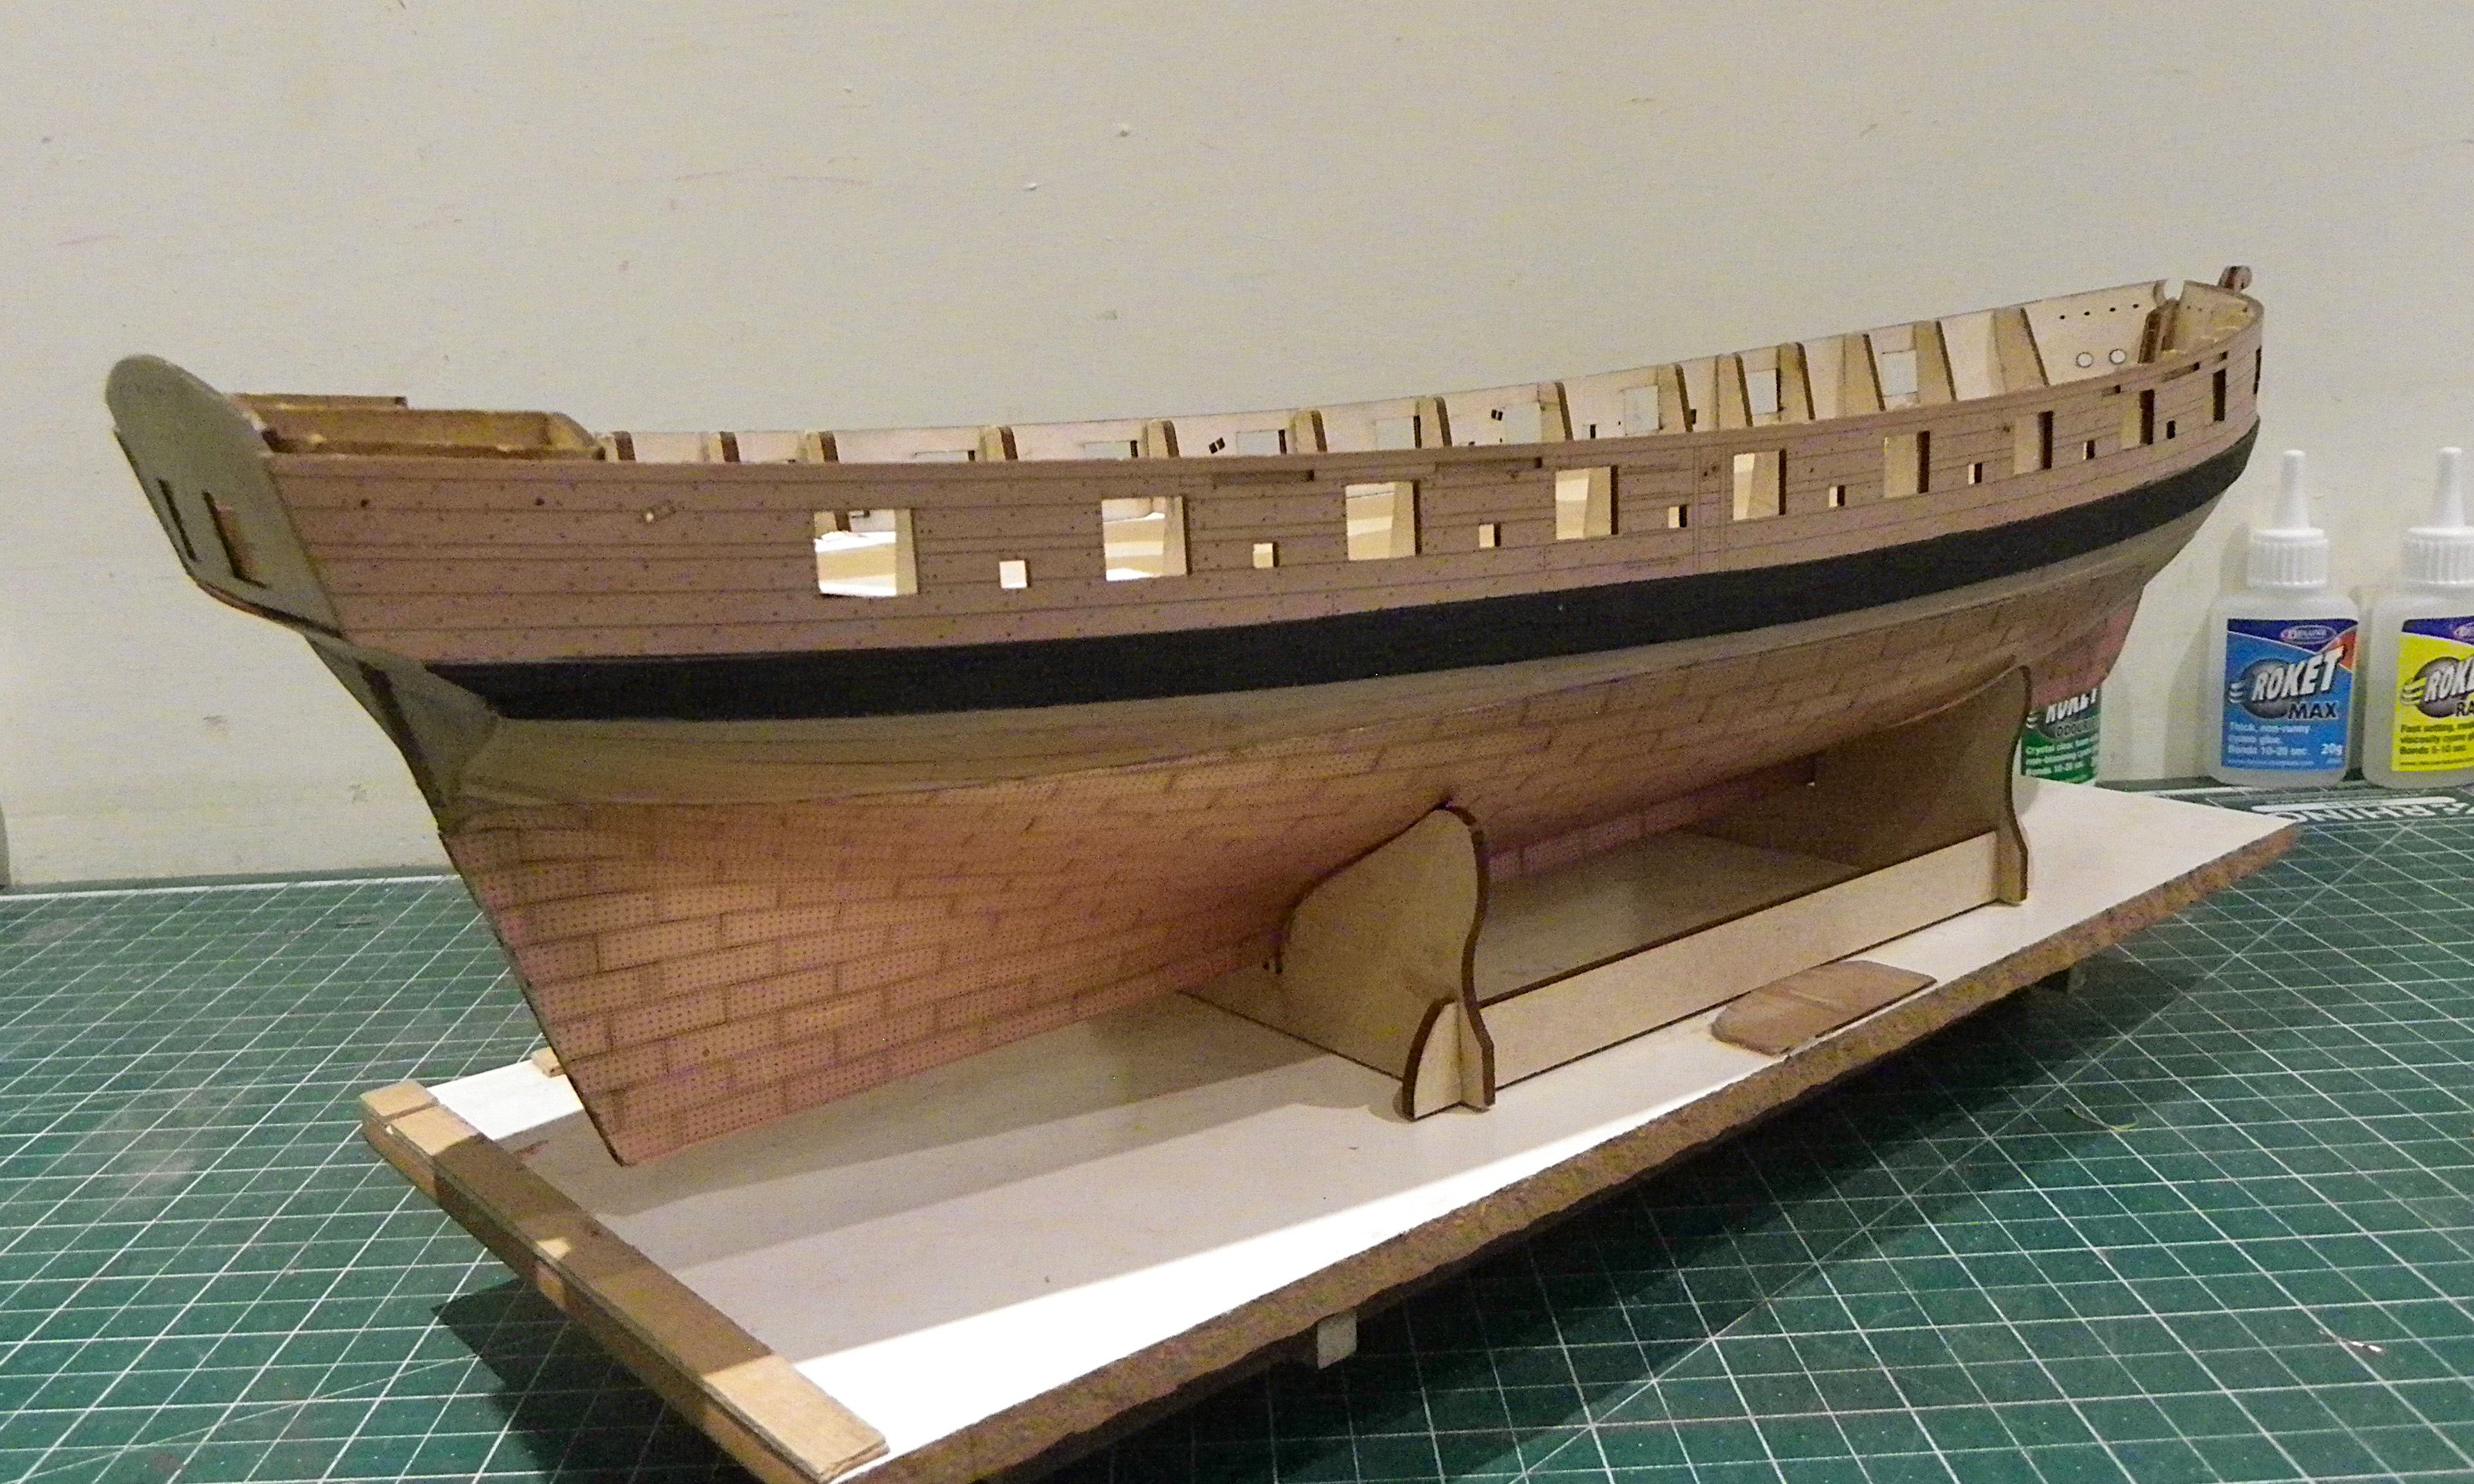
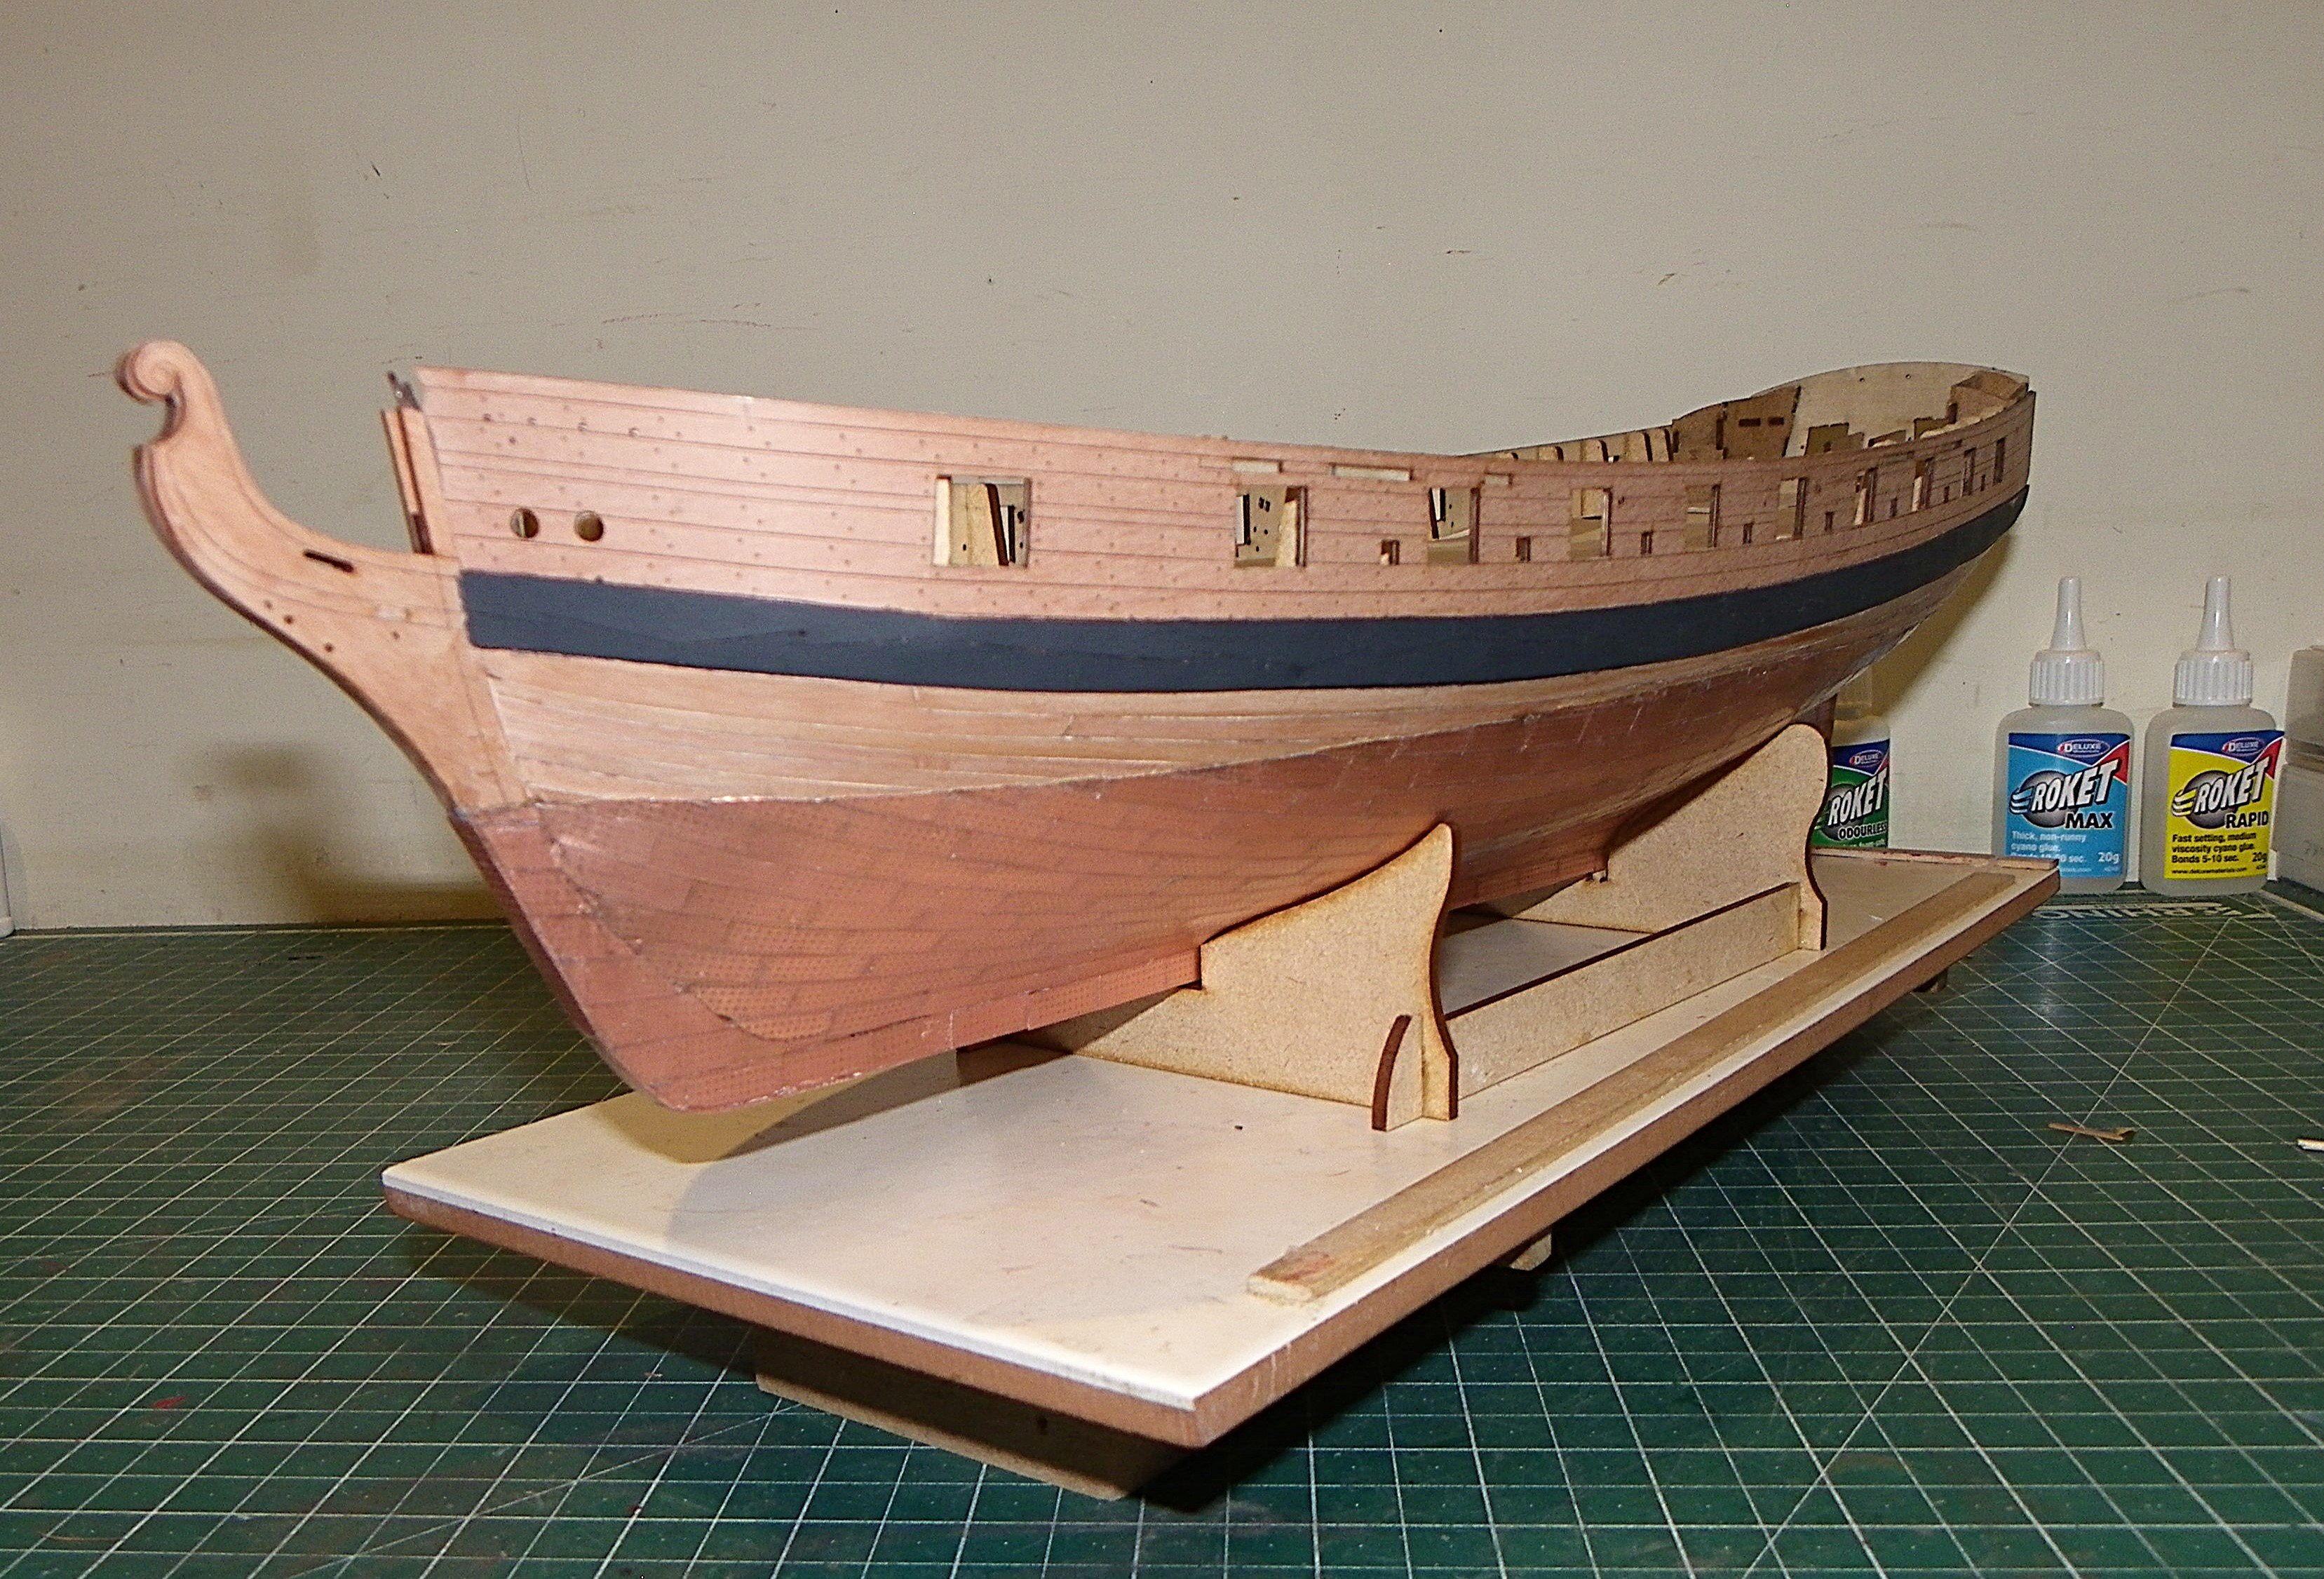
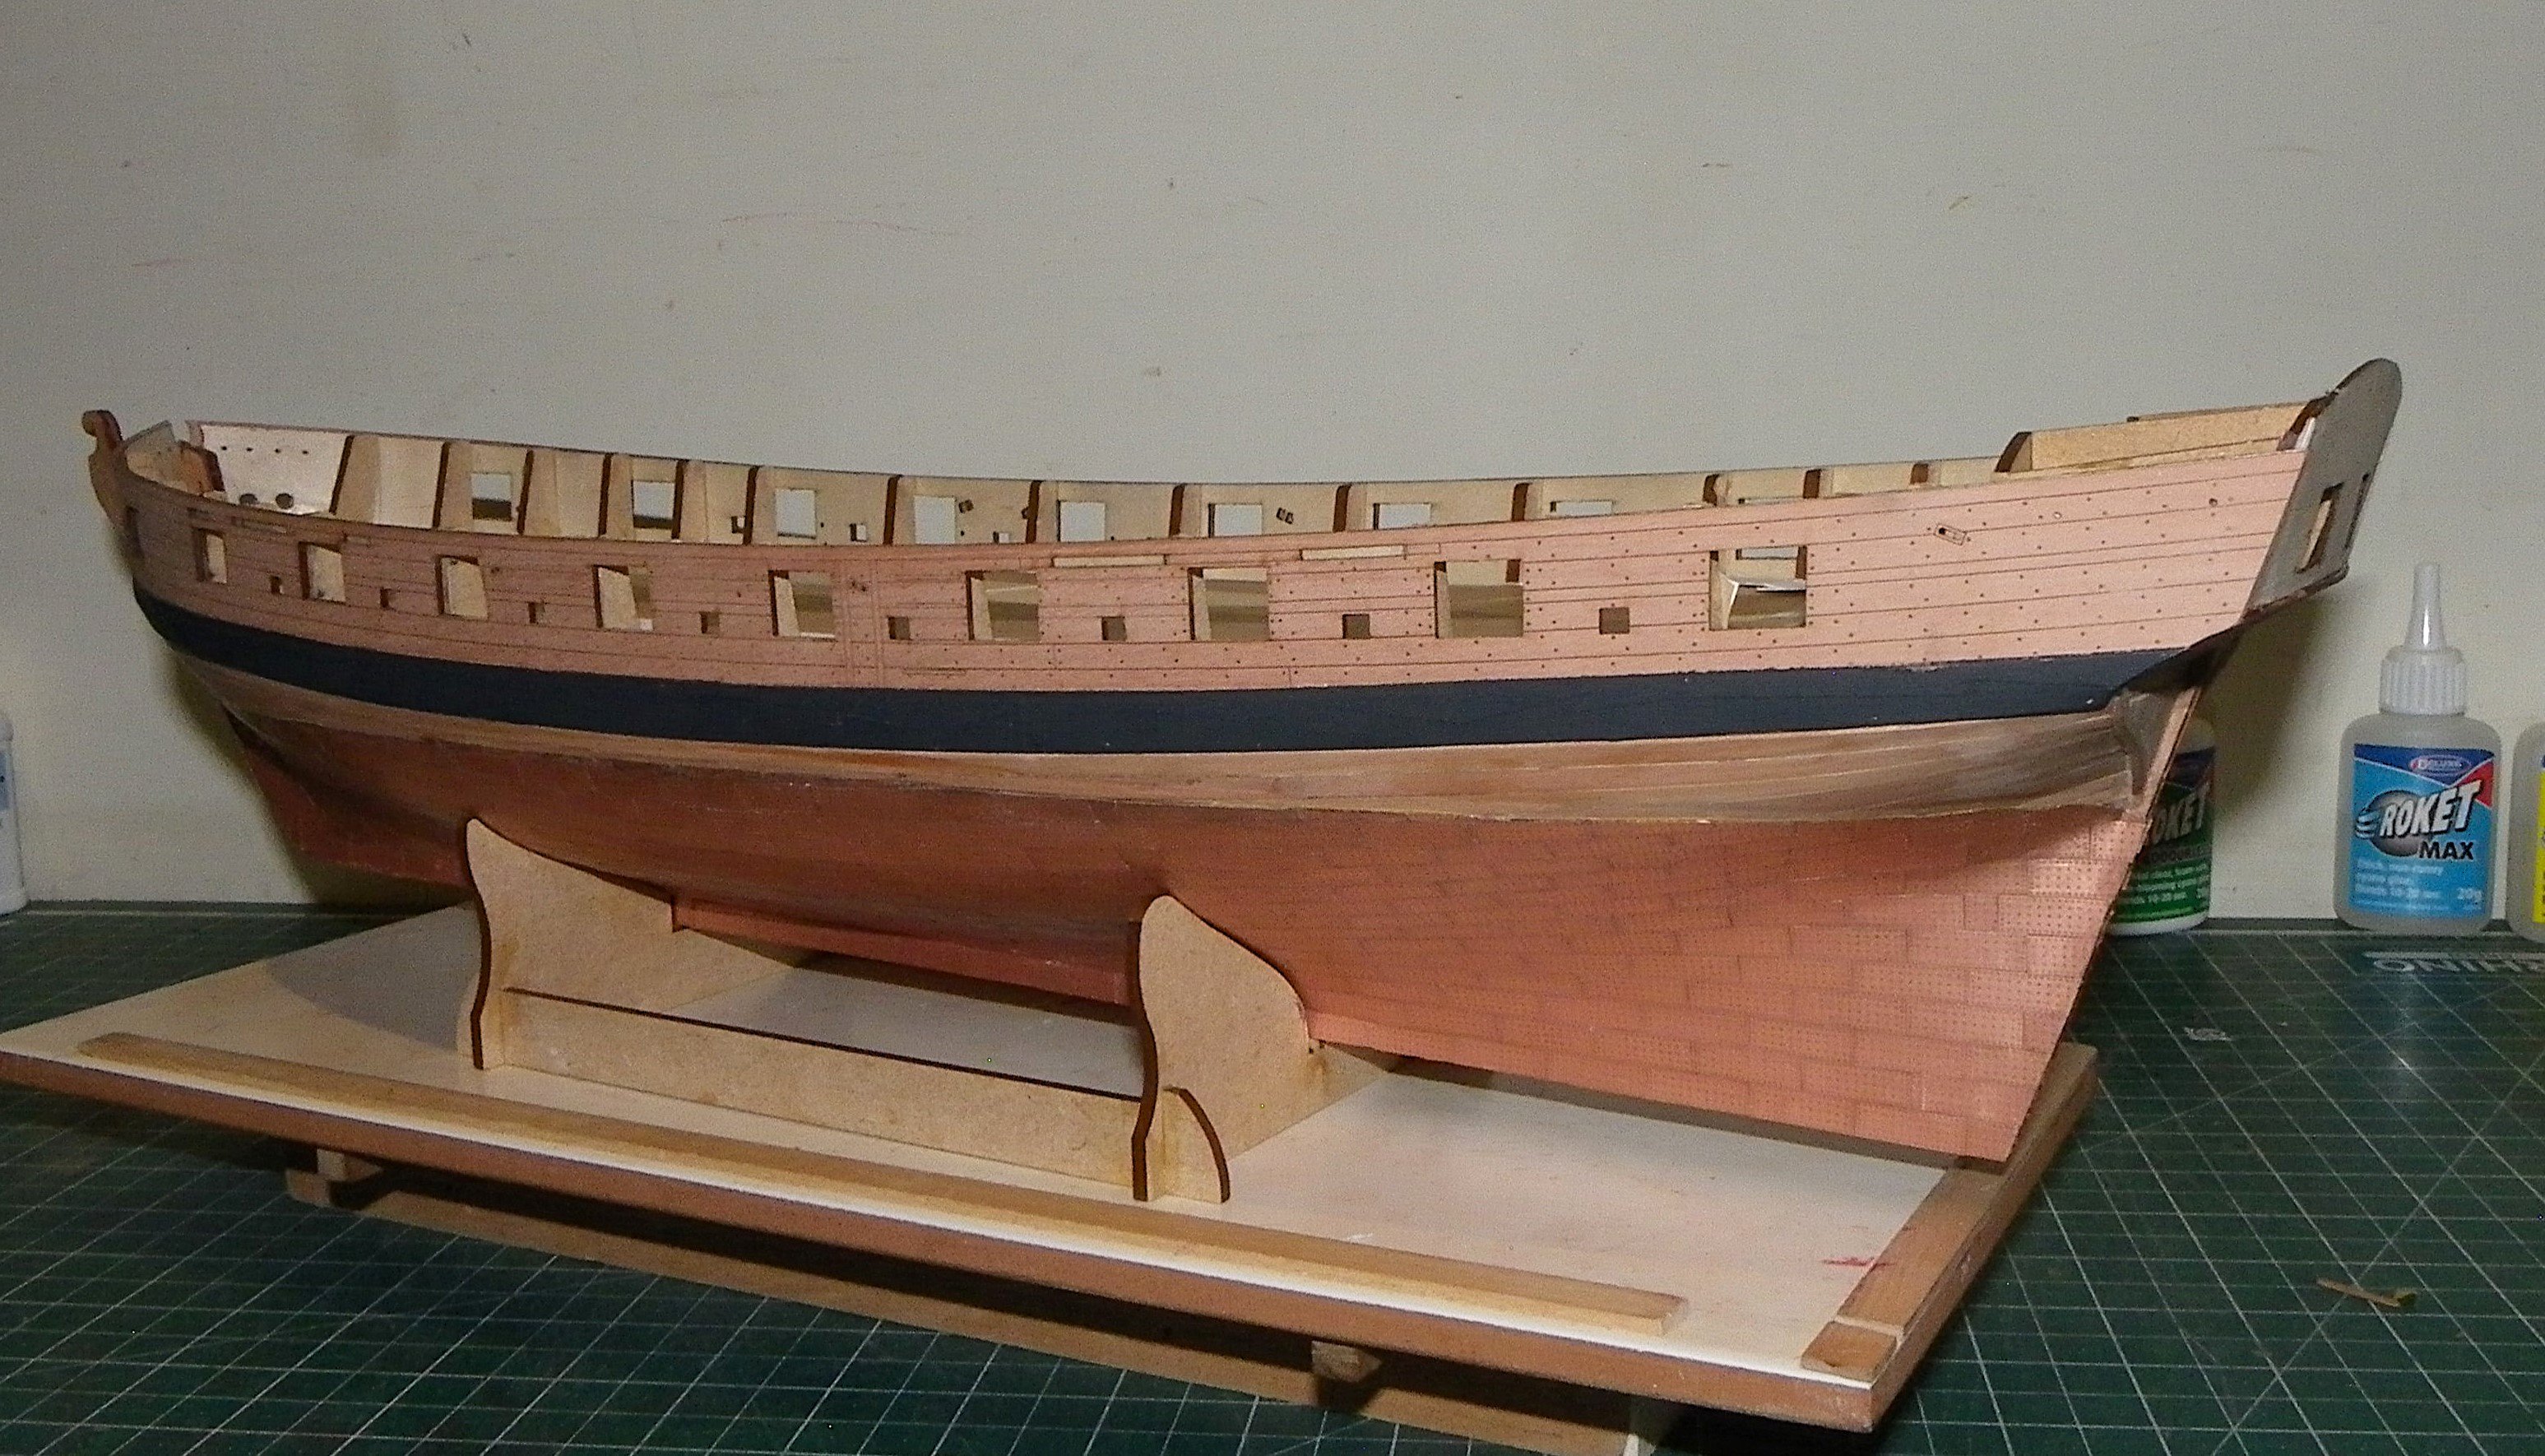
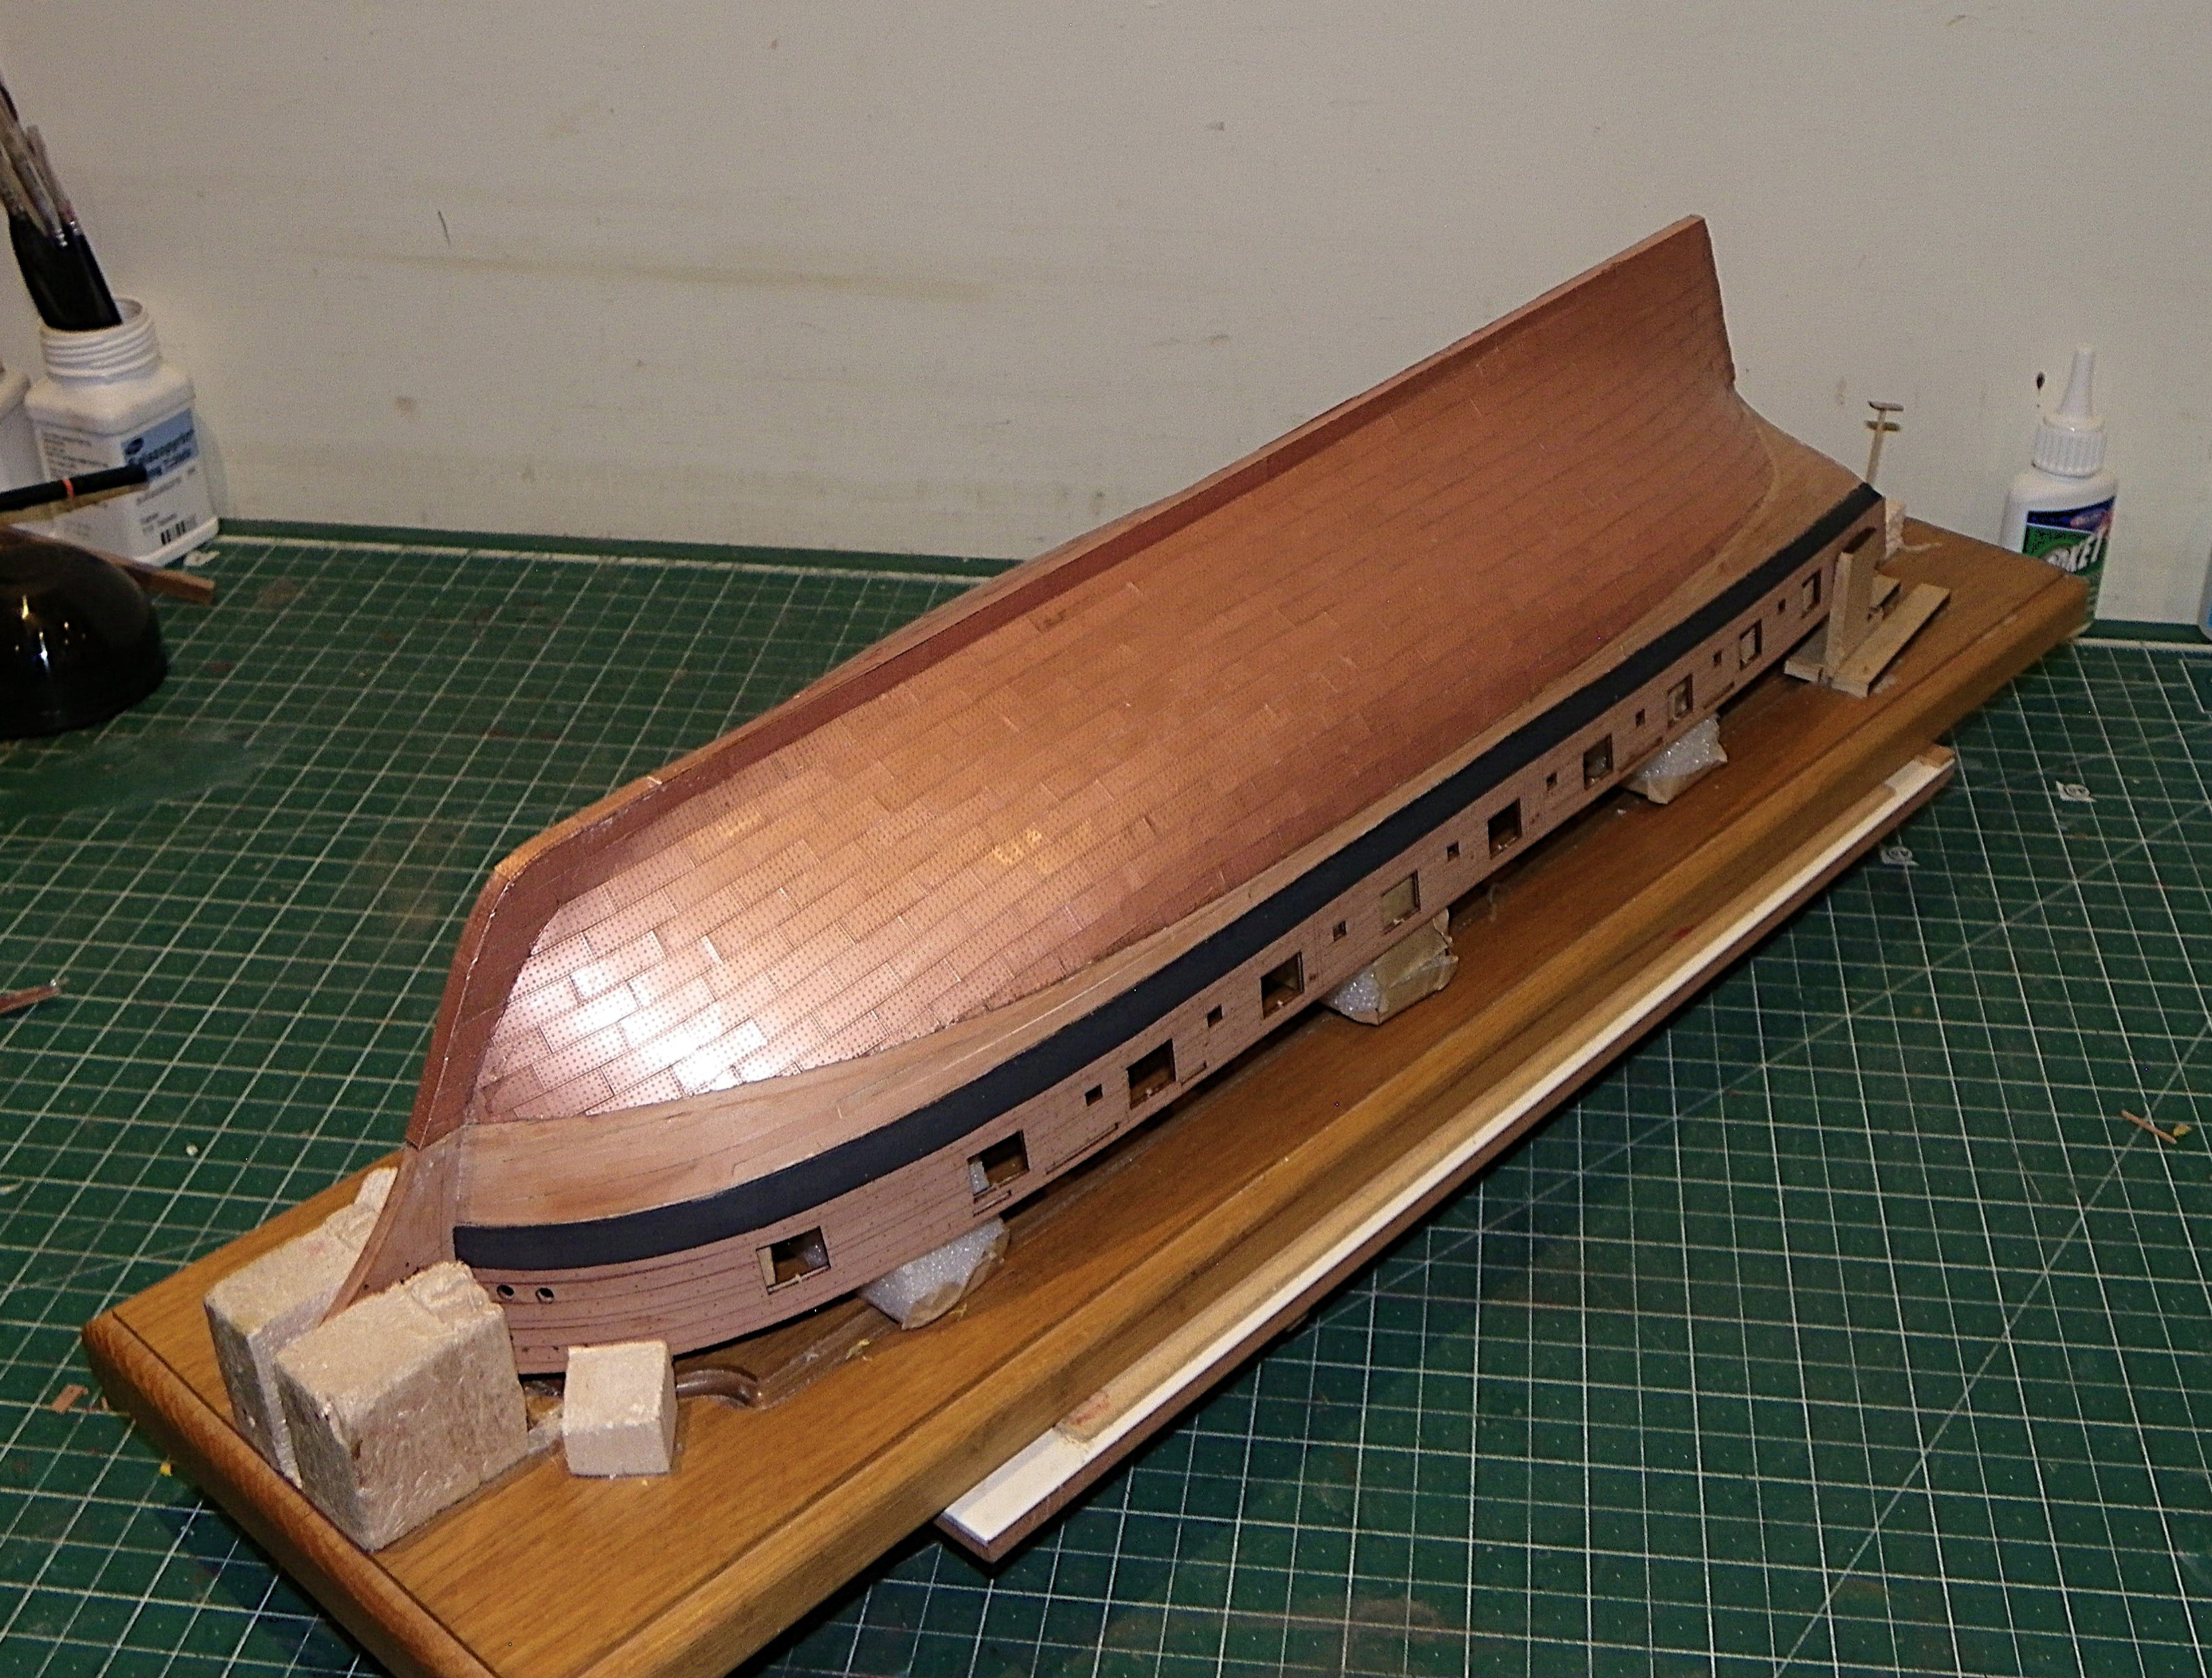
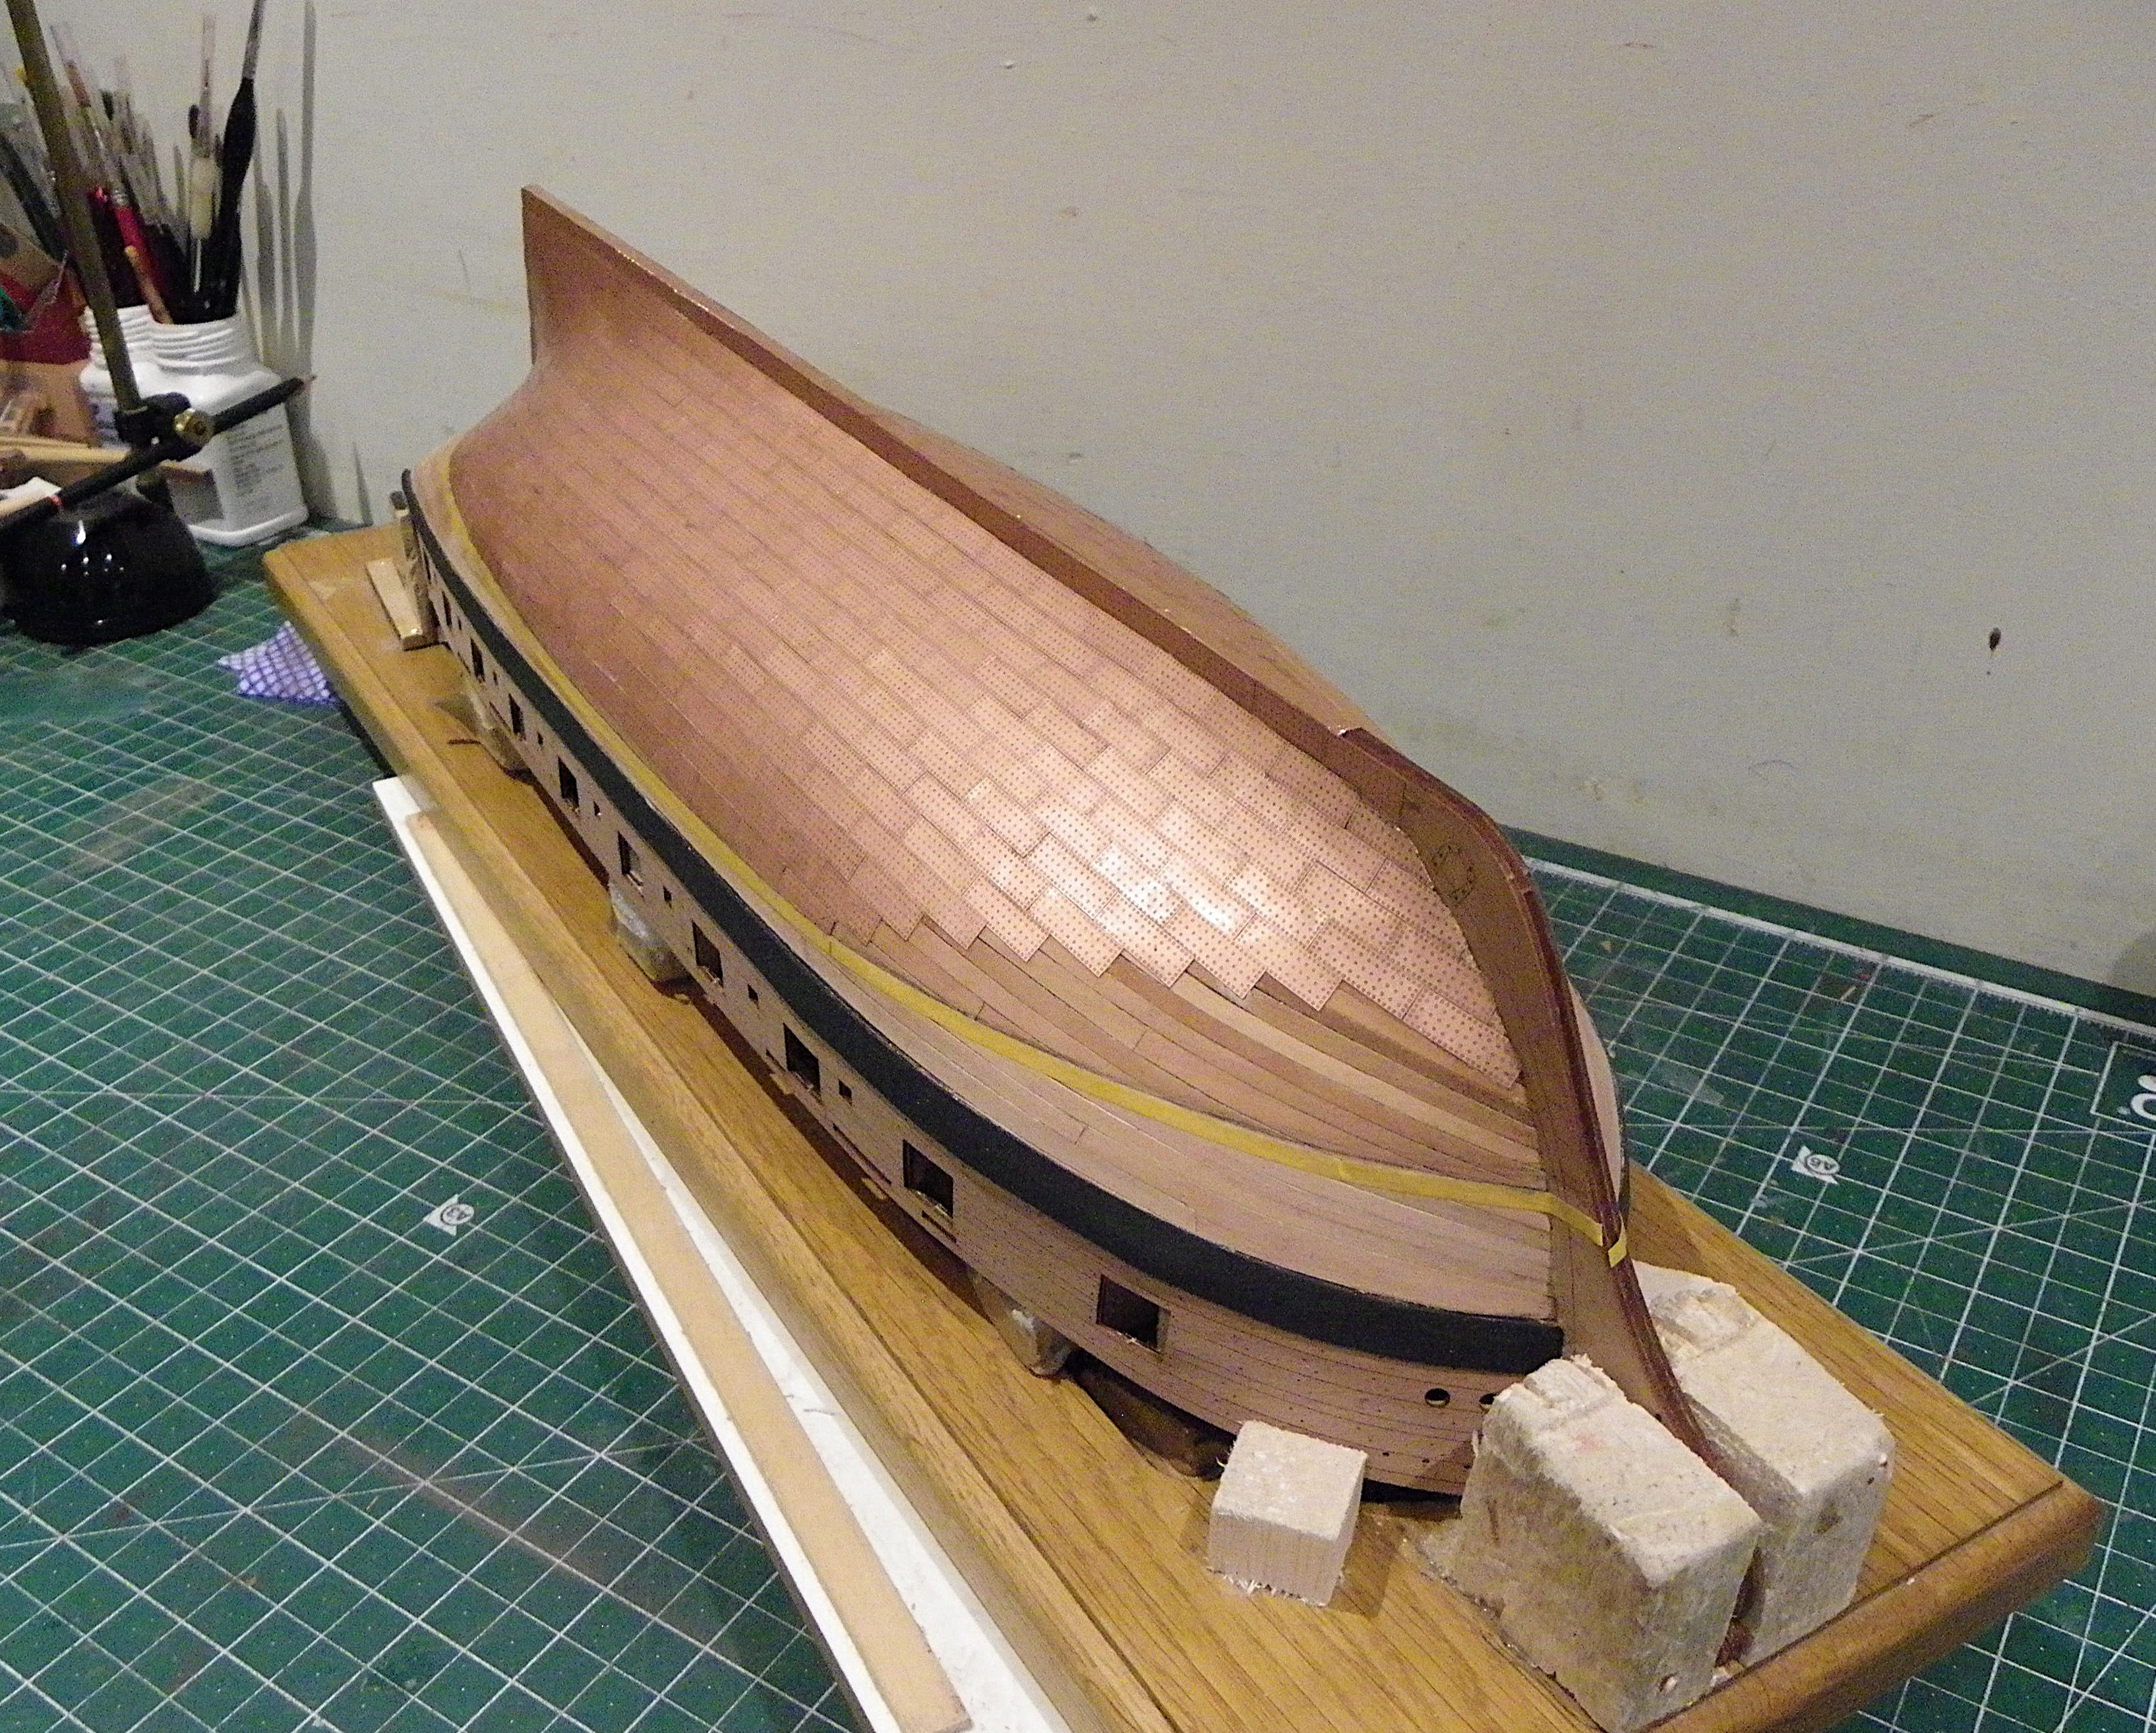
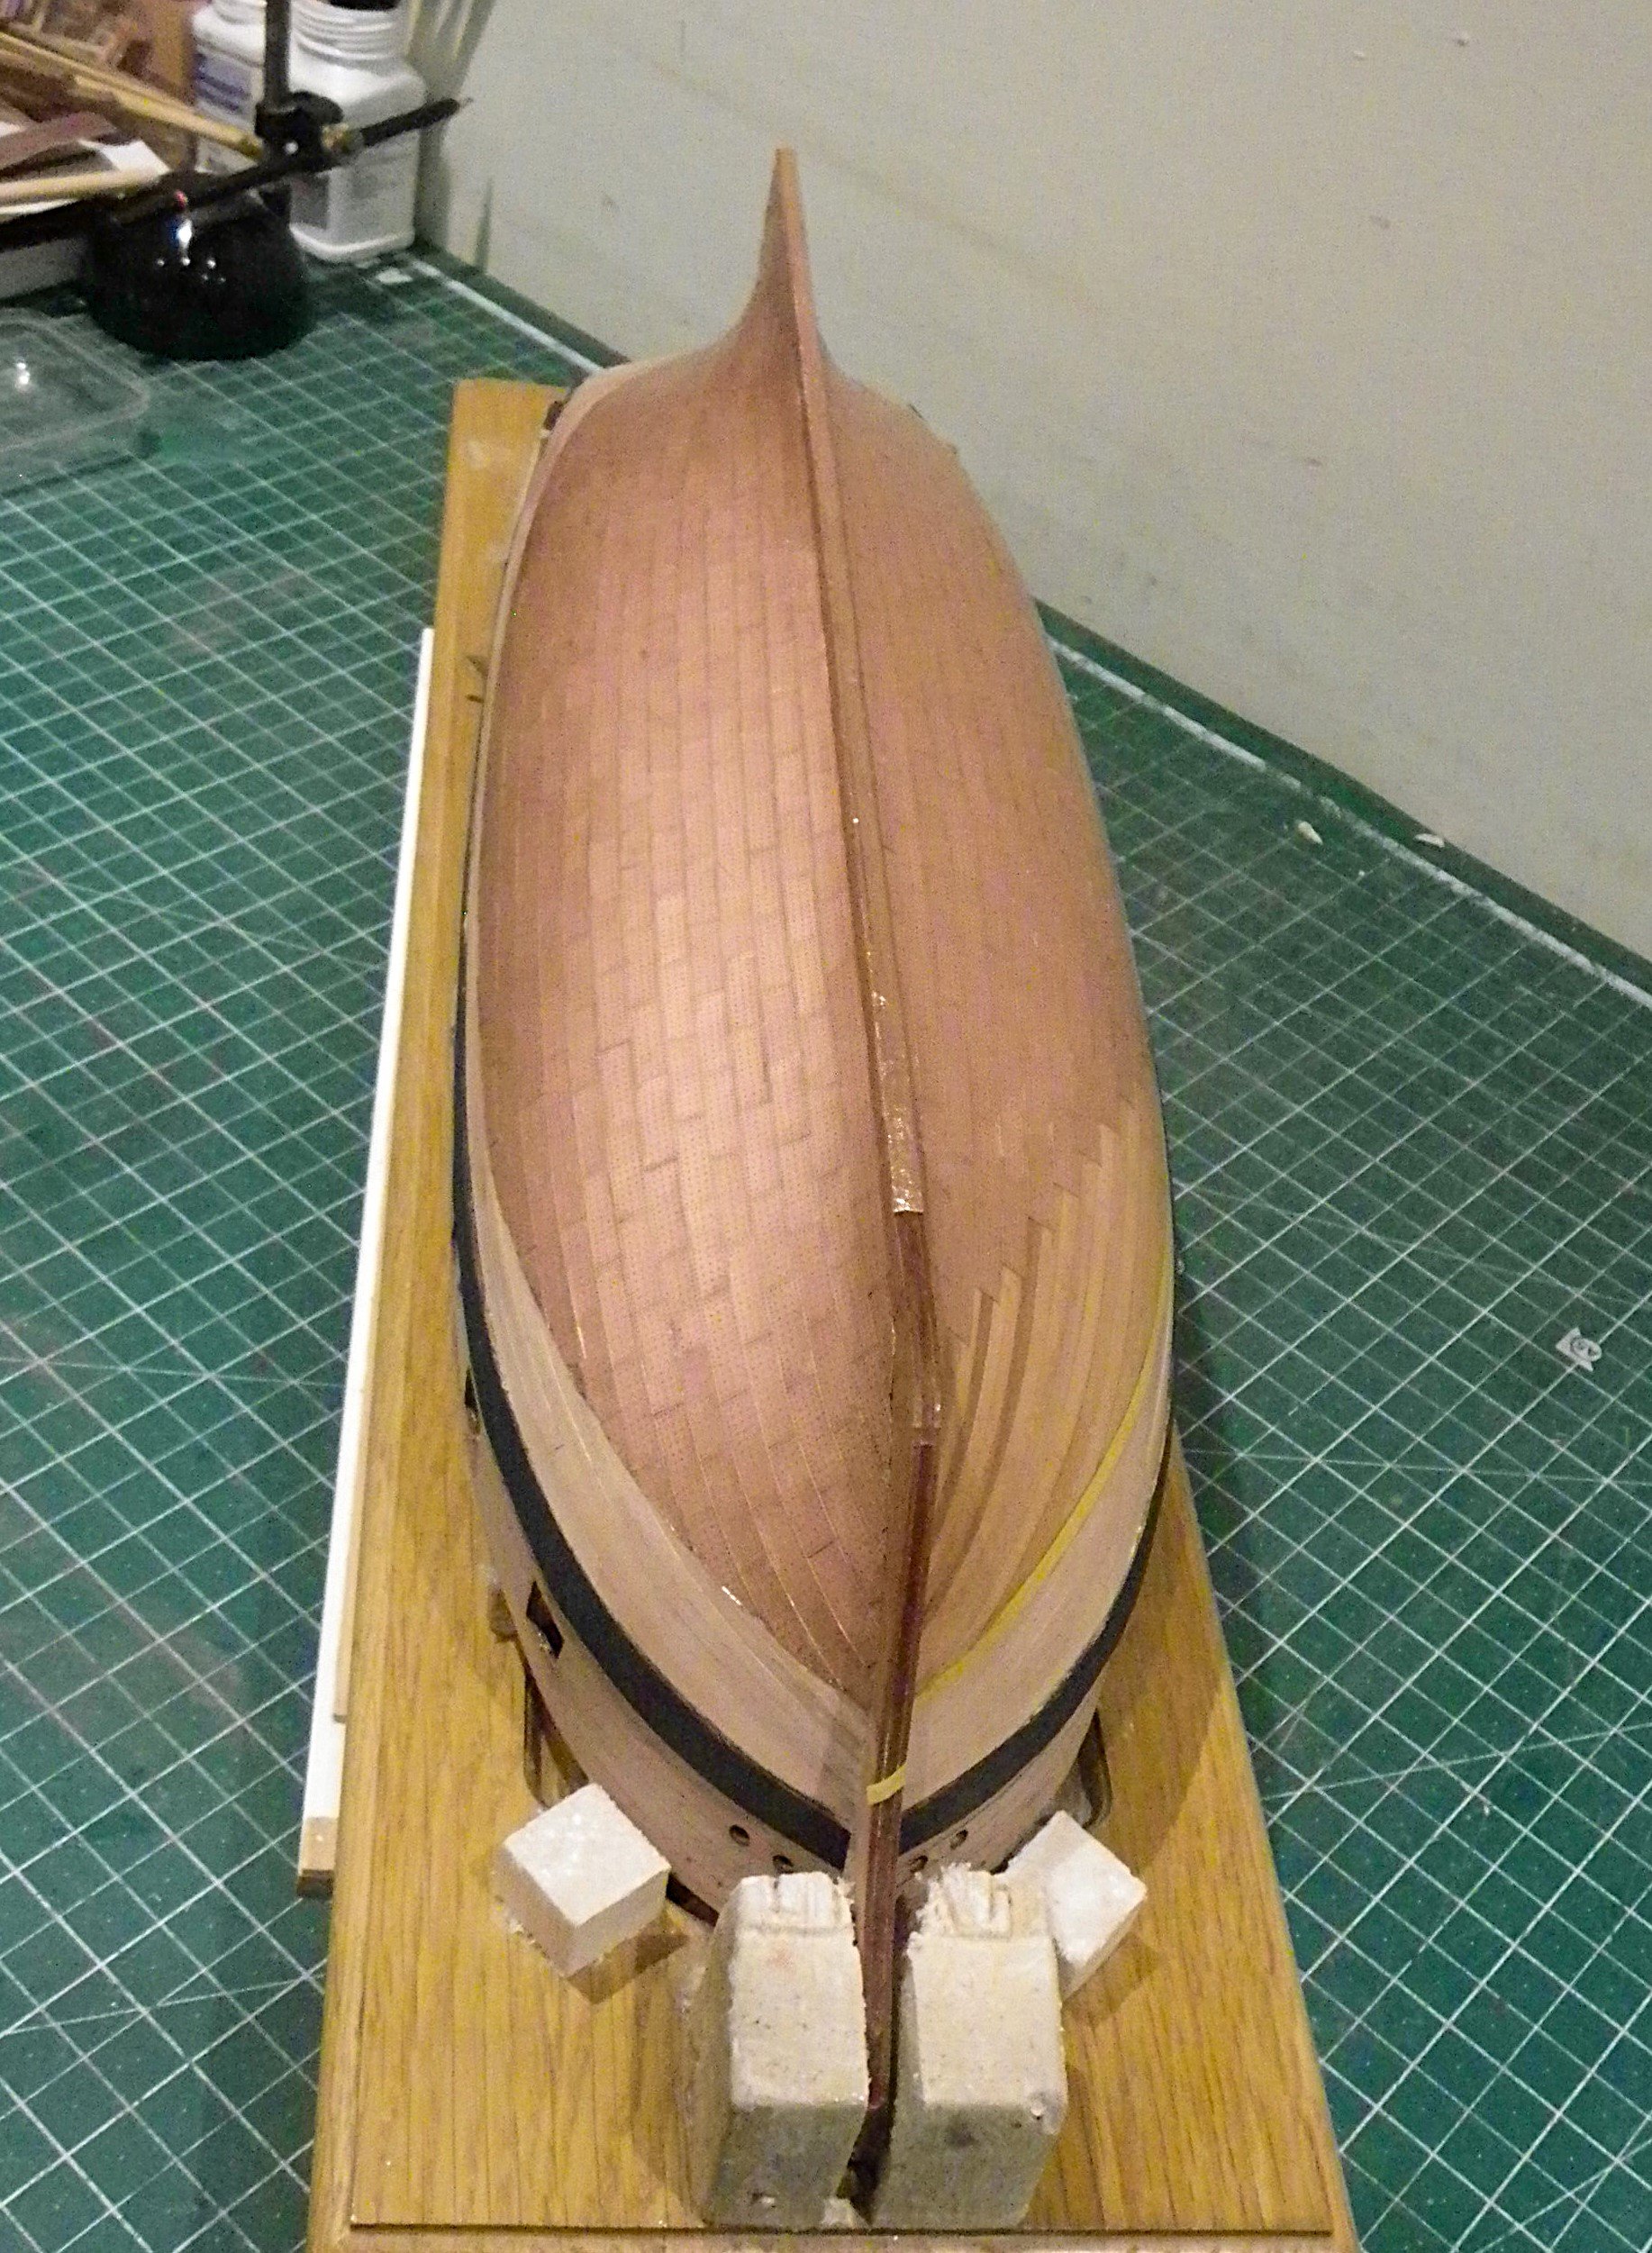
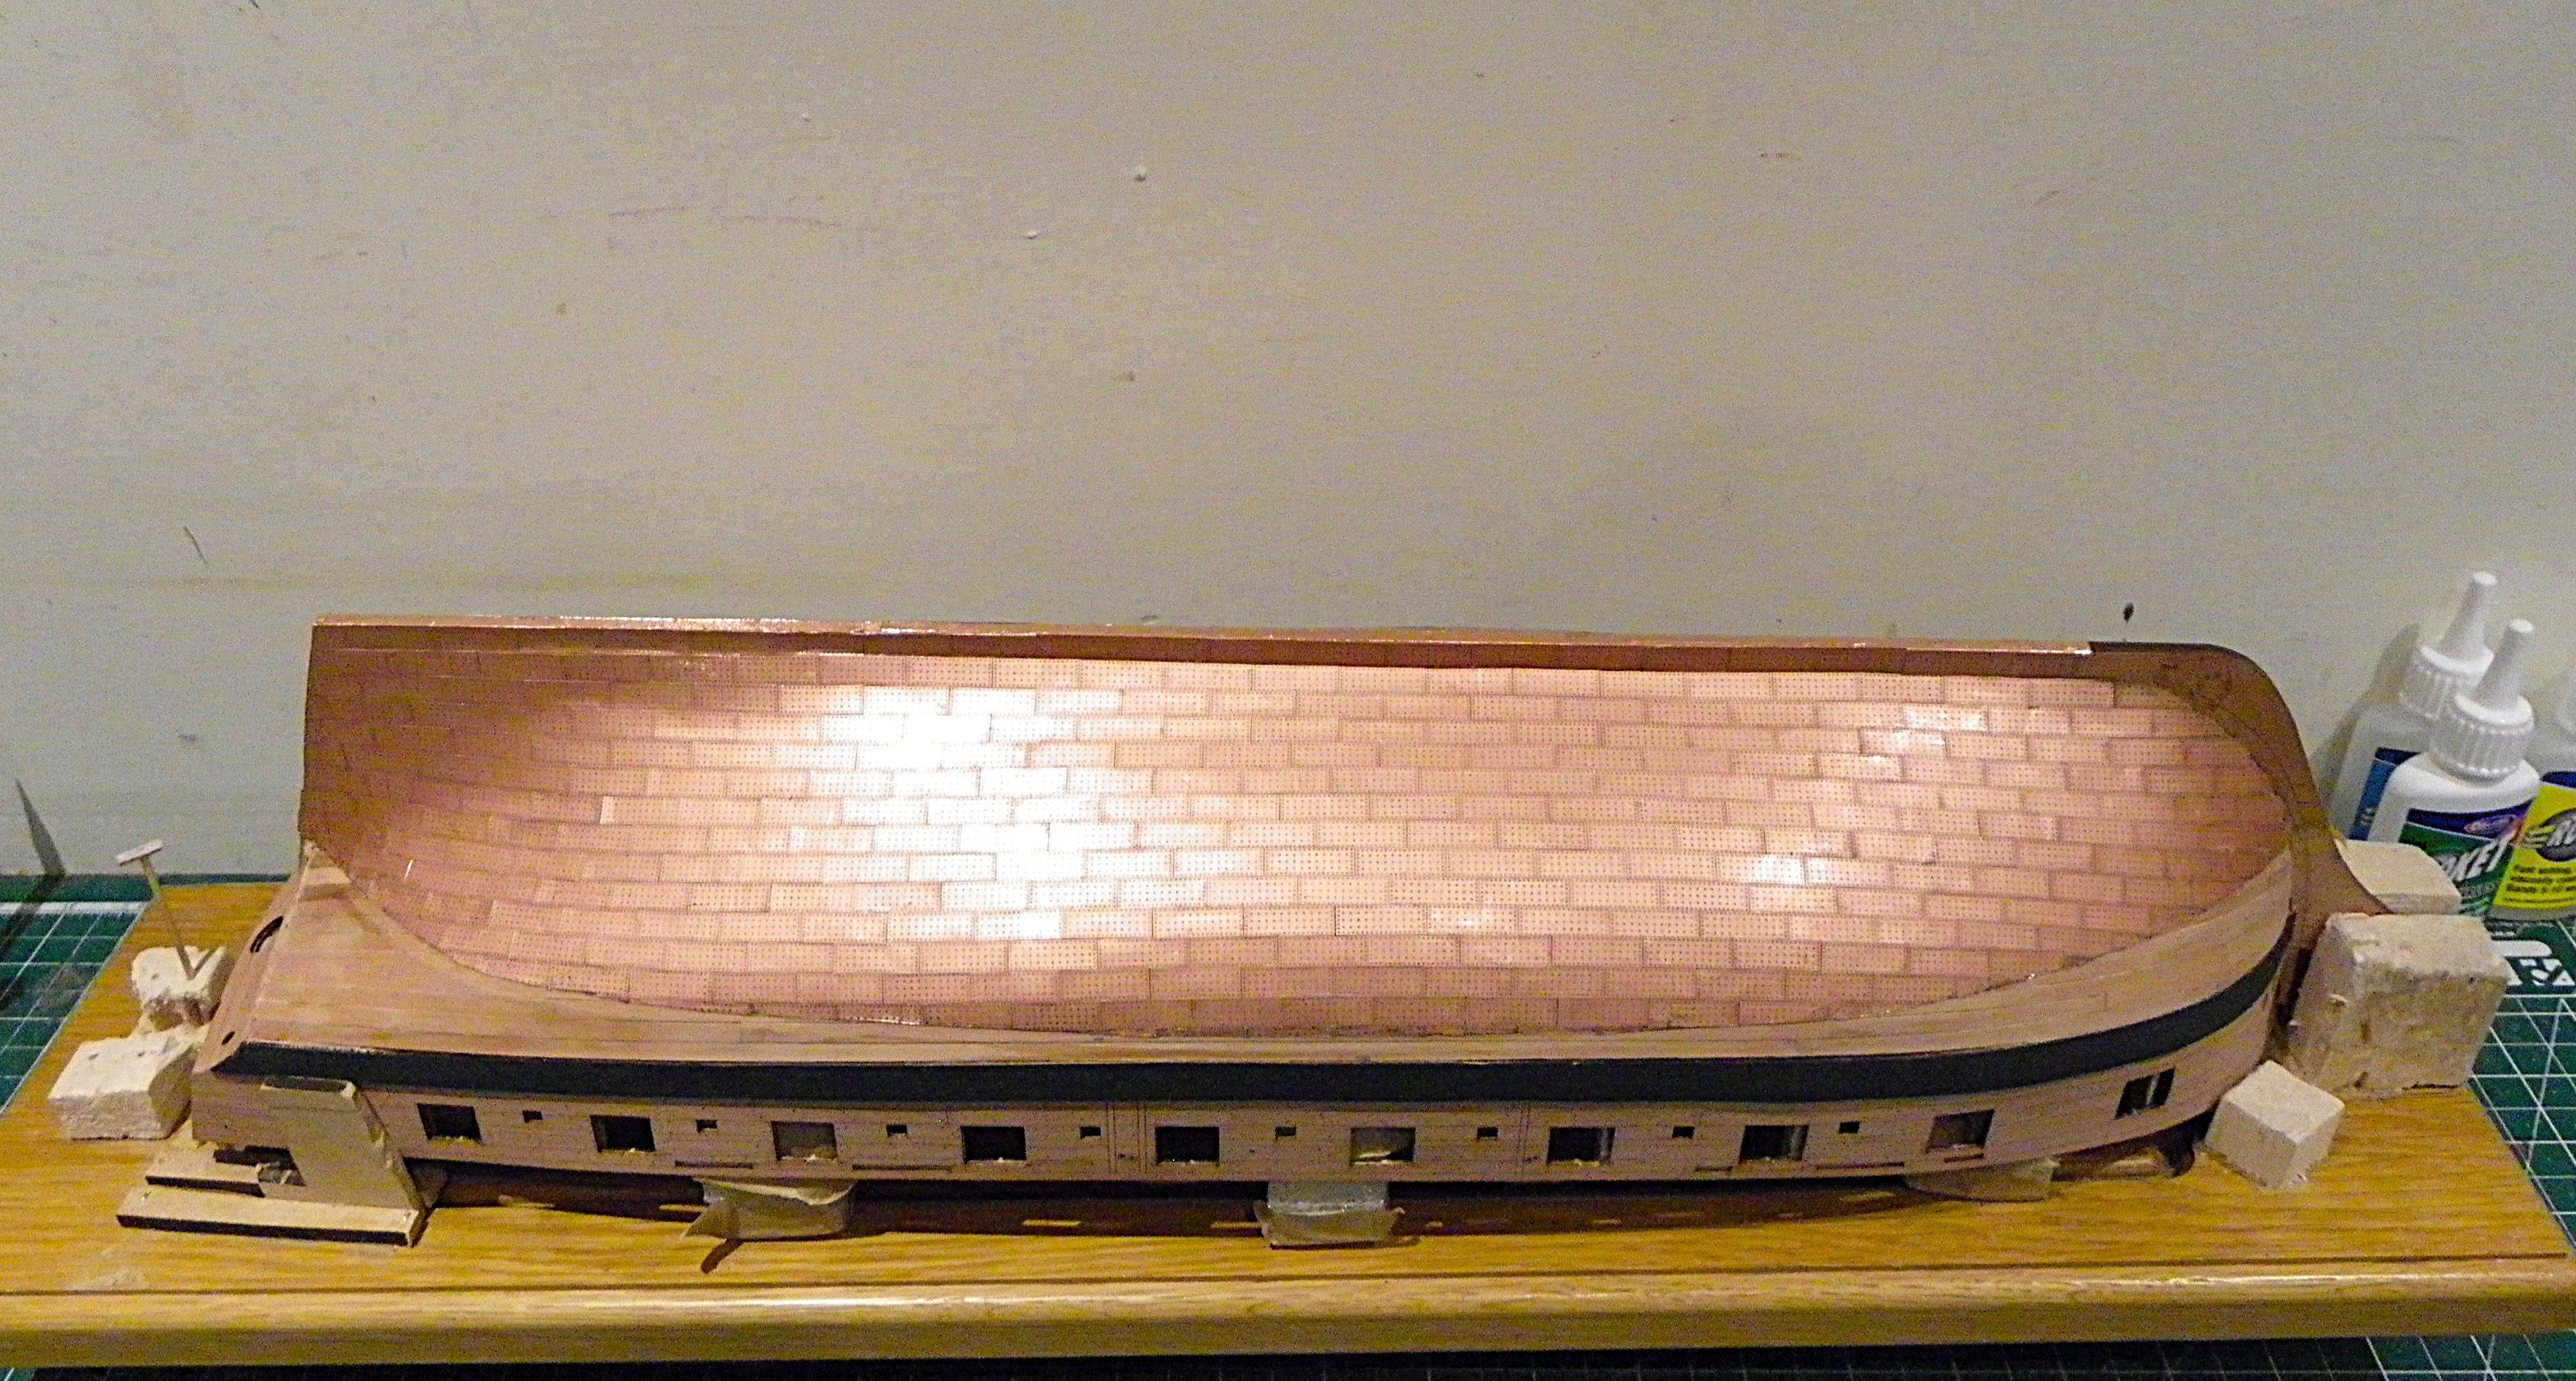
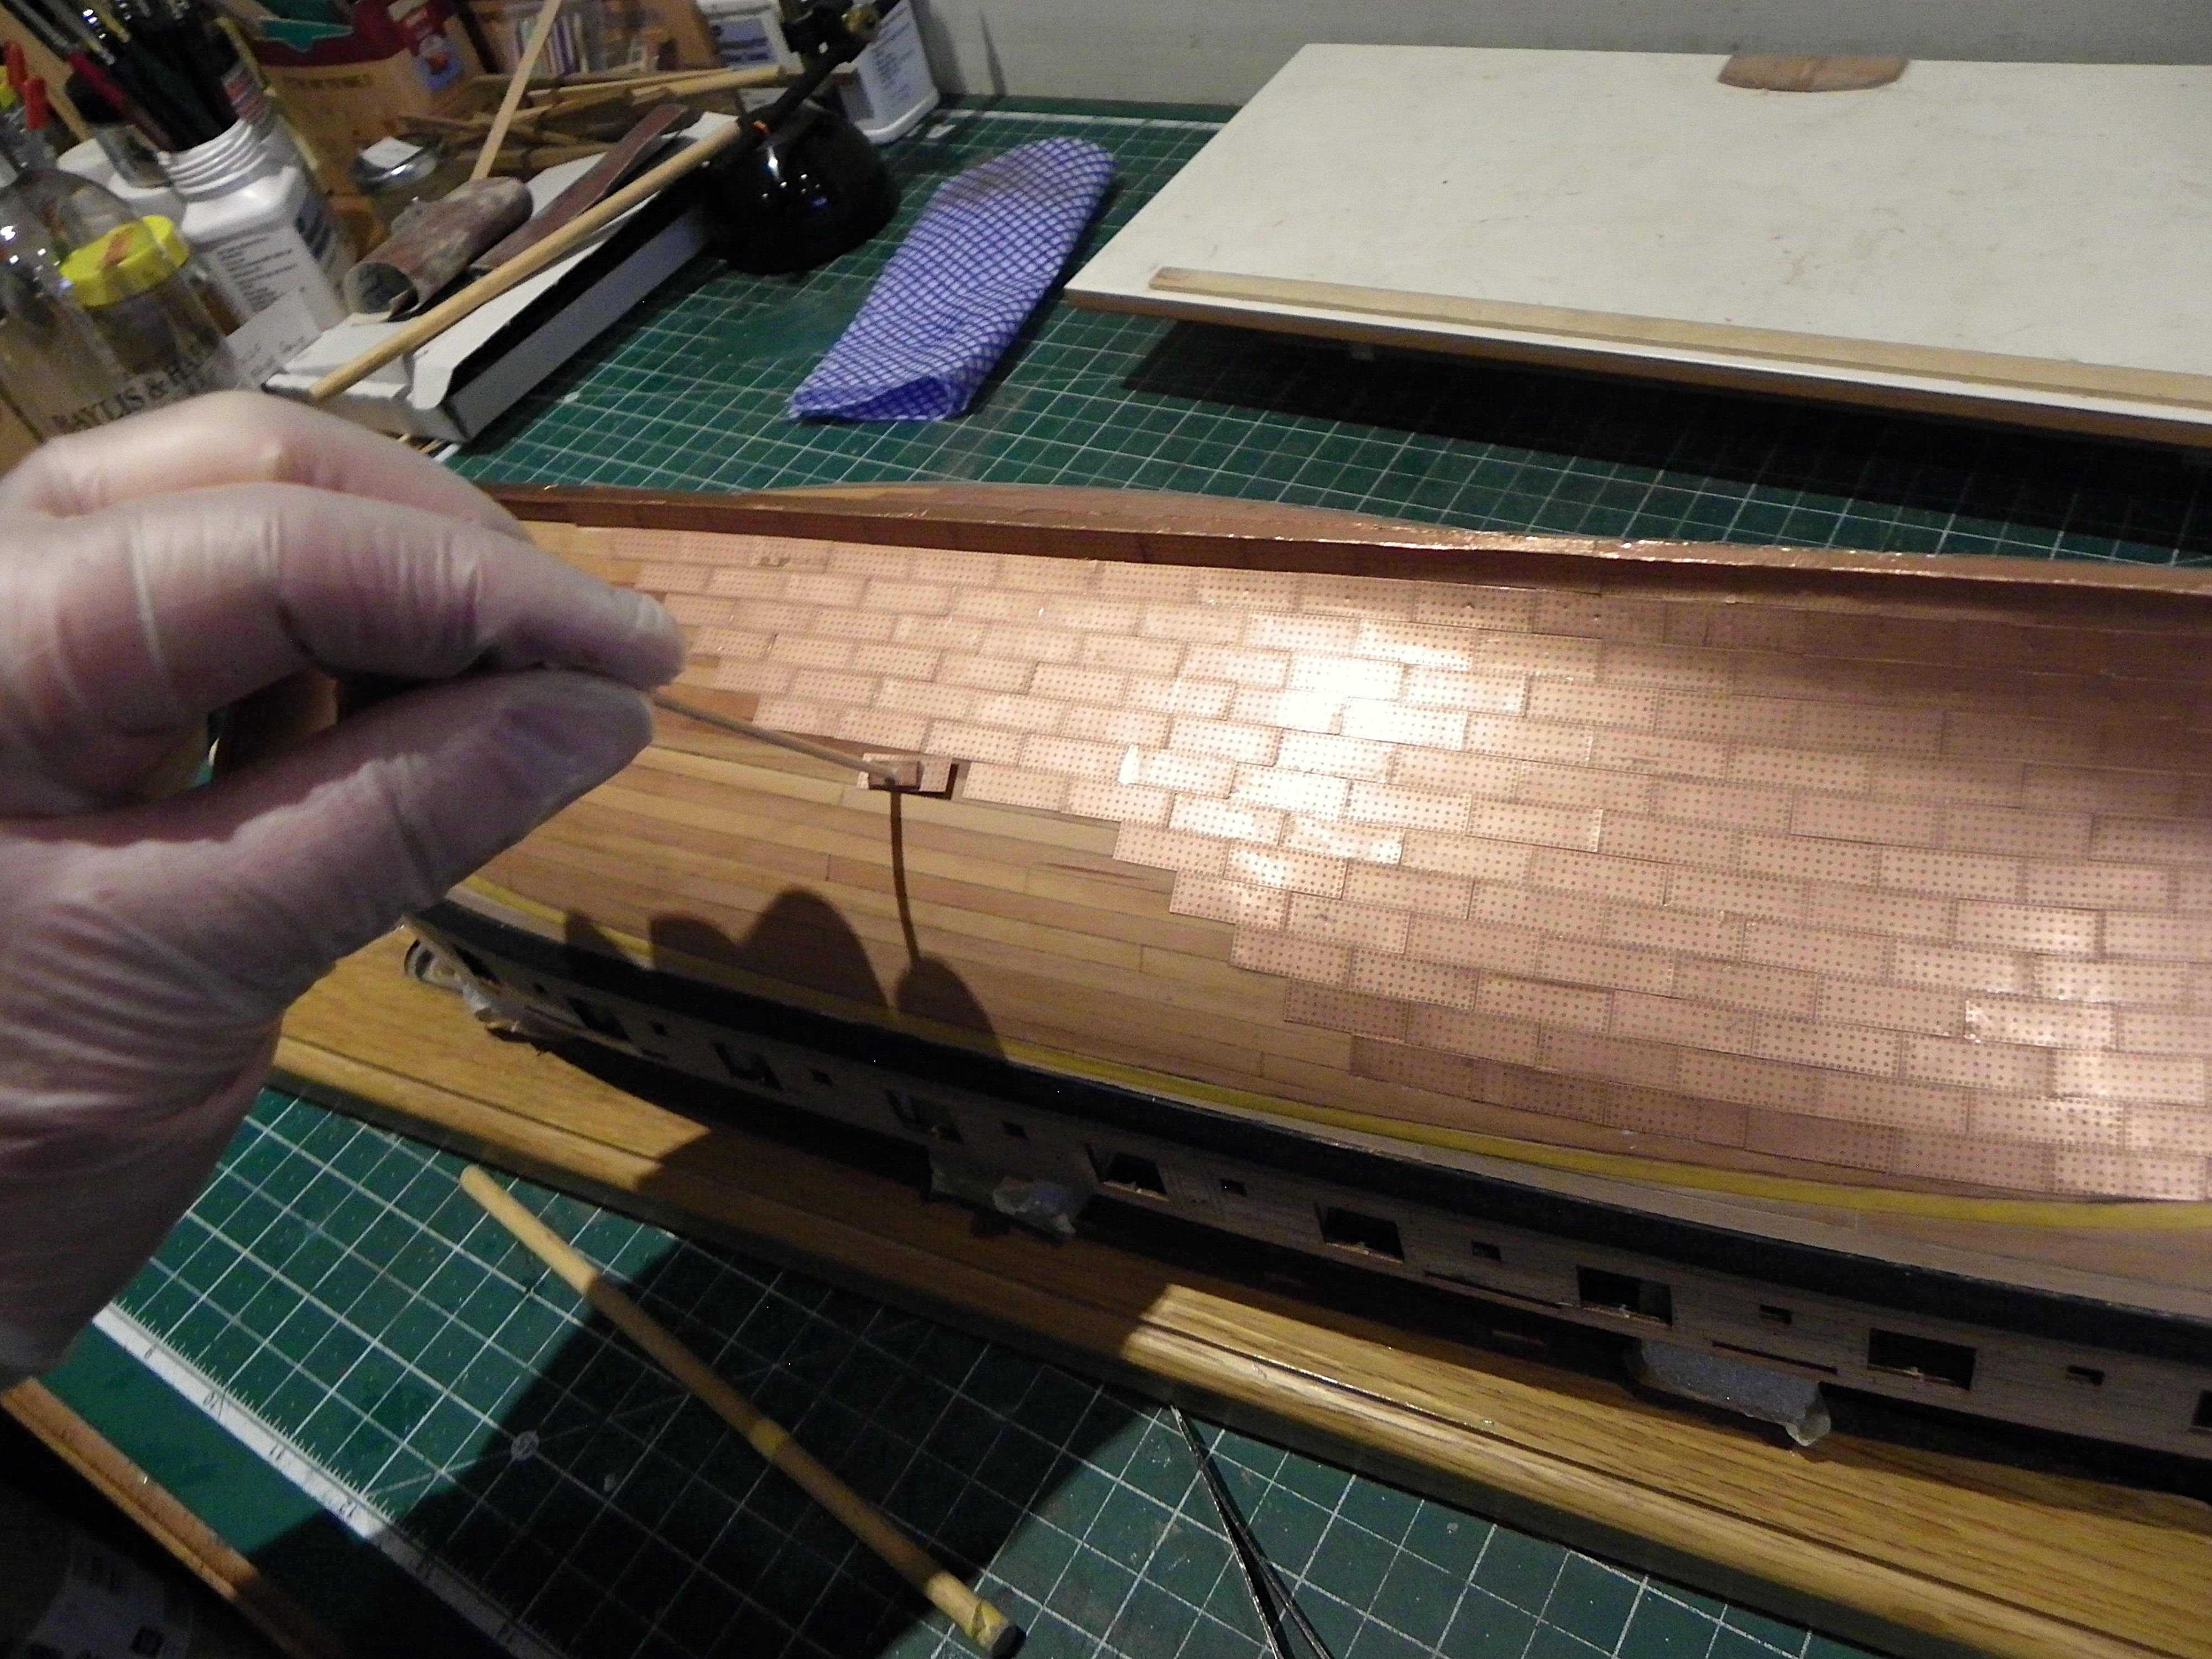
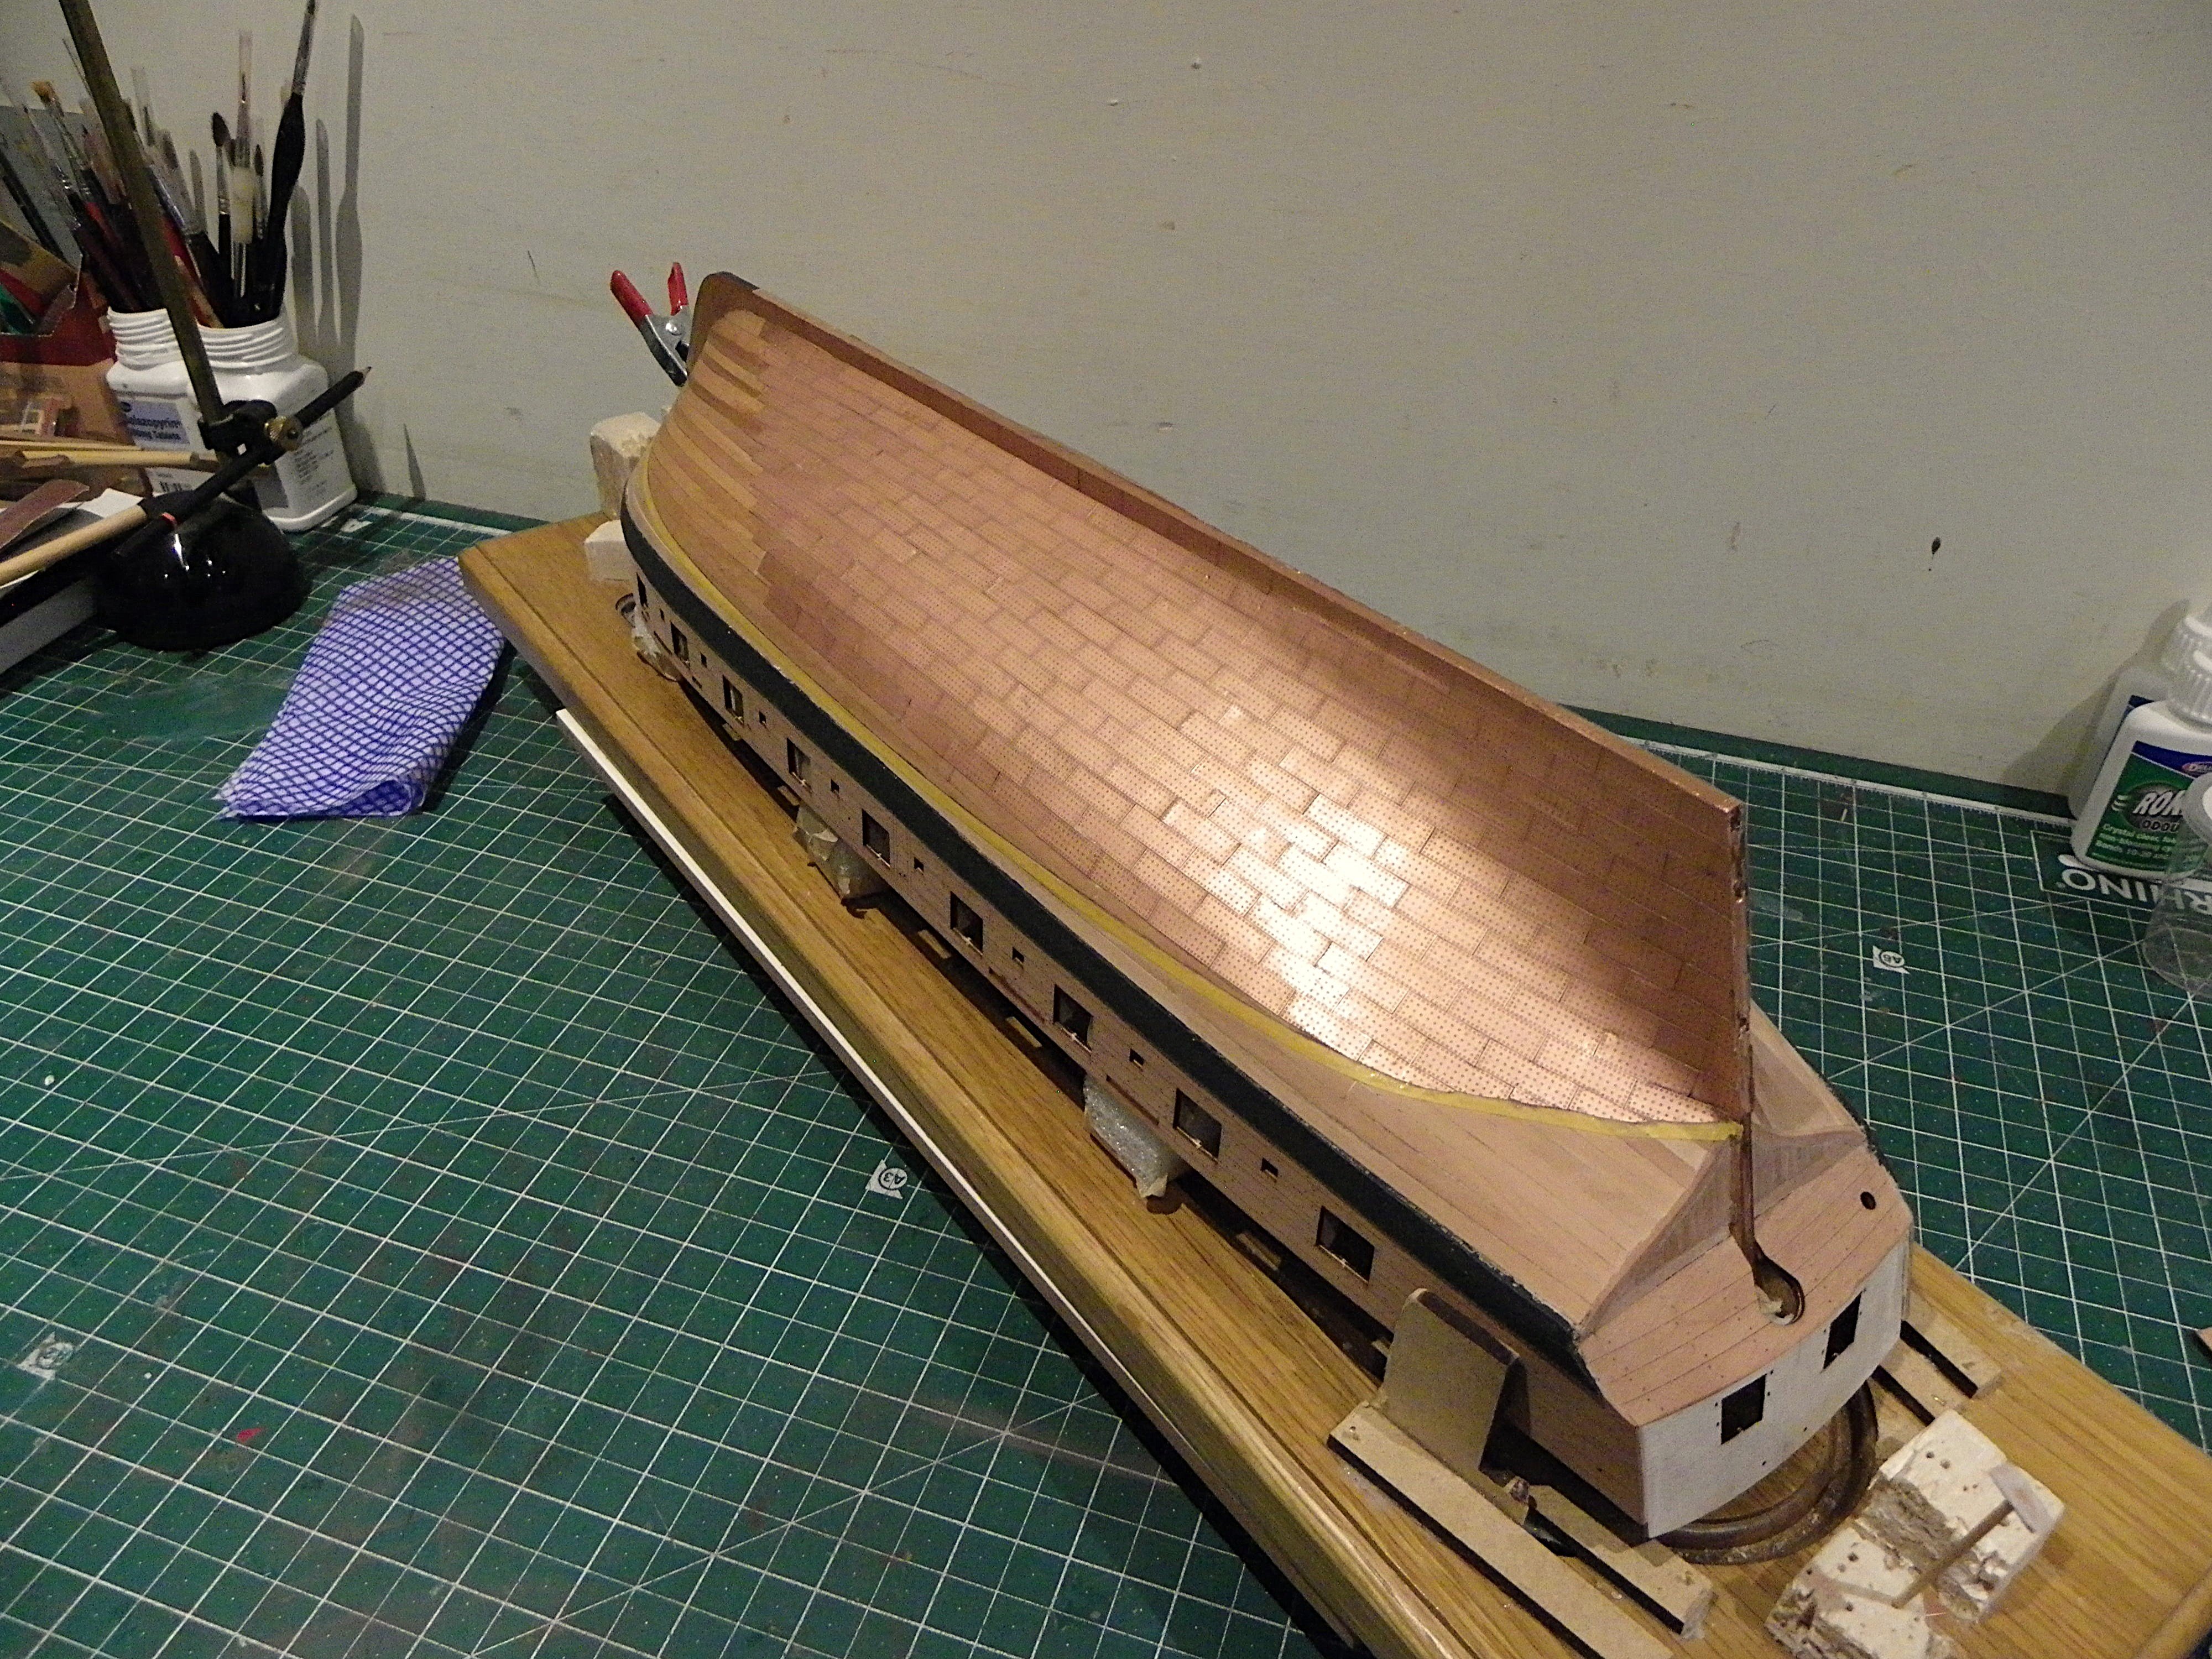
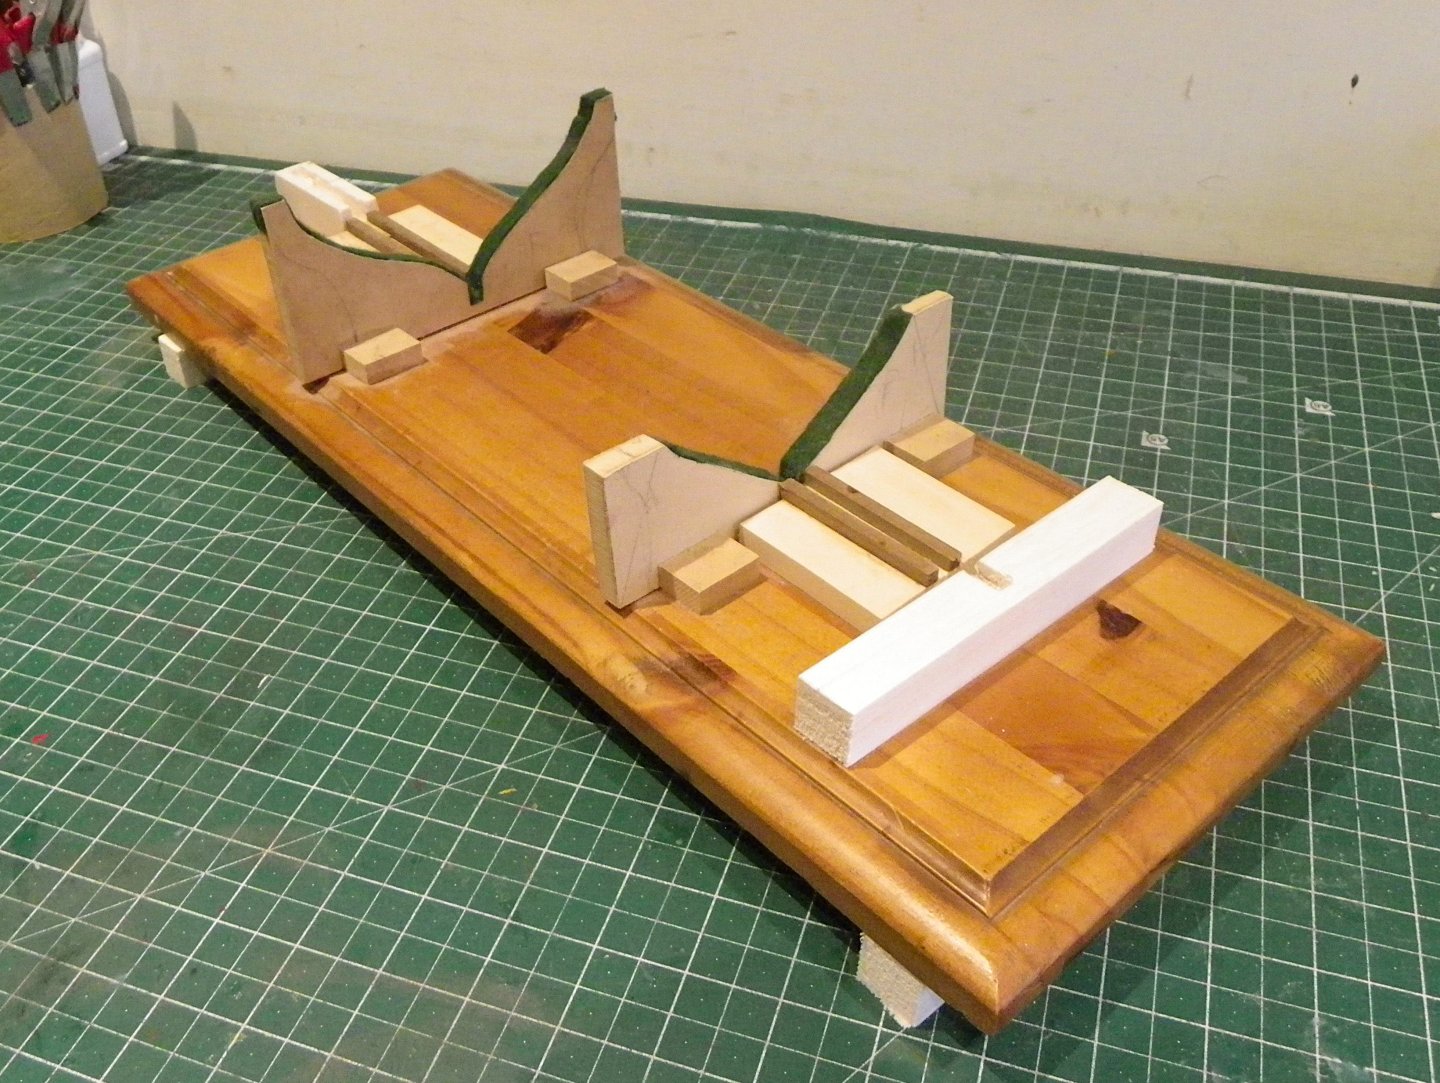
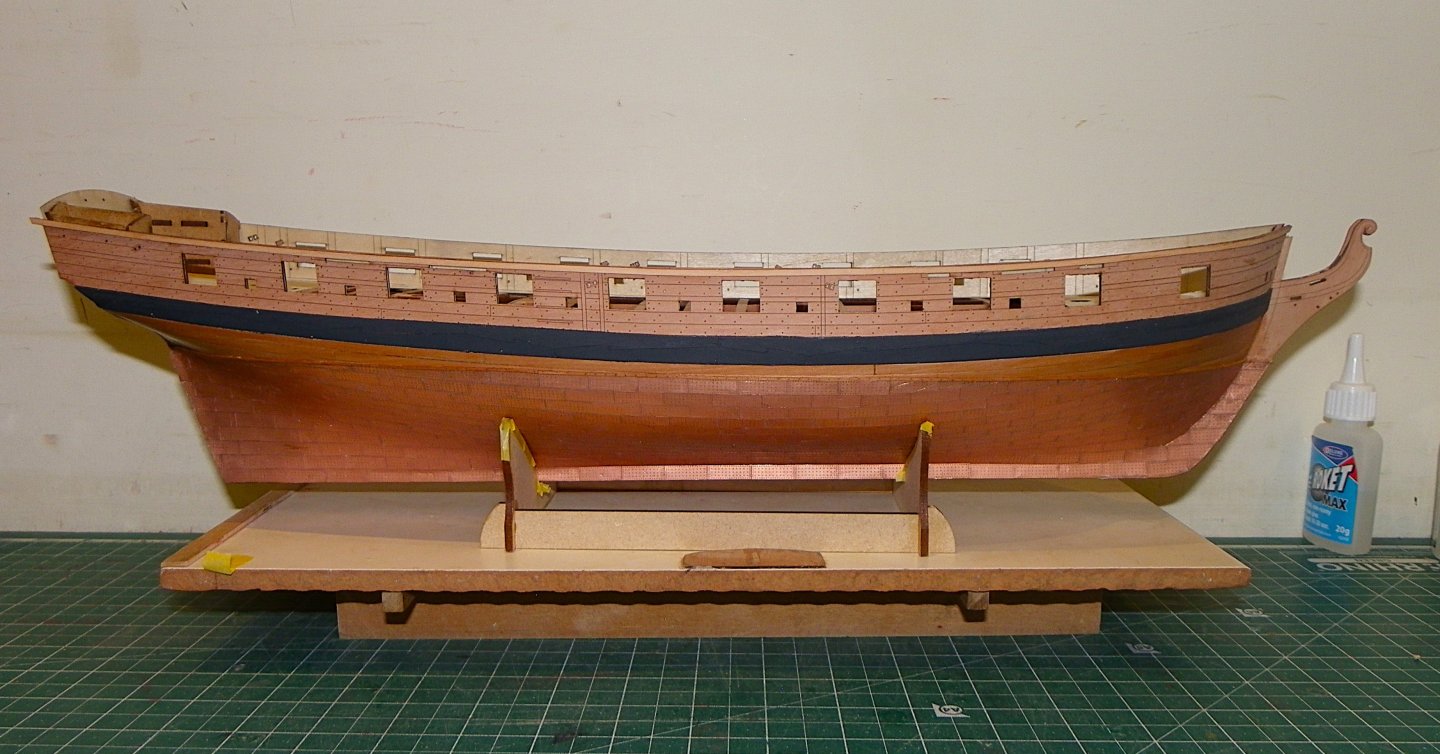
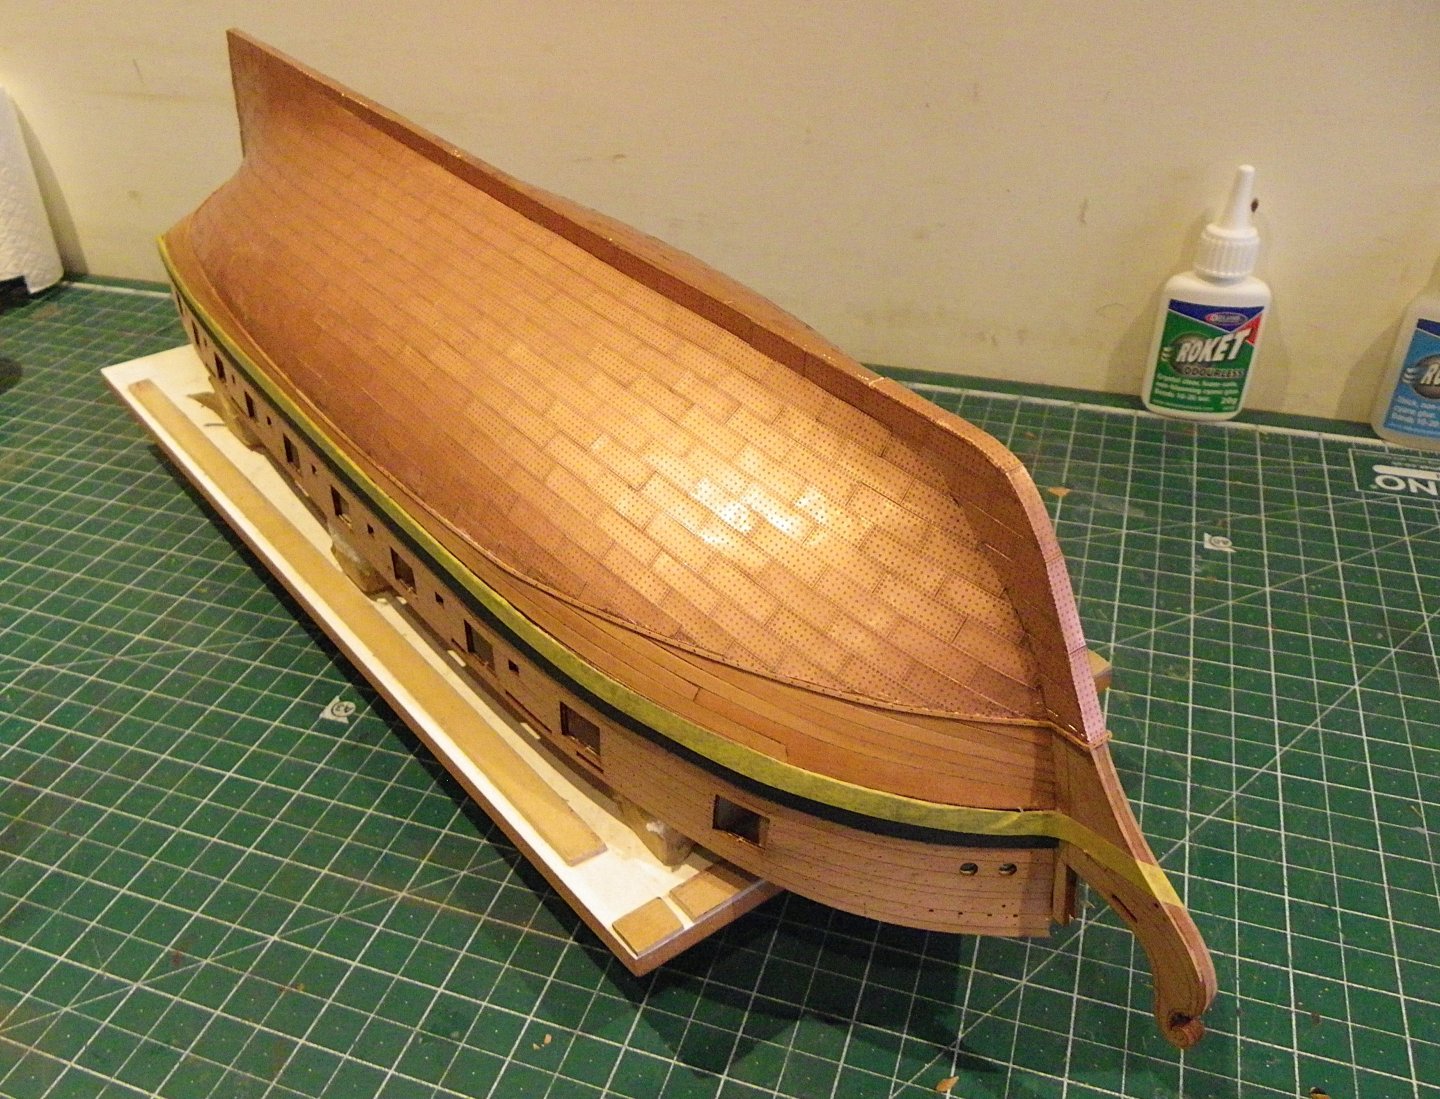
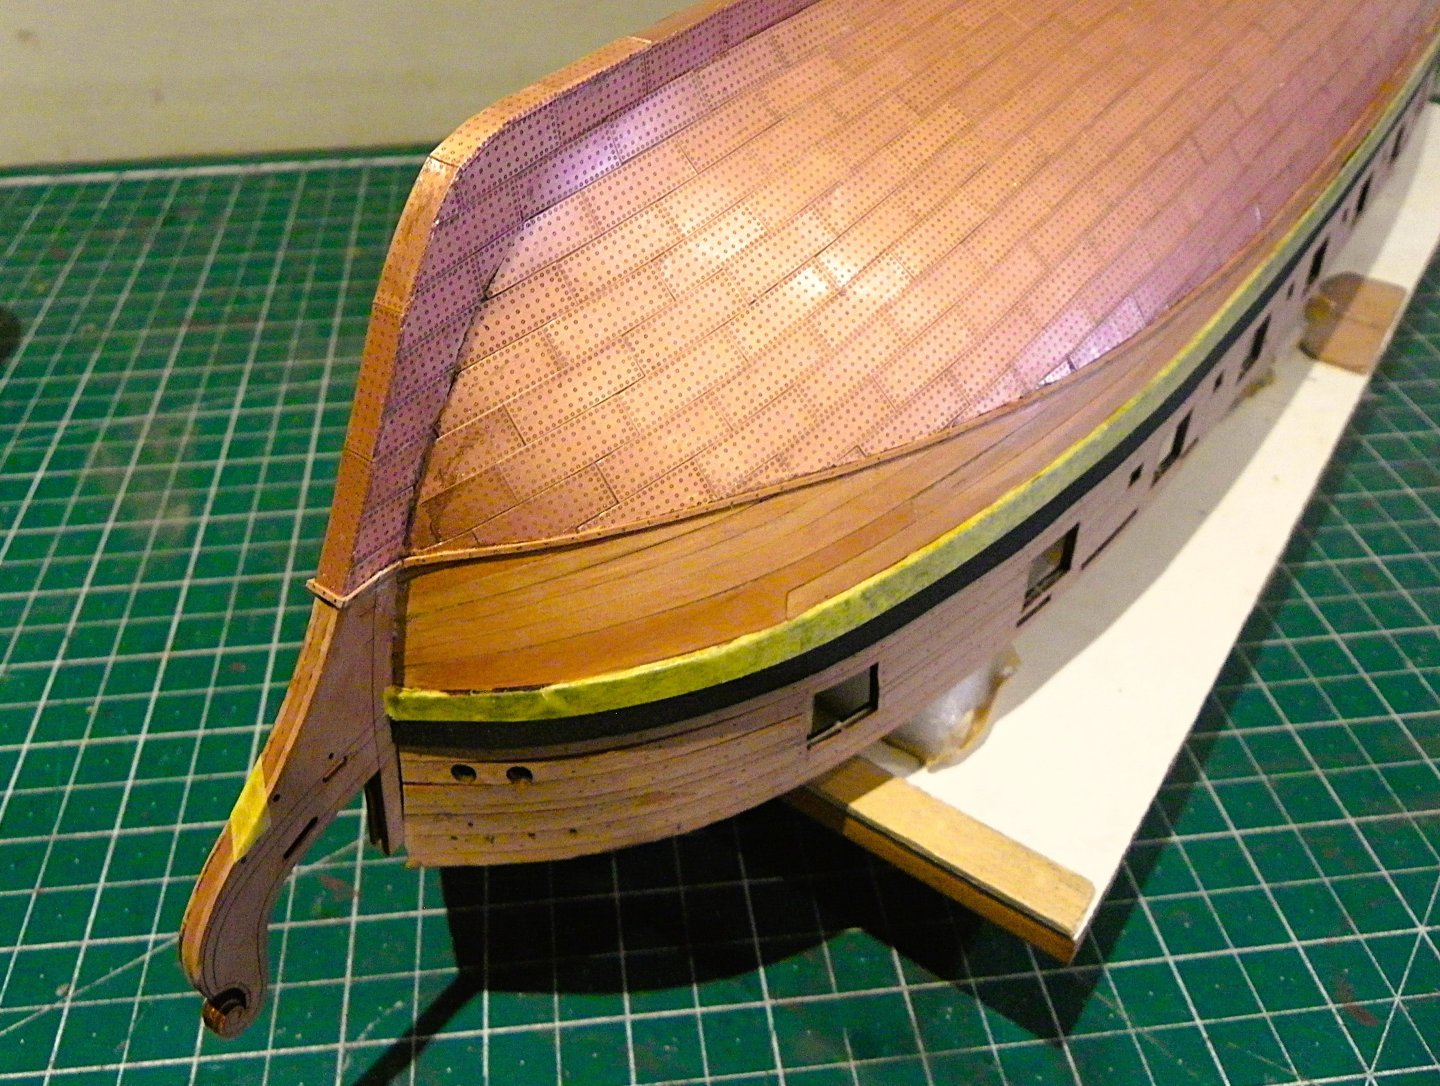
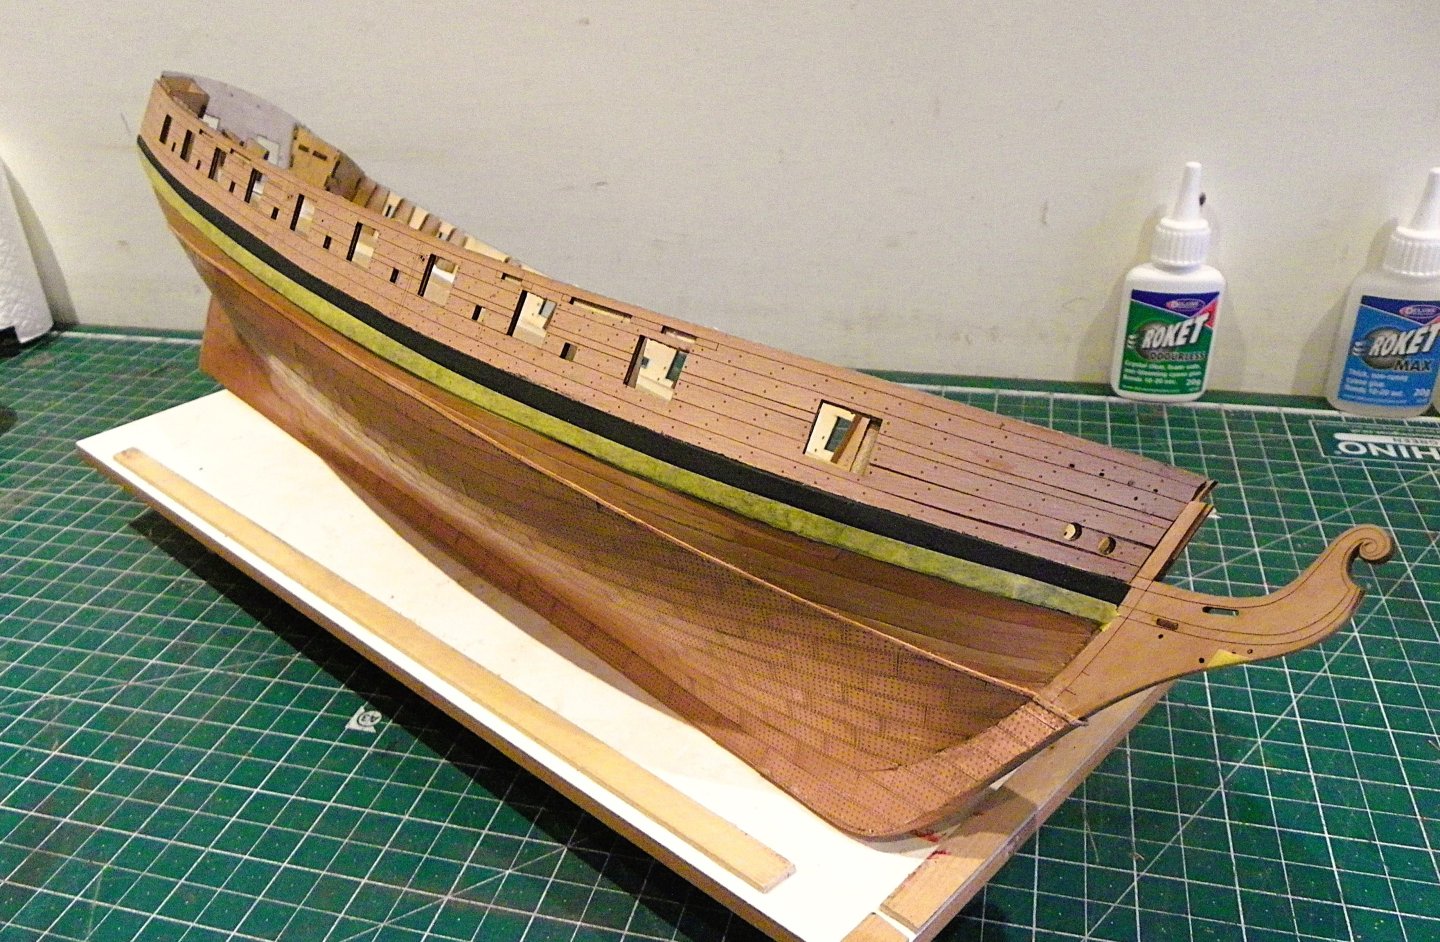
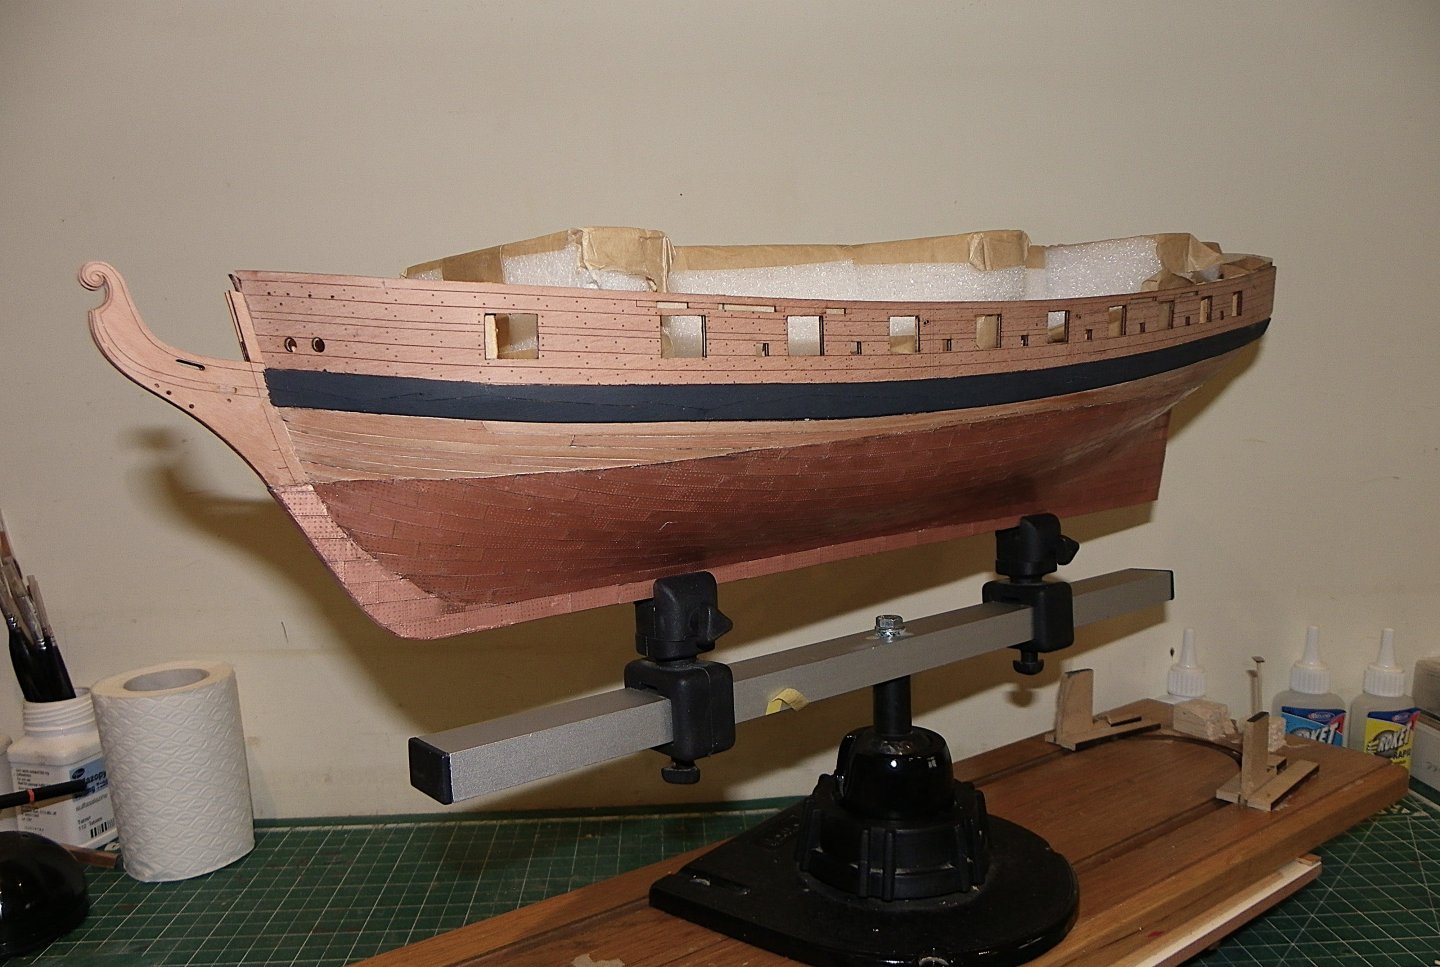
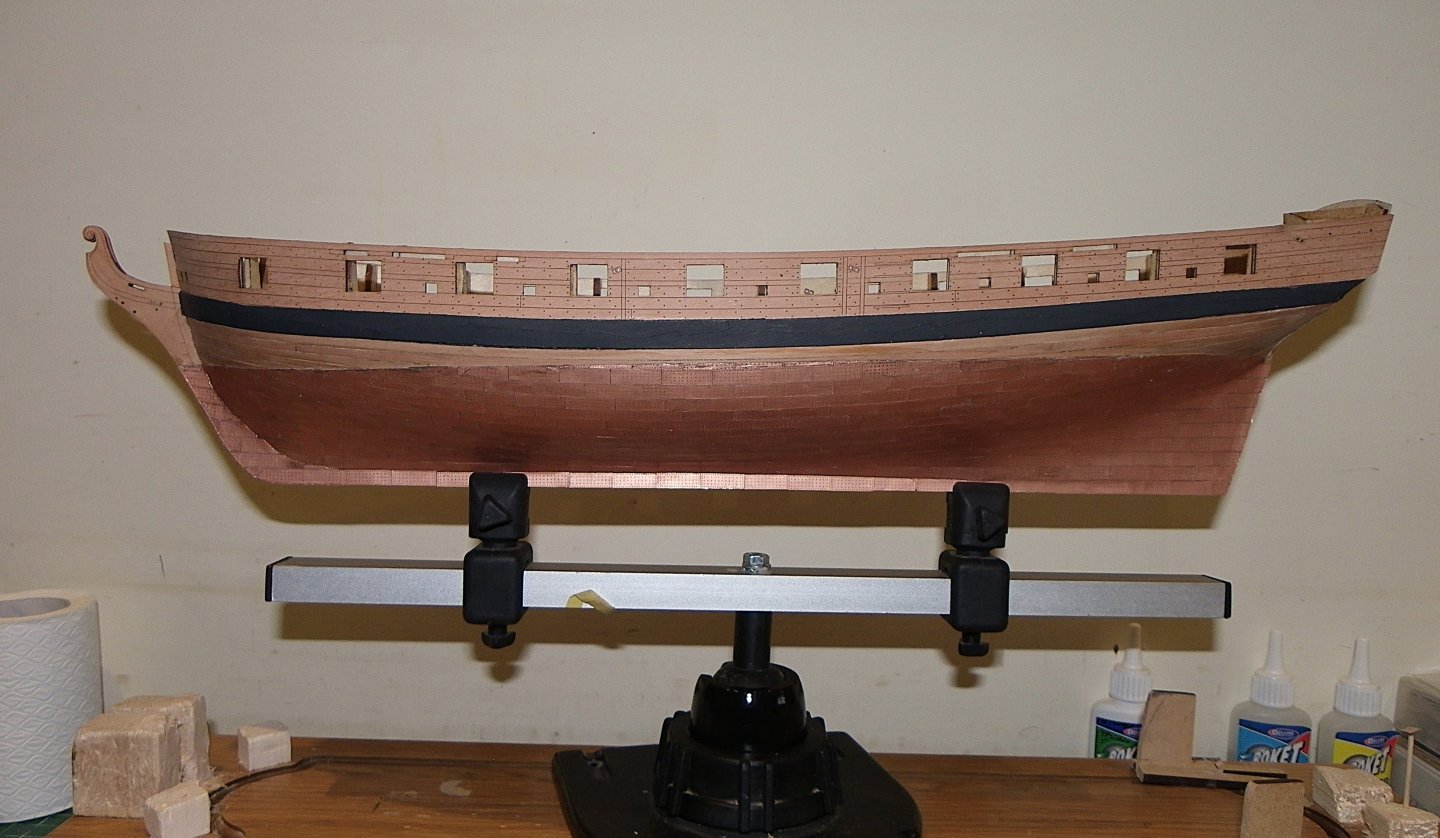
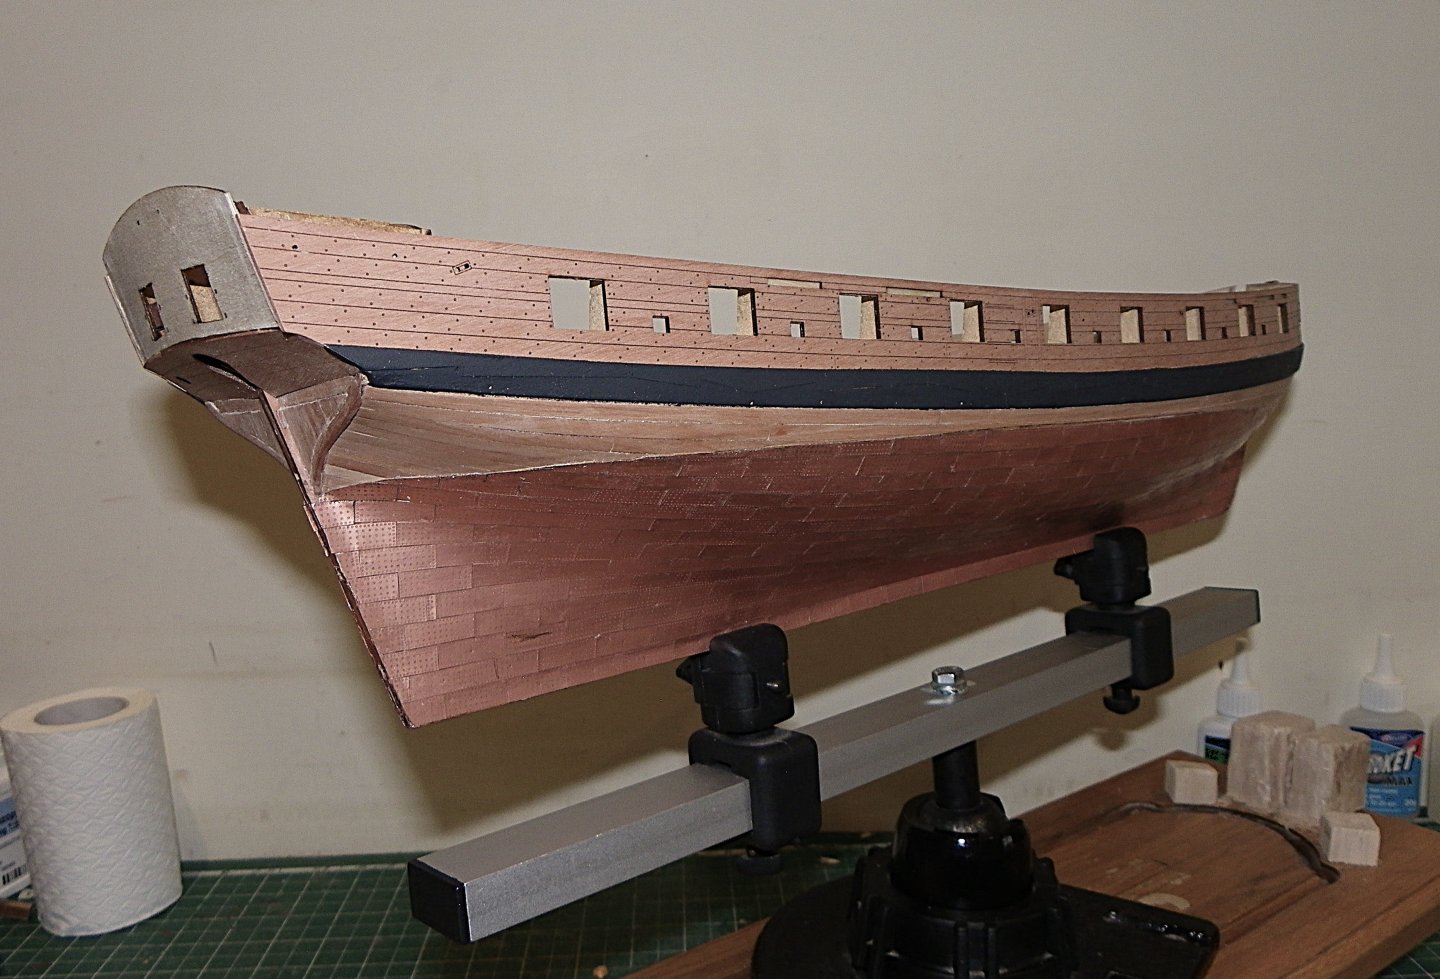
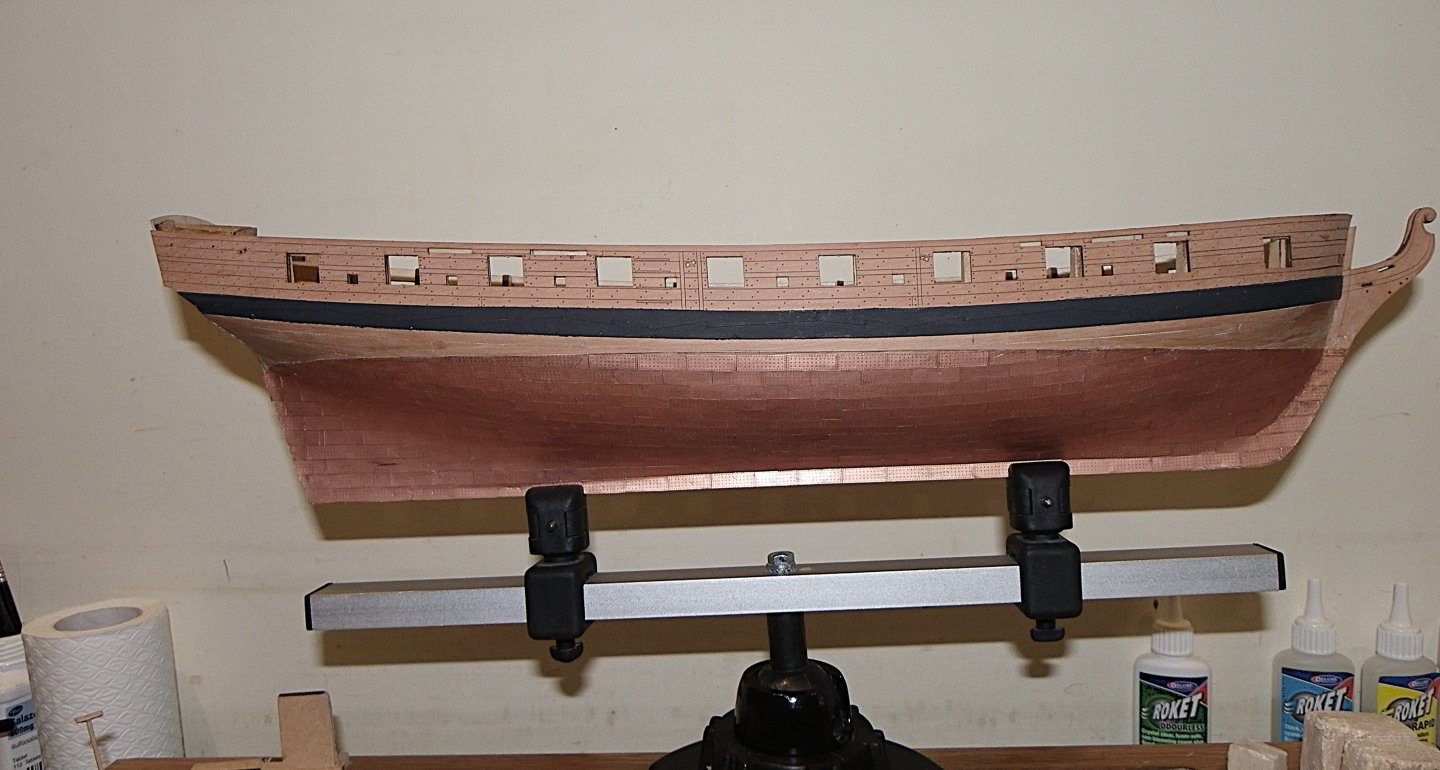
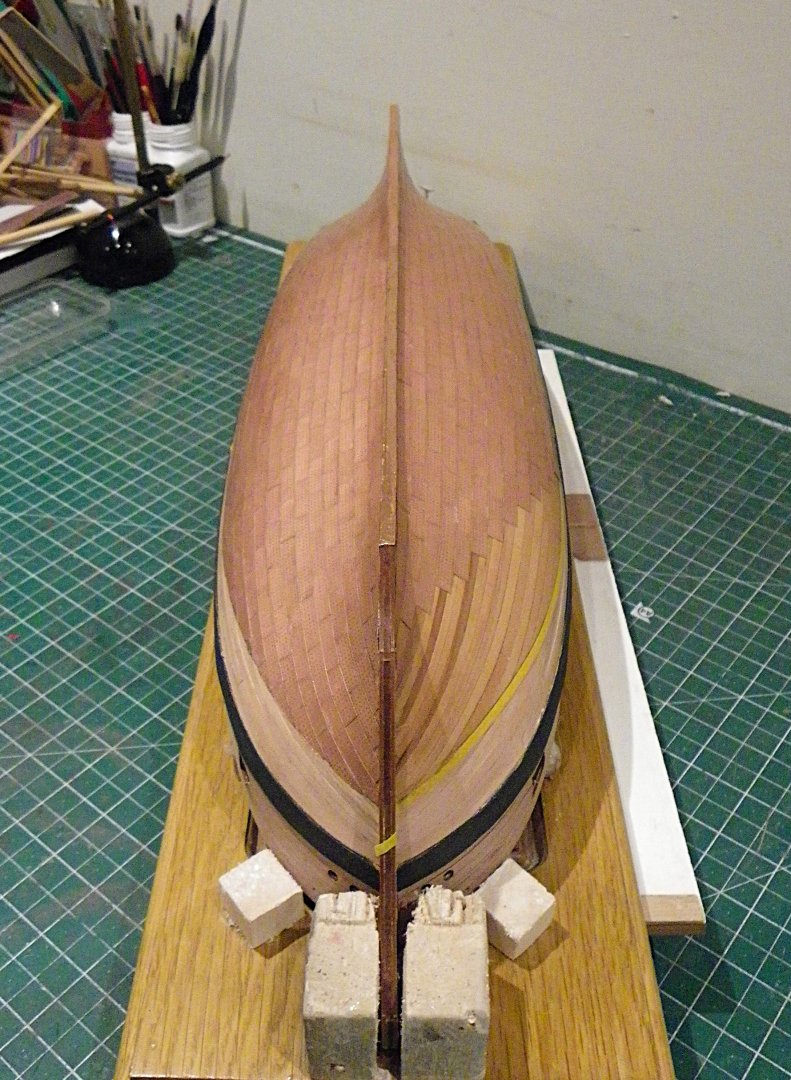
Post 37 Back to the Construction Three coats of W-o-P have been applied between Wale and Water-line, but I’m a tad disappointed. 0369 Despite my efforts to colour match the Pear strips, there is some striping evident. 0355 The mdf tabs have been removed in preparation for deck planking. The lower deck has been covered to prevent dust which may be tricky to completely clear. 0357 0359 A second support cradle, has been re- purposed, from Cheerful I think, for working with the hull upright. The supplied working cradle is good for some things but holding the hull steady ain’t one of them. 0362 0368 0374 0378 The kit instructions now indicate use of the engraved deck section before adding the inner bulwarks. I am looking to plank the deck using Boxwood 3.4mm x 0.7mm strips, and I need to work out a plan before I begin. B.E. 17/02/2025


- 332 replies
-
- 24
-
-
- Harpy
- Vanguard Models
- (and 1 more)
-
Thank you Mark and Ron. @ Ron - Jotika/Caldercraft are still supplying those domed headed plates, difficult to understand why. They don't seem to have moved on very much in their fittings, but I do like their sets of 0.3mm etched eyelets sold in sheets of 250. B.E.
- 332 replies
-
- 1
-
-
- Harpy
- Vanguard Models
- (and 1 more)
-
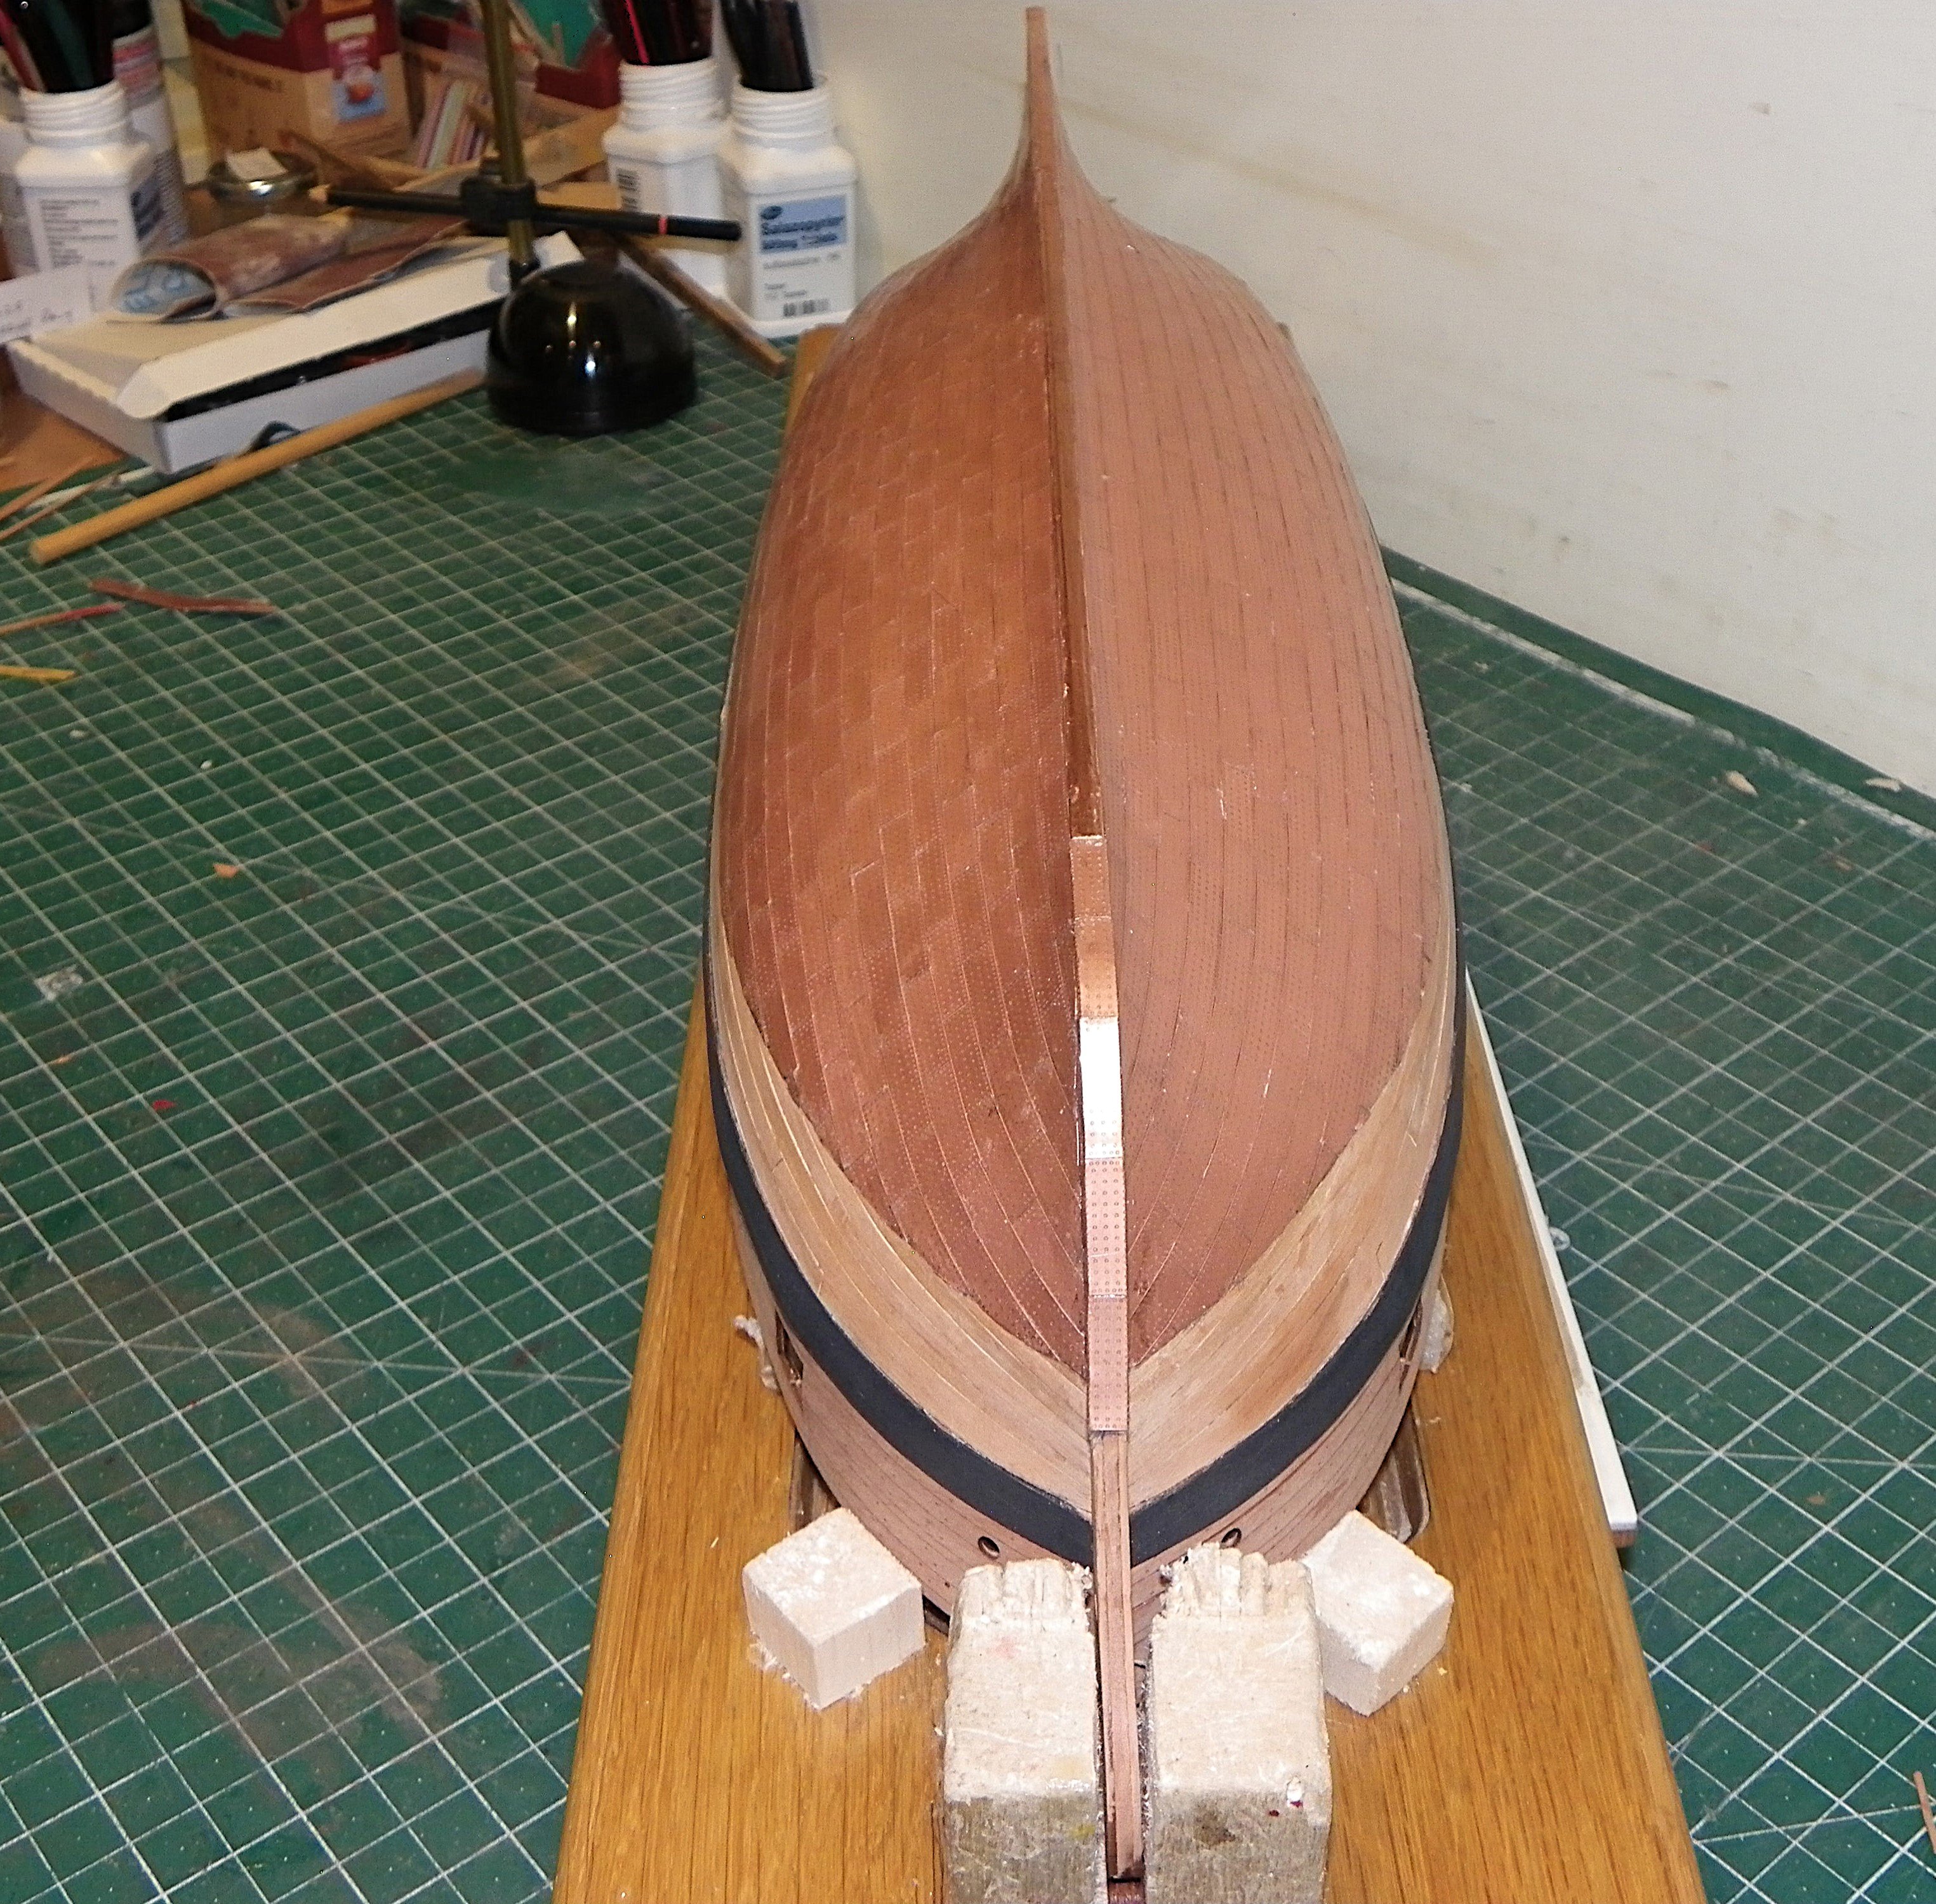
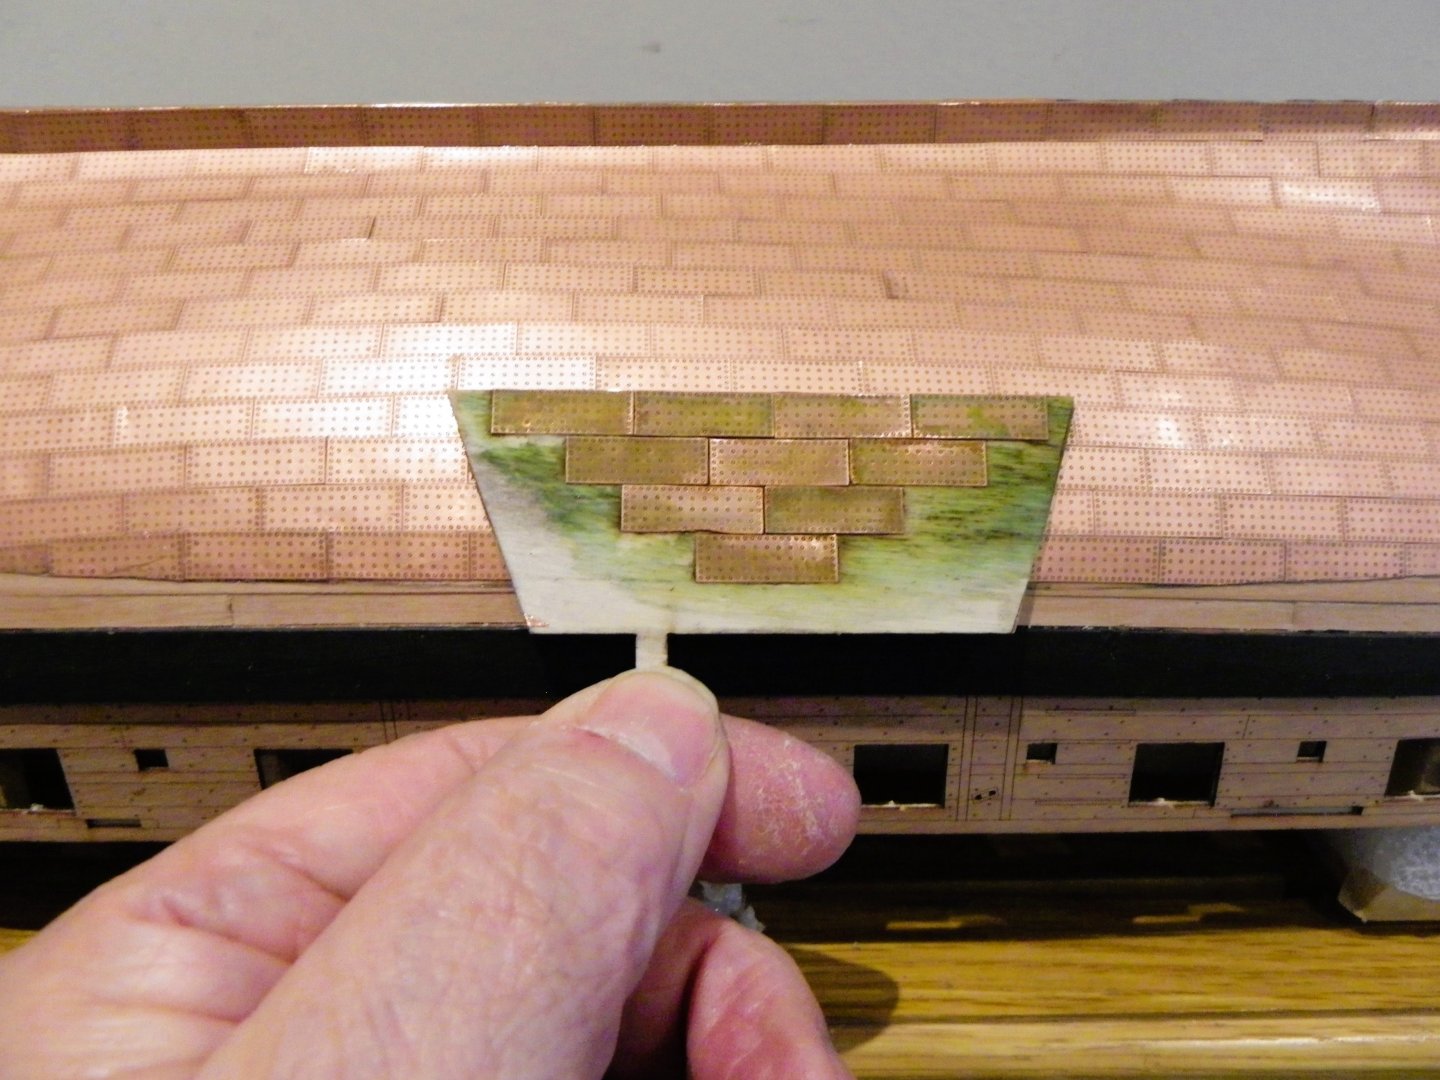
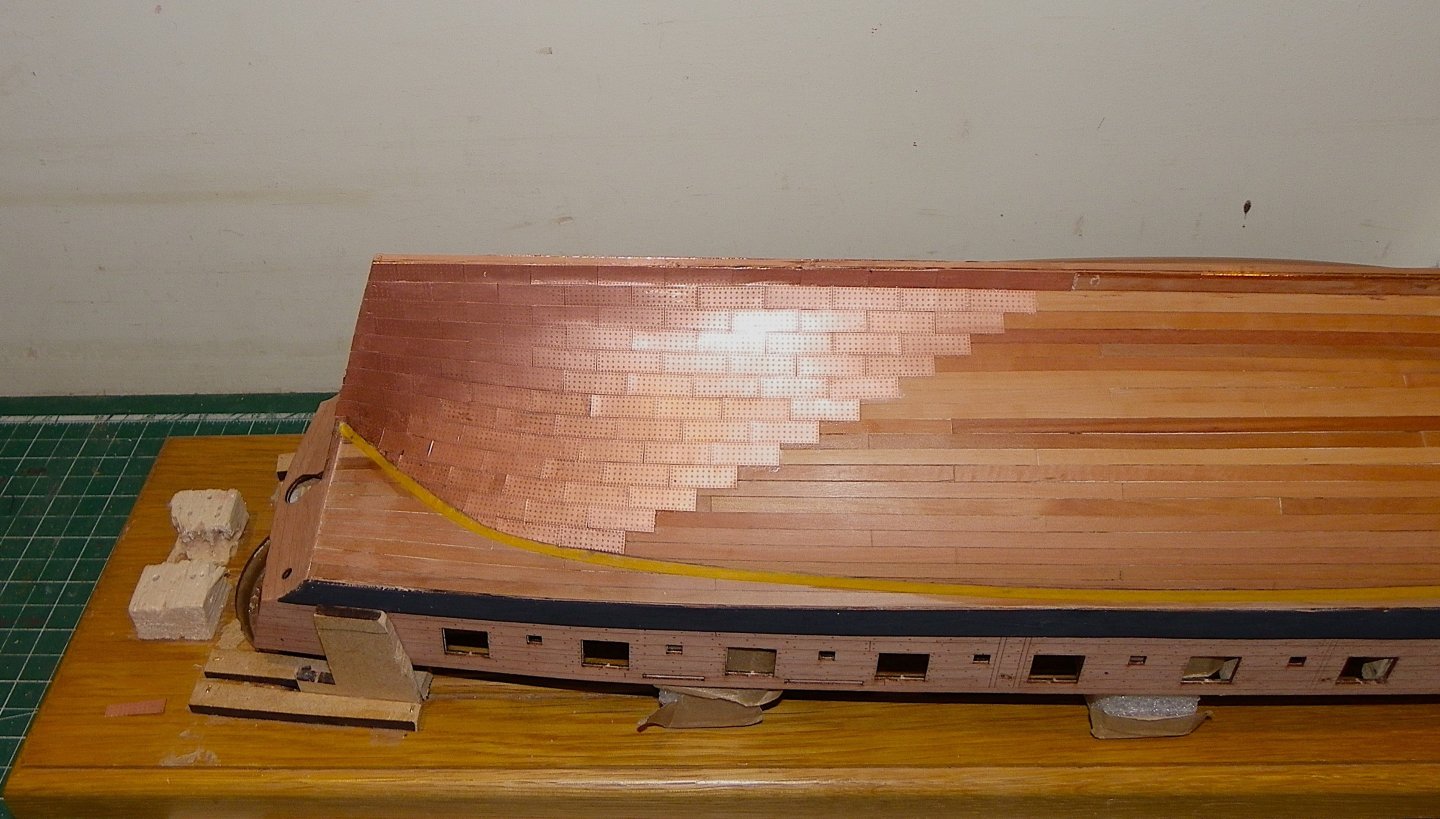
Post 36 The copper saga continues. I decided to add a batten along the copper top line. 0323 0326 For this I used 1.0.x 0.7mm Pearwood strip. 0327 0329 0332 0334 0337 A fairly easy process using cyano on dampened wood, working along the hull by degrees. Acetone was kept handy to clean as I went along. Any tiny gaps were sealed with thick copper paint. The next stage is clean-up, apply w-o-p to the woodwork between wale and copper. Add the Outer Bulwark sheer rails, and remove the mdf bulkhead ears to clear the deck for planking. I will return to the copper sheathing in due course. B.E. 15/02/2025


- 332 replies
-
- 24
-
-
- Harpy
- Vanguard Models
- (and 1 more)
-
I did decide to fit a batten, spent today fitting it. It does neaten up the copper line. B.E.
- 332 replies
-
- 4
-
-
- Harpy
- Vanguard Models
- (and 1 more)
-
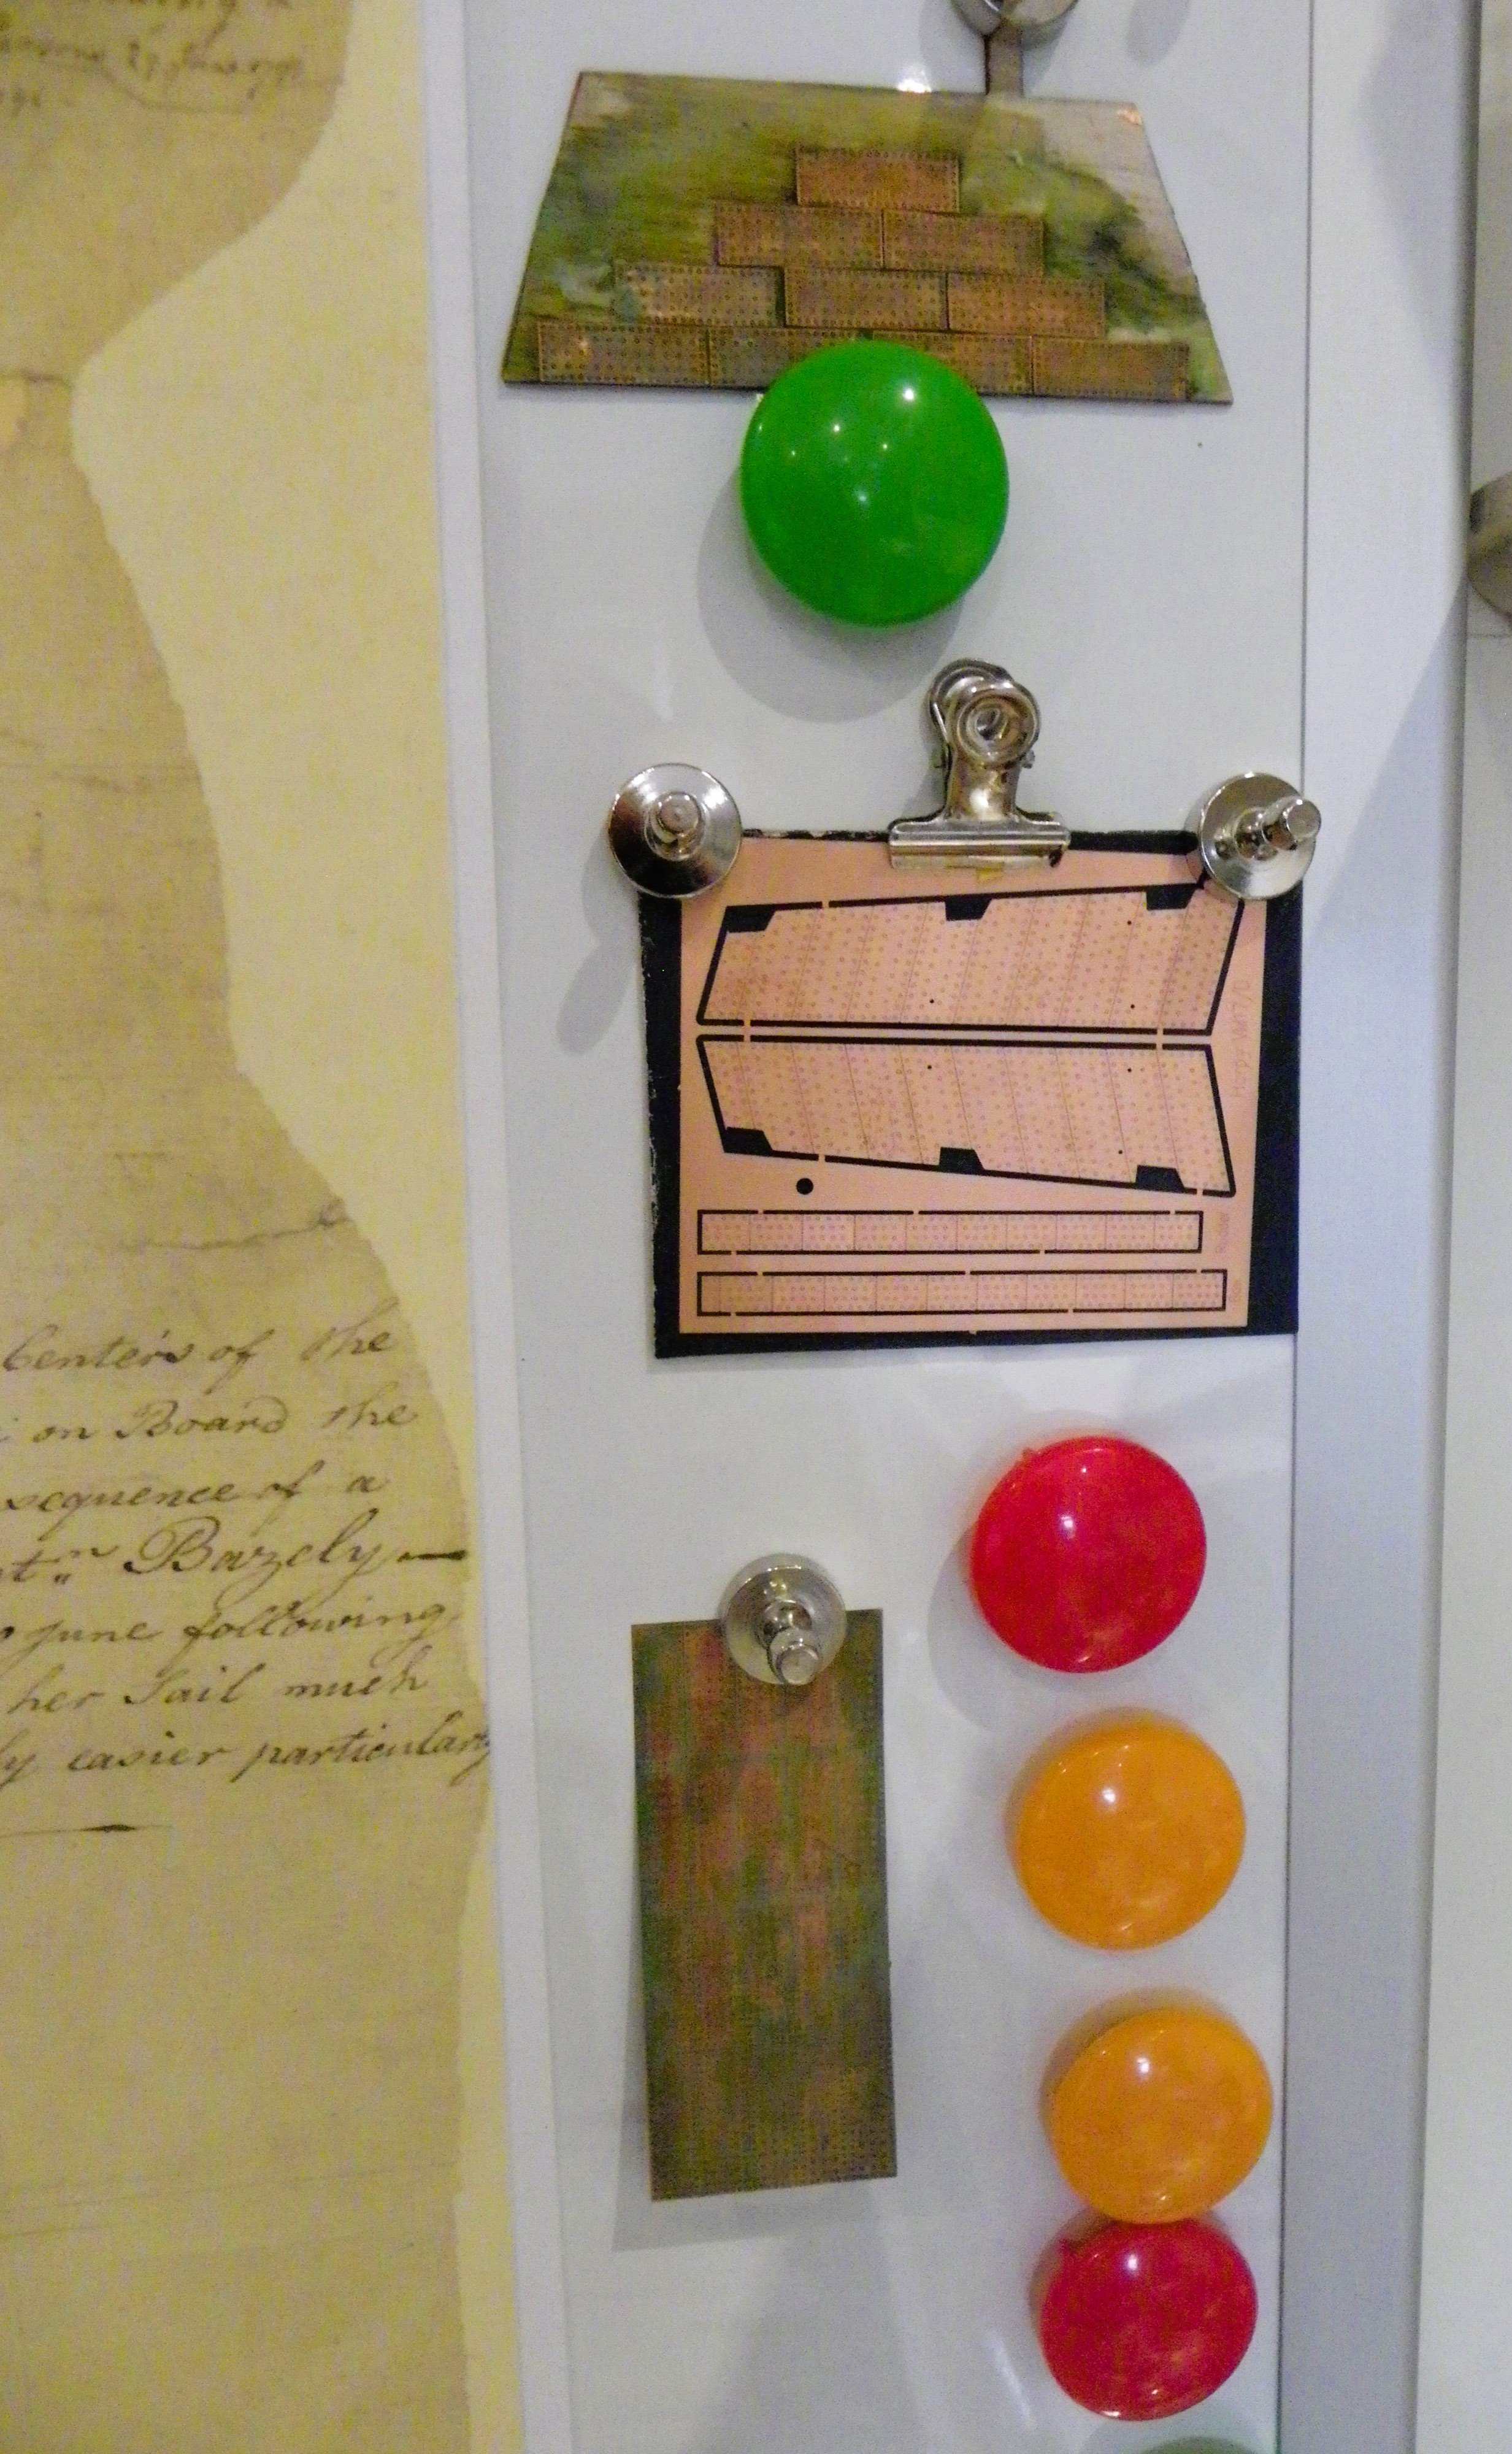
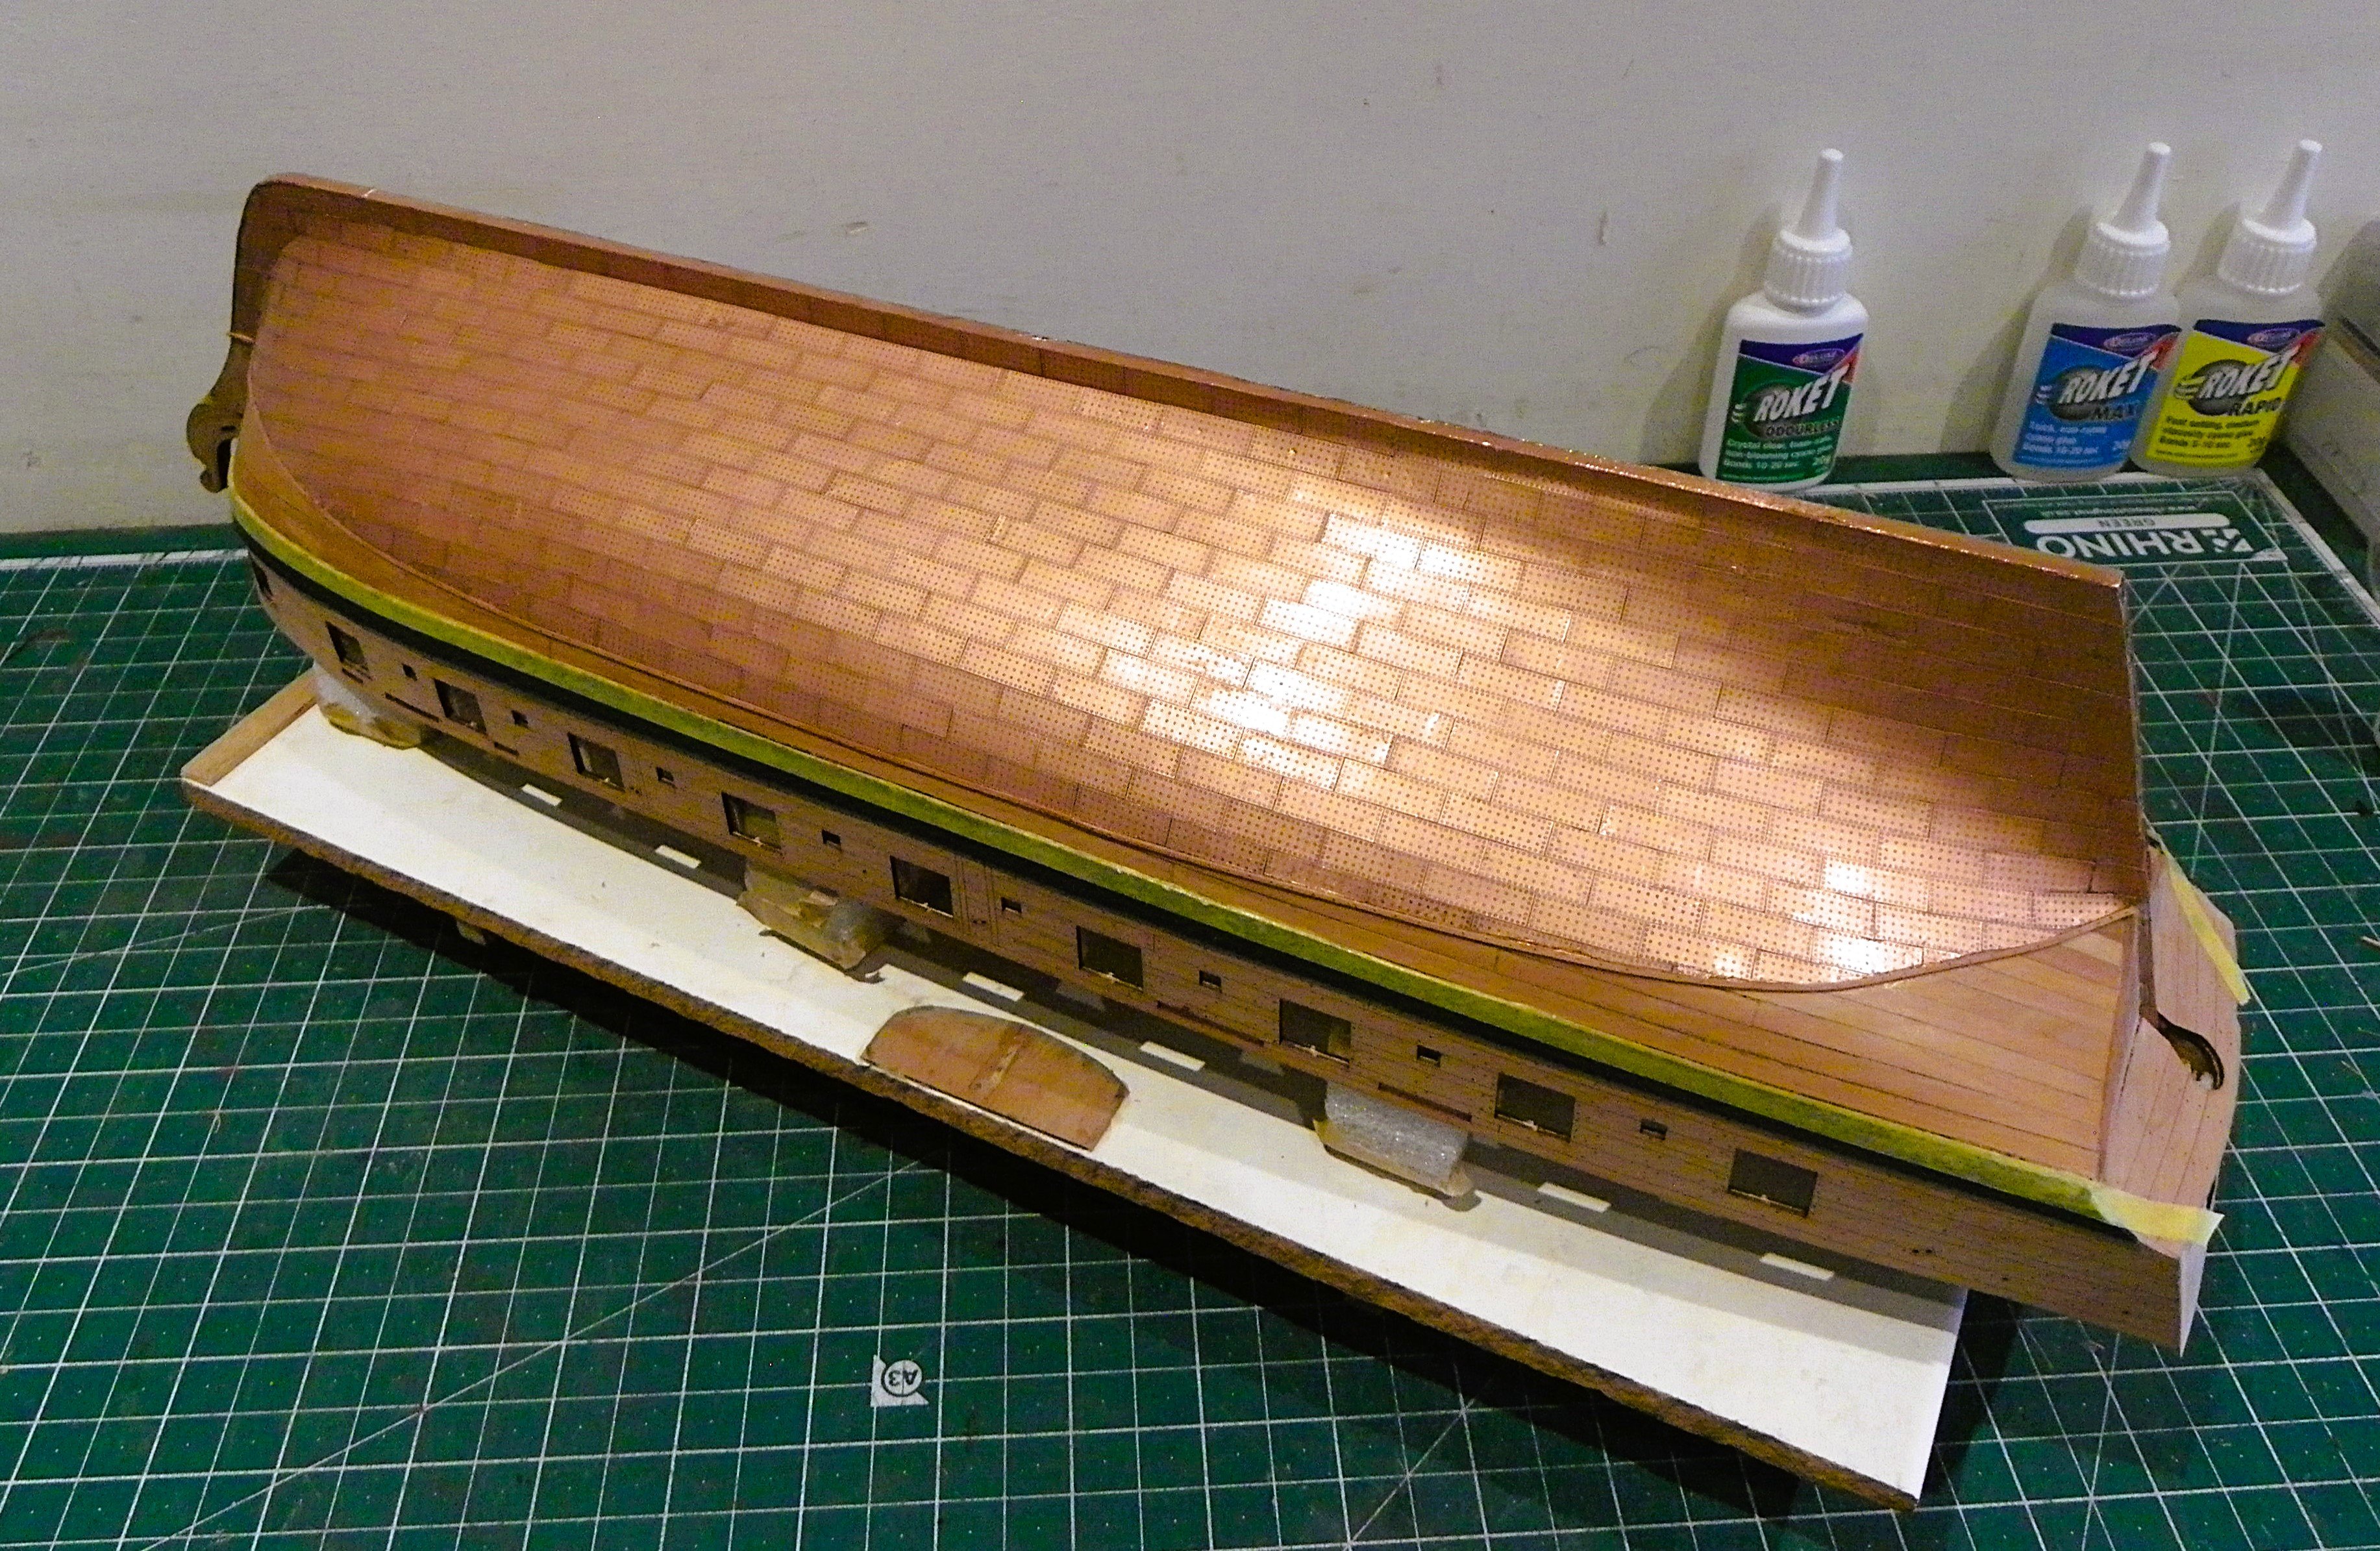
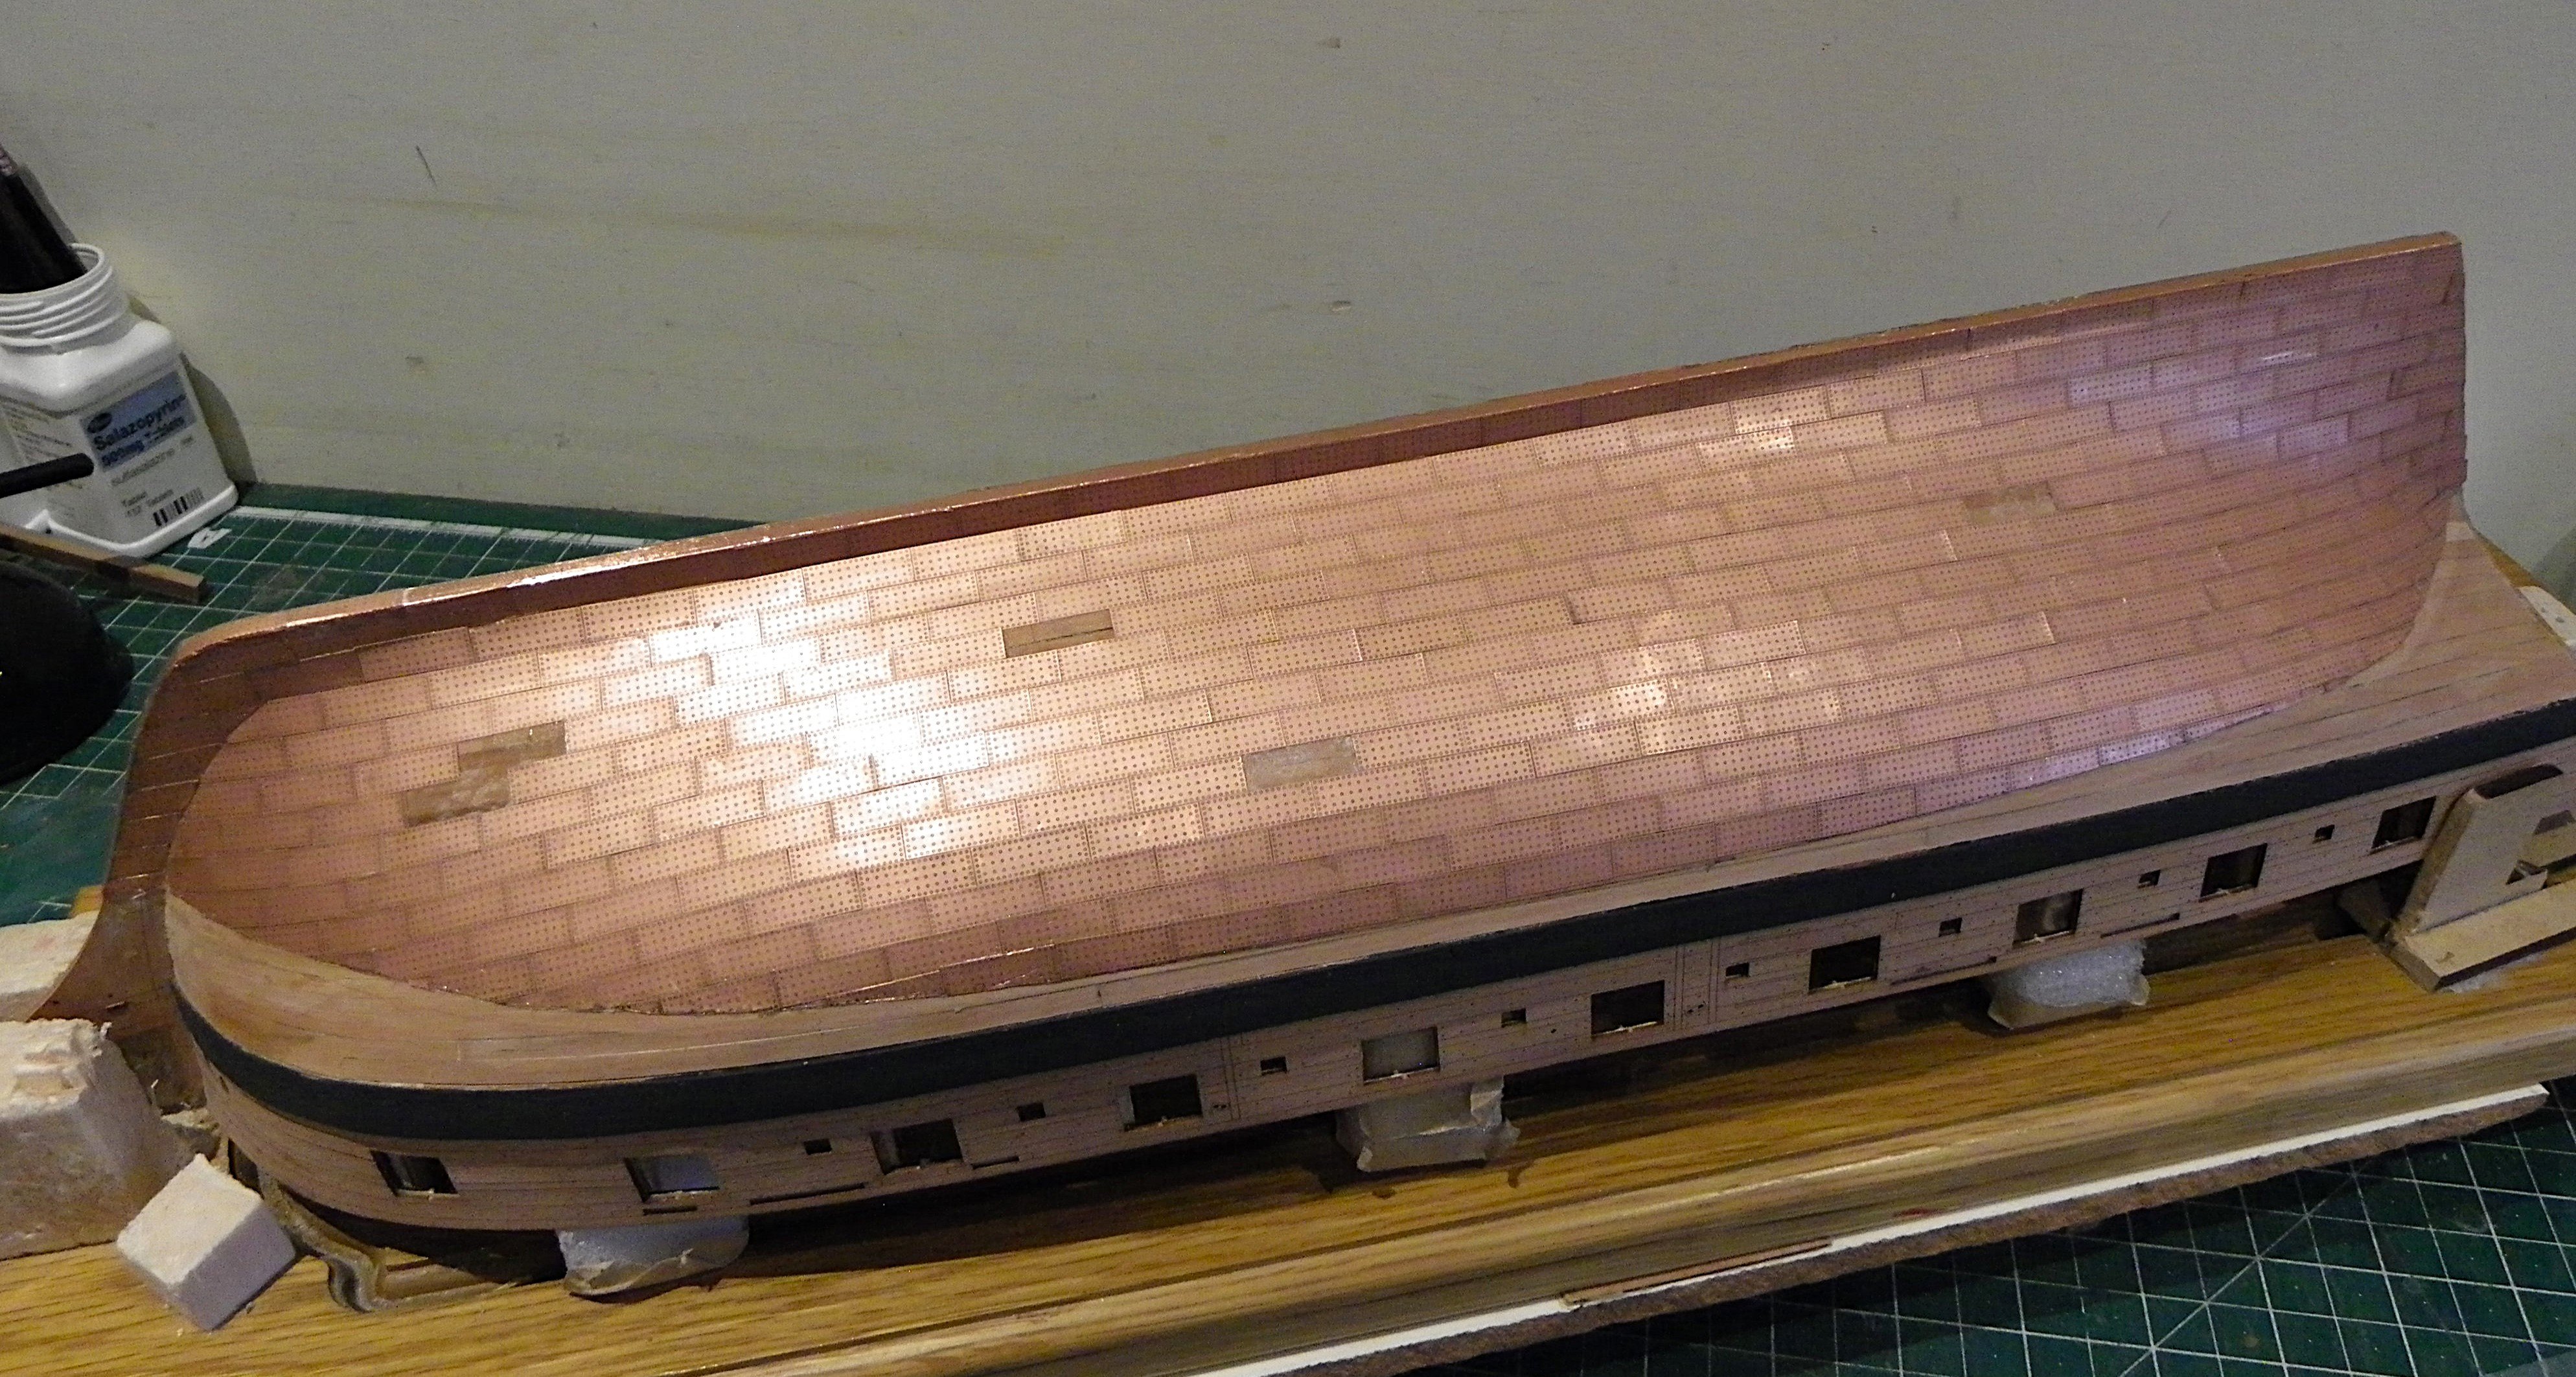
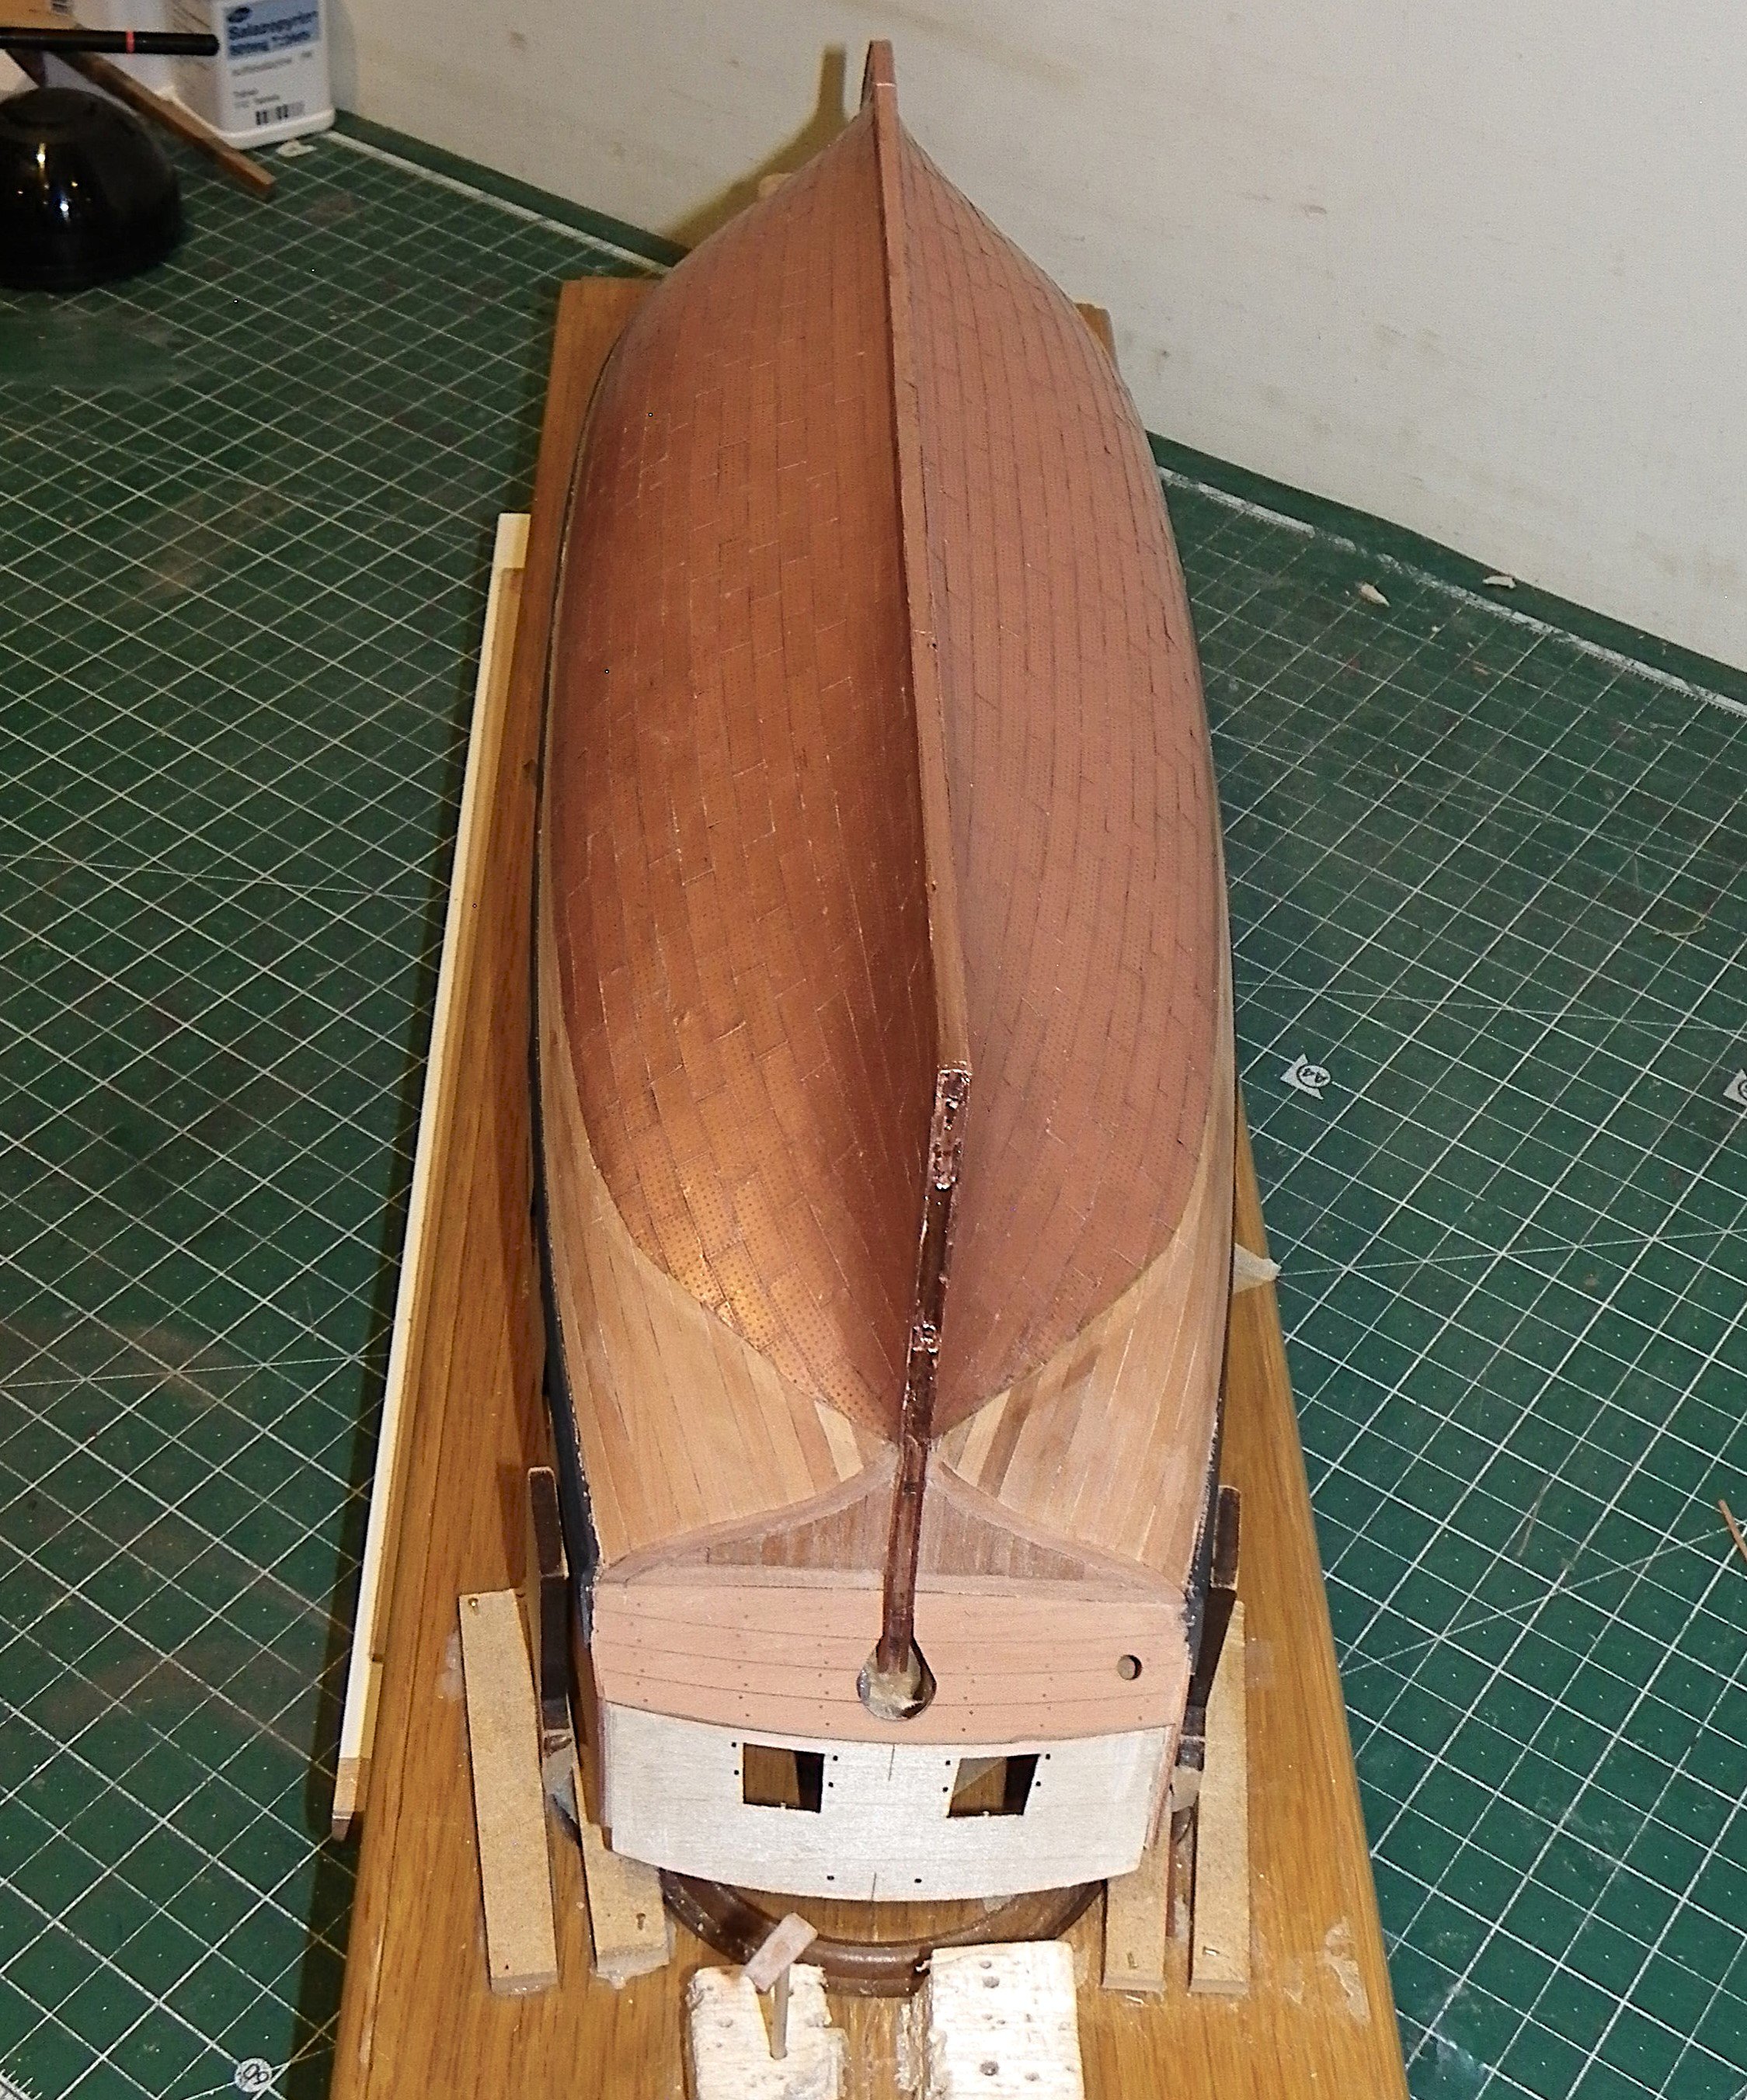
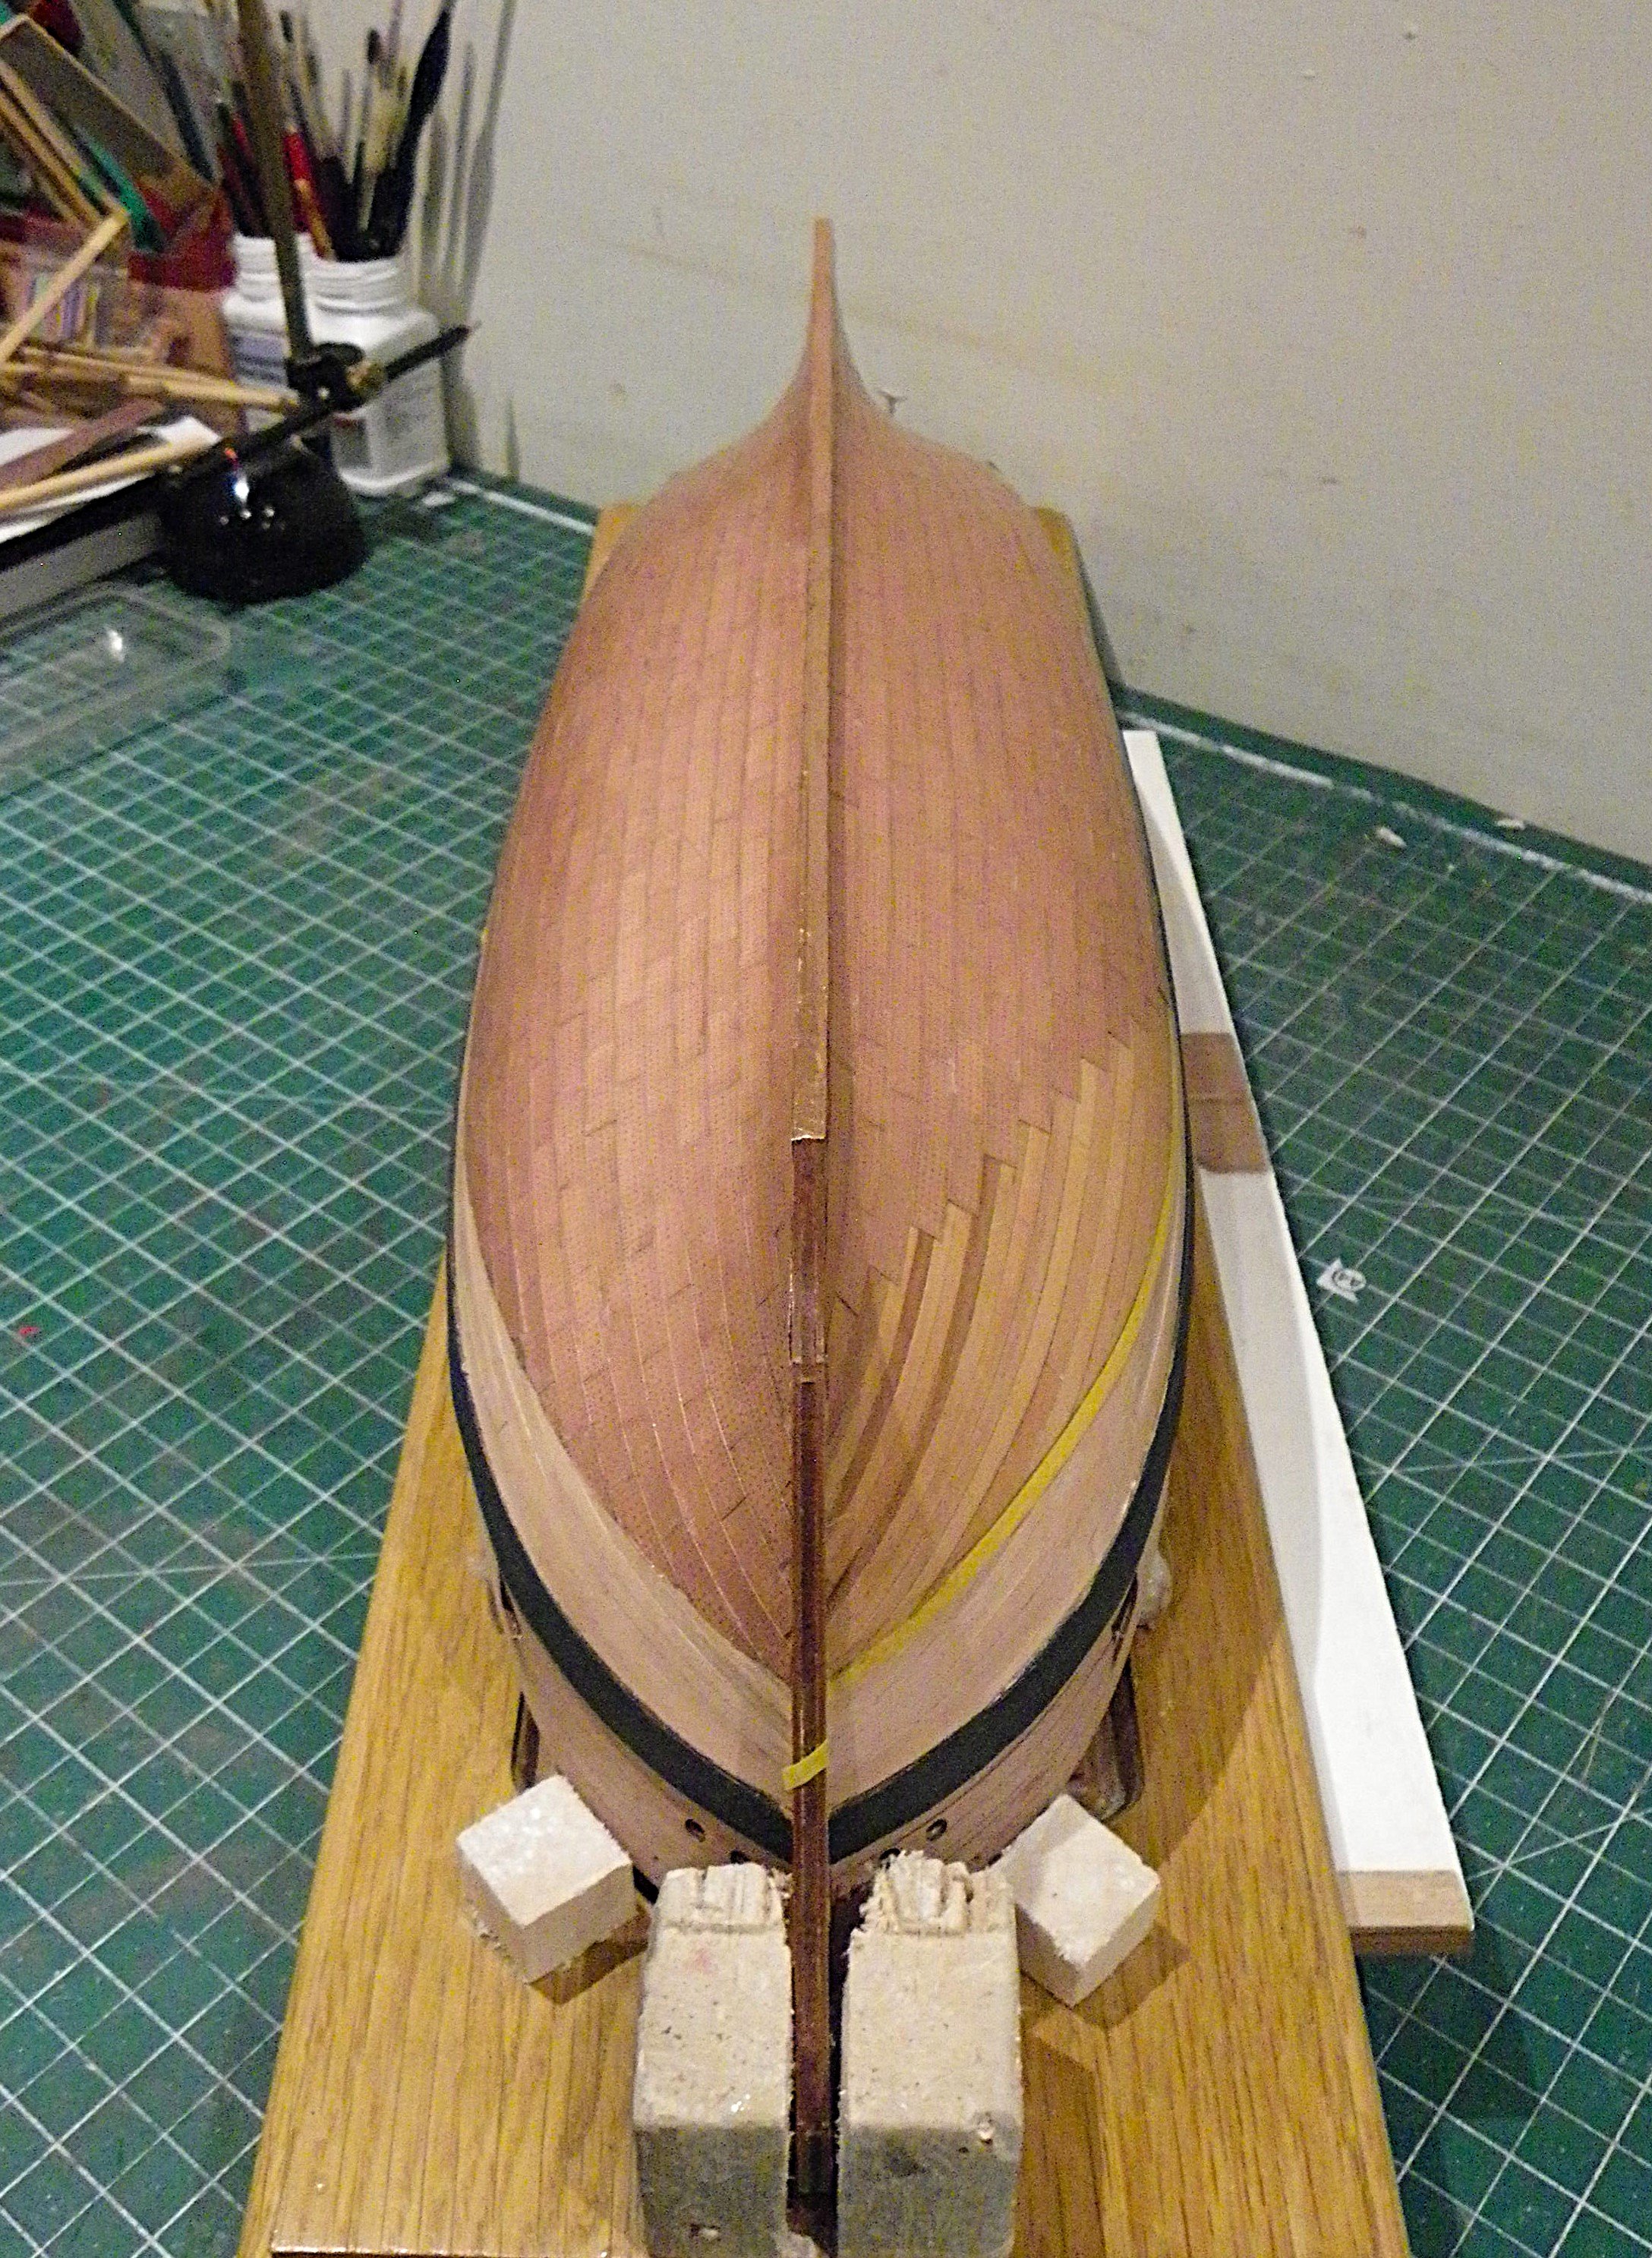
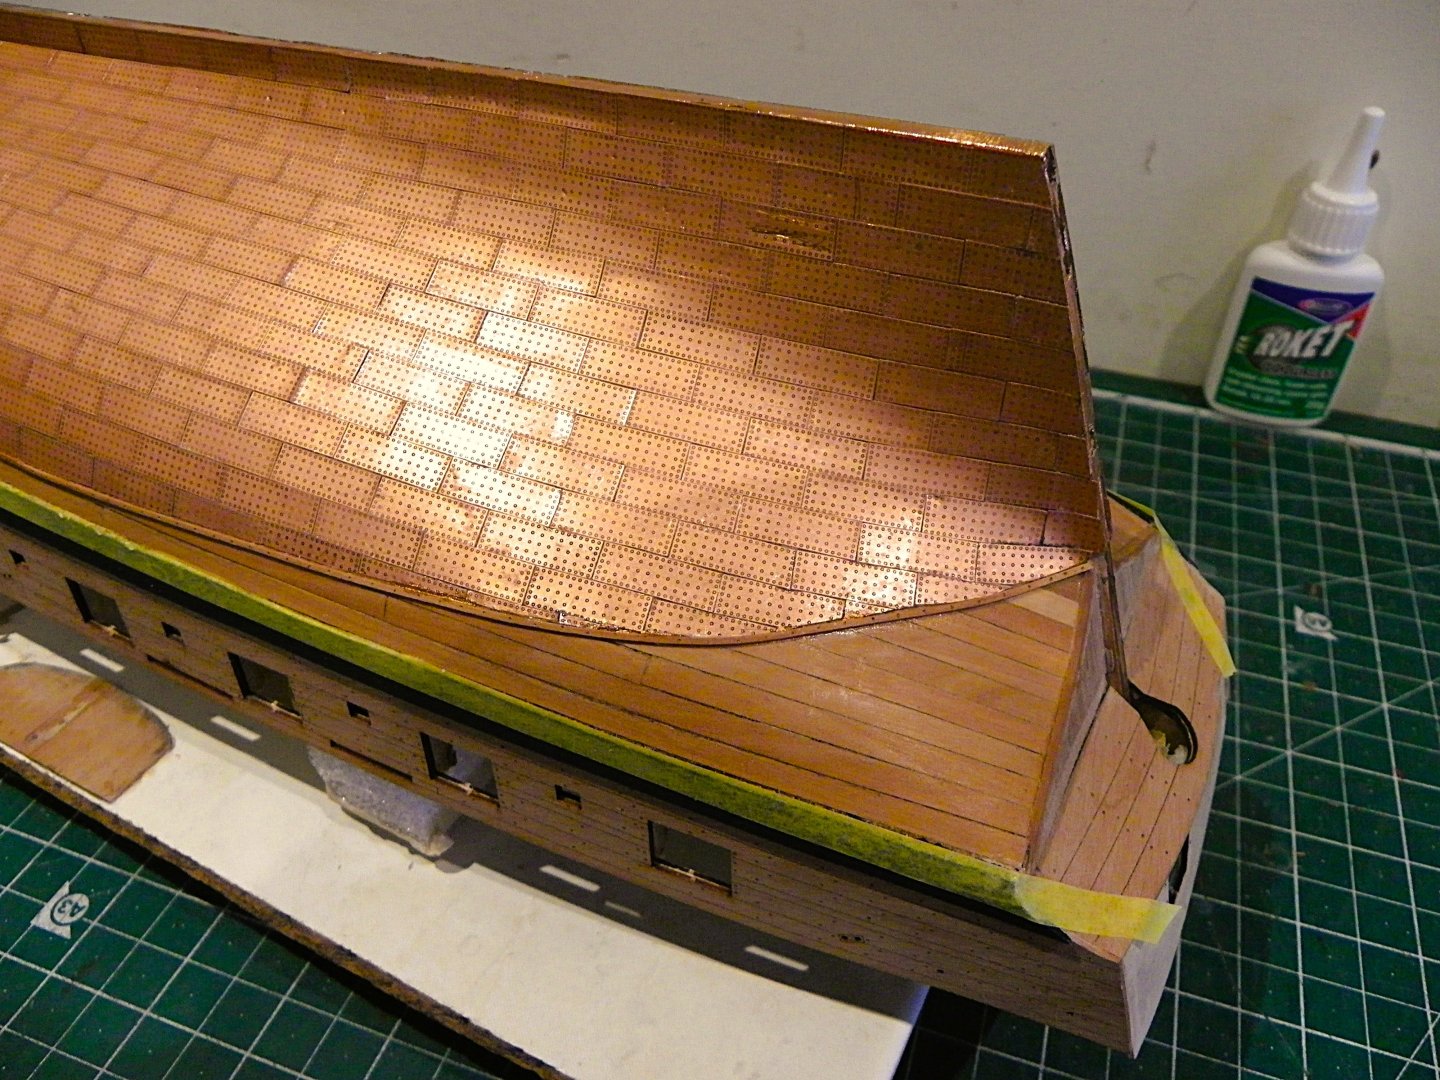
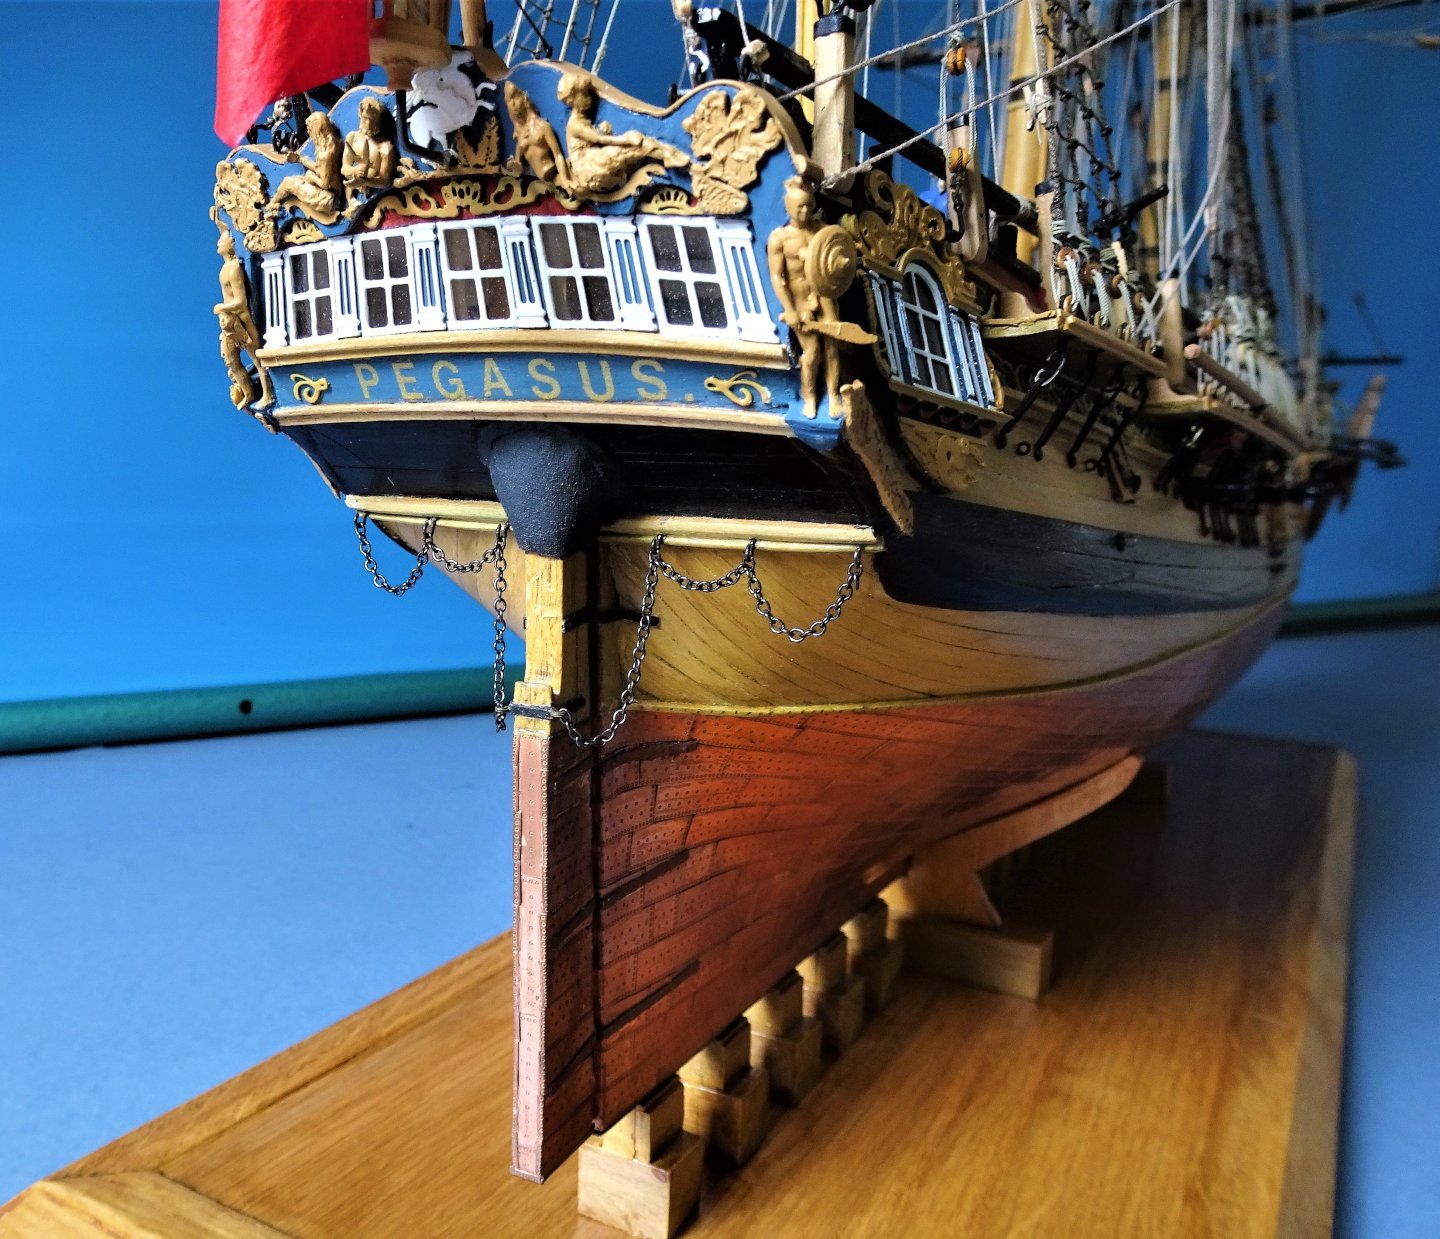
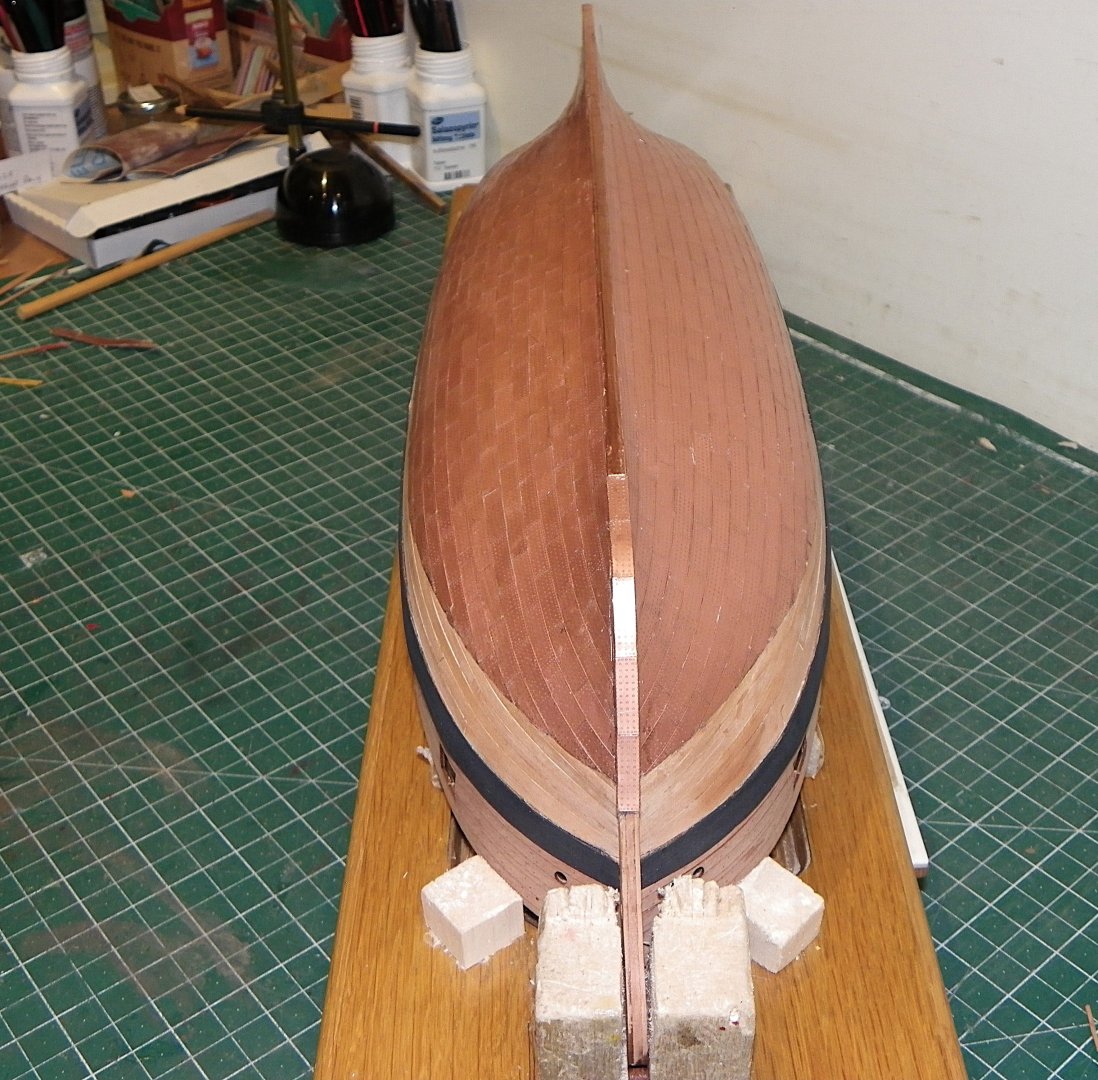
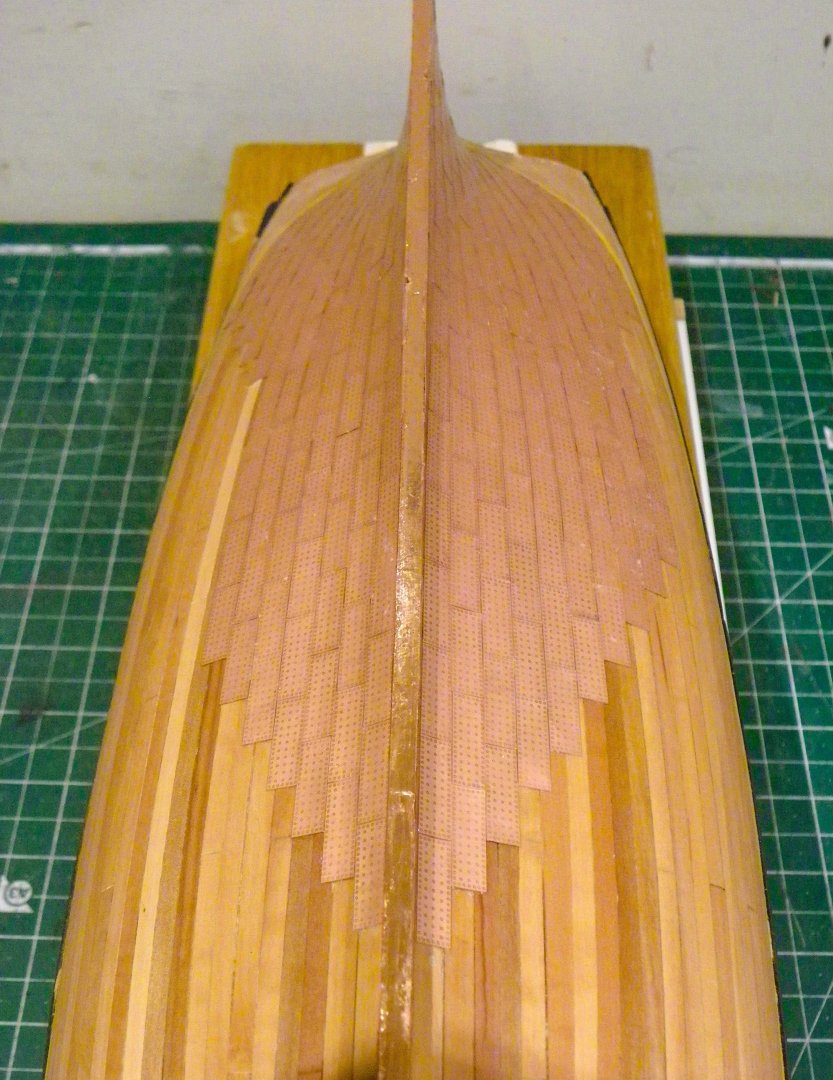
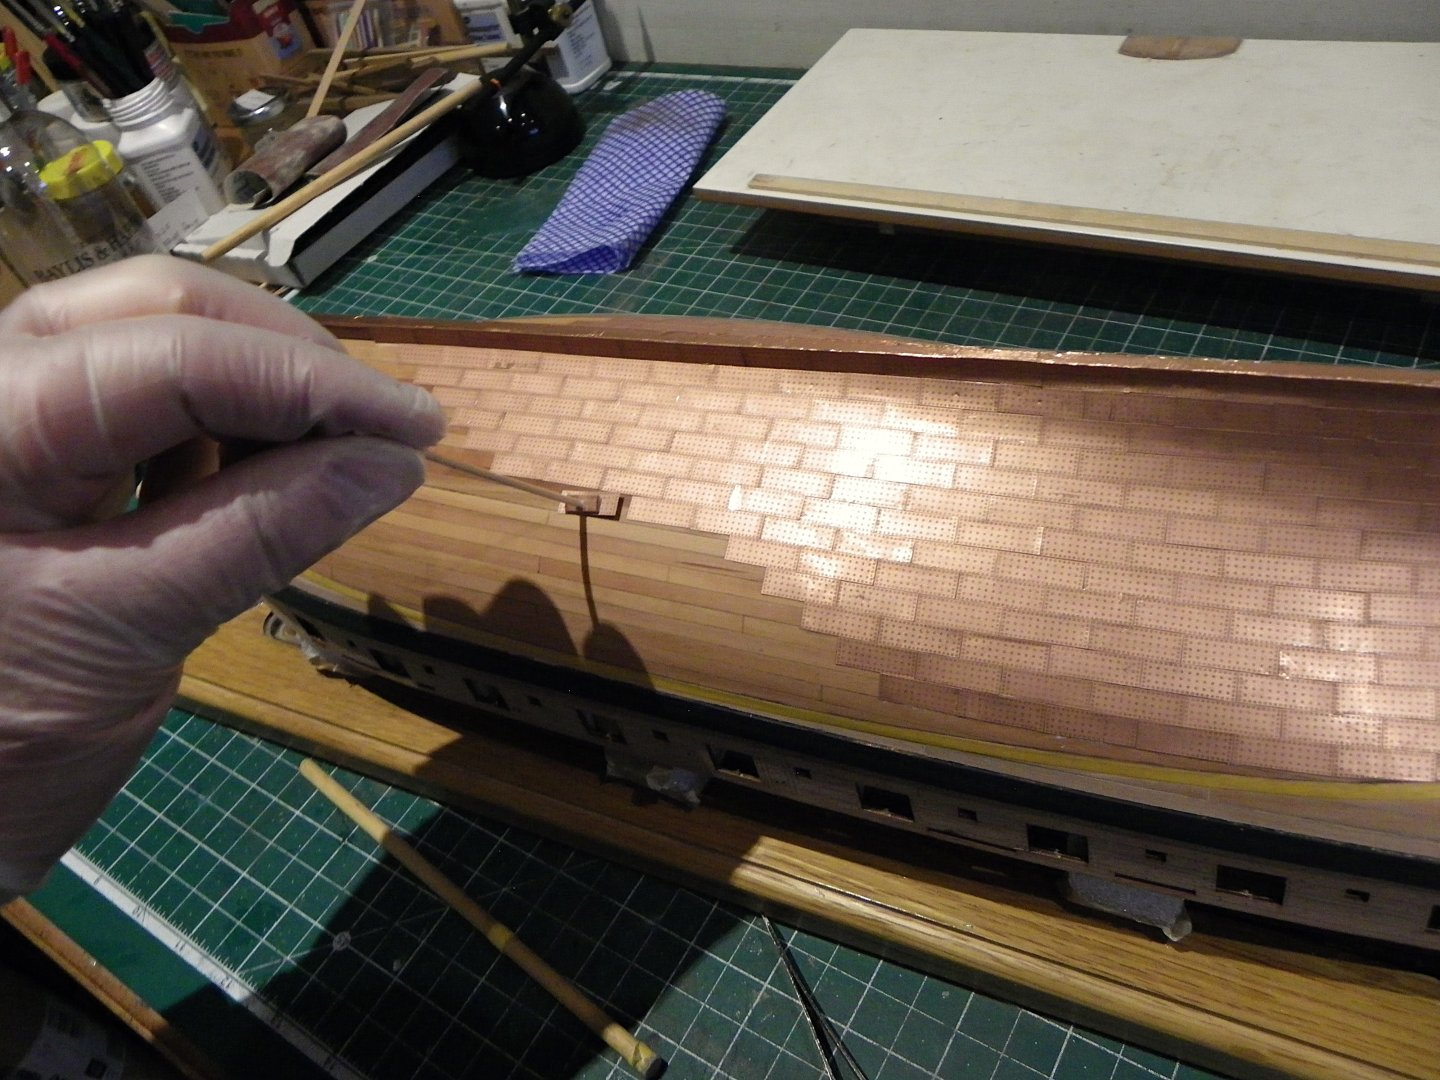
Post 35 A critical look at the coppering. At this point I do a finger test of the plating. Any snags felt require additional gluing or replacing of the plates. 0258 Plates do remove easily once a scalpel blade is inserted beneath one corner. Cleaning the plates with Acetone as they were applied has paid dividends in that the surface colour is even and without any indications of glue marring. It is quite tricky to get a completely smooth and even line at the copper top line because inevitably small pieces are required to meet the marked waterline. This is an area where use of copper tape makes life easier. To address this, tape is once again applied to the copper to show any areas that require further trimming. 0261 A new scalpel blade does cut thro’ the copper plate, but care and a steady hand is required. I took this series of photos to check how the line looked and if anything caught my eye. 0264 0265 0267 0271 0272 Doesn’t look too bad I think, but when I coppered Pegasus I added a batten along the copper top line. Brian Lavery makes reference to this, and indicates use of a 3” elm strip, which equates to around 1mm at scale. 5390 5492 Use of a batten does cover any minor irregularities in the copper line. I will have a play around and see if I prefer the look with or without a batten. As an aside it is interesting to note that Harpy is slightly bigger overall than Pegasus. Heavier, broader, and only shorter by 1’7” on the gun-deck. She is also much more heavily armed, and with an official complement of only four less than Pegasus. What she lacks is the aesthetic beauty of Pegasus. Personally I prefer the more decorative vessels produced up to the last quarter of the 18th century. B.E 14/02/2025


- 332 replies
-
- 19
-
-
- Harpy
- Vanguard Models
- (and 1 more)
-
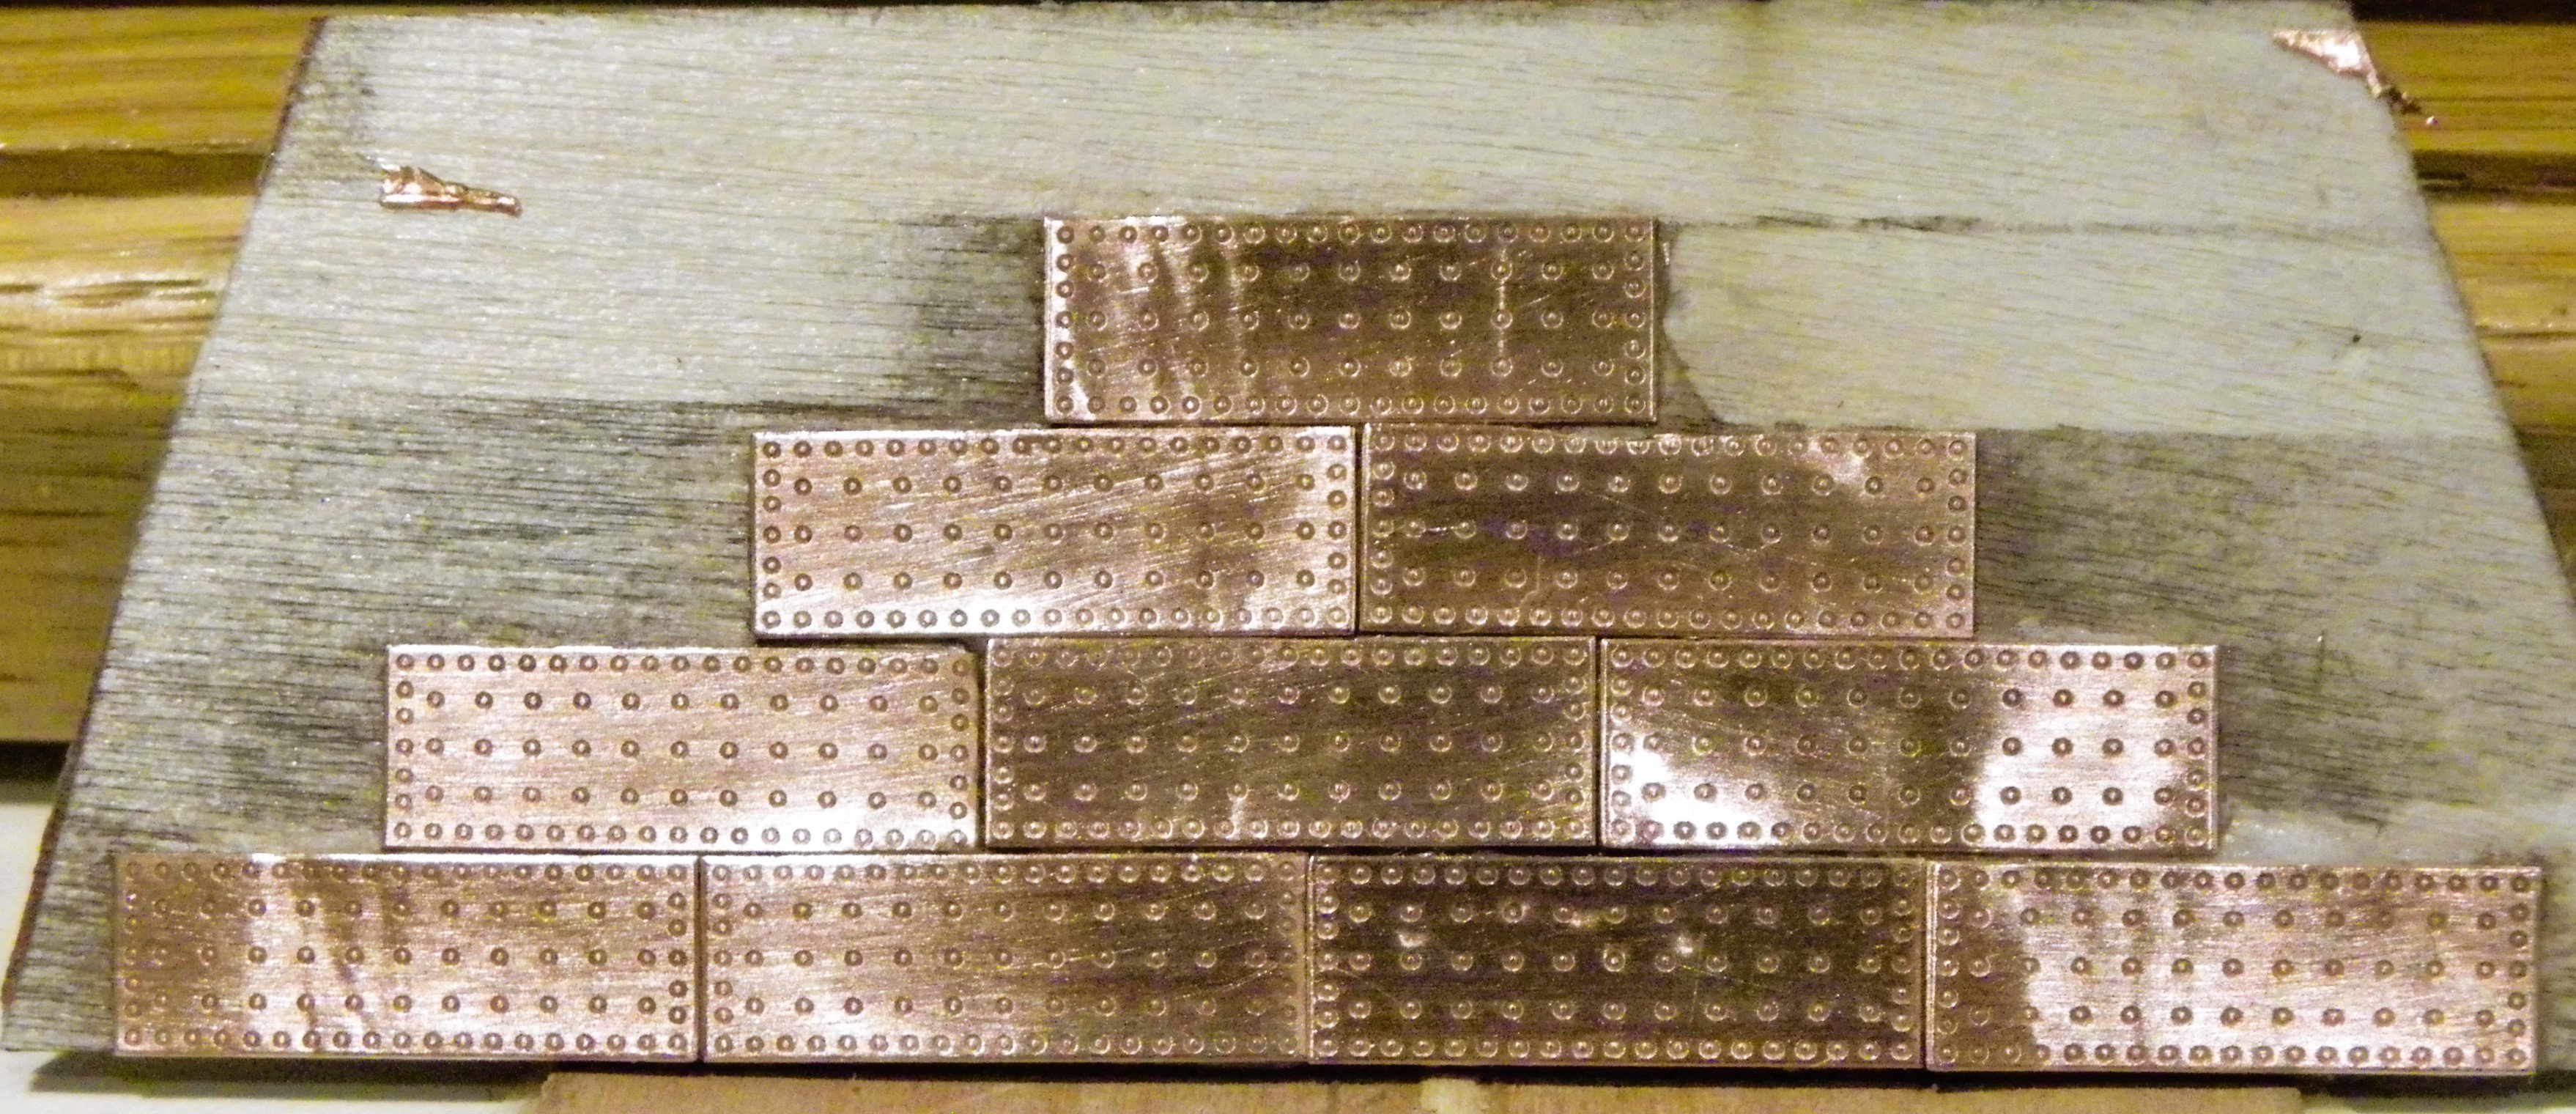
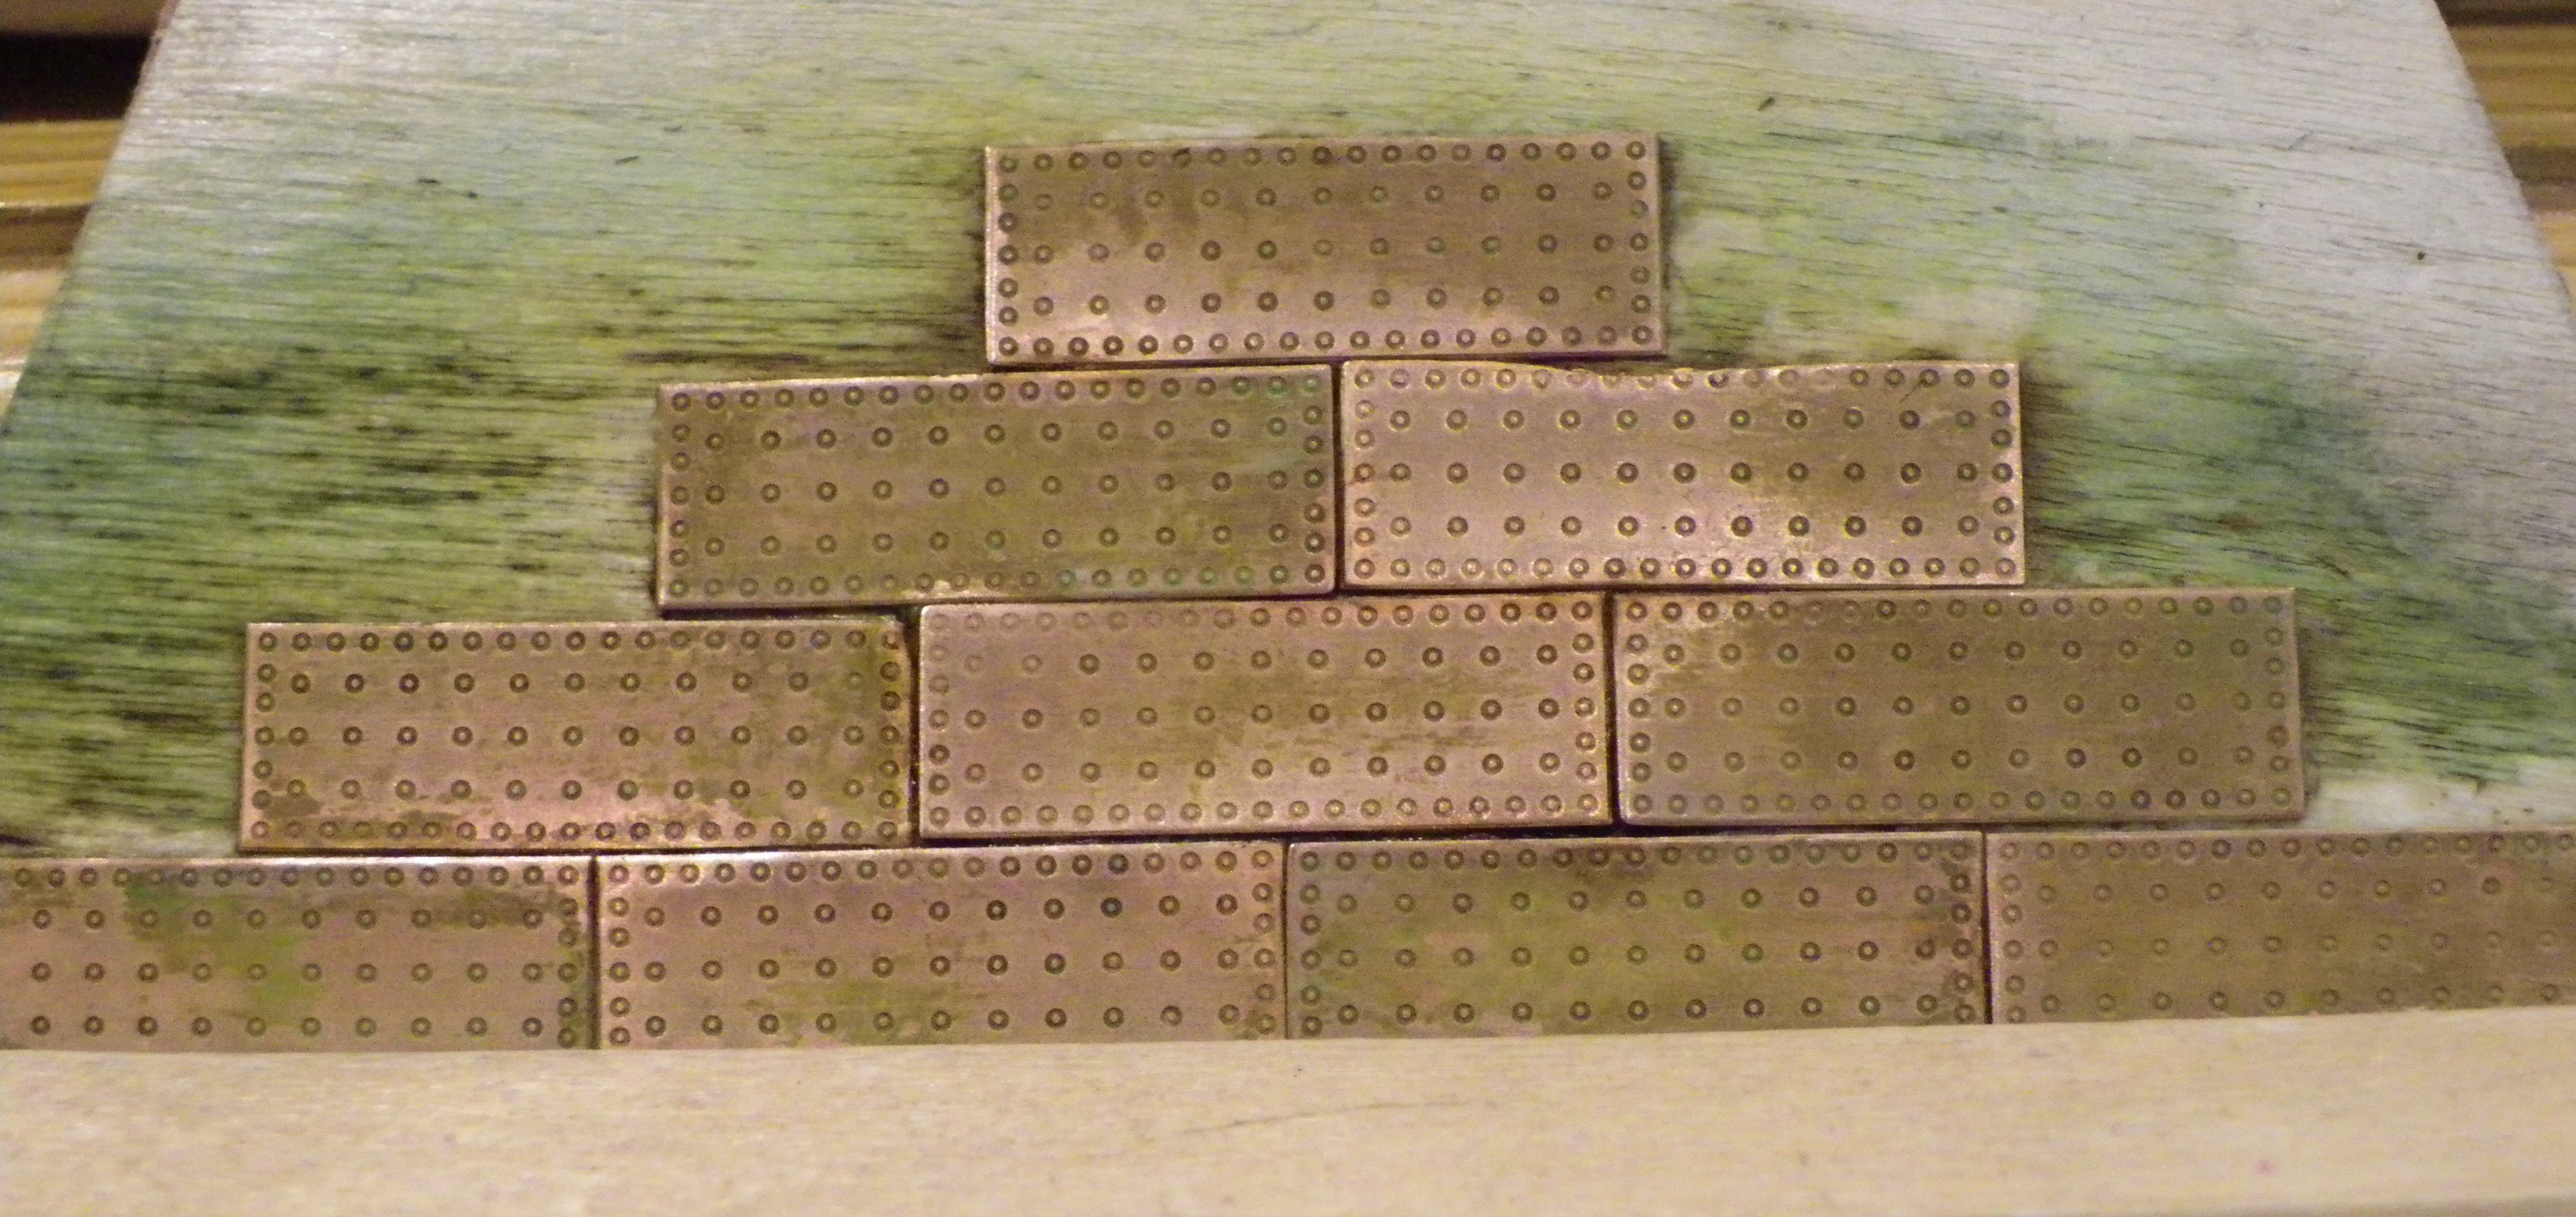
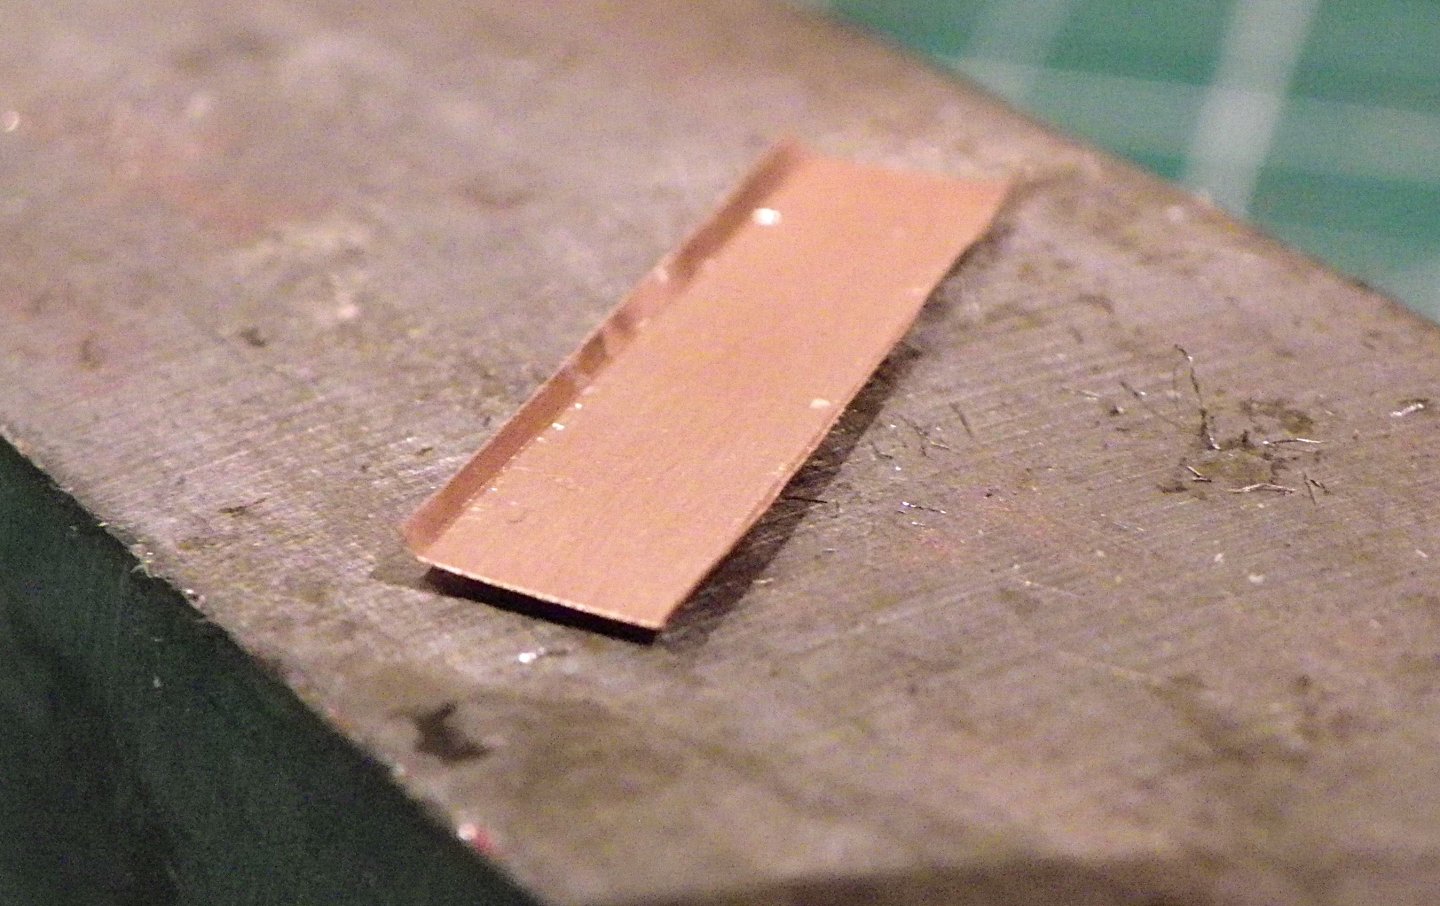
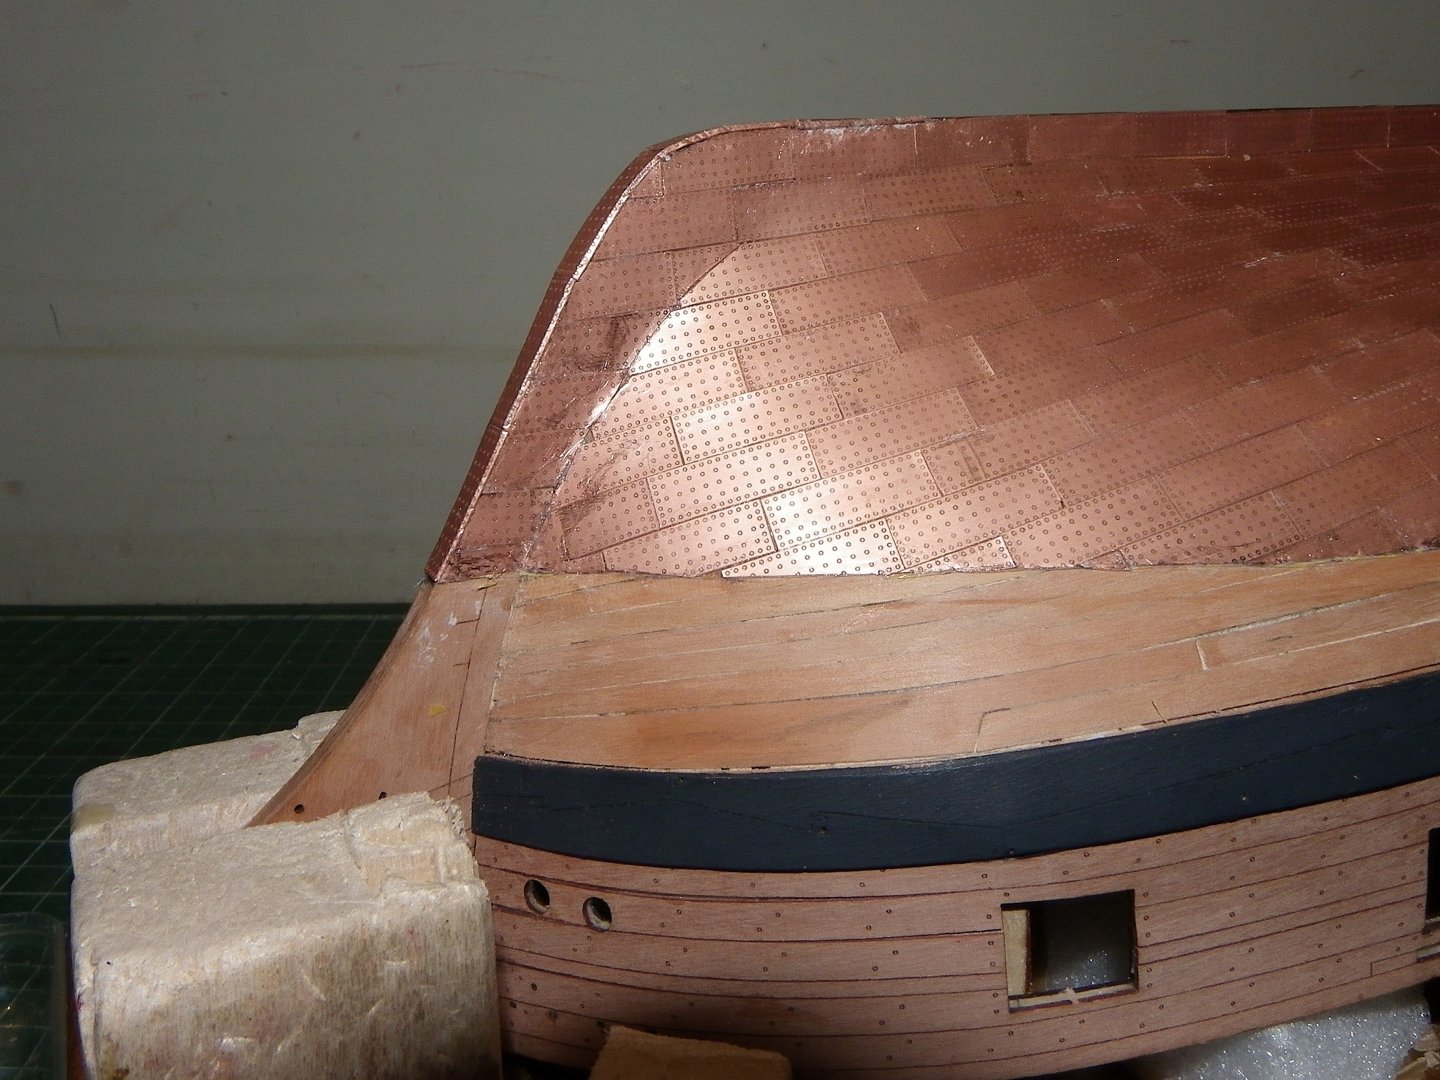
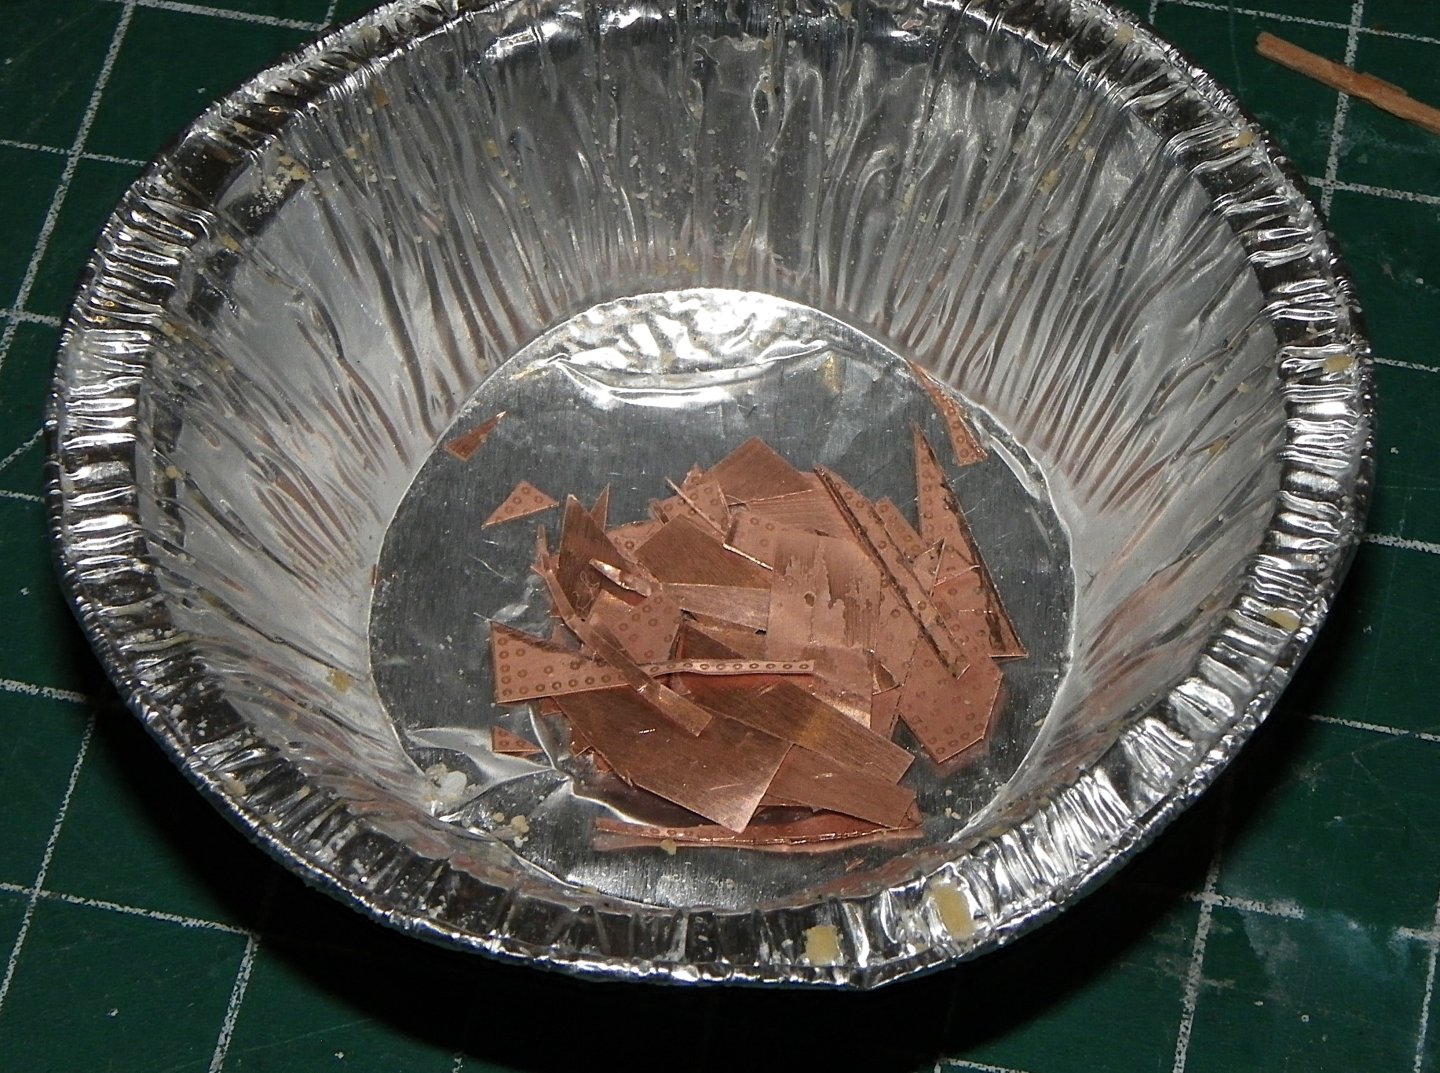
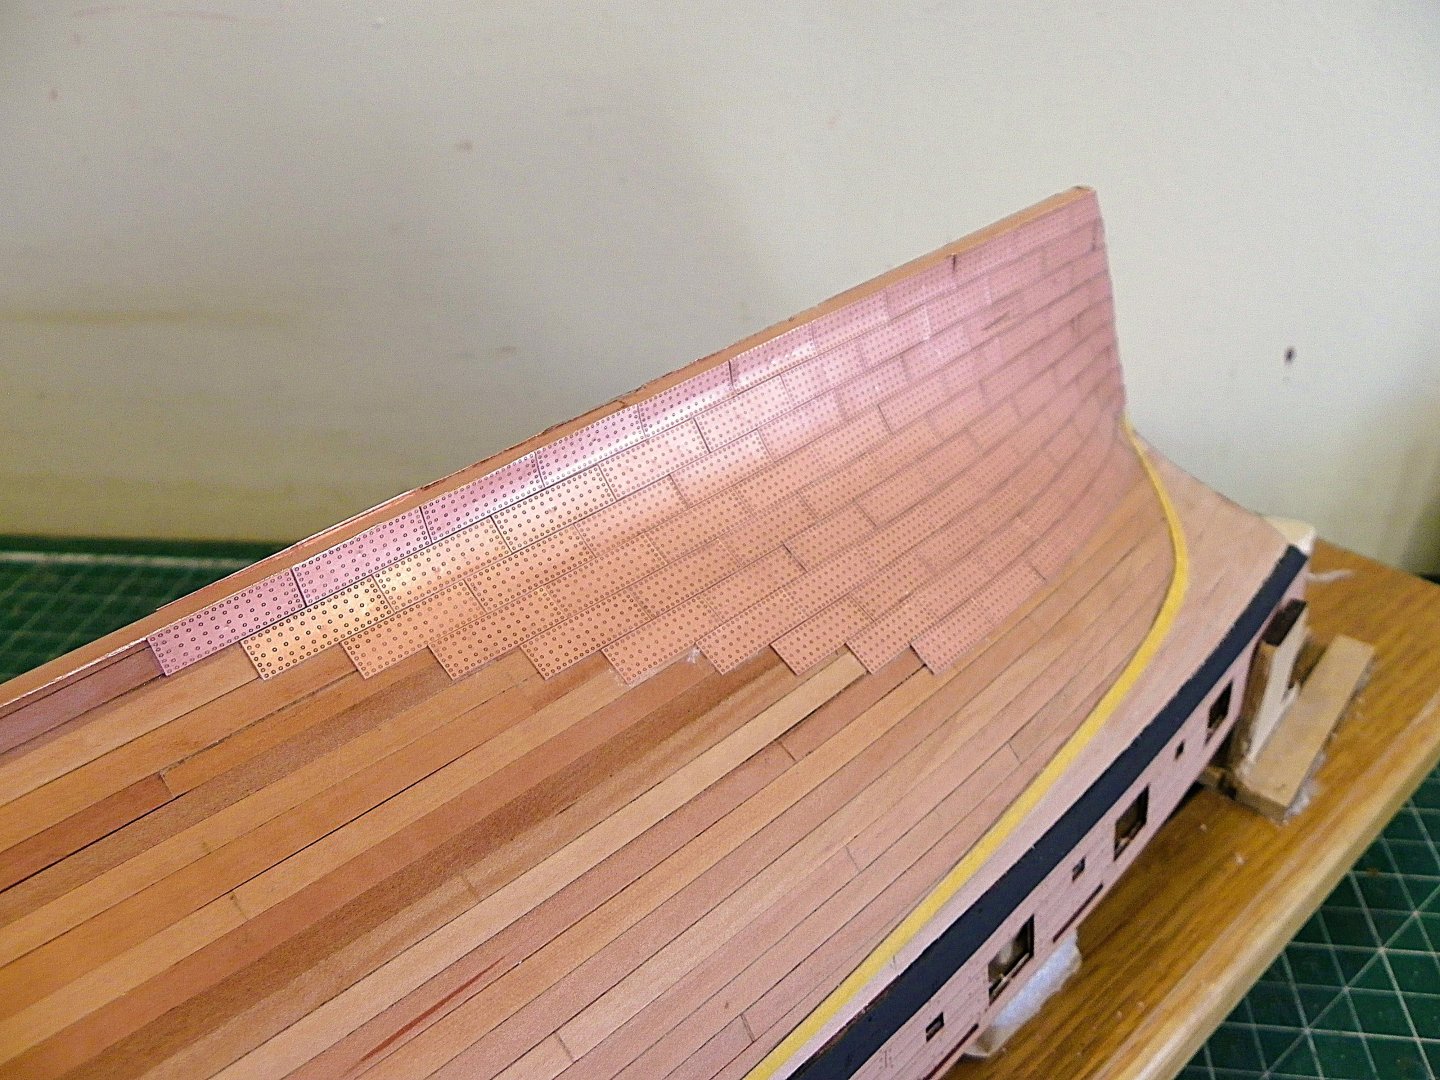
Post 34 Coppering cont’d The eighth day sees the Starboard bow section completed. Many small pieces require cutting to fill in at the water-line and stem, and these take a lot of time. The cutwater is next plated. I needed to think a little about the approach. The facing plates of the cutwater run vertically and are folded over the horizontal plates that extend from the hull. These in turn are lipped over the hull plates by around 3” (1mm at scale). The concern at model scale is that the effect does not look over bulky. The provided plates exceed the width of the stem by the line of the outer nails each side which allows for a very fine return around the stem. With the horizontal plates fixed up to the edge of the stem, the vertical plates were started at the waterline. 0215 I scored a line down each reverse side of a plate which allowed a lip to be formed for the return around the stem. 0254 This eased the fitting and allowed the cyano to quickly bite. The ninth day sees completion of the plating. 0243 0245 0246 0247 0250 0228 0229 0234 0236 On completion I have 237 plates unused, so Chris has included plenty to cover mishaps and miscuts. 0257 I had very few off-cuts left at the end. Not quite the end as the water-line needs cleaning up, I have a couple of options for this. Some plates to be replaced, and then there’s the final cleaning and deciding on the finish. B.E. 13/02/2025


- 332 replies
-
- 26
-
-
- Harpy
- Vanguard Models
- (and 1 more)
-
Post 33 Coppering cont’d. 0205 Sixth day and the cutwater is reached on the Port side at least. 0208 0211 0212 0213 Seventh day and the second sheet of plates has been used up, around 600. One sheet to go. 0210 The Port side has been completed, bar the cleaning up and fettlin’ the waterline. So far, so good, I don't dislike the colour, a sort of sea scoured pink, but my model preference is for flatter and browner, as in old penny. B.E 11/02/2025


- 332 replies
-
- 27
-
-
- Harpy
- Vanguard Models
- (and 1 more)
-
Cheers Guys, @ Glenn, UK – I suspect a few of those plates will be coming off again for re-setting once I’ve completed the whole thing. @ Glenn (USA) – I’m glad I went down the route of coppering side and side about, it removes that sinking feeling of going thro’ the whole thing again. Even so, I’m glad I didn’t copper ‘Indy’.😉 It was Cheerful that gave me the info and example to follow on the Square Tuck, there’s so much in Chuck’s builds that are useful on any other projects. @ Ron – Ha , Ha; I’ve already got the largest room in the house, as my Office/studio/workroom, completed in 2016. As I lurch towards decrepitude I think that phase of my life is done with.🫤 Thanks for the heads up on the Pic n stic , Amazon UK don’t have them, maybe just as well given the price, but I think I will get by with my poor man’s tooth-pick. Thanks Bug, and Mark for your supportive comments.👍 B.E
- 332 replies
-
- 4
-
-
- Harpy
- Vanguard Models
- (and 1 more)
-
Nice work ECK, I like the shade of Red used, which paint is that? B.E.
- 73 replies
-
- 1
-

-
- Harpy
- Vanguard Models
- (and 1 more)
-
Post 32 Coppering cont’d As the copper plates follow the lines of the hull it becomes apparent that in some areas the plates won’t fit square to both edges of the adjacent plates. I find using a needle file to impart a slight concave curve as necessary to get a reasonable fit works, together with a slight angle cut on the short edges. 0176 0182 The most time- consuming aspect is cutting the plates to match the curve of the water-line. 0190 0192 At this point after four days work I have used up the first of three sheets of plates, 299 plates applied. 0197 I can see that one or two plates will need re-fixing and a careful run of fingers over the hull gives a sharp reminder where corners stand proud. I test the fit before applying the cyano. Here I'm using a small pick-up stick that doesn't obscure the plate edges. 0199 0200 Five days and a long session yesterday, but still a way to go. B.E. 09/02/2025


- 332 replies
-
- 23
-
-
- Harpy
- Vanguard Models
- (and 1 more)
-
Certainly with cyano, I applied w-o-p to the hull before plating. My test on bare wood suggested the cyano does not take as well. I also applied sanding sealer to the hull following the first planking layer. Applying a primer is a good idea, you could also use copper paint. B.E.
- 332 replies
-
- 6
-
-
-
- Harpy
- Vanguard Models
- (and 1 more)
-
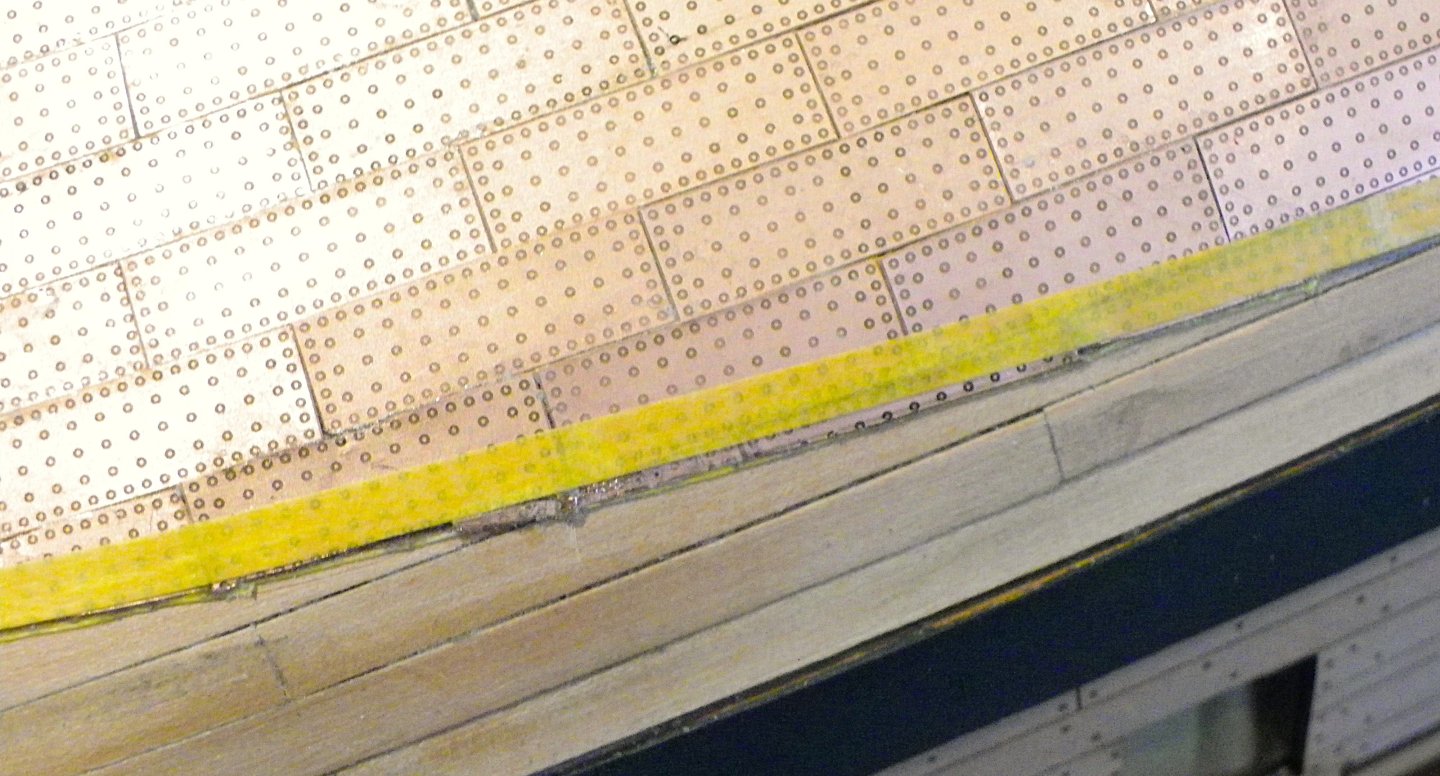
Nothing special Glenn, simply a length of dowel with the end rounded a little. I have also used one of those cheap mechanical pencils with the rubber in the end, that works too. You can see it here on the right hand side of the tile next to my pick-up tool. That could also easily be a small diameter length of dowel, covered in micro-porous tape, and dipped in tacky wax. B.E.
- 332 replies
-
- 4
-
-
- Harpy
- Vanguard Models
- (and 1 more)
-
Well done Chris for re-visiting this model she looks splendid. .... and well done James for the great artistry in the paintwork and finish. My order for the 1:48 scale version will be going in. B.E.
- 3 replies
-
- 4
-
-
- Admirals Barge
- Vanguard Models
- (and 2 more)
-
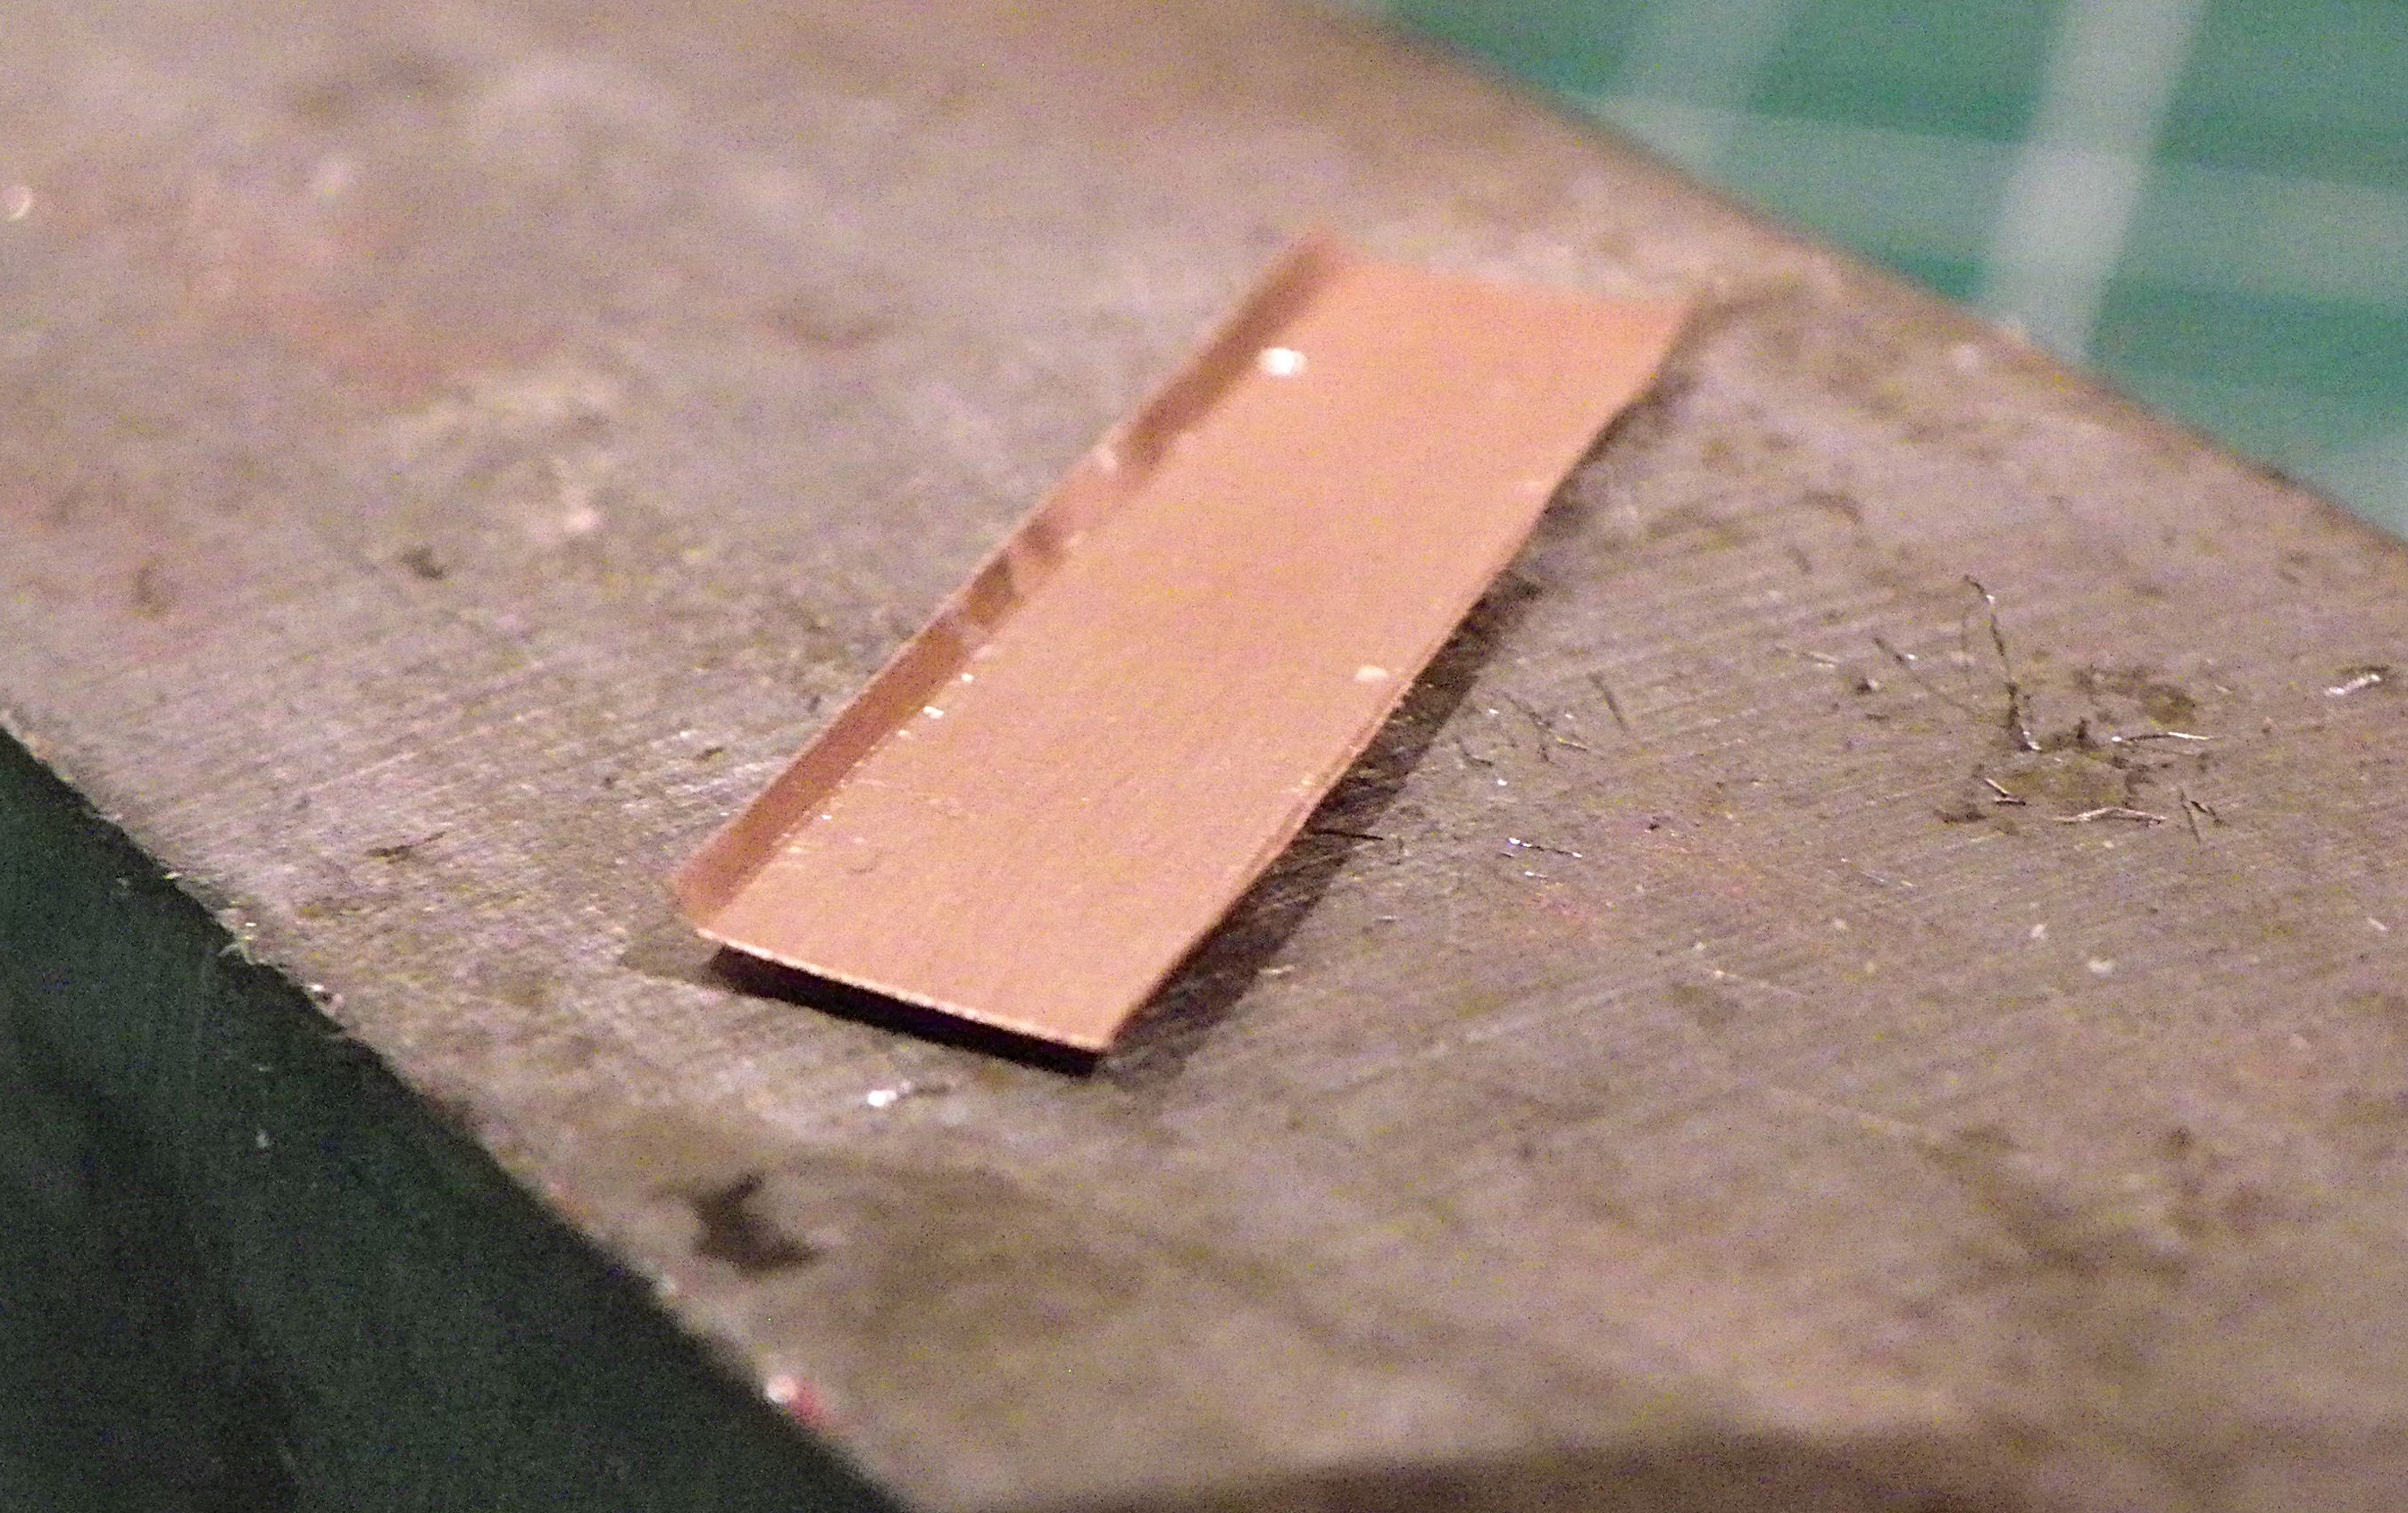
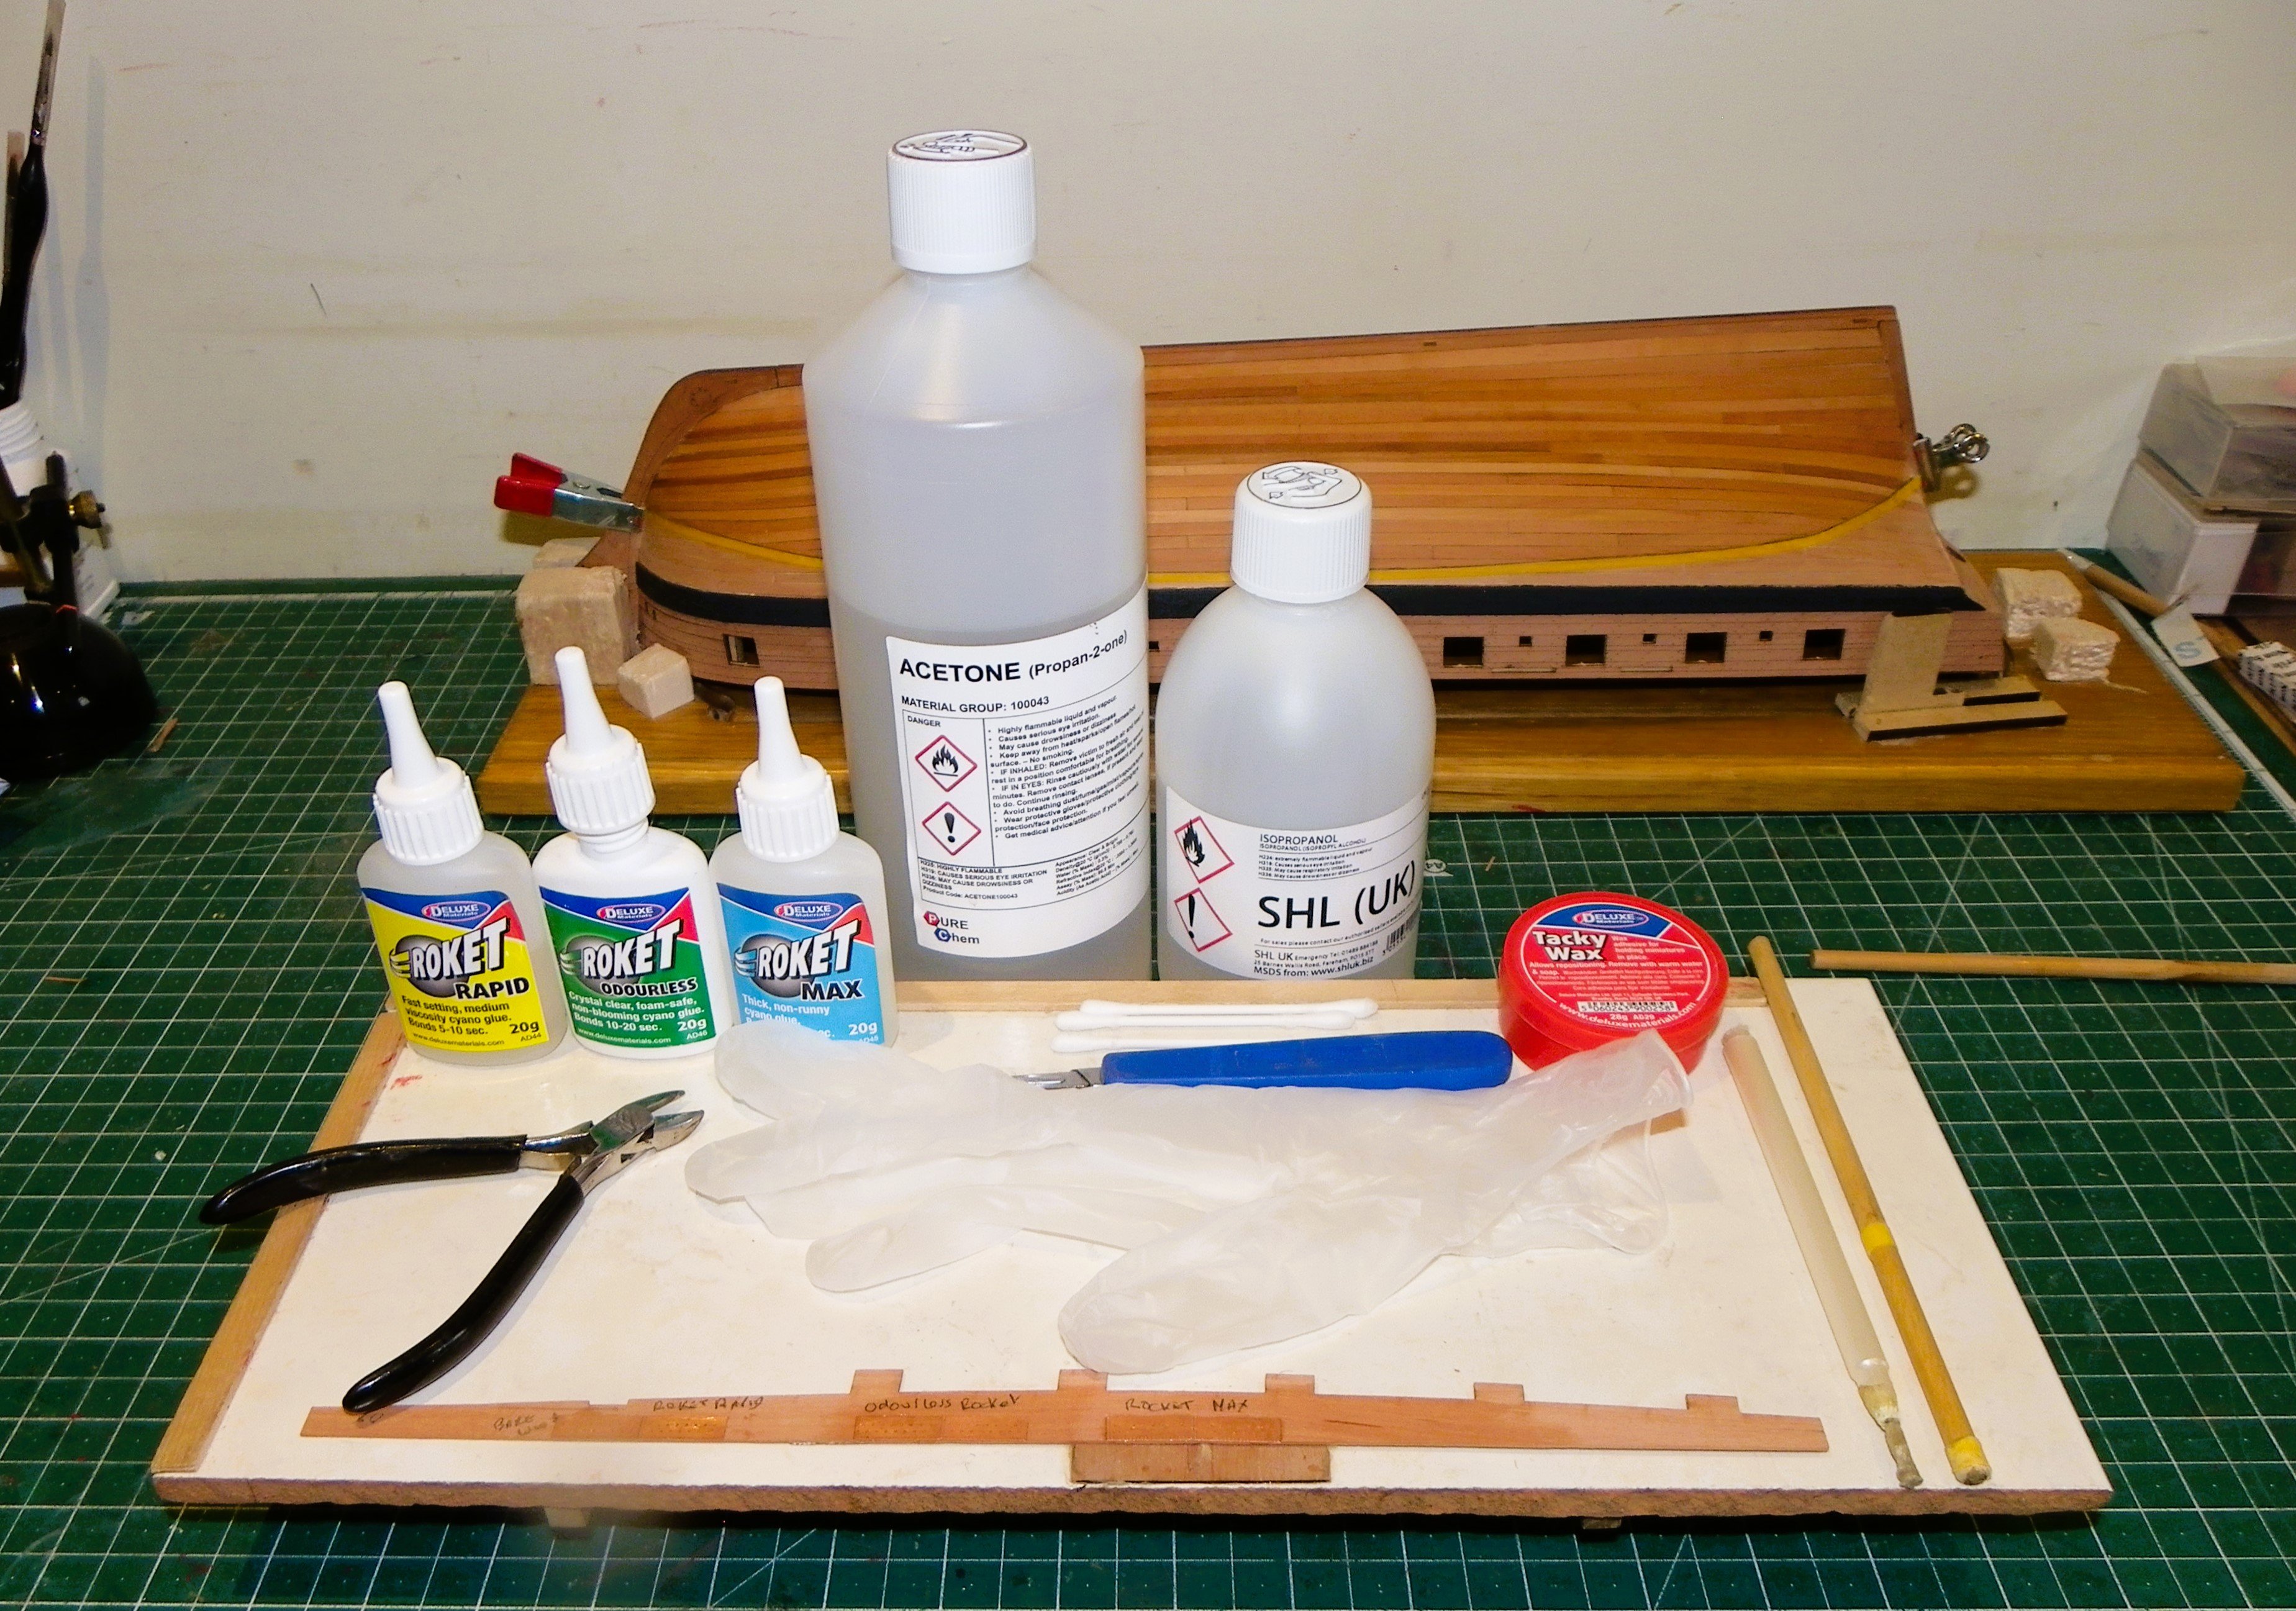
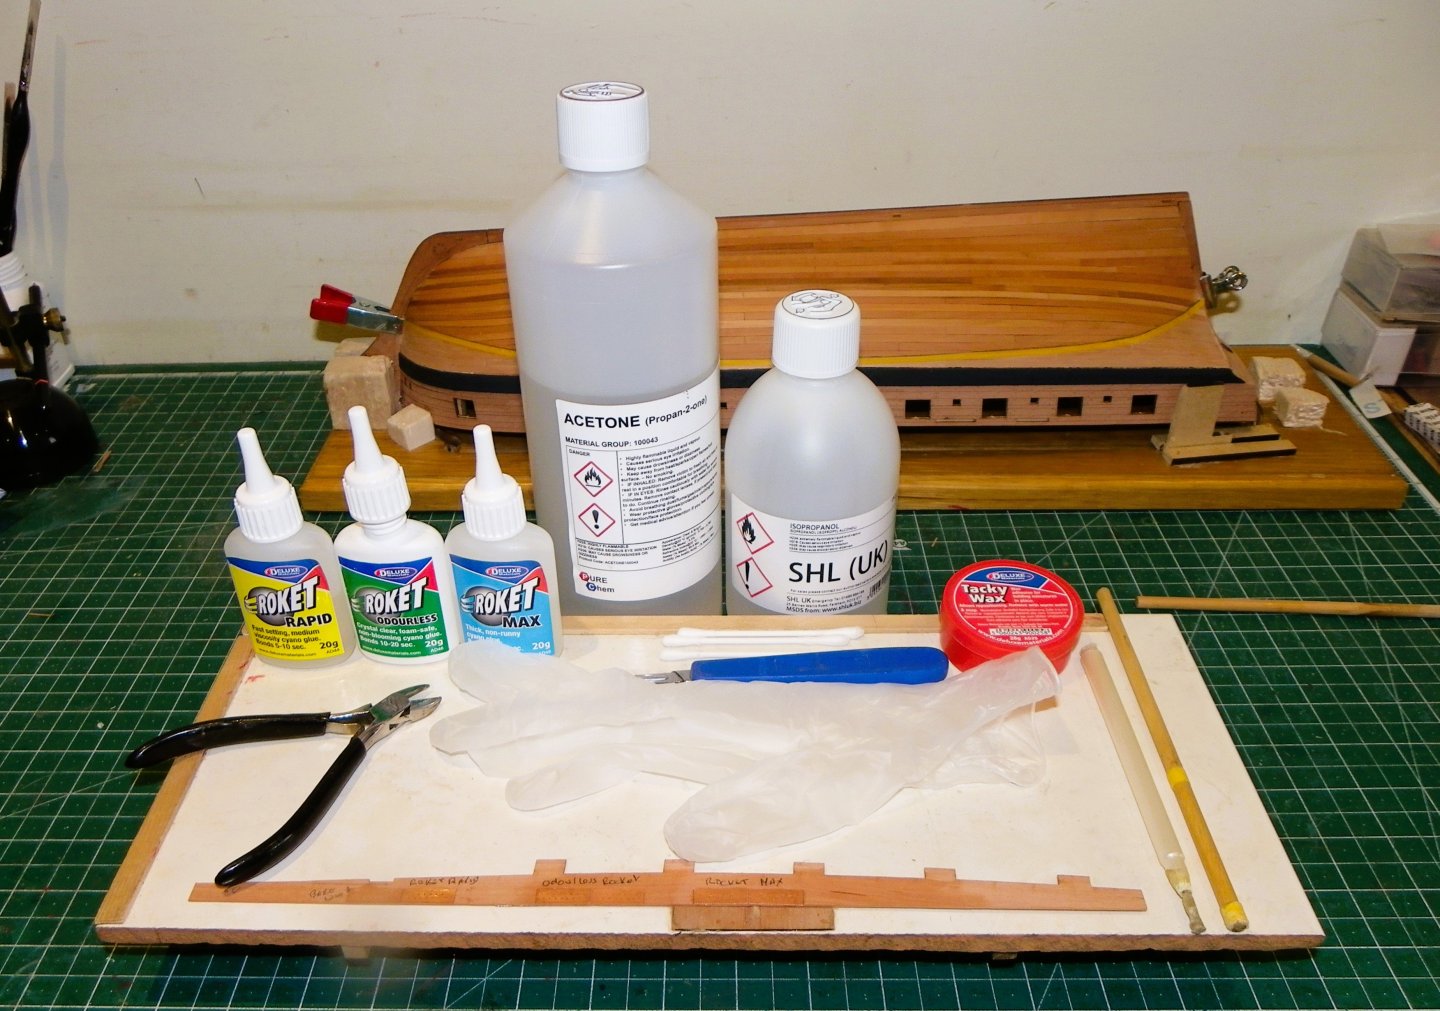
Post 31 Coppering cont’d I did a test using different specs of Deluxe cyano. Each sample plate was glued to a piece of pear to which w-o-p had been applied. Roket Max – thick and non-runny. Slightly more tricky to apply to plates as it tended to drag, and resulted in excess squeezing out from beneath the plates when burnished down. Roket Rapid – Medium viscosity, flowed well onto plate, little excess squeeze. Both held well but will create undesirable fumes. Roket Odourless - Flowed easily onto plate, bonding time 10-20 sec. Has the great advantage of no fumes. I had originally tested this with a long-opened container, so may have become less effective, new stock held fine. Roket Super’Phatic – Has the colour and consistency of milk, did hold the plate but with longer grab, and is far more messy to apply. Cleans up with water, and again no fumes. I am relieved that Roket Odourless cyano did the job, and that is the one I have decided upon. Approach One sheet of plates (299) has been separated for use. The back of the plates have been cleaned with Isopropanol. I will start with the standard naval procedure working from stern keel forward, and keel up, but from there any relationship to reality will end. There will be no overlap of plates which I will butt match albeit in a brick laid pattern. 0167 I am working both sides as I go along, better than the thought of having completed one side, to think I’ve got to do it all over again! 0166 I have started by running strips of copper tape along the keel bottom and the stern post. Atop this I will eventually look to add a wooden strip to represent the False keel. 0171 As each plate is applied I immediately burnish, and clean with a cotton bud dipped in Acetone. Dried on cyano can be a pain to remove later. 0172 It is a long and repetitive business, but once into a rhythm I find it quite relaxing. B.E. 06/02/2025


- 332 replies
-
- 21
-
-
- Harpy
- Vanguard Models
- (and 1 more)
-
A great rigging job you're doing there, Bug 👍 B.E.
- 419 replies
-
- 2
-
-
- Victory Models
- Pegasus
- (and 2 more)
-
Thank you David, I'm still waiting for the stuff to arrive together with a fresh bottle of the 'odourless Cyano..' I'm hoping it will work, the other stuff gets on my chest with the prolonged exposure when plating, and it's tiresome wearing a mask. B.E.
- 332 replies
-
- 3
-
-
- Harpy
- Vanguard Models
- (and 1 more)
-
Coming along very nicely Walter, that planking will sand down to provide a good base for the second layer. Nice work on the Pinnace, tricky little beggars they are. B.E.
-
Well done Bob, I like the look of her. Model completed, process enjoyed, a little knowledge gained along the way, that's what it's all about. Regards, B.E.
- 207 replies
-
- 3
-
-
-
- vanguard models
- Duchess of Kingston
- (and 1 more)