Chuck Seiler
-
Posts
1,878 -
Joined
-
Last visited
Content Type
Profiles
Forums
Gallery
Events
Everything posted by Chuck Seiler
-
 Titebond or Weldbond for the monofiliment? I seldom have success with Titebond on non-wood material.
- 421 replies
-
- 5
-

-
- medway longboat
- Syren Ship Model Company
- (and 1 more)
-
kit review 1:72 La Real - Dusek Ship Kits
Chuck Seiler replied to James H's topic in REVIEWS: Model kits
Your admiral's head on a pike DOES tend to dampen morale. This appears to be somewhat plank on frame. Could you partially plank it, similar to Chuck's Queen Anne Barge, or doesn't it lend itself to that? -
Apparently the hotel has opened up other dates for the NRG rate. I received that from Mary at NRGHQ. Will provide more details when I get home and contact hotel. Who else is going?
-
If I had gone the CA glue route I wouldn't have had to clamp.
-
For the record, Plan B was leave plank 2 unattached to the transom until plank 2 is complete on both sides. Use the rubberband method to clamp the plank to the curvey transom. The offsetting twists balance out.
-
I had more problems with twisting than breaking. No breaks so far, except that previously noted. You see how I have the RBs set up to clamp the plank to the transom. It ended up twisting the transom. I had to unglue the plank and go with plan B.
-
Working on second strake using highly sophisticated clamping system.

-
Thanks to all for tuning in. Chuck, how was Philly?
-
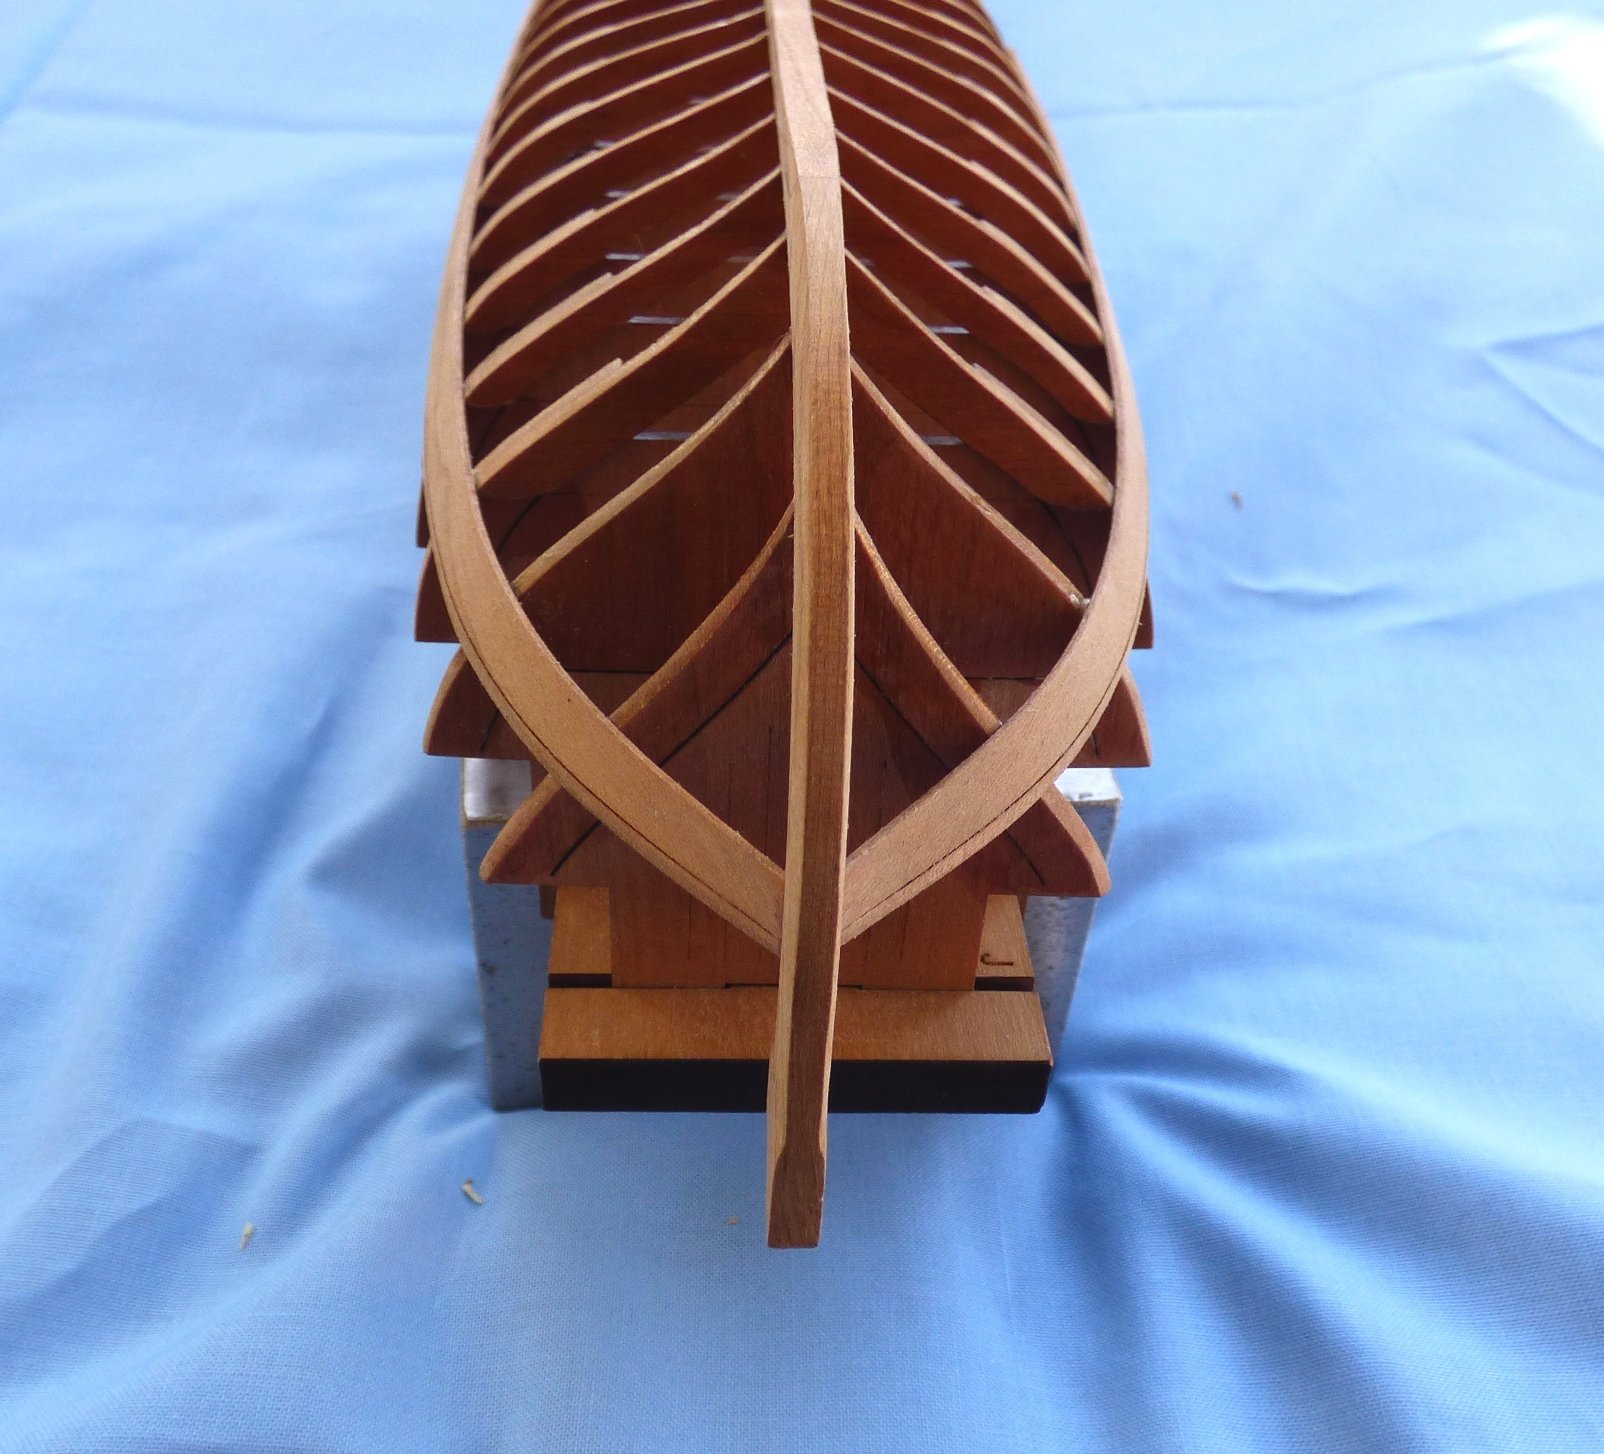
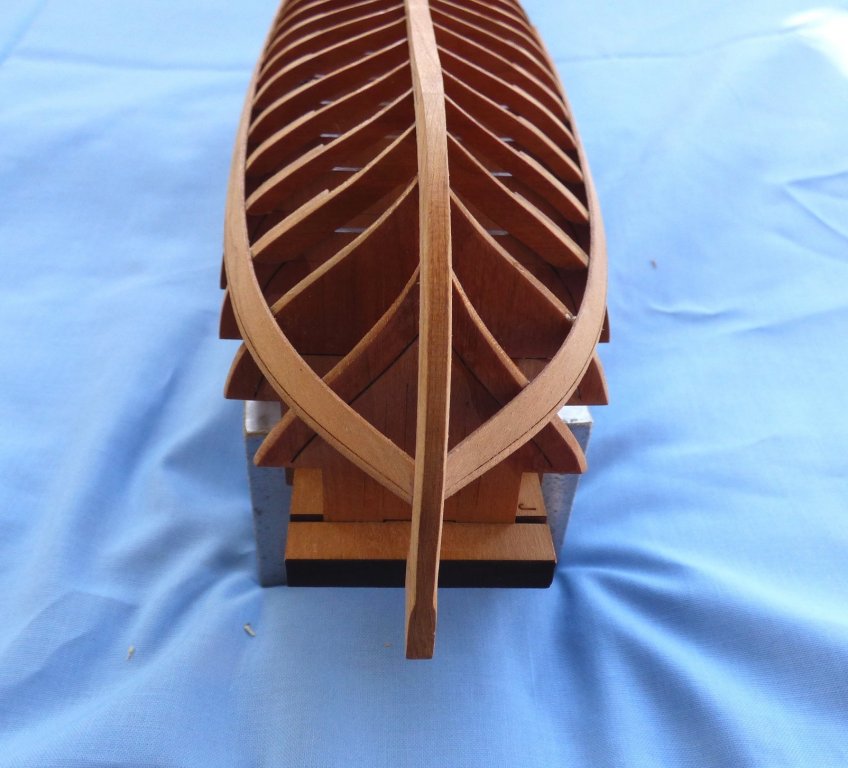
Regular planking begins. I had to slightly sand the frame edges to remove traces of Polywipe. The location of the bottom of the lowest plank was marked per Chuck's instructions. Planks 1 and 2, port and starboard were cleaned up and top edge beveled. This is important to get right since the next plank will lay flush with the bevel. A clean bevel will avoid gaps. Planks 1 port and starboard were soaked, then clamped into place to dry. They are very flexible and handle the twist easily. I will take my time to hopefully avoid errors. First strake is in place. Bow on shot. The lower stake on both sides are in place. In this picture they appear to be uneven, but in real life they line up fine..
-
I just made hotel reservations for the conference. They only had the special rates available for 25, 26 and 27 October. I want to spend a little more times there (24-28) and had to make three separate reservations. I was told I will be in the same room the whole time and the rates for Wednesday and Sunday were pretty reasonable, so no big deal. Just be prepared to be on the phone awhile.
- 19 replies
-
- 1
-
-
- nrg
- conference
- (and 2 more)
-
Except the glue is on the opposite side of the plank.
-
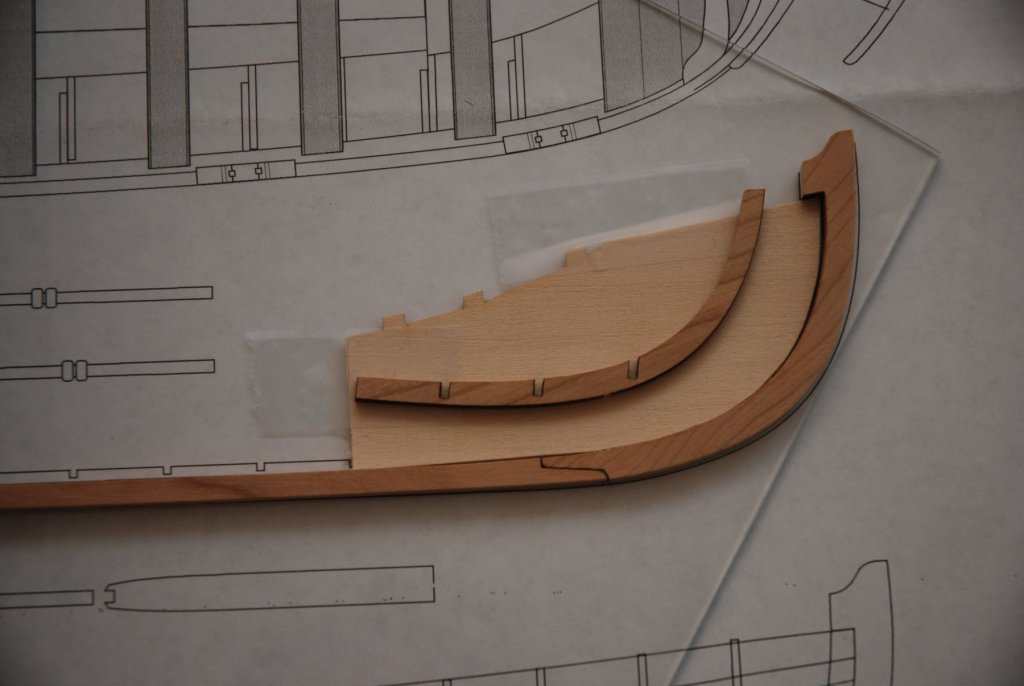
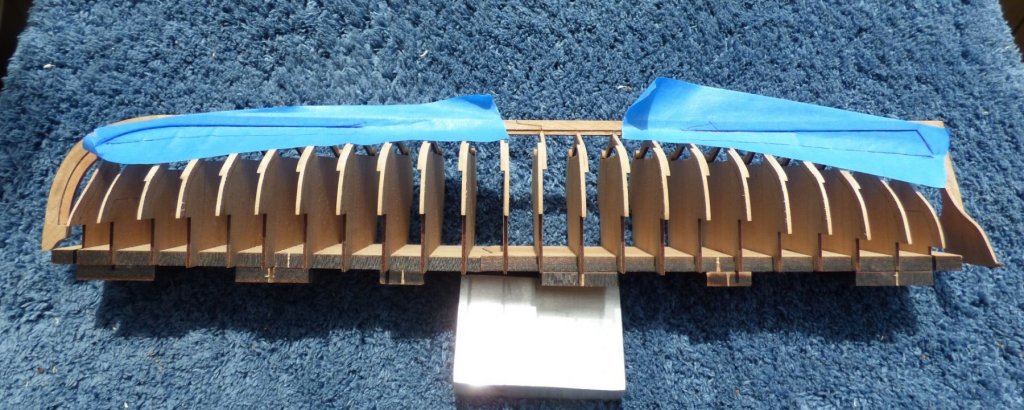
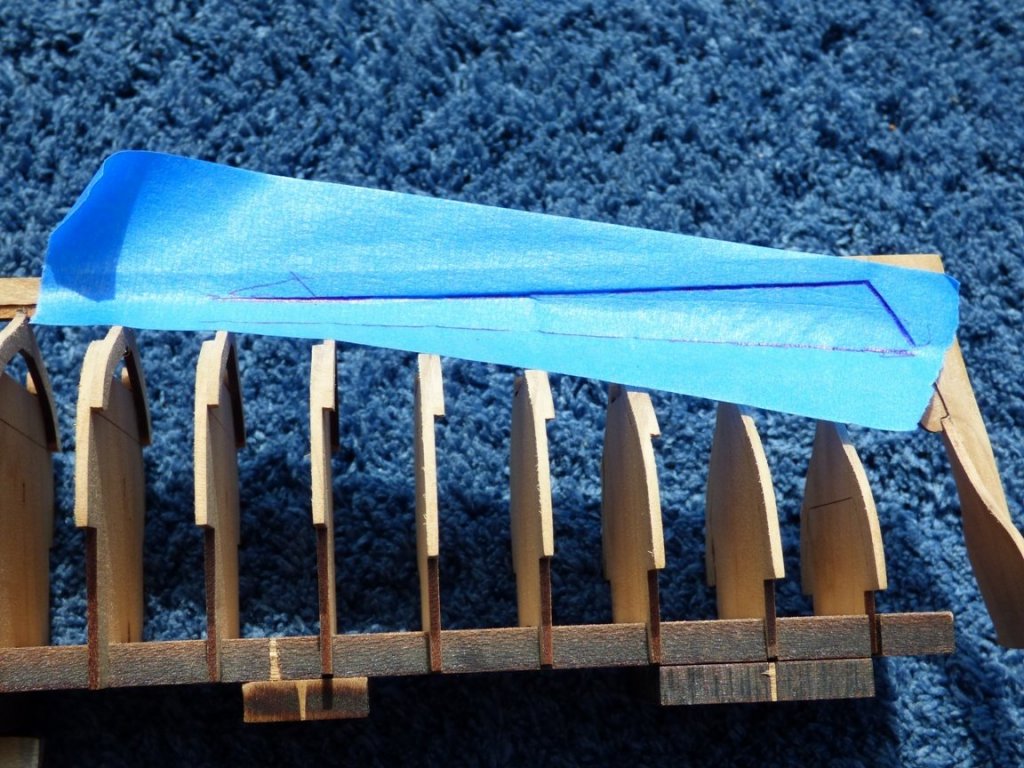
I am spending the rest of the weekend on some side projects. First, I am testing out different stains that I intend using on the keel and unpainted planking. I like the "Golden Pecan" I used for the interior of my PHILADELPHIA. That was on boxwood. We'll see how it works on cherry. I am also considering "Natural". Next, I am laying out the lines for the garboard strake to see if the scrap cherry (or spare planking) supplied in the kit will suffice or if I need to go with plan B. Due to the nature of the scrap available I will have to use 3 planks in the strake. The center plank is an easy straight run. In the below picture, I have applied blue painters tape to the areas that will be most complicated. Close up of stern area. I removed the tape and stuck both pieces to a 3x5 card, then cut out each form. They are both pretty straight, no upward curve. This makes it easier (and options of wood more). I fitted both bow and stern to both sides. Almost perfect fits. It will be easy to fabricate (he sez). The below picture shows the stern plank fitted and clamped in place. It has been soaked and clamped in place to dry. Huzzah!!! First plank in place. I will do the other side, then wait until I have all the rest of the exterior planking done before proceeding with the rest of the garboard strakes. I won't know what 'lumber' is available until I get the planking done...with or without snapping the planks.

-
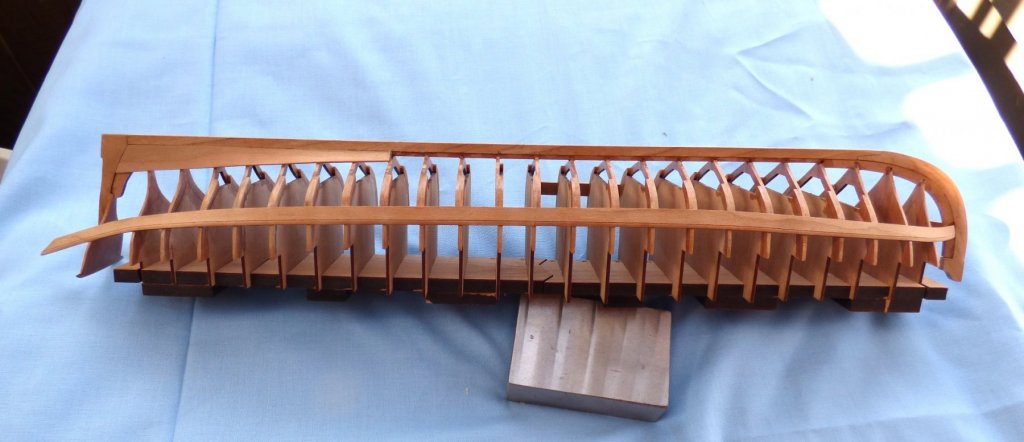
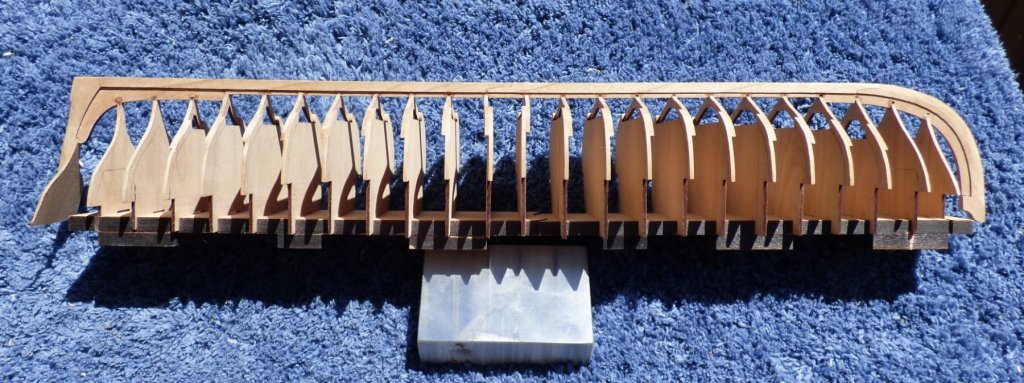
Faring of the hull has been pretty much completed. I still have a little touch up to do, but that is minor. I think Chuck refers to medium grit sand paper. I started off using 120. Later, in reading the Medway Longboat log I noticed he mentioned using finer grit. I switched to 220 and had easier time of it. Less 'grab' on the sides. I had to change paper more often, but the results were better.
-
At this point I want to make a declaration. We will see how well it works out. Before I started building I decided I wanted to strengthen the keel area. I won't get into details here but I anyone is interested, I can explain later. The plan was/is to install the garboard strake. In retrospect, it will not only provide strength, it may help with the unsightly keel joints. Making it won't be a problem (famous last words). What to use is. My original plan was to get some 1/32" boxwood and use it for the garboard strakes as well as the 2 unpainted strakes, using the existing planks as templates. That way all the exposed planking would be the same. As a lazy SOB I am rethinking. Plan B is to use extra planking material for the GS. That will depend on what the GS needs to look like and how many planks I break (and where). After all, I don't need to use cherry for the PAINTED strakes. I will have a better idea once I make a template for the GS. Hold that thought.
-
Did you plan to plank it? Since you already started to paint it, probably not....however.... When I built the solid hull SULTANA I decided to plank above the wale and just paint below. It turned out great. Wale=black and above the wale=natural wood.
-
Skull decorations on ships: real or fake
Chuck Seiler replied to ntmcd1's topic in Nautical/Naval History
Of note, the black flag is still used today as a symbol of anarchy. -
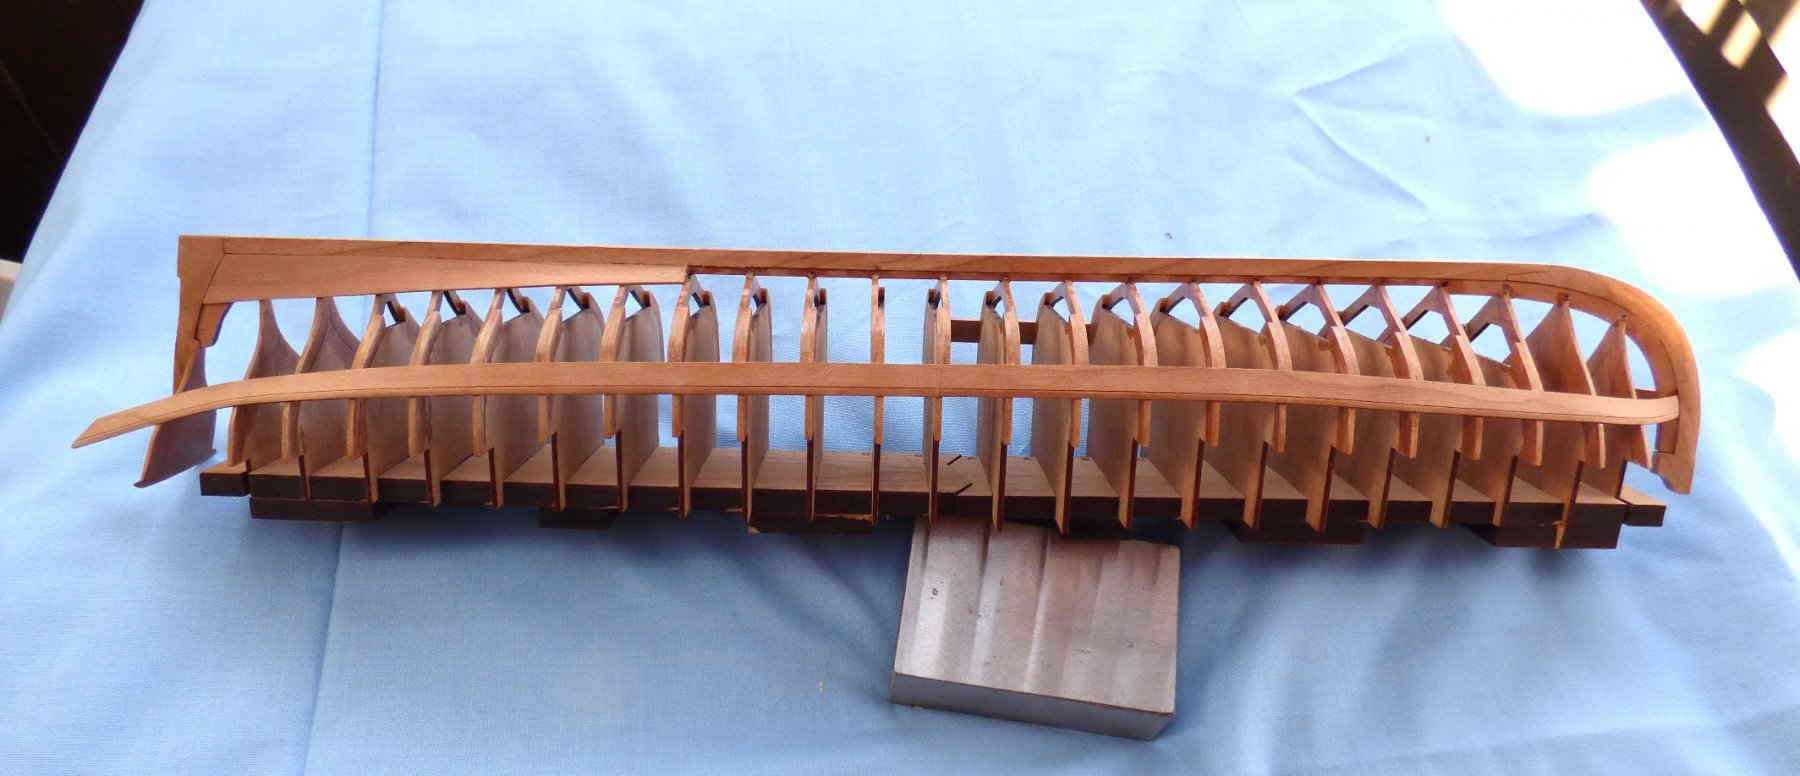
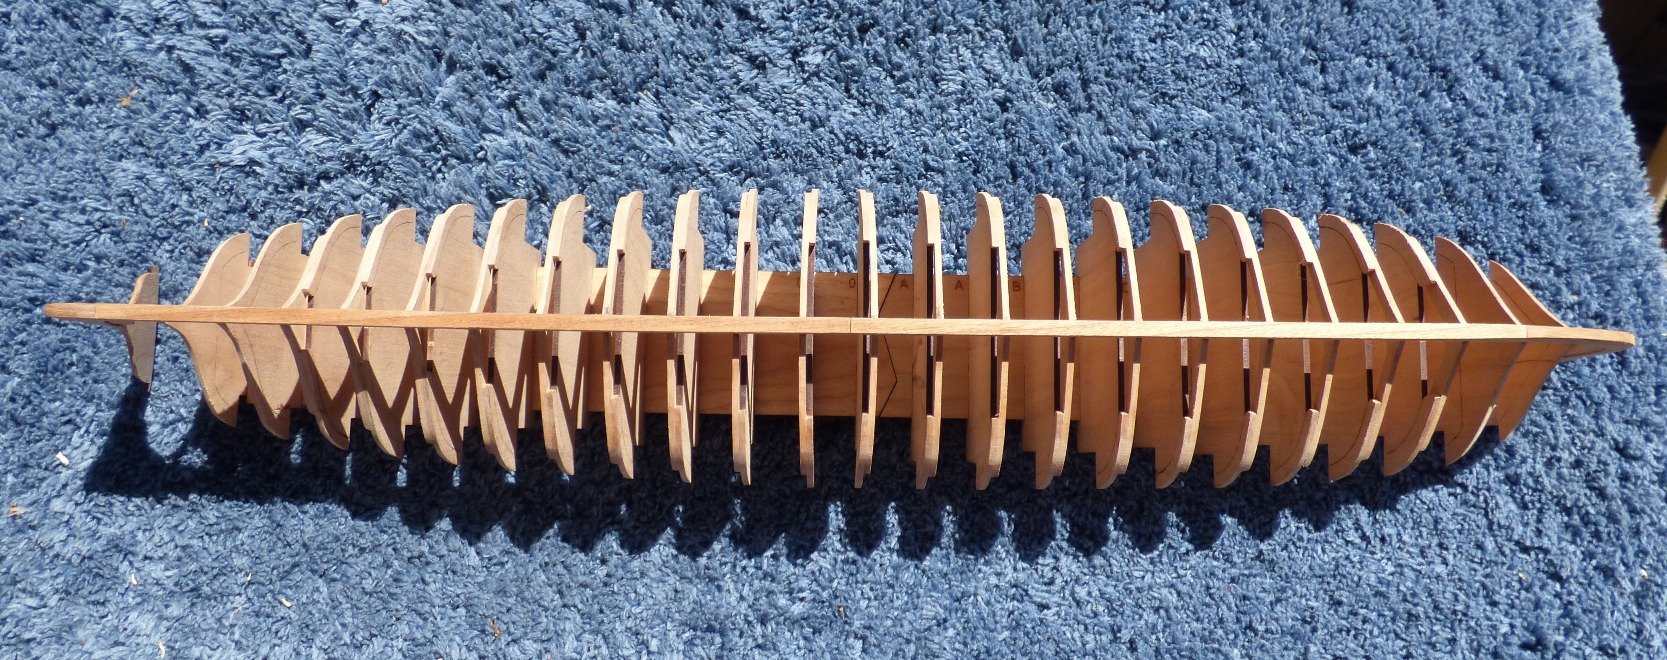
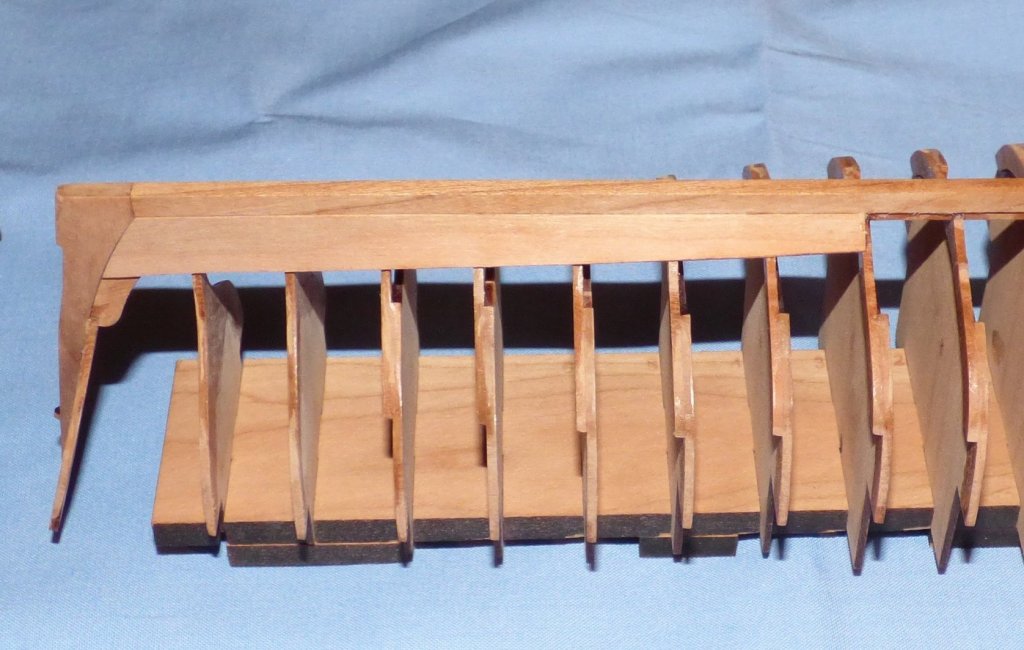
I have done a bit of work and am now going back and documenting. The next step was placing the frames into the build board. Almost all were overly tight. I tried to sand them so they were not too tight, but also not loose. At first they were fine, but as I repeatedly inserted and pulled, testing the fits, the frames ended up getting looser with the working of the wood. I should have used Chuck's "blue tape" solution. They ended up being sloppier than I would have liked. We shall what impact, if any, this will have. Another problem I had was with the keel joints. Chuck said not to sand the char from the slots, so I didn't...kind of. The frames were all too wide and needed to be thinned in order to fit in the lots. I made a single pass with an emery board to get the big chunks of char, but otherwise left the slots alone. I tried to be careful not to sand the frames too much so that there would be a tight fit. My experience with the frame tops was fresh in my mind. Test fit of frames individually and as a group proved successful, however when I applied the glue dab for the final placement the frames did not insert fully into the slot. Something expanded. 😞 I let the assembly dry 24 hours and tested it. There was still some wobble in the frame-to-keel joint so I gave each joint a shot of CA glue. It doesn't look as good as I would like, but I have a plan. 🔨 Faring begins. I am just getting around to reading Chuck's build log on the Medway Longboat in detail. I like the idea of tape reinforcement on the frames. I wish I read it sooner. The assembly is quite delicate, so slow and easy

-
Chuck, Thanks, but no need. Repaired and back on the road.
-
Magnifiers have been found!!!! Frame assembly continues and they look much better. I have unglued the bad frames and re-glued. Frame D broke and I had to repair.
-
Are you saying that you only glue the planks to the frames and not to each other (edge to edge)?
- 421 replies
-
- 5
-
-
- medway longboat
- Syren Ship Model Company
- (and 1 more)
-
I have had the opportunity to look at my frames a little closer. Two of them are a bit off and I have to un-glue/re-glue them. I think the problem is that I wasn't lining the batten up correctly with the line on the frame. Bad eyes!!! I have to find my magnifiers before I continue.
-
Perhaps I am missing something....but how is that a dolphin? Or is it one of those 3 Mile Island dolphins?
- 120 replies
-
- 4
-
-
- queen anne barge
- Syren Ship Model Company
- (and 1 more)
-
I hope to do you proud.
-
James,
How do I link a model in my signature to it's buildlog. It has been so log that I have done this I have forgotten.
Chuck S.
-
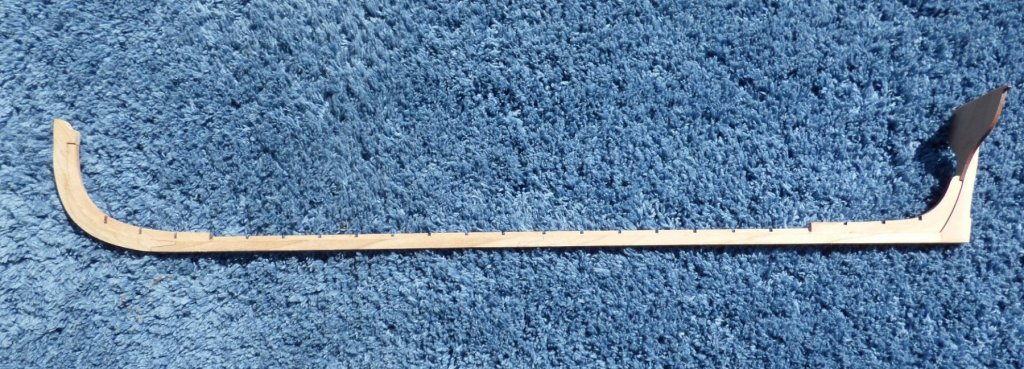
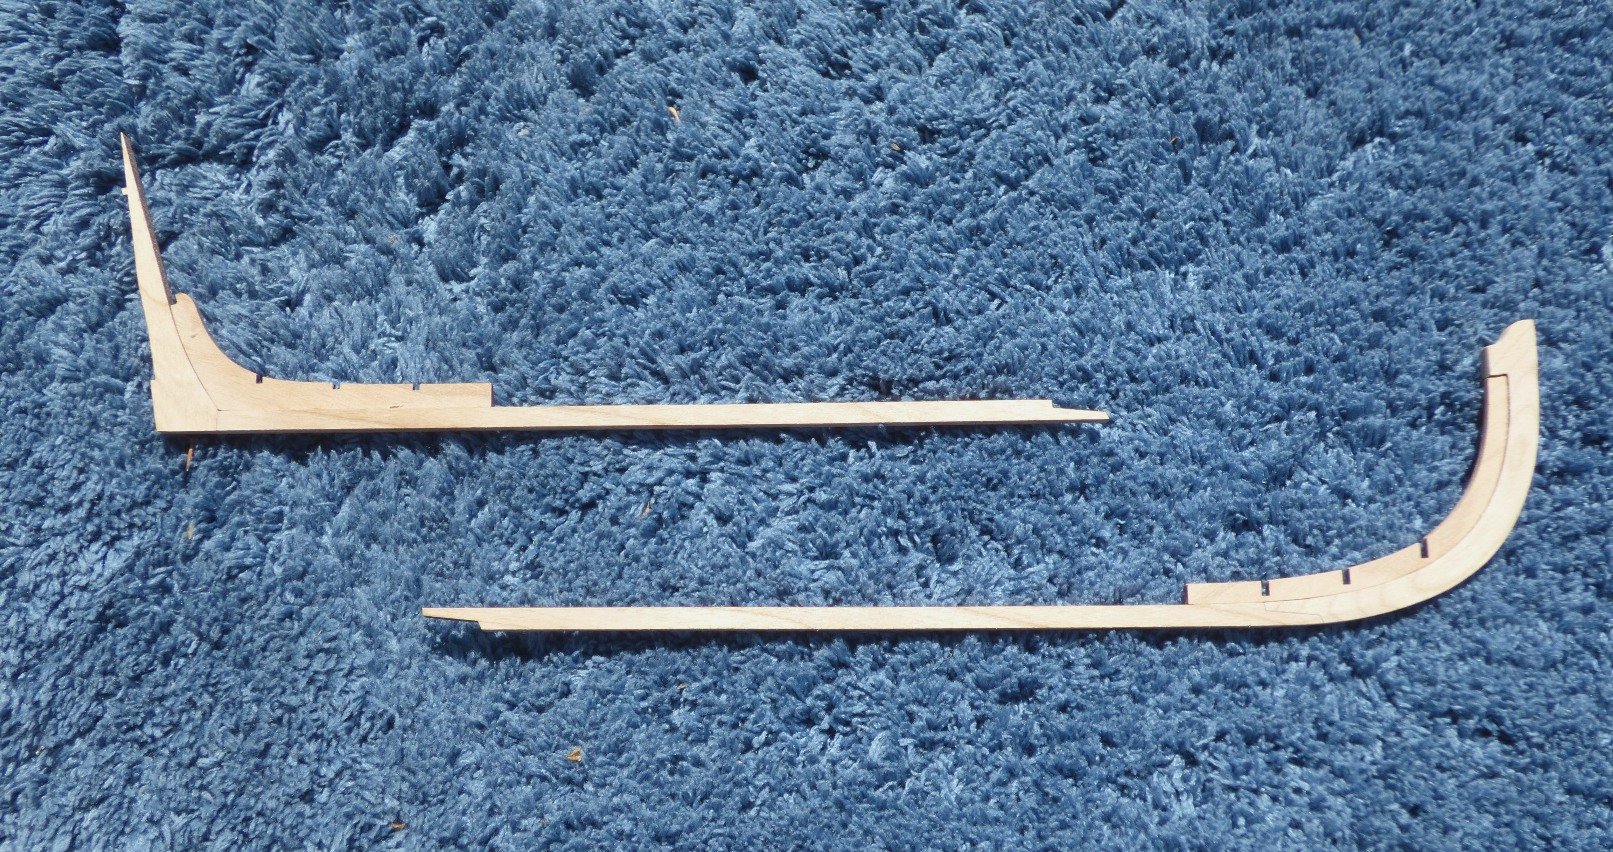
Day 2 of the build and I have completed 6 frames and mostly have the keel done (more on that later). As I have a tendency to go off the beaten path, I appreciate Chuck's warnings "DON'T DO THIS!!!!!!!" in bold red letters. I will pay close attention to those. Nothing exciting to report so far, but I did want to make a couple points about the keel: 1. I really liked JpR62's (Jean-Paul) idea about using a 1/32 piece of scrap to offset the inner keel piece. I used some scrap wood from one of the plank sheets. After testing, I found I had to sand it a wee bit thinner, but it worked great. Thanks Jean-Paul. From JpR62's buildlog 2. I have issues with both the stem area and stern area. To accommodate these, I modified my build order so that I essentially built the keel in two pieces. The scarf joint is so precisely made that the two pieces should join together very easily (we shall see). Chuck's instructions regarding adding the inner keel to the outer keel makes this do-able. The instructions say to taper the stem and keel pieces before assembling. My concern is that if I do that, the pieces will not lay flat and I will not get a good joint. On the other hand, if I glue all four pieces together and attempt to taper, this is a recipe for snapping the keel. Assembling the forward part of the keel and the aft part of the keel separately solves this problem (I hope). I am not wild about sternpost/aft keel joint. To my view it affords too little support for the joint. I am too lazy to do alternative. I glued the sternpost to the aft keel using inner keel piece as a guide. All was clamped in place to ensure adequate alignment. Once dried, I used scrap piece to offset inner keel (the center it in the keel assembly). Glue in place. This results in a strong assembly. I can now taper. Bow and stern keel assemblies Here both halves of the keel structure have been glued together and the center piece of the inner keel (with slots) has been added.