HOLIDAY DONATION DRIVE - SUPPORT MSW - DO YOUR PART TO KEEP THIS GREAT FORUM GOING! (89 donations so far out of 49,000 members - C'mon guys!)
×


Chuck Seiler
-
Posts
1,877 -
Joined
-
Last visited
Content Type
Profiles
Forums
Gallery
Events
Everything posted by Chuck Seiler
-
Take a look at Dubz log, page 4. He talks about an issue of plans versus templates (I think) and how following one screws up plank location. You can't miss it....he exhibits alot of ffrustration and there are pics of the planking being removed. I think this qualifies as a major 'if only'.
-
 I had thought about nailing as I go, as you are doing, but I suspect I will need to sand the hull when complete. I am concerned the 'nails' will pull out.
 -
Tree-nailing or nailing? Chuck uses simulated iron nails (or some sort of nails).
-
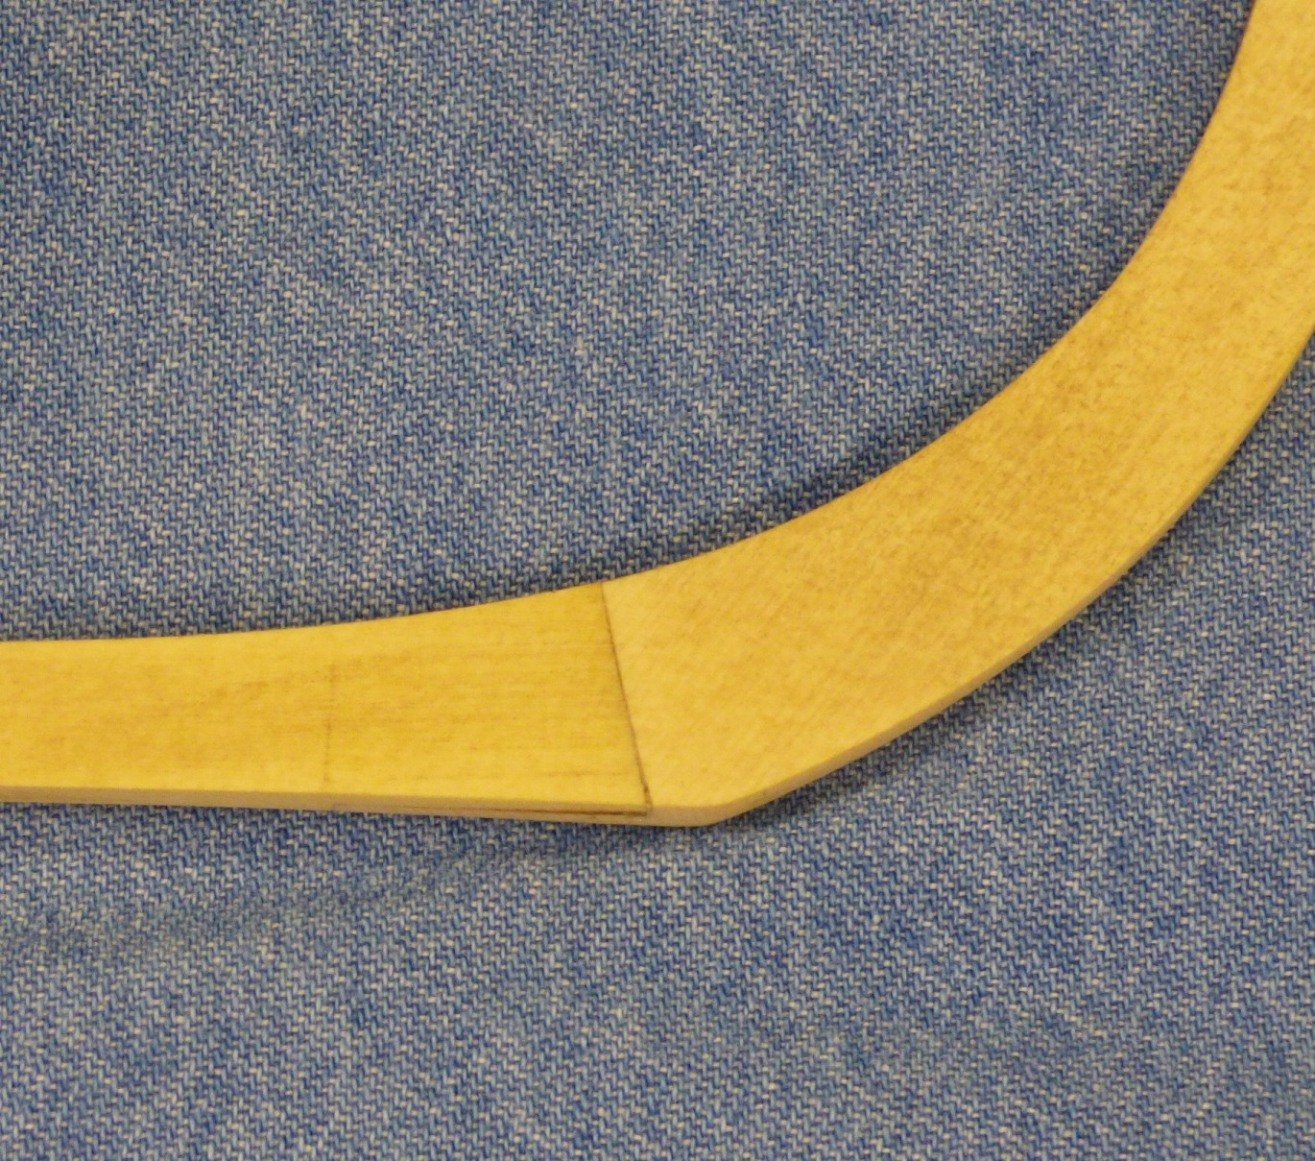
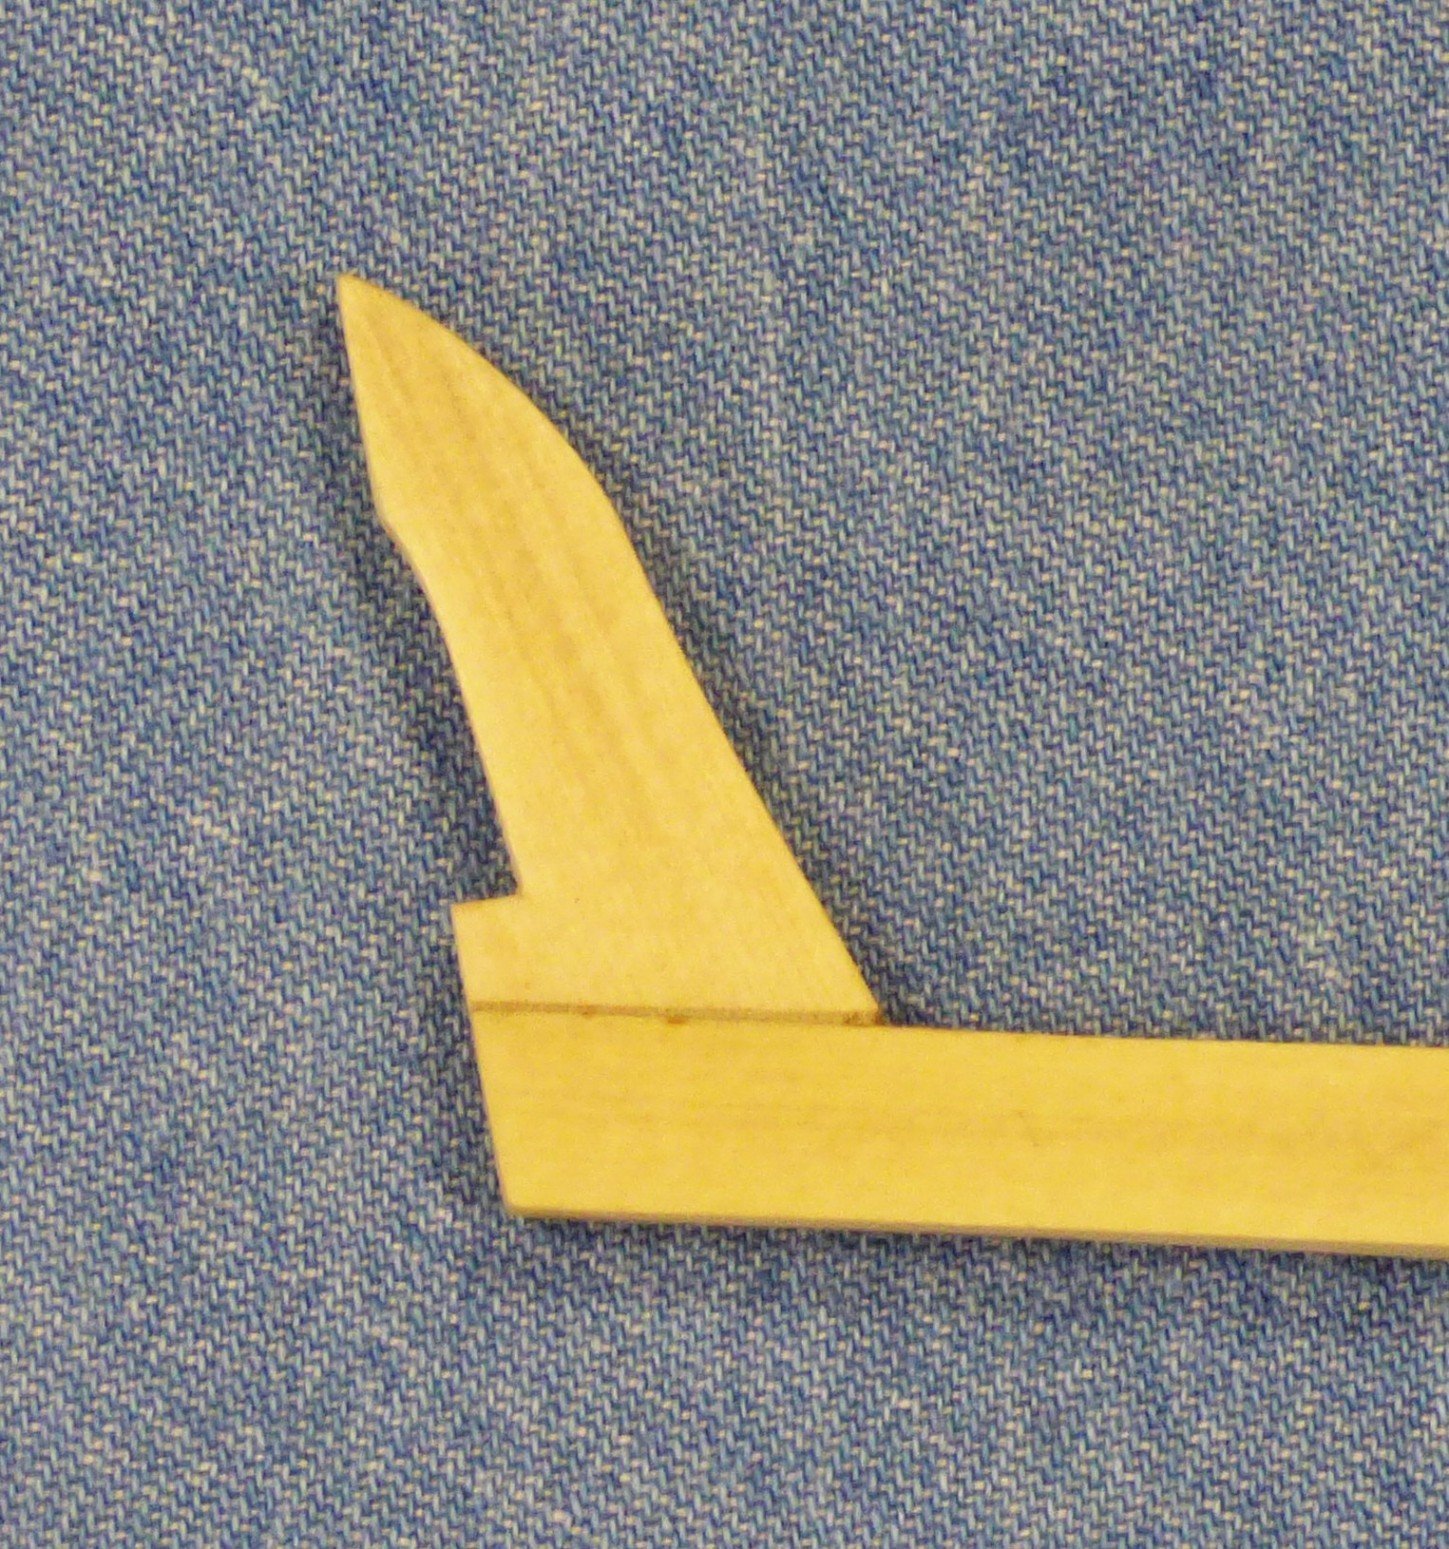
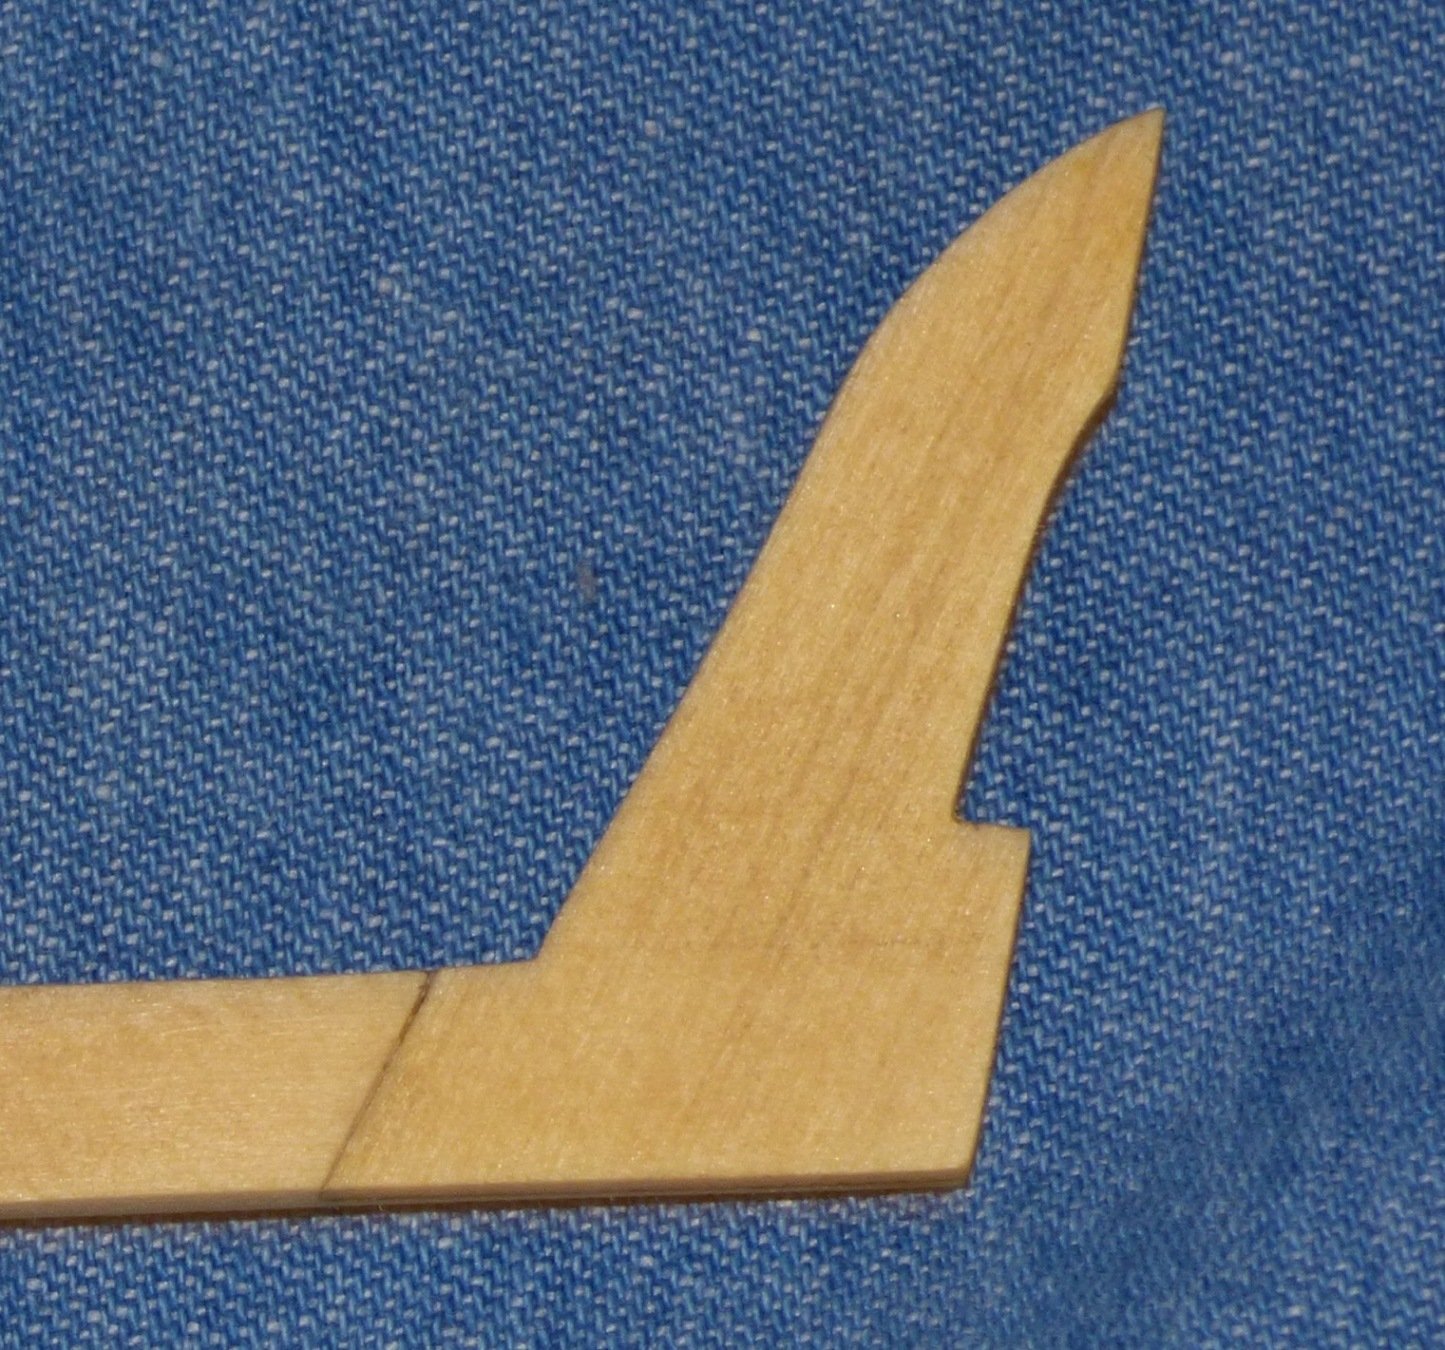
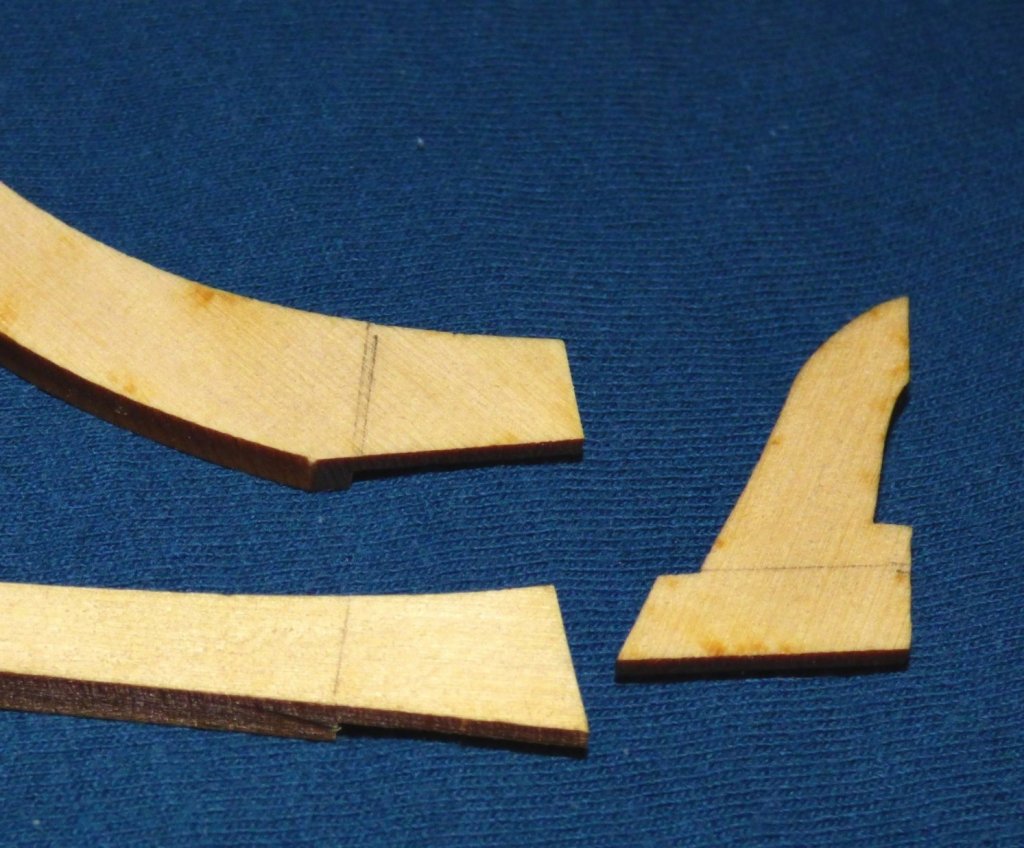
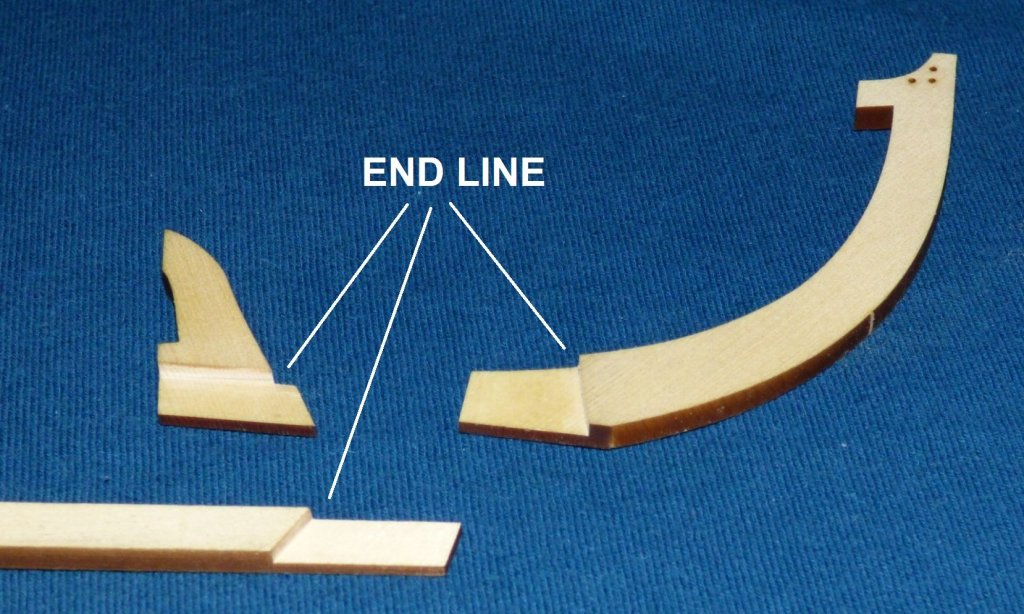
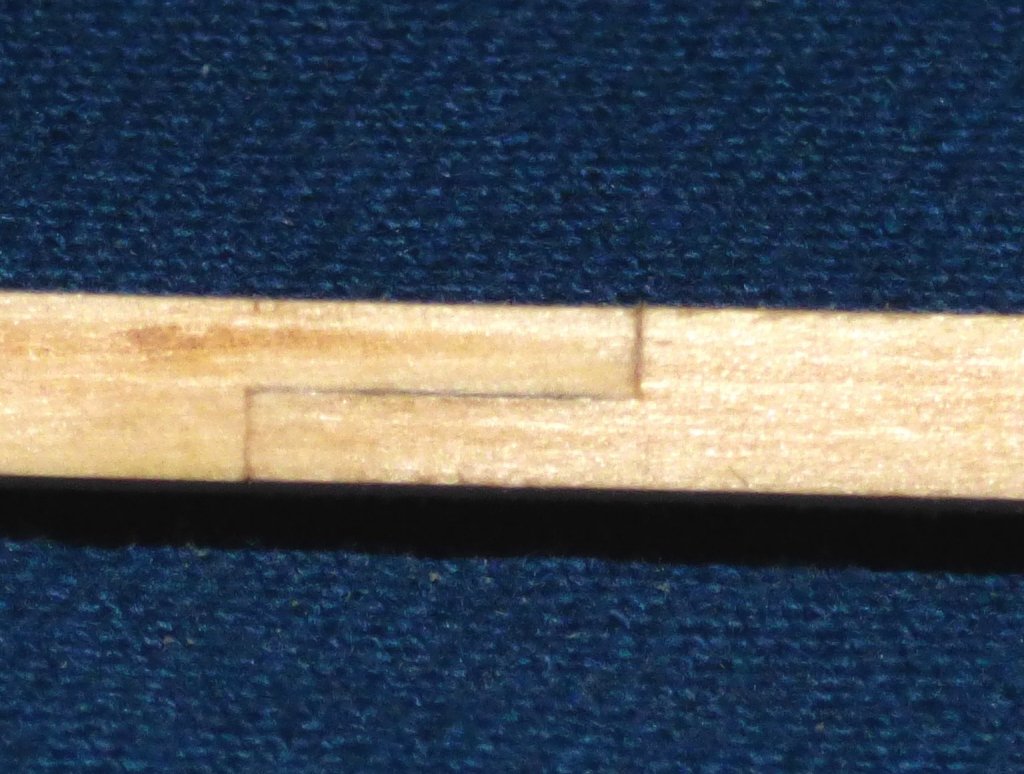
Using the procedures outlined above, I proceeded to cut the lap joints for the keel. It was a little more difficult because we are dealing with angles that are not 90 degrees. I marked each piece opposite the cut so I could align the edge of the cut with the blade. Since the blade is pre-set to the proper height, I had to use the slot forward of the blade to align each piece. For 3 of the 4 cuts I set the mitre to assist with the cut. AS you can imagine, there are alot of places small errors can creep in. I decided to make my cuts a little short of the end line. That way I could correct for any errors in angle or location by cleaning it up with scalpel/sand paper/file. I was glad I did this. After a little cosmetic sanding....I am pretty happy with the resulting joints. Whadya think?


-
JCF, Agreed, to some degree, but it would work well on a model in that you could make a bunch of these off model and just attached them to the eyebolts once the gun is installed.
-
I don't think the gun would be stowed in that manner with the gunports open and the barrel extending beyond the bulwark. On a model it might be okay. I like it!
-
Thank you. Patience. Don't be afraid to unglue something or rework it to make it better.
-
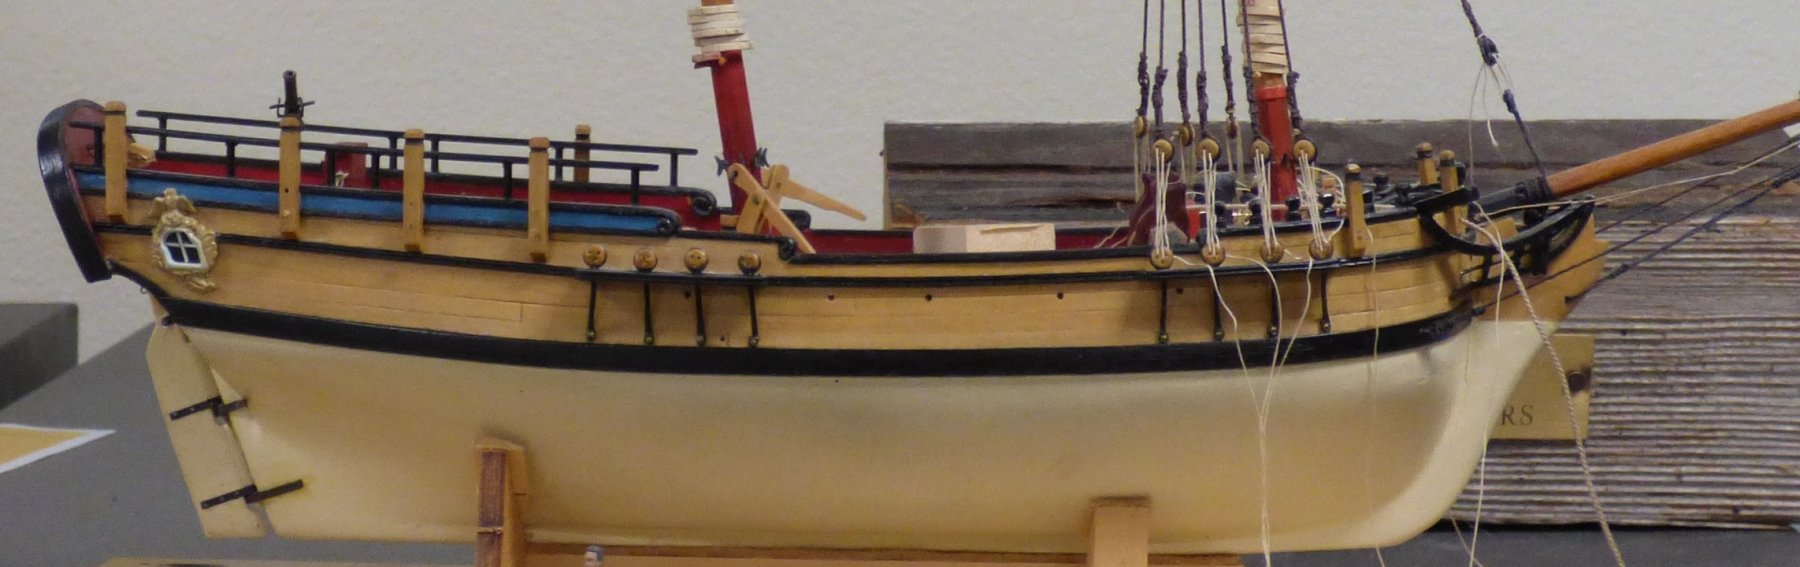
It is. Not my model but the SULTANA model in general. I really like the lines. On top of that, it is relatively simple, but has enough challenge to keep you on your toes. For me, the scale is not too big/not too small. It has just enough rigging to allow you to learn the ropes (so to speak) but not overly complicated. It reminds me I need to scrap that existing standing rigging and give it another shot. Andrea. I think you are really going to enjoy the adventure. I hope I have provided some inspiration.
- 36 replies
-
- 1
-

-
- sultana
- model shipways
- (and 1 more)
-
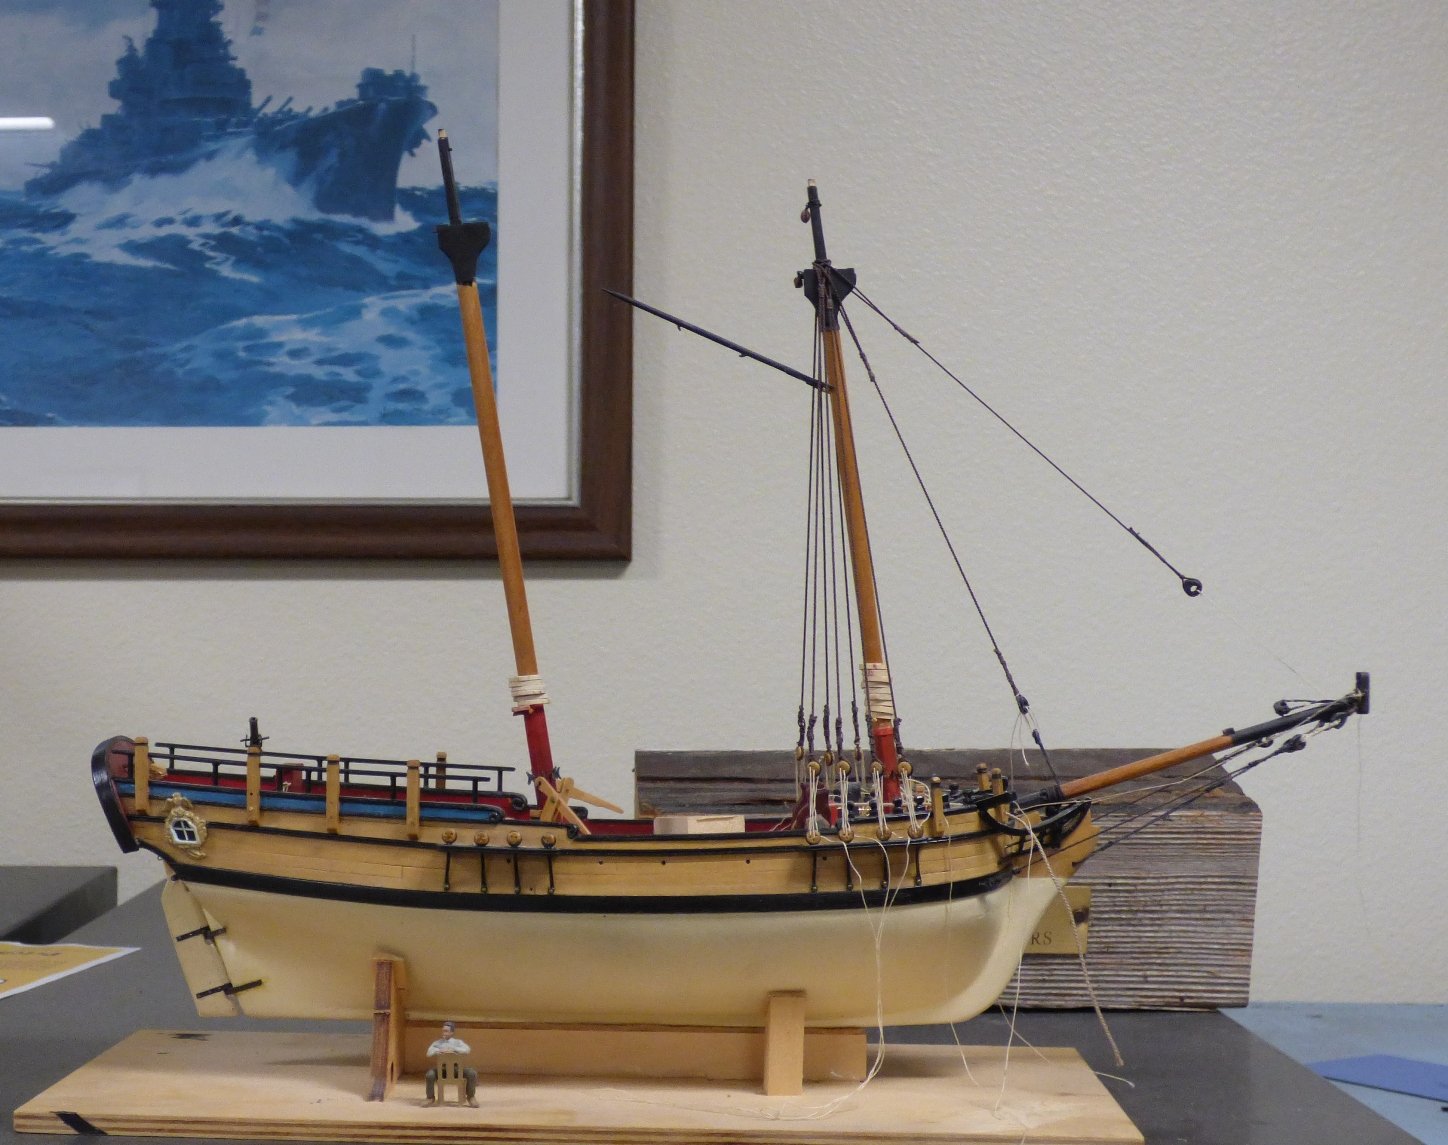
Below are some pics of my SULTANA. I don't want to hijack your blog, but I wanted to show how nice the SULTANA looks when completed. The model is solid/unplanked below the wale. Planked above the wale. I got to the point of rigging, decided I didn't like my shrouds and nevermanaged to finish.


- 36 replies
-
- 2
-
-
- sultana
- model shipways
- (and 1 more)
-
No, unless you have a very very good eye. If you fudge the measurements you will end up with errors that will compound later. Get a cheapie set of calipers from Harbor Freight and a ruler. That will get you started. SMA meeting is next Tuesday.
-
Hello from Southern California!
Chuck Seiler replied to andreank's topic in New member Introductions
Sorry for not responding sooner. Chris has provided the info on the two SOCAL clubs. The SMA would be closer to you, although some SMA members belong to both. -
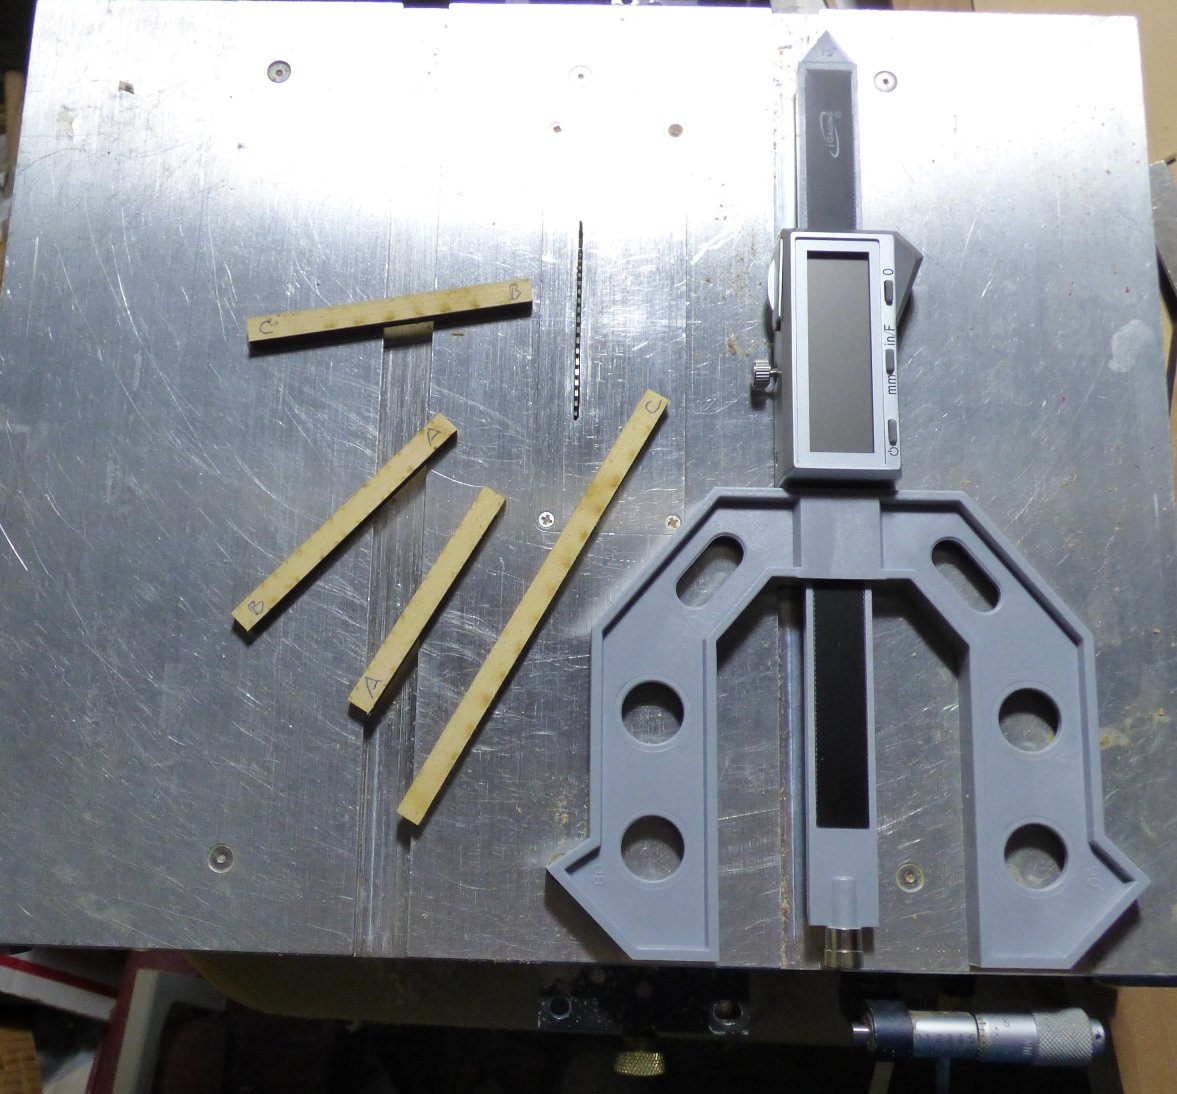
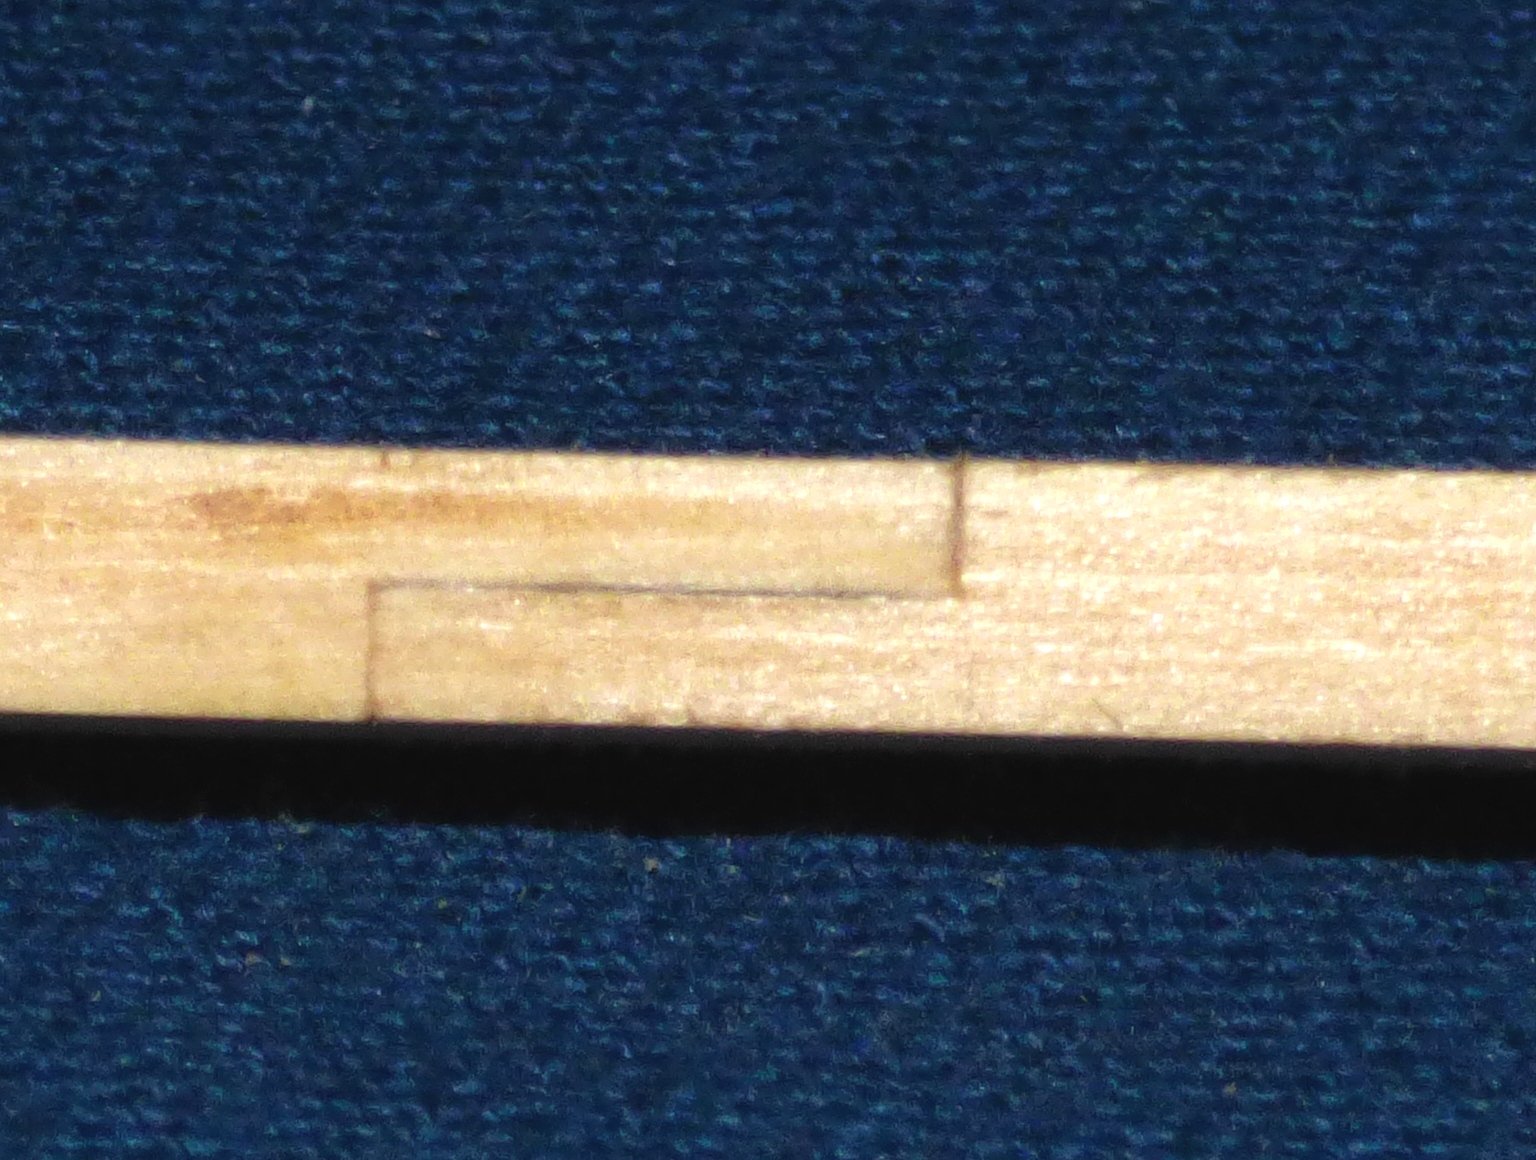
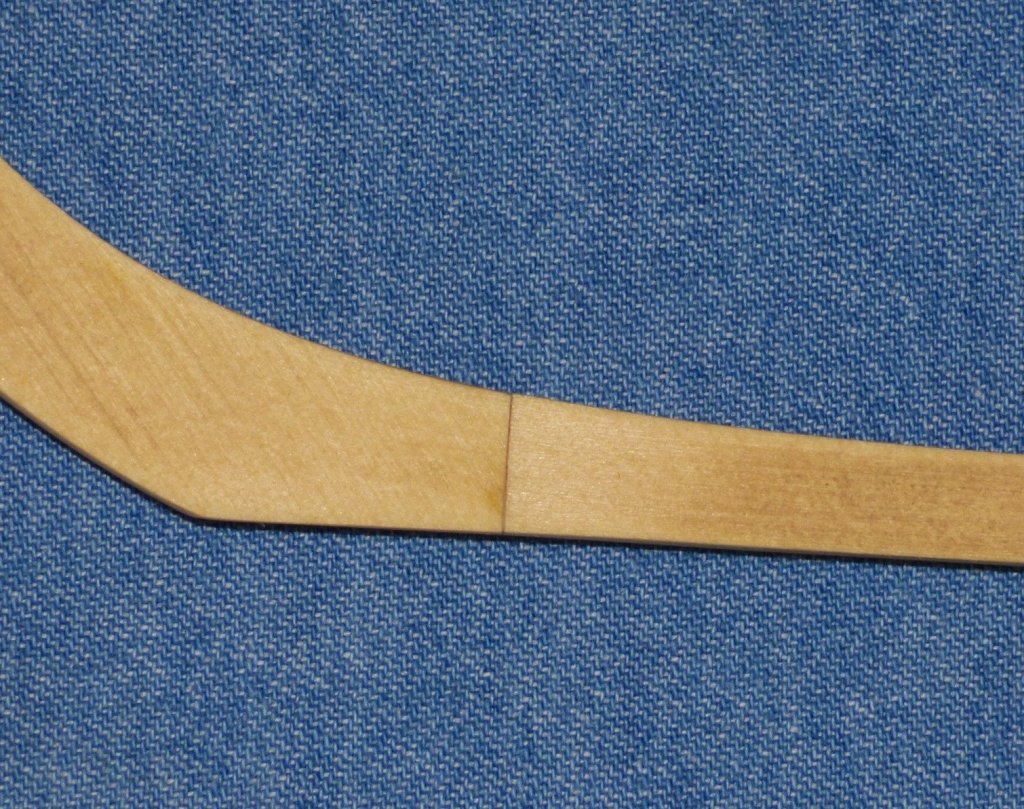
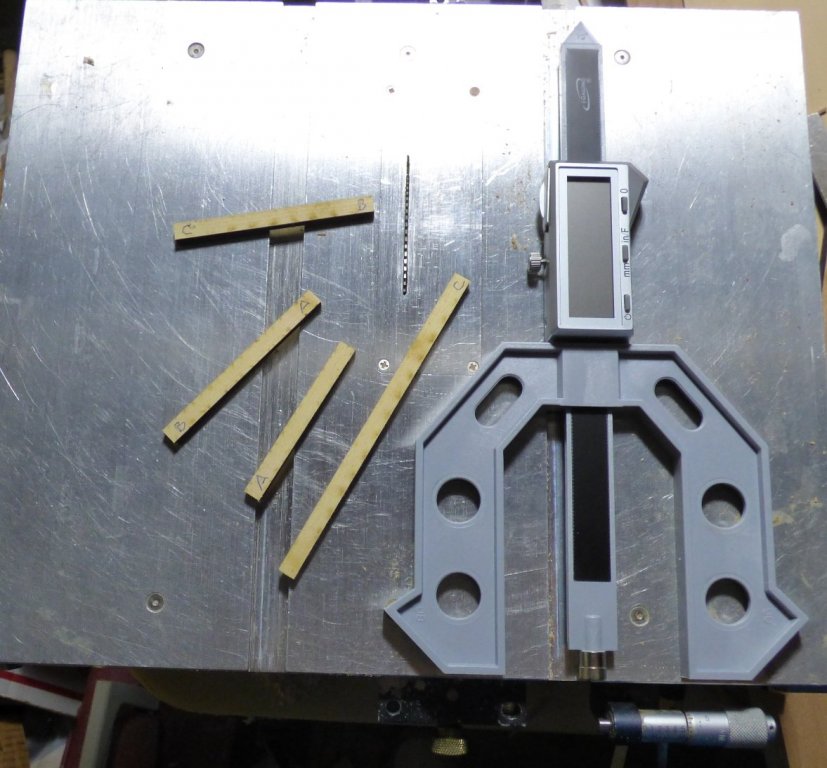
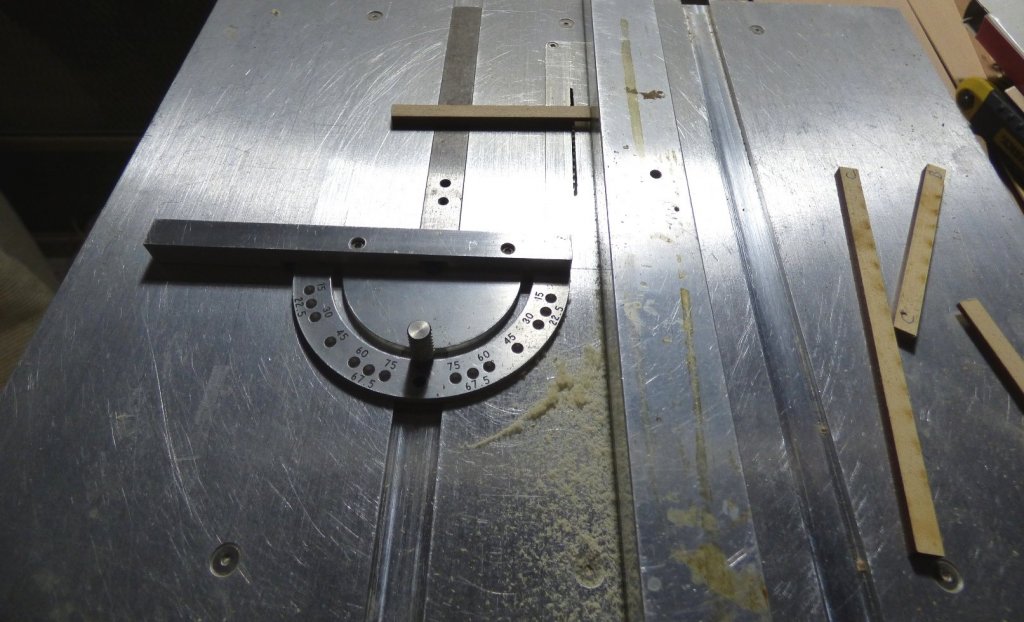
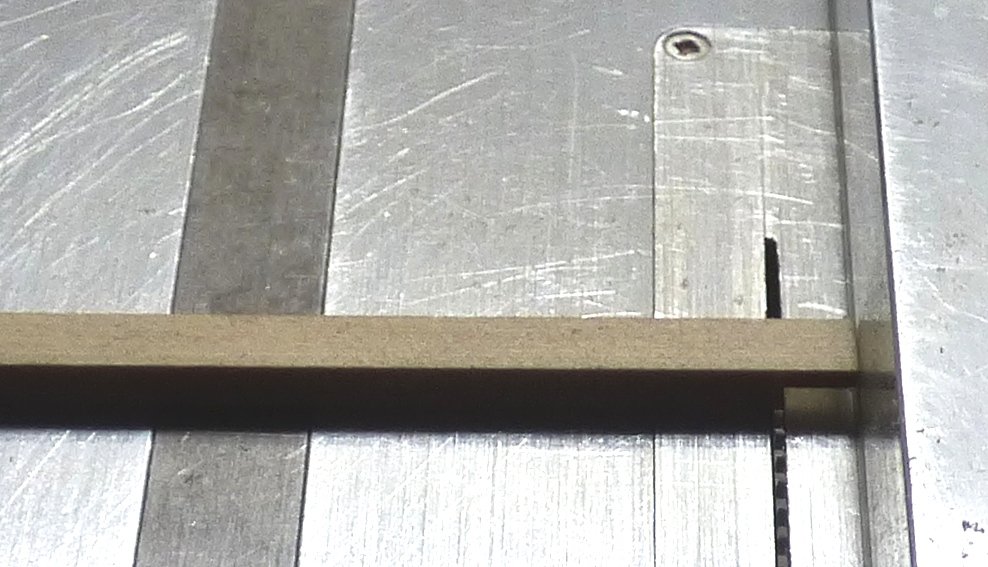
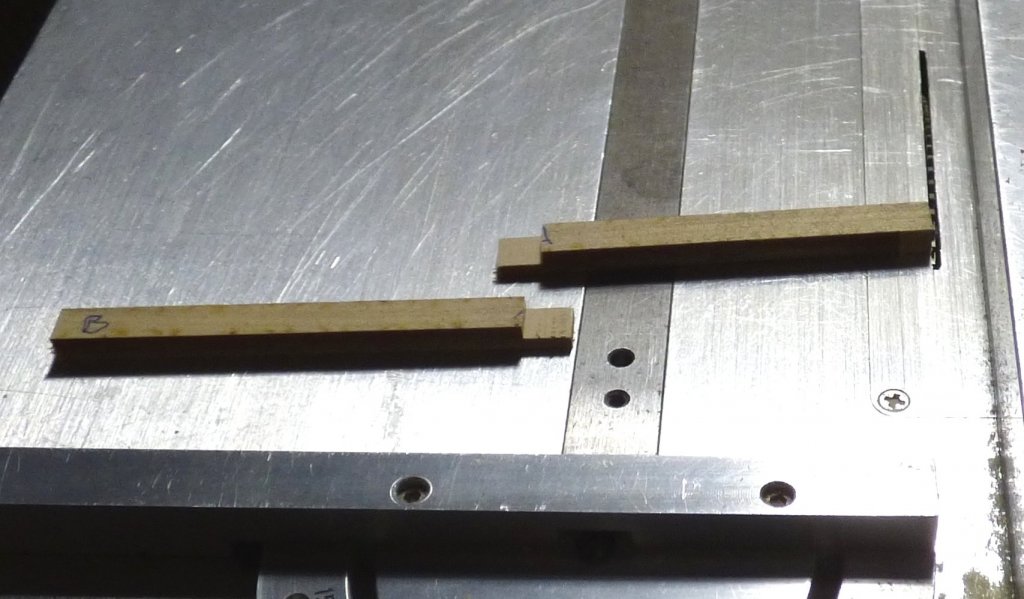
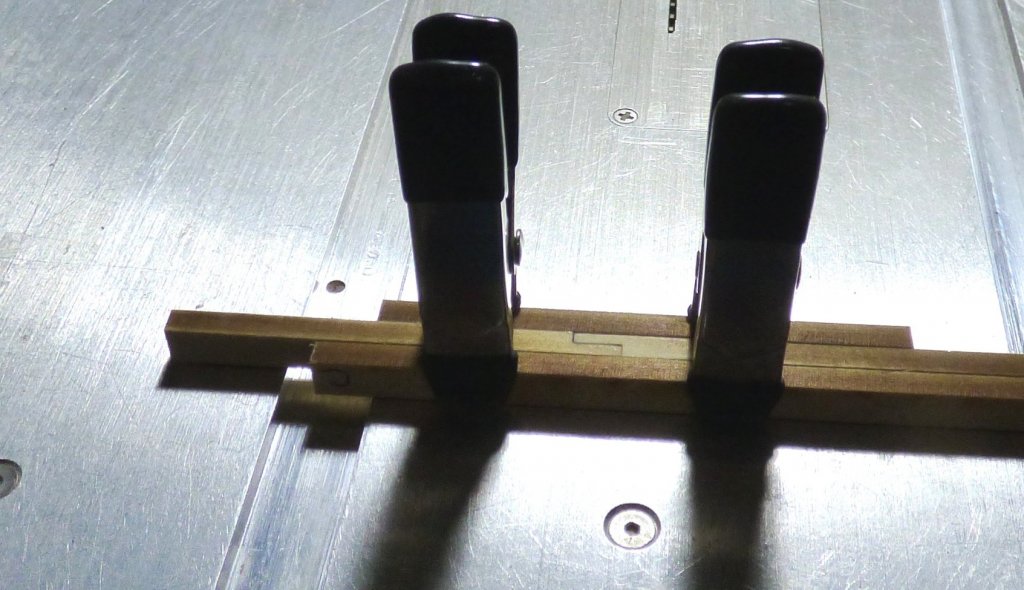
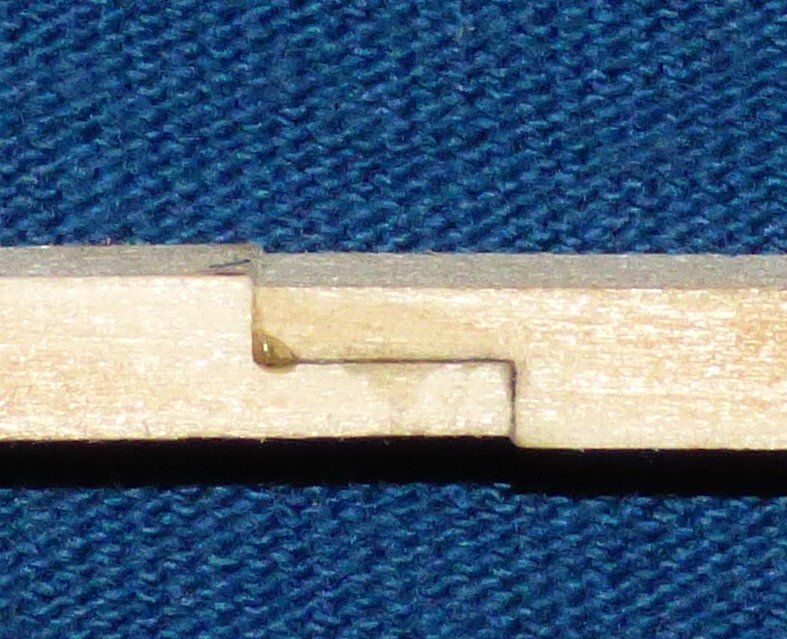
December 8th and I am finally underway. Everybody else has shown you the various parts that come with the kit. I got the same stuff. The first thing I 'get' when opening the box is the cedar aroma. Very pleasant. It increases when sanding or sawing. The first order of business is the keel. As most others have chosen, I am going to attempt the lap joint method and to do that I will be using the iGaging depth gauge discussed elsewhere. First step is to test the process. Above is my Byrnes Saw with iGaging depth gauge and some test pieces. I cut these from the same sheet that included the keel pieces so when I got the right depth dialed in, I would be ready on the actual keel. The gauge told me that my test keel was .167" thick. I would set the blade at .083, giving me .001 to play with. Fine tuning the height those last .001 inches was a chore. I finally got what I thought was correct and started my cuts. The above photo shows the basic process. The fence gives me a constant cut length, cut depth has been set into the blade. These will be square cuts. The cuts on the actual keel will require a little more creativity. A close-up of the cut. First cut is at the deepest part of the cut (lengthwise) working my way to the end. That keeps the whole piece stable. Once the end is finally cut I have to be careful not to push down on the piece, thereby taking off more than desired. Moving the piece back and forth over the center of the blade ensures a smooth cut. Cuts complete.... ...and glued in place. Once dry and unclamped I could see that the cuts were a little too deep and the joint was uneven. Test showed that I did not measure from the center of the blade. Blade height was actually .086". I reset and tried again, ensuring I measured from center. Right on target. We'll see how this works on the real keel.
-
My top 4 most useful tools
Chuck Seiler replied to Tim Moore's topic in Modeling tools and Workshop Equipment
Dremel, Exacto (or scalpel), magnification, lighting oh, and clamps and sand paper. -
My top 4 most useful tools
Chuck Seiler replied to Tim Moore's topic in Modeling tools and Workshop Equipment
Hey! That's cheating! -
Hello from Southern California!
Chuck Seiler replied to andreank's topic in New member Introductions
Andrea, From where in SoCal do you hail? If you are interested in getting involved with a club, there are a couple available. One in San Diego and one in the L.A. area. Both PHANTOM and SULTANA are great starter kits. I prefer SULTANA because I am more into the colonial era but PHANTOM provides the same benefits and challenges. -
What are you using for glue? If wood glue, just soak the joint in rubbing alcohol (soak a cotton ball). It should deconstruct easily.
-
Jean-Paul, I did my coxswain seats the same as you did. I think it helped get the seat back positioned better.
-
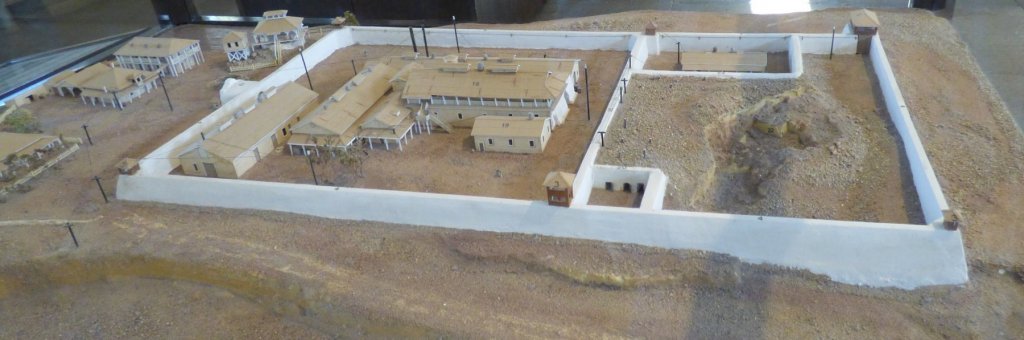
I am currently on road trip in Brian's (GuntherMT) neck of the woods: Casa Grande and Yuma, AZ. I thought I would be able to work on frames in the motel at night. Yeah, well....................... Here is a model of the Yuma Territorial Prison instead.
-
You are on MSW (Model Ship World). I was referring to the sponsors on the front page. Includes models, books, wood, etc.
- 421 replies
-
- 7
-
-
- medway longboat
- Syren Ship Model Company
- (and 1 more)
-
Huzzah! My ship has come in!!! I ordered the kit on 20 Nov and it arrived yesterday. Pretty quick considering Thursday was a holiday. I'll start practicing making lap joints.
-
Mike, Thank you for your kind words. Don't give up completely on kits. They can be the source of some great kit-bashing. ...and there are some VERY NICE kits on the market and about to come out from smaller businesses such as MSW sponsors. When I refer to 'milled' I am not referring to individual planks. I was referring to sheets. Chuck (Syren Ship Model Company) has Alaskan Yellow Cedar, boxwood, Swiss pear and others. Crown also has boxwood, cherry, maple and others. I get various thicknesses of sheet, then use my Byrnes to cut, using for planking, structural and other pieces parts (deck furniture, gratings, etc). For me, that is more cost effective and easier than getting a larger board and cutting it down to sheets.
- 421 replies
-
- 7
-
-
- medway longboat
- Syren Ship Model Company
- (and 1 more)
-
What is your next project? If you can live with a smaller amount of pre milled sheets, get it from Chuck (Syren).
- 421 replies
-
- 4
-
-
- medway longboat
- Syren Ship Model Company
- (and 1 more)
-
Hobby/micro drill press suggestions
Chuck Seiler replied to bigcreekdad's topic in Modeling tools and Workshop Equipment
I have a Dremel. Not bad for general drilling but too sloppy for precision. Whatever you gt, make sure to also get an X-Y table. -
Hello all and already looking for help
Chuck Seiler replied to Signode388's topic in New member Introductions
Phantom is a good starter. It includes a number of 'disciplines' one needs to learn as they progress in the hobby. Unfortunately it does not appear to include hull planking, but all the others will keep you busy and will provide a learning experience. A couple thoughts: As suggested, keep the tools simple at first and get what you need when you need it. You can never have too many clamps. Make sure to have both medium and fine grit sand paper. I have never needed course, but others may differ. Magnification! Definitely....and lighting. Alcohol is your friend (rubbing, not drinking). Don't be afraid to unglue parts that don't look right. Enjoy the build. Ask questions.