HOLIDAY DONATION DRIVE - SUPPORT MSW - DO YOUR PART TO KEEP THIS GREAT FORUM GOING! (Only 20 donations so far - C'mon guys!)
×


Moonbug
-
Posts
1,028 -
Joined
-
Last visited
Content Type
Profiles
Forums
Gallery
Events
Everything posted by Moonbug
-
 Don’t get too discouraged Bruce, that’s a super challenging and delicate part of the build.
 -
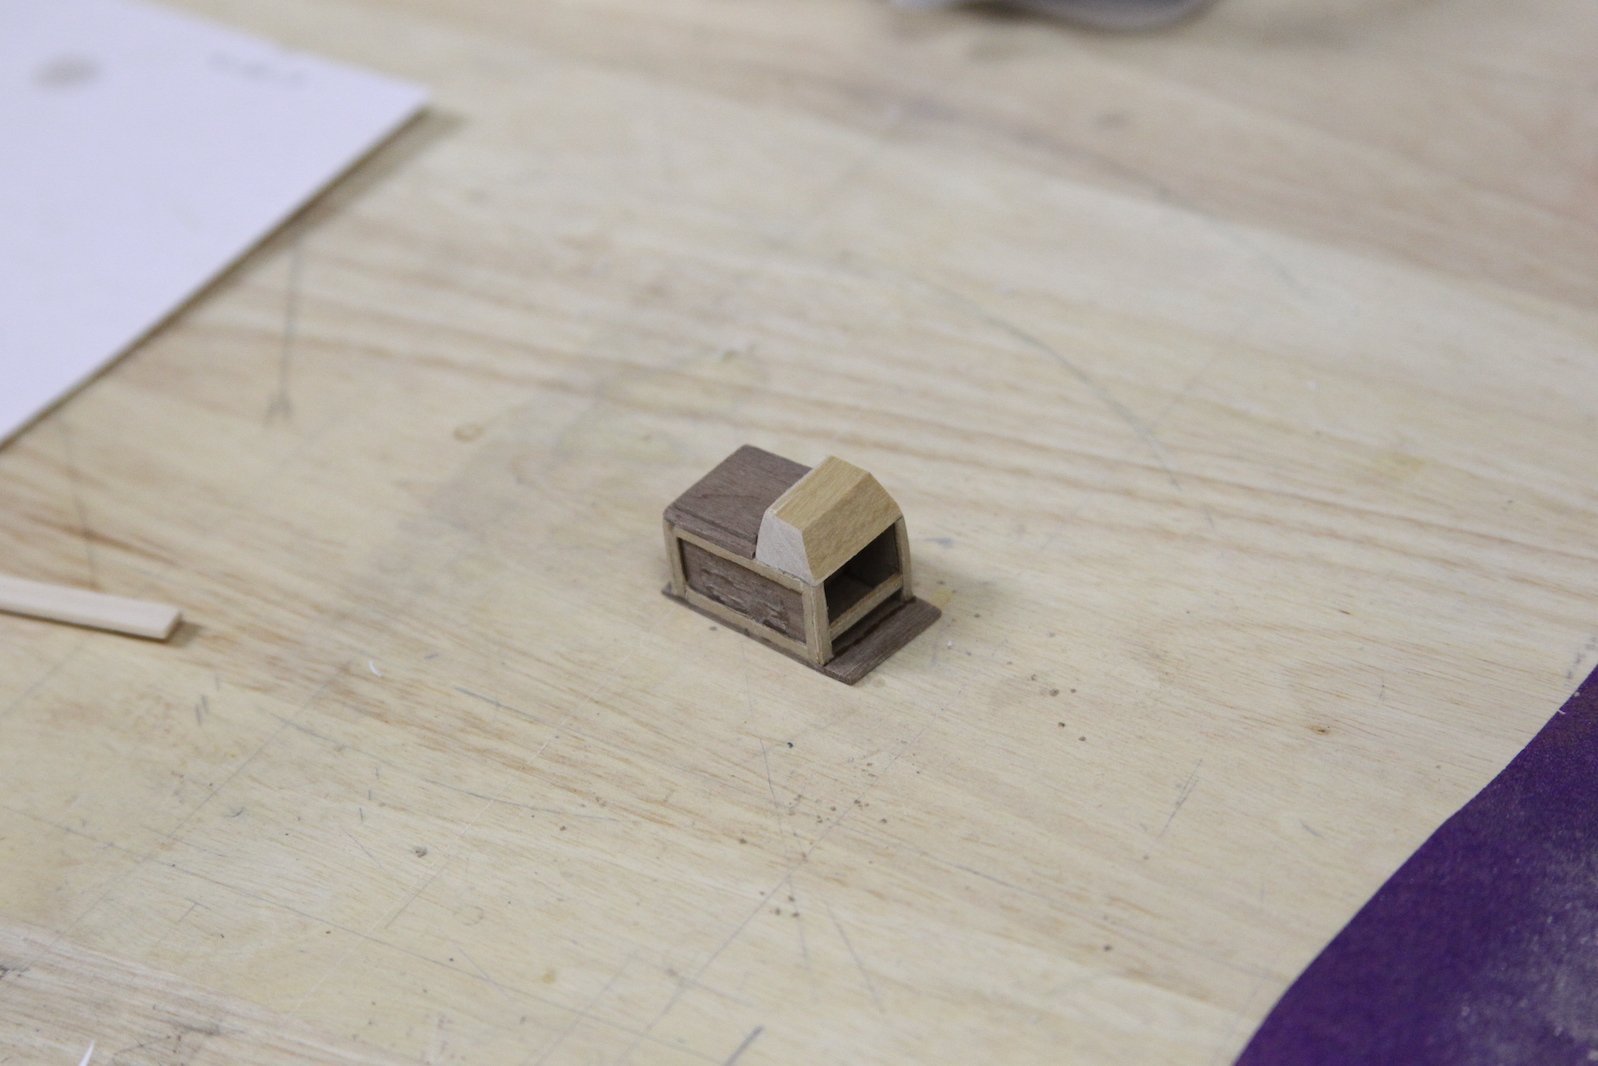
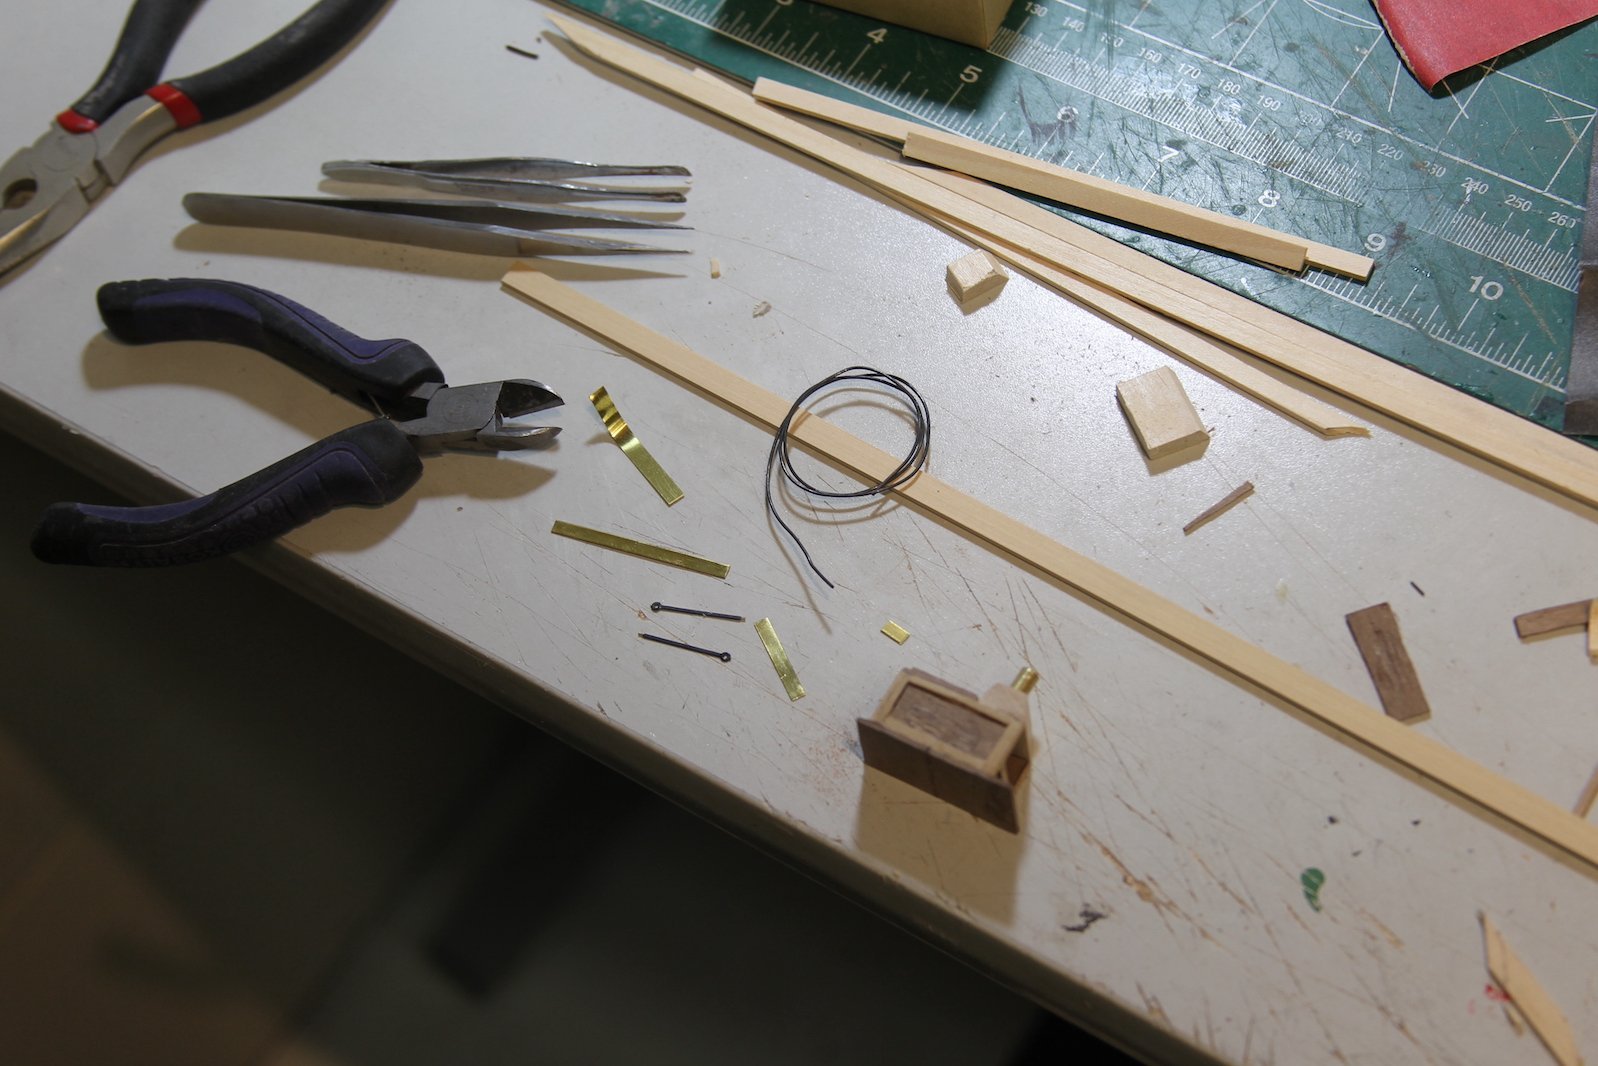
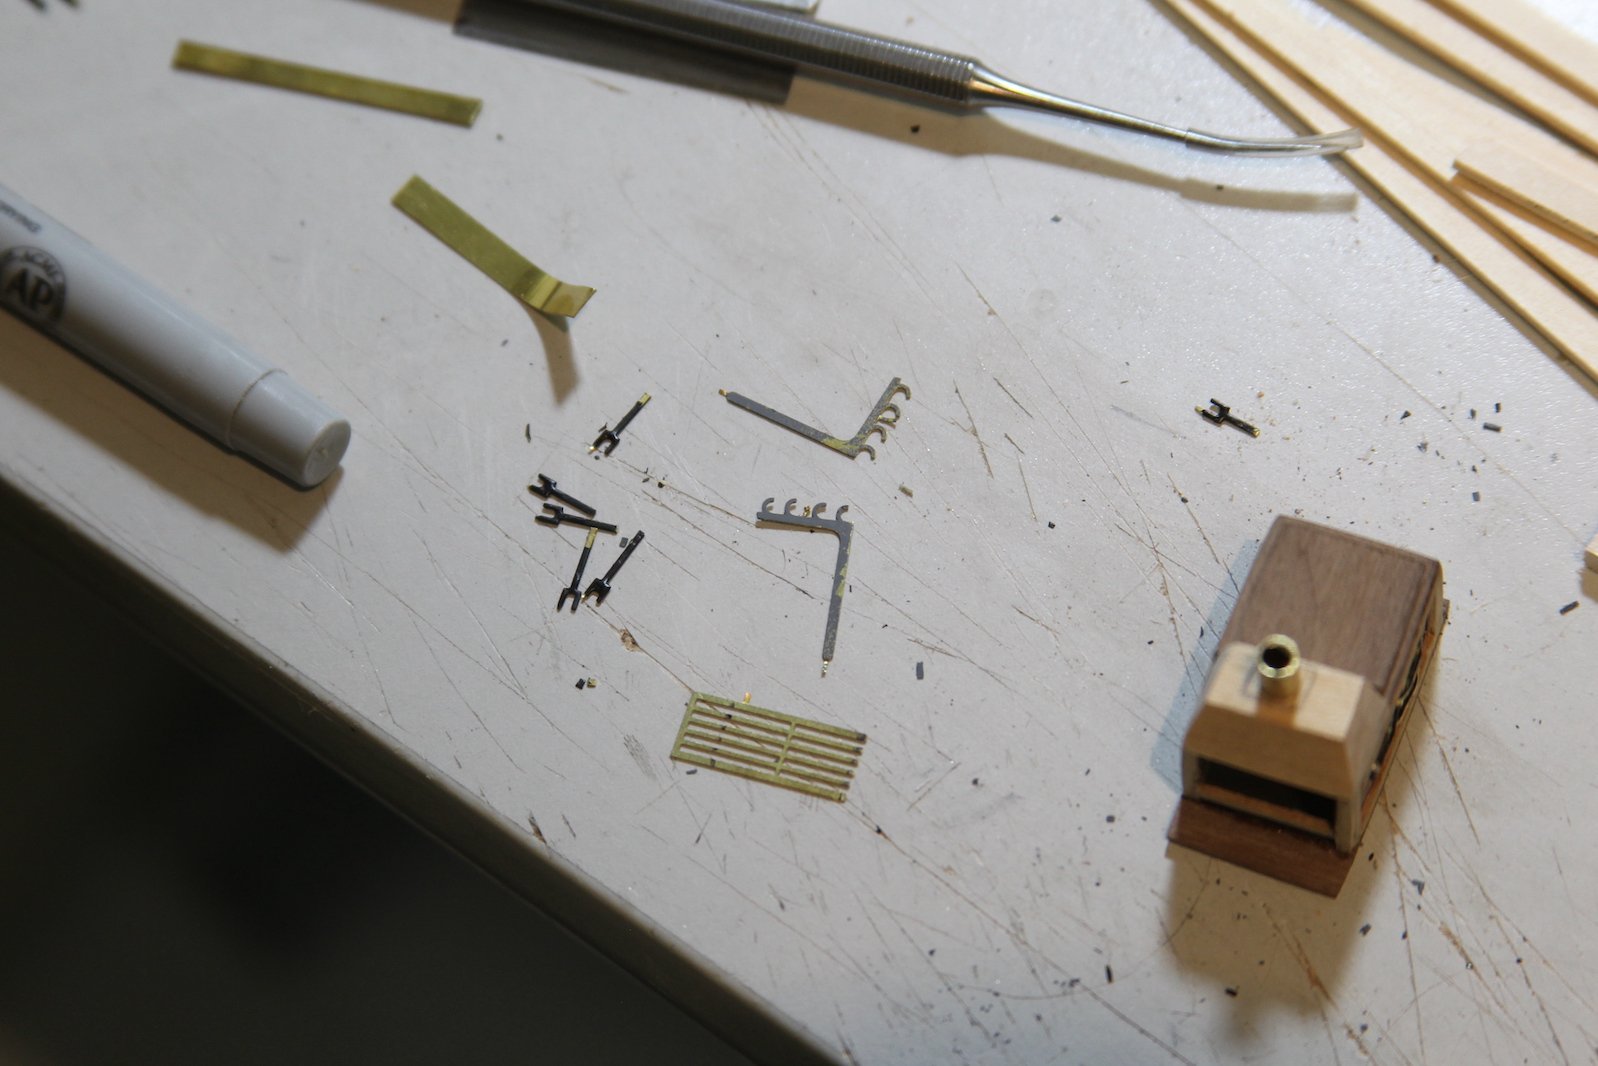
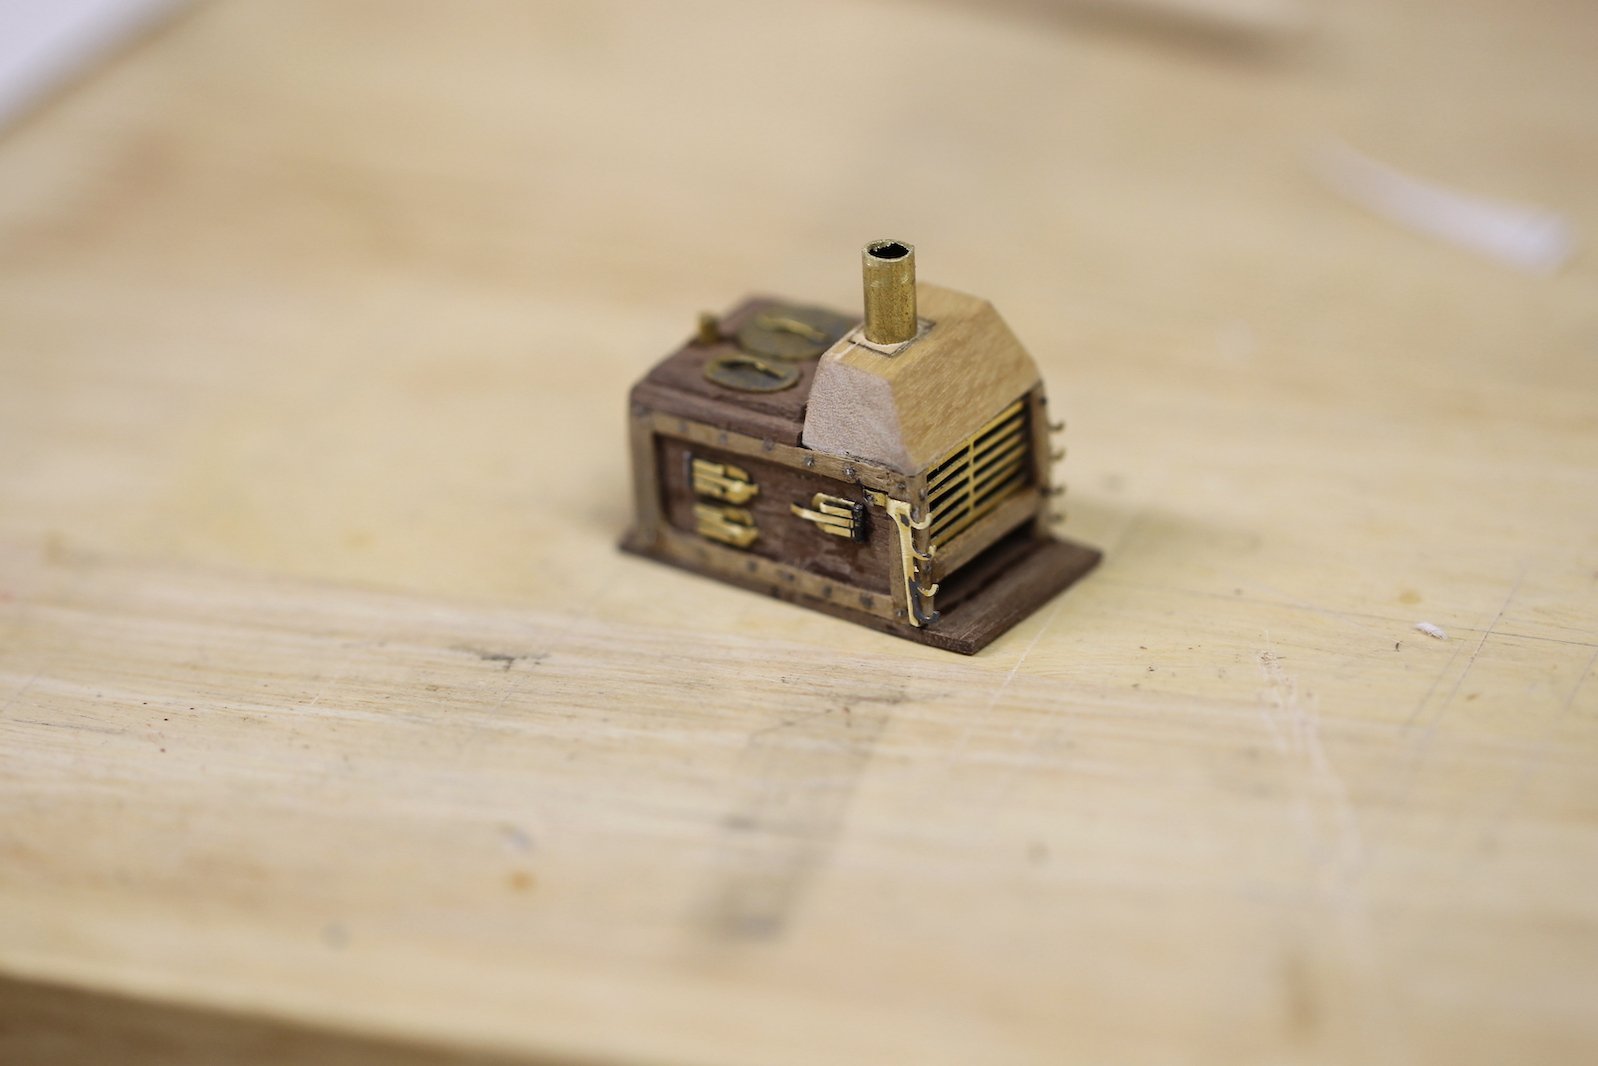
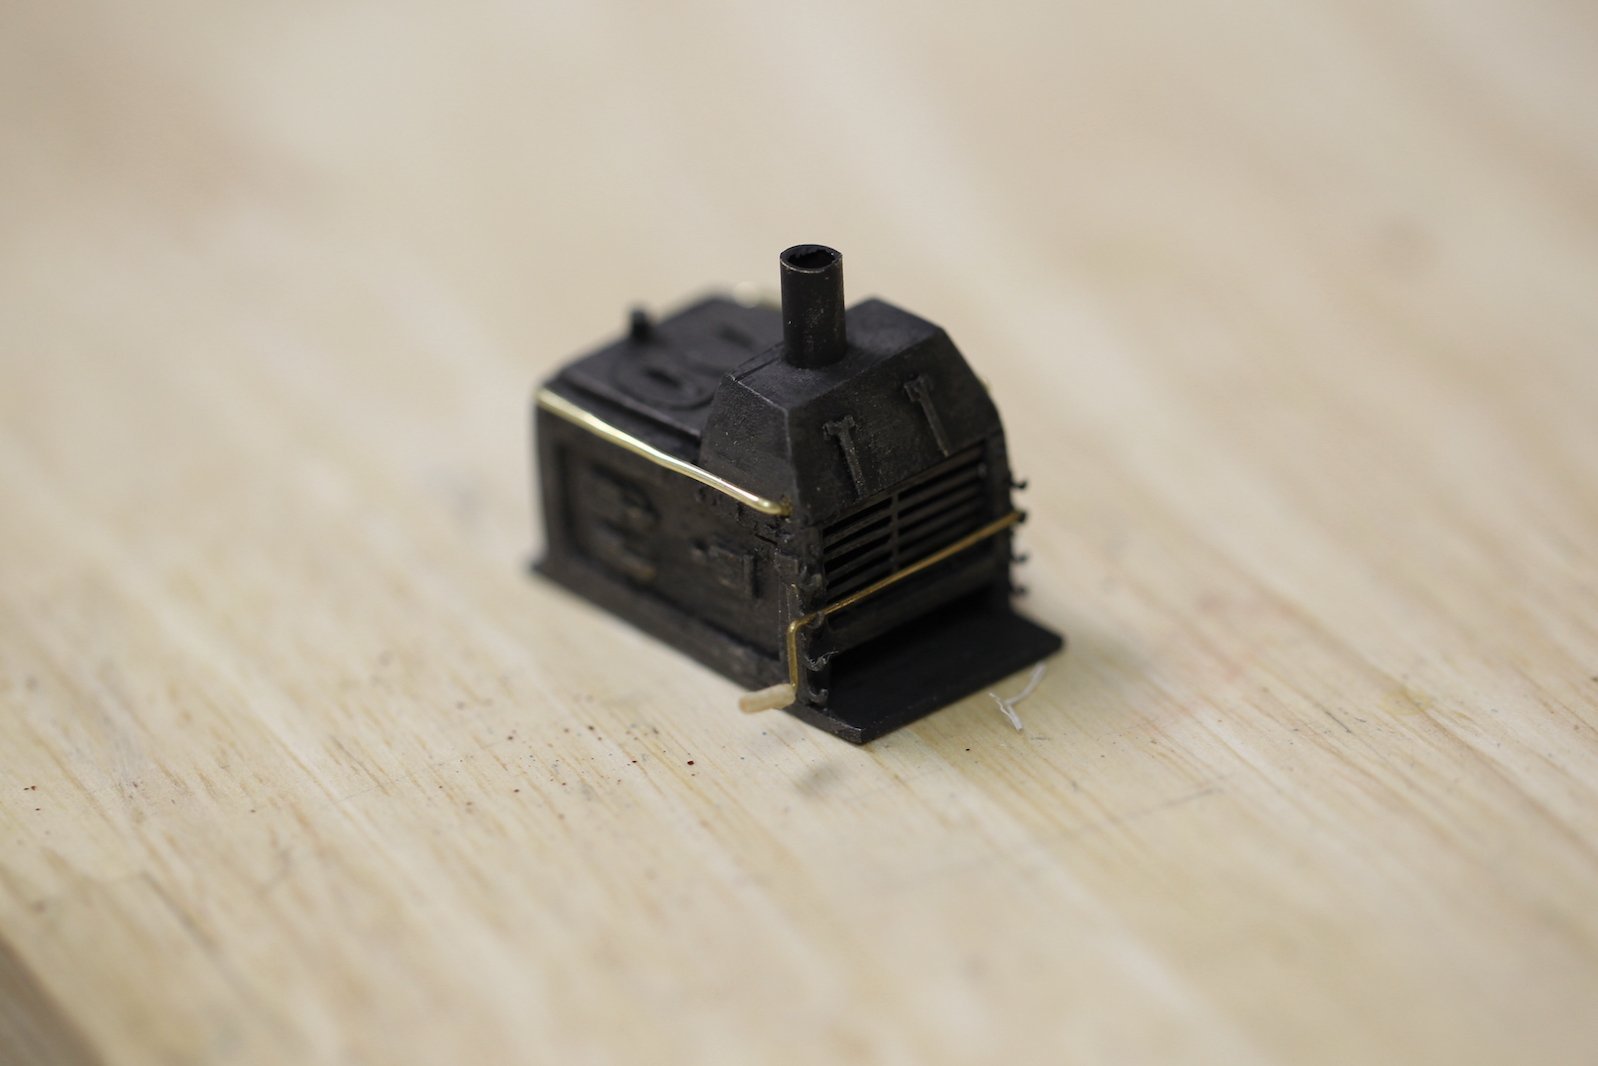
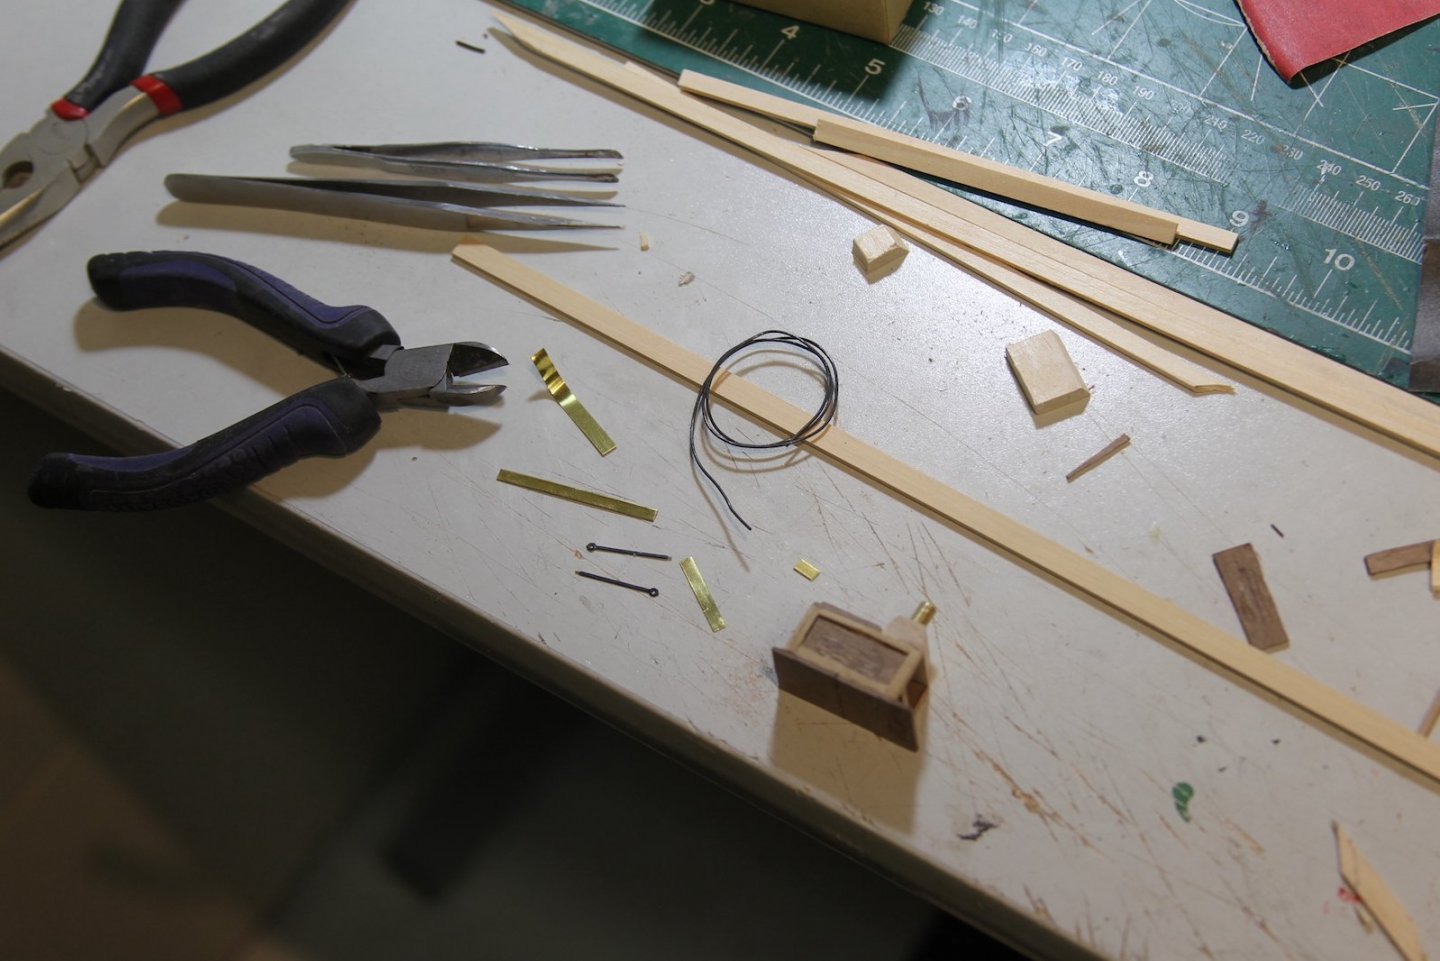
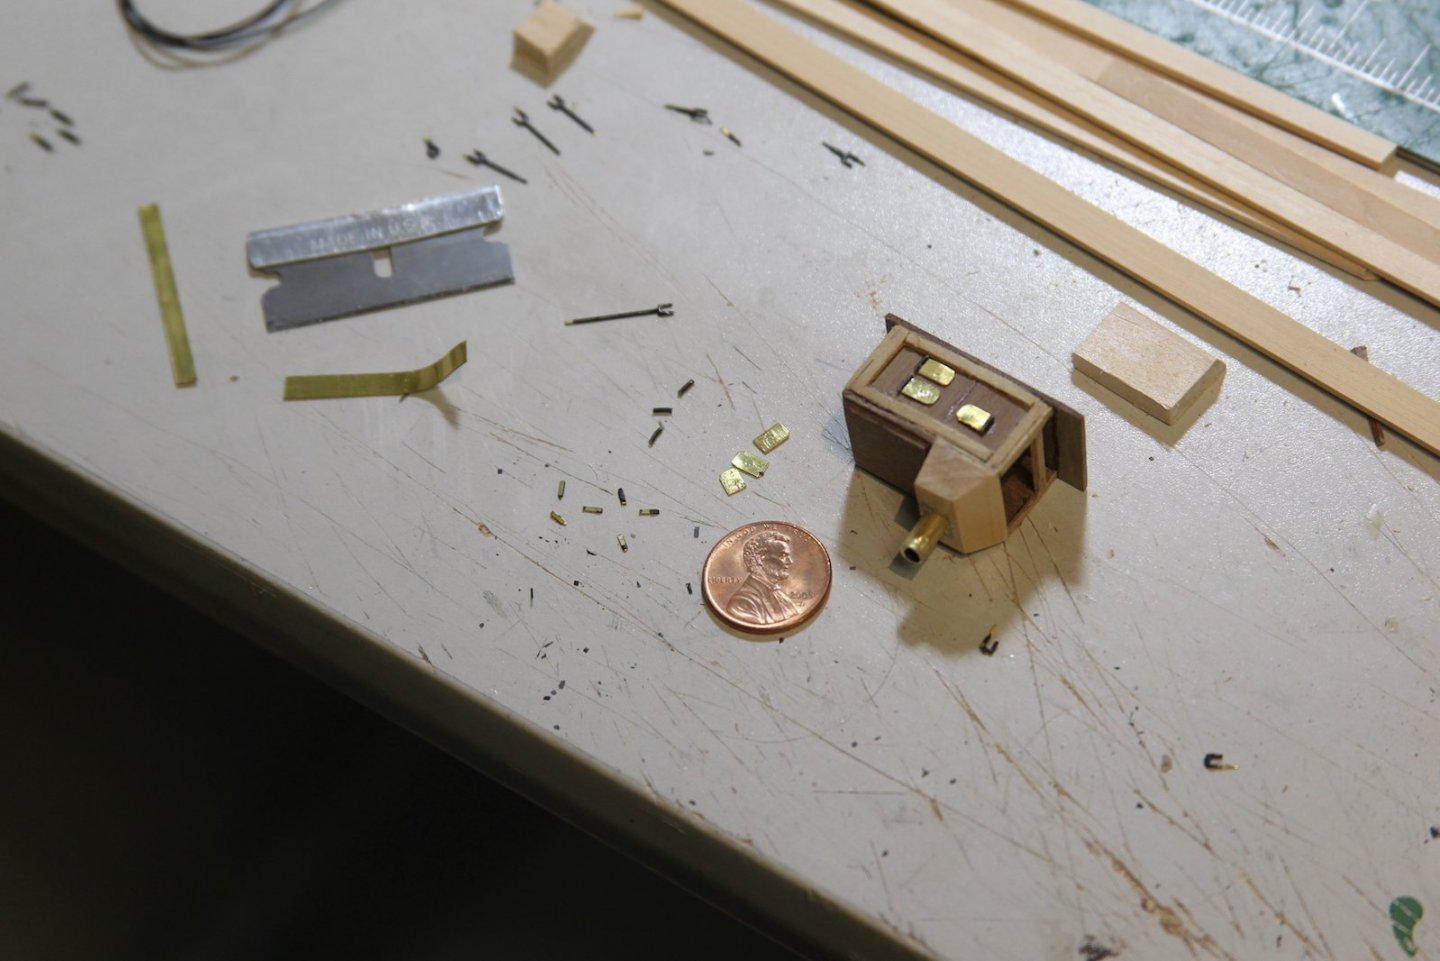
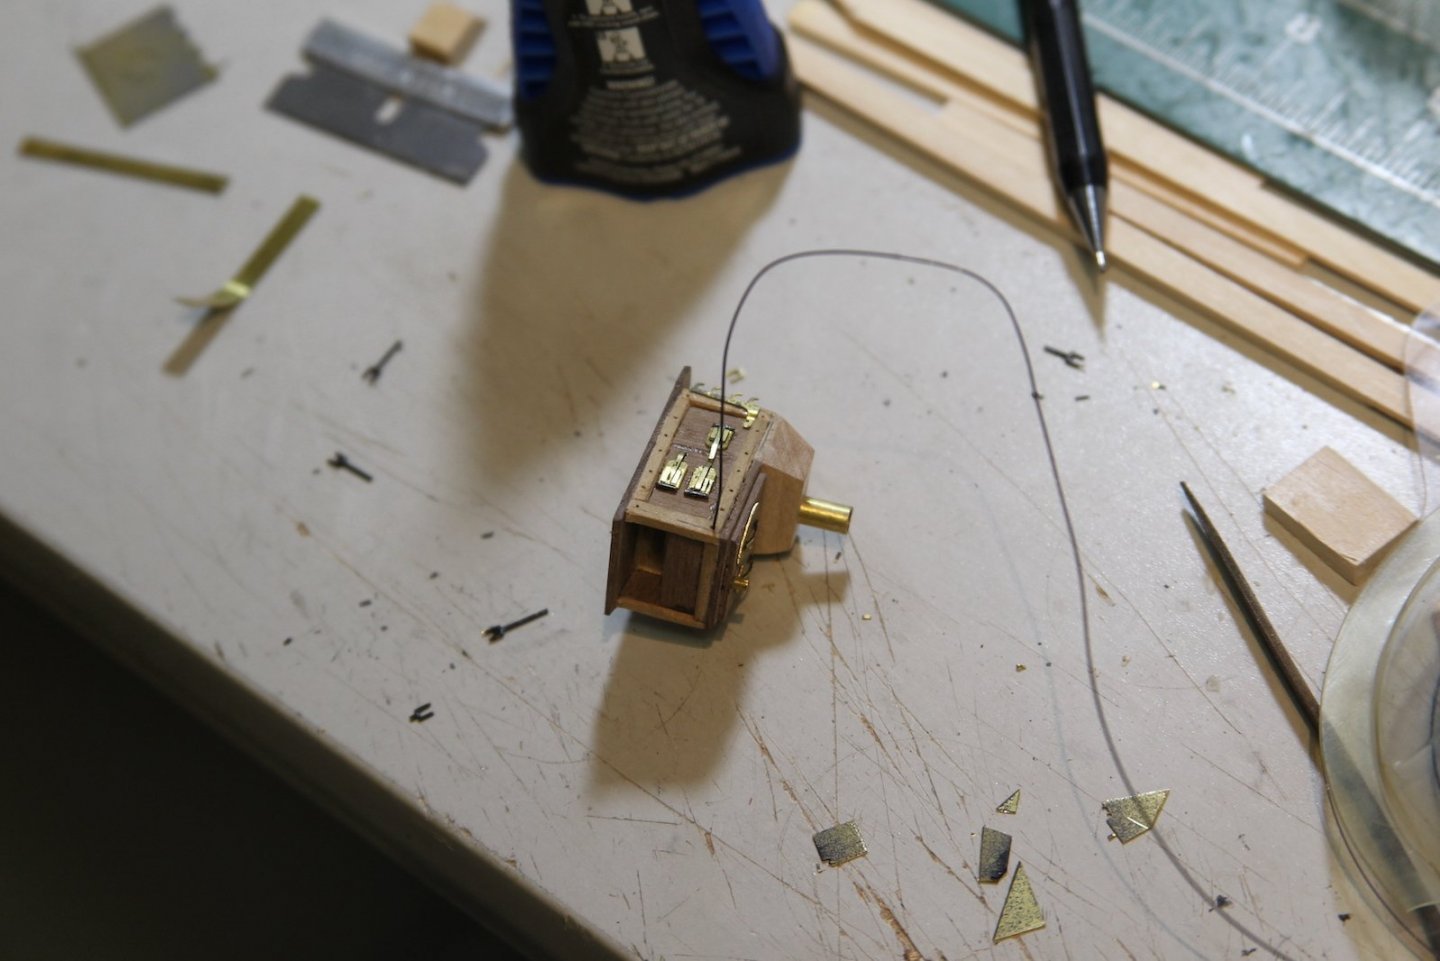
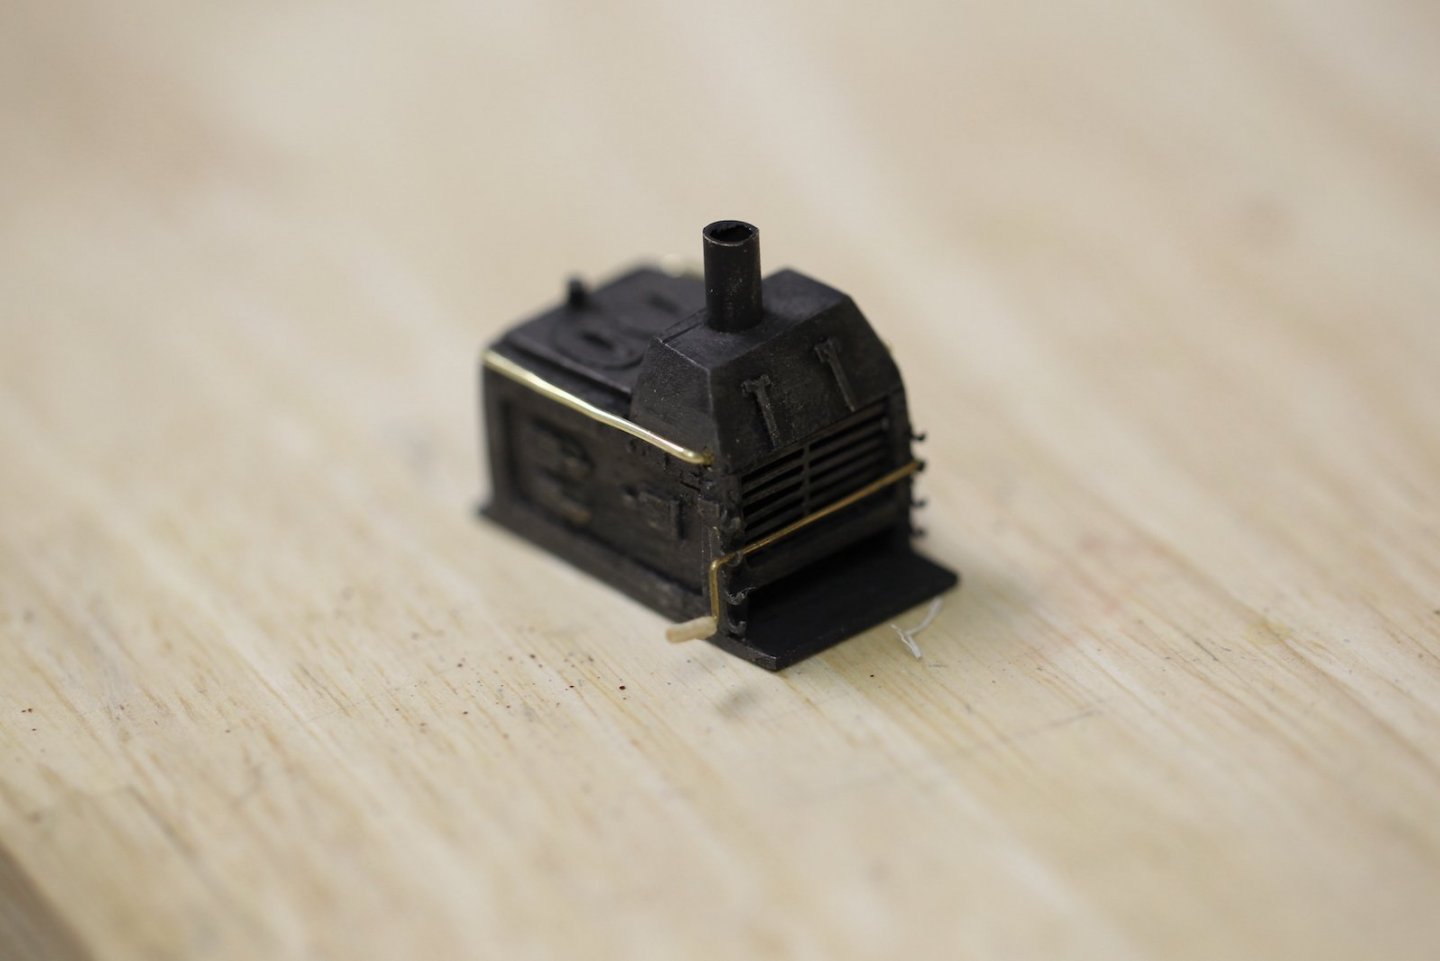
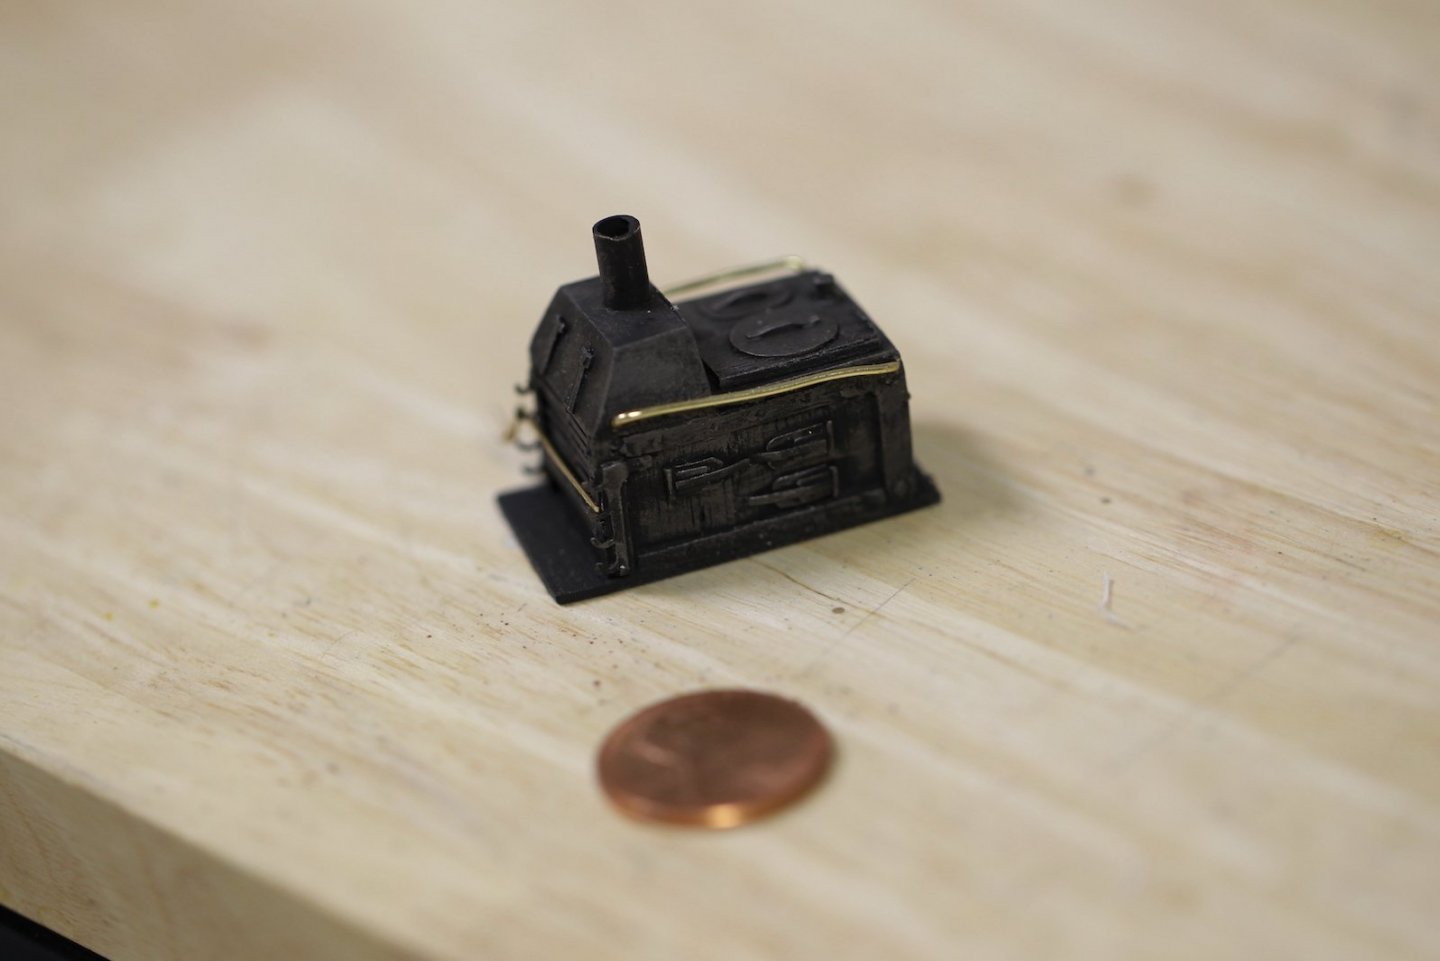
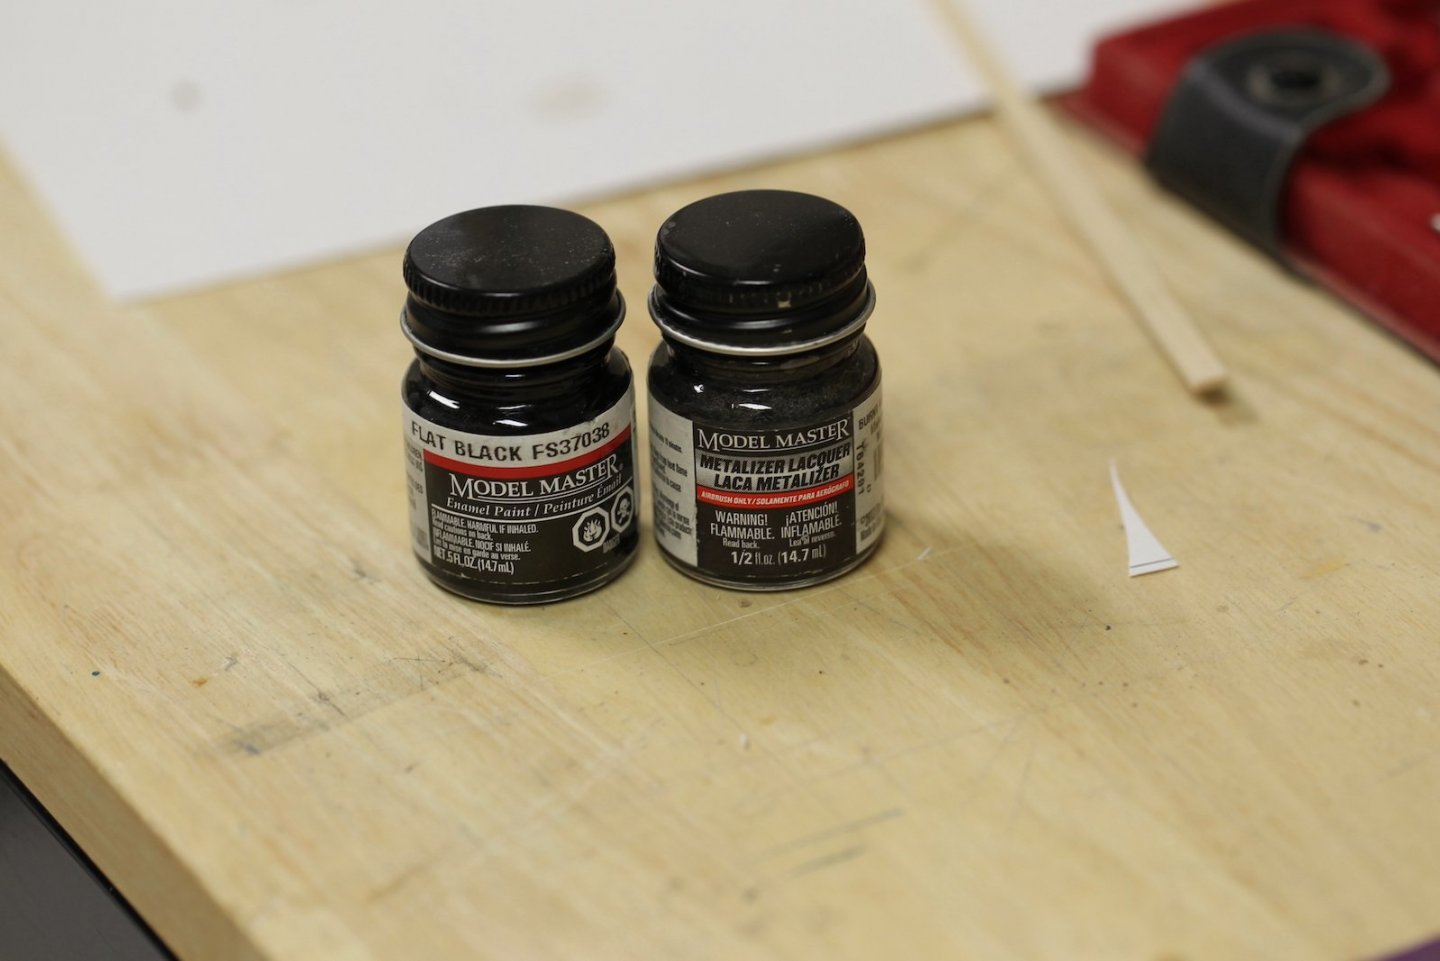
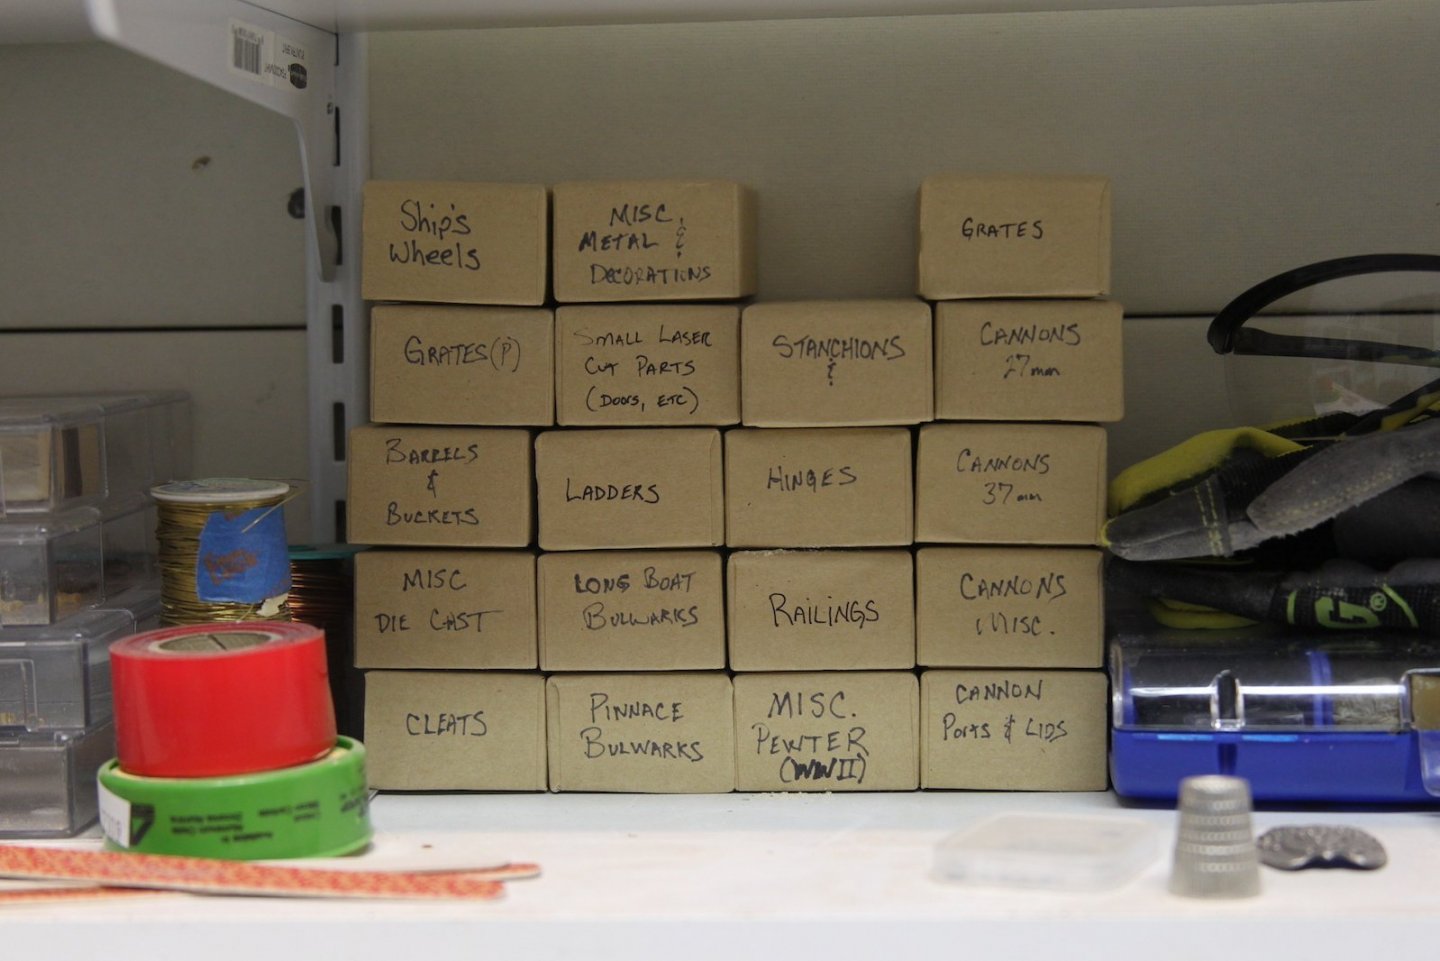
Even though it's going to be nearly impossible to see, I too (like almost everyone else) wanted to do justice to the Ship's Stove. I took the plans from Antcherl and also inspiration from the various interpretations by Blue Ensign, Dan Vadas, and others. I began by carving out and putting together the basic frame of the oven, then I needed to measure it's scale on the deck. The stove barely fits between the bottom and quarter deck with the vent/chimney sticking through the upper deck. In order to accomplish this measurement, I had to go ahead and trim the bulwarks so the upper deck would lay flat. The Victory kit has these little notches that stick up through the quarterdeck. It's a no-brainer that they have to go. Not just for this reason, but because they inhibit proper planking of the decks. Once I had the basic size and shape figured out, I started adding the small elements of the stove like the side doors & hinges and the grates. I dove into my little trove of miscellaneous little scraps and cut and shaped brass strips left over from other builds - mostly the Stagecoach I built the Admiral. Some other parts I used were old stanchions and port lid hinges. There are a couple of really specific pieces for the stove - the grate and also the hooks that hold the rotisserie bit on the front of the stove. This is where it's really handy to have built other ships - especially, in this case, Chuck's USF Confederacy. Not only is the Confederacy also a 1/64 scale, but there were a plethora of extra laser cut pieces. So I looked through my handy stash of extra bits and found just what I needed. I drilled some holes and used wire pins to represent the bolts. This was a solid three days worth of work in between setting planks on the hull to dry to shape. After it was put together, I hit the stove with a layer of flat black, then a soft brushed coat of this super cool metal-izer that I use on my WWII plane models. For the final product, I added the brass rails and the little skewer.


- 419 replies
-
- 8
-

-

-
- Victory Models
- Pegasus
- (and 2 more)
-
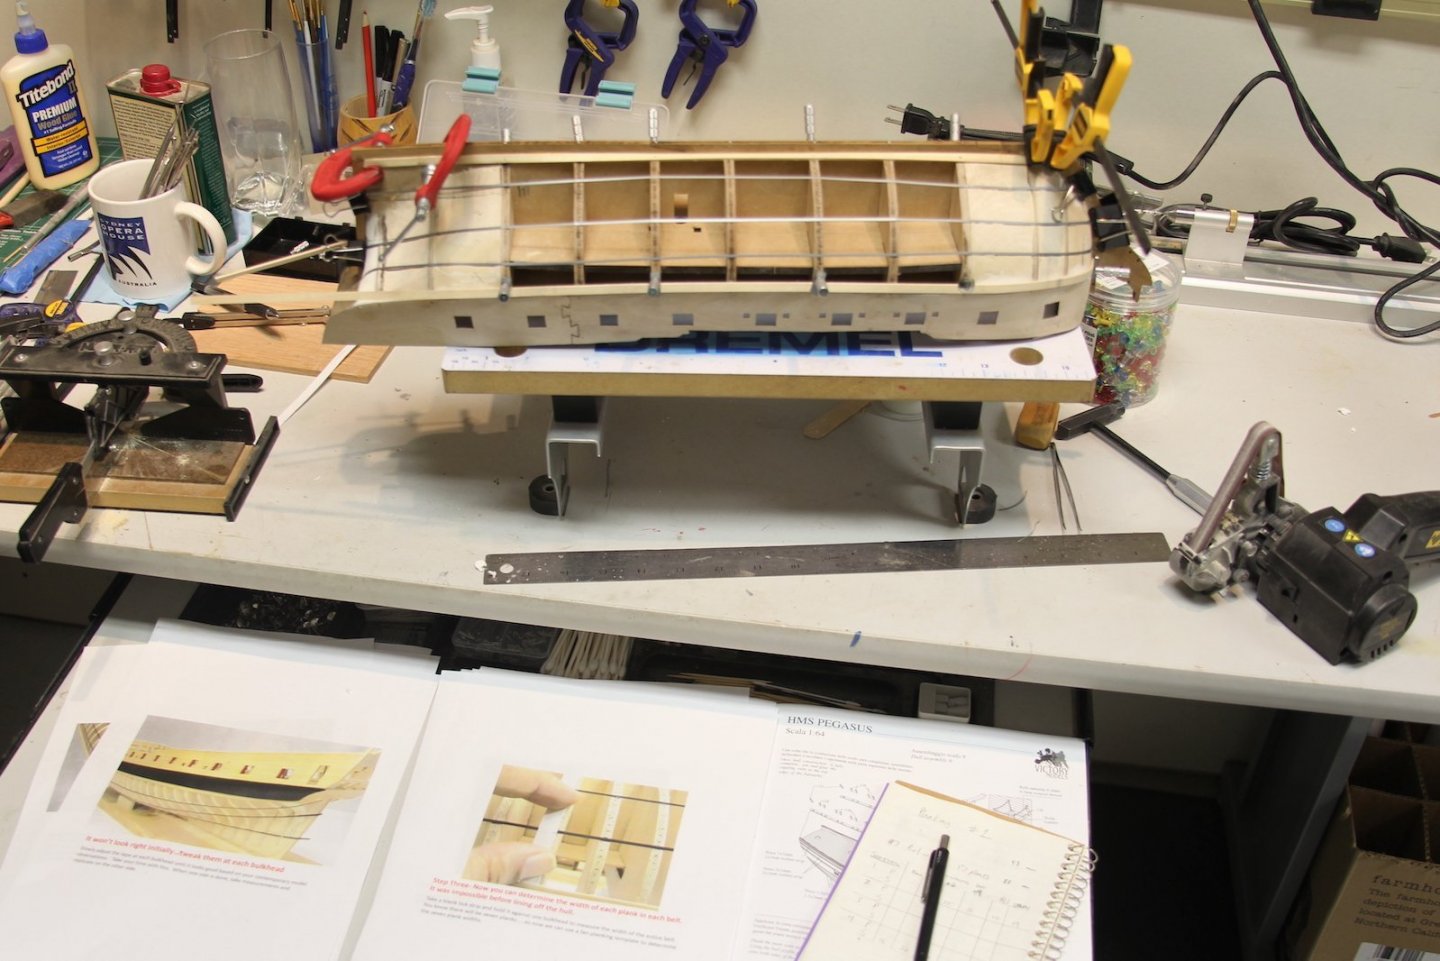
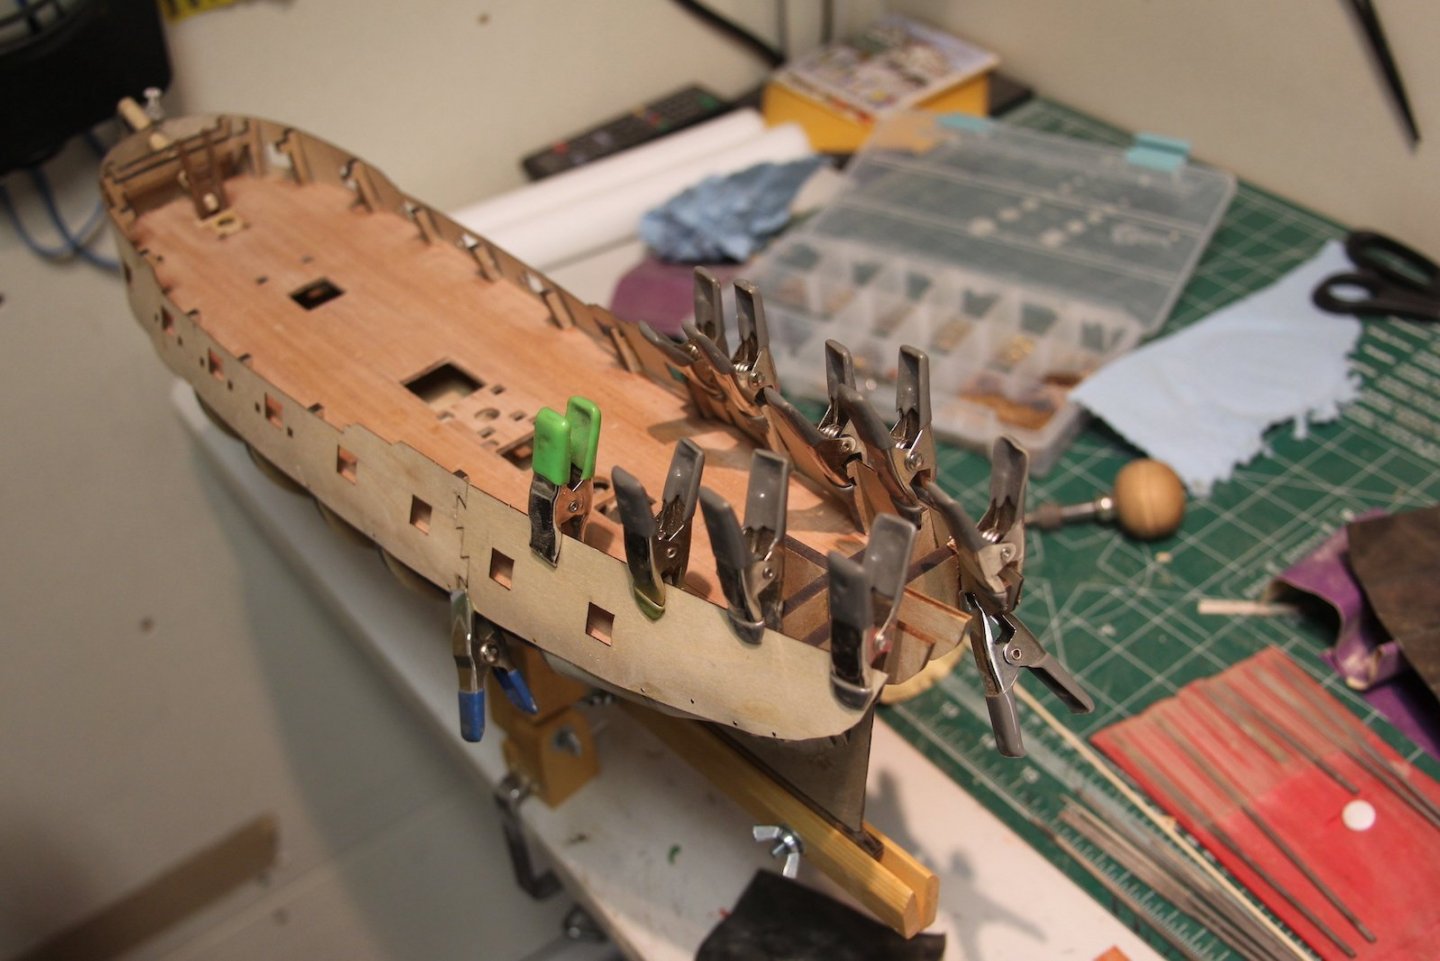
Ok - Lest you think I'm not actually going to plank the Peg - these next few photos show that I have indeed actually started planking her. After a good two hours of re-reading tutorials and watching Chuck's videos, I finally plunged in. As you can see, I've got the tutorial and measurements all laid out so I can go by the book. I measured out the plank sizes and divided the hull into four sections. I used some old pin-striping tape to mark. Then, lo and behold I actually laid the garboard strake. More to come on planking of course, but I'm taking it very slow. I've also decided with the first layer of planking I'm going to go with stealers - especially since I'm not cutting my own plank sizes, but using the kit wood. Incidentally, this is also the first time I purchased and used the little screw in plank holders from Micro-Mark. I saw them on Dan Vadas' builds, and I've gotta say - they work pretty great. The only downside with the Peg is that they have tendency to split or strip the MDF if you're not very slow and careful.


- 419 replies
-
- 5
-
-
- Victory Models
- Pegasus
- (and 2 more)
-
Thanks Vahur! I've seen other folks do this, and it might be a good idea for this one, especially since the build is for my youngest daughter.
- 419 replies
-
- 3
-
-
- Victory Models
- Pegasus
- (and 2 more)
-
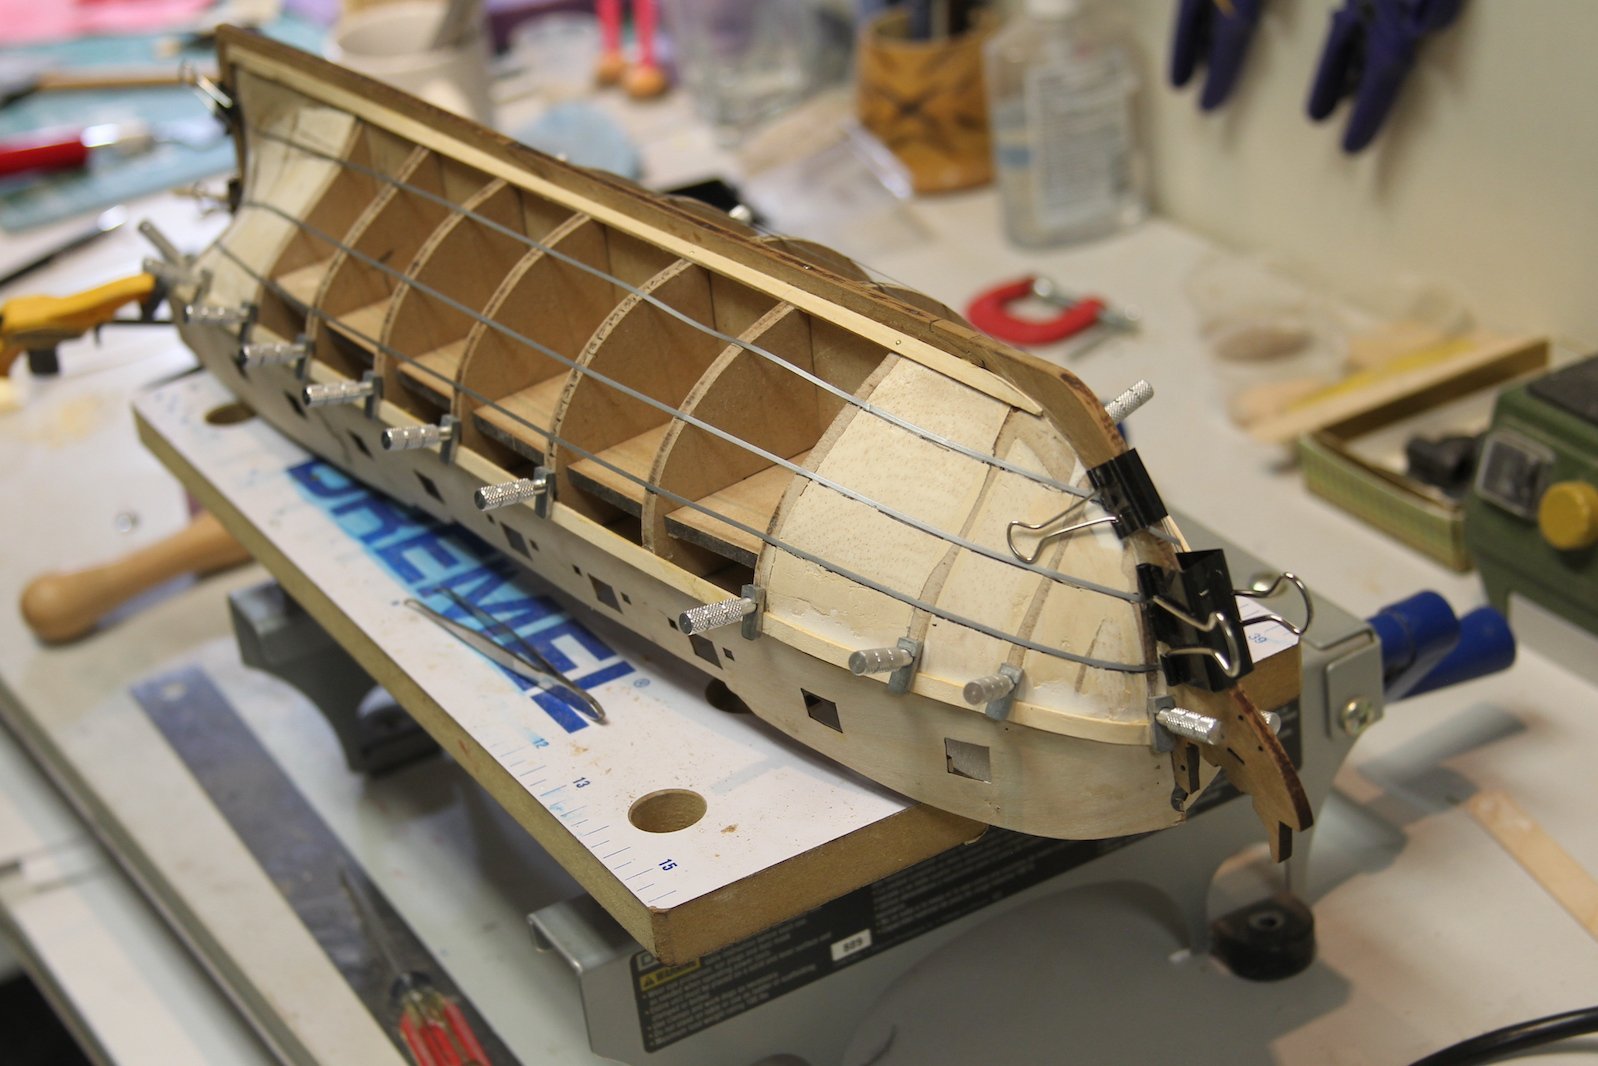
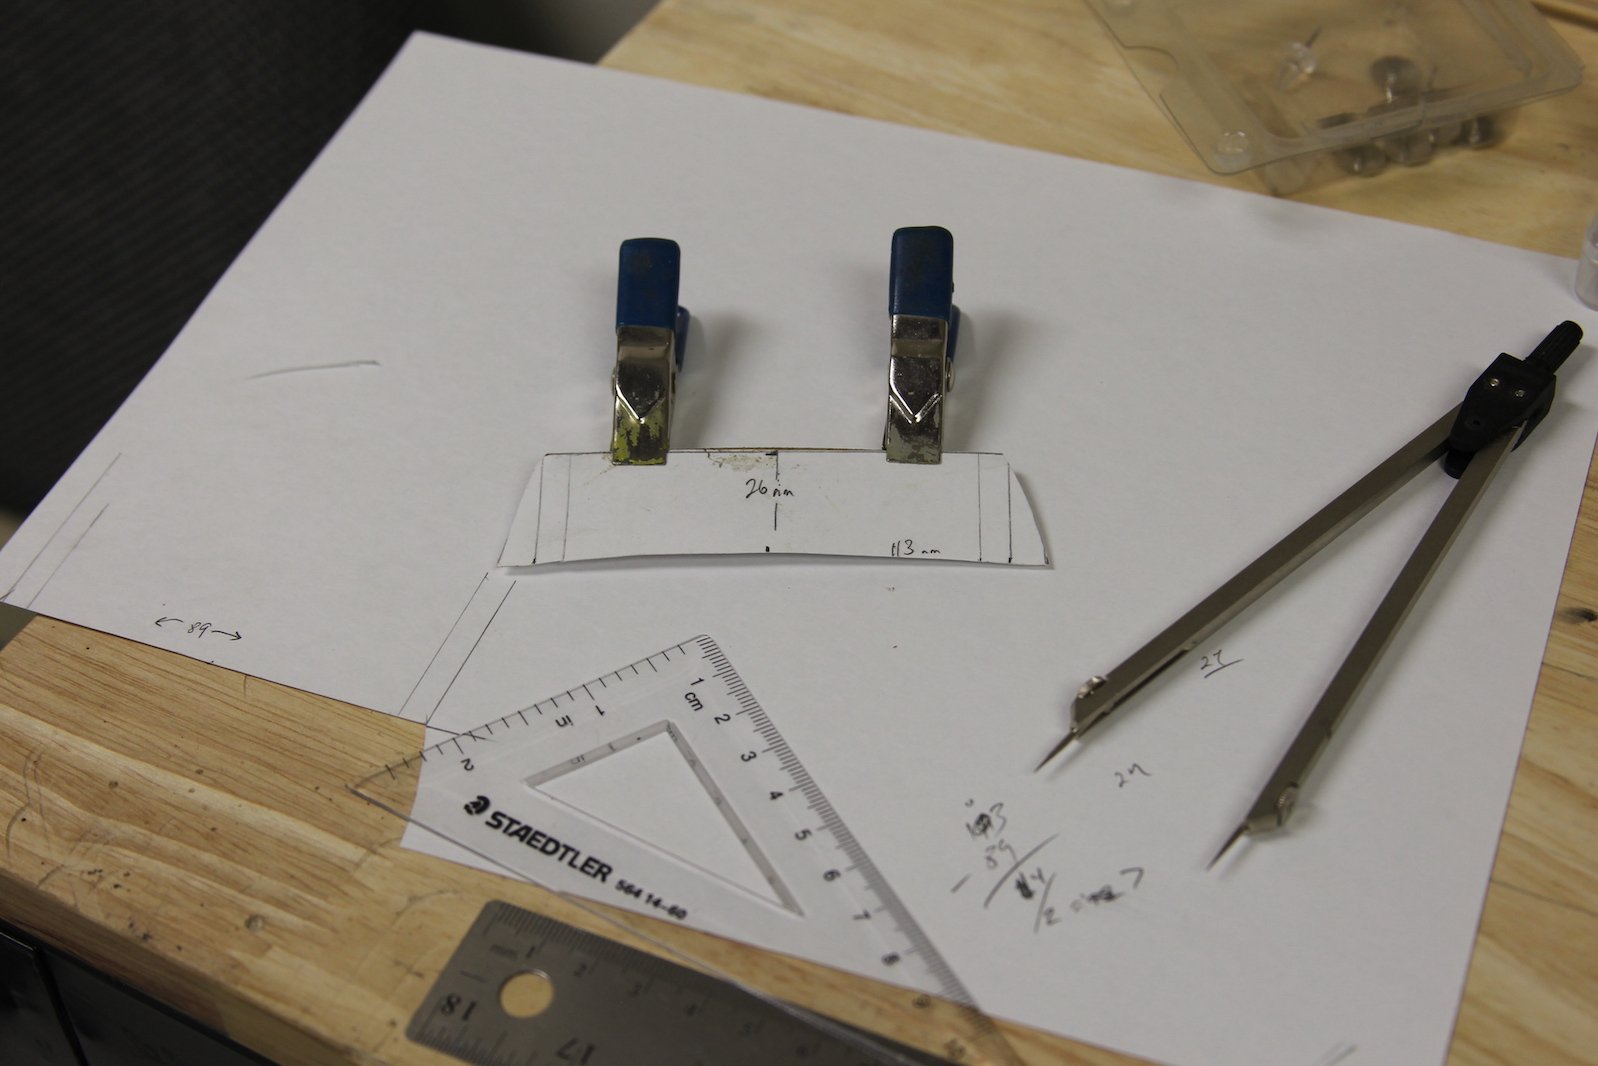
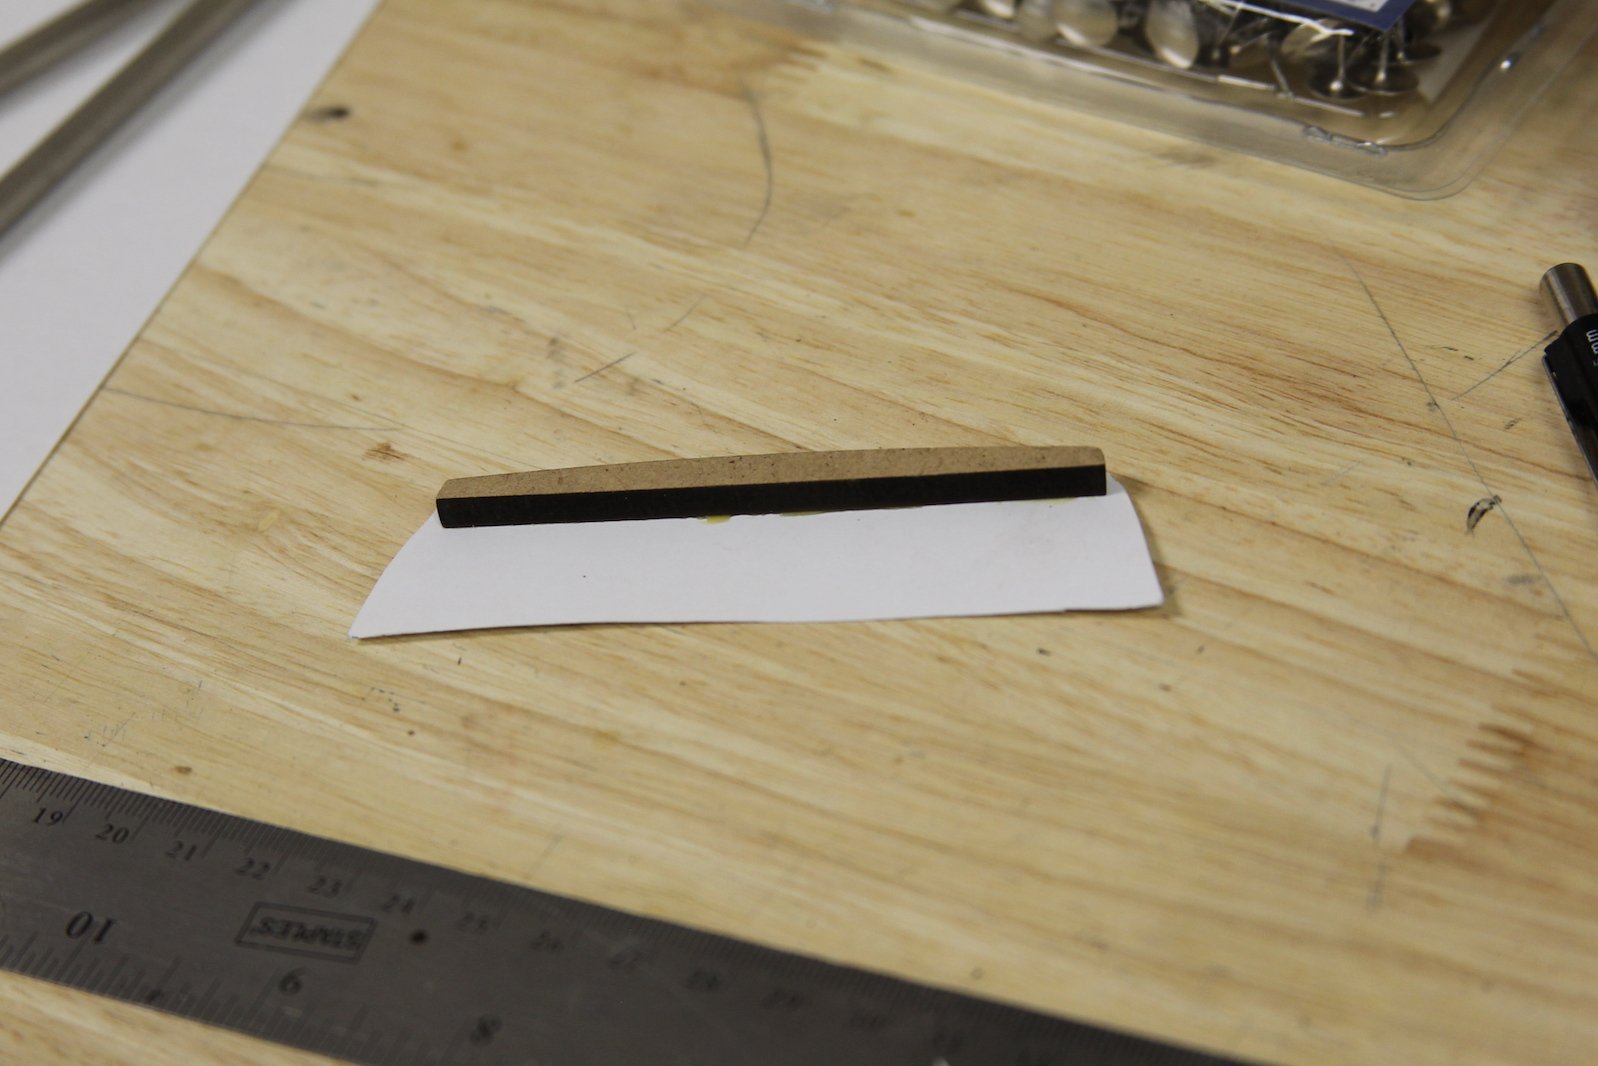
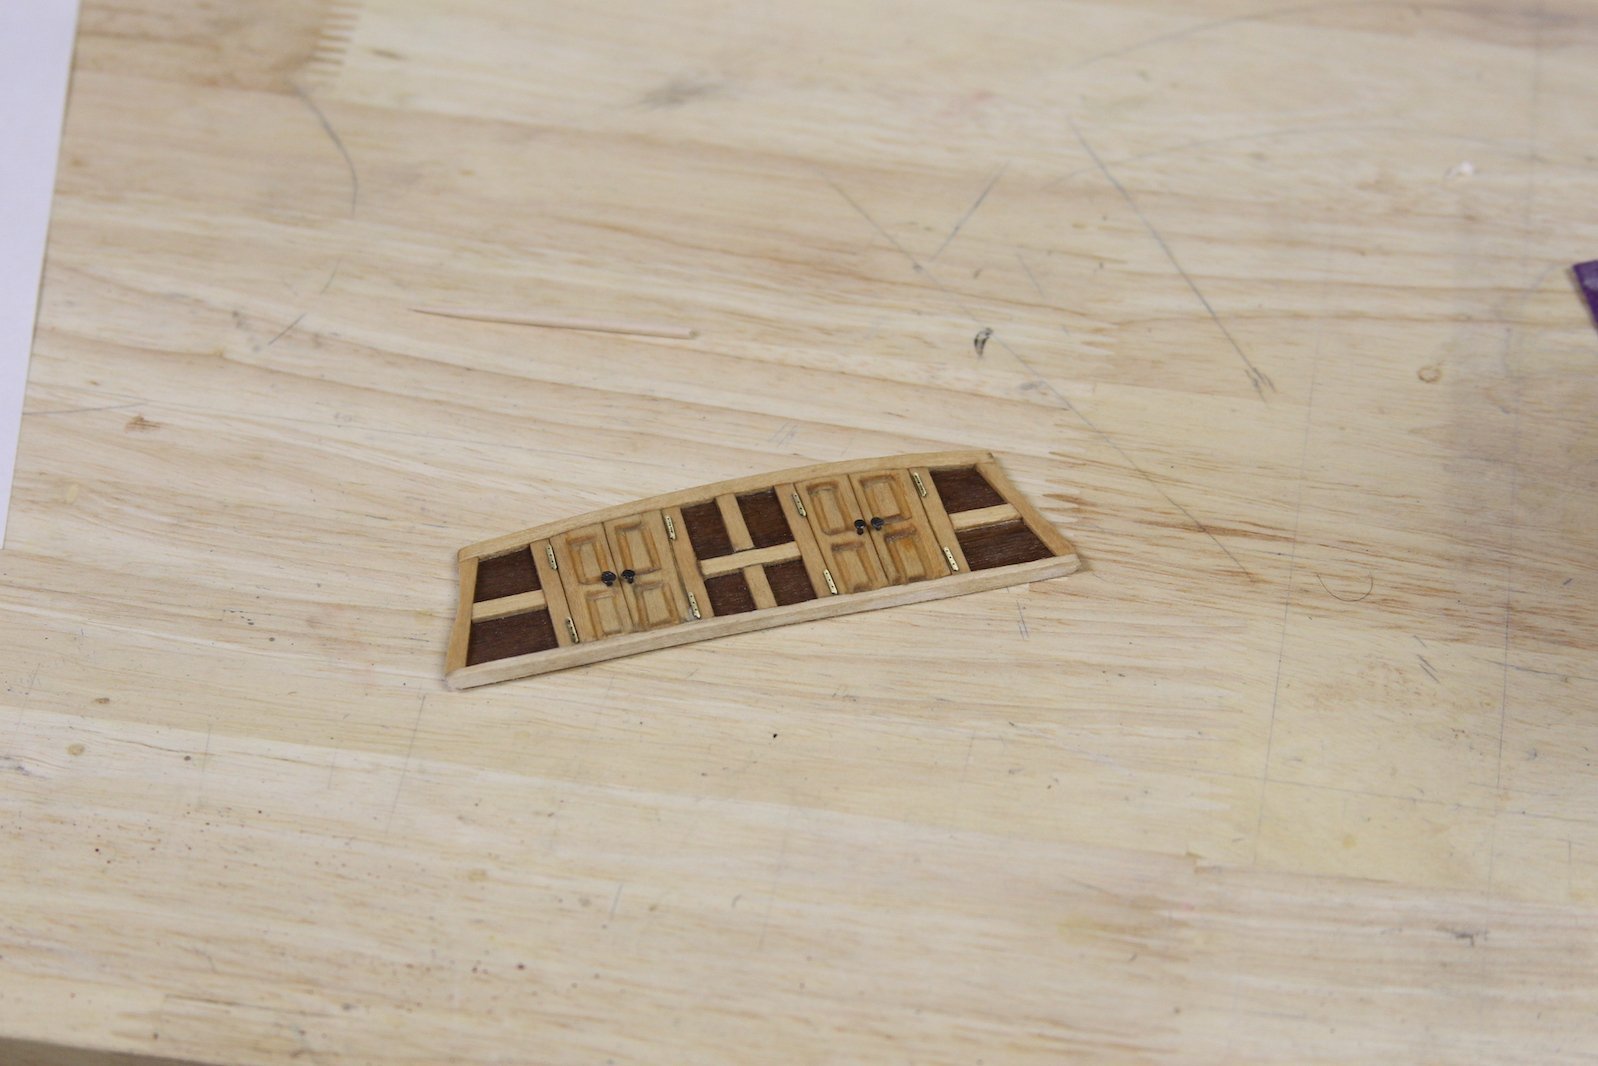
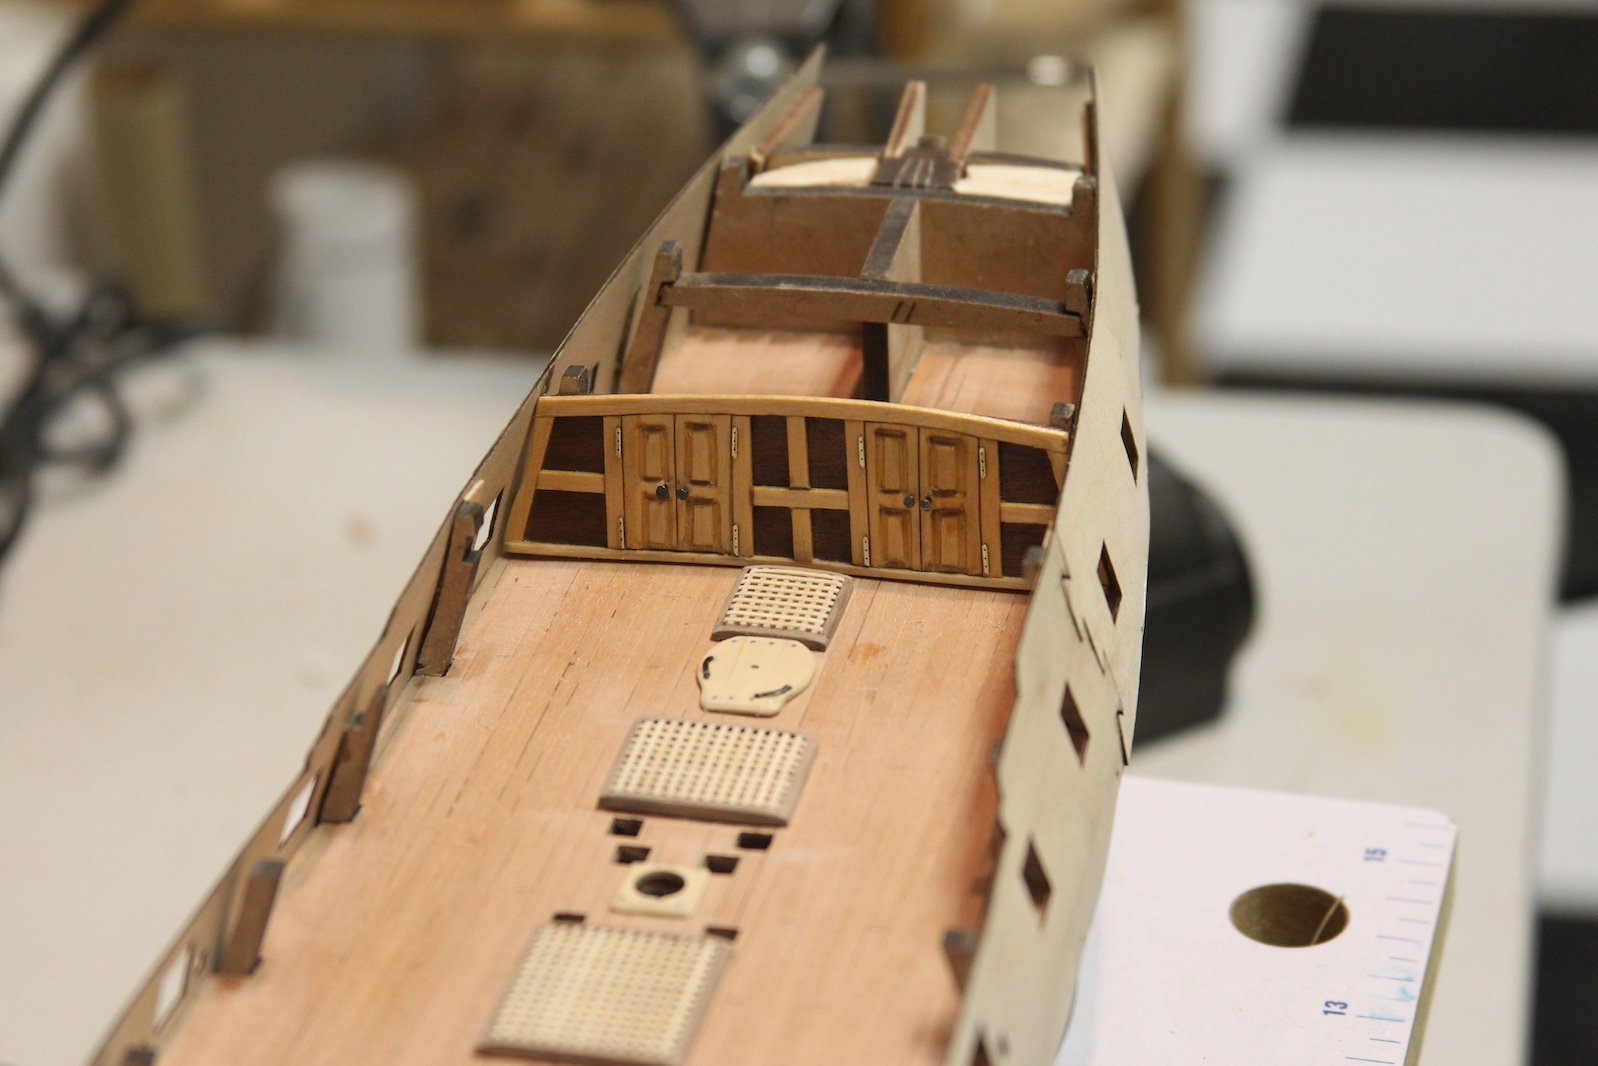
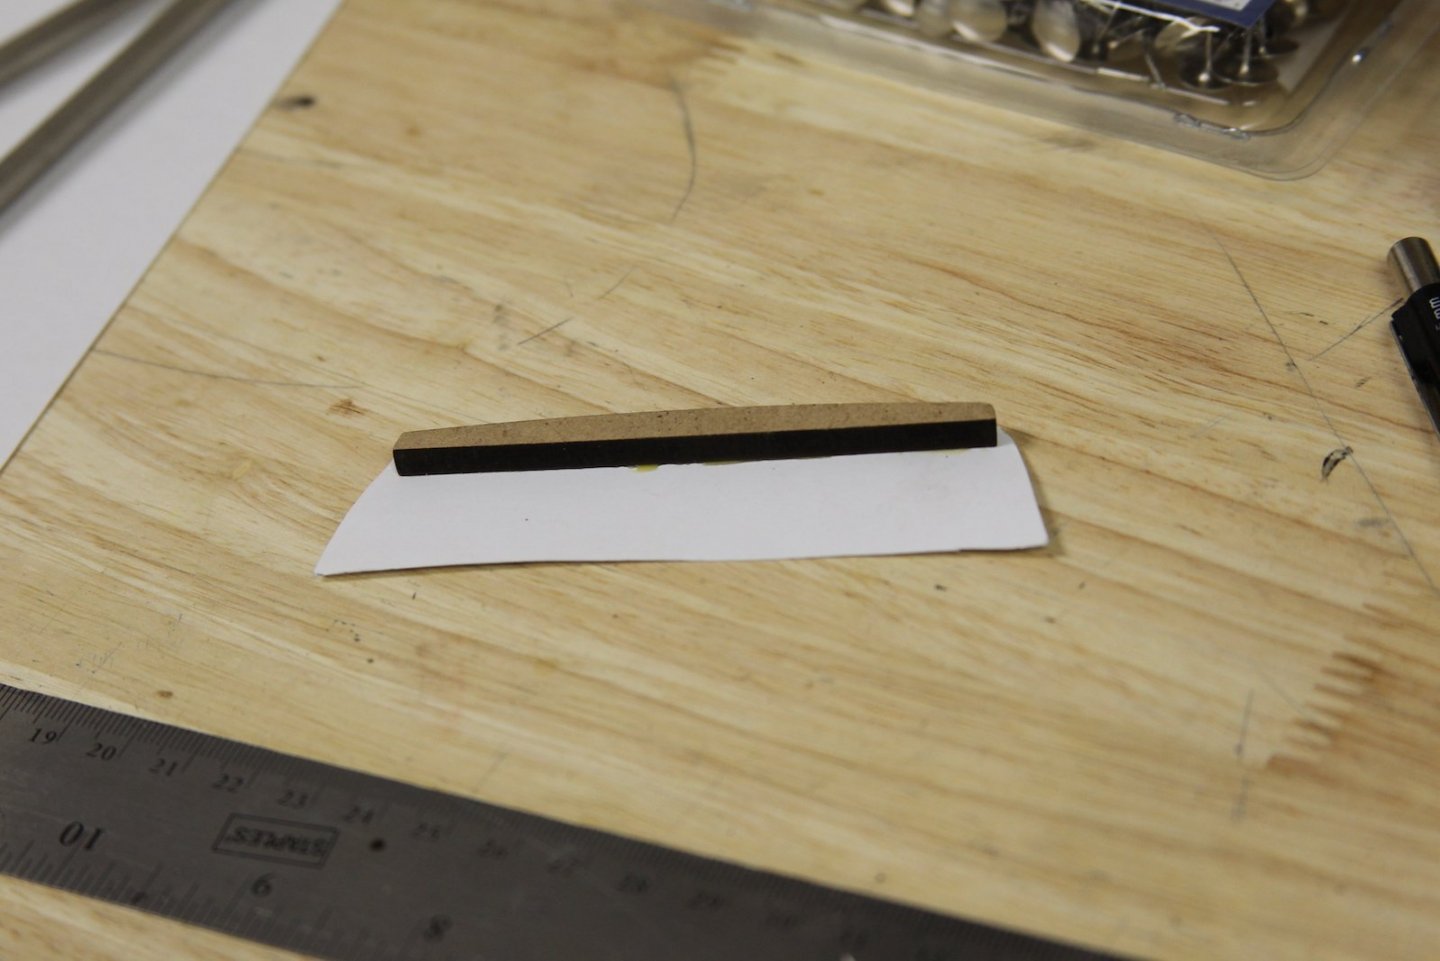
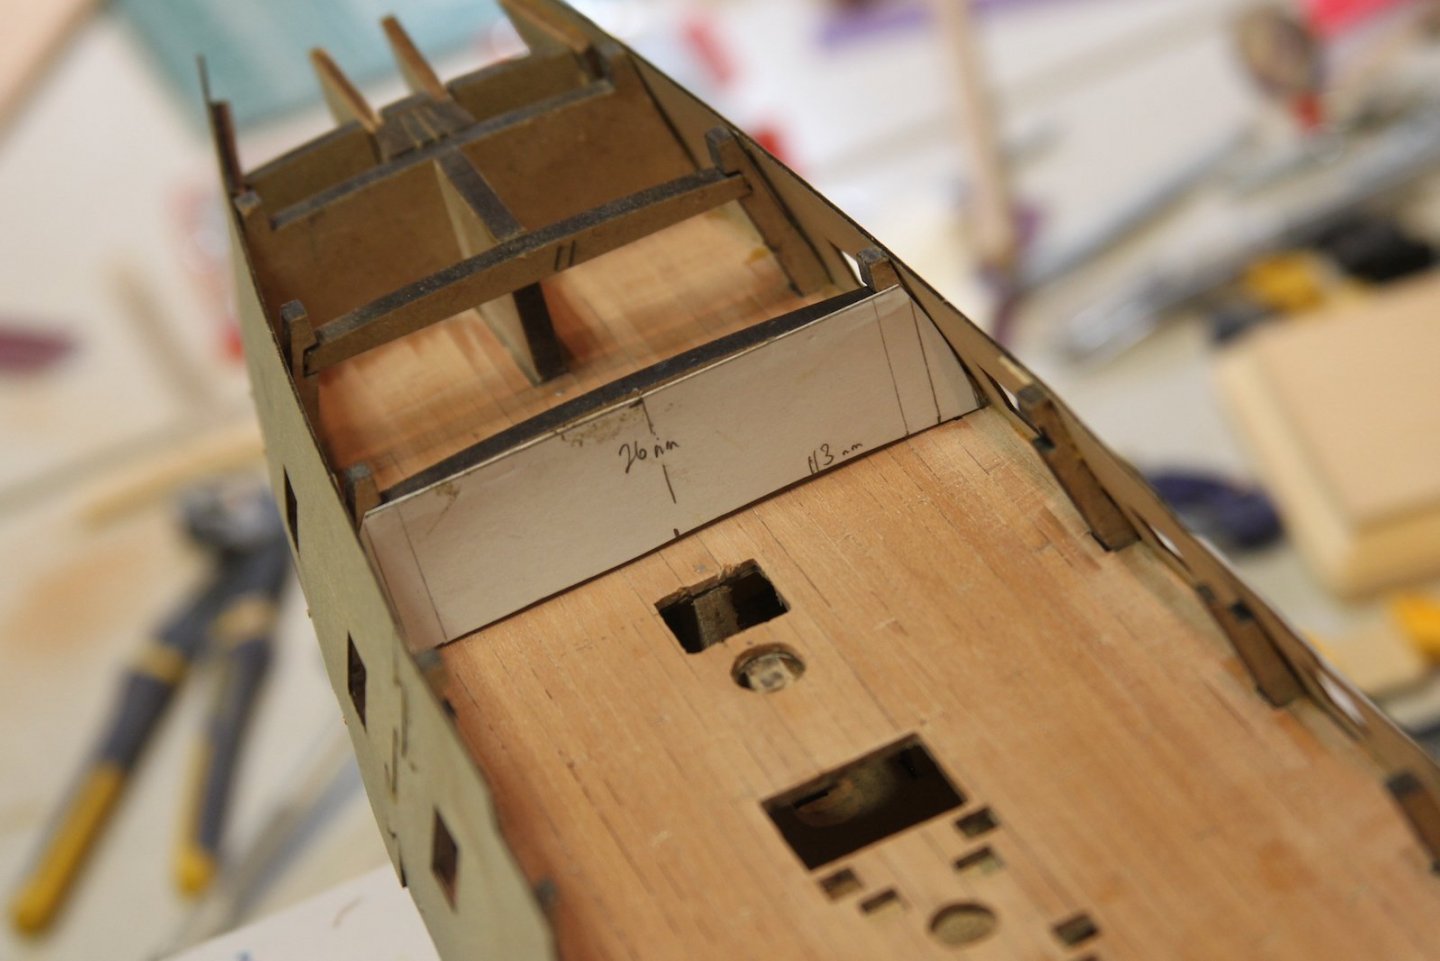
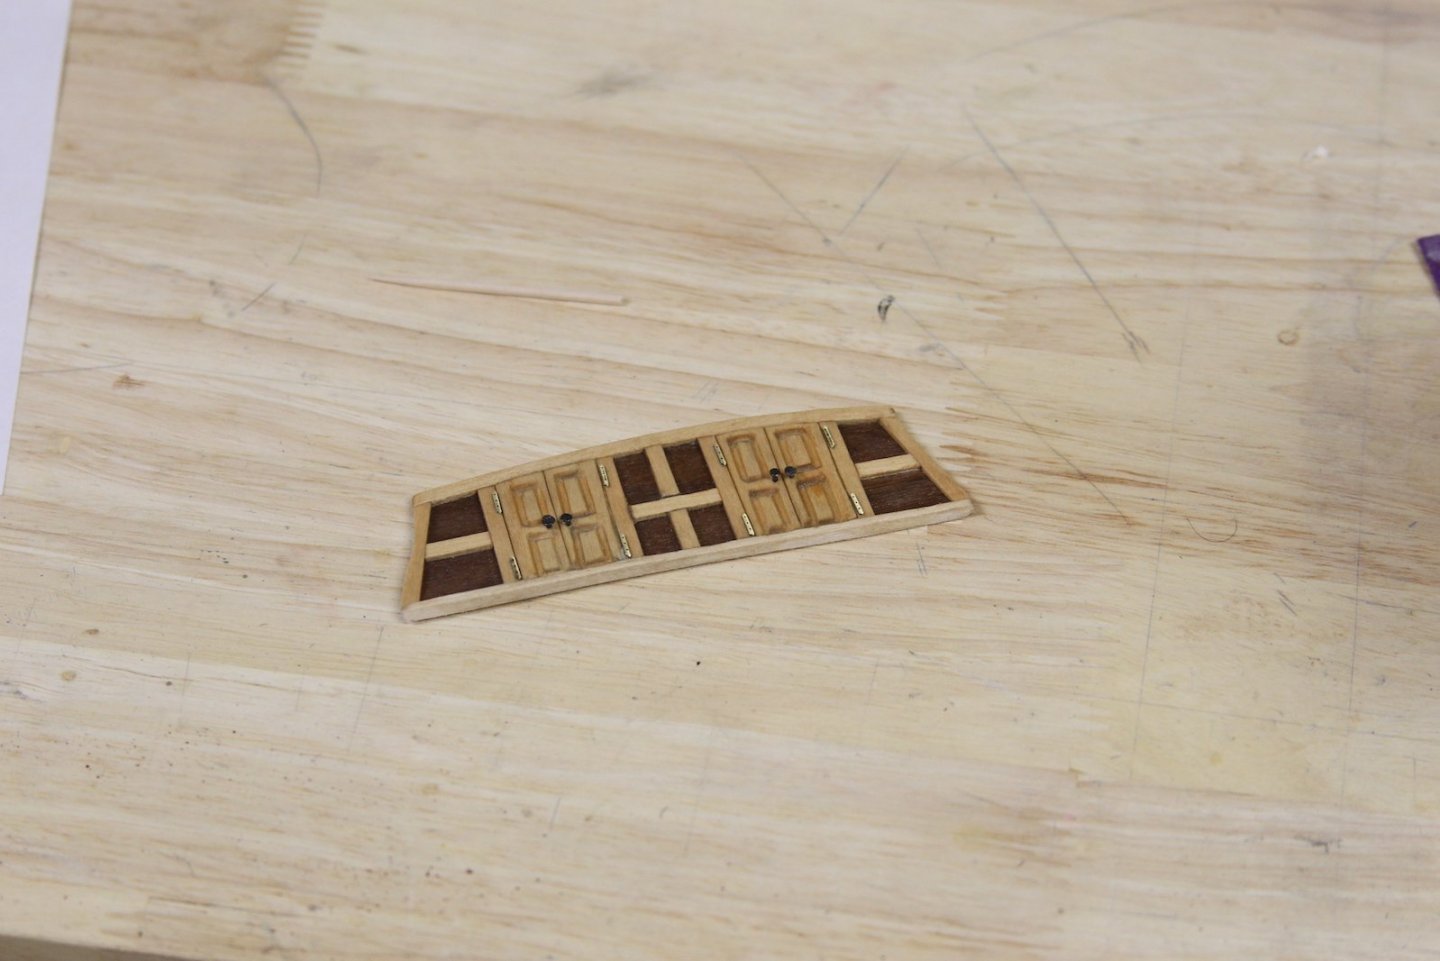
Managed a little bit of work in the shipyard last night despite having to spend much of the afternoon after work in the yard taking care of our yearly "Leaf-pocalypse" that occurs. Looks pretty, but a lot of work... So, a relatively short update working on the lower deck doors to the cabin areas. I was quite tempted to mock up the cabins though they will not be visible (mostly of the cool work done in several of the other Peg builds here), but then decided against it. However, I did want to set a bit of a 'barrier' to the deck by crafting a doorway. I started with a firm template to measure out both the measurements and the deck slopes, and actually glued it to the beam. This let's me slide it in and out of the space until I'm ready to mount it. Pretty basic stuff after that, measured out some framing and doors. I carved out some relief in the doors to give them depth and shape with some pin files in case someone gets frisky and tries to look down in there at some point. I gave that several attempts and this is about as straight as I can get those by hand. Really need to order that drill press from micro-mark.... Christmas is around the corner right?


- 419 replies
-
- 12
-
-
- Victory Models
- Pegasus
- (and 2 more)
-
Good evening Chuck, To provide some feedback on your patience / impatience observation - this concept is the exact reason I started my first build (the San Juan in 2008). Without digressing to much, I had just retired from the military and got a job in a pretty 'high-speed' career field as a civilian. I had a type-A, military leader mentality and did everything full-bore. Building forced me to adopt the mindset of taking a little extra time to take something to the next level. My thought process became "If this is a project that (when completed) will last forever, and be passed on to my children some day - isn't spending an extra hour, or day, or even week on an aspect of it worth it? In all fairness - I still have to remind myself of that regularly - frequently in fact. I get excited about completing an element and I start to rush it. The first capstan I just botched is a great example. But doing it again, and taking a couple extra days to get it right paid off. EVERY time I do that, it has paid off and I feel much better about what I've done. So I guess what I'm saying is - my personal opinion is to not simplify your belfry or other elements any more. These aren't plastic model kits - they're works of art, and the way you design kits doesn't just teach patience, it teaches us to respect the art.
- 1,784 replies
-
- 8
-
-
- winchelsea
- Syren Ship Model Company
- (and 1 more)
-
Hey Popeye, good to see your fine work again!
-
Thanks Mark - honestly, I'd spent so much time out of the hobby room dealing with work and life crisis, I'd forgotten how much I enjoyed the quiet time in the shipyard. So I may be obsessing a bit. Also - if it seems as though I'm overly focused on deck fittings to avoid planking the hull... that is also correct. 😛
- 419 replies
-
- 4
-
-
- Victory Models
- Pegasus
- (and 2 more)
-
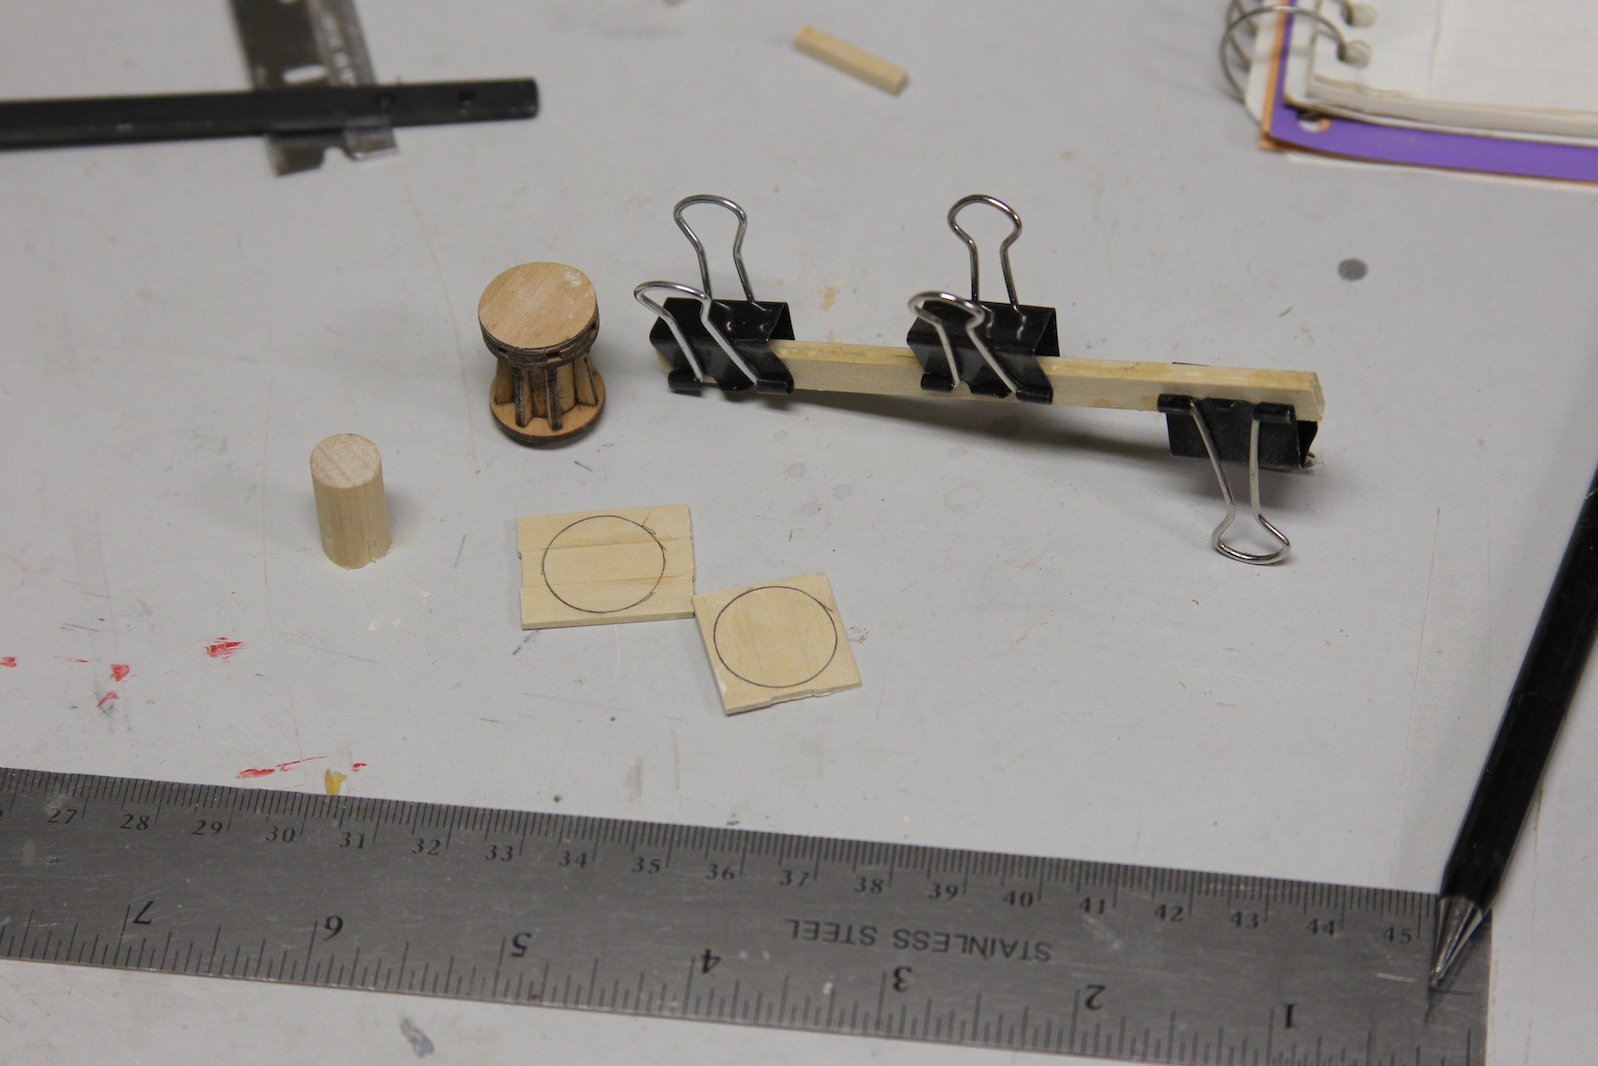
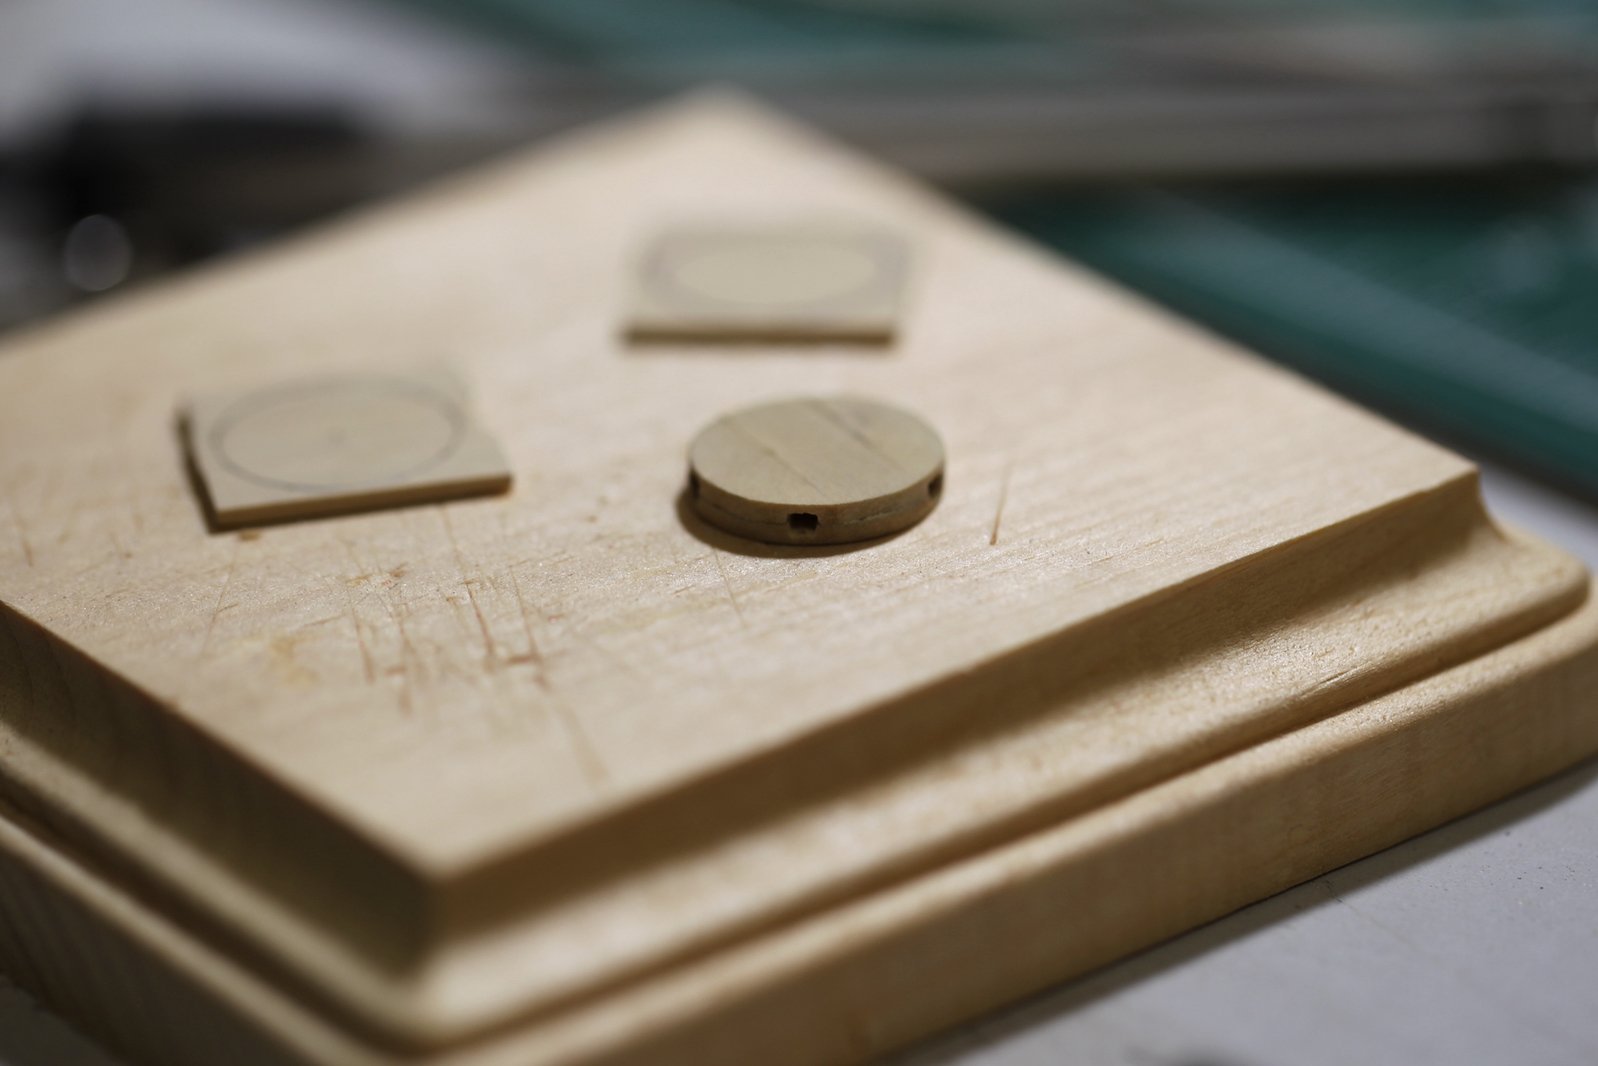
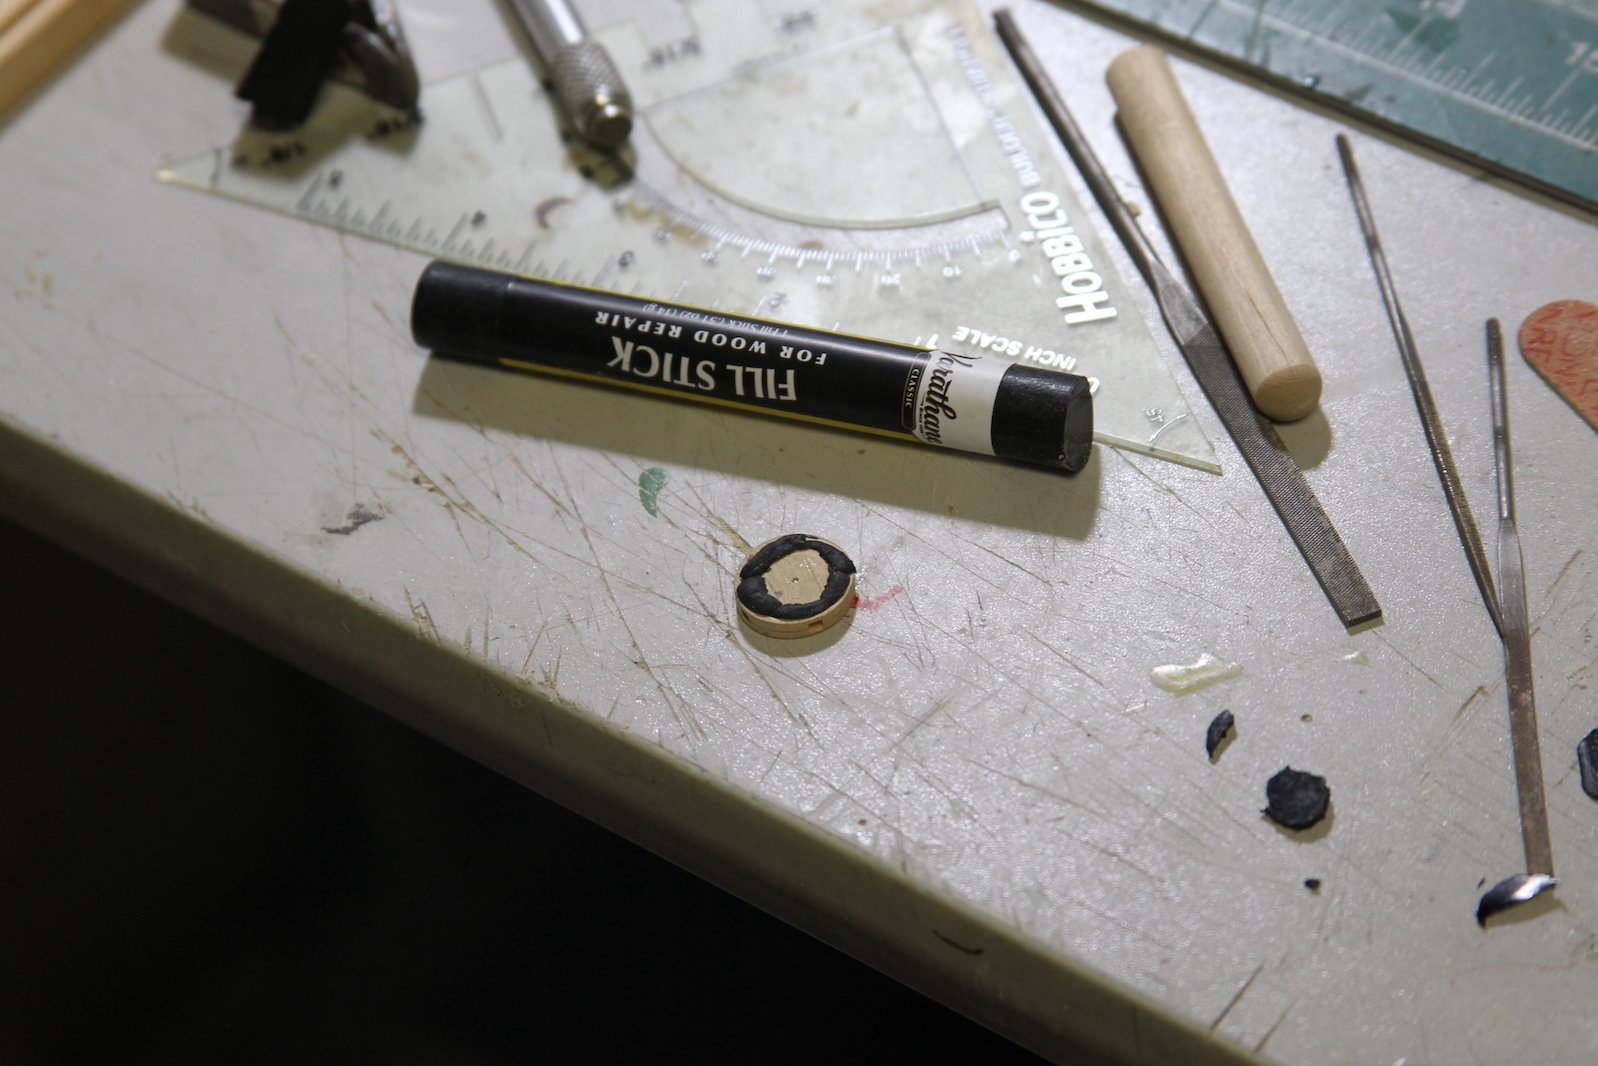
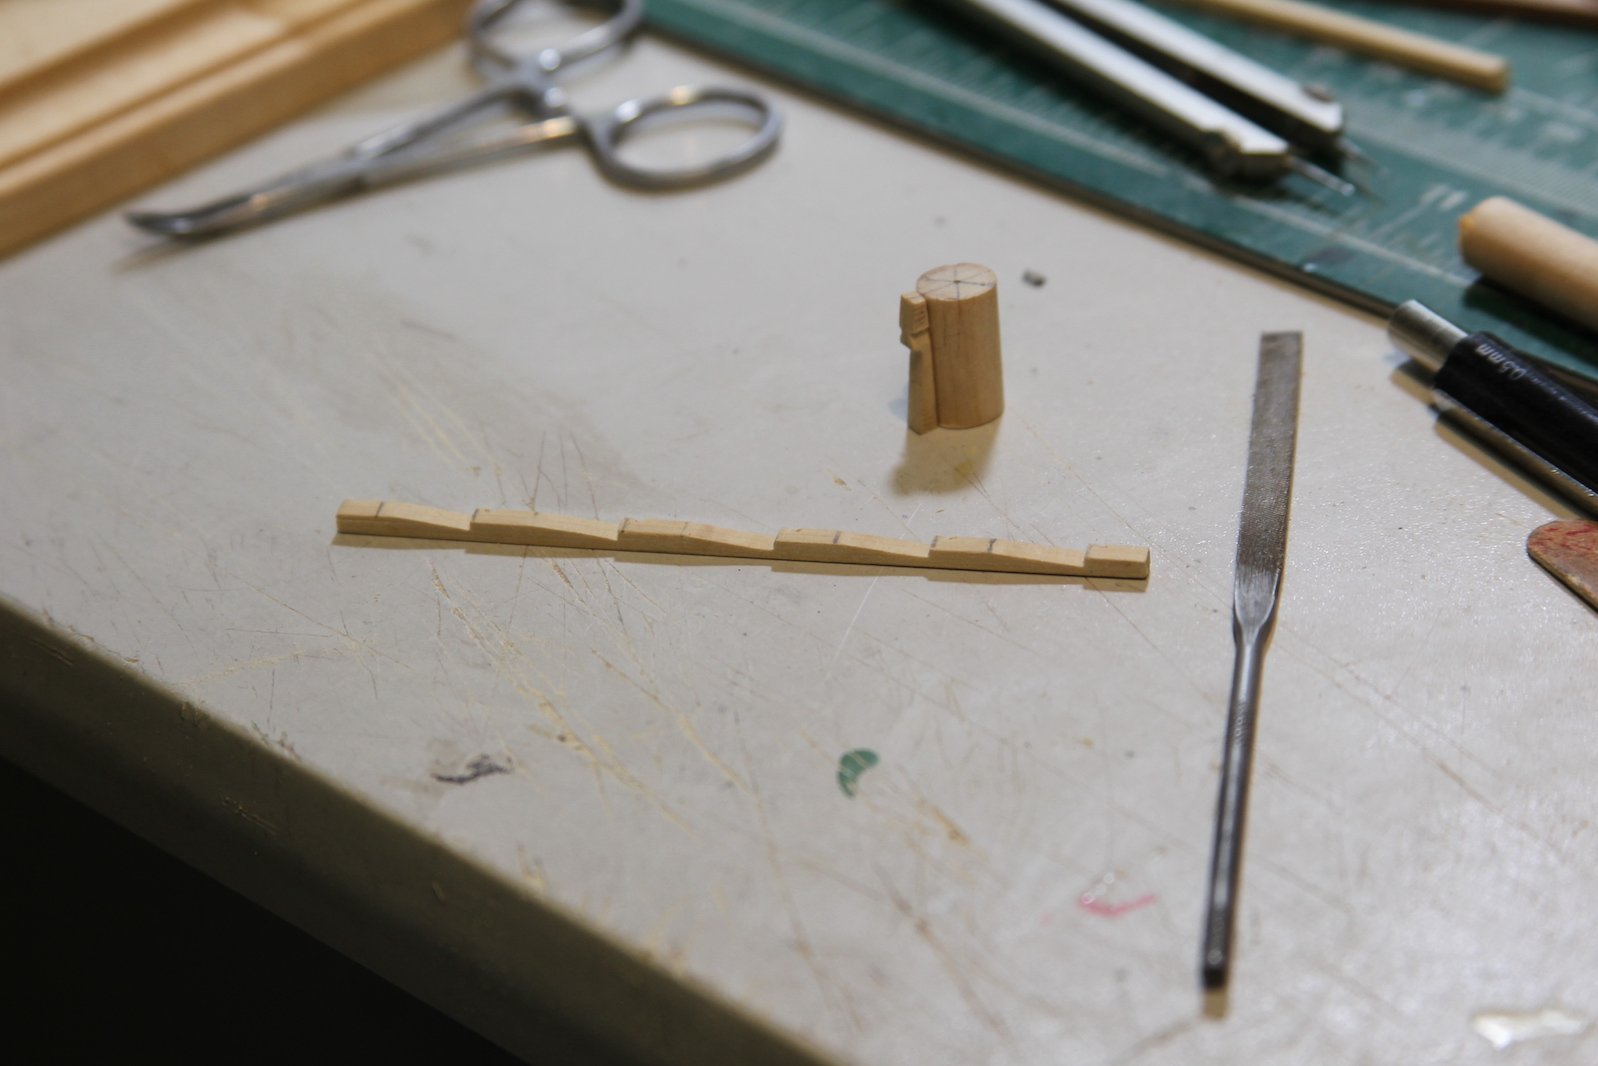
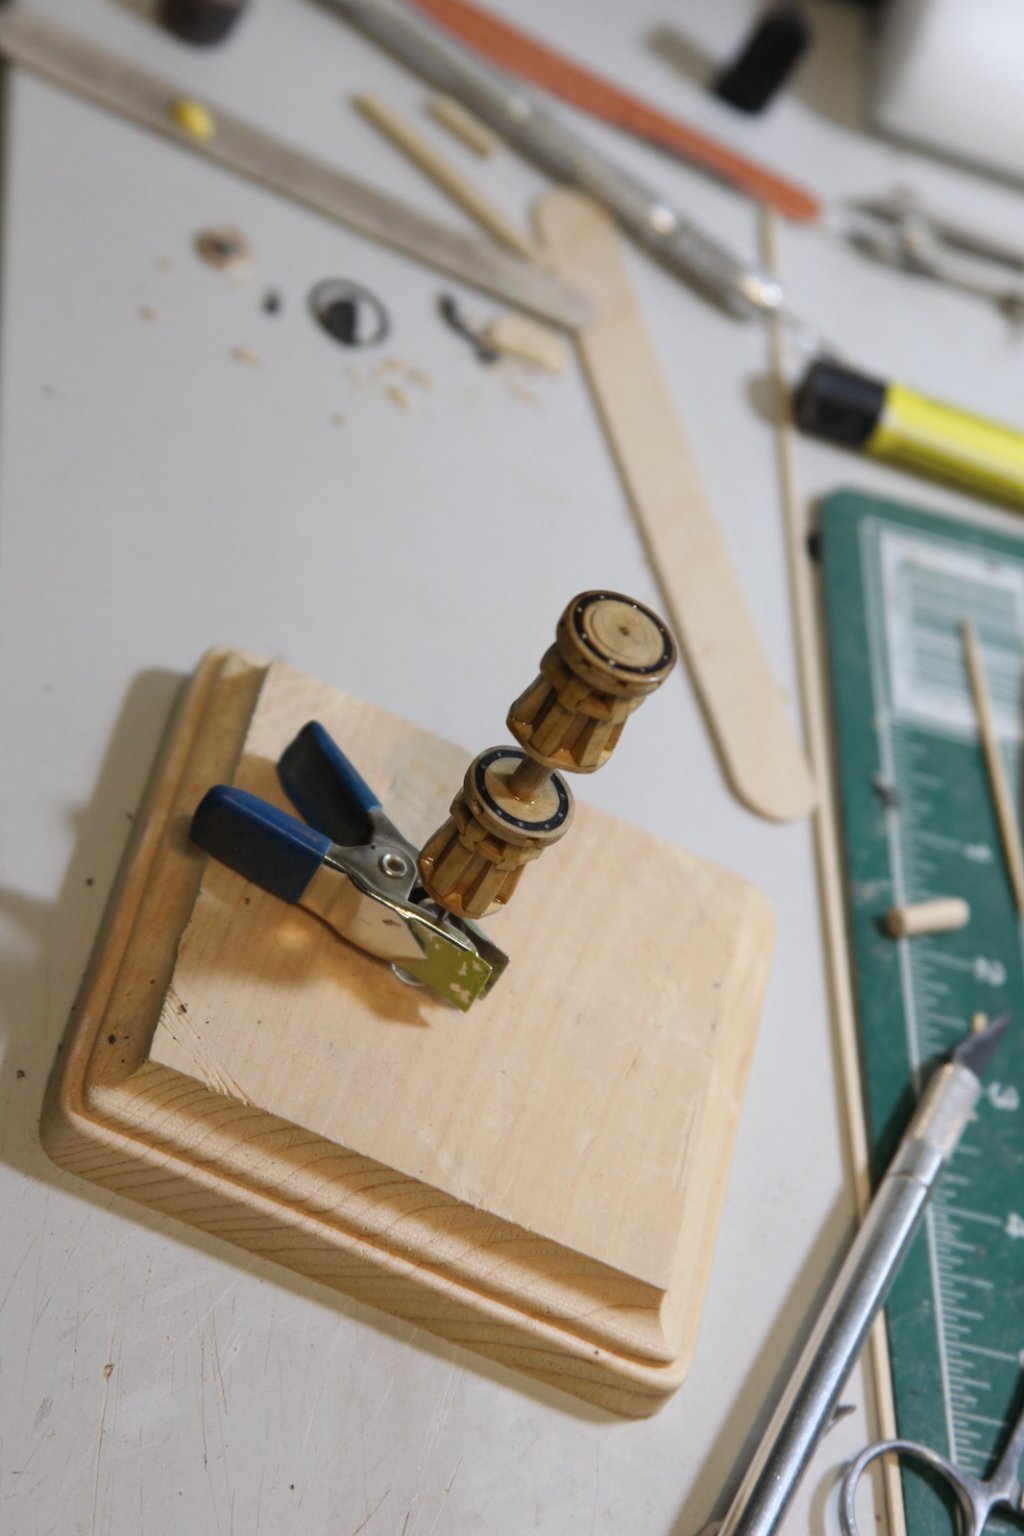
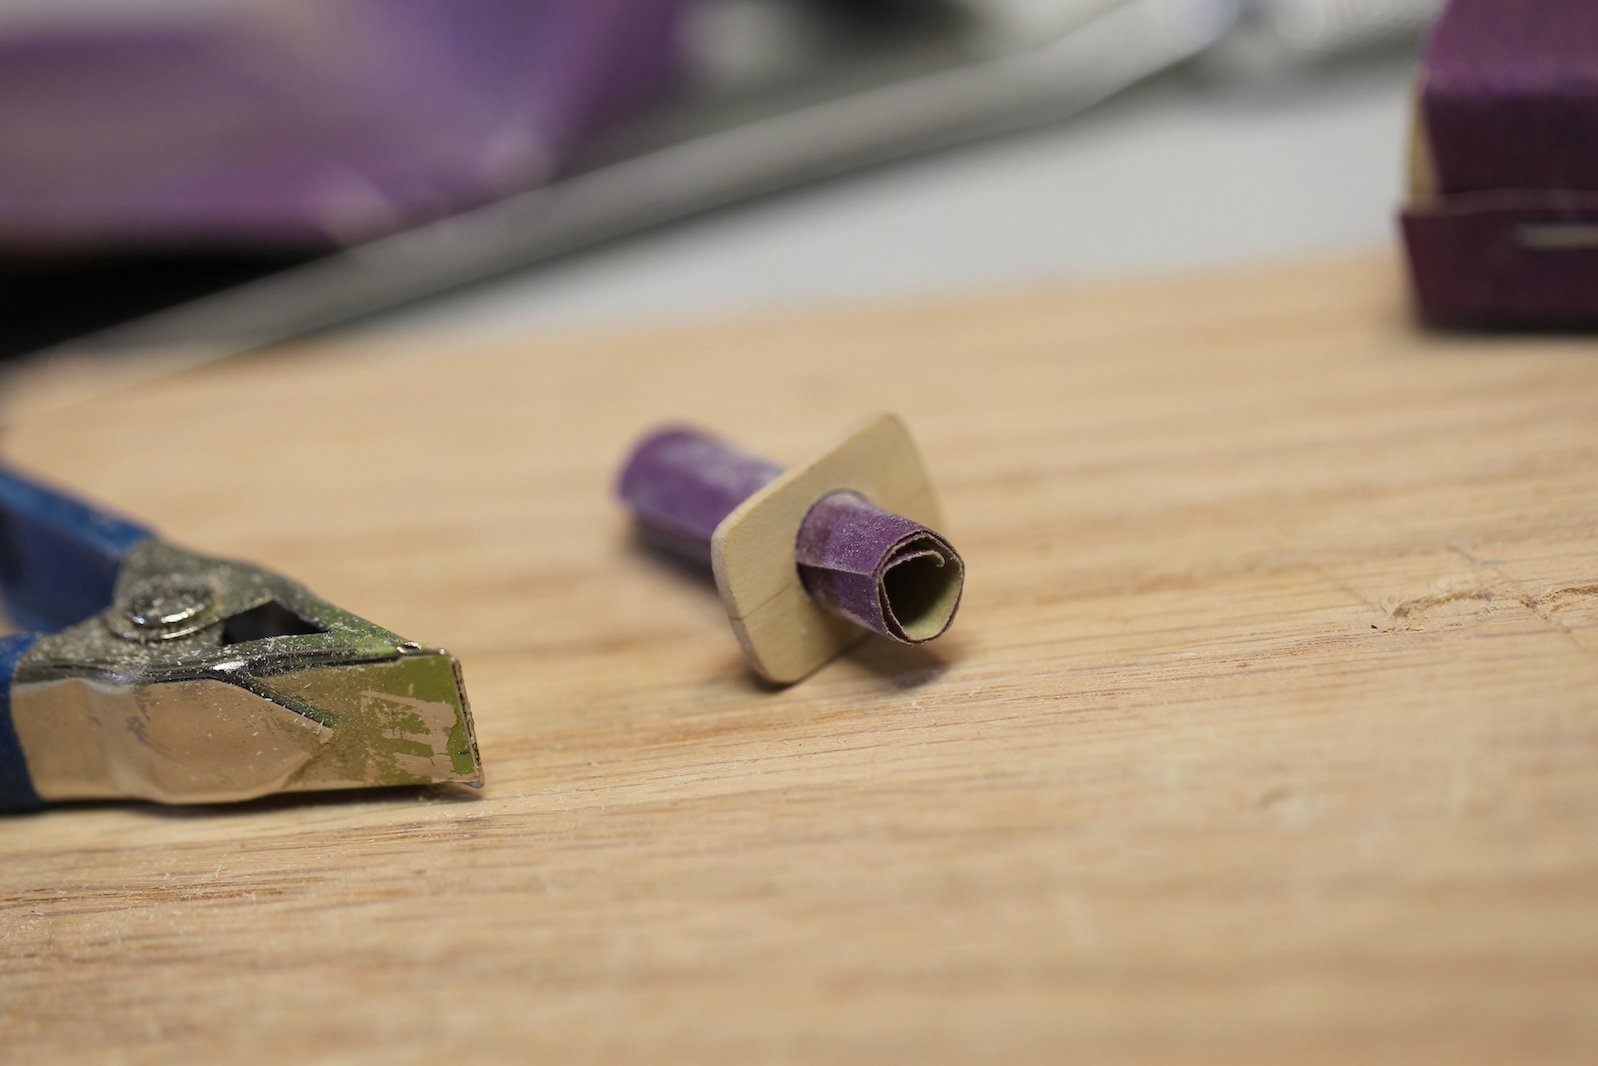
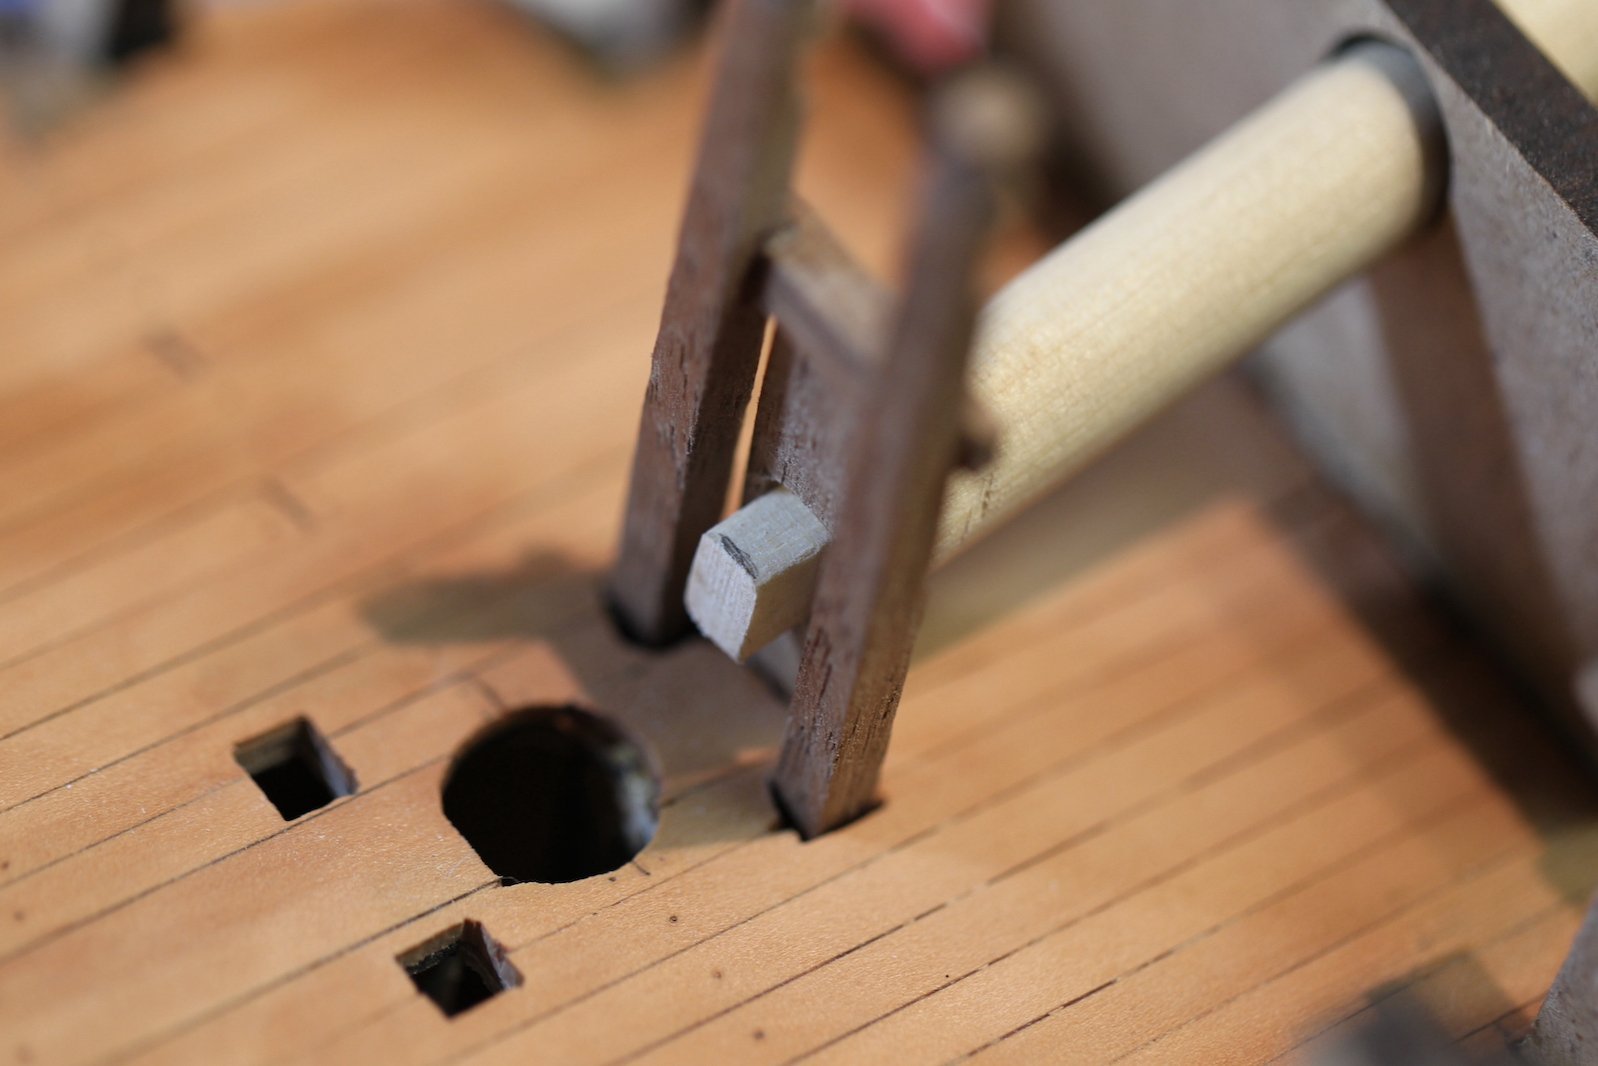
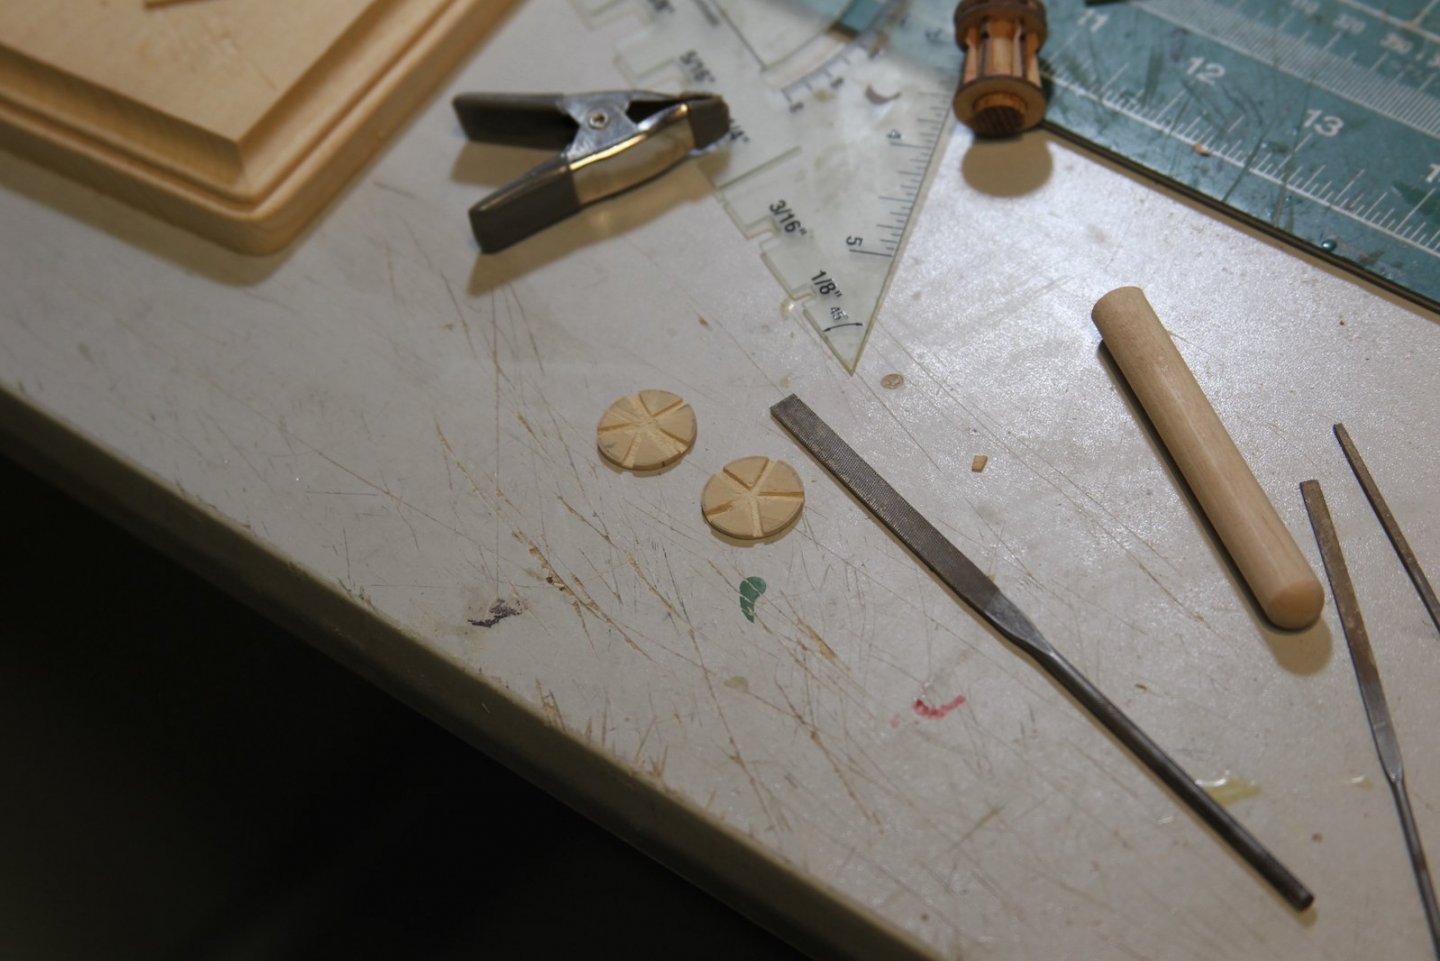
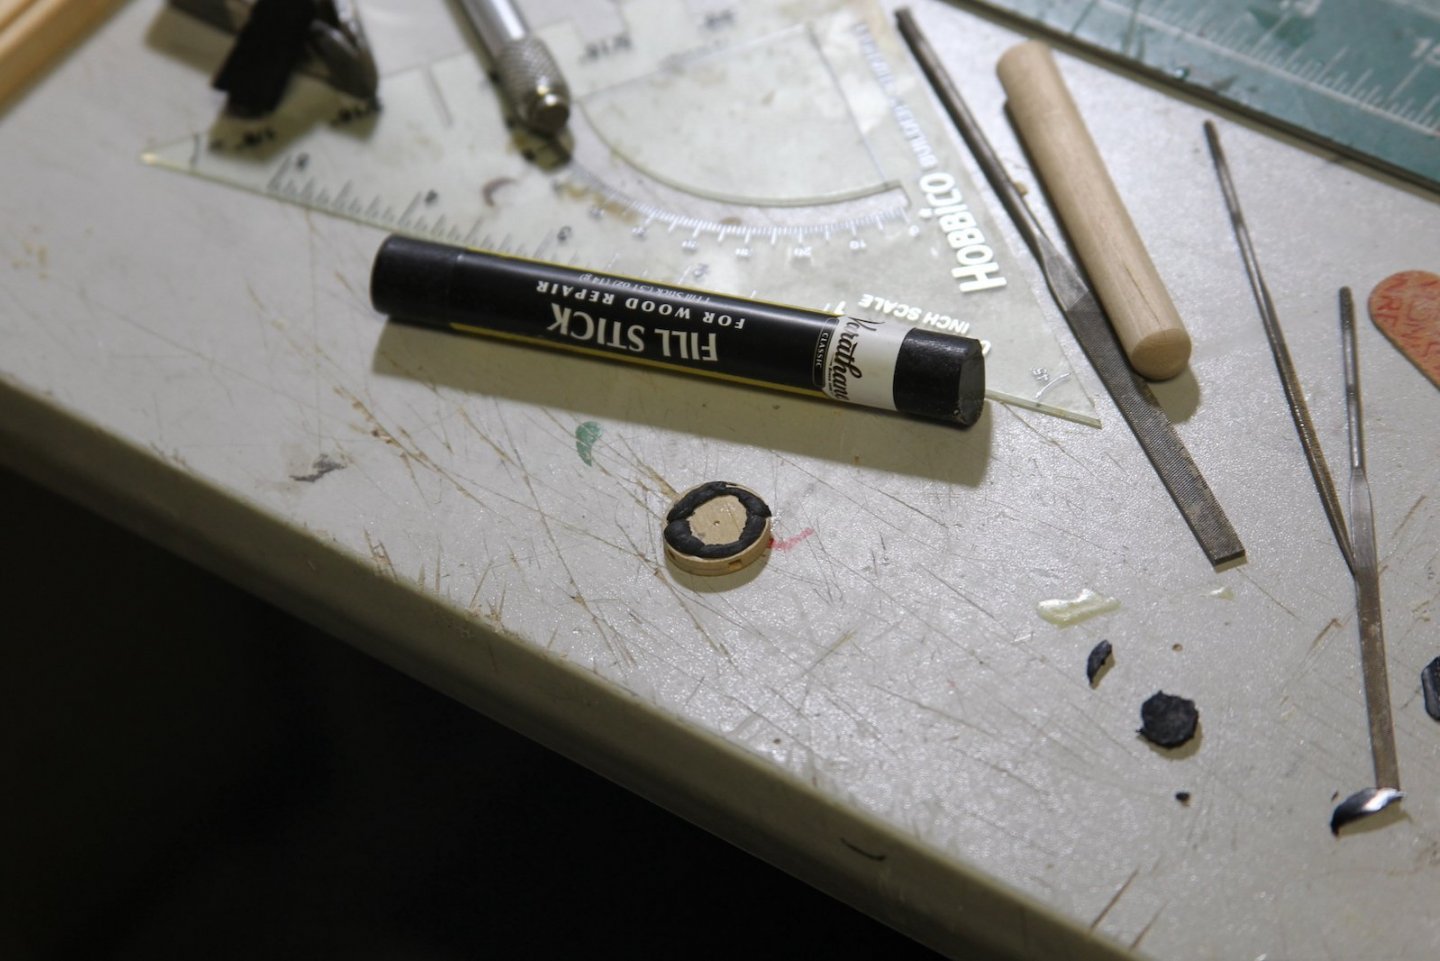
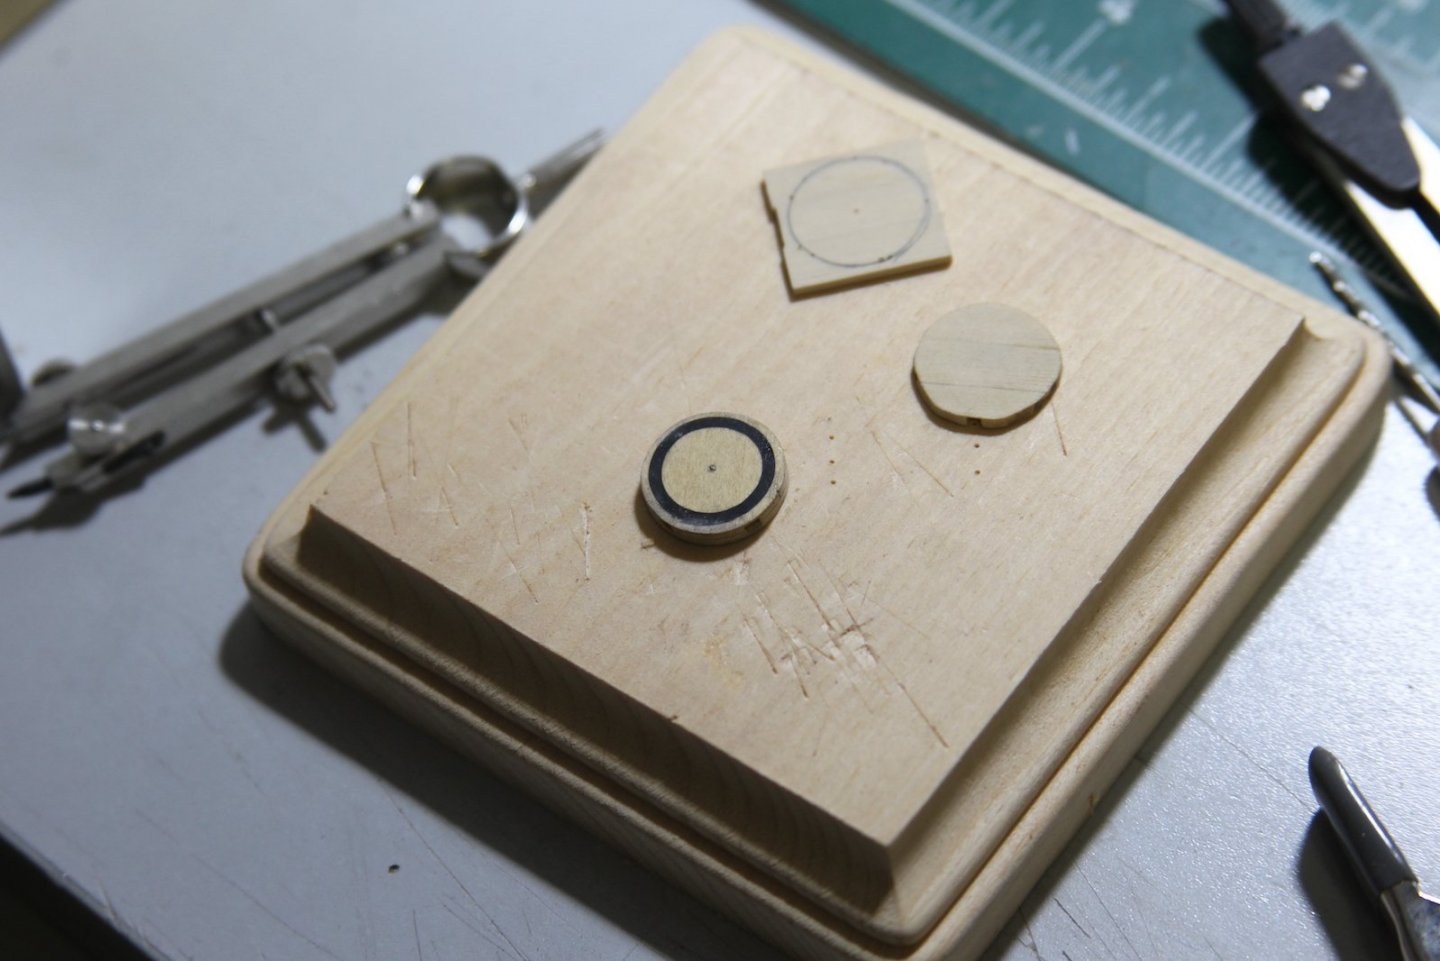
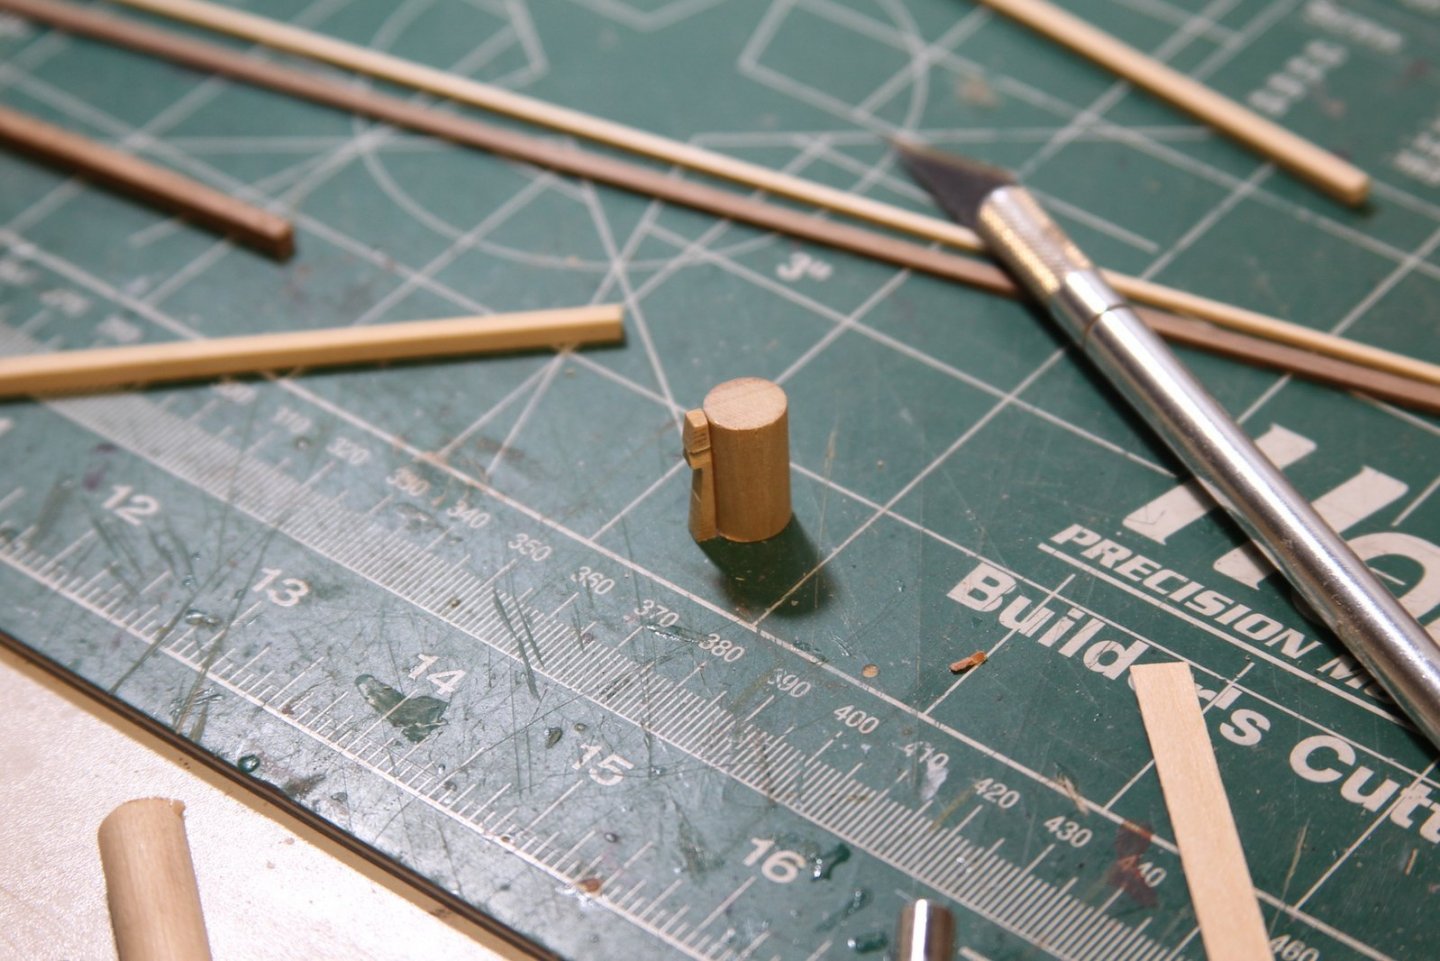
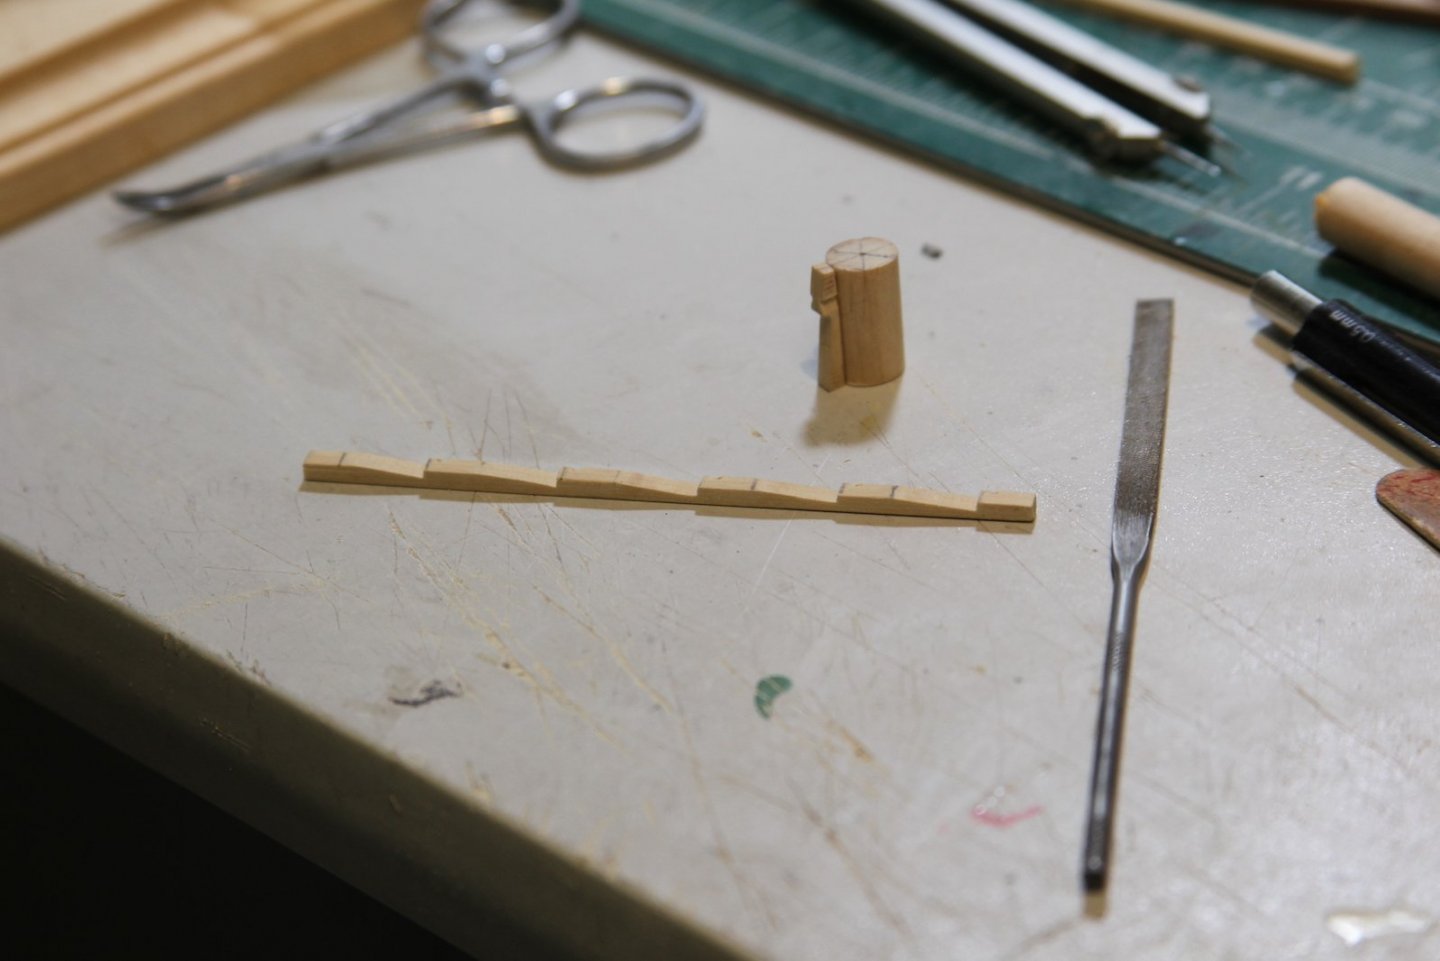
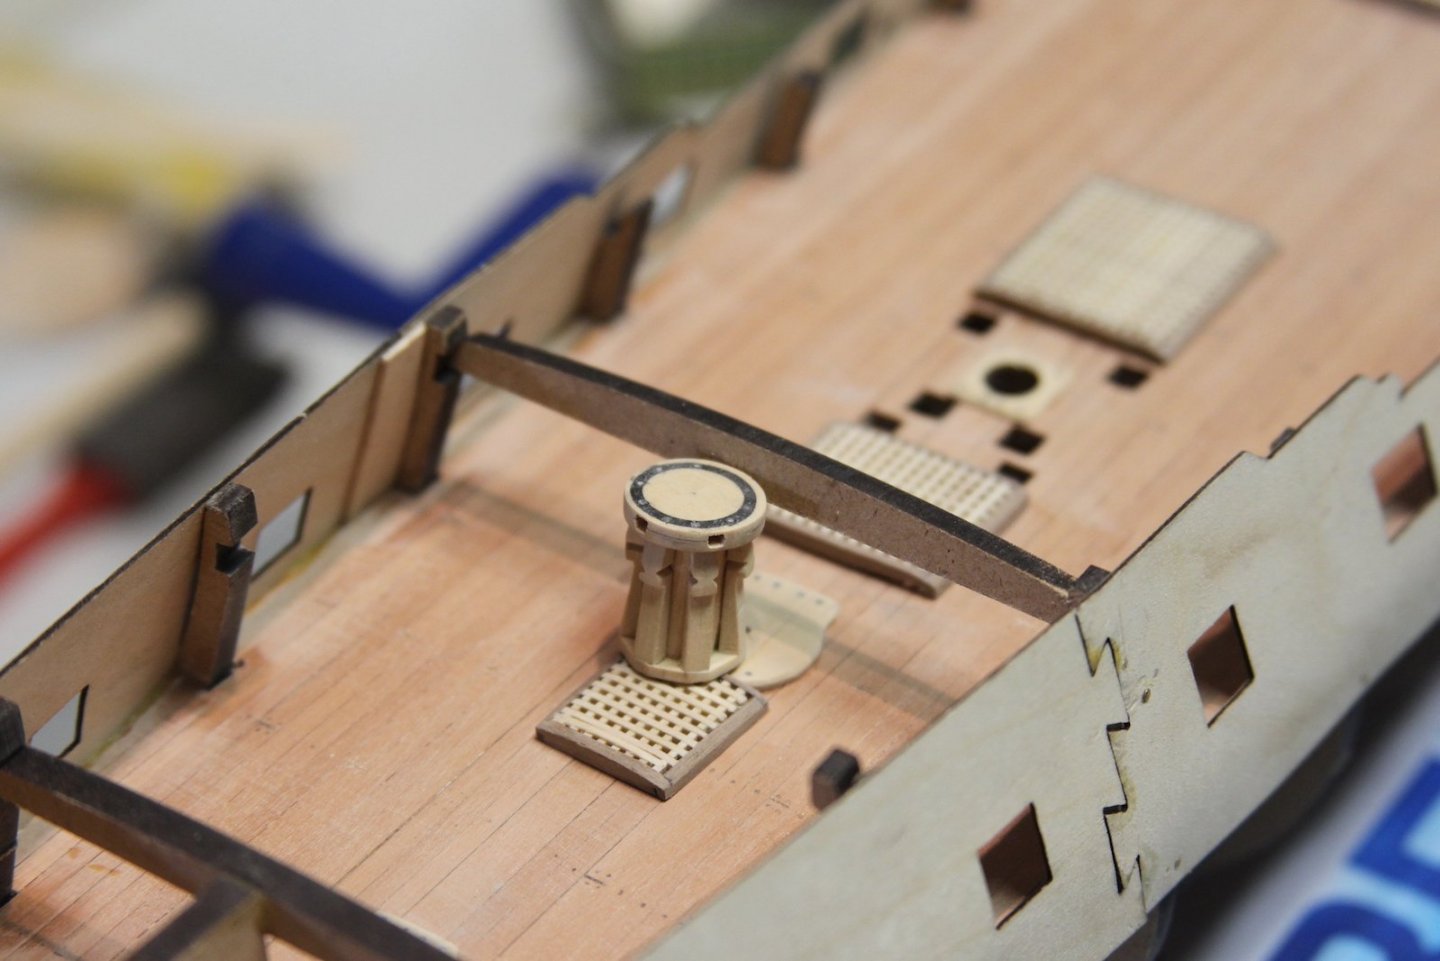
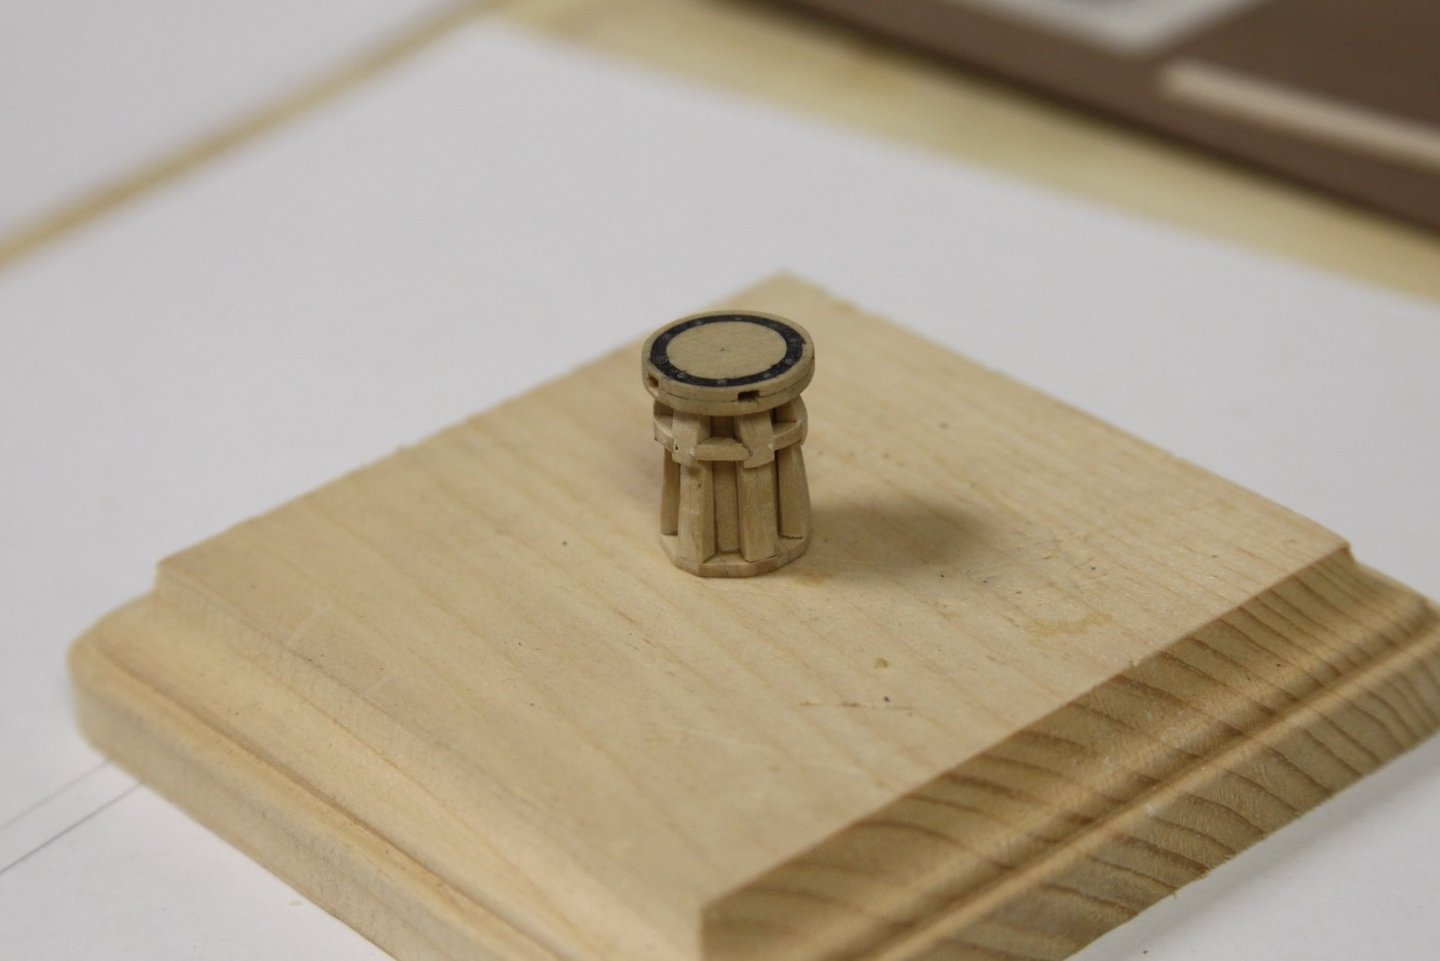
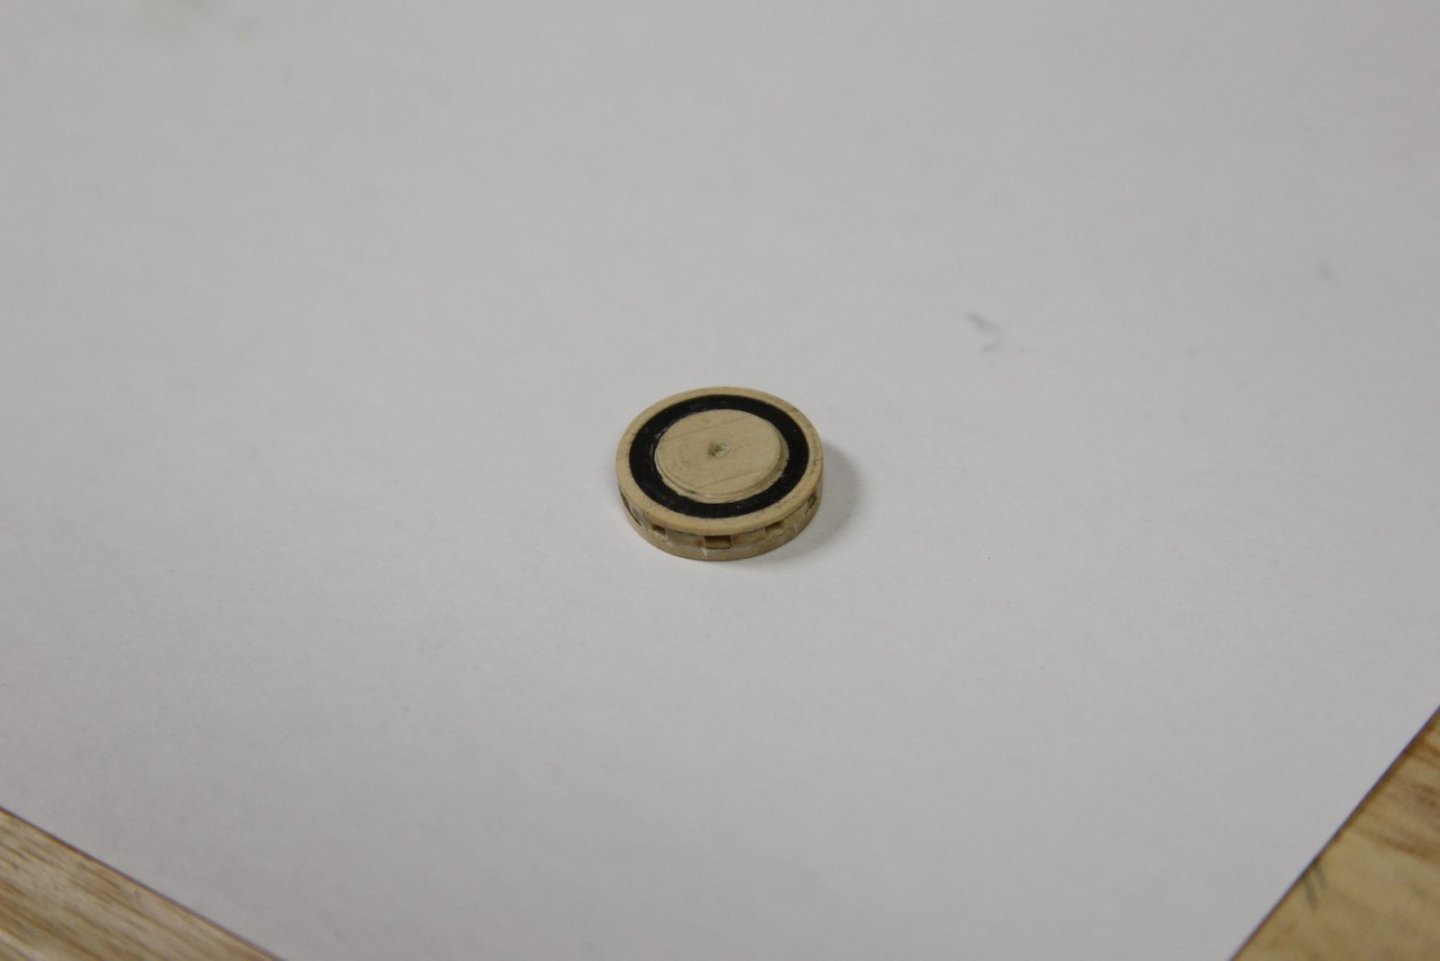
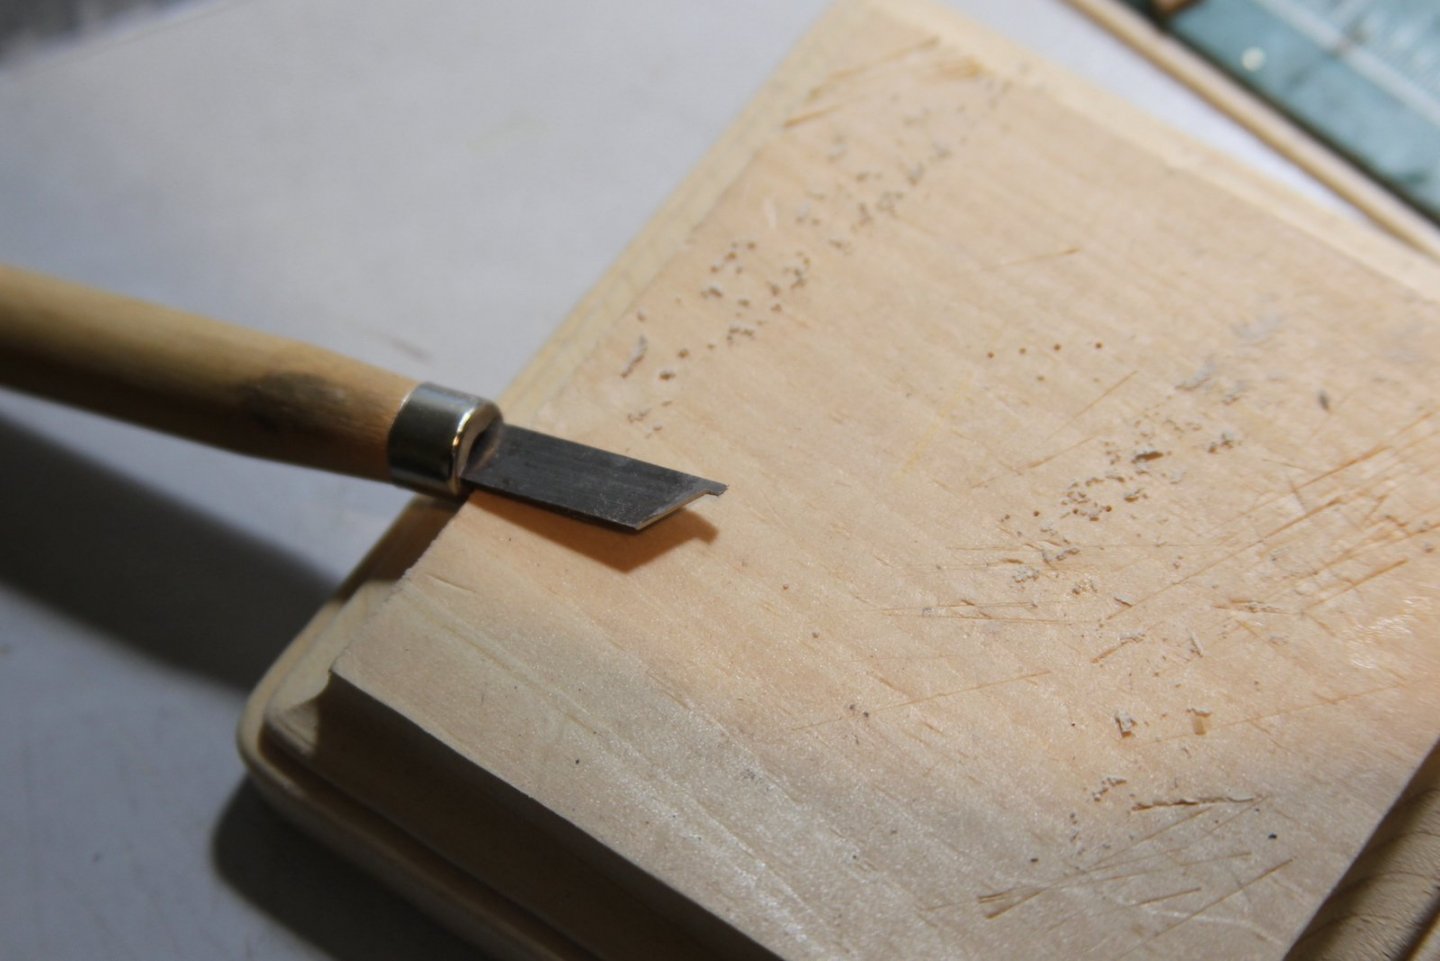
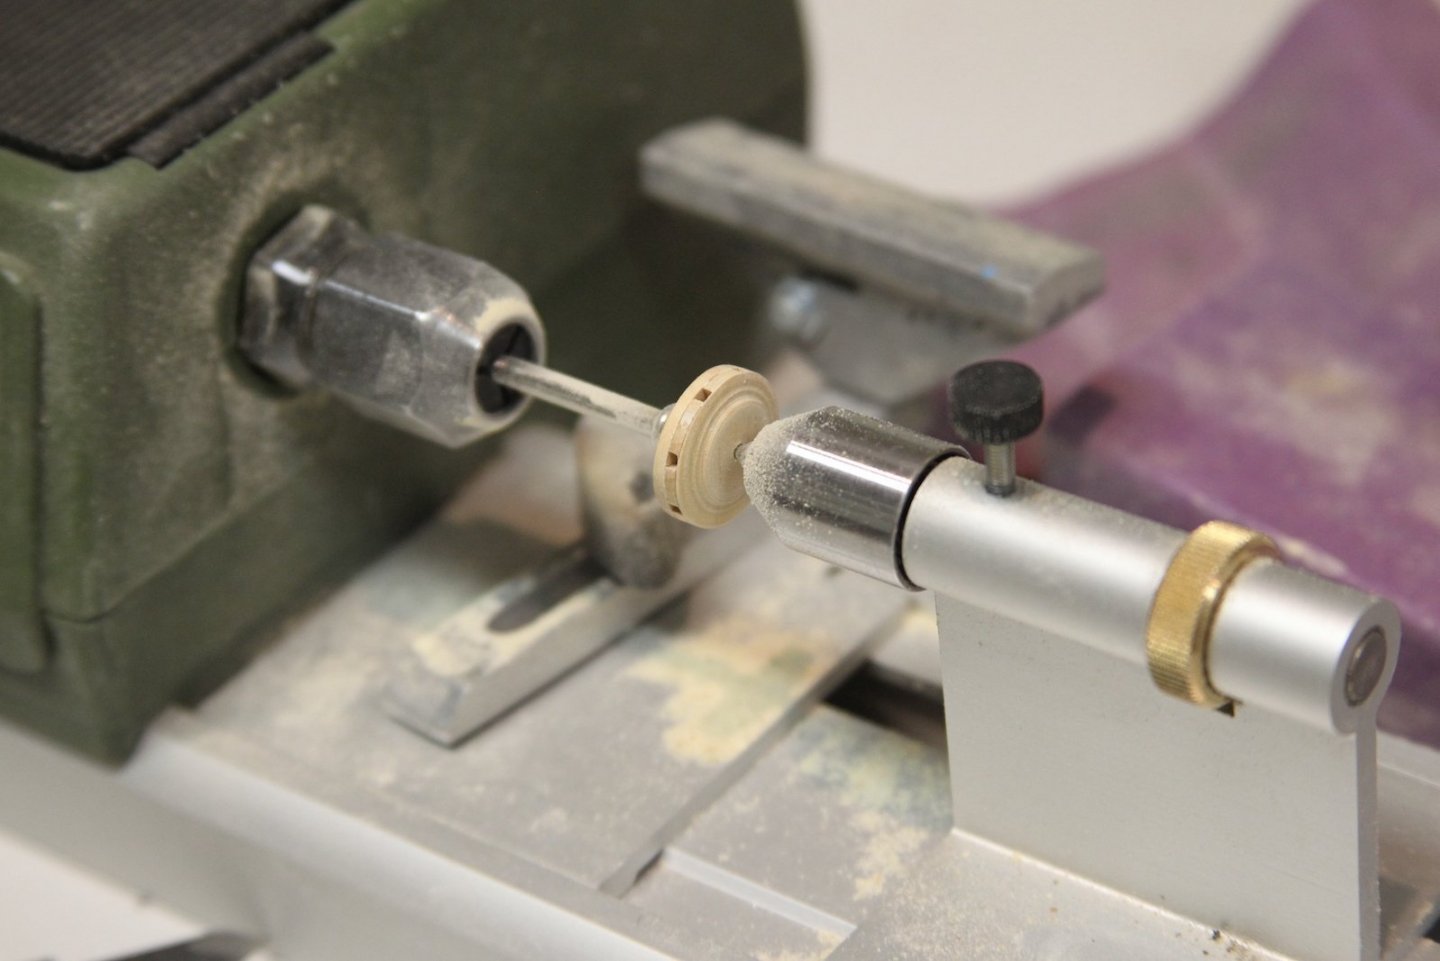
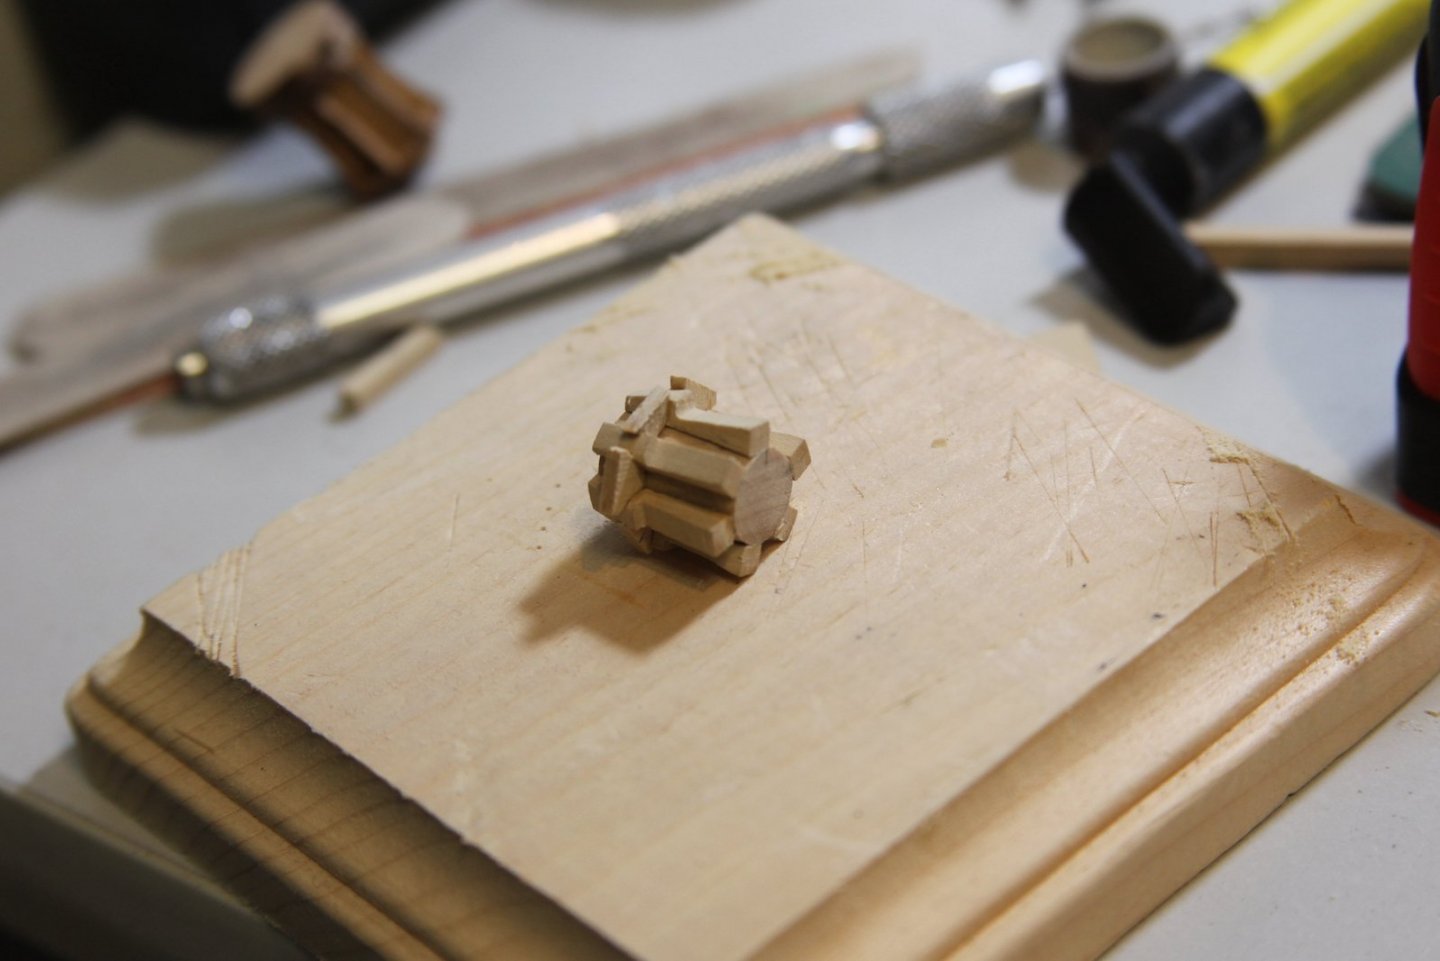
Admittedly, I have a bit of an unhealthy fascination with Capstans. While the Capstan parts that come with the Peg are alright, I really wanted to get this one right. So - I did what any rational builder would do - I consulted not only Antscherl, but Dan Vadas' Capstan build for his Vulture. I used the Victory kit capstan as a scale guide, and some leftover boxwood strips to build out the parts. Following Dan's process, I channeled out the slots in two halves of the top then worked them together. I had to rig up a way to get it into the lathe, but that allowed me to even out the circle and also carve out a channel for the ebony parts. I don't have much in the way of equipment in my shipyard (other than my nifty Proxxon lathe), so I had to use some alternate tactics than Dan, including much use of pin files, x-acto, razor blades, and my handy dentist picks and tools. I also don't have any ebony or super dark wood in my stash, so I used ebony wood filler. I loaded it into the channel, then scrapped it flat and even with a razor blade. This particular wood putty doesn't dry solid, so sanding it requires at least 600 - 1000 grit paper and a VERY light touch or it just smears. I topped it all off with drilled holes and cut off pins. The 'body' of the capstan is relatively standard stuff - I had to do each of the whelps individually without machinery. I split a couple of boxwood planks and glued them together, then filed out the shapes of the whelps. From there, it's gluing them to the base, filling in the gaps and sanding it all down. Clearly I'm going to have to do some work with the framing to get this guy to fit, as well as connect the two capstans. More to come on that. The bottom capstan was relatively experimental, so I shored up my process for the upper capstan. I used the same basic process as the bottom for the drumhead, and I put the whole thing back in the lathe to even out the diameter and carve out the channel for the ebony. Lest you think this all went smoothly - my first attempt at the upper capstan turned out pretty crappy. Too wide of an ebony circle , kinda thin, and overall just kinda crappy looking. So I gave it another shot using three sections of boxwood instead of two, carving out the capstan bar holes from the middle piece. This extra thickness gave me some wiggle room when it came to shaping the drumhead. I sacrificed one of my chisels to get the right sized notch for the ebony ring then used the same wood putty filler and smoothing the whole thing out. Finally, after adding the whelps and filler pieces, I connected the two capstans for mounting later.


- 419 replies
-
- 15
-
-
- Victory Models
- Pegasus
- (and 2 more)
-
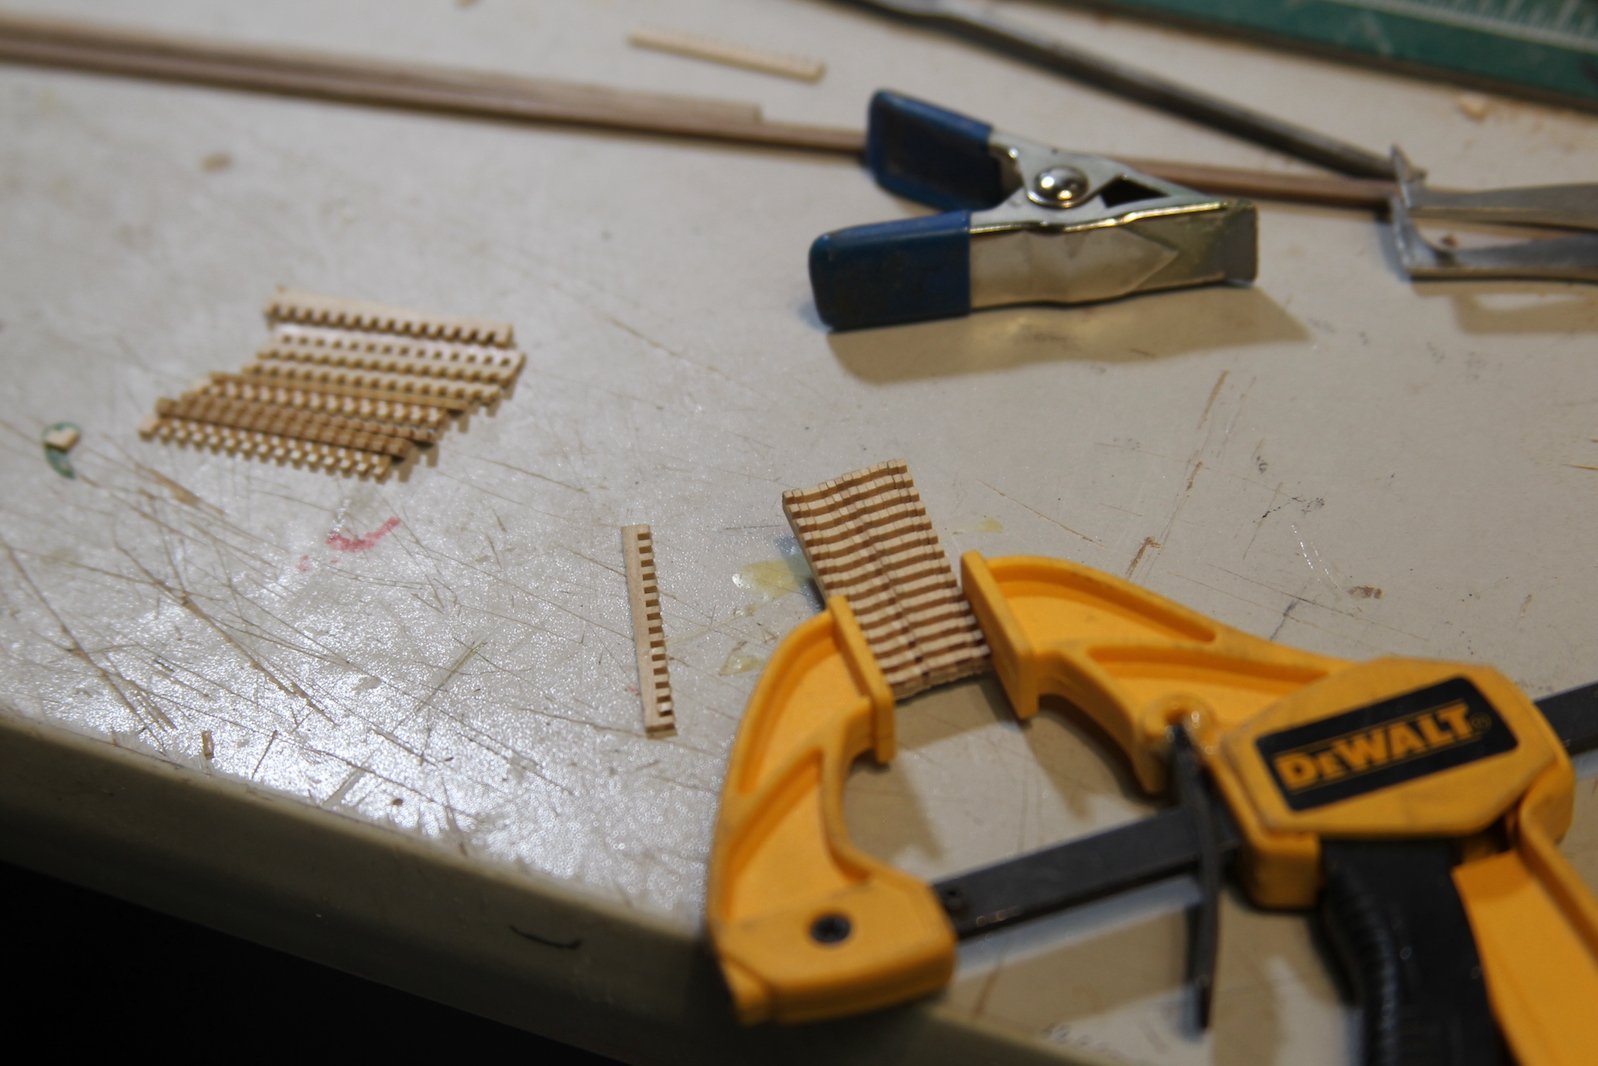
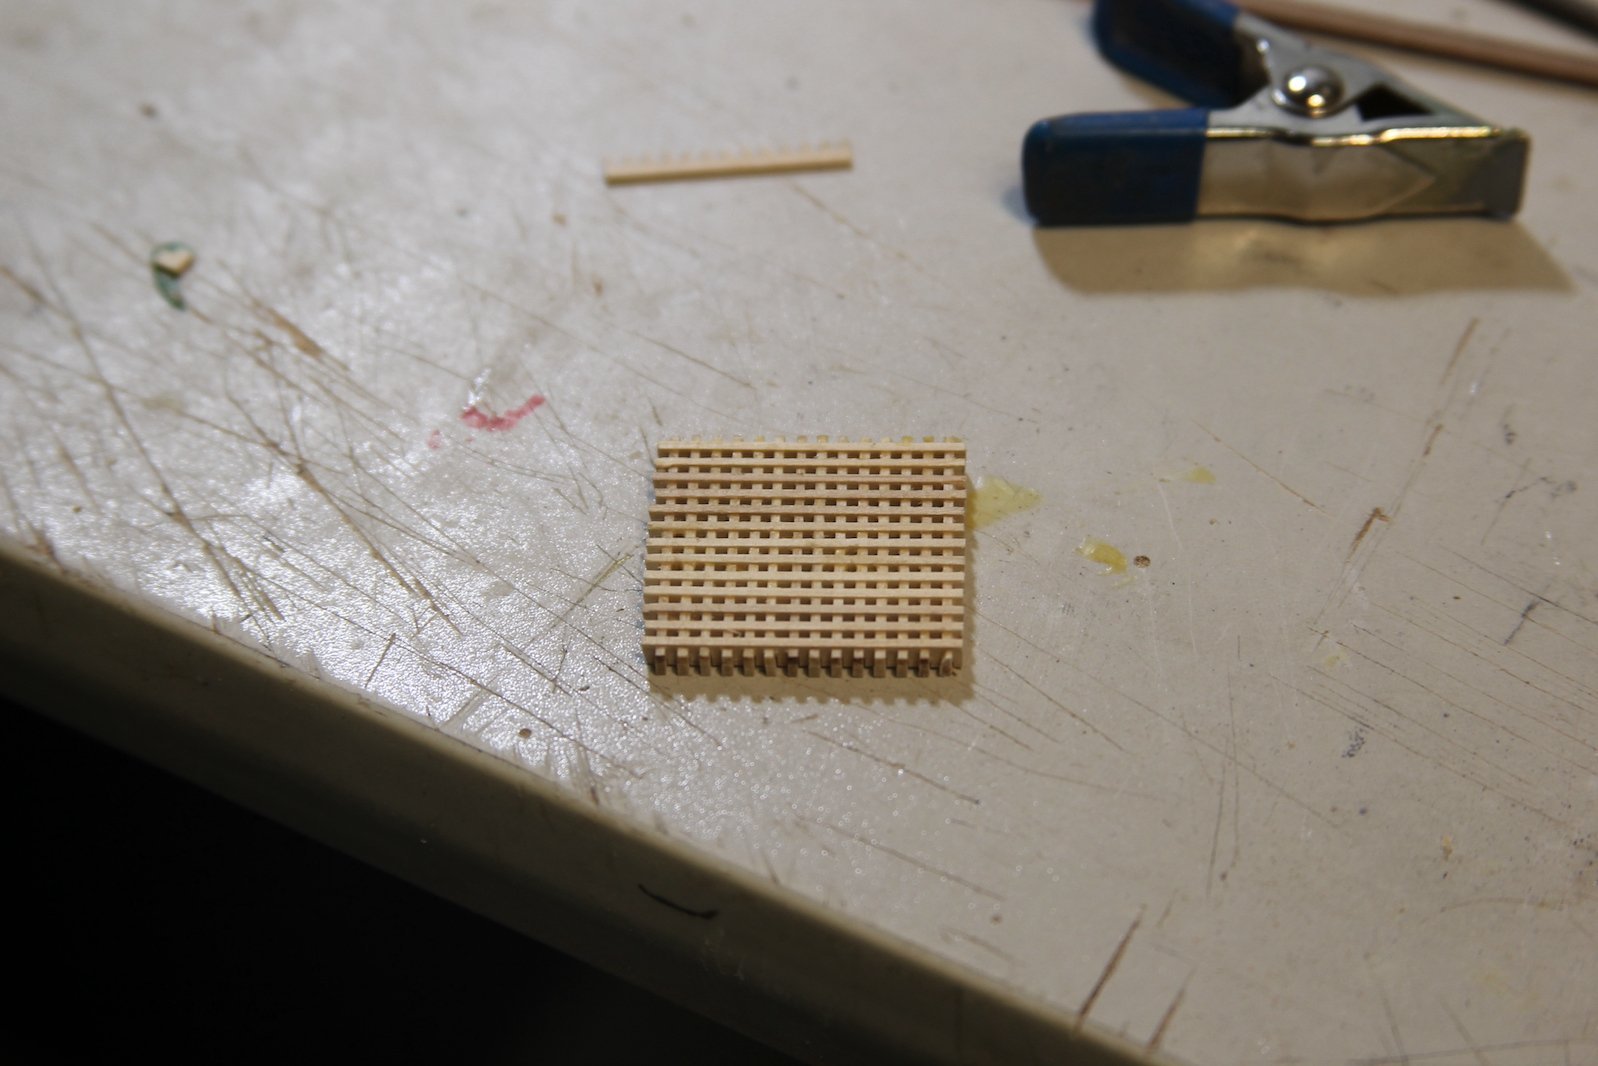
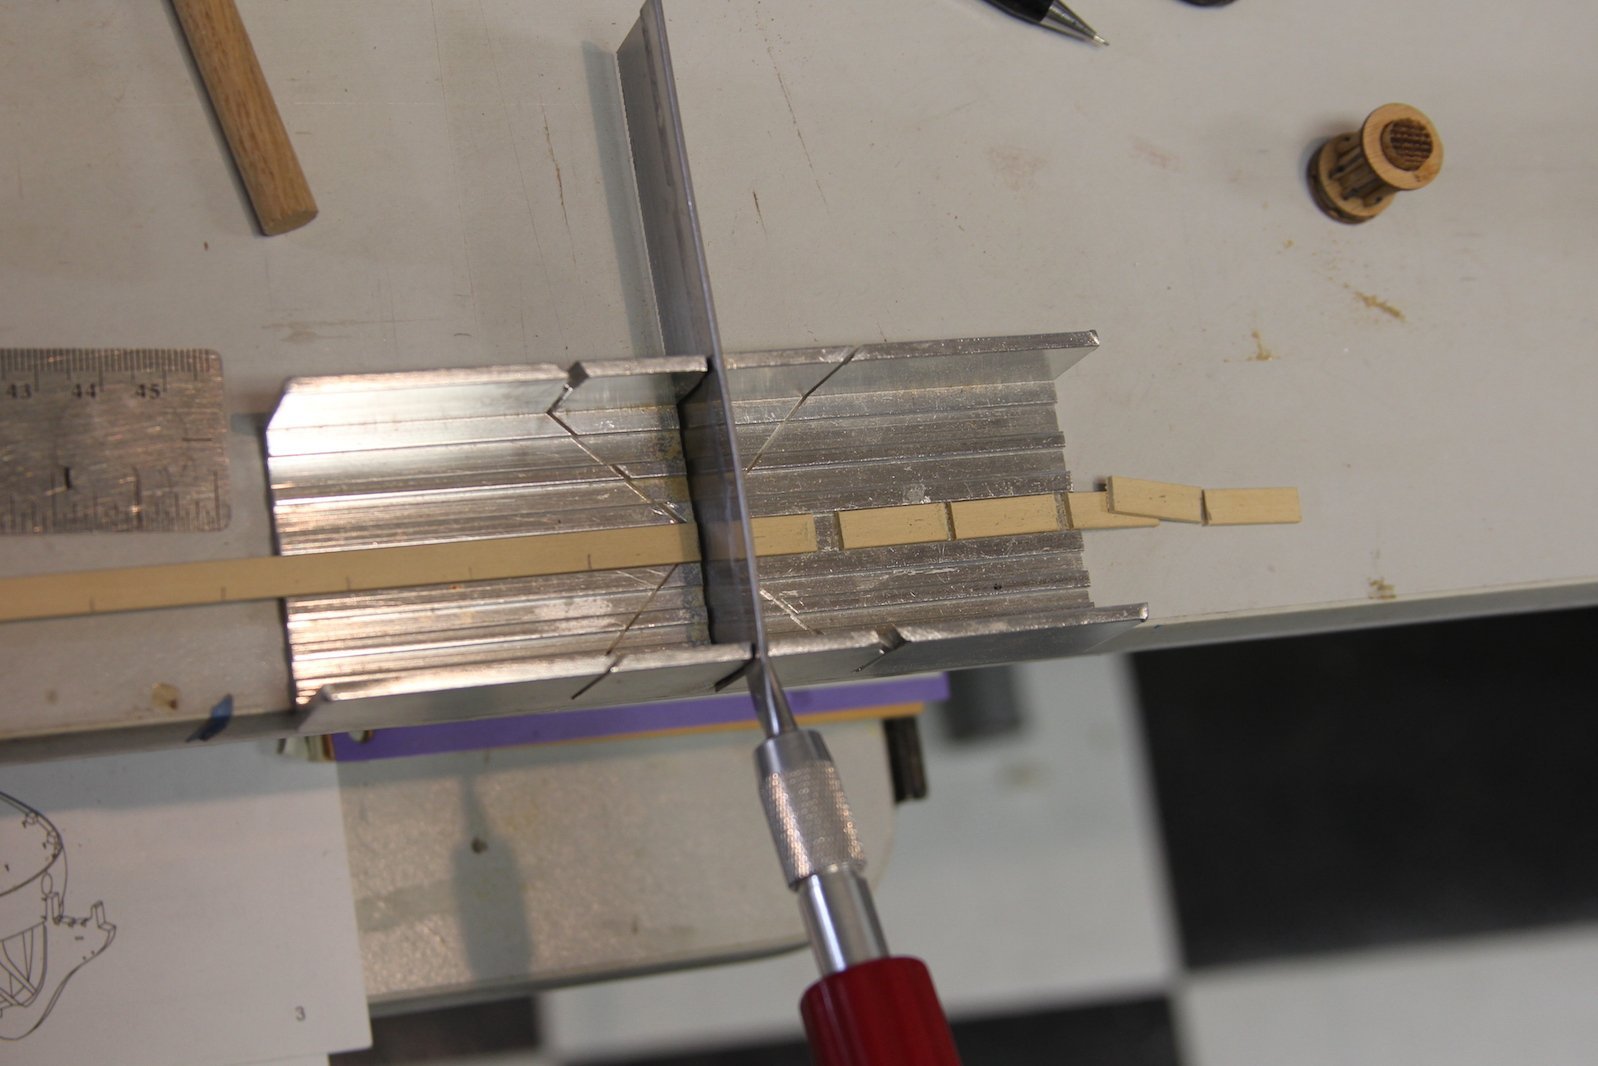
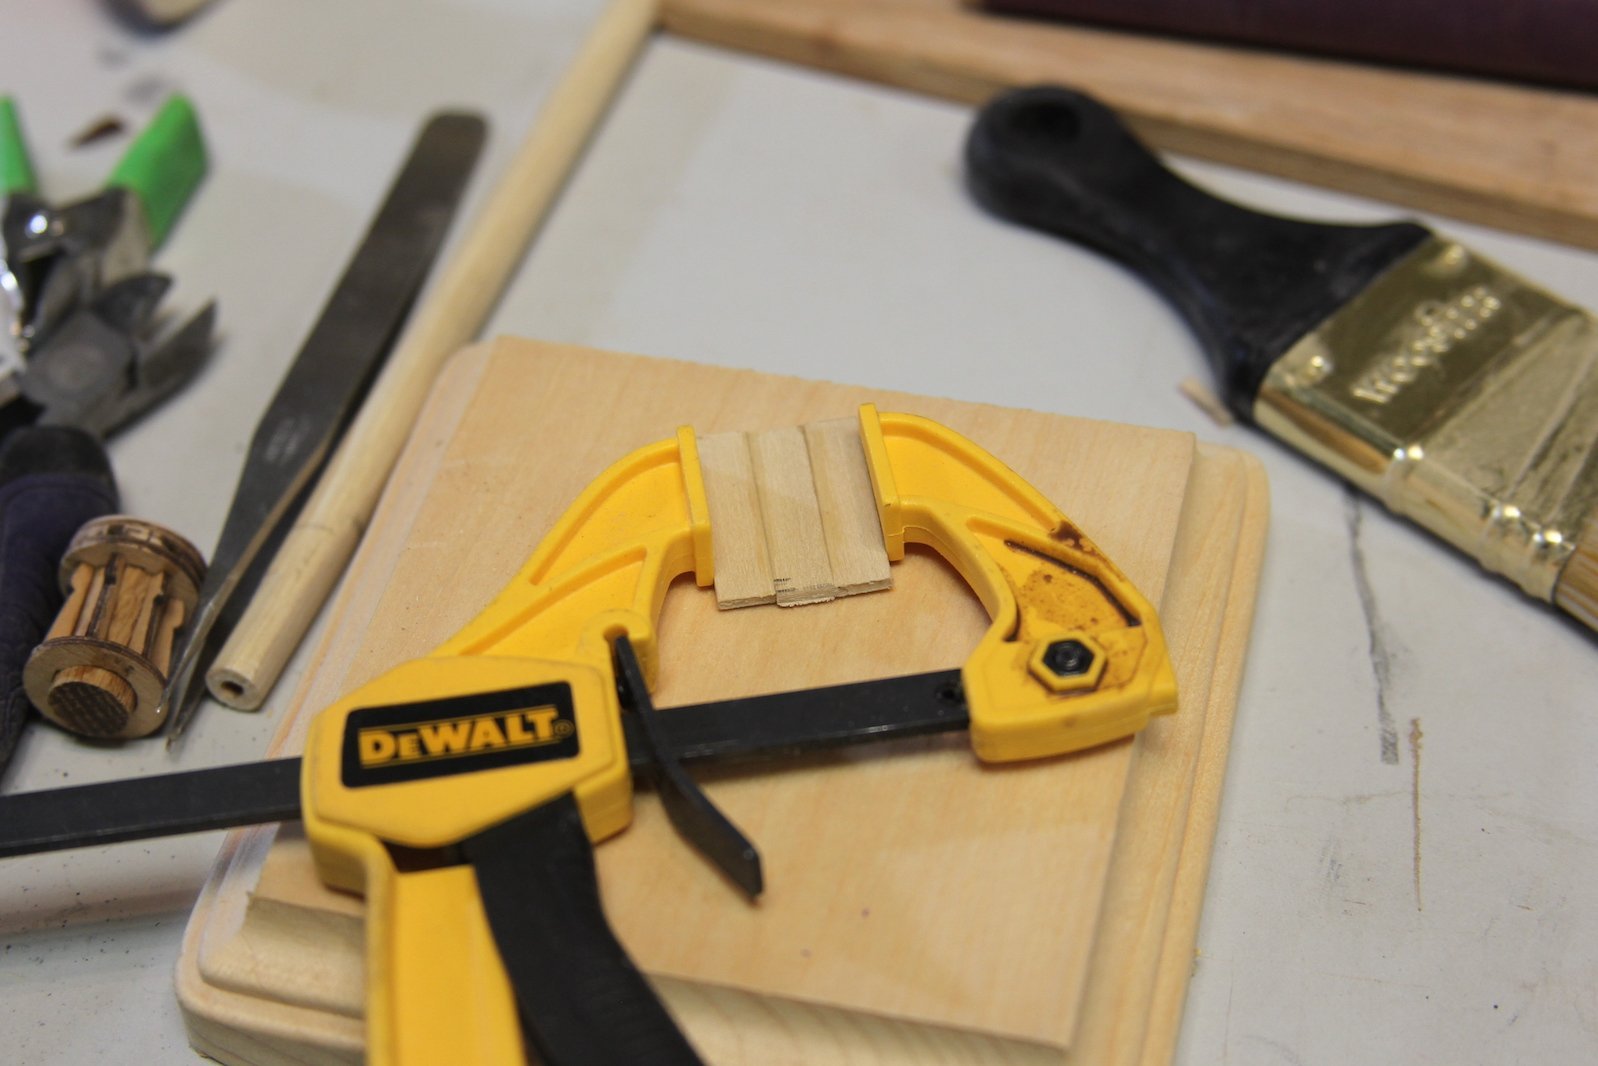
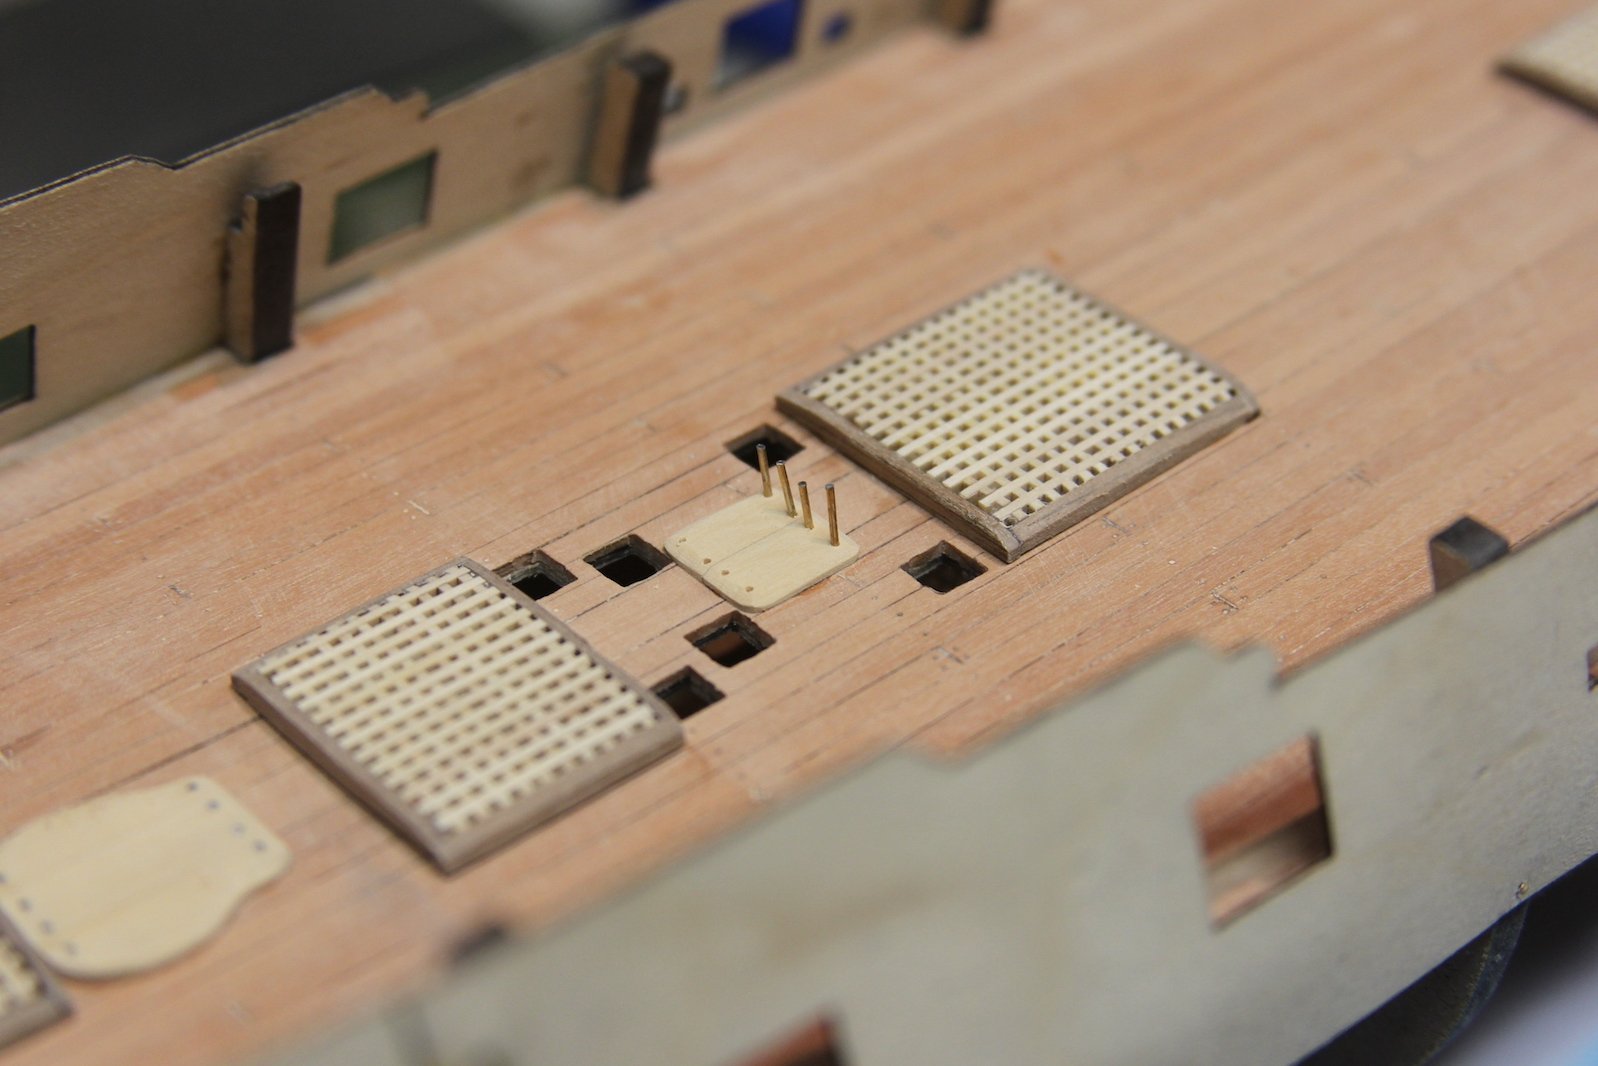
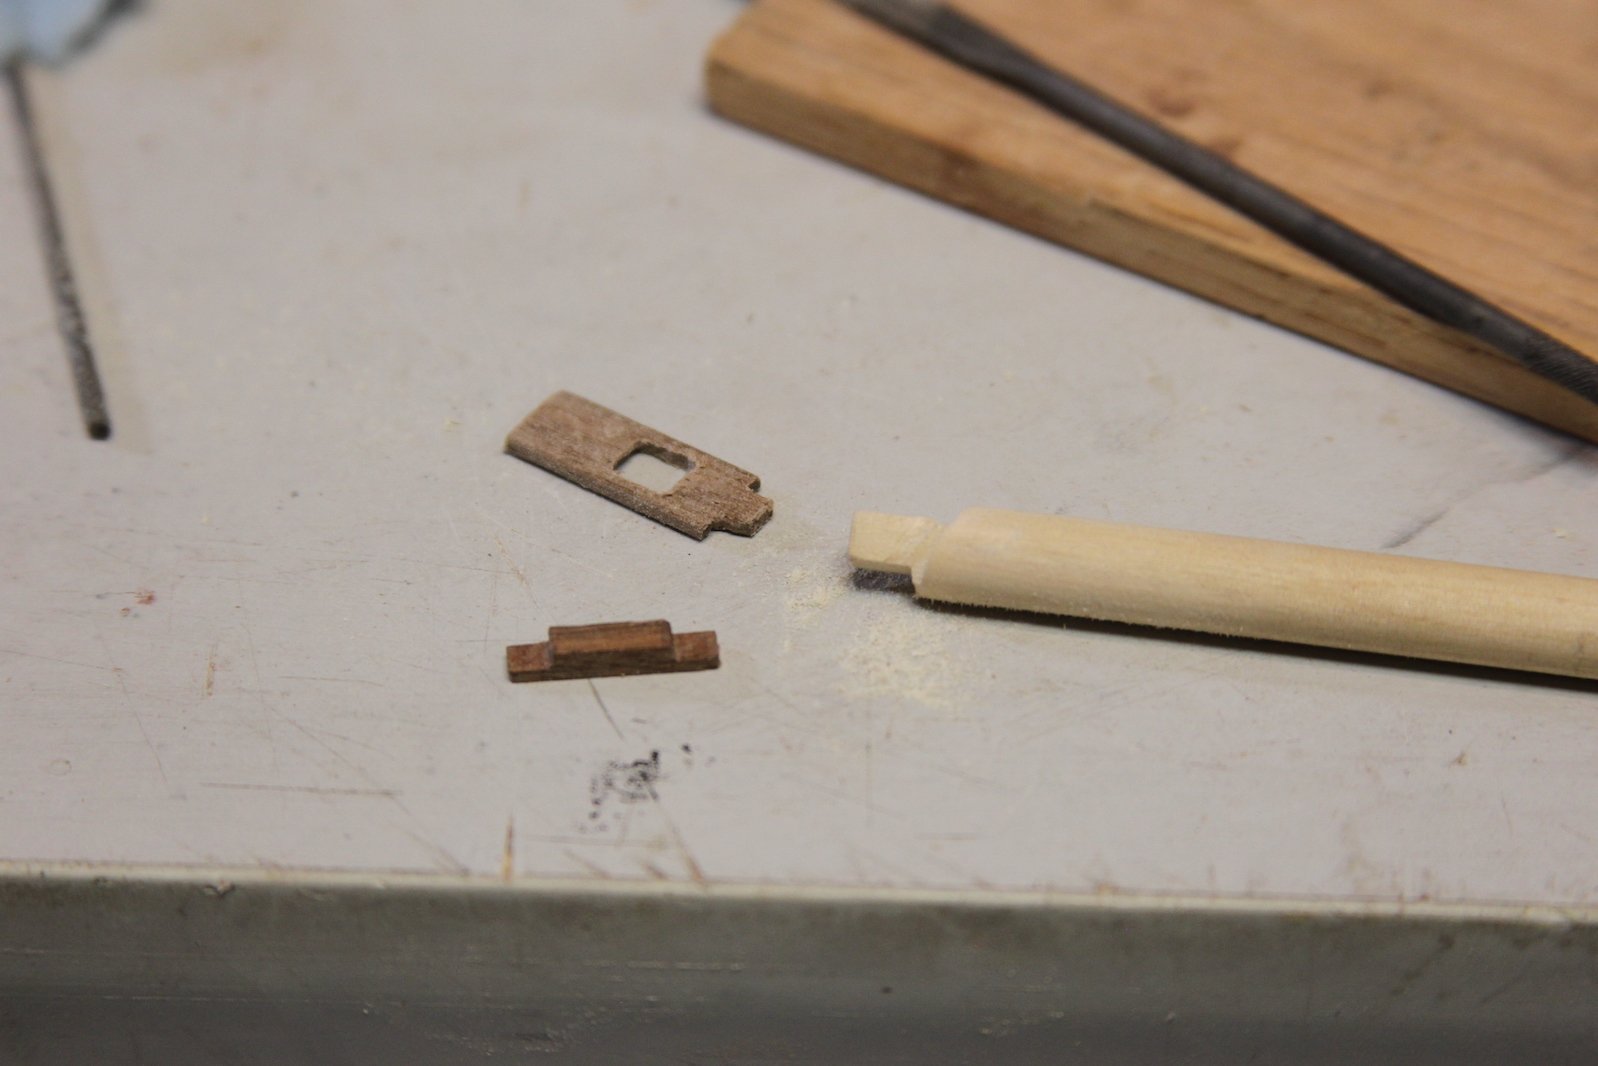
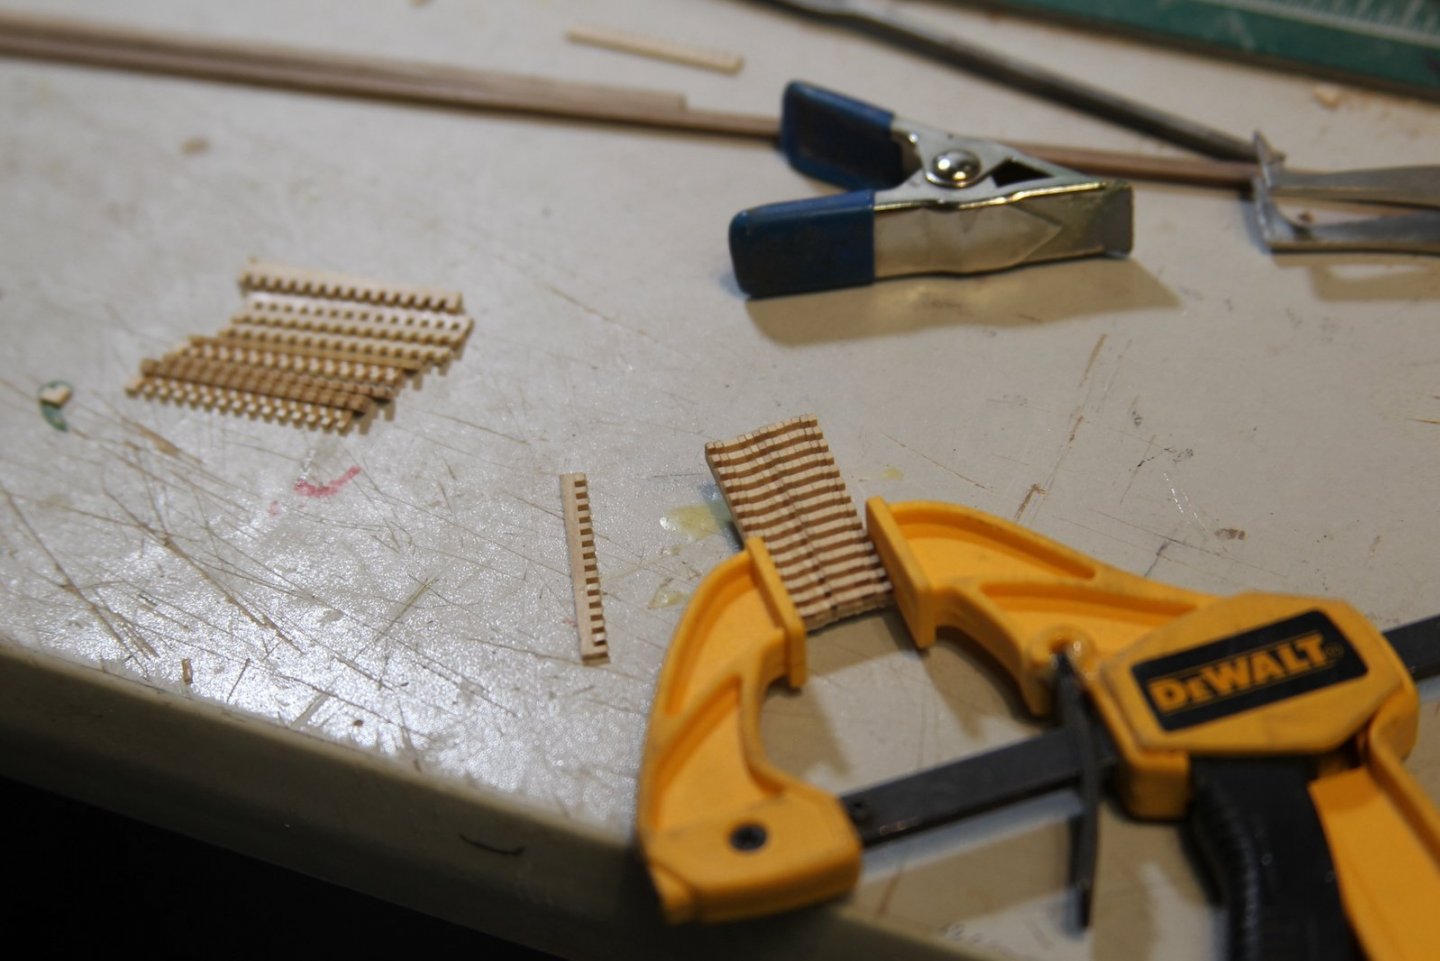
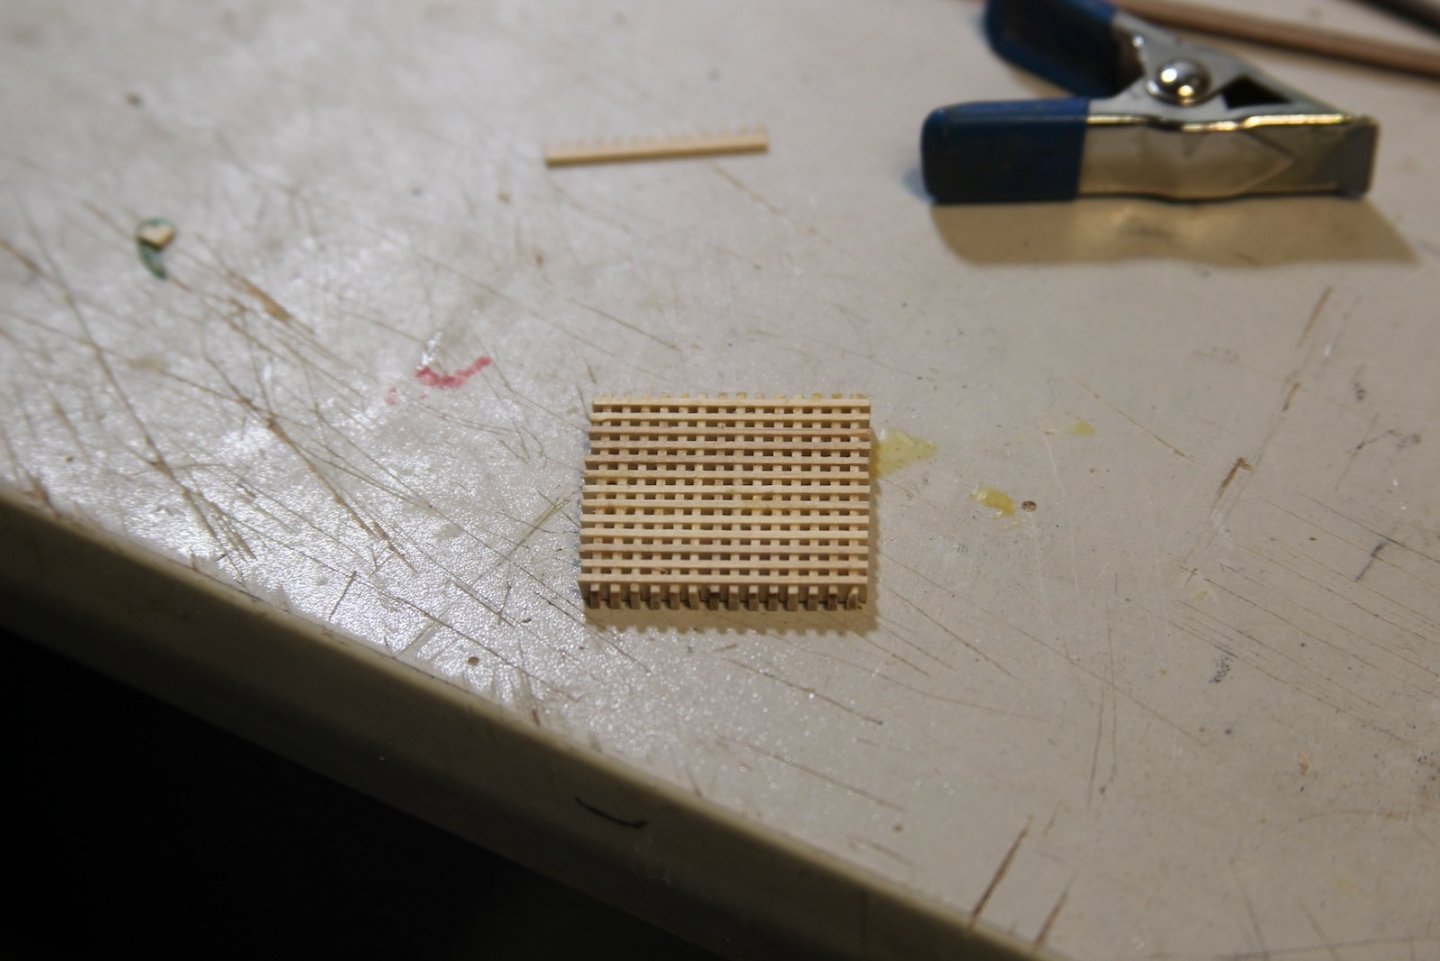
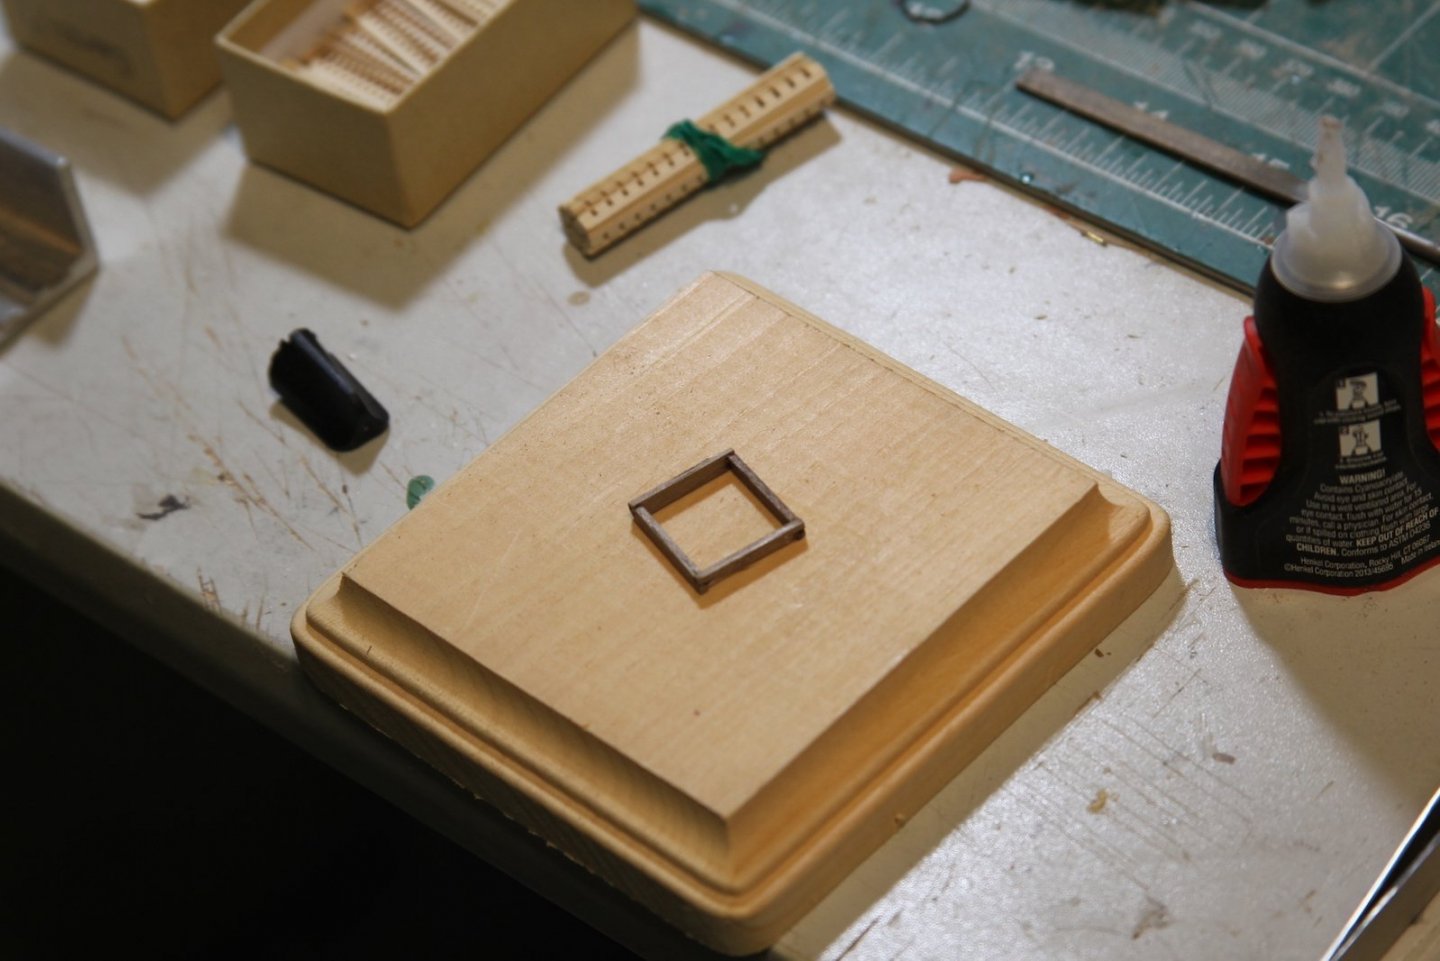
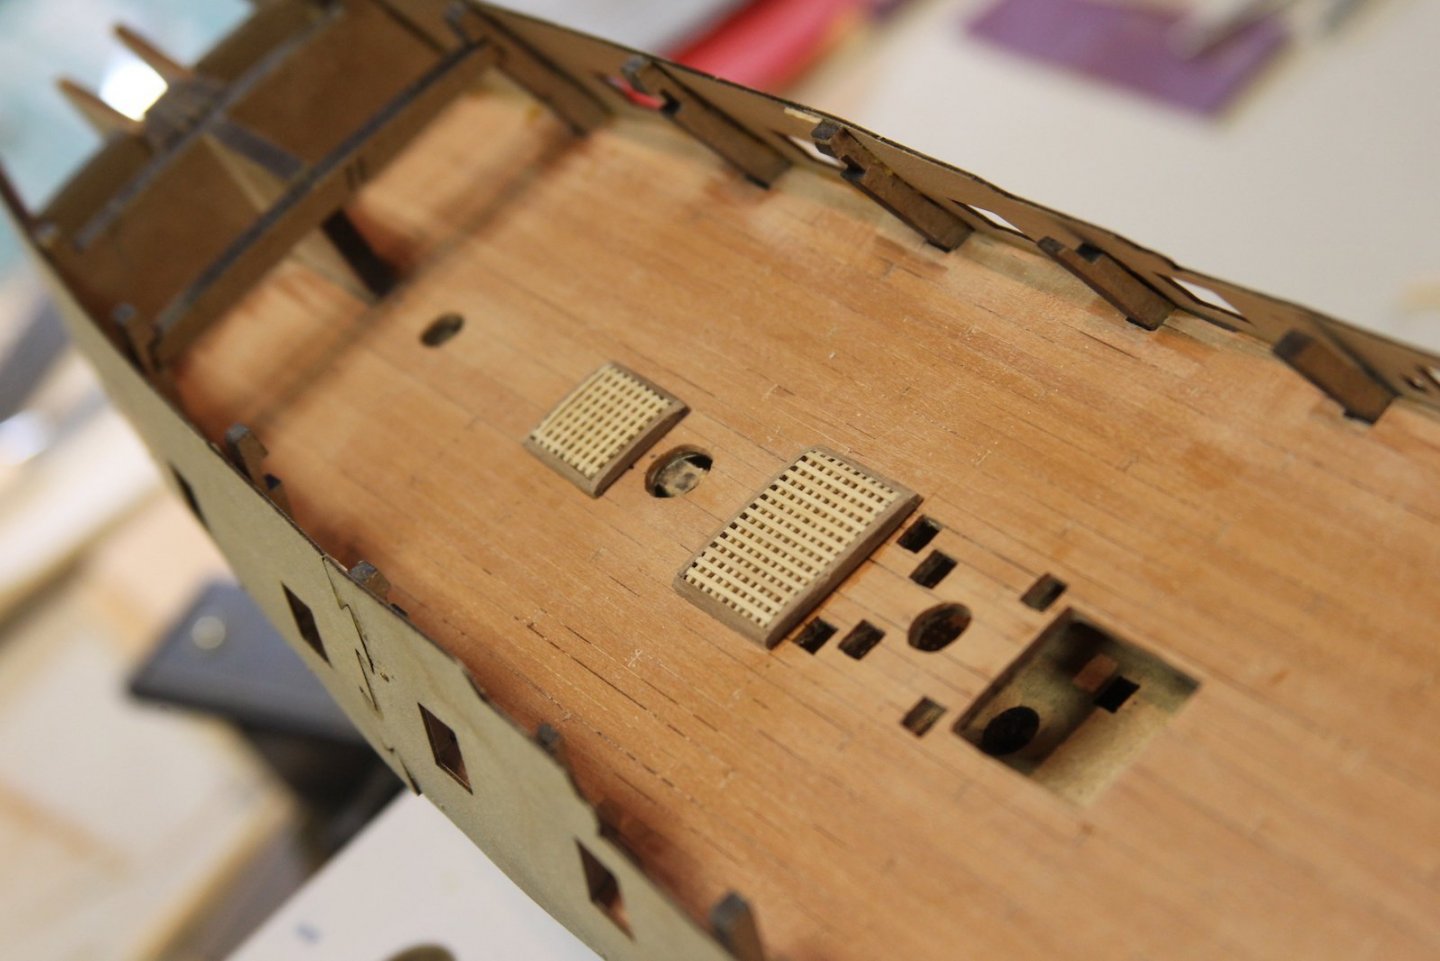
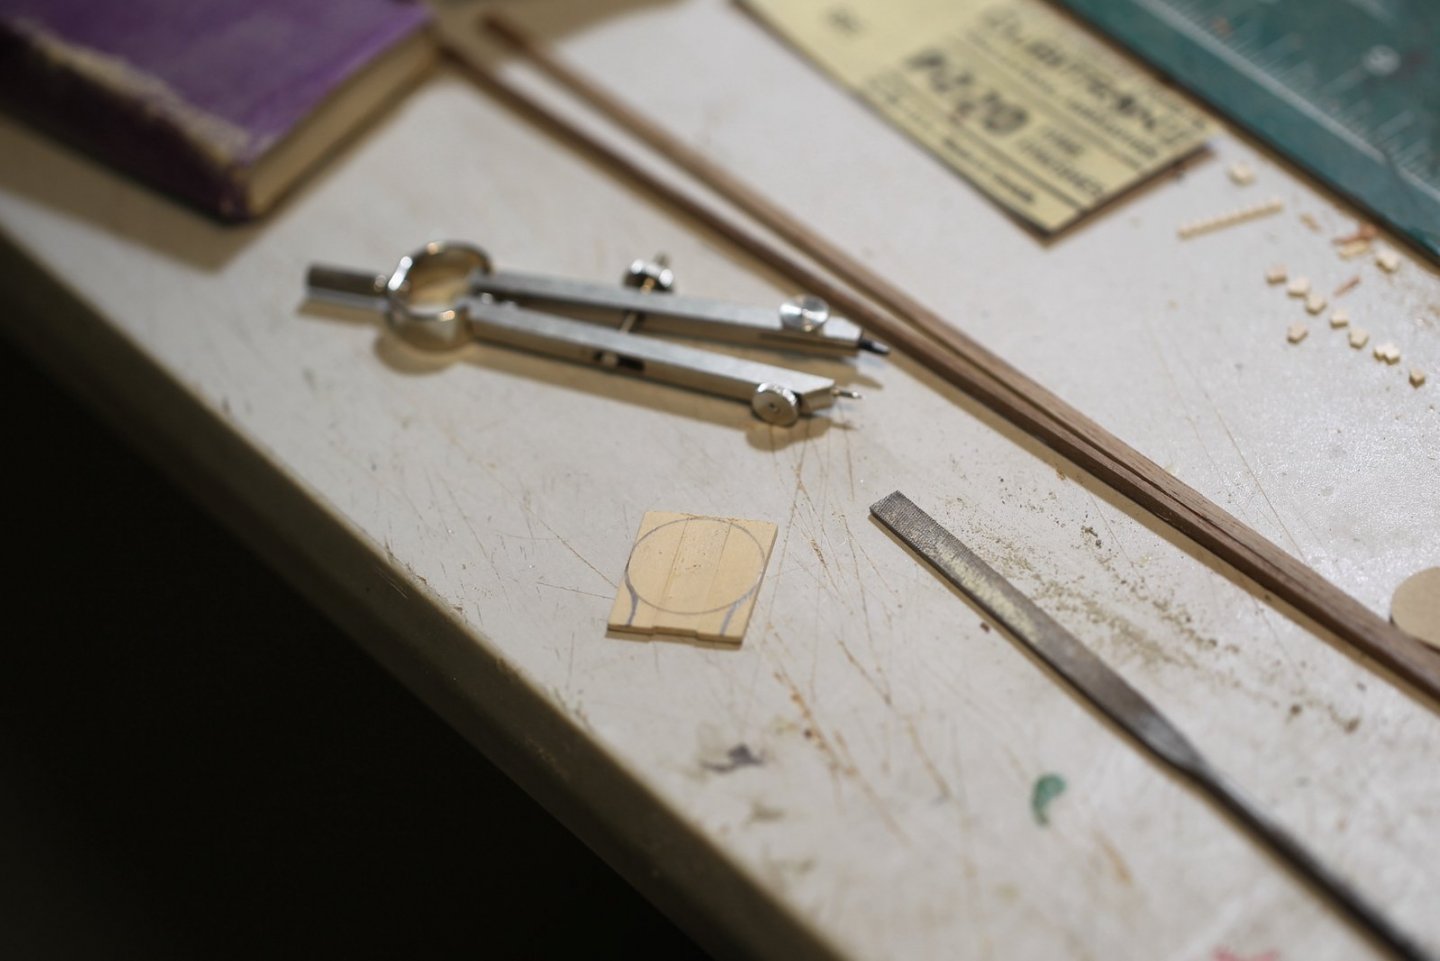
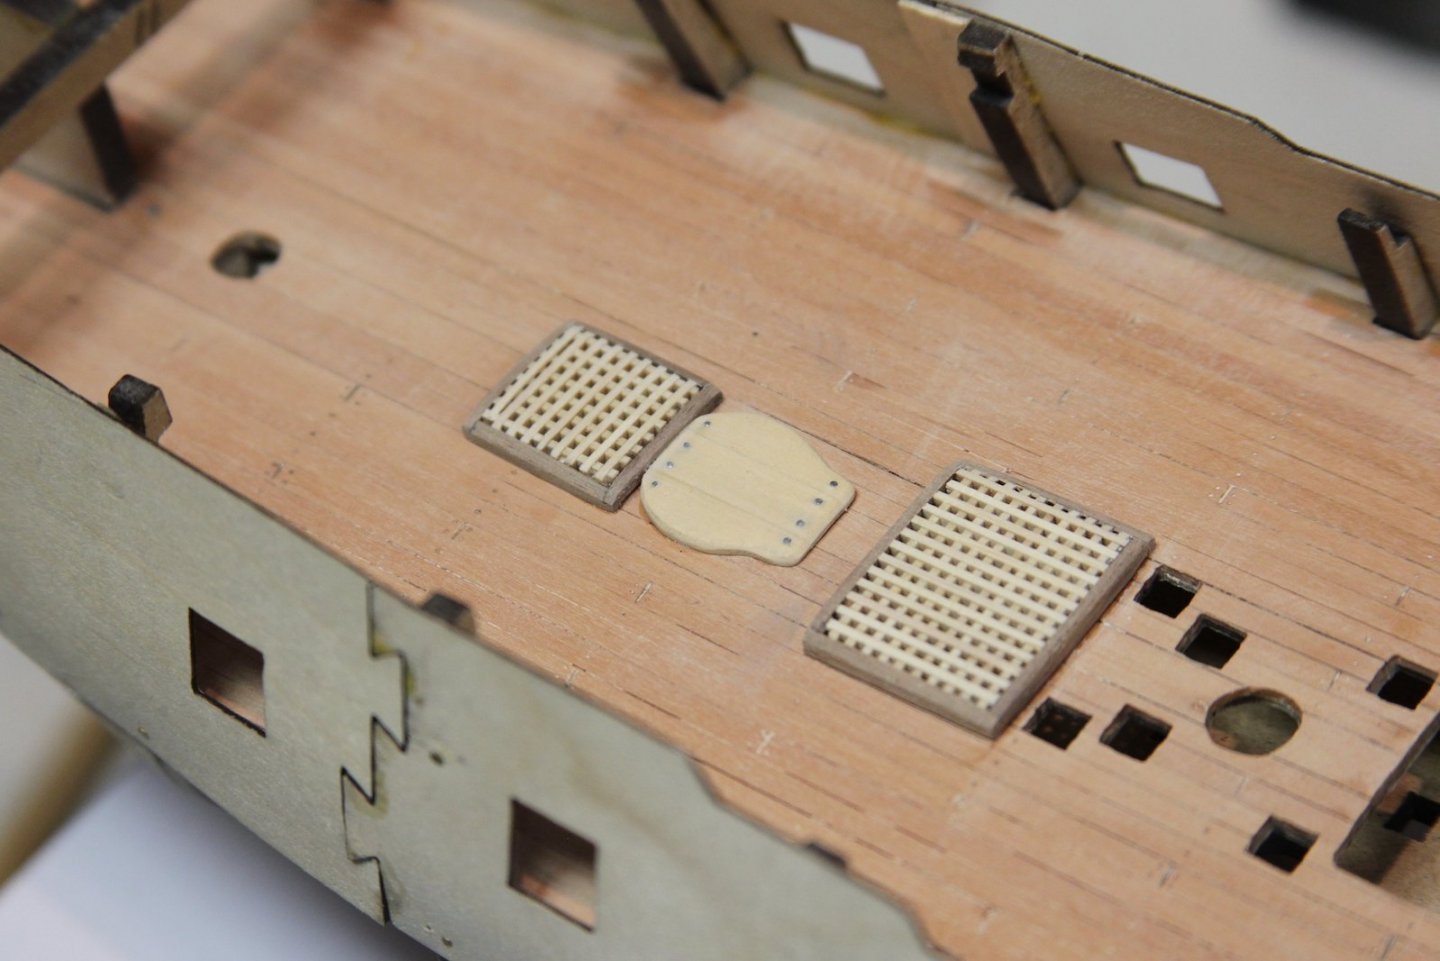
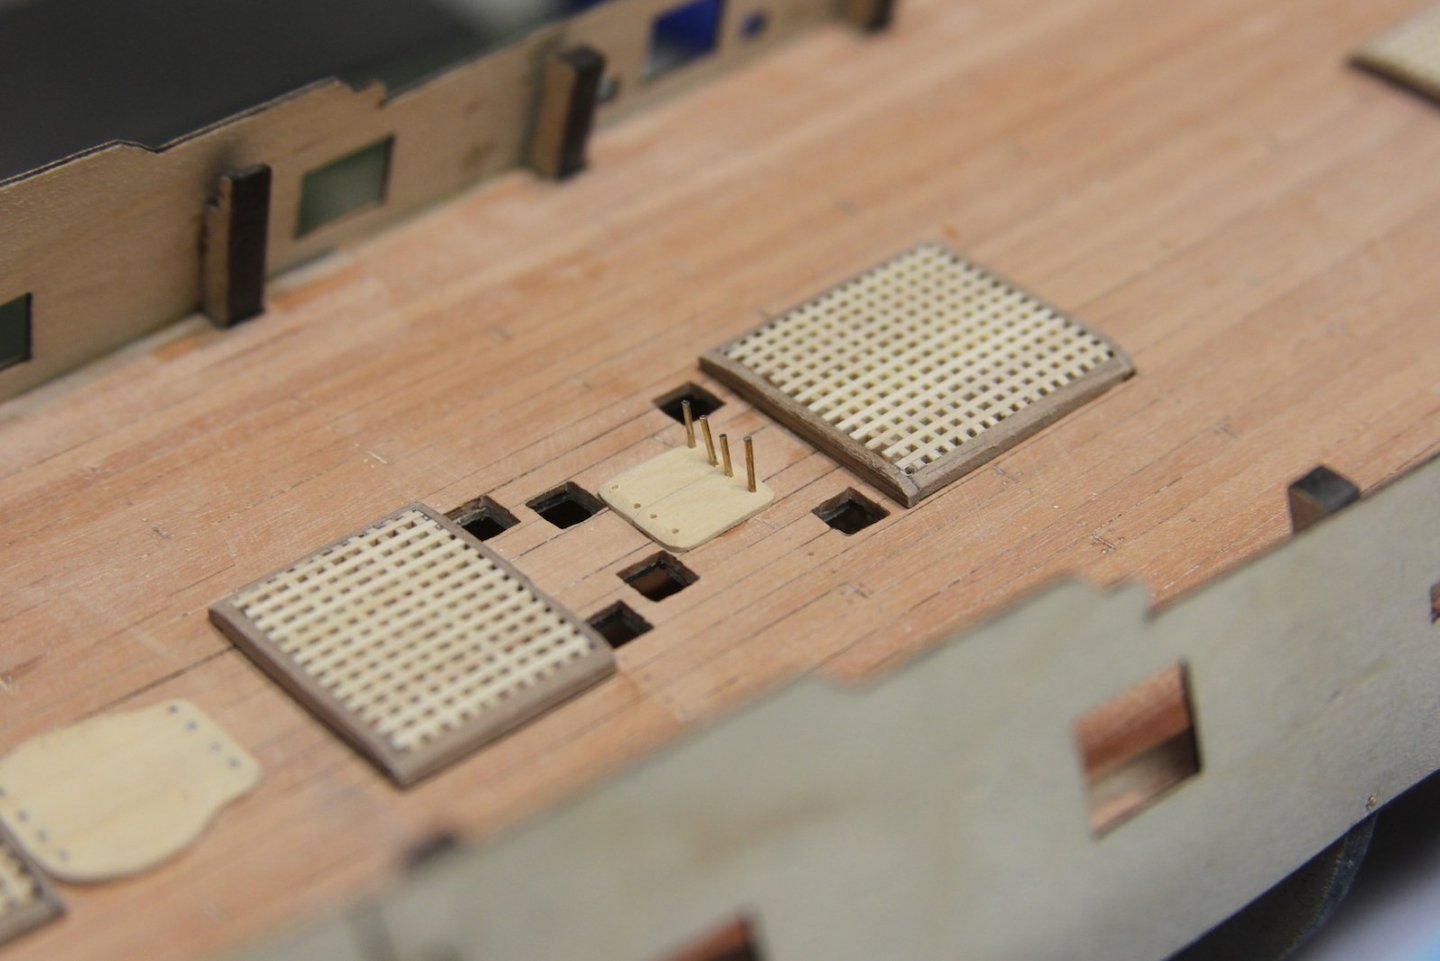
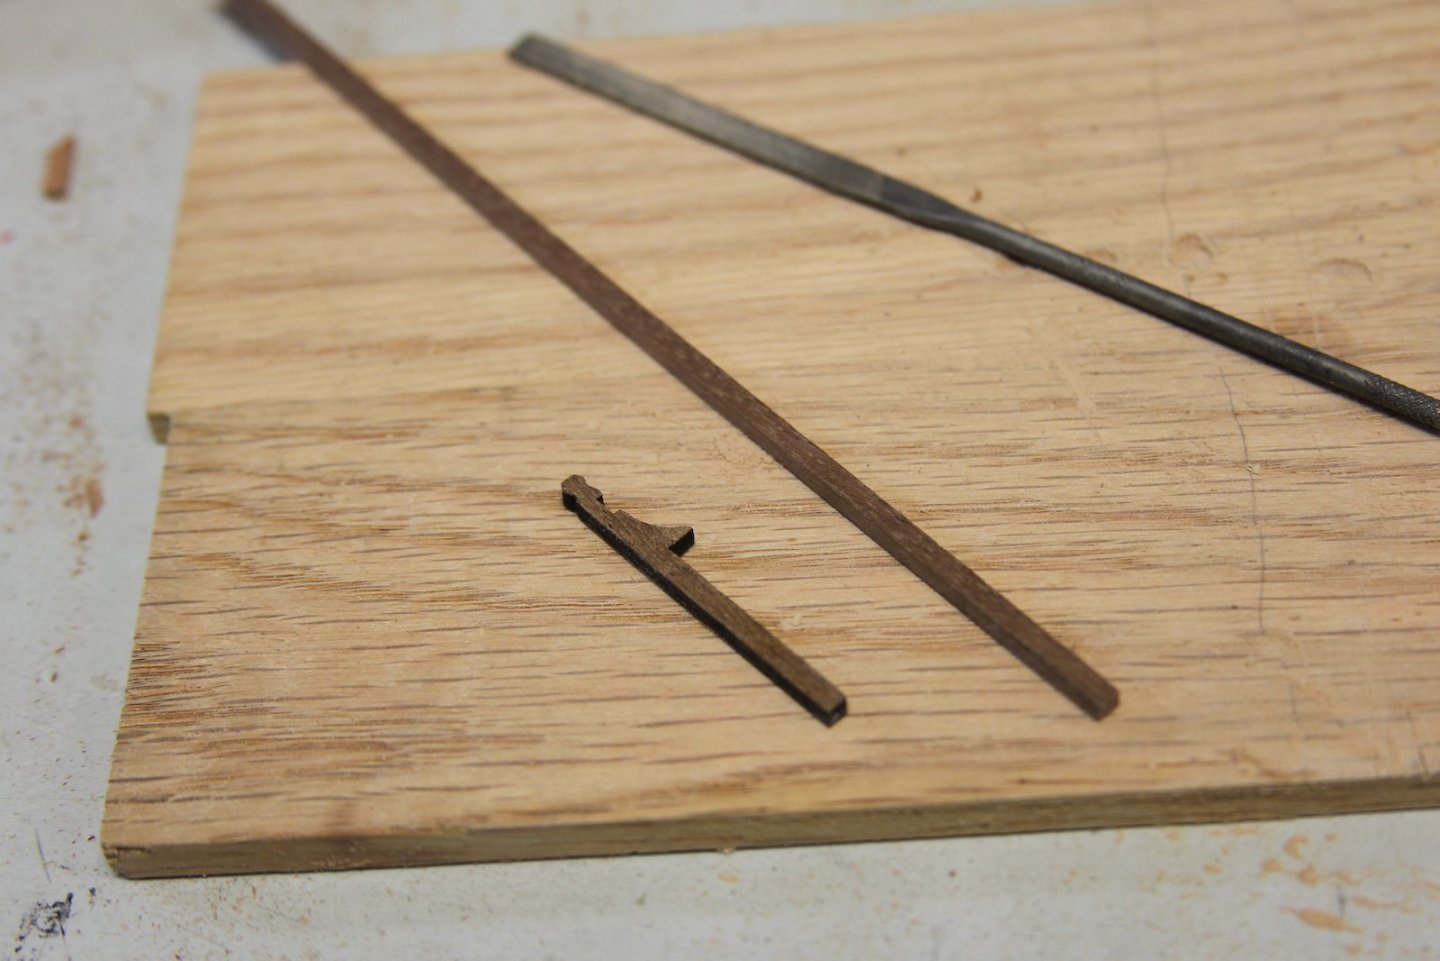
For me, the deck fixtures are always one of my most enjoyable aspects on which to work. I feel as though putting in a little (or sometimes a lot) of extra time on these pieces really enhances the overall build as they often stand out to the viewer. Although the deck fixtures included with the Peg are pretty decent, they still represent an opportunity to add some realism. The grates are pretty straight forward, and the grate pieces that come in the kit were easy to work with. I did pull out my own walnut pieces for the coamings to get a little more shape to them. Otherwise putting the grates together is relatively standard. Personally, I like to group the number of grate linings that I need then cut them with a jeweler's saw so I have them as even as possible. This is a delicate process because the little 'nubs' have a tendency to snap off pretty easily. My mast partners are pretty basic and made by gluing a few pieces of boxwood together, shaping the edges, sanding out the hole, and then mounting them to the deck. The oddly shaped little fella is the step for the Capstan as illustrated in the FFM.


- 419 replies
-
- 8
-
-
- Victory Models
- Pegasus
- (and 2 more)
-
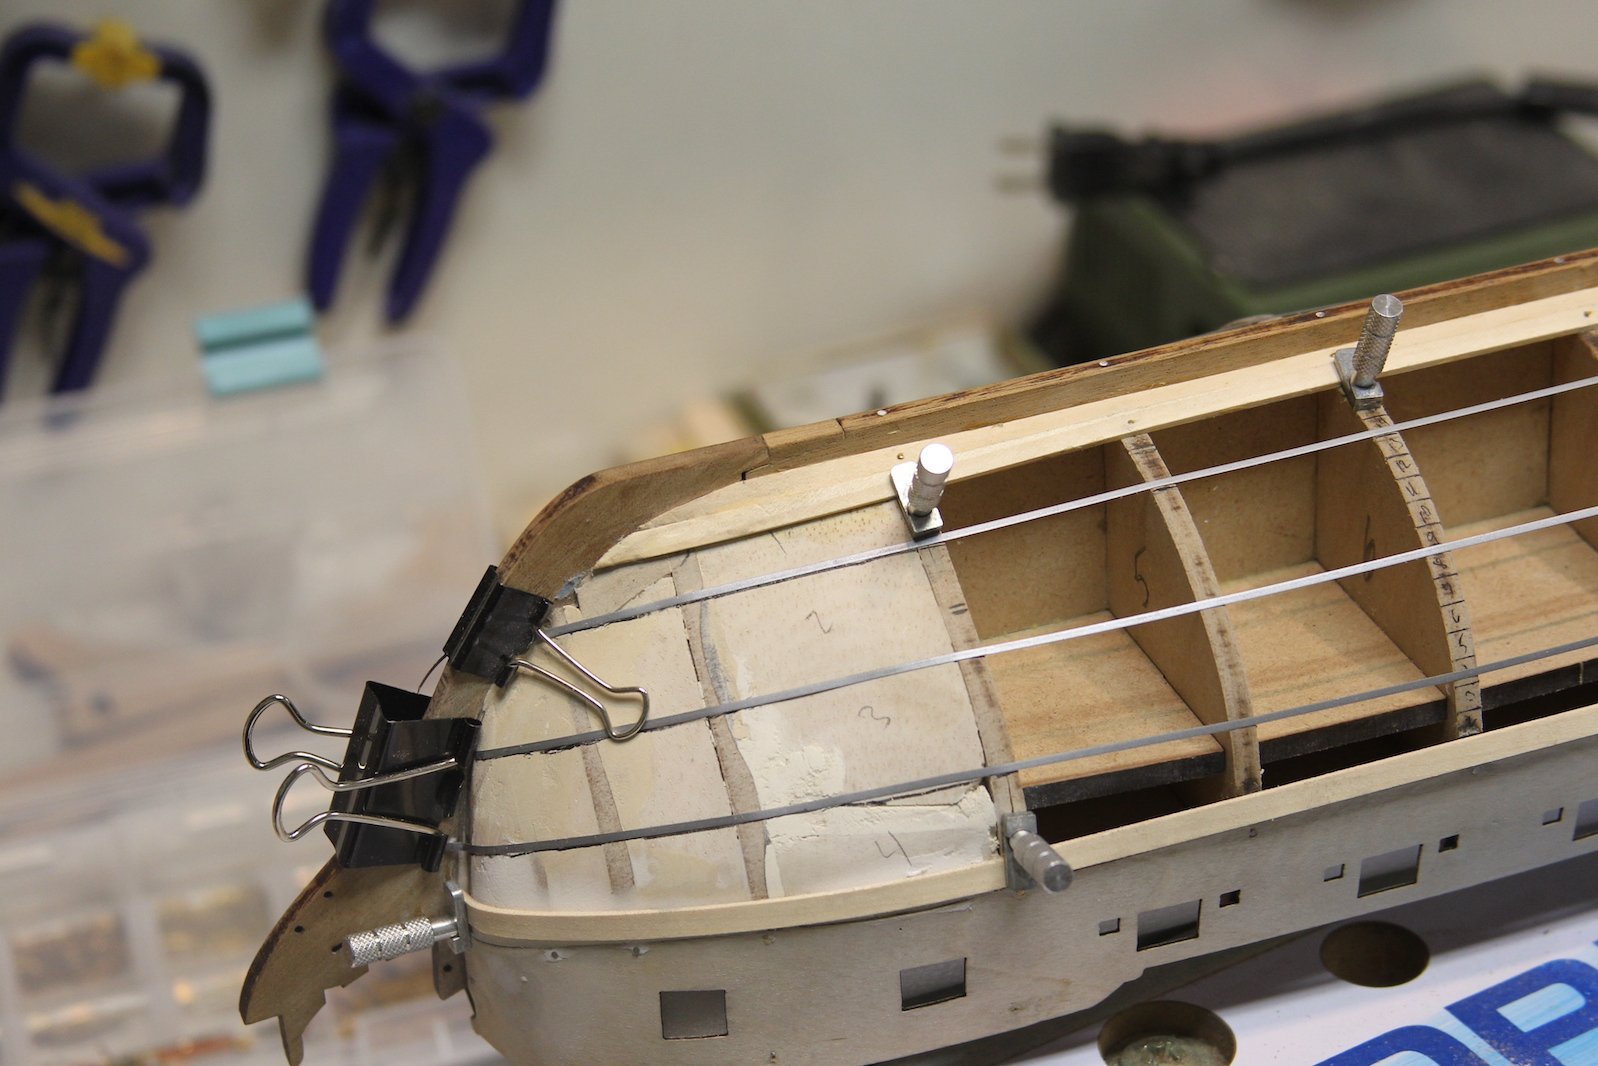
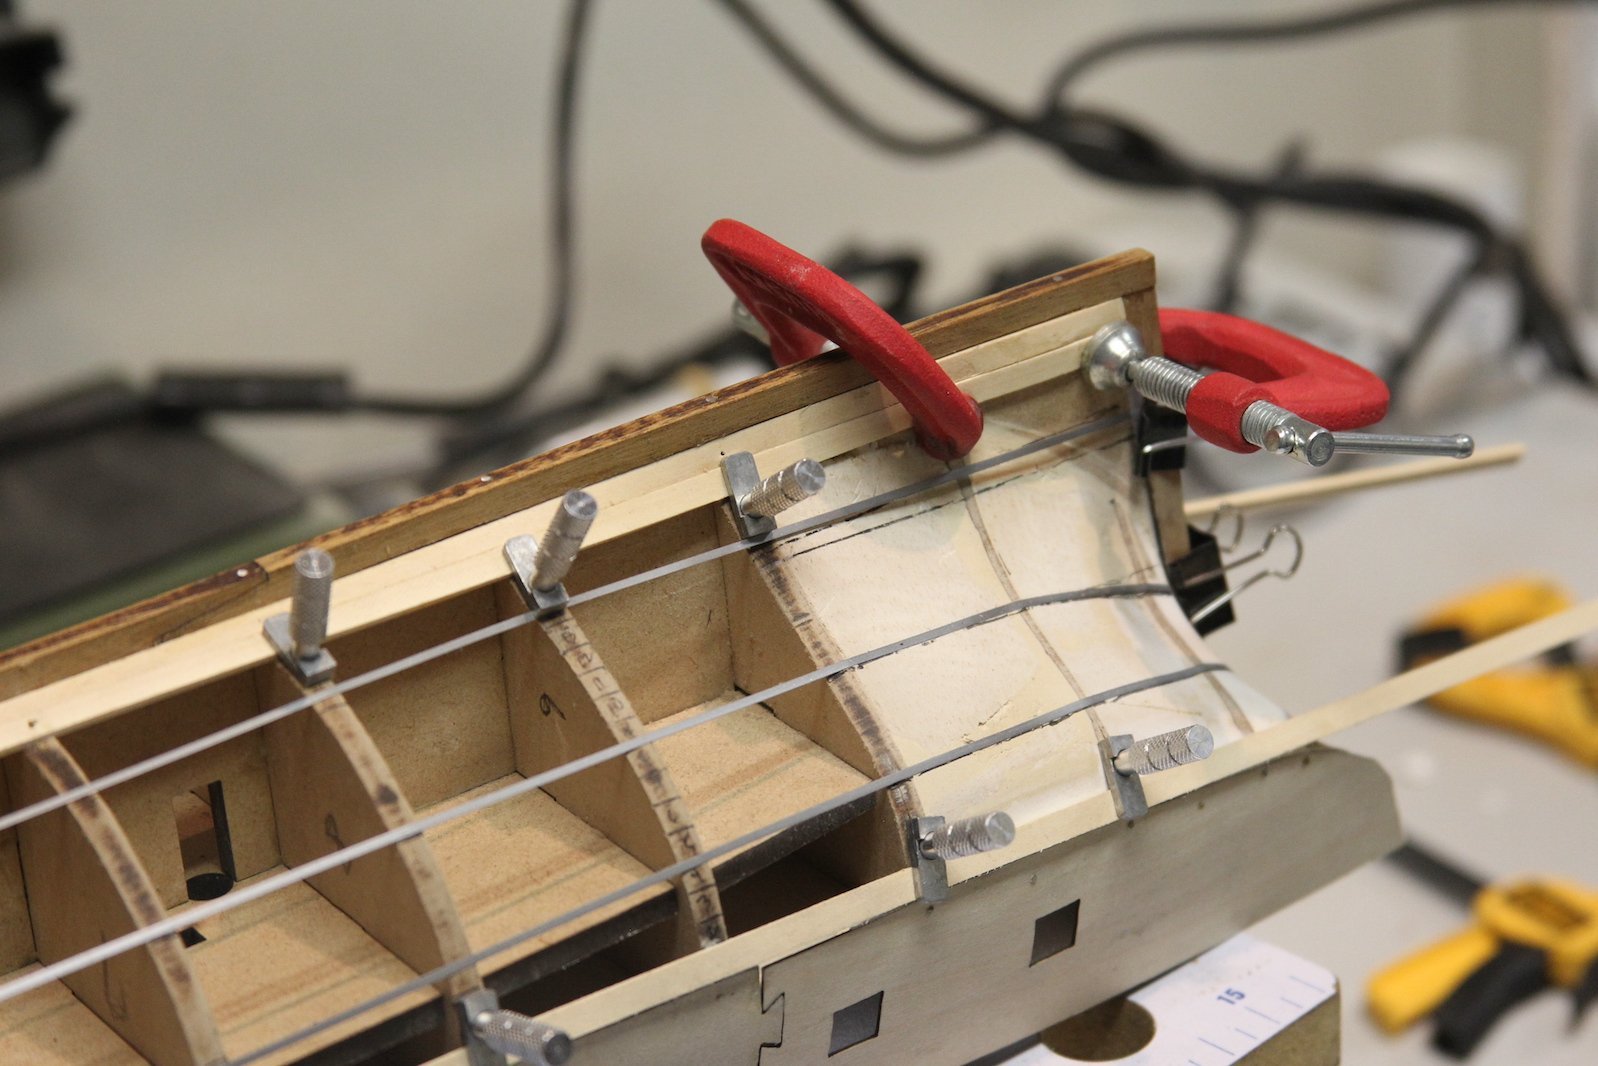
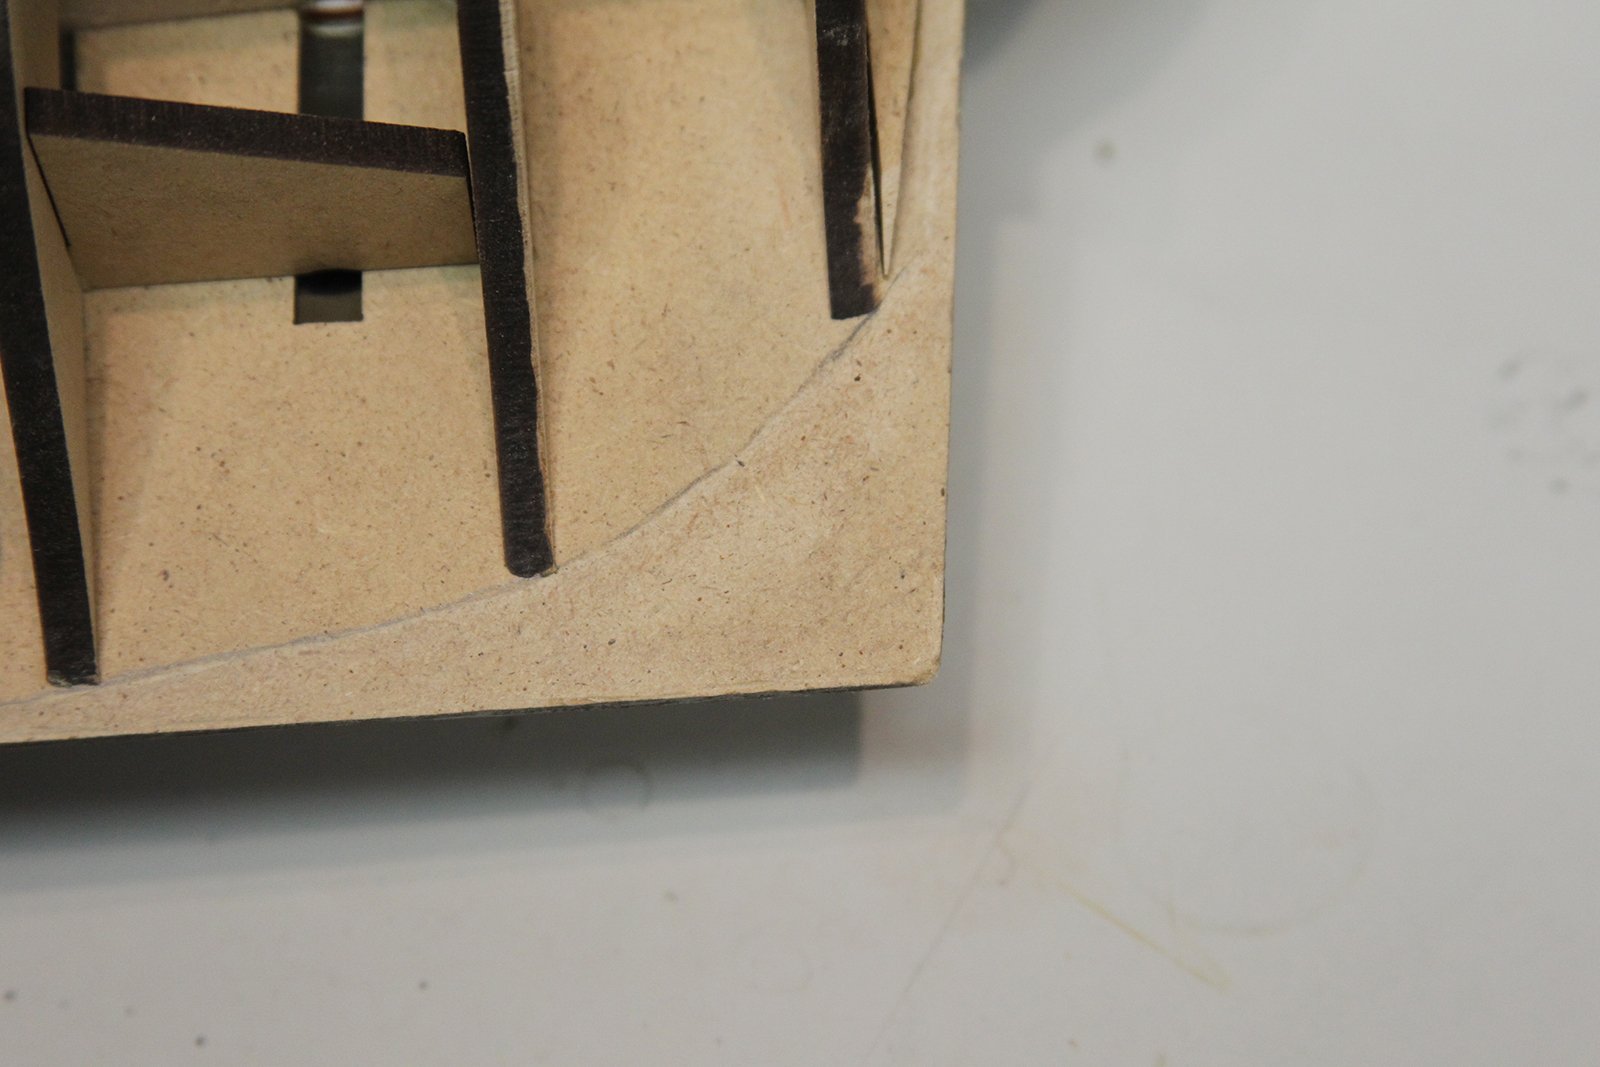
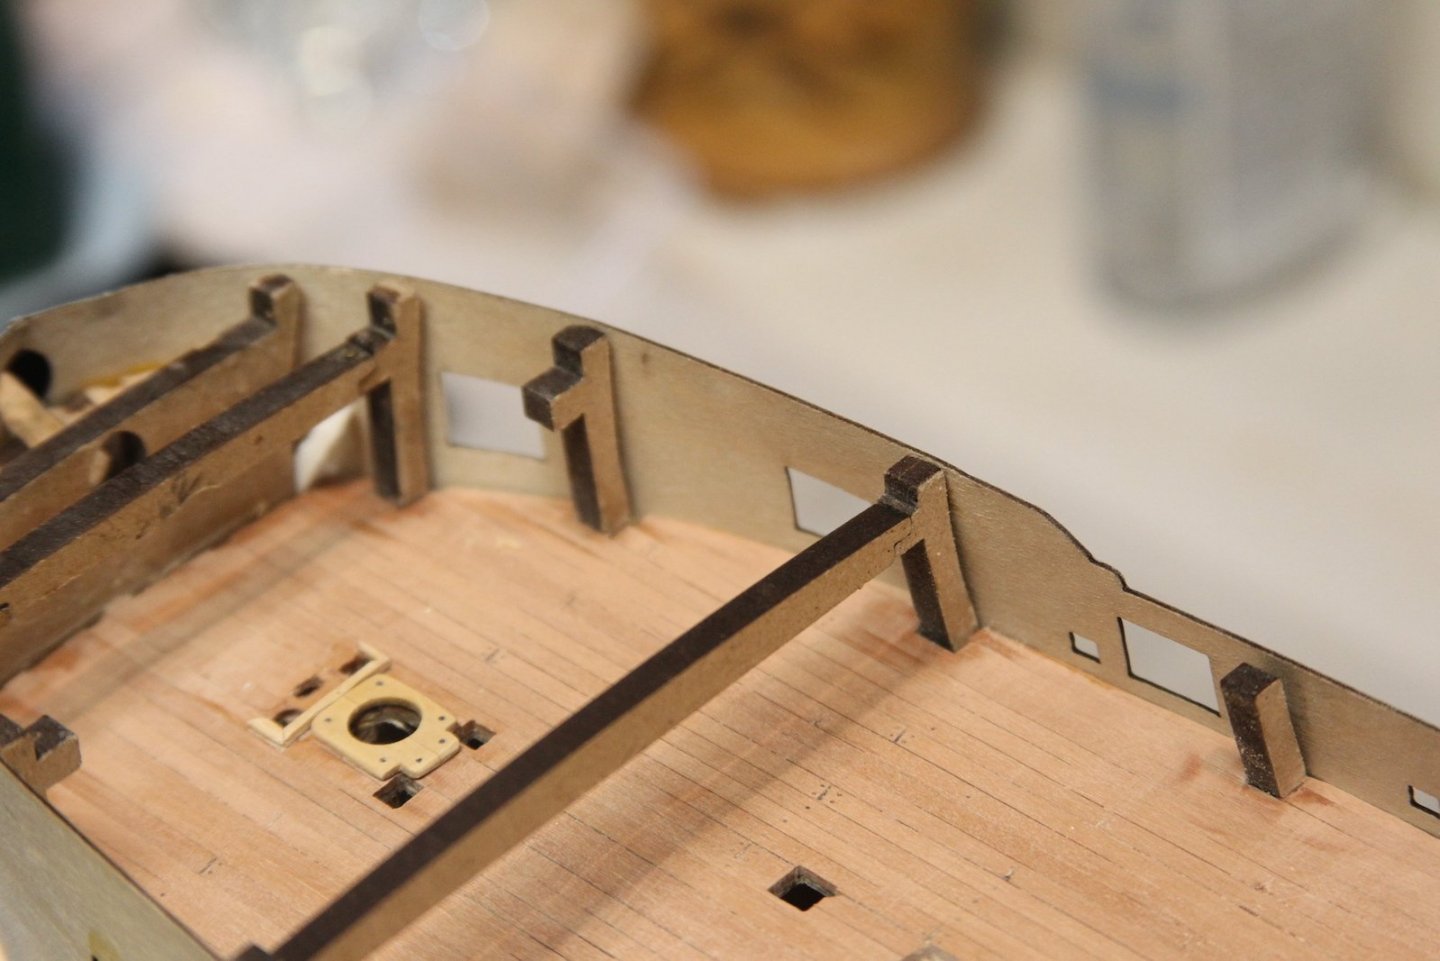
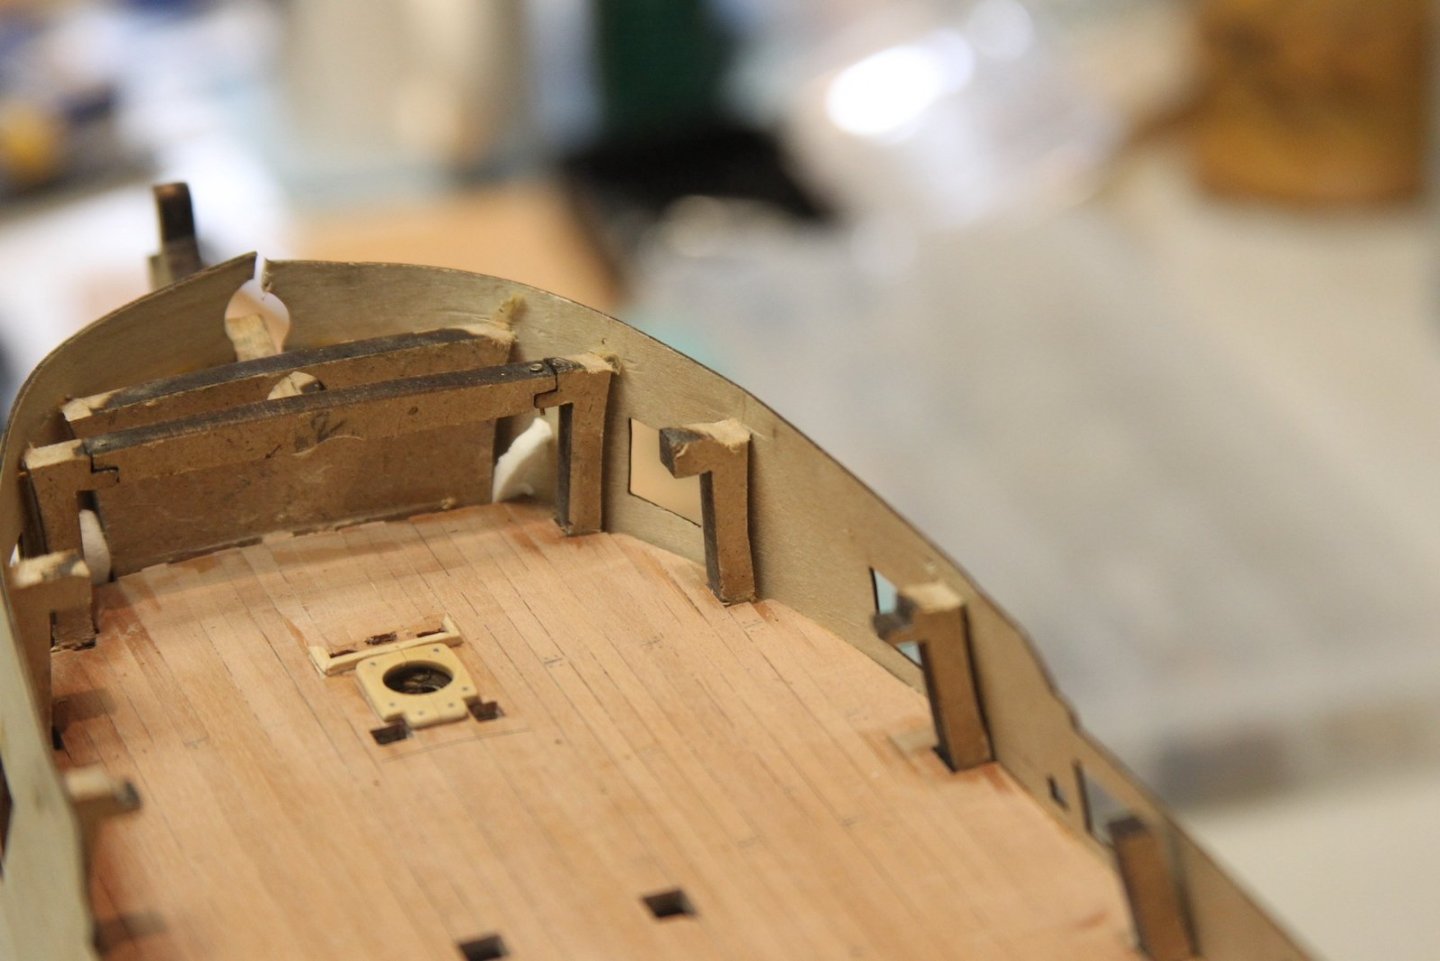
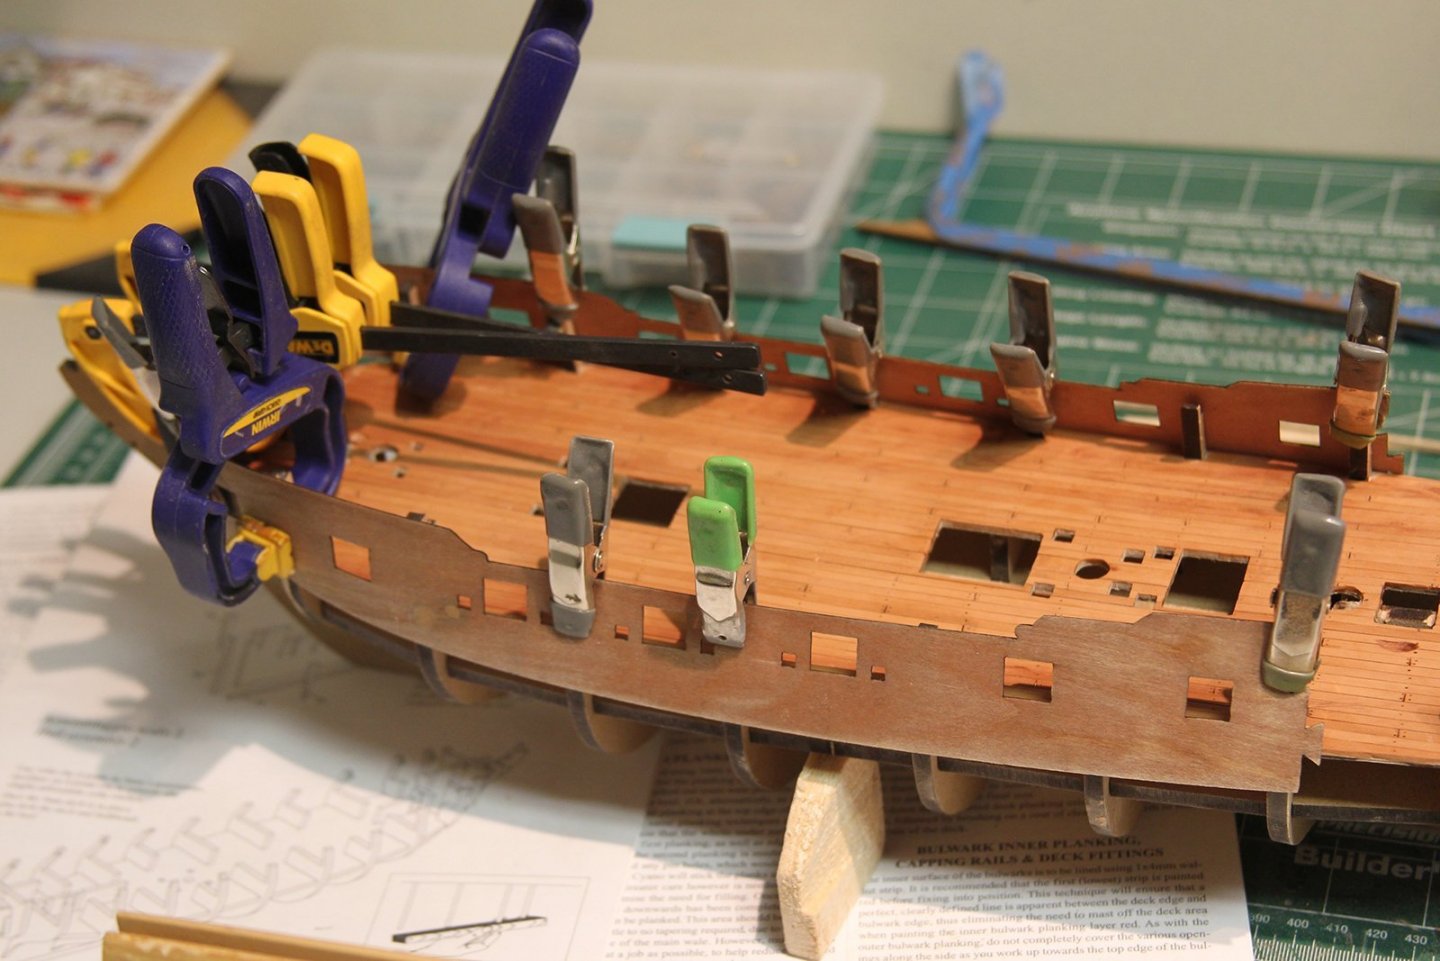
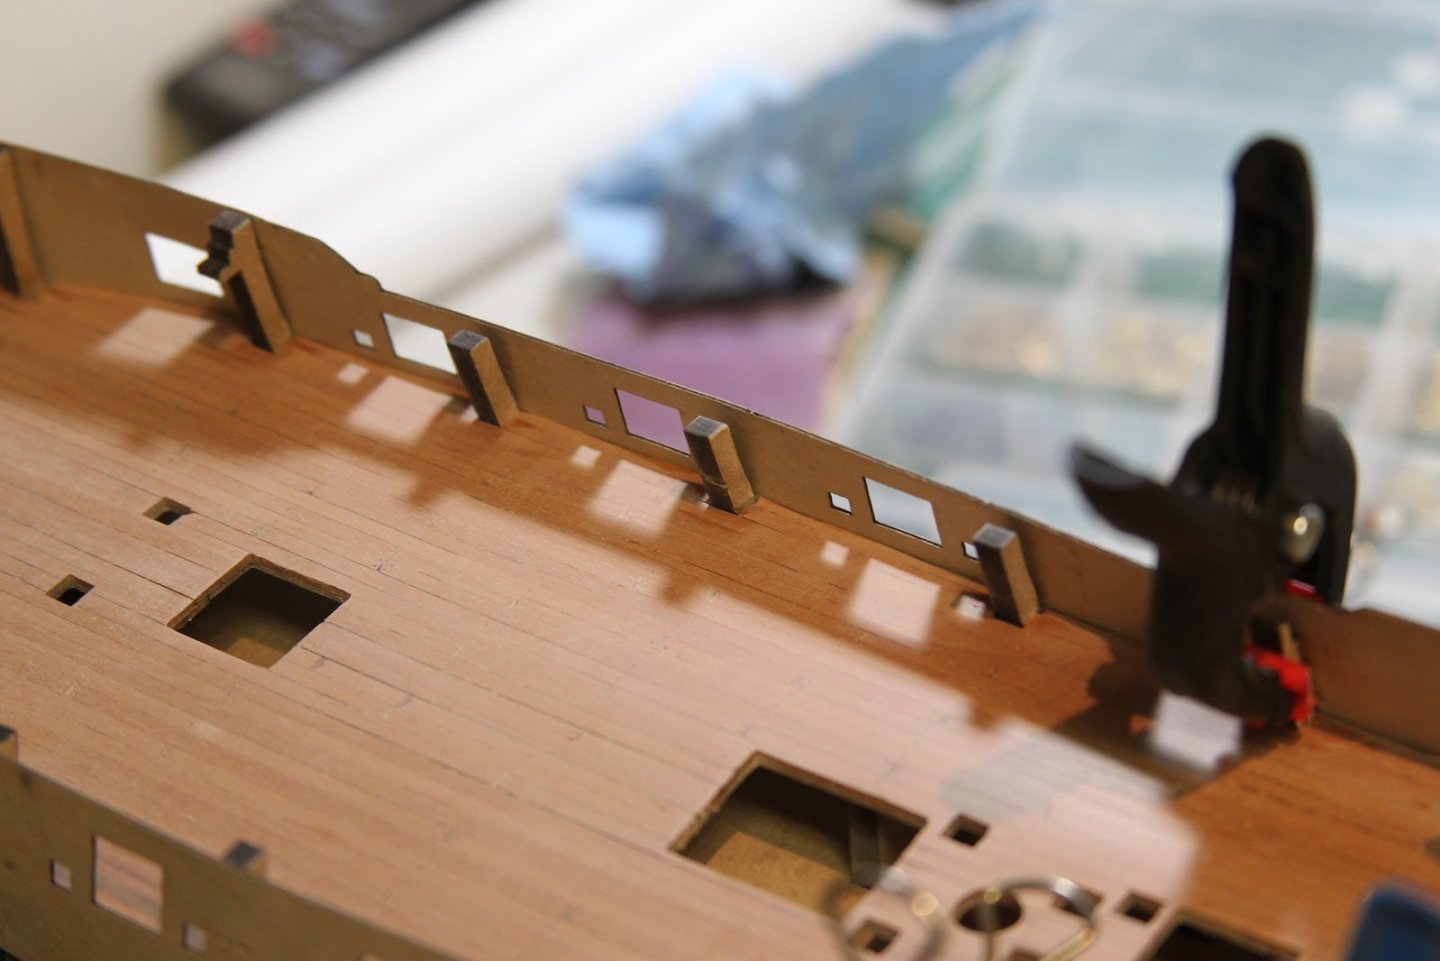
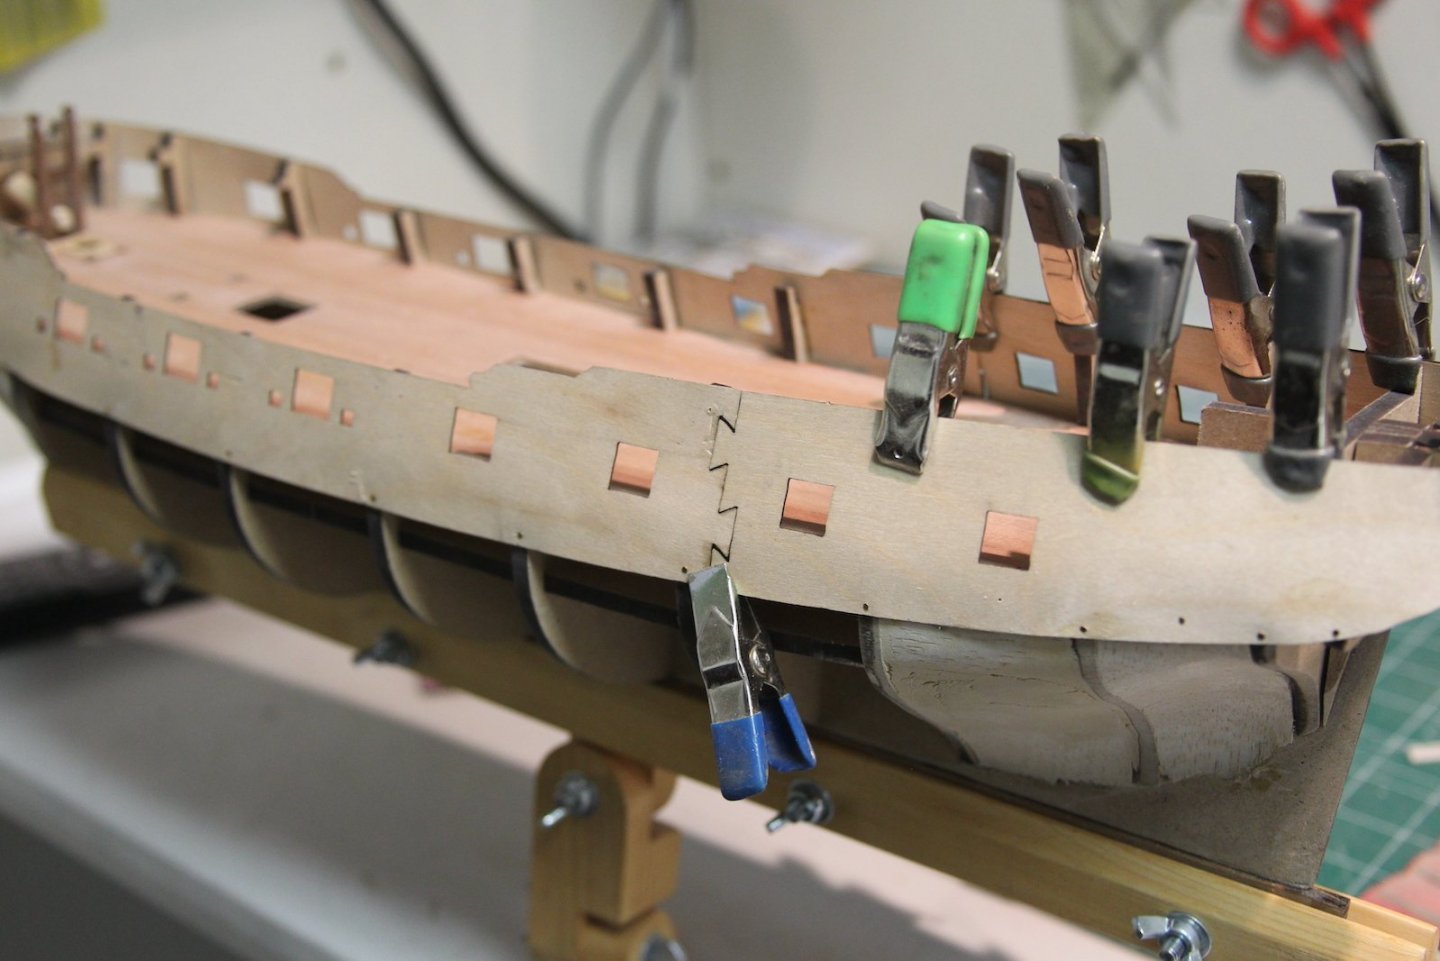
Aligning the gun ports always seems like a pretty simple process when I see it on other builds, but always ends up being a little sketchy. Obviously a crucial process and sets the stage for the rest of the planking from wales on down. The pre-fabricated gun port templates with the peg line up pretty well, but of course there's some shifting and bending along the bulwarks. I soaked them in water for a couple hours to loosen them up, then clamped them to the sides of the ship - careful to line up the ridges with the bulwark posts that extend up through the deck. Then I left them there overnight to dry in that fixed position. Then, I glued them along the sides using PVA (wood) glue along the posts and outside the deck and add nails into the bulwarks and posts. I used a little bit of CA (super glue) on the inner posts just to hold the gun ports in place. But these posts will be removed later. The pre-fab template comes in to pieces that link together toward the stern. This is kinda funky because there's really nothing holding them together and very little space with which to adhere them. So, I added a flat piece of wood behind the seam to bolster the joint. I'm hoping it's thin enough that it won't interfere with planking - otherwise I'll remove it and let the wales hold it in place as it's planked. When the hull is planked, so shall the gun ports - so some imperfections will be covered. But, needless to say the smoother the job here, the easier it'll be to have a smoothly planked hull later.

- 419 replies
-
- 5
-
-
- Victory Models
- Pegasus
- (and 2 more)
-
Really, really nicely done.
-
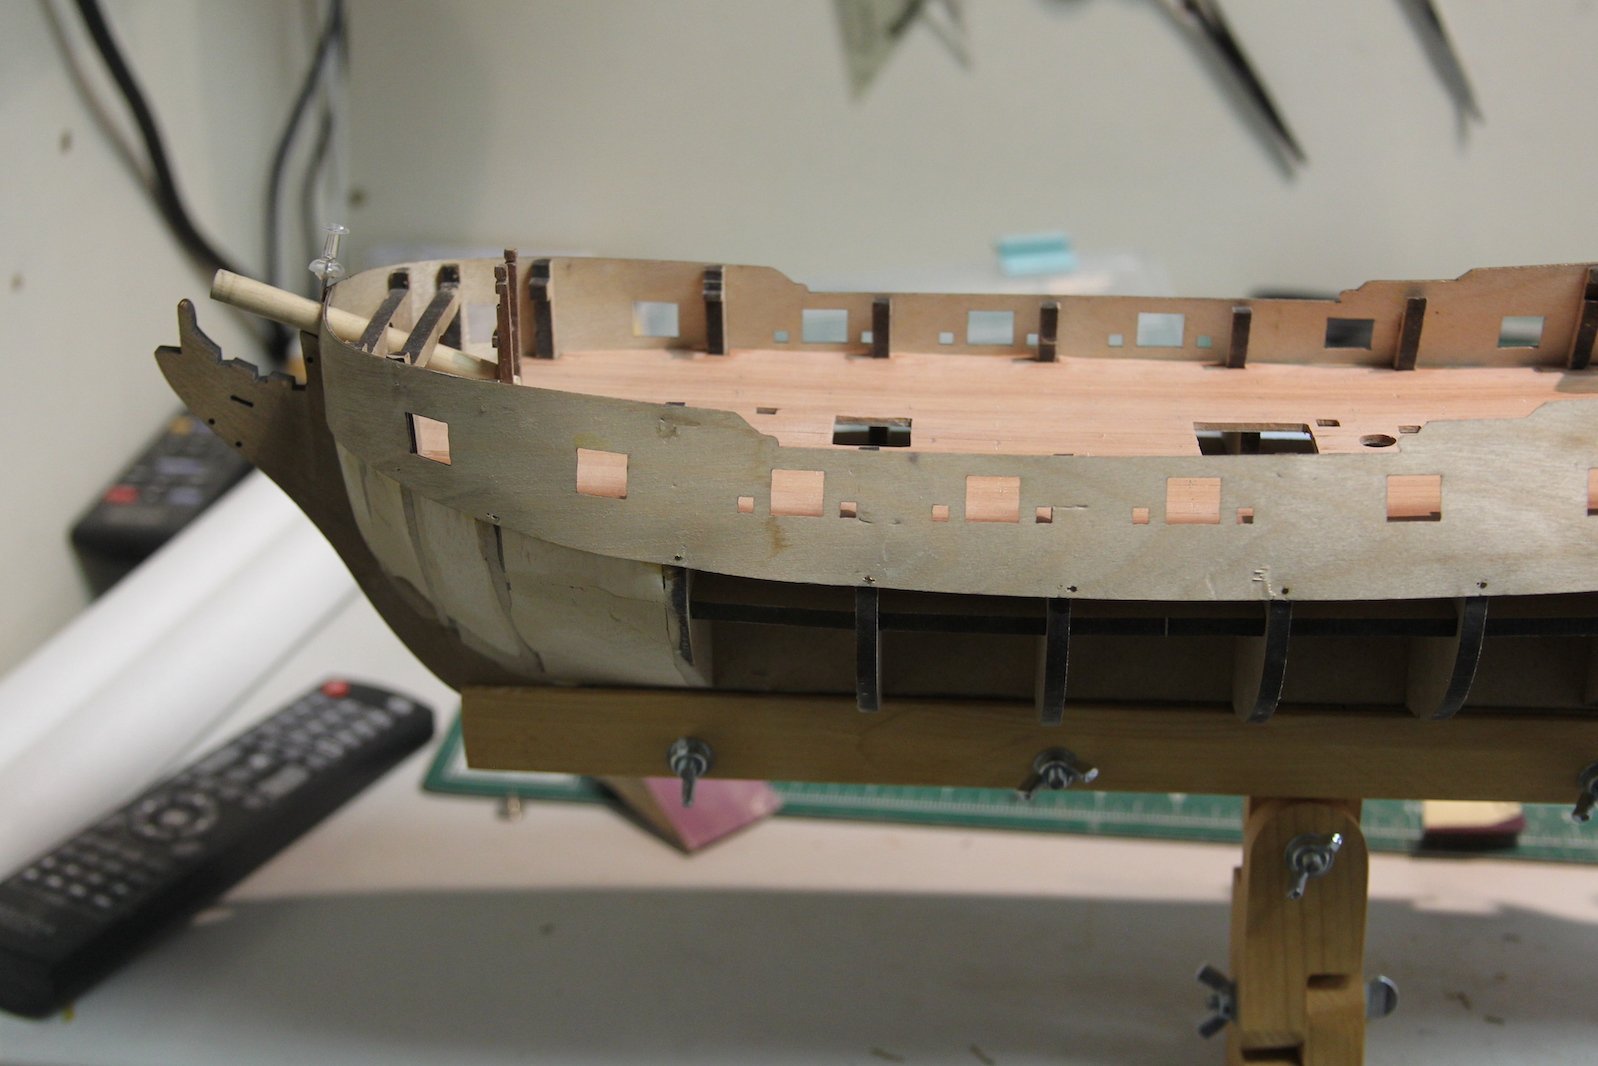
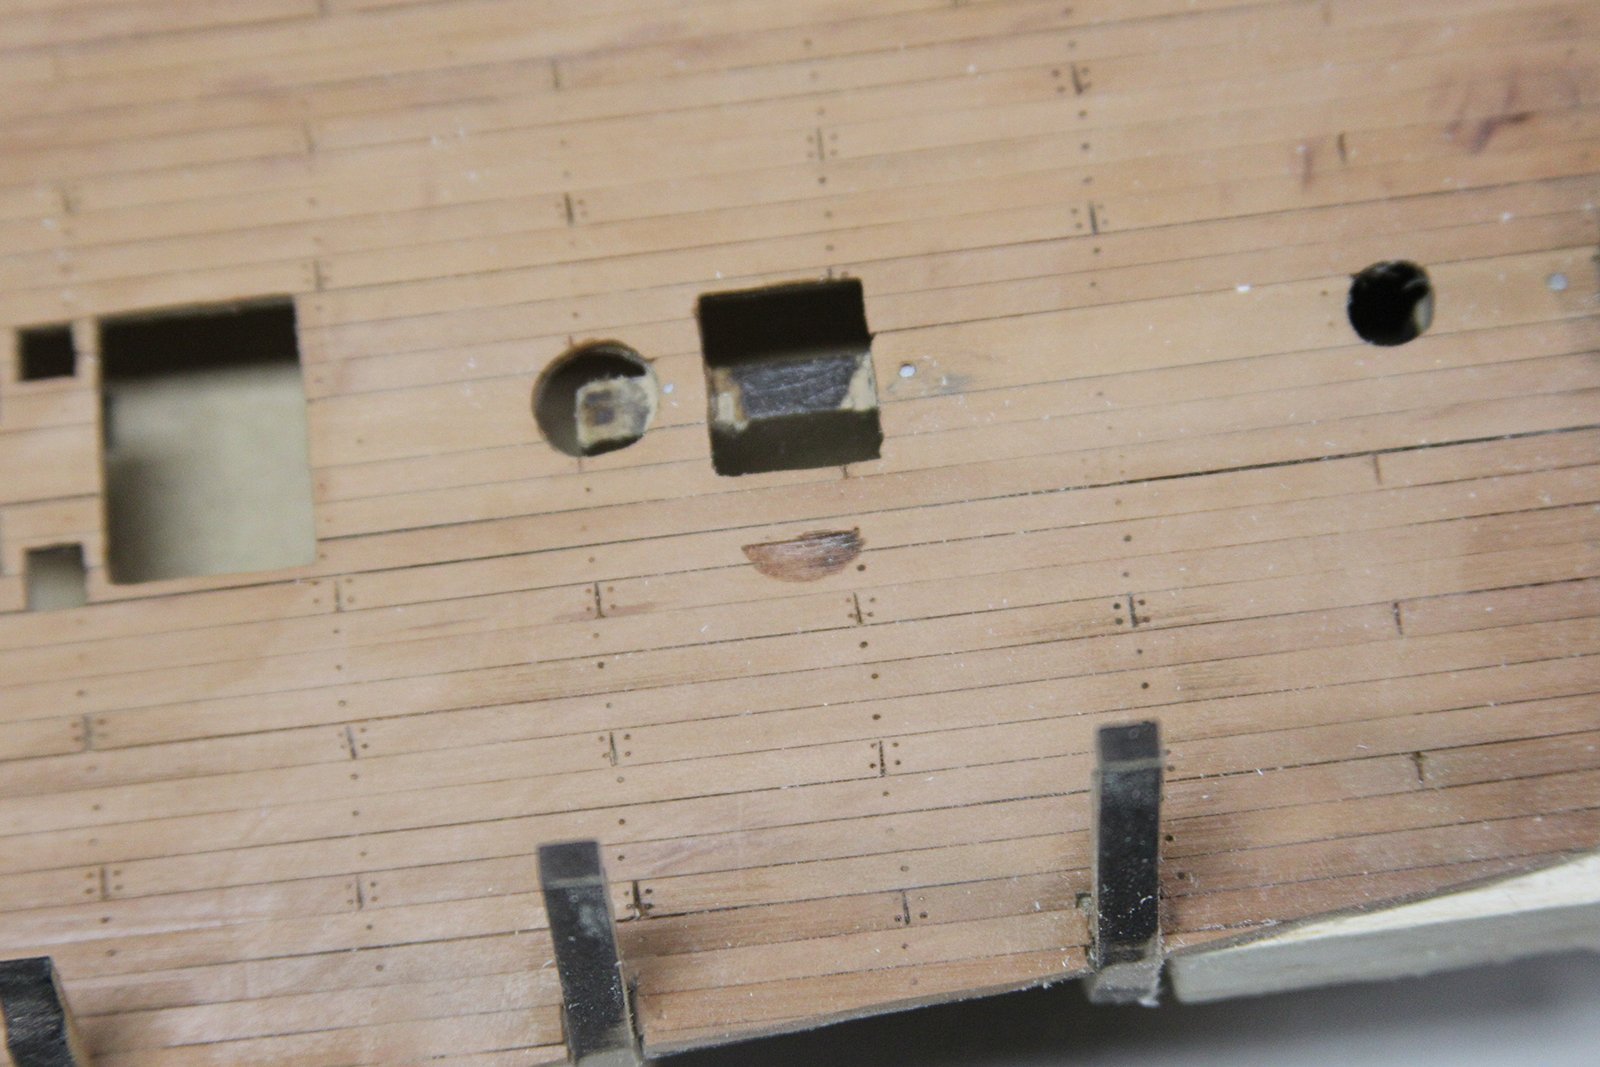
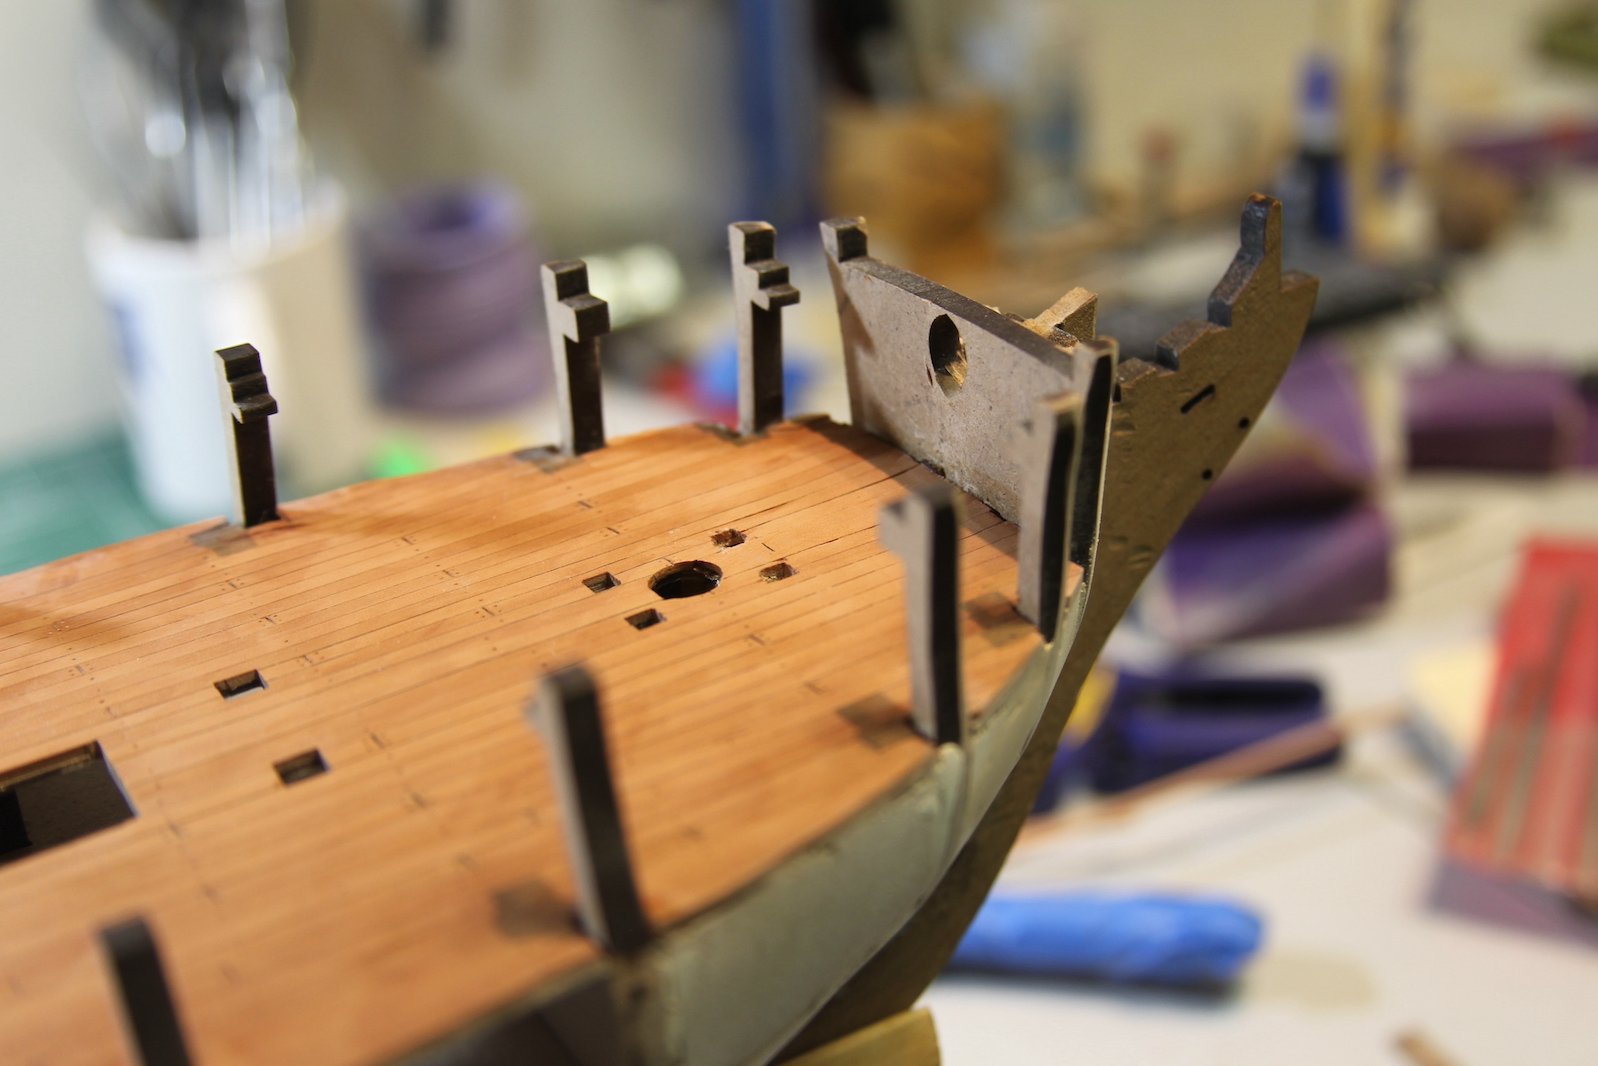
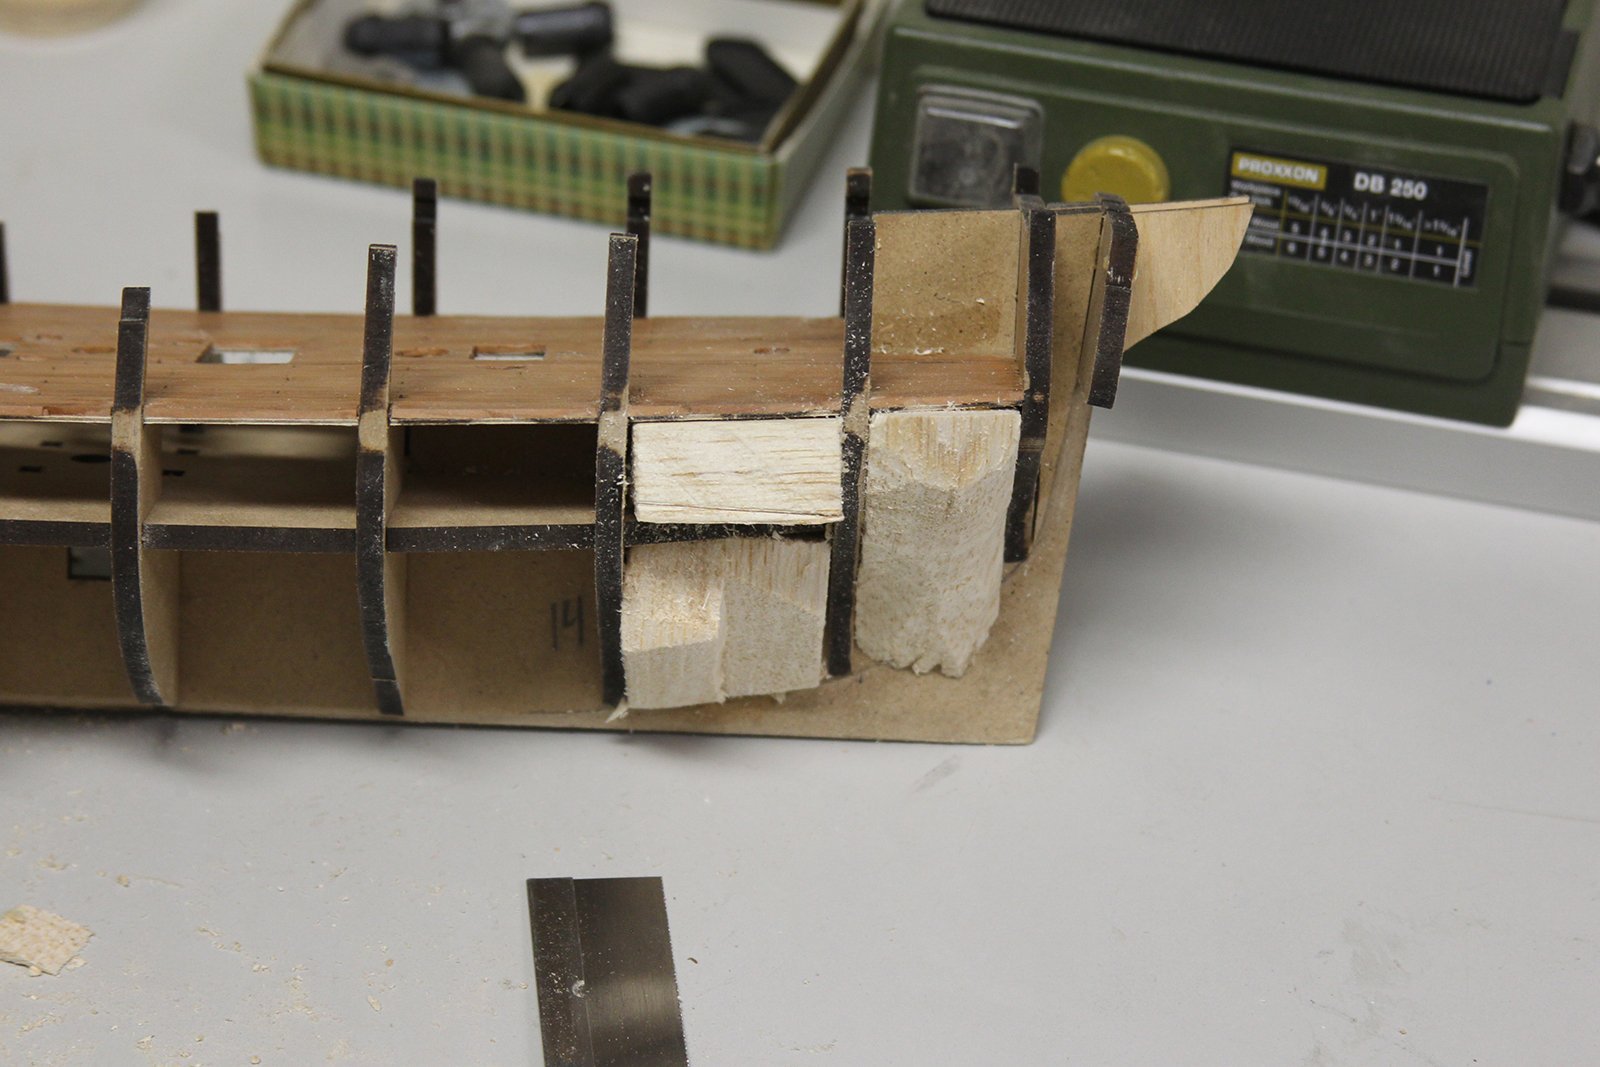
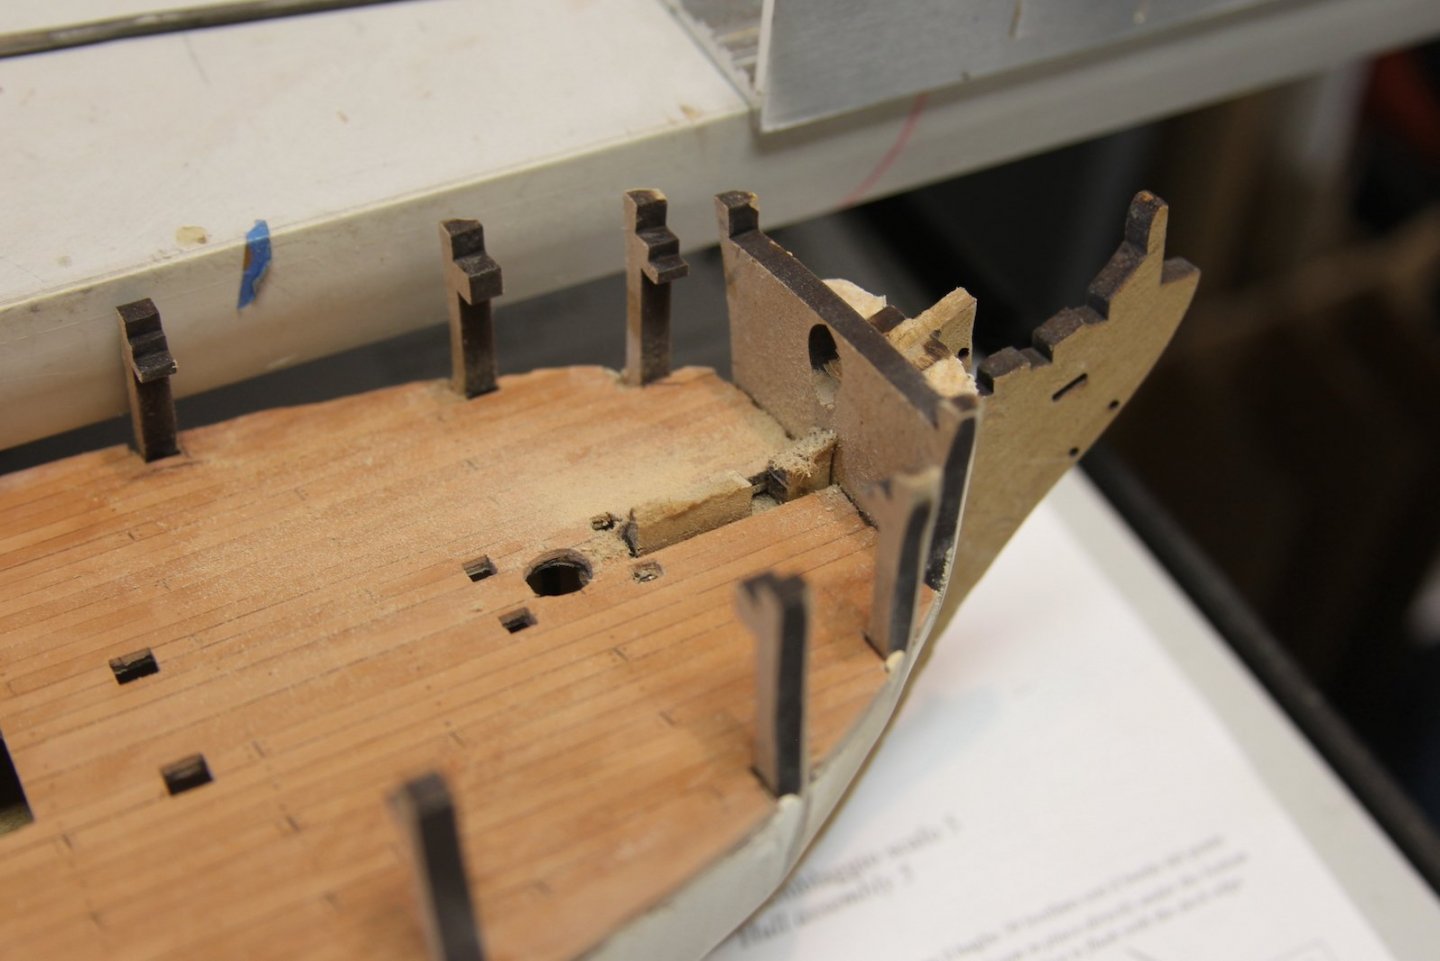
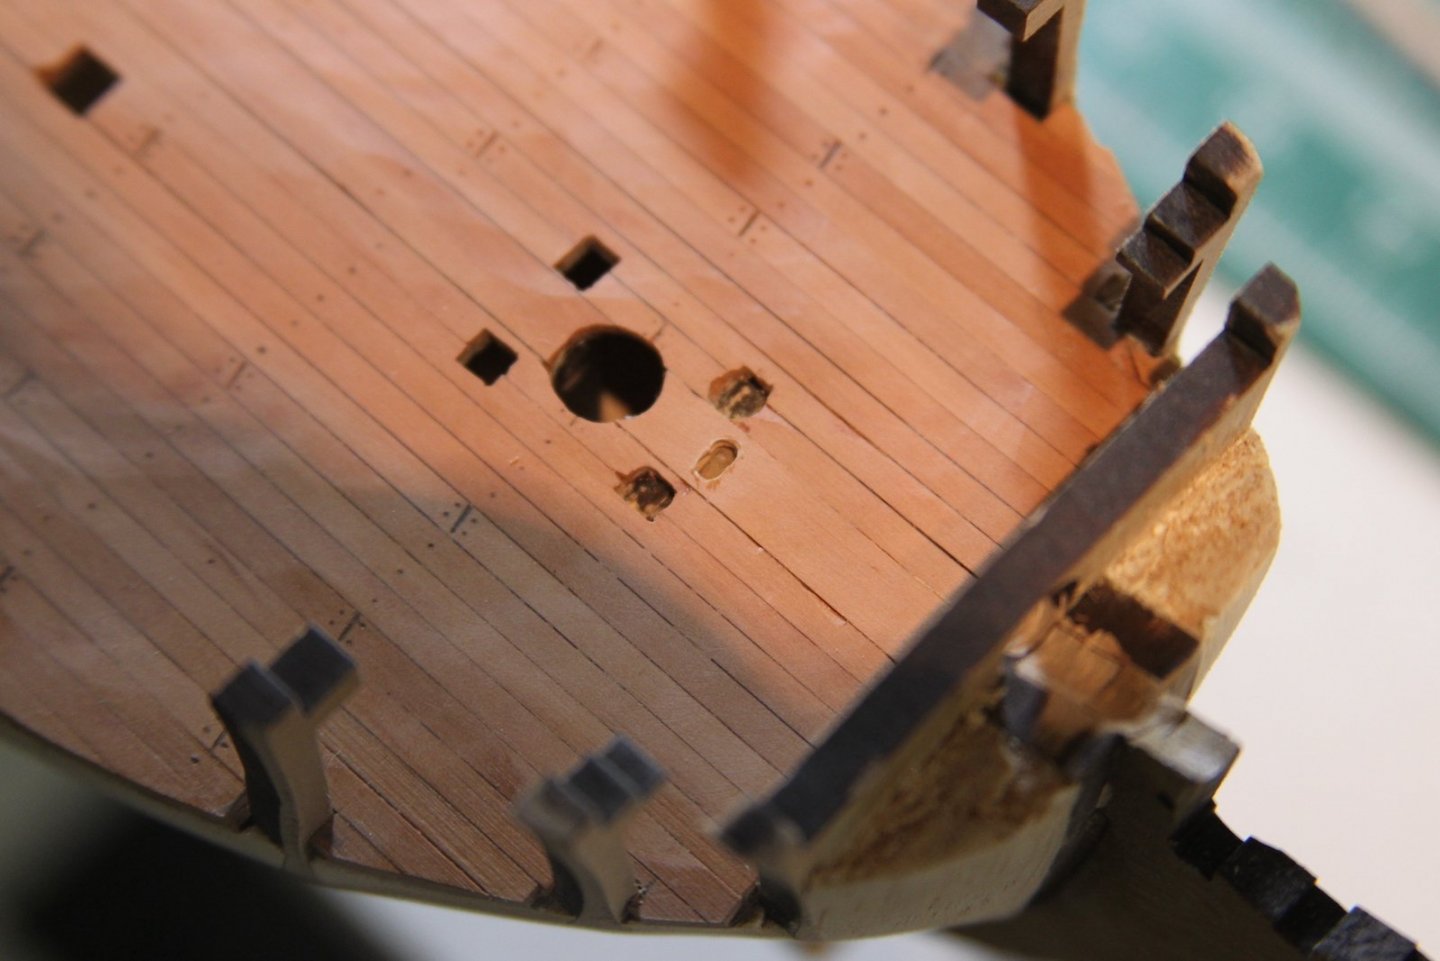
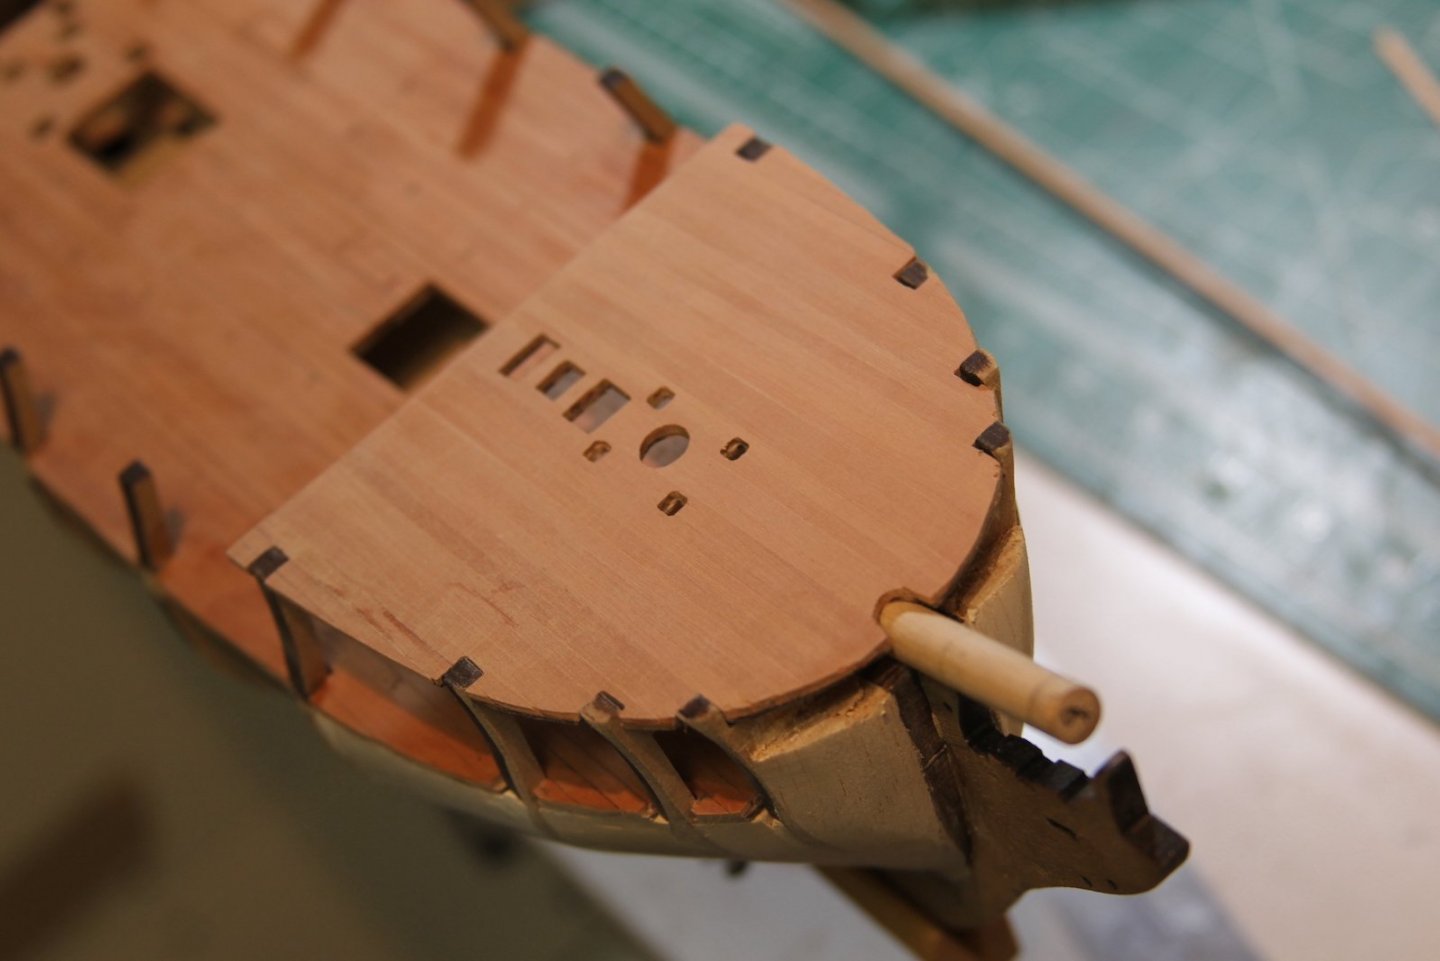
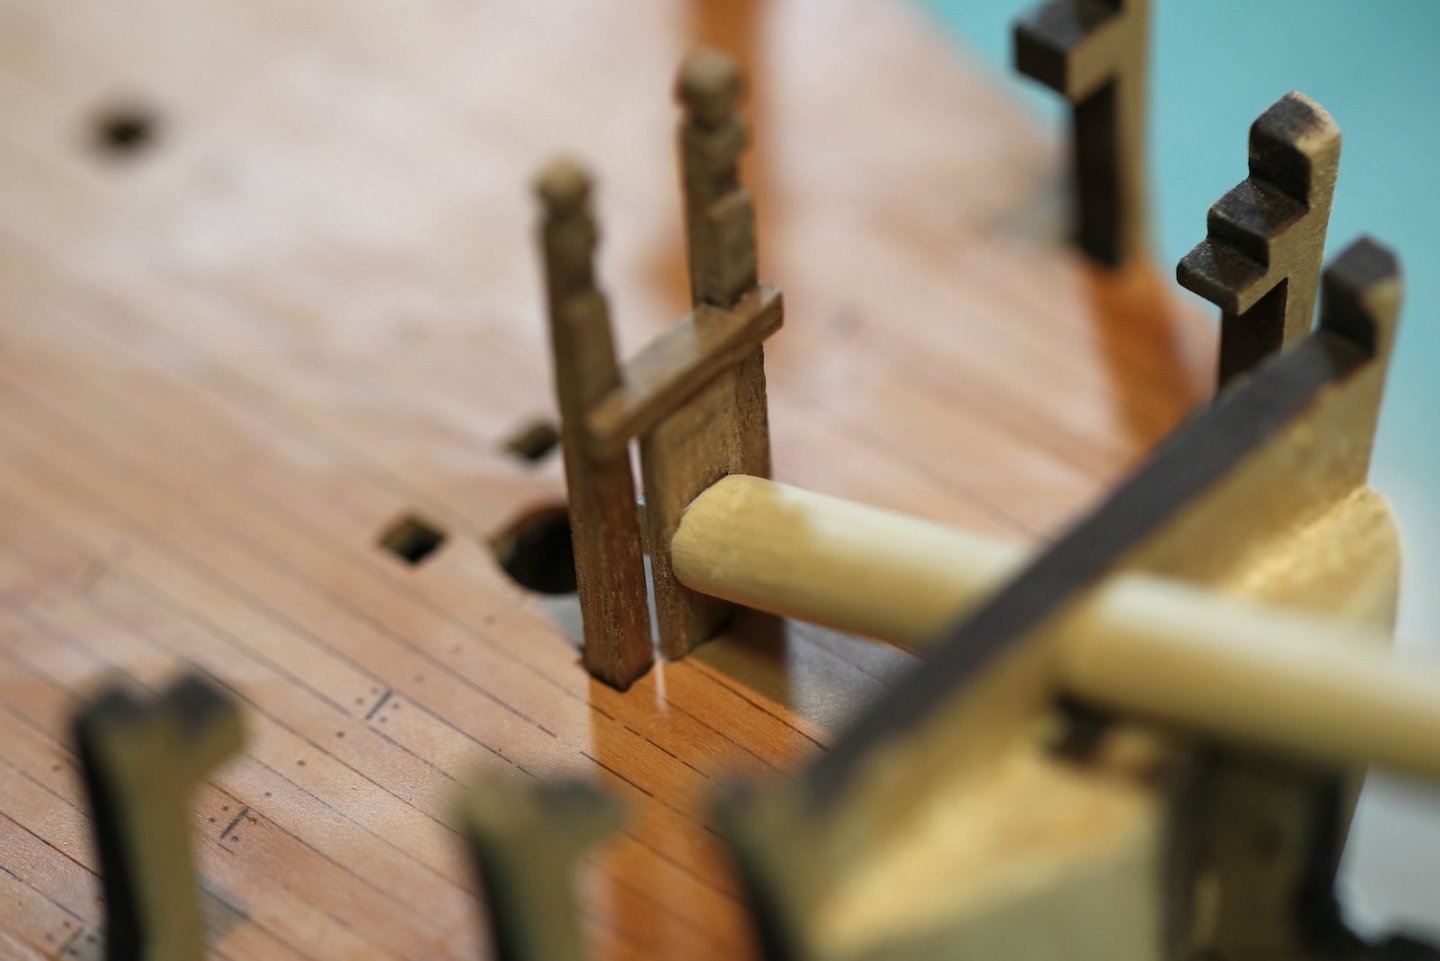
So.... this is what happens when you're not paying attention and you knock a little can of wood filler off the shelf onto the deck. Doh. The little repair did give me the opportunity to smooth out the deck a little more and give it a good couple more runs with some 400 & 600 grit. After that bit of a distraction, I moved on the bow of the ship. one of the things I wasn't thrilled about was the extra 'meat' at the front. I realize a couple things here of course - A - it provides extra support for the upper deck and B - there won't be much to see. None-the-less, I wanted a little more accurate representation of the bowsprit. Also, I figured it would help me out when it's time to mount the pesky gunport patterns. So, I shaved off the extra materials, put together new bitts to extend the bowsprit. I'll add a couple more details later (probably manger boards, etc). I test fit the upper deck here just to see how it'd look.


- 419 replies
-
- 11
-
-
- Victory Models
- Pegasus
- (and 2 more)
-
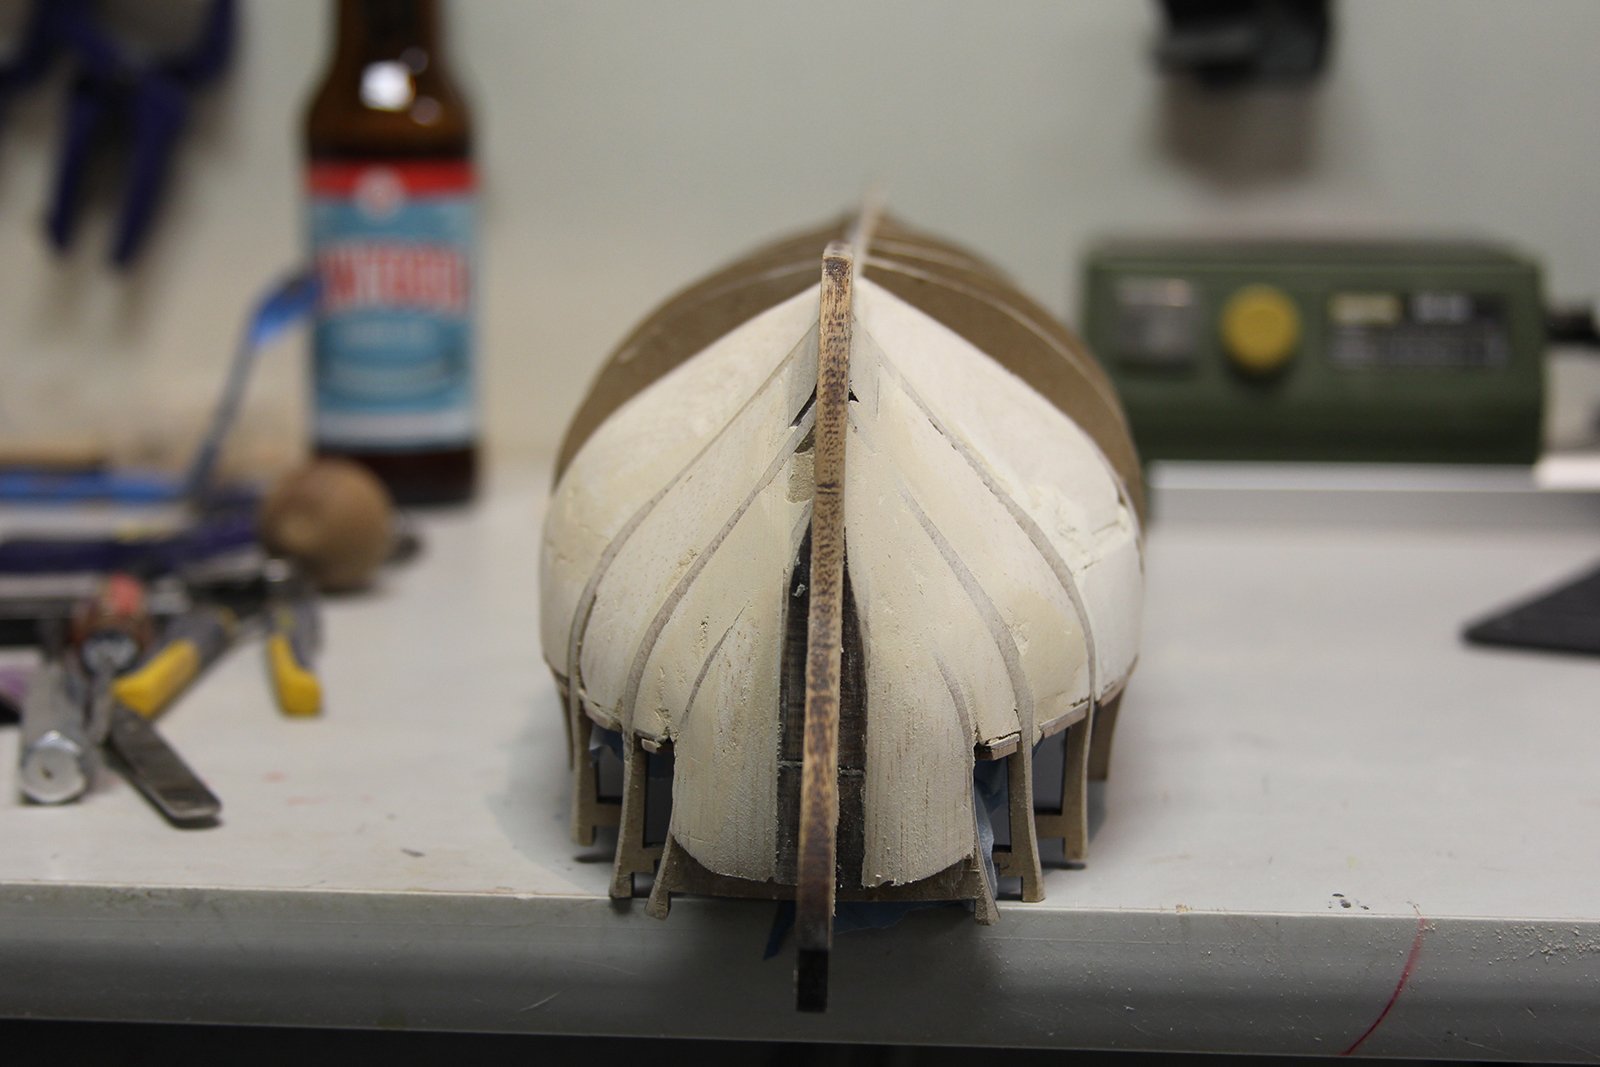
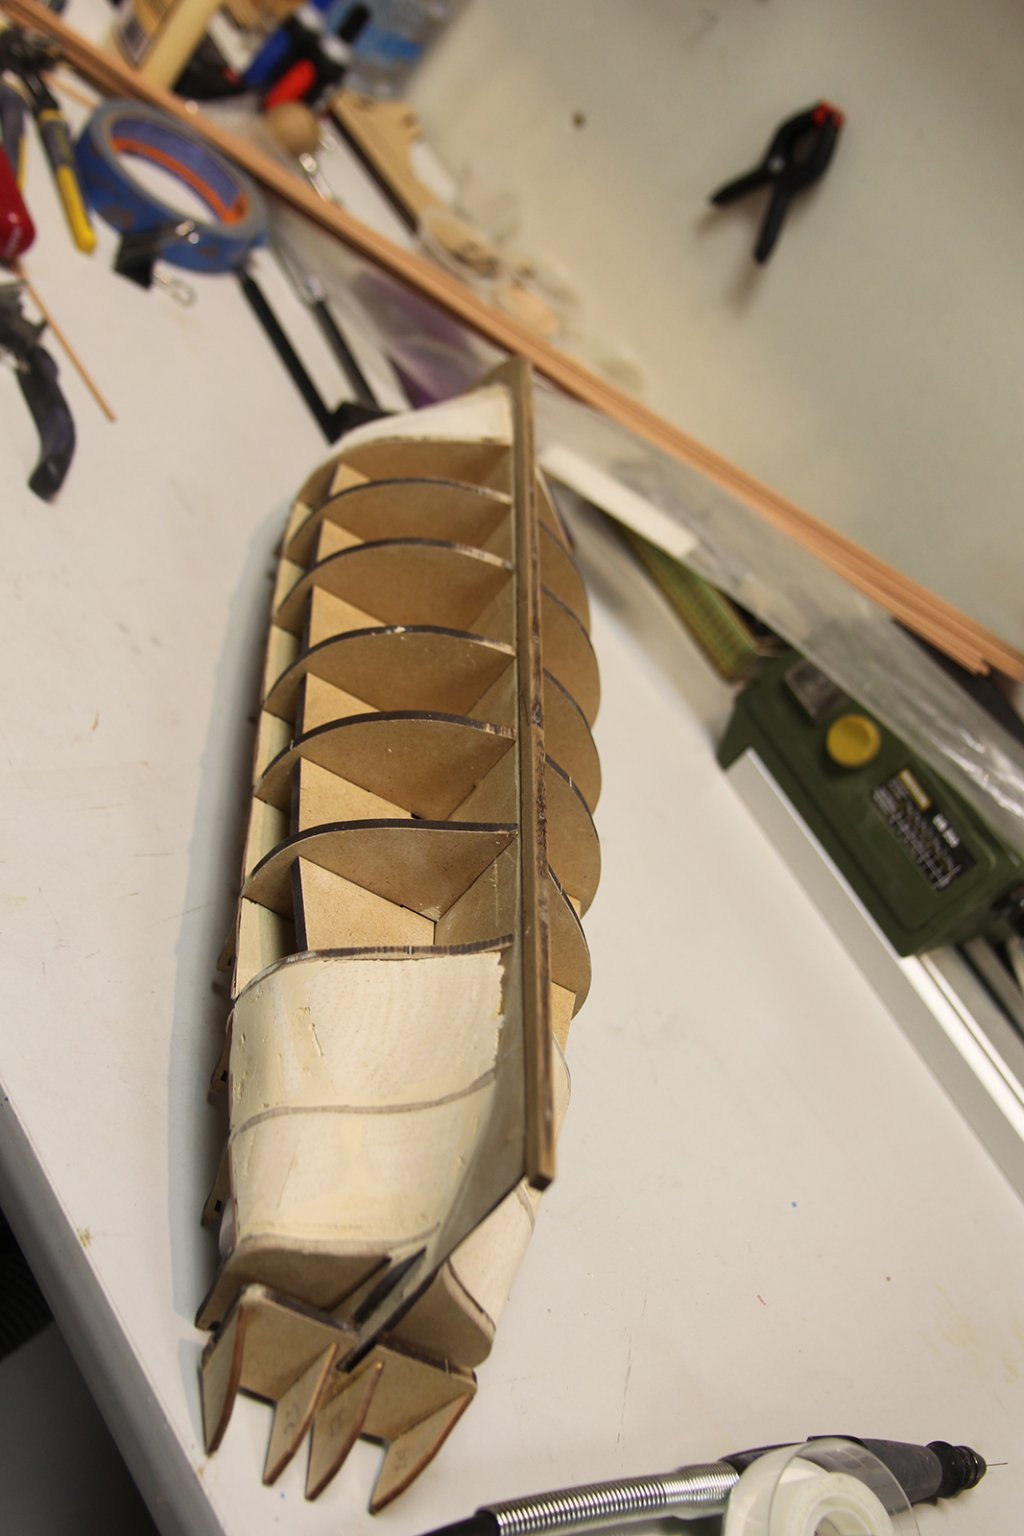
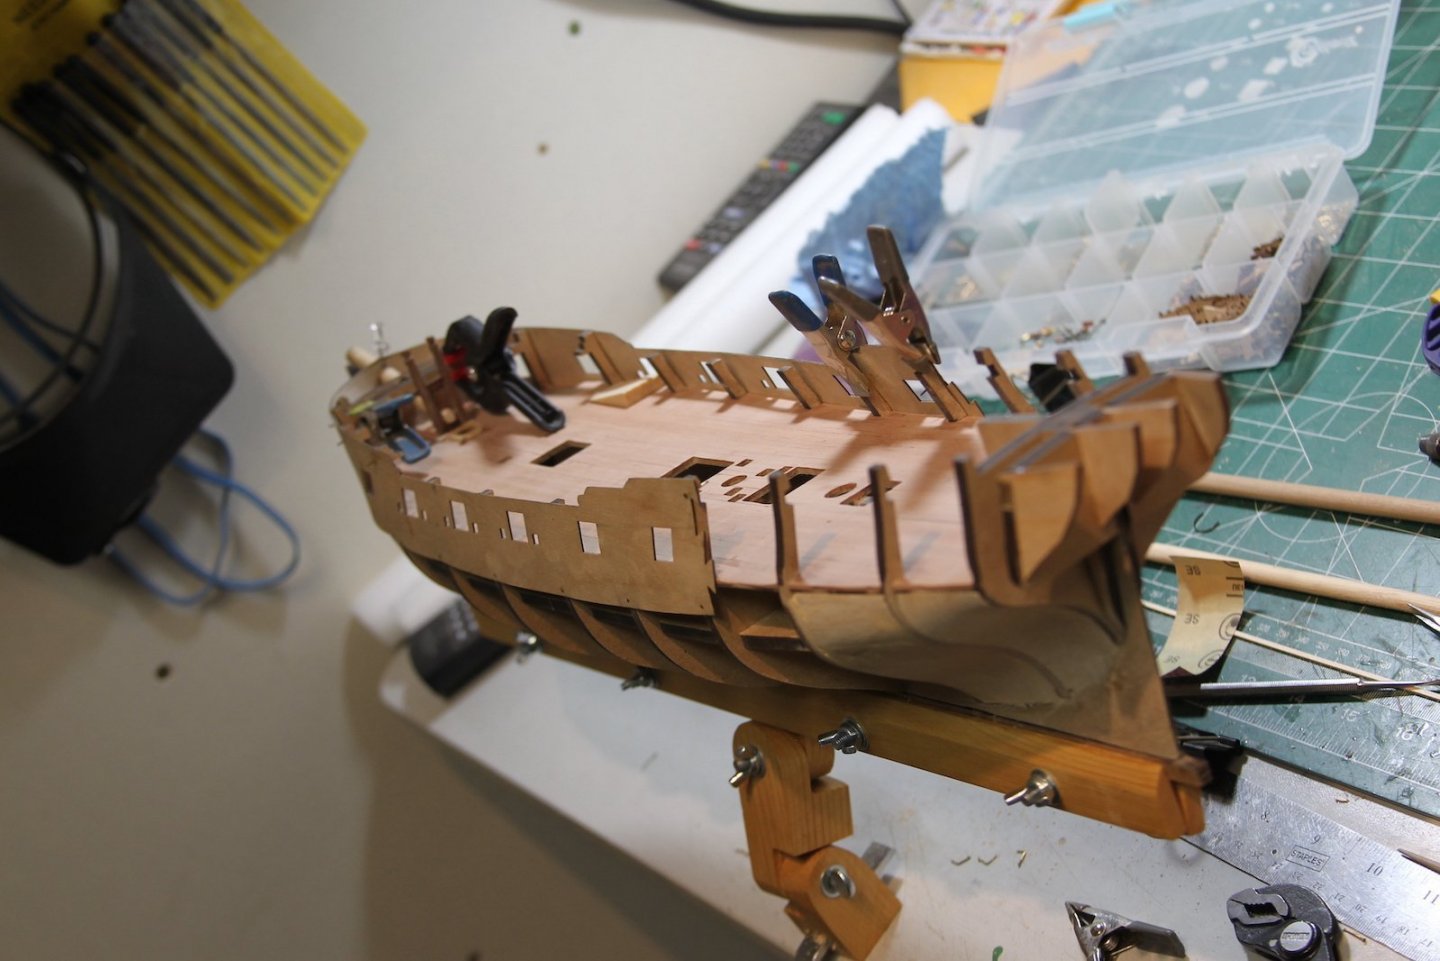
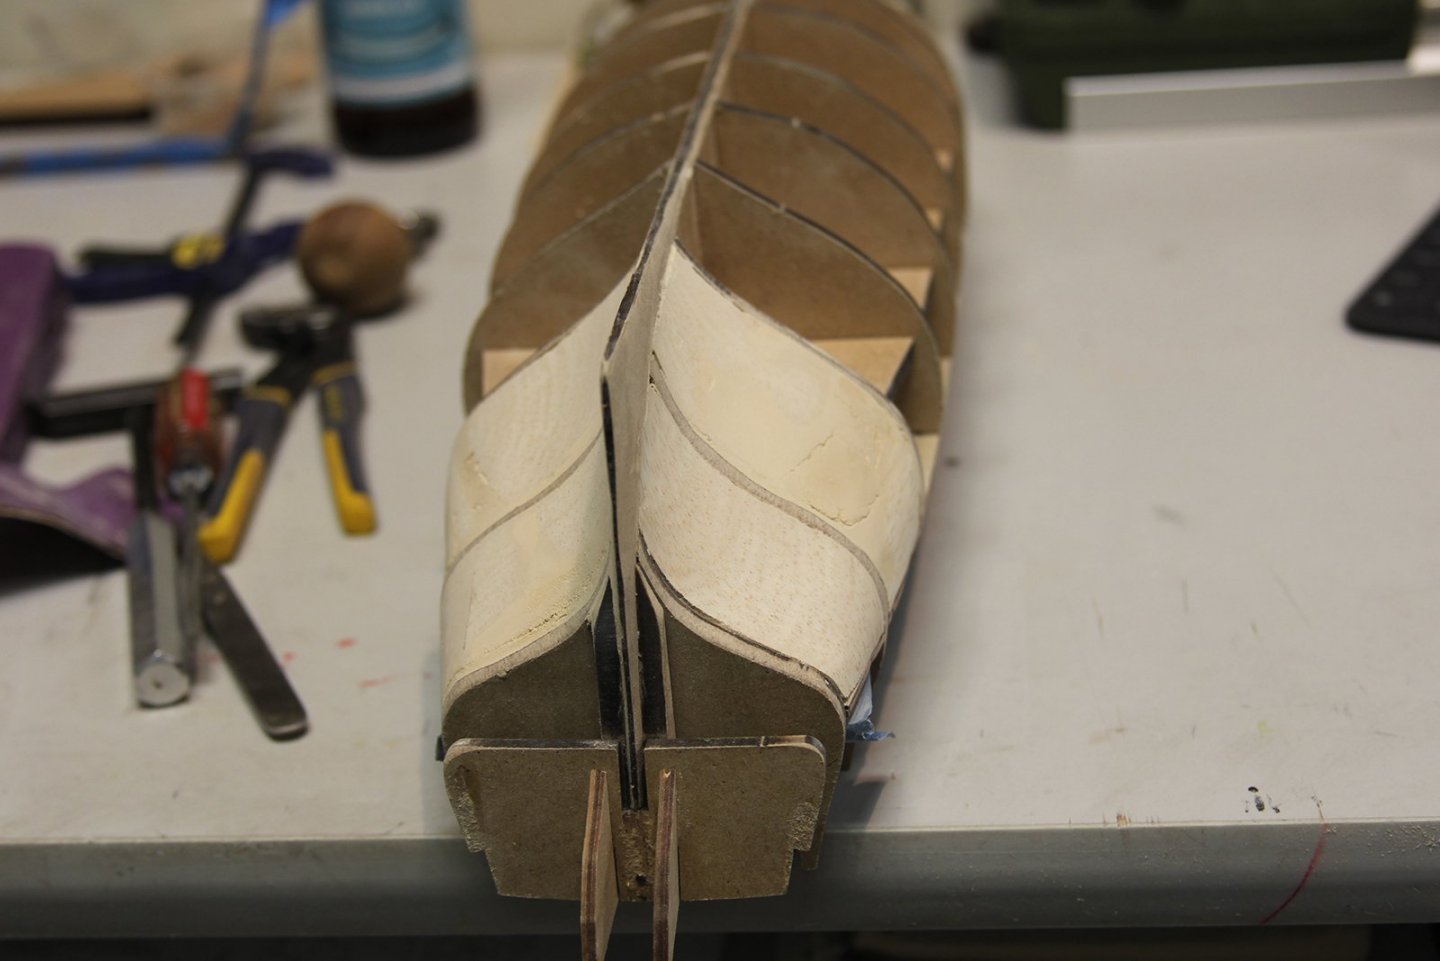
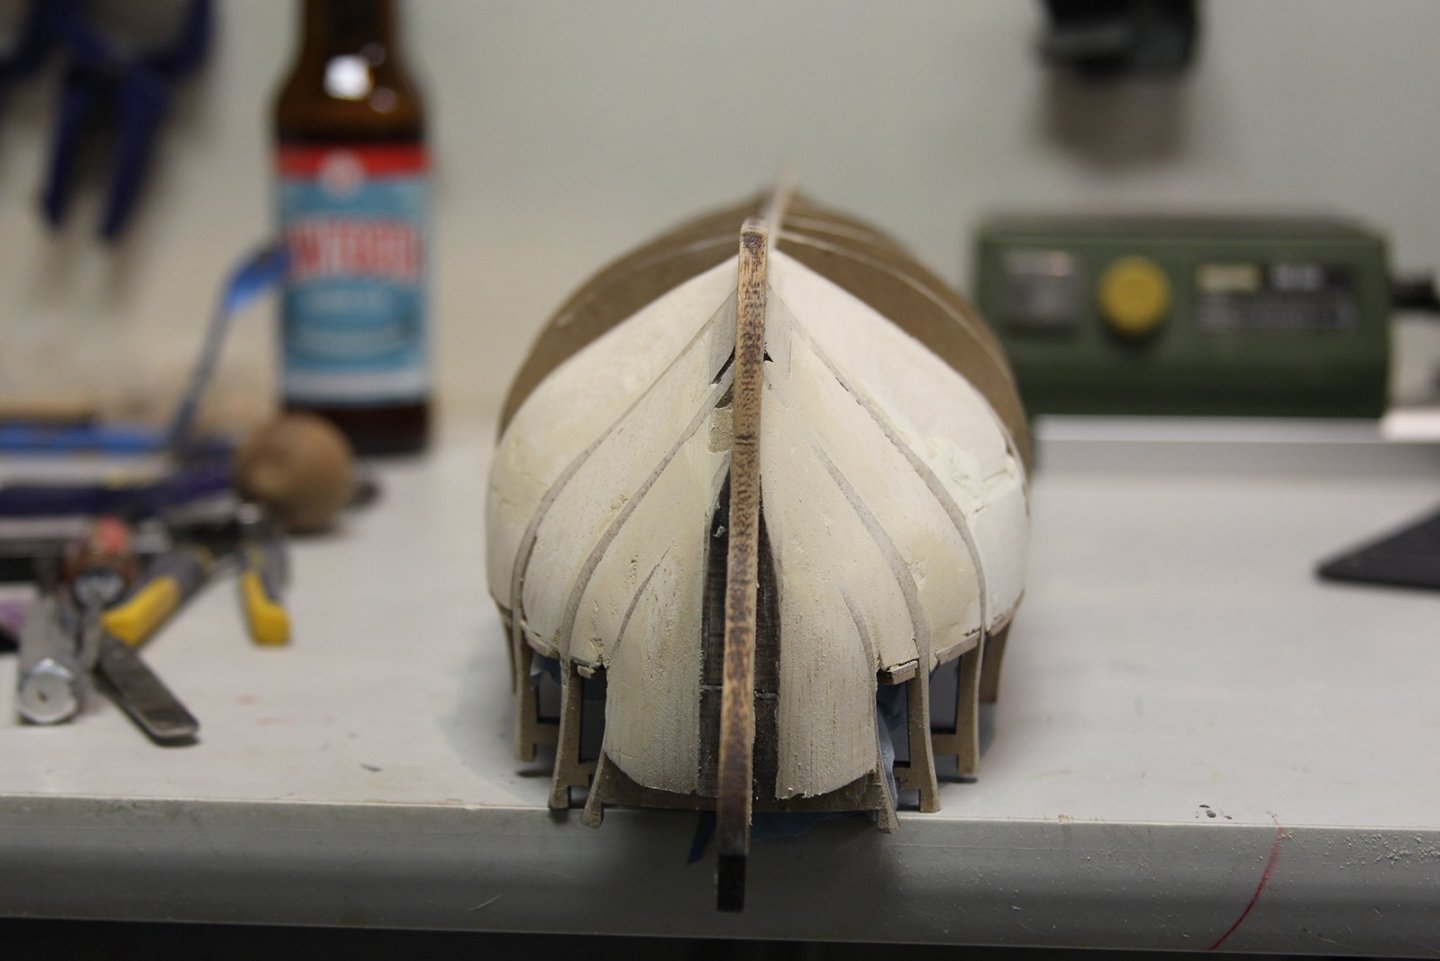
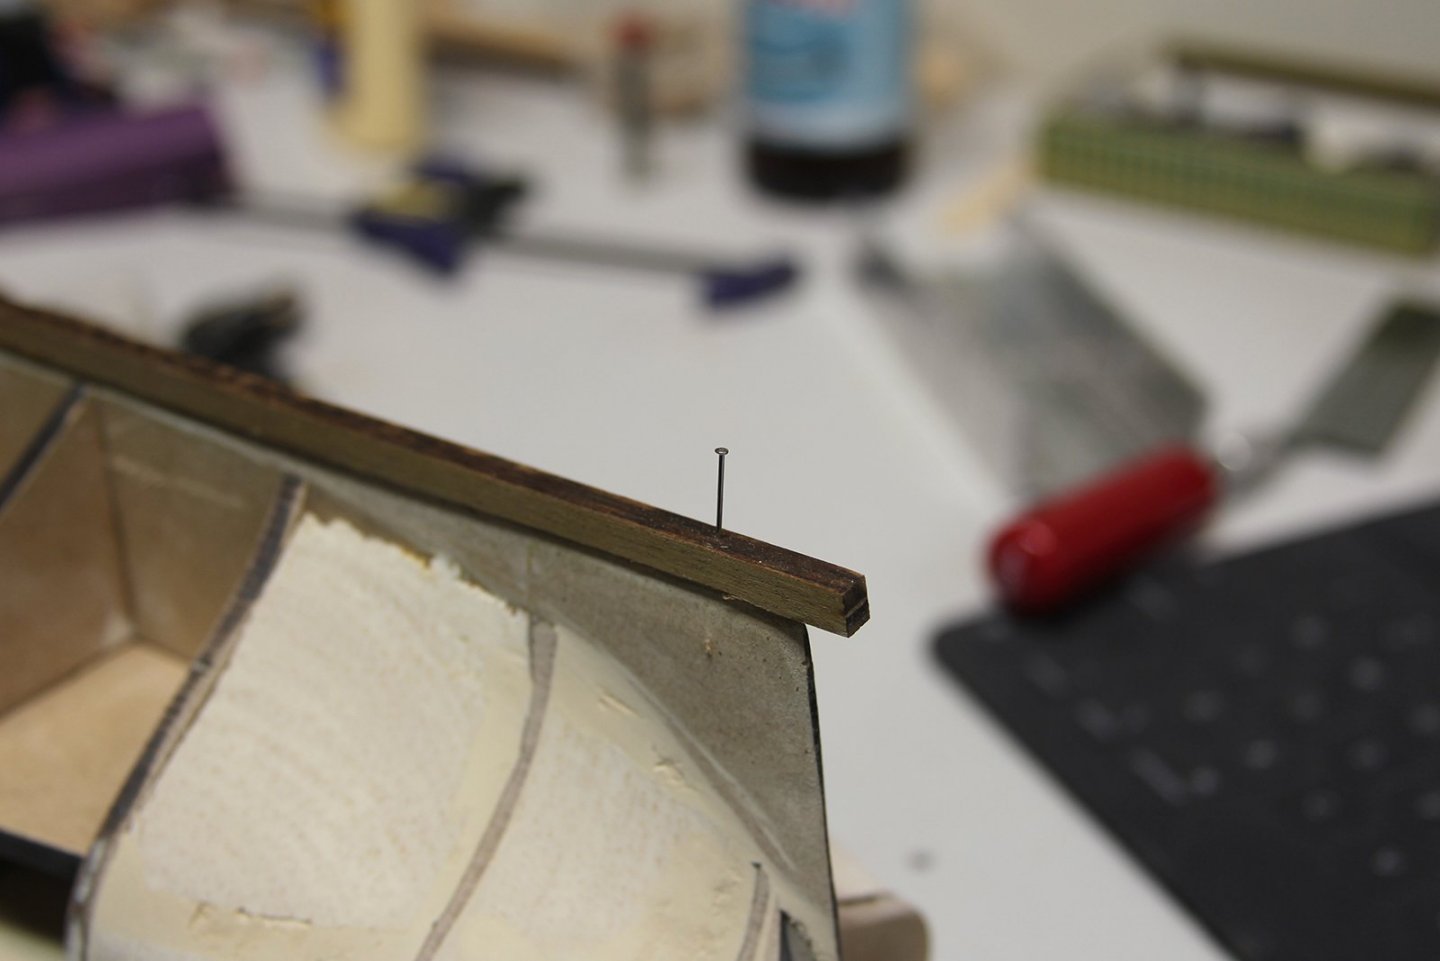
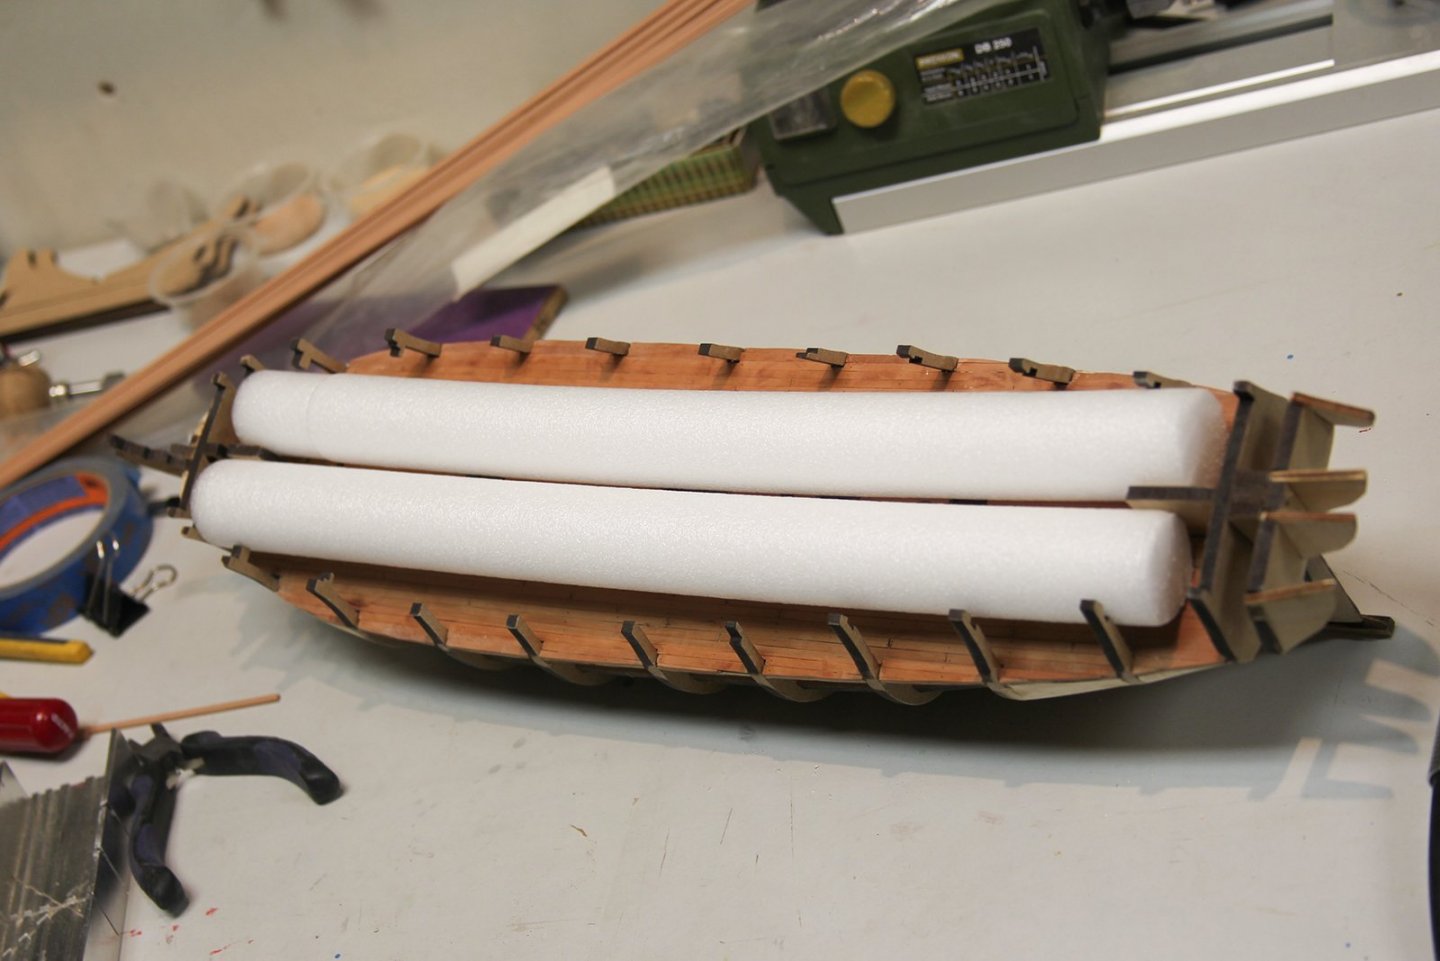
Planking the hull is always the most difficult aspect of a build for me. Not only is it tedious, but it's a challenging and precise endeavour that tolerates few mistakes. Which isn't great because quite honestly - I never really got the hang of it - even after go through all the wonderful tutorials available here. To this end - I'm a pretty big fan of anything I can do to facilitate the process for myself. That means filling the spaces between bulwarks with balsa wood so that I have more solid footing with which to form and mount the planks. I started out by marking and sanding down the bearding line, then filling the spaces with chunks fo balsa. As most of you know, there's just a lot of carving, cutting, and sanding until you get a smooth consistent surface. Inconsistencies are filled in with wood filler, then more sanding. This is always one of the messiest parts of the build (probably next to sanding the hull itself), and I kind of wish I'd taken a couple of photos of the hobby room and garage during the process. Once I got a surface I'm happy with, I remounted the keel. I've always had some difficulty with a keel staying in place with just glue (regardless of the type of glue used - especially as the model is moved around and put in and out of a vise) so in recent builds I've developed a technique where I drill a small hole all the way down through the keel into the hull, then use straight pins as mounting nails in addition to wood glue. This seems to work pretty well, and is an important strengthener. This last photo is just a fun little sidebar - I don't even remember where I got this soft styrofoam tubes, but they work perfectly to protect the deck when I have to have the ship upside down to work on the hull. An example of using whatever's handy during these builds.


- 419 replies
-
- 10
-
-
- Victory Models
- Pegasus
- (and 2 more)
-
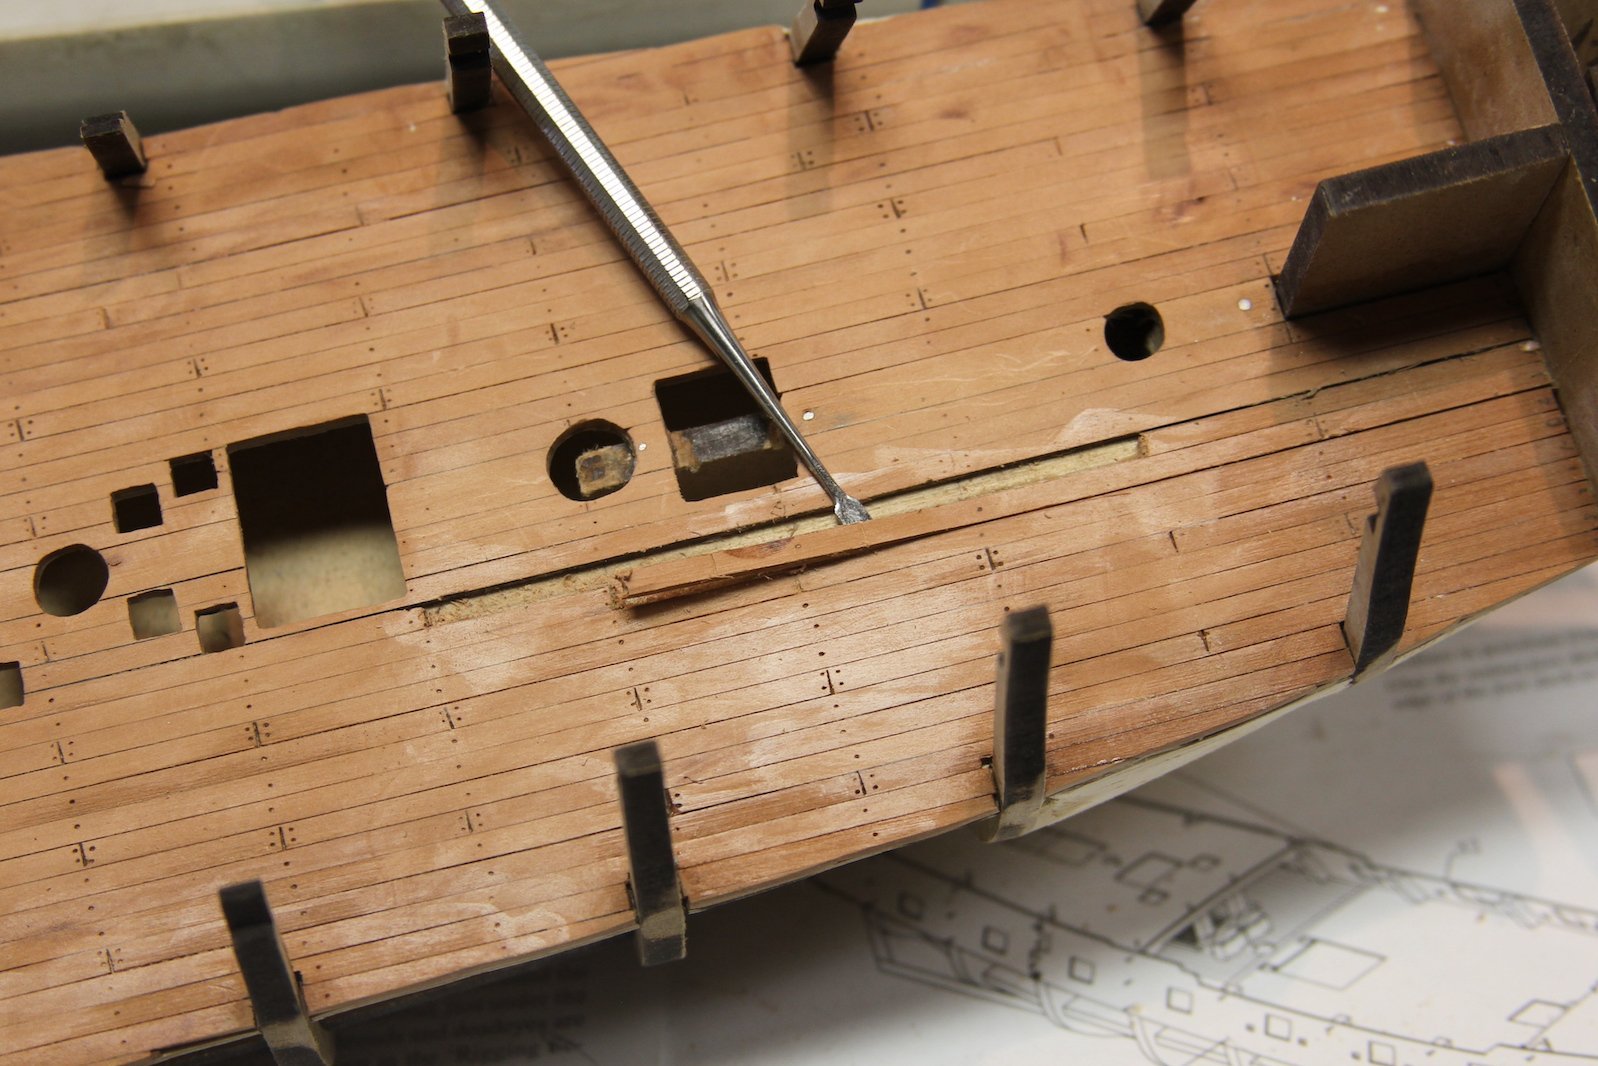
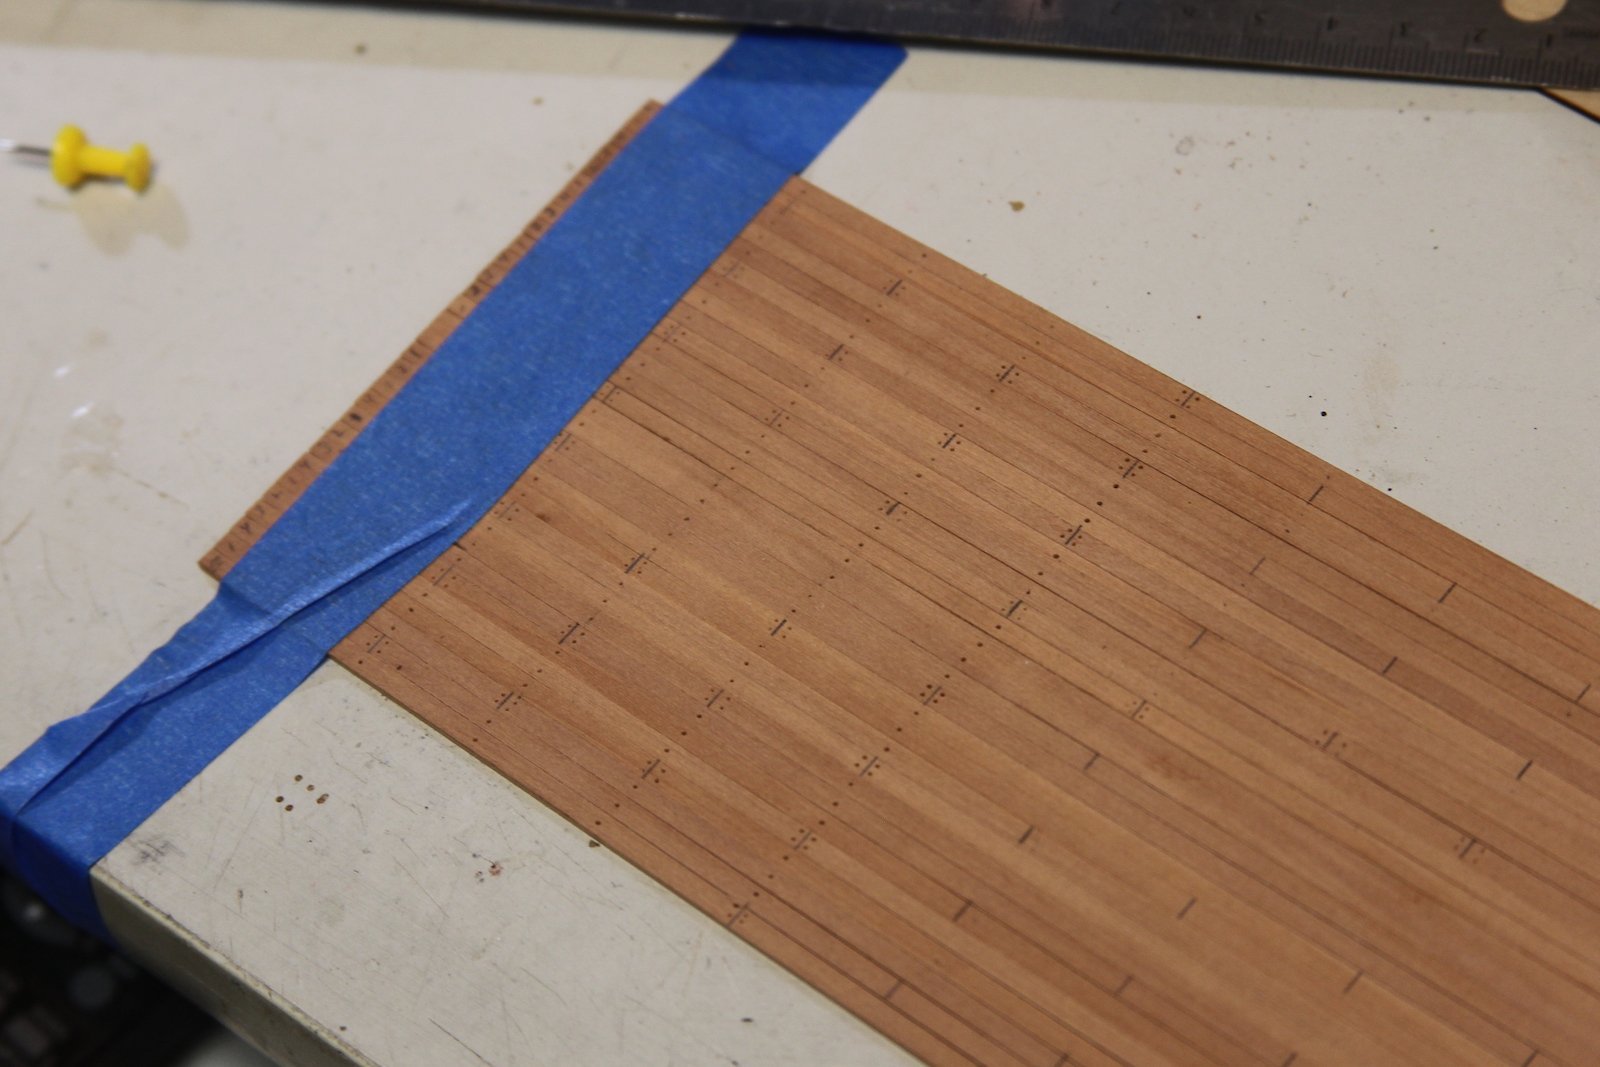
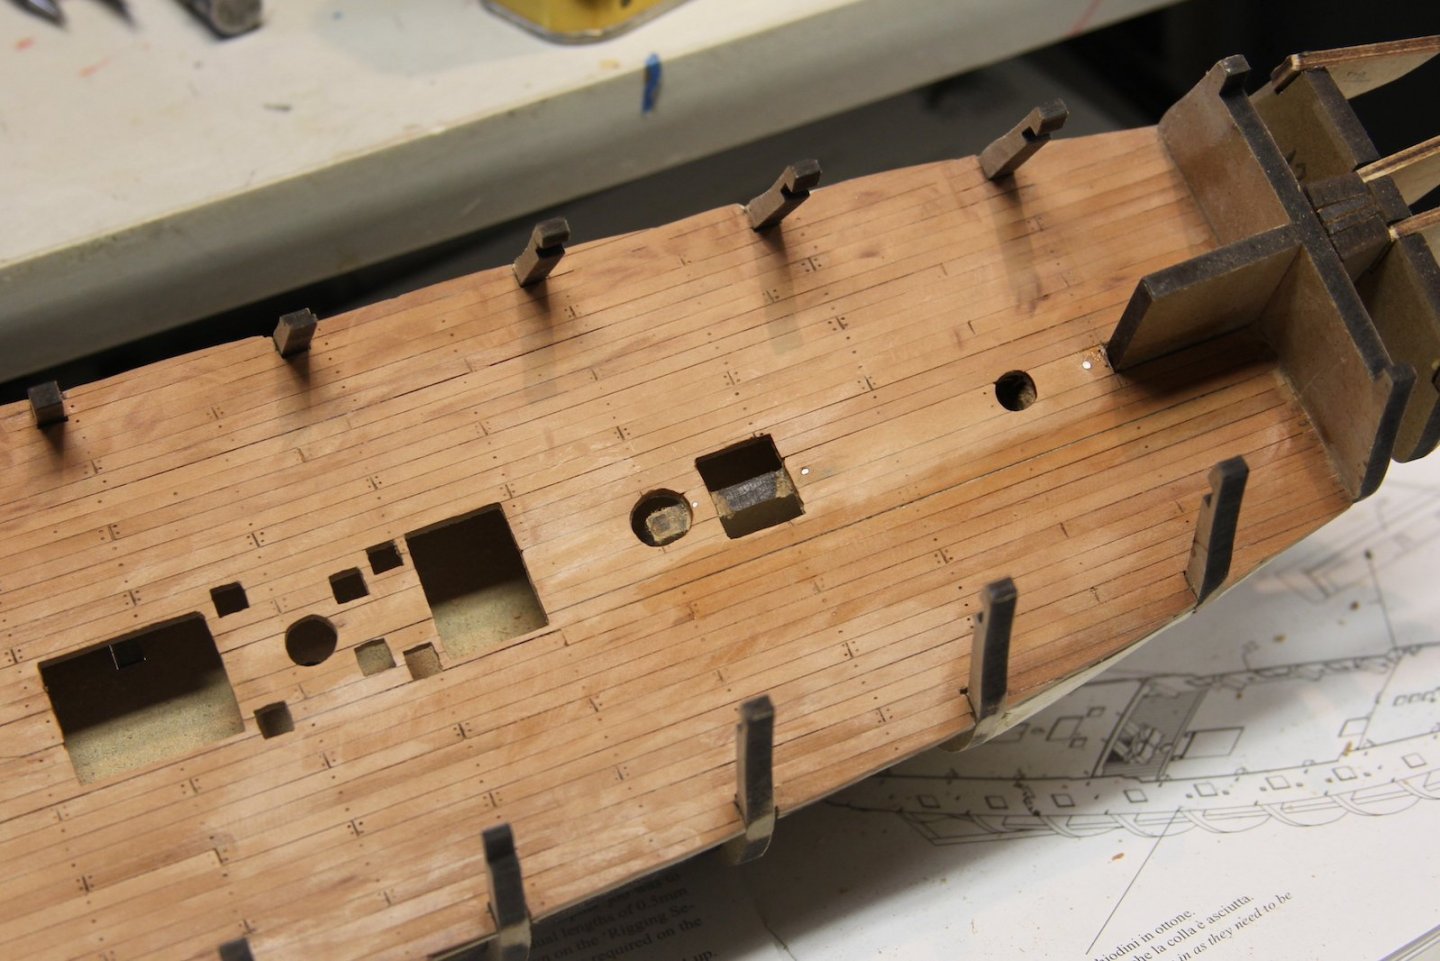
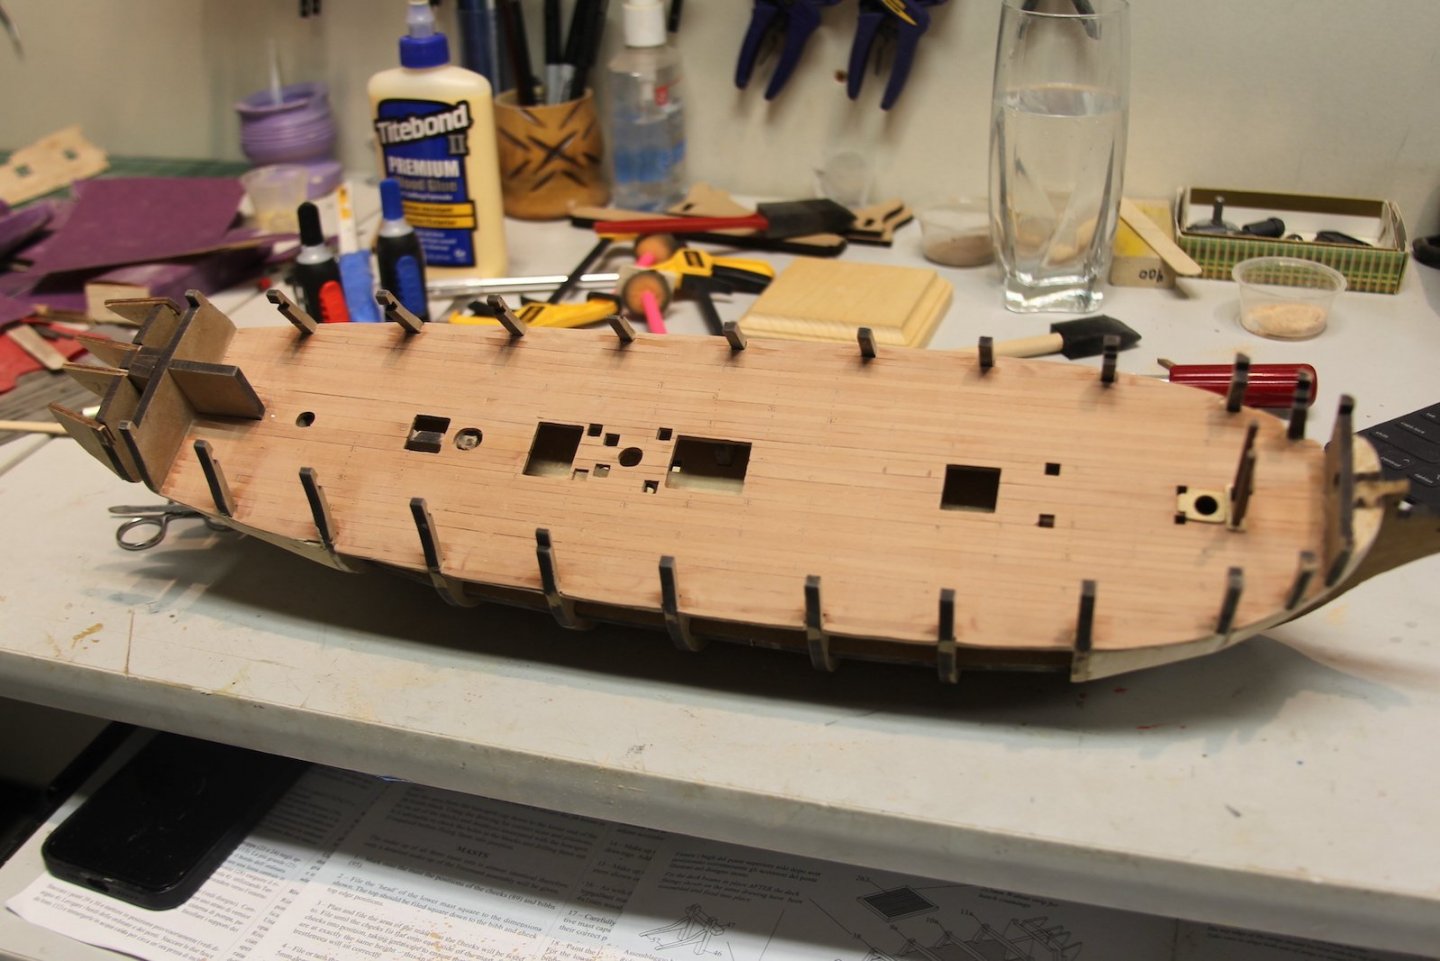
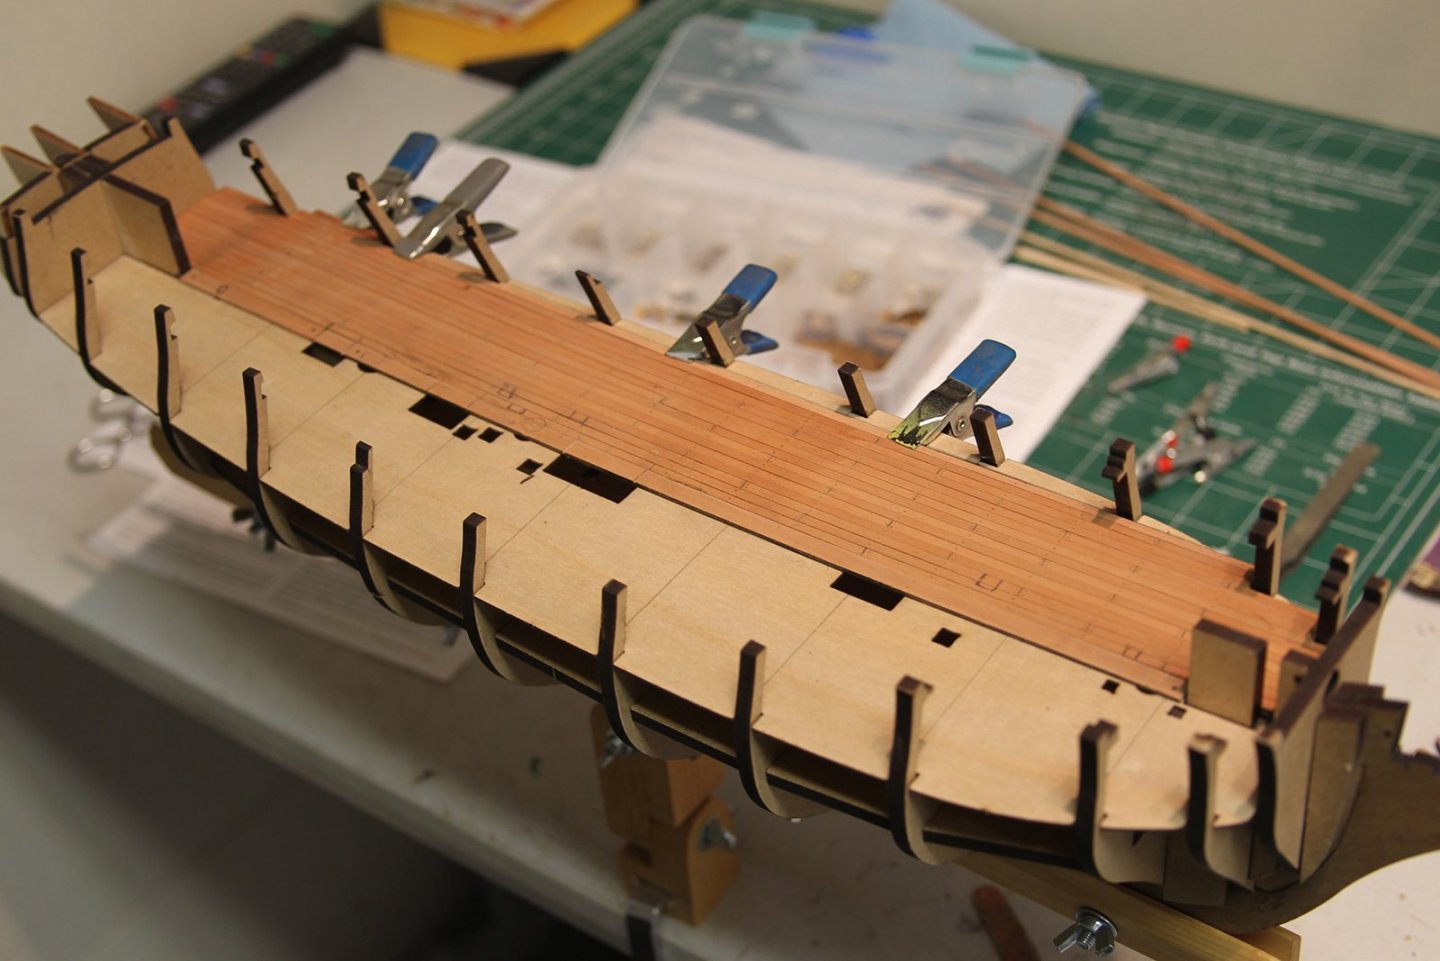
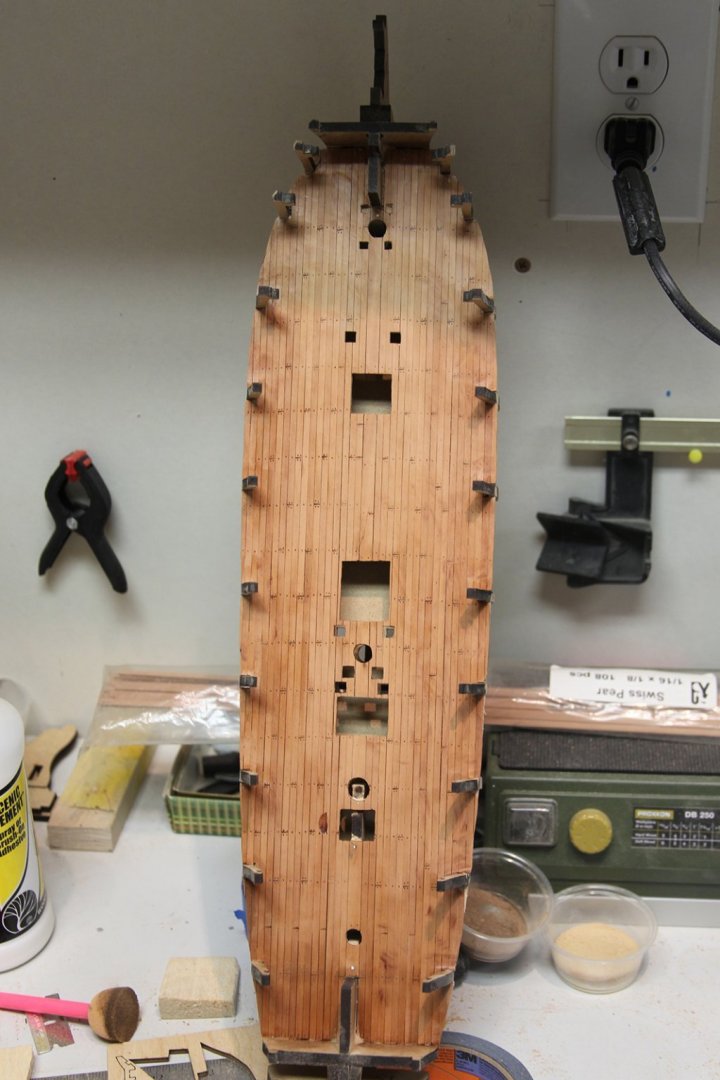
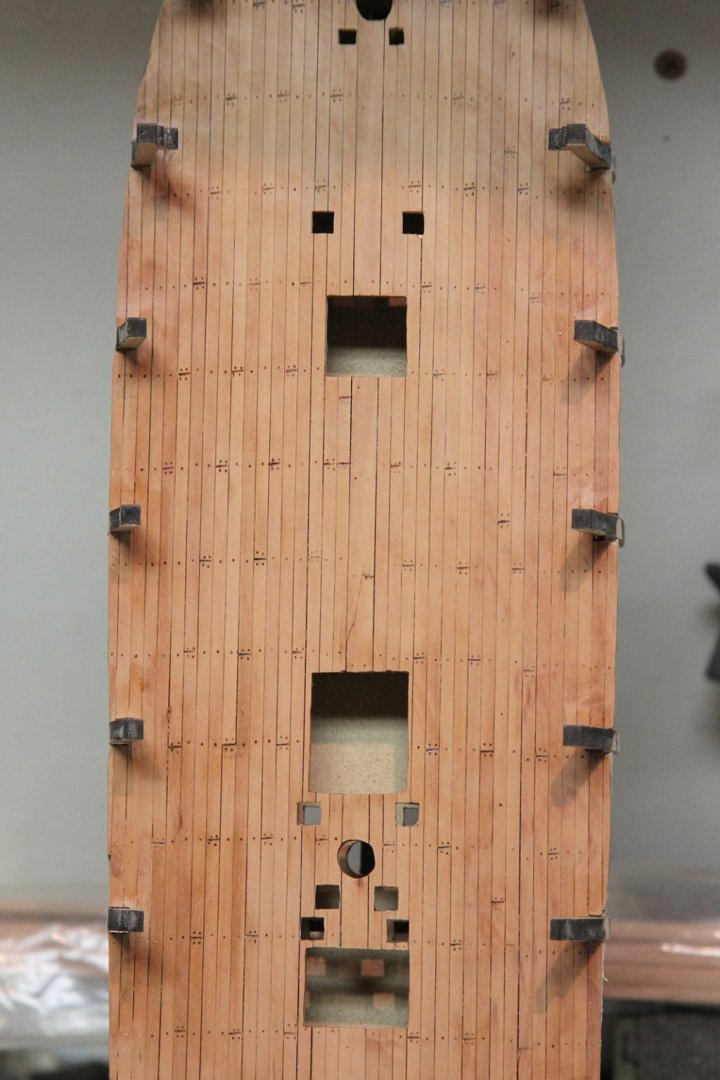
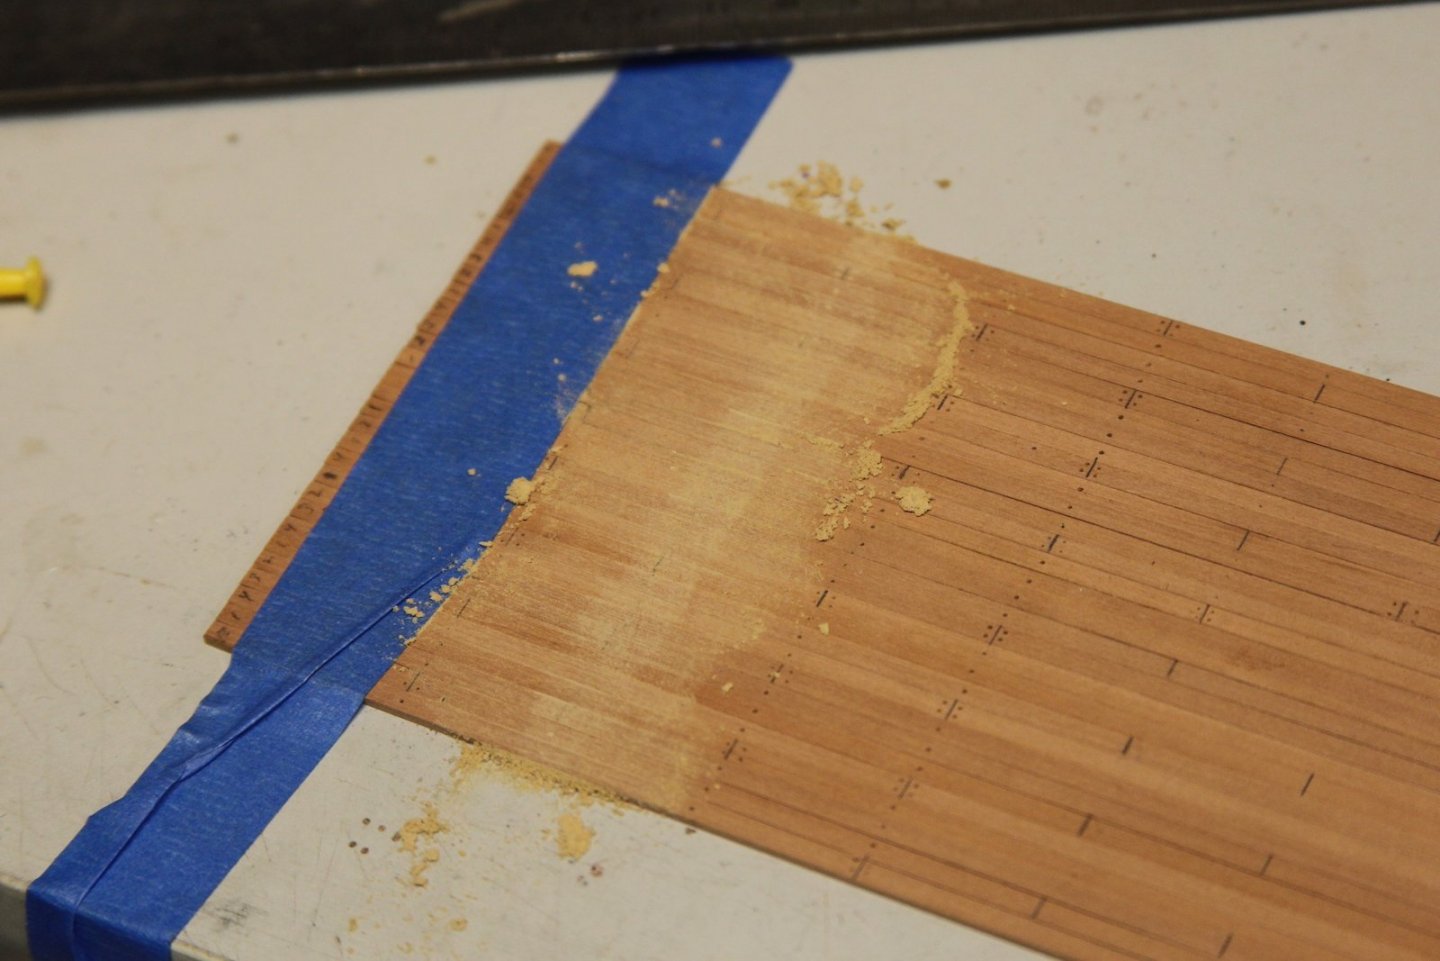
Thanks Bob & BE, much appreciated. Contrary to the plans (and consistent with other Pegasus builds here), I found it much easier to plank the lower deck after it was mounted to the frame. I followed the pattern I laid out on the false deck, keeping in mind I had to cut and shift the planks as I got near the edges. I briefly mulled over the idea of creating a waterway/gutter along the sides, but ultimately ditched the idea for the lower deck as it's a fair amount of work that isn't likely to be seen and would prove challenging based on how the frames are put together. Perhaps for the upper deck. After the deck was fully planked I gave it a light sanding w/ 200 then 400 grit, then gave it a very light layer of wipe on poly to check and see how the trenails would pull out. The lighting on the photos isn't great - but I'm pretty happy with how this turned out. A little crooked on some of my butt marks, but that was part of the reason for experimenting on the lower deck - I'll refine the technique for the upper decks and hopefully have a cleaner look. Overall, I still love the color and feel of the Swiss Pear even though it's obviously not an accurate representation of the decking of the time. I really think it's going to make the deck fixtures and accessories pop.

- 419 replies
-
- 6
-
-
- Victory Models
- Pegasus
- (and 2 more)
-
Great job as always BE - I'm always happy to pick up some additional nuance each time I see your work. - Bug
- 857 replies
-
- 3
-
-
- Sphinx
- Vanguard Models
- (and 1 more)
-
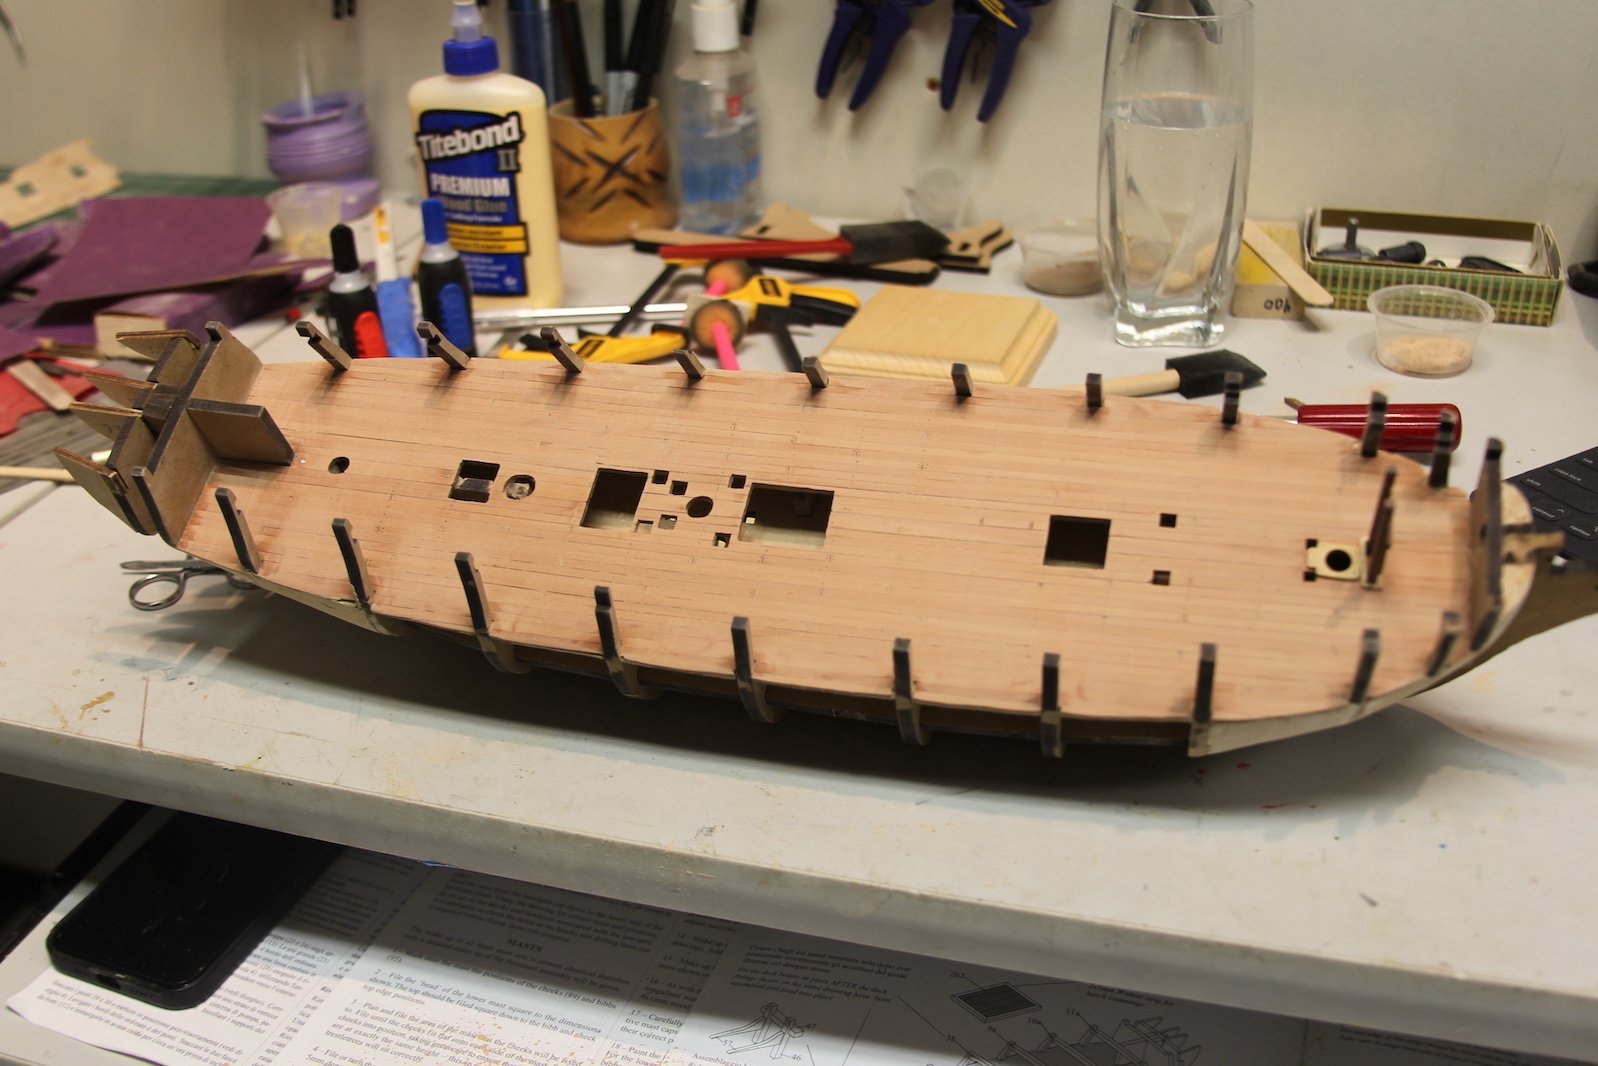
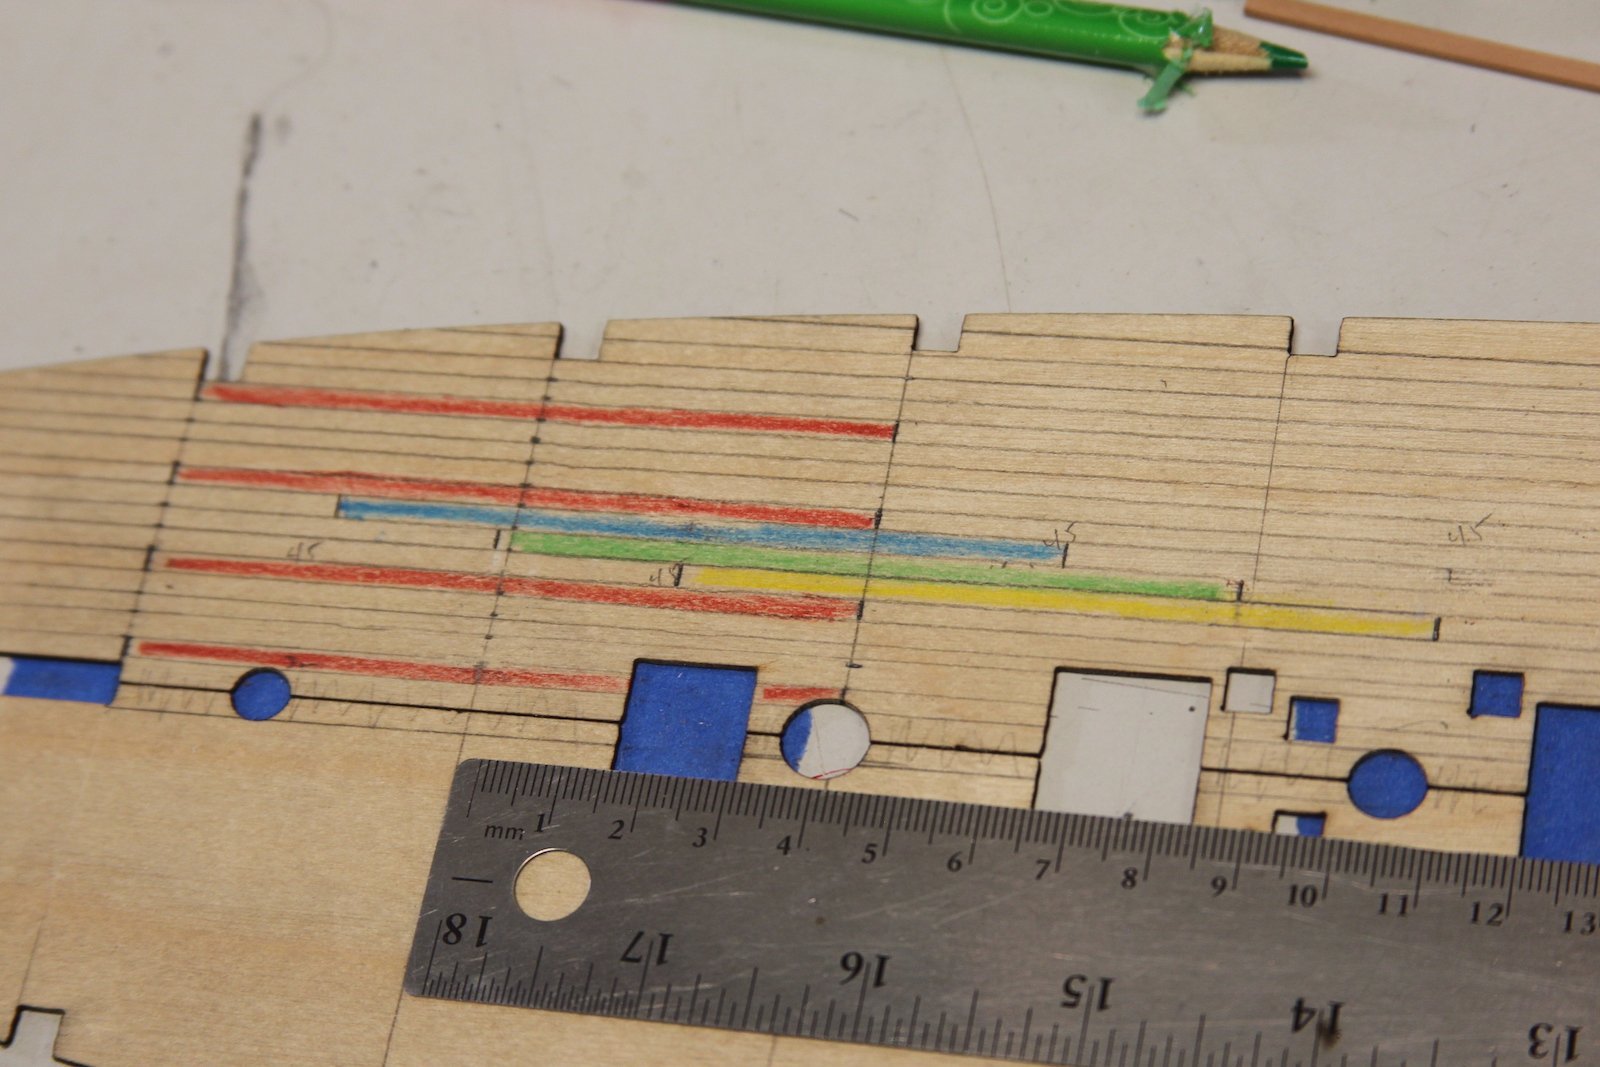
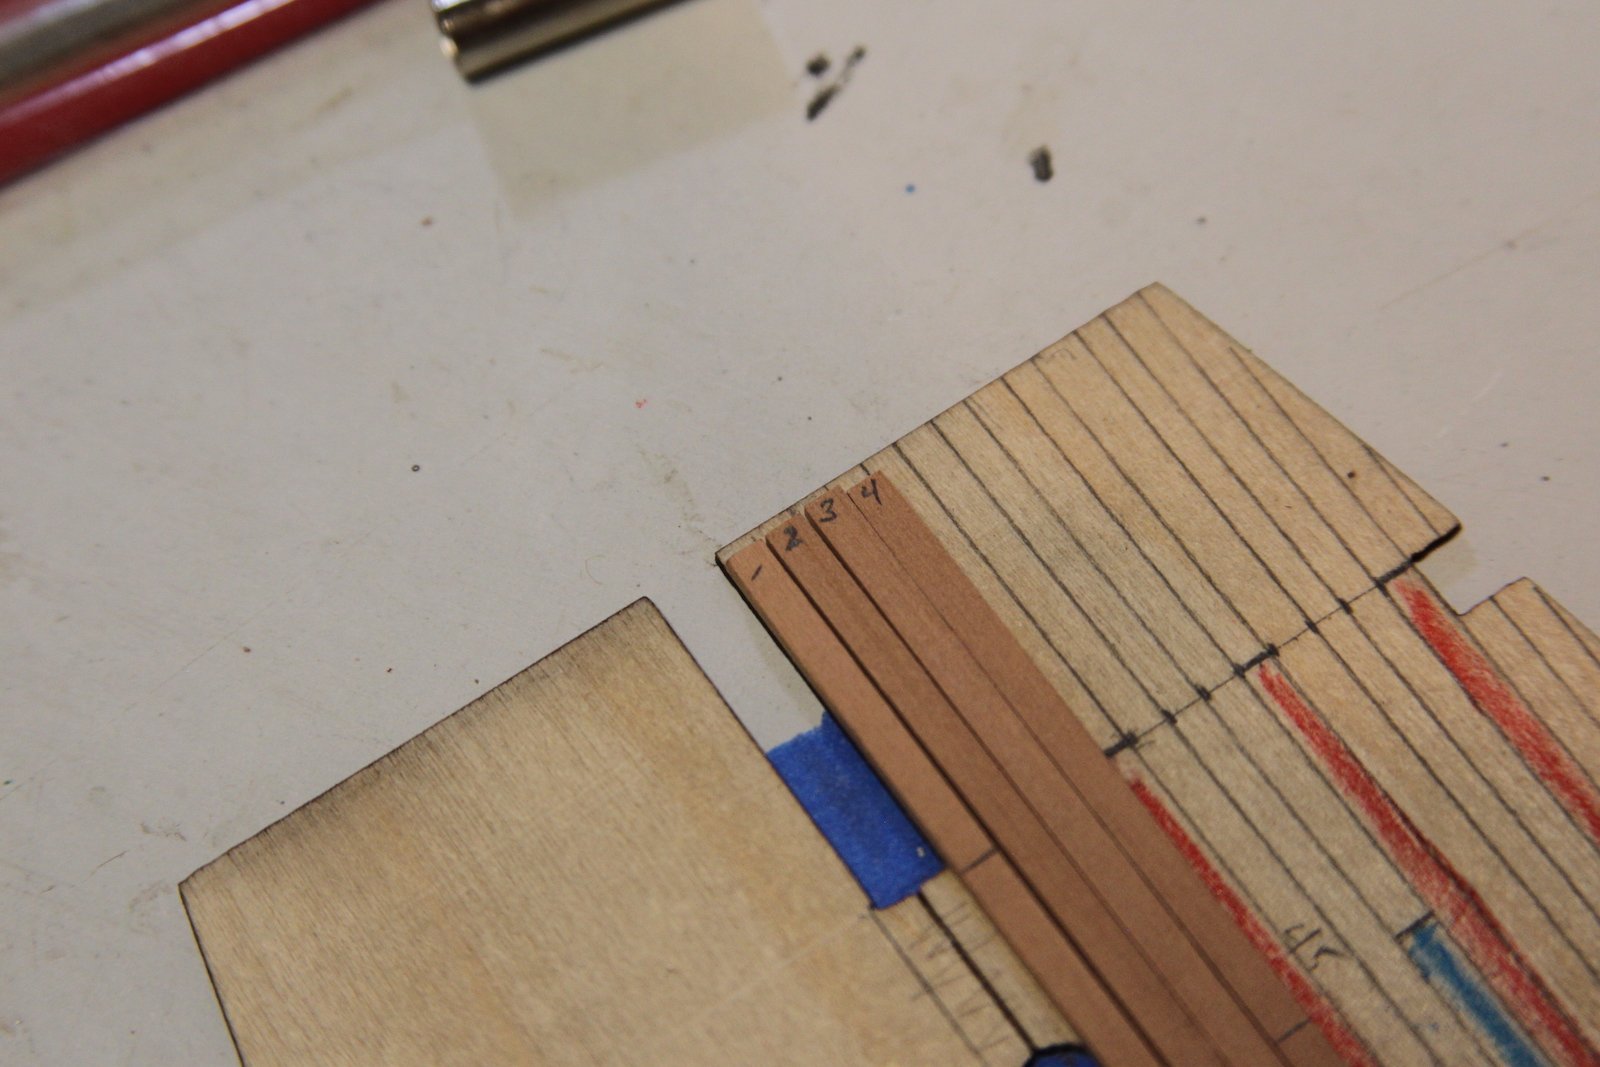
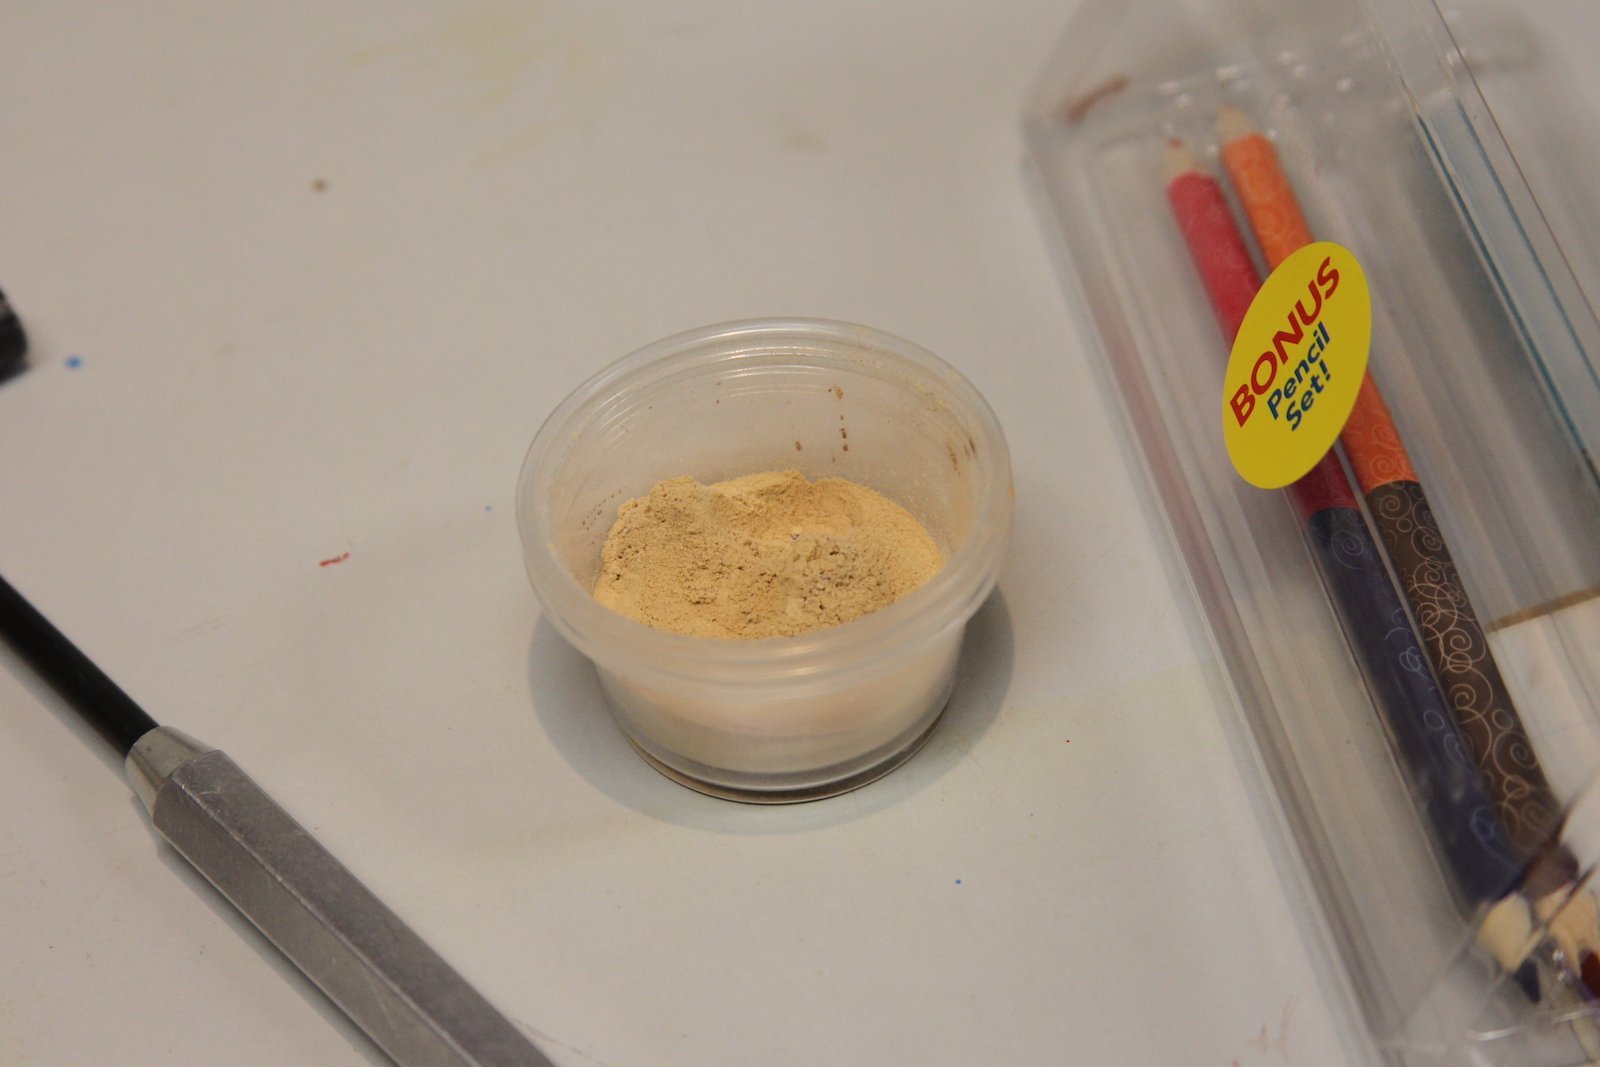
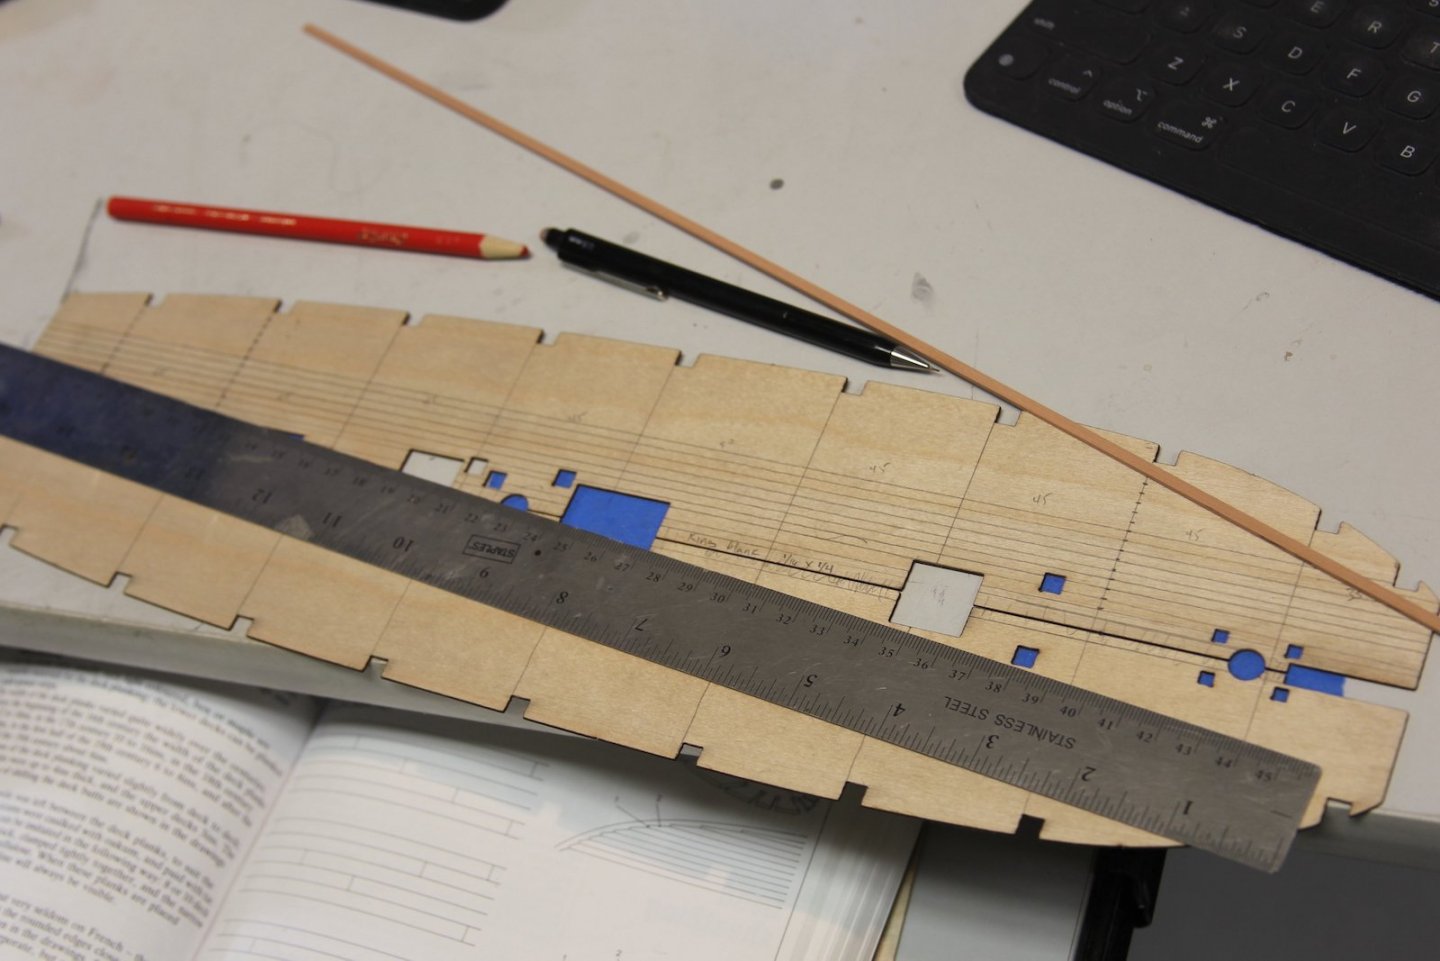
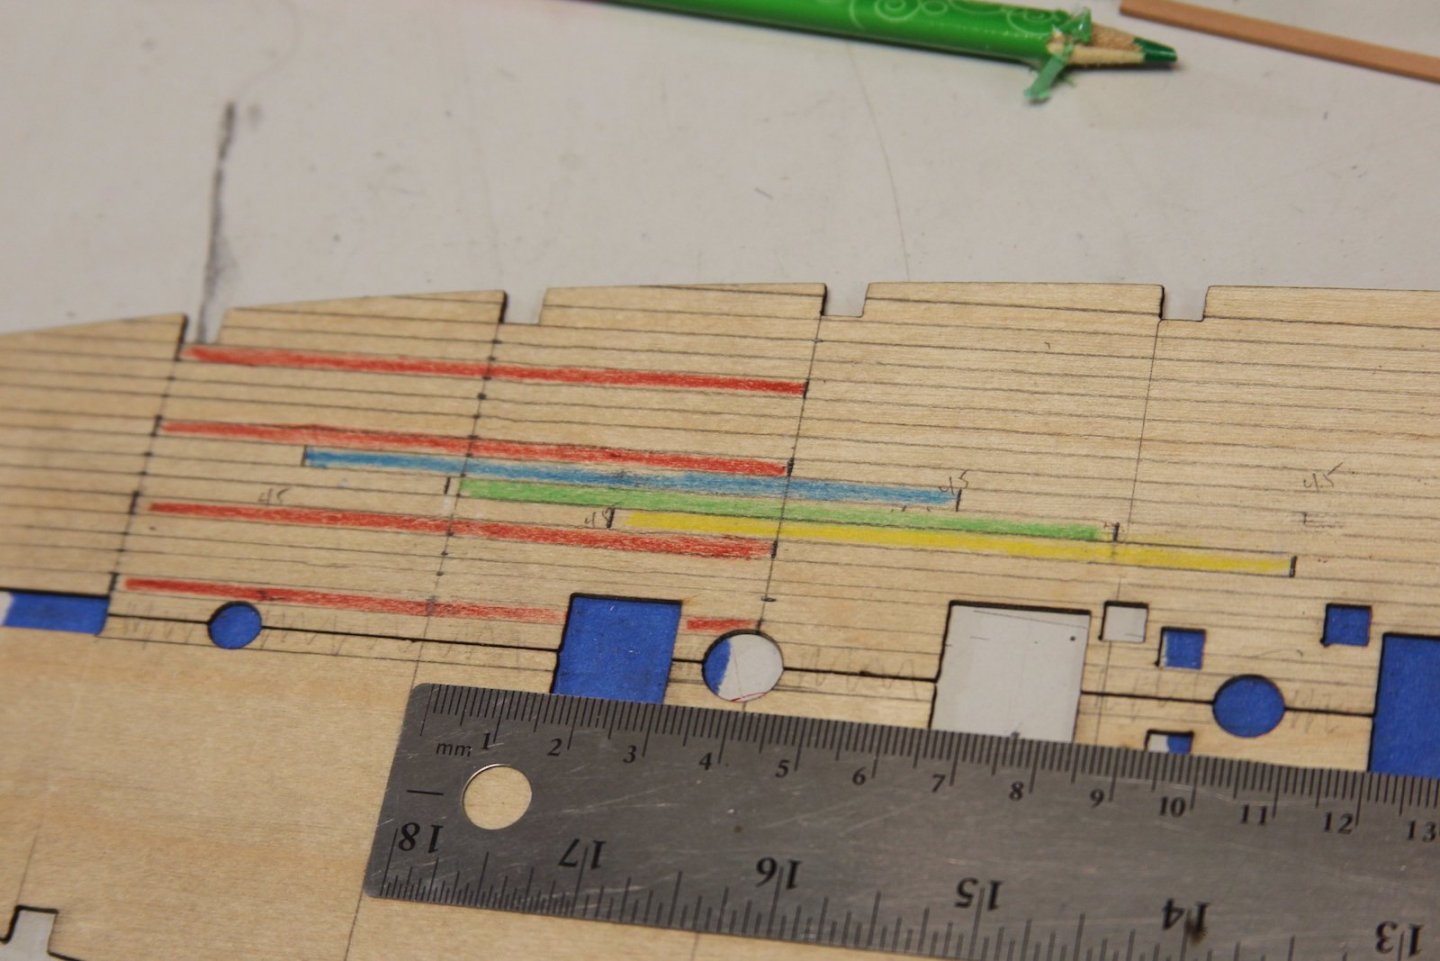
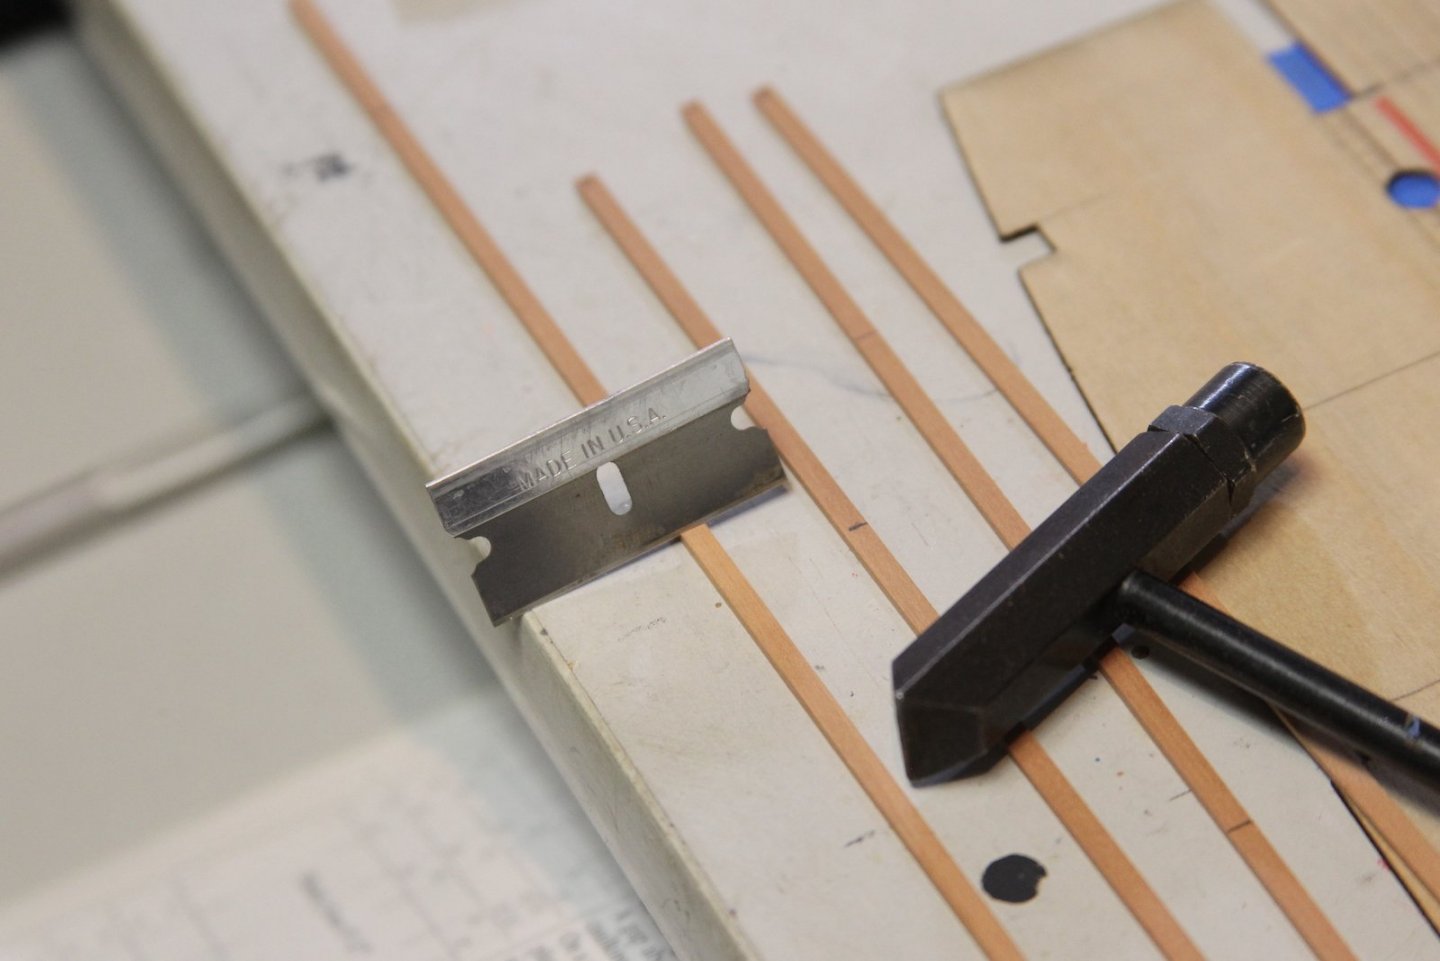
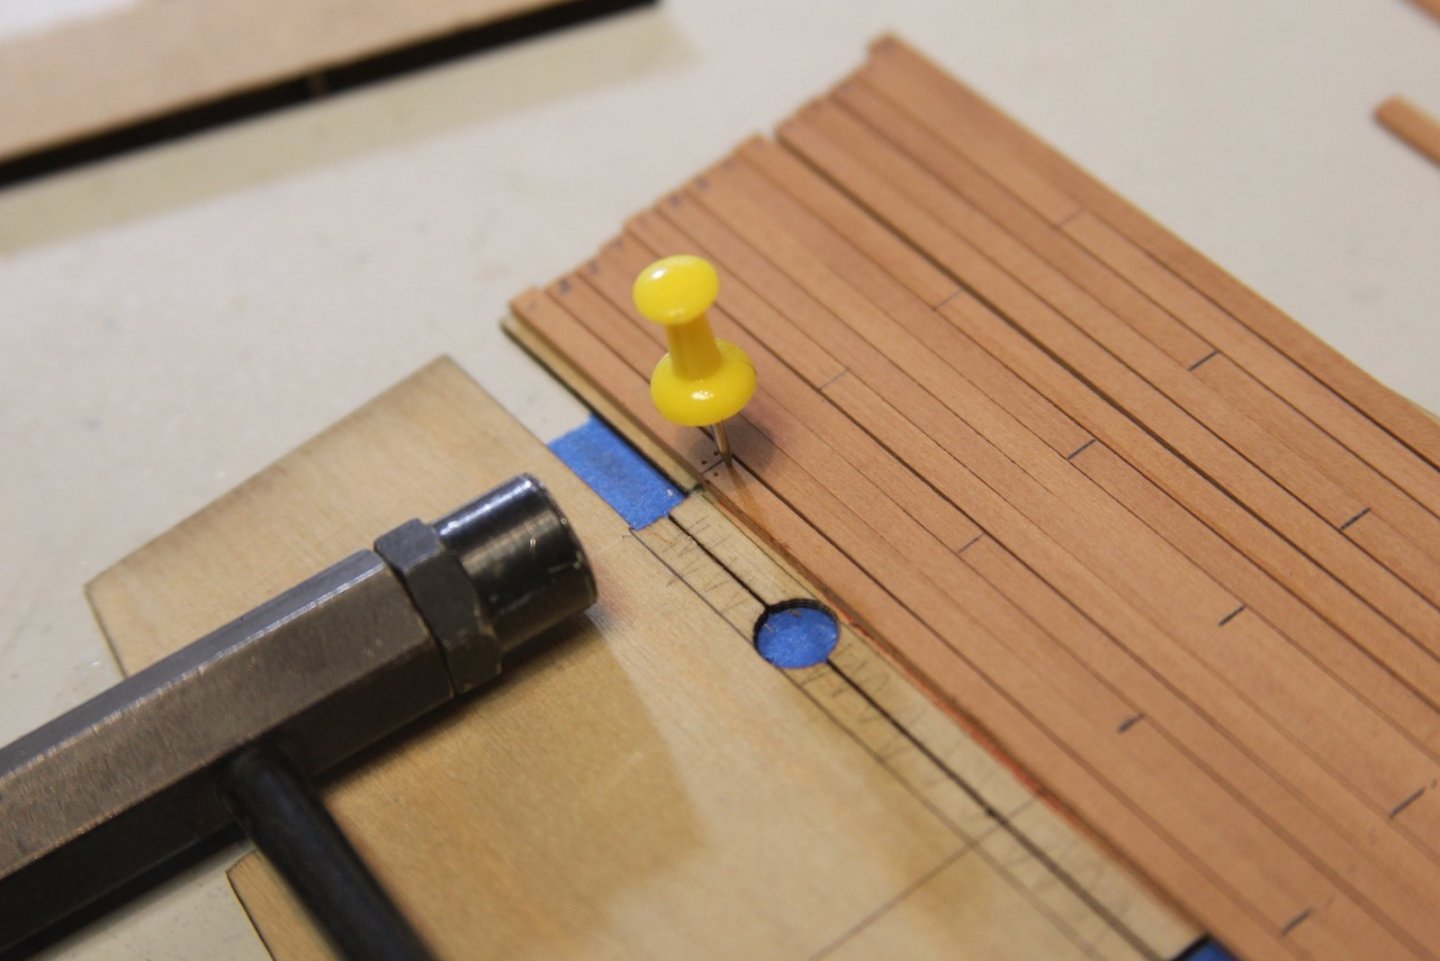
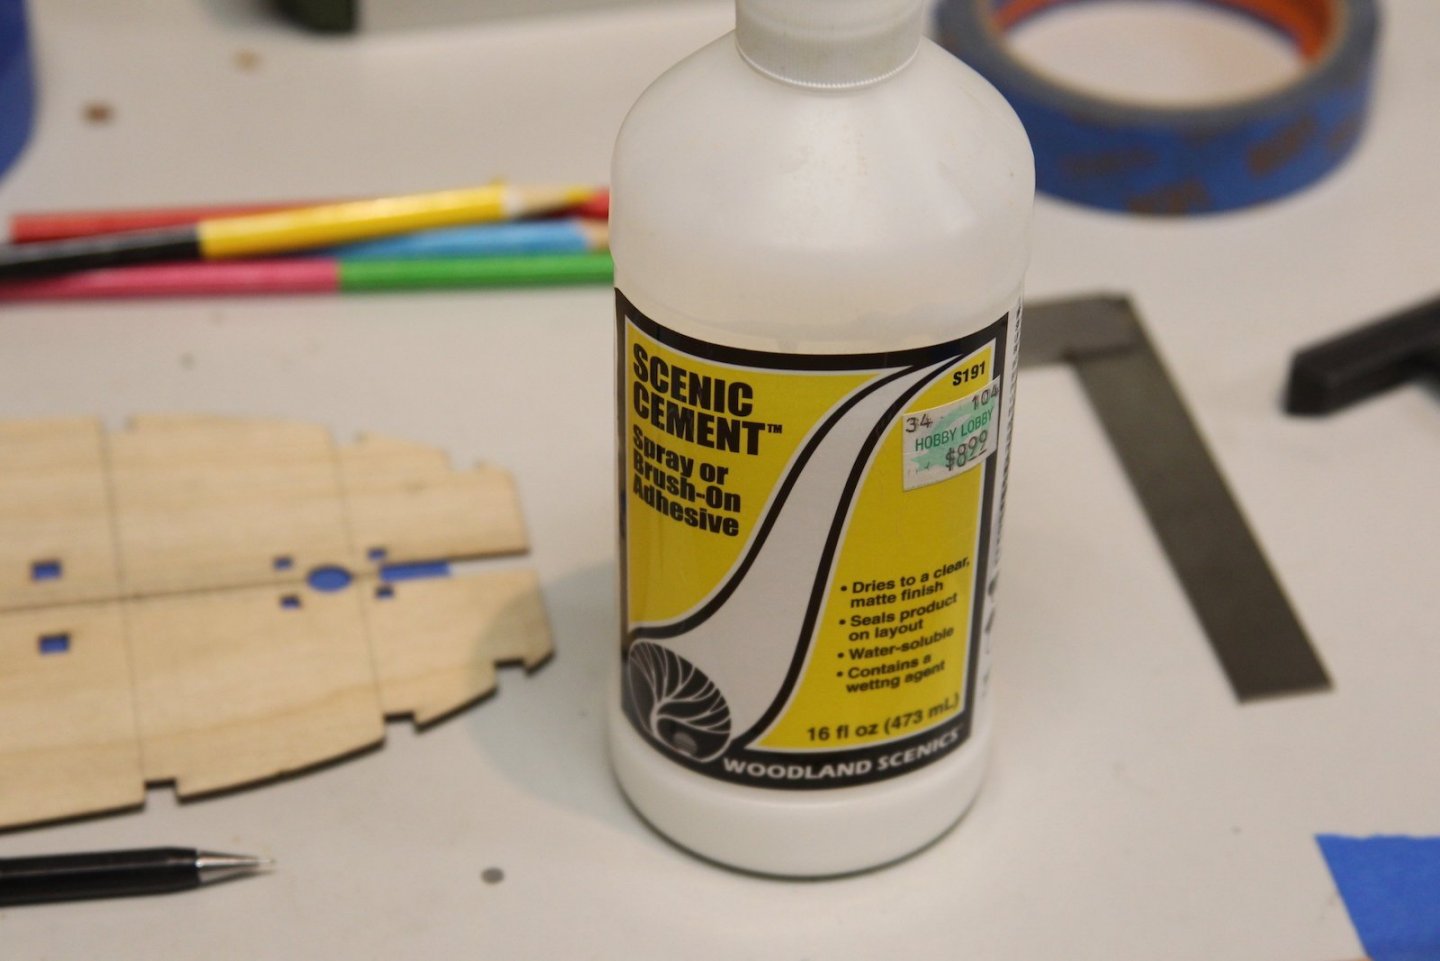
Mounting and letting the frame dry gave me an opportunity to plan out my deck framing strategy. I'm using 4 plank stagger based on Mondfeld's book, as well as Danny's planking example on the lower deck of the Vulture. Since I tend to get easily confused - I like to draw out the lines on the false deck so I stay consistent. I'm planning out 90m planks based on the scale, then I color code the stagger. I have a fair amount of Swiss Pear left over from the Confederacy build, and jus loved the way it looked. It smooths out so beautifully and just adds a touch of class in my opinion. So I'll be using it on Peg as well. As far as planking itself - I'm going to run a 1/8" centerline King plank, then mirror each side with 1/16" planks that run the length of the deck. It's much easier to plank the length, then simulate the end butts with a few taps of a razor blade. The trenails are always a bit of an issue and very much a personal choice in terms of methodology. This time, I'm going to mark them with a thumb tack - double nails on the butts, and a single nail across the beams based on the size of the planks. Planks less than 10" were singled and not double nailed. Numbering the end of each plank allows me to lay them out and cut/mark all of them before I glue them down to the deck. I'll finish simulating the trenails by laying down some of my old school scene glue (from my train village building days) and filling it with fine sawdust. I've always made a habit of collecting and saving the sawdust as it can serve a variety of purposes, including making a convenient filler.


- 419 replies
-
- 7
-
-
- Victory Models
- Pegasus
- (and 2 more)
-
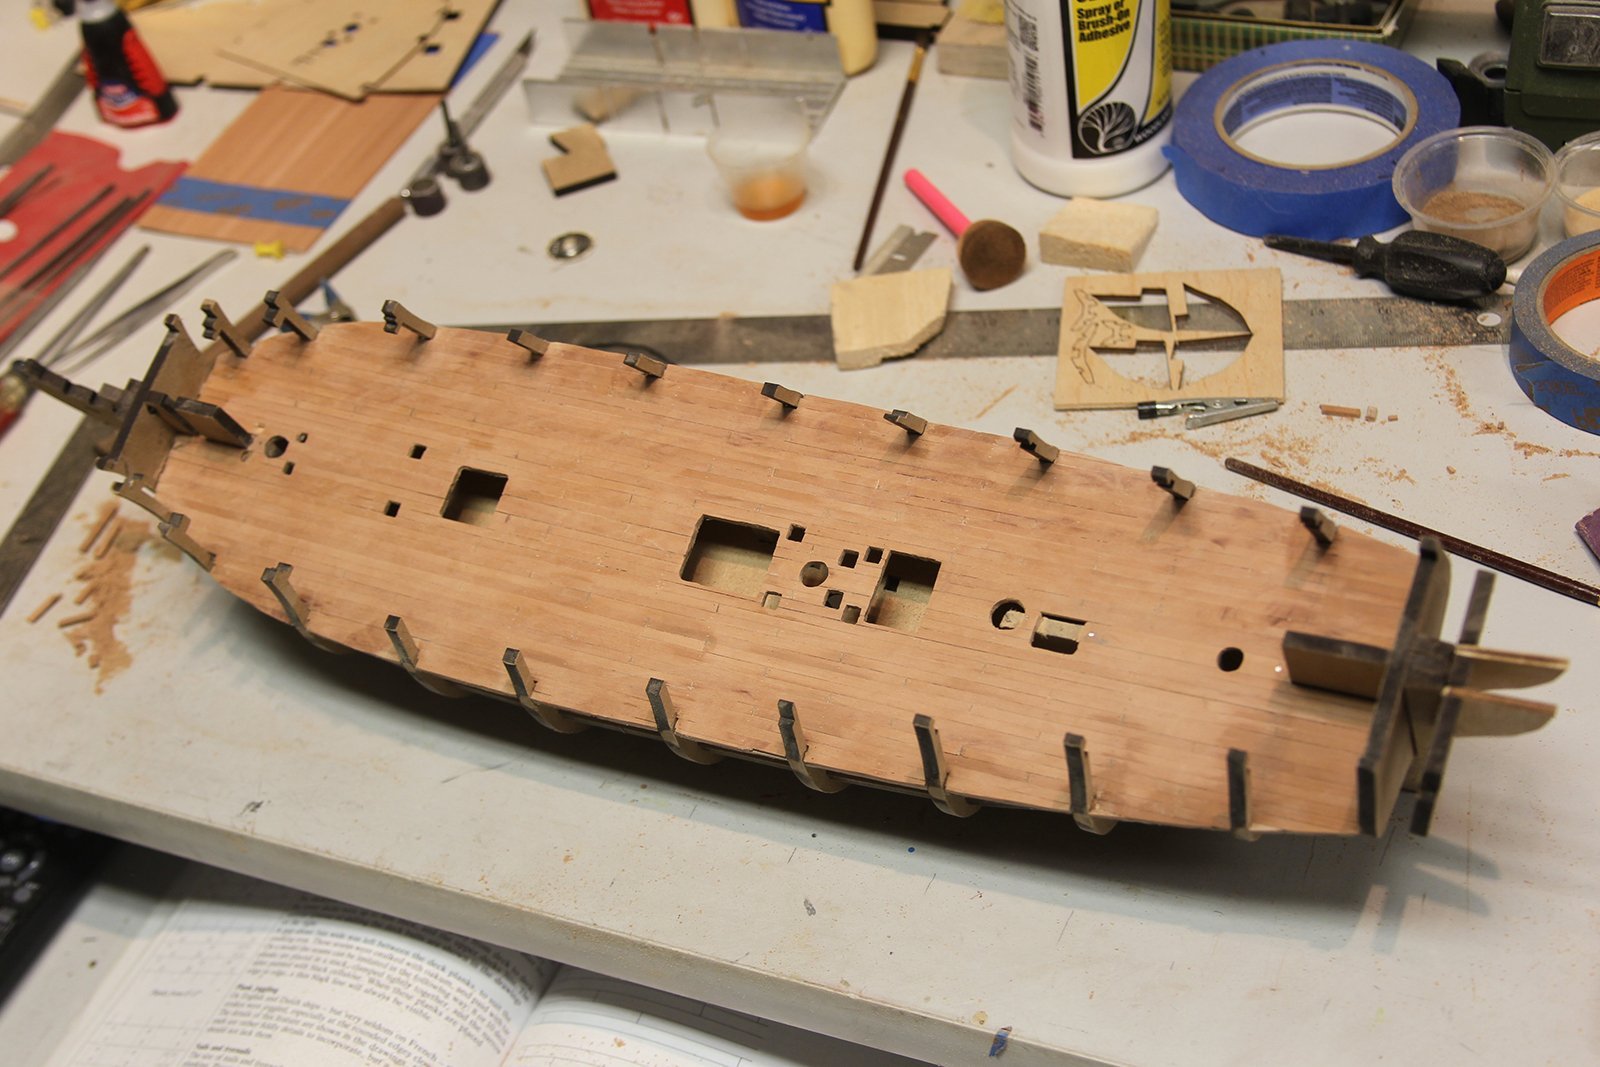
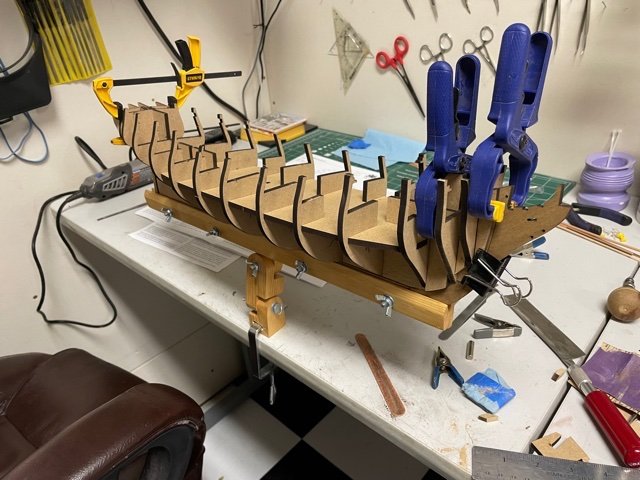
Well here we go - after a long hiatus (and a half dozen or so planes, trains, & automobiles) I'm back in the shipyard with the HMS Pegasus. I won't spend any time on the history, etc - since Victory's Pegasus is pretty prominent throughout the forum. However, I will add a little background why she's my current project. I have four adult children (3 girls and boy) and three ships to go around. So I let the youngest pick out what she she wanted to be built for her. Nice choice kiddo. As with my previous builds, I tend to mix somewhere between 70% accuracy and 30% artistic licensed - which will be the case with the Pegasus as well. Meanwhile, I'll be leaning pretty heavily on Blue Ensign's build (which I believe sets a benchmark for Pegasus..es... Pegasi? in terms of accuracy) as well as Danny Vadas' spectacular work on the Vulture. As always - I thank you all in advance for your encouragement and support. It's good to be back. Here's the typical start to the build. I've gone ahead and added the rabbet even though the plans say it's unnecessary. As I've perused other builds, it looks like it's probably going to come in handy.

- 419 replies
-
- 10
-
-
- Victory Models
- Pegasus
- (and 2 more)
-
Good morning - I debated on whether or not it was appropriate to add another introduction, since I'm not a new member by any stretch. However, since I've basically been out of sight for a good four years - I thought it prudent to at least say hello to all the new members as well as my old comrades. I'll be setting up a build log for a Pegasus journey, upon which I am about to embark. Hello again everyone - and as my wife is fond of saying - "It's good to be back."
-
Very nicely done Danny! Great little project.
-
Great looking metal work Danny! I really need to learn to silver solder....
-
Love the molding Danny... I seriously started looking up mini table saws again because of it... Oy.
-
Mike - I had plenty of room under the seat. But I also pre-measured so that the "hatch" was a little further forward.
-
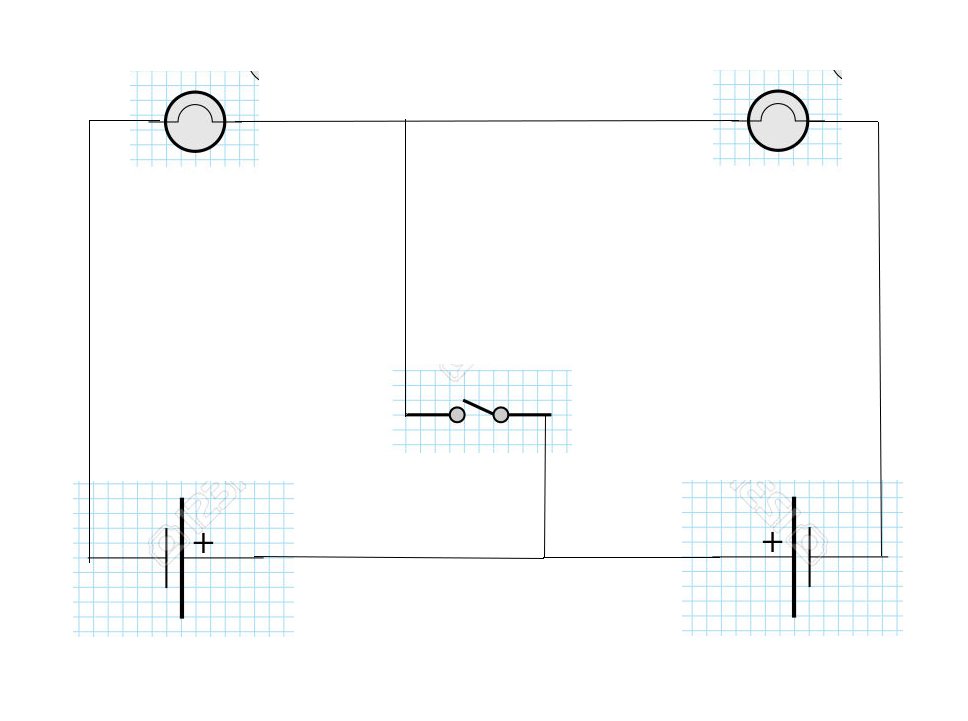
Hey Eddie, FYI - on the wiring, I gave each lamp it's own 9-volt (so they'd have plenty of power) but then wired them in quasi-parallel to a single switch mounted under the front.