HOLIDAY DONATION DRIVE - SUPPORT MSW - DO YOUR PART TO KEEP THIS GREAT FORUM GOING! (Only 13 donations so far - C'mon guys!)
×


Moonbug
-
Posts
1,028 -
Joined
-
Last visited
Content Type
Profiles
Forums
Gallery
Events
Everything posted by Moonbug
-
 Thanks Sjors! Still pluggin' away... Hope you had a great vacation! - Bug
- 2,191 replies
-
- 4
-

-
- confederacy
- Model Shipways
- (and 1 more)
-
I've missed so much! I don't even know where to begin Popeye. Lovely work of course! Though I have to say - I may have underestimated your level of obsession until I say the number of frames and hulls laying about! ;-) -Bug
-
Thanks all, appreciate the input, comments, and likes. I'm headed to Atlanta and Myrtle Beach this week, but will hopeful have some shipyard time this weekend. I've started on the cat heads and can't wait to get back at it. Mac - that's definitely the leading prospect at this point. While I think I can get away with it on an Admiralty display, I'll have to determine whether my Inner-OCD will allow me to have some cannons rigged and some not. ;-) -Bug
- 2,191 replies
-
- 5
-
-
- confederacy
- Model Shipways
- (and 1 more)
-
Beautiful galleries Mark. While I echo your thoughts on the abilities of those who build out the frames by hand, don't sell yourself short on the laser cuts - that's a distinct skill in itself. You're doing an excellent job - as with others, I can't wait to see their progress. -Bug
-
Love the lathe Jesse, I'm completely jealous. I'm still using a modified Dremel - inconsistent and sketchy stability at best. I'll keep a close watch on your experimenting and an eye out for a mini lathe. -Bug
- 1,306 replies
-
- 5
-
-
- syren
- model shipways
- (and 1 more)
-
Ha! I did Kevin! Although there are a couple other missing random bits, that according to Augie's notes they are stowed in his "magnetic ashtray"... No doubt Diane will one day come across a few belaying pins or blocks. I'm glad the Confed kit comes with a fair amount of extra pieces. :-) -Bug
- 2,191 replies
-
- 4
-
-
- confederacy
- Model Shipways
- (and 1 more)
-
Ah - I gotcha Mark. No, there aren't. Misunderstood where you were going b/c the main deck lids aren't installed yet. -Bug
- 2,191 replies
-
- 3
-
-
- confederacy
- Model Shipways
- (and 1 more)
-
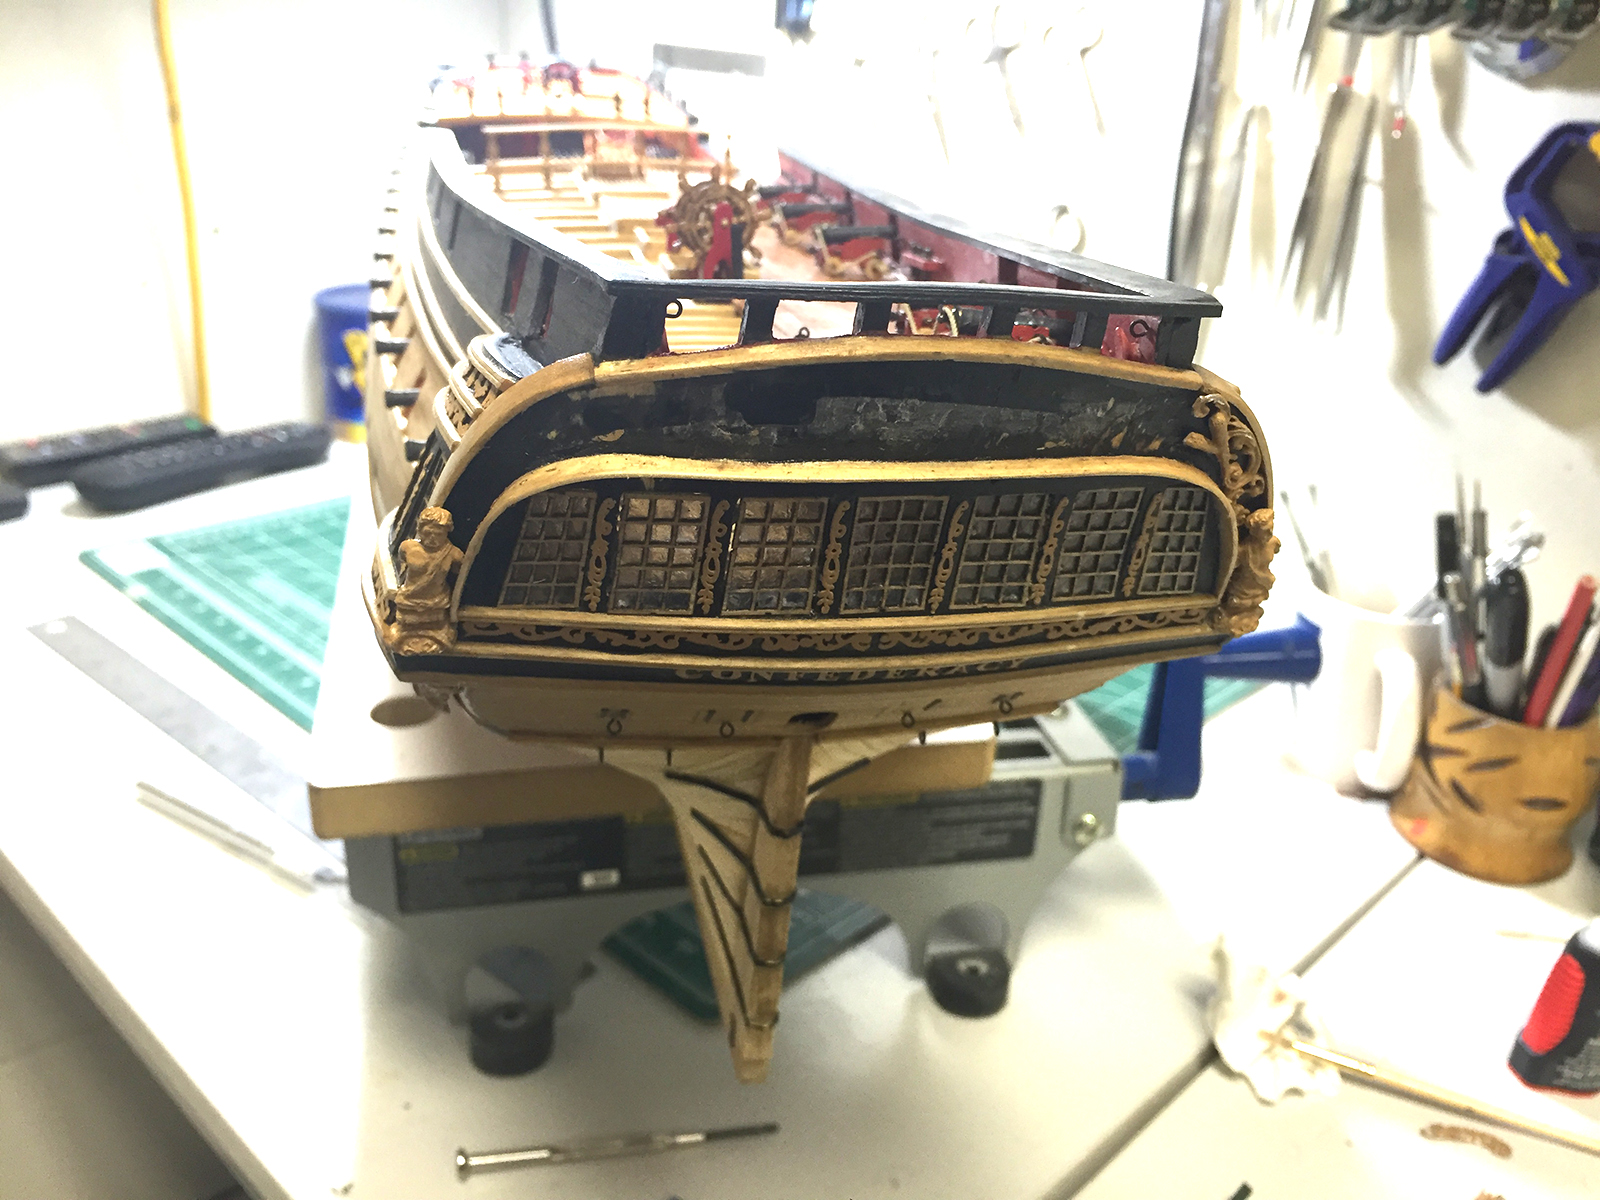
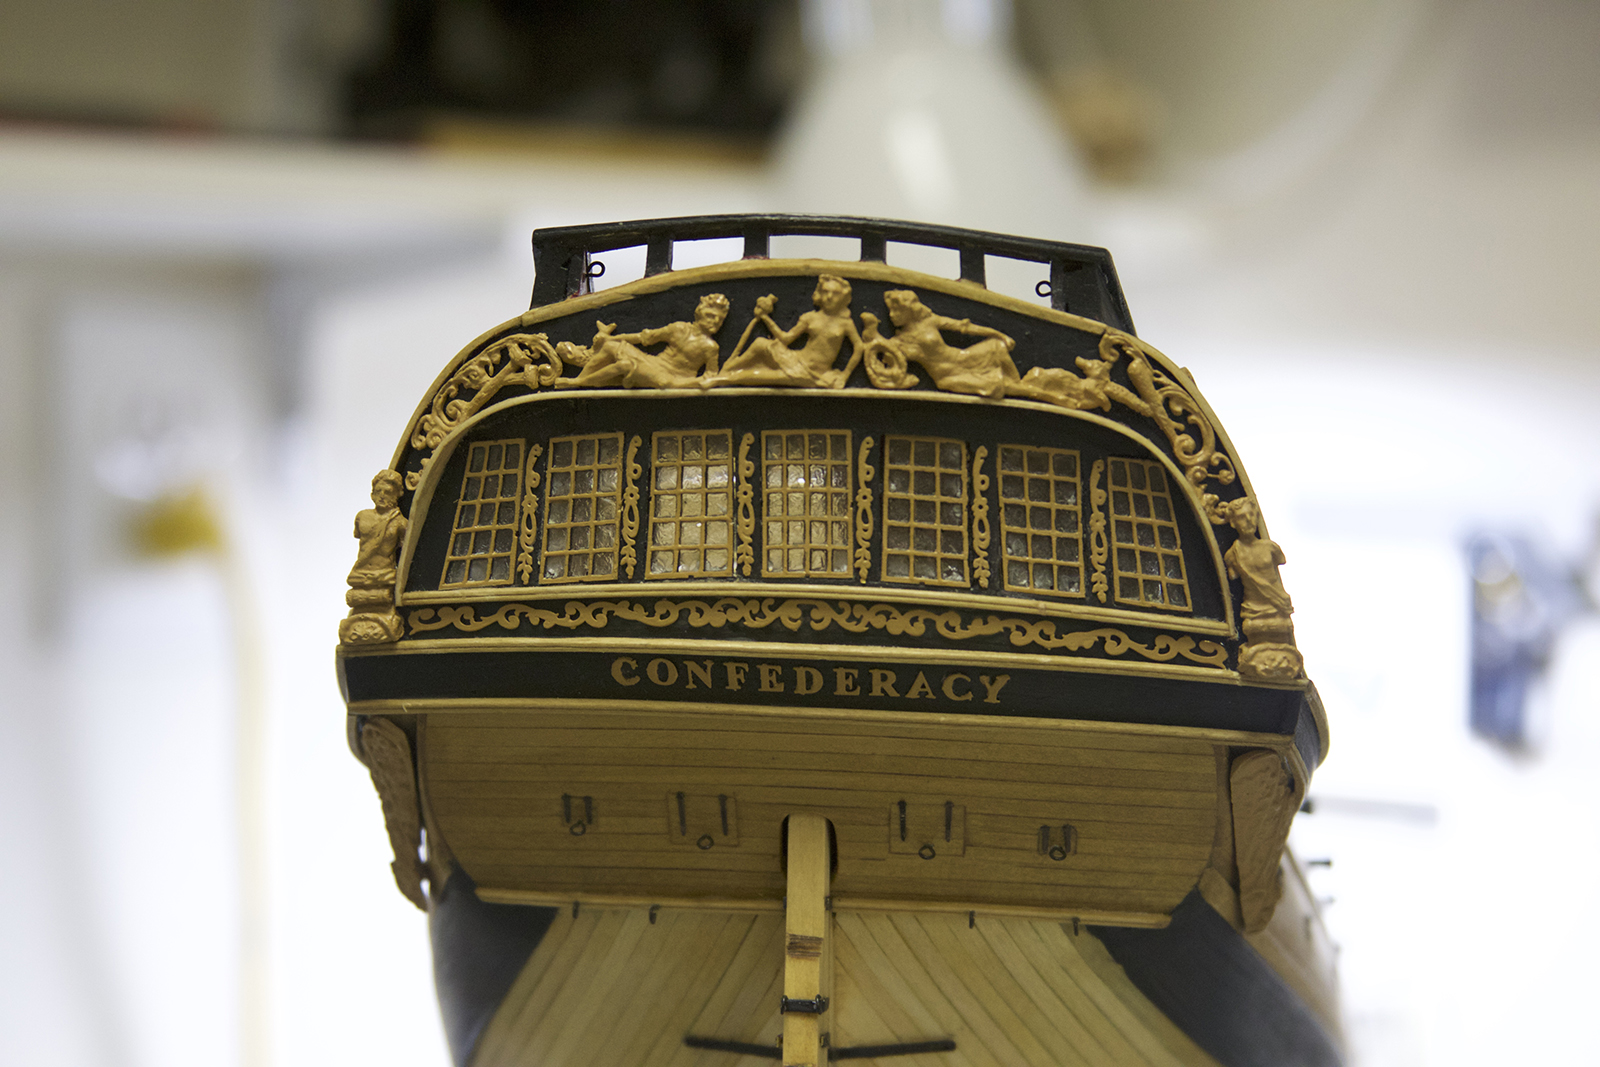
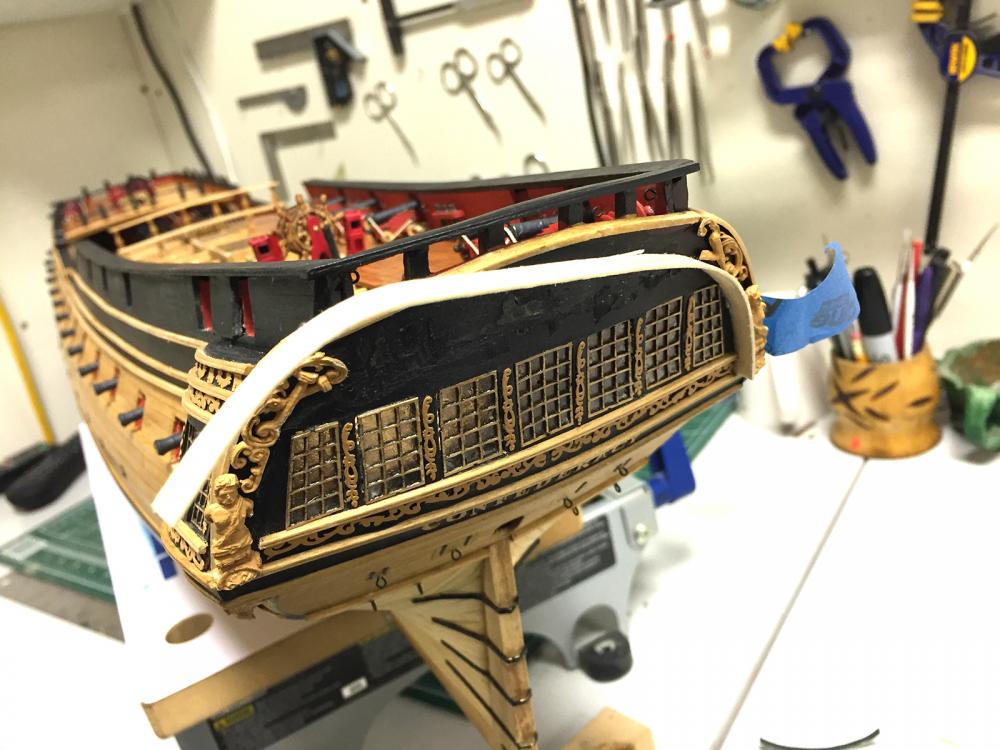
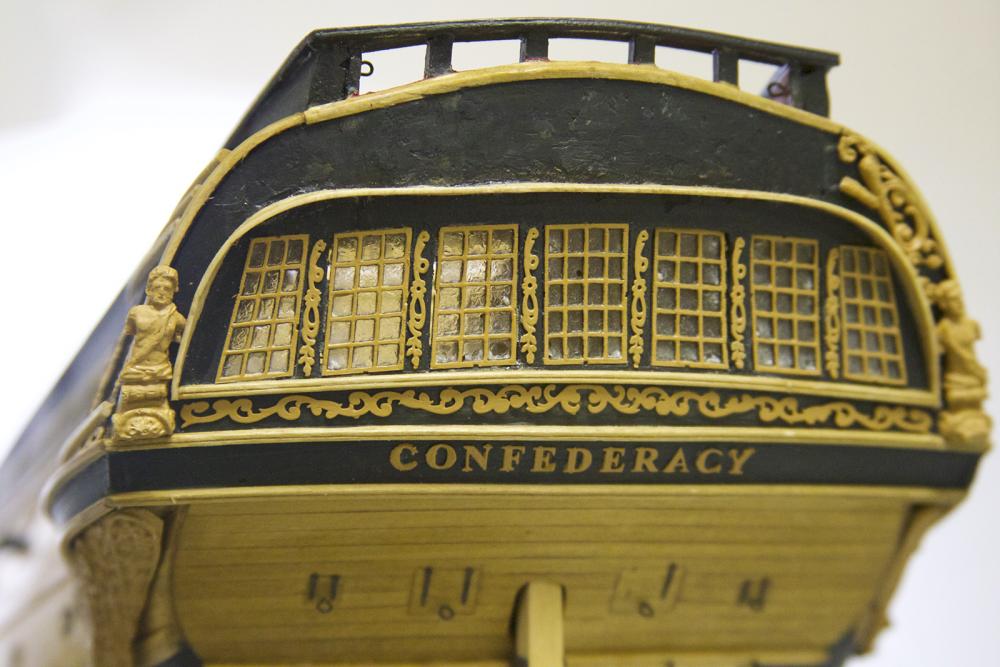
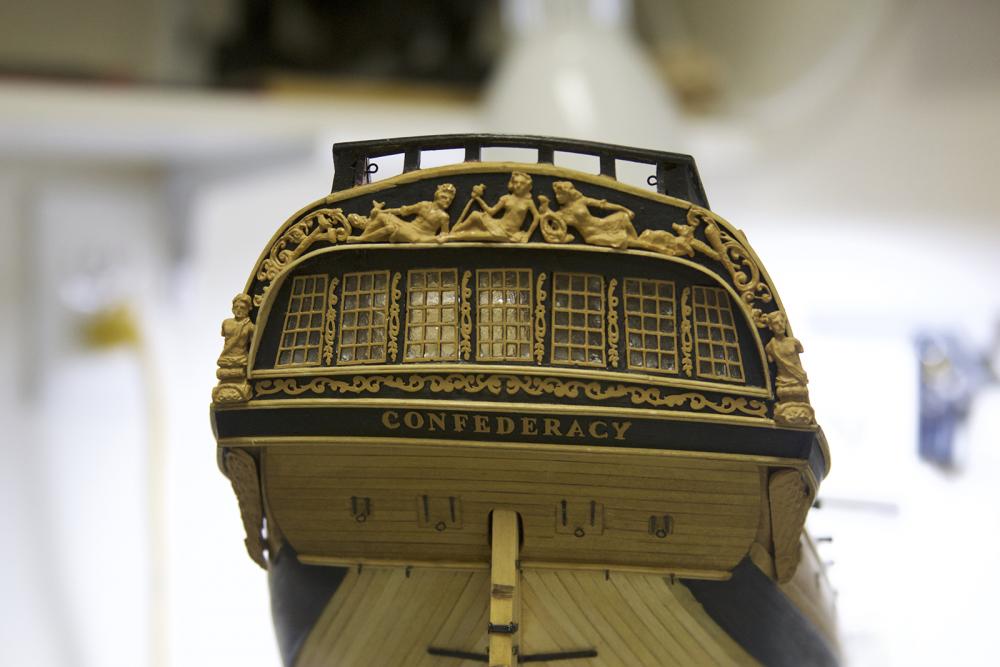
Thanks everyone for your input - much to think about, I'll contemplate it a bit more, and consider how to go about tackling the cannons if I decide to go that route in some capacity. I believe there is some benefit here of this being an Admiralty model, as it's purpose would be to display elements of the ship without necessarily incorporating every detail that a fully rigged replica would entail. Mark - The port lids are coming! ;-) That'll be one of those assembly line moments. In the meantime, yesterday I got a good bit of work done on the Transom. It took a couple bumps and bruises along the way, and some of the paint had shipped off the figures, and created some blemishes on the black. Also - I wanted to touch up the window frames a bit. Augie did such an awesome job with the window "glass" that I wanted to even out the finish and color of the frames to match the rest of the smooth look and feel of what he had going. The BAD new is - I jacked up the cove in the process (Sorry Augie!) so I had to rebuilt / reshape it. WHAT A BEAST. This gained me an entirely new appreciation for Chuck's laser cut parts! *laff* After much soaking, shaping, breaking, re-soaking and re-shaping, I finally got the cove repaired and replaced and stained to match. The GOOD news is - this marked a small milestone in which I will now press on with new progress and moving forward with the build. Yay! Another business trip this week, but after that I should be able to put a few more hours in.


- 2,191 replies
-
- 24
-
-
- confederacy
- Model Shipways
- (and 1 more)
-
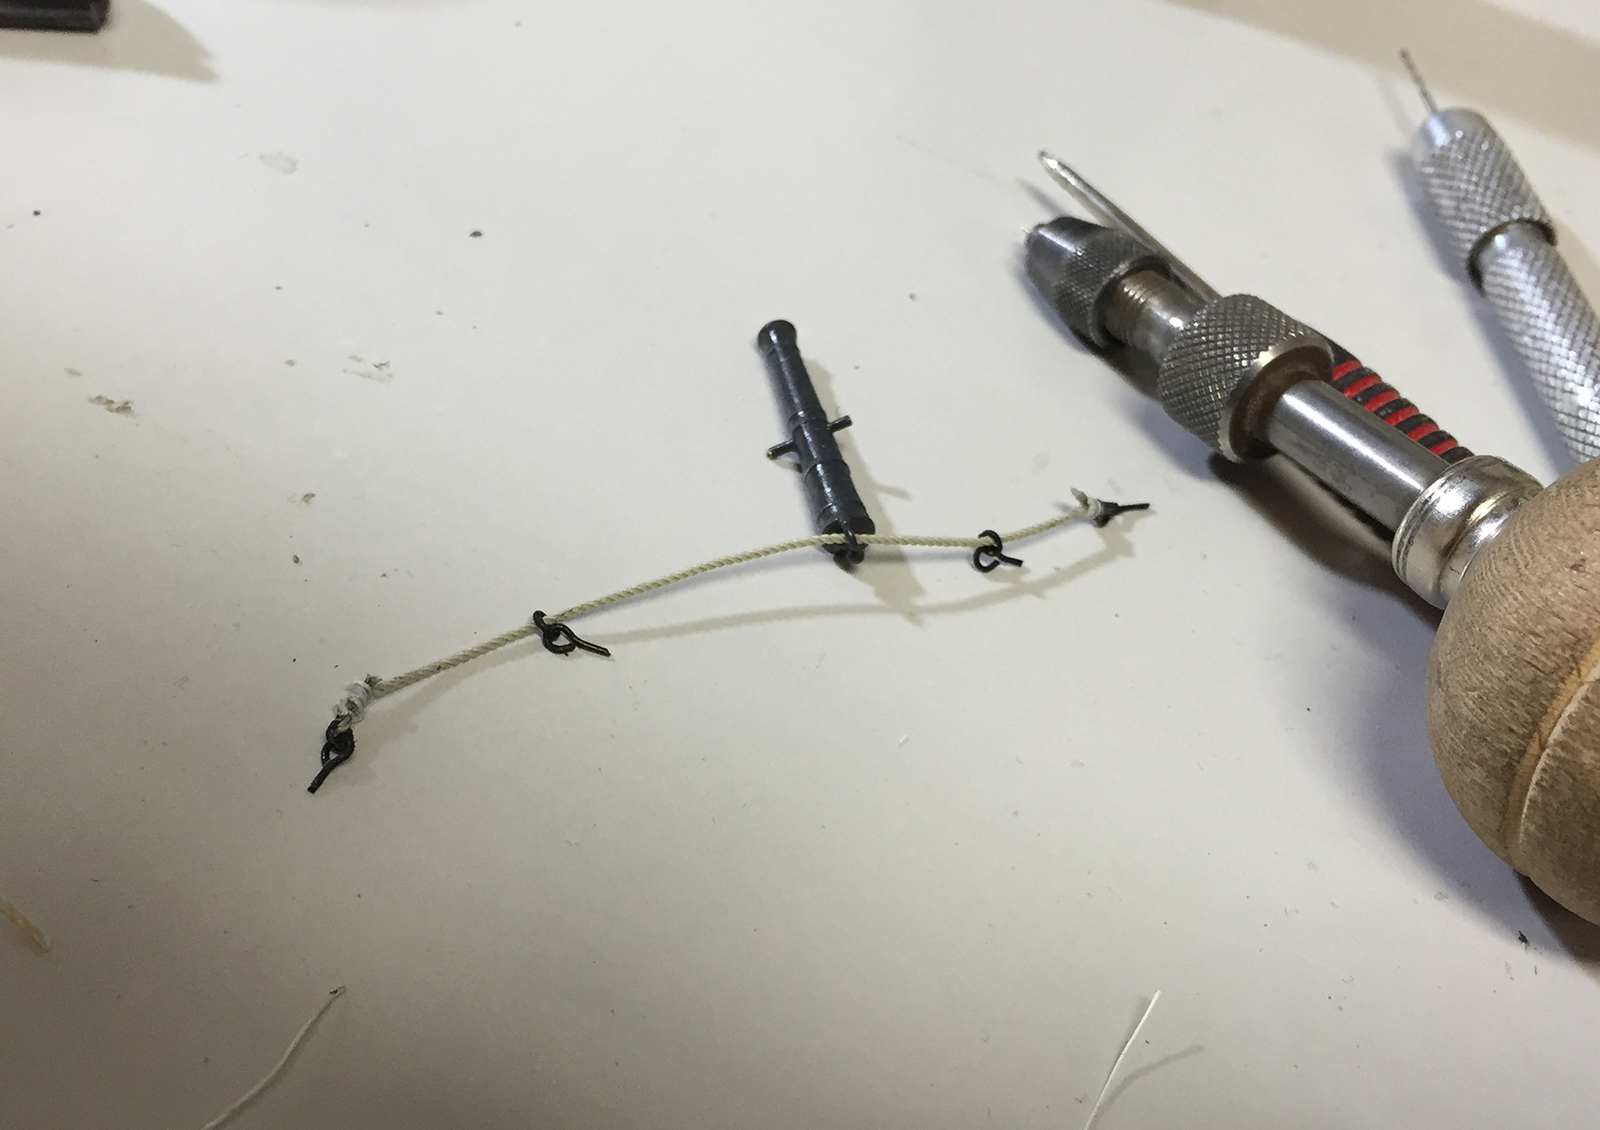
Hello team! Got a question for the group regarding rigging the cannons. The Confed directions call for gun tackles on either side of the cannon. According to Augie's hand written notes in his folder, he didn't intend to rig these as he felt it made the deck a bit crowded. I'm a bit back and forth on this, but ultimately the decision is made a bit easier as it would be nearly impossible to add the side gun tackles to the cannons already mounted on the lower deck. ;-) However - I like what our friend Sjors has done here with his Agamemnon and rear gun tackle. My question is - would that have been appropriate on the Confederacy? I'm having some difficulty confirming one way or another. Thoughts? - Bug

- 2,191 replies
-
- 10
-
-
- confederacy
- Model Shipways
- (and 1 more)
-
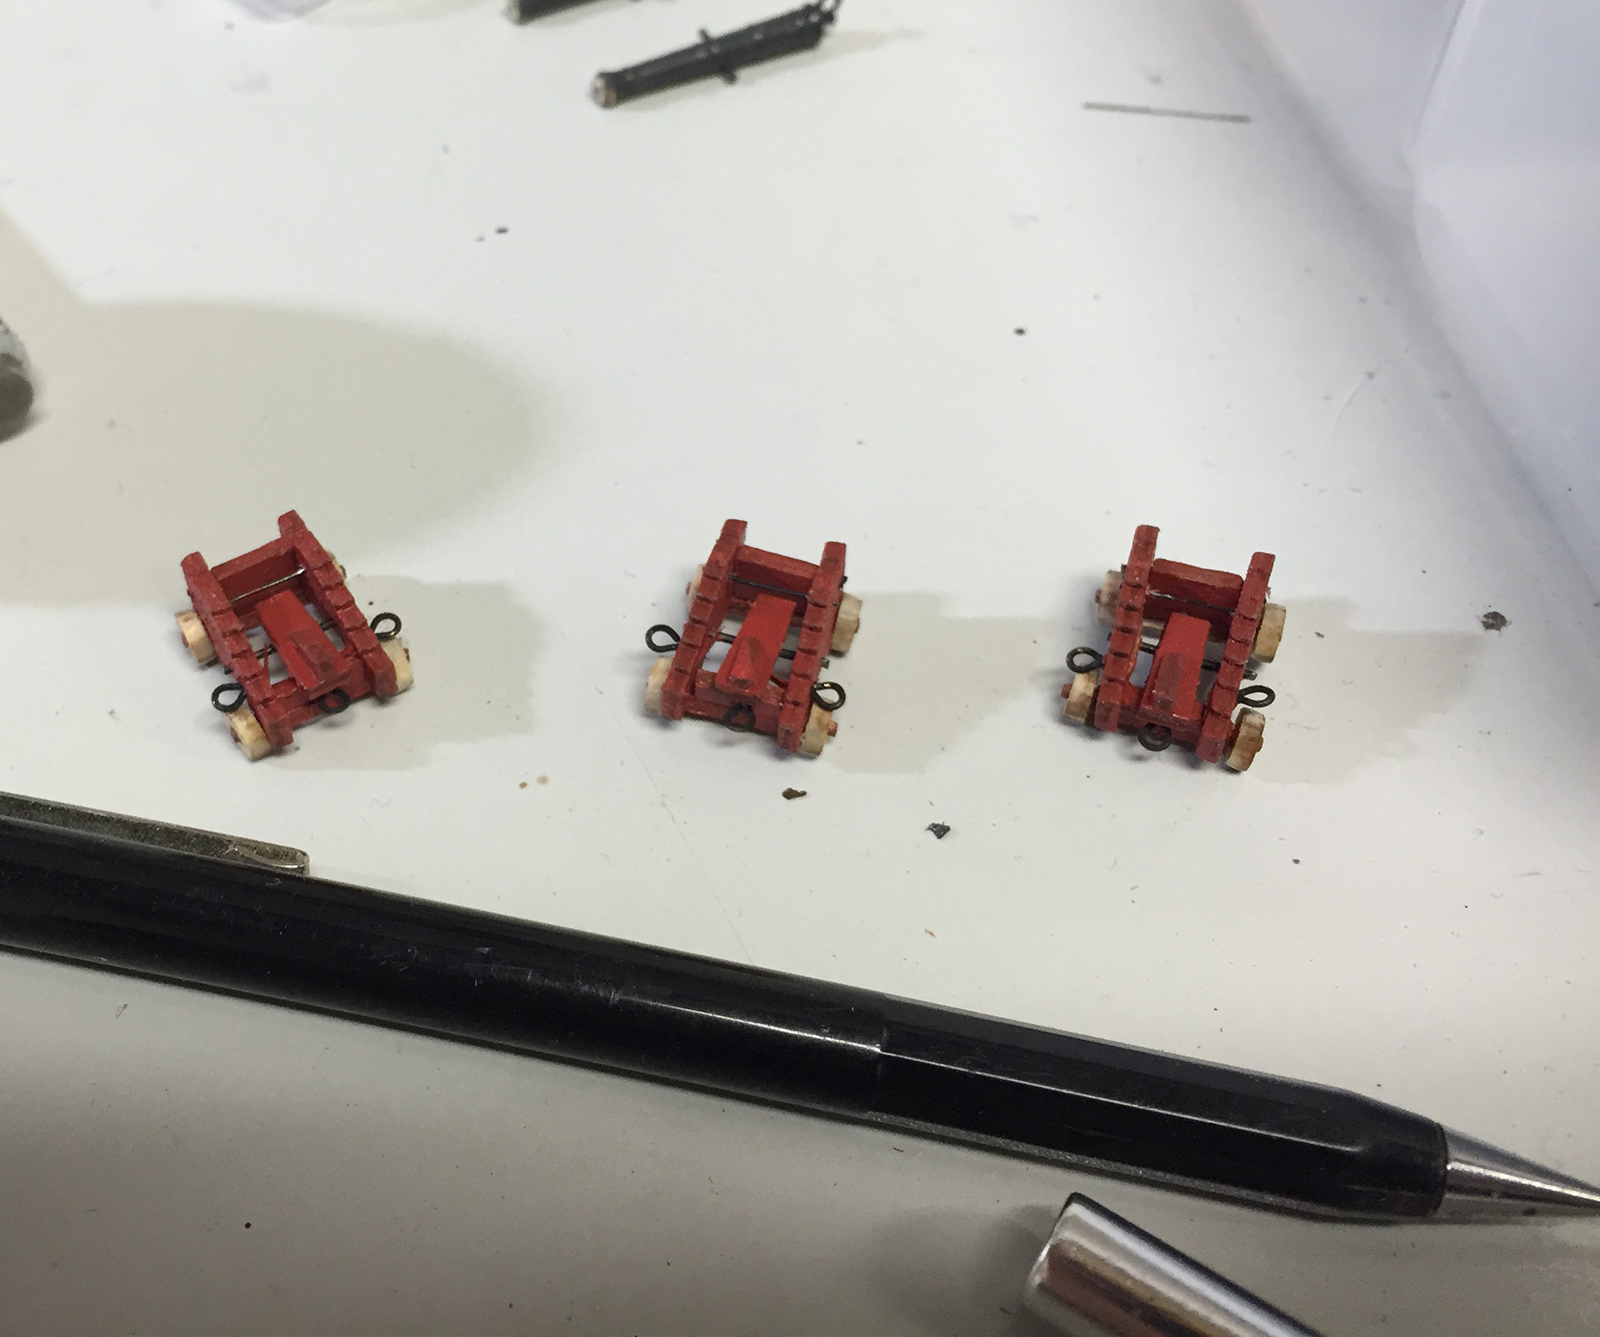
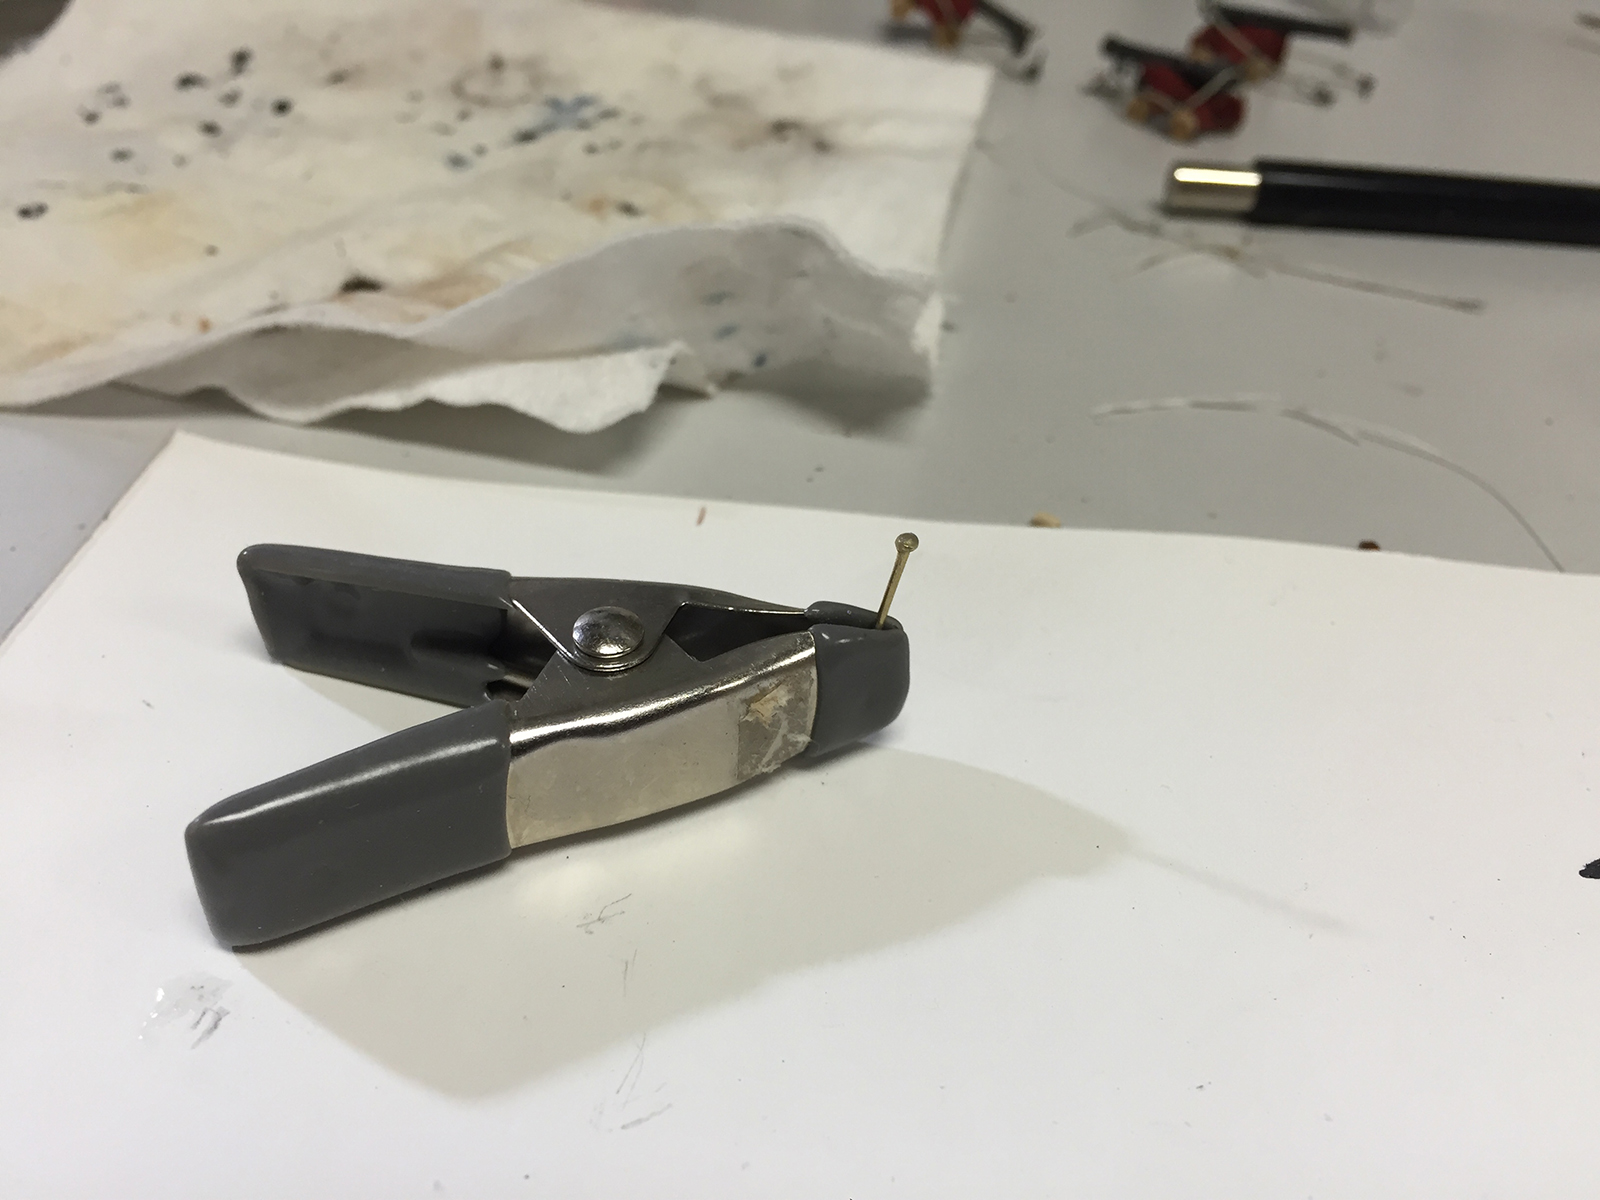
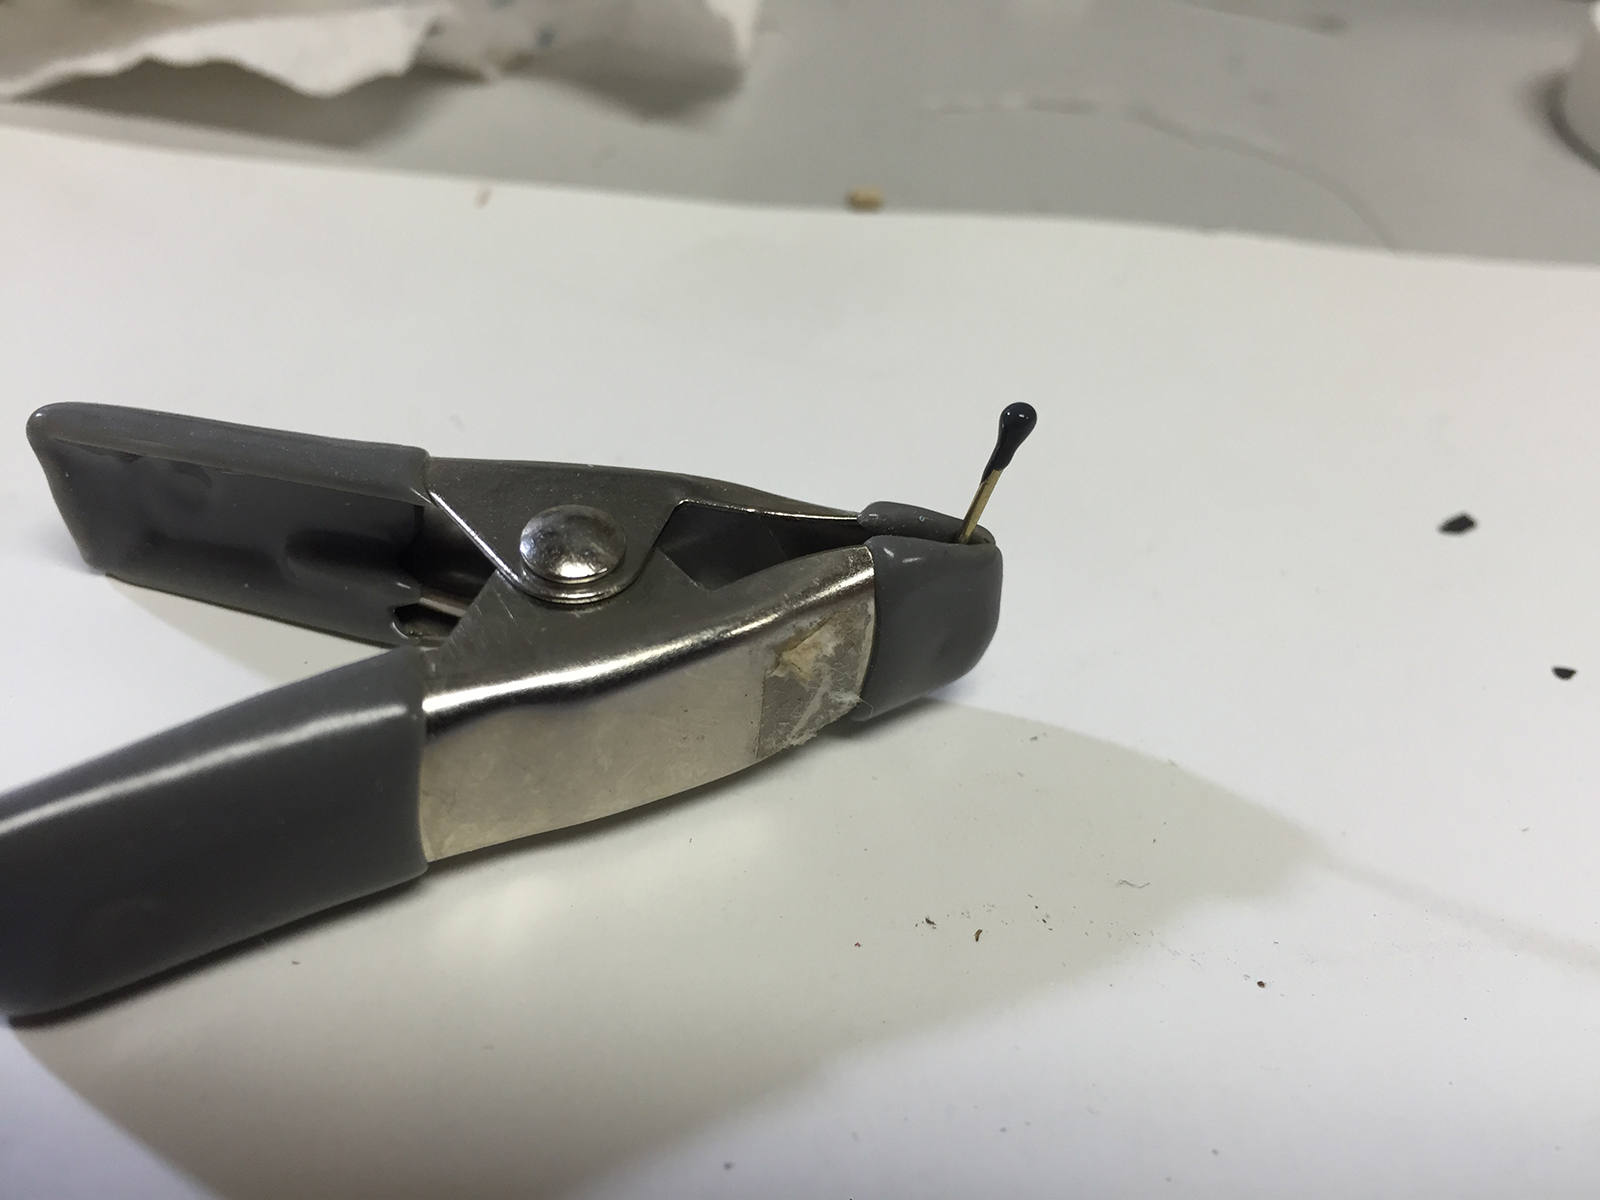
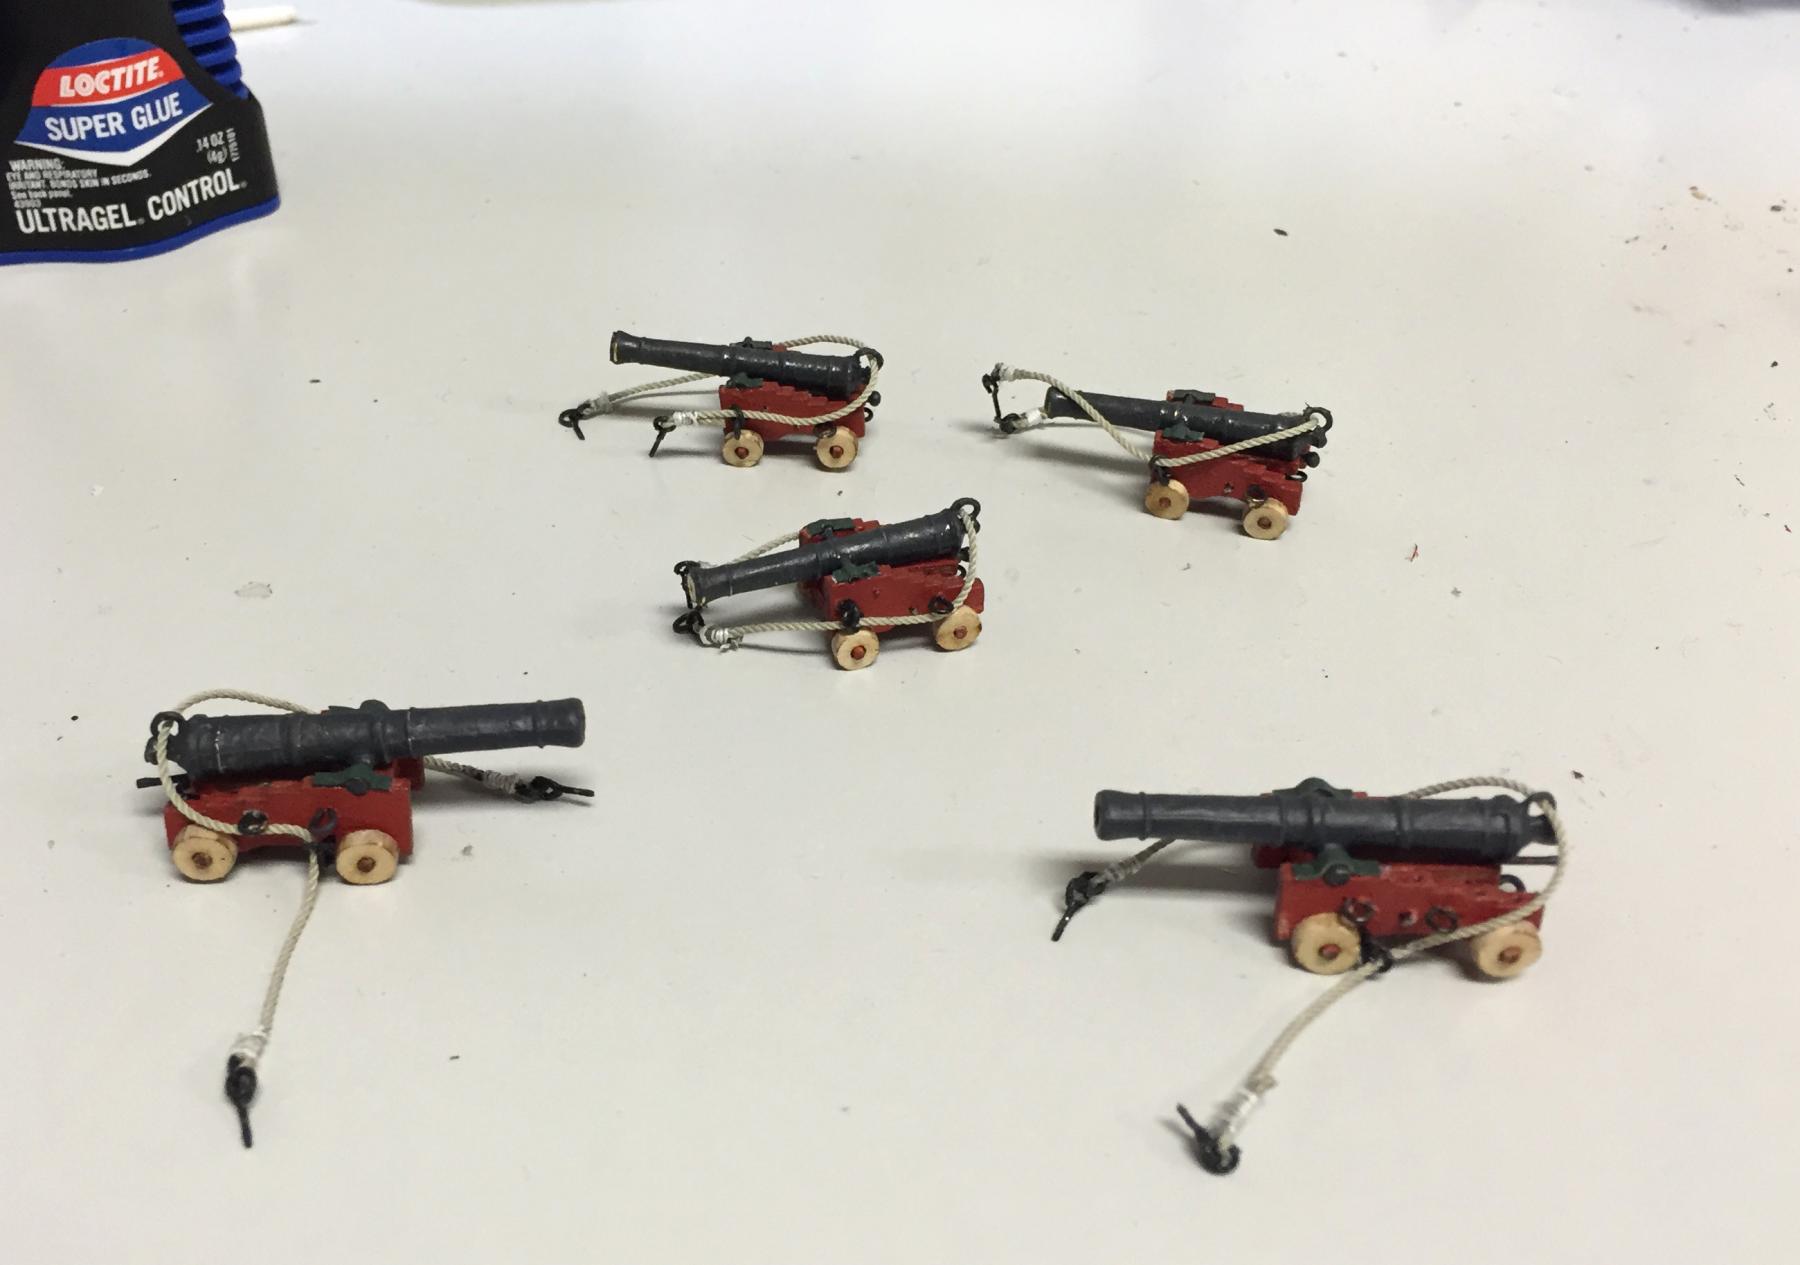
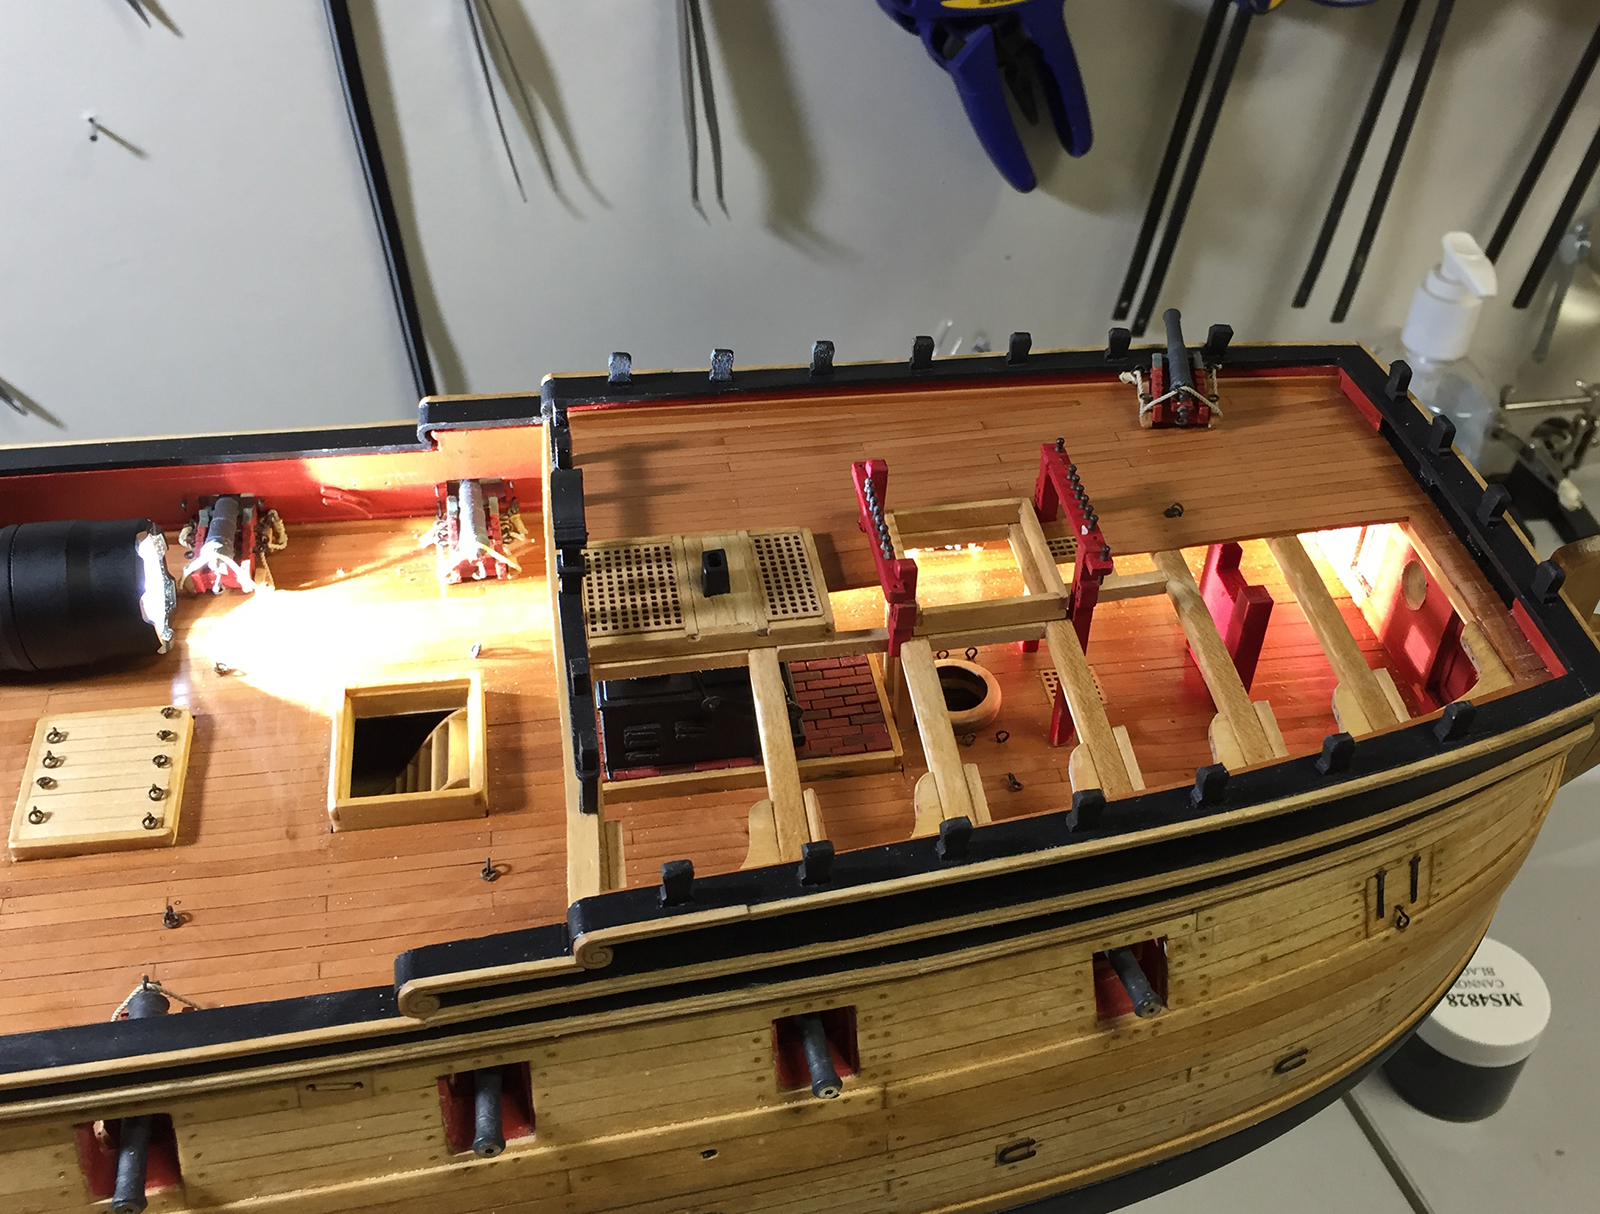
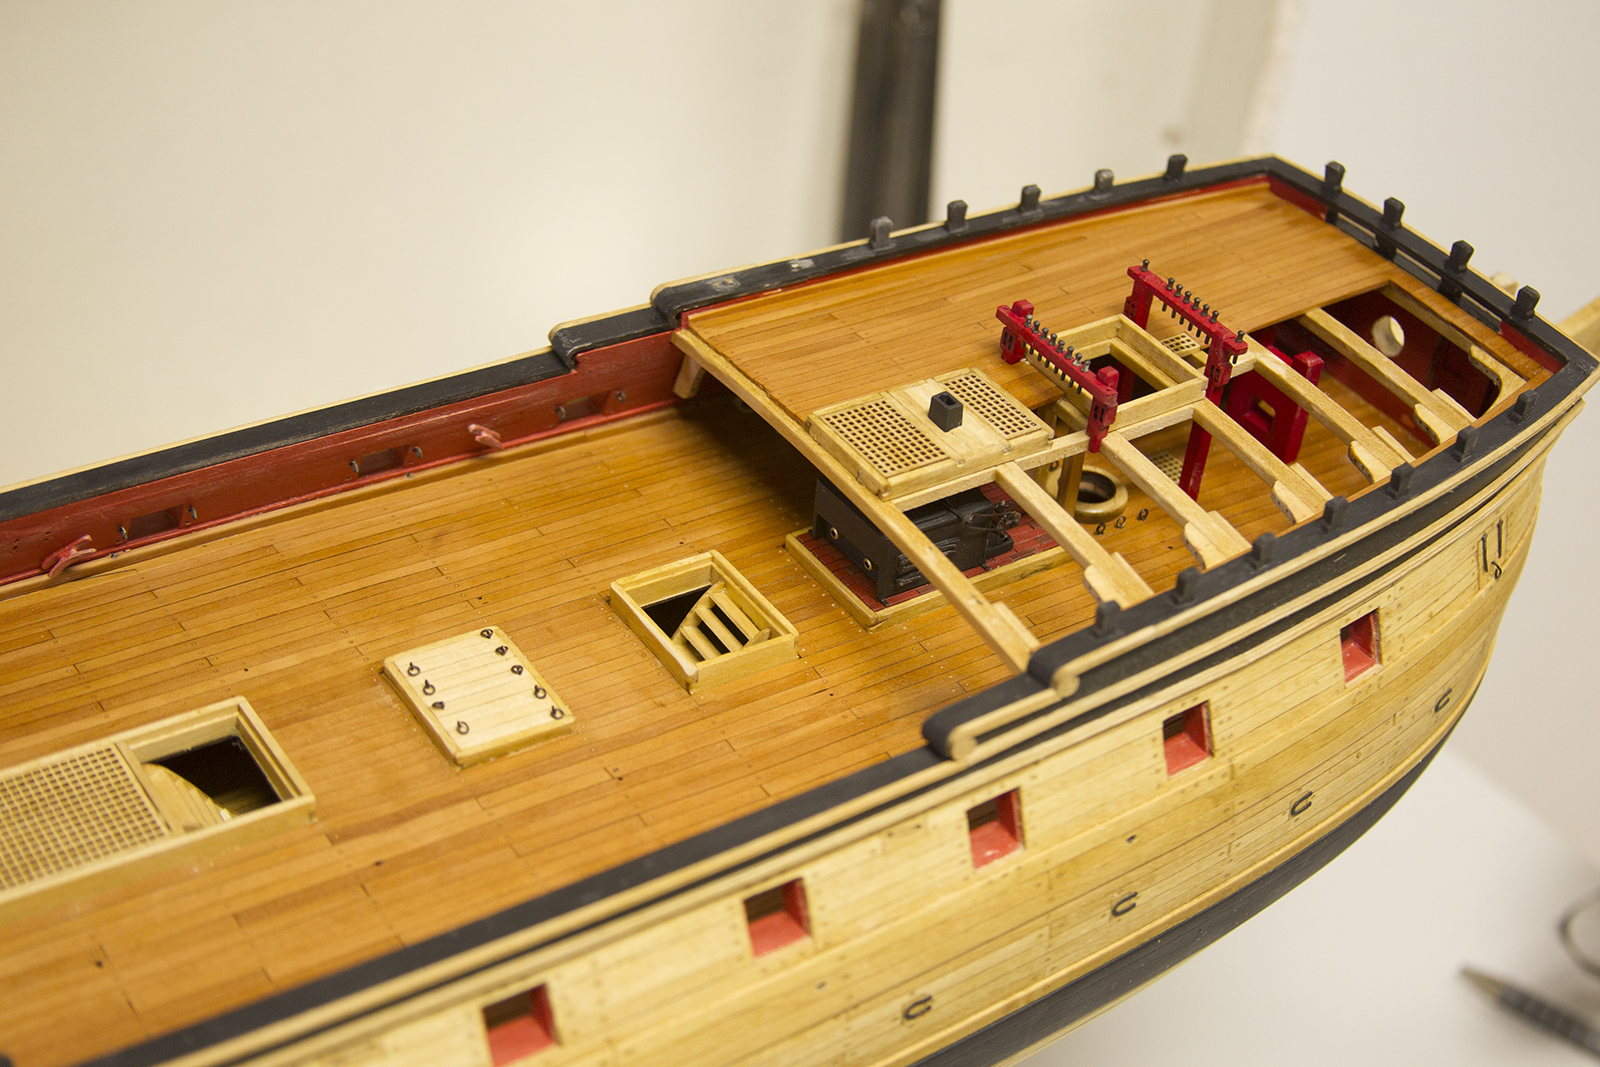
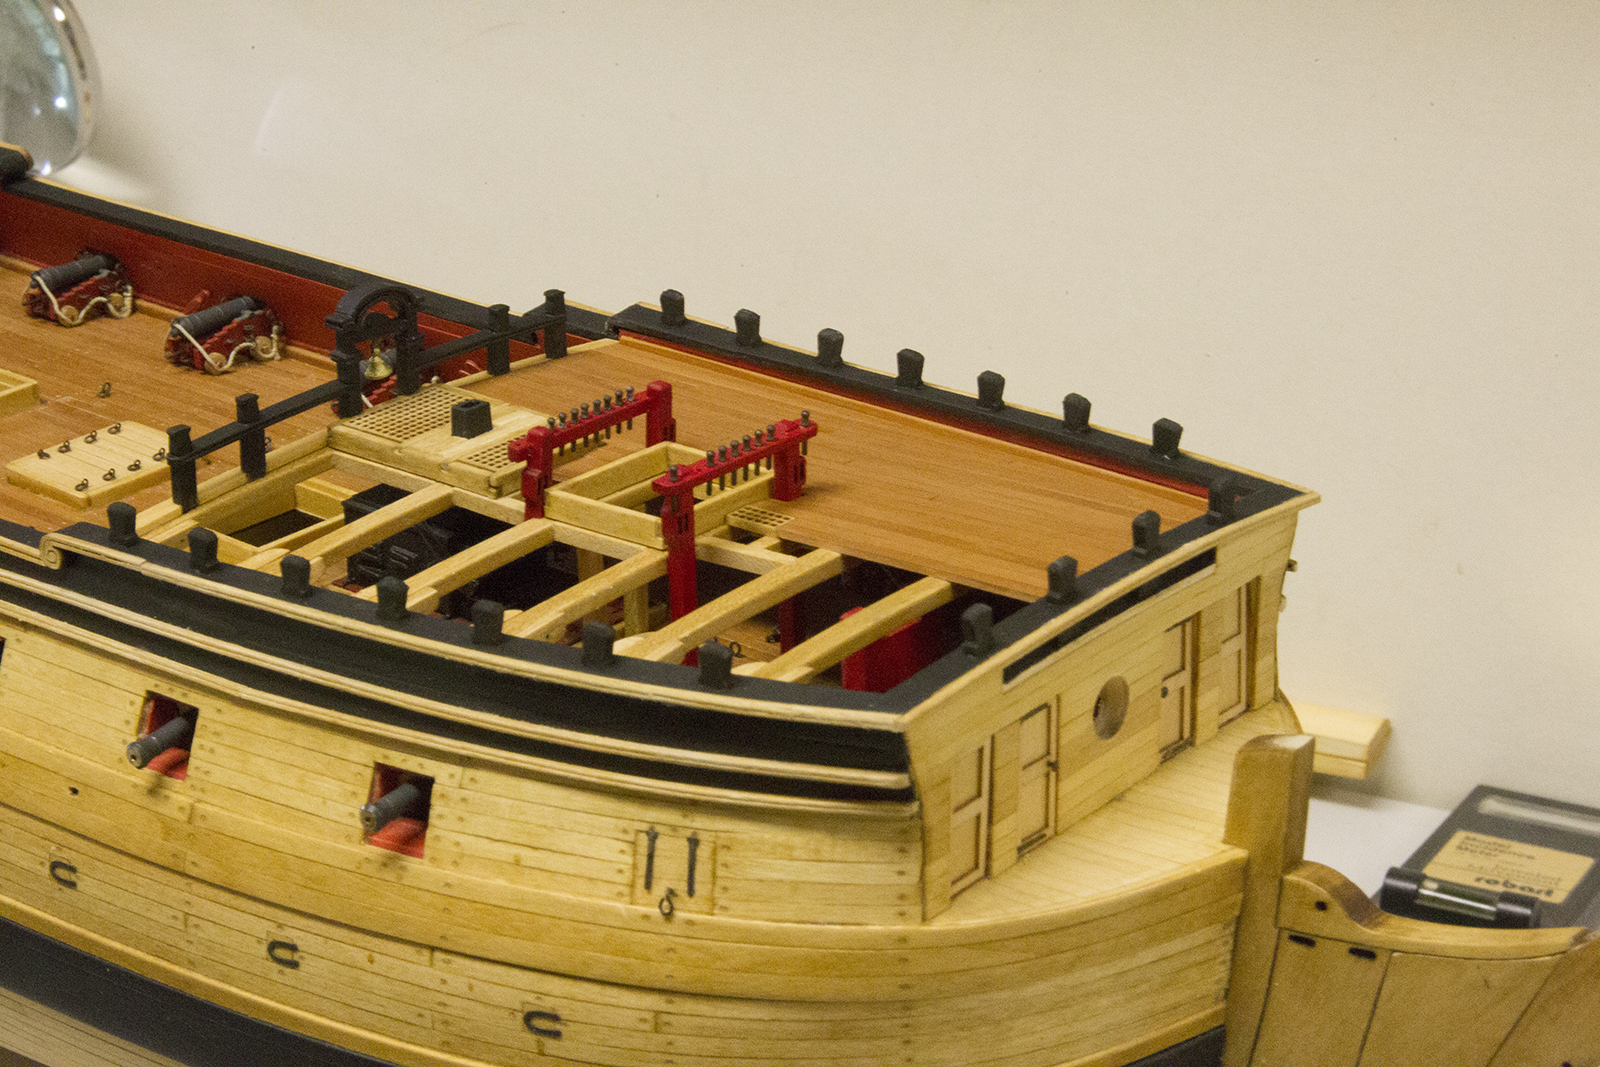
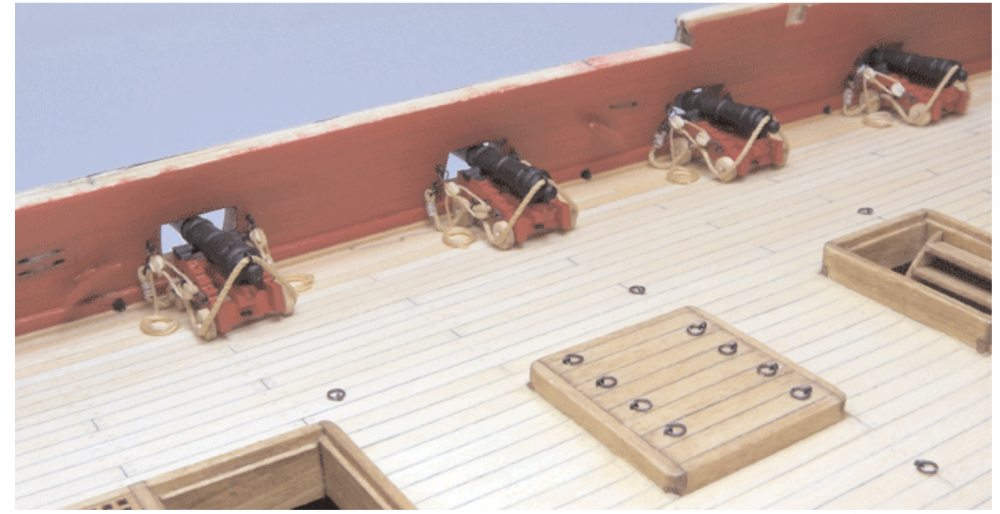
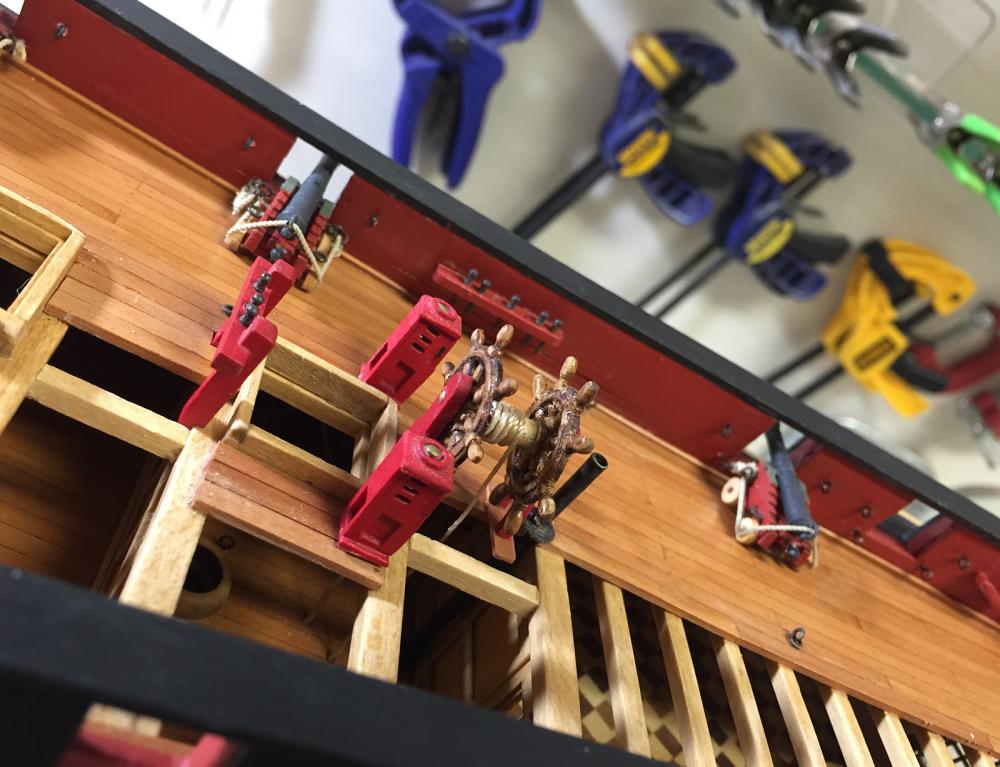
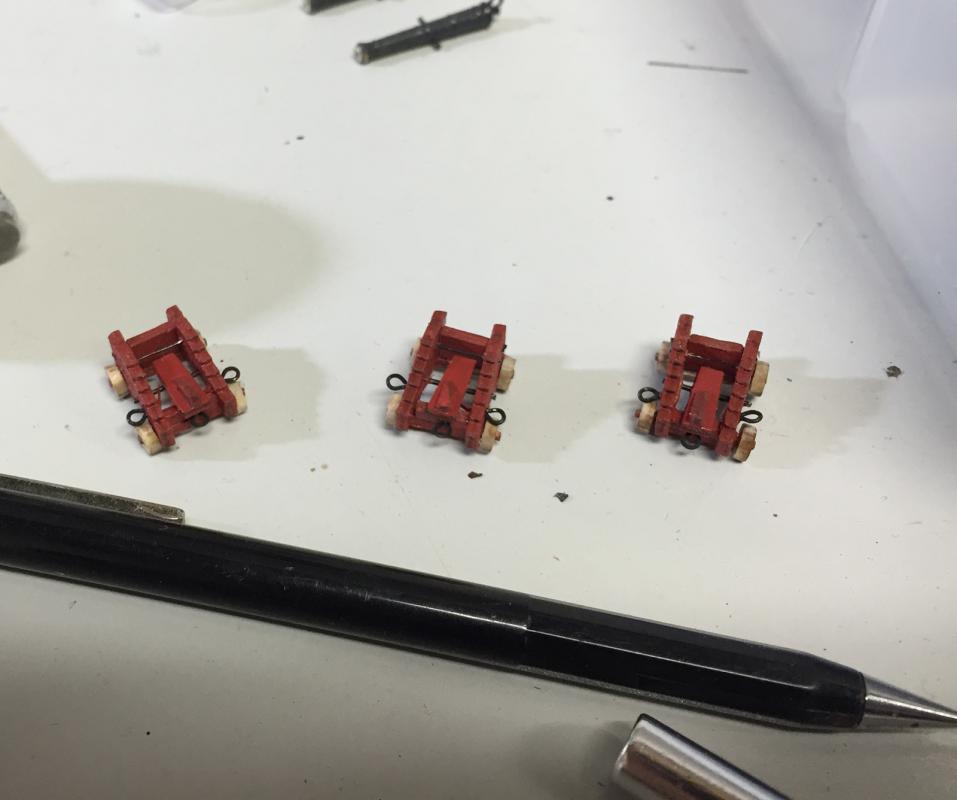
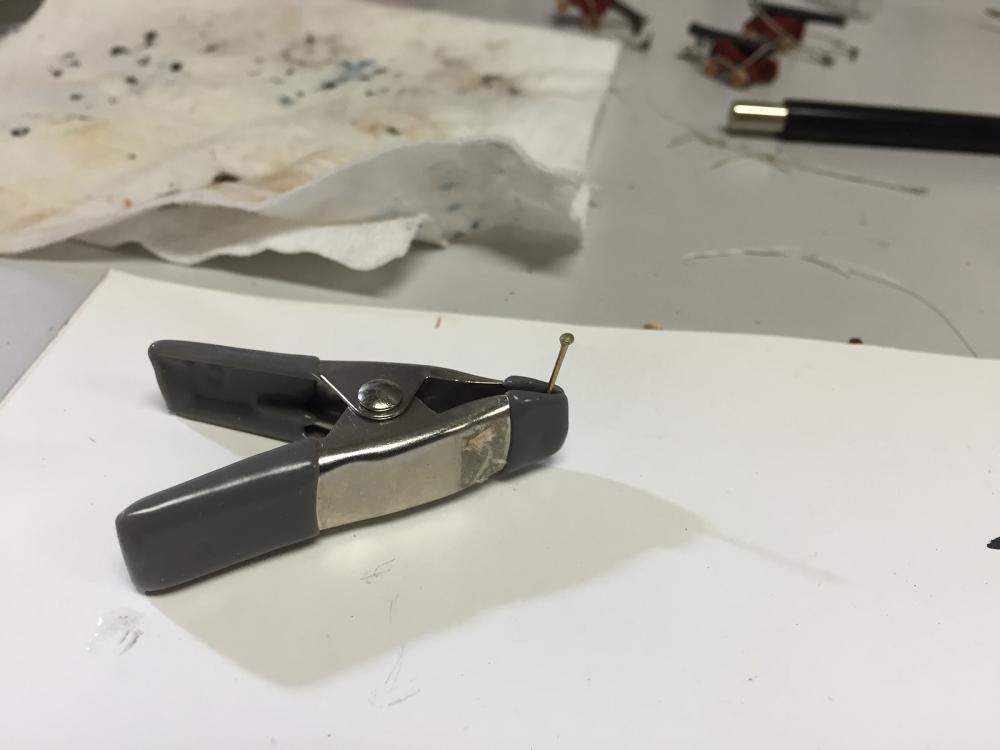
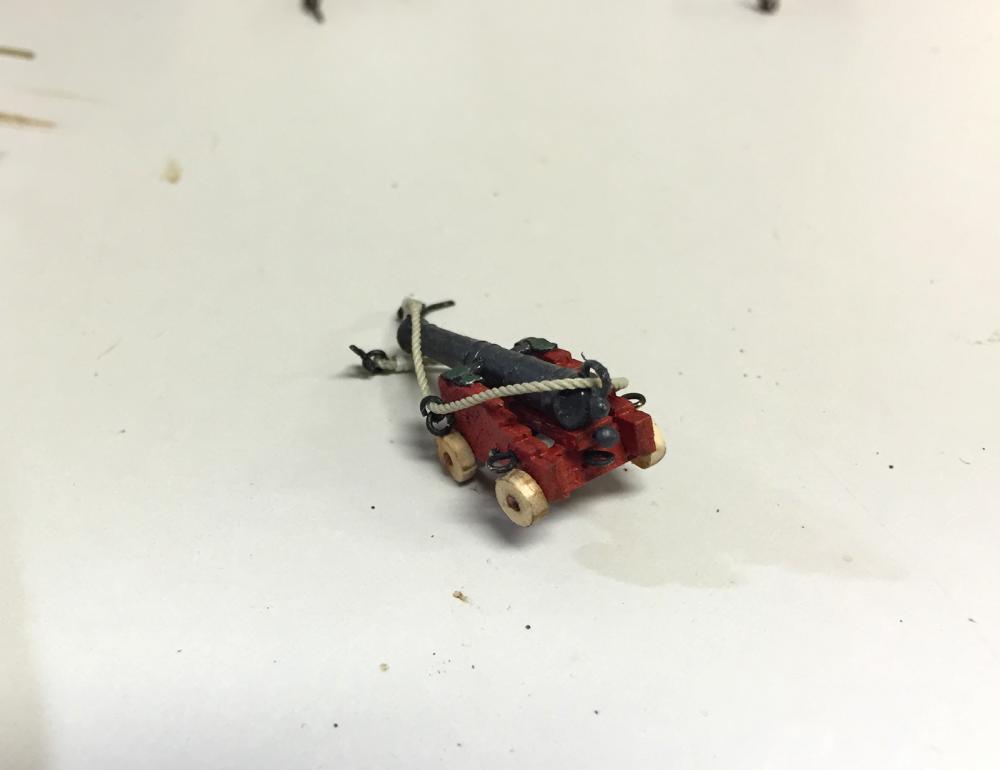
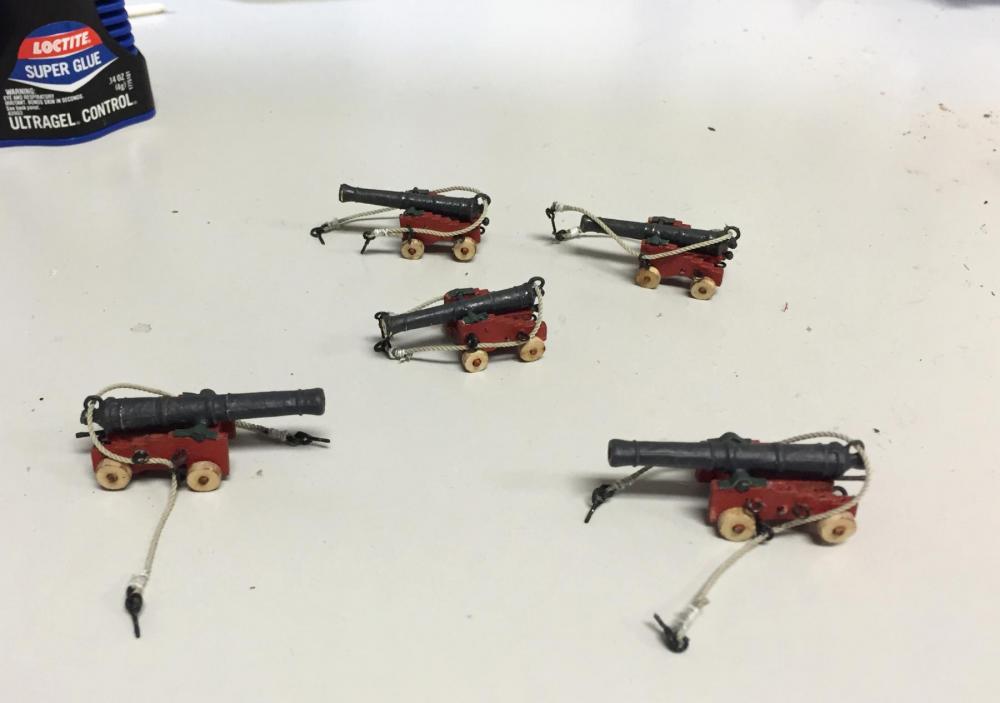
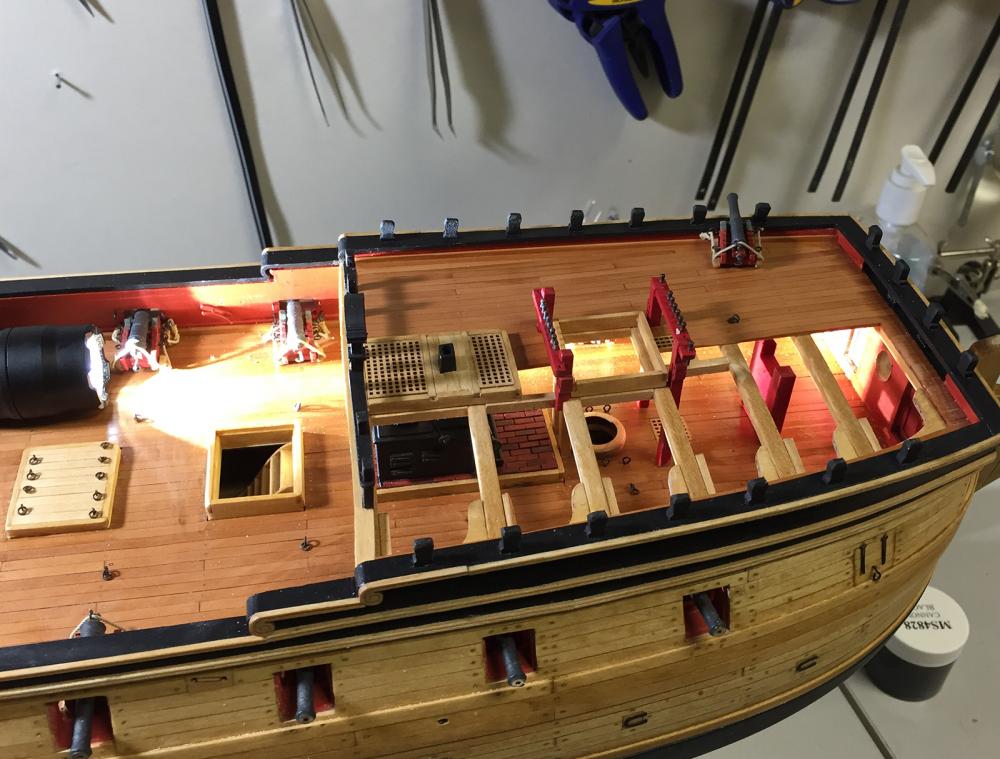
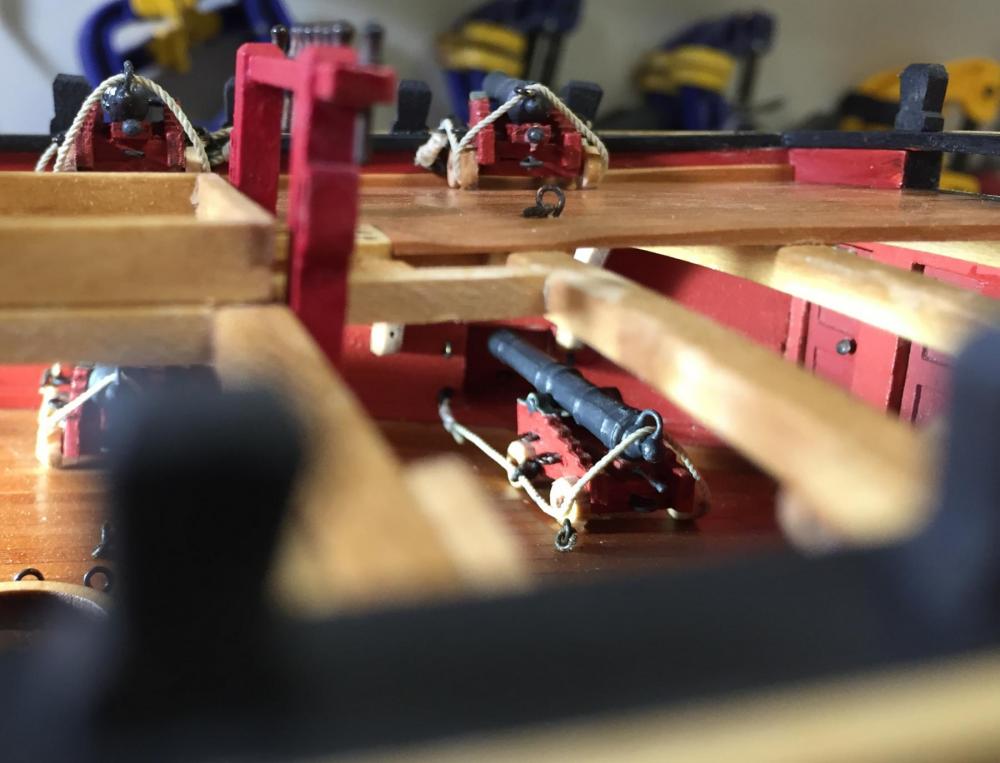
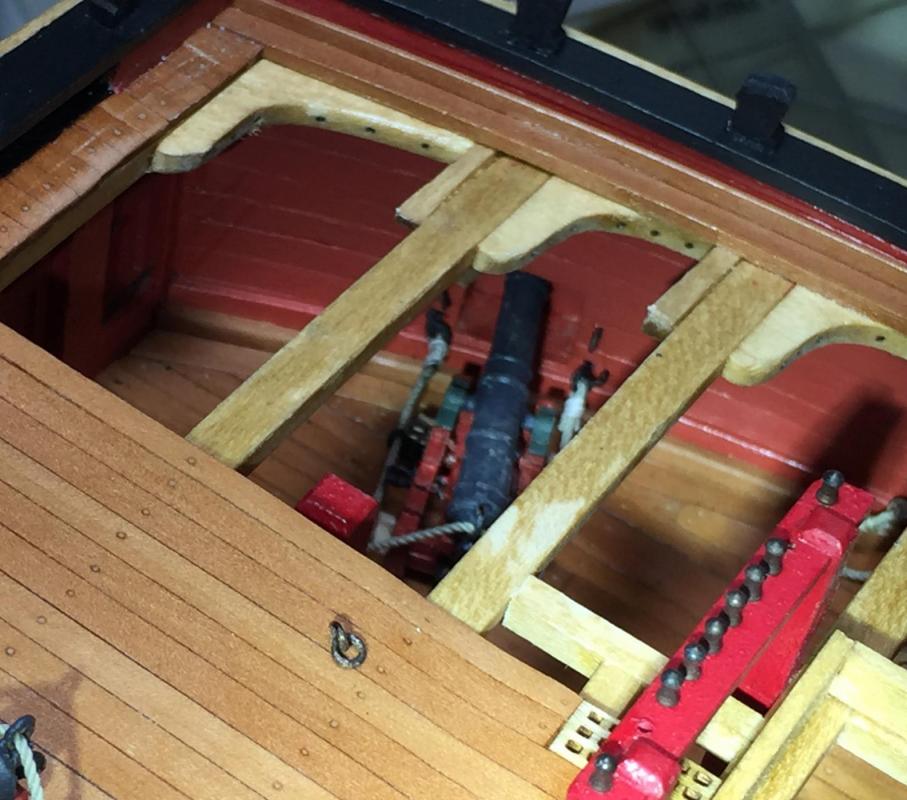
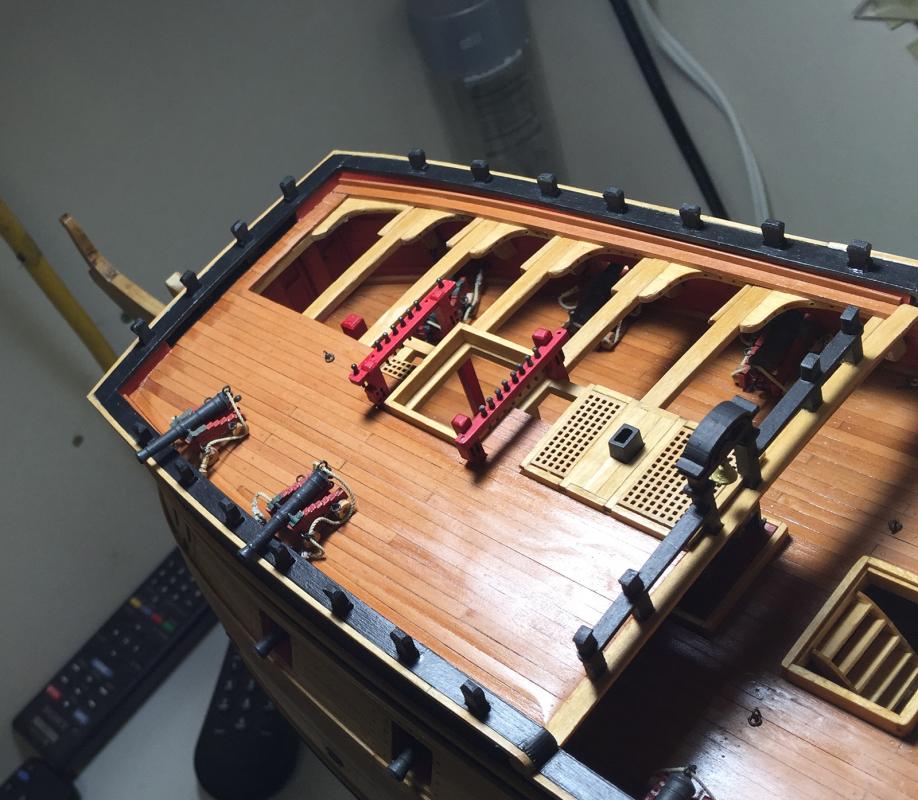
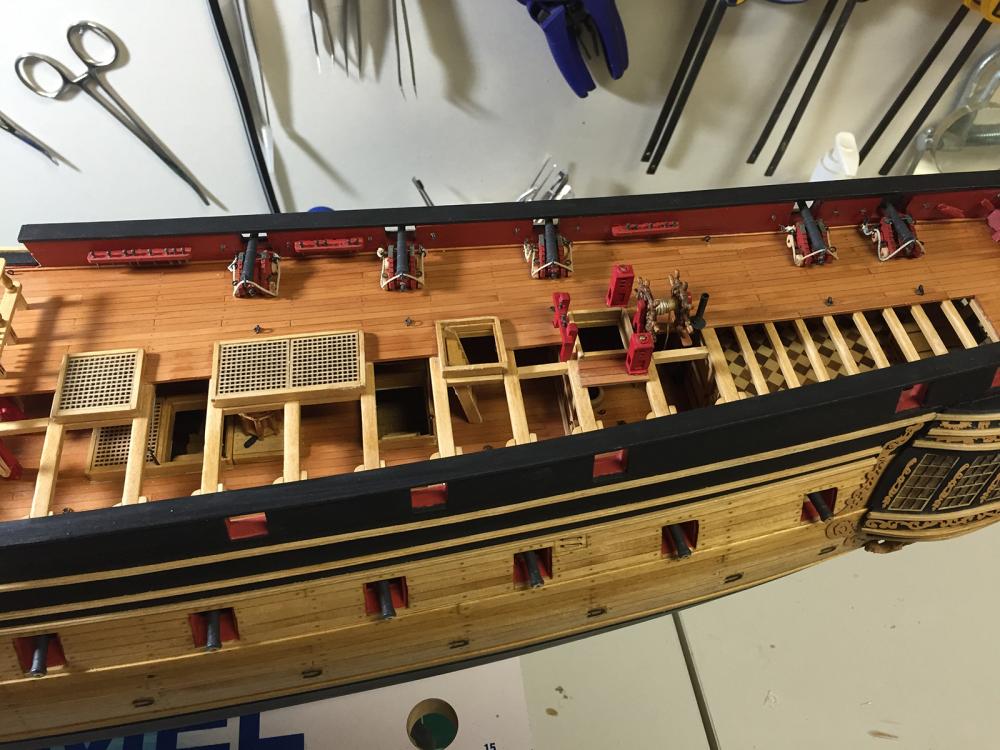
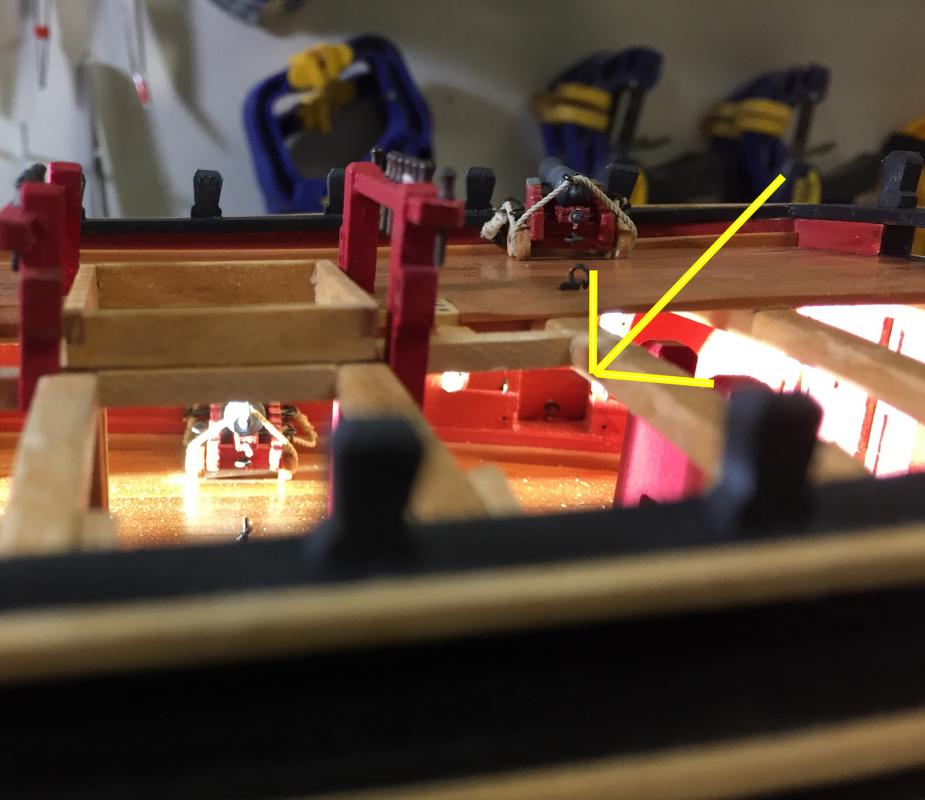
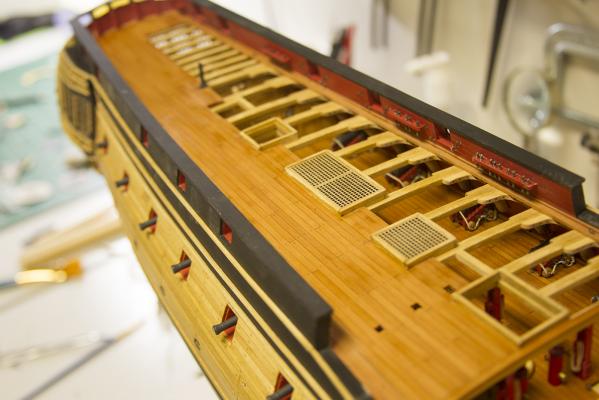
Hello everyone! My sincerest apologies for the complete lack of updates and information. My business travel schedule as of late is pretty brutal. I have two more trips this month (one tomorrow), and then three more in June. Oy. Top that off with organizing a giant party for my lovely wife's 40th Birthday last month and it's been a hectic 2016 thus far to say the least! At any rate, excuses aside - I have done a bit of work on the Confederacy in short spurts and starts when I've had a little availability. Here's what I've been up to: First - I finished up the ship's wheels and remounted them on the deck along with all the fixtures I removed to resurface and smooth out the deck. That also meant re-mounting all the cannon. To that end - even though the plans call for just four six pounders, I wanted to fill out the upper deck a bit more - so I ordered a few more cannon from Chuck and set to work added some guns and putting together some carriages. Of course I referenced Augie's hard work so I could replicate as closely as possible. Obviously I didn't want the additional guns to look any different from what he had on deck already. Now, one part that threw me, and I couldn't find reference to in Augie's log - was how he created the knob/handle on the stool bed. So I took a nail, added a glob of super glue, then painted it. I don't think it's noticeably different from Augie's work, so I'm pleased with that. Along with the 6 pounders, I also wanted to add a couple longer guns to the foremost cannon ports, even though those gun ports are closed. The open deck (starboard) side wasn't too difficult. But on the Port side, that meant I'd have to tuck the cannons below decks, then attach the rigging to the sides of the ship below the deck. It's was a little hairy in there... but I managed to pull it off after bouts of occasional profanity. All cleaned up, I think she looks pretty good. Hopefully Mr. Augie's watching over and is pleased. :-)


- 2,191 replies
-
- 34
-
-
- confederacy
- Model Shipways
- (and 1 more)
-
Nice work Popeye! Almost time for the hot tub? heh
-
Yup... all about clove hitch until you dream about them. And I hate when work gets in the way of hobby! Drat!
- 1,616 replies
-
- 6
-
-
- caldercraft
- agamemnon
- (and 1 more)
-
I'm kinda diggin' the flat one. It gives you a ton of options regarding what to fill it with. Btw - little know "Bug" fact, Adrian Cronauer's job in "Good Morning Vietnam" was what I did in the Air Force for 20 years.
-
Thanks everyone for the comments and likes, I appreciate it. I'll try to do some work on her this week in the evenings, but this weekend I have my first business trip of the year, so I'll be heading to DC for the weekend and won't get to hang out in the shipyard.
- 2,191 replies
-
- 5
-
-
- confederacy
- Model Shipways
- (and 1 more)
-
Nothing works like elbow grease Mark. Nice work. I'm becoming super envious of the laser cutter though. How long til Father's day when I can make up an excuse to buy something else? Heh
-
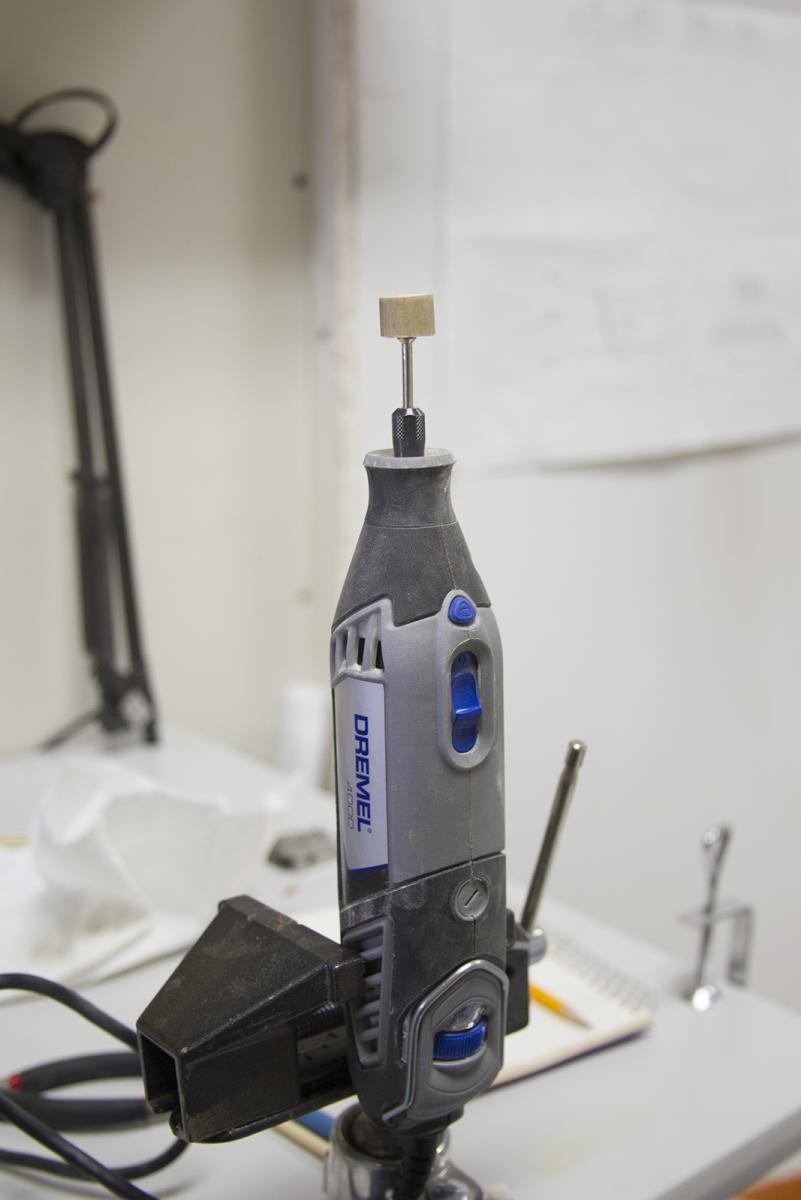
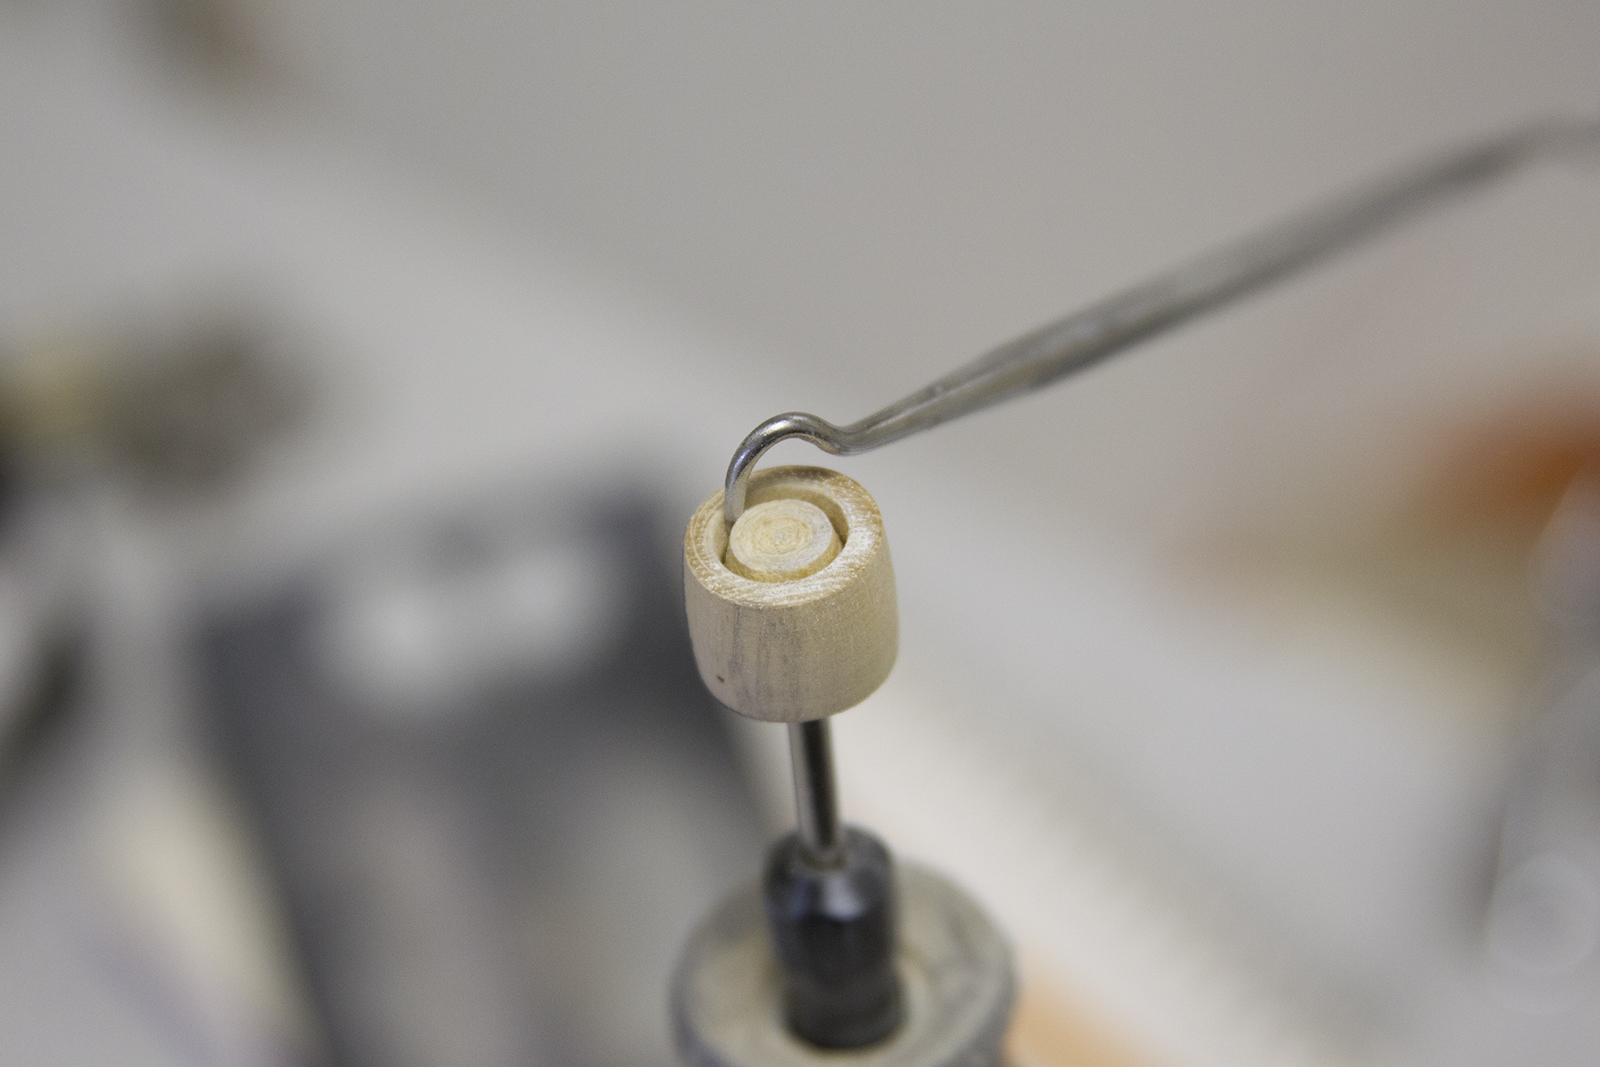
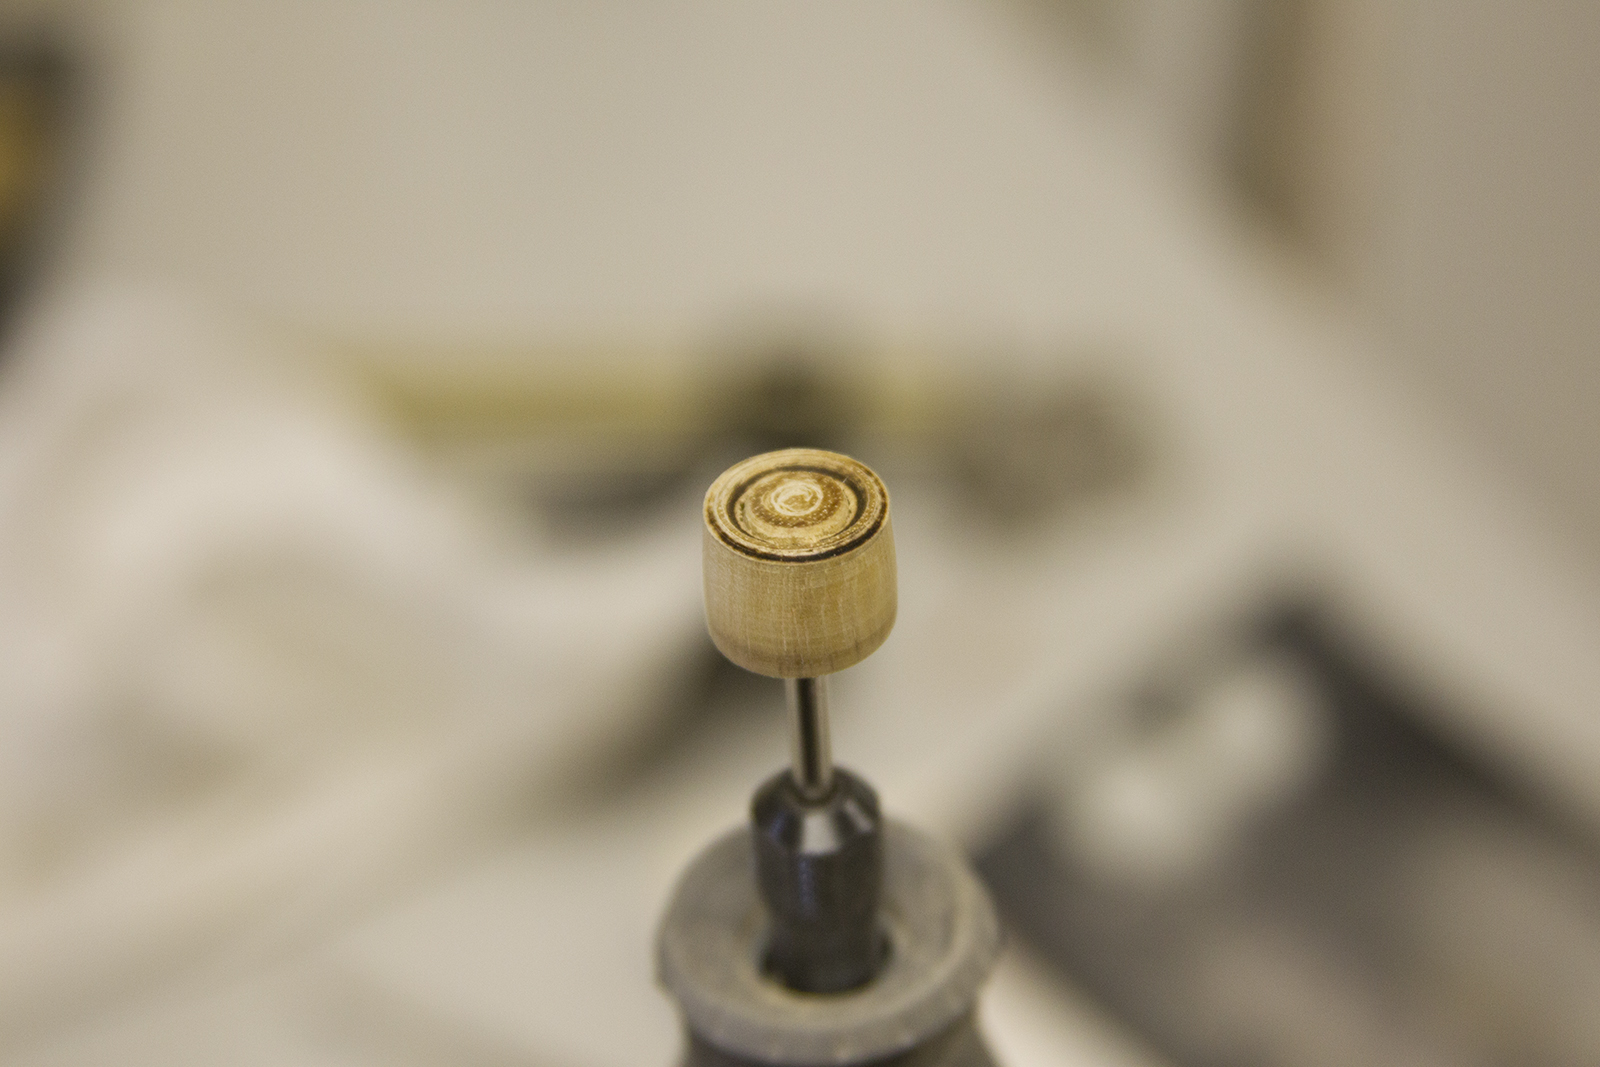
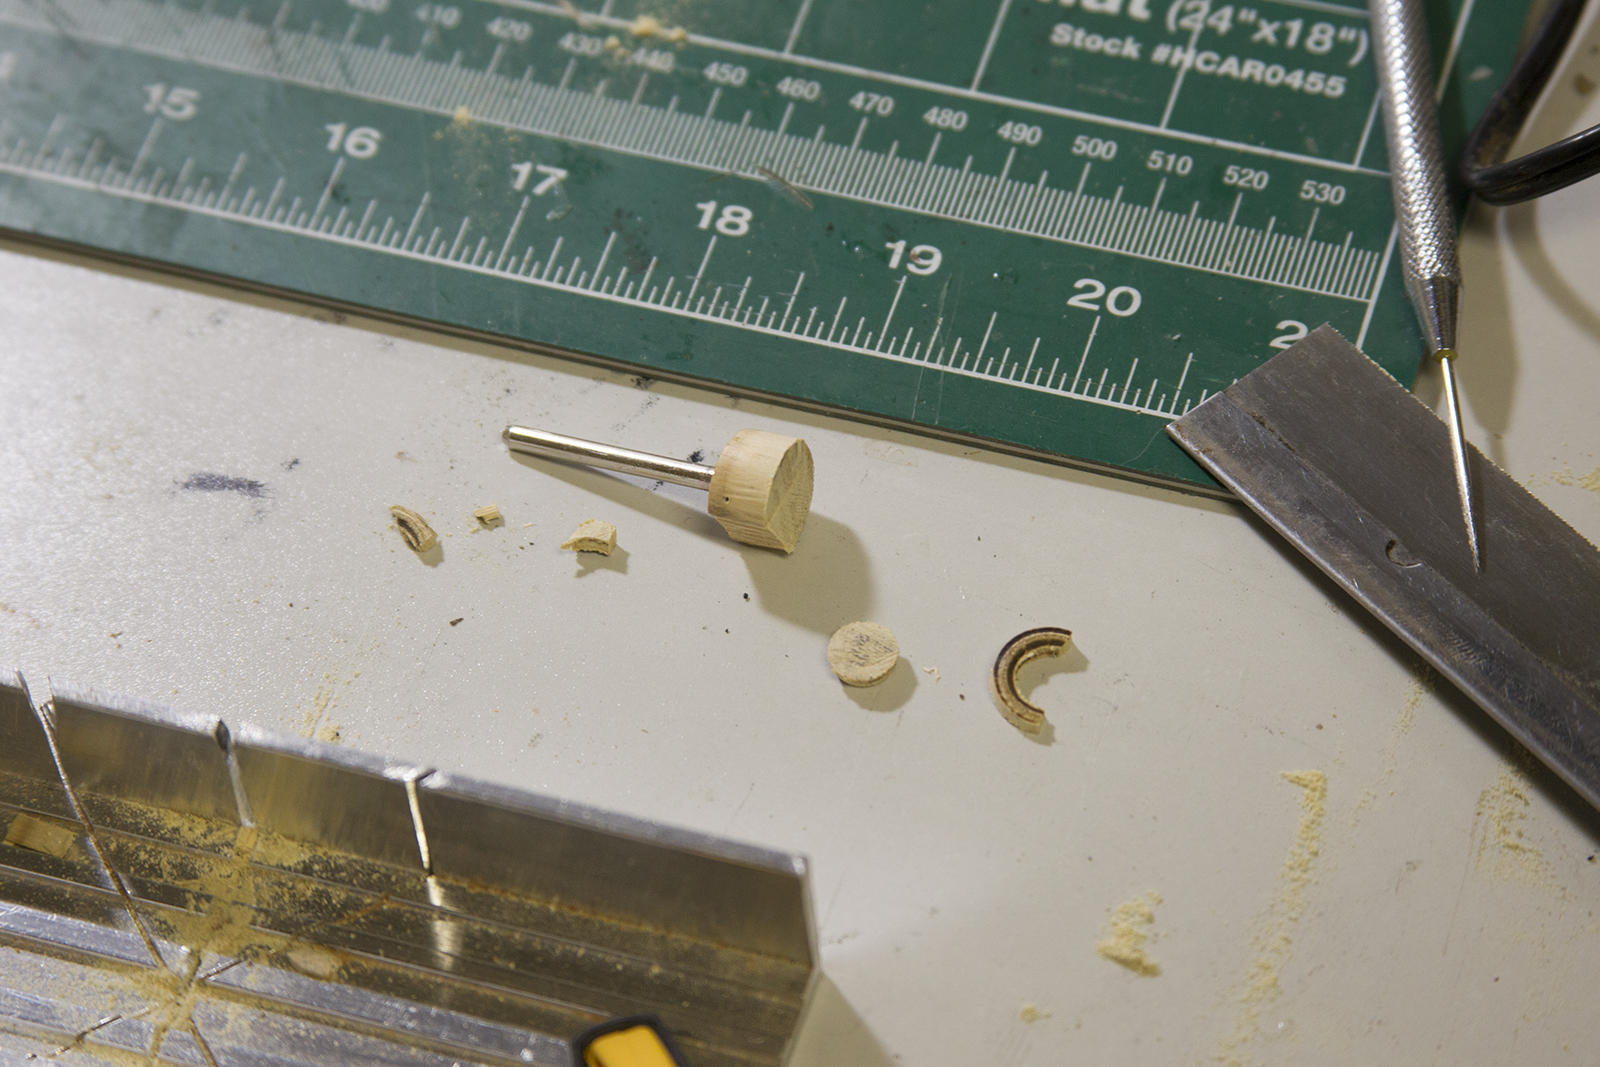
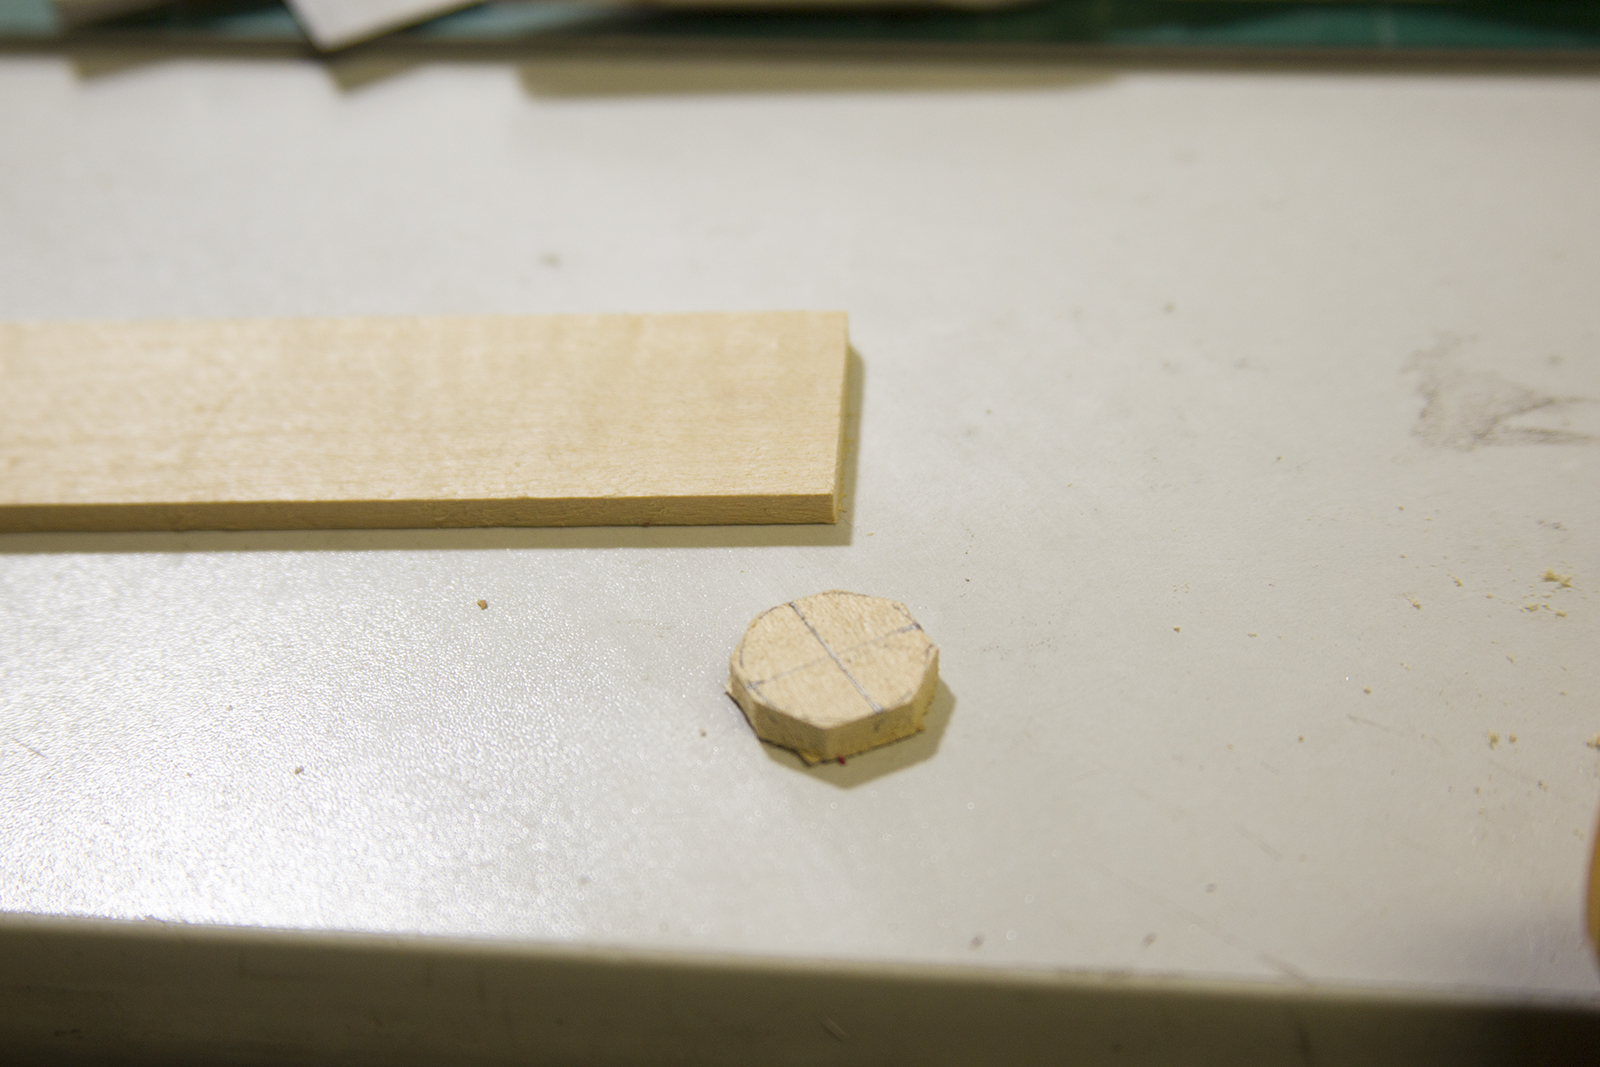
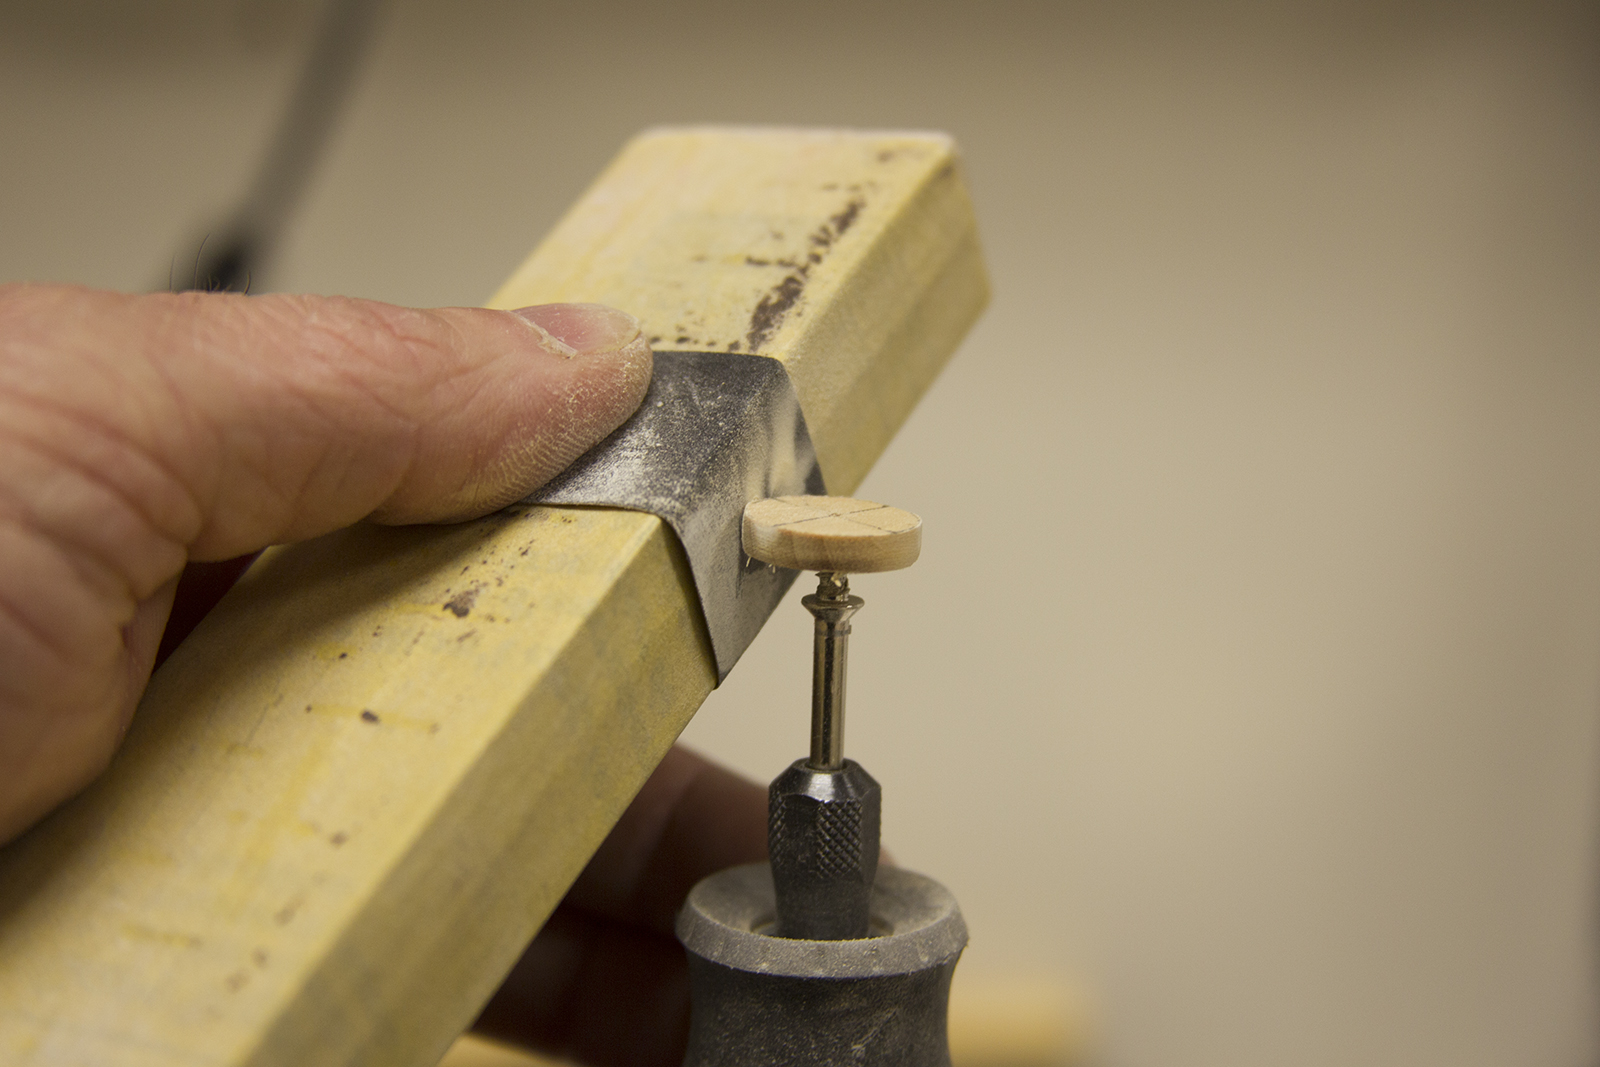
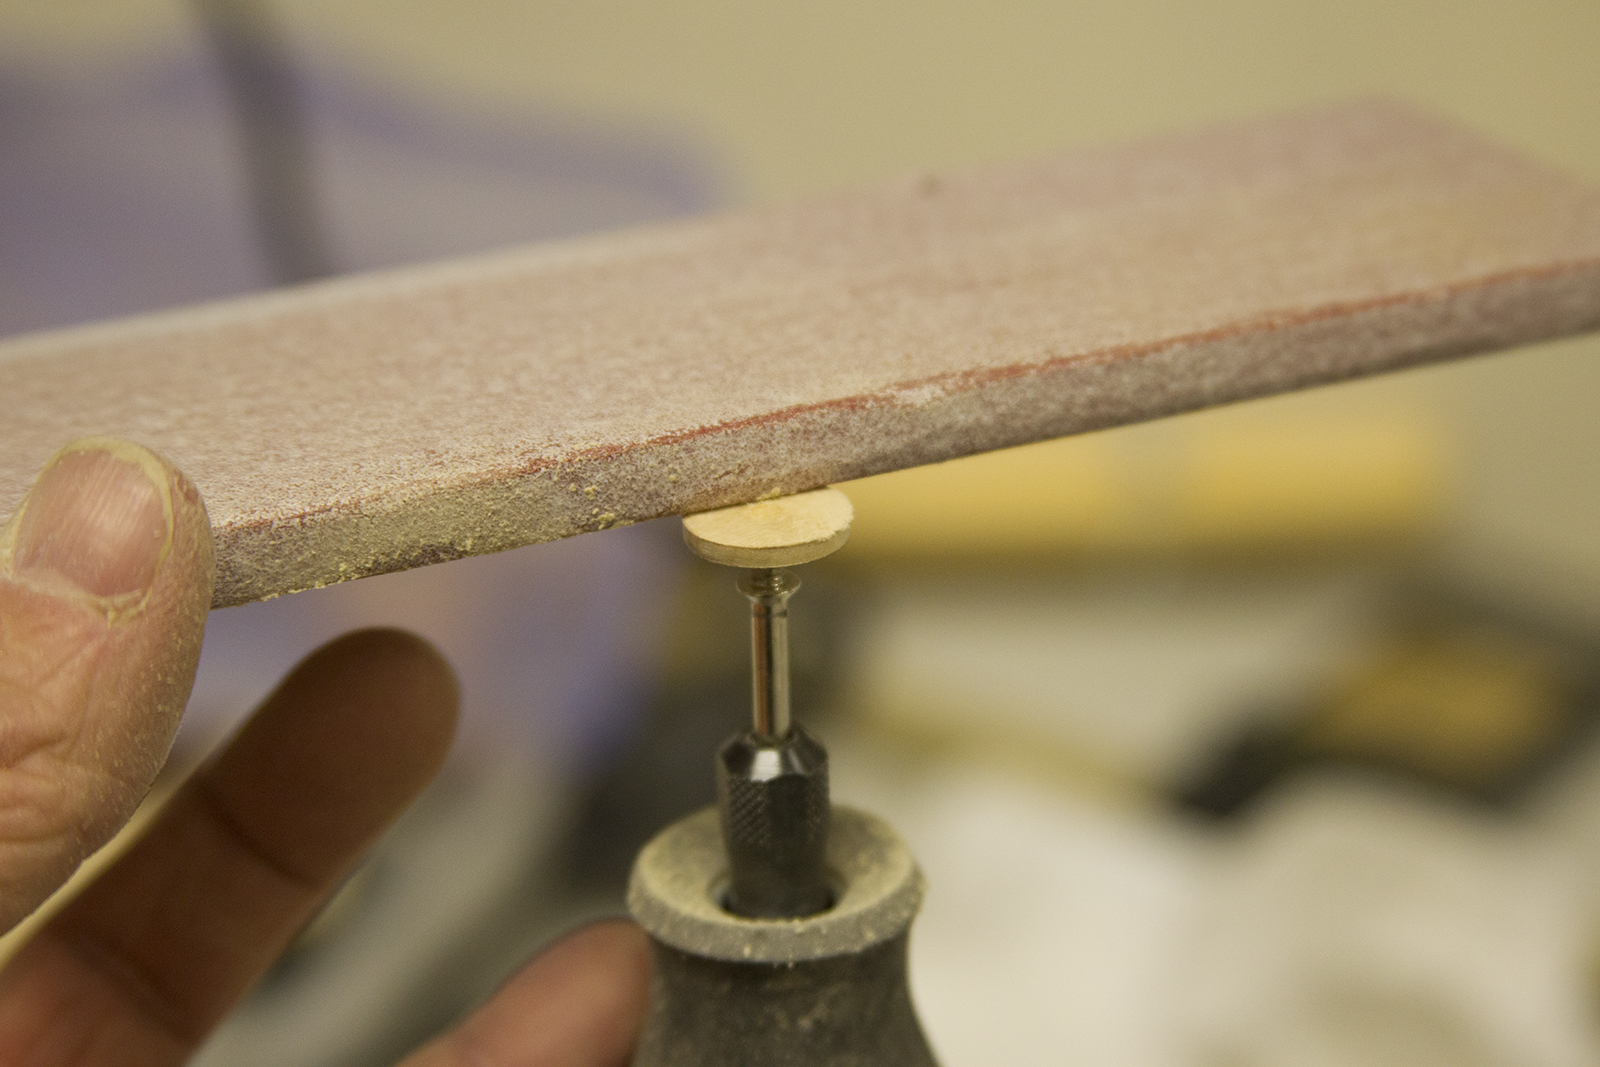
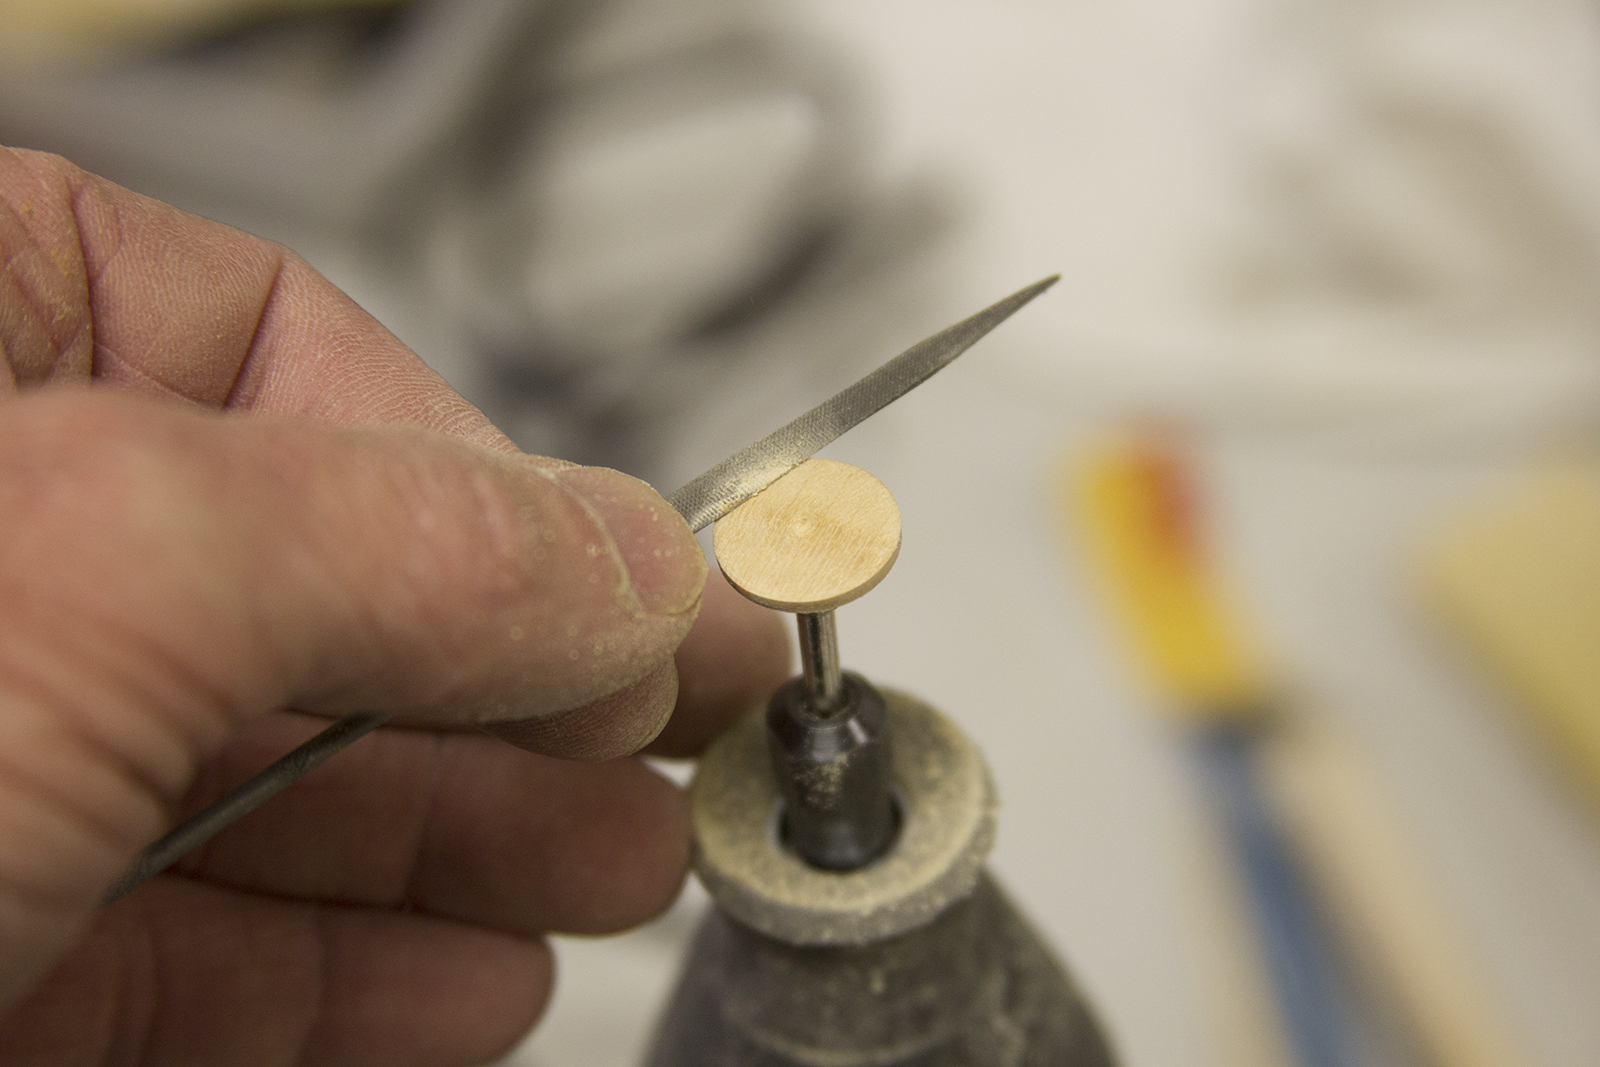
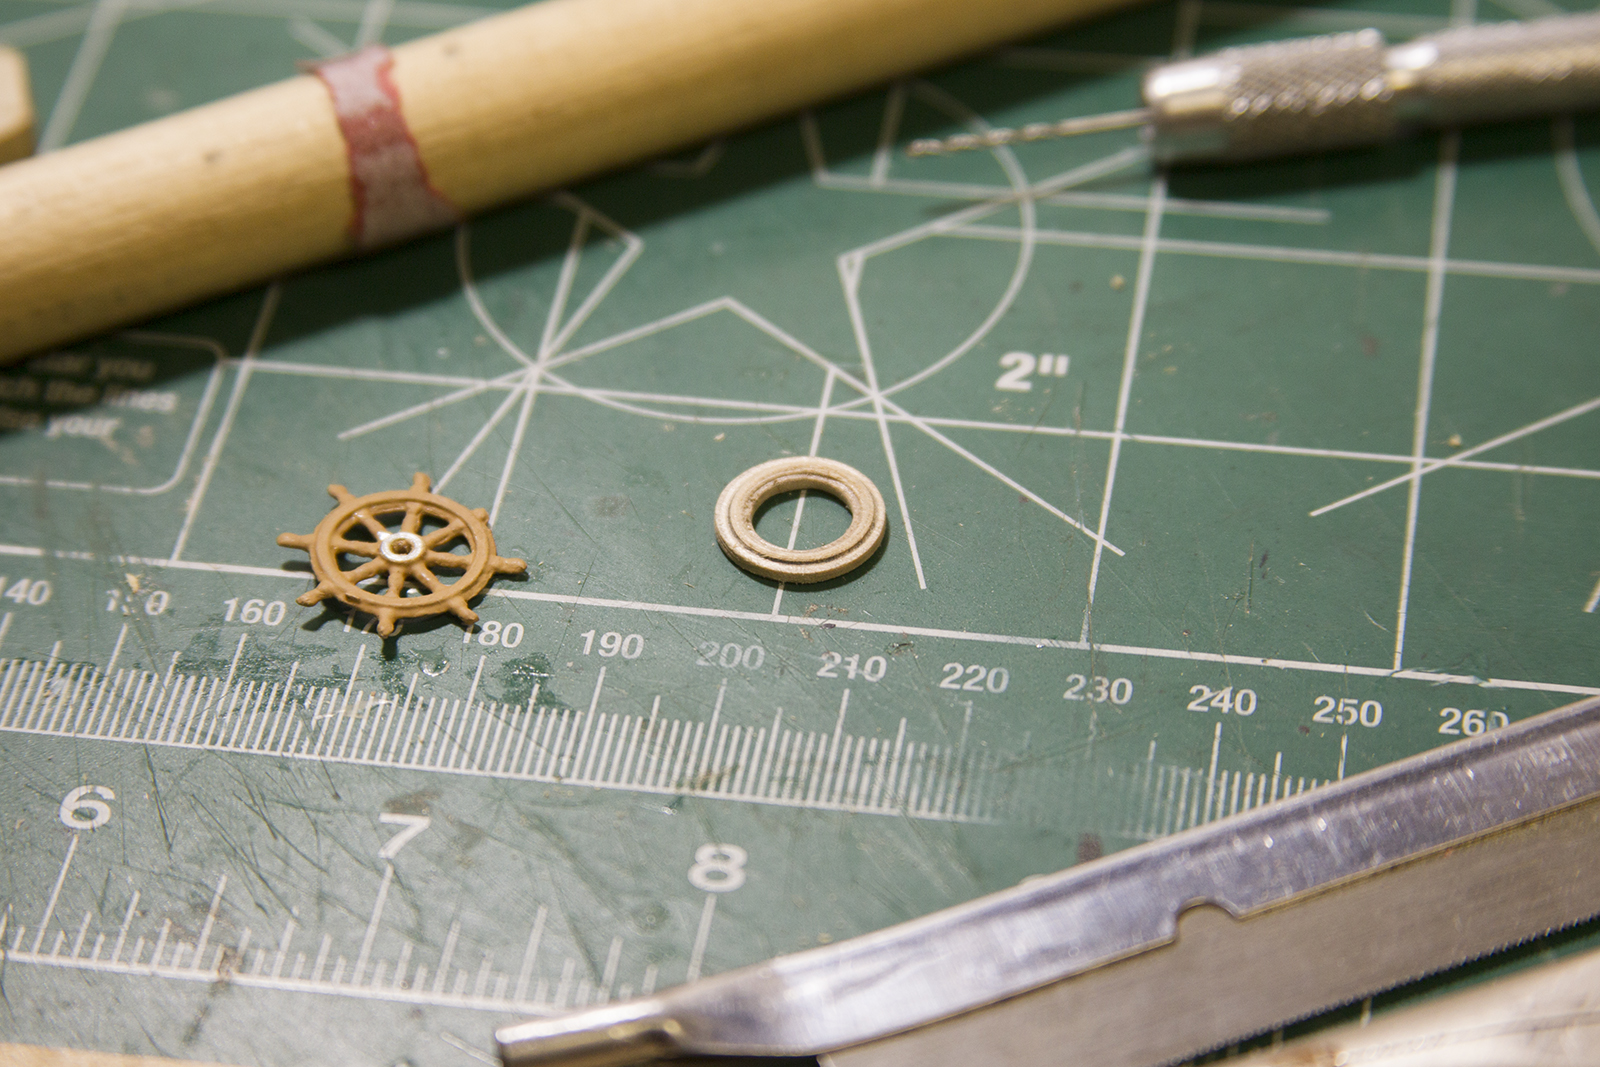
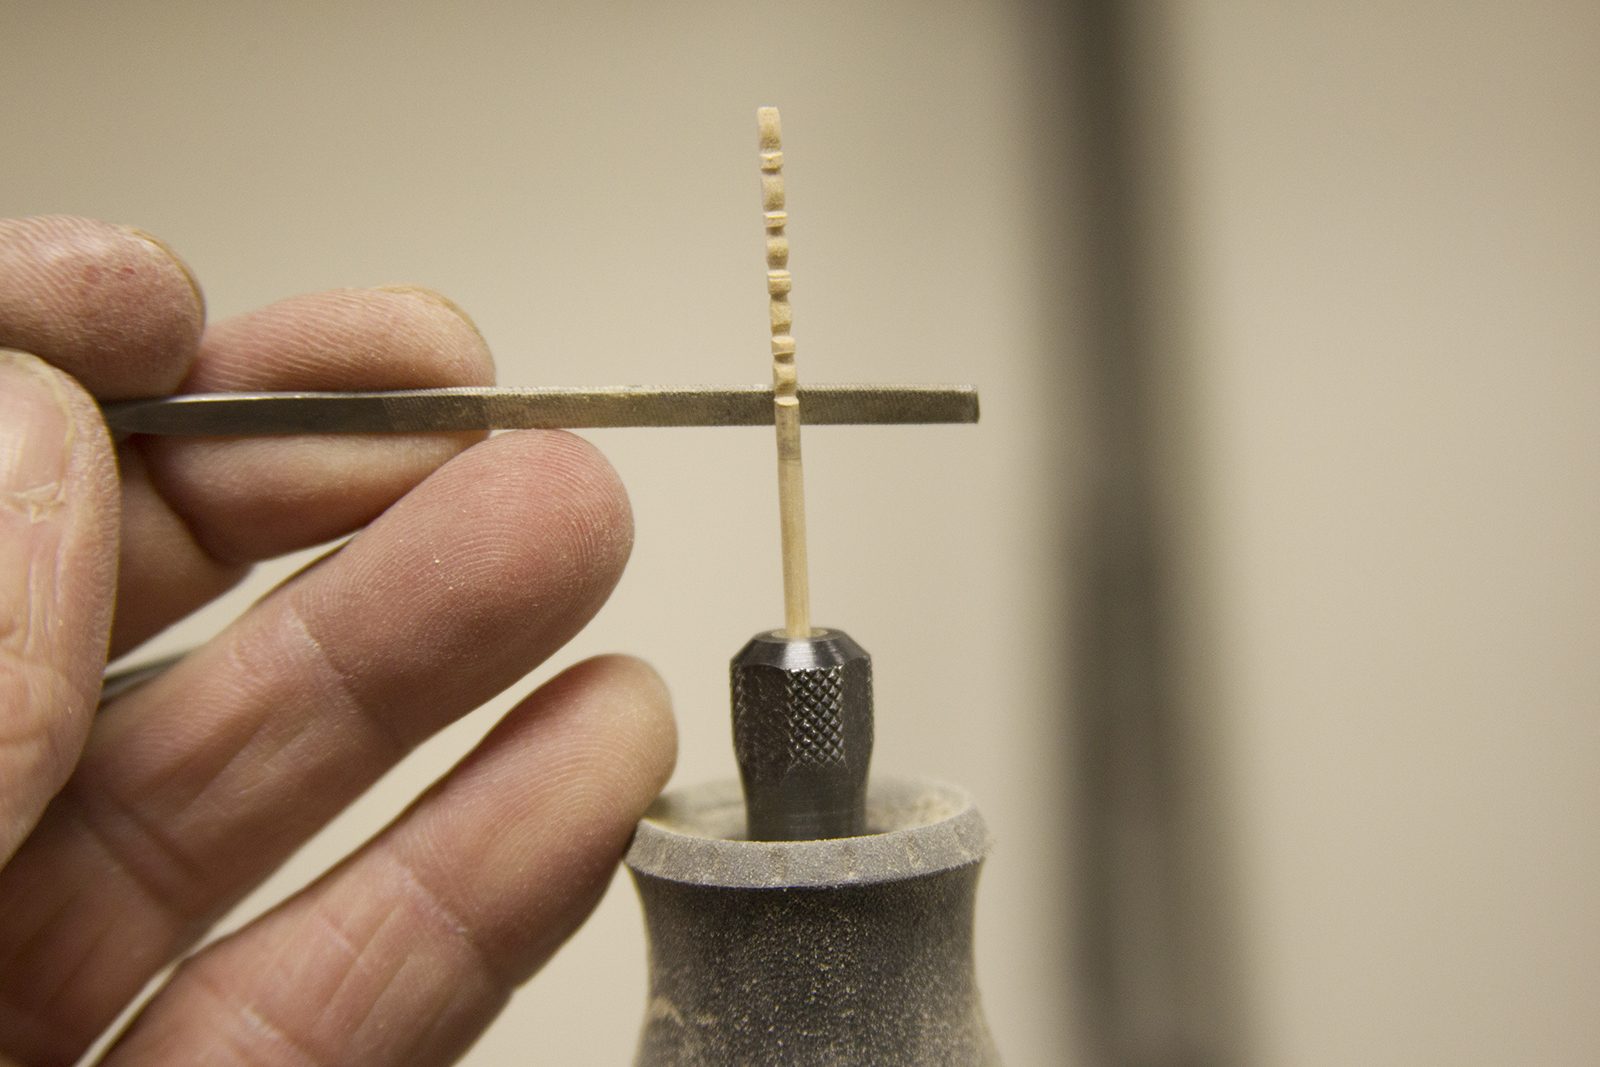
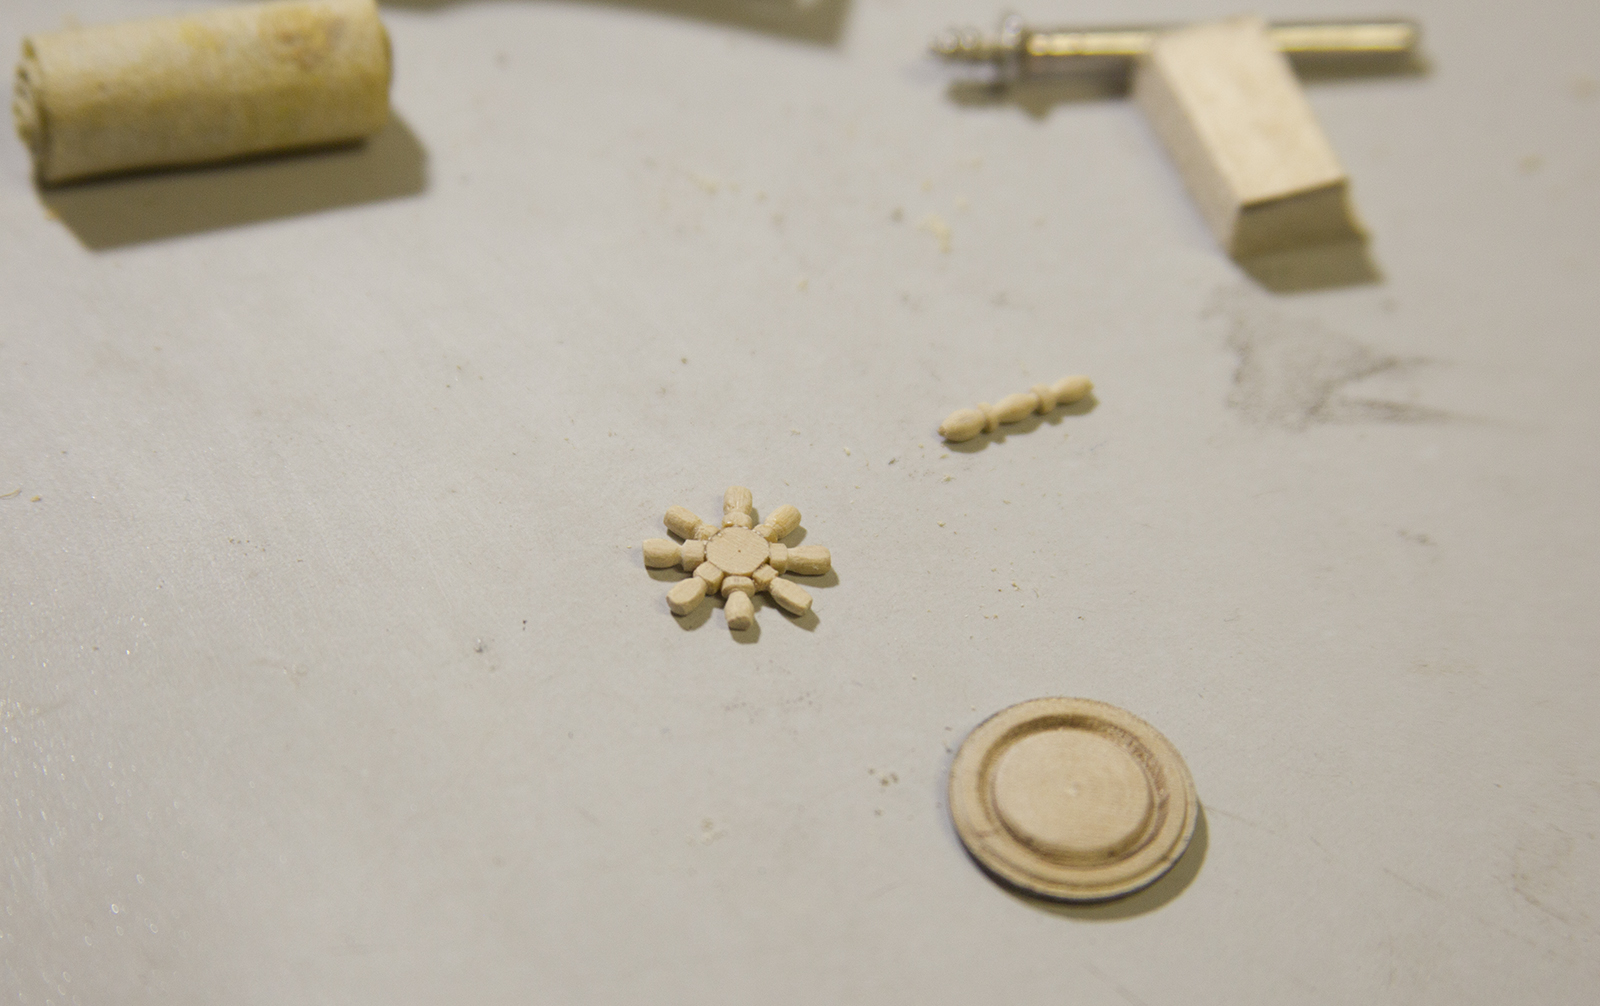
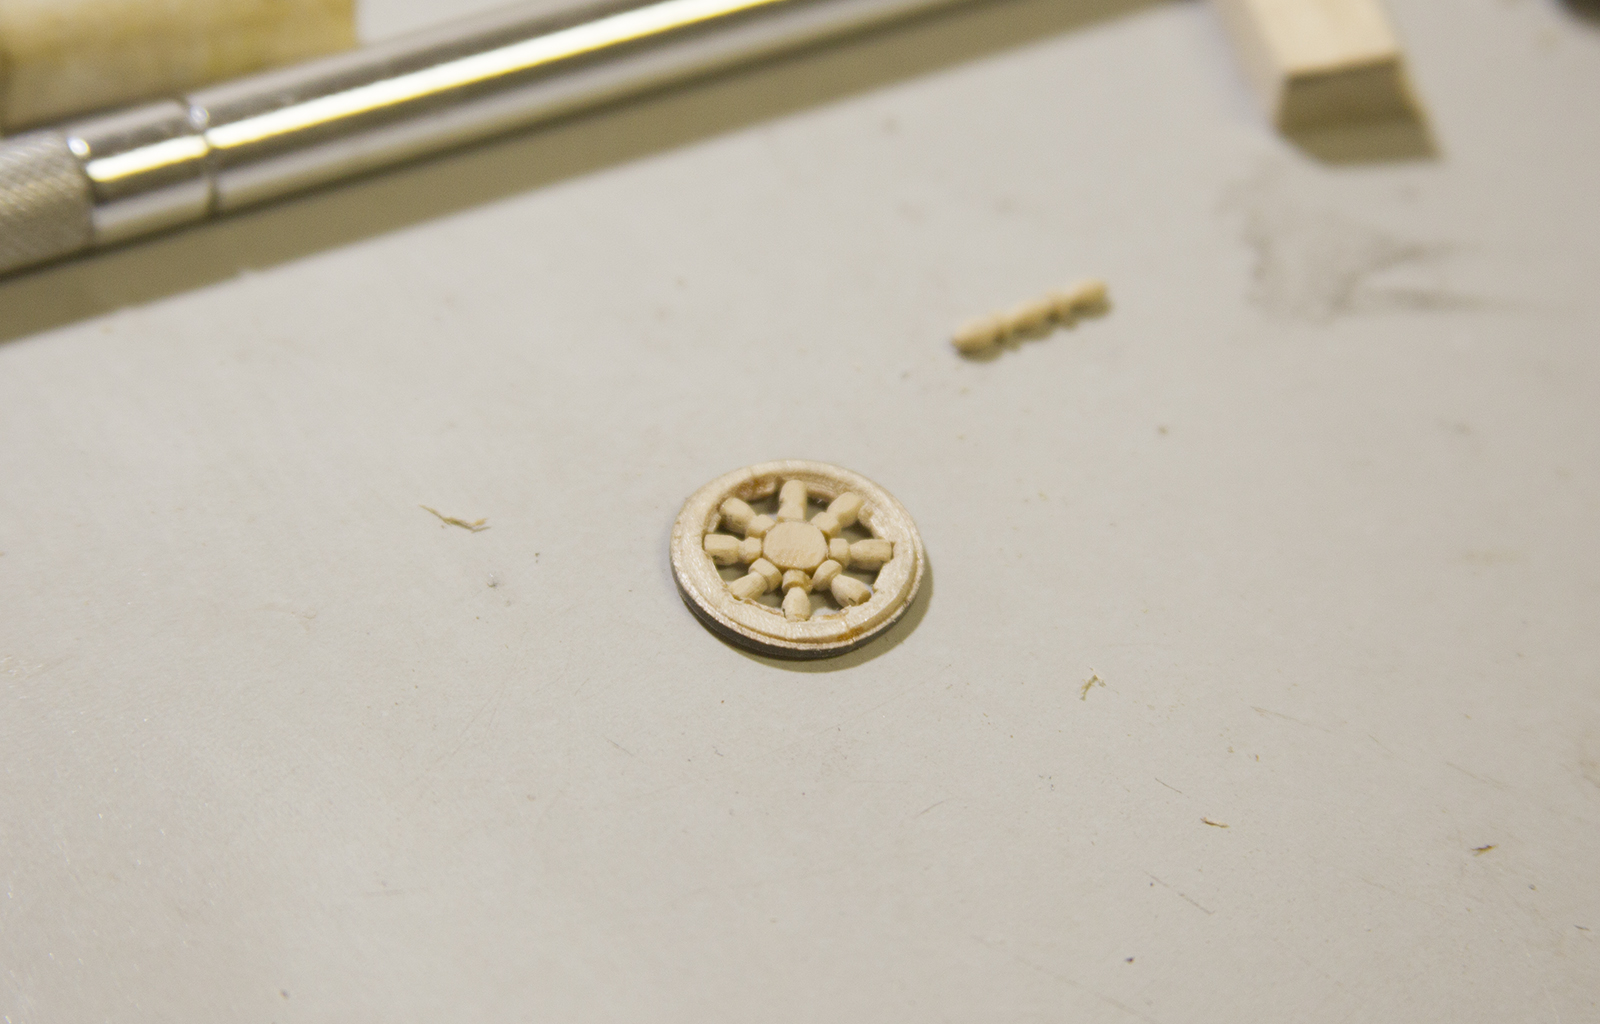
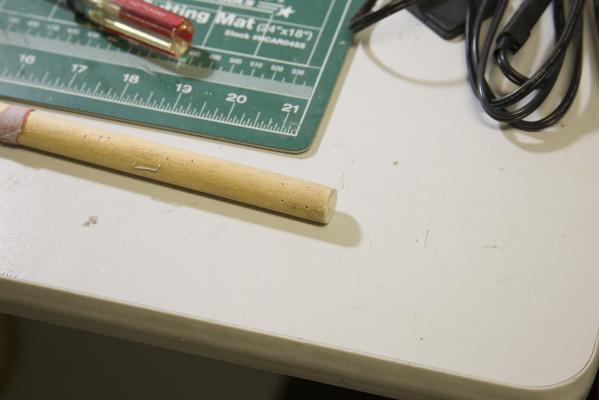
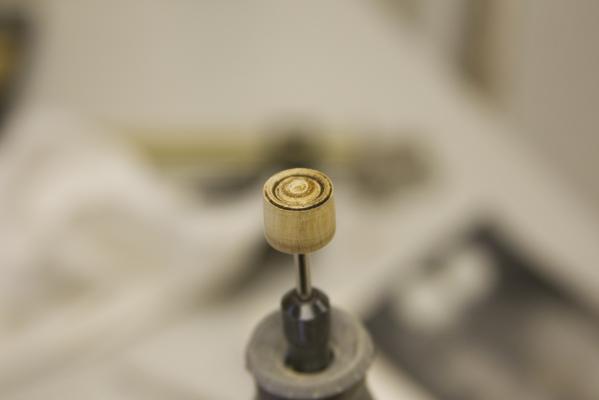
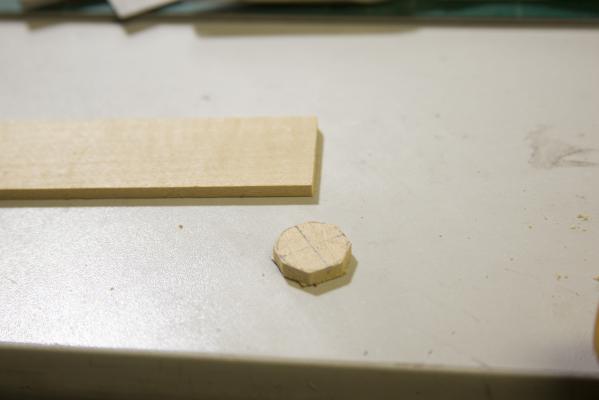
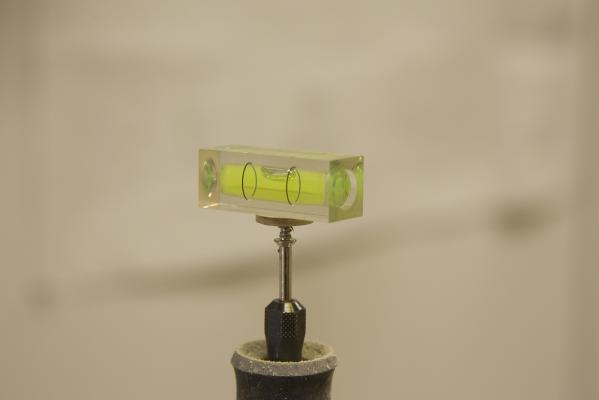
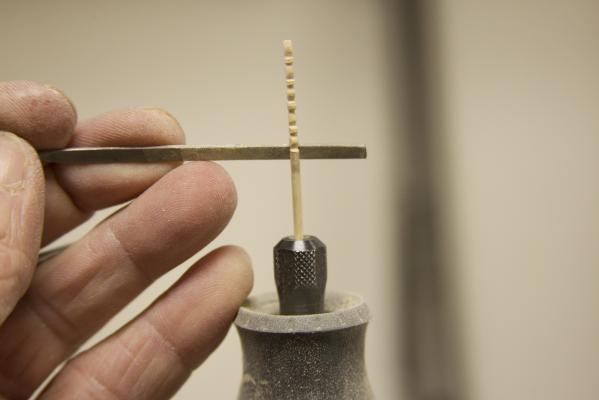
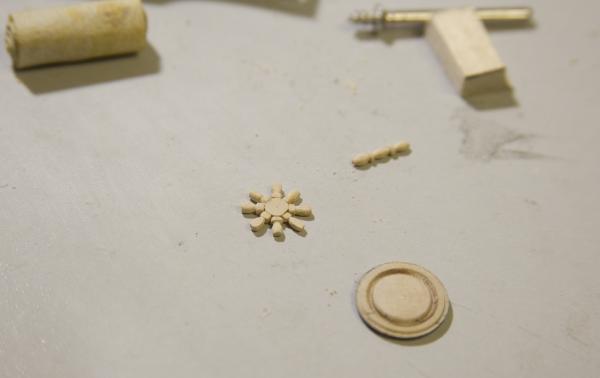
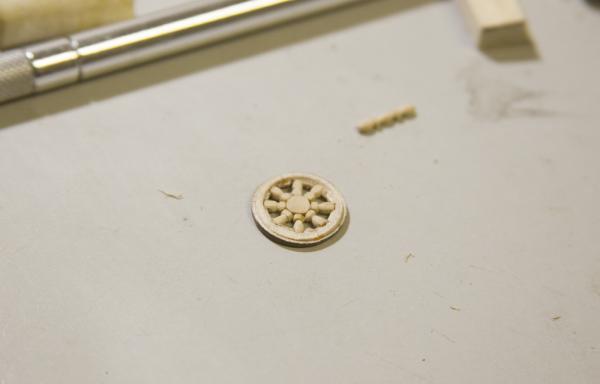
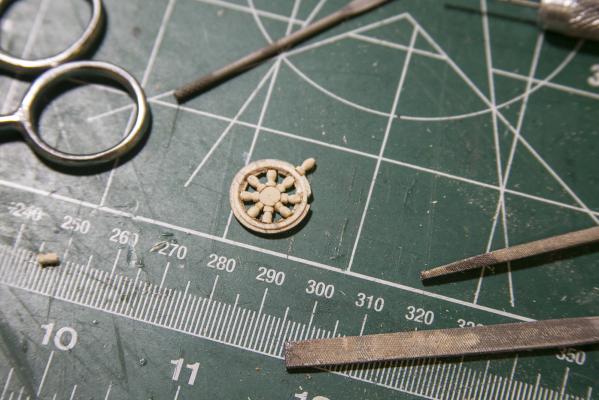
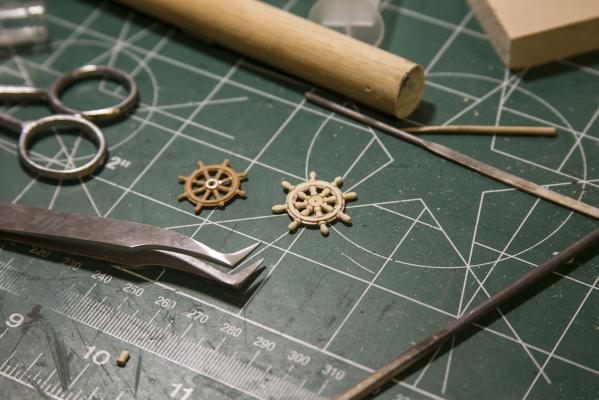
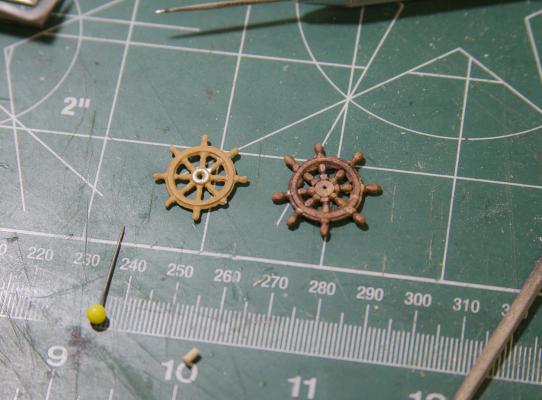
I spend the weekend in the shipyard doing some initial repairs, then some new work. Because Augie hadn't been able to work on the Confederacy for quite some time, it had collected a little bit of dust and had a small amount of disrepair, including some deck planks that had separated a bit and seemed uneven. So I cleared off some of the cannons and fittings, resurfaced the deck, filled in gaps with sawdust from sanded down Swiss Pear, then applied some tung oil and a light coat of satin poly. I also ended up touching up some of the black and red paint that had been negatively affected by dust, etc. During the course of that - I noticed that the steering wheels that had come with the ship, well - just weren't that awesome. After doing some searching for bits and pieces, it turns out it's actually pretty difficult to find good wheels that are not metal and painted. So I set about creating new ones. Attempt #1 I cut off part of a dowel that was 15mm in diameter - the same diameter as the existing wheels. I mounted it onto my Dremel vertically, using a small screw attachment to create a version of a lathe. Then I used dental tools to notch and carve the piece giving it texture. However, because the kind of wood I used was hard, but a little too porous and brittle, it crumbled when I attempted to cut it off the end of the dowel with it's new shape. Drat. Attempt #2 During the second attempt, I used a softer, but more dense piece of wood for the framing of the wheel. This wood is actually from an old pen case that I had from somewhere. You never know what you're going to dig up in the extra supply bin. I cut it square, rounded the edges, then mounted it on the Dremel as before. I smoothed out the top and bottom and used my mini level to make sure it was even. I used miniature files to care out the edges and give the wheel some shape. For the spokes, I used a strip of boxwood, split it to 2mm, then rounded it with sand paper. Once again mounting it into my Dremel Lathe, I used a miniature file to shape the spokes. I then mounted them around a center piece, and sanded my frame out to fit, notching the edges slightly to give room to the spokes. For the outer handles, I used the same process, and notched the frame out to fit the pieces. Finally, I lightly sanded and added a cherry mini-wax stain. When it's dry, I'll sand it out with 1000 grit sand paper. Now I just have to do another one! heh


- 2,191 replies
-
- 36
-
-
- confederacy
- Model Shipways
- (and 1 more)
-
Thanks gentlemen for the likes and comments. And Thanks Mike - great suggestion, I'll definitely have to try it.
- 2,191 replies
-
- 7
-
-
- confederacy
- Model Shipways
- (and 1 more)
-
Yay, updates! Really, really nice work Theo. I love how clean and precise all of your edges and carving are. Outstanding stuff.
-
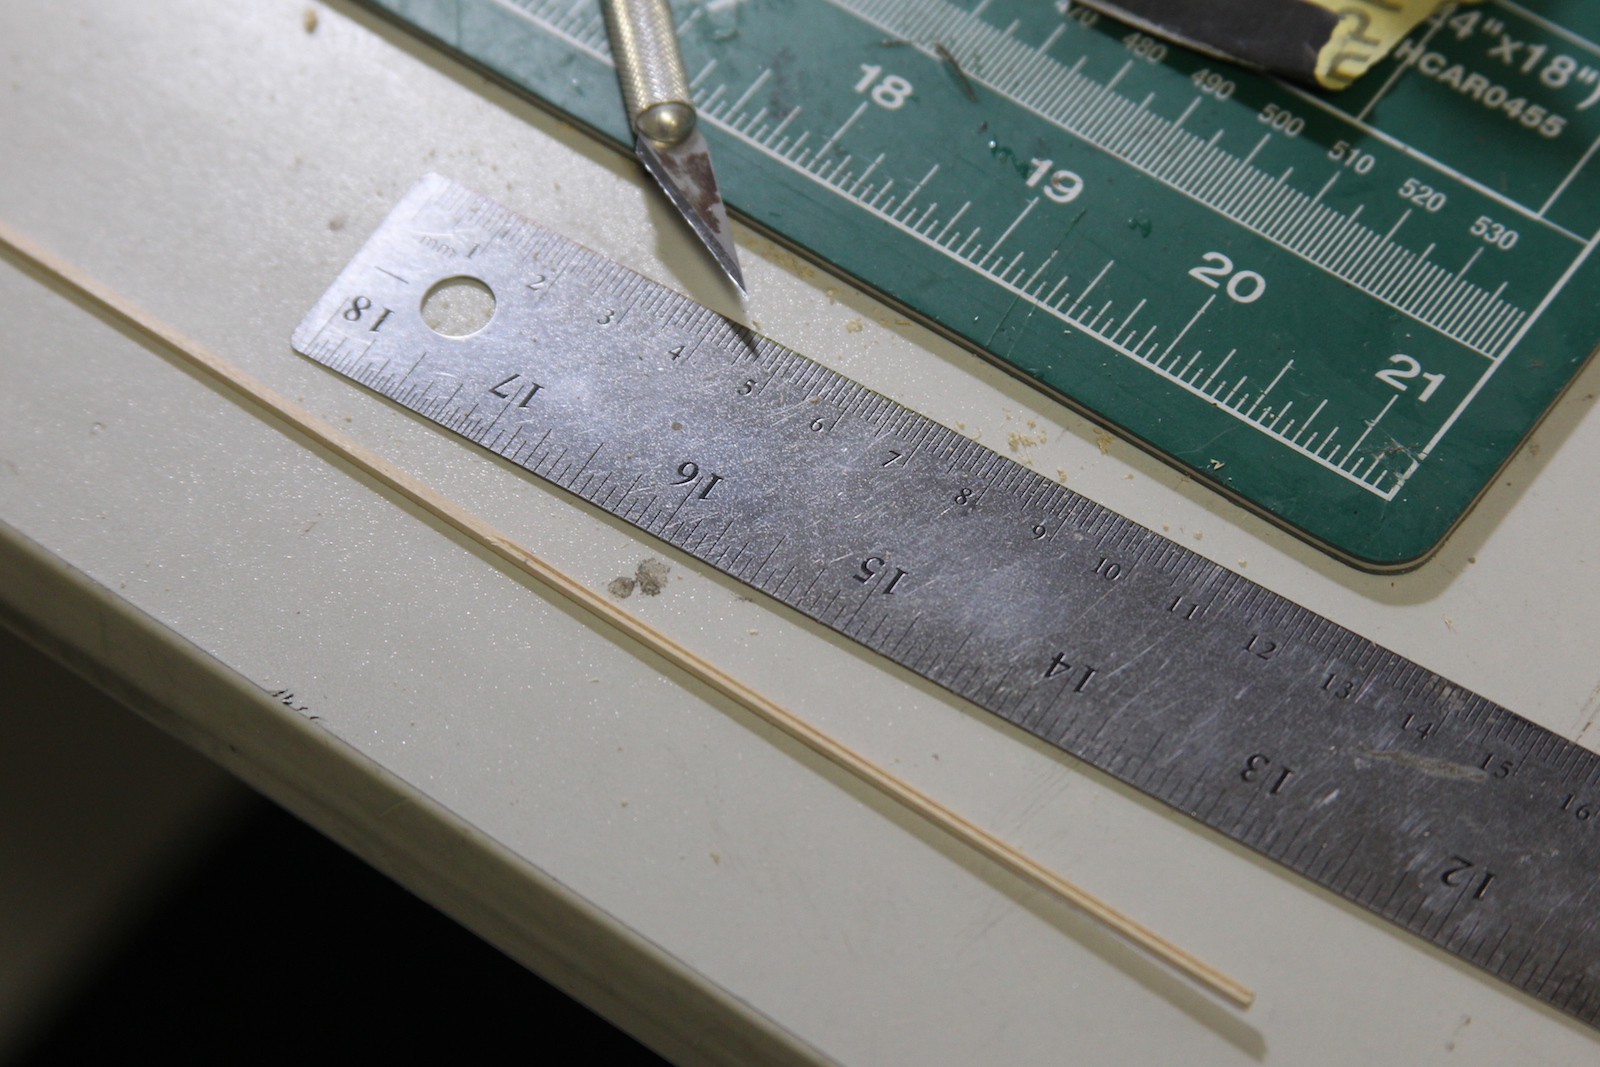
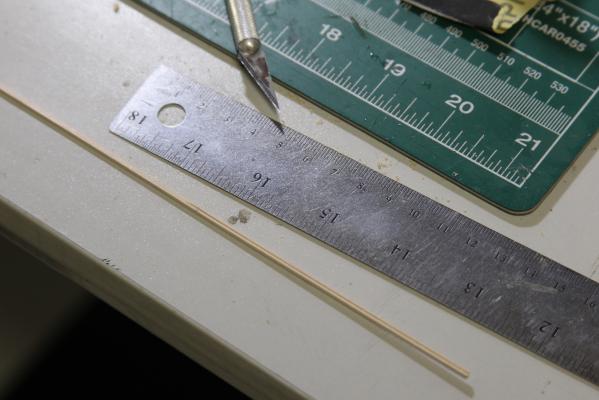
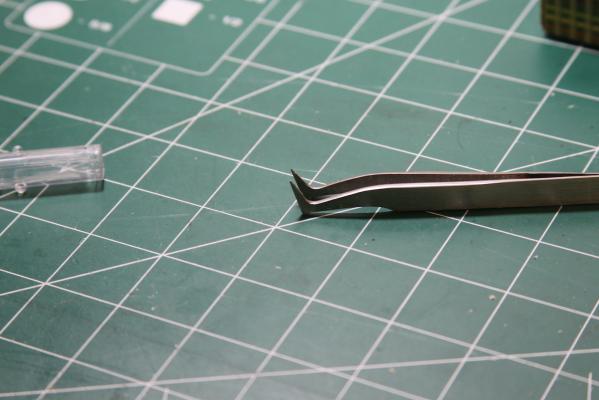
I noticed this afternoon that there was a strip of molding missing from the bow of the ship. Not sure if it dropped off somewhere, or if Augie was waiting to put it on after the timber heads were installed, but it was nowhere to be found. Now, I didn't inherit the handy little scoring tool from Chuck and the fine folks at Model Shipways, so I had to take a couple cracks at it old-school style. I laid my metal ruler along the wood, and first scored it with my X-acto knife to ensure a straight line. Now, when I say "ensure" - I mean took me a couple of tries and a couple of wasted little strips of wood. Then, I gouged out the score a little wider with these handy tweezers. And finally, I folded a piece of 400 grit sandpaper in half, and sanded the groove. After mounting the strip, it was time to dig back through the log and find out how to match the coloring. Turns out, Augie favored a coat of Miniwax prestain, followed by Miniwax "Natural" color, and finally an acrylic coat. As luck would have it - I have a pretty extensive "Mini-wax" collection, so I think I got her pretty close match to the upper strip.
- 2,191 replies
-
- 31
-
-
- confederacy
- Model Shipways
- (and 1 more)
-
I vote for the hot tub!
-
Nice work Sjors, Love those mices - mouses? Meese?
- 1,616 replies
-
- 5
-
-
- caldercraft
- agamemnon
- (and 1 more)
-
Good morning, One additional bit - As I've said, I think it's obviously pretty important to be familiar with the gal you'll be spending so much time with, so I ordered a couple books, looked at a couple Augie had, and did some research on the Confederacy when she came to the shipyard. I didn't want to post it here, because I'm sure most people following Augie's log are already much more familiar with her than I; but if anyone is interested, I put a short synopsis of the Confederacy's history on my blog: http://lehmanshipyard.blogspot.com/2016/02/usf-confederacy-history.html for the other folks who follow along but don't have access to MSW. It's a combination of a few different sources, and there are of course some inconsistencies from author to author. History seems to be nothing if not malleable.
- 2,191 replies
-
- 12
-
-
- confederacy
- Model Shipways
- (and 1 more)
-
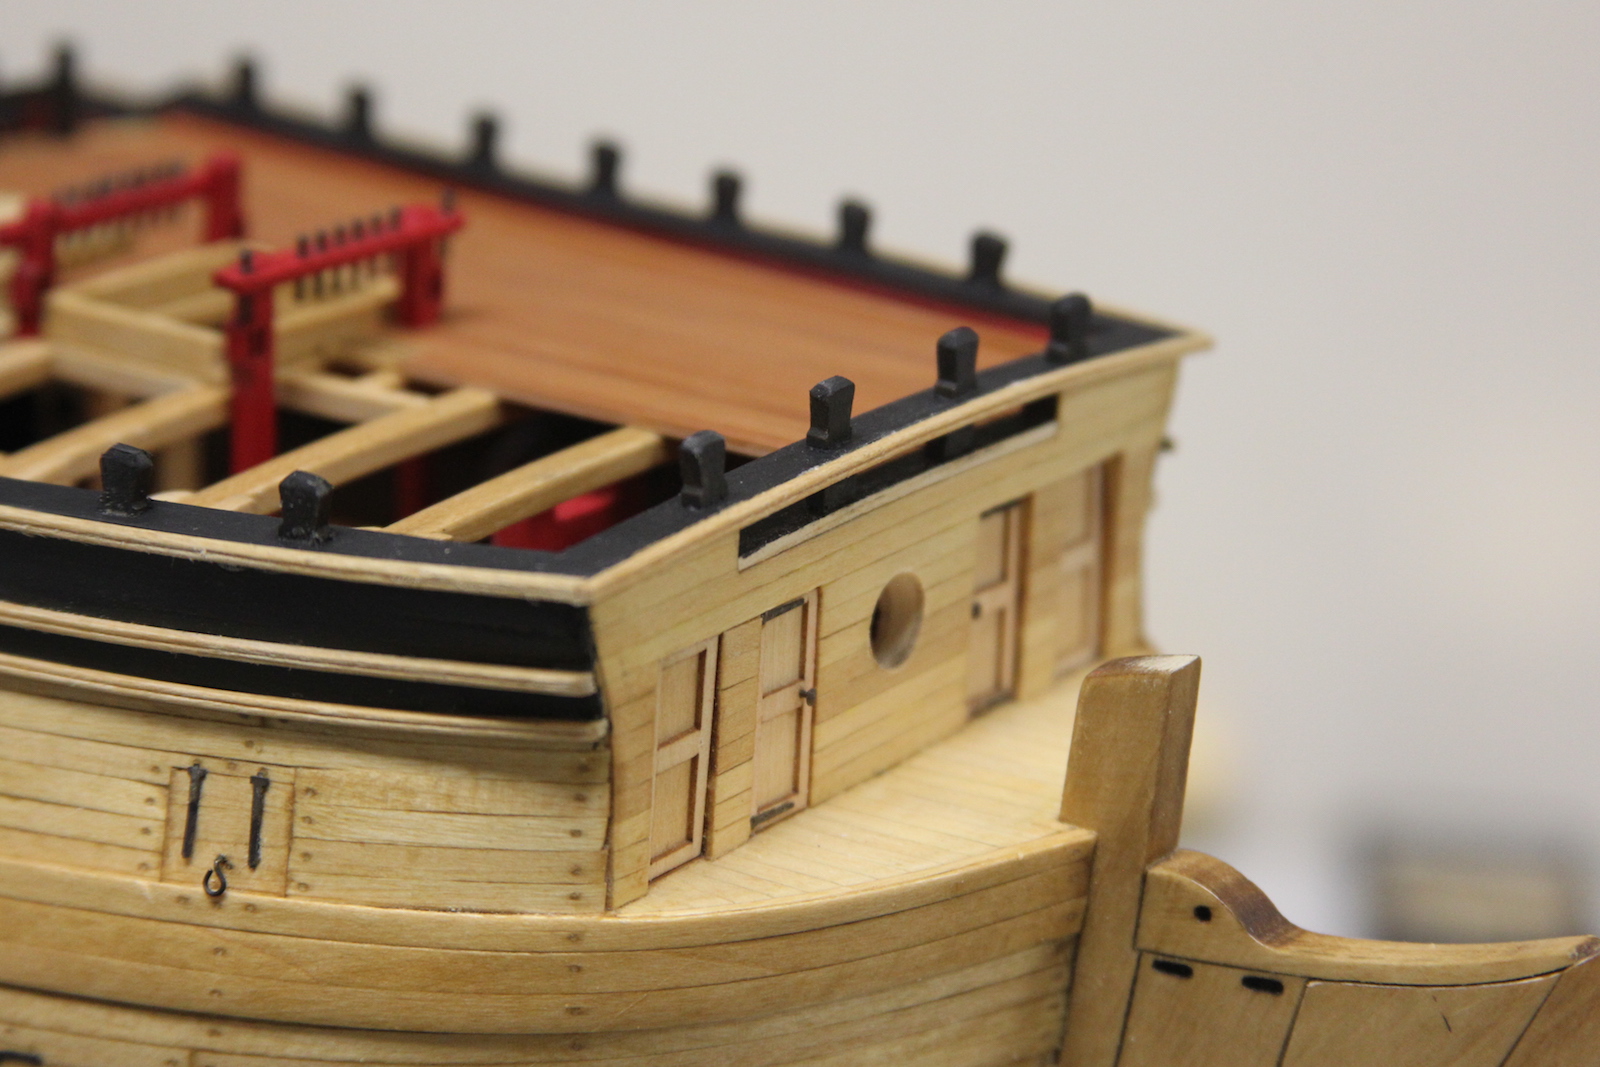
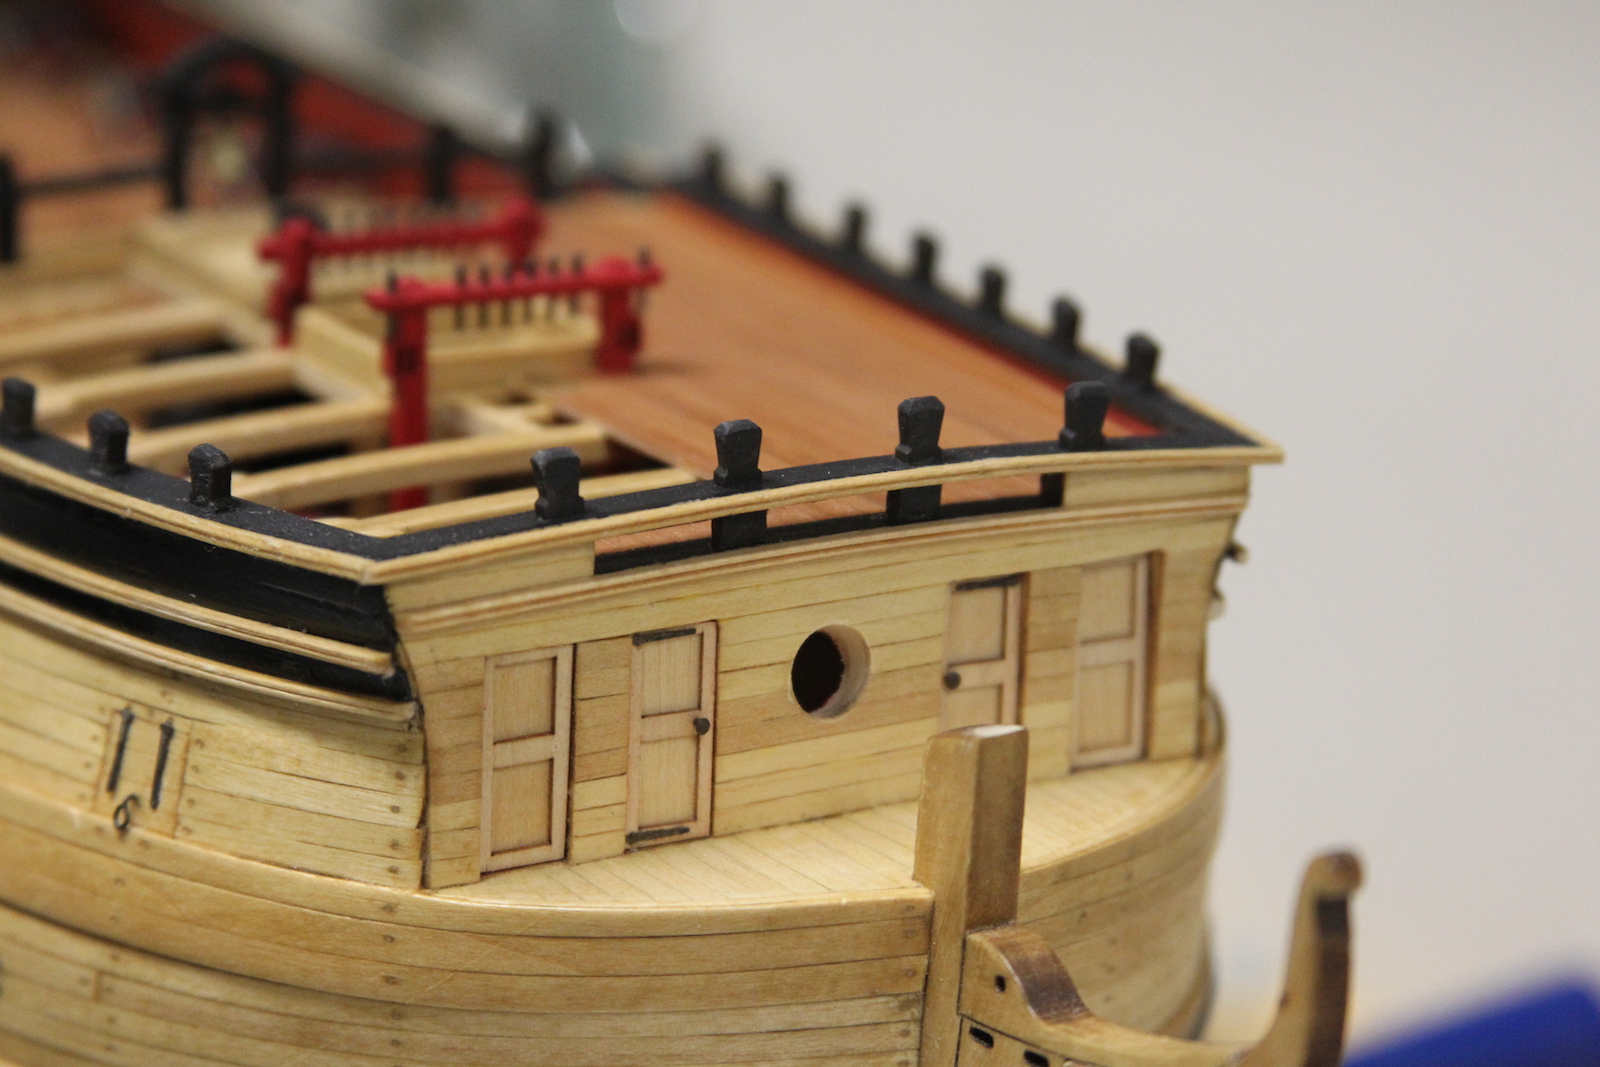
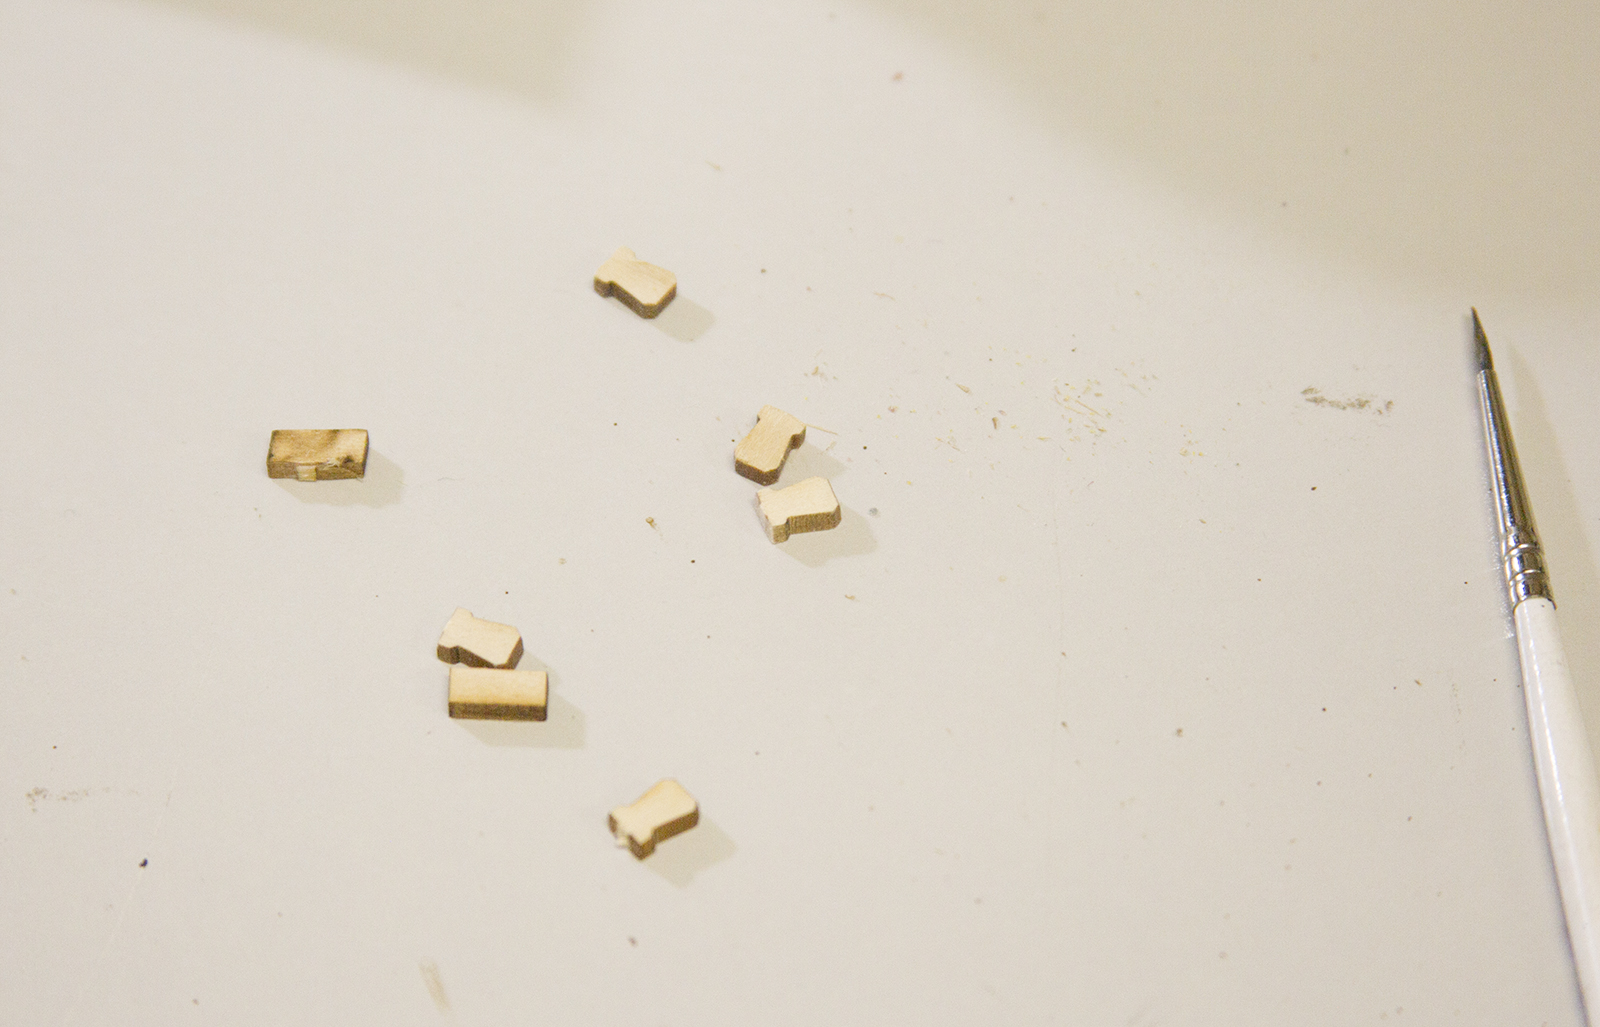
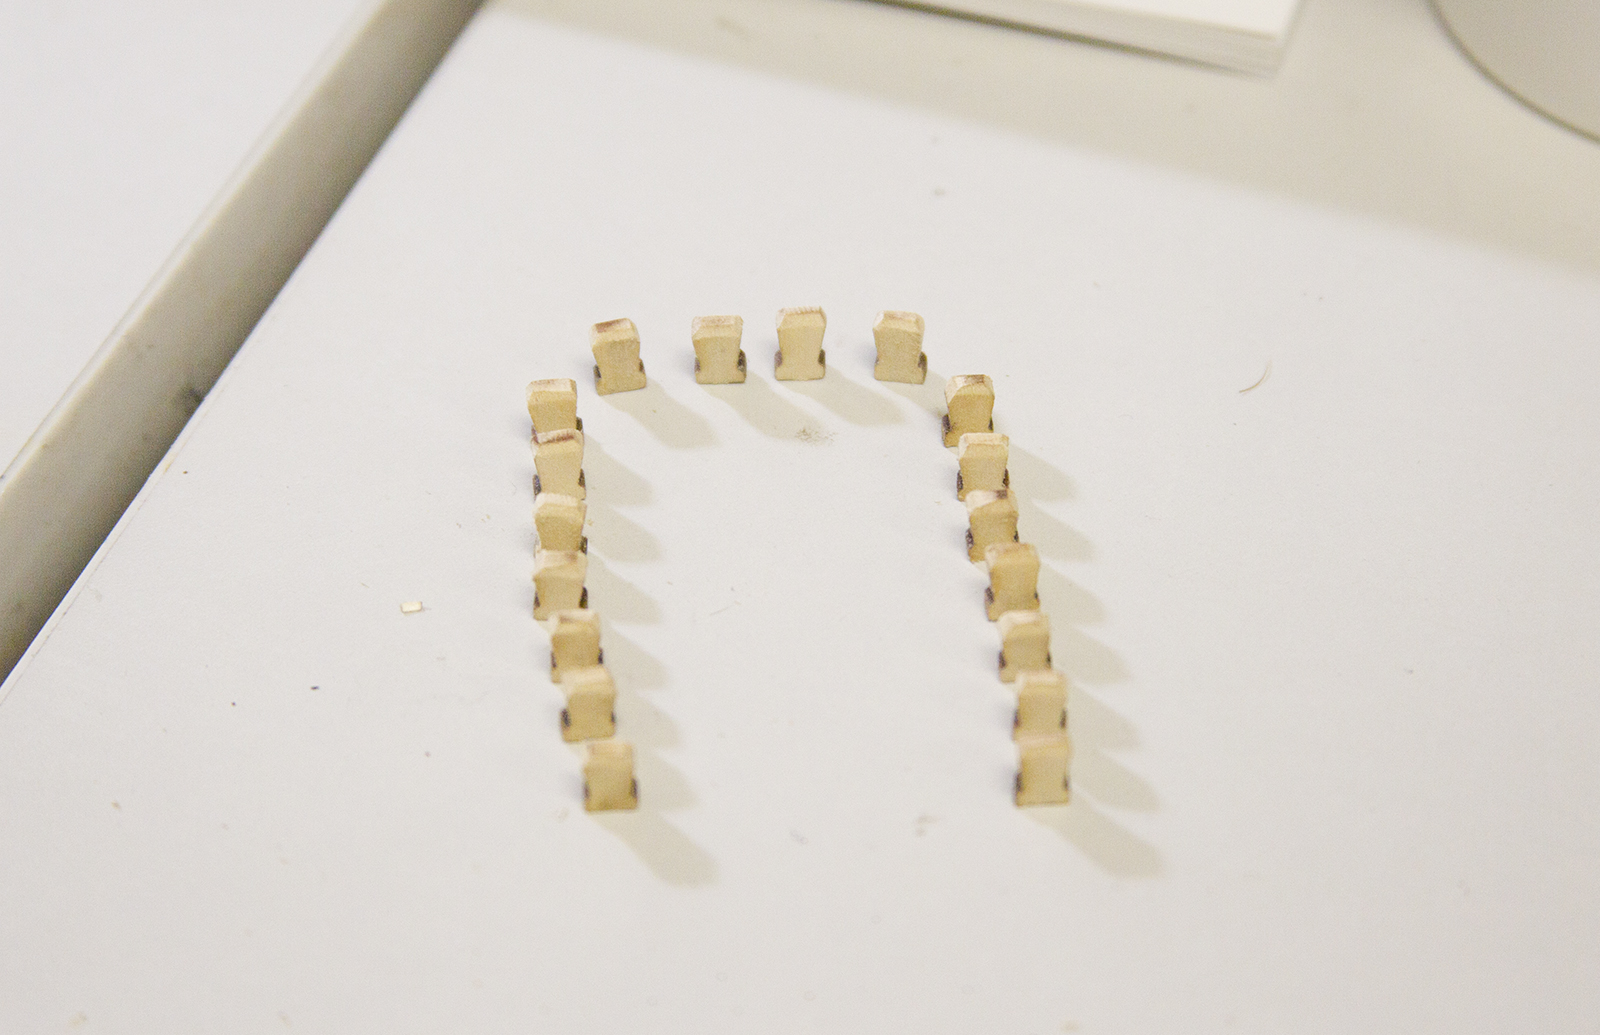
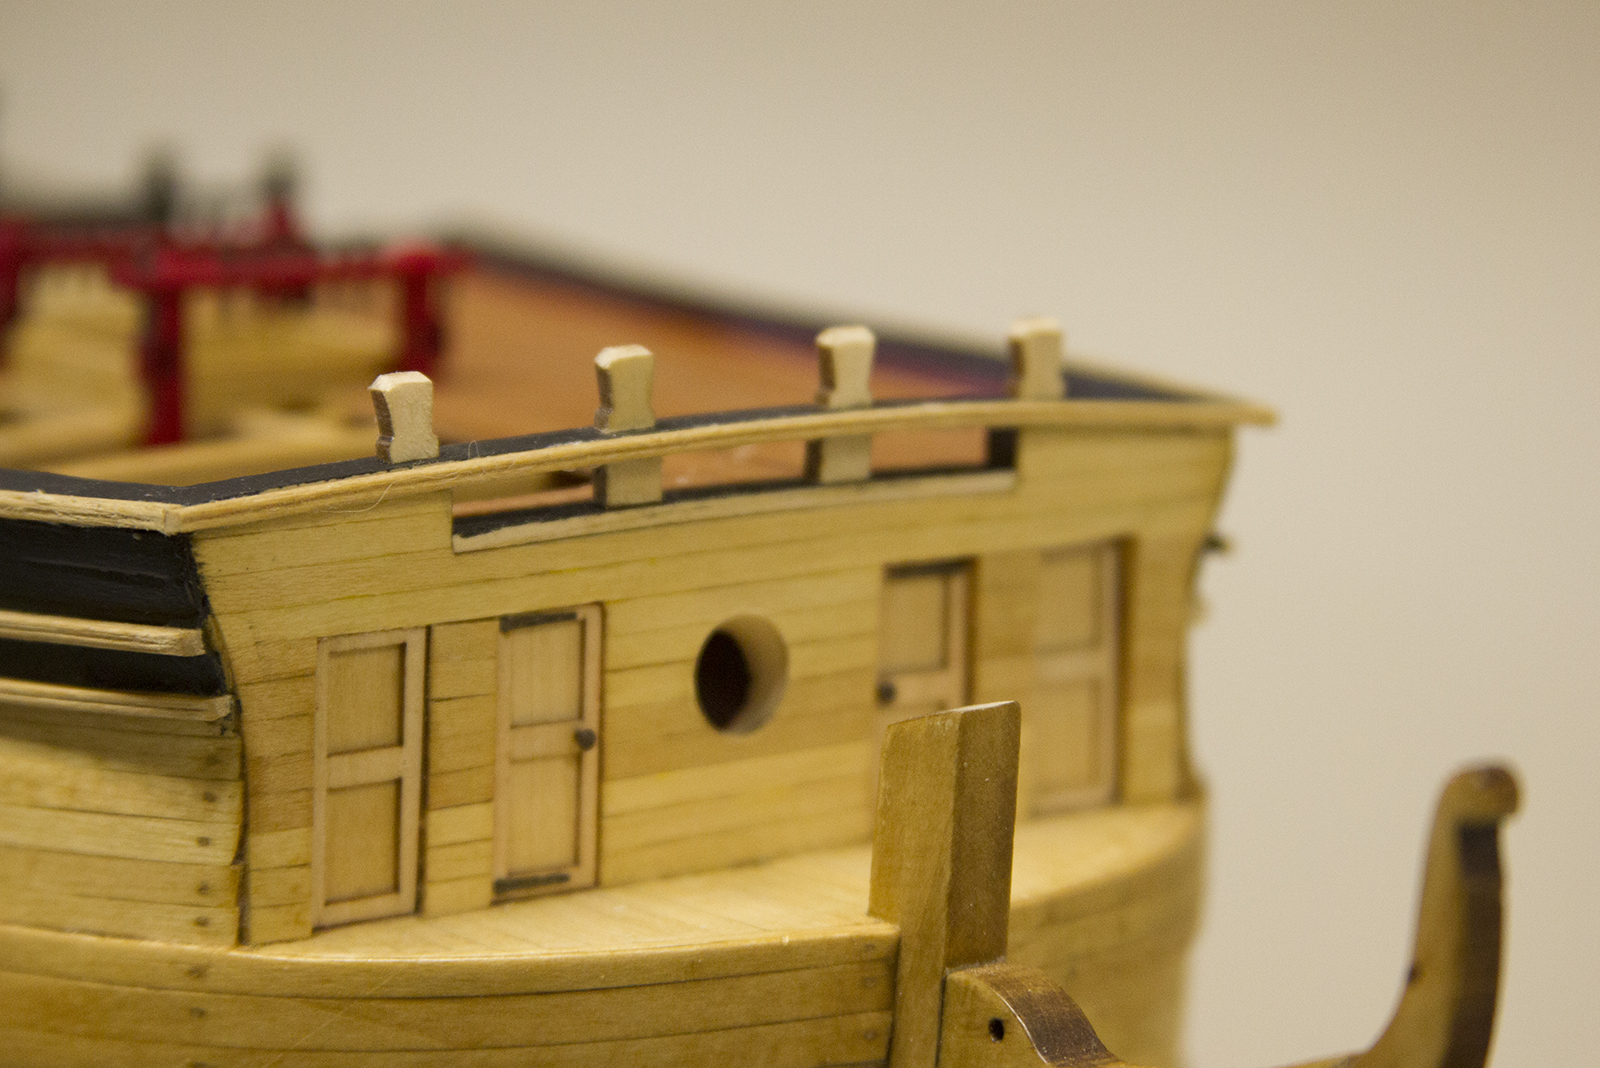
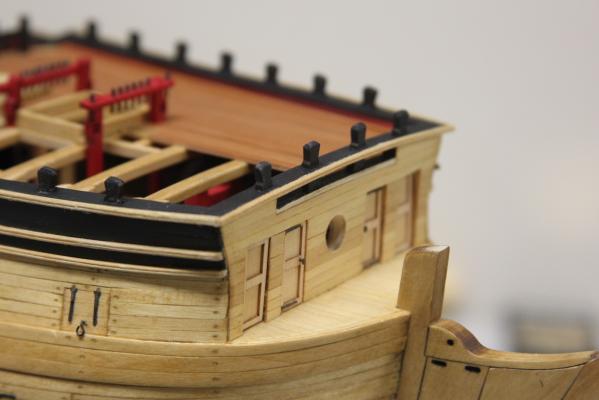
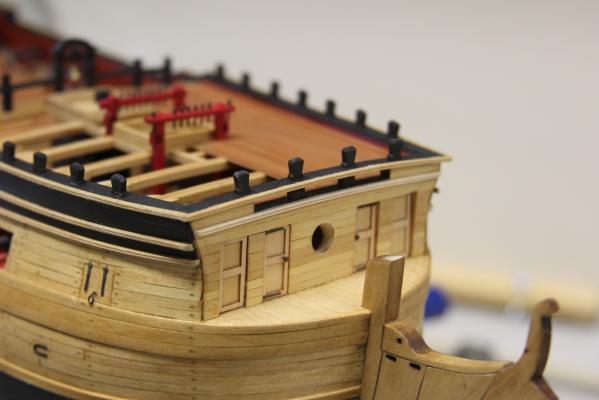
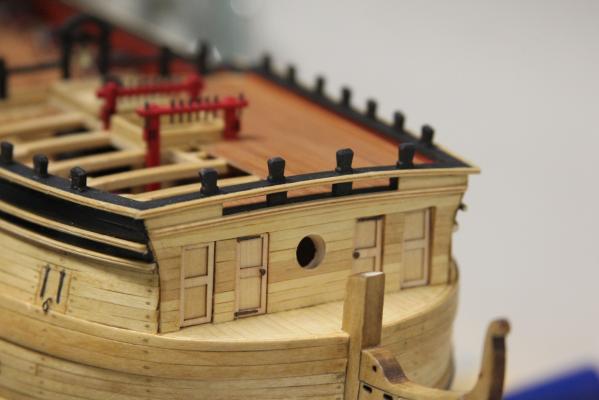
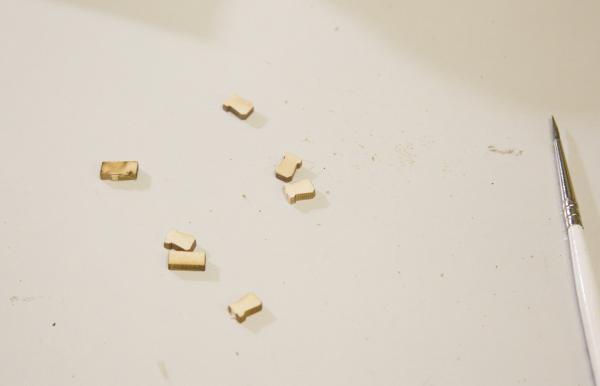
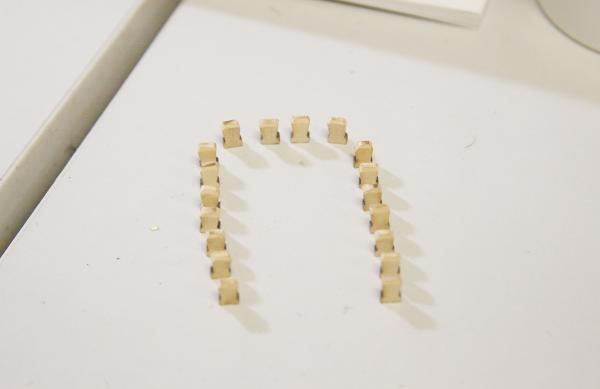
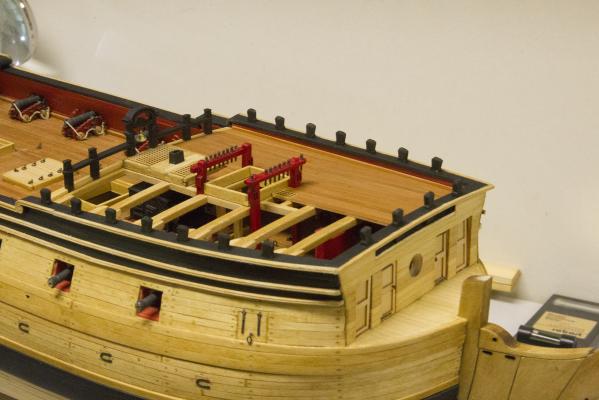
Good morning, I accomplished some actual work last night on the Confed. After several hours of research and trying to get a good handle on where Augie was headed, how some of his ideas differed from the the plans (leaving some rails natural instead of painting, etc.), what he'd left for later, and what he'd done - I picked up with something simple just to get me going; adding the timber heads to the railing. After separating the timber heads, I beveled the top of each one. I started by mounting the lower portions of those on the bow, then matched up the top half. Finally, I spent a little time looking up and matching paint combinations and painted. I still owe them a couple more coats then a finish of clear lacquer. Off we go...!

- 2,191 replies
-
- 28
-
-
- confederacy
- Model Shipways
- (and 1 more)
-
Thanks so much everyone for the kind words and support. I very much appreciate knowing the team is here! I hope to have some actual progress soon!
- 2,191 replies
-
- 13
-
-
- confederacy
- Model Shipways
- (and 1 more)