HOLIDAY DONATION DRIVE - SUPPORT MSW - DO YOUR PART TO KEEP THIS GREAT FORUM GOING! (Only 13 donations so far - C'mon guys!)
×


SawdustDave
-
Posts
1,770 -
Joined
-
Last visited
Content Type
Profiles
Forums
Gallery
Events
Everything posted by SawdustDave
-
 Guess we could have waved as we blew through at about 85 mph.
 -
Very tedious work Russ.... Excellent job. BTW....We just returned from visiting our kids and grandkids in Lake Charles. Thought bout you as we drove through Biloxi going and returning. Happy New Year!
-
Nice work on the ship's stove Augie. Also one of my personal favorite parts of building her. Like you said.... You (and God) will know it is there.
- 2,191 replies
-
- 2
-

-
- confederacy
- Model Shipways
- (and 1 more)
-
As always, your work is a real treat to visit Piet. Beautiful work. Happy holidays my friend.
-
Beautiful job Ken. Something to be very proud of.
-
What a treat.... Haven't had much time to enjoy these visits lately. Beautiful progress master ET. YOU've got something really special going on here. Thank you again for the great lessons.
- 3,618 replies
-
- 1
-
-
- young america
- clipper
- (and 1 more)
-
Lifeboats by SaturnV - FINISHED
SawdustDave replied to SaturnV's topic in - Build logs for subjects built 1901 - Present Day
OK Richard....now my biggest concern is that your lifeboats are going to make mine look bad. What a great looking start. I'm completely lost for words.... and that's saying something in my case, as you may know. Can't wait to see your finished fleet.- 4 replies
-
- 2
-
-
- lifeboat
- ships boat
- (and 1 more)
-
Thanks Sir Piet.... We're having more fun than an old man is entitled to in a lifetime. What a blessing! Stay tuned for more breaking news.
-
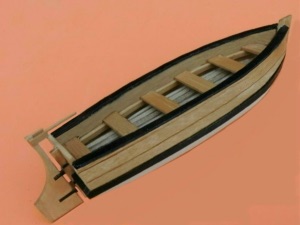
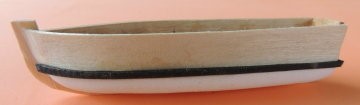
All done.... Lifeboat reporting for duty SIR!

-
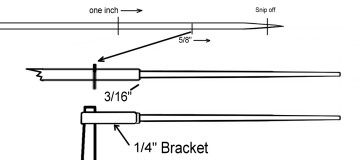
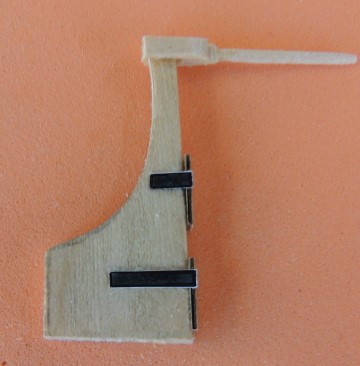
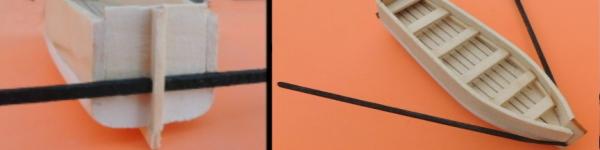
Rudder and tiller drawings.... Rudder and tiller fitted....


-
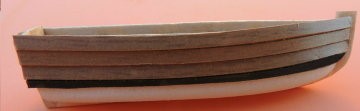
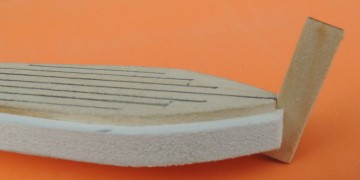
Planking and Cap Rails.... Three overlapping planks per side.... The cap rails are painted black....
-
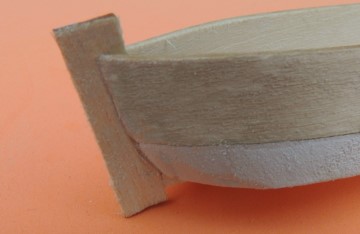
The Wales.... Wale strips painted black. Stern added first.... then sides. Wales fitted.... ready to begin planking.
-
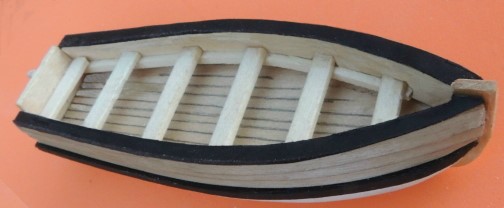
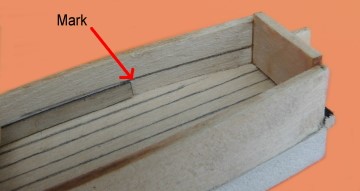
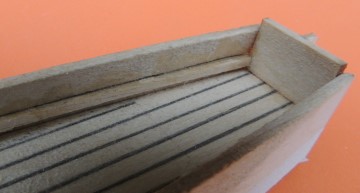
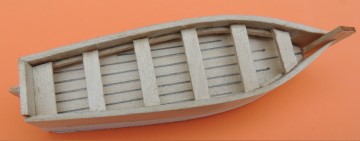
Adding the seats.... First, the inside of the sideboards have been marked for the support strips.... The seat support strips have been fitted to the inside of the sideboards.... Seats have been fitted....
-
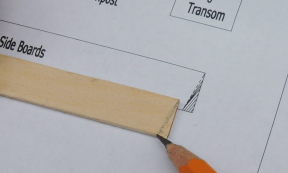
Adding the side boards....

-
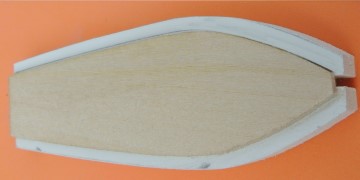
Shaping the hull......... Simply mark a few contour lines along the side of the hull and start sanding....


-
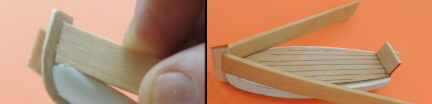
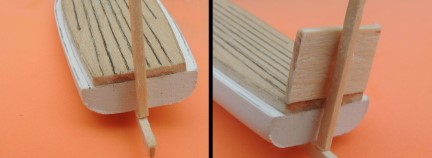
Fitting the bow stem, keel, stern post, and transom....
-
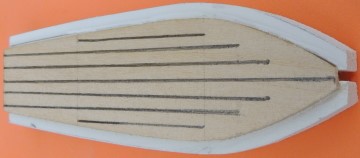
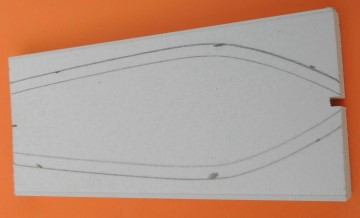
Here, you can see the pre-cut false deck board has been fitted to the hull. Then, the illusion of deck planks is created by simply drawing the parallel lines. Builders may also choose the option of gluing small strips over the lines in order to create an even more realistic illusion.
-
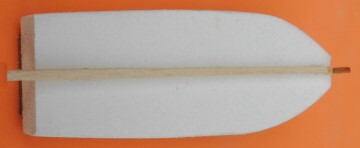
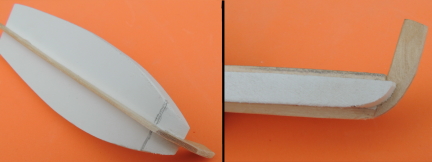
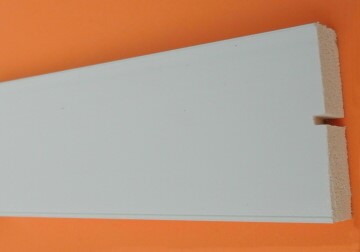
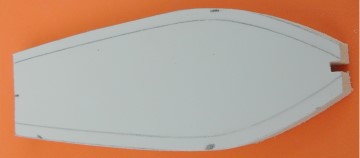
Beginning with the hull.... I used a 1/4" thick piece of white vinyl to create the one-piece hull. The end has been notched to center the bow stem. The pattern is marked by placing the pre-cut deck board on the hull piece and tracing the outer edge. The outer line indicates the outer shape of the hull. And here you see the hull shape has now been cut out....
-
So much has developed with this little lifeboat in such a short time frame, I thought I would take a few moments and bring all of you special modeling friends at MSW up to date. What was intended to be a small local project, very quickly within less than a month, spread to major cities across North and South Carolina through their city Parks and Recreation Departments…. (Fayetteville, Raleigh, Charlotte, Charleston & North Charleston to name a few) All of these programs are being scheduled to launch in the mid-March time frame under the official name of Lifeboats for Warriors Project. My favorite motto of all time has been…. “If you think you can…. Or if you think you can’t…. YOU ARE RIGHT!” Please visit our home website designed to explain the Parks and Recreation program…. http://www.l4wproject.com/ The following build log was developed for the instruction manual for the lifeboat kit. Anyone interested in building one of these and donating it to the project, please send me a PM and I'll be glad to send you a PDF with plan sheets and instructions.
-
Mayflower by SawdustDave - Finished
SawdustDave replied to SawdustDave's topic in - Build logs for subjects built 1751 - 1800
Piet.... Rolling in the floor here! No one can make a subject as interesting as you. You are a unique person who simply lights up everyone's life. Thanks to all for your "likes" as well. -
Mayflower by SawdustDave - Finished
SawdustDave replied to SawdustDave's topic in - Build logs for subjects built 1751 - 1800
Here's a picture of about 10 hours work. People who do not understand this "modeling thing" would never understand. Next.... Rig some shrouds and get on with some rat killin.
- 531 replies
-
- 11
-
-
Mayflower by SawdustDave - Finished
SawdustDave replied to SawdustDave's topic in - Build logs for subjects built 1751 - 1800
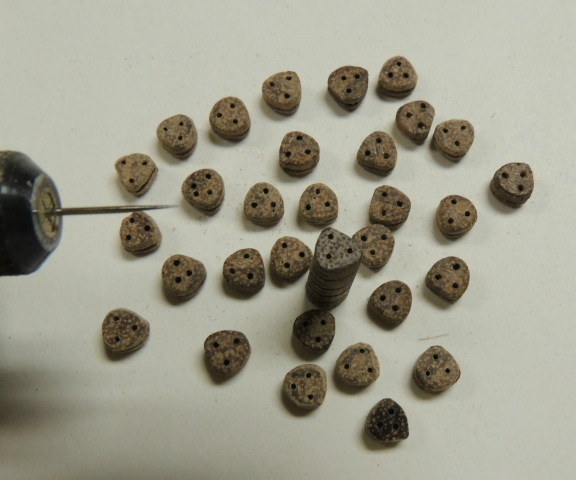
Finally got both lifeboats lashed down on the grating mounts. Back to creating a few more deadeyes so I can get one step closer to tying a boatload of clove hitches.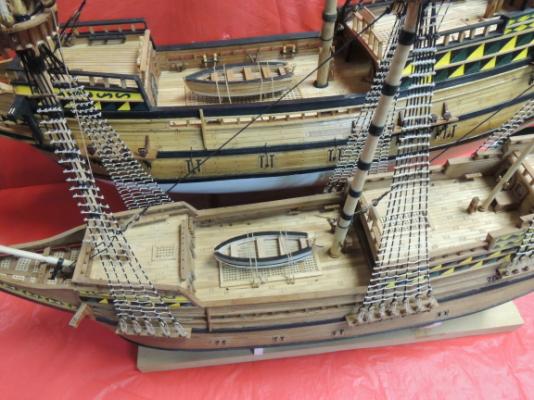
- 531 replies
-
- 14
-
-
Mayflower by SawdustDave - Finished
SawdustDave replied to SawdustDave's topic in - Build logs for subjects built 1751 - 1800
Fun in the shop this morning Popeye. Both boats built, and ready to mount. And.... after giving it some thought, decided to use my "Lifeboat for Warriors" design on both, regardless of the technical issue. The boat going on the larger ship is the actual original prototype I built to launch the project. It now has a pretty special permanent place, rather than eventually getting lost in my boneyard. Pics soon. -
Yep....I agree Toni. Straight jacket and padded walls time for sure.