HOLIDAY DONATION DRIVE - SUPPORT MSW - DO YOUR PART TO KEEP THIS GREAT FORUM GOING! (Only 20 donations so far - C'mon guys!)
×


_SalD_
-
Posts
828 -
Joined
-
Last visited
Content Type
Profiles
Forums
Gallery
Events
Everything posted by _SalD_
-
 Thanks for the comments Gary, Elijah, George & Lawrence. Elijah like George mentioned Amazon is probably a good place to buy a drafting triangle or if you have a Hobby Lobby nearby they should have them or any art supply store will have them. It's been a long time, a real long time, since I've purchase one myself.
- 659 replies
-
- 4
-

-
- syren
- model shipways
- (and 1 more)
-
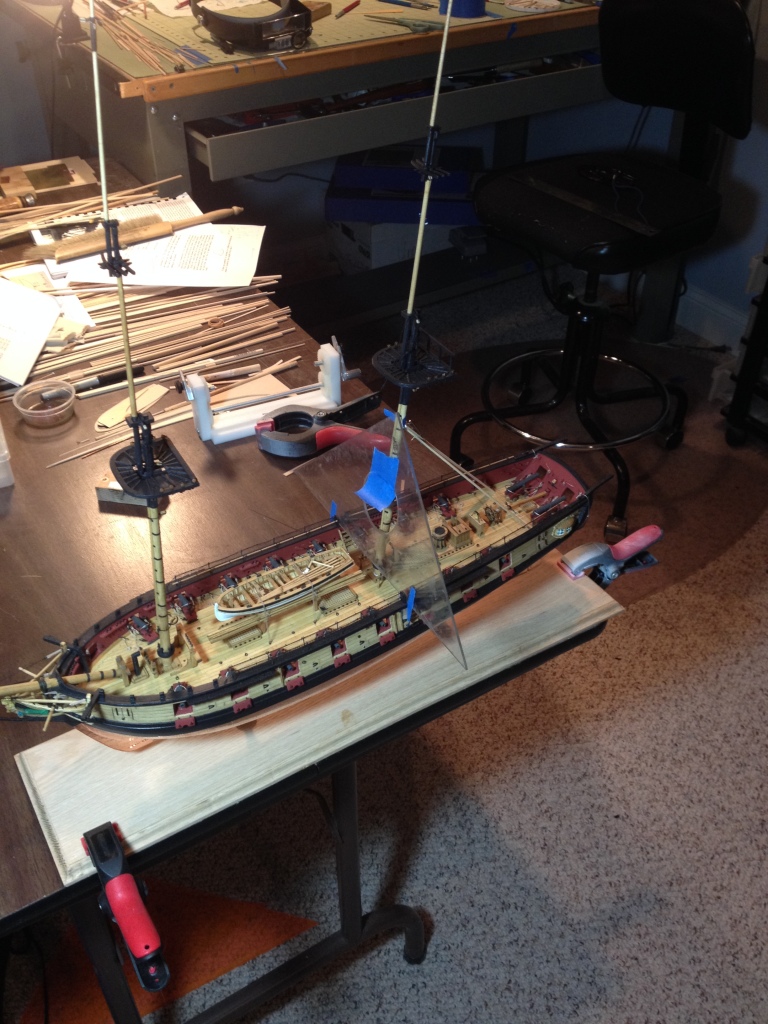
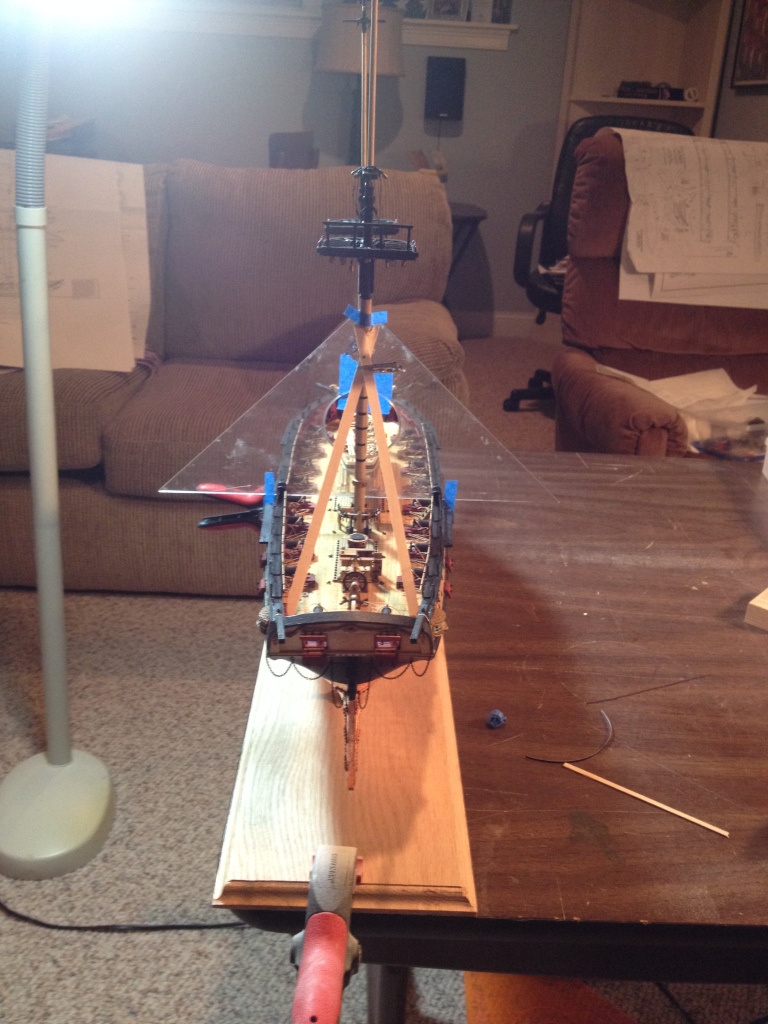
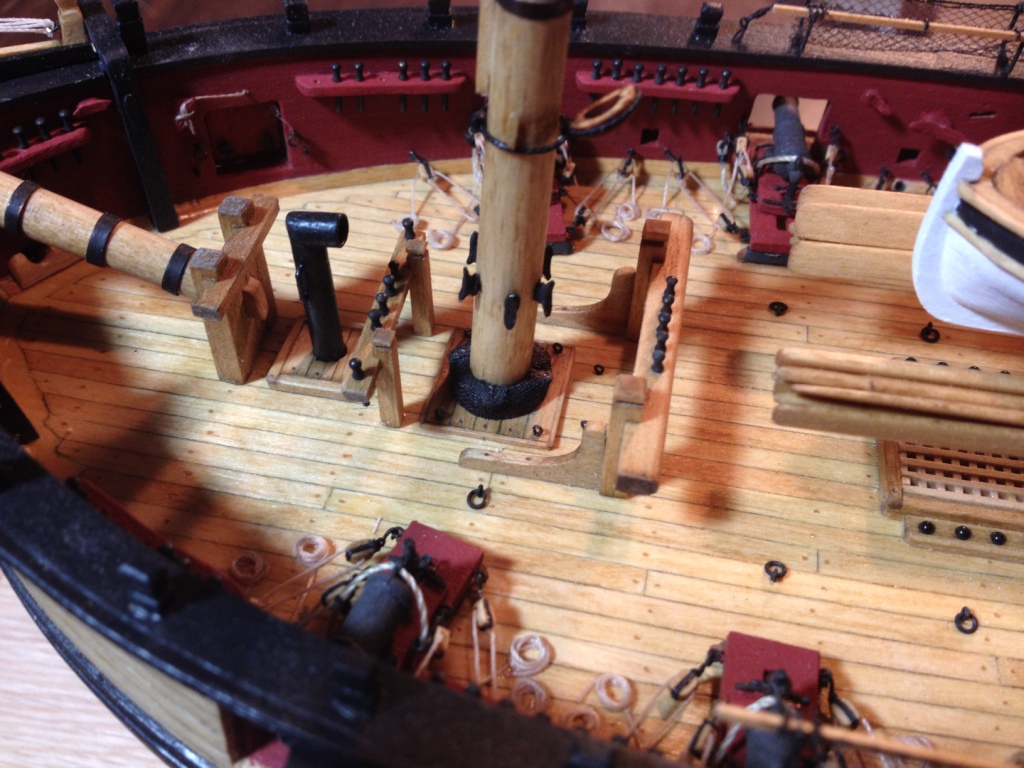
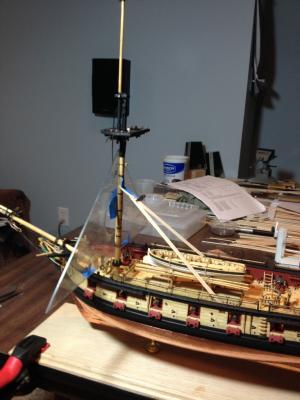
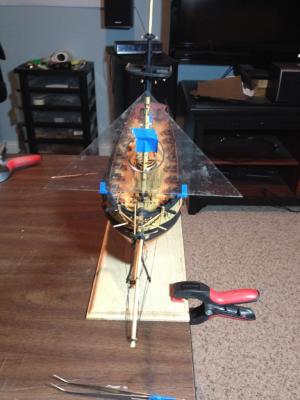
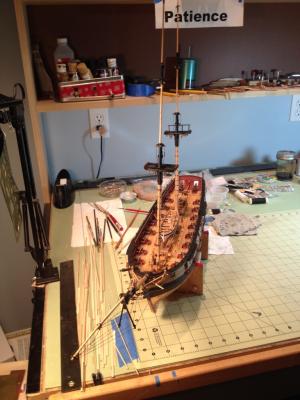
Stepped the masts!! To help align the masts I find that a 45 degree drafting triangle comes in handy. I use the triangle to help me center the mast side to side. First I scribe a line in the plastic triangle bisecting the 90 degree angle and perpendicular to the hypotenuse, pay attention Elijah there’s going to be a quiz on this. Then I measure the overall distance outboard to outboard of the cap rail where the triangle will be placed. Dividing that distance in half I mark that distance on either side of the scribed line along the hypotenuse of the triangle. Then standing the triangle up against the mast and with the two marks at either edge of the cap rail the apex of the bisected 90 degree angle will be centered on the ship and 90 degrees to the deck. For the fore and aft position I used a gin pole arrangement braced back against the cannons. Both fore and main masts were done the same way. Fortunately I was able the use the opening between the hammock netting at the boarding panels to place the triangle for the main mast. The advantage I find with this method is that the ship doesn’t need to be leveled. As long as the ship is built with a reasonable amount of symmetry and the triangle is properly placed across the rails then the apex of the triangle will always be at the center of the ship and 90 degrees to the cap rails (deck). Final step was to push the mast coats down into position. Please excuse the mess


- 659 replies
-
- 19
-
-
- syren
- model shipways
- (and 1 more)
-
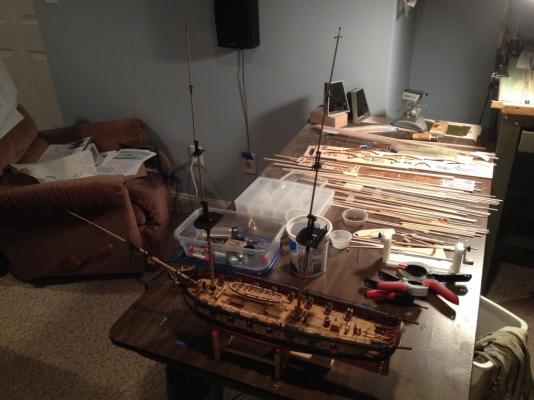
Thanks Dirk and Craig. Makes a big difference with the bowsprit and masts in place. Dirk, you look a lot warmer now.
- 659 replies
-
- 4
-
-
- syren
- model shipways
- (and 1 more)
-
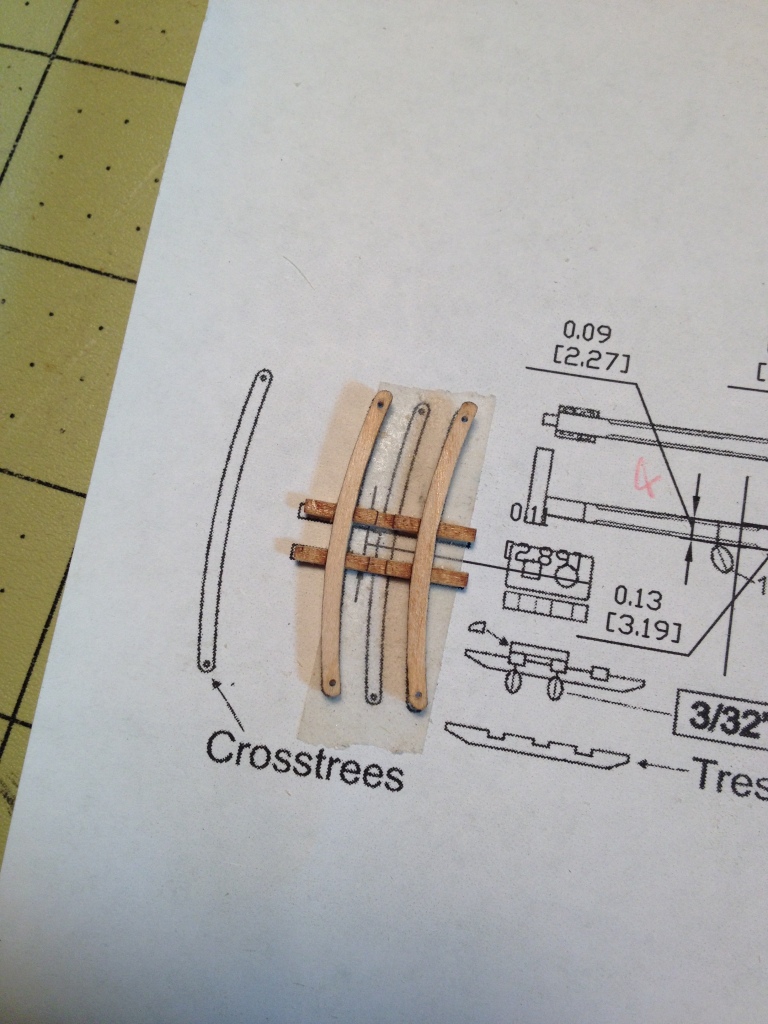
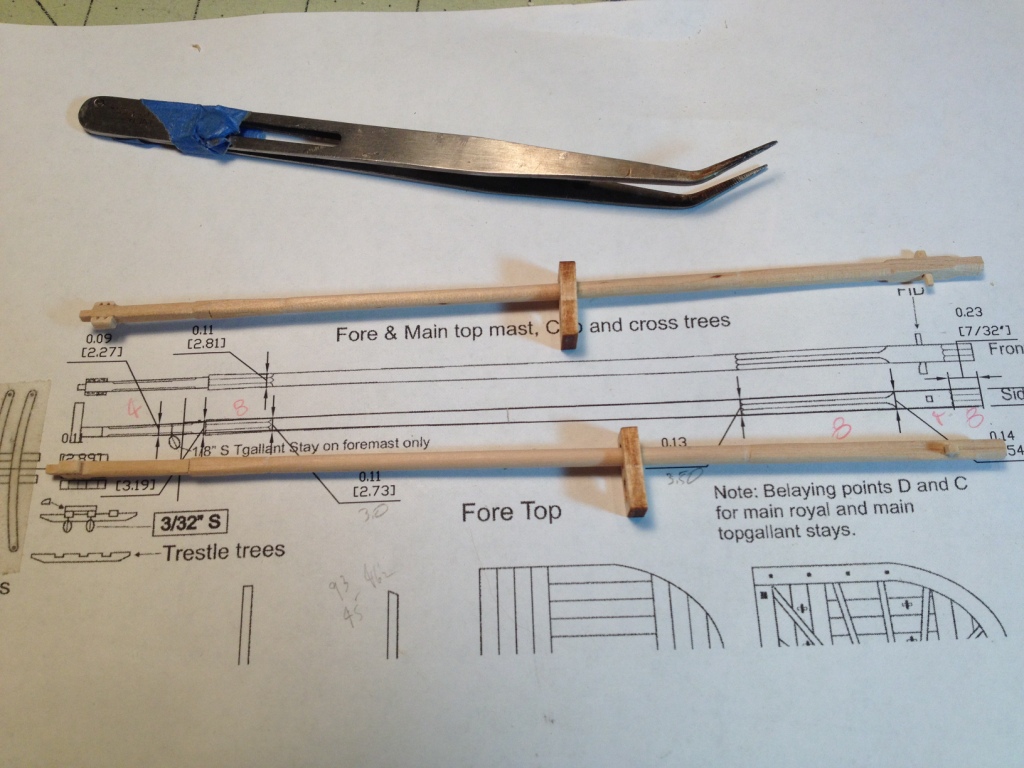
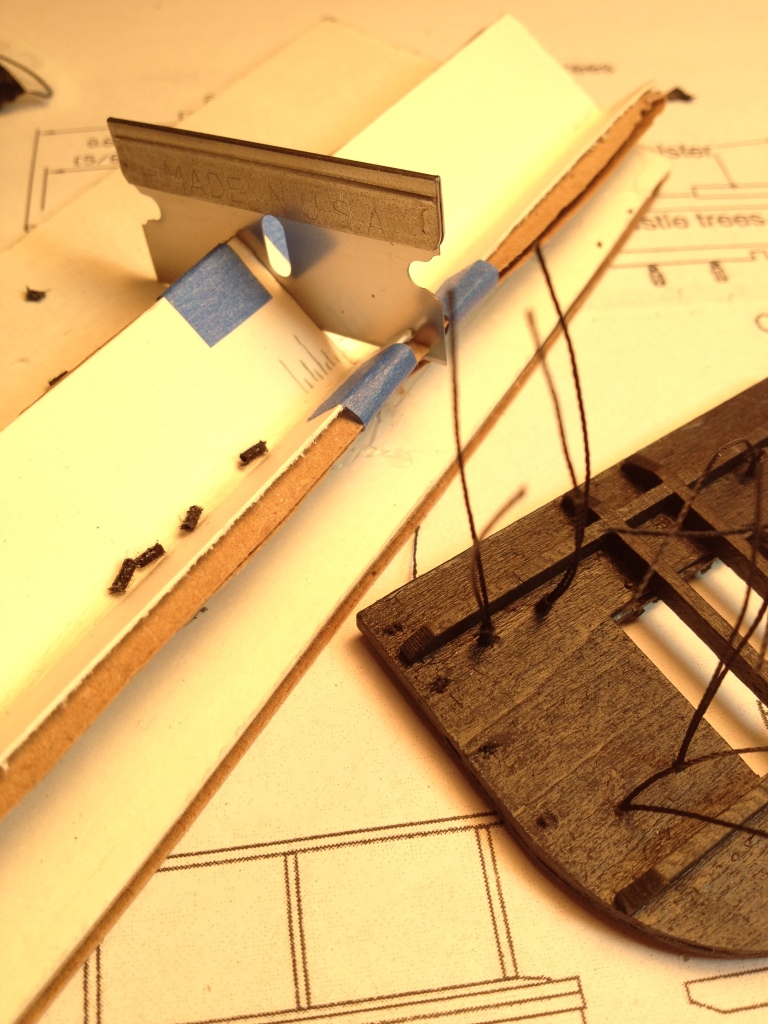
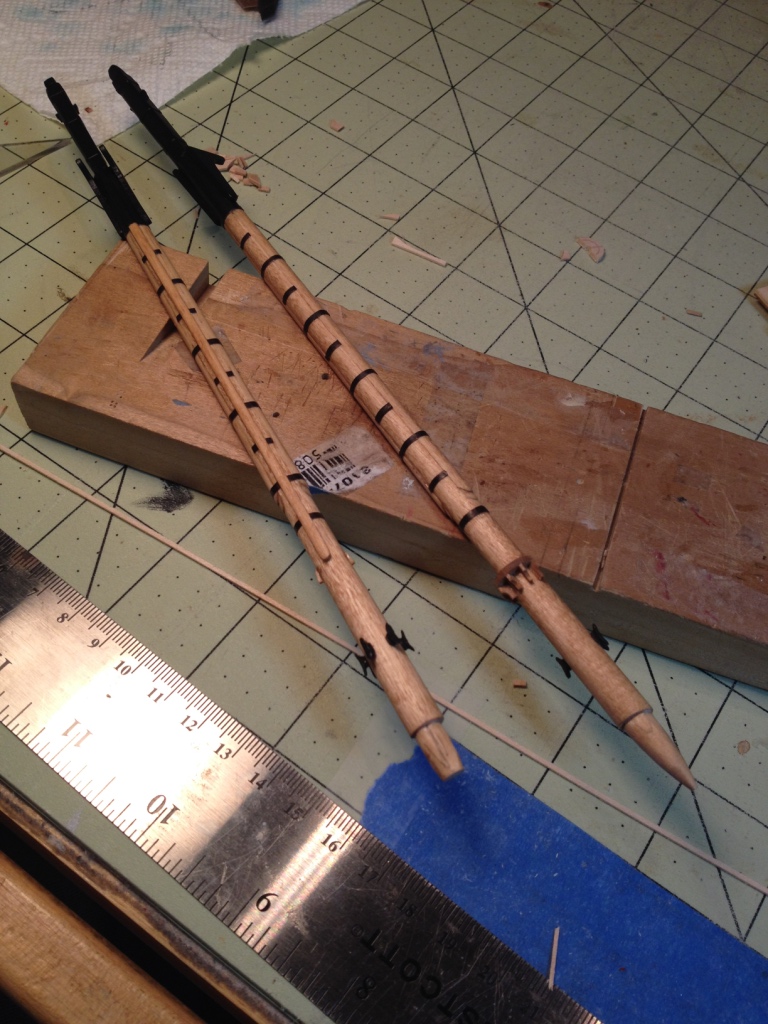
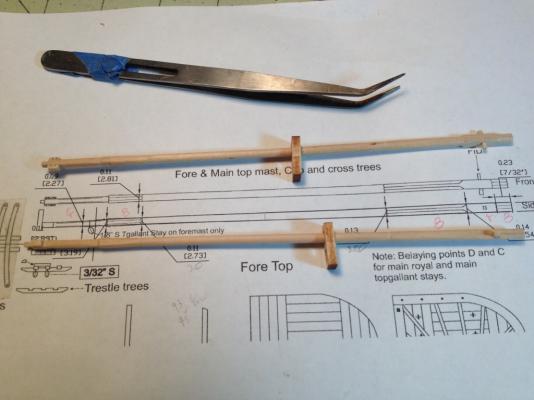
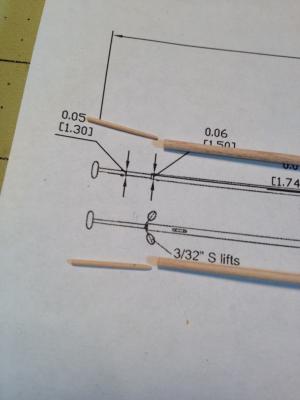
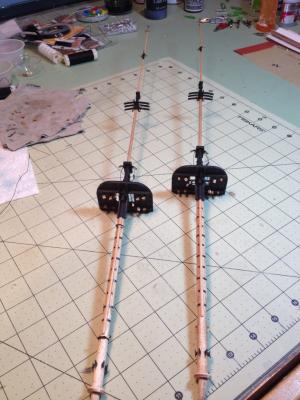
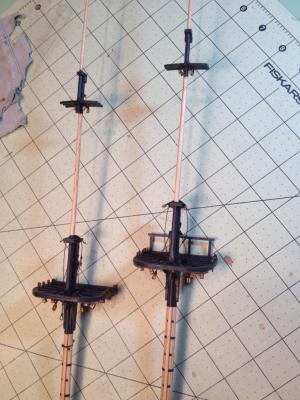
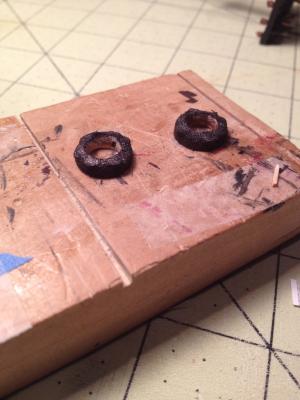
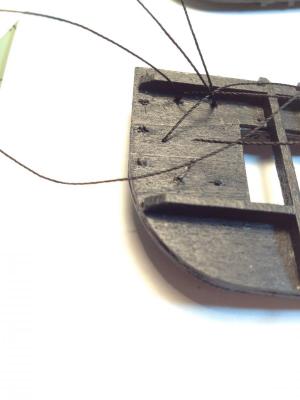
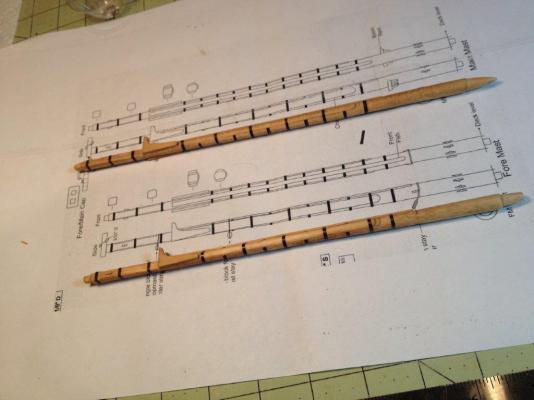
Trestle and cross trees construction. To ensure these pieces were assembled properly I put a piece of two-sided tape down over the drawing and used it for a template to alien the parts. I took Chuck’s advice and predrilled the holes in the cross trees before I removed them from the laser cut sheet. Be very careful while drilling these holes the parts are very fragile. I ended up splitting two of the ends that I had to glue back together. Let the drill do the work and resist the urge to push the bit into the wood like someone I know did. I shaped the top and topgallant masts using the same procedure I used for the lower masts. The only deviation I made from the instructions was to the very top of the topgallant mast. What I did and it wasn’t from lack of trying but after I broke the mast two times while trying to make this little pole at the top I decided that I would just make it a separate piece. I made the topgallant to just above the upper most sheave then drilled a hole in the top so I could insert the pole which was made from a toothpick sanded down to the right diameter. The mast parts were all assembled and painted. I believe (and hope) I installed all the blocks that were shown on the plans. I can see where this would be a pain to do after the masts are in place, if you see something I missed please let me know. Masts temporarily installed The final pieces I made up were the mast coats which I covered in cloth from a handkerchief to make them look like they were covered in canvas.


- 659 replies
-
- 10
-
-
- syren
- model shipways
- (and 1 more)
-
Nice work Jack, I like your mast holding contraption too, very clever.
- 203 replies
-
- 3
-
-
- artesania latina
- marie jeanne
- (and 1 more)
-
Hi Dan, I've also been looking into building one of the Hudson River steamboats. My ship club had plans of the sidewheeler Armenia which I found to be very interesting. What drew my attention to her was the superstructure that was protruding through the upper deck what I've since learned is the 'walking beam engine'. The plans I have were drawn by F. Van Loon Ryder too and I'm in the process of redrawing them in AutoCAD. I've just started researching this ship so I don't have a lot of information on the engine yet but whatever I find I will gladly share with you. I won't be starting this ship for a while because I still have a few months to go on my current build, the Syren.
-
US Brig Syren by Gahm - Model Shipways
_SalD_ replied to Gahm's topic in - Kit build logs for subjects built from 1801 - 1850
Wonderful craftsmanship Thomas and I'll take two after you do Dirk's. -
Thanks Lawrence and if you enjoy rigging how would you like do do mine? The more I look at all those lines the more apprehensive I get about starting. I know I just need to take it one line at a time, but that's a lot of lines! We got about 12" of snow but the temperature is back up in the 40's (F) so it's melting pretty quickly.
- 659 replies
-
- 5
-
-
- syren
- model shipways
- (and 1 more)
-
Thanks Dirk glad you like it. You look cold in your new photo
- 659 replies
-
- 3
-
-
- syren
- model shipways
- (and 1 more)
-
Thanks Bob, George and Jesse and Elijah, I really appreciate the comments and the likes.
- 659 replies
-
- 4
-
-
- syren
- model shipways
- (and 1 more)
-
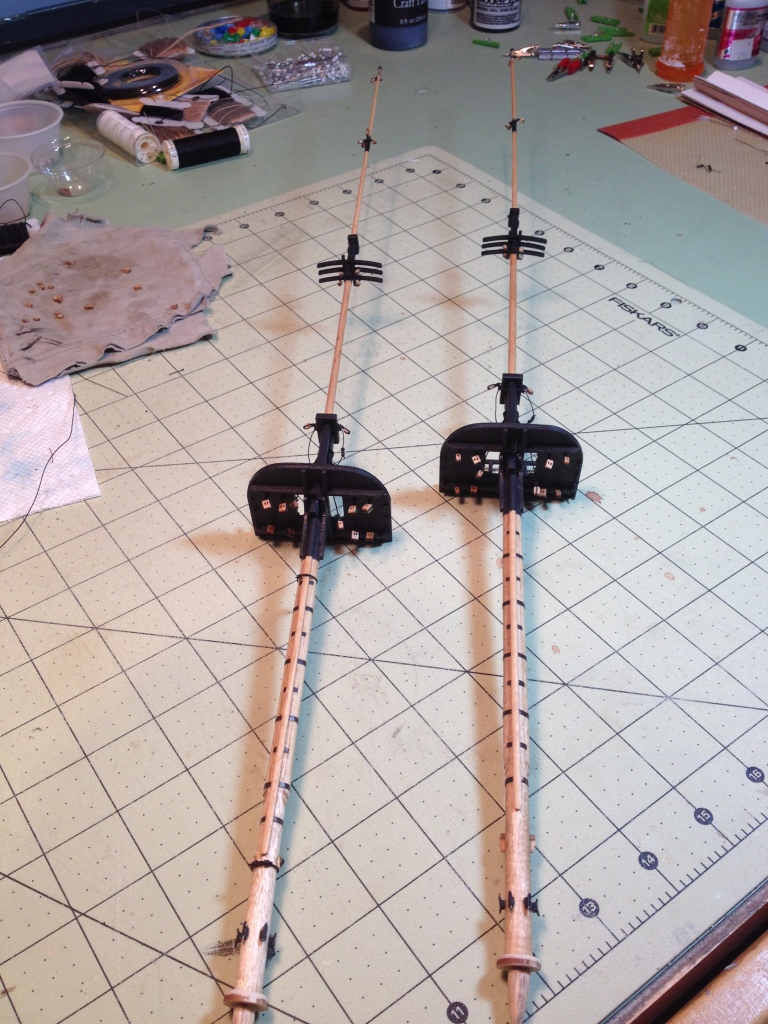
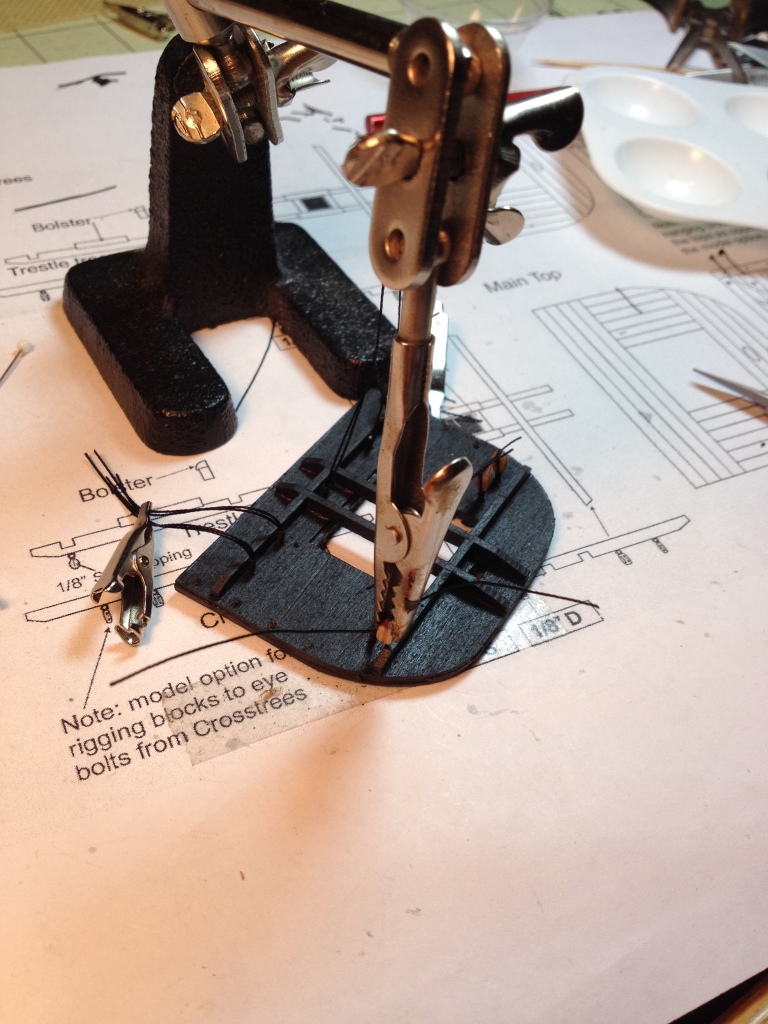
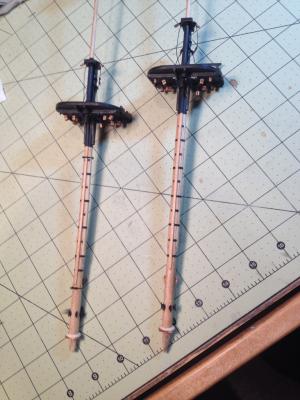
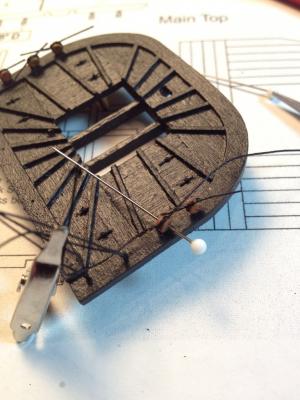
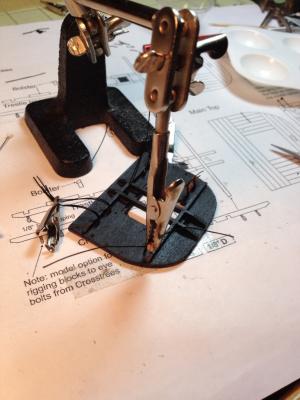
Mast tops finished and unpainted. Railings are not glued in position yet. I decided to use the more accurate method of hanging the blocks below the tops as Chuck noted in the instructions. To thread the rigging line through the holes I used a wire I removed from a needle threader. This allowed me to remove the wire while keeping the loop above the top. To keep the loops from pulling back through the holes I used the scrap shanks from eye bolts that I had cut off previously. After getting frustrated trying to insert the proper size pin in the loop I found it was a lot easier to put in a longer pin than required and then trim it to size after it was in place. To keep the 3/32” clearance between the block and the underside of the mast top I made up some zip-seizing and cut them 3/32” long. These were then slipped over the rigging line to act as spacers. I used a third hand to help hold the blocks in place while I tied the line around them. I wish the tops were painted some other color than black because believe me, black thread on a black background was tough. A pin was used to help keep the deadeyes in place while I tied them. I must be getting better at this because I didn’t launch any of them into never-never land. Also notice the pins below the loops. Finished tops Finished lower masts and I have to say that these two pieces were one of the more complex assemblies I’ve done on this ship. There are a lot of parts that need to be coordinated that I wasn’t fully aware of until assembling everything. My one big faux pas was the placement of the bibbs. When I installed them on the mast cheeks I thought I had aligned them square in the fore and aft direction. However, when I installed the mast tops on top of them I discovered the tops were angled to one side. To fix this I squared the tops to the masts which made the bibbs slightly angled off the trestles. It’s a good thing everything is painted black because it’s hard to notice.


- 659 replies
-
- 15
-
-
- syren
- model shipways
- (and 1 more)
-
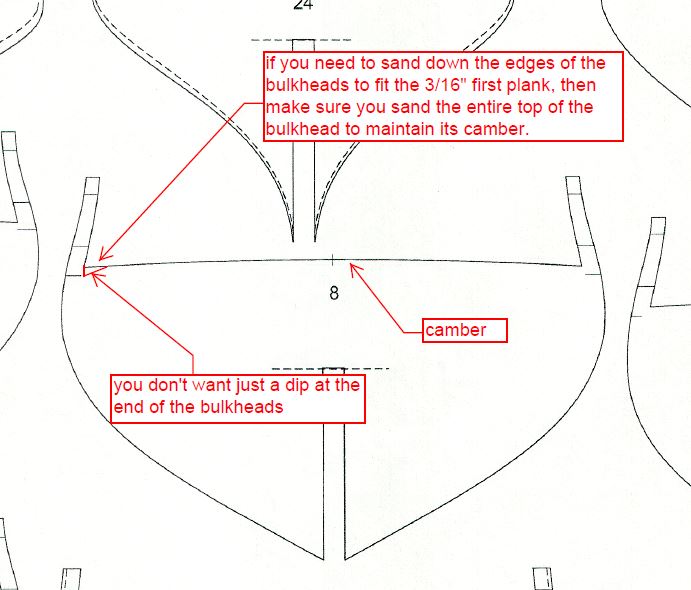
Robbyn, I believe this is the paragraph you are referring to. You only need to be concern with this if you don't have the 3/16" clearance between the top of the bulkheads and the gun port sills. If you have less than 3/16" you need to sand down the tops of the bulkheads so the first plank will fit. When sanding just make sure you maintain the camber of the deck along the bulkheads from side to side, you don't want to just sand down the ends of the bulkheads because the deck won't lay right. . Hope this helps.


-
Hi Nigel, I see you haven't let the shipyard cool off at all between your Red Dragon and this build. Looks like an interesting build and I'll be pulling up a barrel to watch.
-
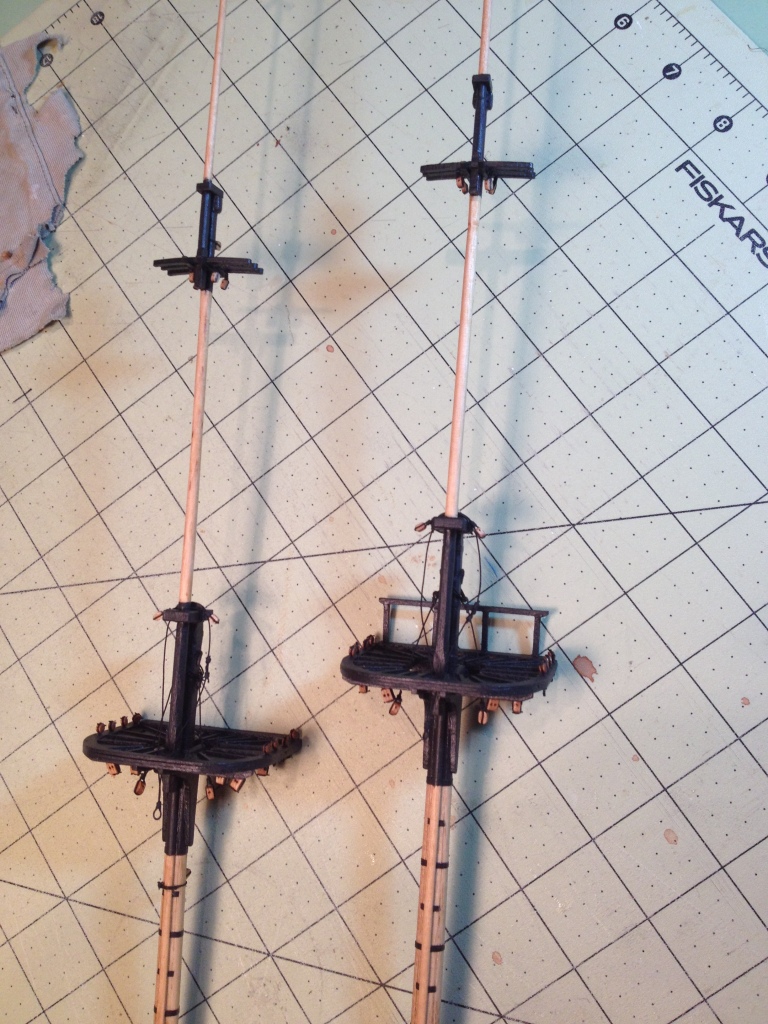
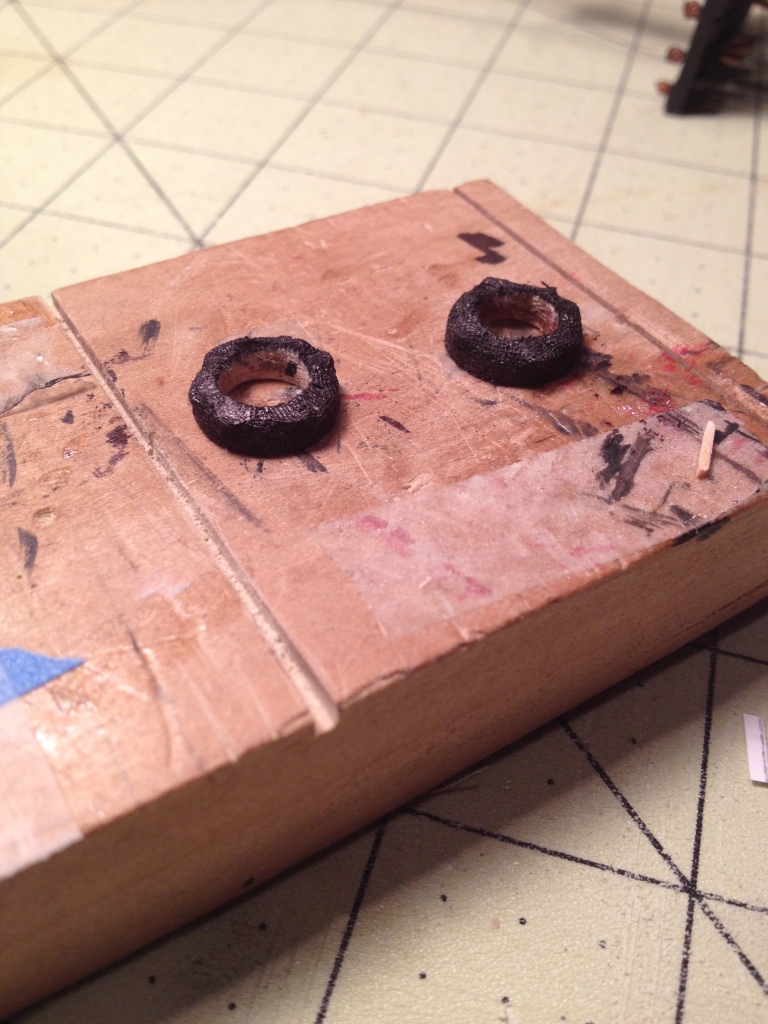
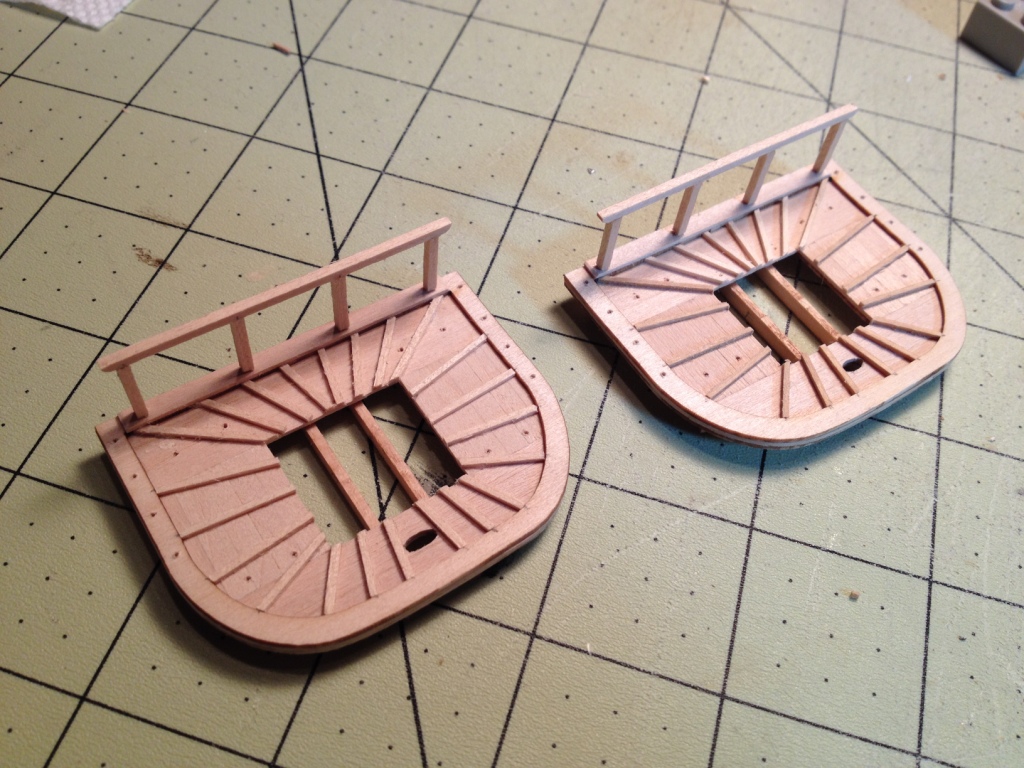
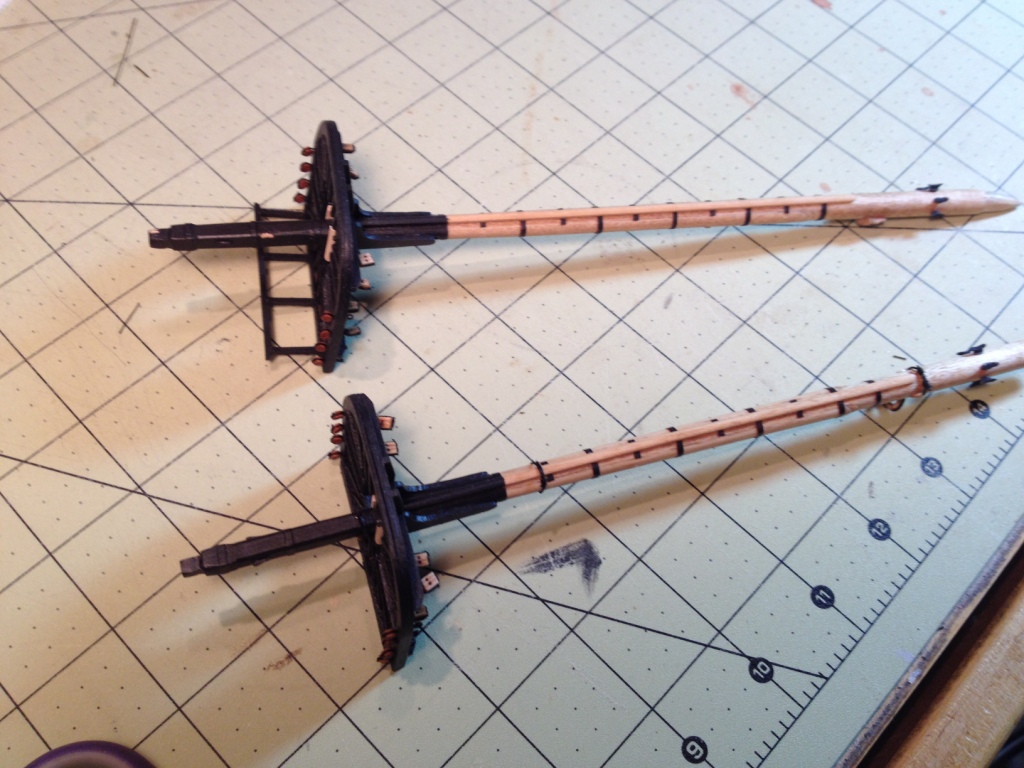
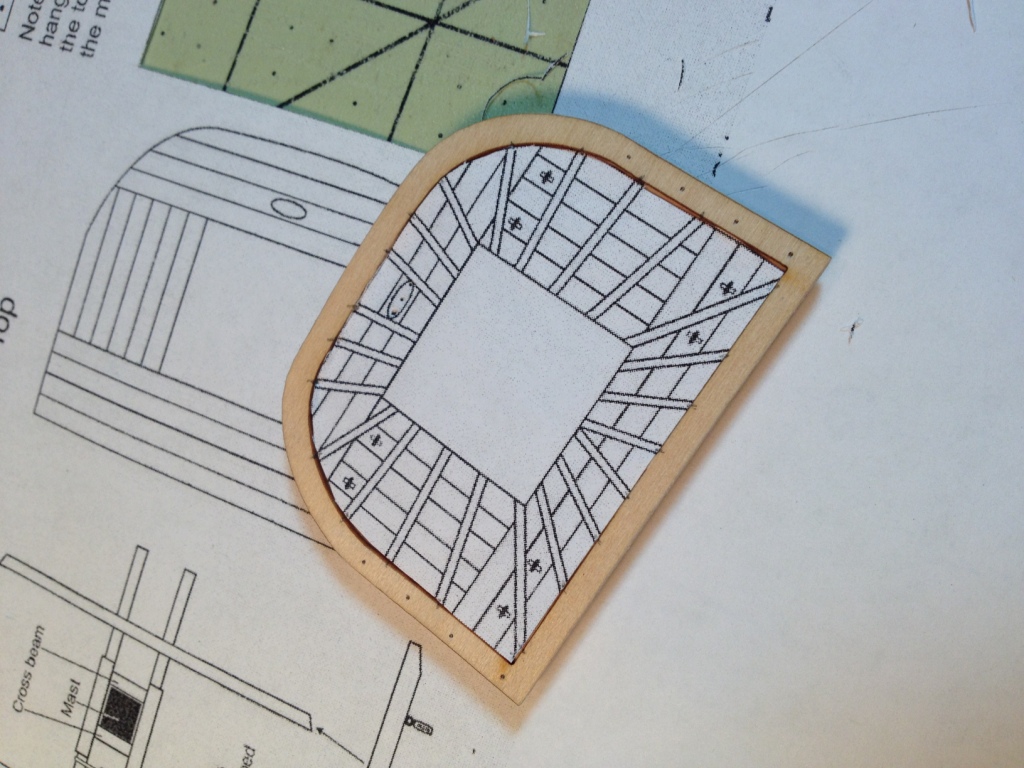
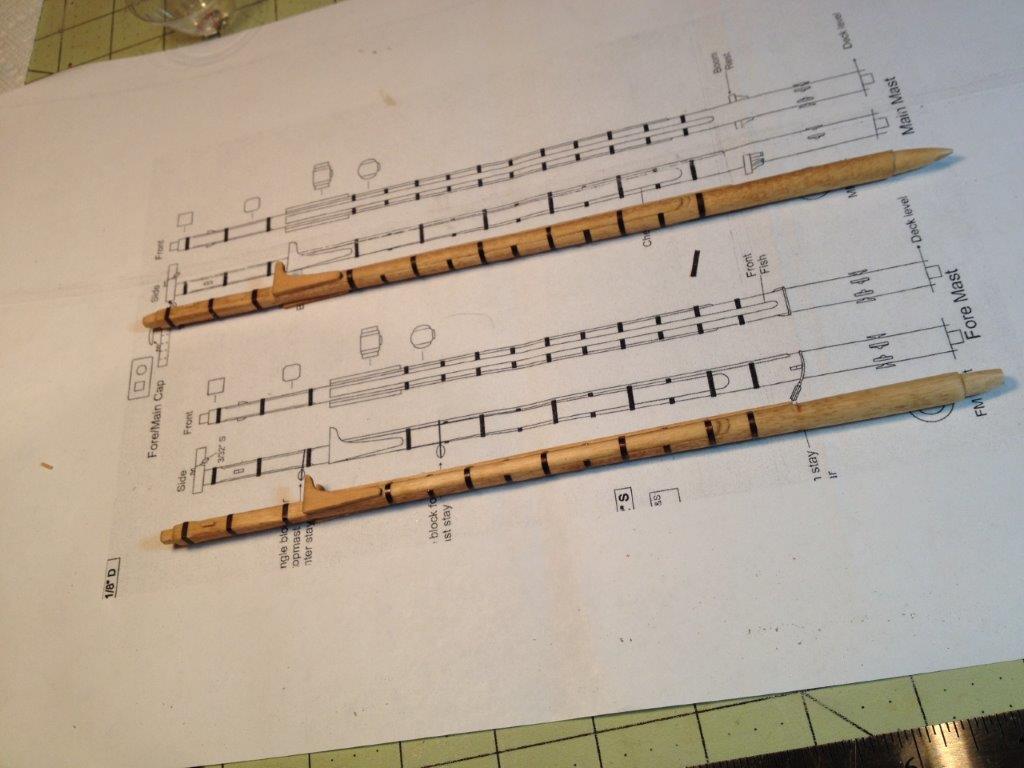
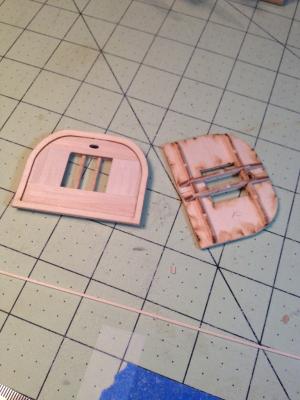
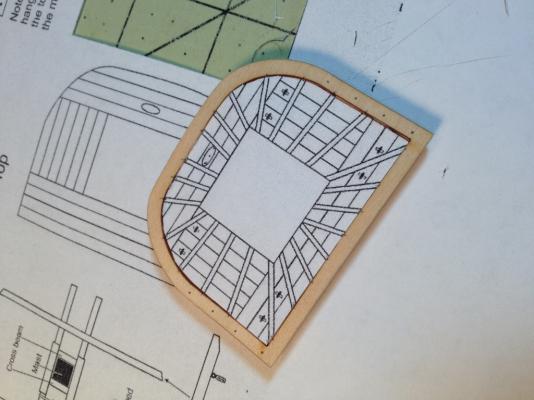
Finished the masts by painting the top portions, added the boom rest and lower cleats which I opted to paint black. I added pins to the back of all the cleats before gluing them to the masts for extra support. The main and fore tops were pretty straight forward and assembled them as per the instructions. The fore and aft planking was run long over the edge of the template plates and then trimmed (no picture of that). To help locate the battens I made a copy of the drawing showing them, cut it out and used it as a pattern to mark their locations. I also cut the center square out to mark the location of the other end of the battens.
- 659 replies
-
- 14
-
-
- syren
- model shipways
- (and 1 more)
-
Capstan and bowsprit came out nice Jack, in spite of the directions.
- 203 replies
-
- 4
-
-
- artesania latina
- marie jeanne
- (and 1 more)
-
Richard, sorry it took so long to get back to you but I checked and I did in fact use the 22 gauge wire,
-
Cutter Cheerful 1806 by rafine - FINISHED
_SalD_ replied to rafine's topic in - Build logs for subjects built 1801 - 1850
Deck fixtures look great Bob. Pumps turned out really nice.- 525 replies
-
- 4
-
-
- cheerful
- Syren Ship Model Company
- (and 1 more)
-
Nice progress Elijah and as the others have pointed out there's no need to rush and congratulations on the new baby brother.
- 701 replies
-
- 4
-
-
- phantom
- model shipways
- (and 1 more)
-
George, Bob, Richard, Elijah, Thomas & Lawrence, thank you all for the kind words. I am back from vacation and was going to complain how unfortunate I was because I caught a cold or the flu as soon as I got there and had to spend most of the time inside in bed, but then I read the sad news of Augie's (Bruno) http://modelshipworld.com/index.php/topic/12546-augie-bruno/?p=379342 passing and now my problems seem to be very trivial. So here's to you Augie, may you rest in peace.
- 659 replies
-
- 9
-
-
- syren
- model shipways
- (and 1 more)
-
Richard, I think I used the heavier gauge wire but I can't remember off hand. I'm on vacation and not at home but as soon as I get back (Wednesday) I can measure the wire to see which one I used.
-
Nigel, congratulations, she's beautiful. Great work all around. Your carvings have inspired me to give it a try.
- 270 replies
-
- 1
-
-
- red dragon
- artesania latina
- (and 1 more)
-
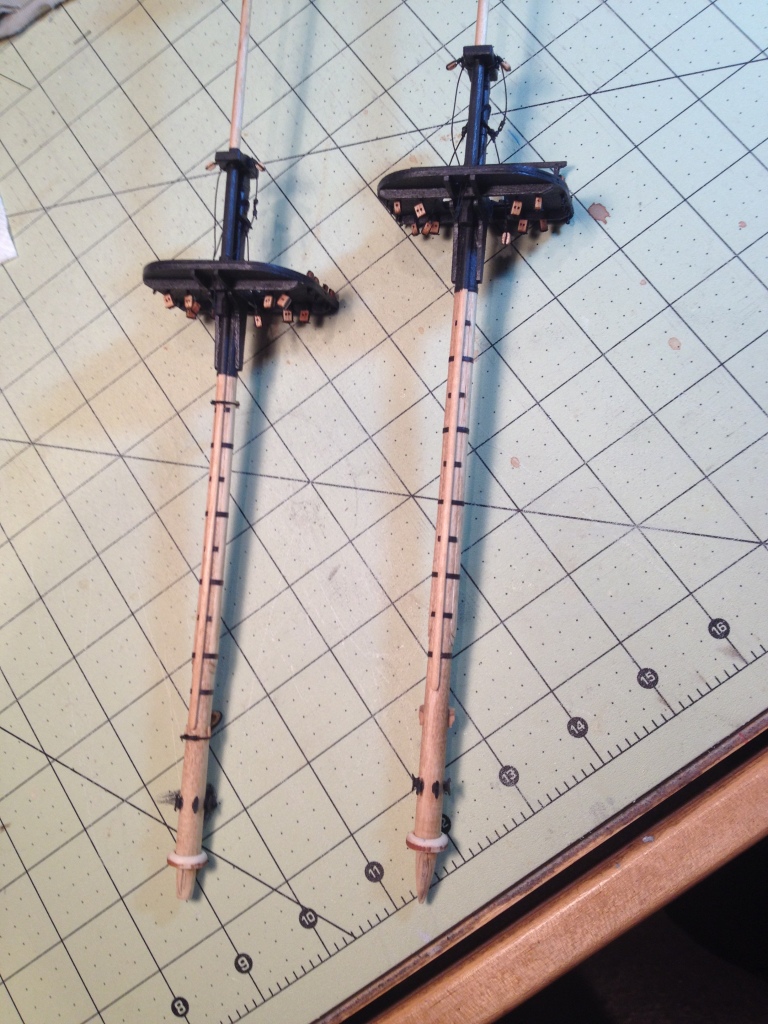
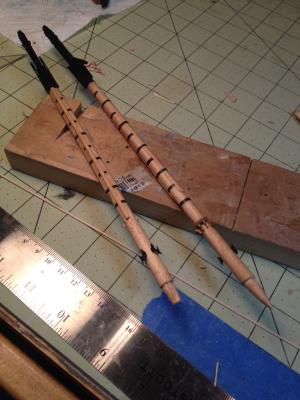
Small update. Finished putting the iron bands on the masts and installed the front fish and bibbs. This will be the last post for a while as the shipyard will be shutting down for a couple of weeks. I will be spending time with the family in sunny Florida on vacation. Happy New Year everyone and thank you for all the likes.
- 659 replies
-
- 12
-
-
- syren
- model shipways
- (and 1 more)