HOLIDAY DONATION DRIVE - SUPPORT MSW - DO YOUR PART TO KEEP THIS GREAT FORUM GOING! (Only 20 donations so far - C'mon guys!)
×


_SalD_
-
Posts
828 -
Joined
-
Last visited
Content Type
Profiles
Forums
Gallery
Events
Everything posted by _SalD_
-
 Thanks for the input Elijah but it's not so much the shine on the bands as it's the way the bands that are suppose to be beneath the cheeks look. The bands were installed all around the mast on top of the cheeks and then the portion that was suppose to be under the cheeks was removed. It was suppose to look like the band went under the cheek but it doesn't really. From about ten feet away they look fine though so I guess I'll leave them.
- 659 replies
-
- 4
-

-
- syren
- model shipways
- (and 1 more)
-
Thanks for the info Richard. The gap is a bit wide, I'll have to try using a piece of wood clamped to the tray. Happy New Year
- 659 replies
-
- 3
-
-
- syren
- model shipways
- (and 1 more)
-
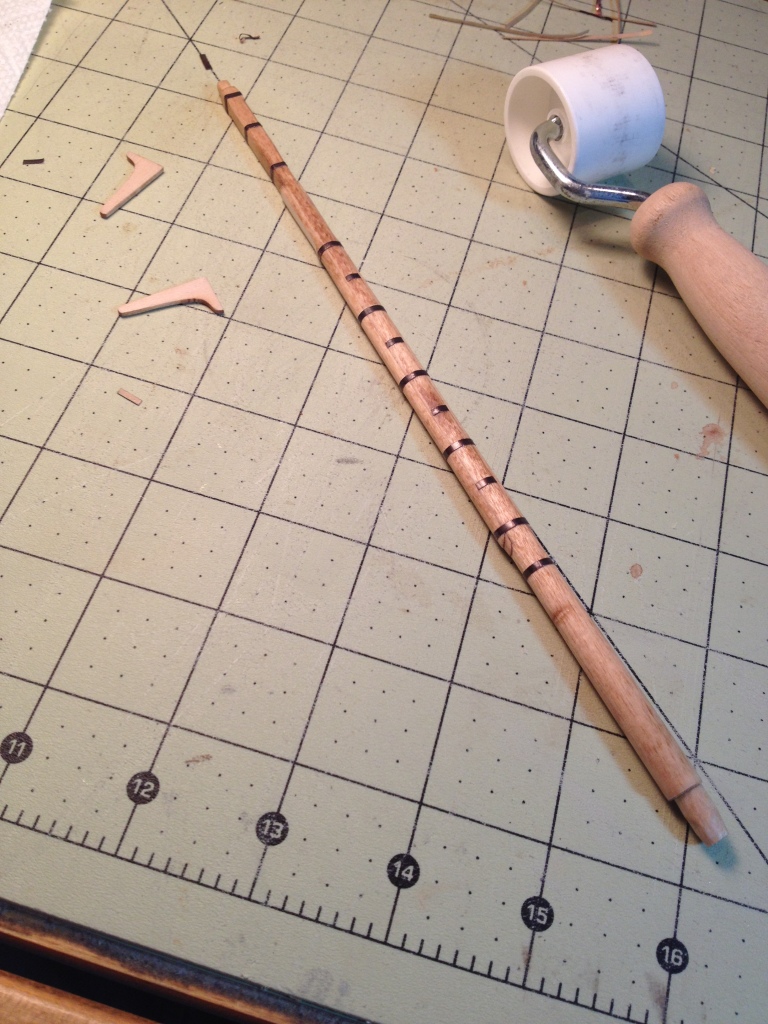
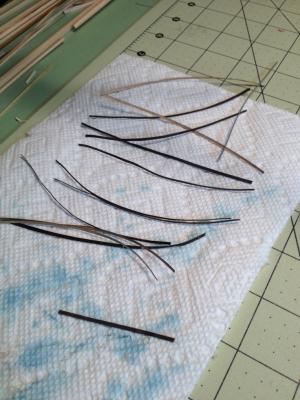
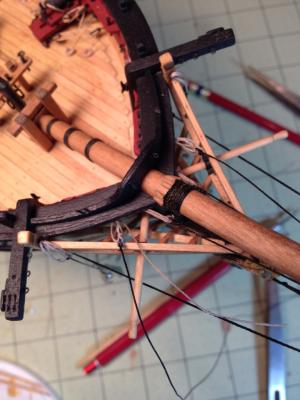
After shaping the masts I flattened the two sides to install the cheeks. After the glued dried overnight I sanded them down and cut in the ‘fingernail’ shape at the bottom. For the iron bands I decided to use the copper foil tape instead of the pinstripe tape. I had considered making them from brass but then I would have had to put some of them on prior to installing the cheeks but thought I would have a hard time sanding the cheeks down without damaging the bands. The foil was cut into 1/16” wide stripes and then blackened. The bands were then installed per the drawings. I’m not really crazy about now the bands that are supposed to be under the cheeks look but not sure how to make them look any better. In order not to damage the bands when sanding down the front fish I decided to round it off before gluing it to the mast (should have thought of this for the cheeks ). To do this I used some double sided tape on a scrape piece of dowel to hold the fish in place while sanding. The pieces were stained and the back notched to fit over the bands. They haven’t been installed yet. Christmas present (I was a good boy) already put to work. Proxxon sander, works very well. Need to get use to it though, removes a lot of material very quickly.


- 659 replies
-
- 14
-
-
- syren
- model shipways
- (and 1 more)
-
Nigel the carvings look great and it's a wise man who knows when to step away from the piece. Happy New Year
- 270 replies
-
- 4
-
-
- red dragon
- artesania latina
- (and 1 more)
-
Elijah, if you don't have any thin plywood you can also print the templates out on thicker card stock or glue the paper templates to cardboard like you find on the back of pads of paper and then cut them out.
- 701 replies
-
- 2
-
-
- phantom
- model shipways
- (and 1 more)
-
Elijah just found your build and it appears that you're off to a great start. As the others above have said take your time and plan out your steps and if you have questions don't hesitate to ask. I also envy you building your first ship at thirteen, it only took me sixty four years to do my first. Good luck and enjoy.
- 701 replies
-
- 6
-
-
- phantom
- model shipways
- (and 1 more)
-
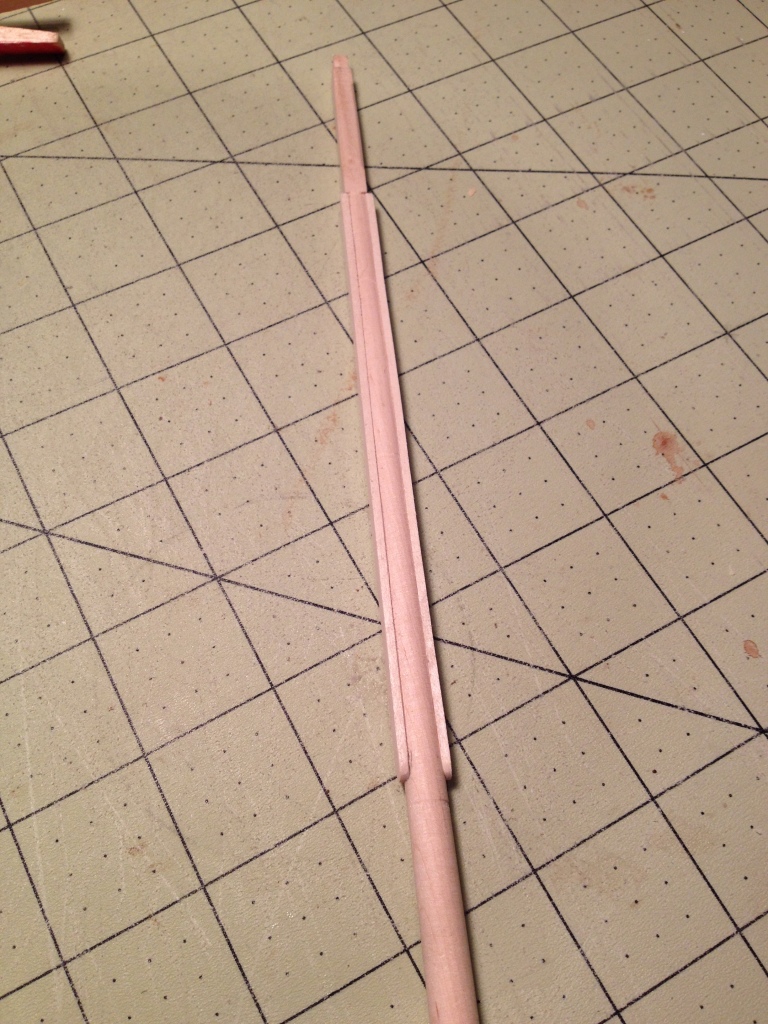
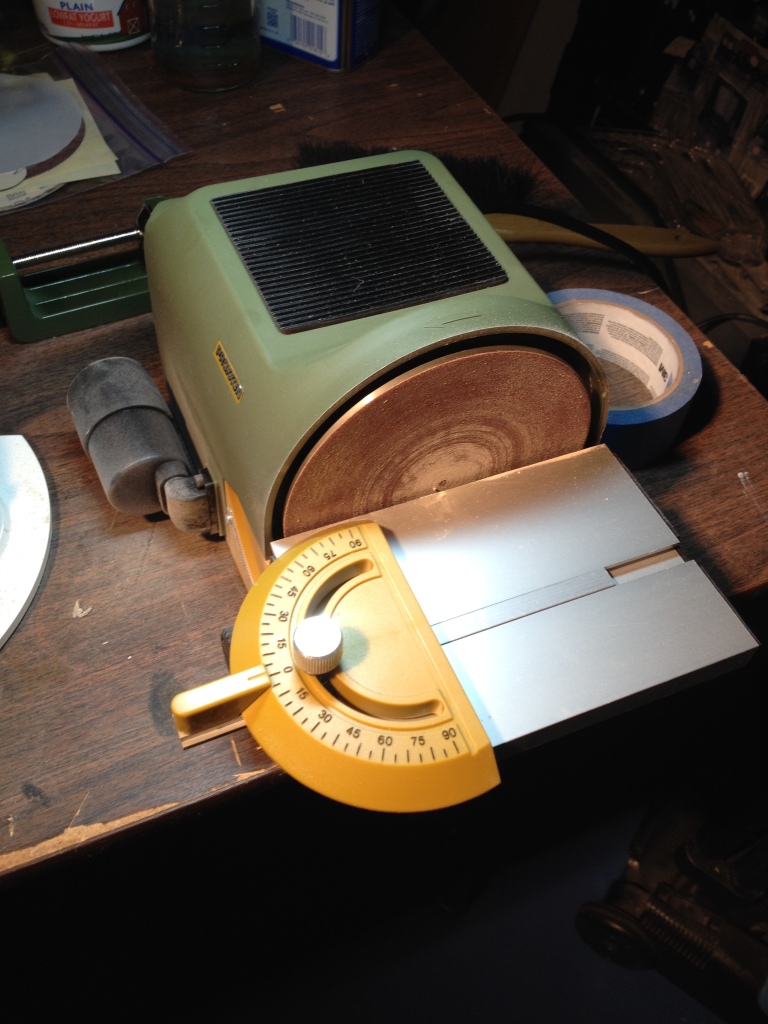
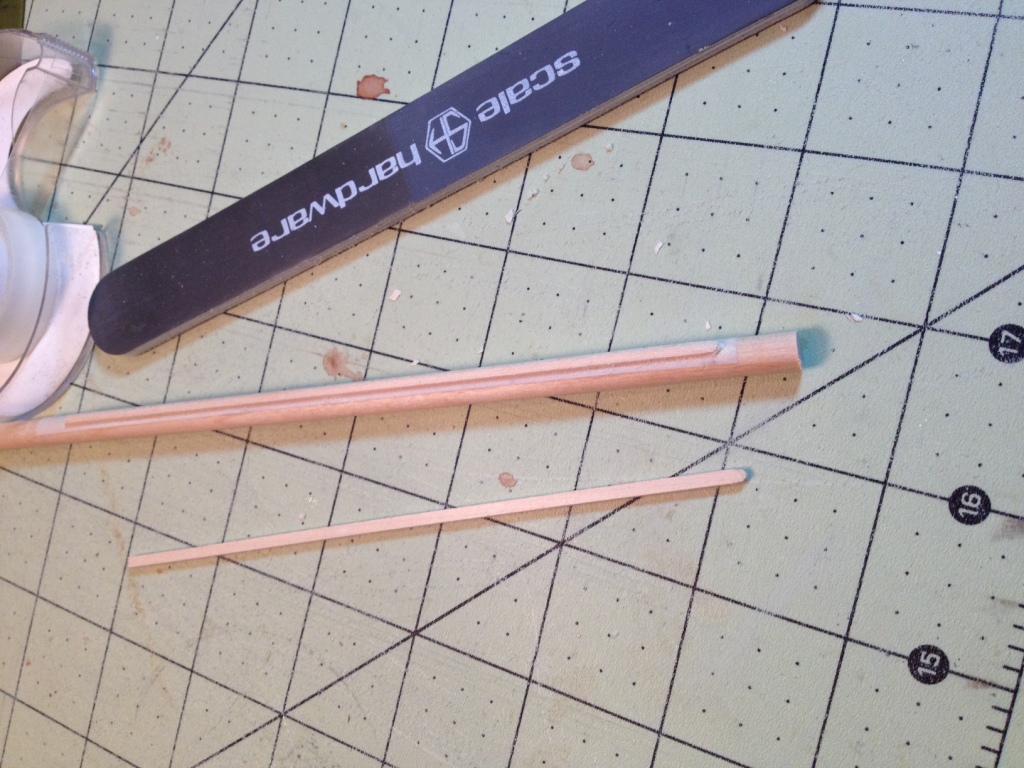
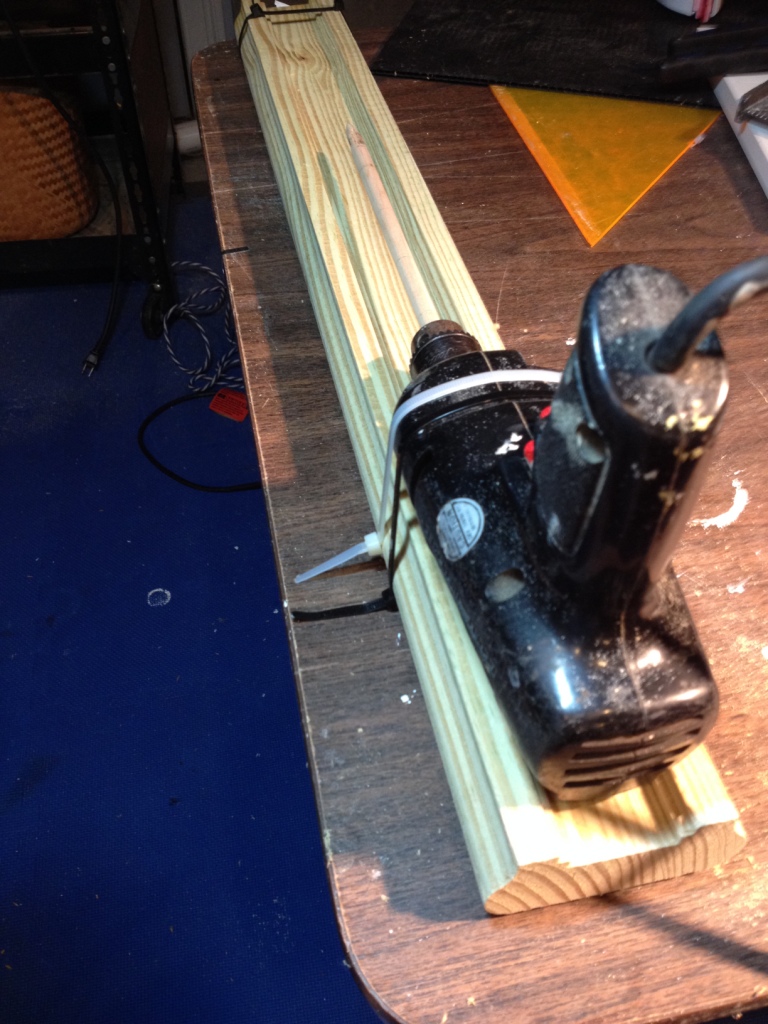
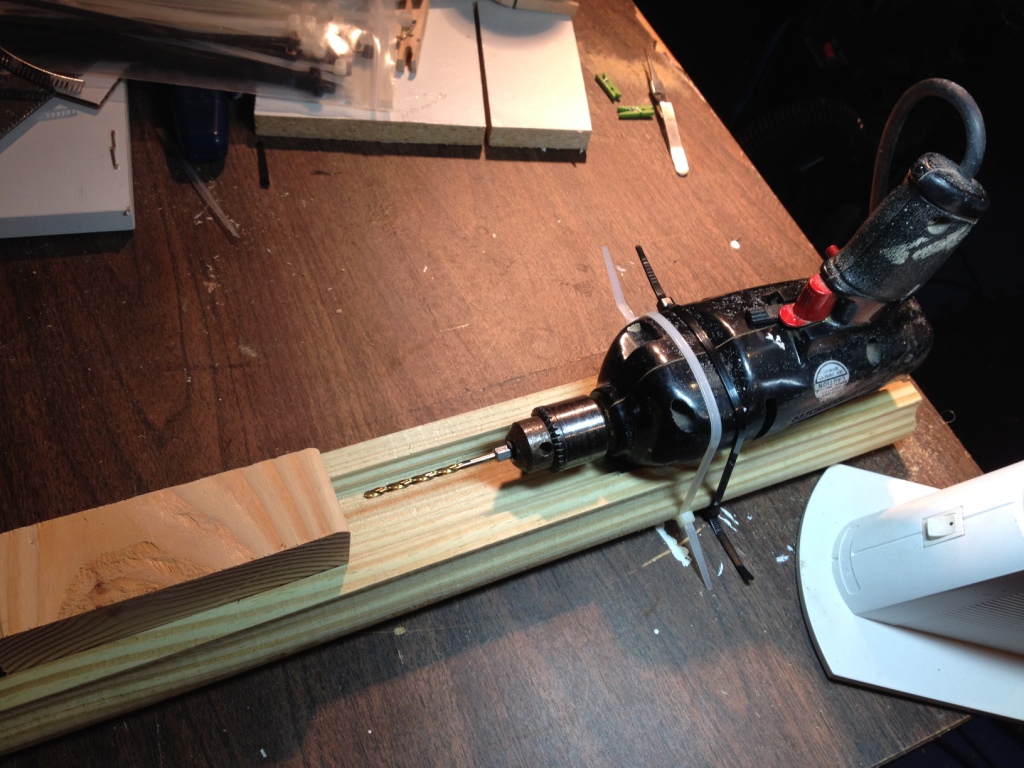
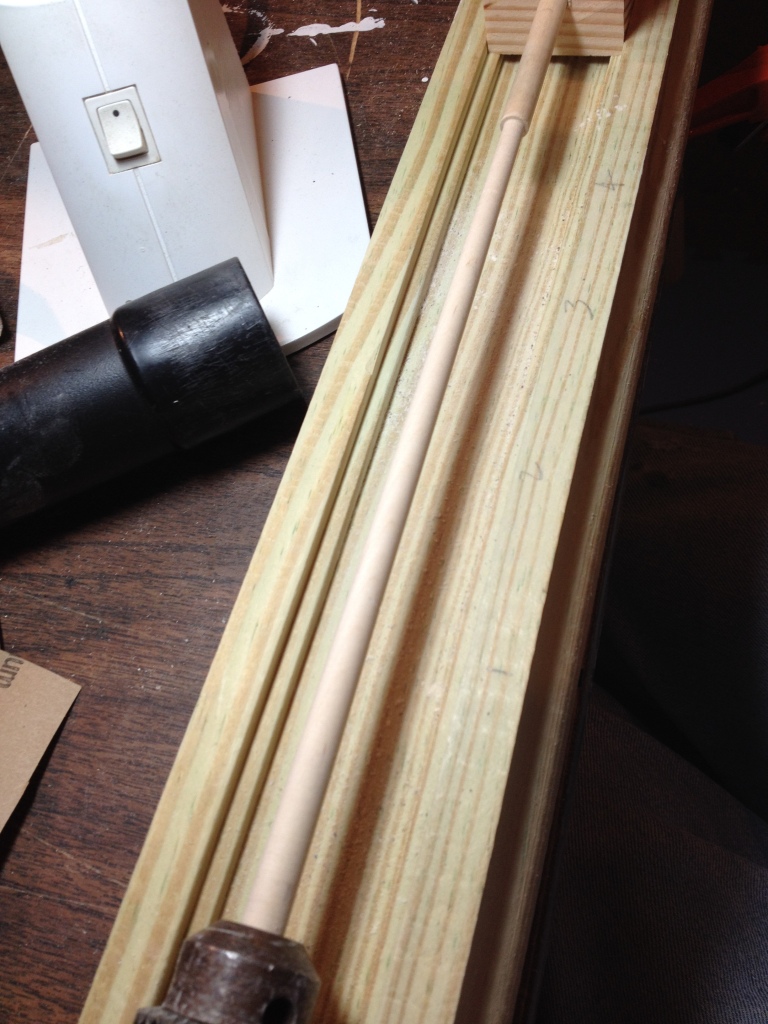
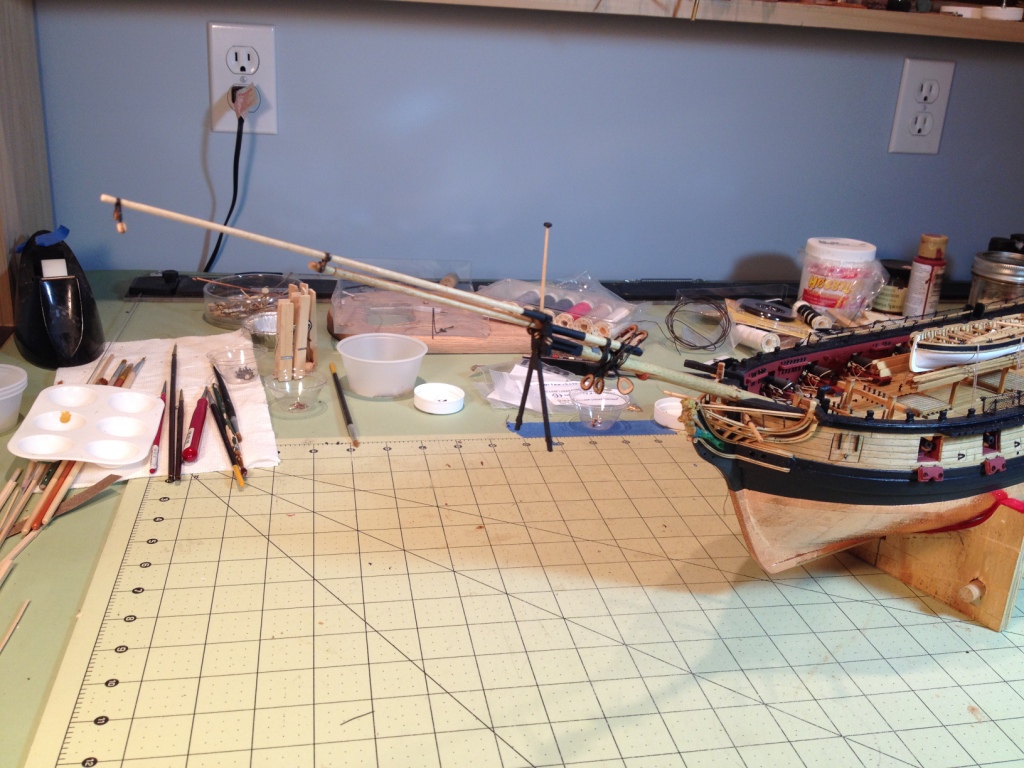
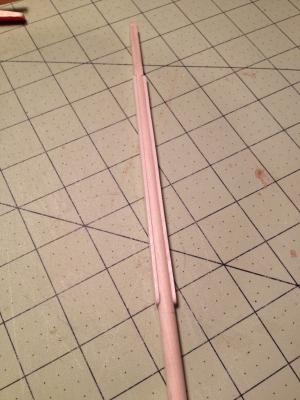
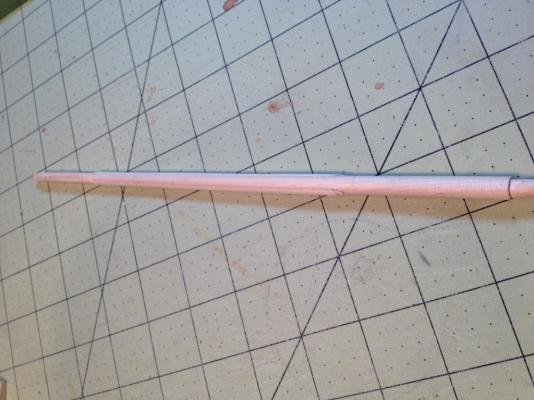
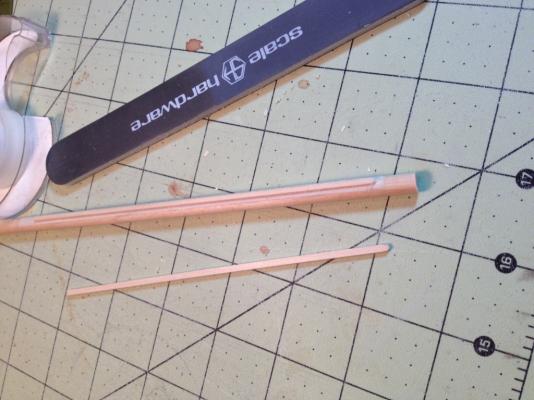
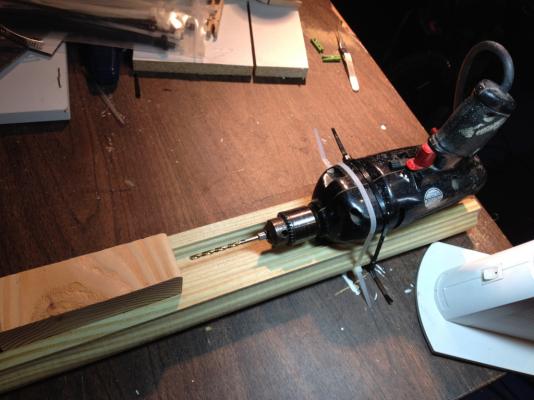
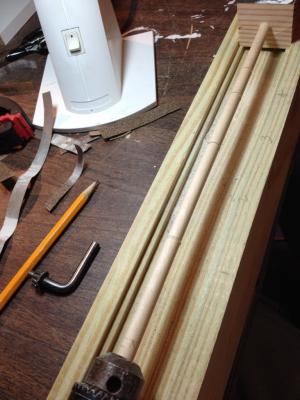
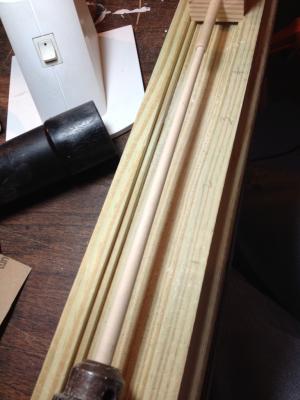
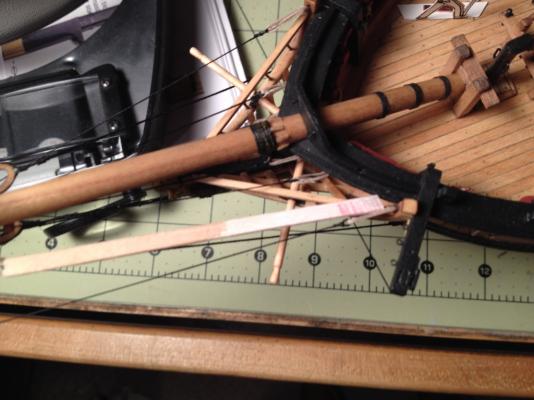
I started work on the masts and discovered that I wouldn’t be able to use the same method to turn them down as I used for the bowsprit. This was because the chuck on my drill press cannot fit the 5/16” diameter dowel. I had thought about trying to make a ‘poor mans’ lathe but always hesitated because I never thought I could properly align the drill with the 'tail-stock' piece. Then, while walking past my pile of scrap wood, I had one of those ‘Eureka!’ moments. What I discovered was a 24” piece of left over deck cap rail. Turning the rail upside down I found that my 30 year old Craftsman electric drill fit very nicely in the groove used to support the railing spindles. The drill was secured by plastic zip-ties. For the 'tail-stock' I cut down a piece of 2x6 to fit in the same groove. This worked out well because I am able to slide the wood block along the groove to fit different length dowels and it's always aligned with the drill chuck. A 5/16” diameter bit was used to drill a hole in the 2x6 for the mast but different size holes can be drilled in other blocks for different diameter dowels. The mast dowel was then chucked into the drill; the 2x6 tail-stock slid in place and clamped and then the dowel was turned down using the same method as the bowsprit. Vacuum cleaner suction hose seen in the last picture was used for dust control. I'd also like to take this time to thank everyone for their continued support and much appreciated encouragement over the past year. Taking on this challenge has been much more enjoyable knowing that there are so many people out there who will unselfishly share their knowledge. Merry Christmas to all and have a safe and happy New Year.

- 659 replies
-
- 14
-
-
- syren
- model shipways
- (and 1 more)
-
Lawrence, thank you for the kind words and may you and the Admiral have a wonderful Christmas and a safe and happy New Year.
- 659 replies
-
- 4
-
-
- syren
- model shipways
- (and 1 more)
-
Elijah, Joe & Thomas thanks so much and a Merry Christmas and Happy New Year to you all.
- 659 replies
-
- 4
-
-
- syren
- model shipways
- (and 1 more)
-
Thank you George and a Merry Christmas and Happy New Years to you too.
- 659 replies
-
- 2
-
-
- syren
- model shipways
- (and 1 more)
-
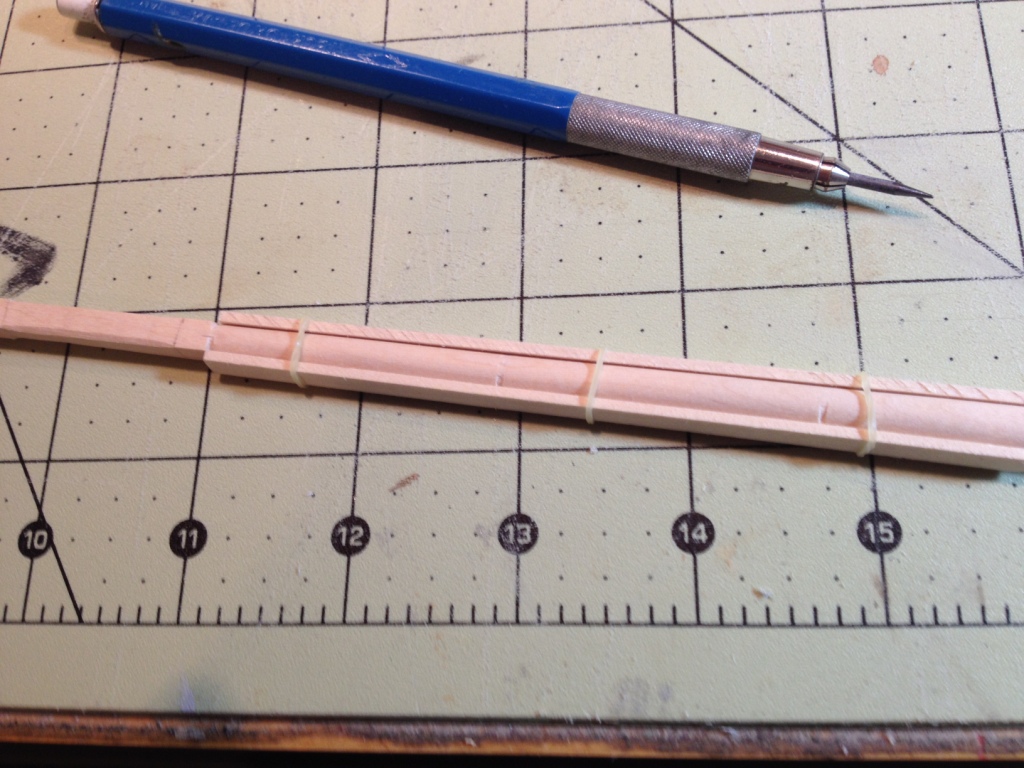
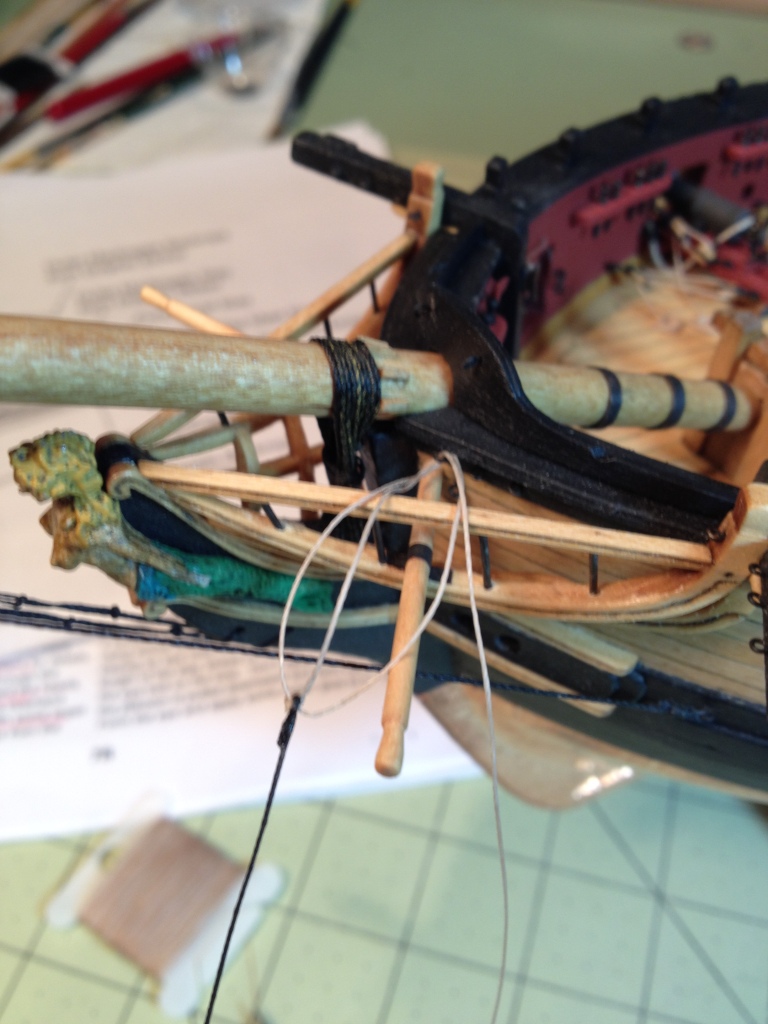
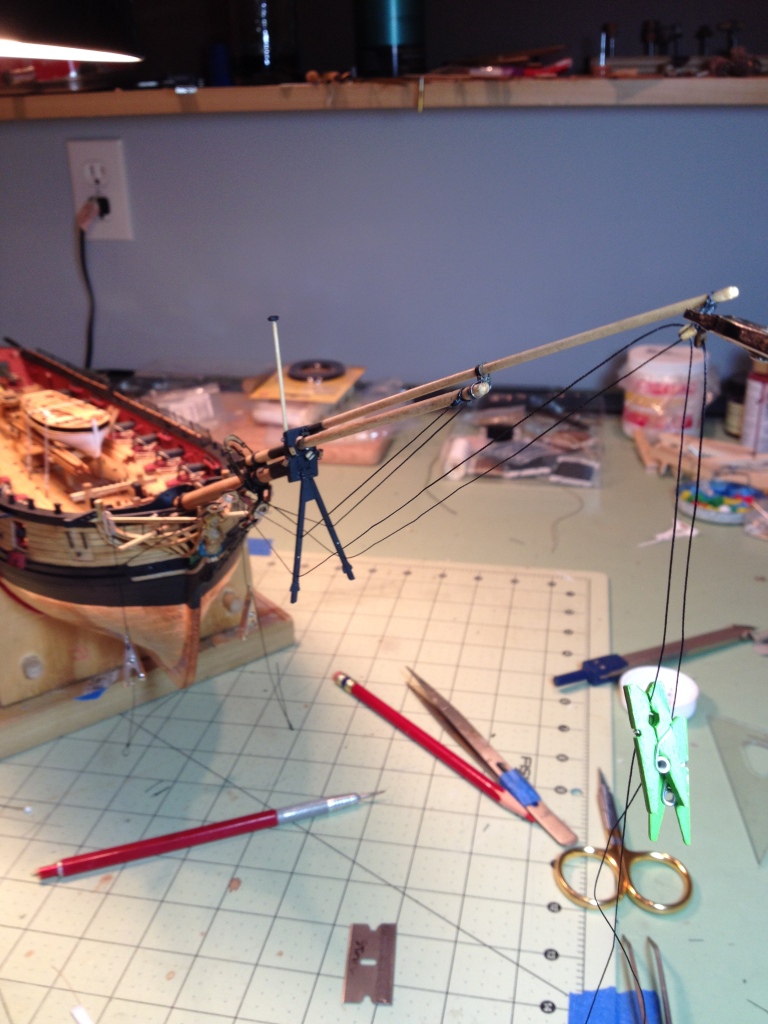
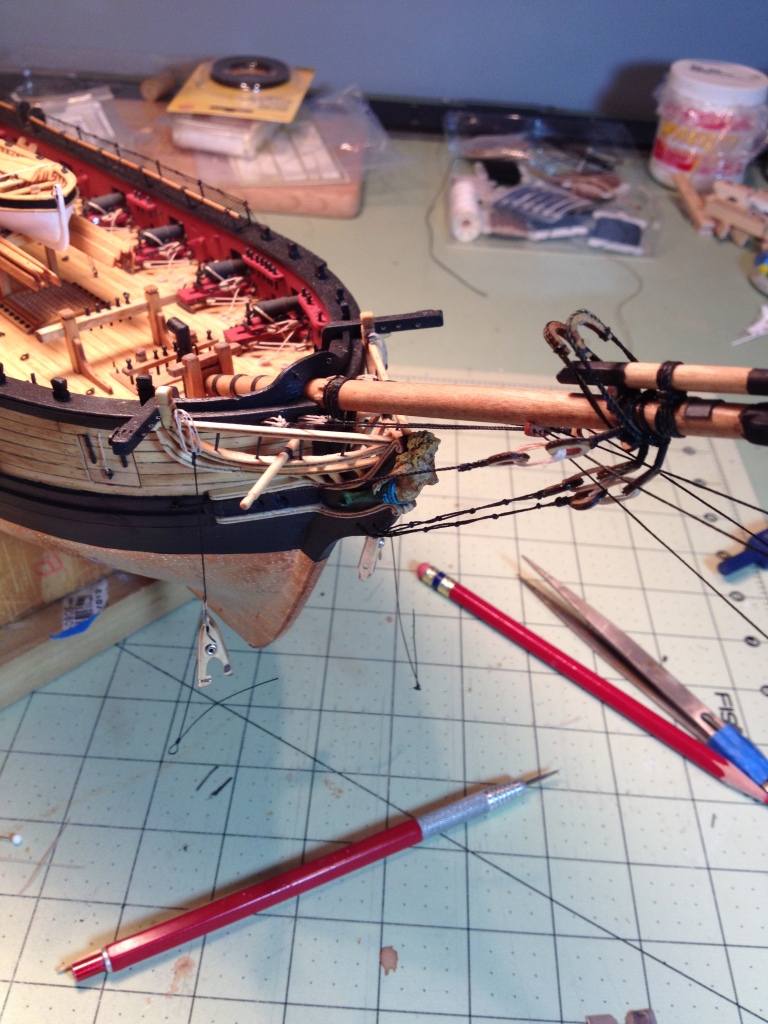
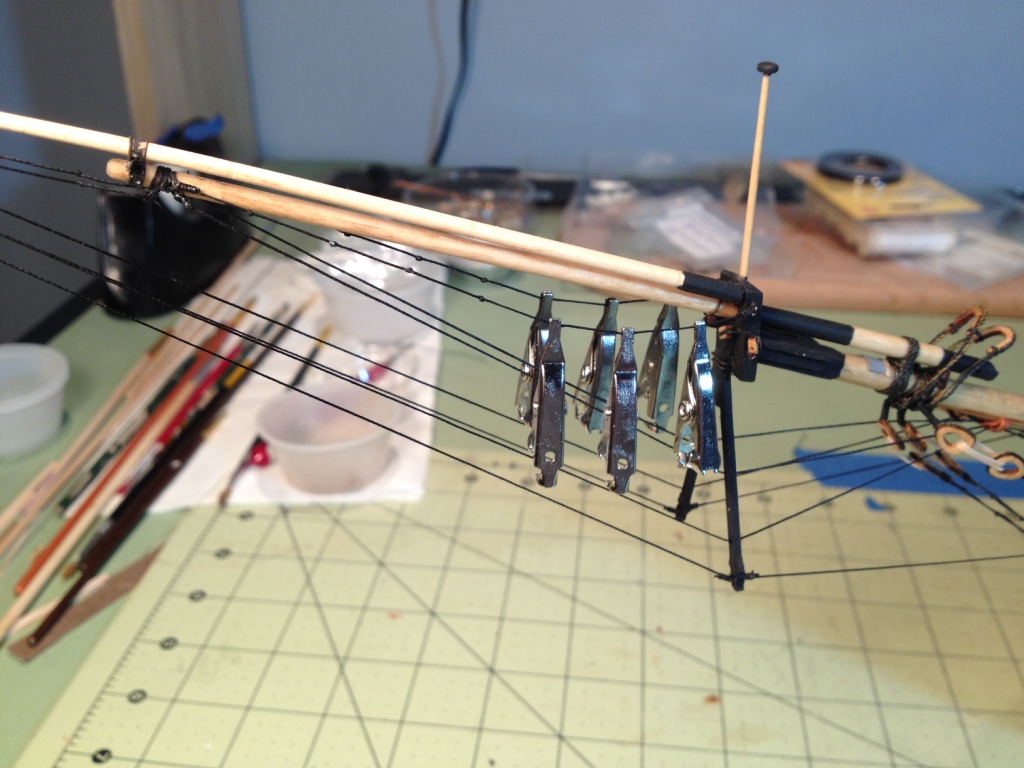
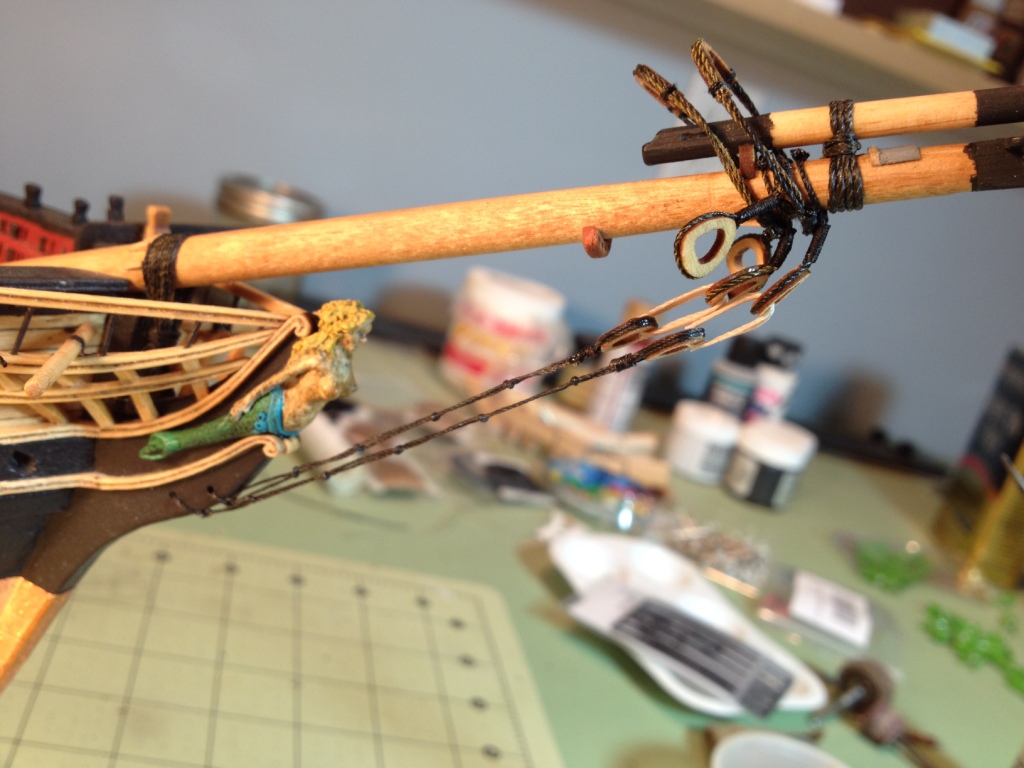
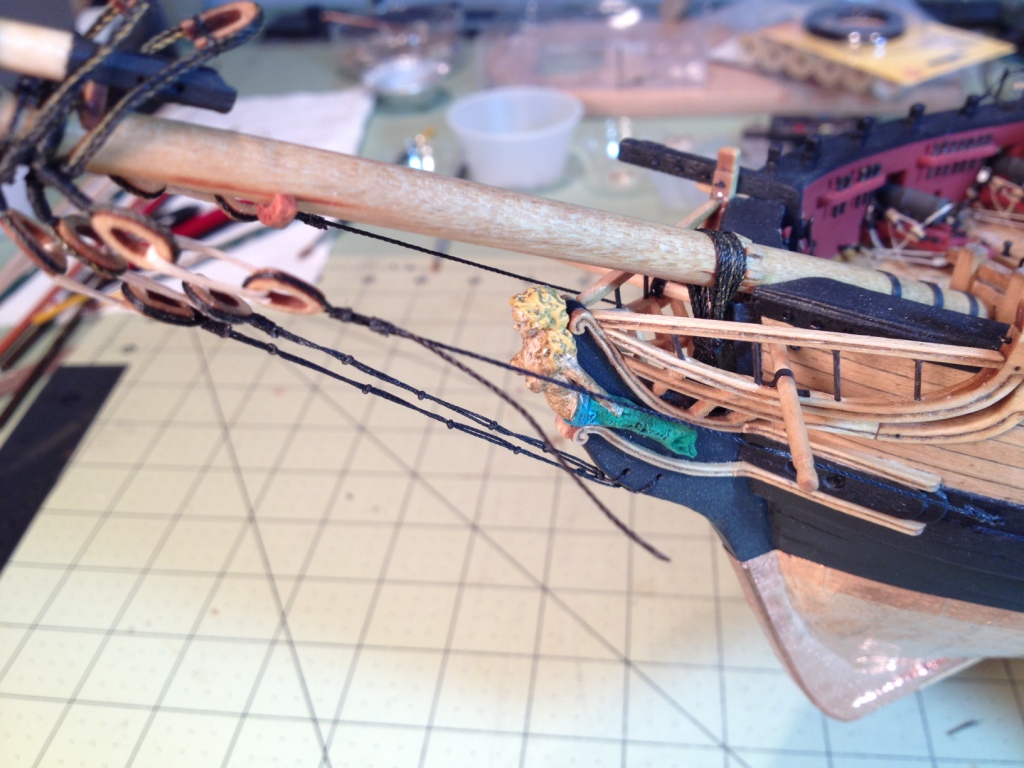
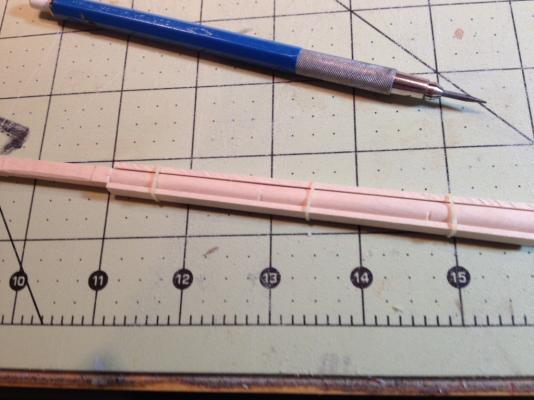
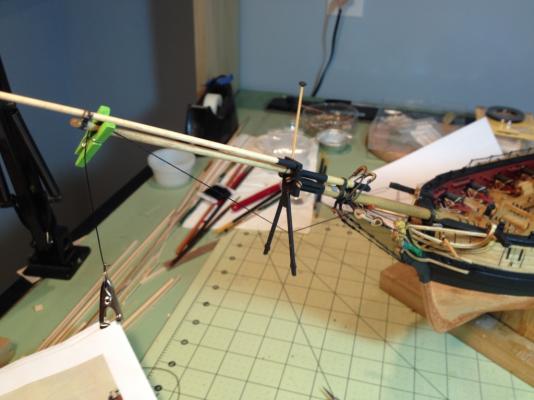
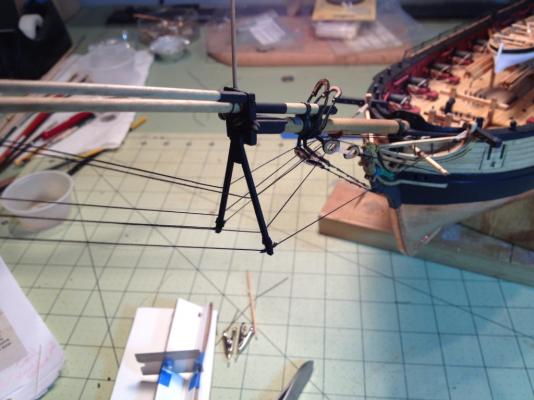
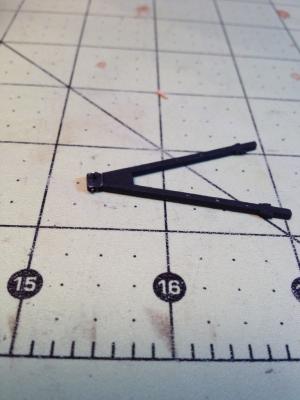
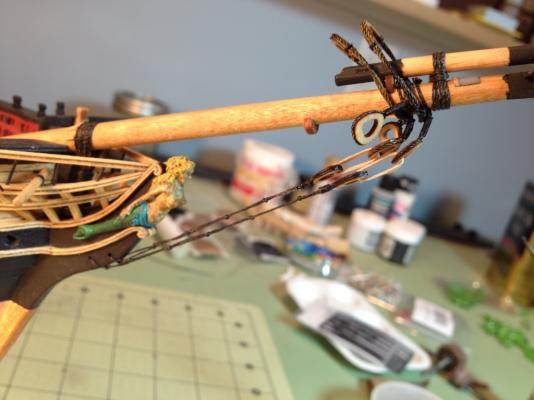
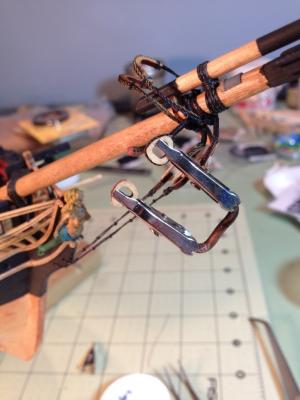
Continuing on with the bowsprit rigging I did the Inner Martingale Stays next. As with the bowsprit shrouds I installed the stays opposite to what's described in the instructions by running the lanyards through the eye bolts at the bow and the bullseyes at the end of the line, then threading the line through the fairlead and dolphin striker and ending by seizing it to the end of the jibboom. For me, I found it easier to do this way because then I didn’t need to worry about determining the correct length of line if I ran it the other way. Instead I used the seizing at the end of the jibboom for final adjustments. Hope that makes sense. The bullseyes at the end of the stays were made as described in the manual which were a lot easier to make before the line was tied to the ship. After installing the stays I glued on the splash guard. Moving on to the Outer Martingale backropes I again tied the lanyards first but decided not to tie the other end of the line to the bottom of the dolphin striker just yet. Thought it would be easier to install the Outer Martingale stay lanyards first so I wouldn’t need to work around the backropes. The stays were installed at the bow and then threaded through the fairlead, dolphin striker and finally through the blocks at the end of the flying jib. Then the backropes and stays were then seized to the bottom of the dolphin striker. The foot ropes were installed as described in the manual except that I tied the knots in the line before putting them on the ship. After they were installed the lines were coated with a 50/50 solution of water and white glue. The glue was left to dry and three or four coats of glue were applied. Clips were added to shape the line and the final coat of glue was left to dry for that mystical time, ‘overnight’. Here is my sophisticated lanyard measuring device to keep them all the same length.


- 659 replies
-
- 14
-
-
- syren
- model shipways
- (and 1 more)
-
Nils, she's beautiful, what can I say that hasn't all ready been said. You did a magnificent job. I like the crew too. Merry Christmas and a Happy New Years
-
Richard, from the drawing it sticks out about 3/4" from the outside edge of the cap rail. When I get home tonight from work I'll measure it and let you know what mine is. Richard, I measured my cathead and it extends out 13/16" from the outside edge of the cap rail and the total length of the top is 1-3/16".
-
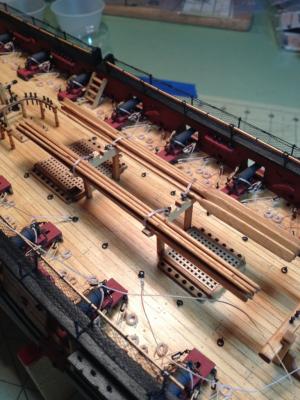
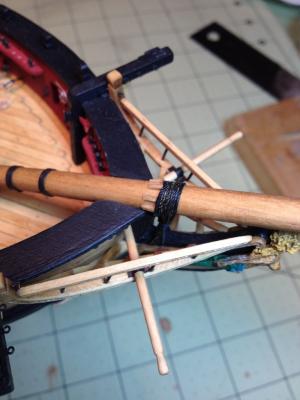
J, I believe Nils was referring to this picture showing the sweeps (oars) secured to the gallow bitts.
- 659 replies
-
- 5
-
-
- syren
- model shipways
- (and 1 more)
-
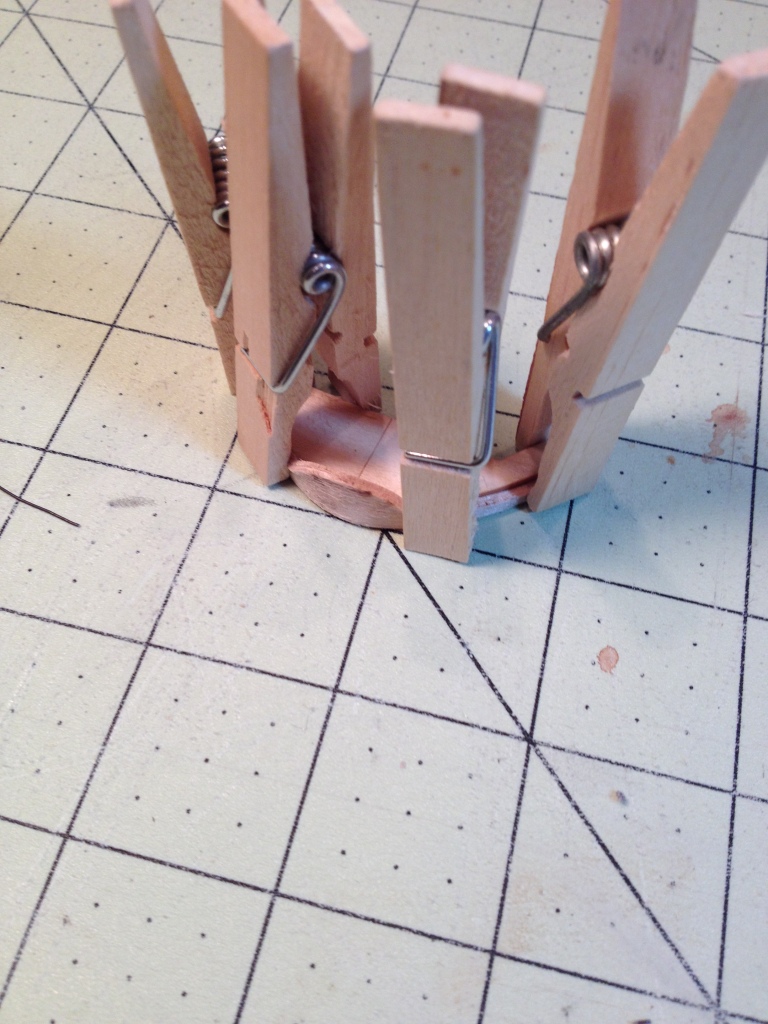
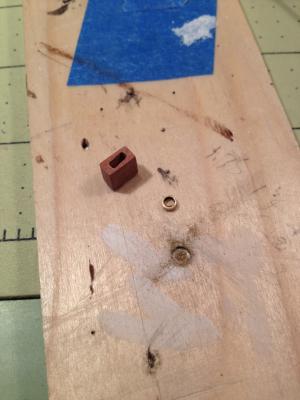
Richard, I use a jeweler's saw to cut the tubing to the approximate size I need. In a piece of scrap wood I drilled a small hole the same diameter as the tube, to a depth of the final sheave thickness. Then I put the tube in the hole, which will hold it in place, and use a file to file the tube down to it's correct height and if I need to make it thinner I just keep filing the tube and the wood together. Hope this makes sense, I included a picture that might help explain.
-
Thanks Thomas, I was hoping you would pick up the pace a bit, I liked watching you do it before I had to. Thanks ca. I had thought about how to make them adjustable but that would have required more thinking . You can vary the distance a bit though depending on where you clamp the piece. Thanks Nils, I figured I put the split rings there so I might as well use them.
- 659 replies
-
- 5
-
-
- syren
- model shipways
- (and 1 more)
-
Richard, nice job on the catheads. Have you ever tried copper or brass tubing for the sheaves? I usually cut a small slice of tubing and then file it down to fit.
-
Thanks Elijah I really appreciate the comments and I'm glad you like the way she coming along. Richard, thank you too. The clips worked out quite well for me. And thanks to all for hitting the likes button.
- 659 replies
-
- 3
-
-
- syren
- model shipways
- (and 1 more)
-
Thanks Bob, I think I need to put some caution tape up all around it.
- 659 replies
-
- 3
-
-
- syren
- model shipways
- (and 1 more)
-
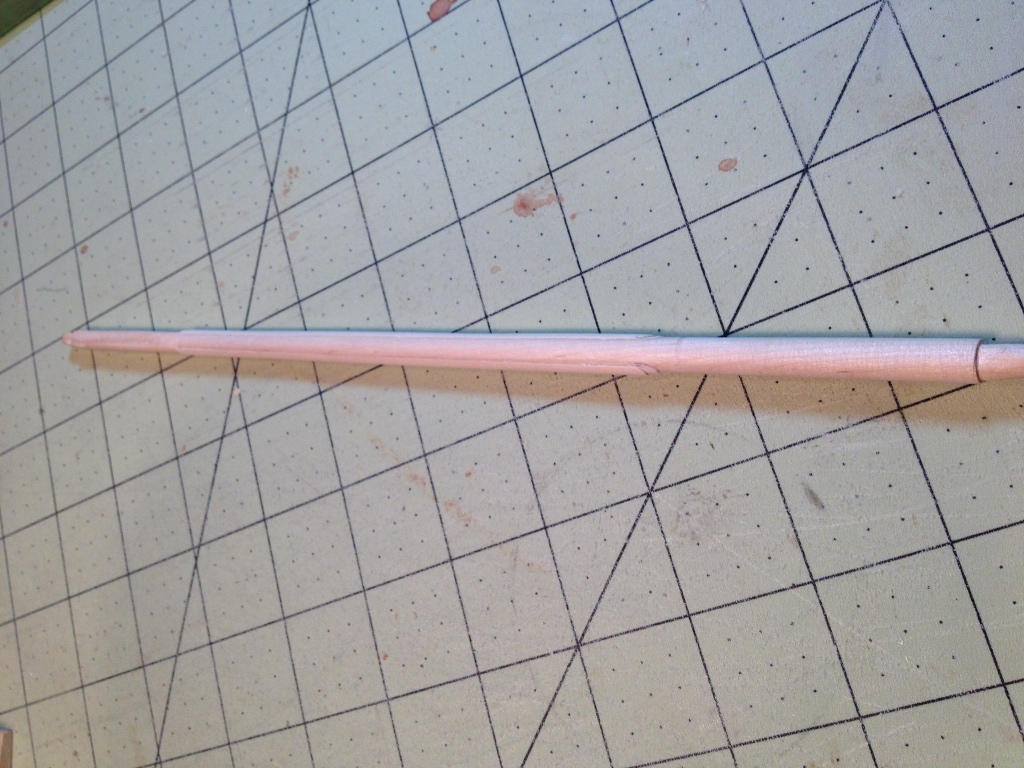
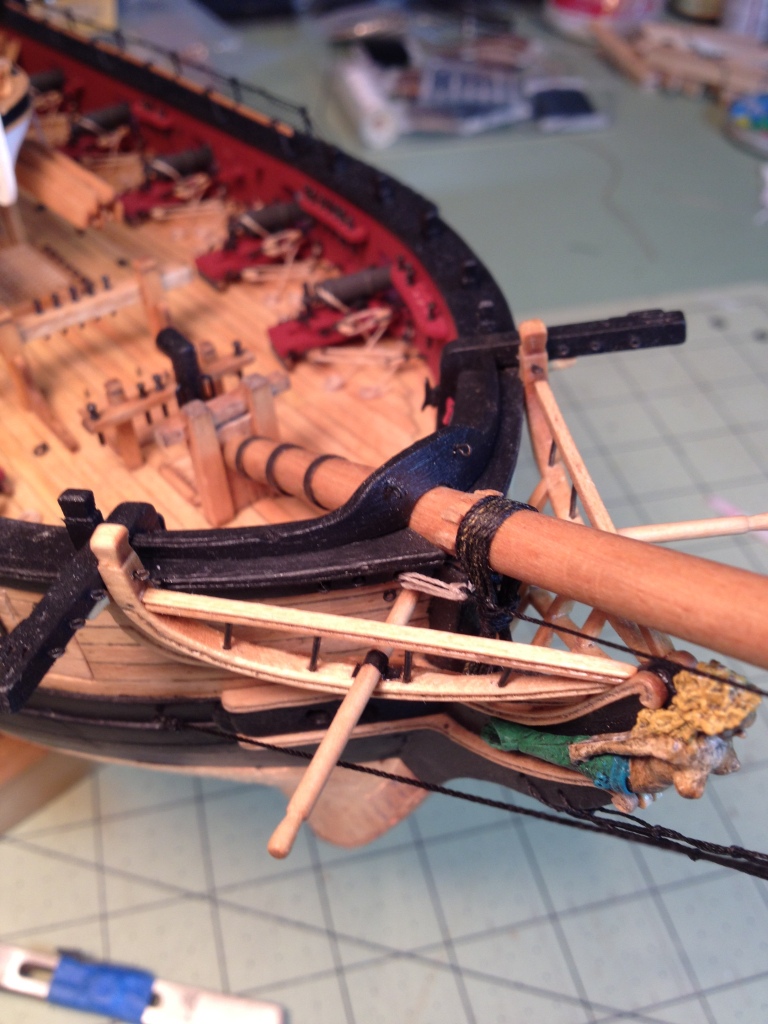
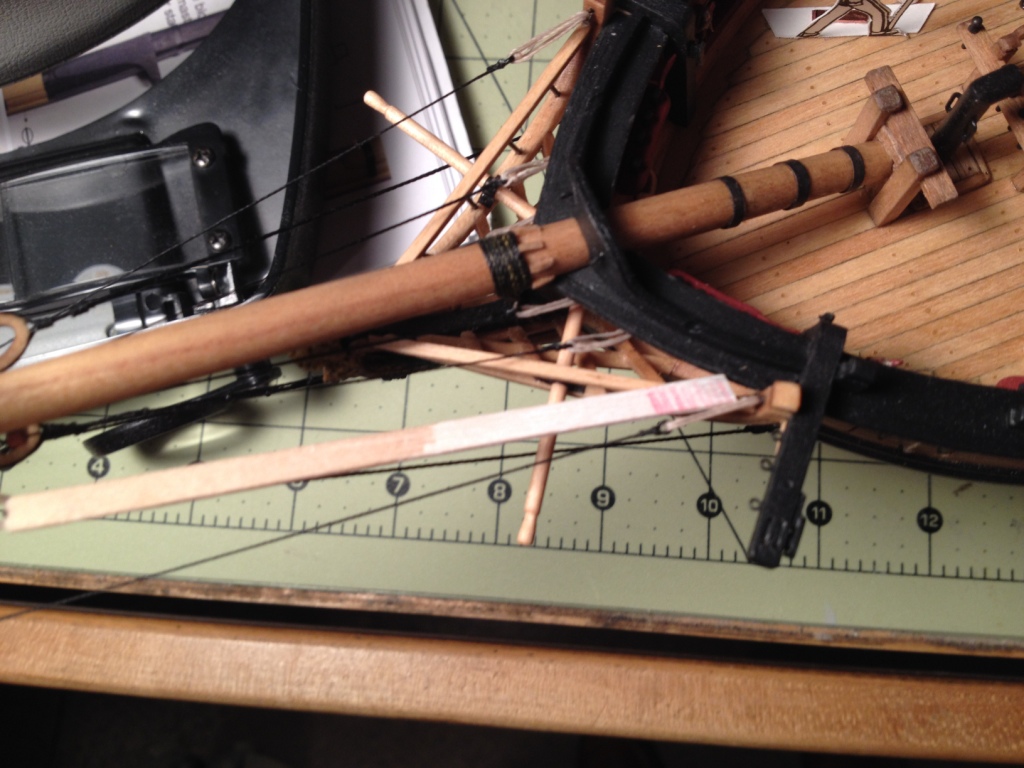
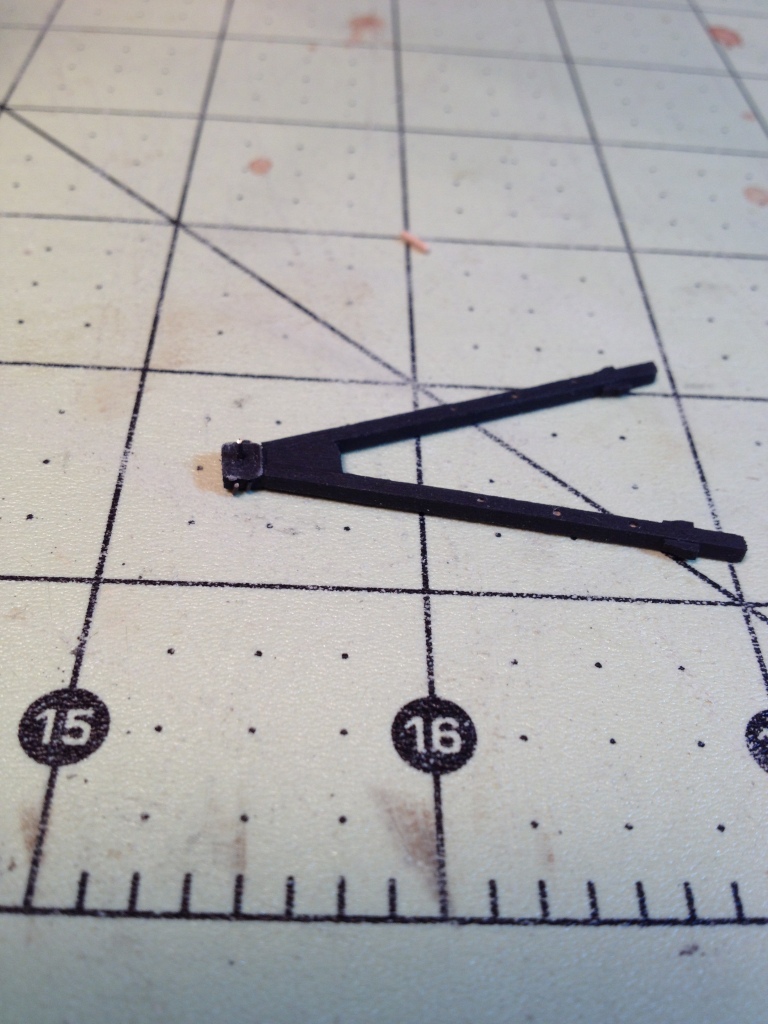
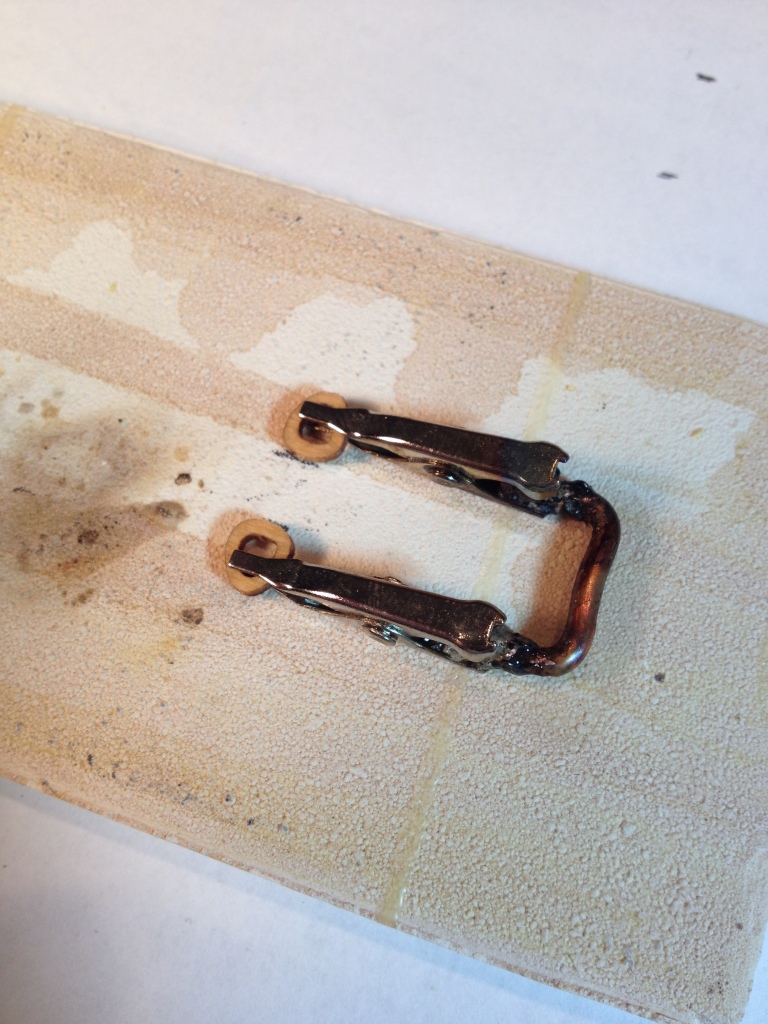
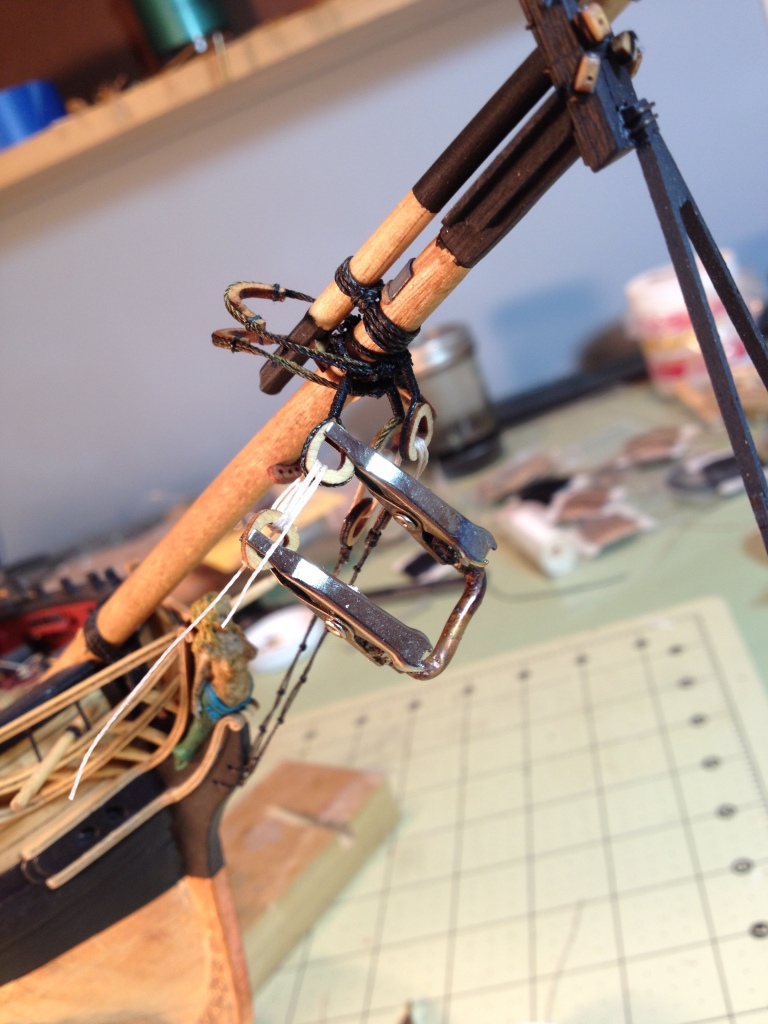
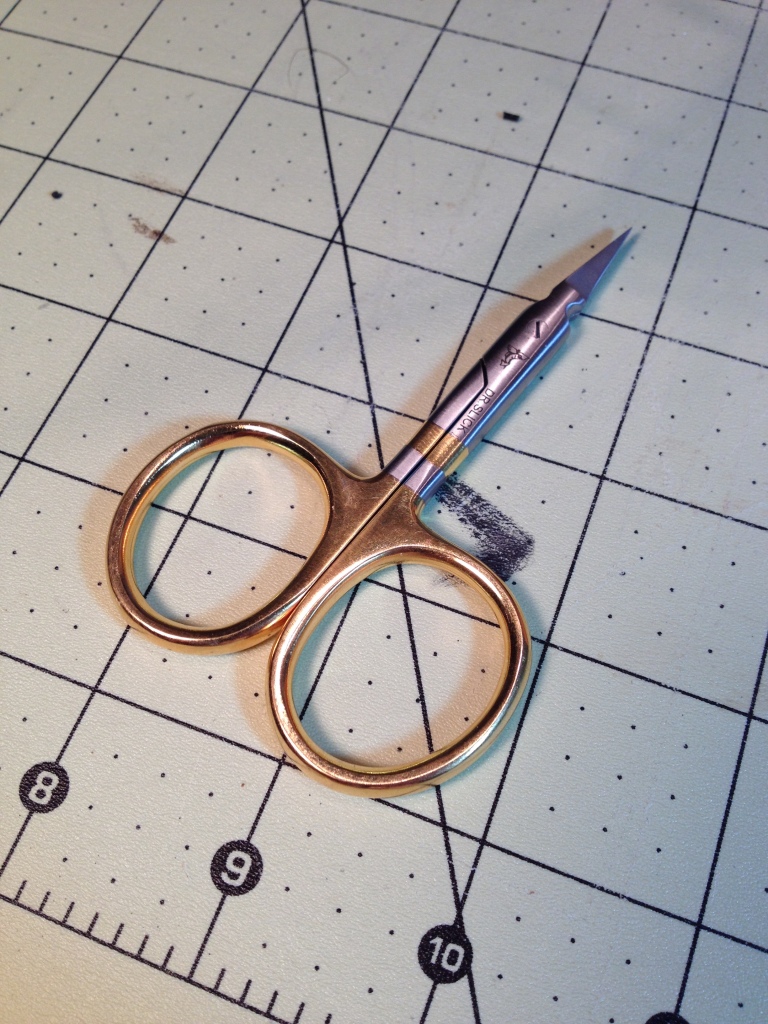
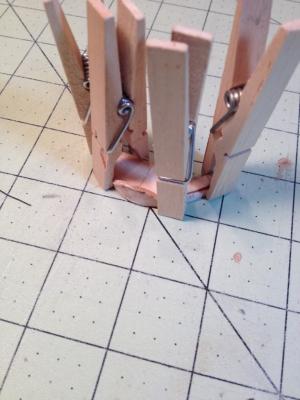
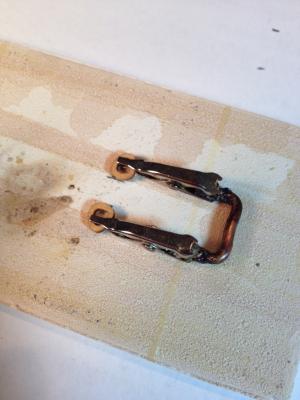
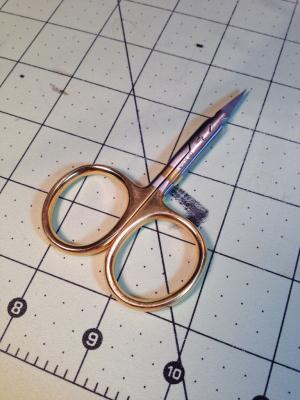
Big step..stepped the bowsprit, no going back now. A heads up about the splash guard. The manual says that the laser cut pieces were suppose to be cut with the grain running top to bottom, which makes sense to make them easier to bend around the jig. The pieces on my sheet, however, were cut with the grain running lengthwise or perpendicular to the way described in the manual. With the grain running in that direction the pieces seemed too stiff to ‘dry’ bend around the jig without breaking so I soaked them in hot water for about an hour. Not only did I soak them but I used a hand steamer to really soften them up. I formed them around the jig provided, bending one piece at a time. I let them dry overnight and then glued them together, clamping the pieces back onto the jig. The gammoning for the bowsprit was next which was straight forward enough but awkward working in such a tight area. First casualty while rigging, I knocked the dolphin striker off. This was probably a blessing in disguise because I hadn’t thought that it was very secure from the beginning. This gave me the opportunity to add a pin to its back in order to secure it better to the bowsprit cap, hard to see the pin. Before starting the bowsprit rigging and after studying the plans I came up with a procedure that, for me, seems to work. I decided that in order to keep the lengths of the lanyards between the hearts consistent that I would tie those first. To do this I made a little jig that would hold the hearts at a set distance apart so I could lash them together. The jig is made of two smooth jawed alligator clips, soldered together with a piece of copper wire. I don’t have pictures doing the bobstays because I was seeing if this method was going to work but I do have them doing the bowsprit shrouds. Hearts held in position Adding the lanyard. I didn’t tie the lanyard in place I just glued the ends to the line adjacent to it. The shroud was then looped around the heart, tightened and seized. The hooked end of the shroud was already hooked to the hull. Early Christmas present to myself, Dr. Slick 3 1/2" scissors. works well.


- 659 replies
-
- 20
-
-
- syren
- model shipways
- (and 1 more)
-
Robbyn, you're most welcome, glad to help. The following link shows how I did mine if you'd like to see. http://modelshipworld.com/index.php/topic/8410-us-brig-syren-by-sald-–-model-shipways/?p=285045
-
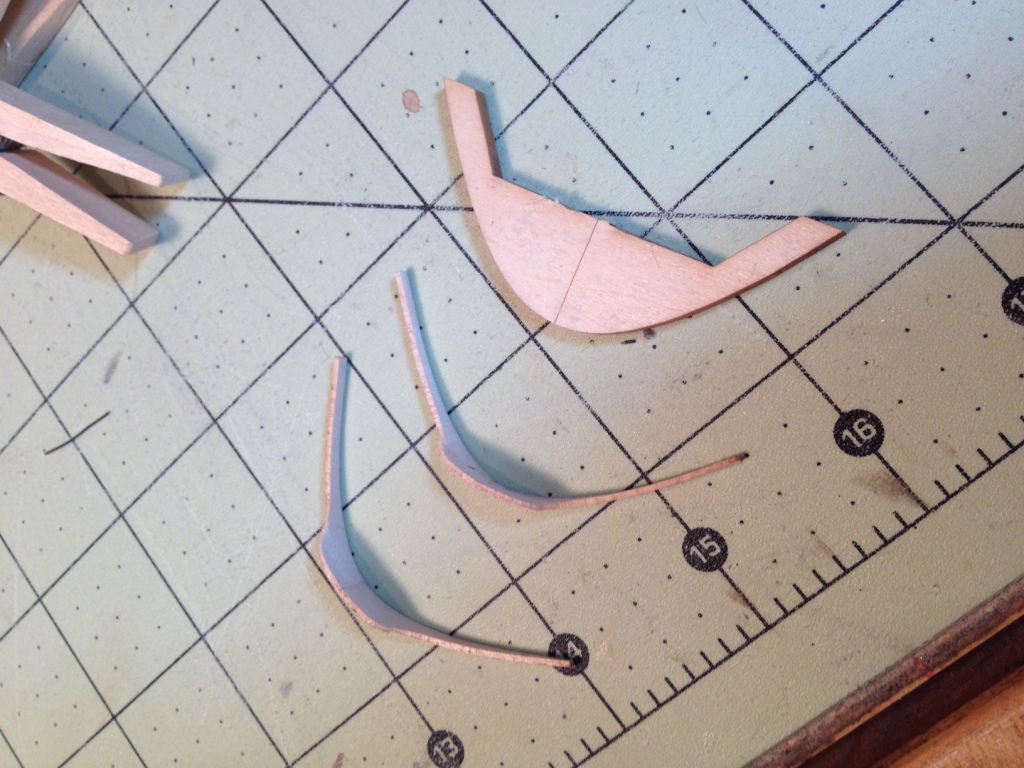
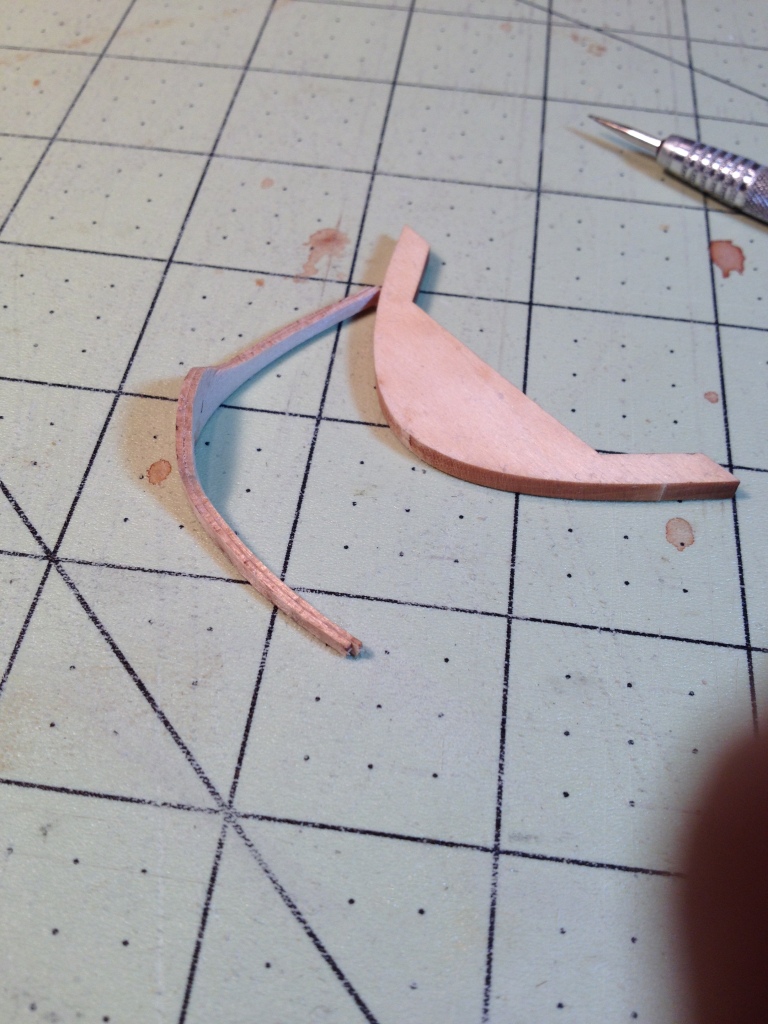
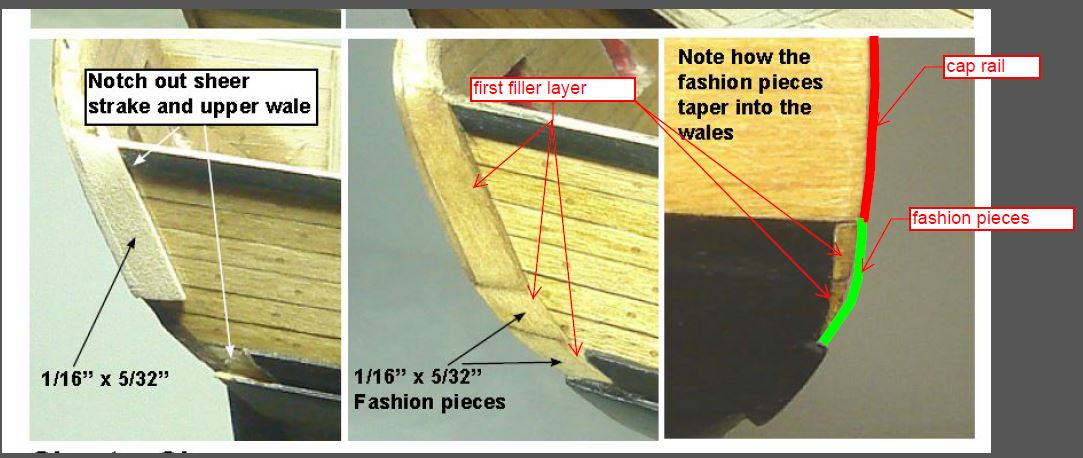
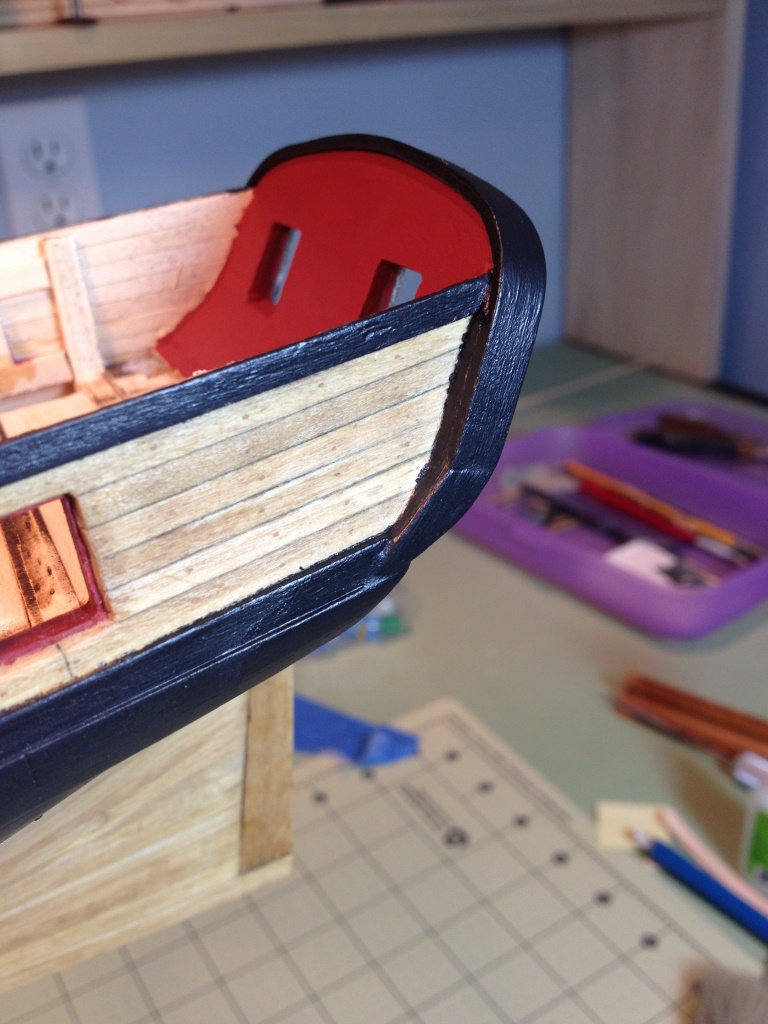
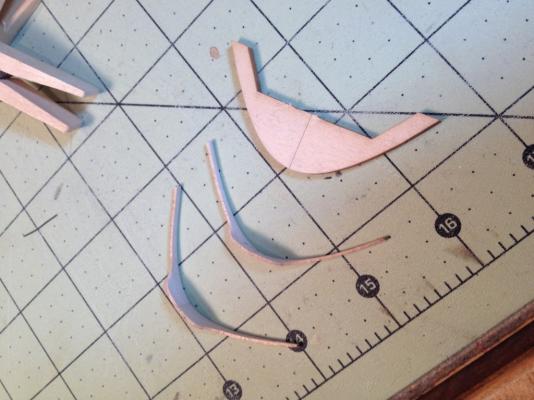
Robbyn, there are two different layers of fashion pieces. The first two are filler pieces and the second two cover them and are blended into the mid-wale. The picture, below, from the manual shows the first layer of fillers. The lower filler piece is sanded down almost to nothing. The red and green lines that I drew denote the final cap rail and fashion pieces that go over the top of the fillers. The other pictures show how I tapered the top fashion piece into the wale. I also found it easier to make the fashion pieces out of one piece of wood instead of two. Hope that helps. Good luck.


-
Great job Nigel, I love the sails, they really make her stand out.
- 270 replies
-
- 3
-
-
- red dragon
- artesania latina
- (and 1 more)