MORE HANDBOOKS ARE ON THEIR WAY! We will let you know when they get here.
×


_SalD_
-
Posts
818 -
Joined
-
Last visited
Content Type
Profiles
Forums
Gallery
Events
Everything posted by _SalD_
-
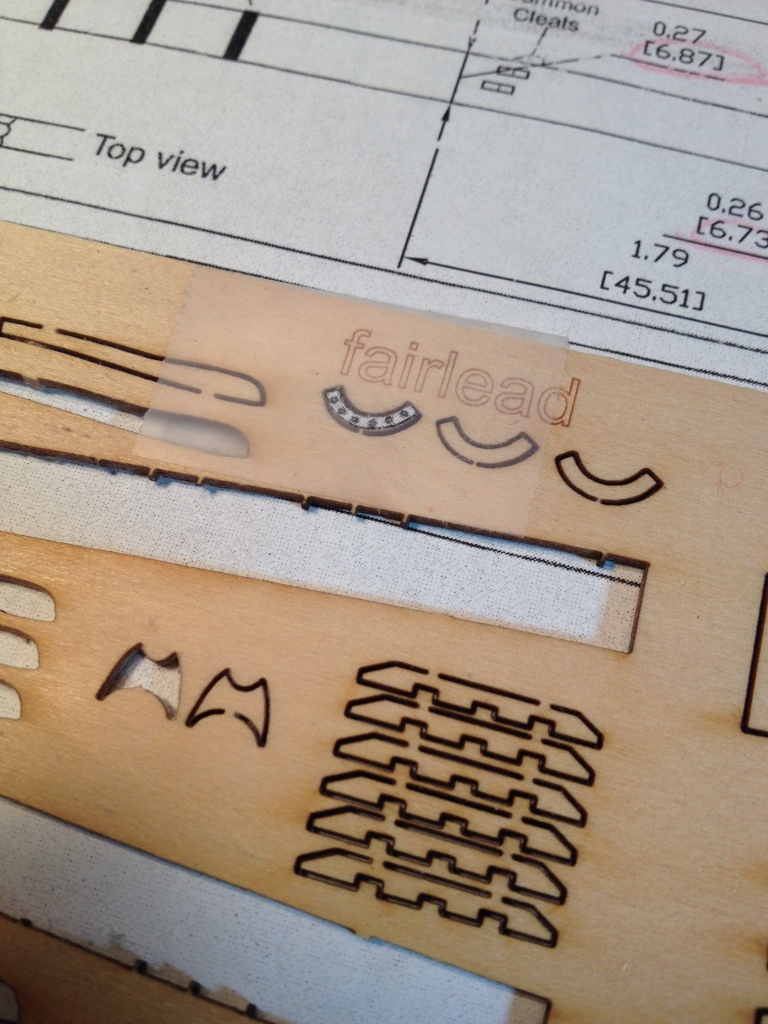
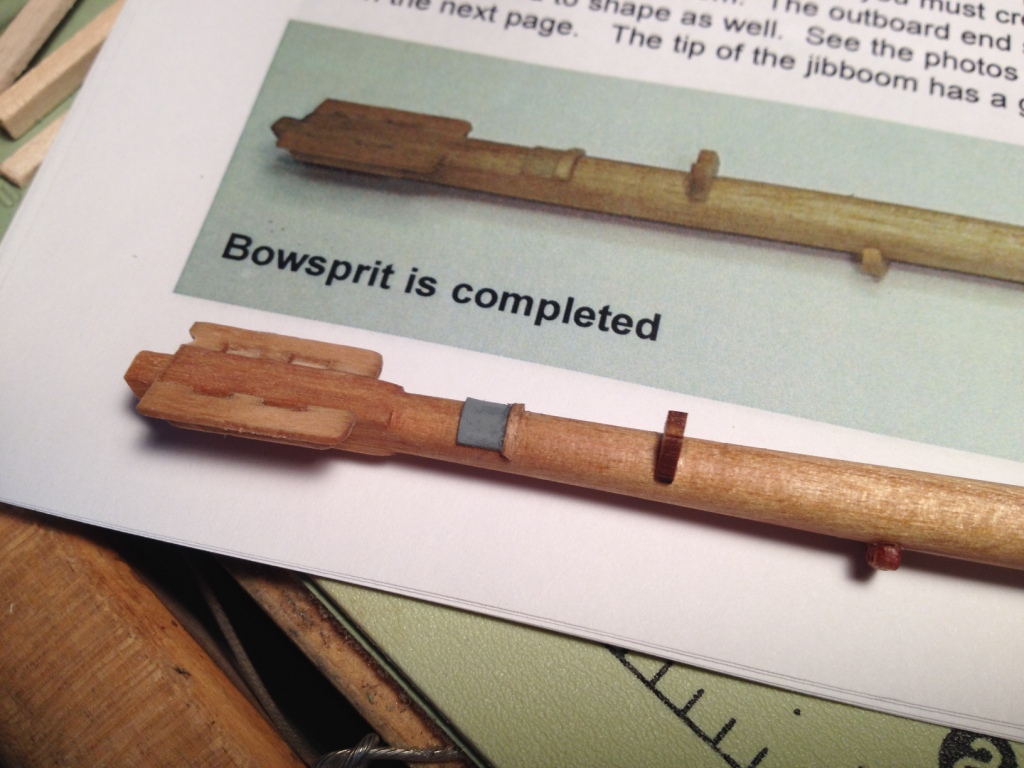
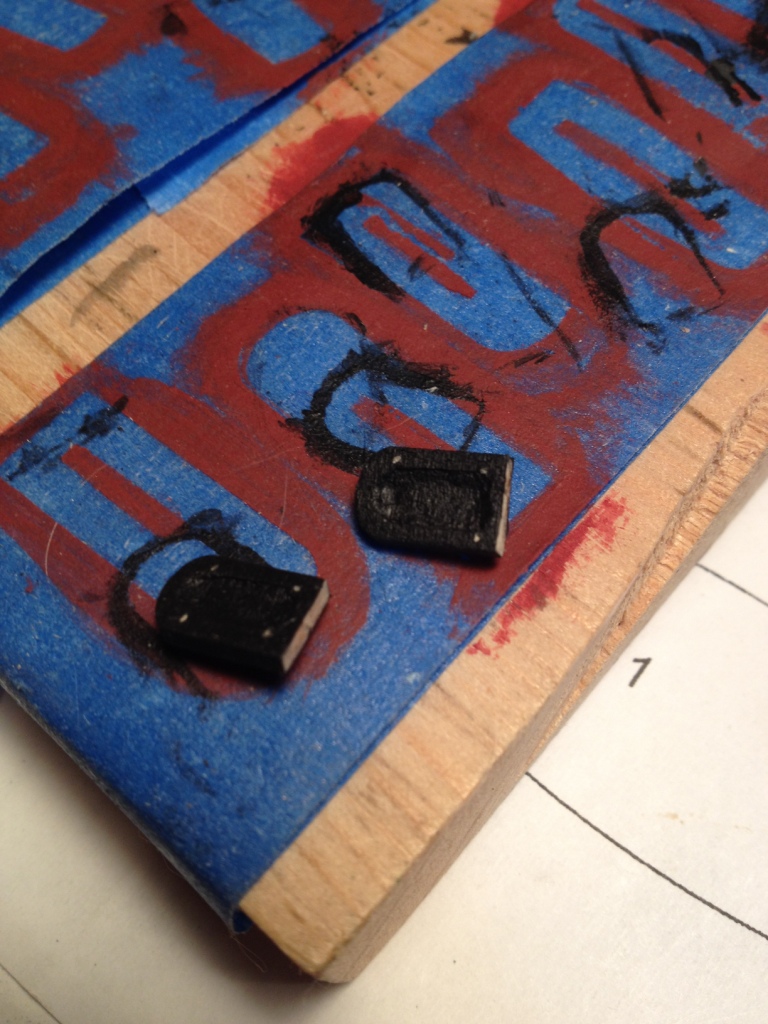
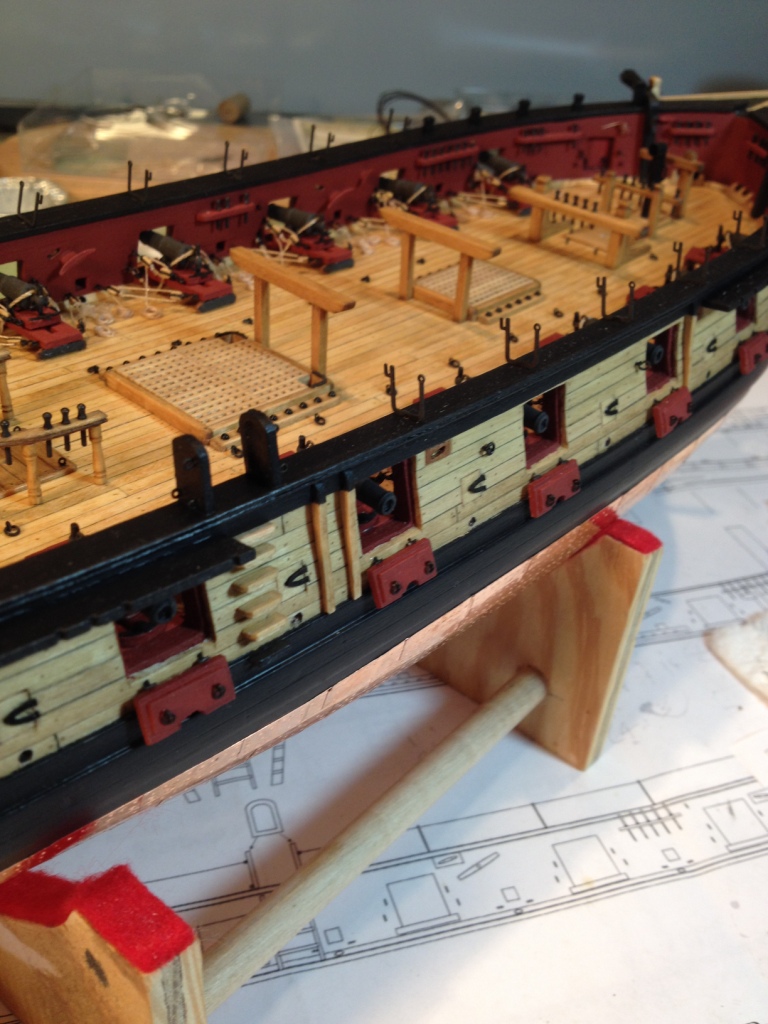
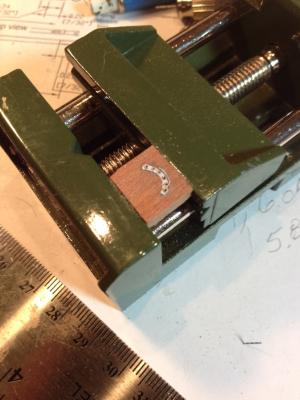
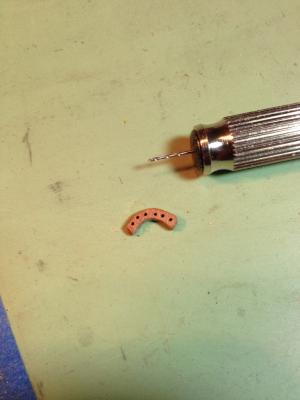
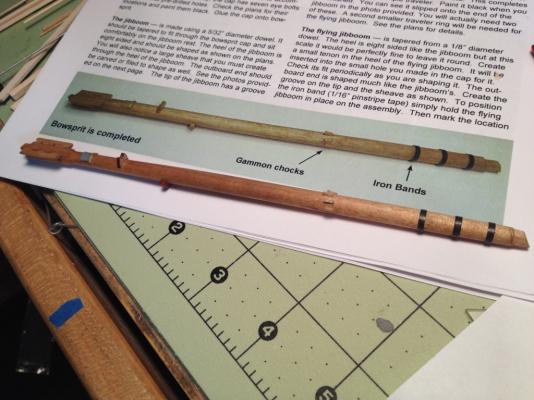
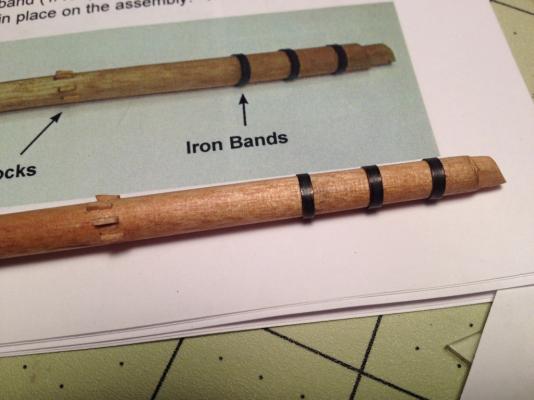
 I started on the bowsprit and you will need to forgive me but I keep forgetting to recharge my phone so I don’t have many pictures of how I made it. Making the parts for this mast is straight forward and were made pretty much per the instructions. The hardest part for me was the fairlead. I’d like to know if anyone who’s made this model was able to use the kit supplied piece. I ruined all three pieces trying to drill the six holes in them. The size of the holes you need are almost as wide as the piece itself! Anyway I finally decided to make my own. The only scrap hard wood I had was some African pear so I tried that. It didn’t come out too bad, just the color of the wood doesn’t match the rest. Here’s the completed bowsprit. The only two, well three, things I did differently than the kit were the fairlead, which I made myself, the saddle for the spritsail and the iron bands. For the spritsail yard sling saddle I didn’t like making it out of paper as instructed in the manual and I believe they were usually made of lead so I decided to use a piece of brass painted to look like lead. For the iron bands on the aft end of the mast I made some brass bands that were blackened instead of using the pinstripe tape provided.
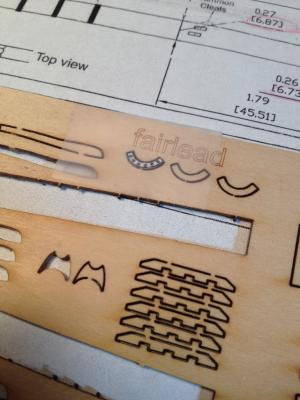

- 659 replies
-
- 12
-

-
- syren
- model shipways
- (and 1 more)
-
Cutter Cheerful 1806 by rafine - FINISHED
_SalD_ replied to rafine's topic in - Build logs for subjects built 1801 - 1850
She's got a nice looking stern Bob.- 525 replies
-
- 3
-
-
- cheerful
- Syren Ship Model Company
- (and 1 more)
-
Thanks Richard, this is a busy time of year. Sometimes I feel guilty about sneaking off to work on my ship (but not too guilty).
- 659 replies
-
- 3
-
-
- syren
- model shipways
- (and 1 more)
-
Jack, I just found your build, I can't believe I missed it for so long. The ship is looking great.
-
Don, George, Ken, Dirk, John, Joe, and Thomas thank you all so much for the kind words, it's really appreciated. I had some reservations in the beginning if I could do justice to this little boat but I enjoyed building it and I'm happy with the way it turned out. Thanks for all the likes too.
- 659 replies
-
- 5
-
-
- syren
- model shipways
- (and 1 more)
-
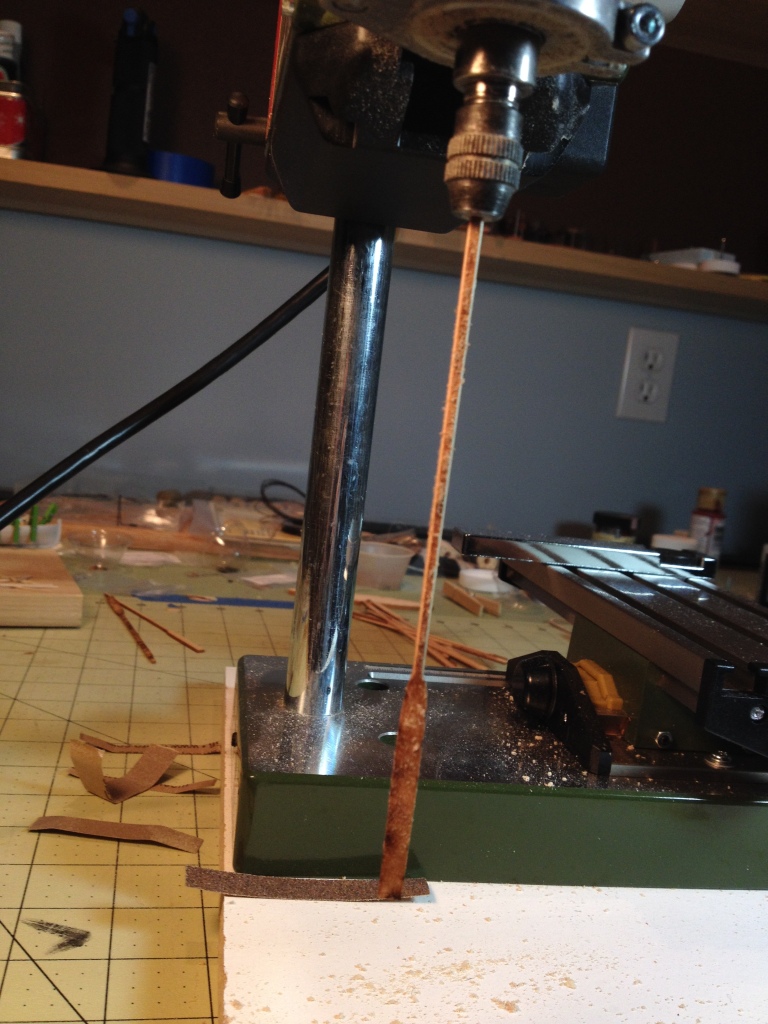
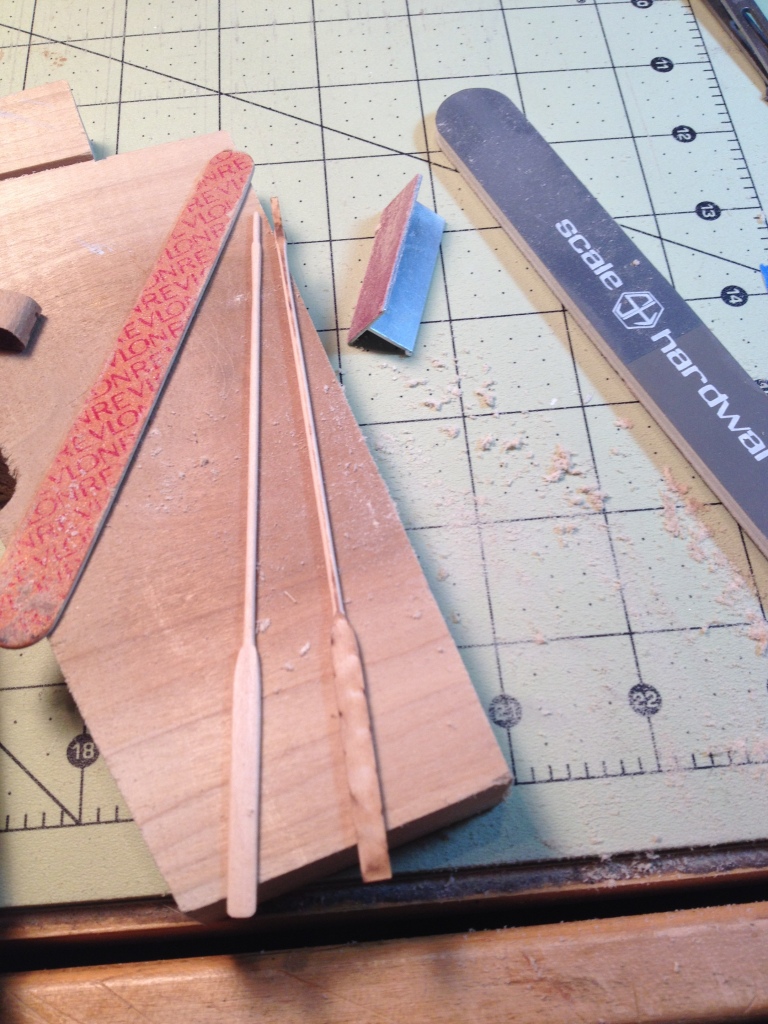
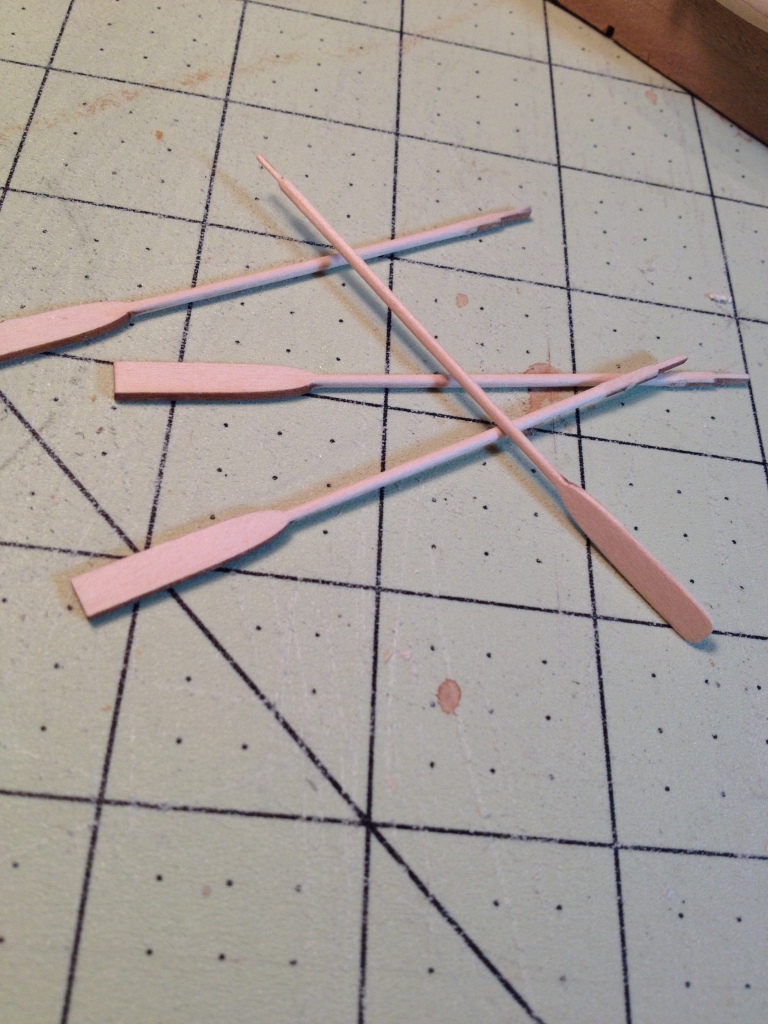
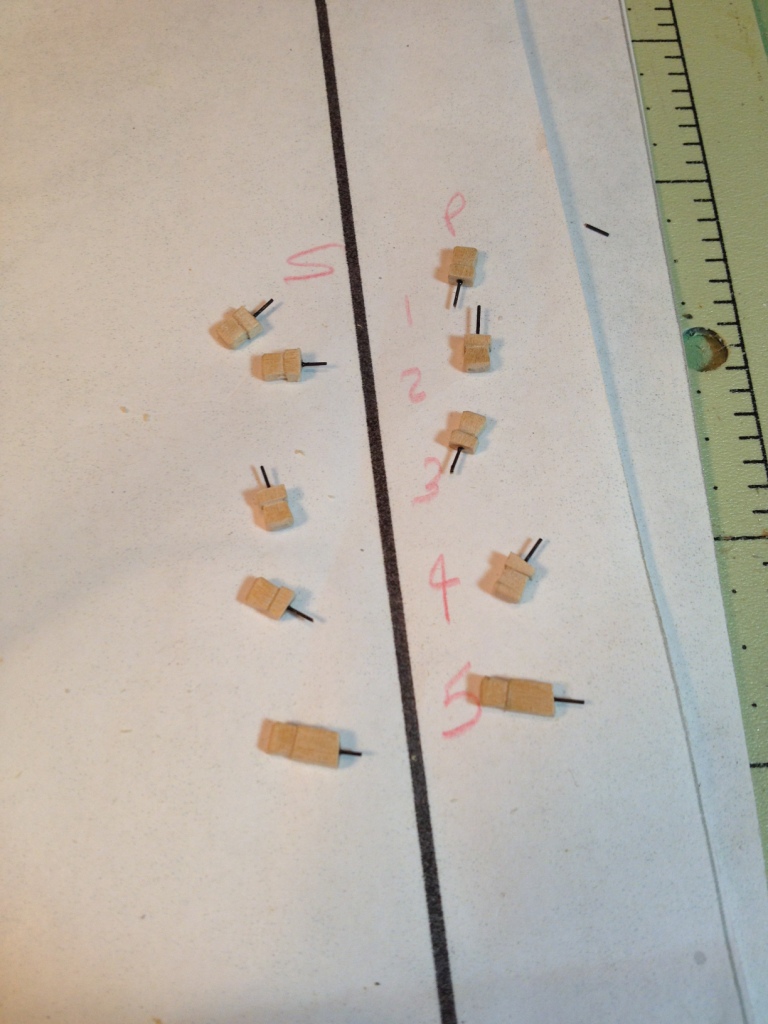
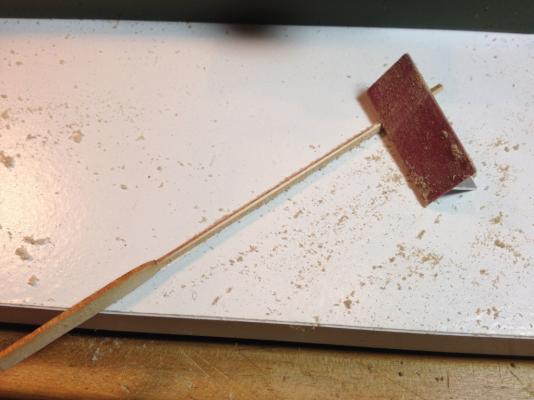
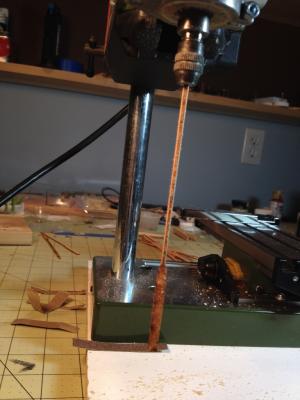
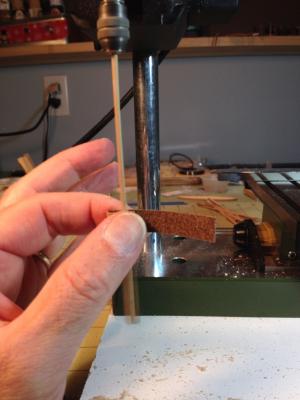
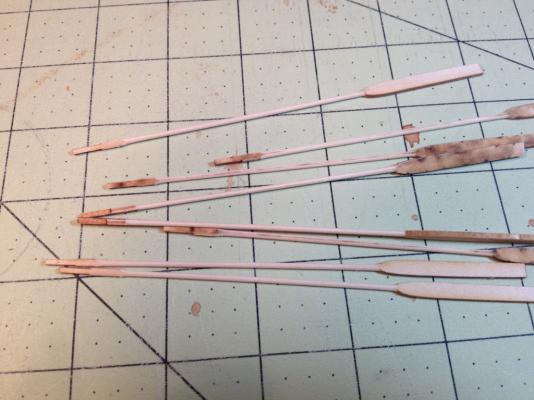
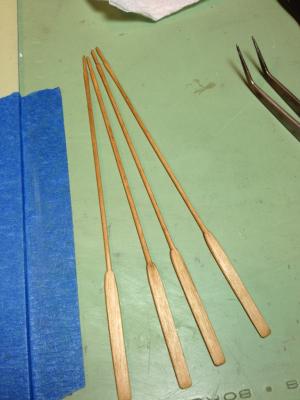
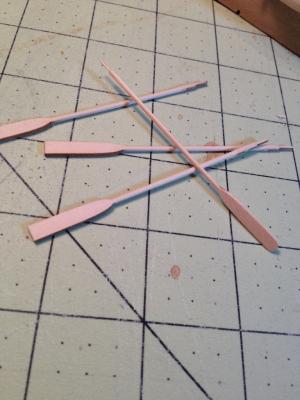
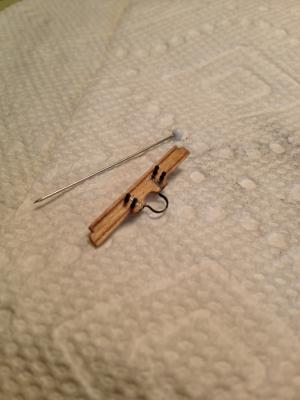
Sweeps I started shaping the sweeps by first sanding down the four corners. Next I chuck the handle end on the sweep into my drill press. Using the drill press I was able to pretty quickly shape the handle. A word of caution: if you do this you must support (hold onto) the sweep down by the blade. If you don’t, and trust me I know, the sweep will break off at the chuck. A benefit of doing this, unbeknownst to me at the time, was that the part of the handle that was in the chuck was shaped to provide a flared end. The blade was sanded by hand using a number of different sanding sticks. The final blades were stained and coated with some wipe on ploy.

- 659 replies
-
- 16
-
-
- syren
- model shipways
- (and 1 more)
-
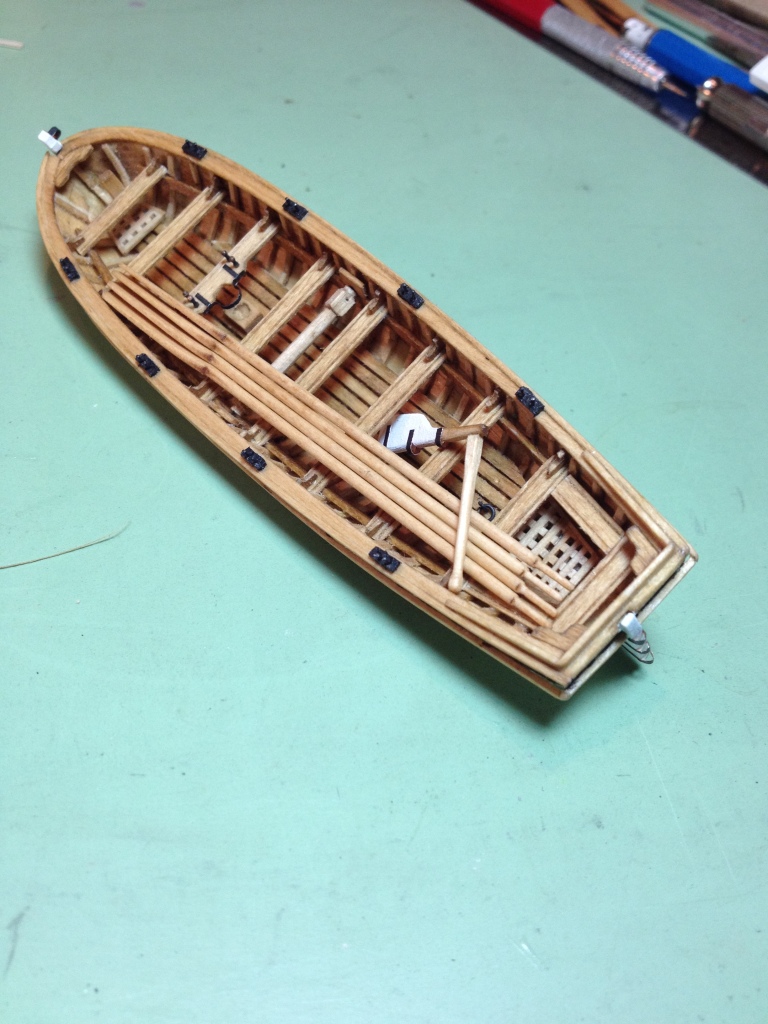
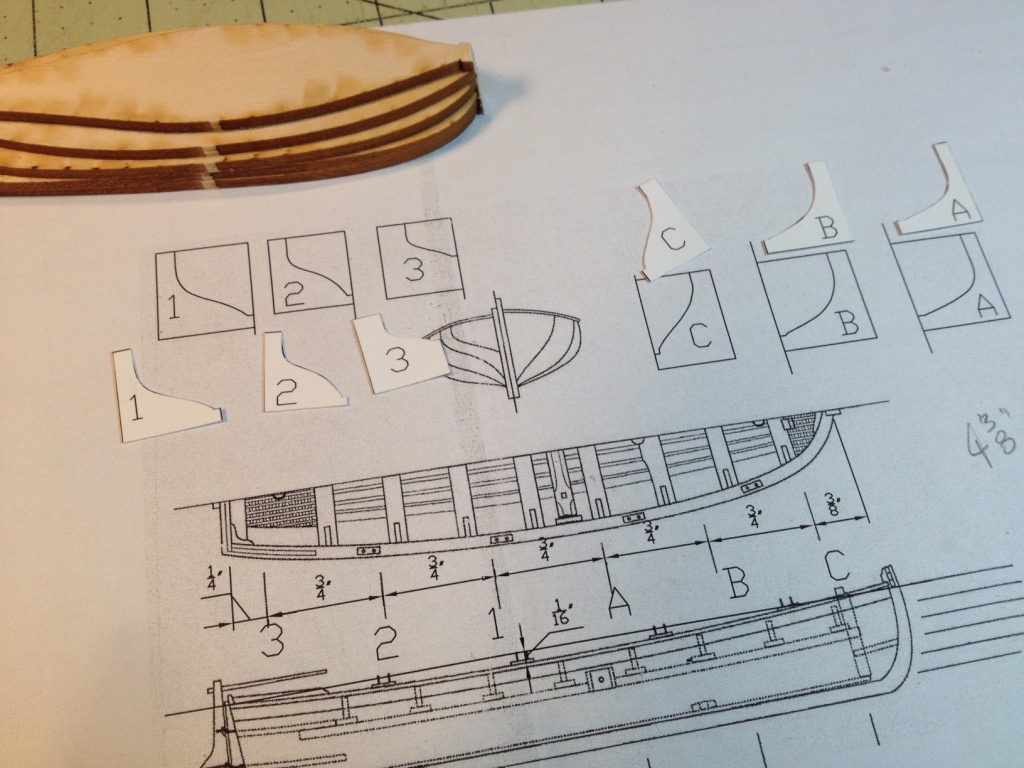
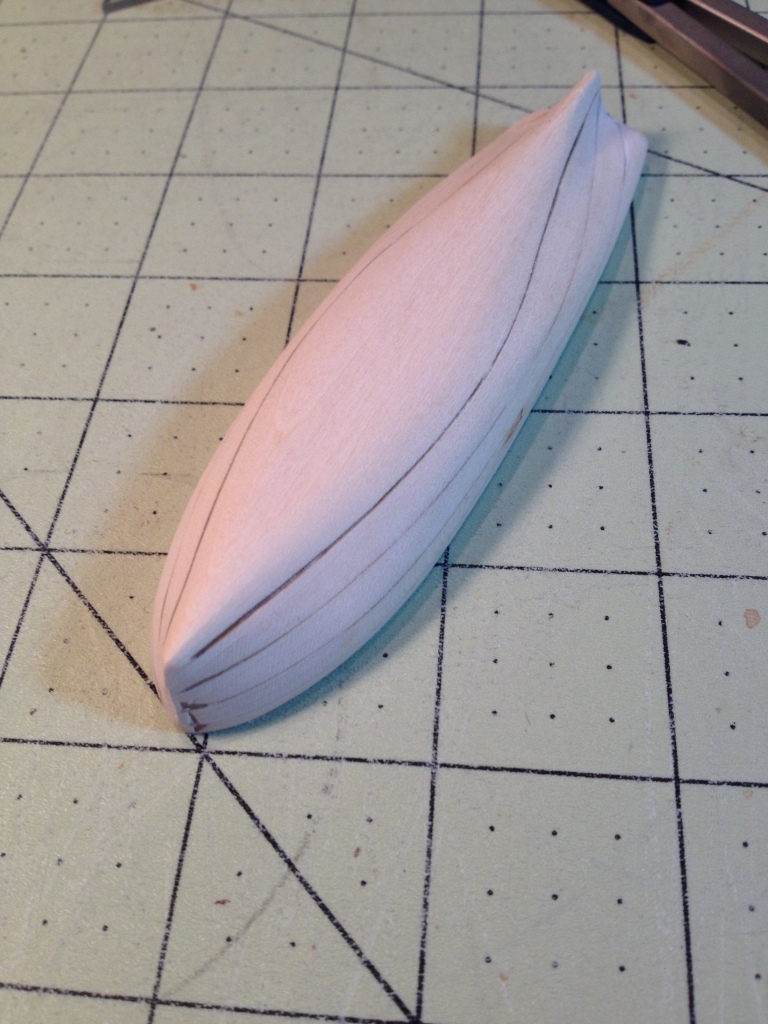
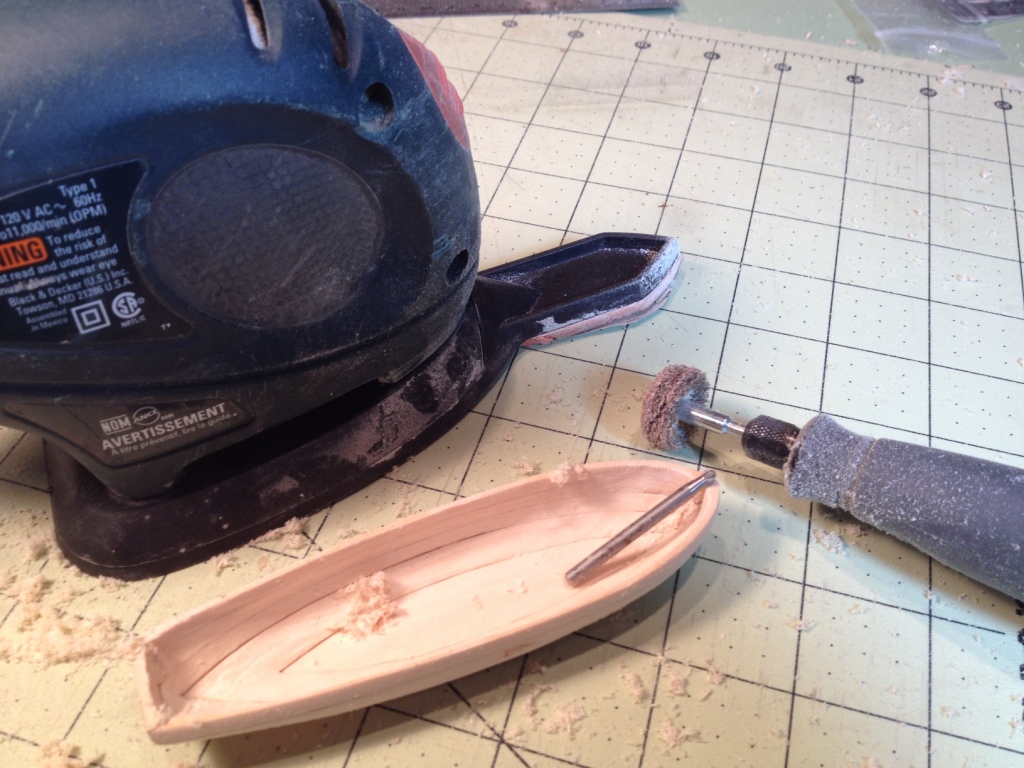
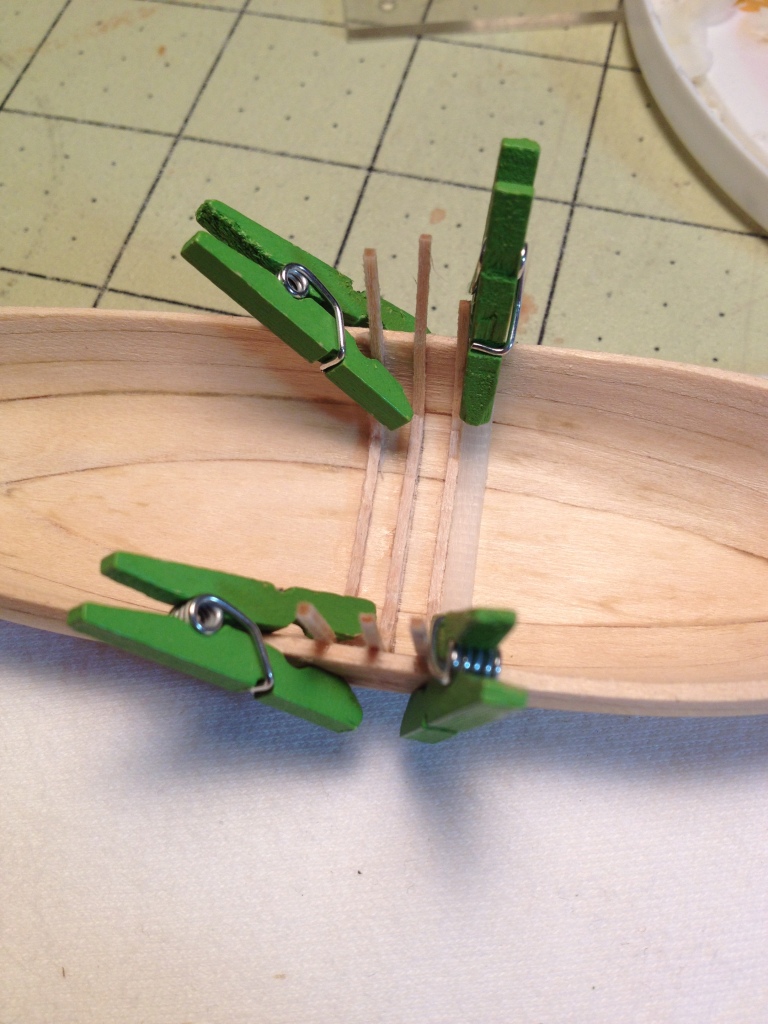
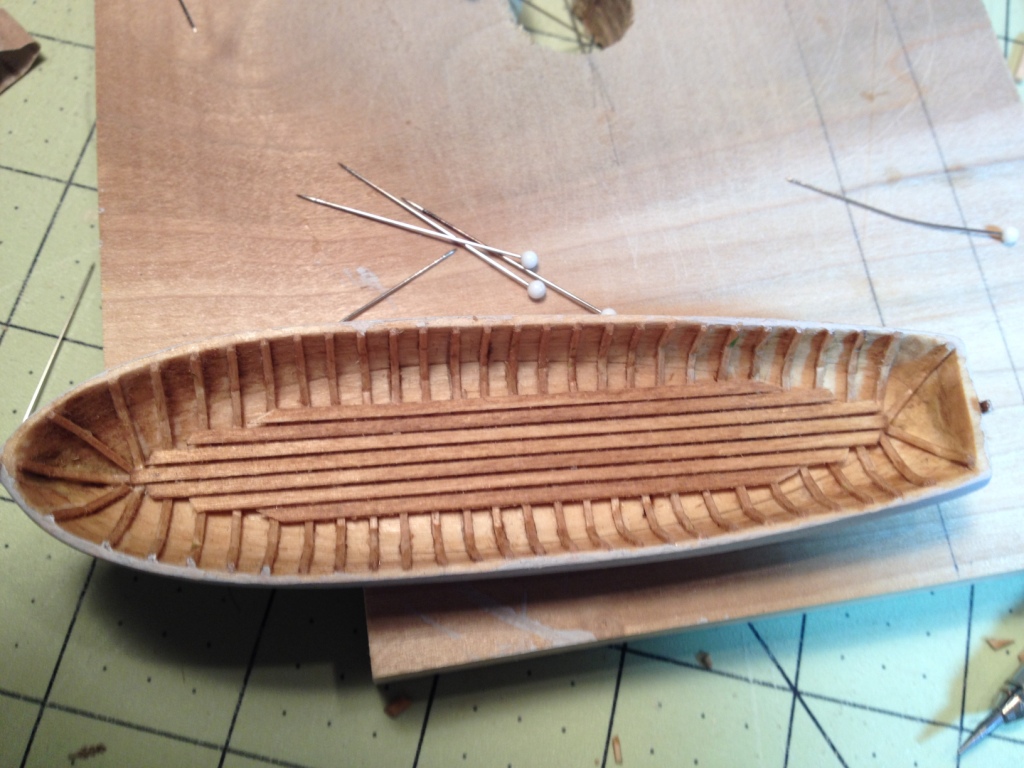
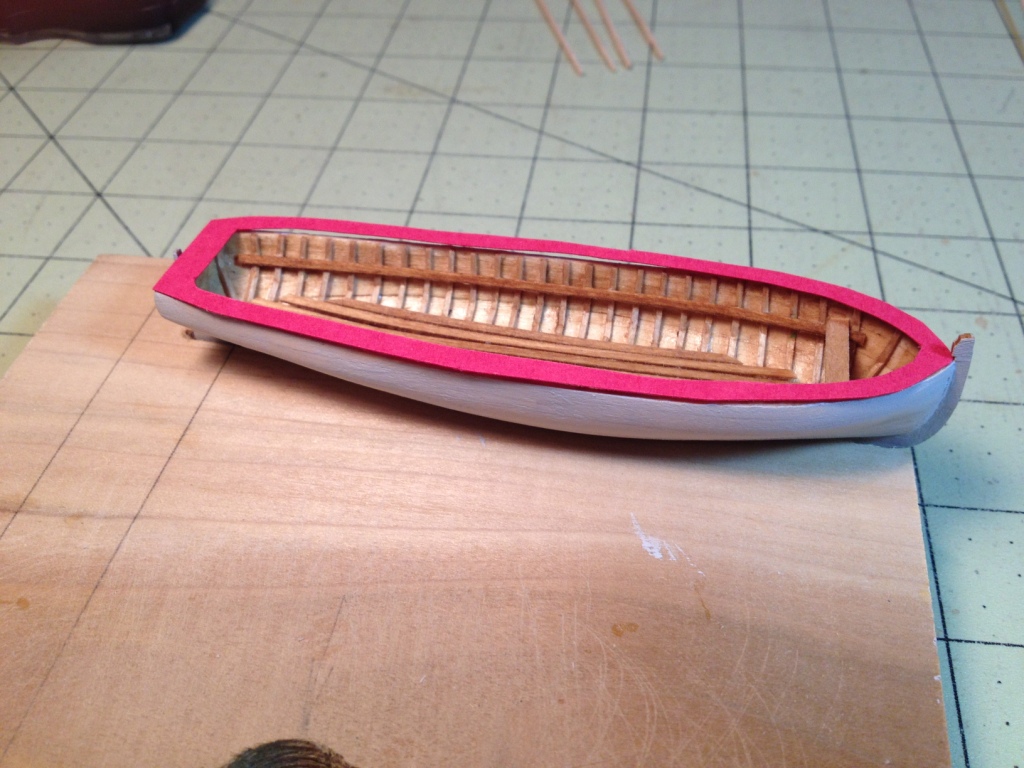
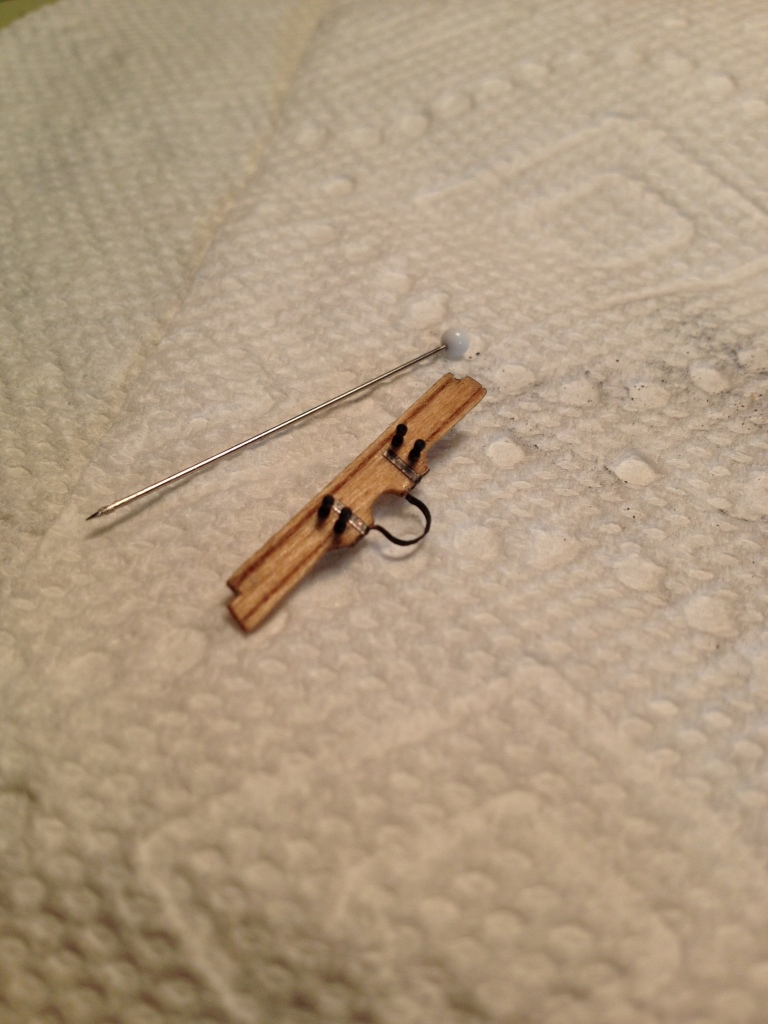
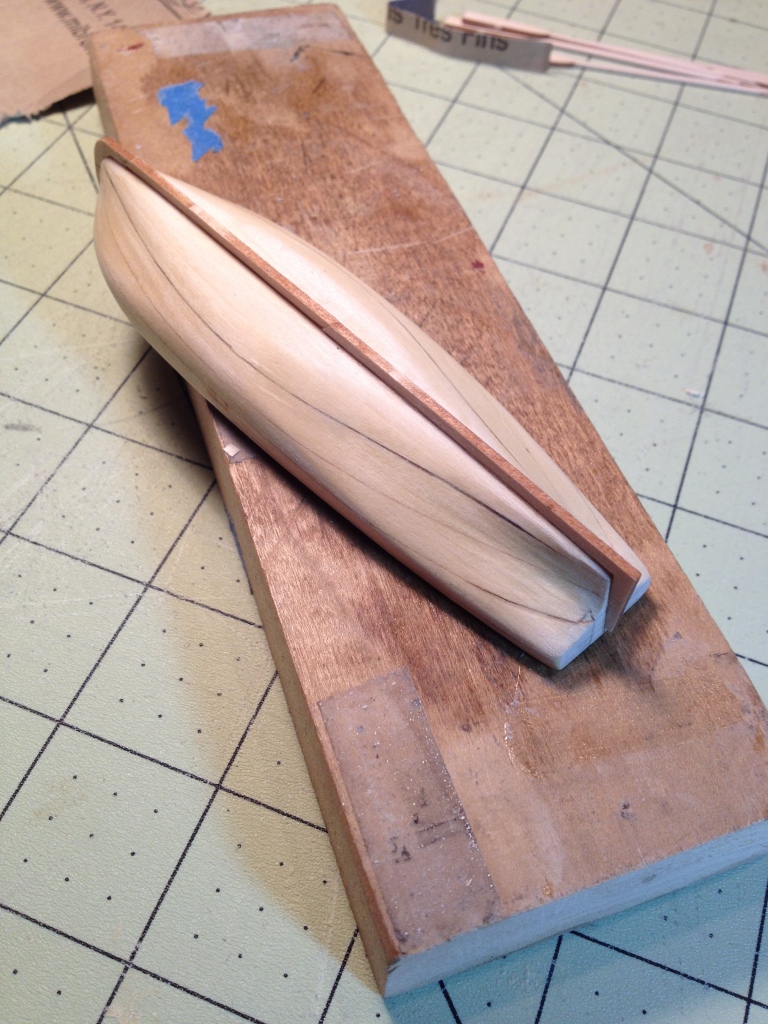
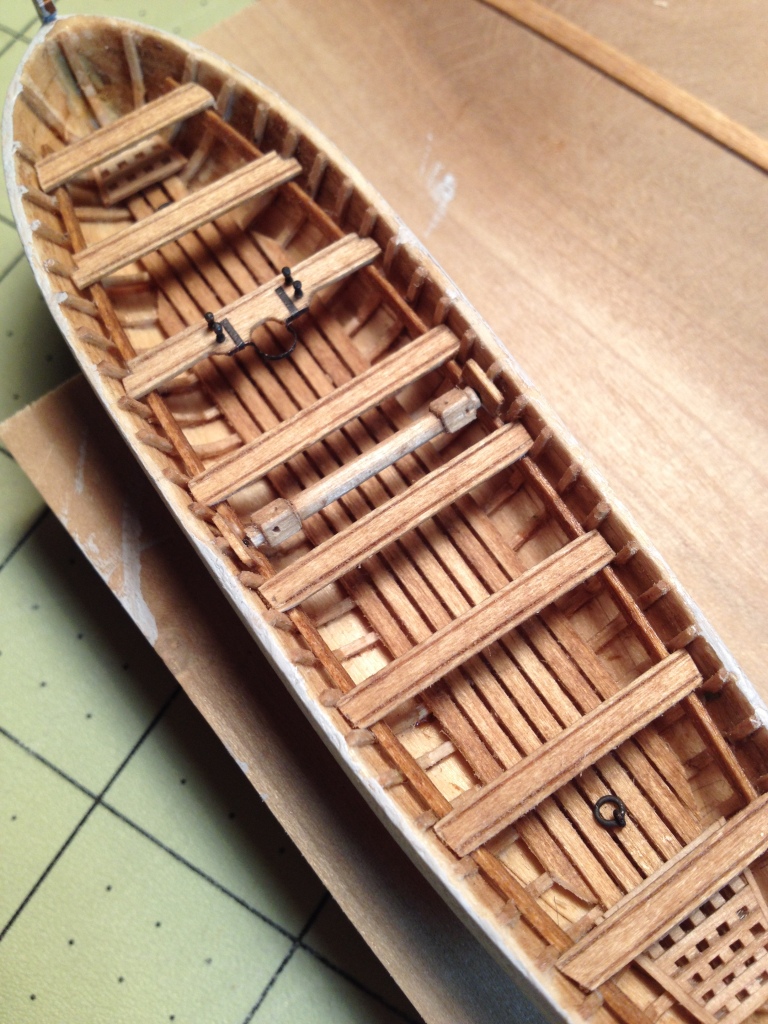
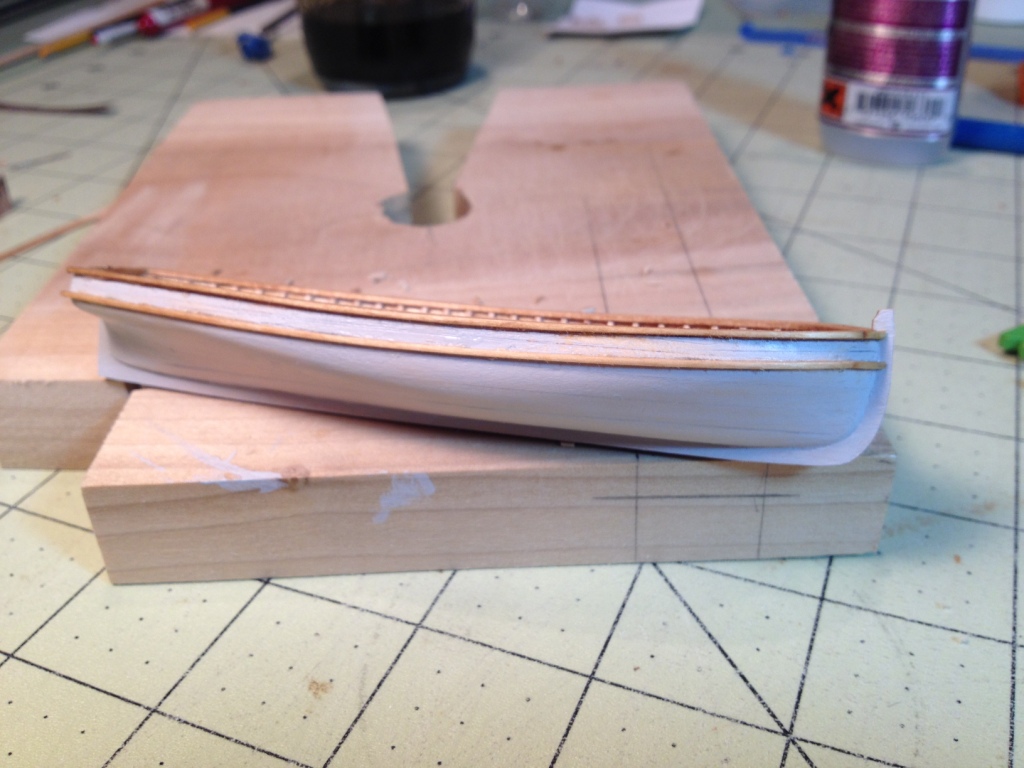
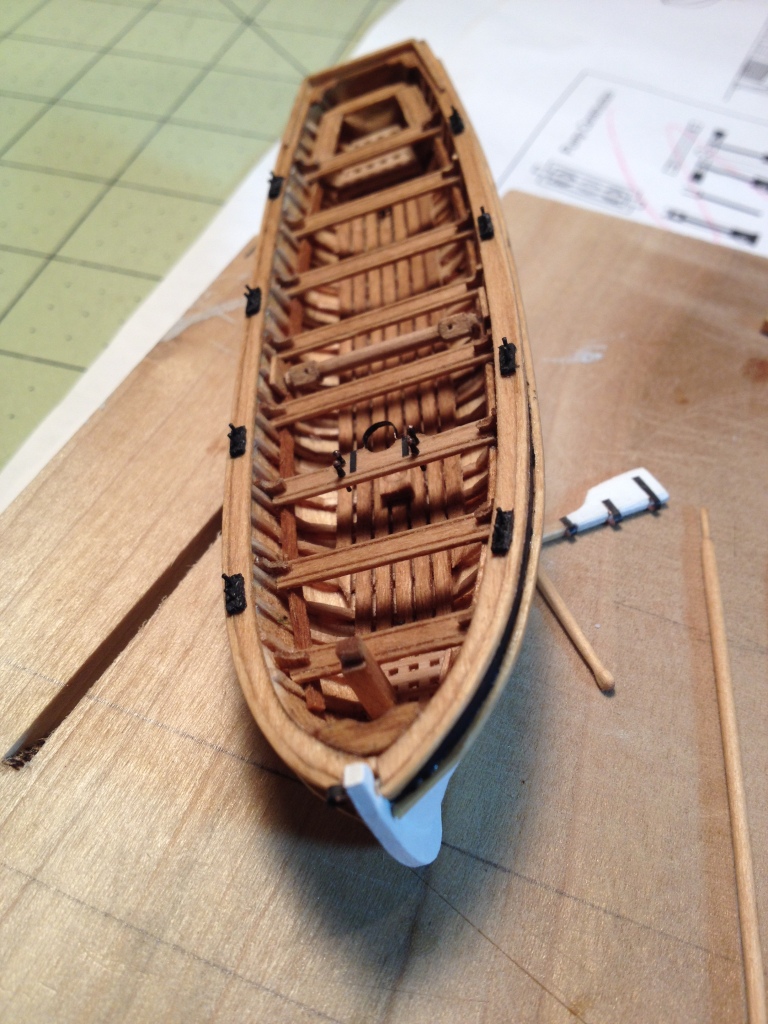
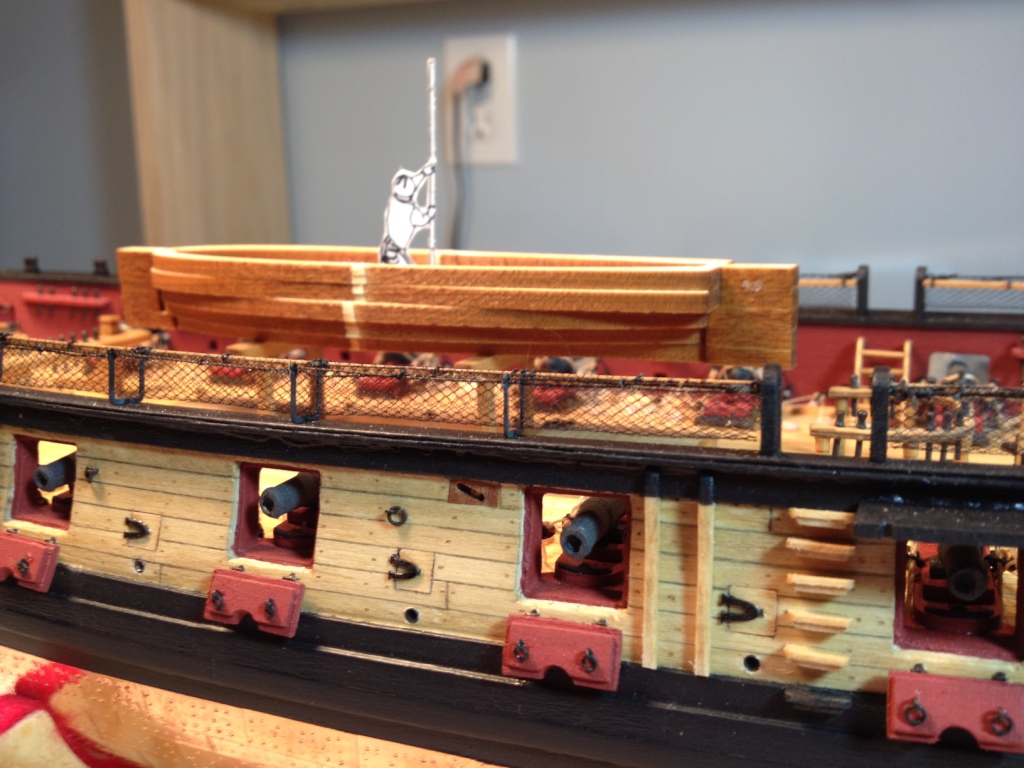
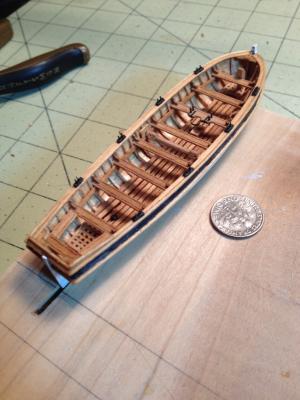
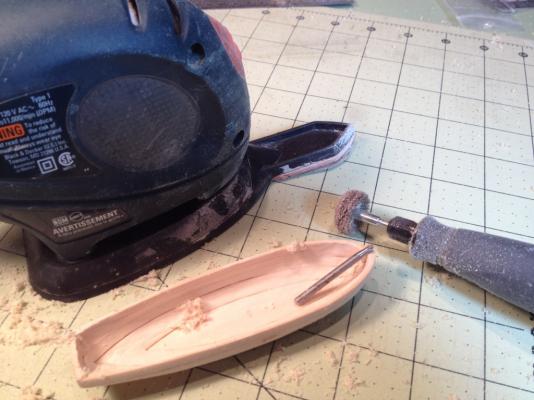
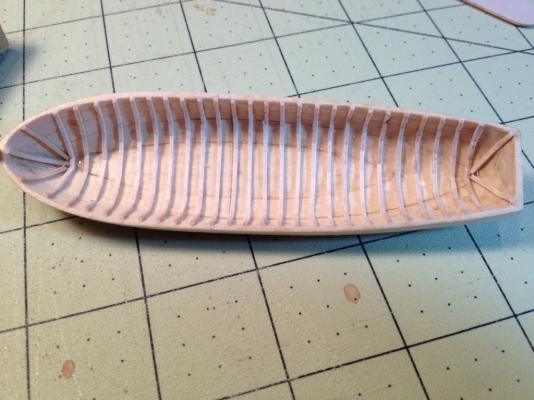
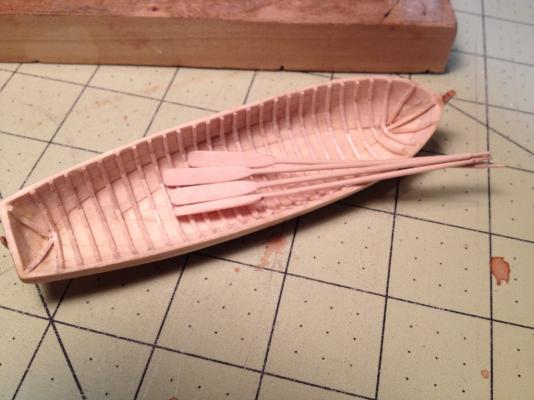
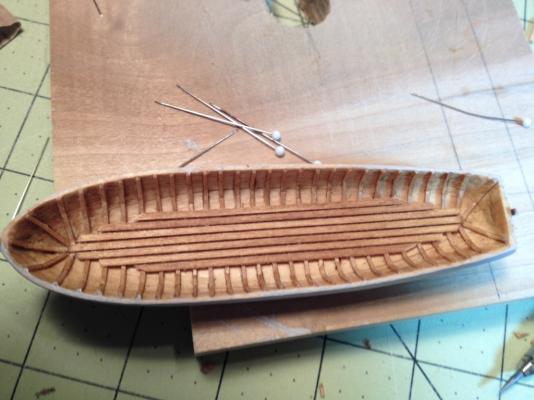
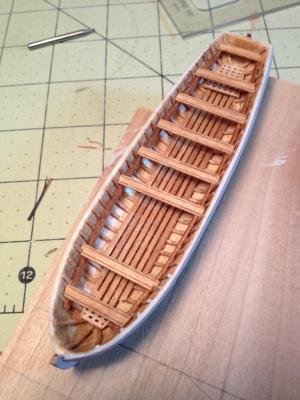
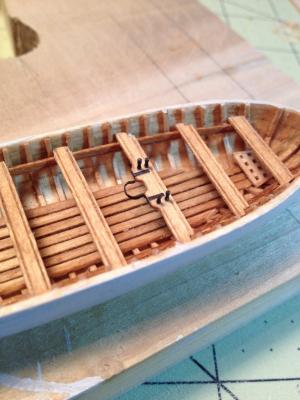
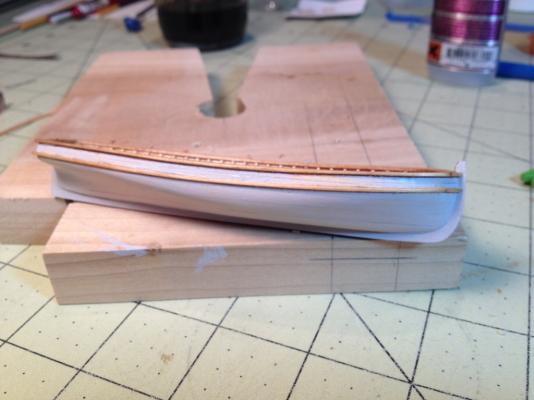
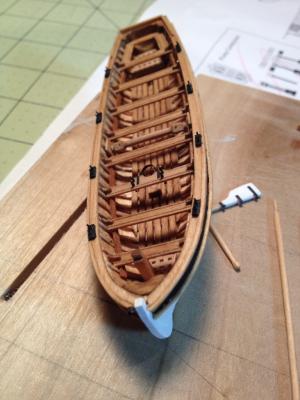
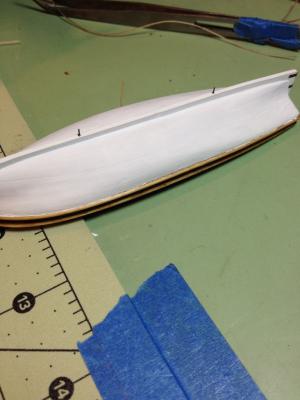
Well it was a very productive holiday break. While the wife and daughter were out shopping I got to play. For this post I was going to do it a little differently. Instead of showing all the steps and then the finished product I thought I would present the finished piece first and then show all the steps for those wanting to see what I did (it is rather long). So ‘Ta-Da’…my longboat. The oars and rudder have not been permanently glued in yet, because I’m trying different arrangements to see which I like best. Now the steps. Since this was going to be my first attempt at building a boat like this I thought I would make up some cross-section templates from the drawing to help me shape the hull. The exterior of the hull was rough sanded and shaped with a ‘mouse’ sander and the interior was done using my dremel and a high speed cutter. The final sanding and shaping was done with the dremel using a coarse and fine abrasive buff. The sheer profile was marked out on the exterior of the hull and shaped with a drum sander attachment on the dremel. All finish sanding was done by hand. Instead of installing the center keel next and then the interior ribs on either side of it I decided to leave out the keel and install the ribs for each side as one piece. I decided to do this since the floor boards will be covering the keel and it won’t be seen. The first rib was installed approximately at the center of the boat. Once that rib was set I used a 3/32” wide plastic zip-tie to space the remaining ribs. I saw this method used here on MSW but for the life of me I can’t remember whose log it was. As careful as I was I found that even after soaking the 1/32” square strips for hours with ammonia that they still kink towards the bottom. While waiting for the glue to dry between ribs I worked on the longboat oars and the ships sweeps. I’ll describe how I did these later on. Next for some unknown reason, well there was a reason but that’s another long story, I install the keel, stem and stern posts. I would not do this at this point the next time. After staining the interior of the boat the floor boards were placed as described in the instructions. I used sewing pins for spacers between the boards. You need to be careful not to push them through the hull. The thwart support was added next. I used a drafting divider to mark its location on the ribs. Note that these pieces and the floor boards were all stained prior to gluing them in place. Next I wanted to see how the longboat would look with red bulwarks and caprail, so I cut out a caprail using some red construction paper and….well the wife and daughter put the nix-e-do to that and I agreed. The grating and thwarts were done next. The grating was done per the instructions and the thwarts were dressed up a bit by scribing the edges. By some miracle most of the thwarts landed squarely between the ribs. The thwart with the iron strap to support the mast was cut out of the scrap 1/32” thick laser cut sheet. The iron straps were made from blackened copper foil and the belaying pins were ones left over from my Phantom kit. The idea for adding the scribed edges and belaying pins were gotten from Chuck’s Model Shipway’s Longboat kit. So were the split rings and mast step on the floor boards. The windlass was made per the instructions. I tried to make the shaft octagonal but it came out more roundish. I should have tried to make it round and then it would have come out octagonal for sure. Moving to the exterior of the boat the caprail and molding below the rail were added next. I used the laser cut caprail with some modifications. The rail provided was a little short, so I needed to cut the end off and add a piece. I apologize that I don’t have any pictures of this because my phone (camera) went dead. After gluing the caprail in place I wasn’t too happy with the outboard side so I sanded it flush to the exterior of the hull and then added a 1/32” square strip to the outside edge. The molding strip was added as per the instructions. The oar locks, splash panels, knees, and bowsprit step were added next and then the exterior of the hull was painted. Once the paint dried I added the gudgeons and bowsprit iron strap. I also added some pins to the bottom of the keel and the chocks on the gallow bitts to help position the boat. The rudder and tiller were made as per the instructions. I tried to put the pins in the pintles but they were just too small.


- 659 replies
-
- 20
-
-
- syren
- model shipways
- (and 1 more)
-
US Brig Syren by Gahm - Model Shipways
_SalD_ replied to Gahm's topic in - Kit build logs for subjects built from 1801 - 1850
Thomas the carronades look awesome, very nice symmetry. -
Tom the trail board painting looks great, nice job.
- 1,348 replies
-
- 3
-
-
- constitution
- model shipways
- (and 1 more)
-
Cutter Cheerful 1806 by rafine - FINISHED
_SalD_ replied to rafine's topic in - Build logs for subjects built 1801 - 1850
Bob, great job on the deck so far. Your scarfed joints look terrific.- 525 replies
-
- 3
-
-
- cheerful
- Syren Ship Model Company
- (and 1 more)
-
Jack, just found your build. Looks as though you have quite the challenge here. Looks great so far. I think I'll pull up a bar stool and tag along.
- 203 replies
-
- 4
-
-
- artesania latina
- marie jeanne
- (and 1 more)
-
Thanks John, Joe and Thomas. Joseph, have a safe trip and a happy Thanksgiving, Merry Christmas and a happy New Years. See you next year. Thomas, As for all the extra details I need to give credit to all the people like yourself and Dirk who have taken the time to post your builds where I can learn the more intricate aspects of ship building. and thanks for all the likes.
- 659 replies
-
- 7
-
-
- syren
- model shipways
- (and 1 more)
-
Thanks Jesse and I don't mind if you copy the rudder coat, I copied the idea from Dirk's build so maybe we should ask him.
- 659 replies
-
- 4
-
-
- syren
- model shipways
- (and 1 more)
-
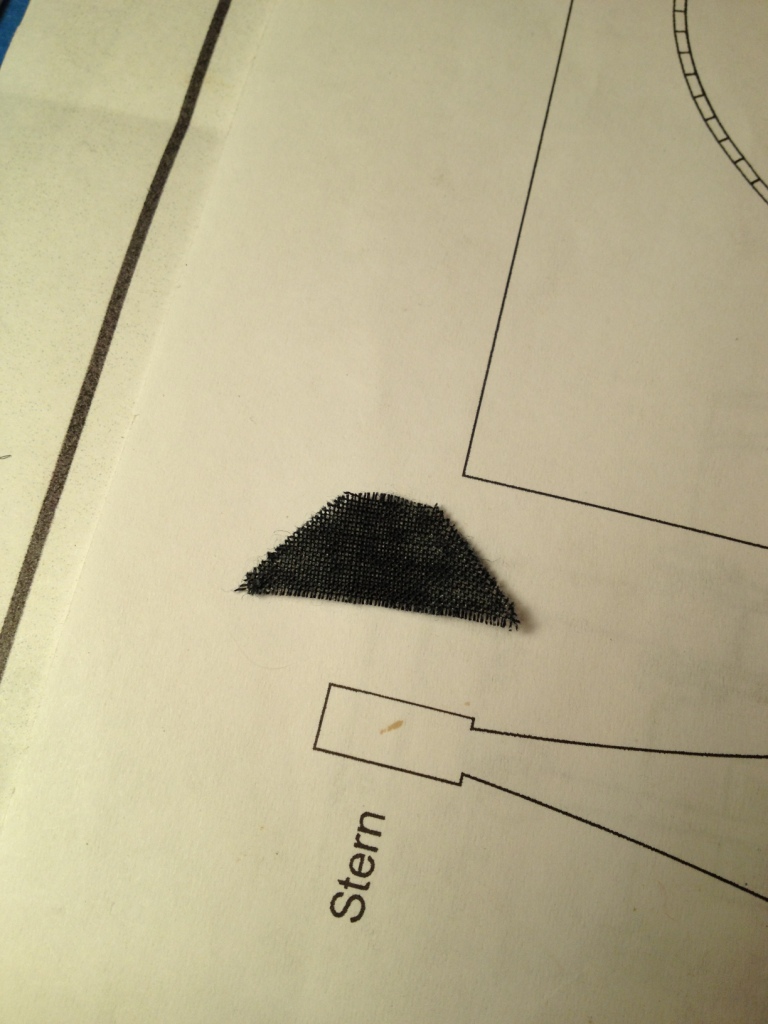
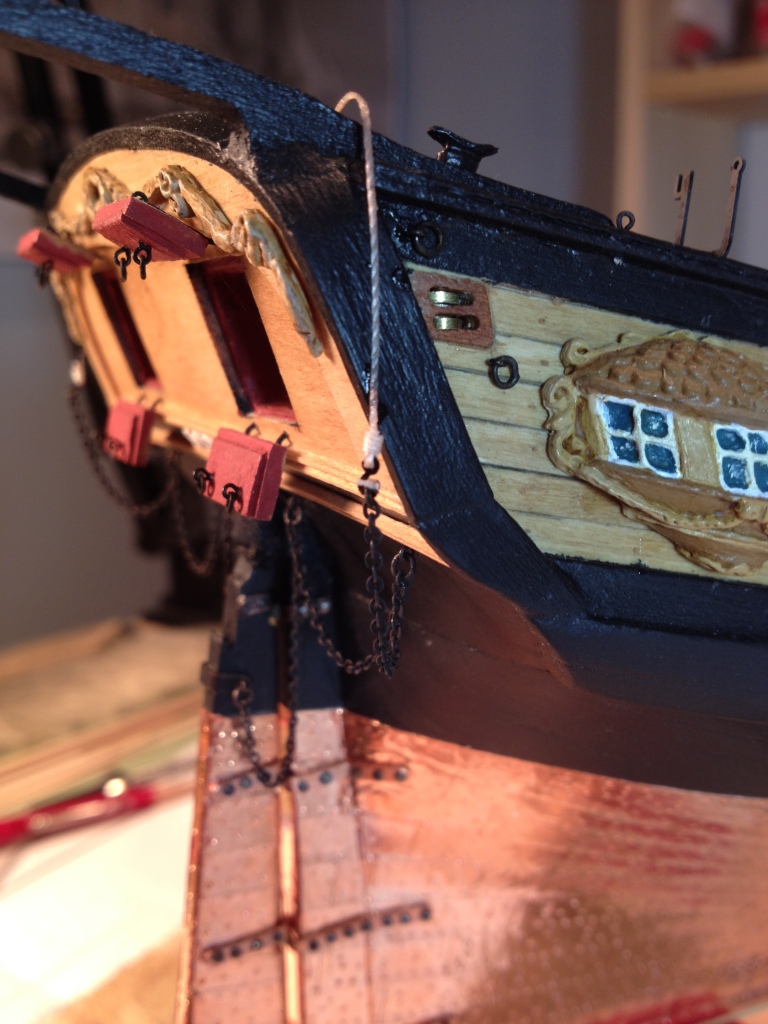
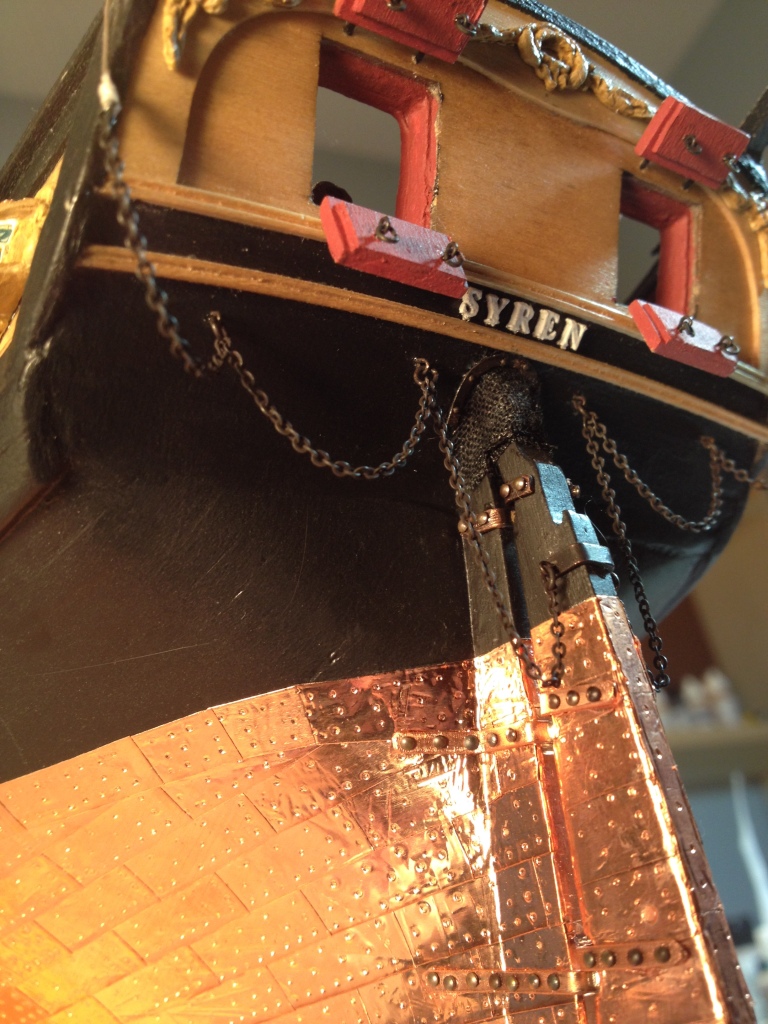
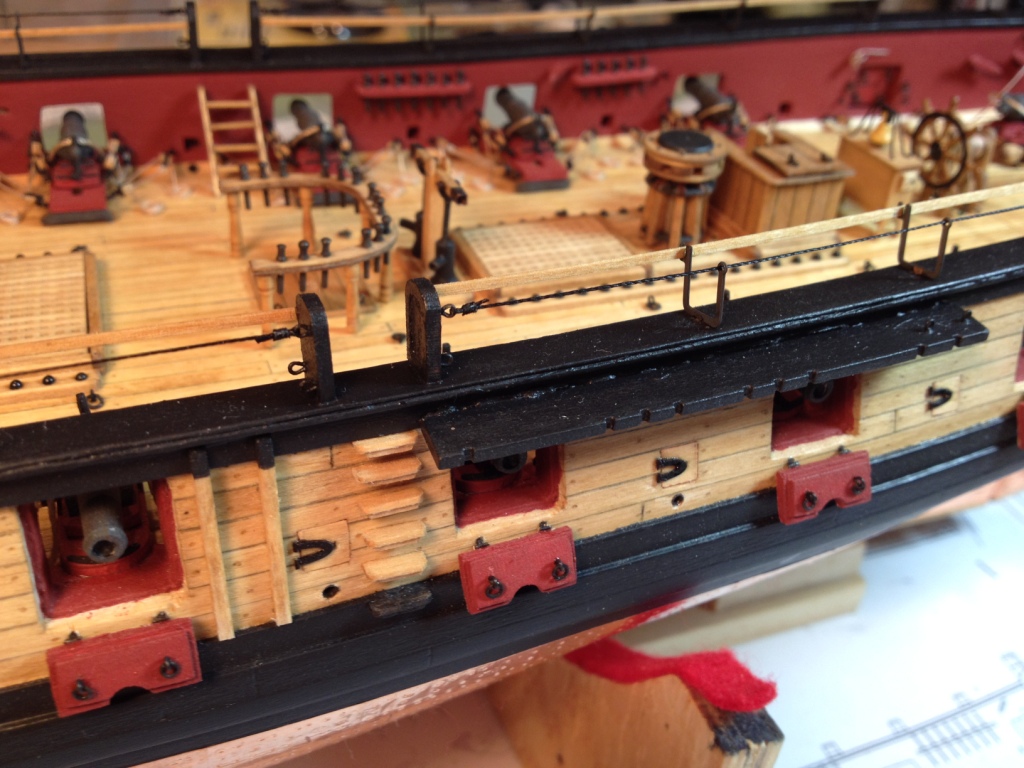
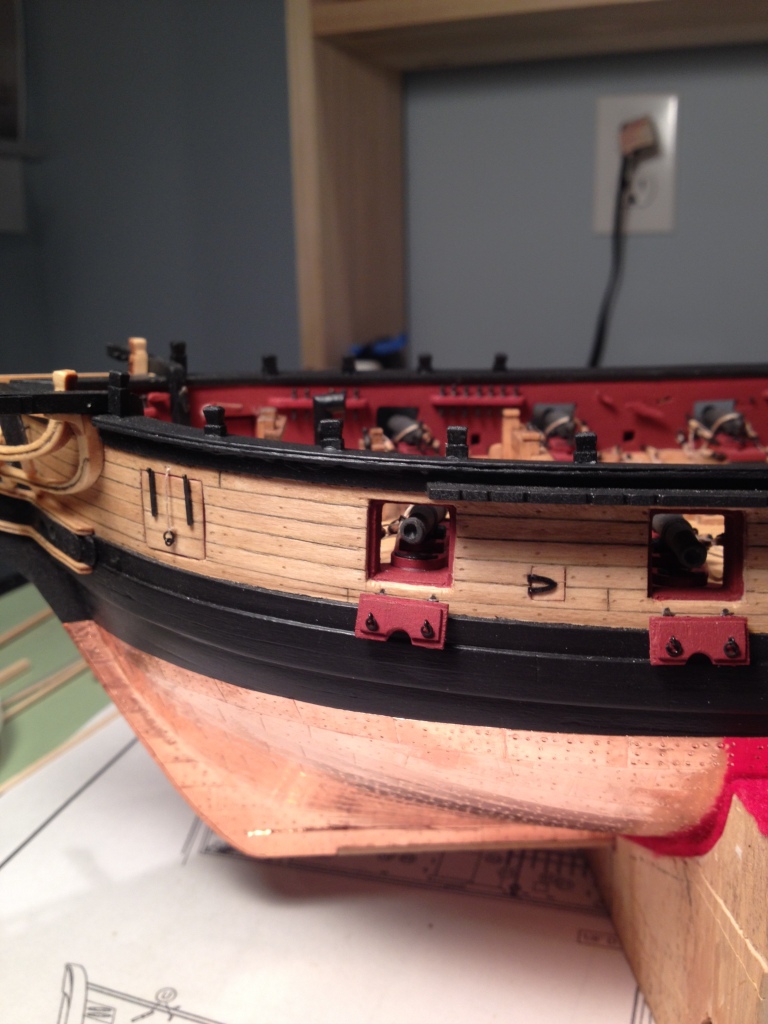
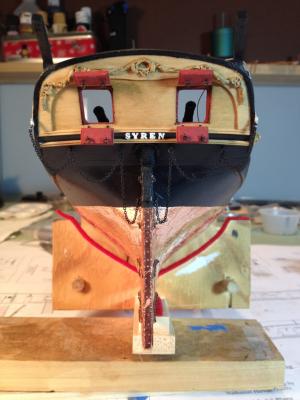
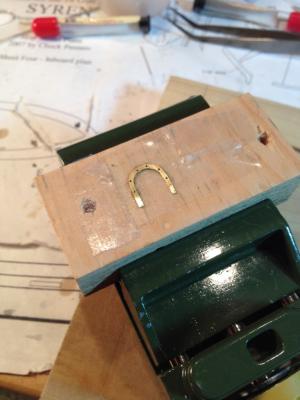
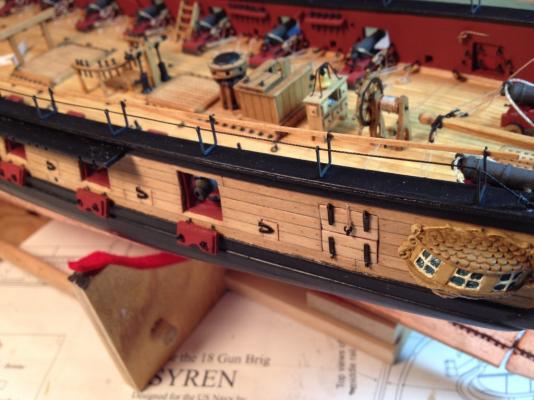
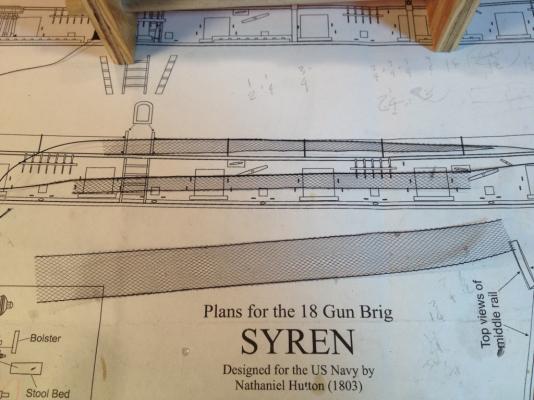
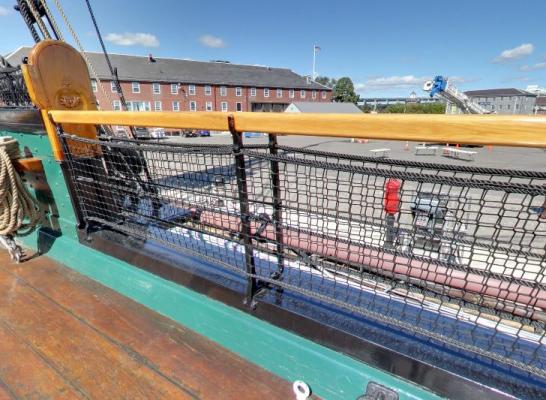
Prior to installing the rudder pendants I decided to add a rudder coat around the rudder post. Using an old handkerchief I soaked it in straight liquid starch and let it dry thoroughly. Next I cut out a small piece and used a felt tip marker to color it black. The piece was then glued around the rudder and stern post using white glue. Next I cut a small U shaped brass plate to place over the coat’s upper edge. The plate was blackened and holes drilled into it for 0.7mm rivets. I need to say that this was the first metal piece I cut that was half way descend and came out looking like what it was suppose to. I’m learning how to use a jeweler’s saw and it’s amazing what you can do if you first read and learn how to correctly use the tool. http://www.fdjtool.com/custom.aspx?id=117. I also should have installed this before doing the deck fixtures, turning the ship upside down to put the rivets in was bit of a challenge. For the rudder pendants I sort of took a different path than the manual. I decided not to place the chain as shown in the manual for a couple reasons. First, damage control! I was a little nervous about having the chain hang down so much because all I could see is it getting caught on something and ripping the rudder off. Second I just thought I’d take some artistic license by draping the chain under the counter. Hooks were added to the ends of the rigging line that attach to the chain. A simulated mousing was put on each hook. The rigging line will be tied off to the cleat on the inboard transom. Next, rigging line was thread through the eyelets on the outboard side of the hammock cranes and the two ends were seized to the eye bolts placed in the cap rail and boarding panel. This was a good place to use some zip-seizing and it made tensioning the line very easy. For the inboard crane rail I used some dimensional lumber from Midwest Products. I used the 0.0208” x 0.0416” size and decided to stain it instead of painting it black. For the hammock crane netting I was toying with a couple arrangements. My first thought was to use something similar to the current netting layout that’s on the Constitution. Pictures of the Constitution show separate netting pieces attached to the inboard and outboard crane arms. However after making up the separate netting pieces I thought I would do something a little more historically correct like Chuck did so I made up netting pieces to drape in between the crane arms. I don't really know why I made these pieces I just thought it would be easier to tie them in place. The netting pieces were then draped and tied into place as explained in the manual. I also decided not to tie the netting to the lower eyebolts that were on the boarding panel. I didn't think it was necessary and removed the eyebolts. On to the long boat.


- 659 replies
-
- 15
-
-
- syren
- model shipways
- (and 1 more)
-
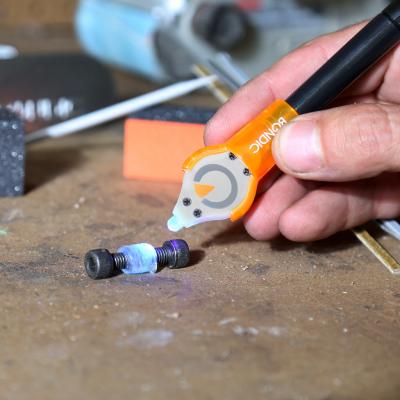
Has anyone try this type of bonding agent? I was wondering if it would work for setting the masts in place. It is a little pricey though. http://www.bondicusa.com/collections/shop
-
Nigel the sail looks awesome, nice color too.
- 270 replies
-
- 3
-
-
- red dragon
- artesania latina
- (and 1 more)
-
Thanks ZyXuz, I wish I had all day to work on it. I hate it when work gets in the way of my hobbies.
- 659 replies
-
- 4
-
-
- syren
- model shipways
- (and 1 more)
-
Thanks Thomas. The more I put on the more nervous I get that I'm going to start bumping into thing and breaking them off.
- 659 replies
-
- 4
-
-
- syren
- model shipways
- (and 1 more)
-
Thanks Tom and George. She taking shape and I'm glad you like her.
- 659 replies
-
- 3
-
-
- syren
- model shipways
- (and 1 more)
-
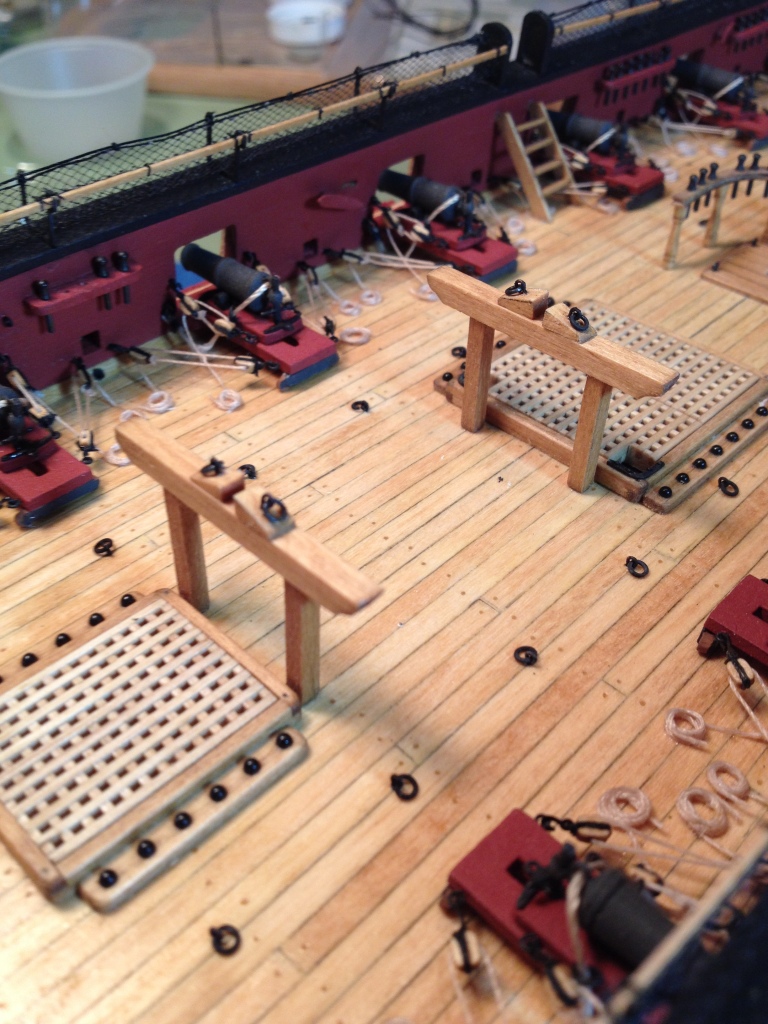
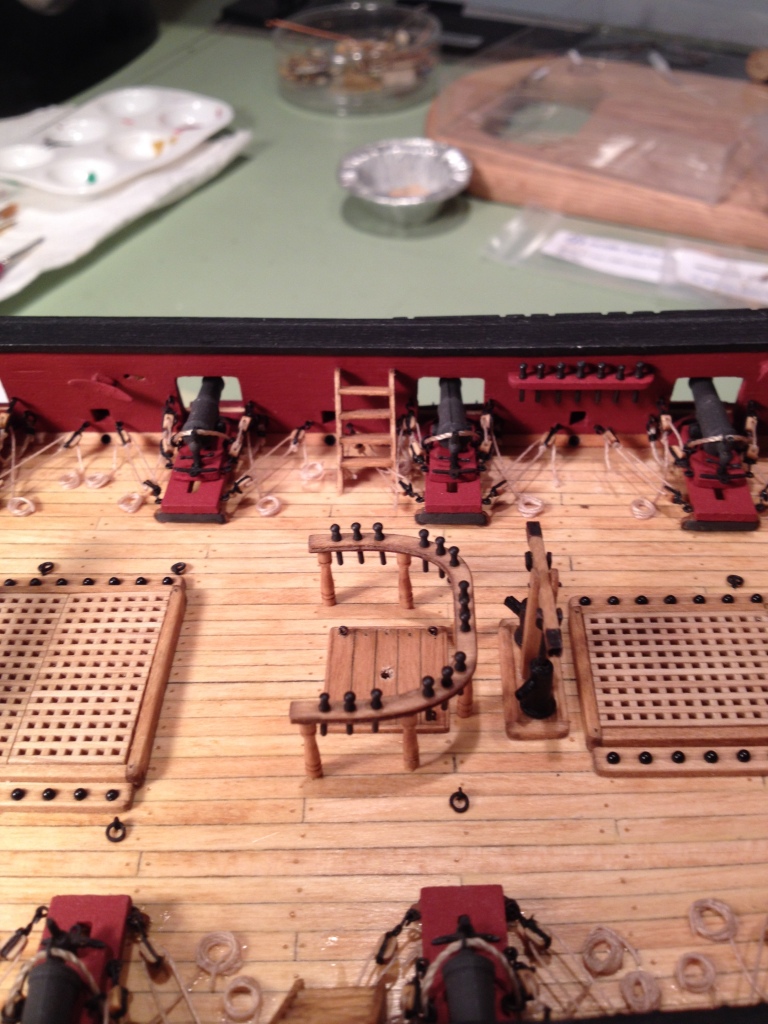
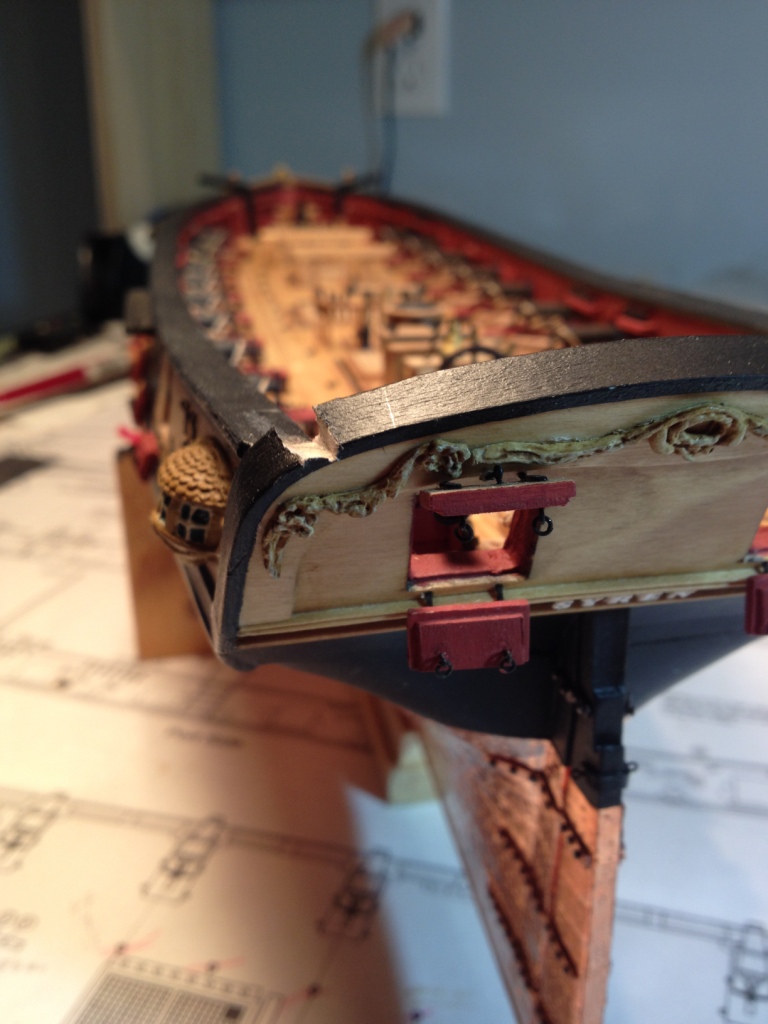
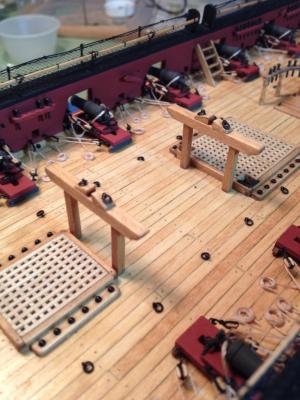
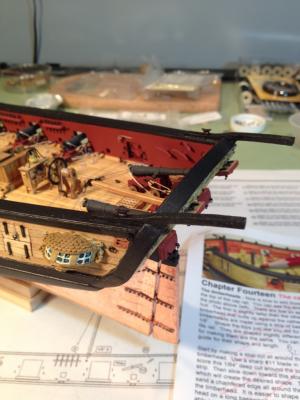
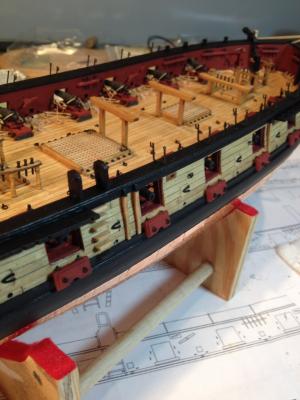
Chapter 14. The timberheads were made pretty much as outlined in the manual except for the pins added to help position them on the cap rail. I also added the two ladders amidships. I needed to rearrange some of the rope coils that interfered with the ladder side rails. The transom was notched for the stern davits very carefully. Prior to installing them the faux sheaves were cut into the outboard ends. Some wood filler was required to fill the gaps between the davits and transom and then everything was painted. The cleat was added after the davit was glued in placed. The boarding panels were carved to simulate a raised panel; it’s hard to see with them painted black. They were then installed on the cap rail along with the hammock cranes. After installing these I noticed a mistake that I made with the cap rail that wasn’t that obvious until the cranes were installed. The cap rail is not level and angles inboard a bit. This angle is more apparent now with the boarding panels and cranes in place, but at least both sides are angled equally so they match. Nothing I can do about it now.


- 659 replies
-
- 18
-
-
- syren
- model shipways
- (and 1 more)
-
Congratulation on the new house Wayne. Best of Luck. How about a new washer & dryer for half the basement?