HOLIDAY DONATION DRIVE - SUPPORT MSW - DO YOUR PART TO KEEP THIS GREAT FORUM GOING! (Only 20 donations so far - C'mon guys!)
×


_SalD_
-
Posts
828 -
Joined
-
Last visited
Content Type
Profiles
Forums
Gallery
Events
Everything posted by _SalD_
-
 Thanks Dirk, Bob & Jesse, appreciate the kind words and the likes
- 659 replies
-
- 3
-

-
- syren
- model shipways
- (and 1 more)
-
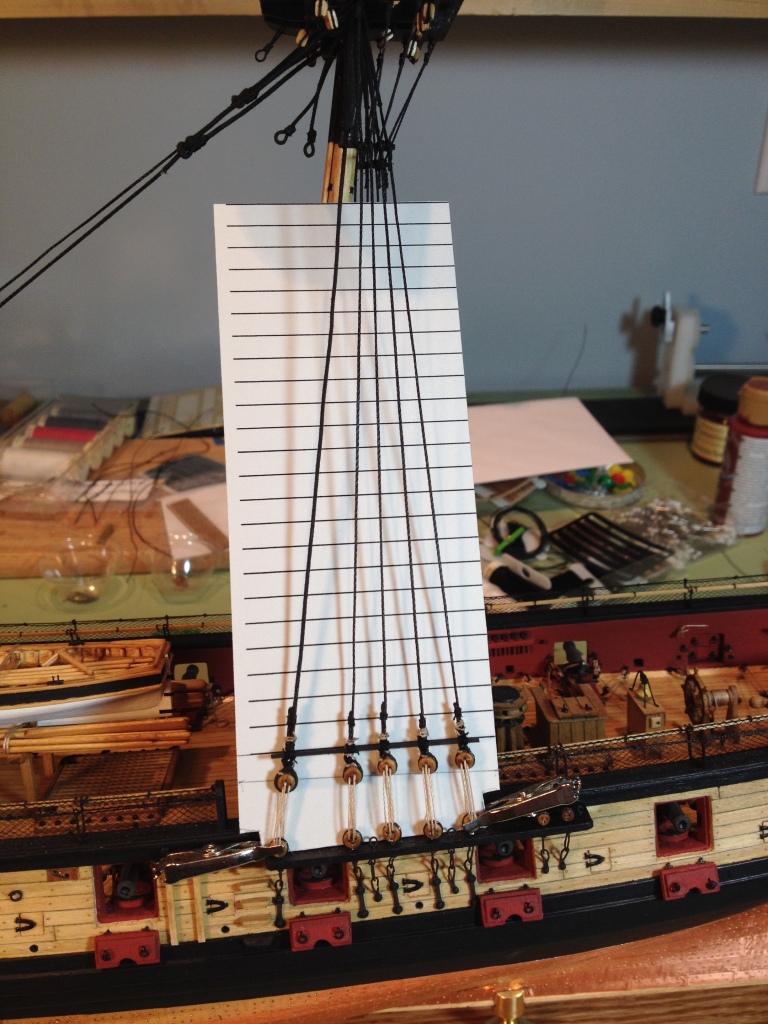
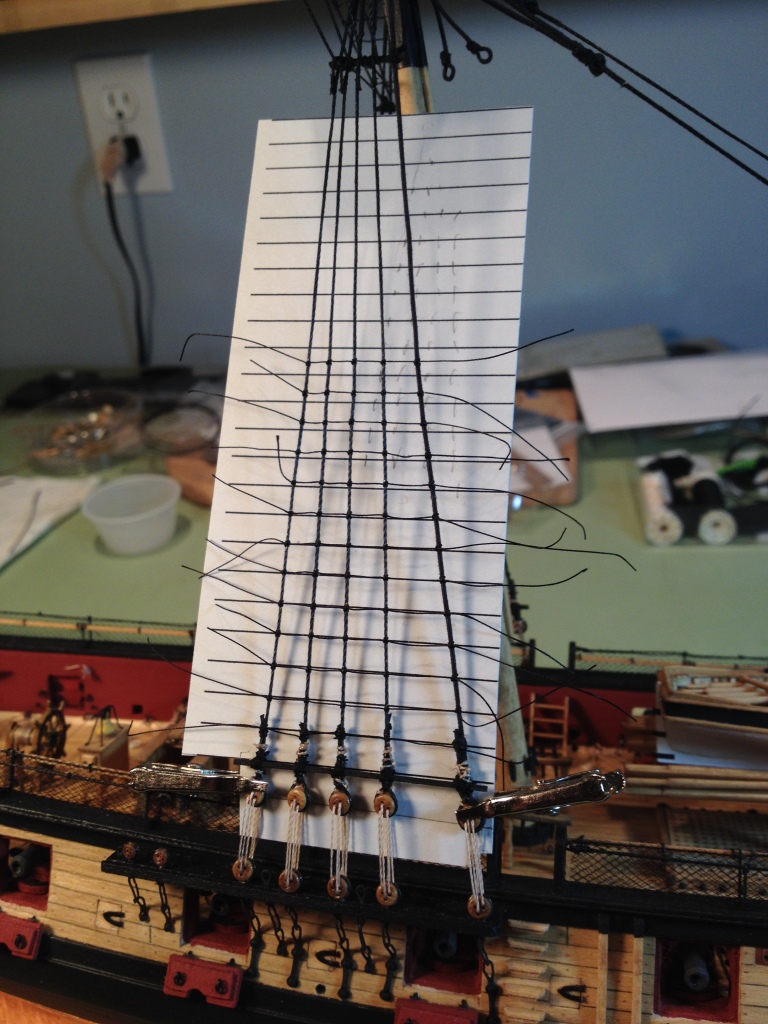
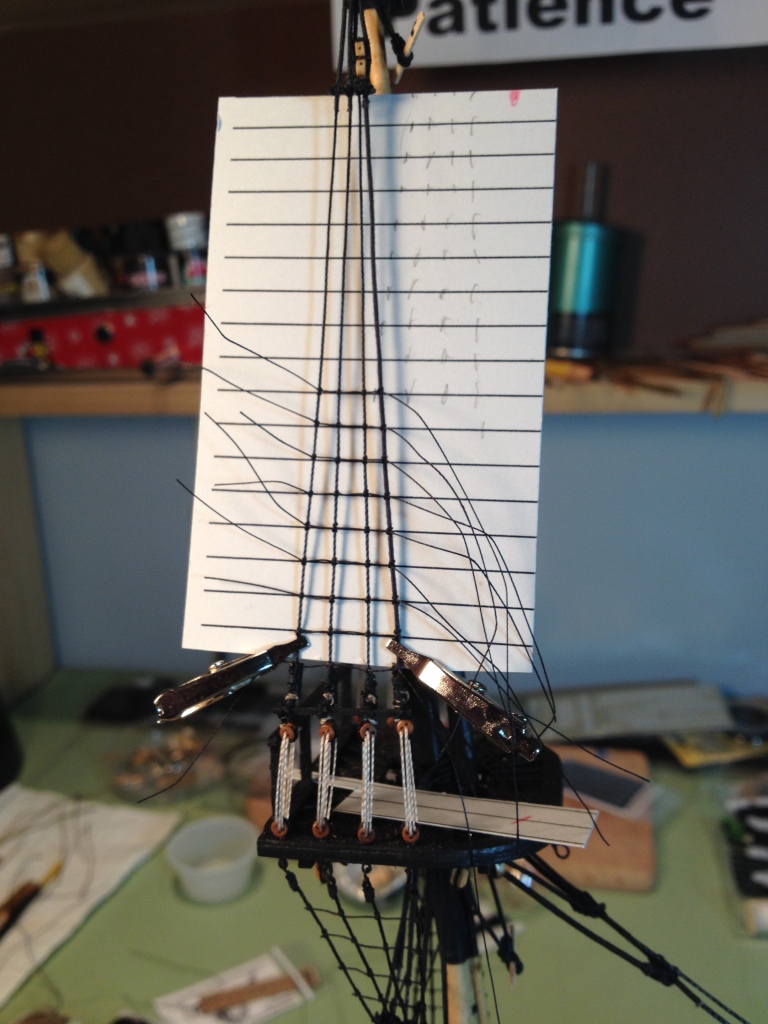
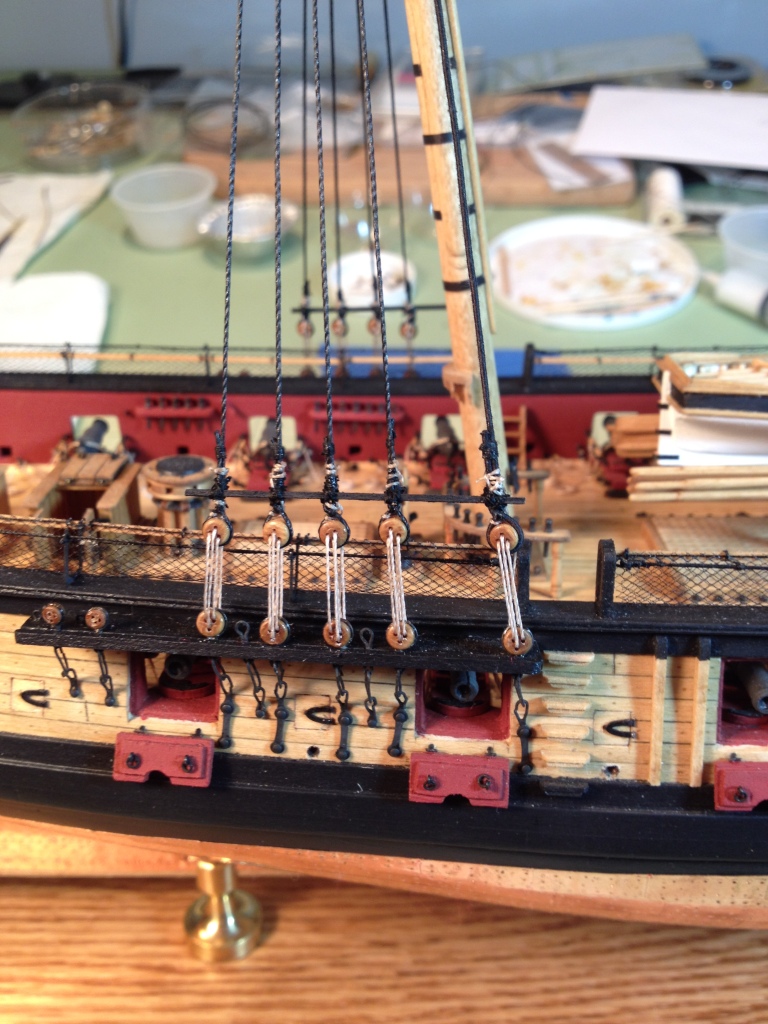
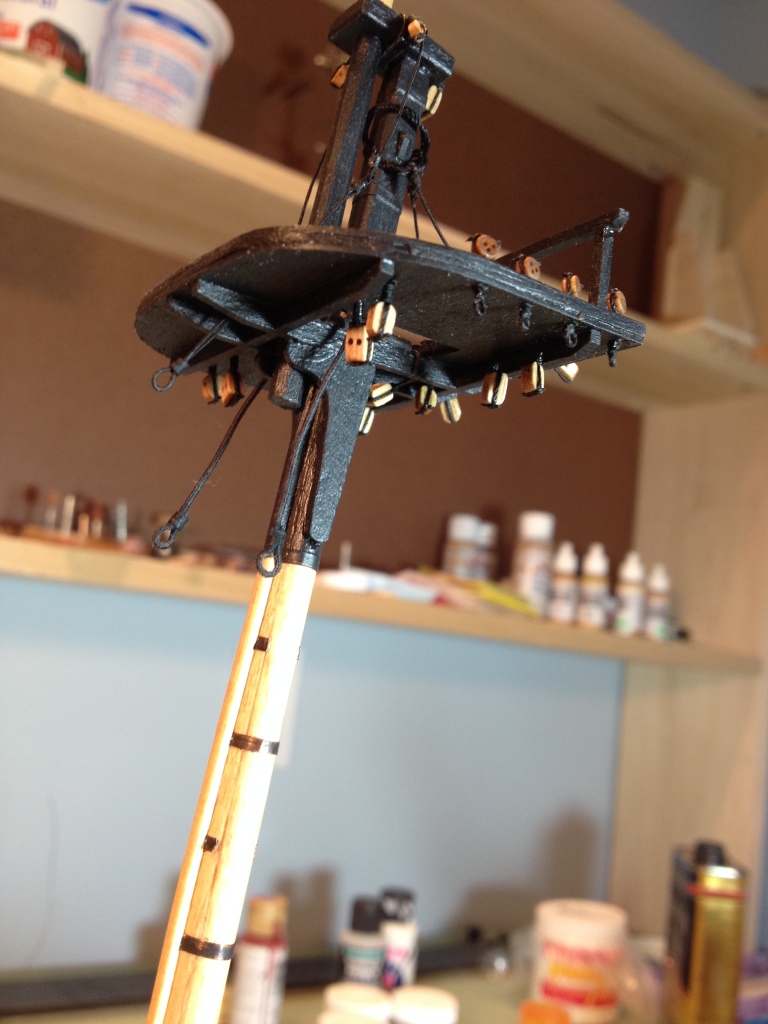
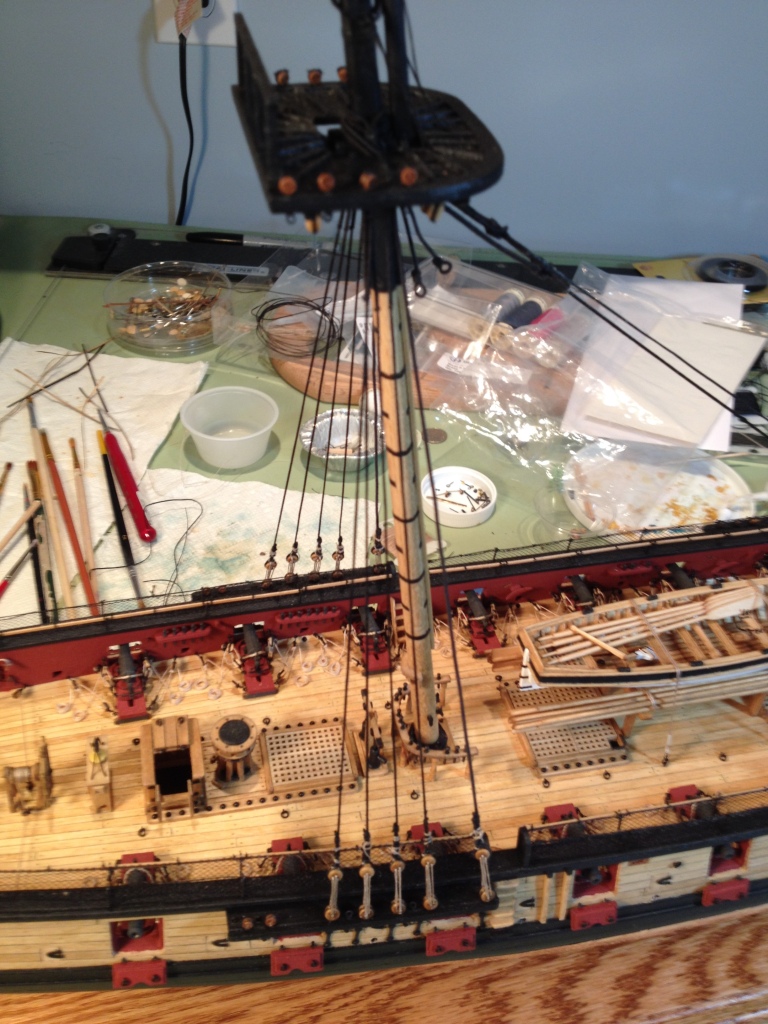
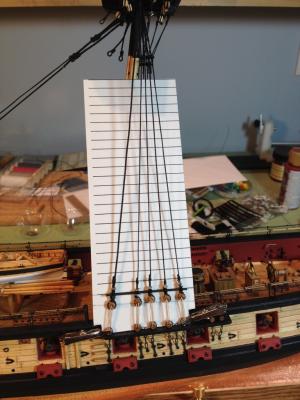
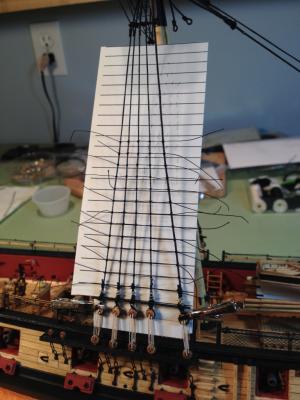
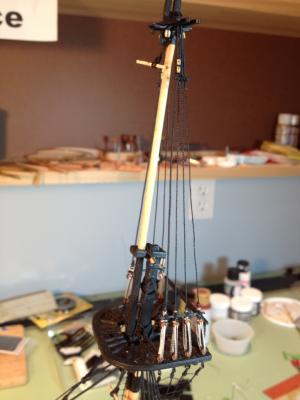
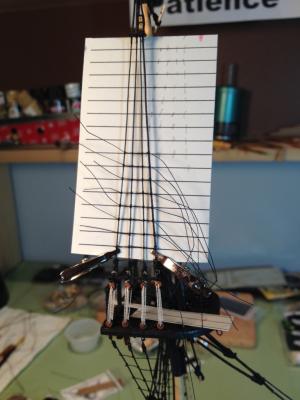
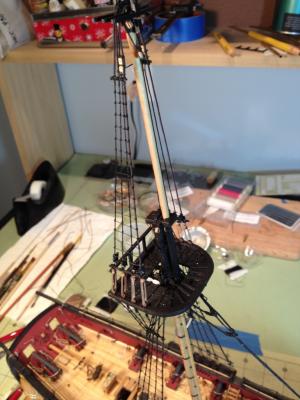
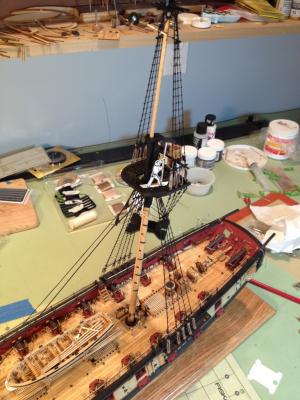
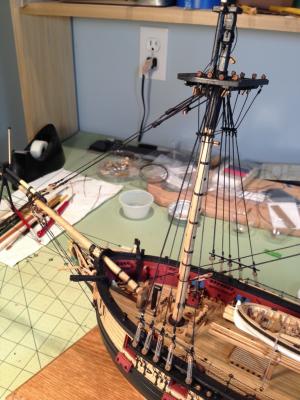
Look down, look down Don't look 'em in the eye Look down, look down, You're here until you die 1….. started the rat lines It was slow at first but once I got the hang of it they moved along quite nicely just very tedious. I used a card with lines on it to help me space the lines which I found to be helpful in a few ways. First it helped keep the lines level and spaced evenly, secondly I found it useful to hold the end of the thread in place while I thread it behind the shroud and lastly, for me anyway, it helped me see the thread. I spaced the lines a little closer than ¼”, 0.22 to be exact, which is closer to what’s shown on the drawing. The futtock shrouds were done the same way. The topmast shrouds and rat lines were done next and similar to the lower mast. I splurged a bit and decided to buy some 5mm cleats from the Syren Model Co. instead of using the supplied metal ones. These were tied to the shrouds as instructed. The sister blocks were tied to the futtock shrouds as was the catharpin. 1. Les Miserables cast lyrics
- 659 replies
-
- 19
-
-
- syren
- model shipways
- (and 1 more)
-
Like Mark said Robbyn using a 2D drawing for a 3D object won't work too well. And the pointy plates are really not that pointy, they appear that way but it's because they are covered by the dressing belt, the last row of plates,
-
Thanks Daniel, Greg H., Bob and Lawrence for the kind words. Bob, I know I read somewhere that the stave was inboard but of course now I can't find where. But I have seen it in both locations so i'll be leaving it where it is. And thanks again to all that hit the likes button.
- 659 replies
-
- 4
-
-
- syren
- model shipways
- (and 1 more)
-
Cutter Cheerful 1806 by rafine - FINISHED
_SalD_ replied to rafine's topic in - Build logs for subjects built 1801 - 1850
Nice start to the rigging Bob. That's the part I like the best too.- 525 replies
-
- 4
-
-
- cheerful
- Syren Ship Model Company
- (and 1 more)
-
Thanks Elijah, don't rush your time will come soon enough. Not sure what's up with the pictures. Thanks for all the likes also.
- 659 replies
-
- 3
-
-
- syren
- model shipways
- (and 1 more)
-
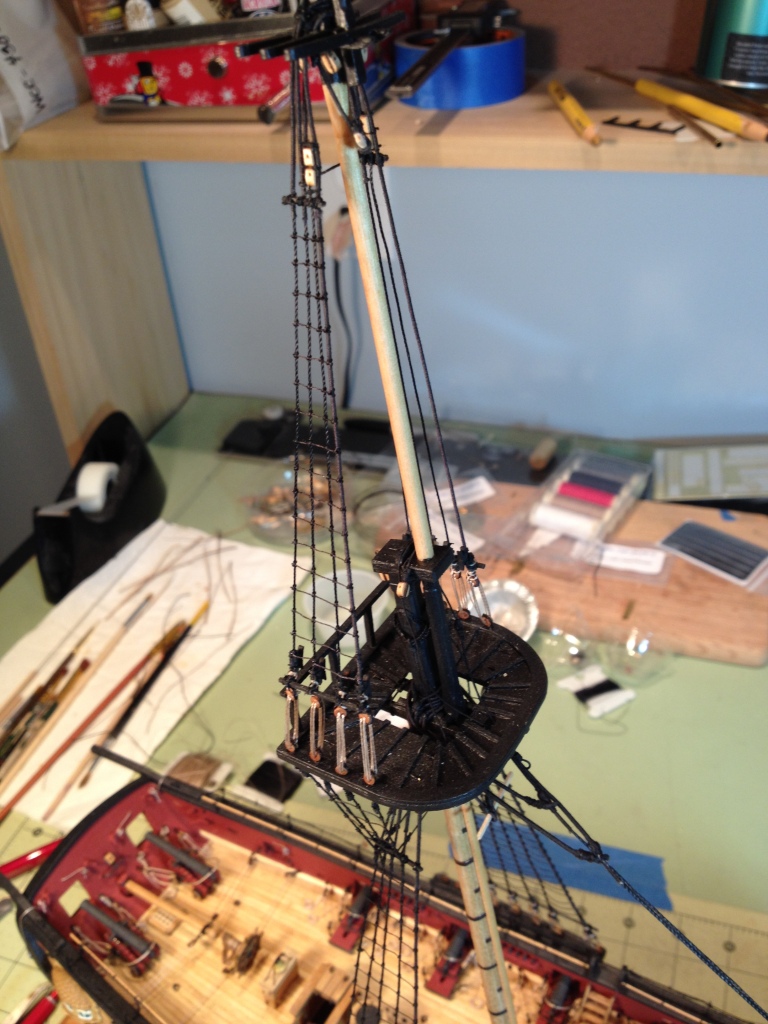
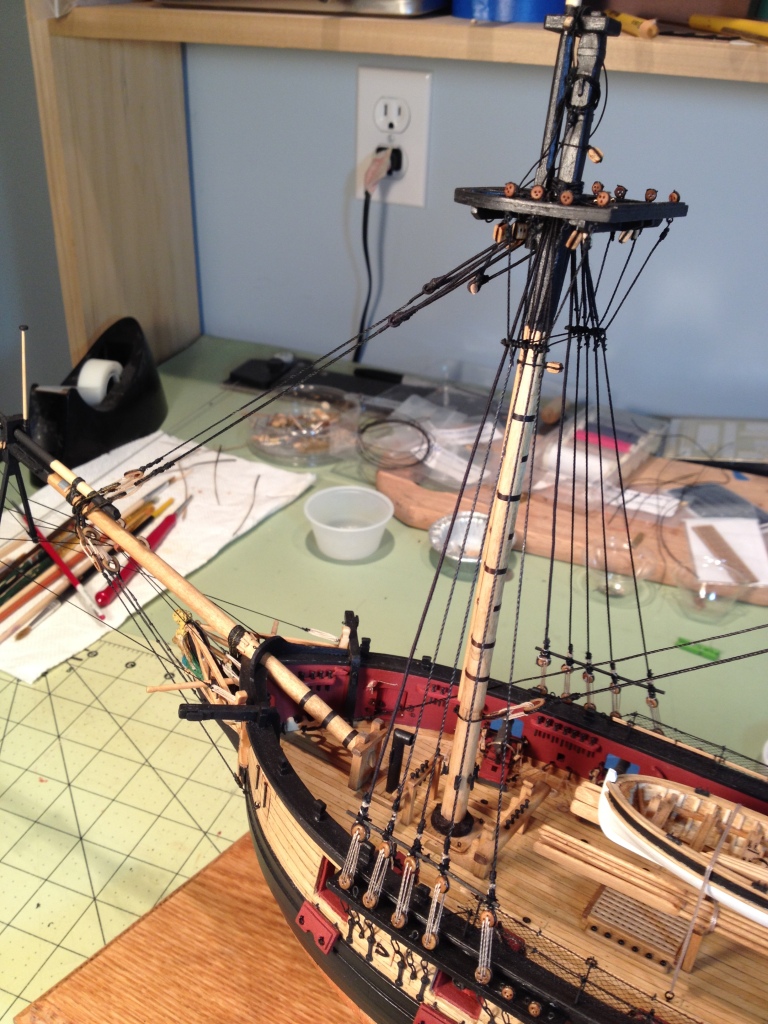
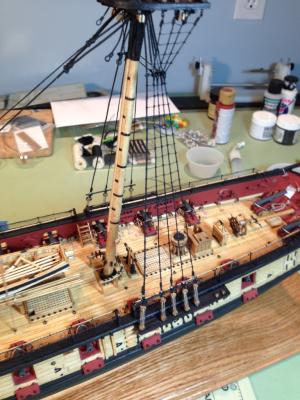
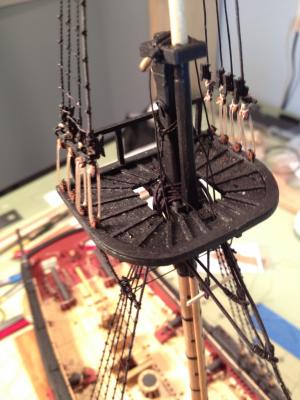
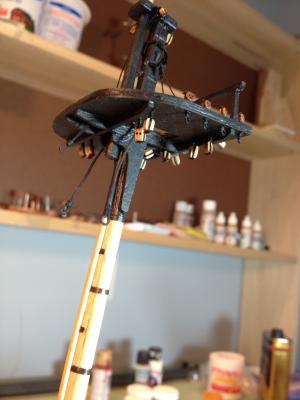
This is one of the parts of ship building I like the best, running all the rigging. As a structural engineer it never ceases to amaze me how they ran the rigging in order to transfer the load from the sails, to the masts, to the shrouds and stays and then into the ship. After every line I put on I push or pull or twist the mast to see how it interconnects with all the other rigging, just amazing. Sorry…I'm just easily amused. I finished up the lower fore mast shrouds and stays which were done pretty much like the main mast. Next the sheer poles and futtock staves were tied in place. I put the futtock stave on the outboard side of the shrouds but after reading up on them (after the fact) I think they should have been placed on the inboard side. The futtock shrouds were installed next. A 3mm hook from the Syren Model Co. was seized to one end to attach to the eye below the top. The other end was wrapped around the futtock stave and seized to the lower shrouds. I used 8/0 fly tying thread for the seizing to keep the seizing small. The catharpins were done next as described in the instructions. Sorry for the blurry pictures One thing I realize now but not at the time I was doing it is that I could have rigged the entire lower masts without installing the top masts. It would have been so much easier to install the shrouds on around the mastheads and not have to worry about breaking the top masts off. Would have been easier just stepping the lower masts too. Next time.


- 659 replies
-
- 18
-
-
- syren
- model shipways
- (and 1 more)
-
Wow!! wonderful craftsmanship Tom, beautiful work, very impressive workshop too.
-
Thanks Thomas, they are very hard to hold onto, very small. I also painted them black just in case the thread didn't cover it all.
- 659 replies
-
- 3
-
-
- syren
- model shipways
- (and 1 more)
-
Thanks Elijah wish my lanyards turned out as nice. Thanks for looking gerty And thank you all for the likes
- 659 replies
-
- 4
-
-
- syren
- model shipways
- (and 1 more)
-
Welcome to the club James, best of luck with the Syren. I noticed you have quite the collection of paints.
-
Elijah, good luck with the decking, the boat should look real nice with it. Sounds like you've joined a great club.
- 701 replies
-
- 3
-
-
- phantom
- model shipways
- (and 1 more)
-
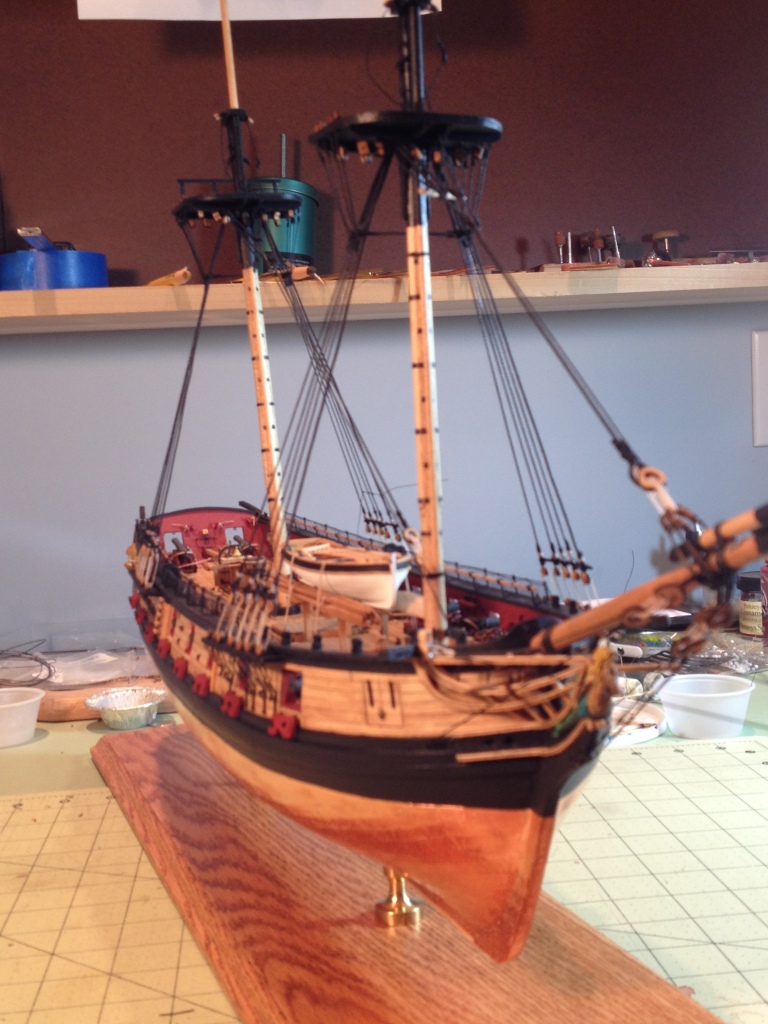
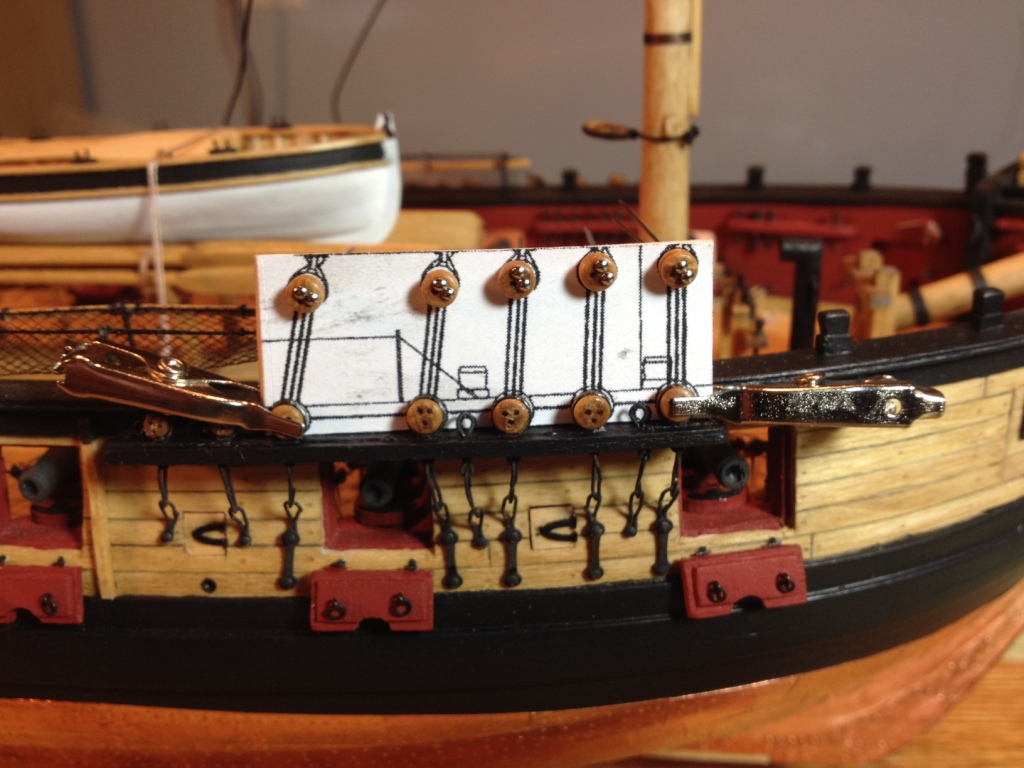
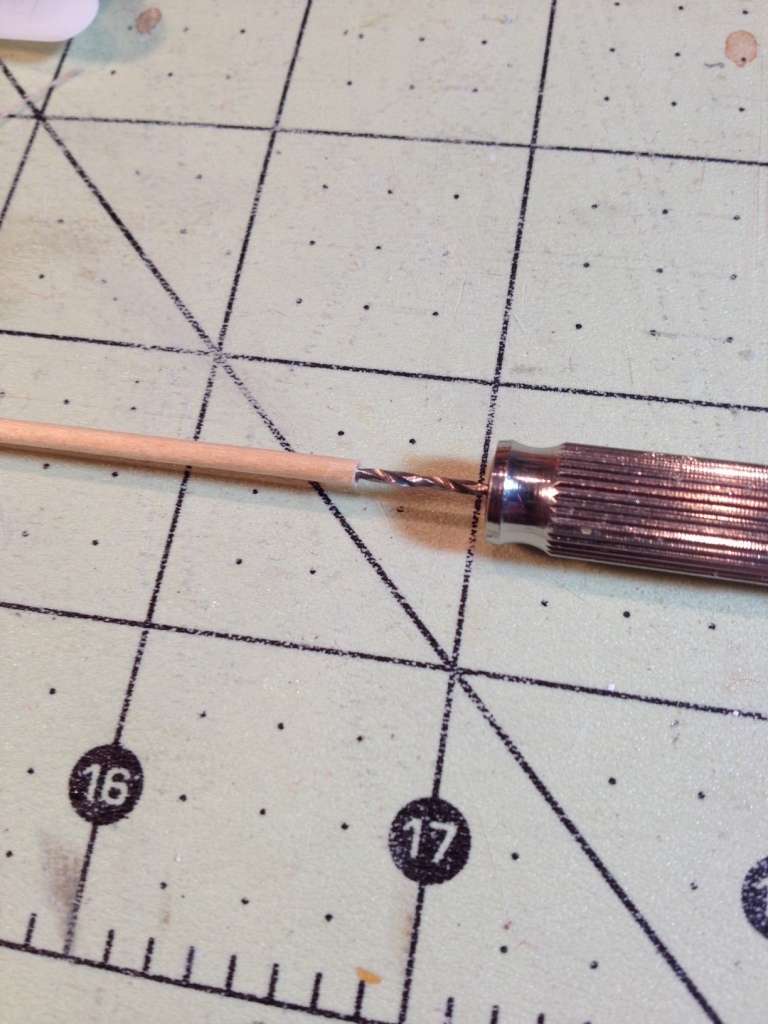
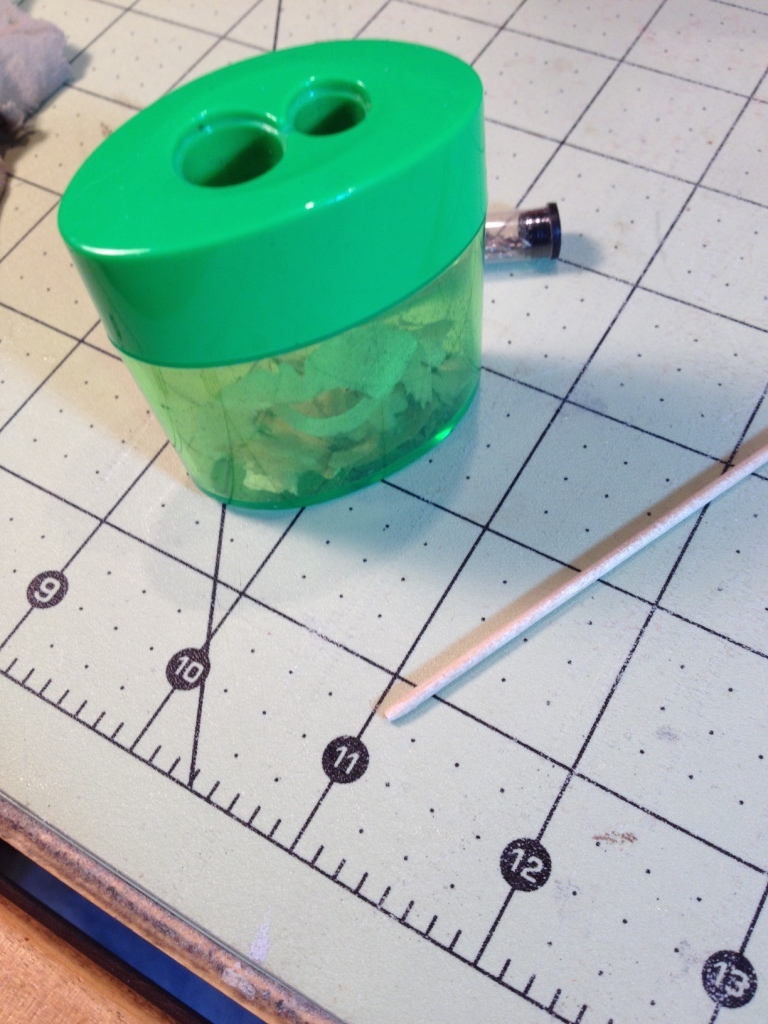
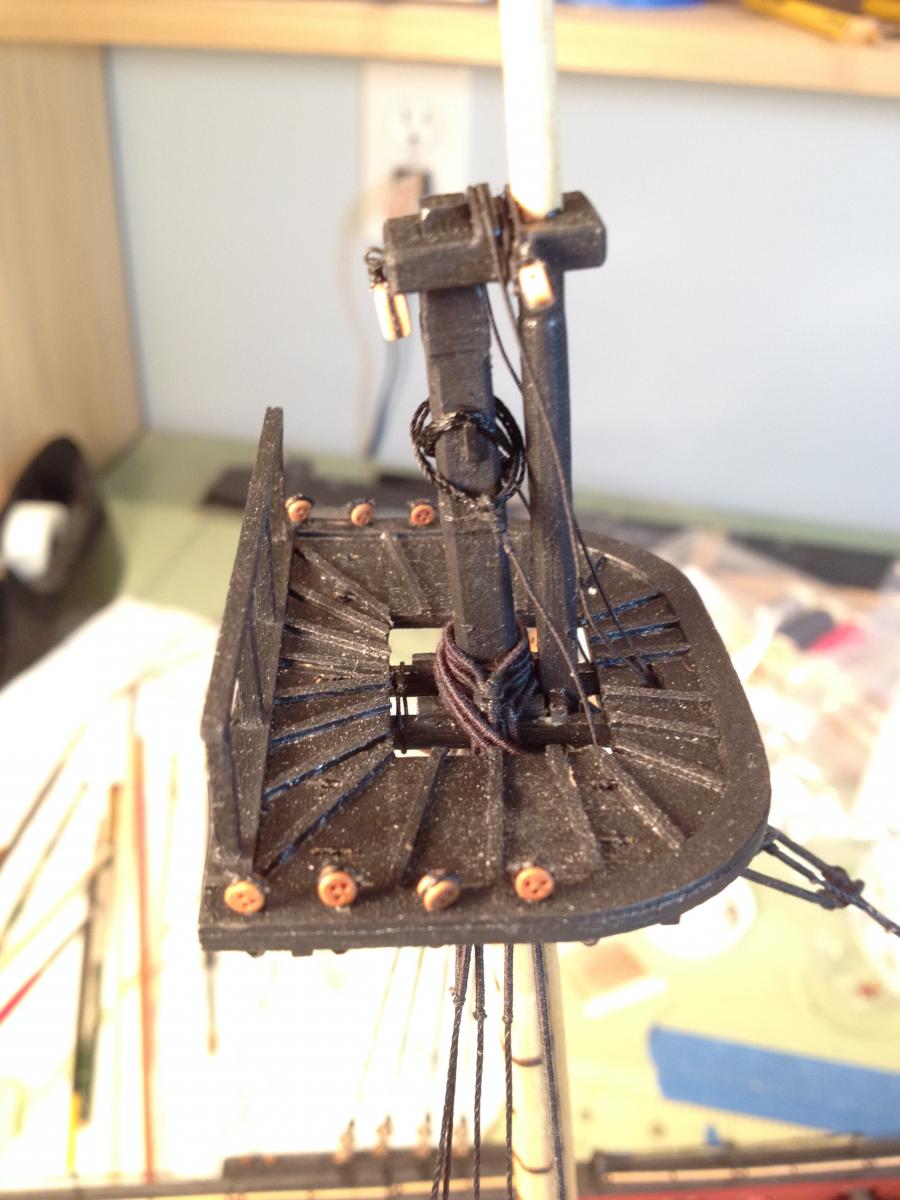
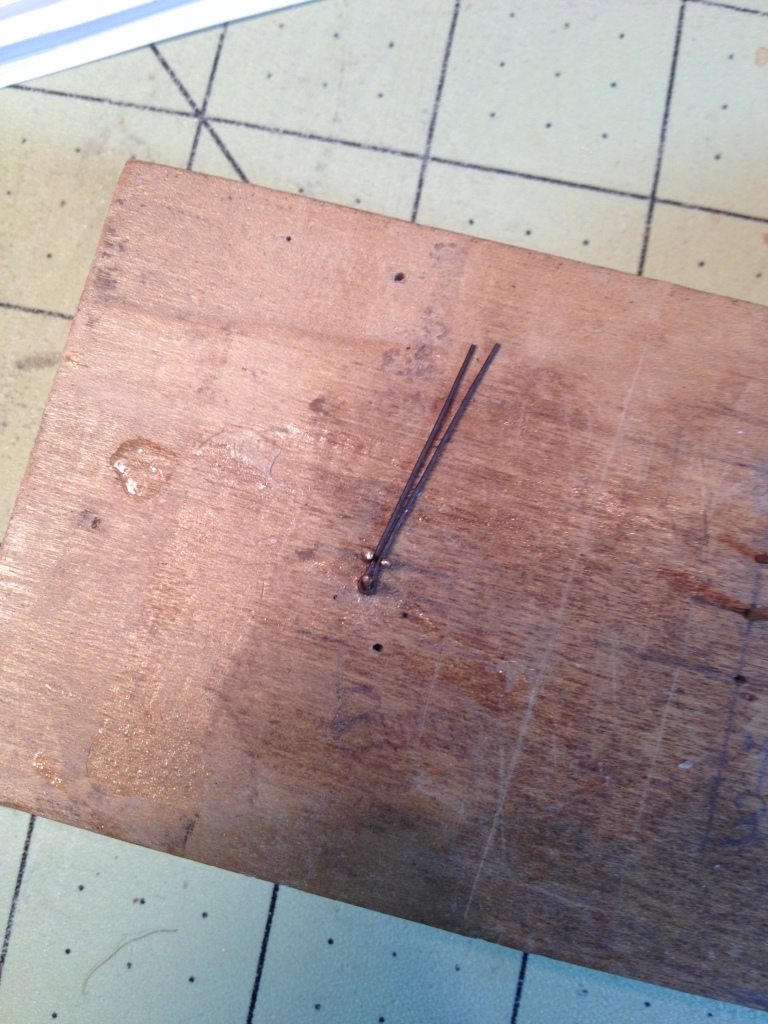
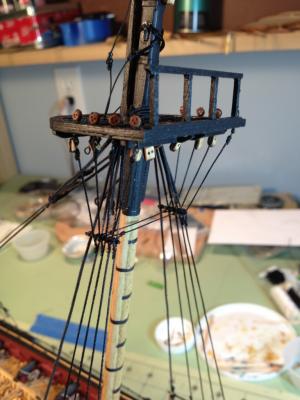
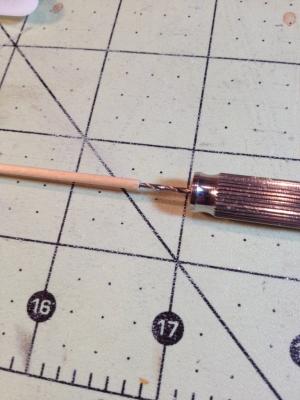
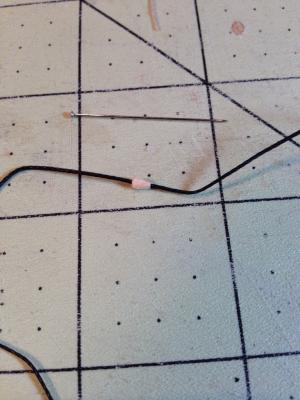
As I had mentioned earlier in one of my posts I had won a small serving machine at the Northeast Ship Model Conference last April so I thought I would use it for some of the standing rigging. The lower pendants were done first by serving two separate pieces of rigging, forming the eye at one end of each piece and then seizing the two pieces together around the mast head. Next I did the lower main shrouds. Only the foremost shroud on either side of the main mast was served in its entirety, all the others were served only where they wrapped around the mast head. I’m glad I did this because, imo, it does look impressive. The only problem I have with it is the black thread on the black mast, it’s very hard to see. I think the next time I’ll paint the mast head white. For tying the shrouds around the deadeyes I used a technique for holding them in position that I read about in Brian’s (GuntherMT) AVS build. http://modelshipworld.com/index.php/topic/8085-armed-virginia-sloop-by-gunthermt-model-shipways-scale-148-complete/?p=340205 I did make one change however, instead of just drawing a line to mark the location of the deadeyes I made a copy of the plans showing them and pasted it to the piece of wood. The deadeyes were then pinned in place in their correct orientation. The below picture is the fore mast but I did the same for the main mast but didn't take a picture. After the shrouds the main stay and preventer stay were done. The portion of the stays that wrap around the mast head were served including the mouse. To make the mouse I use a 5/64” diameter dowel, first I drilled a hole in it, then used a pencil sharpener to get its basis shape and then used a file to round off the back after cutting it of the dowel.


- 659 replies
-
- 17
-
-
- syren
- model shipways
- (and 1 more)
-
I've never used one but I think the ponce wheel would be a good alternative. And I think we've all had those moments, I know I have, where after you post something you slam the heel of your hand into your forehead and say 'what an idiot'.
-
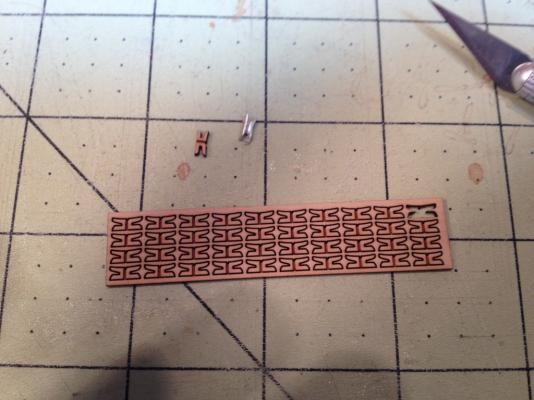
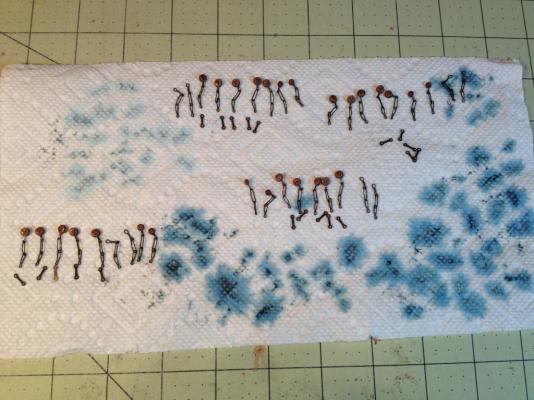
Robbyn, I had to slowly giggle my stamp back & forth and side to side as I pressed down to get a good impression on the tape. I didn't hit the stamp with a hammer either like in the instructions but just pressed it down with my fingers. I'm not sure I fully understand your last question but you do need to cut the tape into individual plates after you stamp them, they're about 3/4" long. http://modelshipworld.com/index.php/topic/8410-us-brig-syren-by-sald-–-model-shipways/?p=300394
-
Good luck with your new build Tom I will be pulling up a chain and following along. Tell me has Toby recovered too and is he still allowed in the work shop?
-
Head rails came out great Richard, nice work.
-
Dirk, Elijah & Nigel thanks for the kind words and thanks to all who hit the likes button
- 659 replies
-
- 4
-
-
- syren
- model shipways
- (and 1 more)
-
looking good Nigel
-
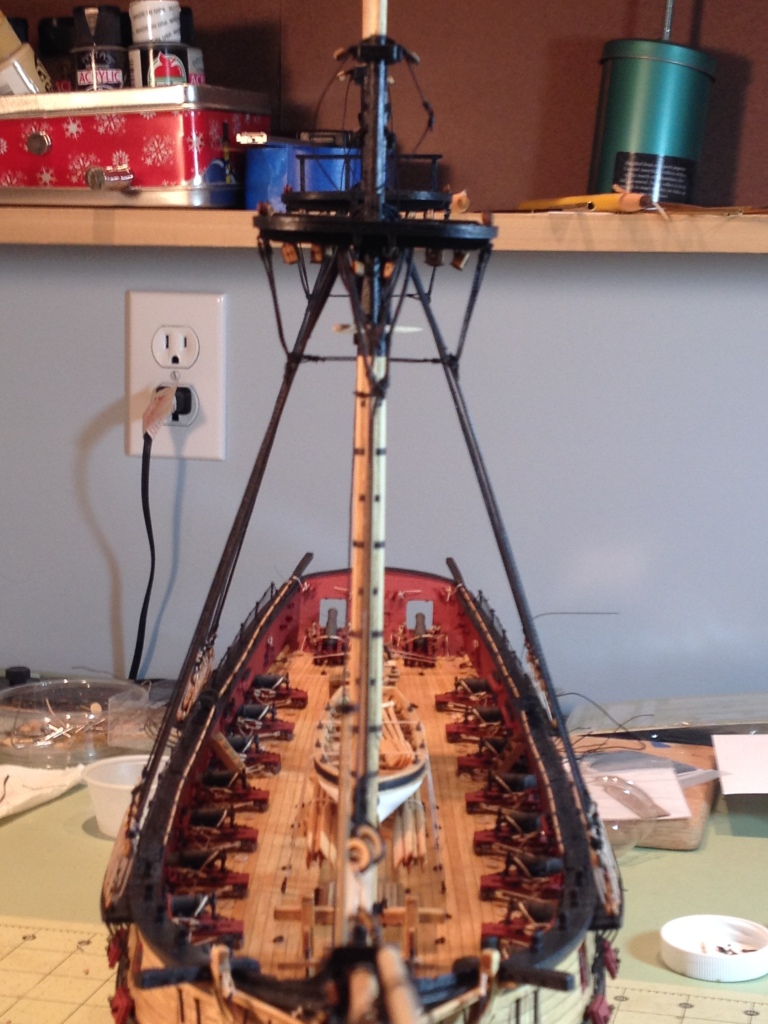
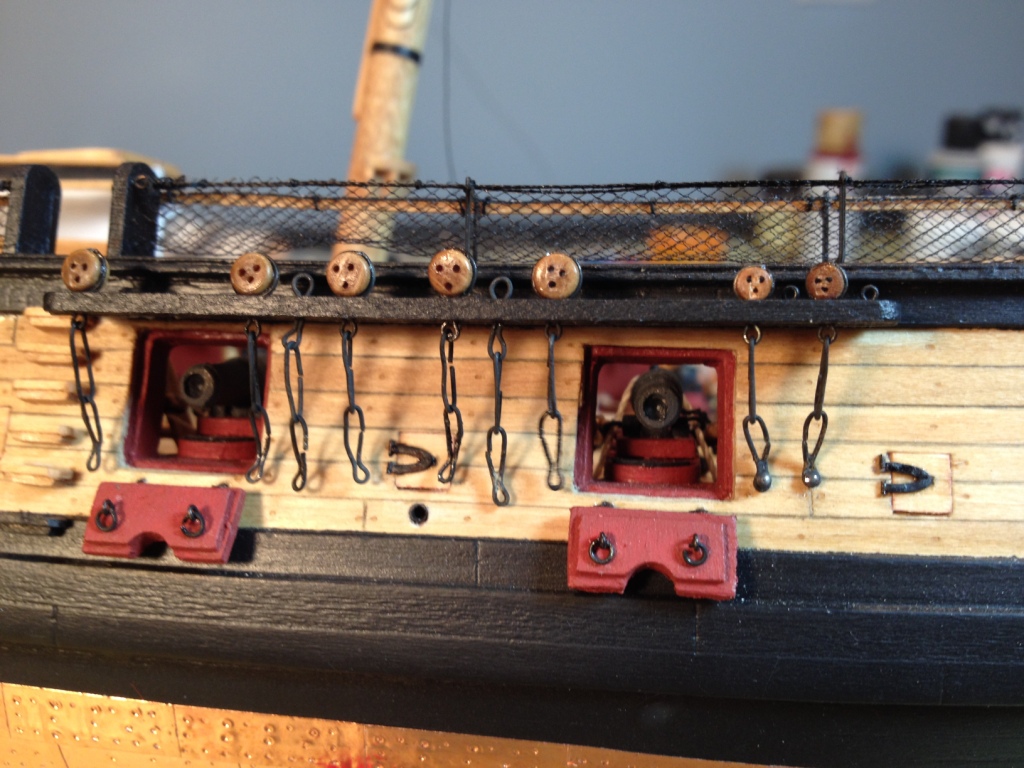
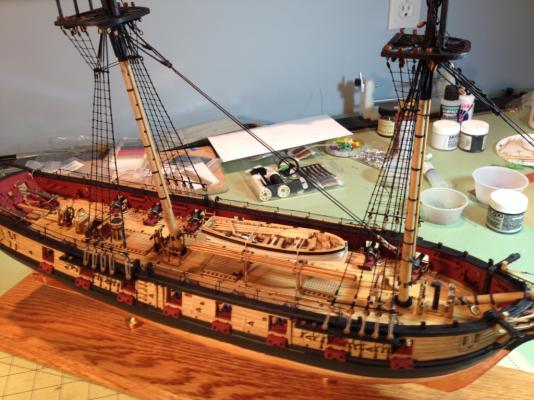
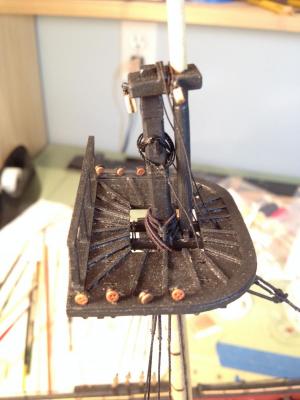
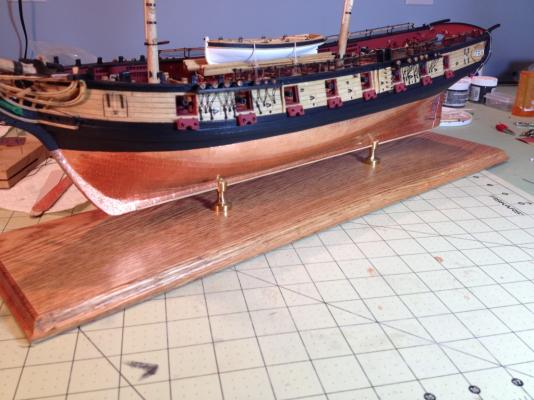
Started the chain plates and made them pretty much as described in the instructions. The only difference was I added two additional pins to the jig for the deadeye strops. The two extra pins as seen in the photo below helped me keep the bent wire together and made it easier to bend back the loose ends. Chain plates assembled. Deadeyes in position with edge strip added to the channels Chain plates fastened to hull. I decided to use the photo etched preventer links because they looked a lot nicer than what I made. The only problem I found with these links was that the brass nails provided with the kit to fasten these links to the hull did not fit though the holes in them. So instead of the brass nails I used some sewing pins I had that fit nicely and actually had a smaller head than the nails. Prior to starting the rigging I decided to mount the ship on its display board and pedestals. The board is ½” oak from Home Depot stained with the same 40-60 mixture of golden oak and natural stain as used on the model and the pedestals are from Model Expo.


- 659 replies
-
- 16
-
-
- syren
- model shipways
- (and 1 more)
-
Nice job Jesse, that had to be one of the most challenging parts to make on this build.
- 1,306 replies
-
- 6
-
-
- syren
- model shipways
- (and 1 more)
-
Hey Duff, Jimmy, thanks for looking in and the nice words, see you Saturday. and thanks for all the likes
- 659 replies
-
- 5
-
-
- syren
- model shipways
- (and 1 more)