HOLIDAY DONATION DRIVE - SUPPORT MSW - DO YOUR PART TO KEEP THIS GREAT FORUM GOING! (Only 20 donations so far - C'mon guys!)
×


_SalD_
-
Posts
828 -
Joined
-
Last visited
Content Type
Profiles
Forums
Gallery
Events
Everything posted by _SalD_
-
 Eric, just rediscovered your build, I'm glad you were able to start again. Your planking looks terrific.
 -
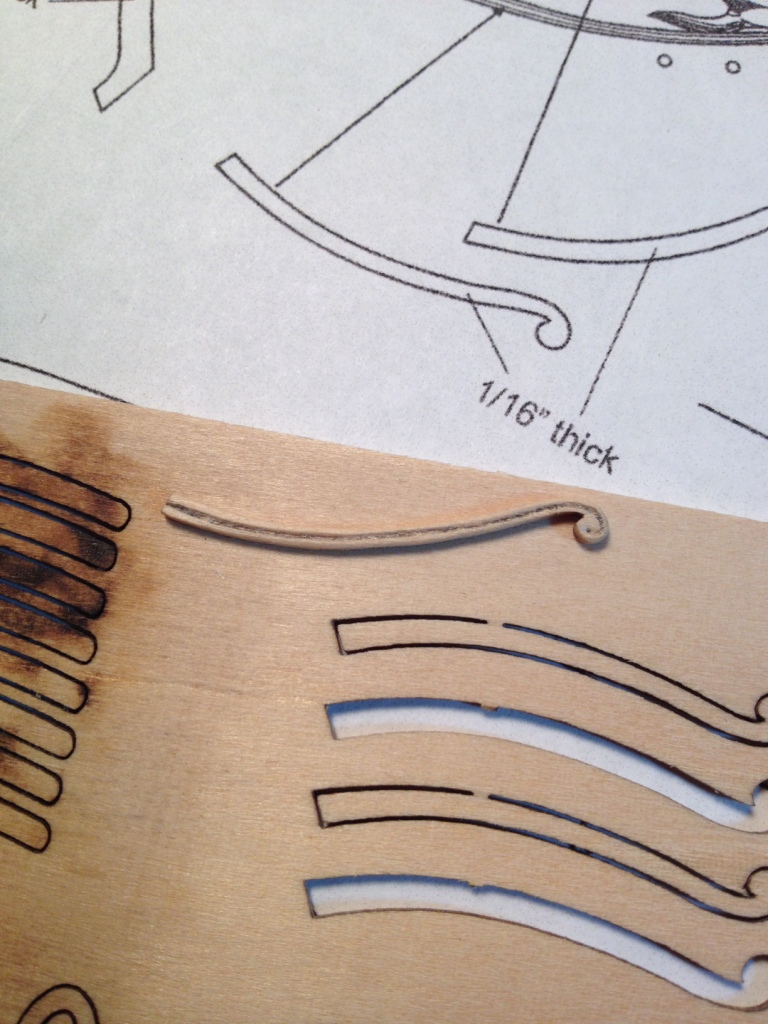
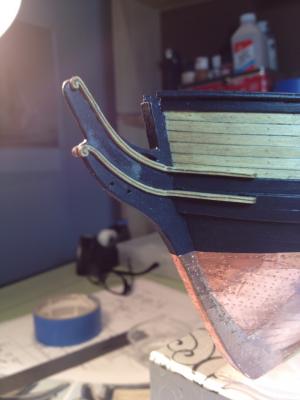
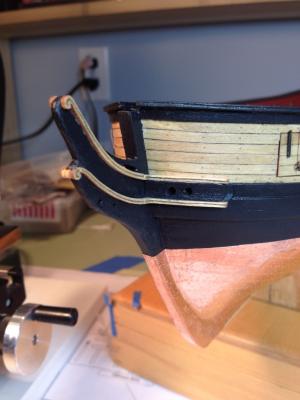
Not too much progress, hard to get motivated this time of year. I worked on installing the upper head rails. The first thing I did was to carve the groove into the side of the rail. I thought it would be easier to do prior to tapering the rail. After the groove was carved I tapered the rail from 1/8” to ~1/16” as described in the instructions. In order to help determine the correct length of the rail I temporarily pinned the rail in place. A small hole was drilled through the rail and into the cap rail so I could insert an eye bolt to hold it in place. With the pin in place I could rotate the rail into position and determine how much I needed to shorten it by. I would take the piece off the ship to sand it and then pin it back on to recheck the length. I did this for both sides and when I was happy with how they looked I glued them in place. When I glued the rail to the cap rail I substituted a smaller pin in place of the eye bolt so it wouldn’t show. After the final length was established and prior to gluing the rails in place I had to re-taper them so the ends fit on the cheeks. Upper head rail pinned in place Checking length Final position


- 659 replies
-
- 10
-

-
- syren
- model shipways
- (and 1 more)
-
Great job Brian, she looks beautiful.
- 831 replies
-
- 2
-
-
- Armed Virginia Sloop
- Model Shipways
- (and 1 more)
-
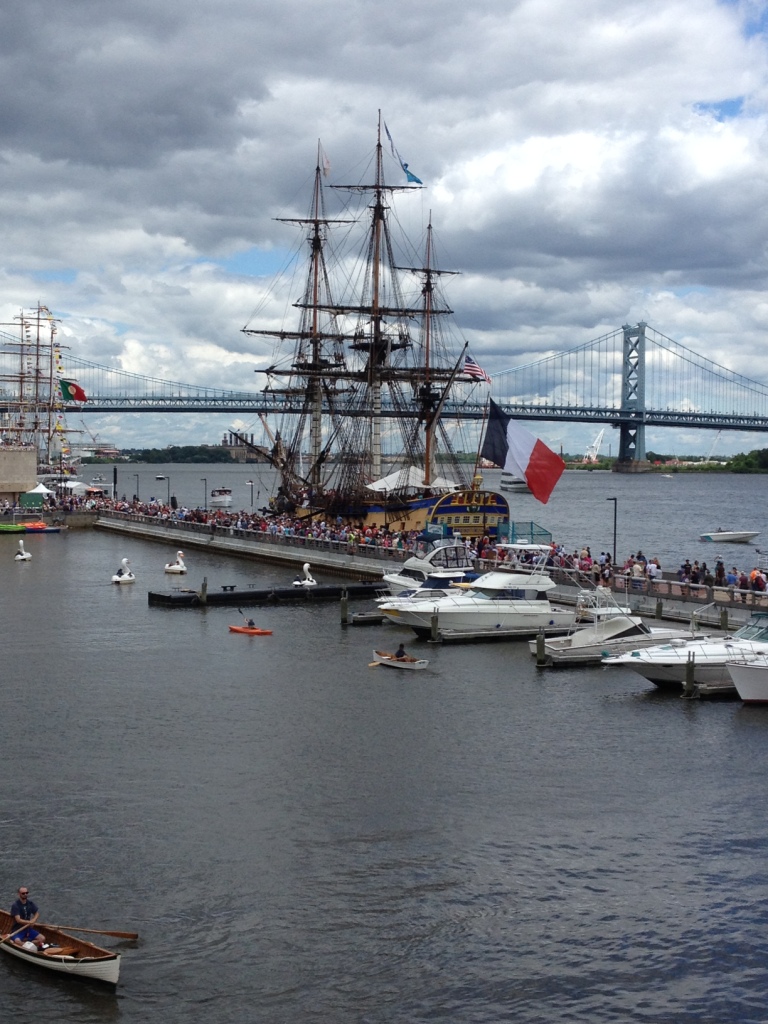
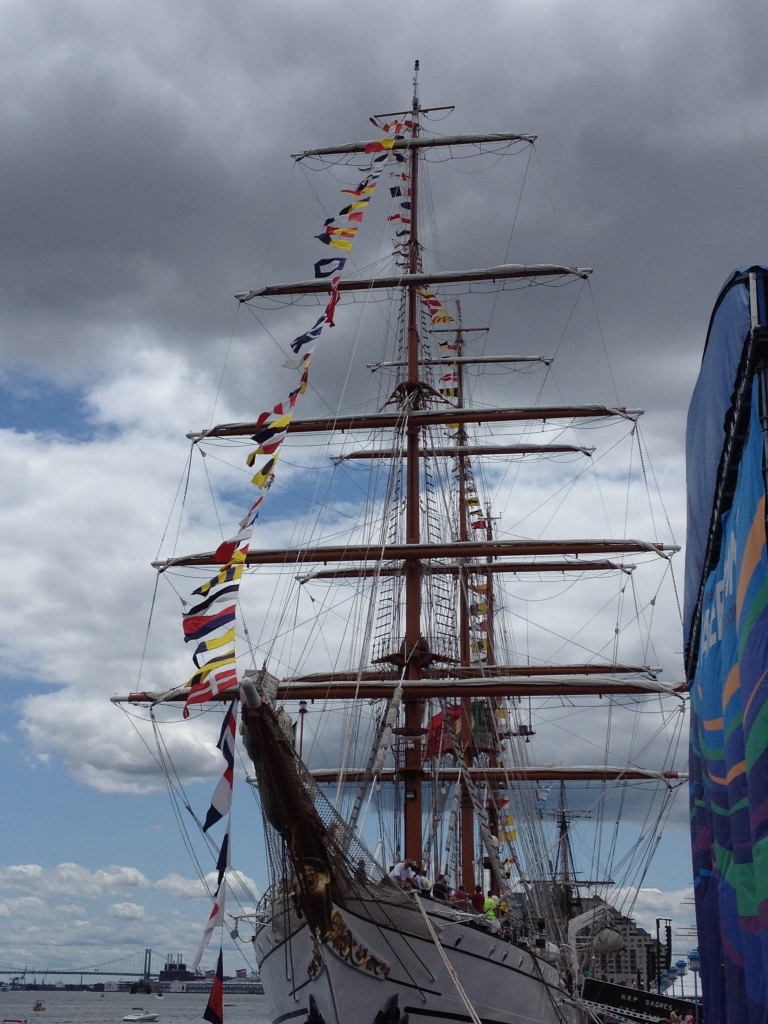
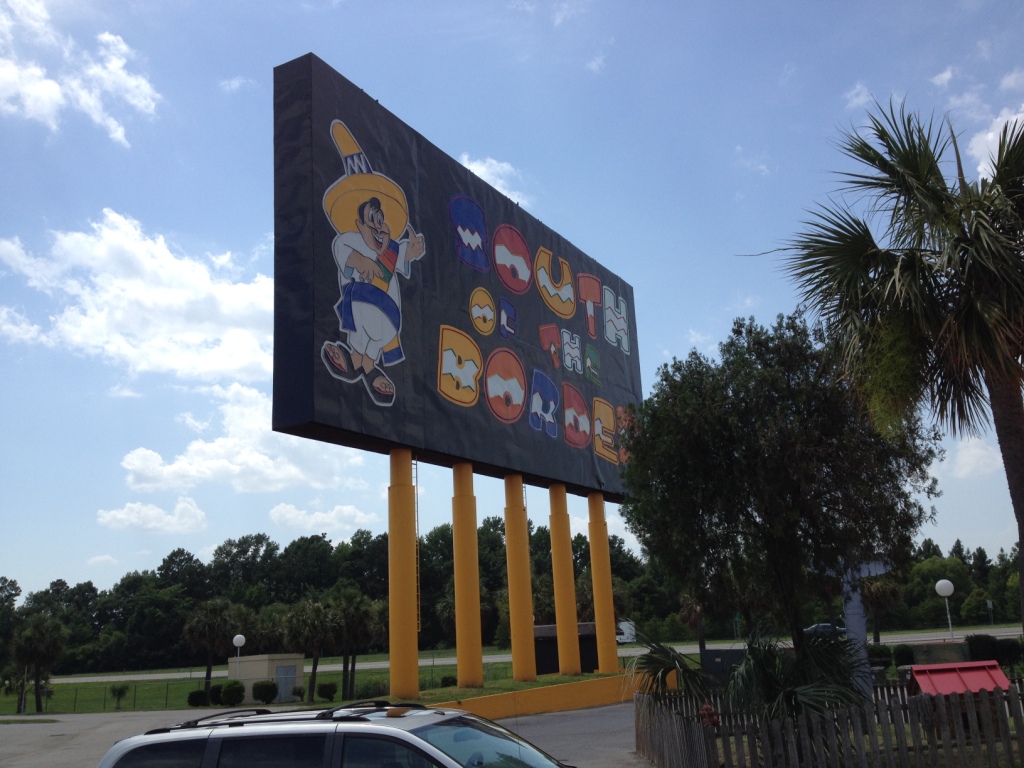
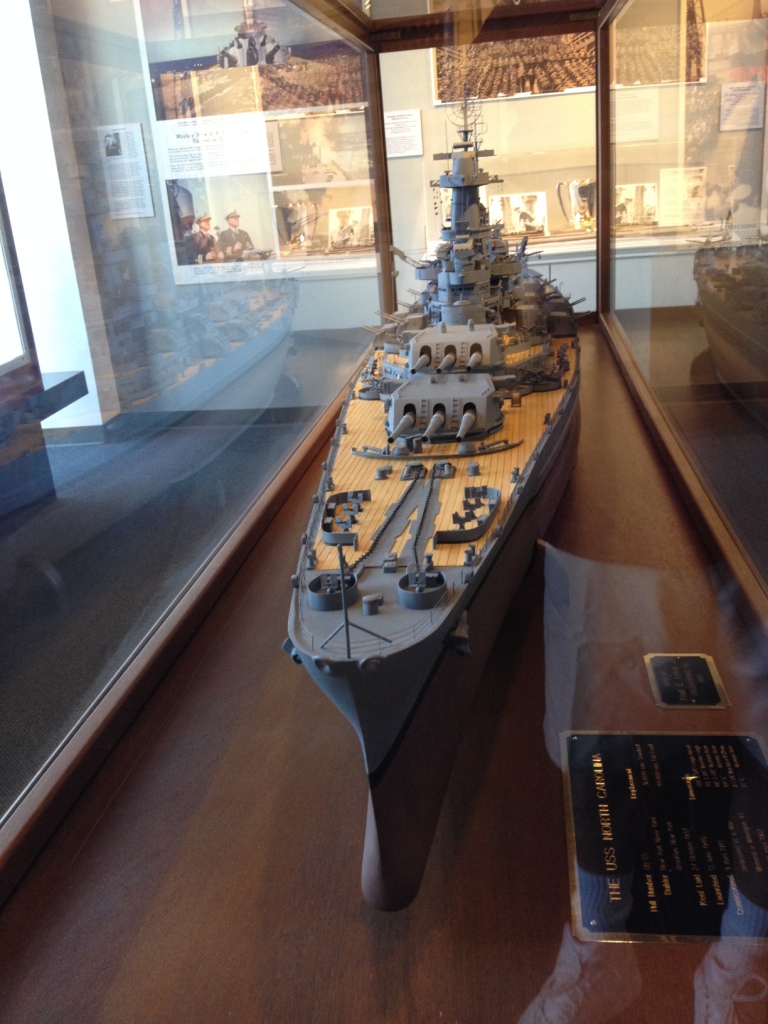
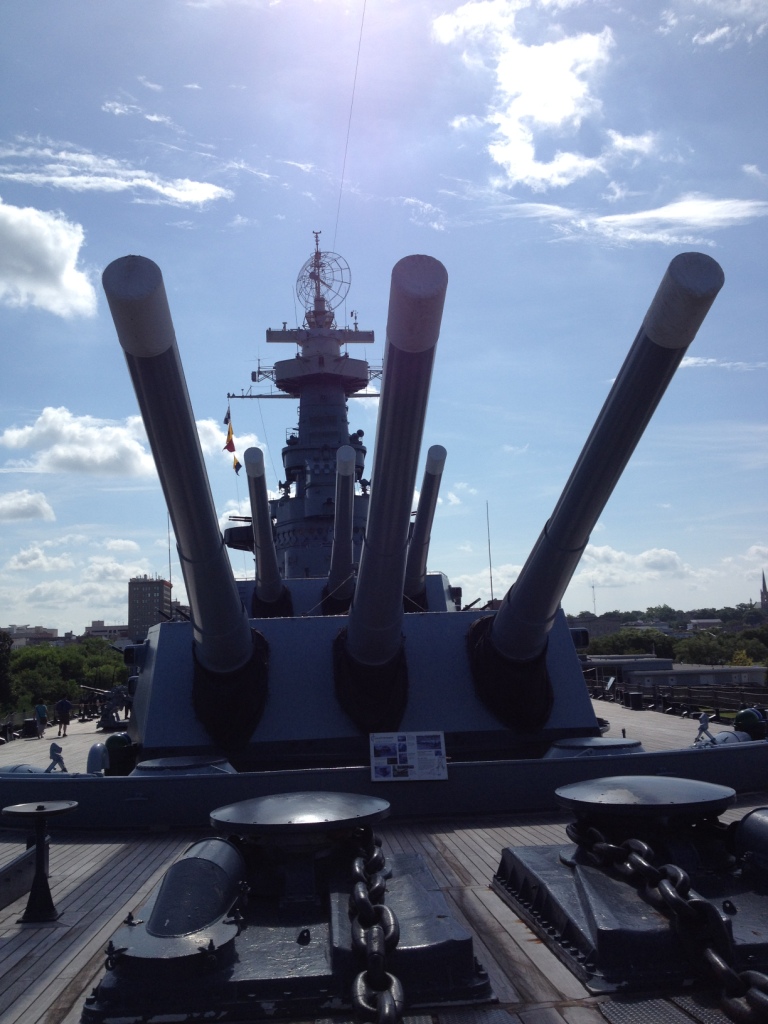
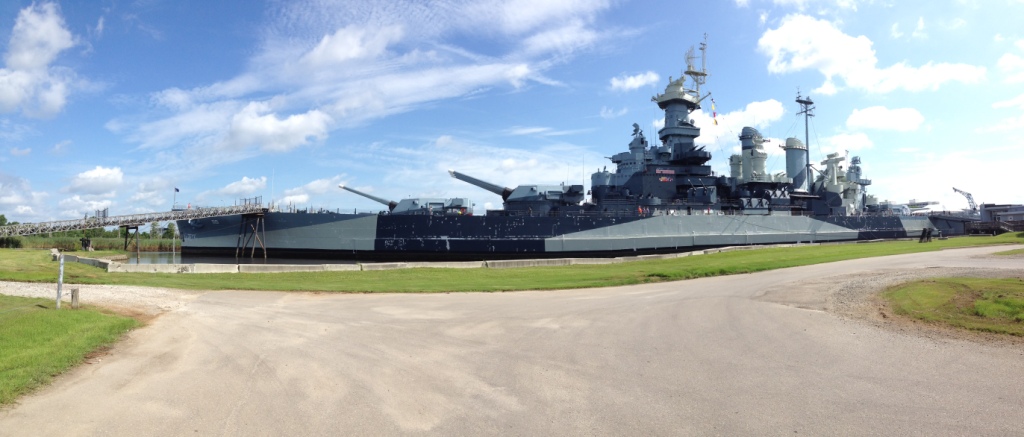
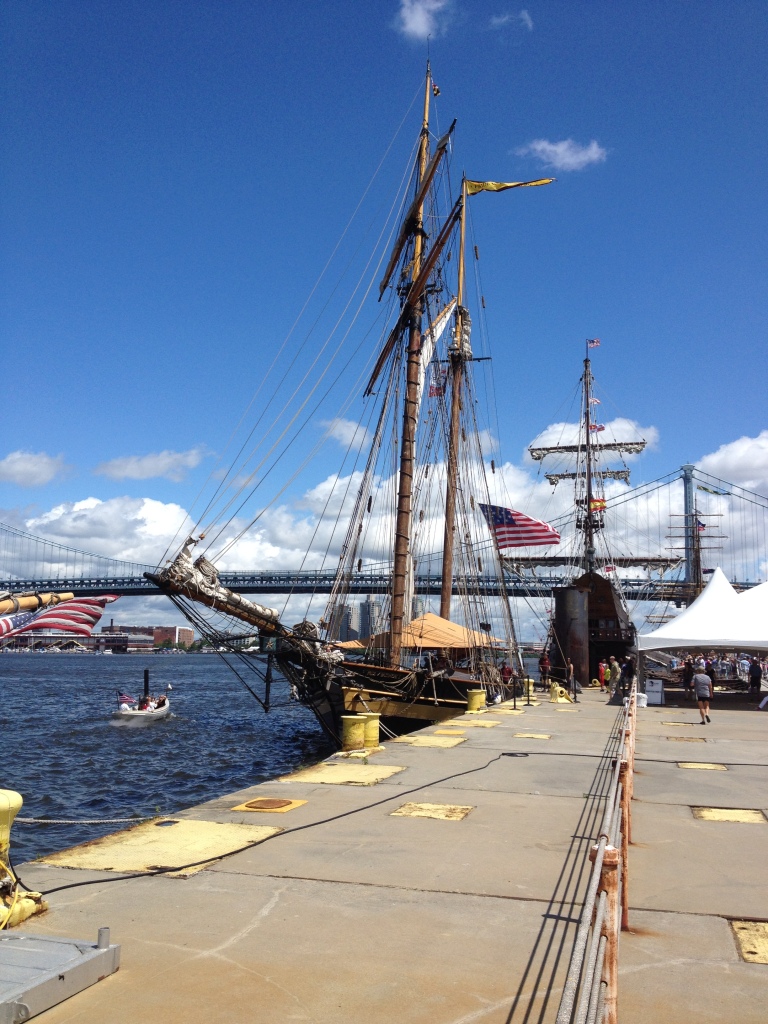
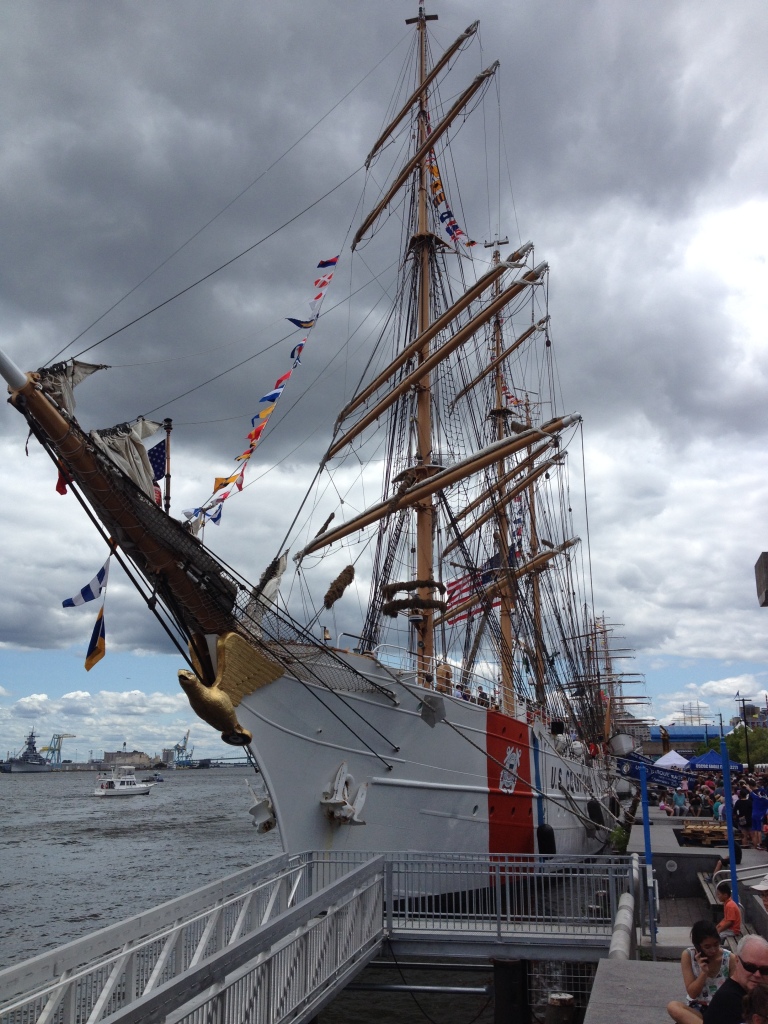
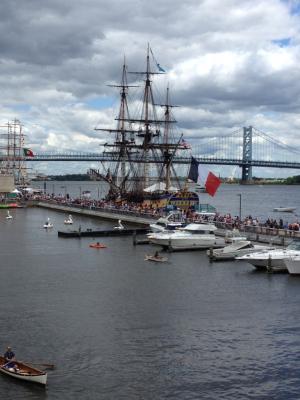
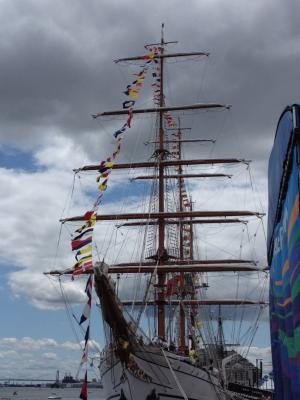
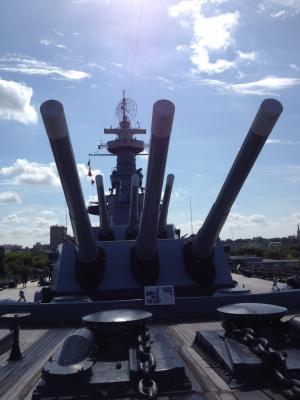
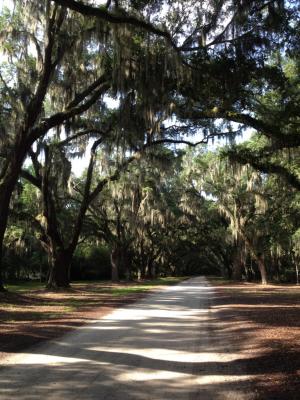
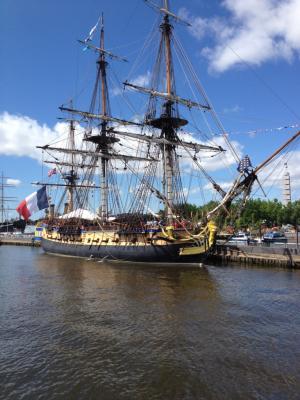
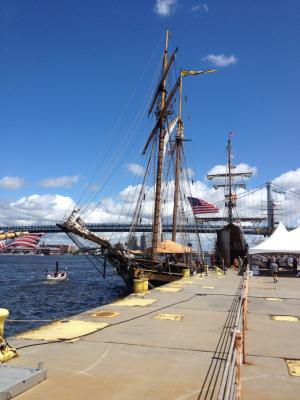
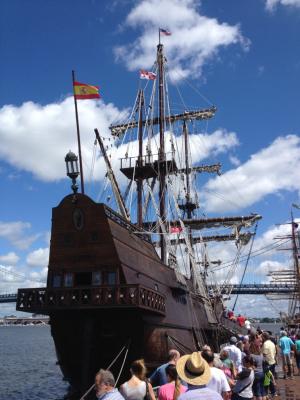
Hello all, got back from vacation last Sunday and haven't gotten the ship yard up and running yet. I don't wish to bore you all with vacation photos but for those of you who might like to see them here they are. I'll do an abridged version. Sunset on Siesta Key, FL. Left Florida and drove to Savannah, GA. Very interesting old southern city. Left Savannah and headed for Wilmington, NC., bypassed Charleston for obvious reasons. Had to stop at 'South of the Border' and show my daughter what she had missed flying to Florida for the past 20 years. In Wilmington we visited the U.S.S. North Carolina. First time I was on a battleship, very inspiring. My wife and daughter, to my surprise, actually enjoyed walking through the ship also. From NC we drove up to Delaware just to stay for the night and the next day visited Philadelphia to attend their Tall Ships Festival which featured the L'Hermione which is visiting from France. There were quite a few other ships, the Eagle, the El Galeon, the Pride of Baltimore II, just to mention a few. Attached link for entire list of ships http://tallshipsphiladelphia.com/ships/. The only downside was that I think the entire population of Philadelphia turned out to see the ships. The waiting time to get on board the ships was close to an hour so we decided not to wait. L'Hermione very long line Eagle Pride of Baltimore (got to go on her) El Galeon Sagres


- 659 replies
-
- 8
-
-
- syren
- model shipways
- (and 1 more)
-
Ladder looks real nice Richard. I like the wood strip you used as a guide and yes, the fenders and chesstrees are behind door number 2.
-
Nice work Richard. I hear you about launching parts into never-never land. I have an old bed sheet spread out on the floor under my chair so when I drop a part it's easier to find than trying to dig it out of the carpet.
-
Thanks Thomas, I tried to clean up the hawse holes the best I could. They don't look too bad now.
- 659 replies
-
- 2
-
-
- syren
- model shipways
- (and 1 more)
-
Thanks Jim and George for looking in and the kind words.
- 659 replies
-
- 2
-
-
- syren
- model shipways
- (and 1 more)
-
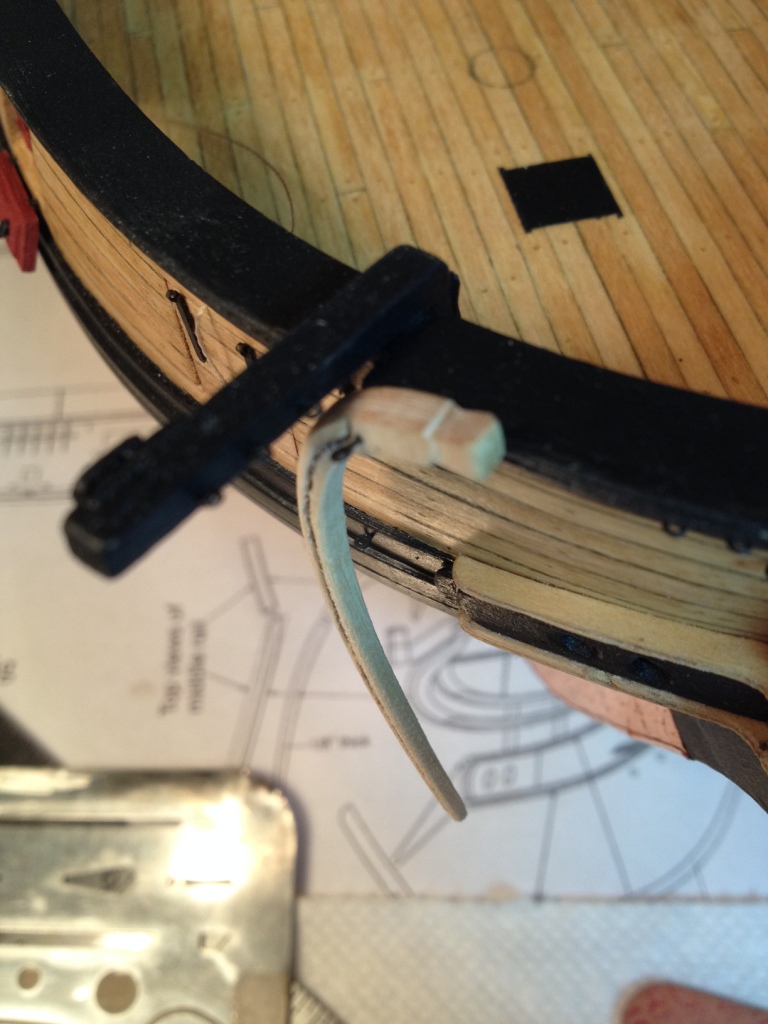
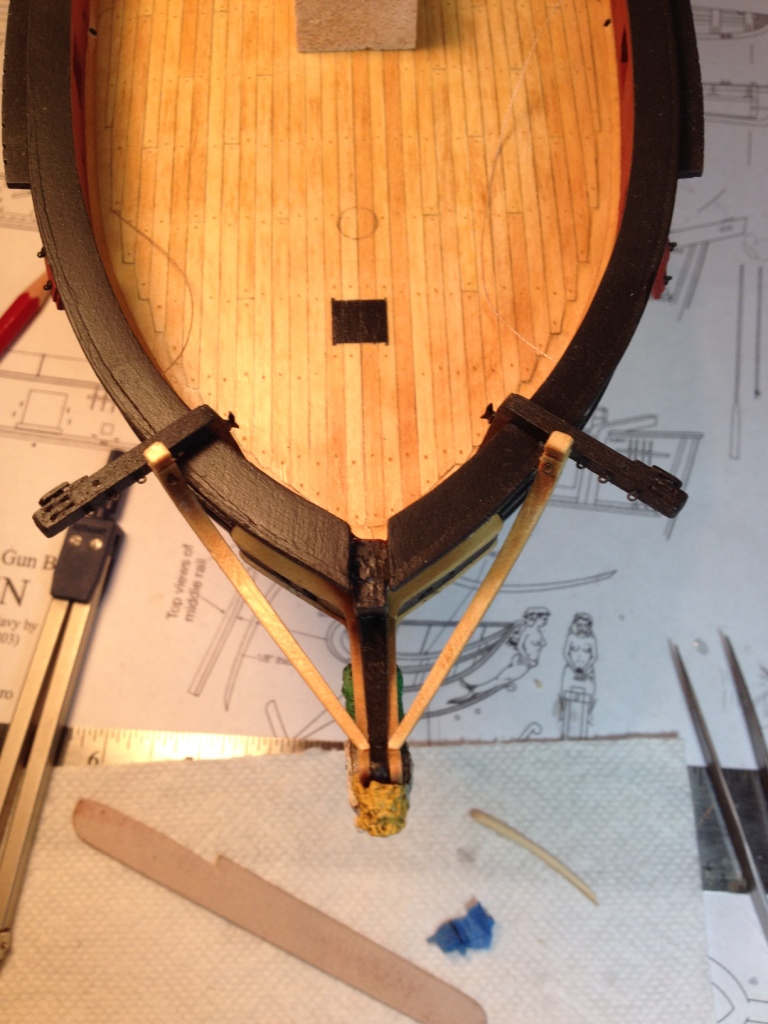
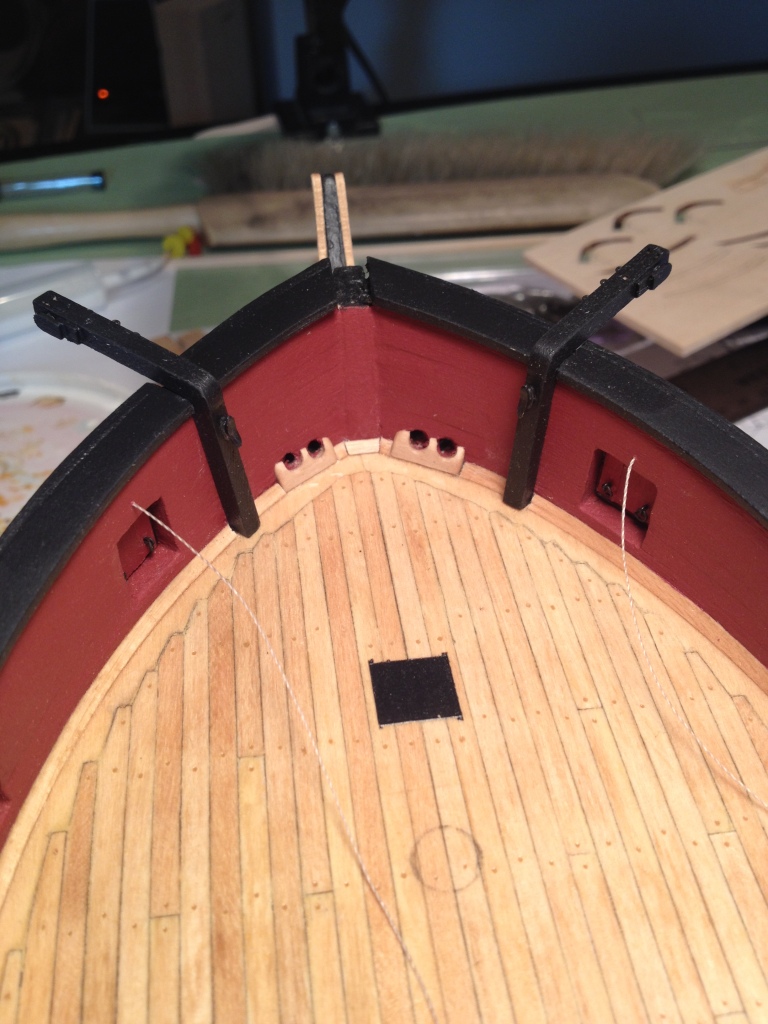
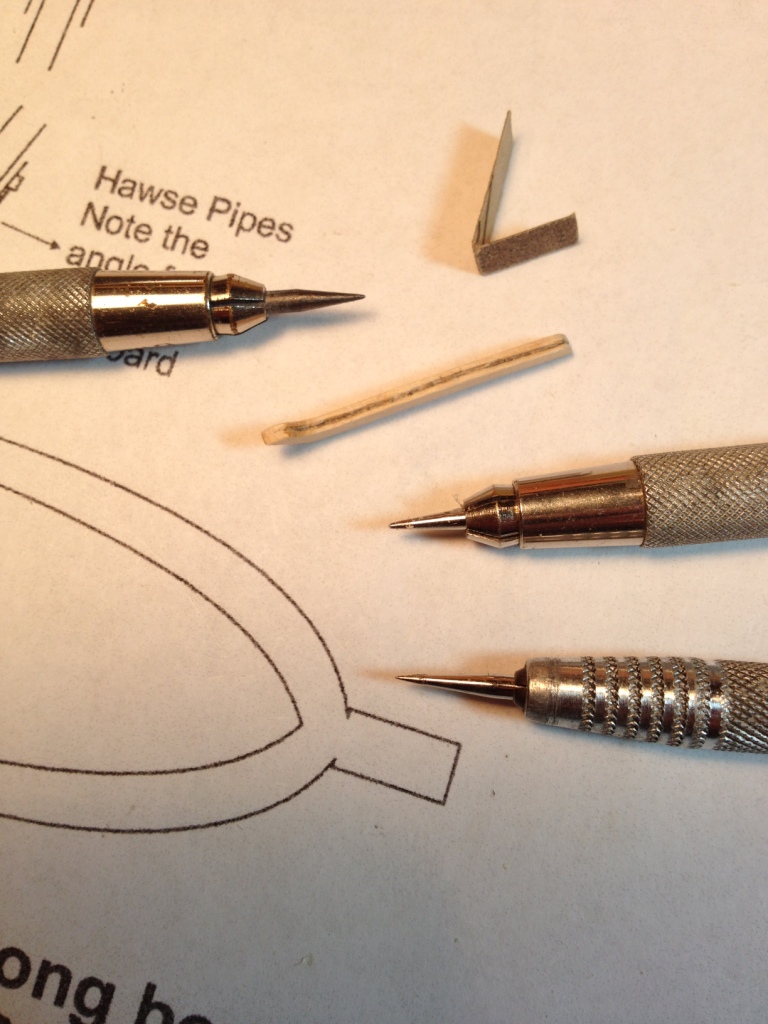
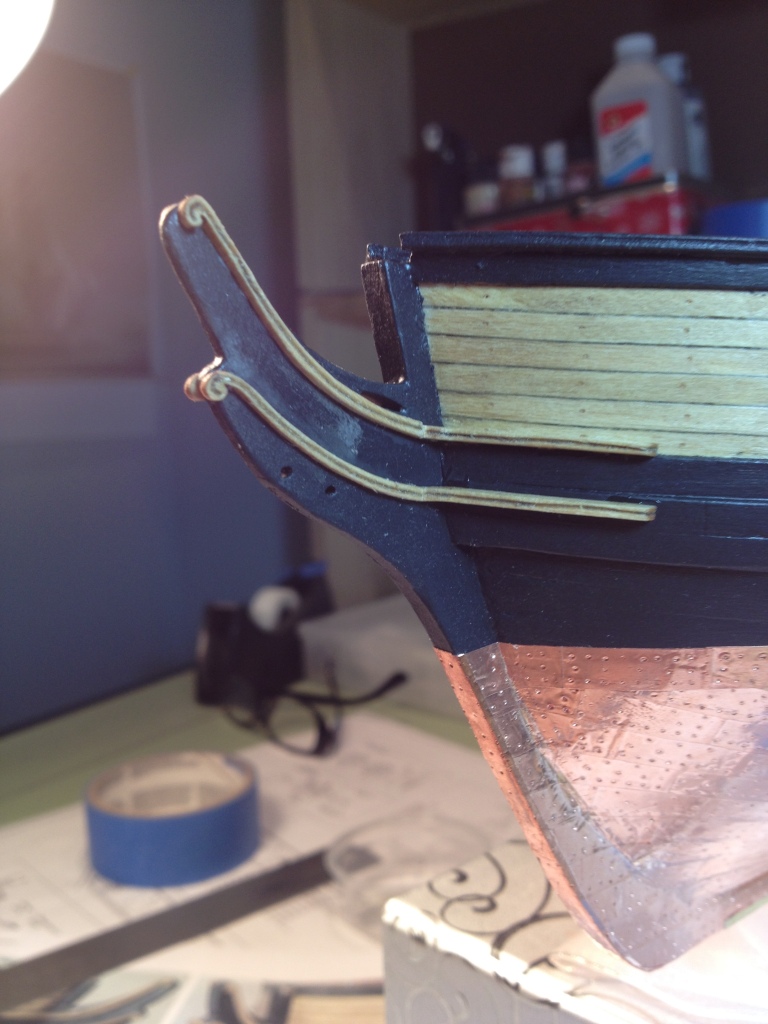
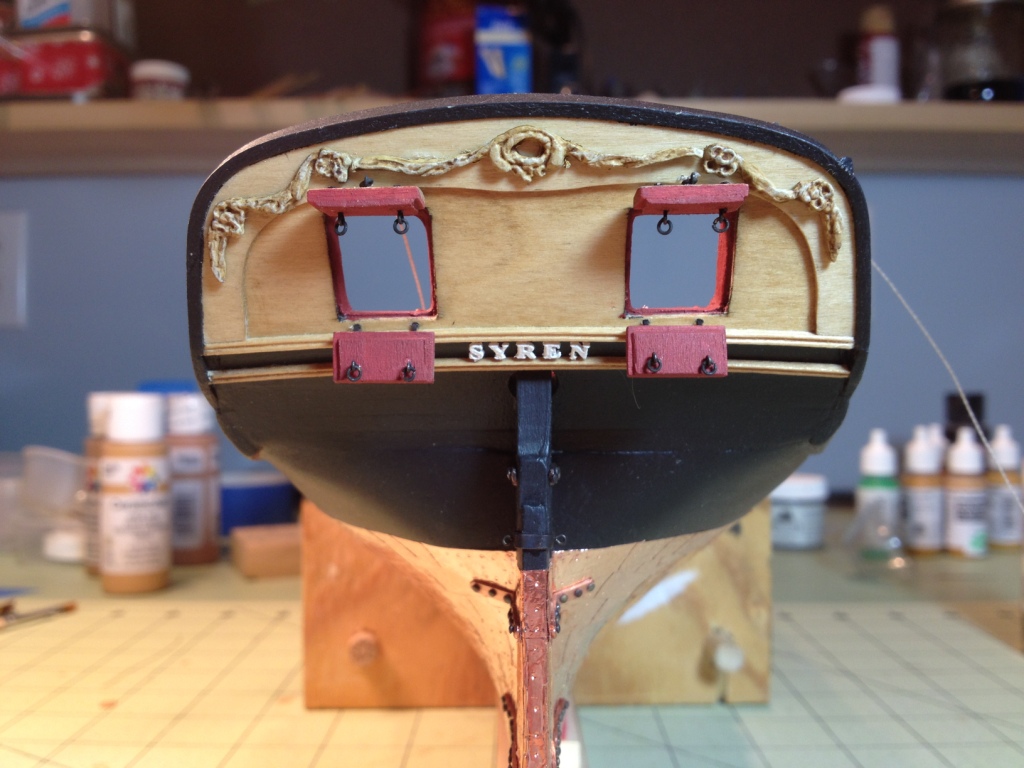
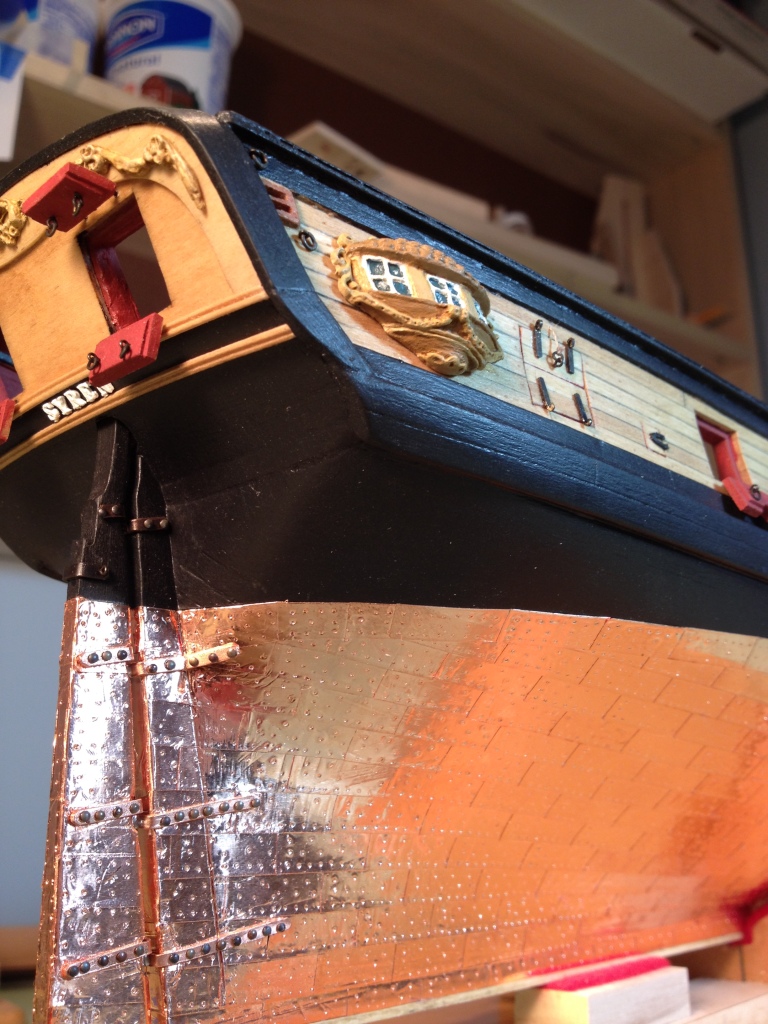
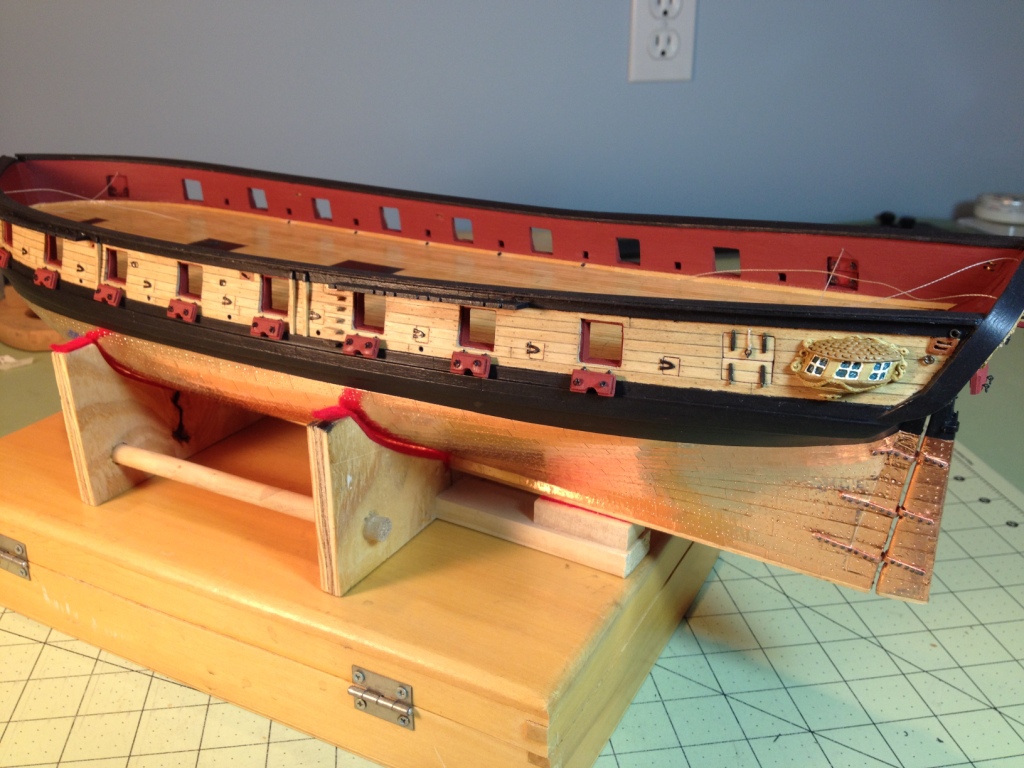
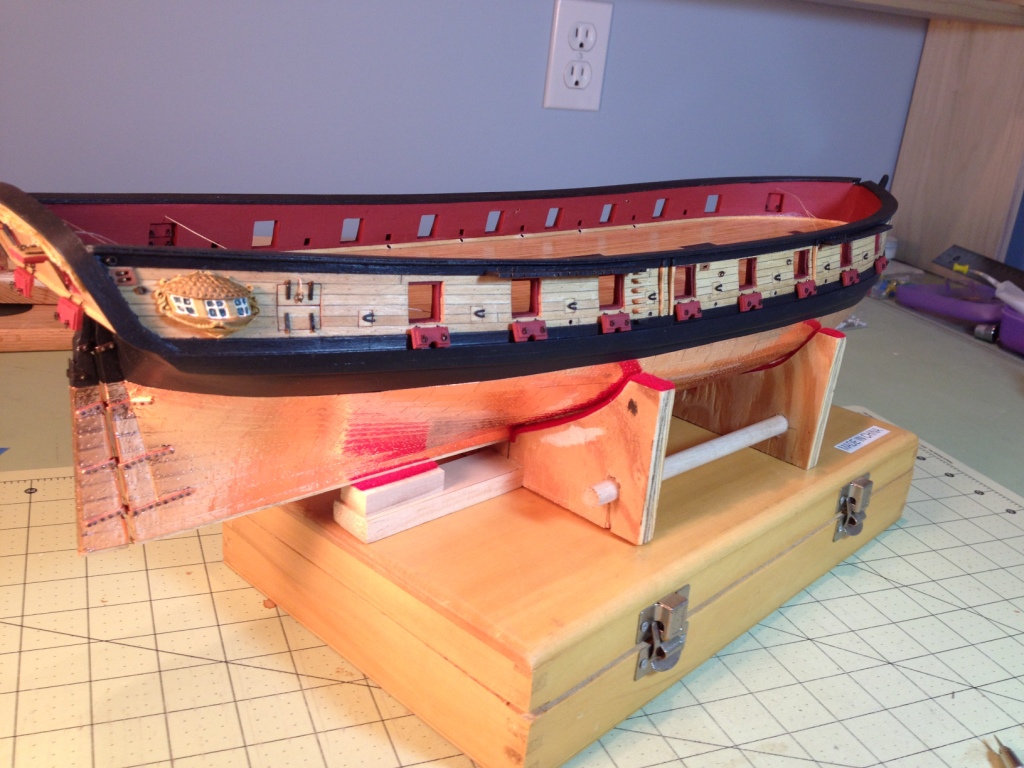
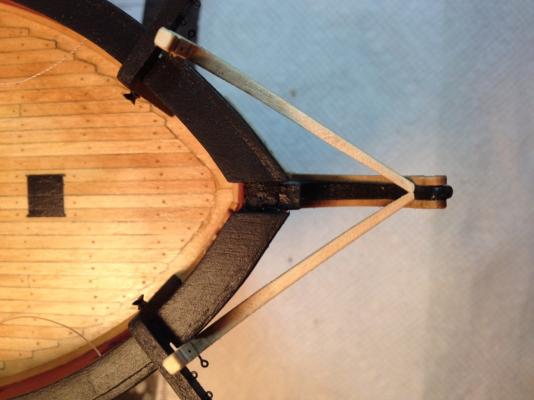
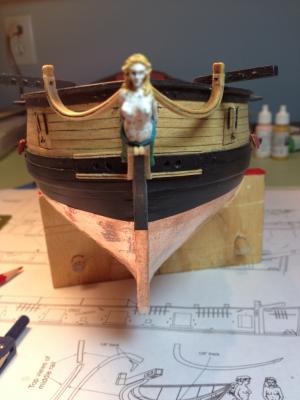
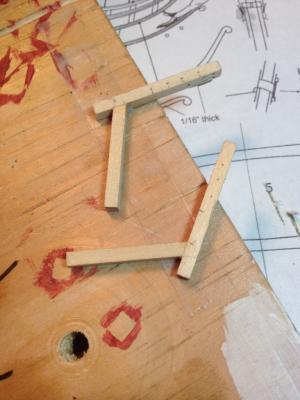
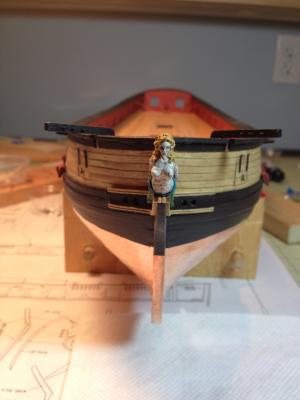
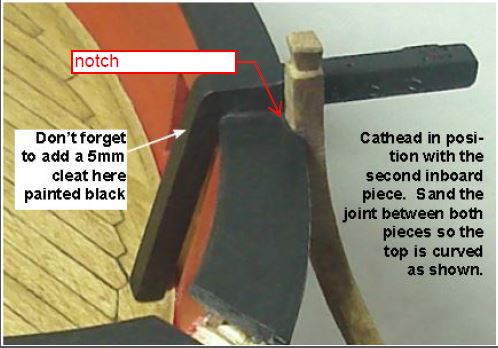
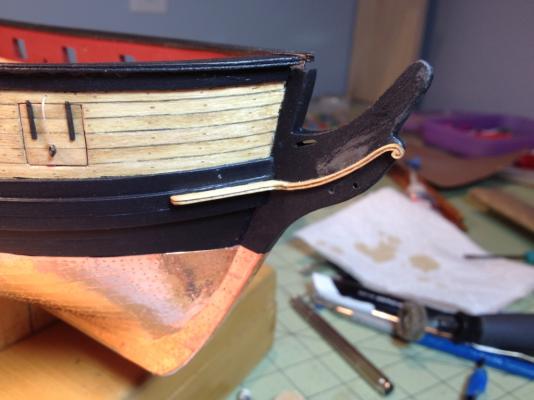
In order to position the top head rail correctly I needed to install the catheads. These I made as described in the instruction using the 1/8” square basswood. Assembling the cathead and cattail. Pieces held in position with double sided tape (my new best friend). I also pre-drilled all the holes for the eye bolts. For the cathead stopper pulley I cut a small section of a toothpick, glued it to the cathead first and slowly sanded it down to the required height. Then I glued the other two pieces as shown in the instructions. Catheads in temporary position. I added a pin to to the bottom of the cattail for additional support. I also notched the waterway and cap rail so it would sit closer to the bulwarks. I have to apologize for the inboard hawse holes, not one of my better efforts. The difficulty with drilling the holes I found was trying to keep the holes parallel to the keel. Painted prior to installing in place. Installed catheads and hawse holes cleaned up a bit.. Front view with figurehead (she looks a little scary) The shipyard will be closing down for a few weeks as we are going on vacation down to the Sunshine State. We're doing something a little different this year in that we are flying down and then driving one of Mr. Hertz's cars back to Connecticut. Planning to stop and spend some time along the way in Savanna, GA and Charleston, SC, so far.


- 659 replies
-
- 13
-
-
- syren
- model shipways
- (and 1 more)
-
Thanks George Thanks Thomas, I know what you mean. I always remember what one of my professors said about solving new problems; First, read the problem, then have a good cry and then set about solving the problem. I'm still a little misty eyed over the head rails. And thanks to all who hit the 'likes' button.
- 659 replies
-
- 3
-
-
- syren
- model shipways
- (and 1 more)
-
Dirk, About my question. I just wanted to make sure we are talking about the same piece. In your picture you show the middle rail which I know you need to notch the cap rail and sheer stake for. I was wondering if you do the same for the upper head rail too. It appears from the picture in the instructions that the cap rail is notched a little but on the drawing it does not appear to be.

- 659 replies
-
- 3
-
-
- syren
- model shipways
- (and 1 more)
-
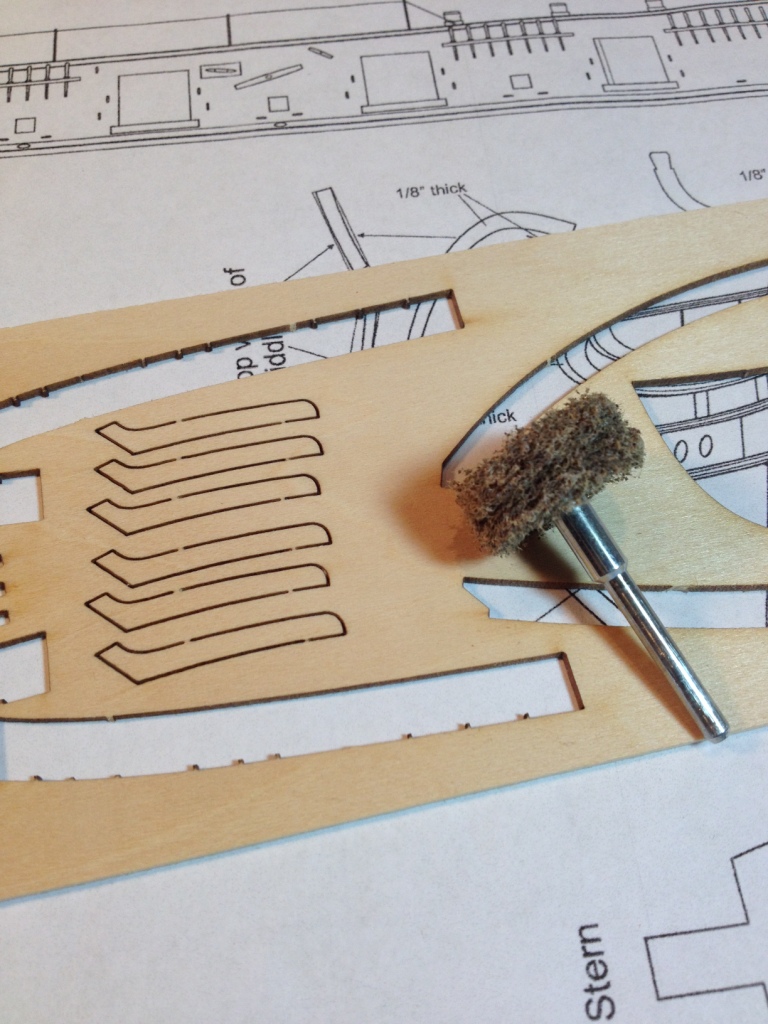
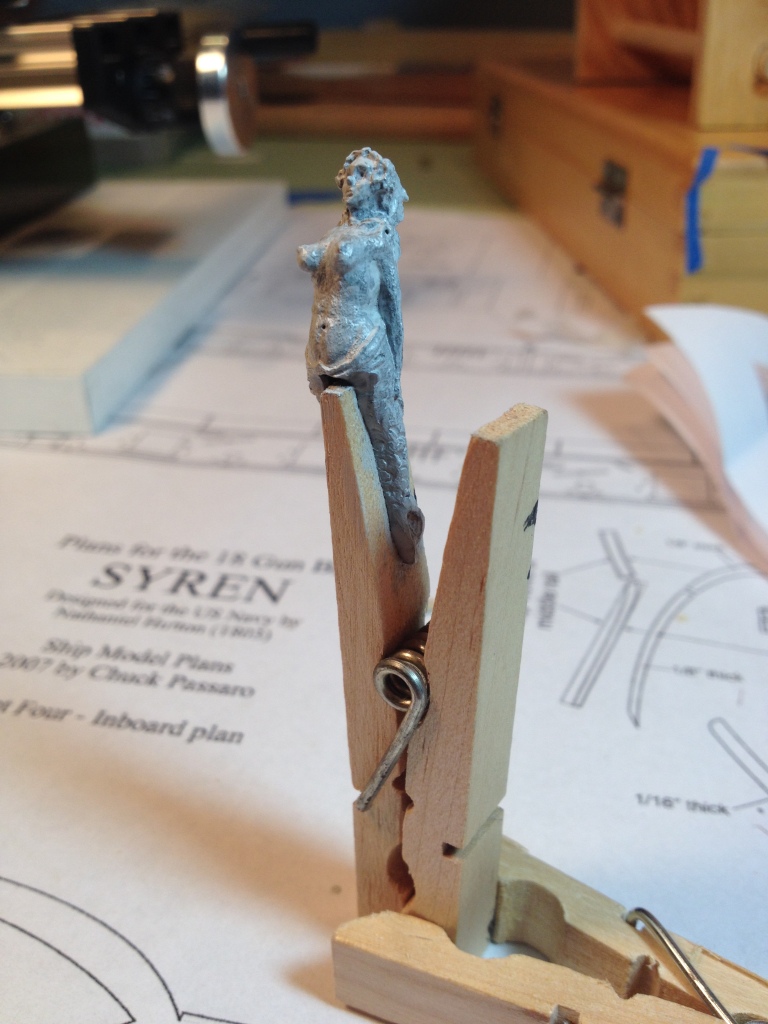
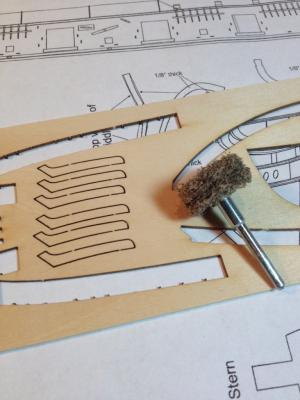
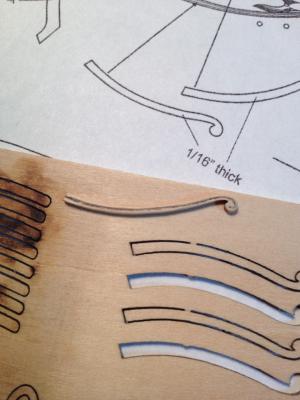
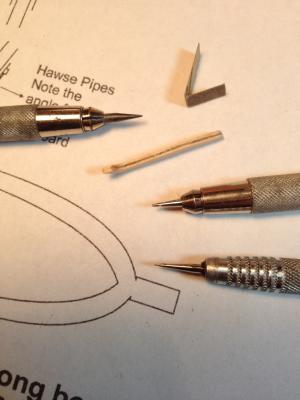
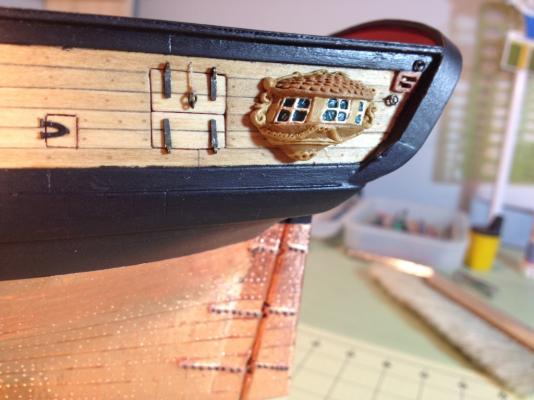
Chapter 10 - Head Rails & Figurehead Prior to removing the laser cut pieces for the head rails I cleaned the char from the outside surfaces with my dremel using an abrasive buff . I just recently discovered that these buffs work very nicely to remove the char by applying very light pressure. After a few failed attempts at trying to carve two grooves into the cheeks and deciding that discretion is the better part of valor, I settled for doing one groove. The groove was made basically the way Chuck describes in the instructions with the exception that I needed to darken the groove with a pencil. This was done because the old eyes ain’t what they used to be and I needed a little contrast to help tell how deep the groove was. After making the four pieces they were glued to the ship. Two pieces of basswood were then cut and glued in between the cheeks. Then things when downhill a bit. Drilling the hawse holes proved to be a challenge and lets just say ‘they’re done’. I’m not really happy with them so I may go back and try again. I started the top head rail but stopped because I wasn’t sure how it frames into the hull. Do I attach it to the edge of the cap rail so the rail sits away from the hull planking or do I notch the cap rail and sheer stake so that it's up against the planking, similar to the middle rail? In the mean time I started painting the figurehead.

- 659 replies
-
- 9
-
-
- syren
- model shipways
- (and 1 more)
-
Robert, when I did my planking I used a jig shown in this link ( http://modelshipworld.com/index.php/topic/8410-us-brig-syren-by-sald-–-model-shipways/?p=265209). The two nails holding the plank at the stem are positioned a little past the point where the end of the plank hits the rabbet. This way the dent on the outside face of the plank gets cut off. I soak my planks in warm water with a little ammonia added and then use a little hand held steamer to heat the planks as I bend them.
-
Very clever Daniel, and just remember, It's better to beg forgiveness, than ask permission.
-
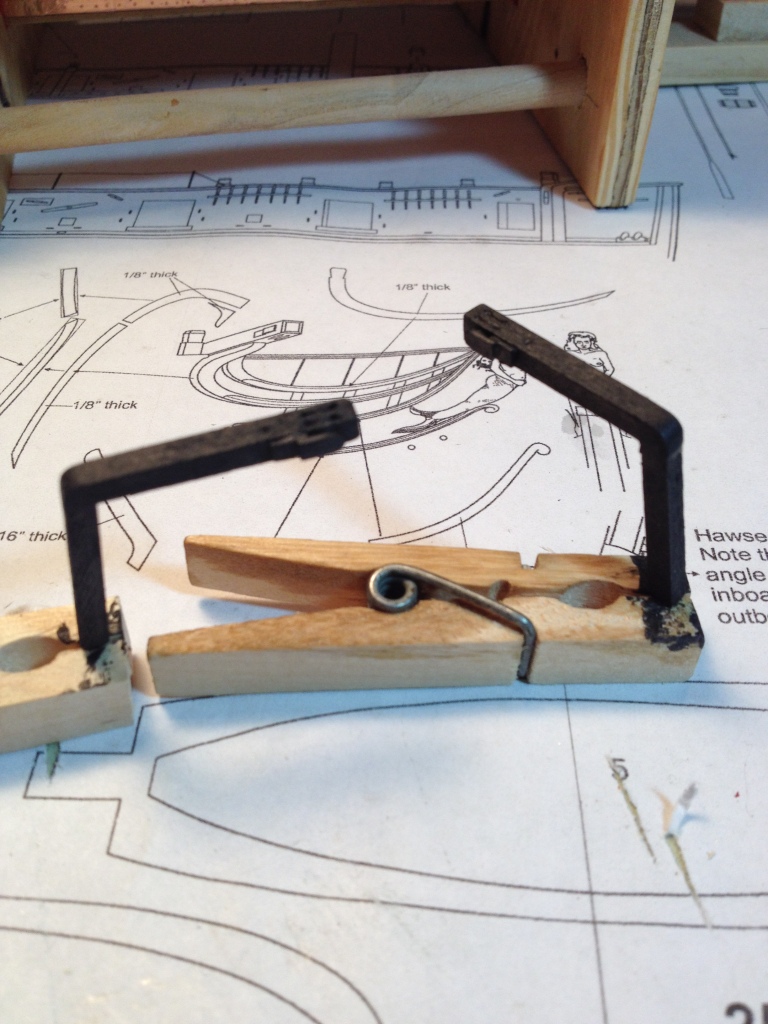
Nicely done Tom, and I like the combination clothespin-toothpick clamping device.
- 1,349 replies
-
- 1
-
-
- constitution
- model shipways
- (and 1 more)
-
Thanks Nils, what my post doesn't show is that it took four or five attempts to get the painting technique down and another four or five attempts to get the colors right but I think it was worth it in the long run.
- 659 replies
-
- 3
-
-
- syren
- model shipways
- (and 1 more)
-
Hi Jeff, thanks for looking in. For the simulated butt end joints, after the spacing was determined I very careful scored the plank with a #11 x-acto blade using a small drafting triangle for a straight edge to keep the score mark perpendicular to the planking. After the plank was scored I used a mechanical pencil with a very sharp point (not too sharp that the point breaks) to darken in the score line, also using the triangle to keep the line straight. Hope that helps, let me know if you have anymore questions.
- 659 replies
-
- 3
-
-
- syren
- model shipways
- (and 1 more)
-
Thanks Thomas, and I do need to confess that the color scheme for my quarter badges was inspired by your superb carvings of yours, so thank you for that also.
- 659 replies
-
- 1
-
-
- syren
- model shipways
- (and 1 more)
-
Thanks George, it's amazing what a coat of paint will do.
- 659 replies
-
- 1
-
-
- syren
- model shipways
- (and 1 more)
-
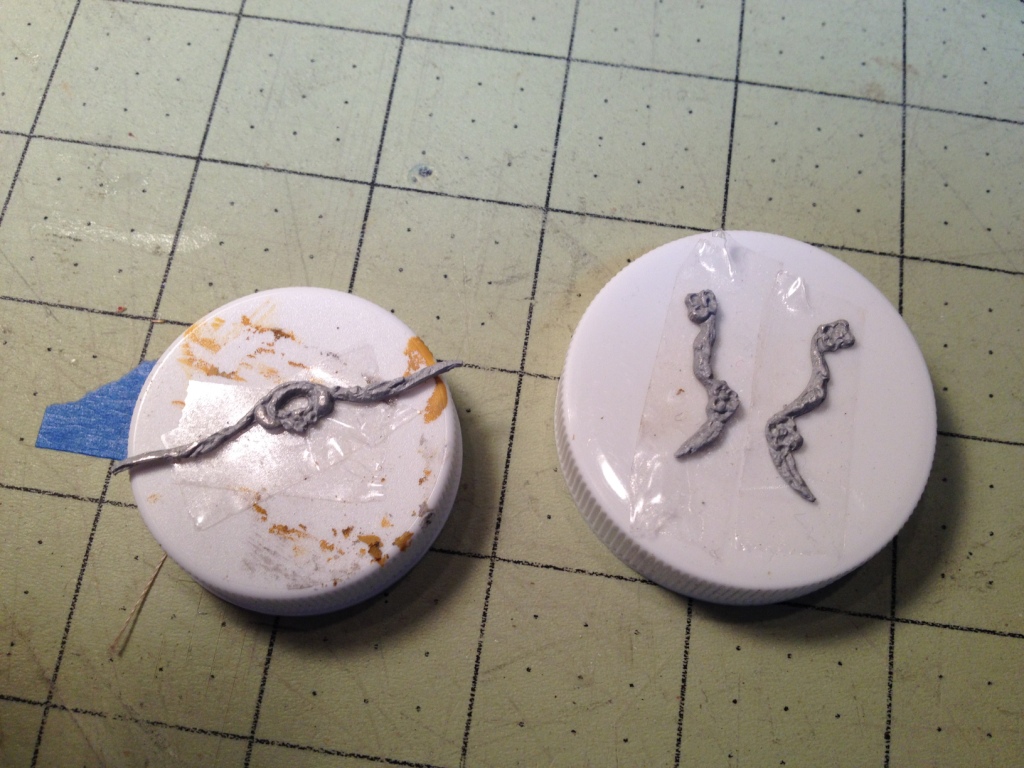
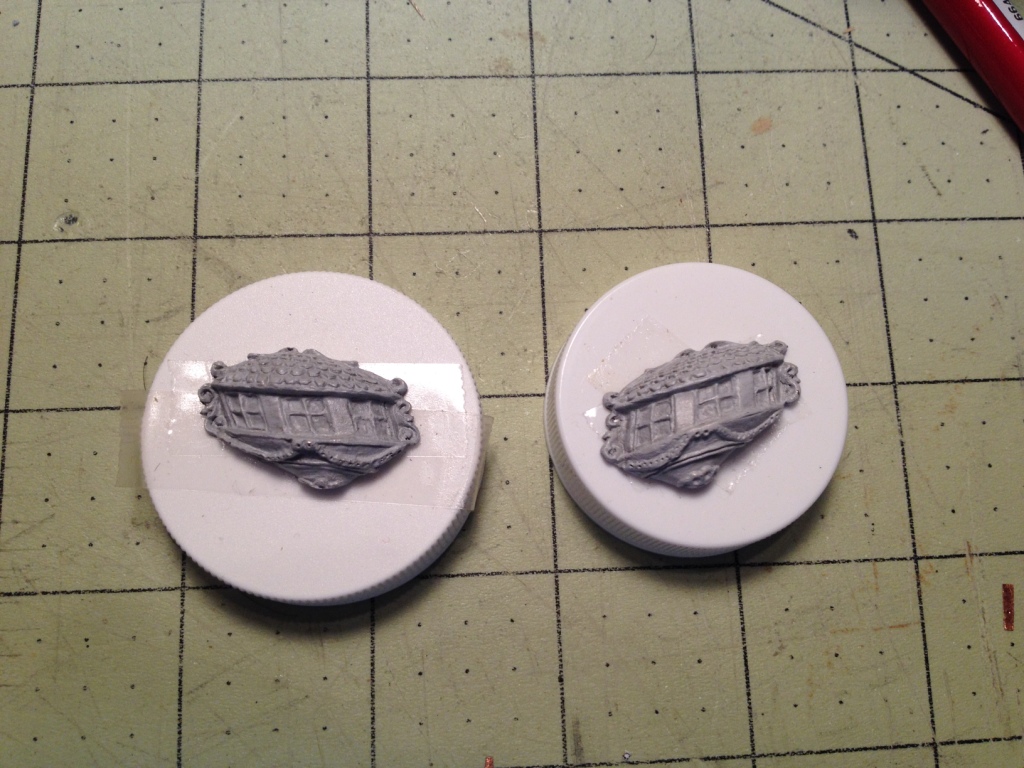
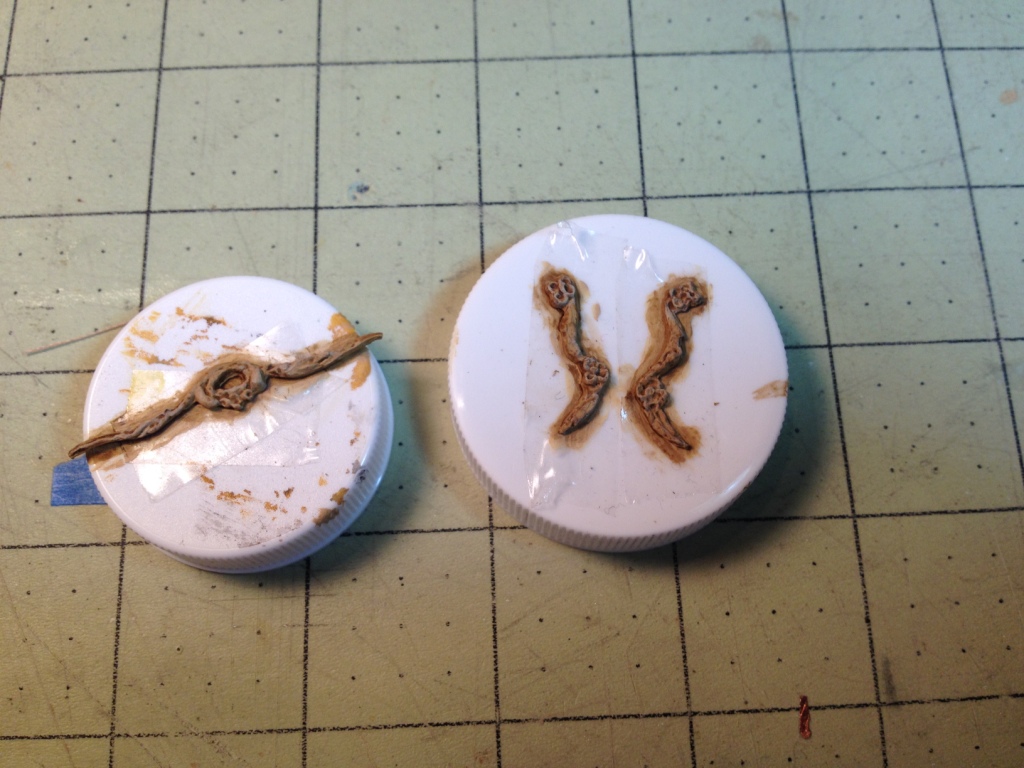
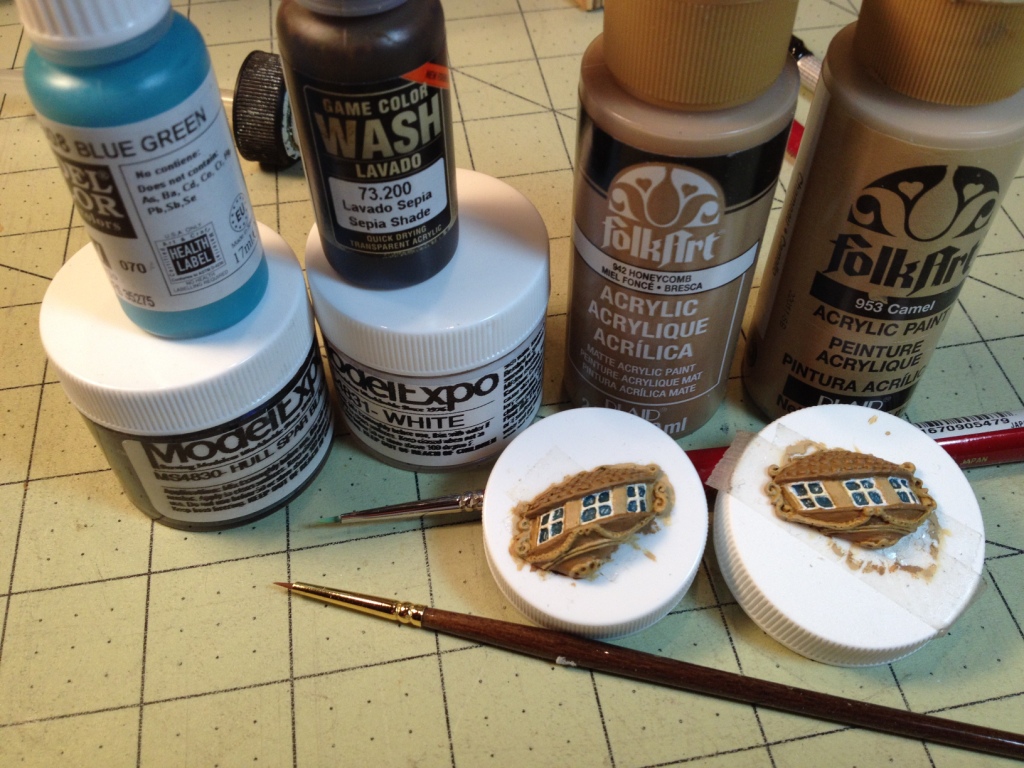
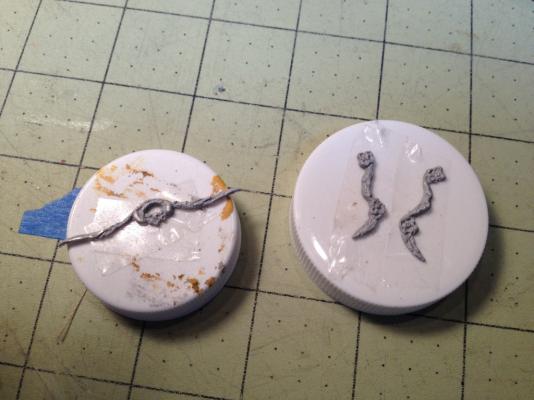
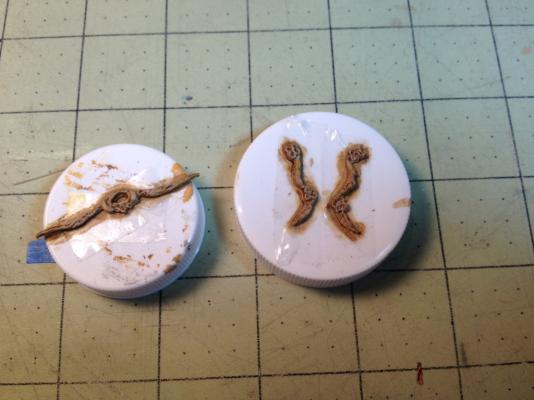
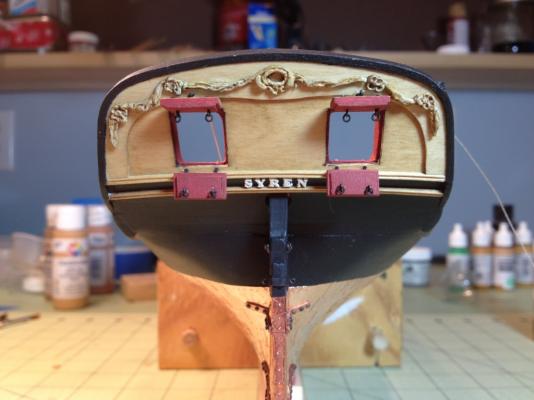
To finish up chapter nine I installed the stern decorative carving and quarter badges. Prior to installing these pieces they were cleaned, primed and painted. As a guide I used a nice painting tutorial written by ChrisLinden here on MSW. http://modelshipworld.com/index.php/topic/8417-painting-tutorial-ornaments-cast-metal-parts/?p=249680 The pieces were mounted on pill bottle caps using two sided tape which made it easy to maneuver each piece while painting. Primed Painted Installed


- 659 replies
-
- 14
-
-
- syren
- model shipways
- (and 1 more)
-
Feel free to ask away Jesse, I'll try my best to help you out and if I can't there are are lot of excellent builders on MSW who will.
- 659 replies
-
- 2
-
-
- syren
- model shipways
- (and 1 more)