Supplies of the Ship Modeler's Handbook are running out. Get your copy NOW before they are gone! Click on photo to order.
×


clearway
-
Posts
2,198 -
Joined
-
Last visited
Content Type
Profiles
Forums
Gallery
Events
Everything posted by clearway
-
 oh yes Keith- it was the captains choice to remove the cross jack and topsail off the mizzen mast and send them back to the naval yard that made Terror and Erebus barque rigged- also accounts of captains heightening/ lowering masts to alter trim when under sail for the first time based on previous experience/ knowledge. In matthews book he states how Crozier sent the iron waist davits back as he didn't think they would stand up to arctic conditions. As Keith S and myself keep saying " all the info we are needing is there on the seafloor - though resembles some of the restoration jobs some of you guys have started build logs with .... hmm looks over at Keith B 😉 Keith
 -
I agree Craig- just sometimes you see things and wonder if they hadn't altered stuff- it's almost as if the admiralty went out of their way to create confusion by mashing up updated fittings on drawings from before the latest drawings! And they provided updated draughts for the updates on their ships except for the re-fit we need (mind you it is the same with Beagle (can't remember the guys name offhand but he didn't seem to like producing complete drawings for his exploration ship re-fits). Keith
-
looking a lot better than the occre sails Daniel- well done. Keith
-
Thanks very muchly guys for the likes and comments- yep Craig that is why i went with iron stanchions- however at the sight where they discovered the long pine "piece" mentioned couple of posts ago, they also found a 3 foot longish piece of oak with a locating peg cut into the bottom and a 1 inch hole through the top which is screaming removable handrail stanchion.... Take care everyone Keith
-
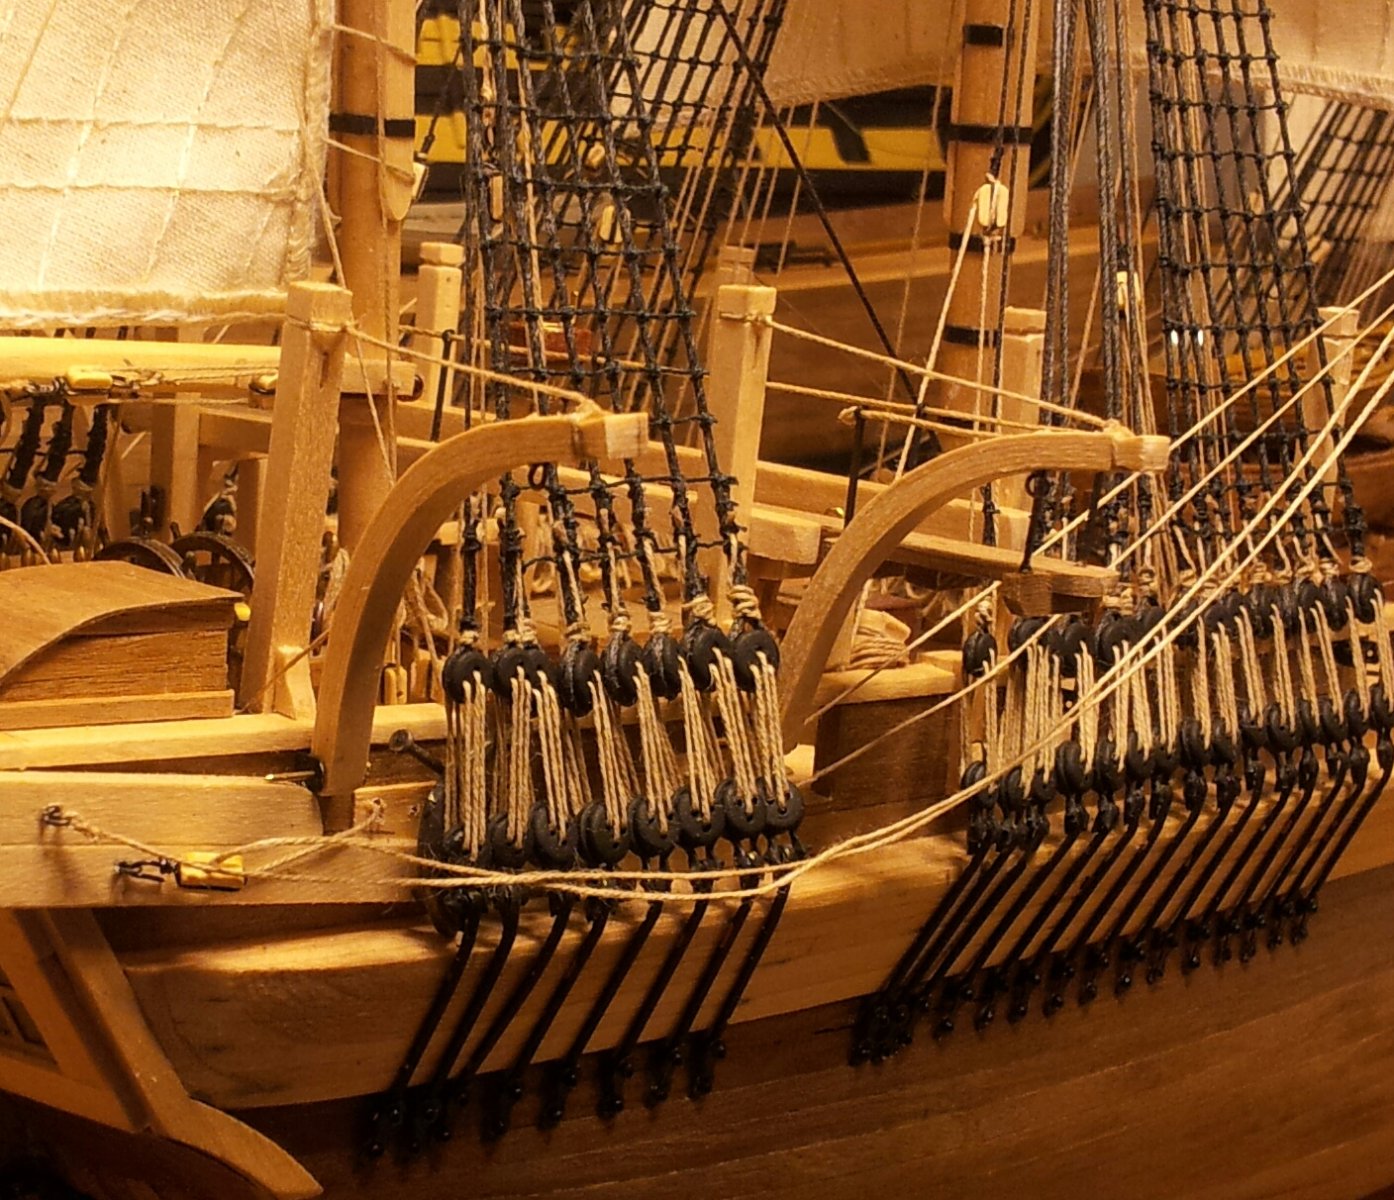
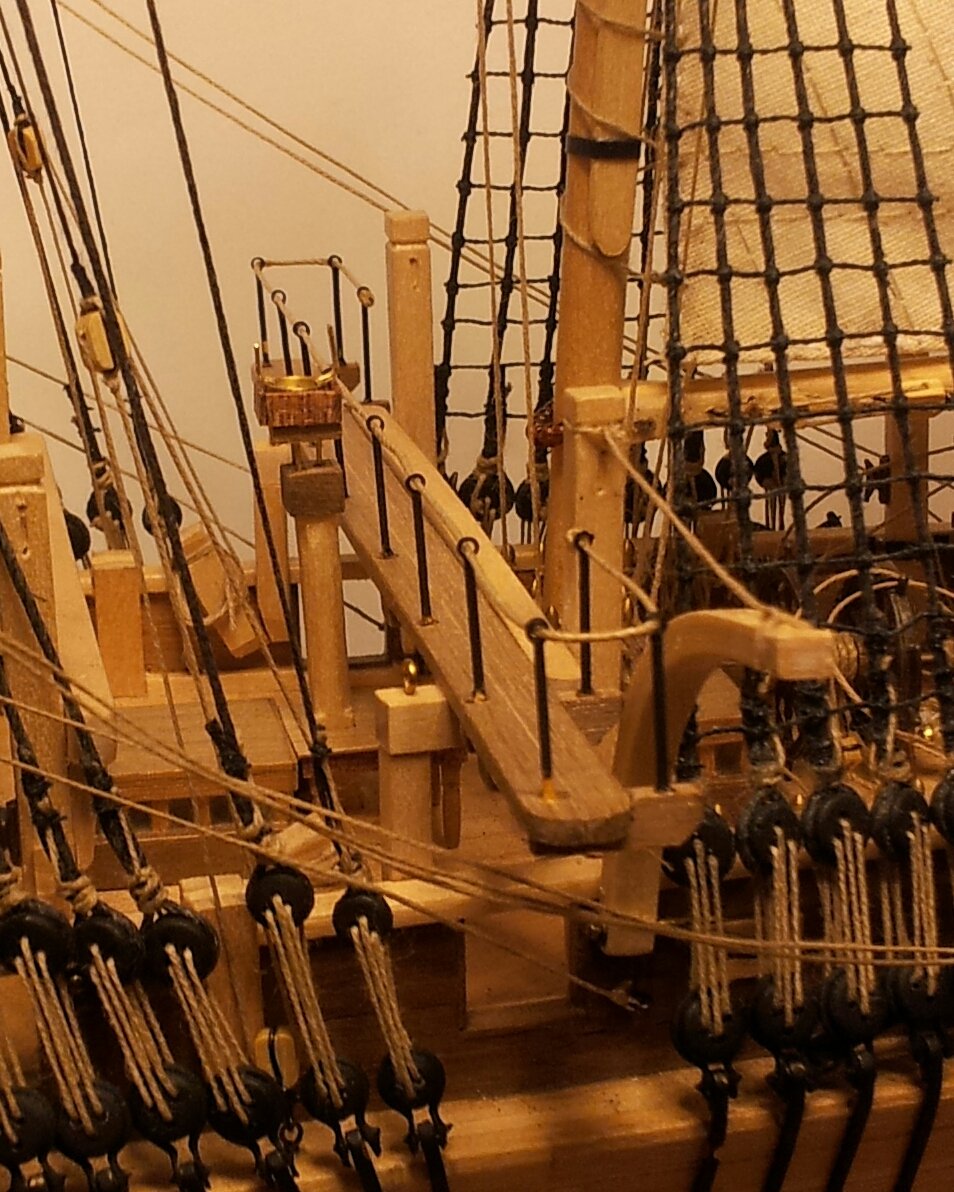
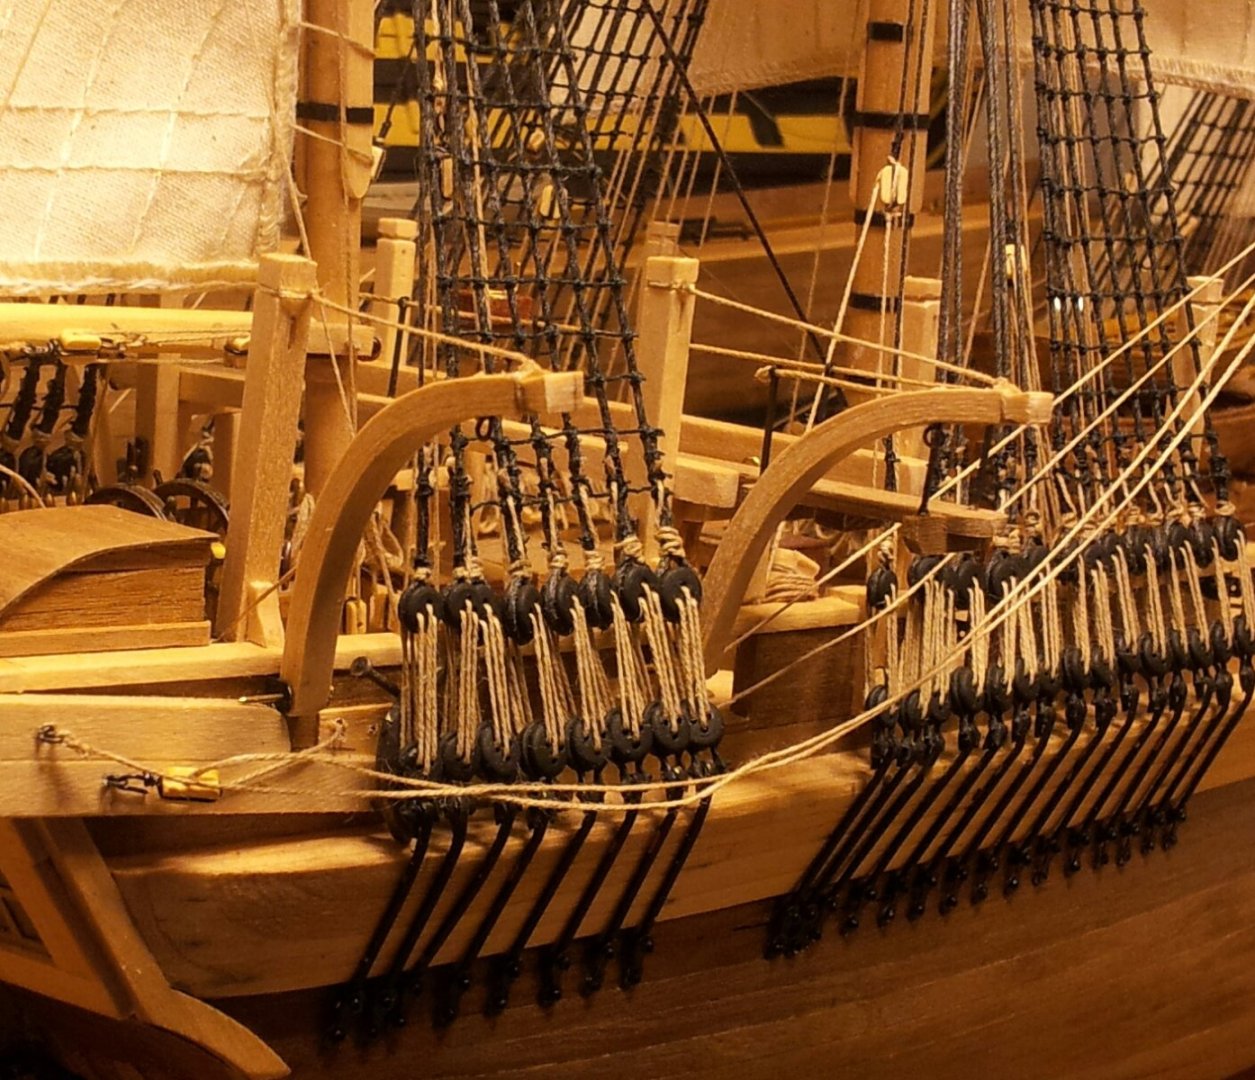
Thanks for looking in everyone, just a quicky tonight with the starboard davits installed (been having a lot of good weather for D.I.Y till today). Have decided will go with wooden supports for the bridge based on the fact that less iron makes sense if trying to heighten the compass away from masses of iron in the hull (should we have used wooden railing supports methinks!? take care all Keith
-
Hey Keith hows it going m8y? the video i watched is by Tom Lauria, i just searched "making silkspan sales" on google. The other Keith
-
wow m8y will be worth it in the end- i can't use a sewing machine to save my life - usually get mother in law to do panels for me and i hand sew the seams, but she is now in her late 70s so its a bit much for her eyesight these days. I would have had to handstitch all the panel lines hence the chickening out. However watched a u tube video of some one making silkspan (model aircraft tissue if looking for it in u.k.) and thought "if only i had watched this several months ago"!!!!!! Keith
-
Polaris by JDillon - OcCre
clearway replied to JDillon's topic in - Kit build logs for subjects built from 1801 - 1850
na Joe the indecision and where to go scenario gets to most who decide to move away from standard kit instructions- if modelling pre 1800 go with white for below waterline or copper sheeting, if a baltic or other cold water ship black will suffice as no shipworm 😜. One of the other terror builds has done the black prow/ stern with varnished wood hull so check his build out but i would stick with stain all around if not painting. Keith -
Polaris by JDillon - OcCre
clearway replied to JDillon's topic in - Kit build logs for subjects built from 1801 - 1850
there are plenty of pics of coasting schooners around online to give inspiration, just adding barrels and other clutter to the decks and adding more realistic ships boats in the waist and off stern davits can work wonders, Also check out some of the schooner builds in build logs to see how they have made the masts etc. Again also highly recommend plank on frame models by harold underhill (volume 1 covers hull and volume 2 covers masts/ yards/ rigging), I agree with Chris , the cannons just dont look right as no room for loading/recoil. Keith -
Polaris by JDillon - OcCre
clearway replied to JDillon's topic in - Kit build logs for subjects built from 1801 - 1850
i would just leave her as merchant ship to be honest- at work at the moment so no access to reference material. mostly governed by size of gun being used really as victory has various sizes depending on cannon size. Keith -
ahhh the memories!!!! keep sanding until no ridges compadre- also for reference in Matthews book and blog are plan views of the "bumpers" which give the general shape towards bow and stern. Keith
-
You maniac!😁😉😉 for the reef points i used some thin rigging thread from my stash and threaded it so far through then ran a couple of stitches around where both sides met the sail to hold them in place along with a drop of dilute P.V.A. to stop the thread unravelling - also unlike me dont forget the reef points on the spanker🙄. Keith
-
ooo good thinking keith B! they did state in the same article they also found a 3 feet long oak stanchion with a locating peg cut into the bottom of it nearby and reckon they could have been carried south by the tides and ice to where they were found. However i am wondering would they make a support for the bridge out of 2 and a half inch pine- but the length sure as heck fits in as they reckon it was longer originally? ahhhh the mystery just keeps going. Keith
-
further to my thoughts on the stanchion here is a quote from John Rae regarding what he found also (though not 100% certain it is off Erebus or Terror it seems likely). In his report to the Royal Geographical Society the following April, Rae recalled how on the afternoon of 21 August 1851 the search party had “proceeded but a short distance when a piece of pine-wood was picked up which excited much interest. “In appearance it resembled the butt end of a small flag-staff; was 5 feet 9 inches in length, and round except 12 inches at the lower end, which was a square of 2 ½ inches. It had a curious mark, resembling this (s c), apparently stamped on one side, and at 2 ½ feet distance from the step there was a bit of white line in the form of a loop nailed on it with two copper tacks. Both the line and the tacks bore the Government mark, the broad arrow being stamped on the latter.” Maybe the "white line" was to help people avoid walking into it on a darkened deck? Keith
-
awesome buddy- just had a thought, how about using stitching to give the impression of the panels -won't look as authentic but from normal viewing distance might pass muster? Keith
-
yet again another build that is awesome,,, you are not helping to dispel the myth that all modellers are a tad crazy and not wired right🤪. Keith
-
Thanks for the likes, links and comments everyone, I now have the rope handrail on the bridge. Thinking about supporting the bridge near midships and when reading Matthews book concerning modifications made to the ships boats mention is made of making use of wooden supports that he suggests might have been used to support the canvas cover for the decks when wintering over, got me thinking "what if they were used for supporting the bridge instead as they would be about the same height"?🤔. Take care all Keith


-
Nice- now you know why i chickened out and used occres poor samples! That will be some stitching exercise😱. Will deffo look awesome though (don't be pinching any wedding dresses for the silk😁) Keith
-
Interesting double look concept- i have seen some railway modellers use a similar technique- one side of a freight vehicle in one livery and the other side with the same livery but altered insignia etc for a later time period (some british goods vehicles went through several changes of owner). Keith
-
Polaris by JDillon - OcCre
clearway replied to JDillon's topic in - Kit build logs for subjects built from 1801 - 1850
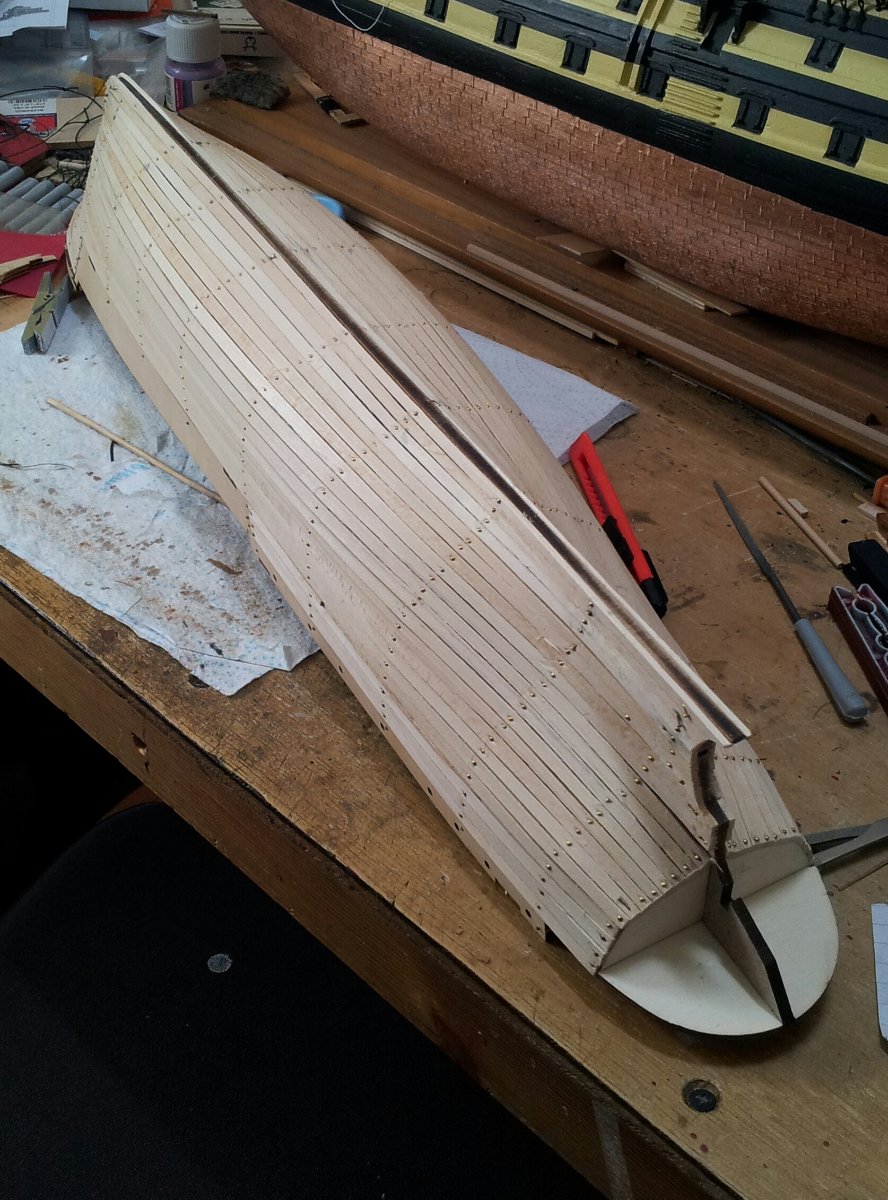
I glue the 2nd planking using evo-stick fast setting wood glue (thin bead on the plank then wiping excess with finger tip) and using dress makers pins to hold in place till dry (see early on in my terror log). regards trimming i glue all planks on first then trim back till a few mm from the hull then sand back with fine sand paper. Ignore occres planking runs - planks taper towards the bow and from deck level till the rudder post. for example if the frame at the bow is 10mm the frame at midships could be 20mm so you will need to taper from where the frames start to lessen towards the bow/ stern. hope this helps (from my endurance log) Keith
-
Polaris by JDillon - OcCre
clearway replied to JDillon's topic in - Kit build logs for subjects built from 1801 - 1850
for a first planking attempt not bad at all, If painting you should get away without 2nd planking, If adding a 2nd layer just add a layer of the cheapest 4 or 5mm x 1mm planking using the first layer to guide you. Keith -
Even though i was sanding outside a dust mask is definitely recommended! As regards the bumpers prime, then sand back then repeat- do the same with the paint proper and it will fill any blemishes which would negate having to plank them (also recommend this for the hull when painting- see my hms victory log) you will still see the odd line here and there which shows there is planking though will be more subtle. Keith
-
Thanks Hake, not sure exactly how accurate we have all got it but we are in the right area (waits while parks canada releases a series of wreck photos showing all the details we have been driving ourselves nuts with)..... just had a thought, if they did put the compasses in the carpenters store while not in use they will all still be there..... Keith S get that diving expedition underway😁. Keith
-
oooo i never thought of that Daniel i just used a lining pen to create a basic compass rose on a piece of stout paper left over when you use a paper punch, dimensions on mine are about same as yours, and yes Craig we have all drifted into a strange mental place🤪 Keith