HOLIDAY DONATION DRIVE - SUPPORT MSW - DO YOUR PART TO KEEP THIS GREAT FORUM GOING! (89 donations so far out of 49,000 members - C'mon guys!)
×


clearway
-
Posts
2,234 -
Joined
-
Last visited
Content Type
Profiles
Forums
Gallery
Events
Everything posted by clearway
-
 Nice work so far, if you want to learn more about planking read Harold Underhill- plank on frame models volume1 from brown and furguson publishers. Keith
 -
Coming along nicely there Keith, use india ink diluted 50/50 with water to colour the standing rigging- get mine from my local art shop. Keith
-
First of many planks in place. Note for new starters- whatever you do to one side of your hull do to the other as well to avoid warping. Keith
-
braces are the ropes used to "swing" the yards to the wind
-
looking good- i worked out that i cut approx 3200 tiles using copper dolls house tape on mine!!!!! Keith
-
wierd how some you get a stand some you don't. At 800 quid you would be better getting the caldercraft victory methinks! Keith
-
Hi dominic, yes there was a cradle supplied with the kit- when i built their "scottish maid" there was no stand supplied- take it no stand with the santa maria? keith
-
excellent work there- i know the feeling from when i was at a similar stage with my billings cutty ark- the ends in sight! luckily i reserved a space in my workshop for mine though. Keith
-
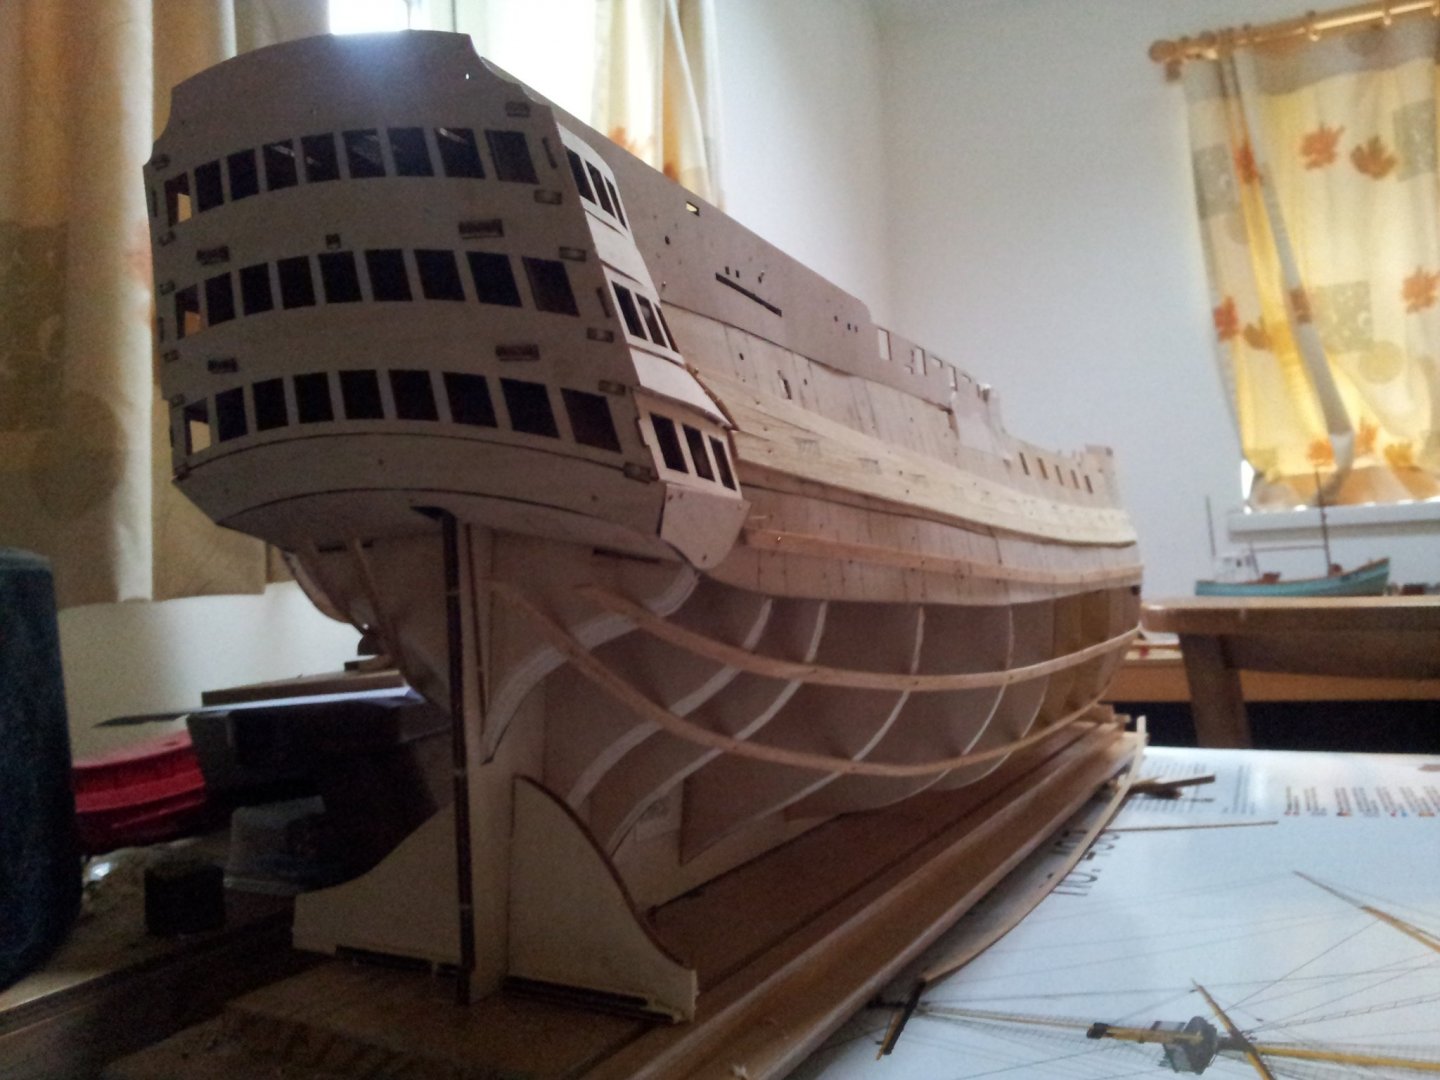
planking for raised stern going in. Keith
-
1/75 scale- there are afew others building this model as well on here- its a pretty impressive size. Keith
-
most of the planking battens in place- decided to plank from main deck level down. Keith
-
[/url thats the last "full plank in place and the waterways installed. Keith
-
Nice work dominic coming along nicely. On my billings victory i glued spare pieces of 3mm by 2mm underneath as deck beams to stiffen them. Keith
-
looking good there dominic- those ply sides will deffo make the build easier. Keith
-
TY,That is the billings hms victory- talk about different builds- bit like david and goliath! keth
-
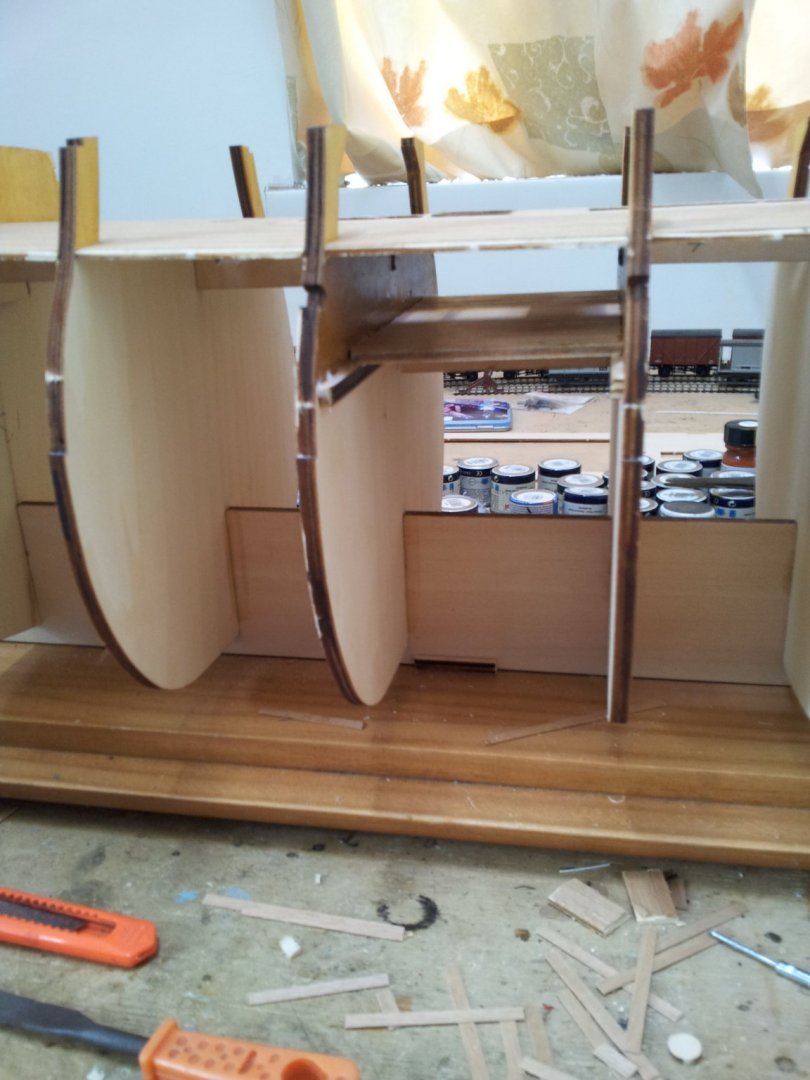
Change of plan! Removed the brass pins from the planking then gave it a course sanding then installed first bulwark plank in place before installing the waterways. pins removed and rough sanded. bulwark plank installed- used clamps as opposed to nails on head timbers to avoid snapping them. Keith
-
excellent work. I have to agree about manufacturers and their instructions. aglad i didn't start billings victory without lots of prior experience! also they "cut corners" with certian features and dumb down others. Keith
-
I recently remasted a very old mantua victory for the lad in the local modelshop and the copper plates were black in places! so deffo worth it. Keith p.s. sure your wife would be as eager as mine to clean the model !!!!!!!!
-
Nice work there.strongly recommend laquering the copper though- i did with my cutty sark and the copper still looks ok 18 years later. (see my pic on new to MSW post) Keith
-
Looking good- wierd how they used extended ply formers from the frames for the bulwarks on Nina and not their Santa Maria kit. Keith
-
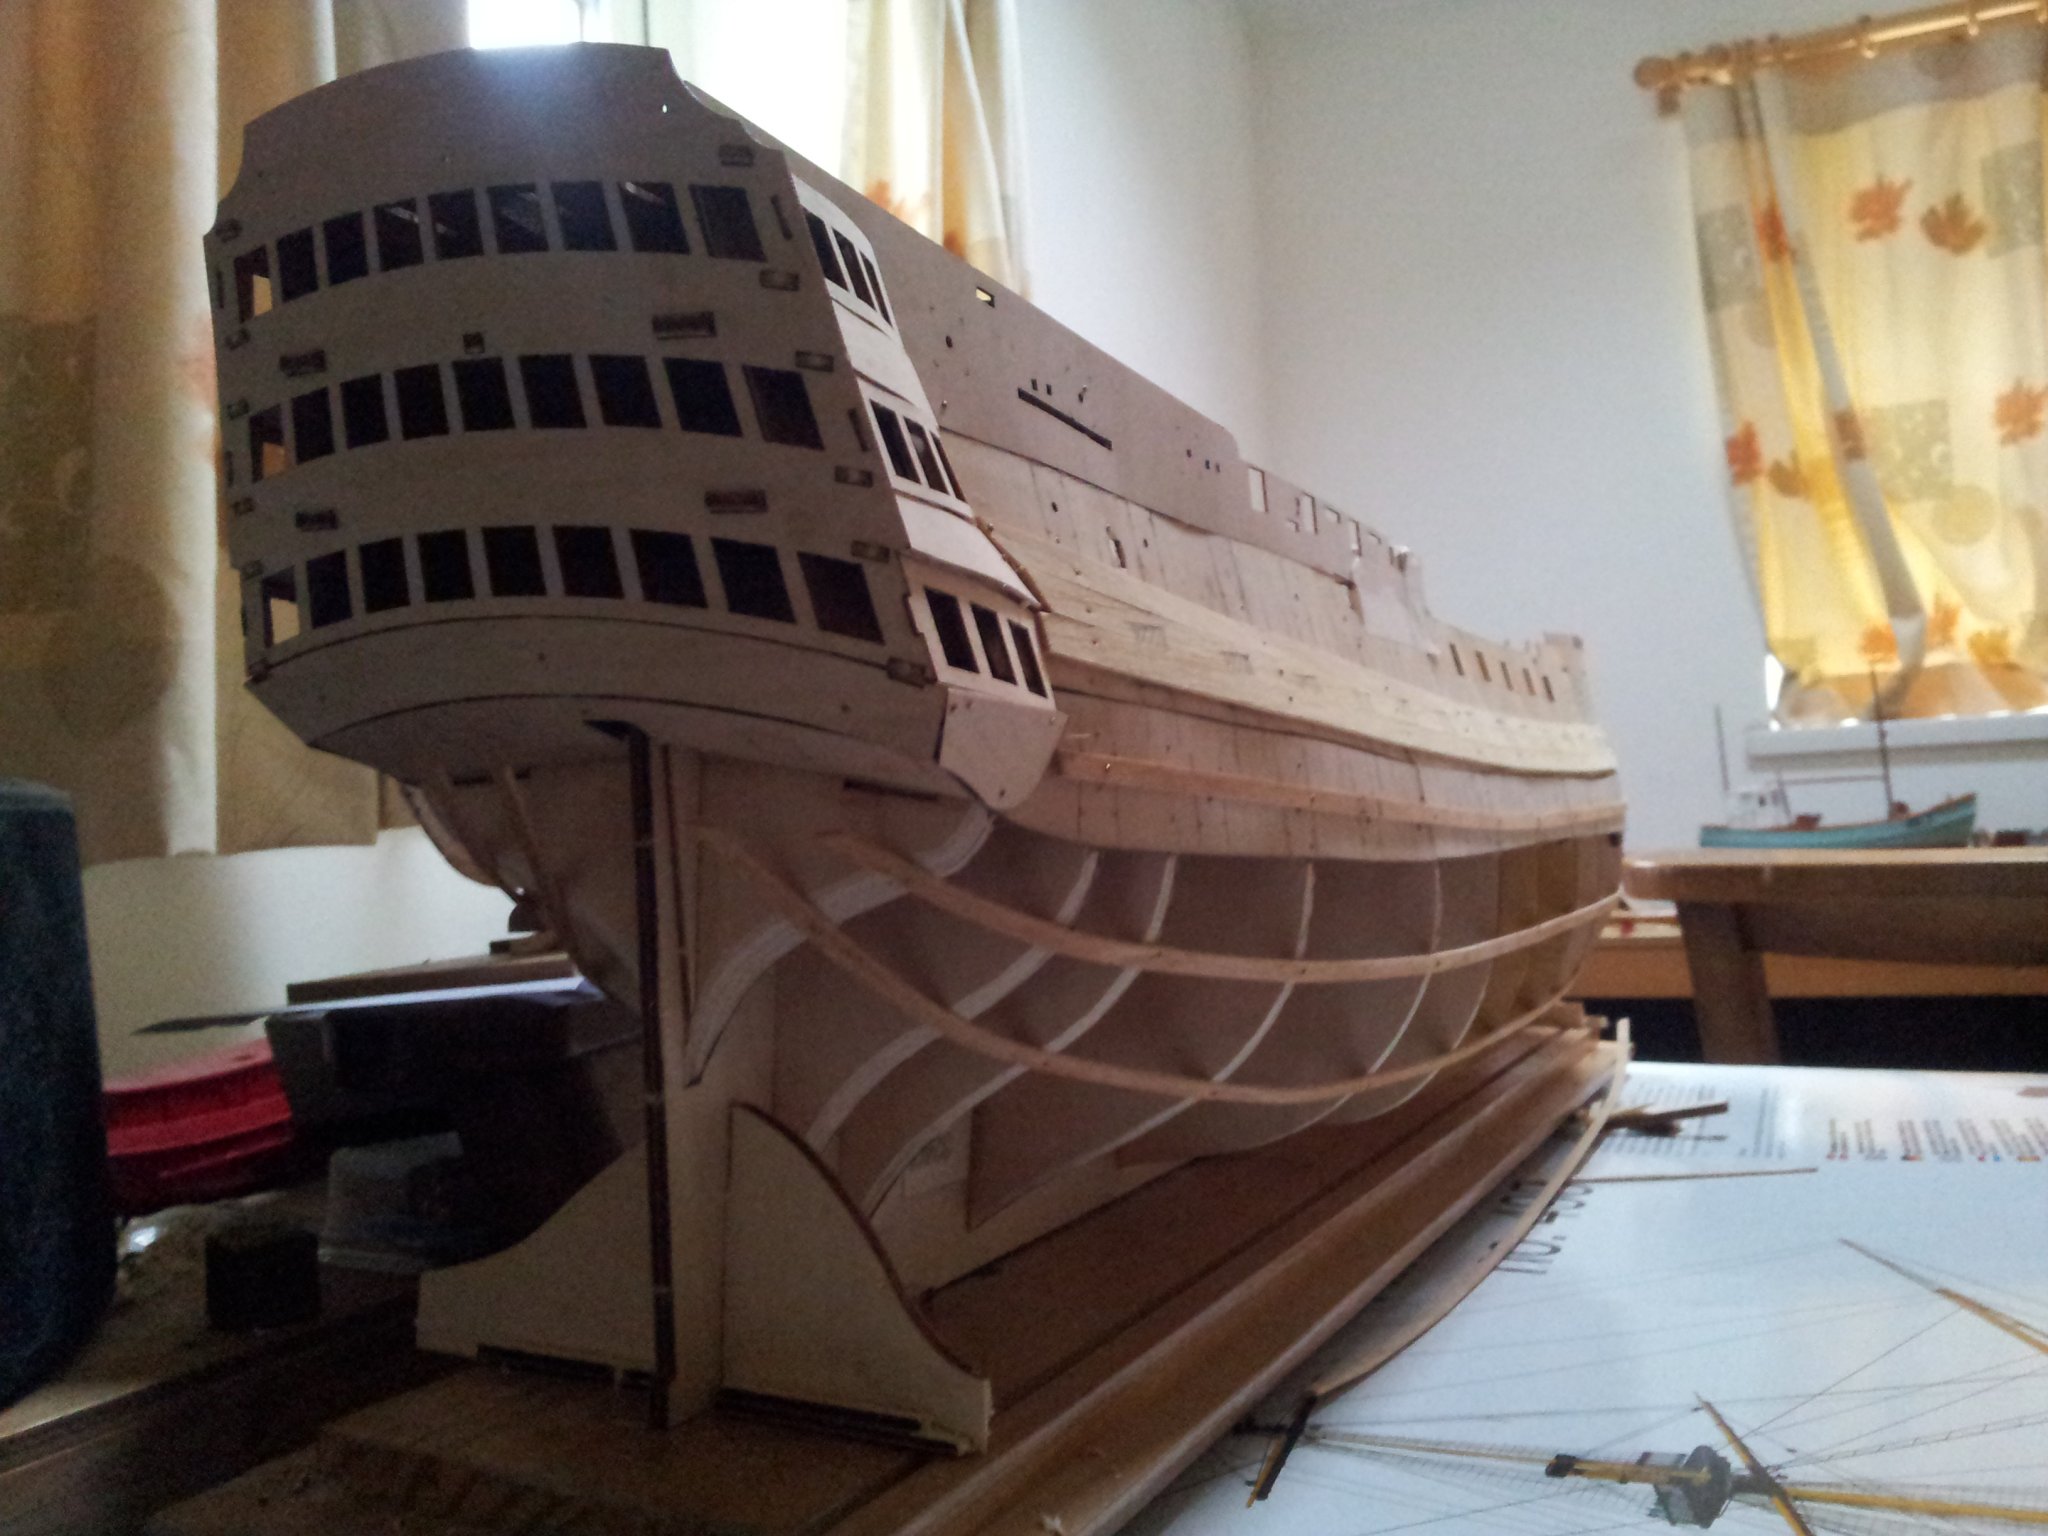
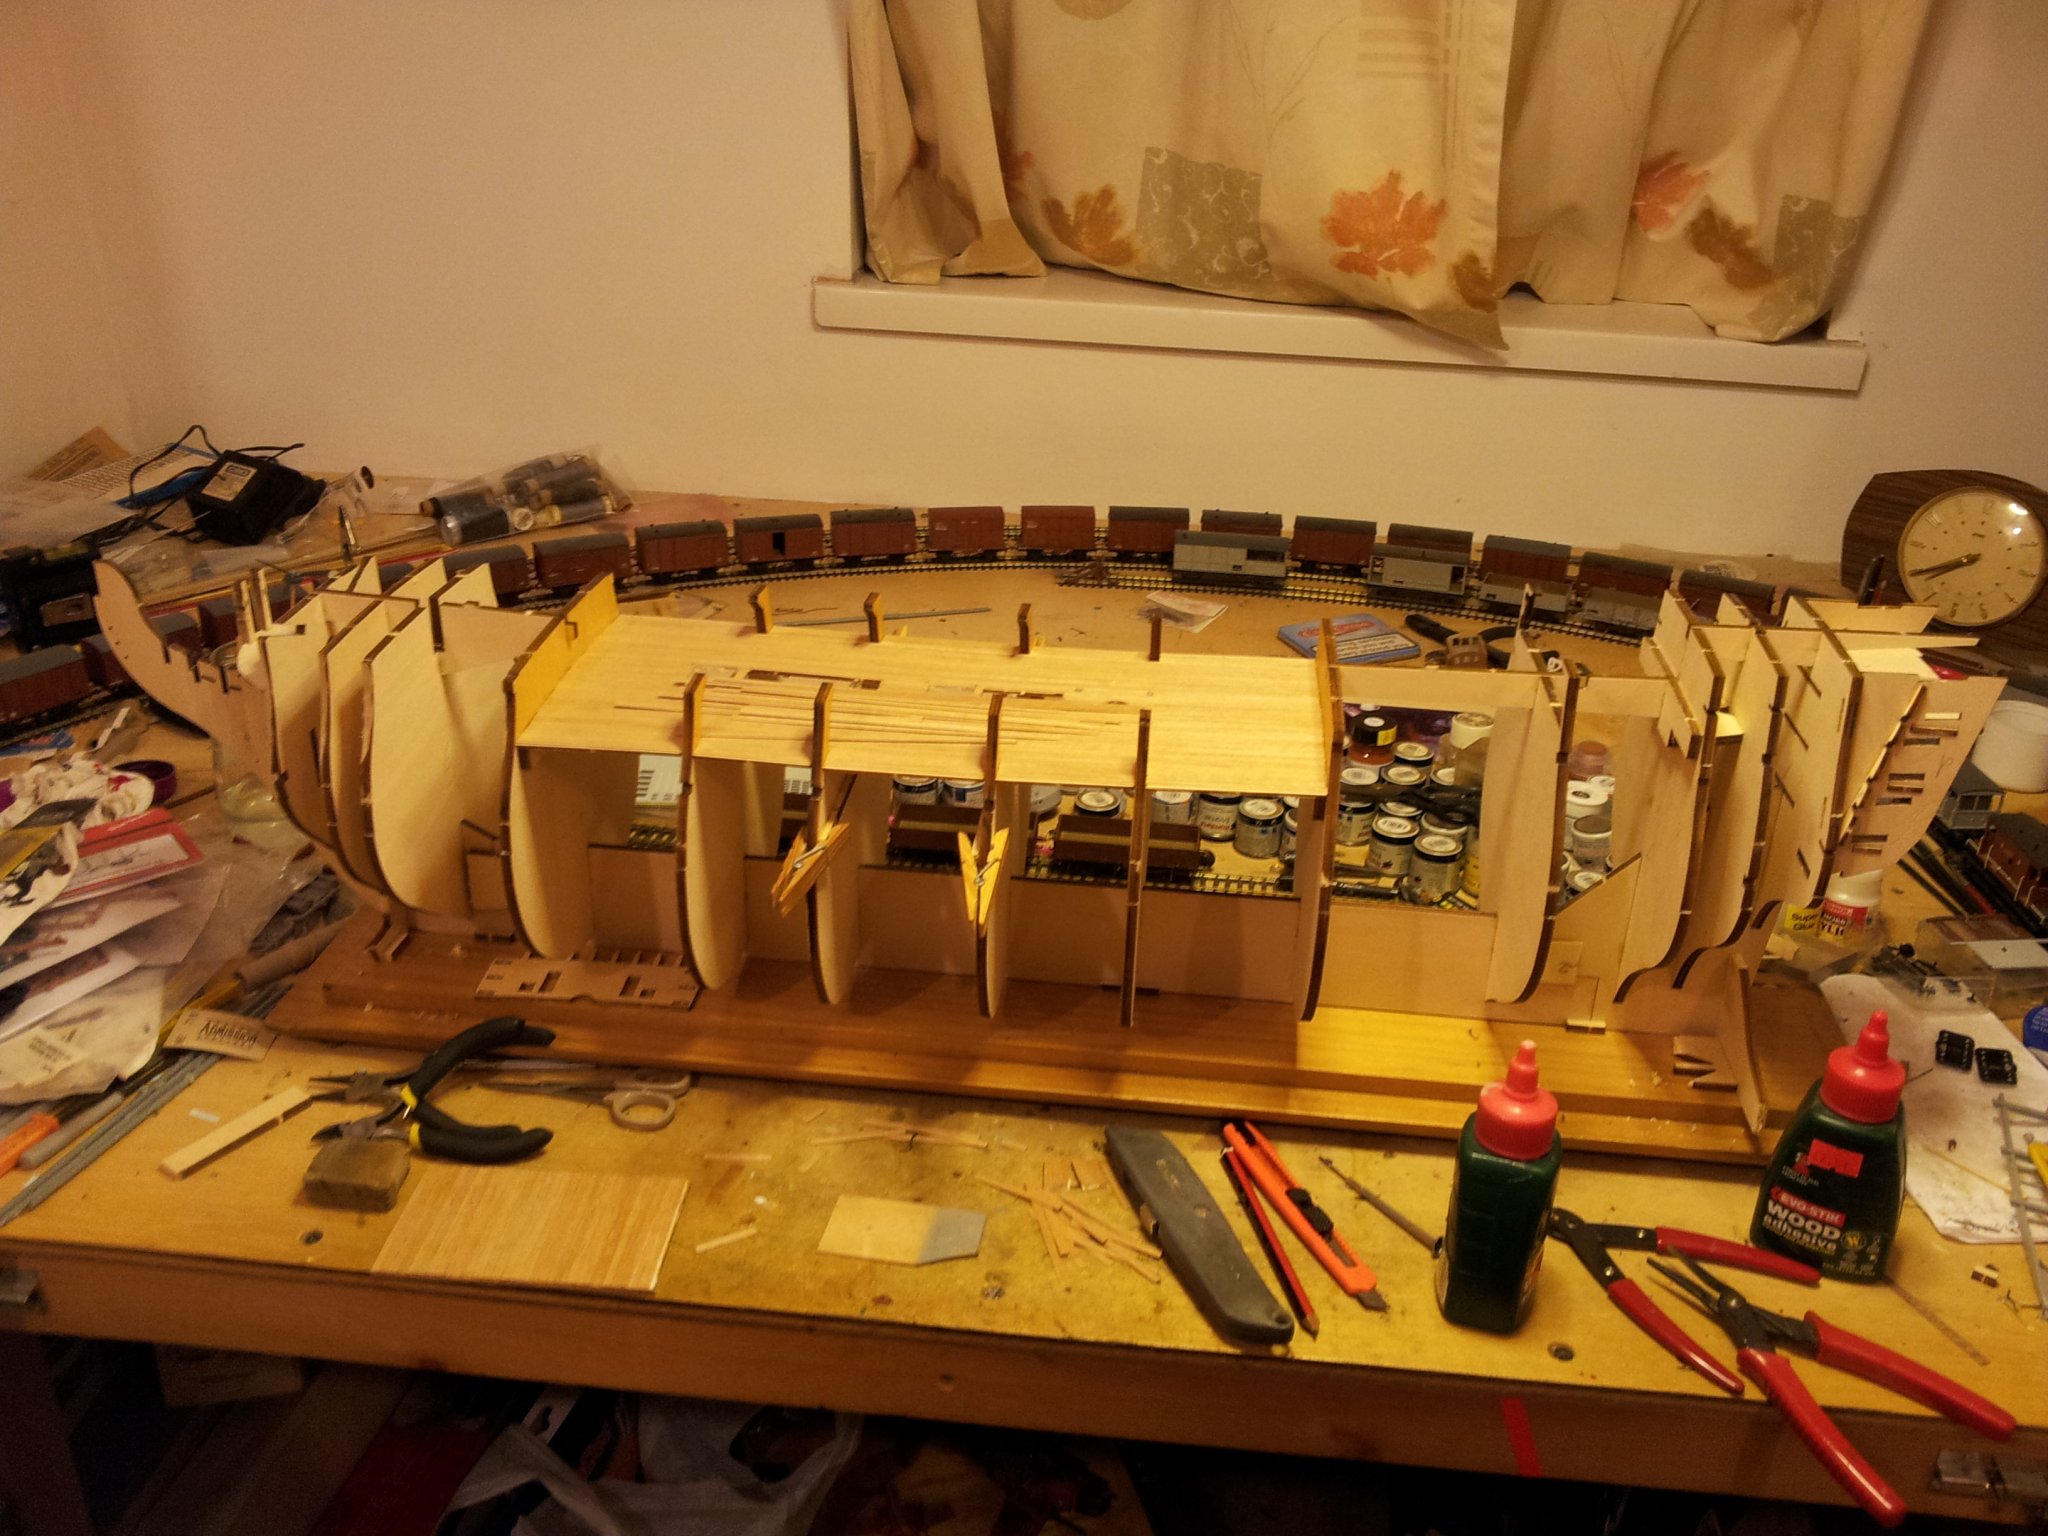
A few people have asked me to start a build log for my billings victory so here goes! Decided to add part of the middle gun deck for at least one of the sets of ladders from the main deck- will cover the other hatchway with a grating- didn't want to weaken the framework in this area to avoid "hogging". work so far- building up courage to start the planking next! Keith

-
Excellent work there and well done. I recently re-masted and rigged an old mantua 1/96th victory for the local model shop owner and fully understand the fun with the rigging! Keith
-
good work so far. we need someone to start pinta now! I always sand frames after assembly to check the run of the planks. Keith
-
ty shihawk- i have always had a couple of projects on the go at once as well as building military vehicles and railway modelling- stops things getting stale! planking of hull in place- next the waterways then the bulwark planking- will need to make frames for the overhang on the stern as i am not using the "double skin" method. Keith
-
frames sanded and planking commenced- note to new starters, i am not following the instructions here! keith