RichardG
-
Posts
695 -
Joined
-
Last visited
Content Type
Profiles
Forums
Gallery
Events
Everything posted by RichardG
-
1/10-scale Japanese Fishing Boat kit from Thermal Studios
RichardG replied to catopower's topic in Wood ship model kits
Clare, I'm really looking forward to seeing this build :-) All the best and Happy Thanksgiving. Richard. -
Stern Details
RichardG replied to t5956ws's topic in Discussion for a Ship's Deck Furniture, Guns, boats and other Fittings
Bill, You might want to take a look at Doris' Royal Caroline build. She has done a superb job using modelling clay. http://modelshipworld.com/index.php/topic/854-royal-caroline-by-doris-card-1749-140/page-4#entry19099 Richard -
That's going to be interesting when people see it. They'll be wondering if it would be rude to mention that the spacing is off . I'm looking forward to seeing this build. A cross-section is my next project (if I can ever get my cutter finished!). Richard.
-
Thank you so much Frank. It is looking a lot better. Now if only I can get the rigging right! I suspect there'll be some rework there as well . I've been taking a look at your Alert build - very good. The sails are excellent. I'm not going to add sails to mine (but maybe I need to rethink that!). Richard.
- 78 replies
-
- 1
-

-
- dallas
- artesania latina
- (and 1 more)
-
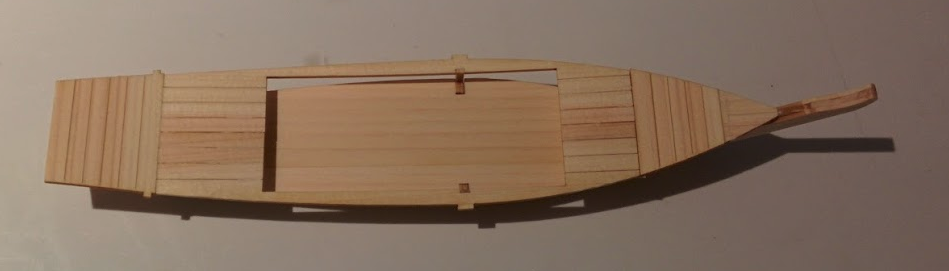
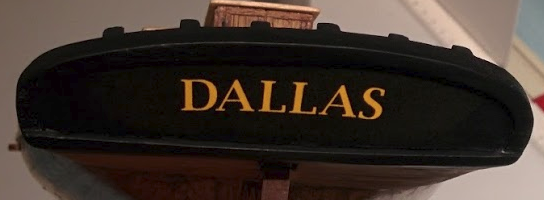
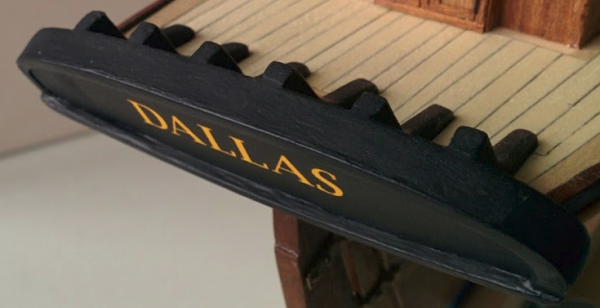
Now where was I? Doesn't time fly when you're having fun. I've been on vacation, painted half the house, built a ship for my daughter, got a promotion and a real office at work (with a door!),written 1 1/2 pieces of software to help me with this hobby, learnt a smidgen of 2D CAD, and totally failed on my first attempt at 3D CAD. For the Dallas, other than some cleanup and a lot of (occasionally useful) thinking, I did manage to complete the stern. When I originally did this, it was completely flat. With careful work with some basswood, cardboard, knife, and sandpaper, it now looks like this: I have no information about how it looked in real life. I'm assuming it wasn't ornate so I've kept it very simple. I have a week off at Thanksgiving (end of November), so hopefully I be able to really get back into the swing of things . All the best, Richard.
- 78 replies
-
- 4
-
-
- dallas
- artesania latina
- (and 1 more)
-
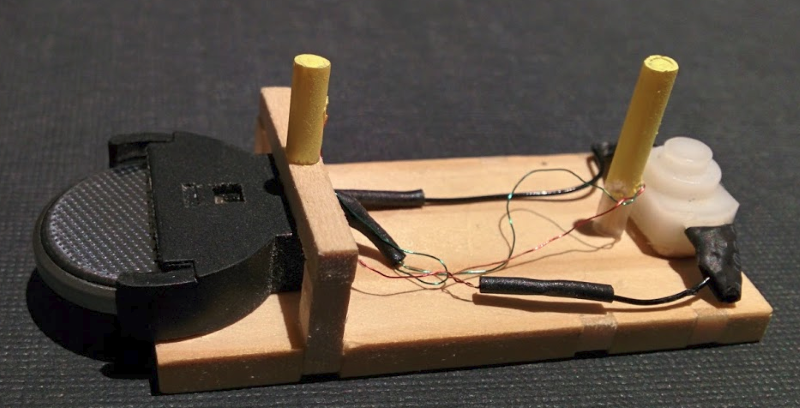
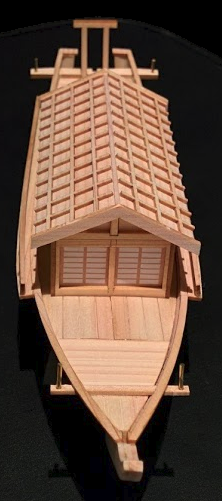
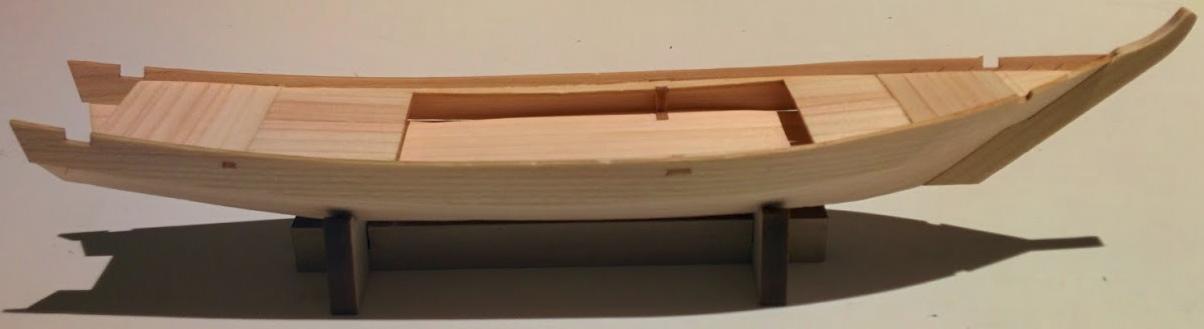
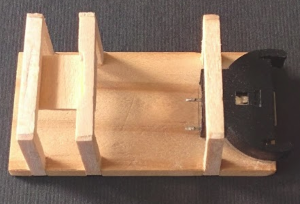
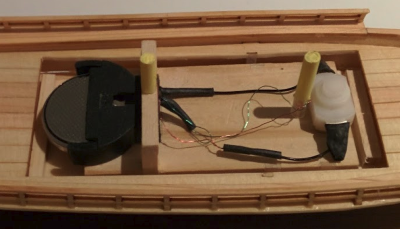
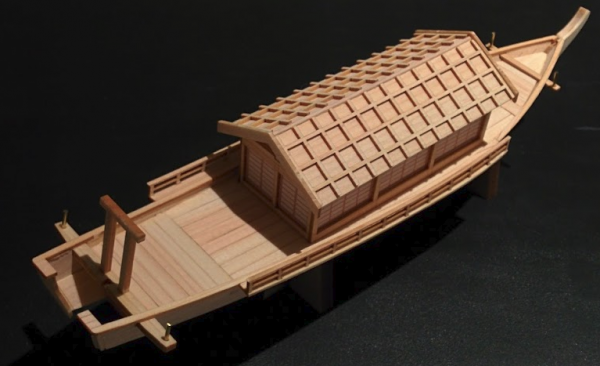
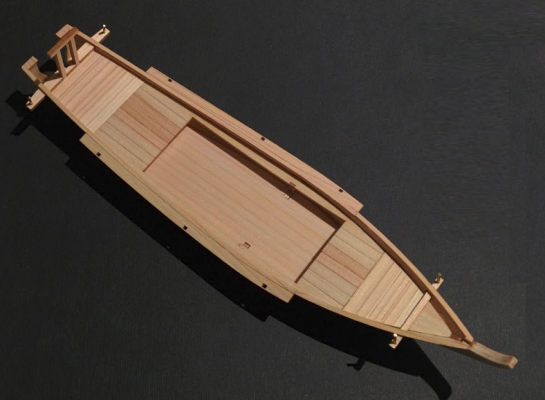
Lighting I made a small wood base for the battery, lights, and switch to fit inside the cabin space, I didn't want any of it visible. The LED's needed to be raised above the deck level. My first attempt was to used 1/8" sq basswood to make raised frames. Although it was fun making all the lap joints, the frames were clearly visible from the outside when the lights were on and looked pretty bad. So I stopped for a while to try and think of a way to hold up some extremely small LED's. I found some small diameter clear plastic tube. It's actually the ends from the inside tubes of a couple of ball-point pens. The wire was threaded through a small hole in the side and the LED's fixed in place by a drop of glue at the top. The tubes were a perfect push-fit over a toothpick dowel. One dowel in the base and the other in a low frame over the battery holder. A little bit of pale yellow paint over the tubes to soften the light and some soldering of wires and it was all done. The battery overhangs the edge to make it easy to pull out and the whole thing just slips into the deck well and the cabin goes over it. Nothing is fixed down. This is how she looks. Final Thoughts My first wooden ship model is complete . I've really enjoyed this kit. It wasn't too difficult, was good value for money, and the instructions using just the pictures were fine. All the pieces were cleanly cut and fitted well. If you're a little heavy handed as I am, adding some support pieces is a good idea. I would also have left the side rails until the very end - you don't want to know how many times I fixed them! I would definitely do another mini-kit as a gift and one of the larger ones is now on my to-do list (but there's 3 others in front so it'll be a while). Again my thanks go to Clare for posting his excellent builds, pointing me to this kit, and for the help with the rigging. Thanks also to the many kind responses and all the likes. And to Bob Riddich for his inspiring build of the Higaki Kaisen. BTW, my daughter loves it . I asked my other daughter (she's almost 11) if she wanted one. She said no, she wants me to make her a desk. This means I'm going have to get the big saws out! All the best, Richard


- 45 replies
-
- 13
-
-
- yakatabune
- woody joe
- (and 1 more)
-
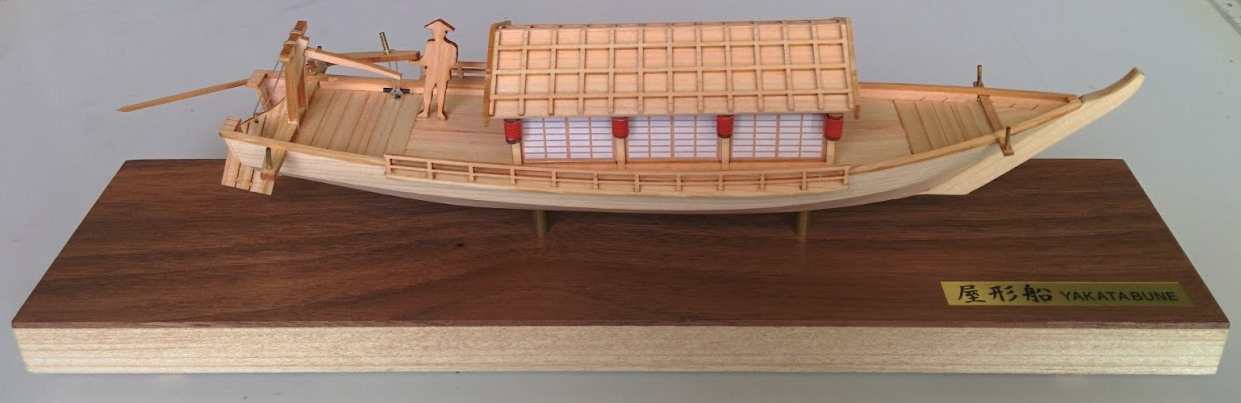
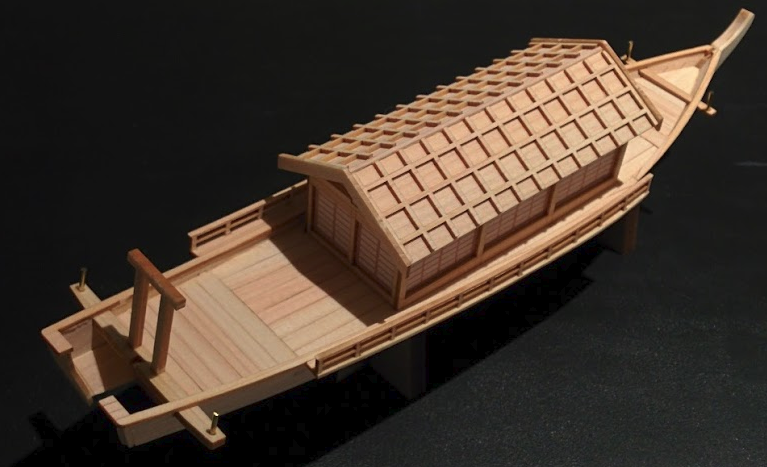
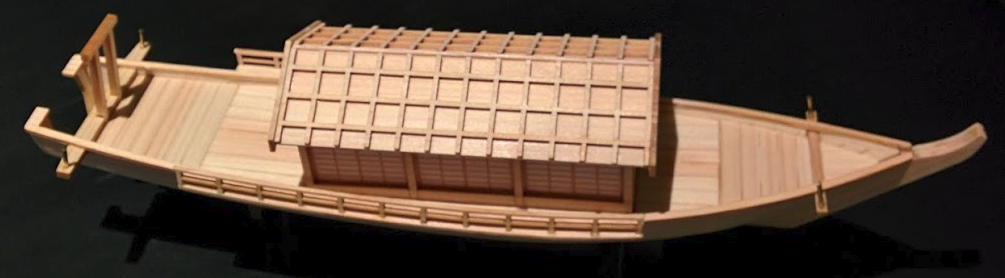
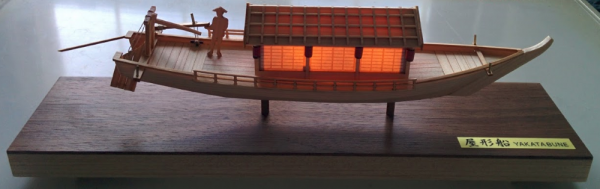
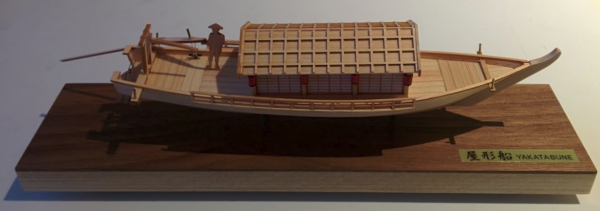
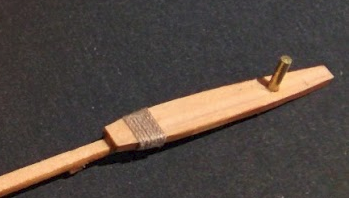
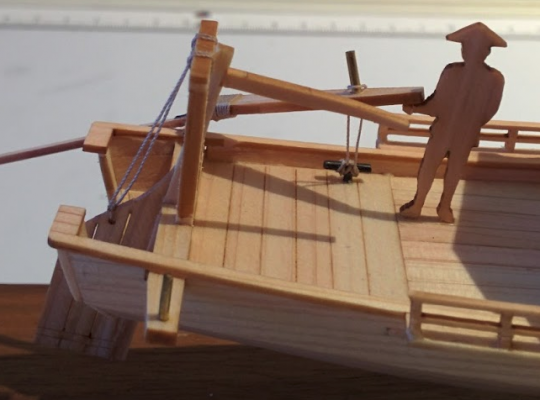
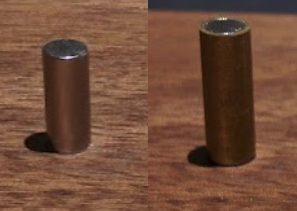
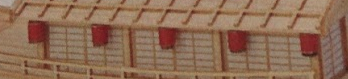
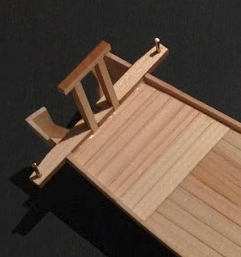
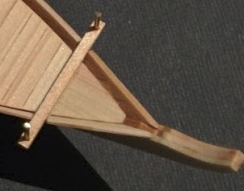
She's Complete Well it's only taken a month to get everything else done! Work and home projects + some fun things got in the way (but generally in a good way). Lanterns These are small laser cut dowels with colored paper strips wrapped around them. In the kit, there are 5 each side but I needed them to be fairly sturdy so I only put 4 on each side where there are supports. A very small peg (turned from a toothpick) was added for extra security. Stand I decided not to use the stand that came with the kit. I'm not putting the ship in a display case and it would be too easy to knock off a shelf (it only weighs a couple of ounces). I wanted a dark base to show off the boat but didn't want it to be overwhelming so I took a length off poplar about 10" x 2 1/2" then added a thin layer of walnut on the top. Some 1/4" sq wood on the bottom gives a slightly floating look. This was finished with a few coats of wipe on poly and the nameplate that came with the kit. I wanted to be able to easily remove the boat from the stand so I decided to use some magnets I already had. In the bottom on the boat I added two 3/32 cube magnets and inserted 1/8" dia 3/4" long magnets about 1/4" into the stand. These are very strong neodymium magnets that easily hold the model even with a layer of wood between the magnets. I then sheathed the magnets in brass tube (to match the brass on the model). Extras The larger Yakatabune model has some rope work on the oar and rudder. Clare (catopower) very kindly supplied the details for this. I used some of Chuck's rope (bought for my other build). This is the oar wrapping The larger model has a wooden cleat to hold the oar rope.. There was no way I could fabricate this so I used 2 pieces brass wire soldered together. This was then chemically blackened (another first for me). The oar is not very secure so I added brass wire to the pivot point and glued it to the figure supplied with the kit (he also has brass wire added to his feet!). There is also rope added to the rudder. This is how the stern looks. Well that's all for now. I don't want to make the post too long and it's late here. I'll post the details of the lighting and final thoughts later in the week. Thanks for reading, Richard.

- 45 replies
-
- 13
-
-
- yakatabune
- woody joe
- (and 1 more)
-
That is impressive. The level of detail at that size is stunning and there's still more to add! Thanks for sharing your build. Richard
-
Clare, Wonderful. The detailed log is also very good. Anyone building this kit will find the log really useful. I'm looking forward to your next build. Richard.
- 106 replies
-
- 5
-
-
- Japanese boat
- Wasen
- (and 2 more)
-
I've used this method with black annealed wire, it was easy and quick - http://modelshipworld.com/index.php/topic/3336-securing-eyebolts/#entry107526 There is also this topic - http://modelshipworld.com/index.php/topic/4308-in-need-of-tips-and-techniques-for-making-eyebolts/#entry123439 Richard
-
I also like Chuck's rope. You might want to read this post though http://modelshipworld.com/index.php/topic/8678-how-to-pre-condition-your-syren-ship-model-company-rope-before-using-it/#entry257903 Richard
-
Ulises, Thanks for the link. I ordered a set. Richard.
-
They have some nice looking stuff. Before you know it, I'd got 35 Euros of items in my cart. I may need to trim(!) this a bit. These look interesting Thanks for the link Al. Richard
-
Thanks George, Patrick, Grant, Frank, and Clare. And I really appreciate the likes as well. This is such a great and supportive site!! My daughter hasn't seen it yet, she wants to wait until it's complete. I have been passing on some of the comments but I had to explain what chuffed means . And yes I agree with Clare, the laser char does improve the look. All the best, Richard
- 45 replies
-
- 4
-
-
- yakatabune
- woody joe
- (and 1 more)
-
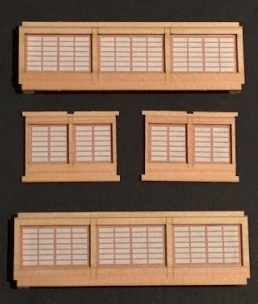
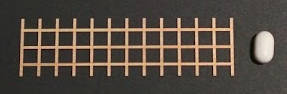
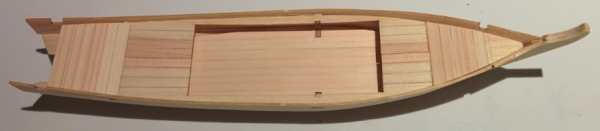
I didn't do much last week but with the extra day this week I managed to make some progress. Step 19 The cabin. This is 4 wall pieces with printed paper screens. I reinforced this for two reasons; I knew I might have difficulty gluing it without breaking something, also the cabin will be removed to control the lighting. Step 20a The cabin roof. This is a laser cut lattice on a thin sheet. Step 21 The cabin is supposed to be glued into the deck opening. I added a couple of supports to the deck to set the cabin to the right level. So this is how it looks now. Finishing. I was going to use a couple of coats of wipe-on poly but having broken one of the cabin windows doing this, I've decided to use a brushed on matt poly instead. The laser-cut edges are a caramel color, this I initially planned to remove but decided this was impossible given the delicacy of the pieces. I've used a Varathane touch-up marker to cover up the where the "sprues" have been removed. What's next The only remaining item from the kit are the lanterns (Step 20b). I have (just about!) started a new base and the lighting support. Richard.


- 45 replies
-
- 12
-
-
- yakatabune
- woody joe
- (and 1 more)
-
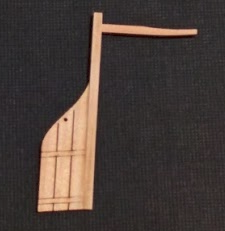
Thanks Patrick, Grant, and George and for the likes. Patrick, I'm just going to add 2-3 coats of wipe-on poly. I think that'll be best. Step 17 Is the stand. I'm going to be replacing this but will use it for now. It's needed because the rudder is deeper than the bottom of the boat. Step 18 (part 1) The rudder. After making this I noticed there was a small hole at the top. There is nothing in the instructions showing this being used. So went to Clare's "Big Build", and the hole is there as well and is used for a rope (to raise and lower the rudder). You can see this here http://modelshipworld.com/index.php/topic/10860-yakatabune-by-catopower-woody-joe-124-scale-small/page-3#entry333749 If I can find some suitable thread, I'll add this as well. The oar, cabin, and outside lanterns are the only items left in the kit. I'm still working out the scaffolding for the lighting. So not too much more to do . Richard.
- 45 replies
-
- 7
-
-
- yakatabune
- woody joe
- (and 1 more)
-
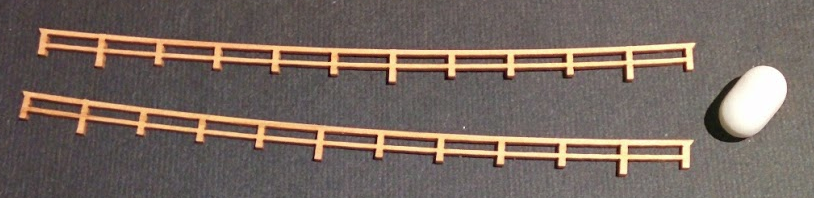
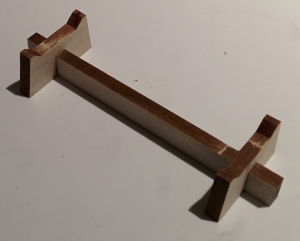
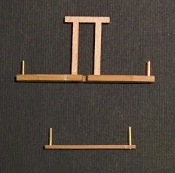
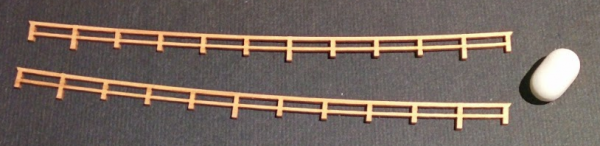
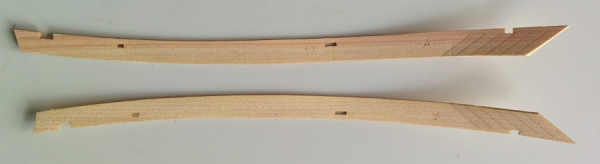
I managed to get some stuff done over the weekend. Step 13 Just some sanding of edges ready for - Step 14 The - I don't know what you call it - rudder support? and the - other piece? - at the bow These have the first metalwork. A single length of brass wire is supplied. The pieces were cut to length and the ends sanded flat. Steps 15 and 16 Then carefully (!) added the rails. Thank goodness for laser cutting! I really pleased with the results so far. See you next time. Richard.

- 45 replies
-
- 9
-
-
- yakatabune
- woody joe
- (and 1 more)
-
Thanks Clare. I would never have found this without you . I'm not so sure about being close to done though! I'm still working out the lights, the cabin screens, and the base. I'm thinking about putting the battery and switch in/on the base to avoid damage to the model during use. Richard.
- 45 replies
-
- 3
-
-
- yakatabune
- woody joe
- (and 1 more)
-
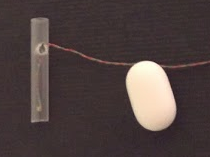
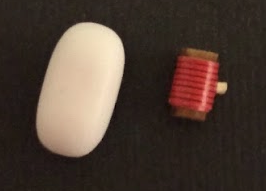
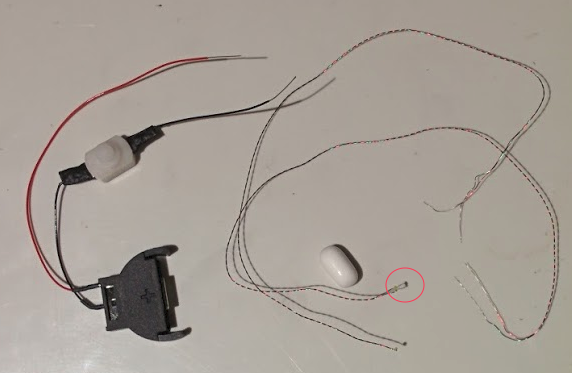
Thanks Bob, not up to the level of your Higaki Kaisen but not too shabby And thank you Patrick. I am enjoying this build and it's going a lot faster than my other one! I received the LED lighting stuff today. It contains a 3V lithium battery holder and switch along with 2 very small LED's (I've circled one of them). This is small enough to fit inside the deck cabin, although I'll have to build some scaffolding. These came from http://www.true2scale.com/battery-holder-and-switch-for-3v-led-lights/ Only a little bit done so far this week. This is back school time for my wife and daughters so "real life" has interfered a little. Richard.
- 45 replies
-
- 4
-
-
- yakatabune
- woody joe
- (and 1 more)
-
Thank you Grant. And thanks for all the likes. Richard.
- 45 replies
-
- 2
-
-
- yakatabune
- woody joe
- (and 1 more)
-
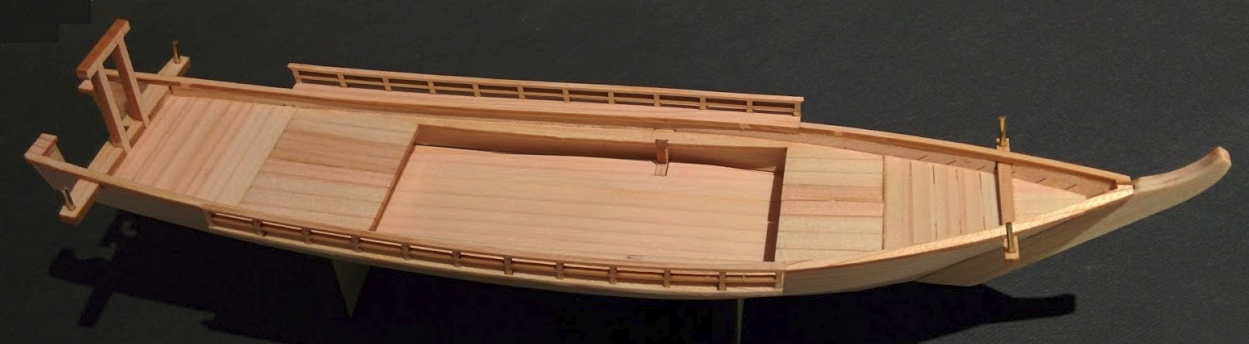
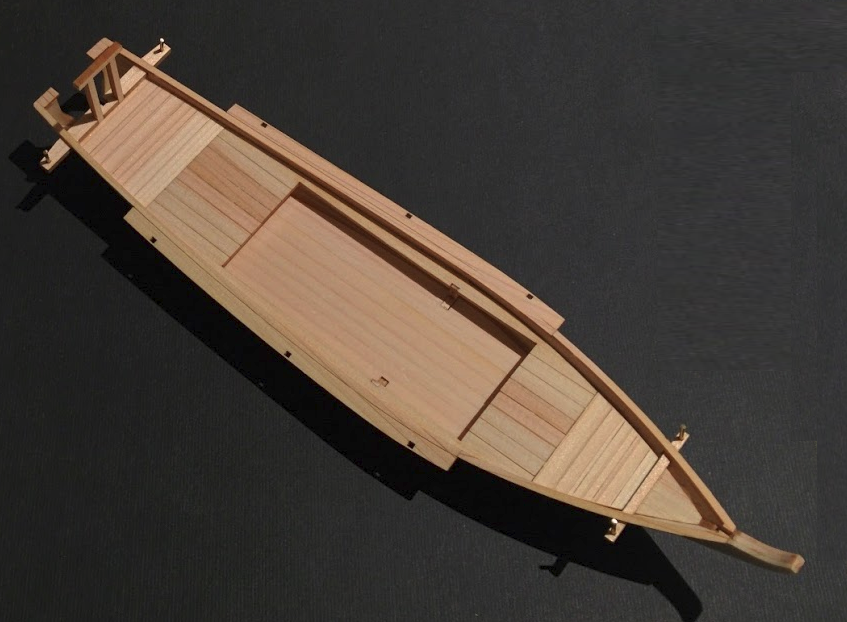
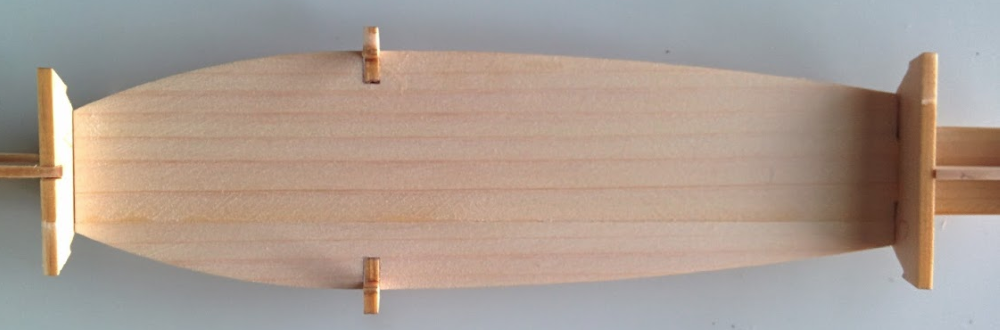
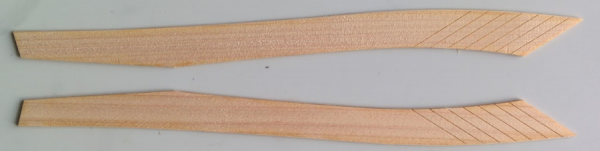
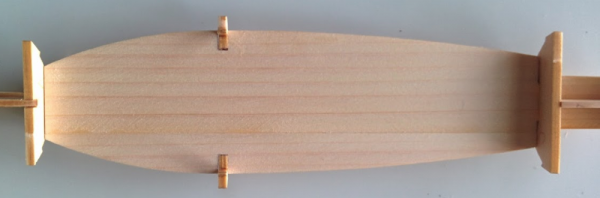
Steps 9 through 12 I've managed to get some work done. The planking is pre-cut to shape and laser scored at the bow to help with the moderate bend. I soaked these for about 20 mins then fixed them in place with elastics bands and a clamp until dry. The top planks are glued first. I fixed each set at the same time to avoid any warping. It's beginning to look like a real boat I've also ordered some miniature LED lighting for the interior. I'm not sure if this will work - we'll see later. Richard.

- 45 replies
-
- 10
-
-
- yakatabune
- woody joe
- (and 1 more)
-
THE 74-GUN SHIP by Jeronimo
RichardG replied to Jeronimo's topic in - Build logs for subjects built 1751 - 1800
Very impressive! Richard. -
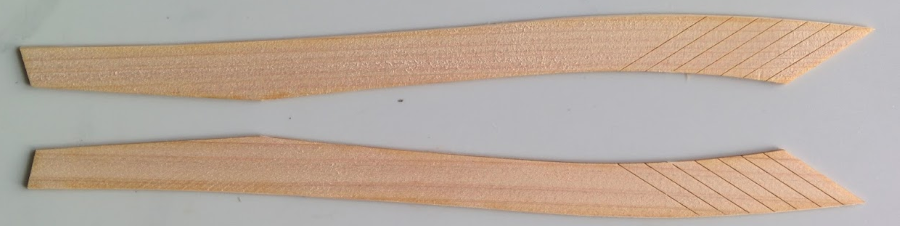
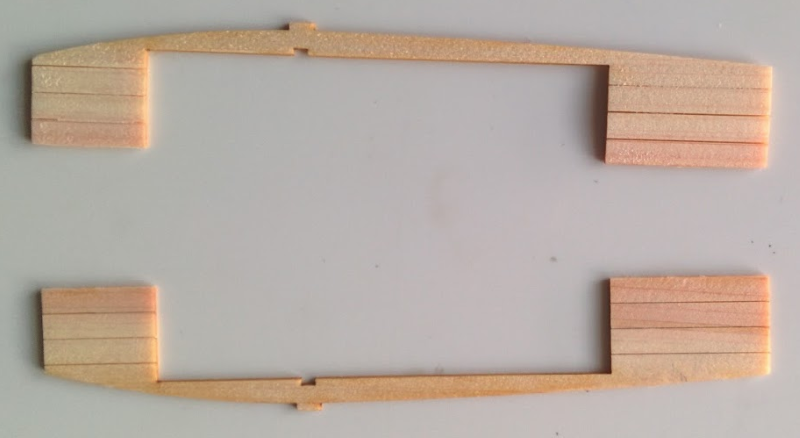
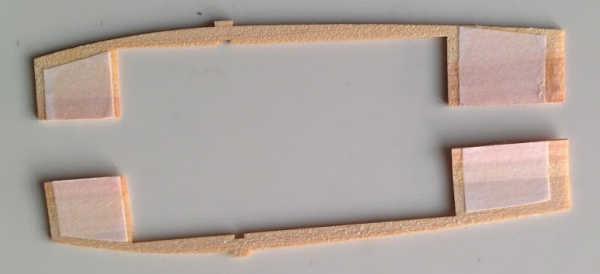
Step 6 The lower deck is complete. Step 7 The main upper deck is also in two parts. The planks are defined by laser etching. Too avoid any problems with the planks separating, I glued some paper on the reverse side. To provide extra support, I also added some small blocks to the bulkheads. (this is before final shaping) Step 8 There are 3 pieces (1 aft, 2 forward) to complete the deck. Now comes the tricky part, the hull planking. The are only 4 planks but they will require some bending. Clare suggests soaking since the cypress can be brittle when dry. I'll probably leave this until the weekend. Richard


- 45 replies
-
- 9
-
-
- yakatabune
- woody joe
- (and 1 more)